
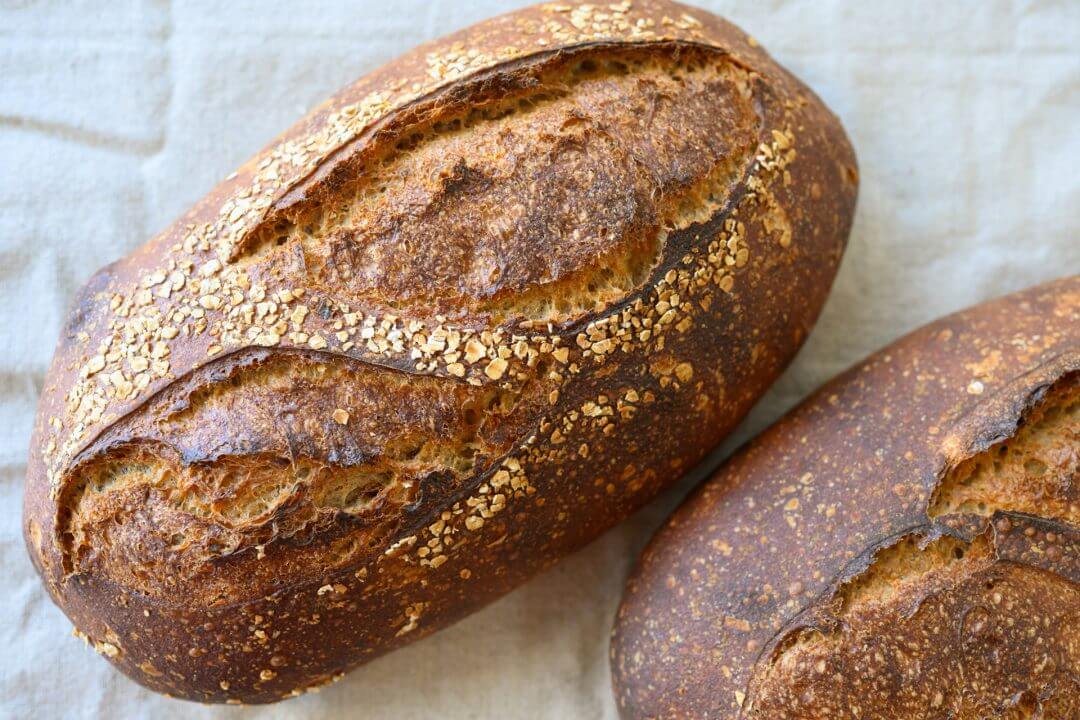
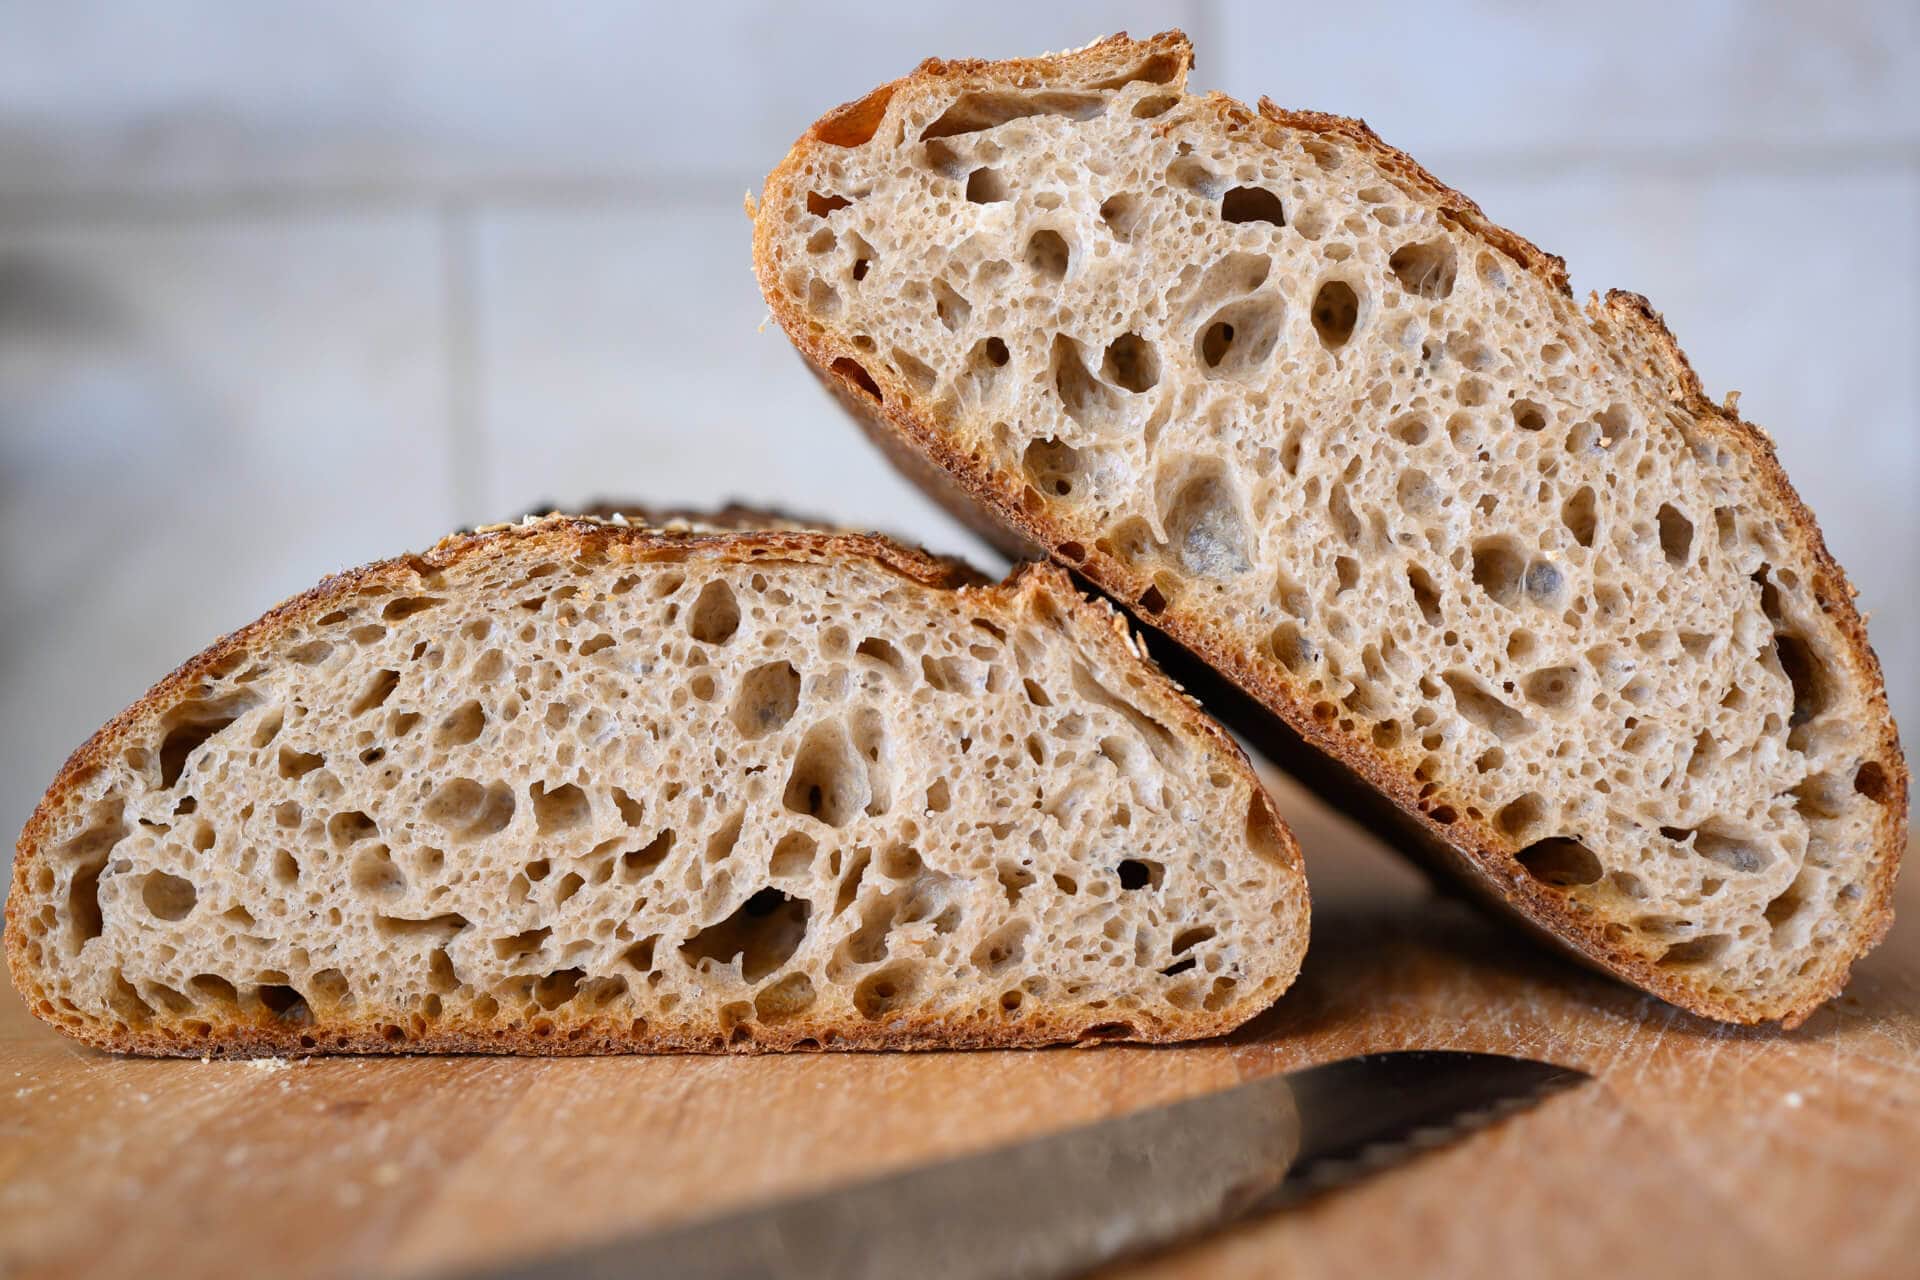
As the chill of winter sets in, I find myself drawn to this recipe. Vibrant and flavorful, healthful yet comforting, it is excellent at combating the cold weather, warming both your body and your kitchen at the same time. Winter urges me to bake anything and everything bread more than any other season. There’s nothing more wonderful to me than the aromas of freshly baked bread from a hot oven in contrast to the snow and howling wind outside. For this bread, I baked, tweaked, and baked again, ultimately landing on a mixture of white, spelt, rye, and whole wheat flours that produced a very craveable, satisfying sourdough bread that I cannot stop baking.
Part of this loaf’s abundant flavor is due to a little more sourness than you find in my typical recipe: a welcome addition that elevates the wholesome character of the crumb and crust. Sure, it has all the usual zest that comes with increasing the whole grain percentage, but it also has something more.
But what? What is that “something”? Is it the crust’s texture or the crumb’s tenderness altering my taste, or is it the perception of the loaf itself? Sometimes I wonder if the full range of textures, colors, and flavors I experience are genuinely there–visible to my eyes, present on my palate–or if I manufacture them when I see something mouthwatering. Perhaps this is the same way a barista might salivate at the sight of a properly pulled espresso, the aroma conjuring that recent summer strawberry, the allusion of toffee or black licorice. That “something more” seems to evolve as the loaf cools, hardens, and matures—an ever-changing kaleidoscope of flavors and textures.
Baking a loaf of sourdough seems to be the only thing that has this effect on me. I think it has something to do with the art of the craft, the work that goes into it, and the satisfaction that results. It’s like a woodworker sitting in their precisely constructed no-nail design chair, corners fitting just so and pieces curved where they’re to be curved, straight where they’re to be straight. The pleasure of a well-executed bread is undoubtedly more than the aesthetic of it; it is also in the culmination of a detailed, devoted process that amplifies everything. Tasting how every piece is in the right groove, how the flavors and textures shift like fragments of colored glass from one bite to the next, is exhilarating.
Of course, it’s likely all of this is simply a result of my obsession with baking naturally leavened bread. But! I do proclaim that this is a great recipe that will make those who eat it smile, and you may even spy a split-second closing of their eyes as they savor the moment. This little, often overlooked token is what I look for when my kids are eating, indicating they deeply enjoy something. And I imagine that this bread will push its way to the top of your baking priorities more often than not.
Flour Selection
I love the small addition of rye flour in this recipe–it’s something you also see in my Beginner’s Sourdough Bread recipe. Even in a small percentage, rye seems to bring loads of flavor and color to the crust. And this loaf is all about flavor.
I use whole grain Red Fife for the whole wheat part of this recipe, which adds significant character to this already flavorful bread. If you have Red Fife, I’d recommend it, but if not, any whole wheat variety will also work very well.
Whole grain spelt brings a nutty, almost sweet character to the flavor profile. I use spelt often because of this addition, and in this bread, even though it’s in small quantity, it’s still a significant contributor to the overall complex flavor profile.
The white flour I use in this recipe is medium protein at around 11-12%. This would be a typical all-purpose flour or a base white flour used for bread-making. If you wanted to increase the strength of this dough and bring additional flavor and nutrition, you could substitute this white flour for a high-quality type 85 flour.
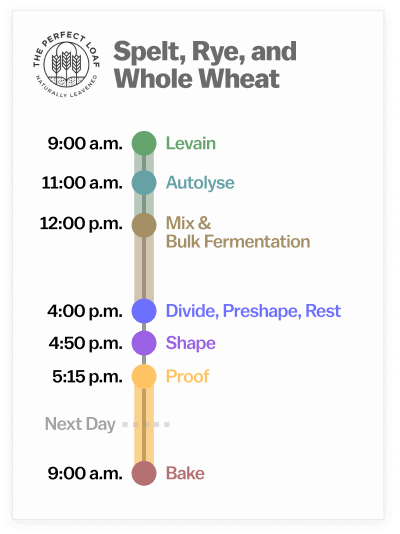
Baking Schedule
This sourdough bread recipe is made over two days, which gives the dough plenty of fermentation time, which results in a deeply complex and flavorful bread.
It’s also possible to bake this loaf all in a single day by allowing the dough to proof on the counter, shaped and covered, until the dough is puffy, relaxed, and passes the dough poke test.
Spelt, Rye, and Whole Wheat Sourdough Bread Recipe
If you want to make only a single loaf or scale this recipe up to make many more, see my guide to baker’s percentages to modify this formula.
Vitals
| Total Dough Weight | 2,000 grams |
| Pre-fermented Flour | 5.3% |
| Levain in final dough | 16.6% |
| Hydration | 85.0% |
| Yield | 2 x 1000g loaves |
Total Formula
The desired dough temperature for this recipe is 78°F (25°C).
| Weight | Ingredient | Baker’s Percentage |
| 520g | White flour (about 11.5% protein; Central Milling Artisan Baker’s Craft Plus) | 50.0% |
| 260g | Whole spelt flour (Central Milling Whole Grain Spelt) | 25.0% |
| 208g | Whole-grain wheat flour (Flourist Whole Grain Red Fife) | 20.0% |
| 52g | Whole-grain rye flour (Central Milling Whole Rye Flour) | 5.0% |
| 781g | Water 1 (levain and autolyse) | 75.0% |
| 104 | Water 2 (mix) | 10.0% |
| 20g | Fine sea salt | 1.9% |
| 55g | Ripe sourdough starter, 100% hydration | 5.3% |
Additional ingredients
Instant or rolled oats, for topping (optional)
Spelt, Rye, and Whole Wheat Sourdough Bread Method
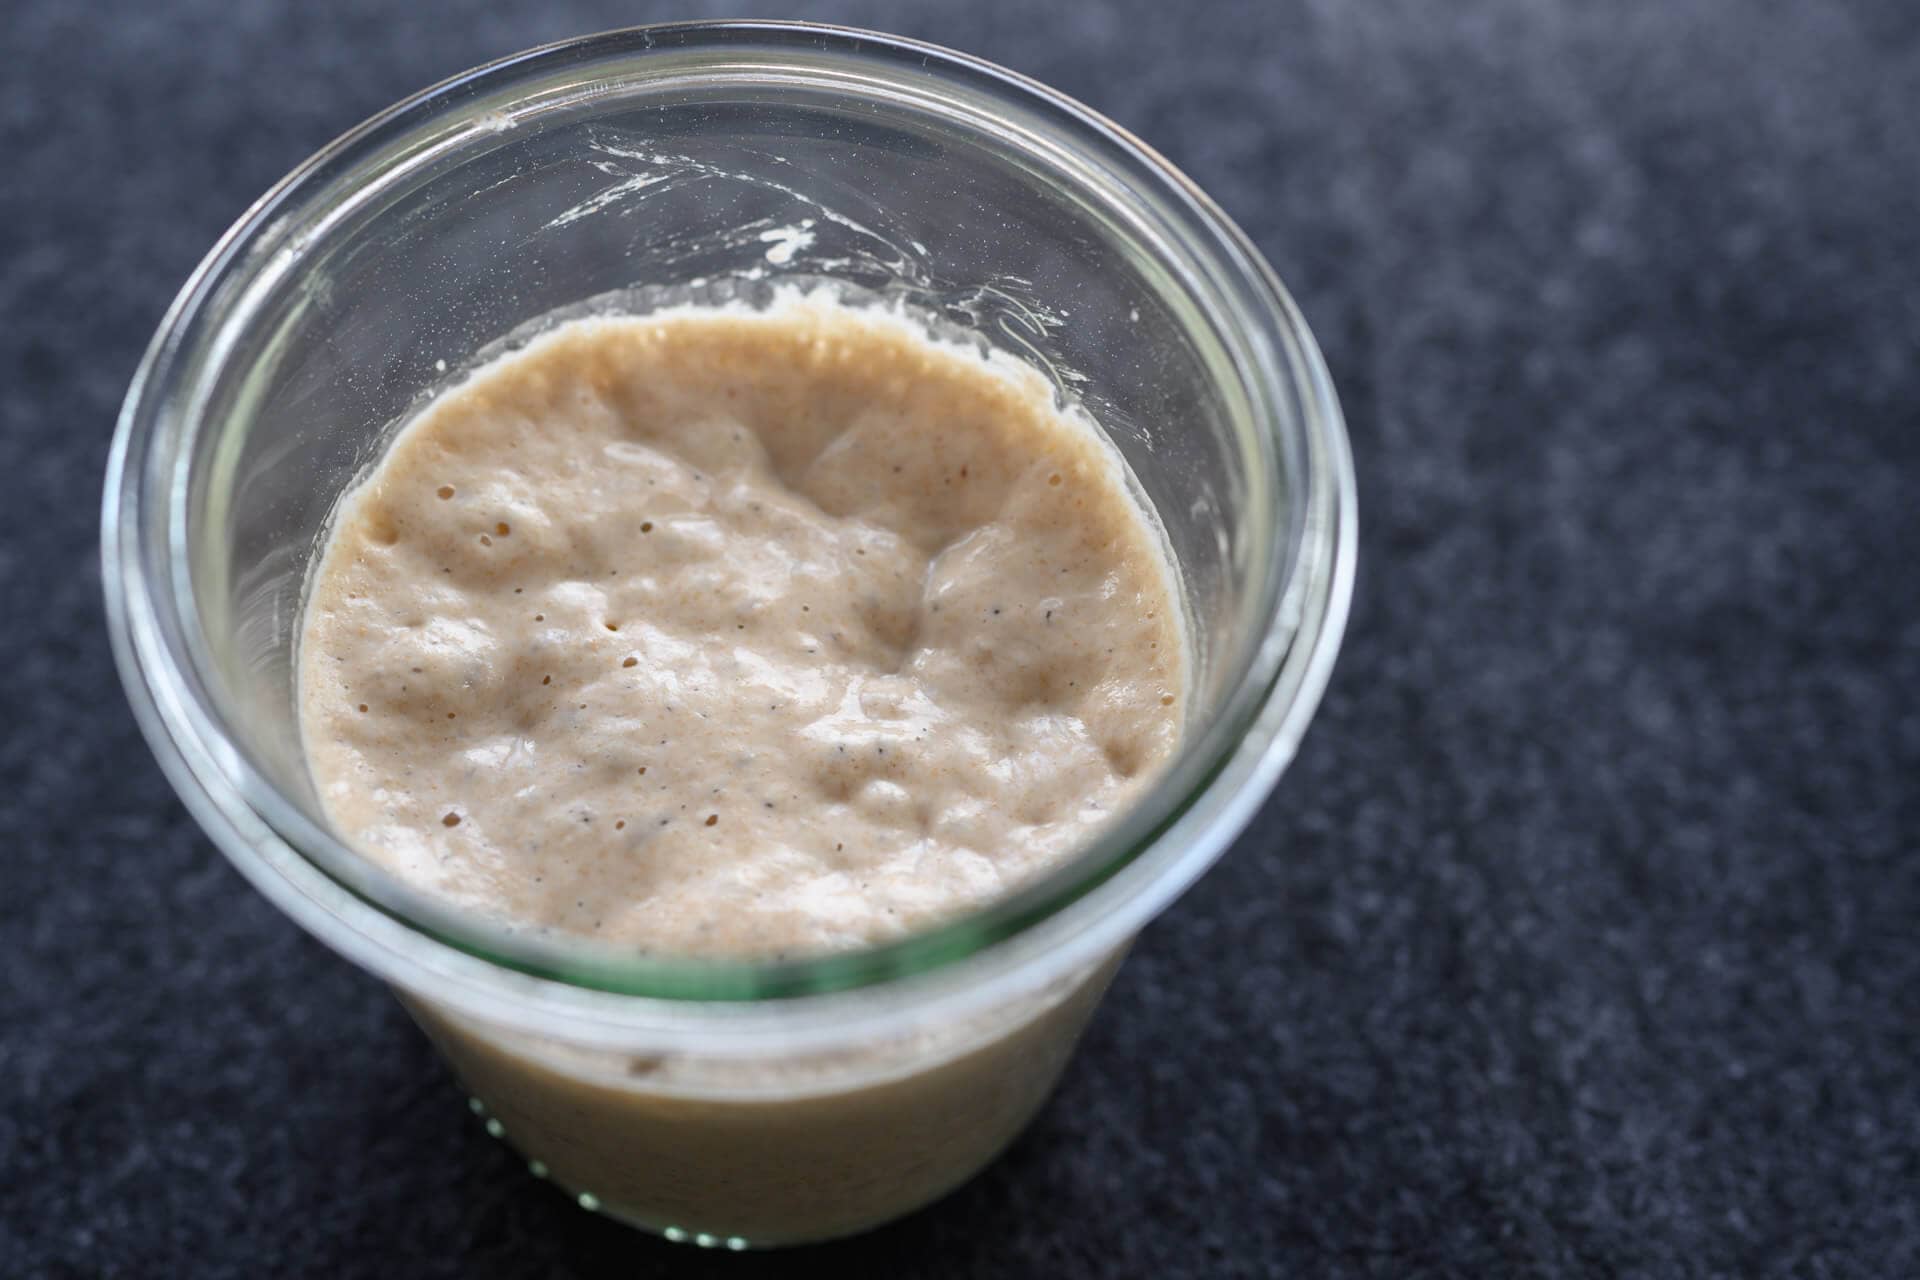
1. Prepare the levain – 9:00 a.m.
| Weight | Ingredient | Baker’s percentage |
| 27g | White flour | 50.0% |
| 27g | Whole spelt flour | 50.0% |
| 55g | Water 1 (levain) | 100.0% |
| 55g | Ripe sourdough starter, 100% hydration | 100.0% |
Mix the above ingredients in a jar and leave them covered at a warm temperature, 74-76°F (23-24°C), to ripen for 3 hours.
2. Autolyse – 11:00 a.m.
| Weight | Ingredient |
| 493g | White flour |
| 233g | Whole spelt flour |
| 208g | Whole wheat flour |
| 52g | Whole rye flour |
| 726g | Water 1 (autolyse) |
Warm or cool the autolyse water so that the temperature of the mixed dough meets the FDT (final dough temperature) of 78°F (25°C) for this recipe. Place all of the flours and water 1 in a large bowl. Use wet hands to mix until no dry bits remain; the dough will be shaggy and loose. Use a bowl scraper to scrape down the sides of the bowl to keep all the dough in one area at the bottom. Cover the bowl and place it near your levain for 1 hour.
3. Mix – 12:00 p.m.
| Weight | Ingredient |
| 104g | Water 2 (mix) |
| 20g | Fine sea salt |
| 164g | Ripe levain (from Step 1) |
Add the salt and levain to the top of the dough in autolyse, and use a splash of water 2 to moisten. With wet hands, mix thoroughly. Add the remaining water if the dough feels cohesive and it can handle the rest. Next, knead the dough for a few minutes using either the slap and fold technique or folds in the bowl. For this dough, I kneaded for about 5 minutes until the dough smoothed and became elastic.
Transfer the dough to a bulk fermentation container and cover.
4. Bulk fermentation – 12:30 p.m. to 4:00 p.m. (3 1/2 hours)
At a warm room temperature, 74-76°F (23-24°C), bulk fermentation should take about 3 1/2 hours.
This dough will require 3 sets of stretches and folds during bulk fermentation. After the first 30 minutes, wet your hands, grab one side of the dough, and lift it up and over to the other side. Rotate the bowl 180 degrees and repeat. The rotate the bowl a quarter turn and stretch and fold that side. Rotate the bowl 180 degrees again and finish with a stretch and fold on the last side. The dough should be neatly folded up in the bowl. Cover and repeat these folds every 30 minutes for a total of 3 sets of stretches and folds. Then let the dough rest, covered, for the remainder of bulk fermentation.
5. Divide and preshape – 4:00 p.m.
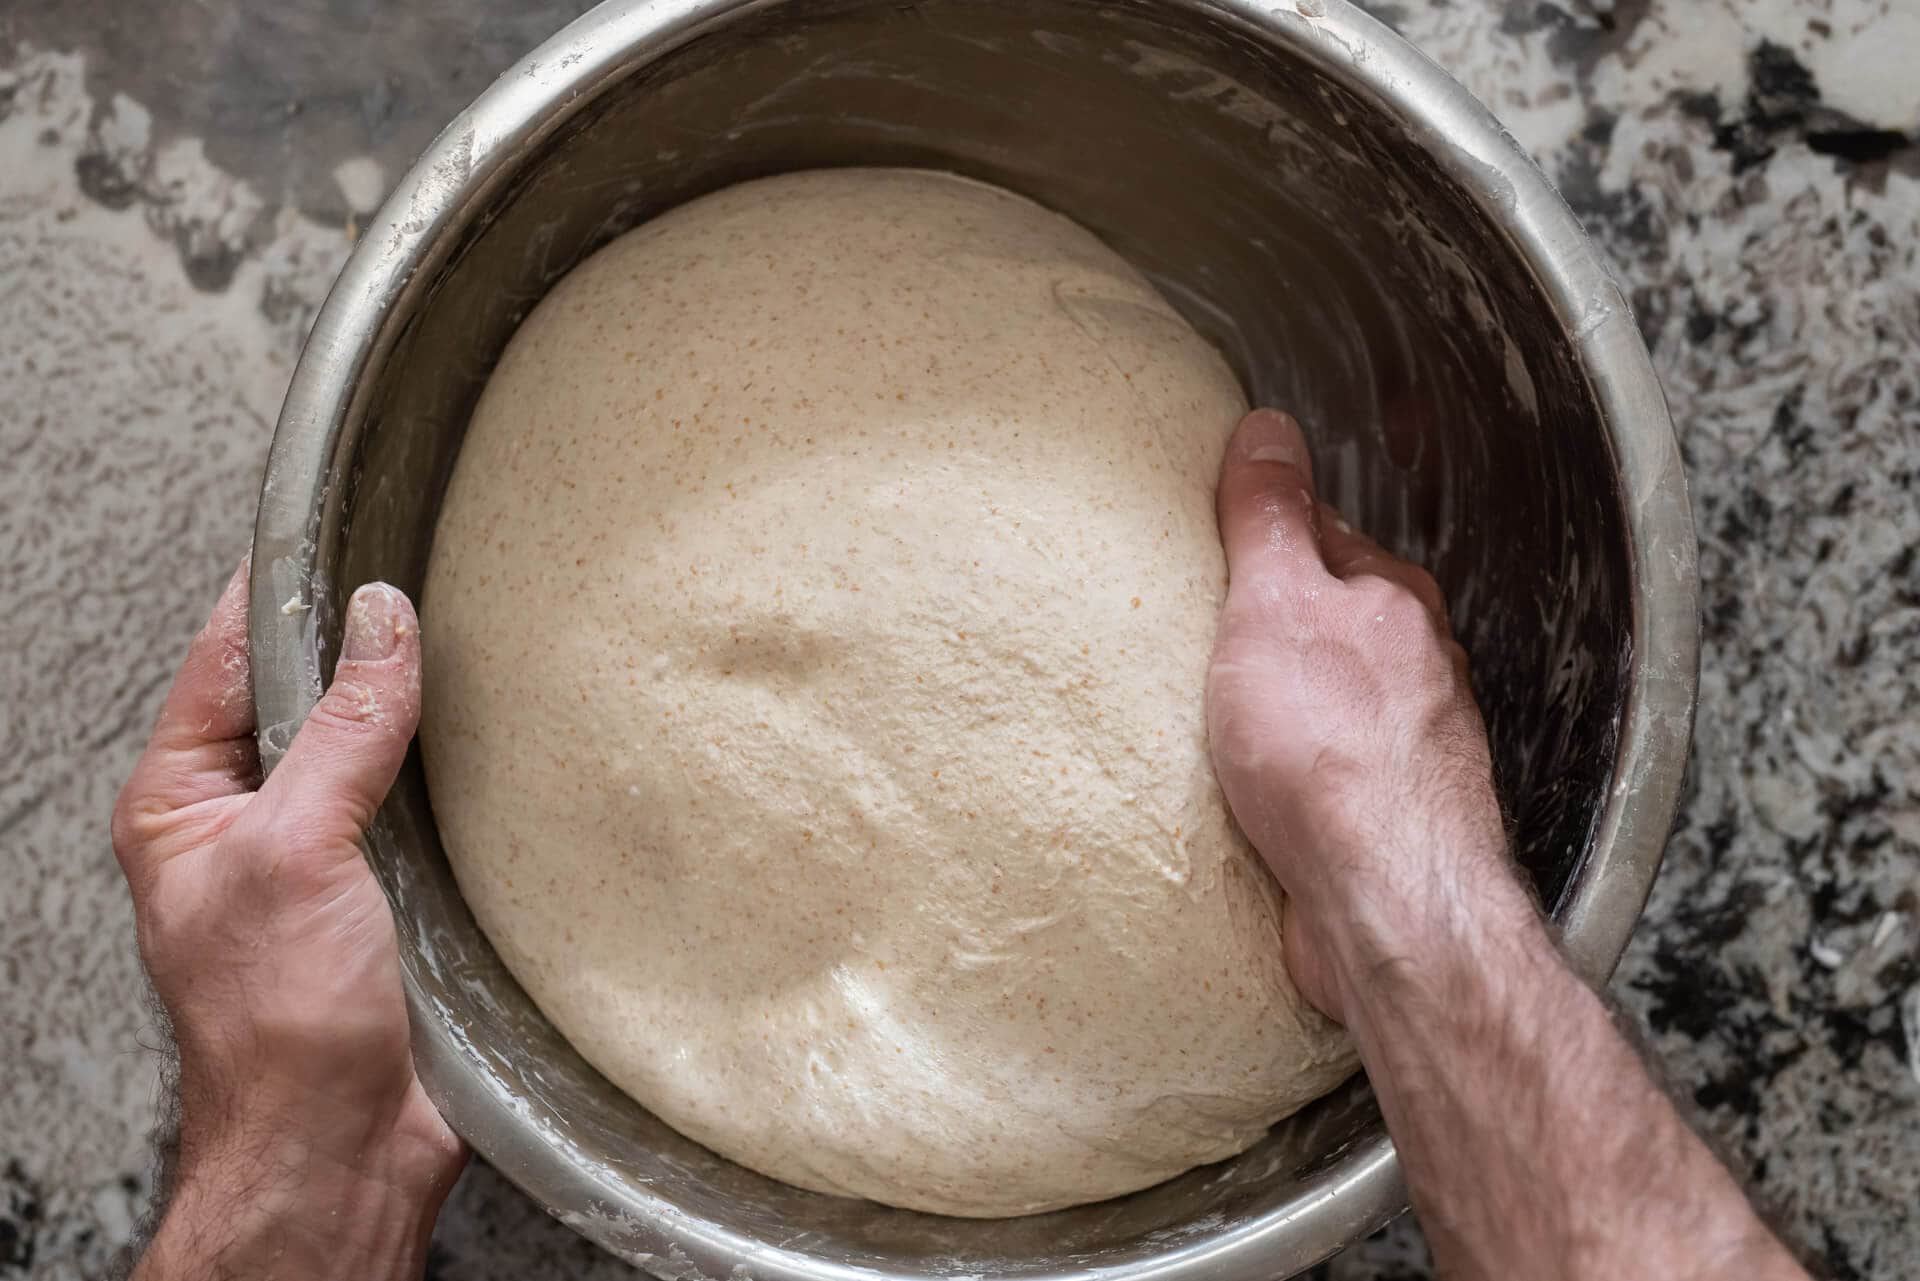
After 3 1/2 hours, the dough should be well-risen in the bulk fermentation container and puffy to the touch. The edge where the dough meets the container should be domed downward, showing strength and rise.
Fill a small bowl with water and place it next to your work surface. Scrape the dough onto a clean counter. Divide the dough into two equal pieces and prehsape each into a tight round.
Let the dough rest, uncovered, for 20 minutes. This is a shorter bench rest because the dough will be looser and slacker than most breads, spreading faster than usual.
6. Shape – 4:50 p.m.
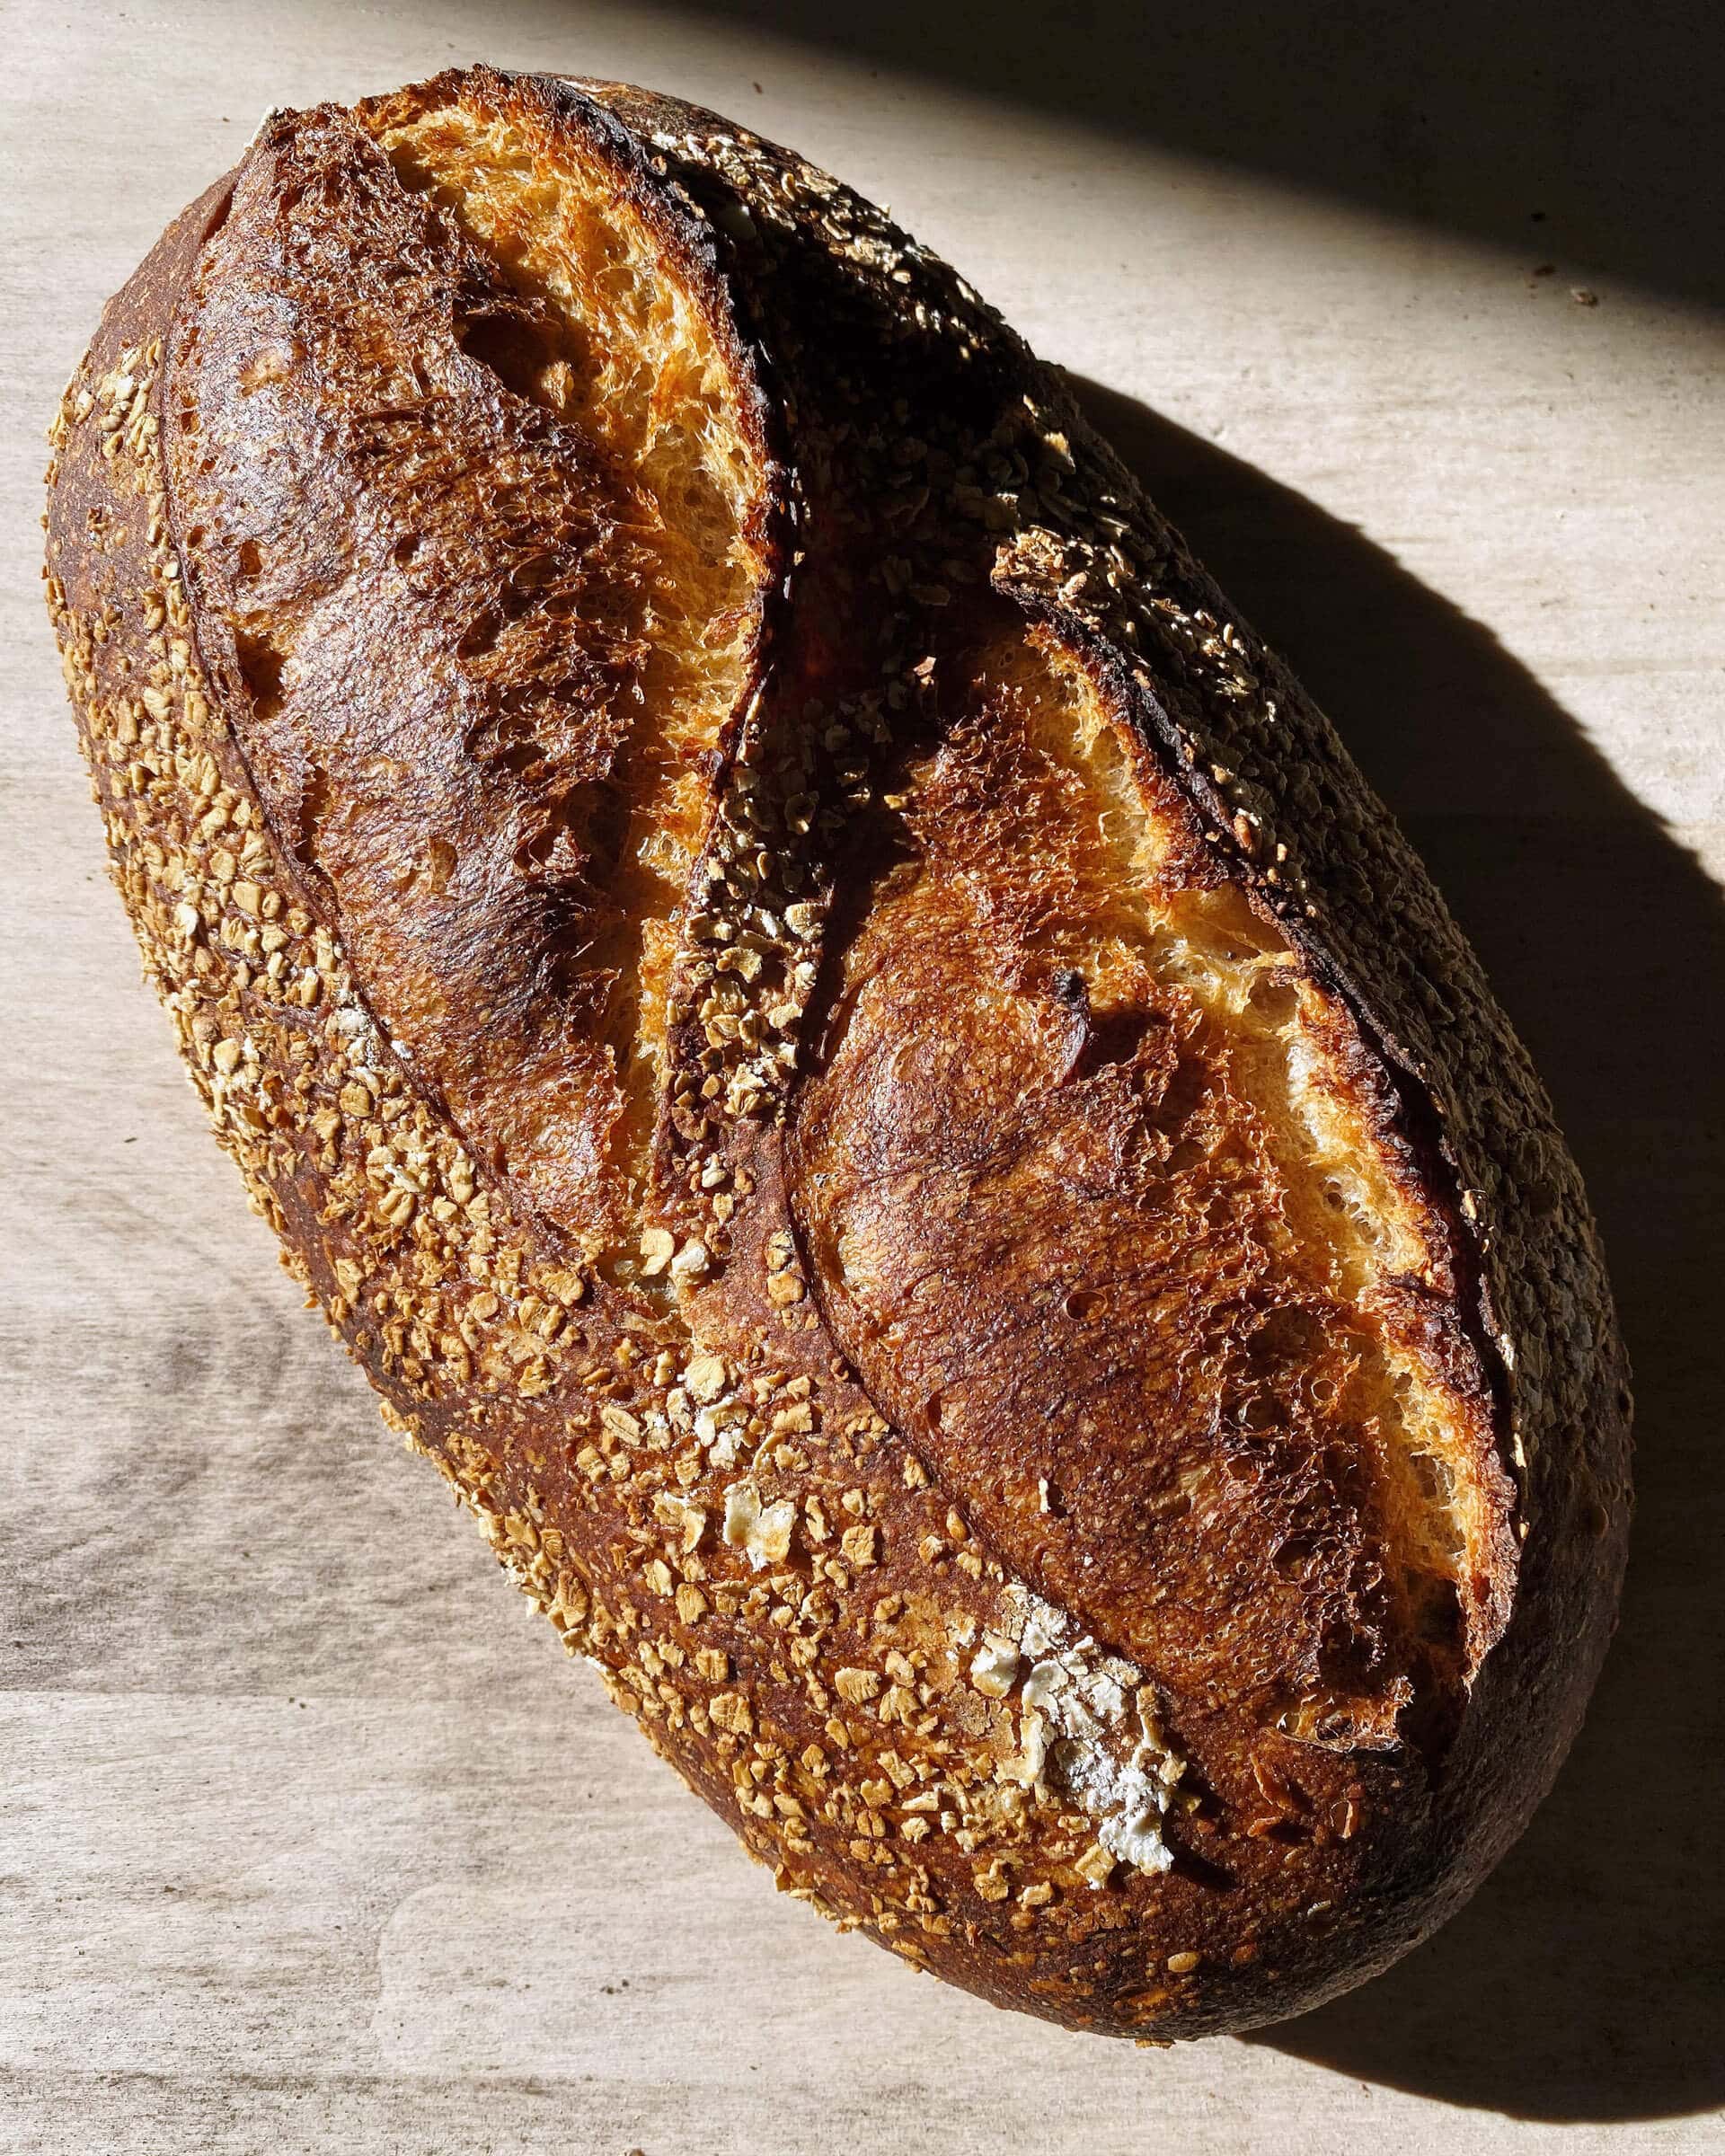
I like to top this spelt, rye, and whole wheat sourdough bread with instant or rolled oats, but this step is optional. Spread an even layer of rolled oats on a clean kitchen towel or sheet pan.
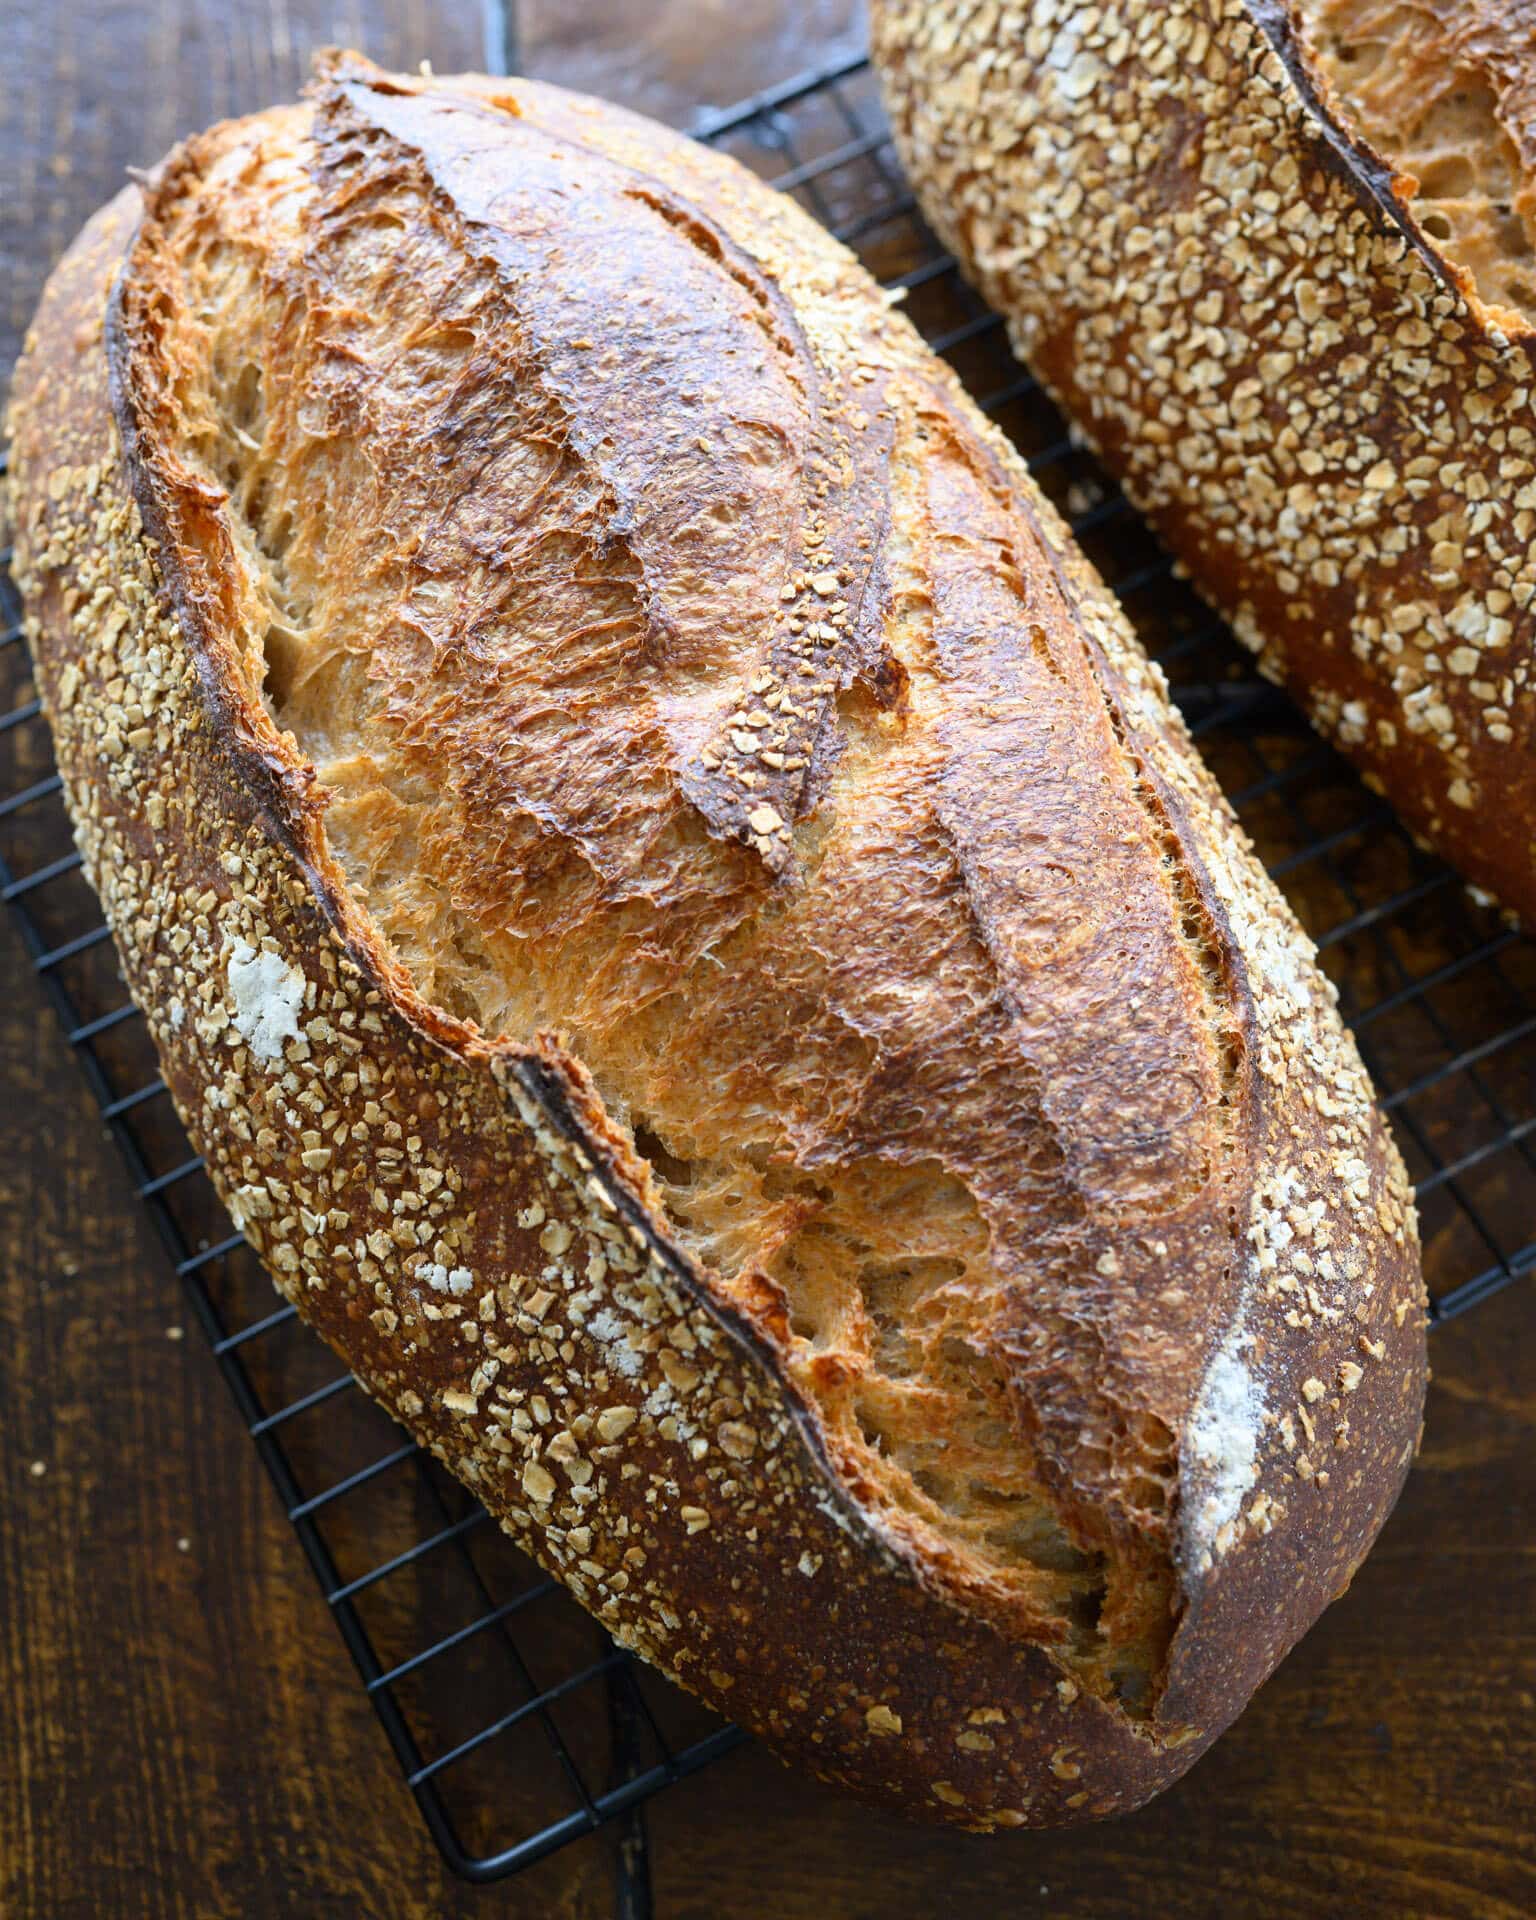
I love to shape this recipe as a long, tapered batard (oval). See my process for shaping a batard or watch me shaping below for a quick tutorial.
Flour the top of each preshaped round and your work surface. Using your bench knife, flip one round over onto the floured area and shape it into a batard. Using two hands, transfer the dough top-side down to the oats, gently rocking the dough back and forth so that the oats stick. Then, flip the dough and place it seam-side-up into a prepared proofing basket.
Repeat for the other preshaped round.
7. Proof – 5:15 p.m. to 9:00 a.m.
Cover the baskets with a large, reusable plastic bag and seal shut. Let proof overnight in the refrigerator.
8. Bake – 9:00 a.m. (the next day)
Due to the large size of these loaves, they may not fit inside of a typical Dutch oven or Combo cooker. I prefer to bake them directly on a baking surface and steam my oven. See my guide to steaming a home oven for bread baking for instructions.
Place an oven rack in the bottom-third of the oven. Preheat your oven with a baking surface inside to 450°F (230°C).
Take the proofing baskets out of the fridge, uncover them, and put a piece of parchment paper over the basket. Place a pizza peel or inverted baking sheet on top of the parchment and, using both hands, flip everything over. Gently remove the basket and score the dough. I like to score these long ovals with a single long slash or a double slash.
Slide the dough into the oven. Steam the oven by pouring ice into the preheated pan at the bottom of the oven. Bake for 20 minutes. Vent the oven of steam by removing the steaming pans. Continue to bake for 35 minutes more. When done, the loaf should have an internal temperature of around 204°F (95°C), and the crust should be deeply colored.
Let the loaf cool on a wire rack for 3 to 4 hours before slicing. This bread will keep well for a week or more if stored properly.
Print
Spelt, Rye, and Whole Wheat Sourdough Bread
- Prep Time: 24 hours
- Cook Time: 1 hour
- Total Time: 25 hours
- Yield: 2 loaves
- Category: Sourdough, Bread
- Cuisine: American
Description
A flavorful—and wholesome—loaf of sourdough bread with whole spelt, whole rye, and whole wheat.
Ingredients
Levain
- 27g white flour (about 11.5% protein)
- 27g whole spelt flour
- 55g water
- 55g ripe sourdough starter, 100% hydration
Autolyse
- 493g white flour
- 233g whole spelt flour
- 208g whole wheat flour
- 52g whole rye flour
- 726g water
Mix (final dough)
- 104g water
- 20g fine sea salt
- 164g ripe levain
Instructions
- Levain (9:00 a.m.)
In a small bowl or jar, mix the Levain ingredients. Cover the jar and keep it at a warm temperature for 3 hours. - Autolyse (11:00 a.m)
In a mixing bowl, add the autolyse ingredients until no dry bits remain. Cover the bowl and let rest for 1-hour. - Mix (12:00 p.m.)
Add the salt and levain to the top of the dough in autolyse, and use a splash of water to moisten. With wet hands, mix thoroughly. Add the remaining water if the dough feels cohesive and it can handle the rest. Next, knead the dough for a few minutes using either the slap and fold technique or folds in the bowl. For this dough, I kneaded for about 5 minutes until the dough smoothed and became elastic.Transfer the dough back to the bowl or to a container for bulk fermentation and cover. - Bulk Fermentation (12:30 p.m. to 4:00 p.m.)
This dough will require 3 sets of stretches and folds during bulk fermentation. After the first 30 minutes, wet your hands, grab one side of the dough, and lift it up and over to the other side. Rotate the bowl 180 degrees and repeat. Then rotate the bowl a quarter turn and stretch and fold that side. Rotate the bowl 180 degrees again and finish with a stretch and fold on the last side. The dough should be neatly folded up in the bowl. Cover and repeat these folds every 30 minutes for a total of 3 sets of stretches and folds. Then let the dough rest, covered, for the remainder of bulk fermentation. - Divide and Preshape (4:00 p.m.)
Use water and a wet hand or lightly flour your work surface (whichever you prefer) and scrape out your dough. Using your bench knife, divide the dough in half. Lightly shape each half into a round shape. Let the dough rest for 20 minutes, uncovered. - Shape (4:50 p.m.)
Lightly flour the top of your preshaped rounds and using floured hands, shape the dough into an oval (batard) shape, then place the dough in proofing baskets, seam side up. - Proof (5:15 p.m. to 9:00 a.m. the next day)
Cover proofing baskets with reusable plastic and seal. Then, place both baskets into the refrigerator and proof overnight. - Bake (The next day, 9:00 a.m.)
Preheat your oven with a baking surface inside to 450°F (230°C). When the oven is preheated, remove your dough from the fridge, score it, and transfer it to the preheated baking surface. Bake for 20 minutes with steam. After this time, vent the steam in the oven and continue to bake for 35 minutes longer. When done, the internal temperature should be around 204°F (95°C). Let the loaves cool for 3 to 4 hours on a wire rack before slicing.
Notes
If you want to bake only a single loaf, divide all the ingredients in half.
What’s Next?
If you love the nutty, almost sweet flavor of spelt flour as I do, check out my whole grain spelt pan loaf which is 100% whole spelt.
If you want to use some more rye in your baking, check out our Light Deli Rye which uses a scalded rye porridge to bring even more flavor.
Buon appetito!


340 Comments
Hi Maurizio, i love your recipes. I have a question regarding this one, though – I don’t think we have malted flour in Poland, but I have barley malt both active and “dark”. Can I add it to my regular bread flour to “malt” it? If so, how much, do you think?
Thanks, Magda! Yes, you can. I’d start low, around .25% active malt and see how that goes. You might not even need it!
Hey Maurizio, love this recipe. It’s so flavorful, and the interior really does melt in your mouth.
I had a question about how your crust turns out on this recipe. Mine is never quite as crackly as with less wholesome recipes, and it’s a little bit thicker than others. Is that normal? Or is there something that I’m doing wrong?
Cheers!
Glad to hear that, John! If you’re baking in a Dutch oven, which tends to result in a thicker crust, then that’s normal.
Hi Mauritzio, love your content!
Wow, this one was challenging. I tried King Aurthur organic AP @ 11.7% protein along with the Spelt, Red Fife (13% protein) and Rye. I went with the full hydration and fermented for 5 hrs @ 83 degrees in my counter top proofer. The dough was the wettest Id ever worked with but still managed to get them into the bannetons. After 18 hrs in the fridge, the proof was still very wet and jiggly in the bannetons. They never held their shape and pancaked into the cast iron combo cooker. Ultimately i have 2 very flat and ugly loaves which I presume will still taste delicious.
So the question is, what to change or iterate first. Less hydration, higher protein bread flour, shorter fermentation time or lower fermentation temp?
Thanks!
Dan
Thanks, Dan! Sounds like they were likely over proofed. I would reduce the hydration 2-5% but also lower the proof temp down to 78F, additionally, drop bulk down to 3.5-4 hours max, even at 78F. A highly hydrated dough that has a long, warm bulk will be very unstable!
Can you help me with high altitude time and temp? I’m at 5600 ft, using and combo cooker.
Hey, Lisa. I live at 5280 ft., the recipe written as-is should work for you. Keep an eye on your dough when baking, it may take a few minutes longer than I’ve written, but otherwise should work fine!
Also, check out my guide to baking at high altitude for more tips!
Wish me luck! I’m a newbie and sweating a bit! 😂
You got this!
Hi Maurizio! I’ve made several of your loaves and they’ve all turned out great. I love your recipes! I have two quick questions about this recipe please:
1) can I add honey or maple syrup? If so, how much and at what stage of the process should I add it?
2) can I skip the proofing/retard in the fridge? I have a Brod Taylor proofing box and was hoping to bake it straight from the proofing box to the oven. Would that work? If so, should I put the shapes loaves in bannetons in the proofer?
Thank you!!
Super glad to hear that!
1) Adding those in more than, say, 2% will alter the recipe (fermentation mostly).
2) Yes, you can certainly do that. Proof the dough, covered, for 1-3 hours as needed (warmer temps will speed this up).
Hope that helps and happy baking!
Thank you! I’m making it right now and I just did the autolyse. Can you explain how adding more than 2% weight in honey will alter the fermentation? Will it change the time needed to ferment, or will it ruin the loaf altogether. Thank you for the response!!
I love this recipe and I think it will be my regular bake. My loaves turned out very well. I do still have a question about the bulk ferment. I did not see much growth in the dough, and you don’t mention this in the recipe. So do I continue to go with the timing – not changes in the dough – as the guide for when BF is over? That’s what I did with this first go. Thanks so much for all you share to get us newbies up and running!
It might be just fine for the dough to seem like it’s not risen fully, the dough is really highly hydrated so it can be tough to spot at times. You should see some rise, though, but it might be less than other recipes you might be familiar with, especially if those doughs are more stiff.
To determine when bulk is over, I like to look for a dough that’s smoother, stronger (more elastic), and has some definition to it–the sides should be well-defined, with a doming downward which gives us a clue that there’s some aeration in the dough and strength. If the dough is super wet, it may be hard to spot these signs.
I’m making this recipe right now. According to the timing I should be just about done with BF. The dough has been kept warm at about 79 f. It hasn’t grown much at all. Do I stick with the timing or give it more time? Thanks so much.
Hi! I made this exactly according to instructions but my boules came out very flat 🙁 this is the second time this happens to me, any tips or insight on what I might be doing wrong? The taste is there, but it’s very dense and flat.
Hey, Alexandra! Sorry to hear about the flat loaves! It could be a few things, and usually it’s either over hydrated dough (that’s not strong enough to rise tall), or over proofed dough. If the dough was very slack, wet, and very sticky, you might want to try reducing the hydration of the recipe to suit your flour. I call for holding back 100g or so, you could omit that and see if your loaves rise up taller next time.
If your loaf was flat and had many, many little holes in the interior (with no dense spots), it might be over proofing on you. Be sure to hit the final dough temperature I list in the recipe and let bulk go as long as I call for, if the dough is bulked for too long, it can over proof during the last rise (proof).
I hope this helps! Let me know if have you have any m ore questions.
Alexandra, I am a relatively new sourdough baker. I made my starter in September and have baked roughly 50 loaves since then. Here are a few thoughts.
Piggybacking on Maurizio’s comments, but speaking as someone still learning, I have found that my two biggest problems, by far, when getting flat loaves is under proofing and not developing enough strength in the dough before shaping.
Cooler weather is an issue this time of year, something that took awhile to sink in. I started to have consistent success when I mixed my dough at around 78-80 degrees and bulk proofed in an oven that stayed between 78-85 degrees. Even then, I found that I often need to bulk an hour or two longer than most recipes called for. And after I shape, I still let my doughs rest for up to an hour in the banneton until they rise some more before they go in the fridge.
I underproofed a number of times early on. I have only overproofed perhaps once, but it may have been the case that the dough just wasn’t strengthened enough.
My other failure was not doing enough folds or not doing them vigorously enough. Only lately, after baking so many loaves, am I finally starting to get a sense of what a dough should feel like when it is sufficiently proofed for shaping. Generally that means more vigorous stretch and folds at the start of bulk and then more sets than what most recipes call for.
The shaping itself always signals to me whether I did enough. Each time I’ve had to preshape twice, I could tell my dough was going to end up flatter. My failed loaves were stickier than normal and didn’t release from the sides of the bowl as easily.
When I shape, I use a combination method that includes techniques used by Chad Robertson, Trevor Wilson and the Tartine video produced by Weeds & Sardines. I also stitch at the end of the shape.
One other issue I’ve had is flour selection. Some just do better than others. I’ve had the best success with Central Milling flours and KA as well. Apparently the 365 line of flours sold at Whole Foods is made by Central Milling.
It would be great if we could follow a recipe exactly as is, but I don’t think that has ever happened to me successfully. Frustrating, yes, but baking sourdough simply involves more variables than any other kind of food prep I’ve done.
Fantastic comments with a lot of great insight—thank you!
After writing all that, my bake this morning went just like a Chad Robertson or Maurizio Leo might envision. The proofed dough looked like what I’d see in the Tartine book or on TPL. And the bread out of the oven had great spring.
My dough rose quite big in about 3 hours or so with just four sets of folds and was very gaseous. Didn’t even have to use flour to shape (moistened hands). When I put the dough in the baskets, I didn’t need to let them rise on the counter. They filled up the bannetons nicely and went right into the fridge, rising even more over night.
What did I do different? I used the Tartine master recipe, but raised the whole wheat content to 20% from 10%. I also used whole wheat Red Fife from Breadtopia. Autolysed for one hour sans leaven, then did another 40 minutes with the leaven. The leavan itself included Red Fife.
Nothing really jumps out to as to why my dough was so gaseous and strong. Like I said, and as Maurizio says, every bake is different. No two snowflakes are alike.
I made this recipe this weekend exactly as instructed, except I used Arrowhead whole spelt.
Excellent-flavored recipe, but I am puzzled as to why just three sets of stretches and folds are recommended after the initial slap and fold (I did about 50 stretch and folds in the proofing container instead).
I’d figure that the addition of spelt and rye would call for more stretch and folds to build structure given the propensity for spelt to extend itself. Fear of overhandling?
In any case, my first of two loaves came out well. It did spread, but still rose to about 3 1/2 inches and looks very similar to the photo of Maurizio’s loaf.
Since the first one stuck to the basket, though, I plopped the second basket down hard into my Challenger to quick loosen the dough for the second loaf. I am guessing that is a mistake because my bread spread and flattened out even more.
Either that, or it was how I scored. The first loaf got three diagonal slashes, the second a long slash down the middle. Maybe I am hallucinating, but the middle slash seemed to hasten the spread.
What I learned most of all, though, is the old bread-making advice: Listen to the dough. I didn’t think the dough was quite strong enough after the third stretch and fold and should have done more. The fault is entirely my own.
Hey there! Glad the loaf tasted great, it is one of my favorites by far. For me, 8 minutes of vigorous stretch and folds was sufficient with this dough to get it into a pretty strong state, even though it’s highly hydrated and has flour that needs a little more work. I’m pretty rough on the dough during that period, really slapping, stretching, and folding. But that time is totally dependent on the mixer’s (the person) actions. If the dough needs more stretch and folds during bulk, absolutely add those in as necessary. If the dough feels super slack at the beginning of bulk, I’ll also sometimes do the first set after only 15 minutes, then another after another 15 minutes. Front loading helps ensure we’re not folding too much toward the end of bulk fermentation.
These loaves aren’t your typical white loaf that’ll rise up super tall, as you indicated. Mine didn’t have huge spring at all—and that’s ok for me! The flavor and texture is what this bread is all about 🙂
Your last sentences are so key. We always have to adjust based on the dough we have in front of us! Perhaps i need to add a few more warnings/clarifications in the writeup so people keep a watchful eye on that dough and adjust as necessary—not all your fault!
Thanks for the feedback and I hope it was still a wonderful set of loaves!
This is my second time making this recipe but I’m still not getting any oven spring. The loaves are quite flat. The crumb appears open but the texture is dense. I’m not quite sure where I’m going wrong. Please advise. Here is my process. Thanks!
Levain Build 3h
– 30g starter
– 15g Farmer Ground Stone Spelt
– 15g King Arthur AP Flour 11.7%
– 30g water 80F
Autolyse 30m
– 250g King Arthur AP Flour 11.7%
– 125g Farmer Ground Stone Spelt
– 100g King Arthur Whole Wheat
– 25g Farmer Ground Stone Rye
– 325g Water 80F (reserved 100g for mix)
Mix
– Added Levain, salt and 100g of remaining water (total water 425g / 85%)
– Mix was too wet to slap and fold so I folded in mixing bowl for 8 minutes.
Bulk 3.5h
– I let rest for 15 minutes and then folded. I folded 2 more times 30 minutes apart for a total 3 folds.
– After 3.5h in warm apartment the dough had a few bubbles but was still very wet. It did not appear very active.
Pre-shape
– The dough was incredibly wet and unmanageable after moving to counter for shaping.
– I shaped once and the dough pancaked after 20m with no structure, flat tapered edges.
– I shape a second time and after another 20m the dough held together more. The edges where more fat and rounded.
Shape
– I shaped with folds trying to get some structure then the moved dough into floured colander lined with towel
– I proofed in the refrigerator for 16h
Bake
– I preheated oven to 450F with stone on middle rack. Also placed a roasting pan on floor of oven for steaming.
– After 45m of preheating I removed dough from refrigerator and placed on a floured peel
– I scored loaf with a cross then slid it onto the stone.
– I added a cup of water to steam tray then closed oven.
– I baked for 50m
Sorry for the long post. I just really would like to nail this recipe. I know it will taste great and be healthy. Thanks for your help!
Hey, Adam! Thanks for sending over all of that information. I’m wondering if it’s a combination of maybe too wet of a dough (which weakens things and you’ll get less volume) and maybe a touch over proofed. I’d say try dropping that water in the final mix to better match your flour. You could leave out that final 100g. As for the proof, try cutting bulk back by 15-30m as well, that should help get you more “runway” for the loaf so it doesnt over proof. Let me know how it goes!
Working on it now. Thanks for the info! Fingers crossed.
Hi Maurizio! This recipe is definitely one of my favorite, thank you so much for sharing it with us.
I have a question regarding the flour strength: I have a *lot* of fairly strong white bread flour (12.6%) that I plan on using for my next bakes. I know you use mostly softer flour for a majority of your loaves, would you have any recommendations on how to adjust your recipes when using stronger flour? Would it affect maybe hydration, or the kneading time?
Thank you again
Leo
Hey, Leo! You’re very welcome. Usually (not always), with stronger flour I need to increase hydration a bit in compensation. In addition, an autolyse can sometimes help with strong flour as well (see my guide to the autolyse technique for more on this). As far as mixing/kneading time, yes, usually stronger flour requires less strengthening to get the dough to the same state as a softer flour.
Hope that helps!
Hey, Rob! It’s hard to say. It could be a shaping issue (you were a little more intensive shaping the bottom, which would have been the top of the shaped dough when in the basket), a heat issue with the dough, or a scoring+shaping issue. Hard to say without photos!
Season’s Greetings Maurizio!
I’ve been enjoying your web site, recipes, and advice for several months now, thank you! I saw this recipe and after ordering whole spelt, rye, Khorasan, and wheat from Central Milling, gave it a try. First try was exactly as outlined in the recipe with 75% hydration and attempted slap & fold with decent results. 2nd attempt (next day), I used only Hi-Pro organic unbleached and even with 80% hydration, it felt like working with Play-Doh! I kept incorporating more water, but it was really stiff all the way through! What a difference the flour can make. No slap & fold required!
Today I did half way between the two and it was more shaggy with 75% to start and 82% final hydration. I started the slap & fold once again and saw the change happen right before my eyes!!! A shaggy mass turned into a cohesive oval when the fold occurred, and the dough sticking to my hands initially became dough that stayed OFF my hands! It was like a miracle! Just like your video!
I was sweating like a horse and sweat marks were showing through my shirts. What a road that has become and I’m loving it!
Hey, Peter! Happy holiday. Yes, CM High Pro can be a thirsty flour! You’re right, each flour brings a different absorbency to the table. So awesome to hear the slap/fold technique worked for you. It’s a pleasurable thing, I have to say, even if I get a little sweaty as well 🙂 Have fun!
Do you bake with Kamut ever? Man it is expensive. I bought a 20 lb bag of wheat berries and want to try it out. Could I use Kamut in place of WW in some of your recipes? Without having to change anything along the way with the recipe? Thanks again!!
I do! Check out my kamut demi-baguettes. It is expensive, but the flavor is pretty fantastic. Yes, you could sub out WW for Kamut. They’re similar in terms of strength, typically.
Can you add sauté onions to this recipe like a traditional onion rye loaf?
If I don’t have spelt flour, can I sub it with the AP or whole wheat flour?
I have never had that but it sounds delicious. Sure, sub out the spelt for either AP or WW (I’d opt for the latter).
Hello Maurizio, this recipe is so delicious and I managed to handle the high hydration. I been
Making this for the last 3 weeks and families love it for the fact texture is softer and flavour is just right.
Is there a tip of scoring? I never had issues with scoring in the past except for this?( lower hydration) What do you think im doing wrong?.
Thank you again for sharing!
Glad to hear that, Barb! This is certainly one of my most favorite breads. The higher hydration dough will be a little more challenging to score. It should be easier if the dough is cold from a cold proof, but be sure to have a sharp blade and move quickly, that’ll help it open up much easier.
Hello Maurizio, I have been making bread using your fantastic recipes. My favourite is your Best Sourdough Loaf. I decided to try the bread with spelt and rye flour this weekend. If I replace the whole wheat with Kamut or Einkorn flour, should I make any adjustments?
Hey there! If you go with einkorn I’d suggest dropping the hydration of the loaf by 5-10% as it’s a more delicate flour. Kamut should be fine as-is!
I made this last week as a single loaf. For a few months I’ve been doing most AP loaves, but with Fall decided it was time for more whole grains. Wonderful flavor and texture!! Added 100g chopped dates—the sweet bits contrasted perfectly with the nutty and sour flavors. Thanks for another great recipe! It was a bit flat; will play with it to try to get better oven spring, but crumb and texture were still excellent.
That sounds delicious, Sheila! Thanks for the feedback and so happy to hear you enjoyed your loaf 🙂
I love this recipe it has been my most successful and tastiest. Could you suggest a slower levin build to accommodate my work schedule ,starting the build at 7 am ready for continuing the loaf and 1 pm ish ,. Thank you
So glad to hear that, Denise! It’s absolutely one of my favorite breads to make. Check out my weekly sourdough bread recipe, it has just that. I think you could use the same build parameters to make the levain for this bread and have it ripen over 8-10 hours while you’re at work.
Would you bake this loaf at a slightly lower temperature (450°) when using a dutch oven? And would you then lower the temp after you take off the lid at 20 minutes or would you leave it at 450?
No, I would actually go same temp and times using the Dutch oven!
Hi Maurizio! Quick, basic question for you: is there a shorthand for how increasing the whole-grain percentage of a dough will impact development? Does higher whole-wheat or spelt content mean I should extend bulk, or act more aggressively during stretch and folds, or do more counter proof before it goes in the fridge? When upping hydration there are some obvious changes to keep in mind, and I’m wondering if there is something similar for upping whole grain…
Generally, with increase whole grains expect the dough to need more water and fermentation activity to increase (which can mean a shorter bulk and/or proof if everything else kept the same in the formula).
Thanks Maurizio! So, all else being equal, if I up the whole grain percentage I will want to up the hydration a bit and keep a slightly closer eye on bulk/proof. This might explain why my higher-grain loaves have denser crumbs but still have good oven spring: they are potentially over-fermenting in bulk. Could I control that by changing the levain % in the mix as well? Up or down?
Yes, that’s right! You could also reduce the levain percentage to offset the additional whole grains, which is typically what I would do.
🙏🙏🙏🙏🙏🙏🙏🙏🙏🙏
Hi Maurizio.
Would it work to substitute more whole grain flour (ie the wheat, spelt or rye) for some of the white flour, so the percentage of whole grain to white flour is greater than 50/50? If so, how much wheat/spelt/ or rye would you suggest substituting for white flour, and would any other ingredients, such as water, need to change? Thanks so much.
Suzy, yes you could do that. I’d probably try going up by 10-20% at first, but be aware you might need additional water in the dough. Also, keep an eye on the dough because it’ll increase fermentation activity.
I also always have my fifty fifty recipe!
Thank you! It worked out great and is my family’s new favorite. Love how easy your recipes are to follow.
Fantastic to hear that, Suzy! Happy baking 🙂
Hi Maurizio,
this recipe is absolutely fantastic! It worked super well even by using non specific bread flour… The spelta and rye flours were freshly ground. The oven spring of this bread has been incredible! I never made such a beautiful bread. Thank you!
So happy to hear that, Antonella!
Just tried this recipe and got a pancake loaf with very little oven spring – any idea where the process I made a misstep? Thanks!
Laura–over proofed/over hydrated?
Hi Maurizio,
I made this recipe for the first time and it came out absolutely delicious (and beautiful). My bulk fermentation took a little longer as it’s winter where I am, but if anything it developed more flavour! The photos are on my IG: @alinelorieri
Thank you so much for sharing so much knowledge and such delicious recipes!
Aline
So glad to hear that, Aline! I looked for your post but couldn’t find it 🙂 Happy to help and happy baking!