
Baking sourdough bread at home certainly comes with challenges (or, as my enigmatic calculus professor used to tell me, opportunities for continuous growth). Baking bread at home with a consistent outcome has even more, ahem, opportunities. But one of the most critical facets of successful sourdough bread baking is learning to consistently monitor and adjust the dough’s temperature to keep it within an optimal range for vigorous fermentation. This will help produce consistent loaves of bread with a tall rise and the most flavor.
I’d argue that temperature is the most important aspect of the bread-making process because it greatly impacts fermentation, which is the backbone of sourdough bread. And, of course, maintaining a consistent and sufficiently high dough temperature becomes even more difficult when ambient temperatures begin to drop (hey, winter!) or when they’re in flux (as they often are in a typical home kitchen). Like a frog in a pot, sometimes we don’t even realize temperature change is happening.
Often, we blame our sourdough starter if the dough is slow to rise or if the final loaf has a lackluster flavor: it just wasn’t as lively as usual, we say, or maybe we forgot to feed it last night, we confess. While sticking to a dependable starter maintenance routine is essential, sometimes the dough’s temperature (too low or too high) is at fault. We must make simple adjustments to ensure the dough is at the right temperature for optimal fermentation activity.
Let’s first look at why temperature is so important when baking sourdough bread in the first place.
Real Quick: What’s My Favorite Dough Thermometer?
Without question, my Thermoworks Thermapen. It can read the temperature within a second or two and is extremely accurate. If you’ve ever taken a workshop or baking tour with me, you’ll recognize it: I always (always!) have it in my shirt pocket ready to test a dough’s temperature.
Why is Dough Temperature Important?
Temperature is the driving force in fermentation, and fermentation impacts sourdough bread volume, flavor, and texture. Warmer bread dough will ferment faster than colder dough, and strong fermentation will result in better bread. The longer the dough can ferment, the greater the opportunity yeast and bacteria (primarily) have to flavor it. But there’s a limit. If a dough ferments too long or is too warm, it can quickly overproof and degrade its structure, resulting in poor rise.
It’s also important to keep the dough temperature consistent throughout the bread-making process. If we can ensure temperature consistency, we know the dough will be in the same fermentation condition throughout the lengthy process. And further, if we maintain the same temperatures each time we bake, we make delicious bread.
In other words, we cannot expect consistent results every time we bake if our dough temperature varies widely.
I measure and log two dough temperatures every time I bake: the desired dough temperature (DDT) and the final dough temperature (FDT). And yes, I keep an extensive written record of my dough temperatures to refer to them for future bakes–all to produce consistently delicious loaves!
(Psst! If you don’t want to do any math, scroll for a temperature cheat sheet and calculator.)
What is the Desired Dough Temperature?
The desired dough temperature (DDT) is the ideal dough temperature at the end of mixing, just before bulk fermentation begins. Each of my recipes includes a DDT as a guide.
What is the Final Dough Temperature?
The final dough temperature (FDT) is similar to the desired dough temperature, except it’s the actual measured temperature of the dough right after mixing all the ingredients.
How Temperature Affects Flavor (Not Just Timing)
Temperature doesn’t just control how fast your dough ferments; it influences how it ferments, and that shows up directly in flavor.
At warmer temperatures (around 78-82°F / 25-28°C), both yeast and bacteria are highly active. Fermentation is efficient and relatively fast, which tends to produce a milder, more lactic sourness that’s smooth and yogurt-like.
At cooler temperatures, yeasts remain relatively active while lactic acid bacteria slow down more significantly. This shifts the balance of acid production toward acetic acid (the sharper, vinegar-like tang that defines more assertive sourdough). Cooler, slower fermentation—whether during a long bulk at 70°F or an extended cold proof (retard) in the refrigerator—generally produces more complex, developed flavor.
This is why bread baked in a cool kitchen, or left for a longer overnight cold proof, often has more depth of flavor than bread rushed through a warm fermentation. The tradeoff is time, but for many bakers it’s worth it.
How Warm Should Dough Be to Rise?
The warmer the sourdough bread dough, the faster it will ferment and rise. Dough should be warm enough to encourage lively fermentation and flavor development, but not so warm that it overproofs quickly. For most recipes here, I target a final dough temperature between 75°F and 78°F (24-25°C).
Bacteria and yeasts function optimally at different temperatures: 89°F (32°C) and 80°F (27°C), respectively. However, these temperatures are relatively high, so finding a happy medium at around 78°F (25°C) results in a dough that’s warm enough to have ample bacteria and yeast fermentation activity but not so warm that you end up with a dough that ferments too quickly and becomes sticky, hard to handle, and overproofs.
For doughs with a high whole-grain content, I typically reduce the desired dough temperature (DDT) to around 75°F (23°C) to avoid overproofing. Whole-grain doughs contain more bran and germ particles in the flour, which enhance fermentation activity.
| Type of dough | Approximate DDT |
|---|---|
| Mostly white flour | 75°F to 78°F (24 to 25°C) |
| Mostly whole-grain flour (including freshly milled whole grains) | 75°F (23°C) |
What Happens if My Bread Dough is Too Warm?
Most bakers know that cold dough means a longer bulk fermentation, but the reverse is equally important to understand. If your dough comes out warmer than the DDT, fermentation will move faster than the recipe anticipates.
Watch for rapid bubble formation early in bulk, a dough that feels very alive and active during folds, and a faster-than-expected volume increase. You may need to divide and shape 30-60 minutes earlier than the recipe suggests.
The risk with warm dough is overproofing. Dough that gets away from you becomes slack, loses structure, and bakes up flat with poor oven spring. When I’m in this situation, I usually err on the side of dividing earlier—it’s much better to slightly underproof going into the fridge than to let the dough go too far.
To remedy a dough that’s too warm: place the bulk fermentation container, covered, in the refrigerator for 15 to 30 minutes at the start of bulk fermentation to help bring the temperature down.
What Happens if My Bread Dough is Too Cold?
If the bread dough is cold, even by just a few degrees below the desired dough temperature, it might result in a much longer bulk fermentation and/or proof time. In this case, be flexible and wait to divide or bake the dough until it displays the signs it’s ready to move on to the next step in the bread-making process.
To remedy a dough that’s too cold, put the container with the dough, covered, in a warmer spot in the kitchen (or a home dough proofer; more on this below) until the dough reaches the desired temperature.
Next, let’s look at measuring and monitoring dough temperature because, well, without the ability to measure, it’s hard to ensure the temperature is where we want it to be.
Seasonal Sourdough Bread Baking
Temperature management looks quite different depending on the time of year. I’ve written two dedicated guides that go deep on the specific adjustments for each season:
- How to Bake Sourdough Bread in Summer — Keeping fermentation under control when your kitchen is hot, including reducing pre-fermented flour, using ice water, and watching your dough more closely.
- How to Bake Sourdough Bread in Winter — Combating slow fermentation in a cold kitchen and avoiding the most common winter mistake: underproofed dough.
How to Monitor Dough Temperature
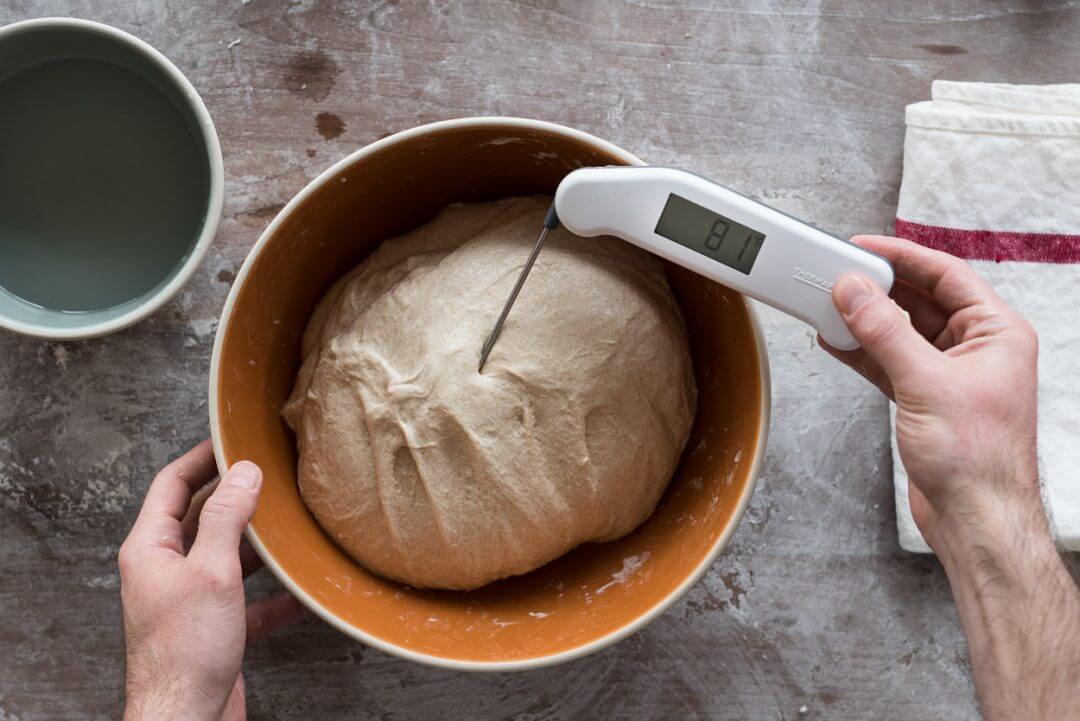
Monitoring a dough’s temperature is simple: stick an instant-read thermometer into the center of the dough and record the temperature.
I like to take the dough’s temperature at the end of mixing to record the final dough temperature in my baking notebook. I also record the dough’s temperature a few more times during bulk fermentation, when I stretch and fold it—this is a great time to check in and see how fermentation is progressing.
Some bakers will say you don’t need a thermometer and don’t need to monitor dough temperature—strictly speaking, this is true! People have been baking bread for centuries—way before the thermometer was even invented. However, I find investing in a few simple tools, with corresponding processes, helps me remove the guesswork and take steps to improve my bread-making consistency. A good quality thermometer (like my Thermapen) is one such tool.
Over time, as your baking intuition builds, reliance on these tools does subside, but to this day, I always take a minute (if that) to measure the dough temperature right at the onset of bulk fermentation. Why? It provides me with an intuitive sense of how bulk fermentation will progress. Is my dough temperature a few degrees lower than I expected after mixing? If so, I’ll either warm up my dough a little at the beginning of bulk, or I’ll plan for bulk fermentation to go a little longer than planned. Conversely, if I overshot my DDT, I know bulk fermentation will likely take less time, and I’ll keep an eye on the dough to divide it earlier.
Now, let’s look at how to use temperatures to ensure our dough is on target.
How to Calculate the Mixing Water Temperature for Bread Dough
Water is often the largest ingredient in a dough, so it has the largest impact on the final dough temperature (FDT). This is an opportunity for us bakers because the water’s temperature is easily adjustable, allowing us to dial in the final dough temperature.
If we measure the temperature of other factors—flour, the levain or preferment, the room temperature, and take into account heat generated when mixing—we can do a simple calculation to figure out to what temperature we should heat (or cool) the water to reach a recipe’s desired dough temperature (DDT).
Example: Calculating the Mixing Water Temperature for my Beginner’s Sourdough Bread
In the following example, which is from my Beginner’s Sourdough Bread. The recipe has a DDT of 78°F (25°C). First, look at the temperatures needed for the calculation:
- Levain or preferment temperature (this might be your sourdough starter, if you’re using that directly)
- Flour temperature (usually the same as your room temperature)
- Room temperature (use your Thermapen to measure this!)
- Friction factor (see below)
What is Friction Factor?
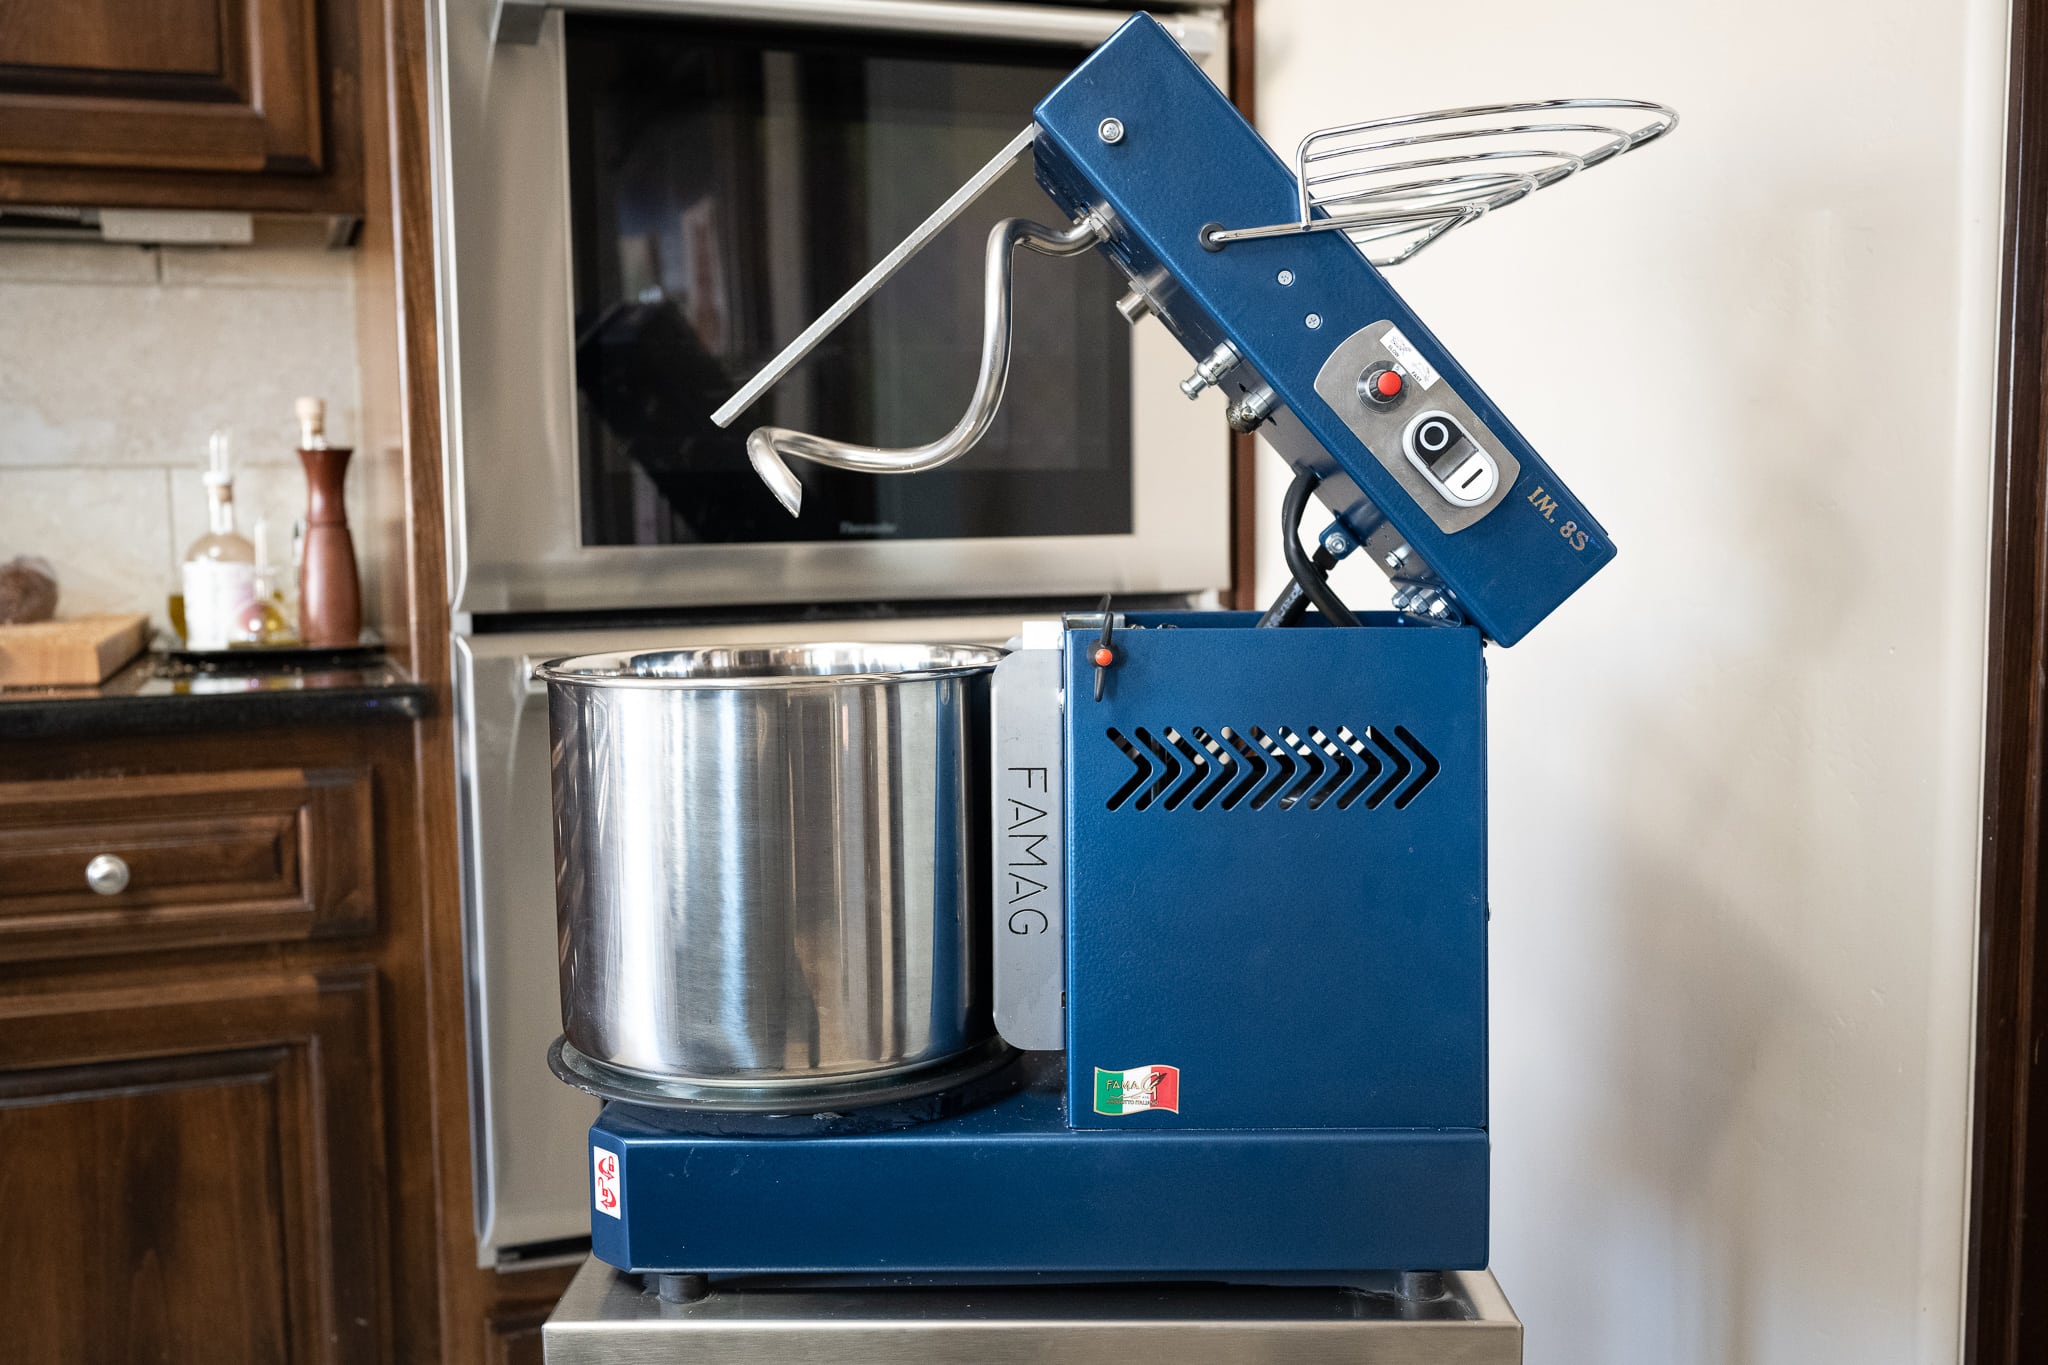
One variable in the water temperature formula that often causes confusion is the friction factor—the heat generated by mechanical mixing. When a stand mixer is running, the motor and mixing action warm the dough, sometimes significantly, depending on the mixer, speed, and mixing time.
When mixing by hand, I set the friction factor to 0. Hand mixing simply isn’t vigorous enough to heat the dough in any meaningful way (and in a cold winter kitchen, it might actually cool it slightly).
If you use a stand mixer, you’ll need to determine your friction factor by experimenting: mix a dough, note the dough temperature before and after mixing, and calculate the difference. Once you know your mixer’s friction factor, it stays fairly consistent as long as your speed and mix times don’t change.
So, back to our example, here are the temperatures I measured:
| Temperature Variable | Measured Temperature |
| Levain | 78°F (25°C) |
| Flour | 74°F (23°C) |
| Room Temperature | 74°F (23°C) |
| Friction Factor | 0 (since I’m mixing by hand) |
Mixing Water Temp = (DDT x 4) - (Levain Temp + Flour Temp + Ambient Temp + Friction Factor)
Mixing Water Temp = (78 x 4) - (78 + 74 + 74 + 0)
Required Mixing Water Temp = 86°F
We need to warm our water to 86°F (30°C) so that, at the end of our mix, our FDT will be 78°F (25°C).
Water Temperature Calculator
Use the interactive dough water temperature calculator to quickly determine how much to warm or cool your water so that, at the end of mixing, your dough reaches the desired dough temperature. Head to the water temperature calculator page to bookmark it and use it each time you mix.

Water Temperature Calculator
Don’t Like Math? Use This Water Temperature Cheat Sheet
I have a cheat sheet for temperatures like this in my cookbook, but here’s a quick reference chart. On the left, it shows what your kitchen temperature might be, and on the right, what you should warm your mixing water to so you get close to a final dough temperature of 78°F (25°C), the common goal for recipes at The Perfect Loaf.
| If your kitchen temperature is | Warm or cool the mixing water to |
| 68°F (20°C) | 98°F (37°C) |
| 70°F (21°C) | 94°F (34°C) |
| 72°F (22°C) | 90°F (32°C) |
| 74°F (23°C) | 86°F (30°C) |
| 76°F (24°C) | 82°F (28°C) |
| 78°F (25°C) | 78°F (26°C) |
| 80°F (26°C) | 74°F (23°C) |
How to Heat or Cool the Mixing Water
The easiest way to warm the mixing water is to heat it in the microwave (my choice for convenience), on the stove, or to draw warm water from the tap. To cool the water, use cold water from the fridge (I keep a container inside just for this) or drop a few ice cubes inside your water pitcher.
Where is The Best Place For My Dough to Rise?
Now that we know how to monitor our dough temperature and hit that all-important DDT each time, how do we ensure our dough maintains a sufficient temperature throughout bulk fermentation and proofing? As home bakers, this can be challenging because our doughs are usually smaller batches, which are more easily affected by temperature changes. Additionally, the home kitchen can also have drastic temperature changes due to heating and cooling. So, the trick is finding the optimal place to proof dough.
These are my favorite places to let my sourdough bread dough rise:
- Inside a small home dough proofer
- Inside the home oven, closed and with the light on
- Inside the microwave
- In a warm spot in the kitchen, for me, this is on top of my refrigerator
Let’s look at each option in more detail.
Using a Home Dough Proofer to Maintain Dough Temperature
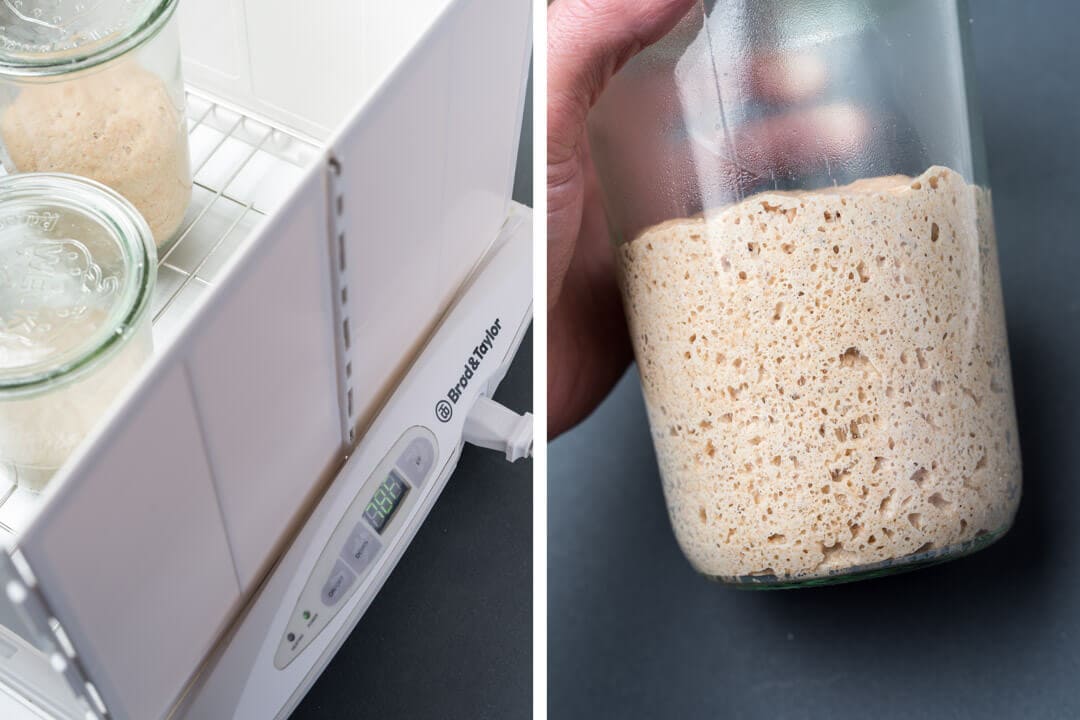
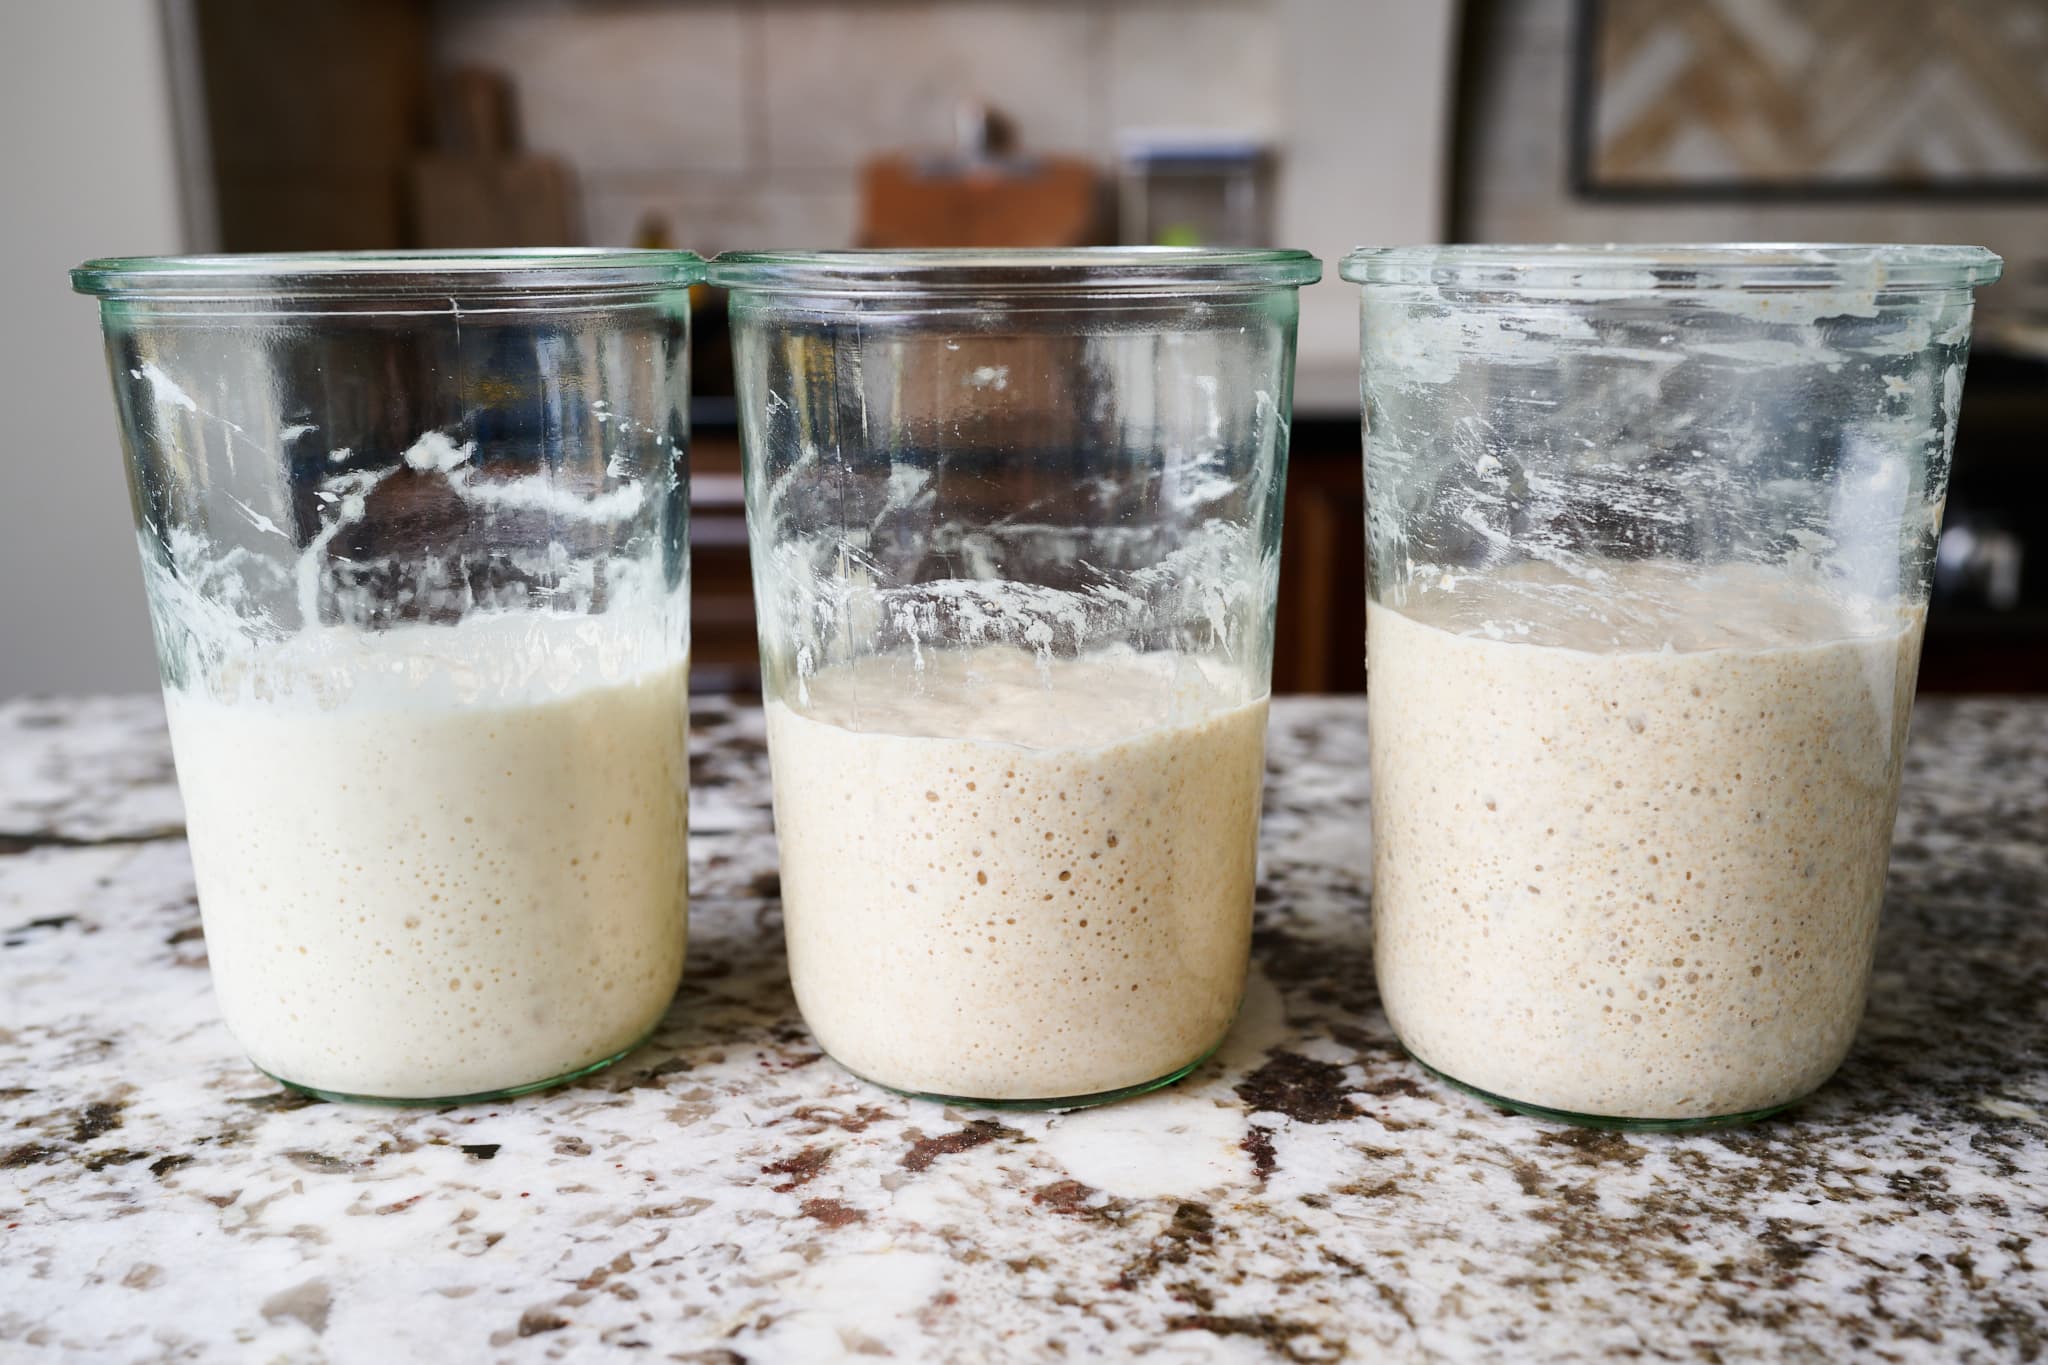
I’ve been using a Brød & Taylor dough proofer for years. The electric proofing box sits in my pantry and runs 24/7, keeping my sourdough starter (and a levain before a bake) at a comfortable 76°F (24°C) for optimal fermentation. Since purchasing this proofer, I have noticed a significant increase in the consistency of my bread, thanks to its steady temperature.
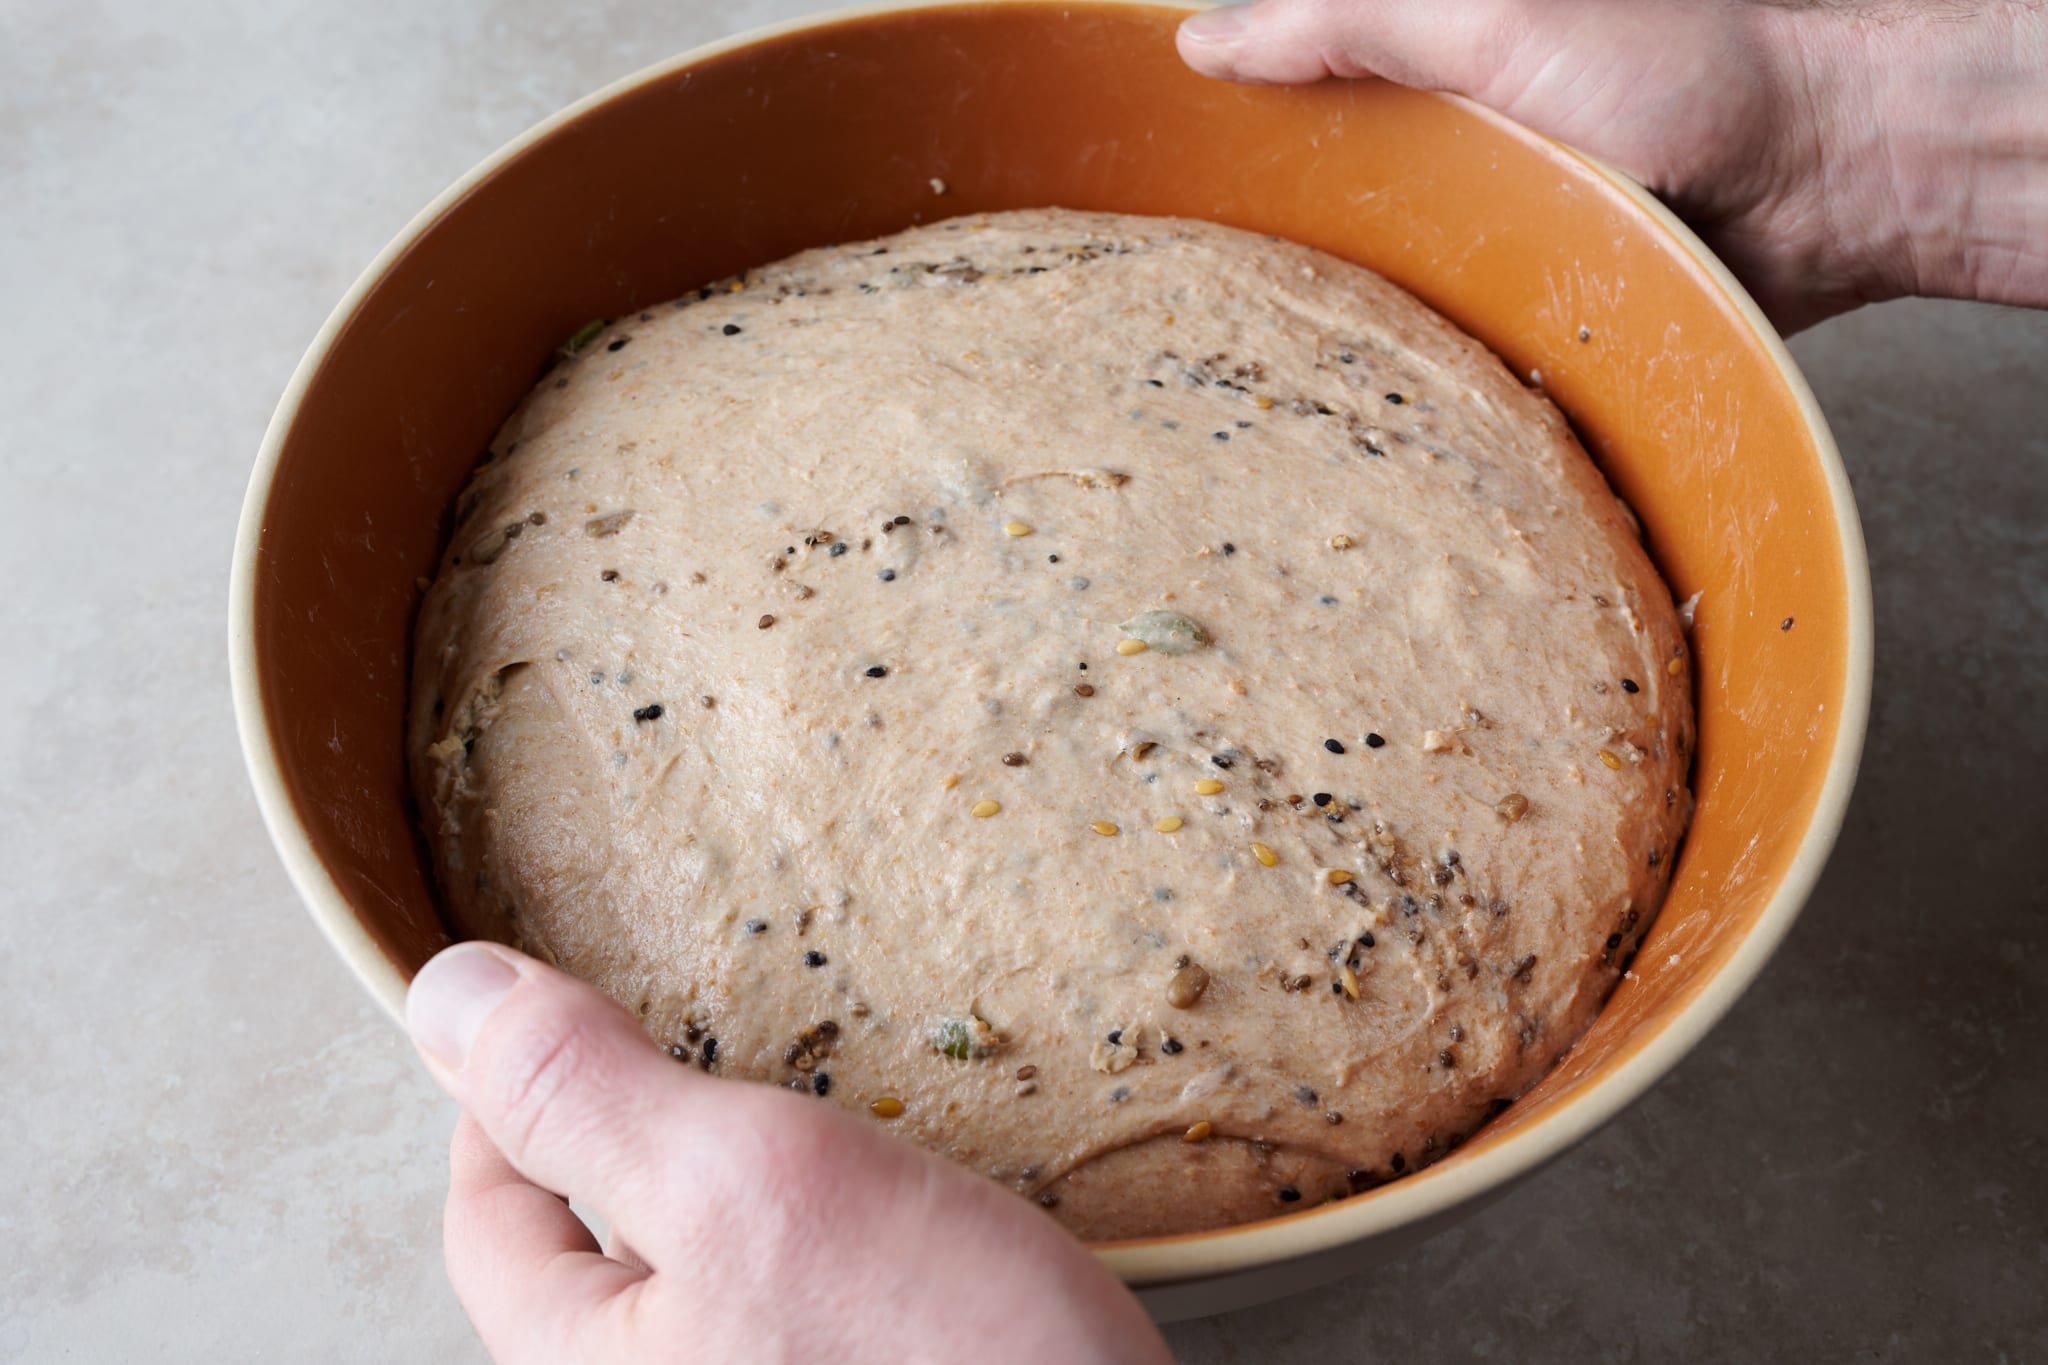
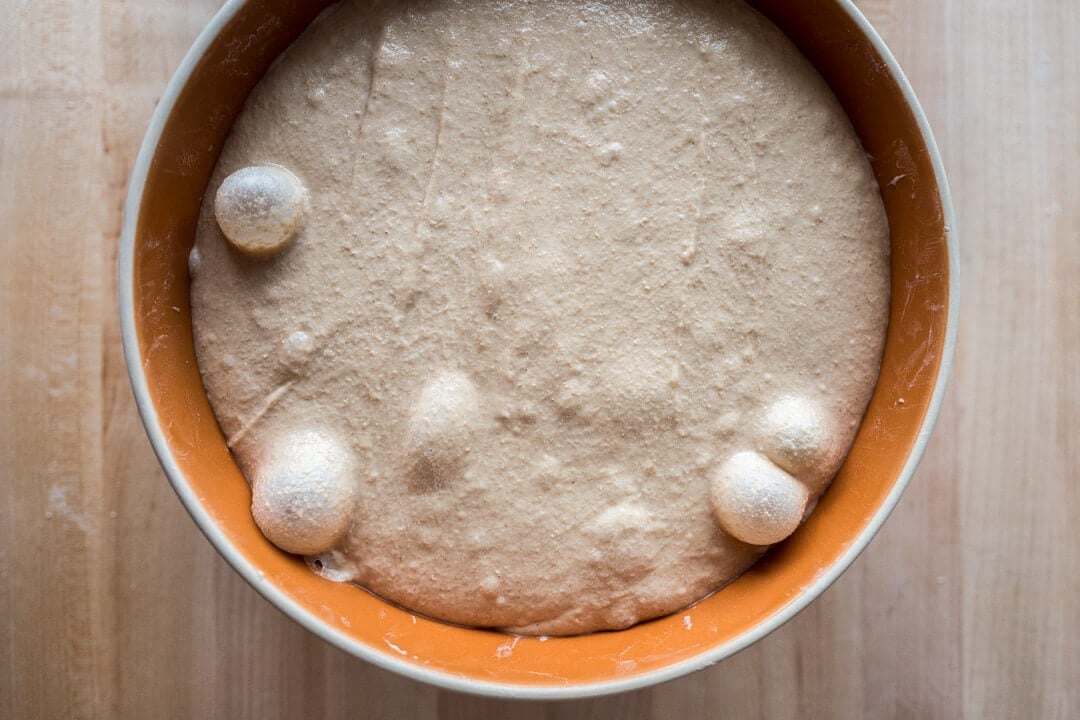
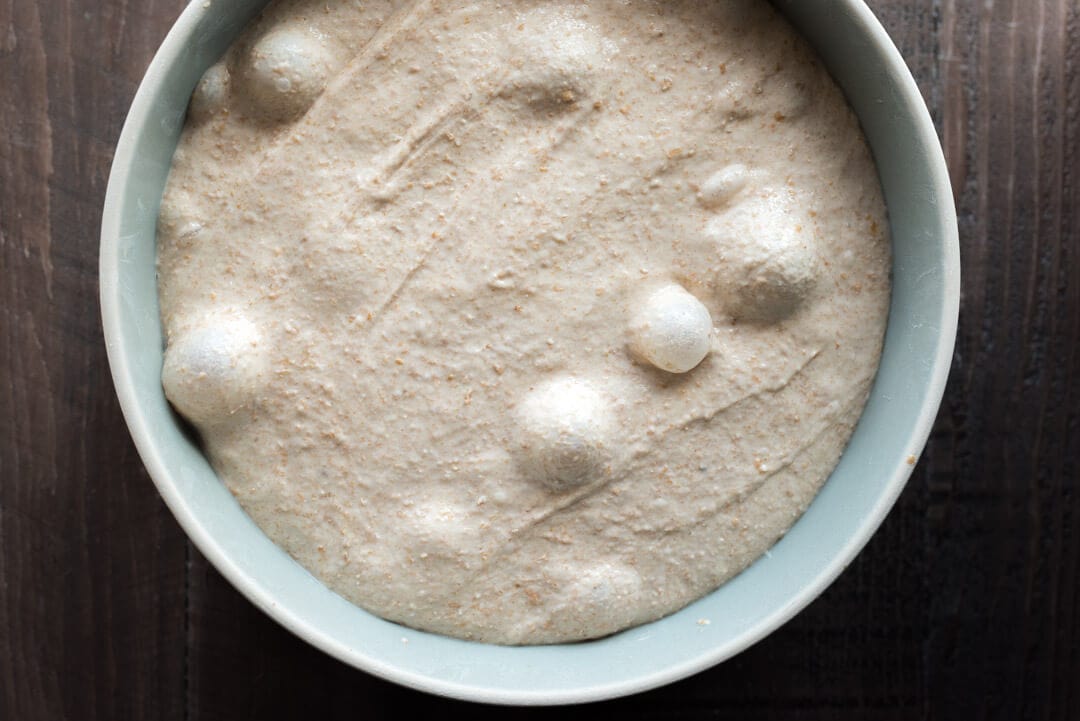
There’s enough room in the proofer to fit my starter (and even another levain) in a corner and my proofing bowl with 2kg of dough (see the picture below). This means I can have multiple bakes that are nice and warm at the same time.
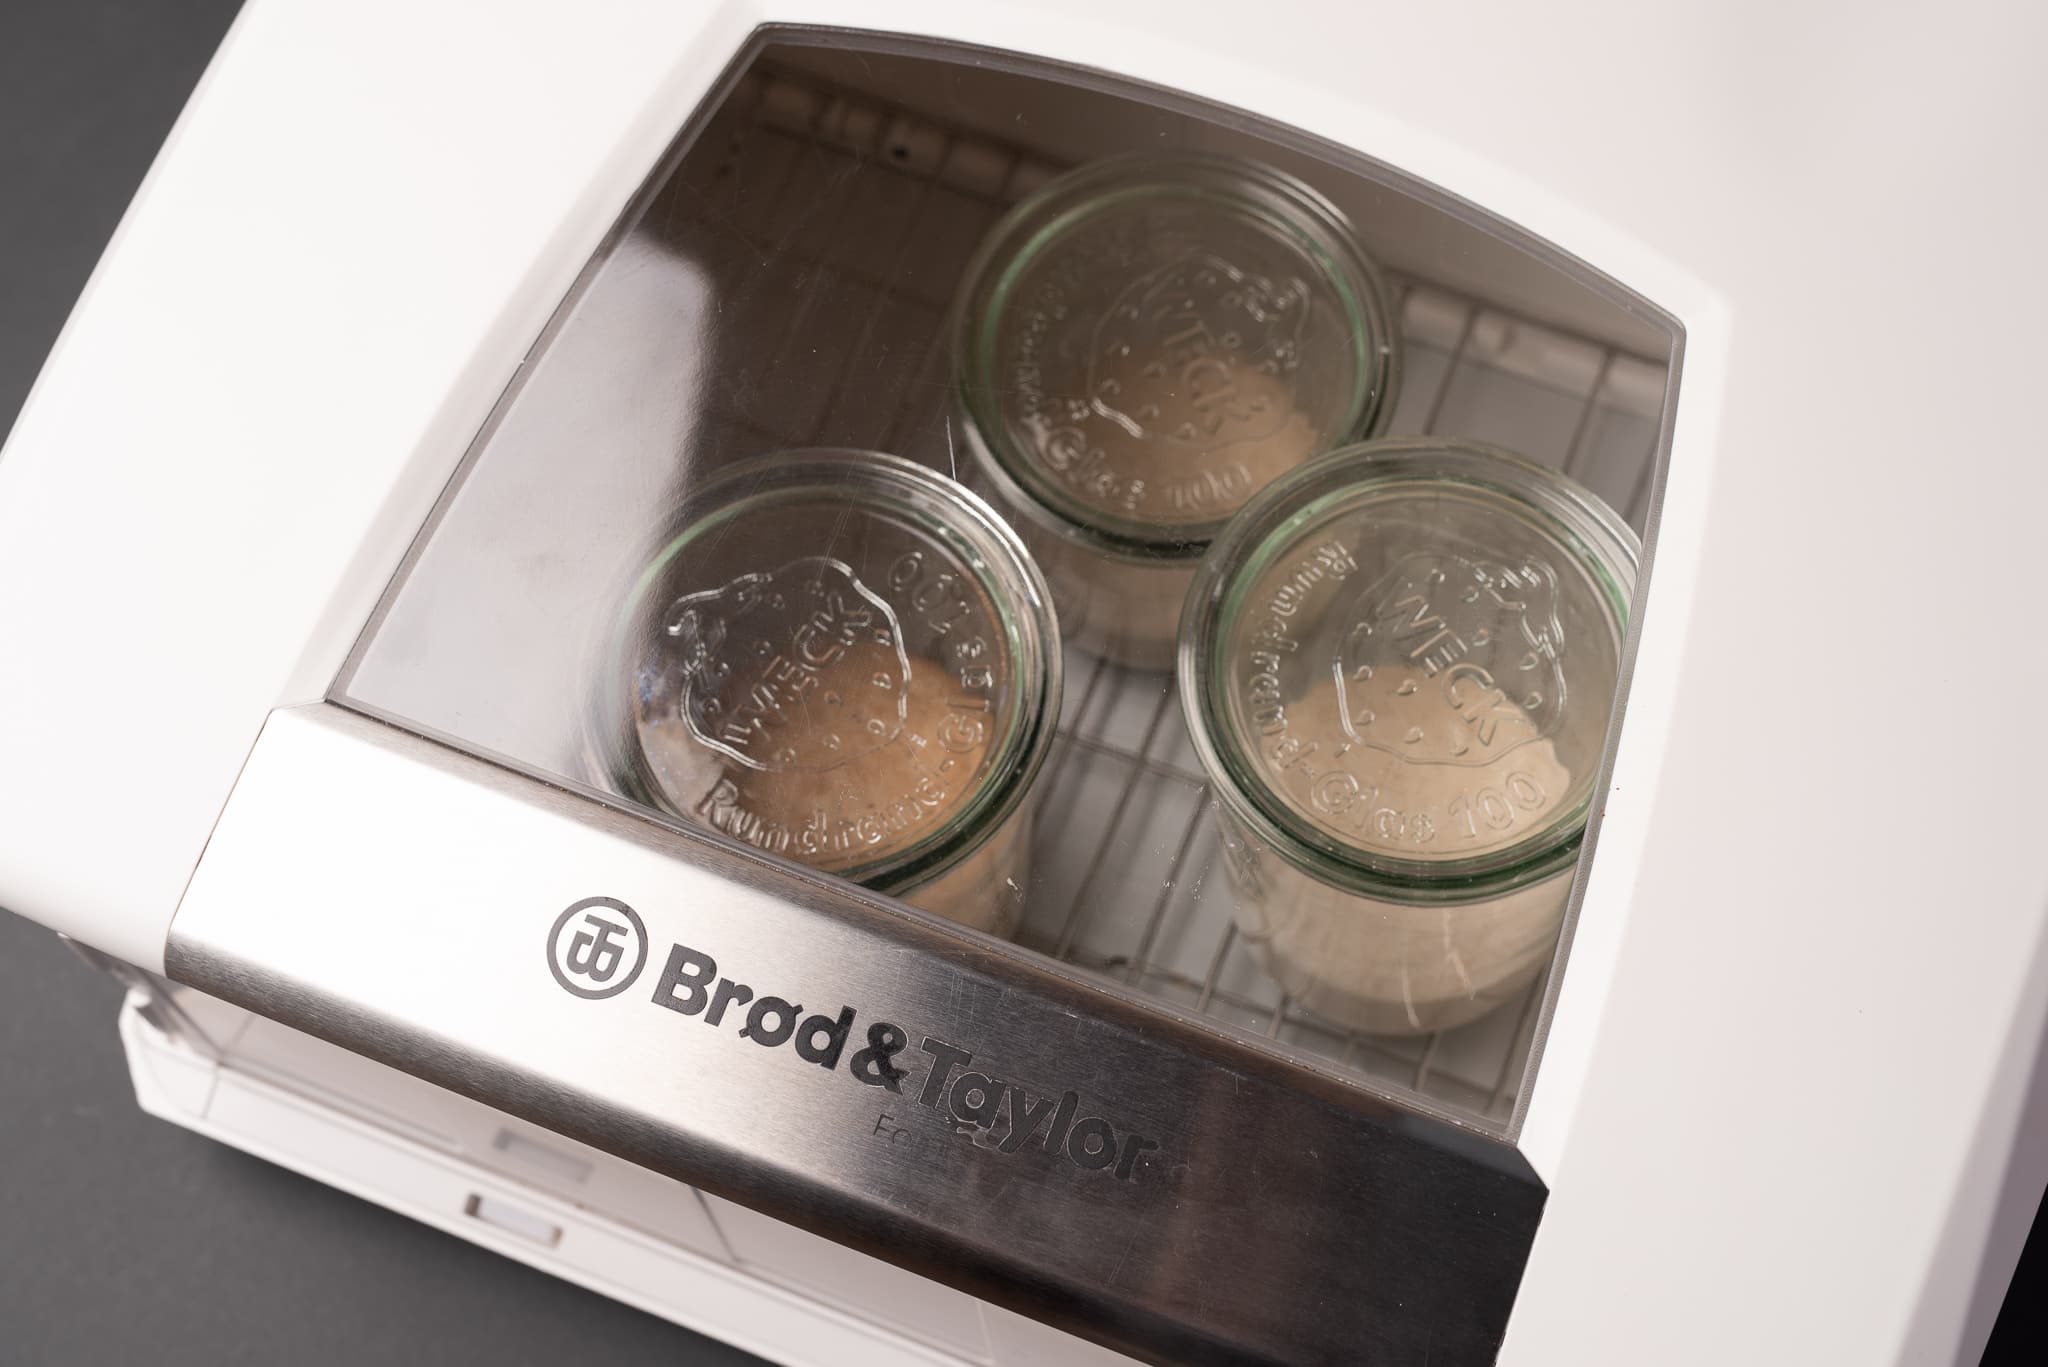
What you see above is typical of a morning in my kitchen: two levain and my starter (on the left) in my favorite Weck jars. The proofer is plenty spacious, and I can even fit my bulk fermentation container with these three jars.
The proofer is dead simple to use. Use the up and down buttons to enter the desired temperature until it is displayed. The entire bottom of the unit is a gentle heating element that runs continuously to maintain the set temperature. They even make a shelf you can insert halfway down the length to hold shallow bowls or trays.
In the beginning, I mentioned that adjustments could be made in bulk if we miss our DDT by a small margin (1 to 2 degrees). If my measured FDT is a little low, I’ll turn up the proofer by 5 degrees so the dough mass heats up at the start of bulk. Then, at each set of stretches and folds (30 minutes apart), I remove my dough from the proofer and measure its internal temperature. If the temperature is close enough to my initial target, I’ll set the proofer back to my DDT for the remainder of bulk.
When I have dough in bulk fermentation inside the proofer, I set it exactly to the formula’s DDT (typically 78°F/25°C).
Because the proofing can be adjusted quickly, we can speed up or slow down fermentation (within reason). There are so many handy features of a home proofer, and I recommend reading my guide to using the Brod and Taylor Proofer for an in-depth discussion.
Using a Home Oven to Maintain Dough Temperature
A home oven is another great, convenient option for maintaining dough temperature. Place your starter or bulk fermentation container in the oven (turned off), insert an ambient-temperature thermometer inside, and turn on the interior light. Usually, this light will generate enough heat to raise the internal temperature quite a bit—just keep an eye on that thermometer to ensure it doesn’t go too high. (Additionally, put a sticky note on the outside of the oven that says “Do Not Turn On!” so someone doesn’t accidentally bake your starter.)
Using a Microwave to Maintain Dough Temperature
A microwave is a small, sealed chamber that is rather convenient for holding a starter, levain, or a bowl of rising bread dough. I typically cover my bulk fermentation container or proofing dough, then place it in the microwave to help insulate the dough and keep it warm. If you want to warm up the dough, boil a small cup or bowl of water and place it inside the microwave alongside the dough.
Using a Warm Spot in Your Kitchen to Maintain Dough Temperature
Every kitchen has warm and cool spots. As bakers, we seek these out over time and learn to place our dough (and our sourdough starter) in various locations depending on its temperature needs. The top of my refrigerator is always a few degrees warmer than the rest of the kitchen. In your kitchen, the warmest spot might also be next to a coffee machine, a home oven, or another secret spot. Find yours!
Note: For my sourdough starter, I like to keep it in my Sourdough Home, a specially designed little unit that maintains the perfect temperature.
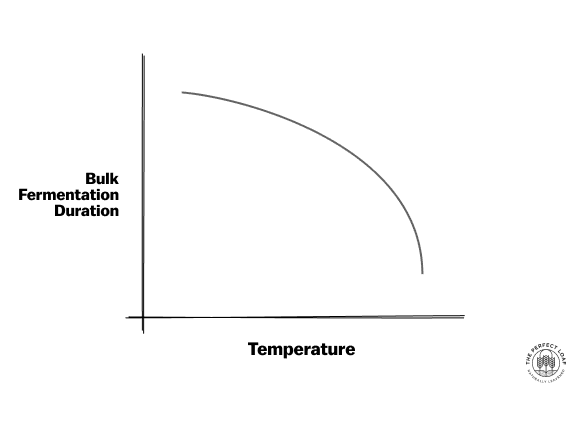
How does Dough Temperature Affect Bulk Fermentation Time?
While it’s challenging (if not impossible) to assign a hard number for how long bulk fermentation should last for a particular dough, the following table shows how a range of final dough temperatures could impact this duration.
Note that this table is for illustrative purposes only and provides a snapshot of how the bulk fermentation duration may vary with temperature. The table assumes all other factors are equal, bake-to-bake (which is hard to ensure!), and is most accurate for the recipes and processes here at The Perfect Loaf.
| Final Dough Temperature (FDT) | Typical Bulk Fermentation Duration |
| 75°F (24°C) | 4 to 4.5 hours |
| 78°F (25°C) | 3.5 to 4 hours |
| 80°F (26°C) | 3 to 3.5 hours |
In the chart below, you can see this idea depicted roughly in a diagram: as dough temperature increases the bulk fermentation duration decreases.
Dough Temperature FAQs
When is the dough temperature for bakers calculated?
The final dough temperature (FDT) is calculated right at the end of mixing, before the start of bulk fermentation.
Where is the best place to put the dough to rise?
A warm spot in your kitchen is the best place for bread dough to rise. Try to find a place that’s between 75°F and 78°F (24°C and 25°C) to encourage strong sourdough fermentation.
What happens if the dough is too warm?
If the dough is too warm, it can become sticky, hard to handle, and eventually overproof.
Will dough rise at room temperature?
Yes, absolutely. Room temperature can vary widely and differs from room to room, but as long as it’s around 68 to 76°F (20 to 24°C), you’ll see your sourdough dough rise. The cooler the temperature, the longer it will take for your dough to rise.
How long can you let the dough rise at room temperature?
The time you let the dough rise at warm room temperature depends on the dough formula and the exact temperature. For most sourdough bread doughs, a final rise (proof) time of 1 to 4 hours at room temperature is appropriate.
My kitchen runs very hot—between 82-90°F (28-32°C). How do I adjust my timing?
At these temperatures, fermentation can move twice as fast as a recipe anticipates. For instance, a 4-5-hour bulk might be done in 2 to 2.5 hours. Use ice water for mixing, watch the dough rather than the clock, and consider reducing your levain percentage to 10-12% pre-fermented flour to buy yourself more working time.
What’s the ideal refrigerator temperature for cold proofing? My dough always comes out underproofed from the fridge.
Aim for 38-40°F (3-4°C) and verify with a thermometer, as home fridges often run colder than the dial suggests; below 35°F (2°C), fermentation can nearly stall. Also, check that the bulk has gone far enough before shaping: a 50% rise alone isn’t always sufficient. Look for a dough that feels aerated and jiggly, and give shaped loaves a 20-30 minute rest at room temperature before refrigerating.
During bulk fermentation, the rise doesn’t seem significant. Is this because of low kitchen temperatures?
Most likely yes. In a cool kitchen (around 68°F / 20°C), bulk can easily take 6-8 hours, and the dough often feels sluggish for the first half before picking up. Don’t rely on volume alone. Look for bubbles on the sides, a lighter feel, and a jiggle when you shake the container. Use warmer mixing water to hit your DDT and find a warm spot to maintain it throughout bulk.
Is there a maximum water temperature I should use to avoid killing the yeast in my levain (or starter)?
Yeast starts to weaken around 120°F (49°C) and dies above 130°F (54°C). As a practical limit, stay below 110°F (43°C) for mixing water, especially since you’re often adding water near the levain before it’s diluted by flour. In practice the formula rarely calls for water that hot anyway, but it’s a good ceiling to keep in mind.
What’s Next?
As bakers, I’ve talked about how we need to be acutely aware of our environment and treat temperature as importantly as our ingredients—and it is that critical: temperature is the driving force behind fermentation. To see how temperature plays a role in the final rise of sourdough bread dough, read through my guide to proofing bread dough.
Happy baking!


208 Comments
Struggling to understand how to maintain any consistent temp in a dough when recipes ask to autolayse for 2 hours??
Can you do a post on how to achieve a more open crumb with a 74-75% hydration? I have tried laminating the dough, using coil folds, strengthening the dough up front and handling the dough very gently later in the process, skipping the pre-shape (to help avoid degassing) and going directly to a final shaping, using just the tuck and turn method of shaping, etc. My starter is very strong, I proof the dough in a Brod and Taylor proofer, monitor my dough temps, keeping them between 78-80 throughout the process, and even using an aliquot tube in conjunction to help determine when to end the bulk fermentation. My loaves get a nice oven rise, and the crumb is even but I'd still like a more open crumb. (I use only white flour in my loaf and a little rye in the starter). Thanks.
Great article. Just what I needed to use as a reference for DDT and FDT! Thanks!
I live in the Philippines, where the kitchen temperature can be between 28 to 32°C
It would be useful to know how long the times at these temperatures 🌡
Hey William—got your answer now in the post above in the FAQ section. Really great question.
Thank you! I’ve finally managed to bake a perfect loaf of sourdough bread after many years of trying. Keeping the dough at 25 °C during bulk fermentation, shaping it after the prescribed 4.5 hours, letting it ferment for another hour at 25 °C, and then leaving it in the fridge for 18 hours did the trick.
Super glad this guide helped, Paulina!
Hello, Maurizo,
Thank you for such an incredibly helpful website. I have two questions for you, if you have time –
1) I've read your detailed guides on starter and ripeness, but I remain confused about one particular point – if I'm building a levain at 9 am and my starter was fed the night before and sat in my chilly house overnight, how do I make sure it is at the proper stage of ripeness for a 9 am levain build? My starter is very healthy – even the discard has overtopped the half-full Weck jar in the fridge at times! But first thing in the morning, the starter looks a little sleepy, if you know what I mean. I've taken to putting it in a water bath in my yogurt maker for about 2 1/2 hours and then used it – it looks right to me, but I really don't know what I'm talking about. My bread has turned out well, so maybe I'm worrying about nothing – I'd just like a little more certainty about the timing for having the starter ready for use in the morning.
2) And today, trying to keep my levain warm, I left it on the yogurt maker too long! I use the yogurt maker for all stages, essentially, to maintain proper temperature. I'm normally vigilant and testing regularly to make sure things don't overheat (the lowest temp on the yogurt maker is 94 degrees or something like that). Today, of course, I got distracted and my levain hit 90 degrees! How bad is that? Have I killed it? Will the taste of the bread be off?
Thanks again. And I have ordered your book! Through our local bookstore, so it will be awhile getting here, but not too long.
Kathy in Vermont
Temperature control is a challenging thing at home, for sure. That's why I partnered with B&T on developing the Sourdough Home . In addition to using a dedicated device to maintain temperature, warm the mixing water to help increase the final temperature of your starter. Then, I find it helps to put it inside a storage container as a sort of proofing cabinet.
Hi Maurizio,
I just made my second attempt at an old family white bread recipe. It came out a lot better than my first try which was very very dense. It made one loaf of bread and a small pizza. Today was a lot better more like bread and the pizza was lite and kind of flakey…. the but and questions are about the dough and how i suspect i need to improve working it..
it seemed a little sticky to start after only kneading it for about 5 minutes.
i think i proofed it at too hi a temperature as it doubled in size in about an hour
it was hard to work with from then on but although the bread loaves didn't rise much they lightly browned up, had a good thump, and were no where near the density of my first attempt and the pizza came out a lot better too.
my plan for next time is to watch the amount and temp of water at the start and find a cooler but warm place to do proving
Please advise feedback if and when you can.
Best regards
Hey Stephen it sounds like you're on the right track here. Temp of the water is super important because it's going to dictate fermentation during bulk and even later in proof. I always like to shoot for a final dough that's around 76-78F. I think this will help.
Thank you very much…
… trying to recreate memories of my youth… the lady the recipe originated from would throw it together like falling off a log and make the best bread and pizza I’ve known…. cheers.
Hey Maurizio, what would be the ideal fridge temperature for cold proofing? So far I have been unsuccessful in proofing in the fridge (always underproofed dough). I bulk ferment to approx 50% increase in volume, shape and put dough to fridge for overnight/ + 12 hours and I feel like my fridge temperature could be the culprit here.
Thanks in advance
I would like an answer to this same question! When I cold proof for 1-6 hours (acc to the recipe I follow), the dough is REALLY cold, like 53 degrees. So should i wait for it to proof in my kitchen again and warm up to the mid 70s?
Rachel check my reply to Martin, above.
Yeah, home fridges are super cold at around 39F typically. It's not really an option to adjust this temp, either, unless you want things in there to spoil 🙂 What you can do is let the dough sit out after shaping for 30m to 45m to get more "floor time," to ferment further. Then pop it into the fridge.
Hi Maurizio, I'm embarking on my sourdough journey with your book. I made my best loaf a few days ago and I've just pulled out another two today from the oven, I haven't cut them yet though. I just want to ask about getting good rise!
When I first started my bakes were a bit flat with not enough rise I feel. I am in Australia in a subtropical climate and the temps have been fluctuating but are generally lower at present, around 18 degrees Celsius during the day. When the dough is in bulk fermentation the rise just doesn't seem significant enough. Is this because of low kitchen temps?
Also I've been doing the calculations for mixing water temp. And on two occasions when I calculated, my FDT was 2 degrees Celcius higher than the DDT. Do you have any idea why that might be?
thanks so much, me and my family are enjoying all the delicious bread coming out of this newfound passion of mine!
Hey Elanora! Sorry for the delay. Thanks so much for getting my cookbook! Hope you're loving it so far.
Yeah, that low kitchen temp will dramatically slow the fermentation process. I usually shoot for 24-26C if possible for my doughs. If it's colder, it'll take more time at each step. Warm your mixing water to help offset this so the FDT is higher.
If your ambient temp is 18C, your mixing water should be quite warm! If your FDT is too high even with the calculation, just reduce the mixing water a few degrees to help offset this. It's not going to be 100% accurate, but should get you in the ballpark!
I leave in Southeast Asia where room temp in my kitchen is almost 90 degrees Fahrenheit and humidity is through the roof. What can I do?
You'll definitely want to mix the dough with super, super cold water (I usually put ice cubes in there and let them melt). I can also help to keep other ingredients in the fridge before mixing. Try to get your final dough temp down lower below what recipes recommend, because it'll warm up quickly during bulk!
I have some other great tips, here:
https://www.theperfectloaf.com/how-to-bake-sourdough-bread-in-summer/
Hi Maurizio,
There’s a part of the bulk fermentation process that confuses me: if it takes 12 hours for my starter to ripen, why shouldn’t I expect the bulk fermentation process to take just as long?
While I’m seeing activity in my starter, I’m seeing very little in my dough. The result is a loaf that lacks any appreciable oven-spring. The flavor is great but the crumb is gummy.
I’m able to maintain 76 degrees for both my starter and the dough during the bulk fermentation process.
Thanks!
Alex
It’s been 5 months so I’m assuming you’ve figured it out. At 76 degrees, it should take a fair amount of time (8ish hours). If you are fermenting 12 hours, then lack of oven-spring might be attributed to over-proofing. I don’t have the science on it, but your question poses an interesting point (starter to ripen/why not bulk ferment?). The only thought I can think of there is that gluten might start to break down at that time, resulting in a slack dough.
Crumb being gummy assuming proper proof: generally, people take their loaf out too early. Once the loaf hits 212 degrees F, it will plateau as the water bakes out. I used to remove at 210 but it left the dough wetter than I would have liked. I shoot for about 5 minutes at 212.
It's because the levain amount in the final dough might be higher with respect to the flour in the dough than the levain. For example, the levain might be 10% ripe starter to 100% flour, whereas the levain might be 20% ripe levain to 100% flour!
Maurizio… I’ve been making sourdough for 40 years, and this week, just followed your suggestion on the Sourdough Home. Made my first starter in several years, and was amazed! First day… not too much. Second day, it almost exploded, and 3d day, almost lifted top off the Weck jar. I’m on day 5 now and things have slowed slightly, so we will see. But these results are exciting… and surprising.
BTW… going on a 10 day trip next week. What is the coolest temp you would set the SD Home to try to maintain starter so its useable when I return?
Oh that's just fantastic to hear, Gregg (sorry for the late reply!).
I hope by now you've figured out some good timings for the SDH. I have some tips, here:
https://www.theperfectloaf.com/feed-your-starter-less-often-thanks-to-the-sourdough-home/