
In this guide to proofing bread dough, I’ll walk through a challenging—yet critical—step in the sourdough bread-making process. Proofing is near the end of the entire process when shaped bread dough is left to ferment and rise untouched in preparation for baking. During this time—which varies based on the dough and temperature—fermentation continues to play the critical role of changing available sugars to organic acids and gasses to flavor and leaven the dough, all of which result in a loaf with ample volume and improved eating quality.
If you’ve ever wondered what you should look for to determine when your proofing bread dough is ready to bake, this is the guide for you.
Your Ultimate Guide to Sourdough
This guide is part of a series, tap to learn about each step of the bread-making process from starter to finished loaf.
What is Proofing Bread Dough?
Proofing bread dough, sometimes called a dough’s second rise, final fermentation, or proving dough, is the step after shaping the dough before it’s baked in the oven. During this time, the dough continues to ferment (with sourdough, instant or commercial yeast, or a combination) to build up additional acidity and increase volume.
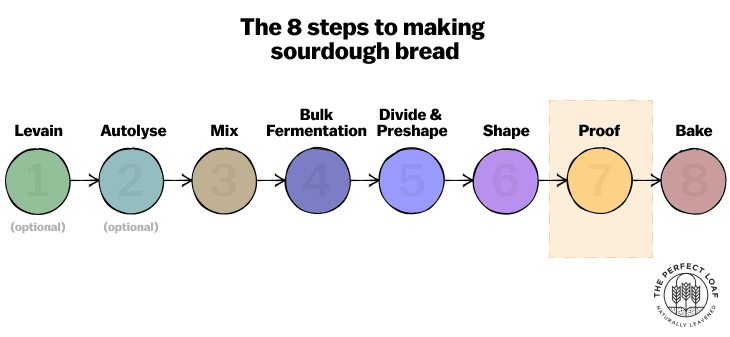
My cookbook describes the eight steps to making sourdough bread, from creating an (optional) levain to baking. Proofing bread dough is the seventh step.
What is the Difference Between Bulk Fermentation and Proofing?
The proofing step is often confused with bulk fermentation. Generally, both steps are concerned with letting the dough rest and rise as fermentation continues. But the key difference is that the proofing step takes place after the dough has been shaped into its final form before baking. So, the dough is no longer in a single, large mass as it is in bulk fermentation. Rather, the dough has been divided into smaller pieces, shaped, and then placed in its final proofing container to rise.
What is the Best Temperature for Proofing Dough?
There is no best temperature when proofing sourdough bread dough; it all depends on the dough you’re working with, the flavor and texture you seek, and your desired baking schedule. Generally, there are two types of proofing: same-day proofing at a warm temperature and cold proofing (retarding) for many hours.
1. Proofing bread dough at a warm temperature
Same-day proofing is where the shaped dough is left out at a warm temperature until sufficiently proofed. The amount of time the dough is left to proof at warm temperature depends on the dough makeup (the type of flour, water, and how much preferment was used) and the temperature at which it’s proofing.
What happens when I proof bread dough at ambient temperature?
- Less sourness
- A more mild flavor profile overall that highlights the grain flavor
- A harder to score dough since it’s warm
How long is bread dough proofed at ambient (room) temperature?
Generally, and for most recipes you’ll find here, the proofing time at warm temperatures will be between 1 1/2 to 3 hours.
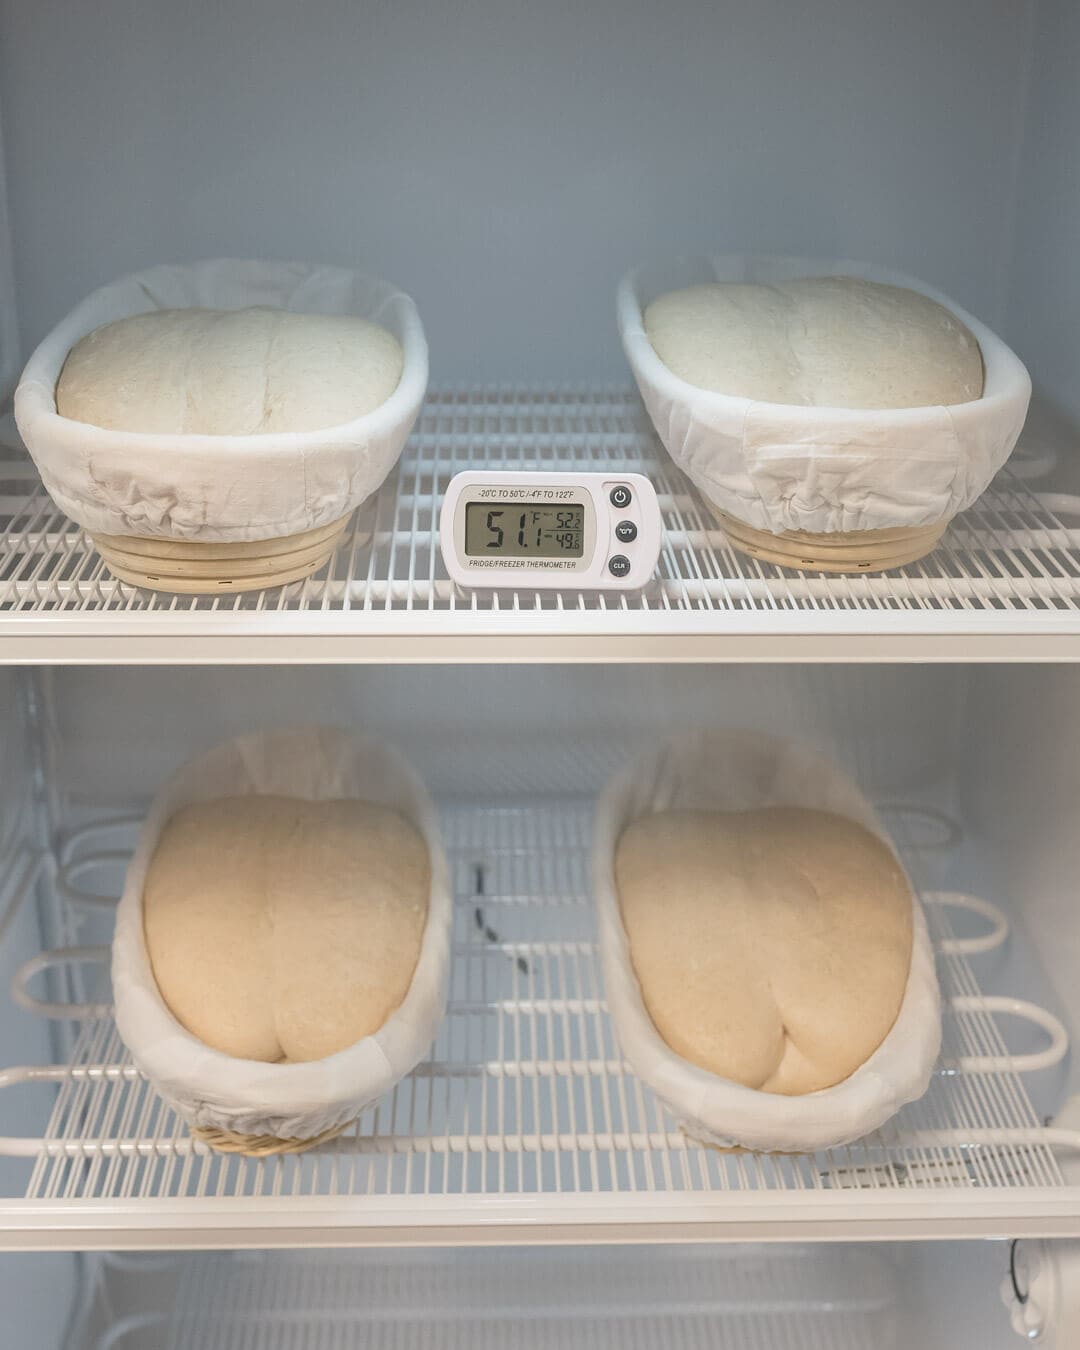
2. Retarding bread dough (proofing at cold temperature)
Cold proofing, or retarding, is where the shaped dough is placed into the refrigerator (or a dough retarder) to let proof for many hours at a cold temperature (usually overnight). Then, the dough is typically baked straight from the refrigerator or after it’s brought up to room temperature.
I often proof my sourdough bread dough in the refrigerator overnight because I find the baking schedule easier for the home baker. But in addition, I love the depth of flavor a long, cold fermentation brings to the final bread.
My Spelt, Rye, and Whole Wheat Sourdough Bread recipe is a great example of a loaf with incredibly deep flavor—contributed partly by a long, cold fermentation overnight.
What happens when I proof bread dough overnight in the refrigerator?
- Potentially increased sourness
- A more complex flavor profile
- Easier to score since the dough is cold and firm
- Potential crust blistering
How long is bread dough proofed at cold temperature?
Generally, the dough is proofed at a cold temperature for 8 to 16 hours, depending on the temperature. The period is commonly overnight for a home baker (and many professional bakers).
More on this is below.
Read my guide to the importance of temperature in baking for more on why it’s such an important factor when making sourdough bread.
Can I proof bread dough at room temperature instead of in the refrigerator?
Yes! If a recipe calls for proofing bread dough overnight in the refrigerator, it can be proofed on the counter at a warmer temperature for a shorter period. Rather than placing the dough in the refrigerator overnight, leave it covered on the counter for 1 to 4 hours until it’s ready to bake.
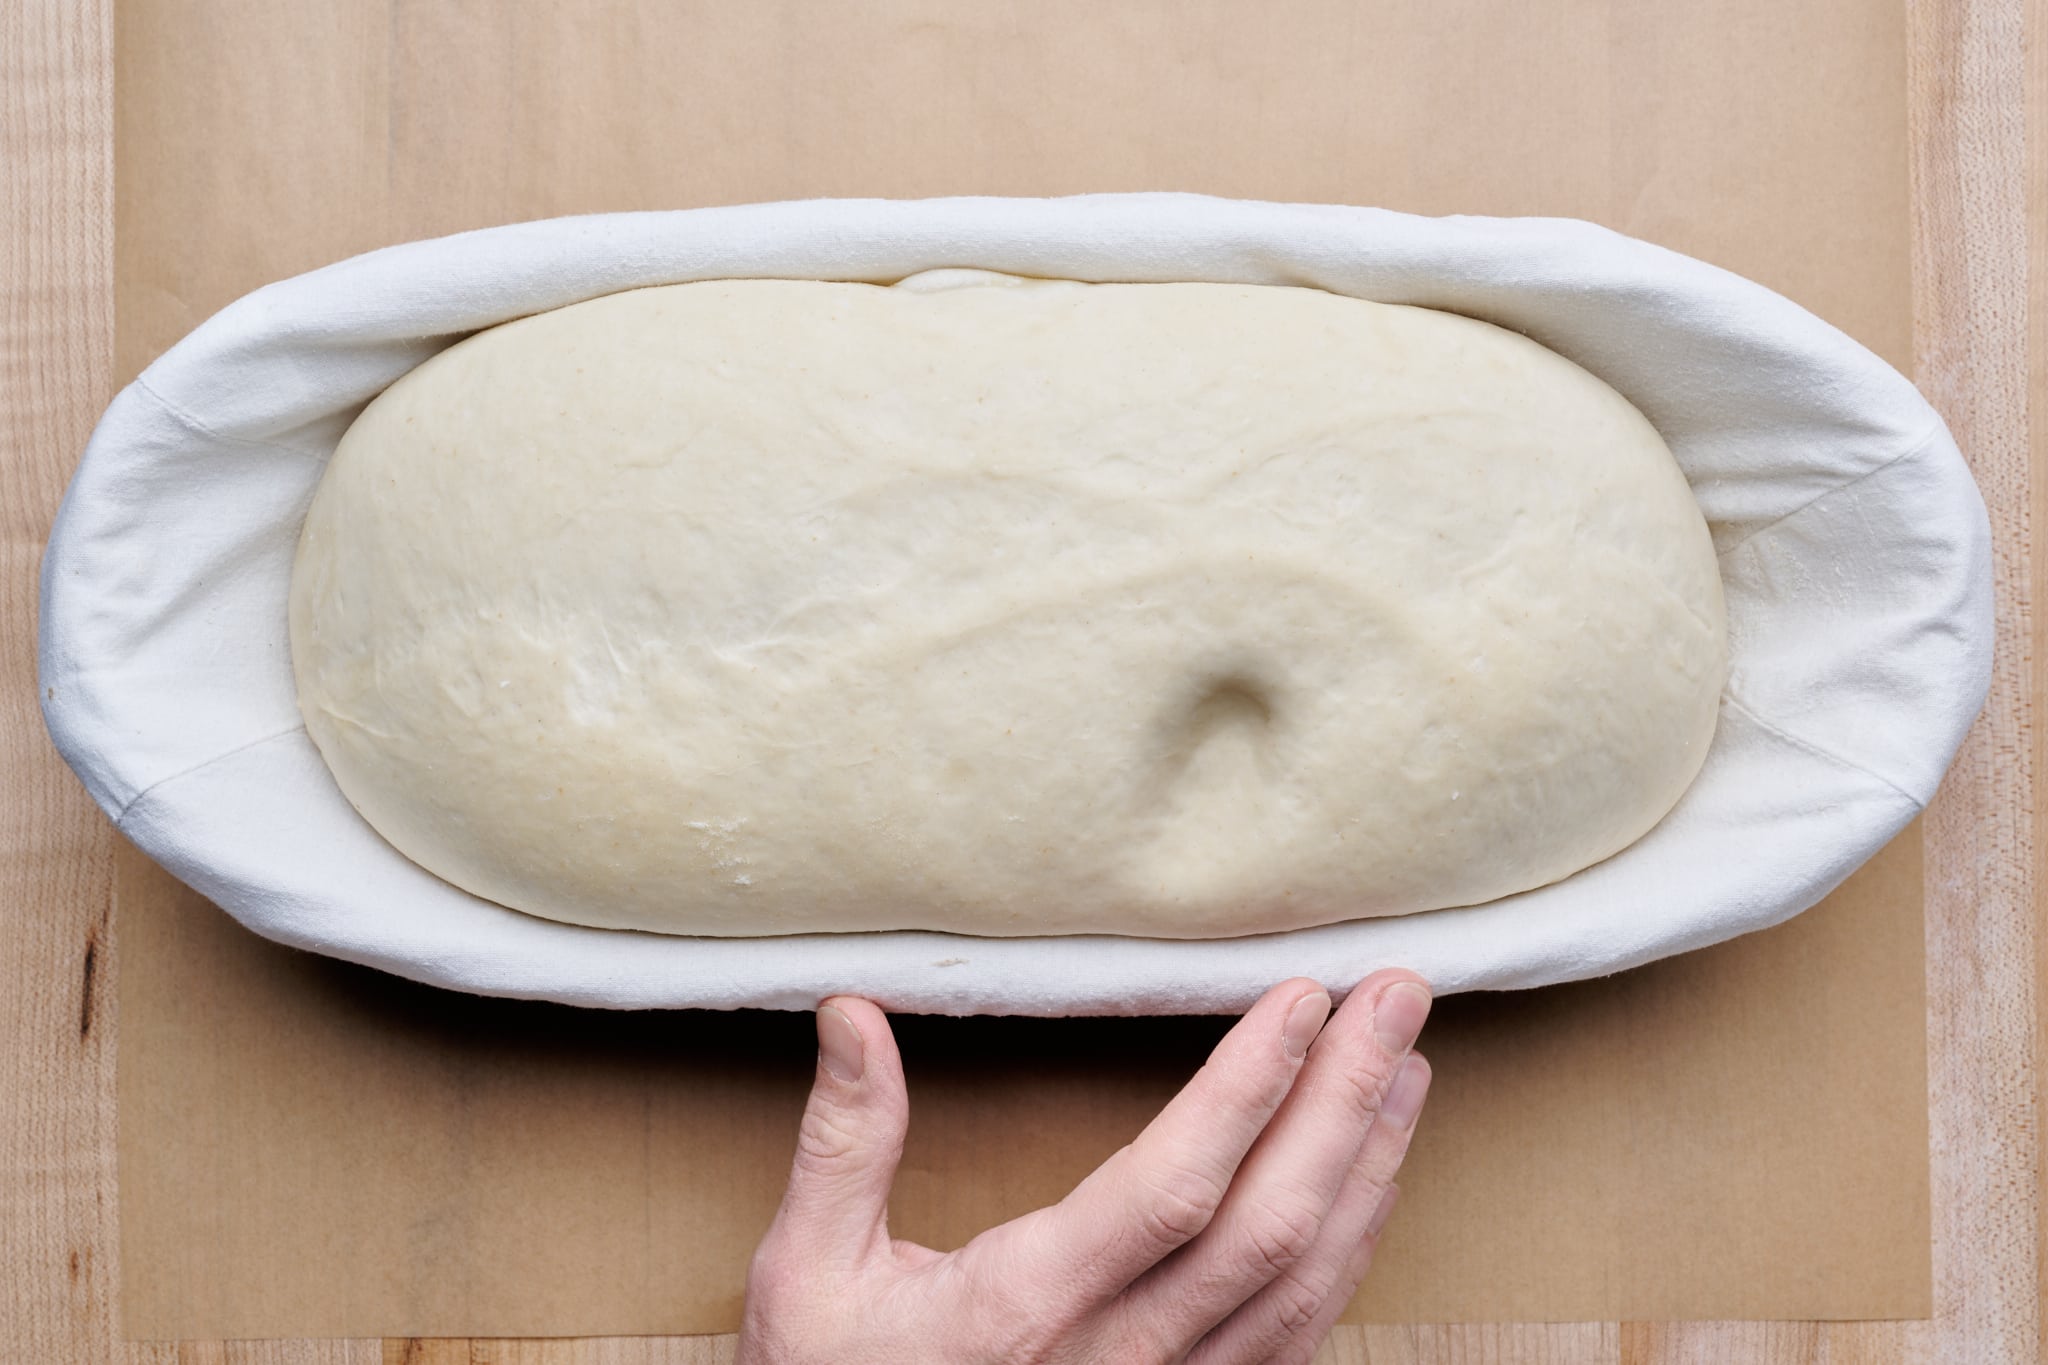
Since the dough is proofed at room temperature, I find using the poke test a very effective way to tell when the bread dough is ready for the oven. When you poke the dough, a finger press should slowly spring back to fill in the indentation partly.
How long can I proof my bread dough in the fridge?
Generally, I like to proof bread dough in the fridge for 10 to 16 hours (usually overnight, baking it the next day in the morning). You can certainly leave the dough in the fridge longer than this, but know that the longer you leave the dough to proof at a cold temperature, the more sourness and less rise you will have in your sourdough bread. I’ve left bread dough for up to 48 hours in the fridge, and while the final loaf was sourer and had less rise, it was still incredibly delicious.
How many hours is “overnight?”
When baking a recipe with an overnight proof, the recipe will almost always call for retarding dough in the refrigerator. In this case, the recipe often ambiguously states to “proof the dough overnight.” The exact number of hours can vary, though, based on when the dough was first mixed (and more accurately, when the preferment was added to the main dough). For instance, if you started mixing the dough at 9:00 a.m. versus 5:00 p.m., the total proof time would be drastically different because the dough would be proofed longer in the refrigerator. In the end, I find little difference if the dough is proofed in the refrigerator between 10 to 16 hours or so.
However, if you find a dough that’s sticky, slack, and spreads excessively when baking, it has likely overproofed and needs a reduction in the total fermentation time.
How can I stop overproofing my dough that’s proofed in the refrigerator?
To fix a dough that’s overproofed because it’s been proofing in the refrigerator too long:
- Mix the dough later in the day, so it goes into the fridge later
- Cut bulk fermentation slightly short, perhaps 15 to 30 minutes
- Proof the dough at a colder temperature. A typical home fridge is around 39°F (4°C); you could try a degree or two colder if you’re able to change the temperature
How Long Should I Proof my Sourdough Dough?
The proofing time for bread dough varies based on the dough’s makeup (amount of preferment, flour choices, and hydration) and the temperature at which it’s proofed. The dough should generally be proofed for around 1 to 4 hours at a warm temperature or overnight (or more) at a cold refrigerator temperature.
As the proofing temperature increases, the total fermentation time will decrease. While it’s not completely a linear correlation, as shown below, the general idea holds that warmer dough ferments faster and colder dough ferments slower.
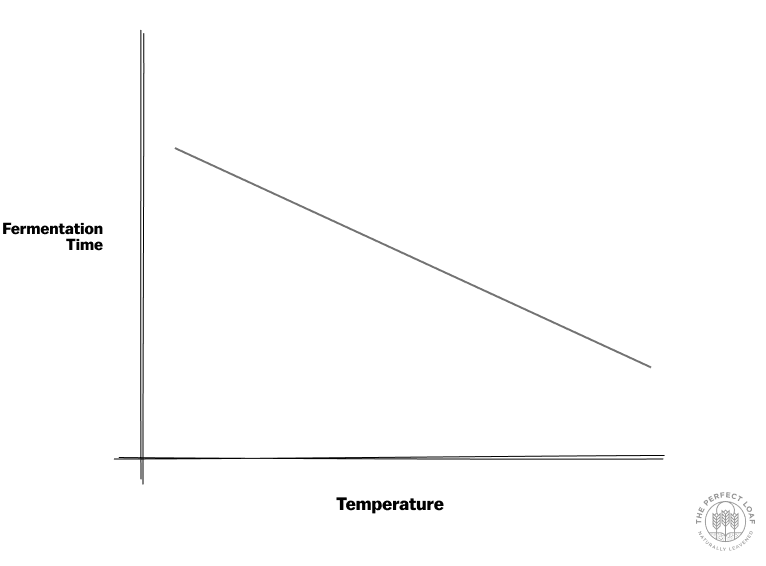
Here are my general guidelines for how long a dough needs to proof at various temperatures. This chart is most accurate for the types of doughs I make here, which are 100% naturally leavened (no commercial or instant yeast used), and in baker’s percentages, and have a levain percentage around 16 to 20% to total flour weight.
| Proof time | Temperature | Example location |
|---|---|---|
| 1 to 2 hours | 80°F (26°C) | Very warm kitchen or proofer |
| 2 to 4 hours | 74 to 76°F (23-24°C) | Warm kitchen |
| 6 to 8 hours | 46°F (8°C) | Dough retarder |
| 10 to 16 hours | 39°F (4°C) | Home refrigerator |
How can I speed up dough proofing?
By the time your dough is in its proofing step, you can speed up or slow down proofing by changing the temperature of the dough. By keeping your dough warmer, you’ll increase fermentation activity and reduce the time the dough needs to be sufficiently proofed before baking. There’s a limit, though, and typically I’m not particularly eager to go above 85°F (29°C).
As proofing temperatures get too high, I find the dough becomes unstable and can quickly overproof (especially for high-hydration sourdough bread).
How to Determine When Your Bread Dough is Fully Proofed
To determine when your sourdough bread dough is ready to bake, there are two key components: first, you must take a holistic view of the dough formula and its process. Second, focus on key sights and textures as the dough nears the end of proofing.
Let’s look at each.
1. Use instinct and experience and assess the formula and process
First, consider the recipe at hand. All of the following factors can increase fermentation:
- the whole grain percentage of the dough
- the amount of preferment
- the final dough temperature (warmer means faster fermentation)
- the temperature and duration for the final proof
Because these increase fermentation activity, they are key drivers for determining when to bake bread dough. For instance, if the temperature is high, say 80°F (26°C), it might mean you need to bake earlier than a dough that’s kept at 78°F (25°C). Or, if the dough has a very high amount of preferment mixed in, the dough will need to be baked earlier (assuming all other pieces are equal).
Next, if you’re following a recipe, use the recipe’s timeline as a guidepost for how long proofing should last. Recipes here will always list temperatures for dough fermentation, so if your dough temperature is below the temperature listed in the recipe, expect that bulk fermentation or proofing will take longer. Conversely, bulk and proofing will take less time if the dough temperature is higher than listed in the recipe.
Then, assess the dough on hand in addition to looking at the formula and process with your experienced baker’s eye.
Next, let’s look at a few visual and textural things to look for.
2. Consider the dough’s current state (visual and textural)
As you get farther into proofing, poke the dough periodically (using the poke test, below) to evaluate fermentation levels and determine the amount of fermentation in the dough and how much it’s relaxed.
What should you look for when the dough is proofing? Look for some rise in the dough, large bubbles, airiness, and lightness. When you poke the dough, it should feel alive, soft, and extensible. The dough’s texture will begin to break down as gluten is broken down while the dough proofs—and this is a good thing, to a point. The dough needs to break down and relax outward, allowing it to rise with less restriction during baking.
If you’ve ever seen dramatic ruptures when baking underproofed dough, this is one reason: the dough hasn’t had enough fermentation time to soften and become more extensible.
Next, use the poke test to get a good feel for how well-fermented the dough is.

What is “the poke test?”
The poke test is a technique where you poke proofing dough in its proofing container at several spots on top. Based on how the dough responds to your poke, you’ll get a general idea of whether the dough has had enough fermentation time and is ready to bake.
Here’s a look at what a poke with the poke test might mean:
| After poking the dough, the indentation… | The dough is… |
|---|---|
| Springs back quickly | Underproofed (poke test fails) |
| Springs back slowly, not completely filling back in | Properly proofed (poke test passes) |
| Never springs back | Overproofed (poke test fails) |
Read through my comprehensive guide to the poke test here →
Does my dough have to double in size?
No, your dough does not necessarily have to double in size before it is sufficiently proofed and ready to bake. The rise in the dough is highly dependent on the dough’s makeup, especially the hydration, and to some extent, the flour (particularly if it’s high-protein white flour). You want to see some rise in the dough (which will vary based on the formula), showing signs of strong fermentation.
Exactly how much should my dough rise during proofing? 30, 40, or 50%?
If you’re a frequent reader here, you’ll know I don’t give specific dough sizes during proofing (e.g., your dough is fully proofed when it gains 30% volume). Why? Every dough will rise differently depending on the flour makeup, the hydration, the dough strength, and how tightly you’ve shaped it. In my opinion, it’s hard to give an exact percentage volume increase for every situation.
Instead of using how much a dough gains in volume as an indicator for baking, use your experience and intuition in combination with the poke test to determine when it’s ready to bake.
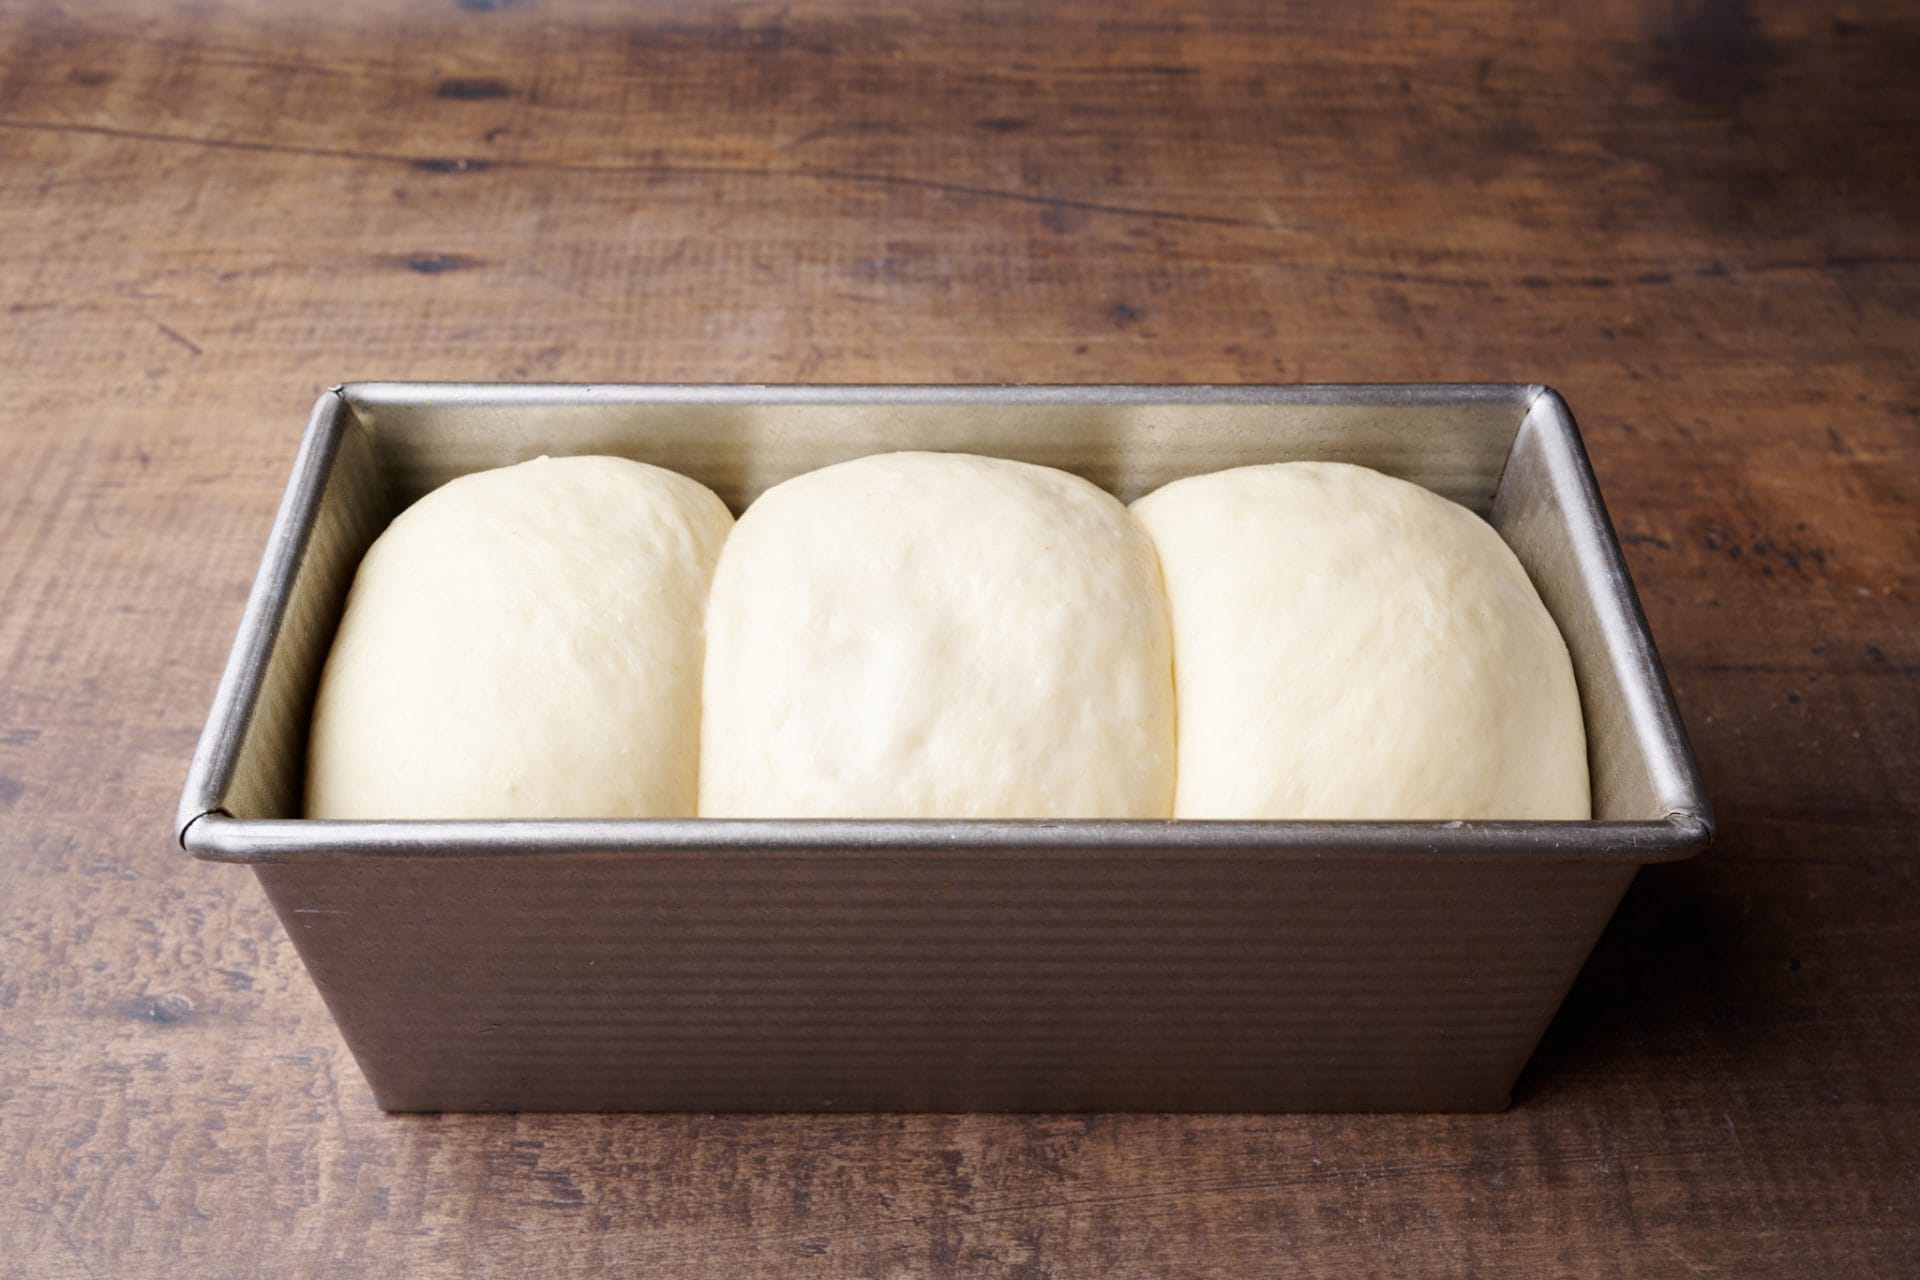
What happens if I proof my dough for too long?
If you’ve overproofed your sourdough bread dough, you can bake as soon as possible, pivot, and use the dough as a base for focaccia, or drop it into a loaf pan and bake sandwich bread. In both cases, the pan used to hold the dough will help prevent it from spreading excessively in the oven, a common result with overproofed dough.
To make sourdough focaccia, gently scrape the dough out of the basket into a focaccia pan. Using wet hands, gently stretch the dough out to fit the edges of the pan. Then, drizzle olive oil over the dough, top with coarse sea salt and chopped rosemary, and bake!
What Does Underproofed, Properly Proofed, and Overproofed Bread Look Like?
Here are a few examples of loaves baked at various dough states. The first image is a dough baked too early and underproofed. The second (middle) image is a dough that was baked at the proper proof time (it passed the poke test). Finally, the last loaf has been proofed too long and should have been baked earlier.
(Click the images below for larger versions.)

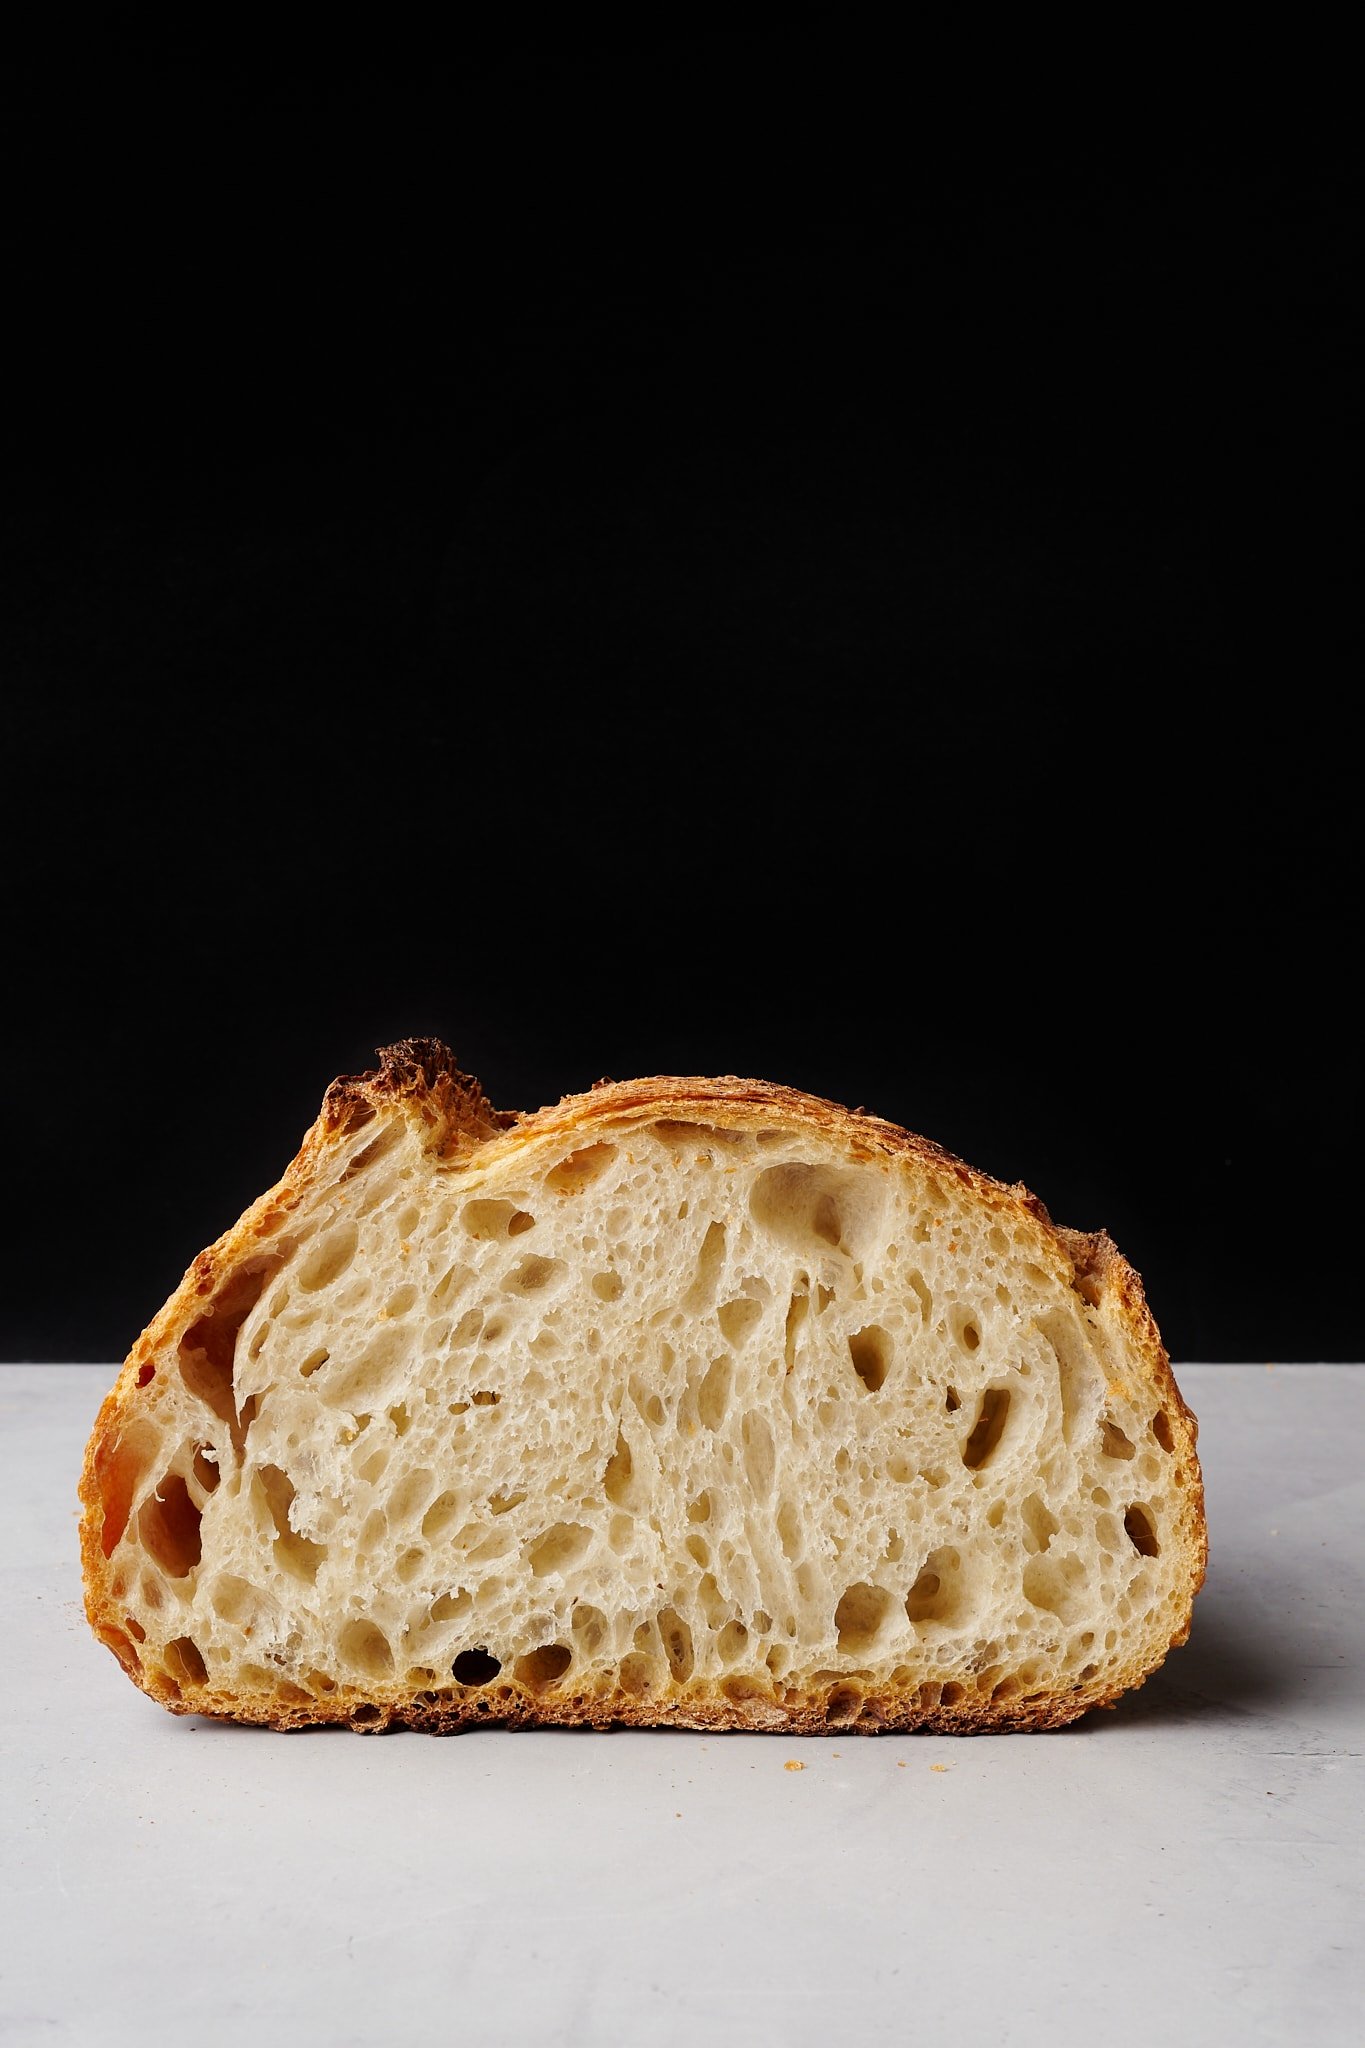
What does underproofed bread look like?
Underproofed bread dough is simply dough that has not had enough total fermentation time: the time from where your preferment (such as a sourdough starter or levain) is added to the dough until baking.
- Explosive oven spring (rise) in the oven
- An ear that potentially splits open (ruptures) excessively
- A bottom-crust that may be “U” shaped rather than flat
- Several scattered large holes with other areas tight and dense
How do I fix underproofed bread?
To fix underproofed bread, next time, give the dough more time to ferment before baking. This could mean additional time in bulk fermentation, proof, or a combination.
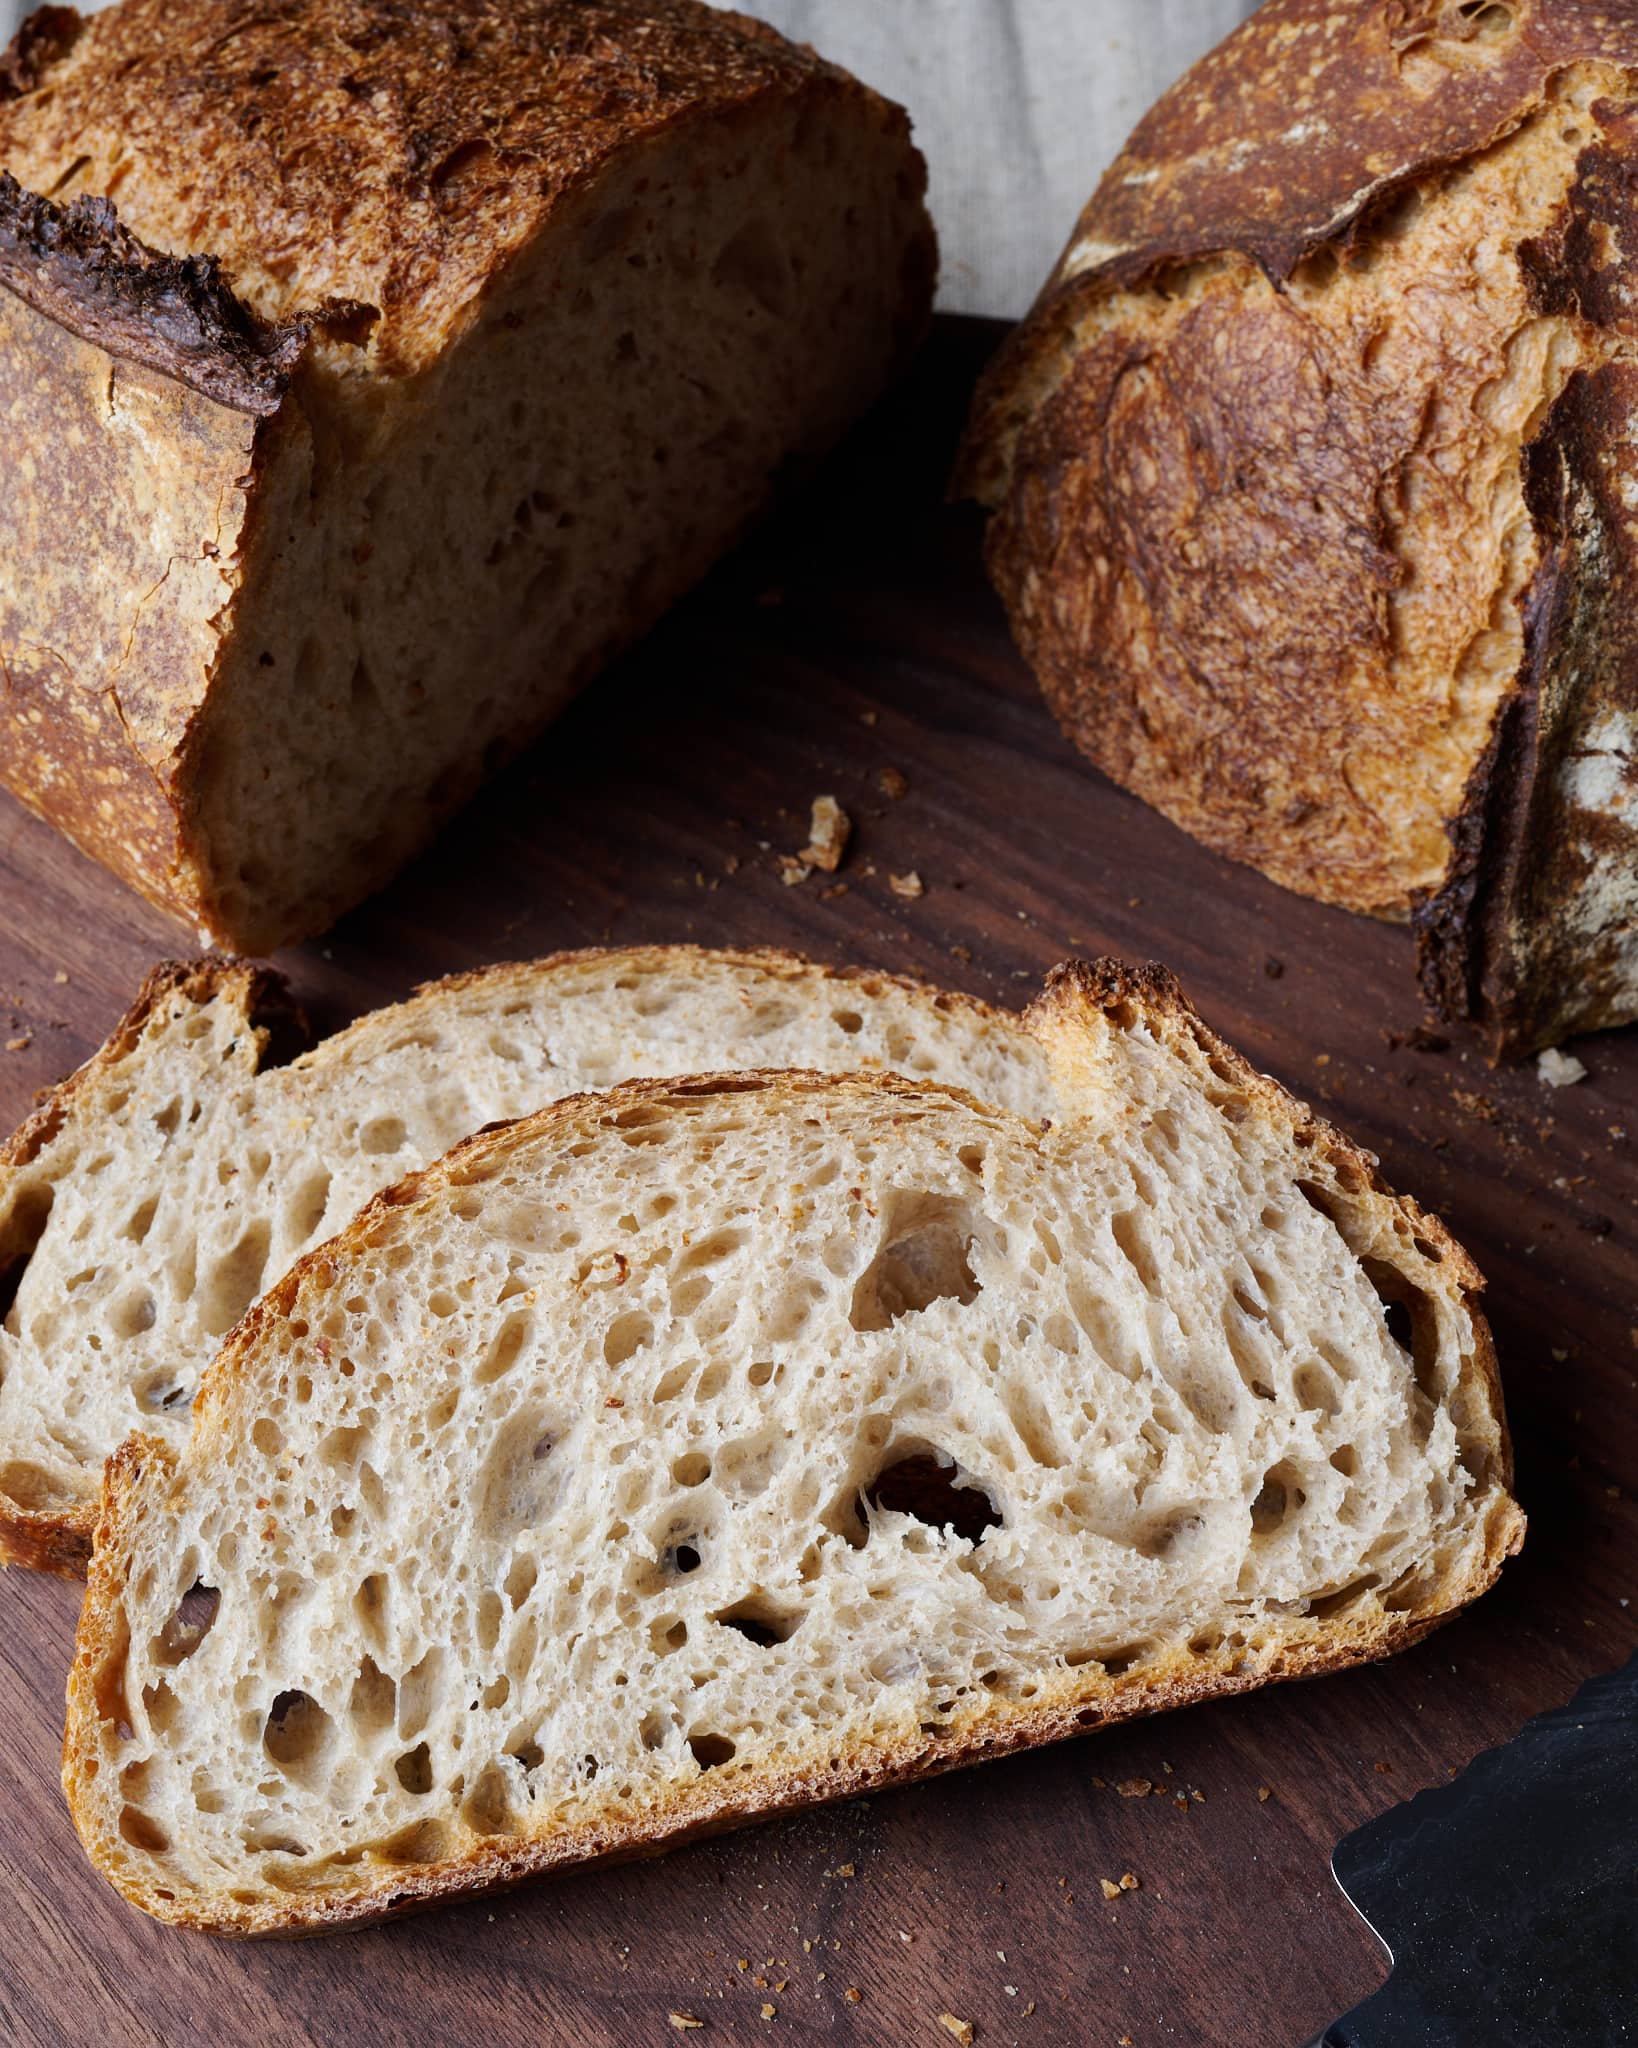
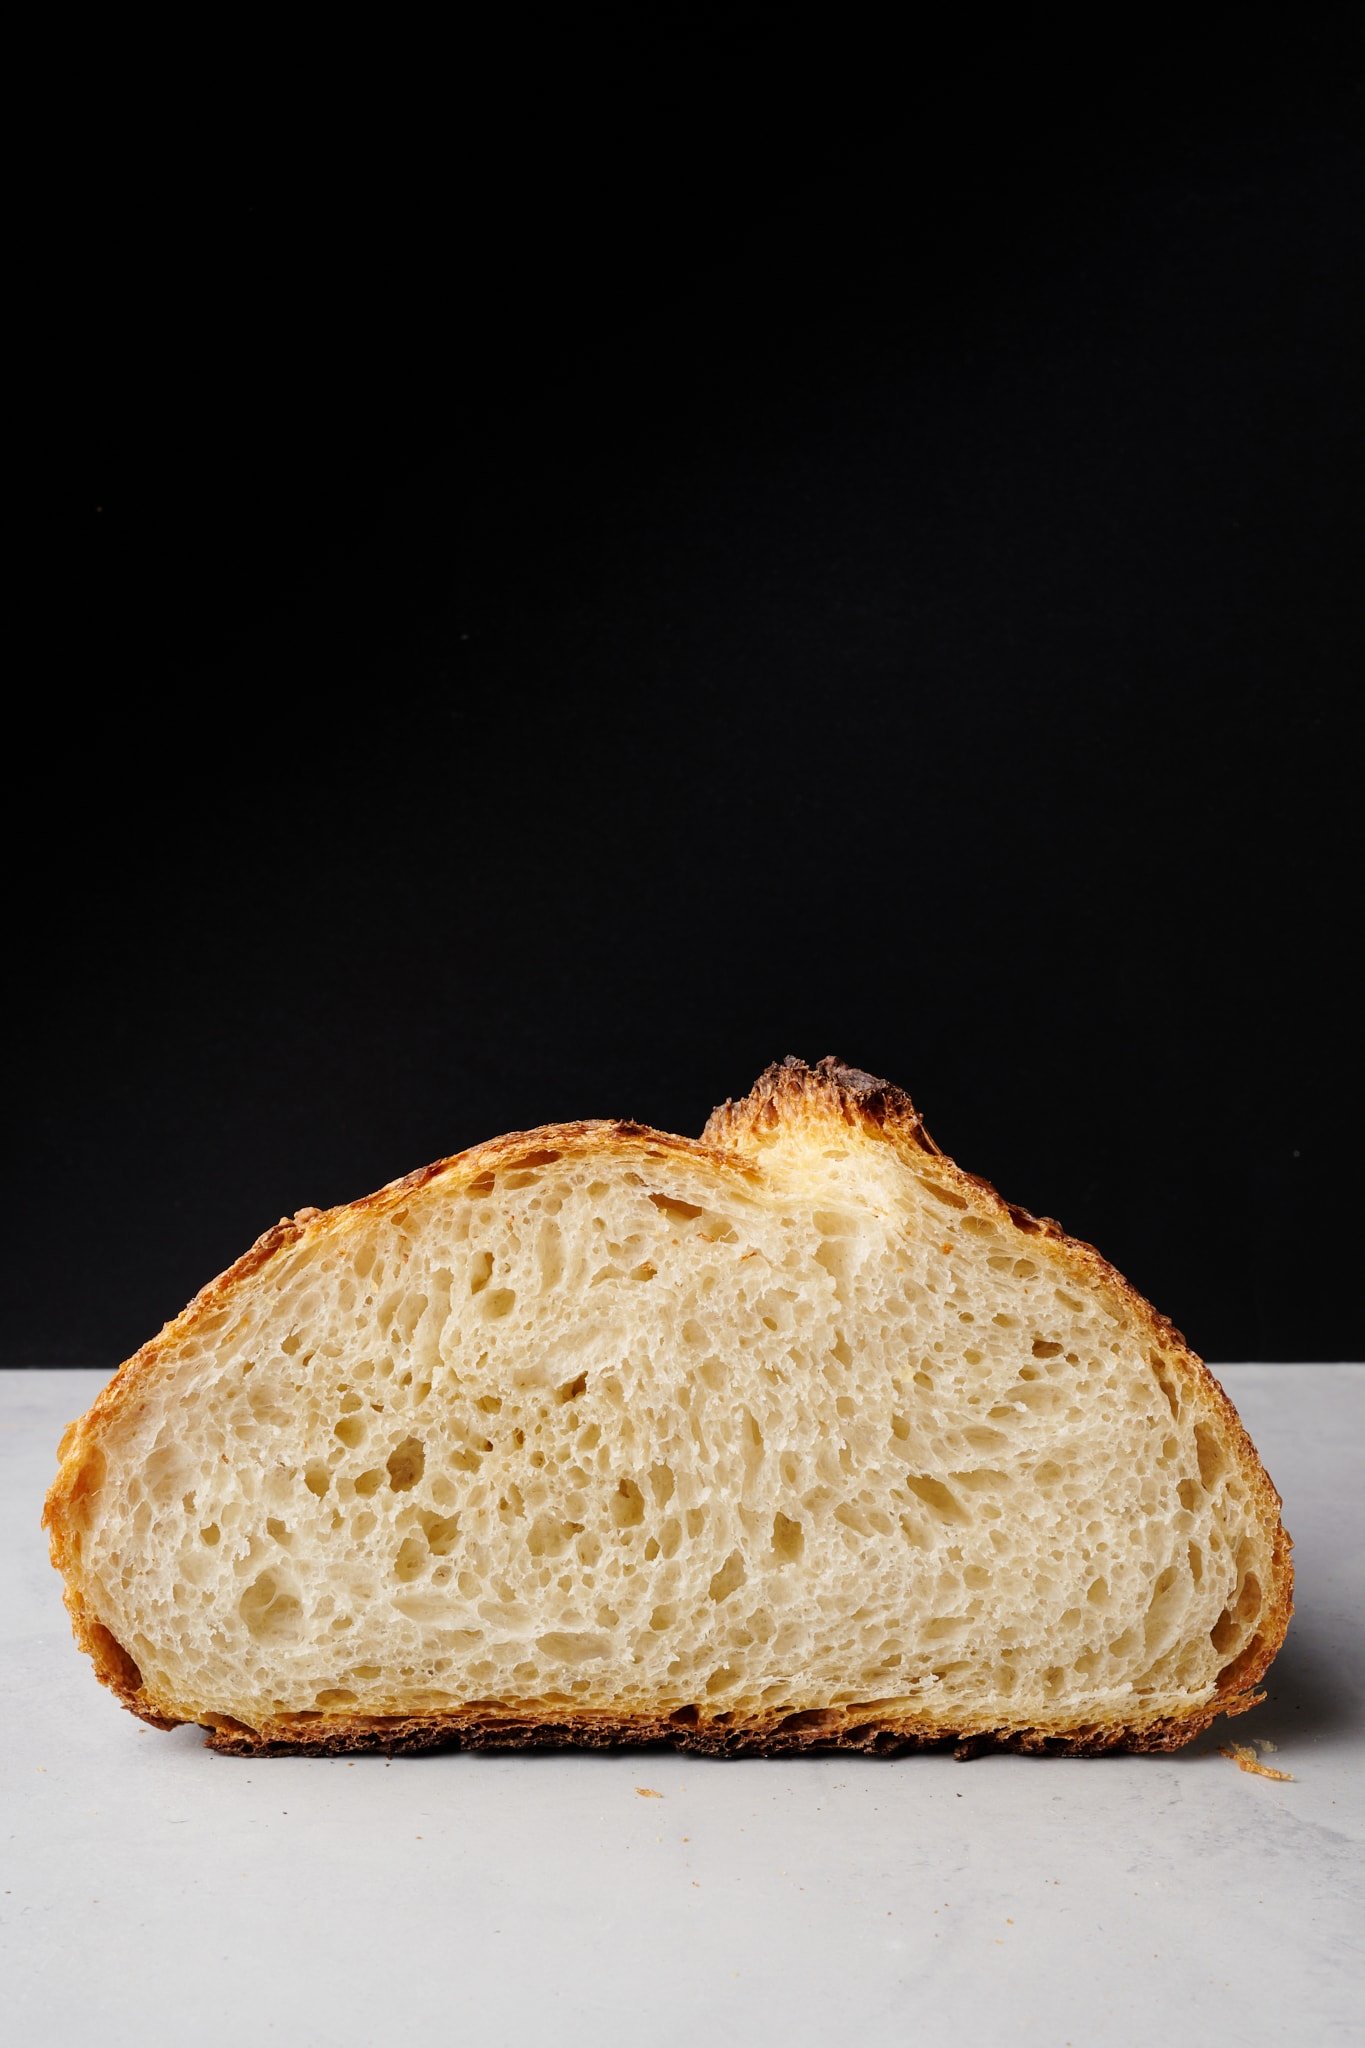
What does properly proofed bread look like?
Properly proofed bread has had sufficient fermentation time but not too much. I like to call it the goldilocks of proofing. The bread dough is baked when sourdough fermentation has created ample organic acids and carbon dioxide gasses to flavor and leaven the dough. The result is bread with a tall rise, delicate structure, pleasant eating quality, and abundant flavor.
- A controlled rise in the oven with a clean score (cut)
- Even holes across the cross-section of a loaf
- No large gaping holes (though these can also be due to errors in shaping)
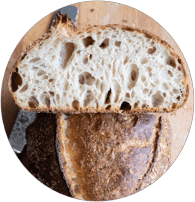
What does overproofed bread look like?
Overproofed bread dough is dough that’s had too much fermentation activity. This could be dough left to ferment for too long or dough that’s fermented at too warm of a temperature for too long.
- Lack of oven spring
- An (interior) crumb with lots of little holes but not dense spots
- Potentially a large hole up top near the crust
How do I fix overproofed bread?
To fix overproofed bread, bake it sooner to reduce total fermentation time. You can reduce the amount of fermentation in the dough by shortening the bulk fermentation time, the proof time, or a combination.
One tactic I’ve found to help avoid overproofing my bread dough is to take notes with each bake. Recording the formula, temperatures, and, ultimately, the durations for each bake help me spot trends and diagnose problems. Download my free baking notes page for help.

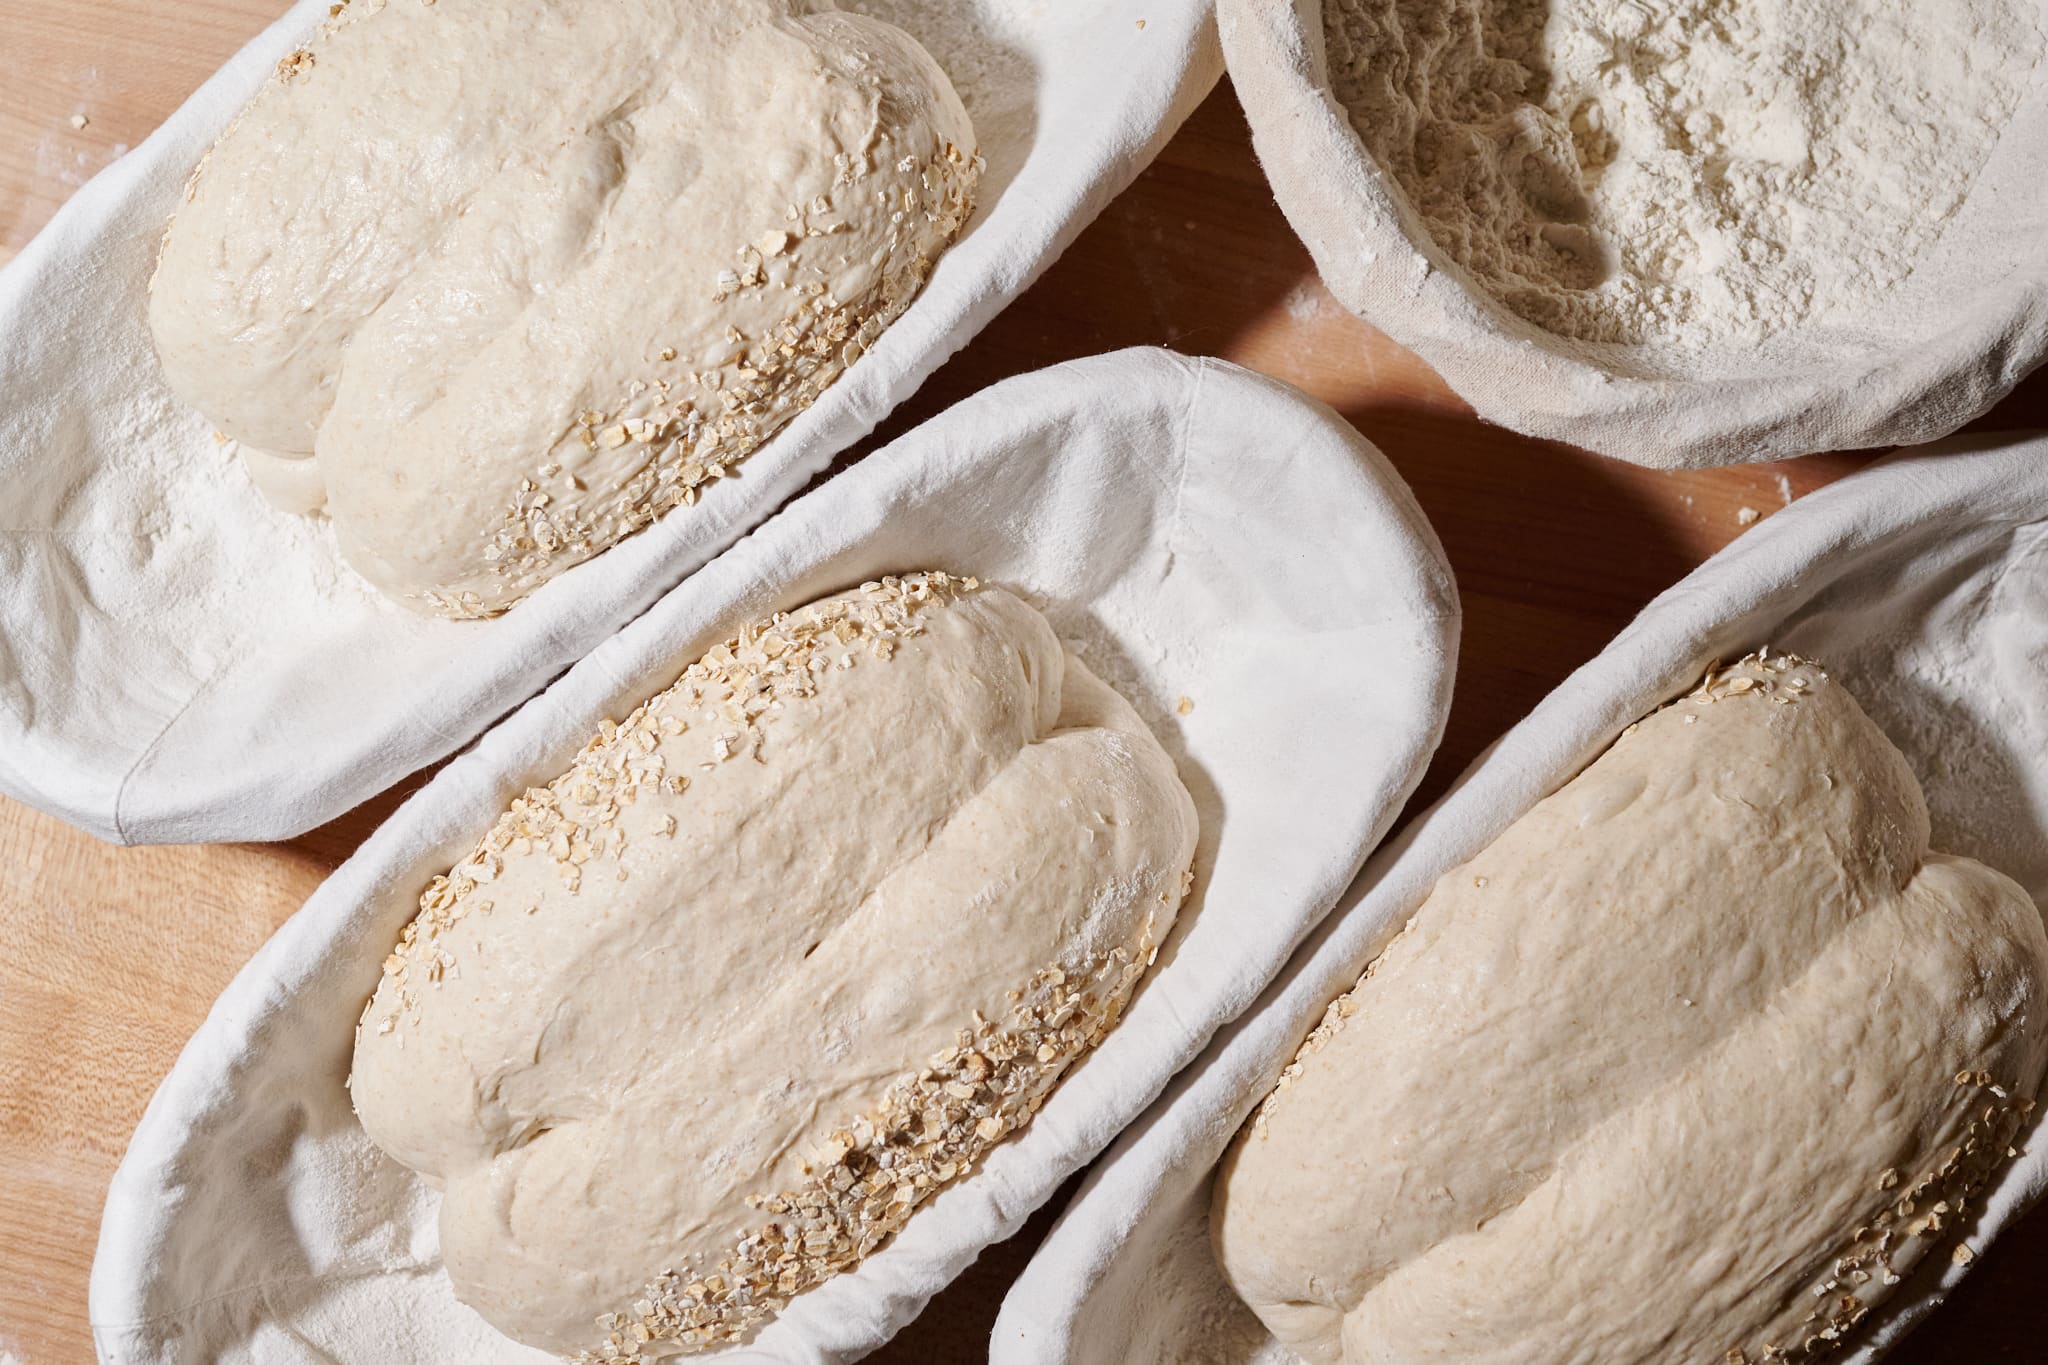
Everything You Need to Know About Proofing Containers
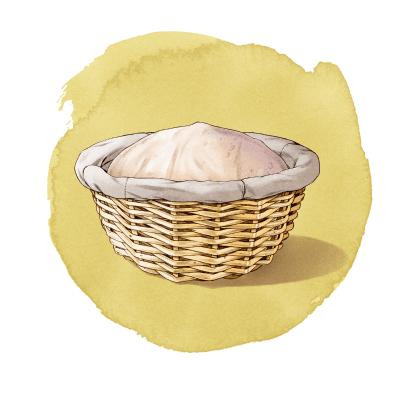
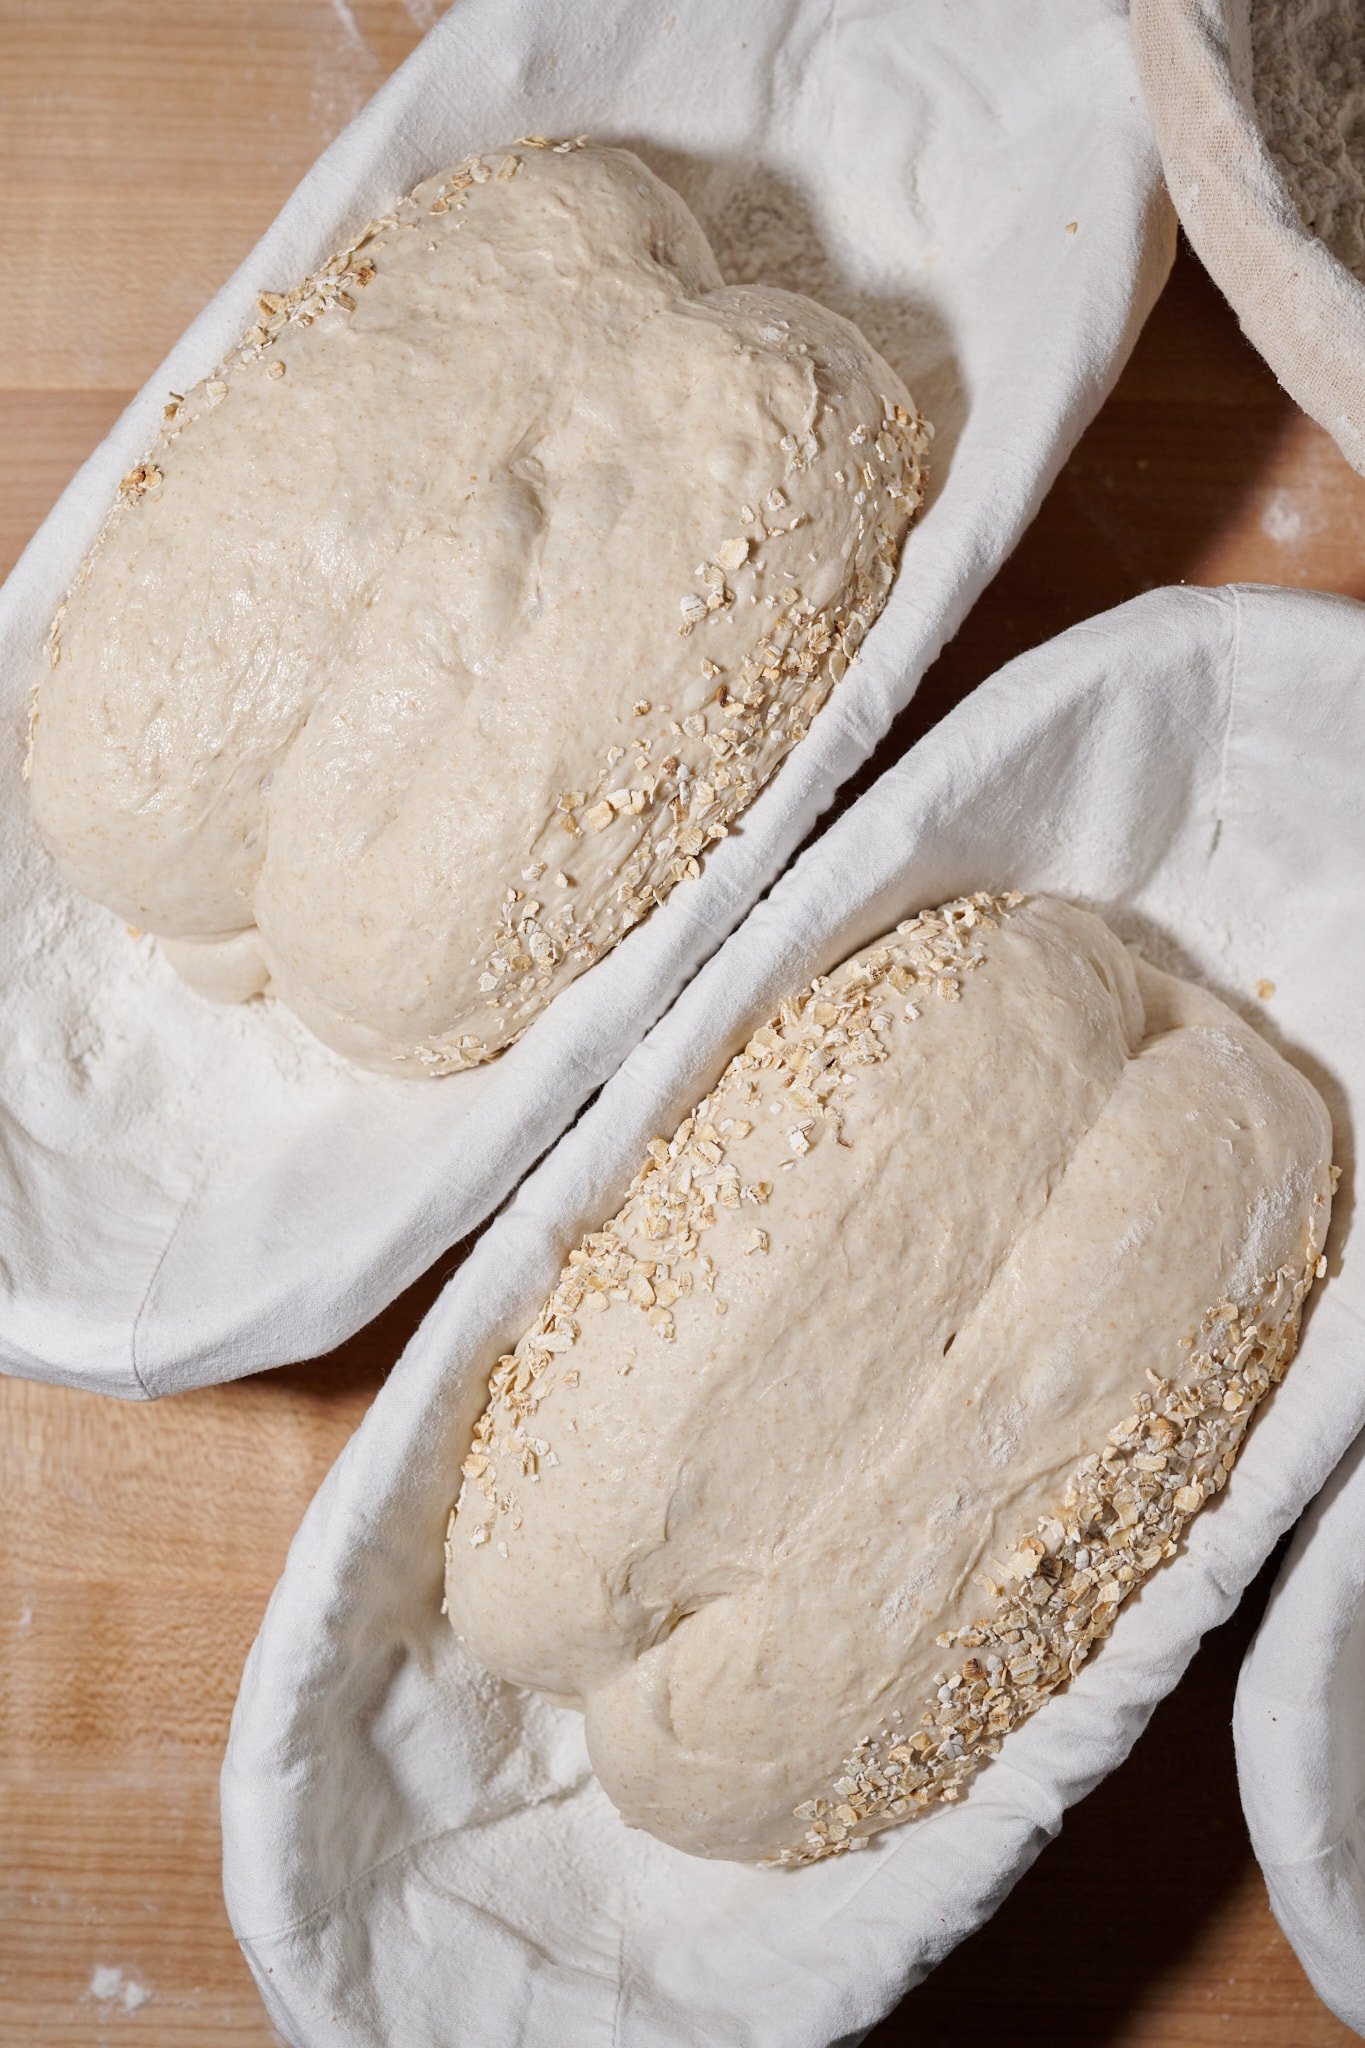
When you proof bread dough, it needs a container or other support while it continues to ferment and rise. The container can be anything from a clean kitchen bowl to a cane banneton to a wicker basket or even a large piece of sturdy cloth. And if you’re baking a sandwich or pan loaf (like a Pain de Mie), the dough will be proofed directly in the pan and eventually baked inside.
Let’s look at my favorite proofing baskets and containers.
The best baskets for proofing bread dough
Any bowl or basket will work well to hold bread dough during proofing, though some bowls and baskets work better than others. I like to use containers with little space to let the dough rise uninhibited. If you’re working with a highly hydrated dough or one that is slack and weak, be sure the container is more tight-fitting so the dough doesn’t spread too much.
An important consideration in choosing a proofing container is to be sure it’s nonstick so the dough removes cleanly. To make it nonstick, use a flour sack towel or specially made liner, or dust it with white flour (more below).
Proofing baskets for round loaves
With round loaves, there’s more wiggle room in how much dough you can fit into a basket because they rise above the rim if there’s a bit too much, but as long as it doesn’t overflow, there’s no issue.
(After trying hundreds of bread-proofing baskets over the years, I’ve settled on a few I think are the best. I’ve linked the containers below in the tables.)
| Dough weight | Round basket size | Example loaf |
|---|---|---|
| 500 to 650g | 8-inch round | |
| 700 to 1,000g | 10-inch round | Easy no-knead sourdough bread |
| 1,100 to 1,300g | 12-inch round | A large sourdough miche |
Proofing baskets for oval loaves
| Dough weight | Oval basket size | Example loaf |
|---|---|---|
| 600 to 900g | 10 or 11-inch-long oval | Jalapeño-cheddar sourdough bread |
| 950 to 2,000g | 14-inch-long oval | Brown rice and sesame sourdough bread |
How do you keep dough from sticking to proofing baskets?
When bread dough is strong and shaped tightly enough, it will remove cleanly from the proofing basket. Dough sticking to a proofing basket is usually the result of dough that’s under-strengthened, over-hydrated, or not shaped tightly enough. To keep bread dough from sticking to proofing baskets, be sure you don’t over-hydrate your dough, mix or knead the dough sufficiently (I like using the slap and fold technique), and shape the dough tightly so there is a taut outer skin on the dough.
It can also help if you use cloth proofing basket liners, which helps the dough remove cleanly and also helps keep the baskets clean.
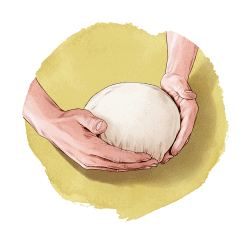
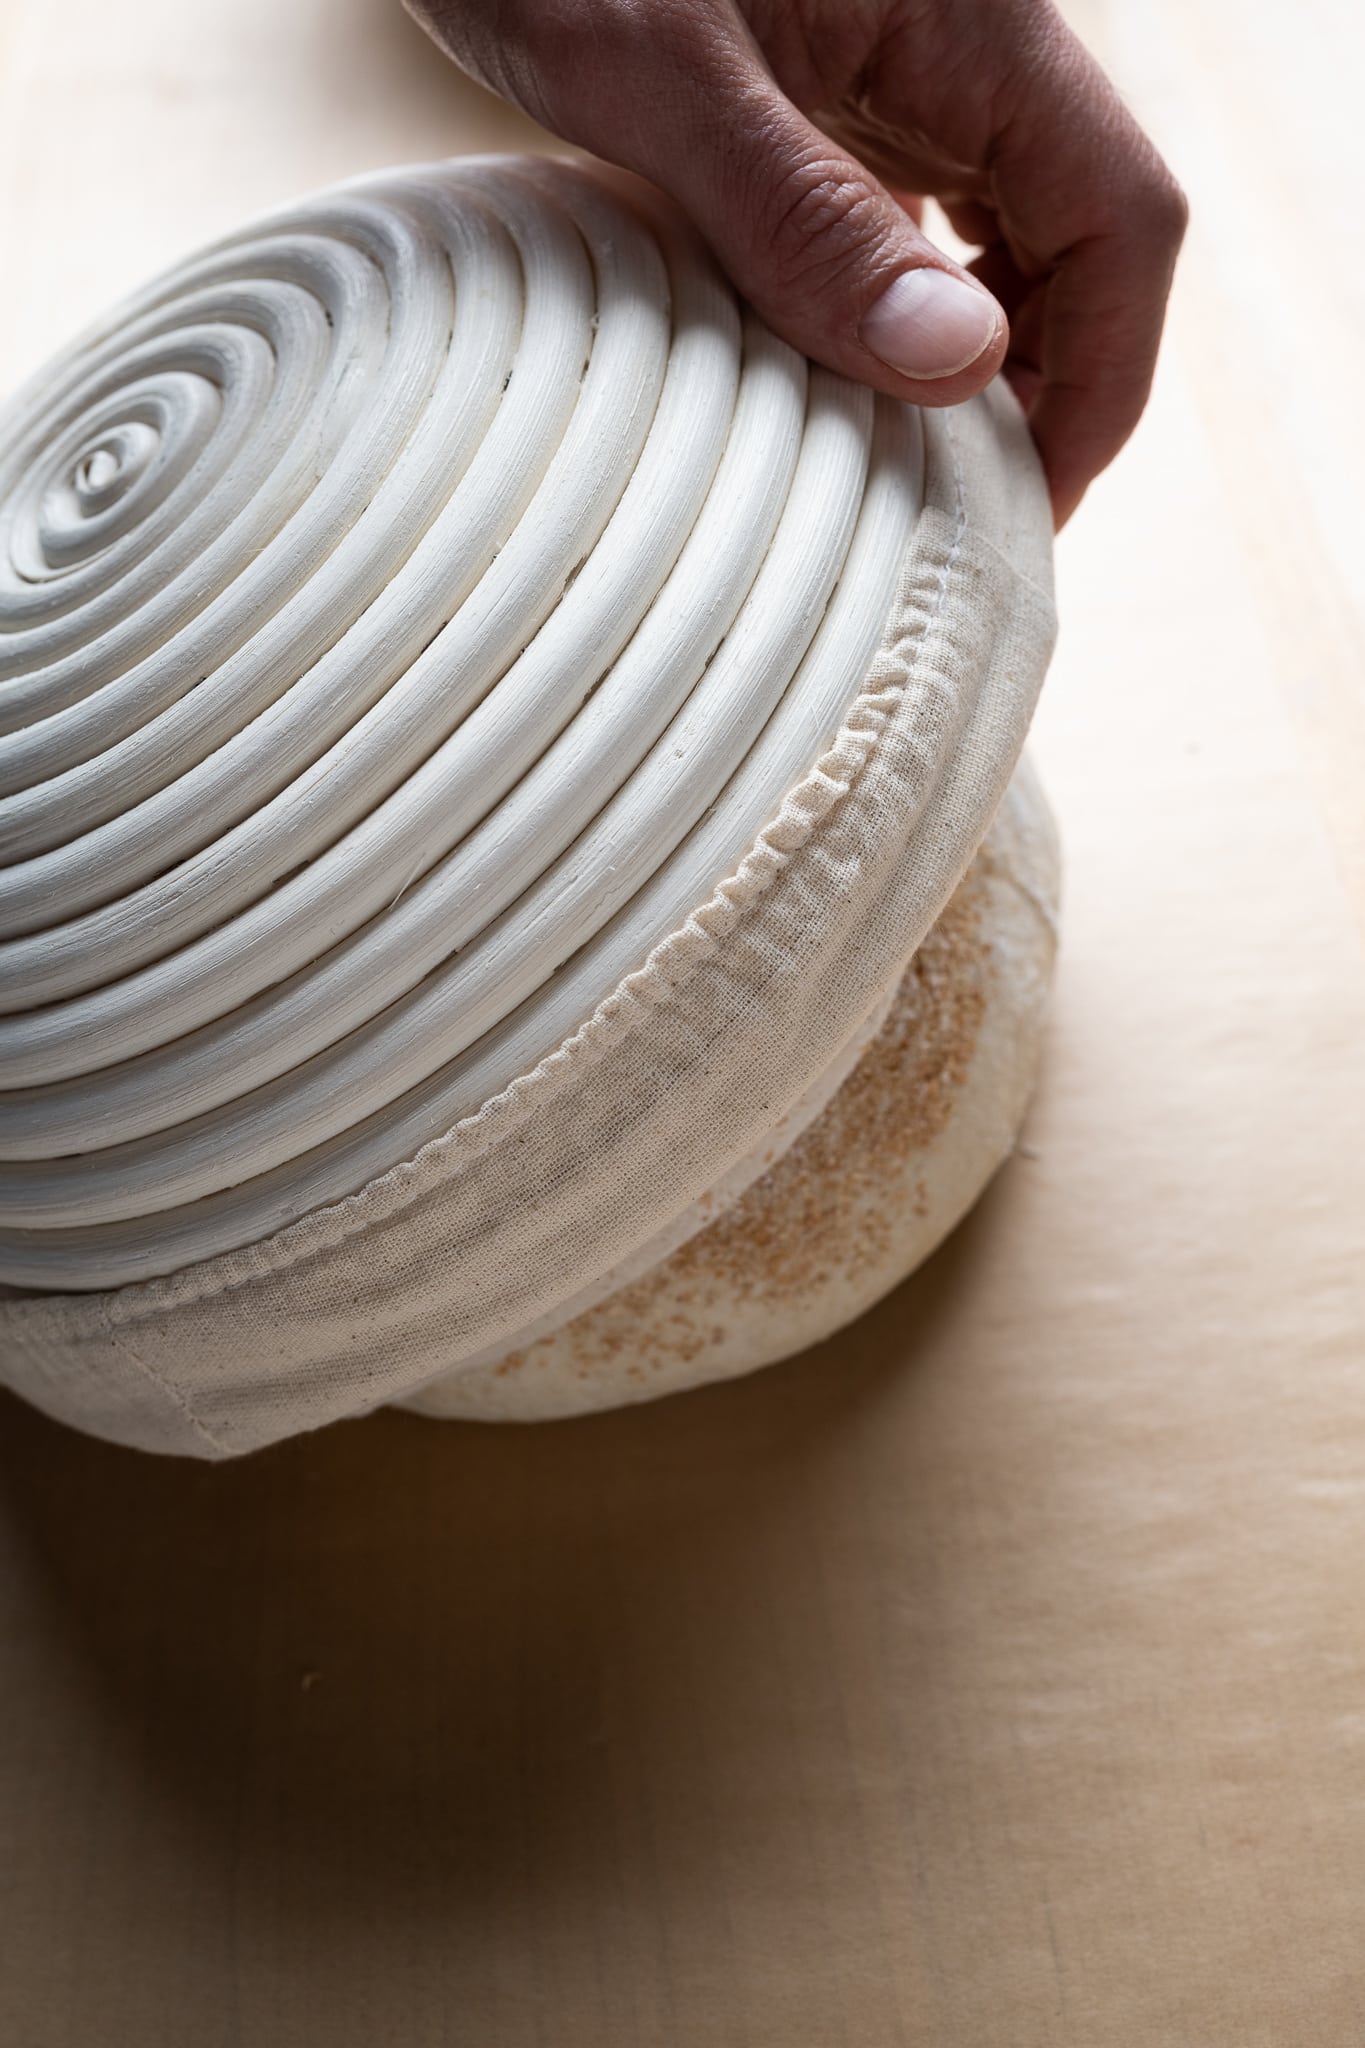
How do you remove dough from a proofing basket?
After your dough is fully proofed, tip the proofing basket over and assertively knock the basket on the counter to encourage the dough to fall out of the basket cleanly. If the dough is stuck at any point in the basket, gently scrape it with your fingers.
What is a banneton?
A banneton is a round, oval, or even triangular basket typically made from cane that’s bent into shape. These baskets are sometimes lined with cloth but are often dusted with flour to impart a coiled effect on the proofing dough, which leaves a beautiful pattern on the final loaf.
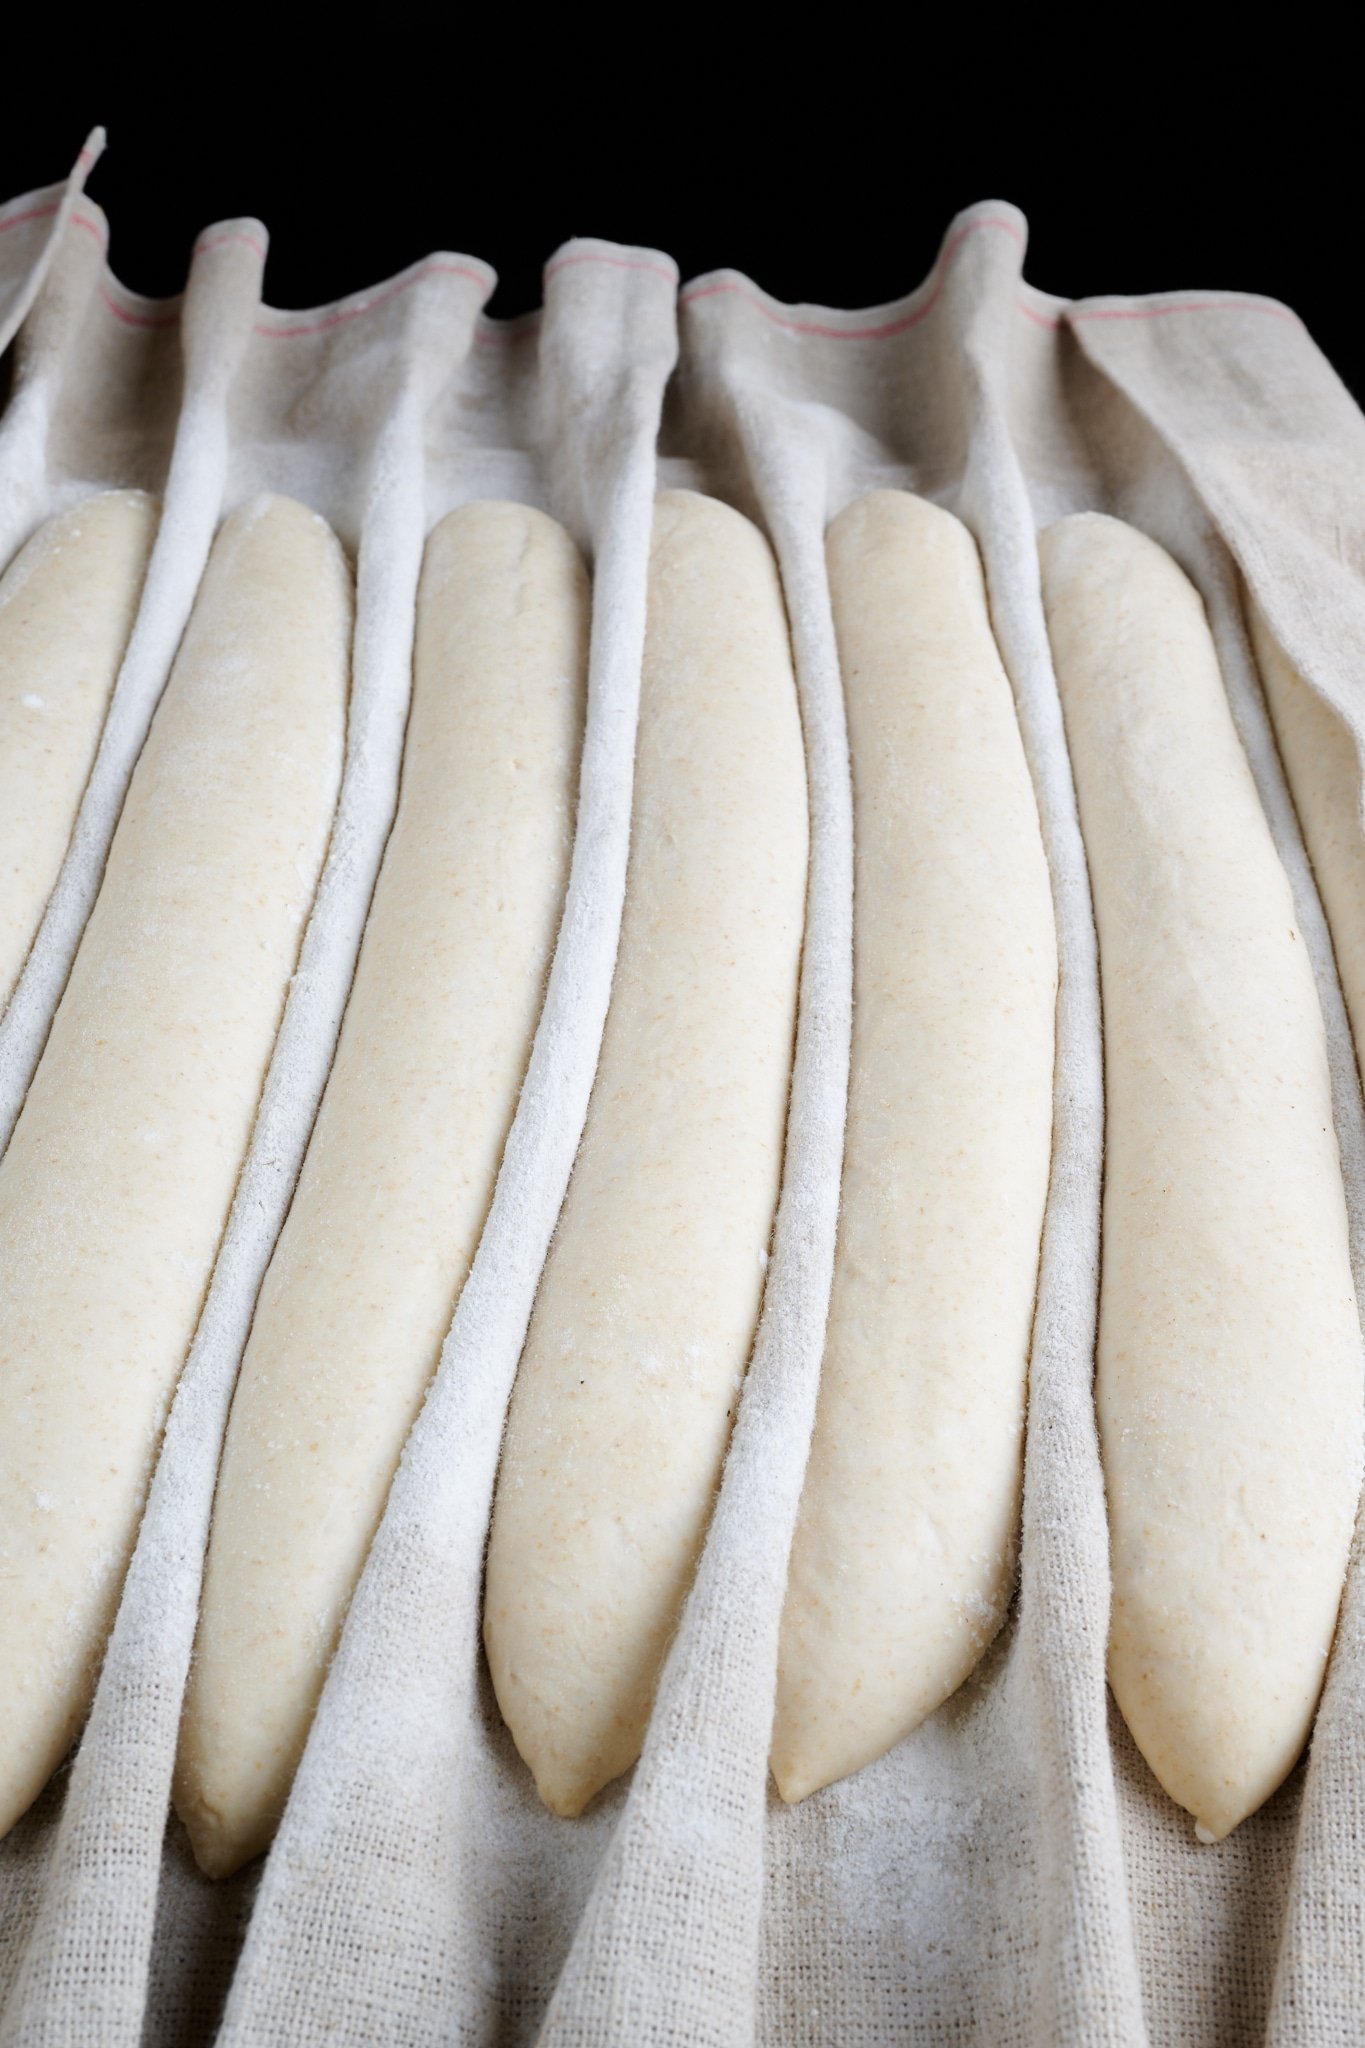
What is a couche?
A couche, also called baker’s linen, is a piece of cloth or canvas used to provide structure to proofing dough. A couche is often used to support ciabatta or baguette dough during proofing, but it can also be used for larger loaves that are oval or other unique shapes.
A couche is useful when proofing baguettes because the canvas can be folded to create wells for the long, thin baguette dough.
A couche will last indefinitely if well-cared for; I’ve had my pair for over ten years. Never wash or wet your couche. Knock out any excess flour and brush it to remove caked-on flour.
How to Proof Bread Dough in a Cold Kitchen
If your kitchen is cold, which is often the case in the winter, you’ll notice slow fermentation activity and generally a sluggish dough. To keep dough fermentation on schedule (and for the best flavor and texture), we can use a few tricks in the home kitchen to keep the dough warm and fermentation strong in our bread dough.
Ready my winter bread baking guide for more tips when baking in the winter →
Proof your bread dough in your oven with a light on
Also, when proofing bread dough in the oven, put a sticky on the outside that says:
“DOUGH PROOFING, DO NOT TURN ON.”
This is the easiest technique because most of us have an oven already! Turn on the interior light in your home oven and place your dough inside. It may not seem like it will do much, but that light can get hot and create a warm, insulated environment for your proofing bread dough. I also like to put a small thermometer next to my dough to be sure it doesn’t get too hot (keep an eye on this, some ovens can get up to 100°F (37°C) with just that small light on!).
Also, when proofing bread dough in the oven, put a sticky on the outside that says: “DOUGH PROOFING, DO NOT TURN ON.”
Proof your bread dough in a dough-proofing box
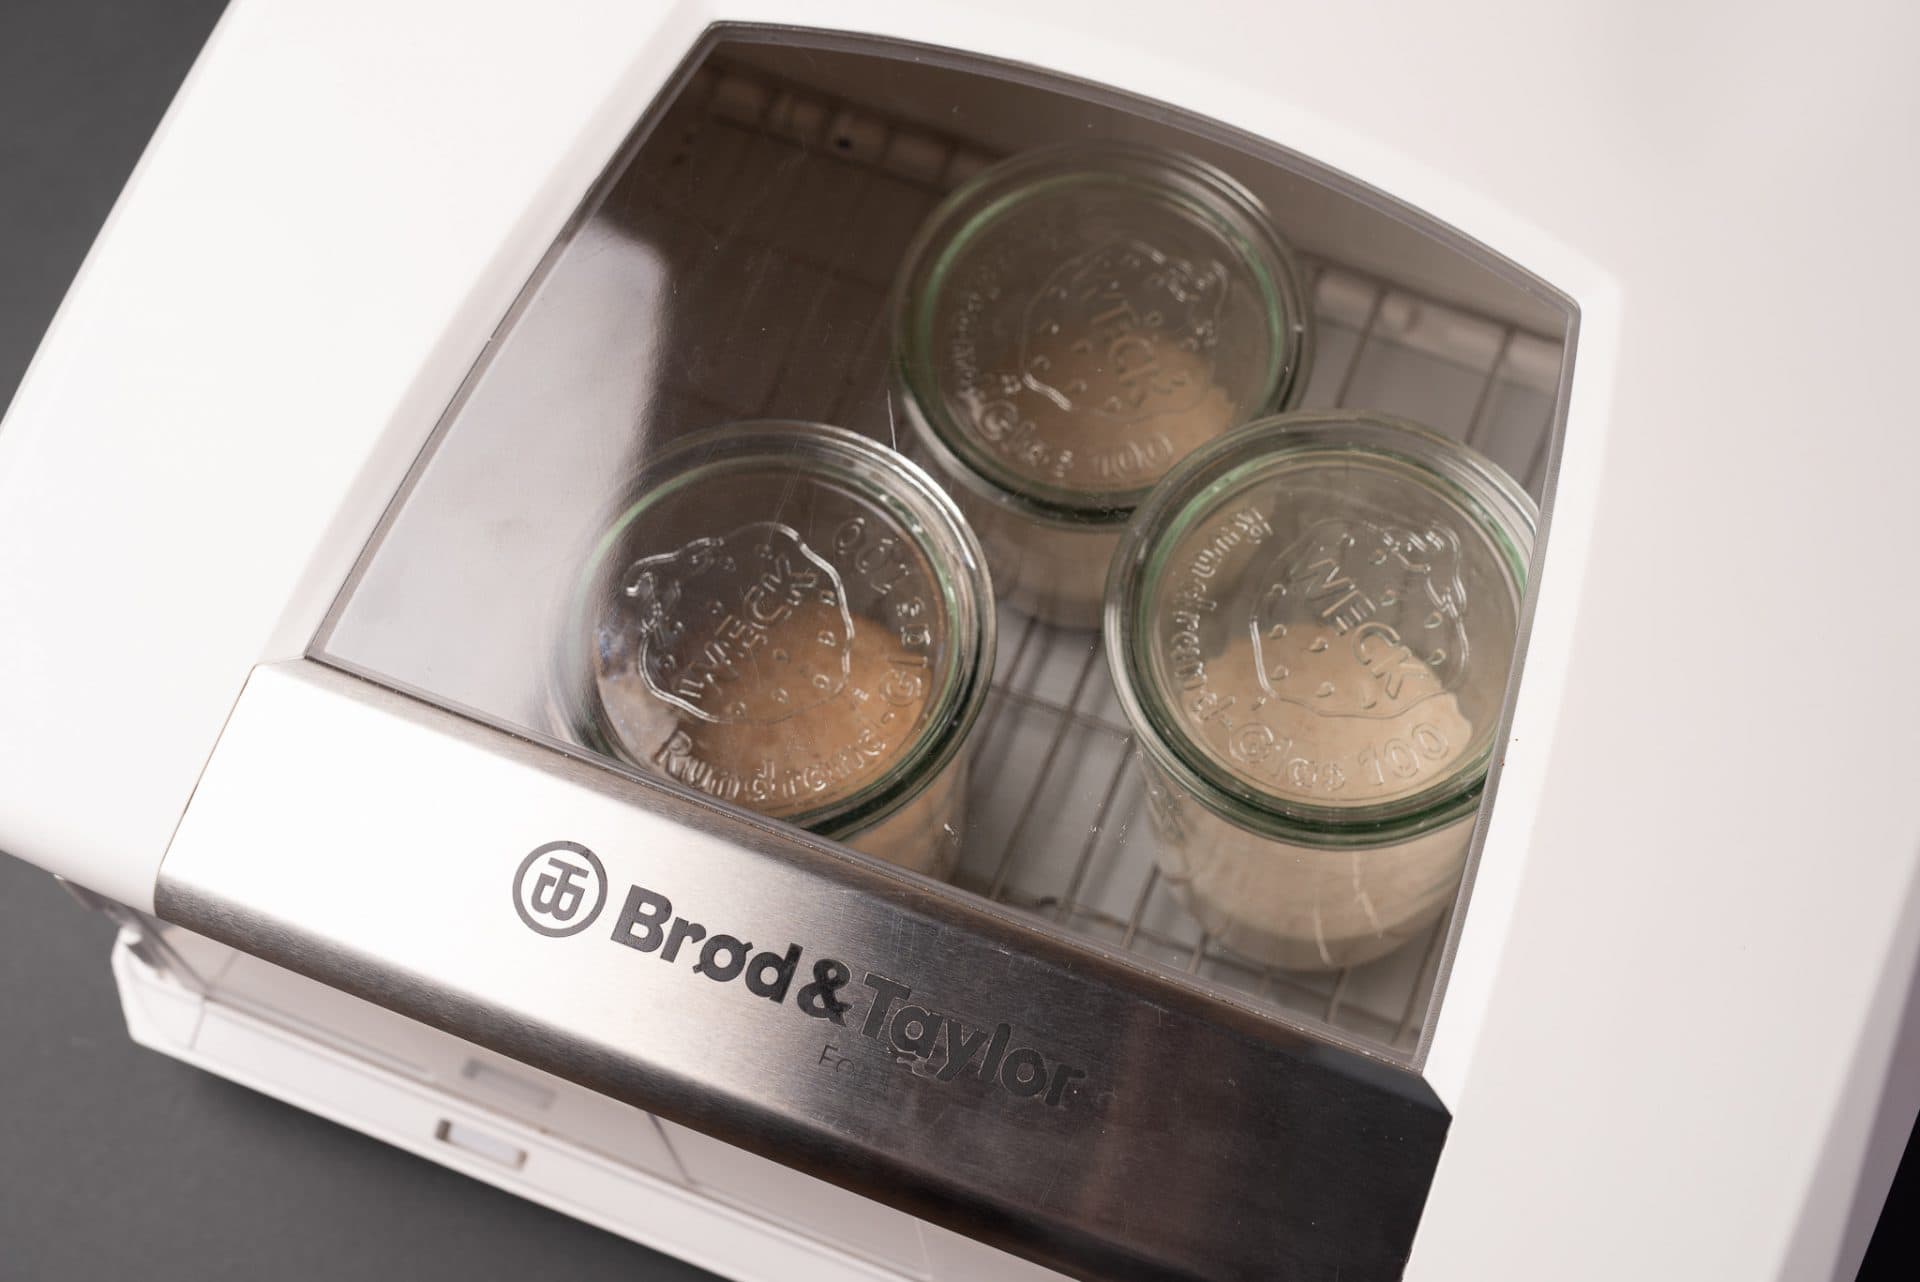
The easiest way to keep your bread dough (and your sourdough starter or levain, too) warm during proofing is to use a dedicated bread proofing box. This box lets you punch in the desired temperature to keep your dough at, and that’s it, no fuss.
Covering the Dough While Proofing
I live in Albuquerque, New Mexico, at a very high altitude, and it’s very dry here. But even if you’re at a lower altitude and more humid environment, I always recommend covering the dough during proofing to ensure a skin—dried dough—doesn’t form on top of the dough. If bread dough develops a skin on the top, it can harden off significantly, reducing the total rise in the dough.
What should be used to cover dough while proofing?
I cover proofing bread dough with large, reusable plastic bags (which are also handy for covering sheet pans and many other tasks). Any airtight cover will do the job here, though, and even something like a shower cap (yes, the hair shower caps) with an elastic band works well.
Do I need to cover dough when proofing in the oven?
Yes, I recommend covering your dough when proofing in a home oven. Even though a home oven will retain some humidity, it’s not completely sealed. Cover your bread dough when proofing it in the oven to ensure it does not develop a thick skin on top.
Proofing Bread Dough FAQs
Can I proof my bread dough for more than overnight in the fridge?
Yes, absolutely. Know that the longer you proof your dough in the refrigerator, the less rise and more (potential) sourness you’ll get in the resulting loaf of sourdough bread.
What’s Next?
Now that your bread dough is proofed and ready to bake see my guide to the best way to score your dough and bake it in your home oven.
Or, check out all the steps to making sourdough bread in the Beginner’s Guide to Sourdough Bread.
