

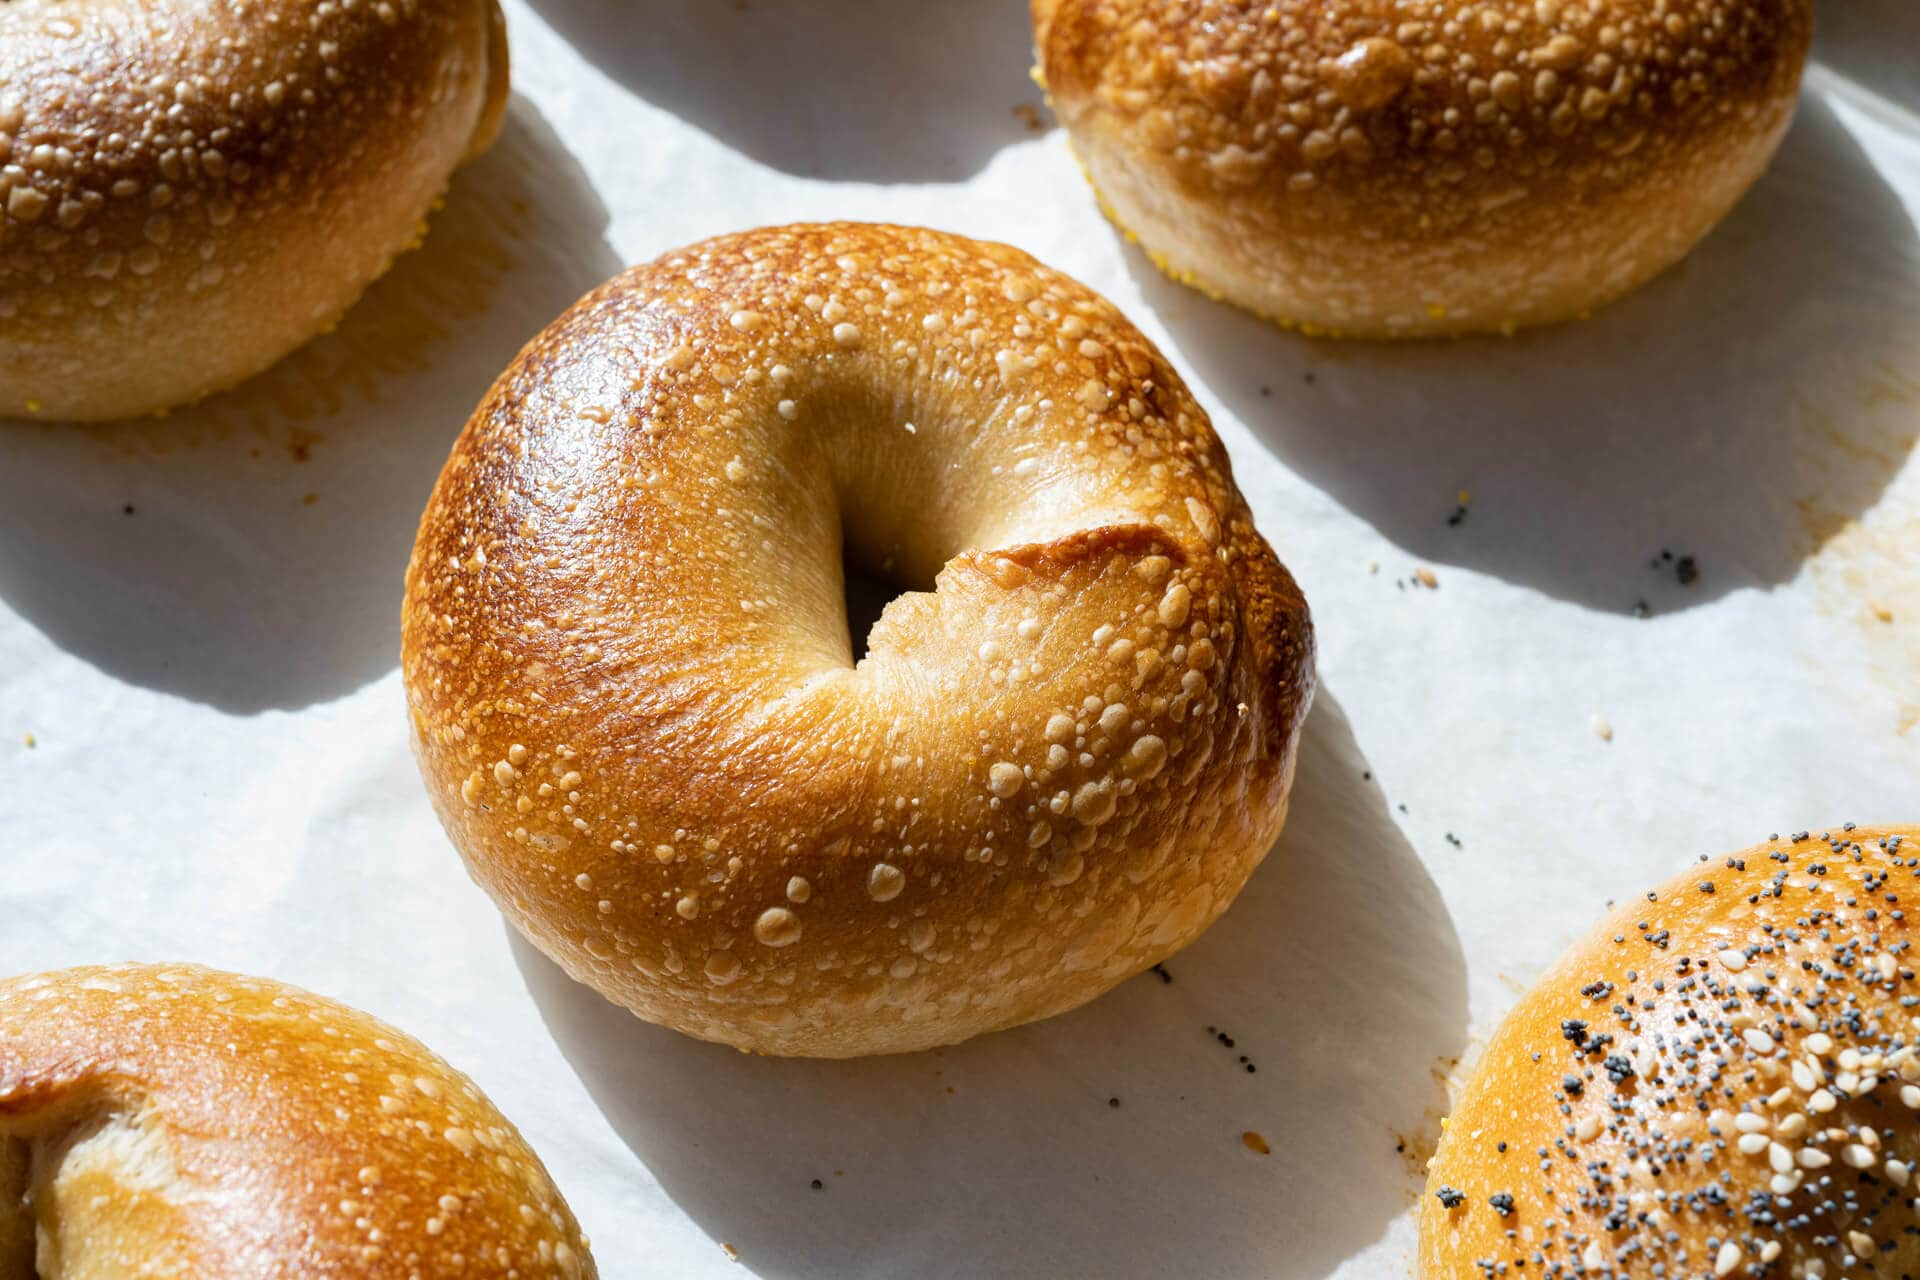
I try not to talk about bagels with friends. Talking about them always starts innocently, a little witty banter about the crust, crumb, and color traits and past eating experiences: “that bagel I had in New York that one time,” or “there was this one bagel shop down the street…” This jovial chat slowly evolves into a friendly argument about more-sweet versus more-savory and crunchy versus soft; maybe one even mentions steaming the bagel instead of baking it (😱).
Finally, the once innocuous chatter results in the participants either forming a stronger friendship over common bagel zealotry or the unfortunate end to the friendship altogether. It’s like the old axiom: never play Risk with a friend you want to keep. Exaggeration? Perhaps. But bagels do seem to rouse an enthusiasm rarely seen with other food (I’d argue pizza might be a solid contender, though). They carry a different meaning depending on where you’ve grown up, what local shops were in the area, and ultimately, where your preferences lie. But these sourdough bagels seem to transcend almost every bagel I’ve had, especially the mass-produced ones—oh yes, definitely those.
While these bagels are more along the New York Bagel style, I’m also a fan of the newer wave bagels with a super thin, glossy, and crispy crust. In fact, I have a recipe for those glossy bagels, too, if that’s more your thing.
I recall occasionally eating those bagels from the bag at the market: that ultra-chewy (from end to end) vehicle was mostly there to convey cream cheese, or schmear, from package to mouth. Rest assured, these sourdough bagels are not that in the slightest. They have a very thin and crisp exterior, not tough or hard, but rather, a little crunch that gives the chewy bagel a textural counterpoint. You see, the interior is as chewy as you’d expect a bagel, but if the entire thing is chewy, you end up with just a big chewy thing. But if you have a contrasting texture, it seems to amplify the chewy thing, much like adding an acid elaborates other flavors.
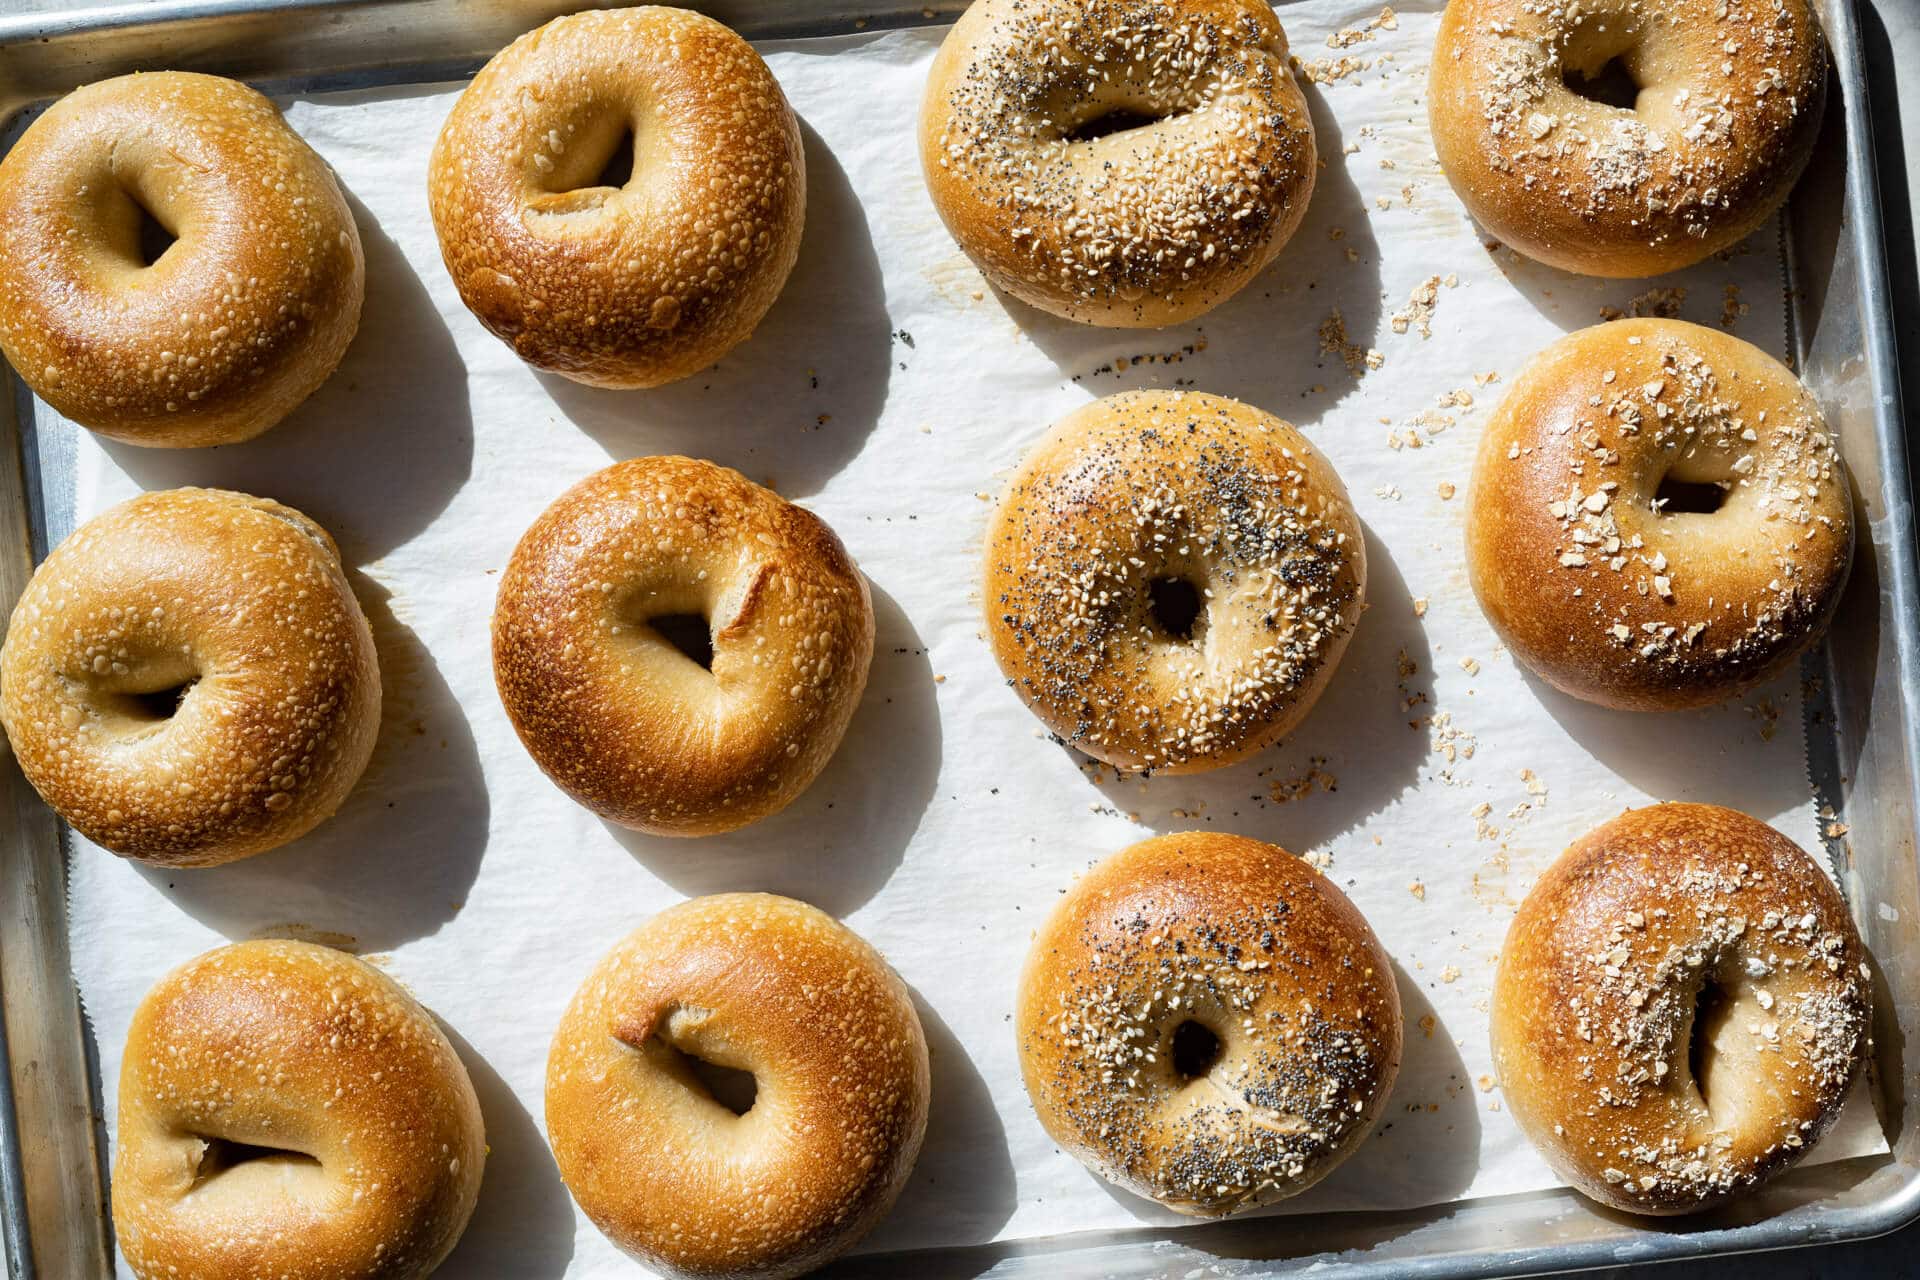
And overall, these bagels are pretty darn easygoing. Unlike bread dough, there’s no need to be overly critical of each motion when shaping, and in the end, the bagel rings puff up uniformly, boil beautifully, and bake easily. Speaking of the boil, perhaps one of the things that keep many from making them, but it’s such a simple thing. And while I often draw parallels between this dough and my sourdough pretzel—mostly in that they each have a stiff dough and a pre-bake step—there’s far less prep before baking bagels than pretzel—not that those sourdough pretzels aren’t worth the effort, because they certainly are.
First, let’s look at some tools I use when making these sourdough bagels.
Tools and Ingredients
First, a few of the tools and ingredients I use for this recipe
- Barley malt syrup – this is the classic sweetener added to a bagel dough and it has a very unique flavor and aroma. I like the Eden brand, but any should work well.
- Diastatic malt powder – see the post on diastatic vs. nondiastatic malt and why it’s used in baking.
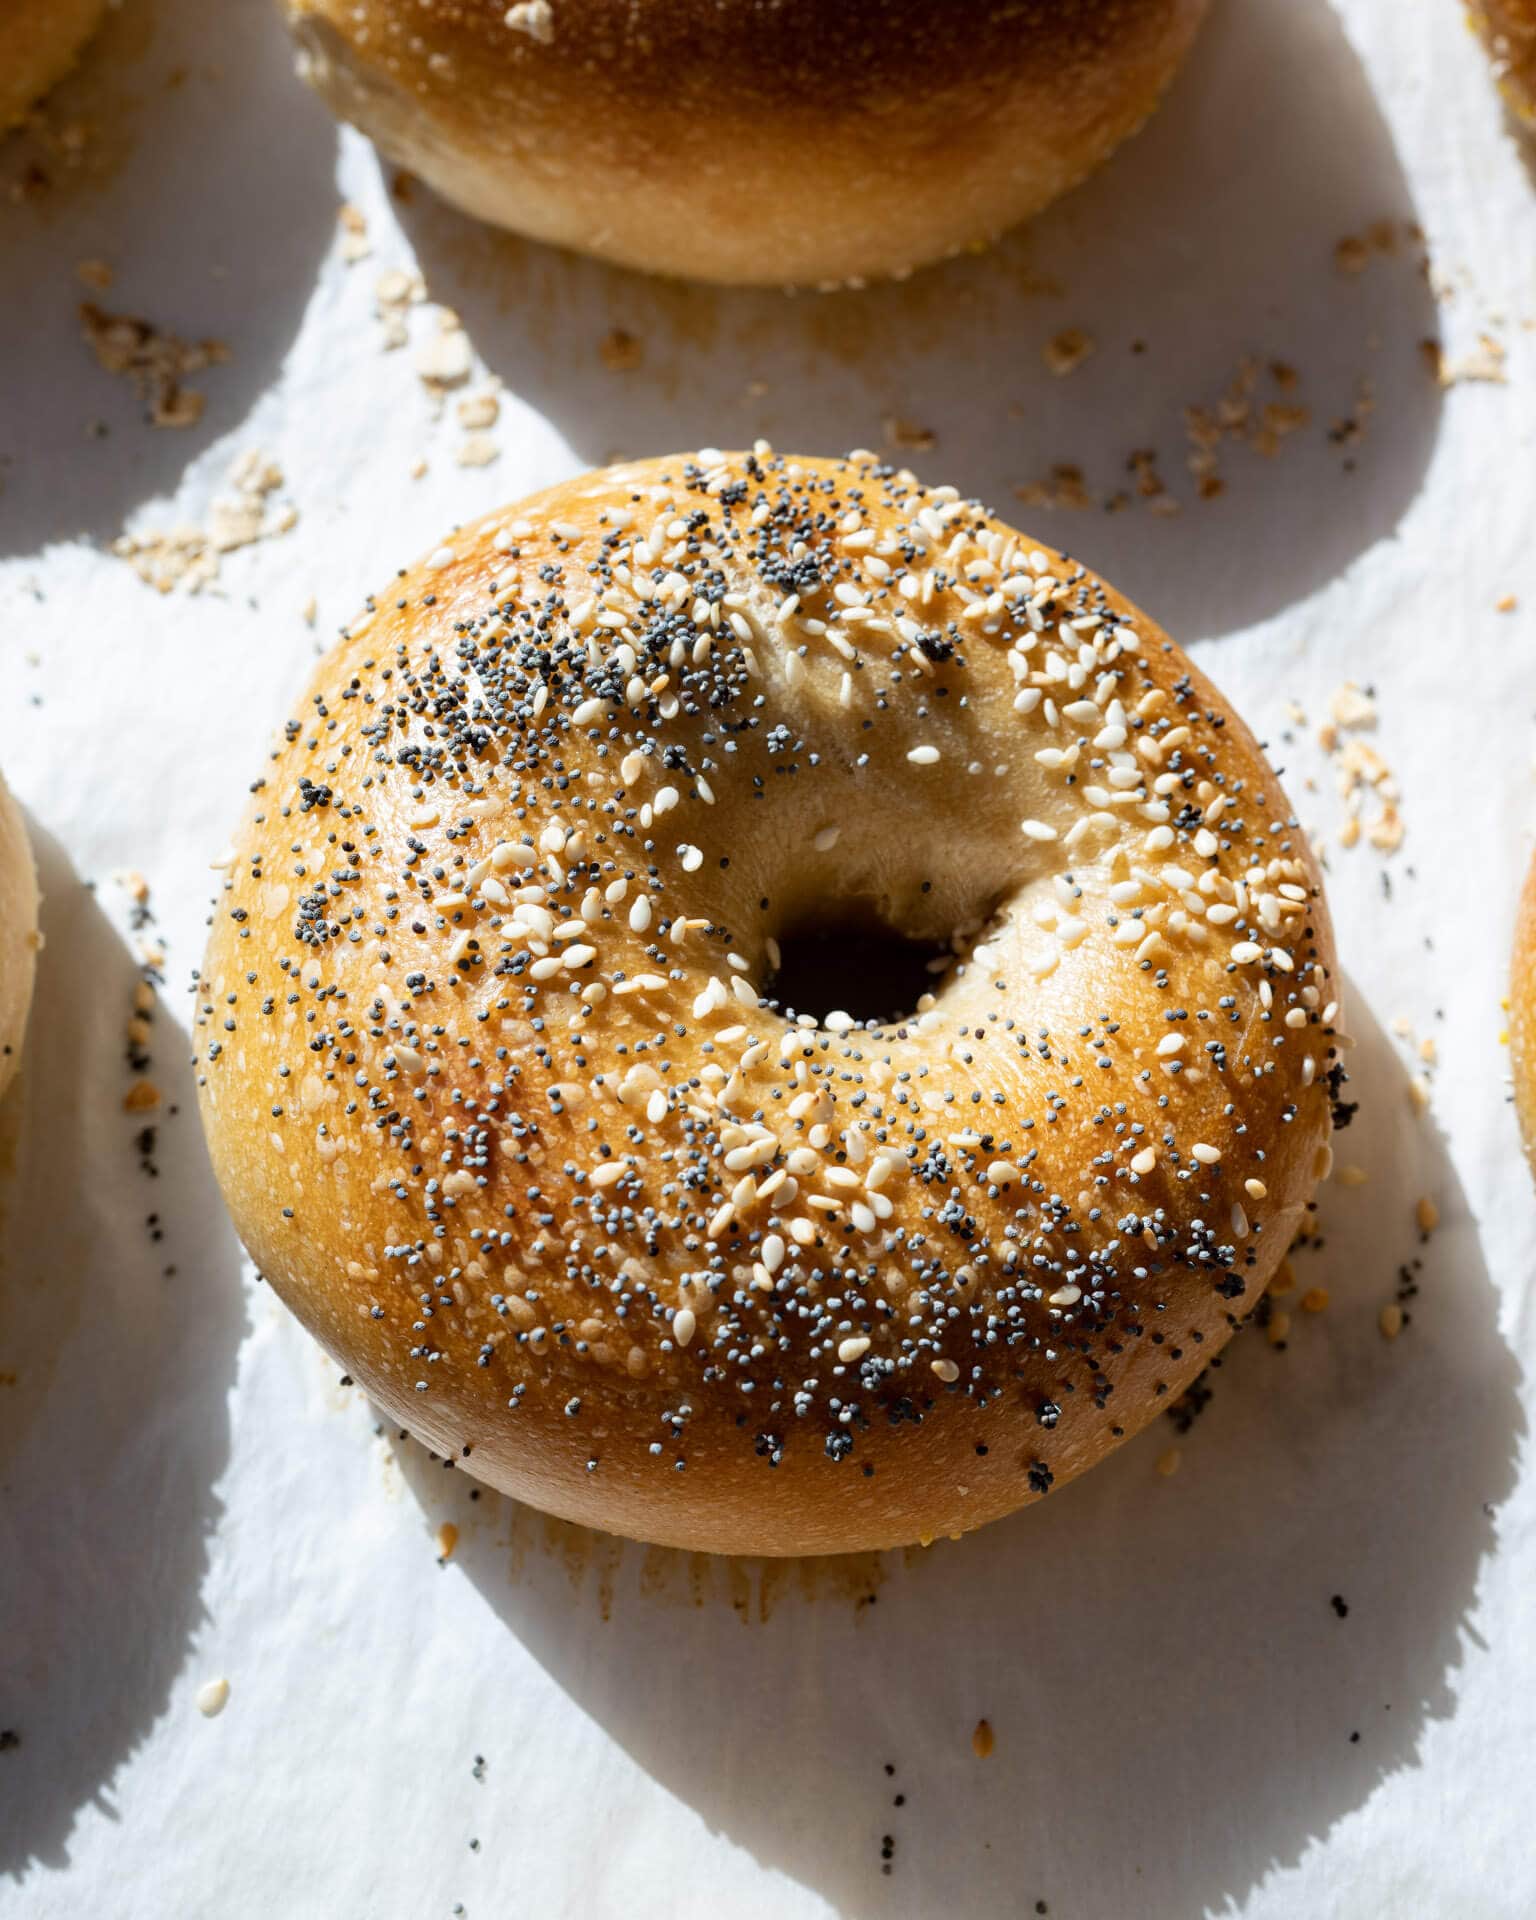
- Everything bagel topping – I love this mix of seeds and dried spices for topping bagels.
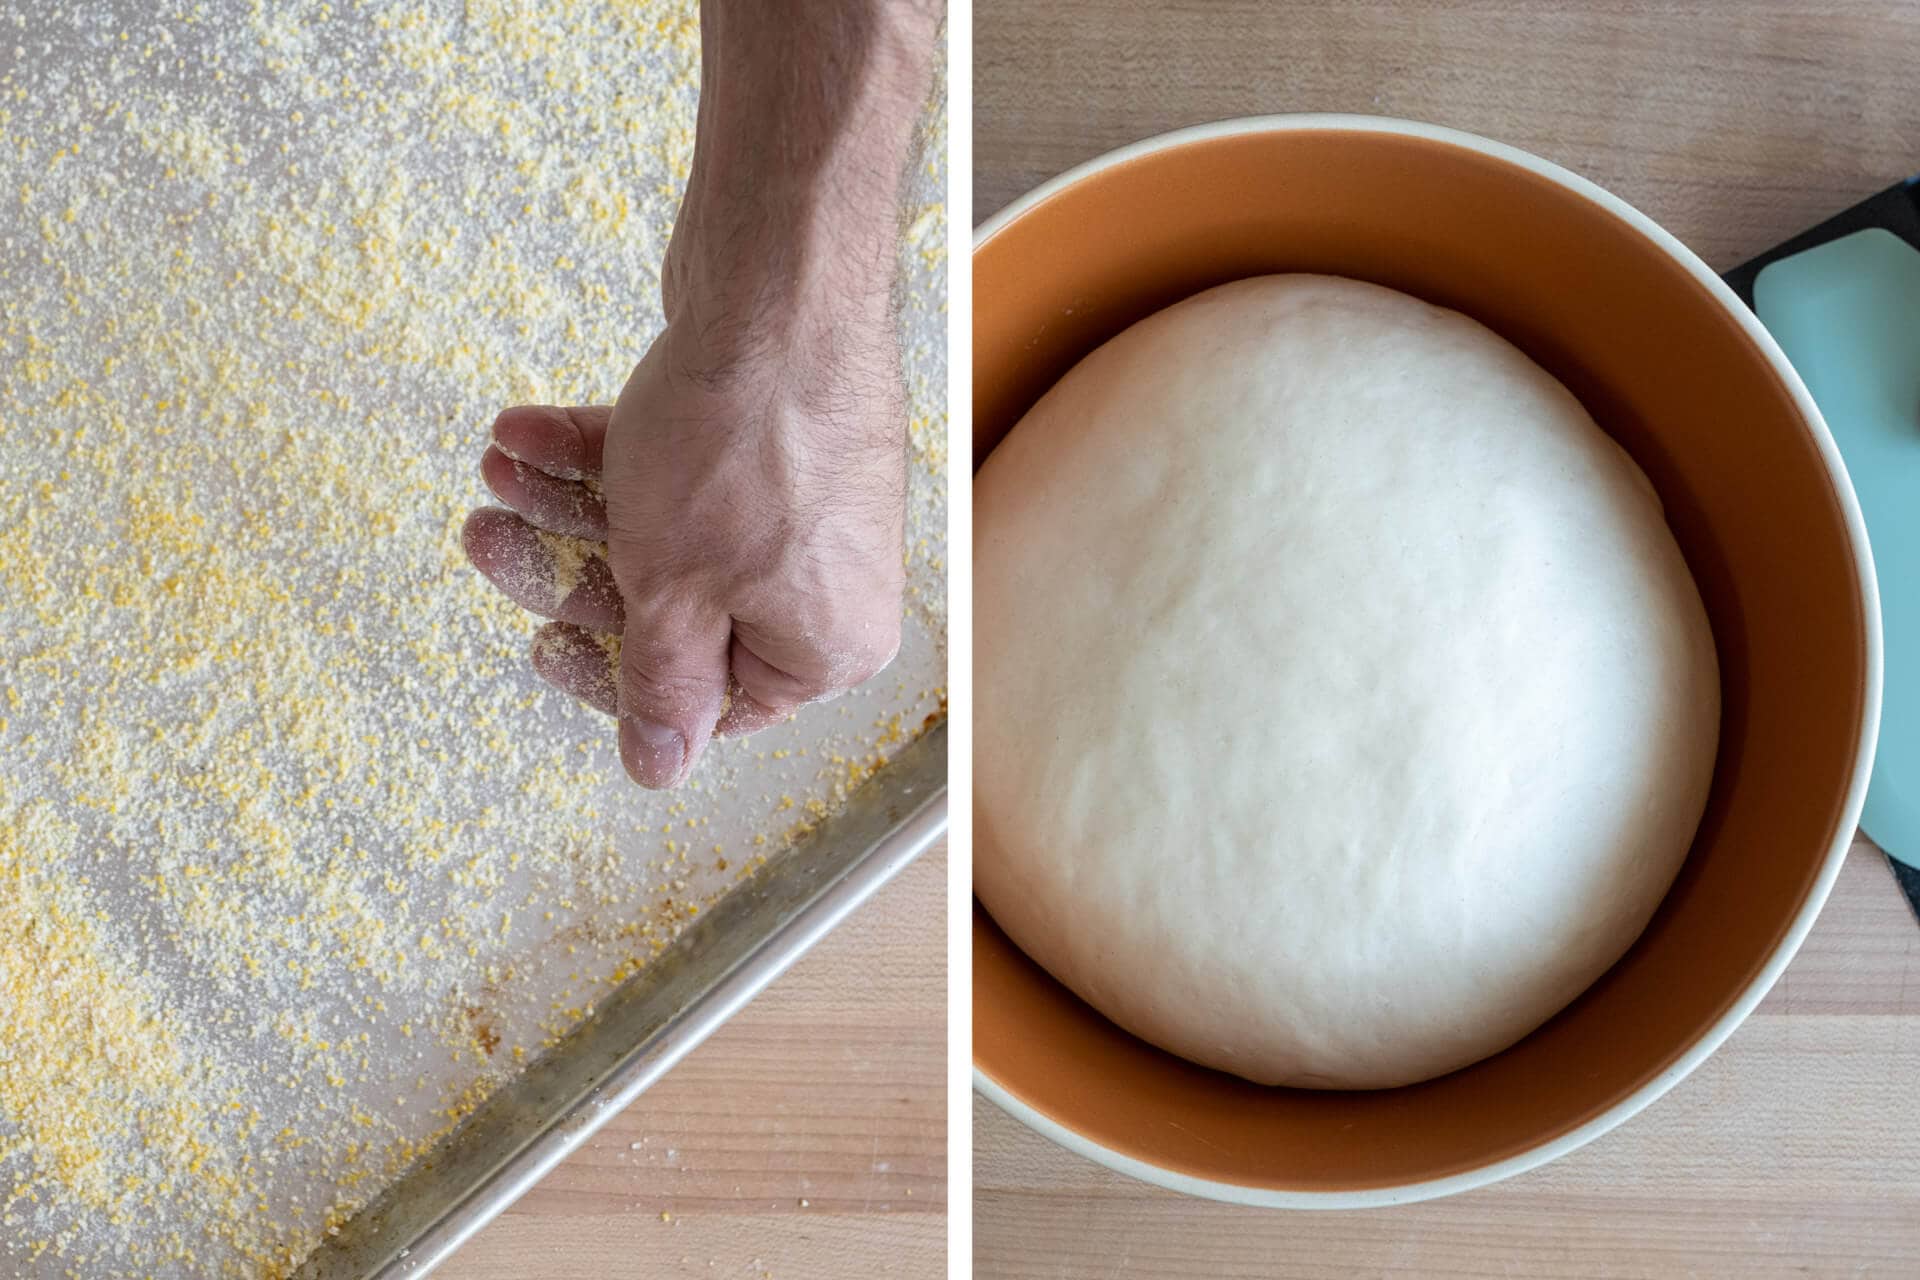
- Cornmeal – traditionally used to keep the bagels from sticking to the baking sheet during proofing (and they add extra starch to the boiling water).
- Half baking sheet – I use this to proof all 12 dough pieces to save space in a home refrigerator.
- Full baking sheet – perfect for baking all 12 bagels, with room in between, on a single baking sheet for even baking.
Flour Selection
Many bagel recipes, mine included, call for high-protein white flour to get that characteristic chew and structure.
I’ve tried this with Tony Gemignani’s Pizza Flour (15% protein), and while there was a bit more chew, I wouldn’t say it was necessary to order some for making sourdough bagels. I like to use Central Milling High Mountain, King Arthur Bread Flour, or Bob’s Red Mill Bread Flour.
Baking Schedule

These sourdough bagels take three days to make: from creating the levain at night on day one to boiling and baking them in the morning on day three. I know—three days!?—but the good news is, most of the time you’re not actively handling the dough, it’s fermenting in one stage or another.
All-in-all, this is a straightforward schedule. It’s also quite flexible by a few hours here and there once the dough is chilled and in the fridge: if you can’t boil and bake first thing on day three, it’ll hold a few more hours (or perhaps longer).
Sourdough Bagel Formula
For tips on how to calculate baker’s percentages or how to modify this formula, see my post on baker’s percentages (baker’s math).
| Total Dough Weight | 1,600 grams |
| Pre-fermented Flour | 12.00% |
| Yield | 12 x 125g bagels |
Total Formula
Desired dough temperature: 78°F (25°C). See my post on the importance of dough temperature for more information on dough temperatures.
| Weight | Ingredient | Baker’s Percentage |
|---|---|---|
| 964g | High-protein white flour (~13% protein, Central Milling High Mountain, King Arthur Flour Bread flour, or Bob’s Red Mill Bread Flour) | 100.00% |
| 530g | Water | 55.00% |
| 29g | Sugar, caster | 3.00% |
| 29g | Barley malt syrup | 3.00% |
| 18g | Salt | 1.90% |
| 7g | Diastatic malt | 0.75% |
| 23g | Sourdough starter (100% hydration; 40% rye, 60% white flour) | 2.40% |
Sourdough Bagel Method
1. Prepare Levain – Night before mixing, 9:30 p.m. (Day one)
Mix the following ingredients together in a container and leave covered to ripen for 12 hours overnight. It mixes up to a stiff consistency so I like to mix and knead the dough in a mixing bowl, then I transfer to a narrow and tall jar.
Try to hit a final dough temperature of 78°F (25°C) for this levain.
| Weight | Ingredient | Baker’s Percentage |
|---|---|---|
| 116g | High protein flour | 100.00% |
| 58g | Water | 50.00% |
| 23g | Ripe sourdough starter | 20.00% |
23.18% Levain In Final Dough Mix.
2. Mix – 9:30 a.m. (Day two)
A note on mechanical mixing: This dough is low hydration and comprised of high protein flour—it’s a firm dough! I used my Haussler Alpha mixer to mix this for 5 minutes on speed one. You could use a KitchenAid stand mixer to mix this dough for a few minutes in the beginning, but I wouldn’t push it too far and risk damaging the mixer—ultimately you make the call. After mixing in the KitchenAid, you could then turn the dough out to the counter to finish kneading like pasta dough, as described below.
| Weight | Ingredient |
|---|---|
| 848g | High protein flour |
| 472g | Water |
| 29g | Sugar, caster |
| 29g | Barley malt syrup |
| 18g | Salt |
| 7g | Diastatic malt |
| 197g | Levain (see Prepare Levain, above) |
Make the malt syrup slurry: This will help the sticky, viscous barley malt syrup incorporate more easily into the dough. To a small mixing bowl, add a bit of the mixing water, barley malt syrup, sugar, diastatic malt powder, and salt. Stir until everything dissolves.
To your mixing bowl, add the malt syrup slurry, flour, water, and ripe levain. If using a mechanical mixer (see the note, above), mix on low speed for approximately 5 minutes until the dough strengthens and begins to smooth. This dough is so firm it doesn’t need much.
If you do choose to use a mechanical mixer, you might need to cool the mixing water to ensure you hit the FDT of 78°F (25°C). I used cold water straight from my fridge.
If mixing by hand, mix everything in the bowl until well incorporated. Turn the dough out to a clean work surface and knead the dough like pasta: fold half over onto itself and push the mass away from you with the palm of your hand. Continue folding over and pushing away for 8-10 minutes until the dough firms up, and it becomes hard to knead any further.
Transfer your dough to a bulk fermentation container and cover.
3. Bulk Fermentation – 9:45 a.m. to 12:45 p.m.
Give this dough a single fold after 1 hour and 30 minutes into bulk fermentation. For the fold, turn the dough out to a clean work surface and do your best to fold it into thirds. Place the dough back into the bulk fermentation container with its seam side down, and cover. Let the dough rest, covered, for the remainder of bulk fermentation.
4. Divide and Shape – 12:45 p.m.
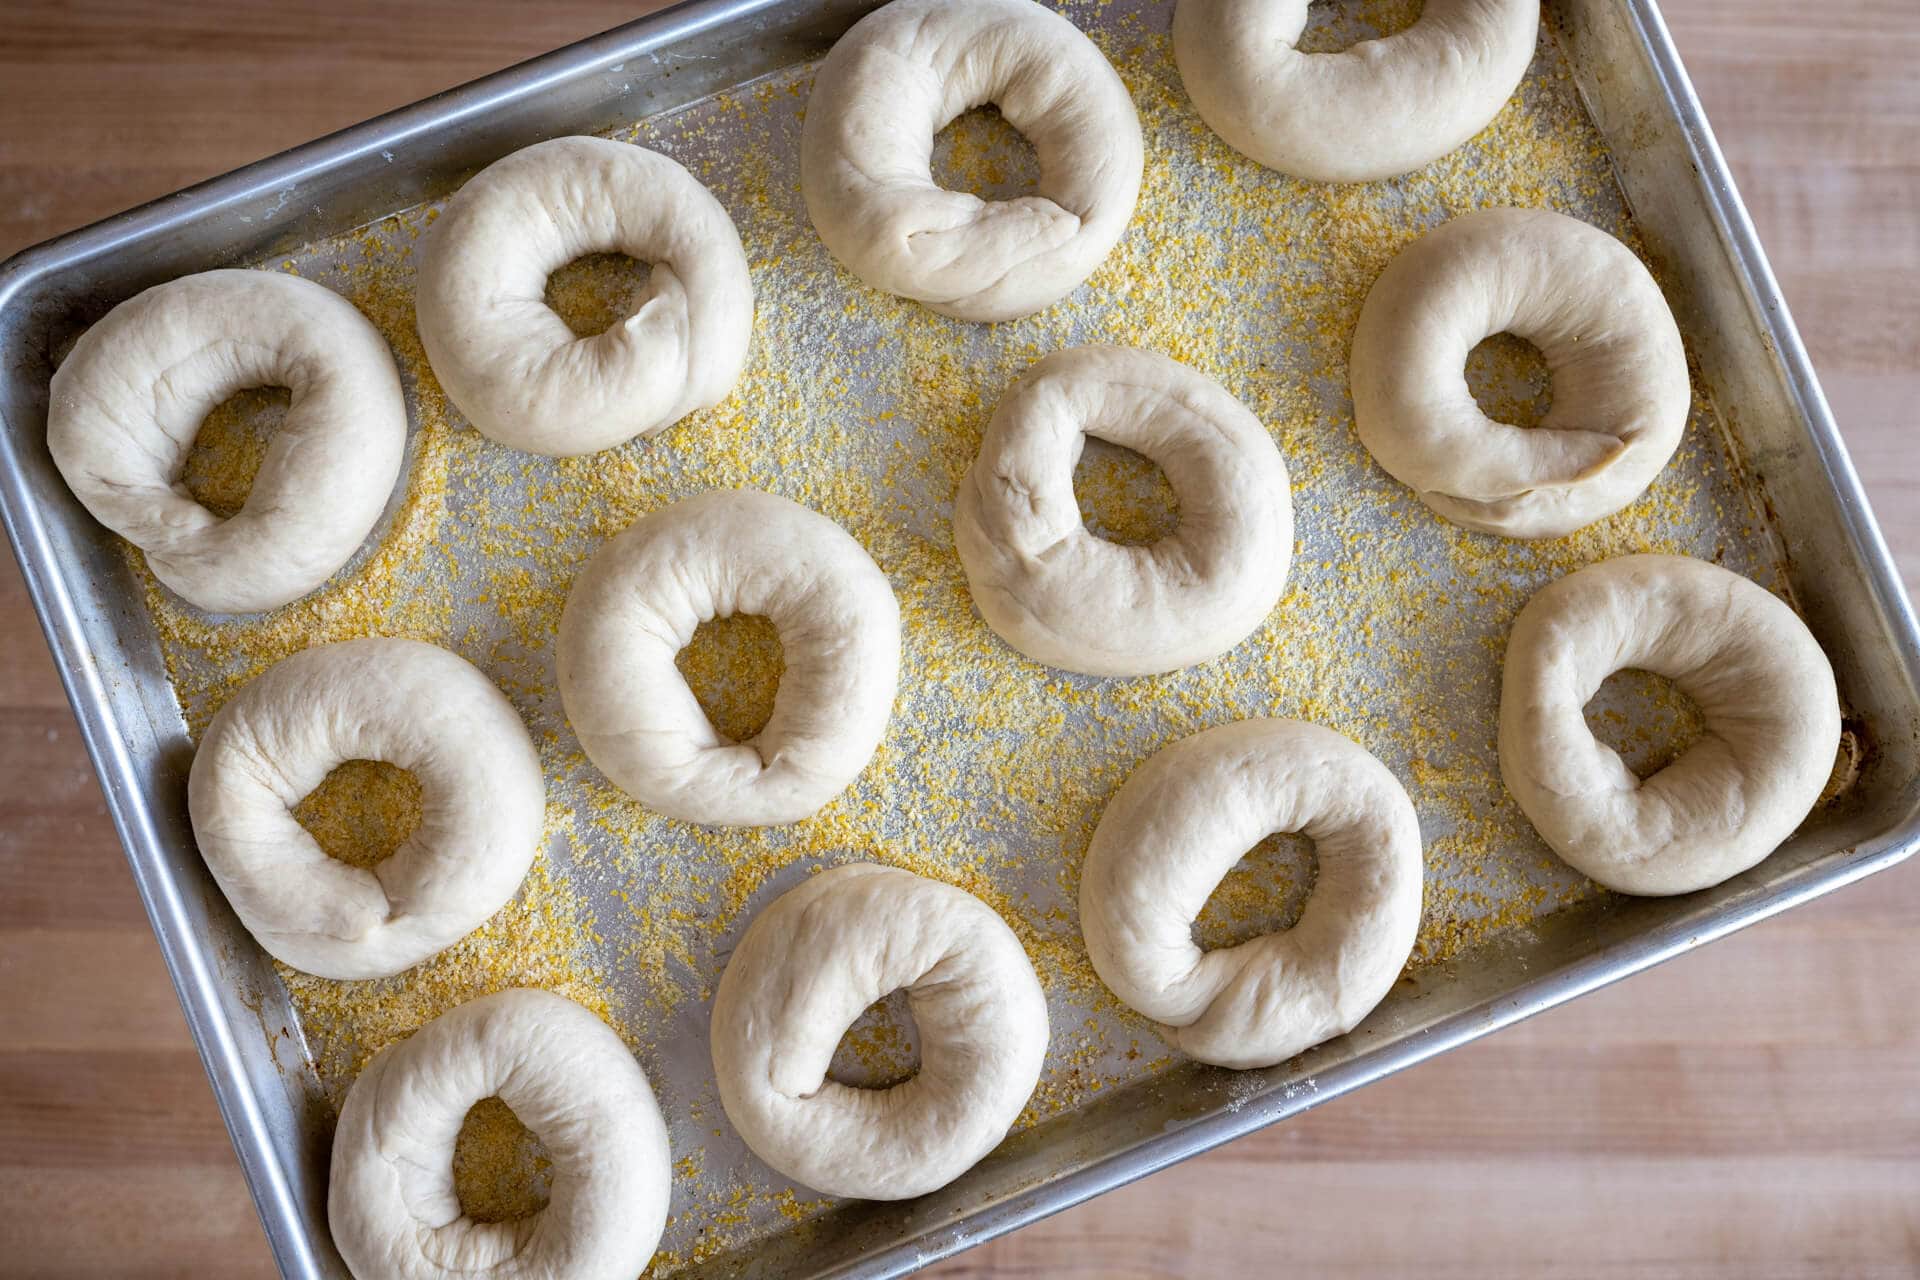
Use a half baking sheet (so it fits into your refrigerator) to hold the 12 pieces of shaped dough. Later, after boiling the dough, I upsize to a full baking sheet to help the dough evenly bake. Spread a thin layer of cornmeal on the half sheet to prevent the bagel dough from sticking during proofing.
Divide the dough into twelve 125g pieces.
First, degas the piece by tamping down a bit with your hand. Then, do your best to form the piece into a rough rectangle and cinch down from the top, so the dough ends up in a little tube. This cinching doesn’t have to be forceful, and it helps to get the dough into a tube shape.
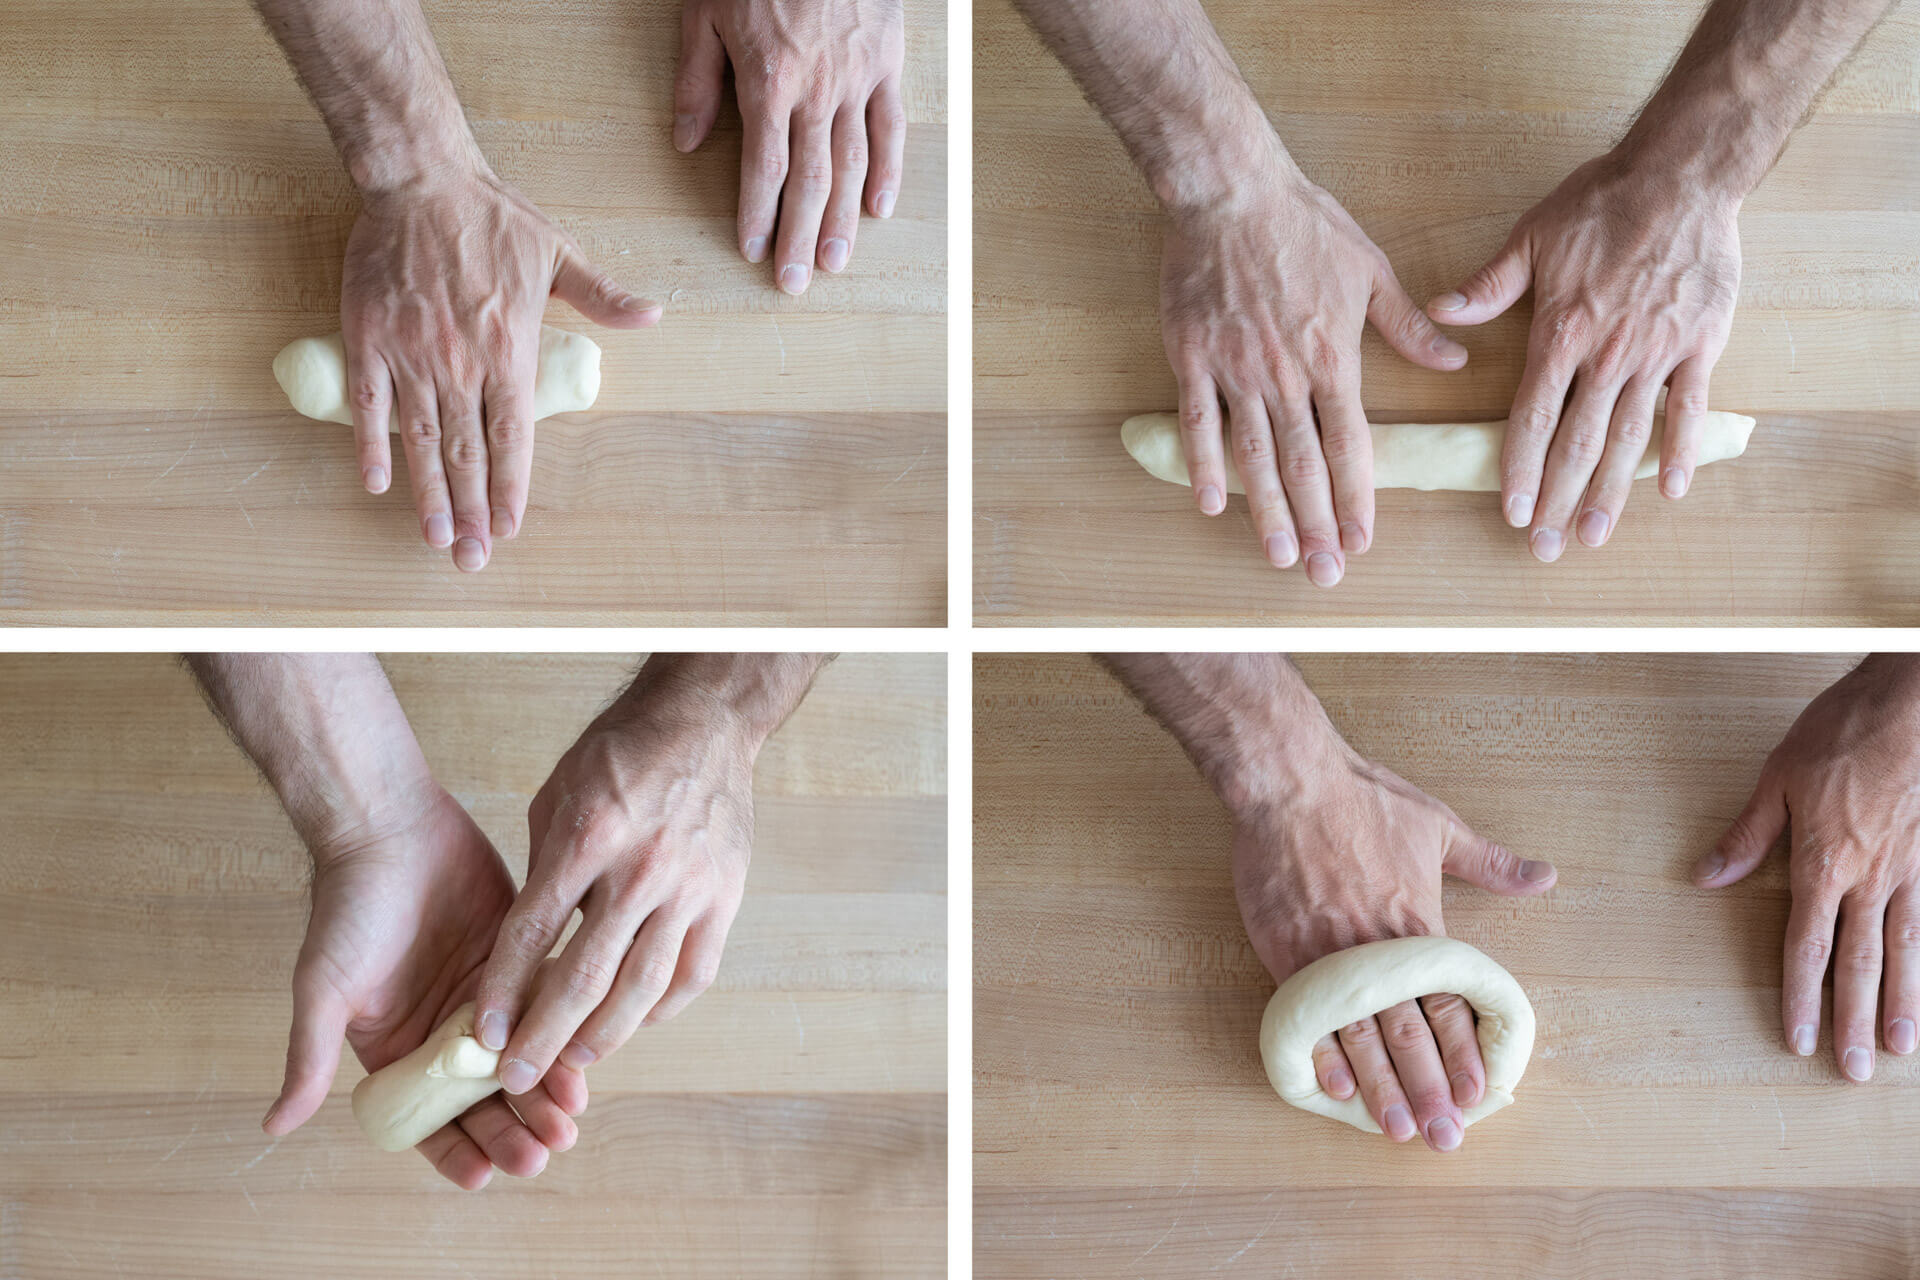
Next, roll your hand in the center a few times to create a bulb at each end. Then, switch to two hands and roll outward to about 12 inches and a tube that’s mostly the same thickness all the way through. If you prefer a bagel with a large hole, roll out the tube, so it’s longer.
Once rolled out to a long tube, wrap it around the backside of your hand between your knuckles and wrist. Overlap the two ends of the dough in the palm of your hand, and gently press the two ends together. Next, press your palm down on the work surface, and in a repetitive motion, roll the dough on the work surface repeatedly to seal.
Here’s a video on my YouTube channel of me shaping one of the pieces
After shaping a piece, transfer it to the cornmeal-dusted baking sheet. Repeat for the remaining pieces, and you will end up with four rows of three.
5. Proof – 1:00 p.m. 3:00 p.m. (2 hours room temperature, then retard overnight)
Cover the baking sheet with a large, reusable plastic bag and seal shut. Let the dough proof at room temperature, around 72-74°F (22-23°C), for 2 hours. The dough should puff up slightly after this time but not excessively. If the dough still feels very dense to the touch, give it another 15-30 minutes and check again.
After 2 hours, place the covered baking sheet into the fridge overnight at around 39°F (4°C).
6. Boil and Top – 9:30 a.m. (Day three)
Oven prep: Before you begin boiling your bagel dough, preheat your oven to 475°F (245°C) with convection or 500°F (260°C) without convection. Place one rack at the bottom third of the oven. Place a baking stone or baking steel on the rack to preheat. I steam my oven as described on my oven steaming method post, so place a roasting pan on the bottom filled with lava rocks to prepare to steam. I also fill a cup of ice and place it next to my oven (I will pour this over the lava rocks to steam the oven).
Bagels are unique because you boil the dough before baking. This boiling gelatinizes the starches in the flour and gives them a little more chew and helps them achieve a shiny crust. This gelatinization is very similar to how you make a tangzhong or roux. But for a bagel, the longer you boil them, the thicker the crust and chewier they will become. There is a limit to the boil duration, though, as they will degrade in the water after a while. I have found boiling the dough 40 seconds on each side, for a total of 1 minute and 20 seconds, to be just right.
Many places like to add barley malt syrup or honey to the boiling water, but in side-by-side testing I didn’t find the added syrup to give them any more shine. The cornmeal brought into the boiling water might also add starches, much like when making pasta.
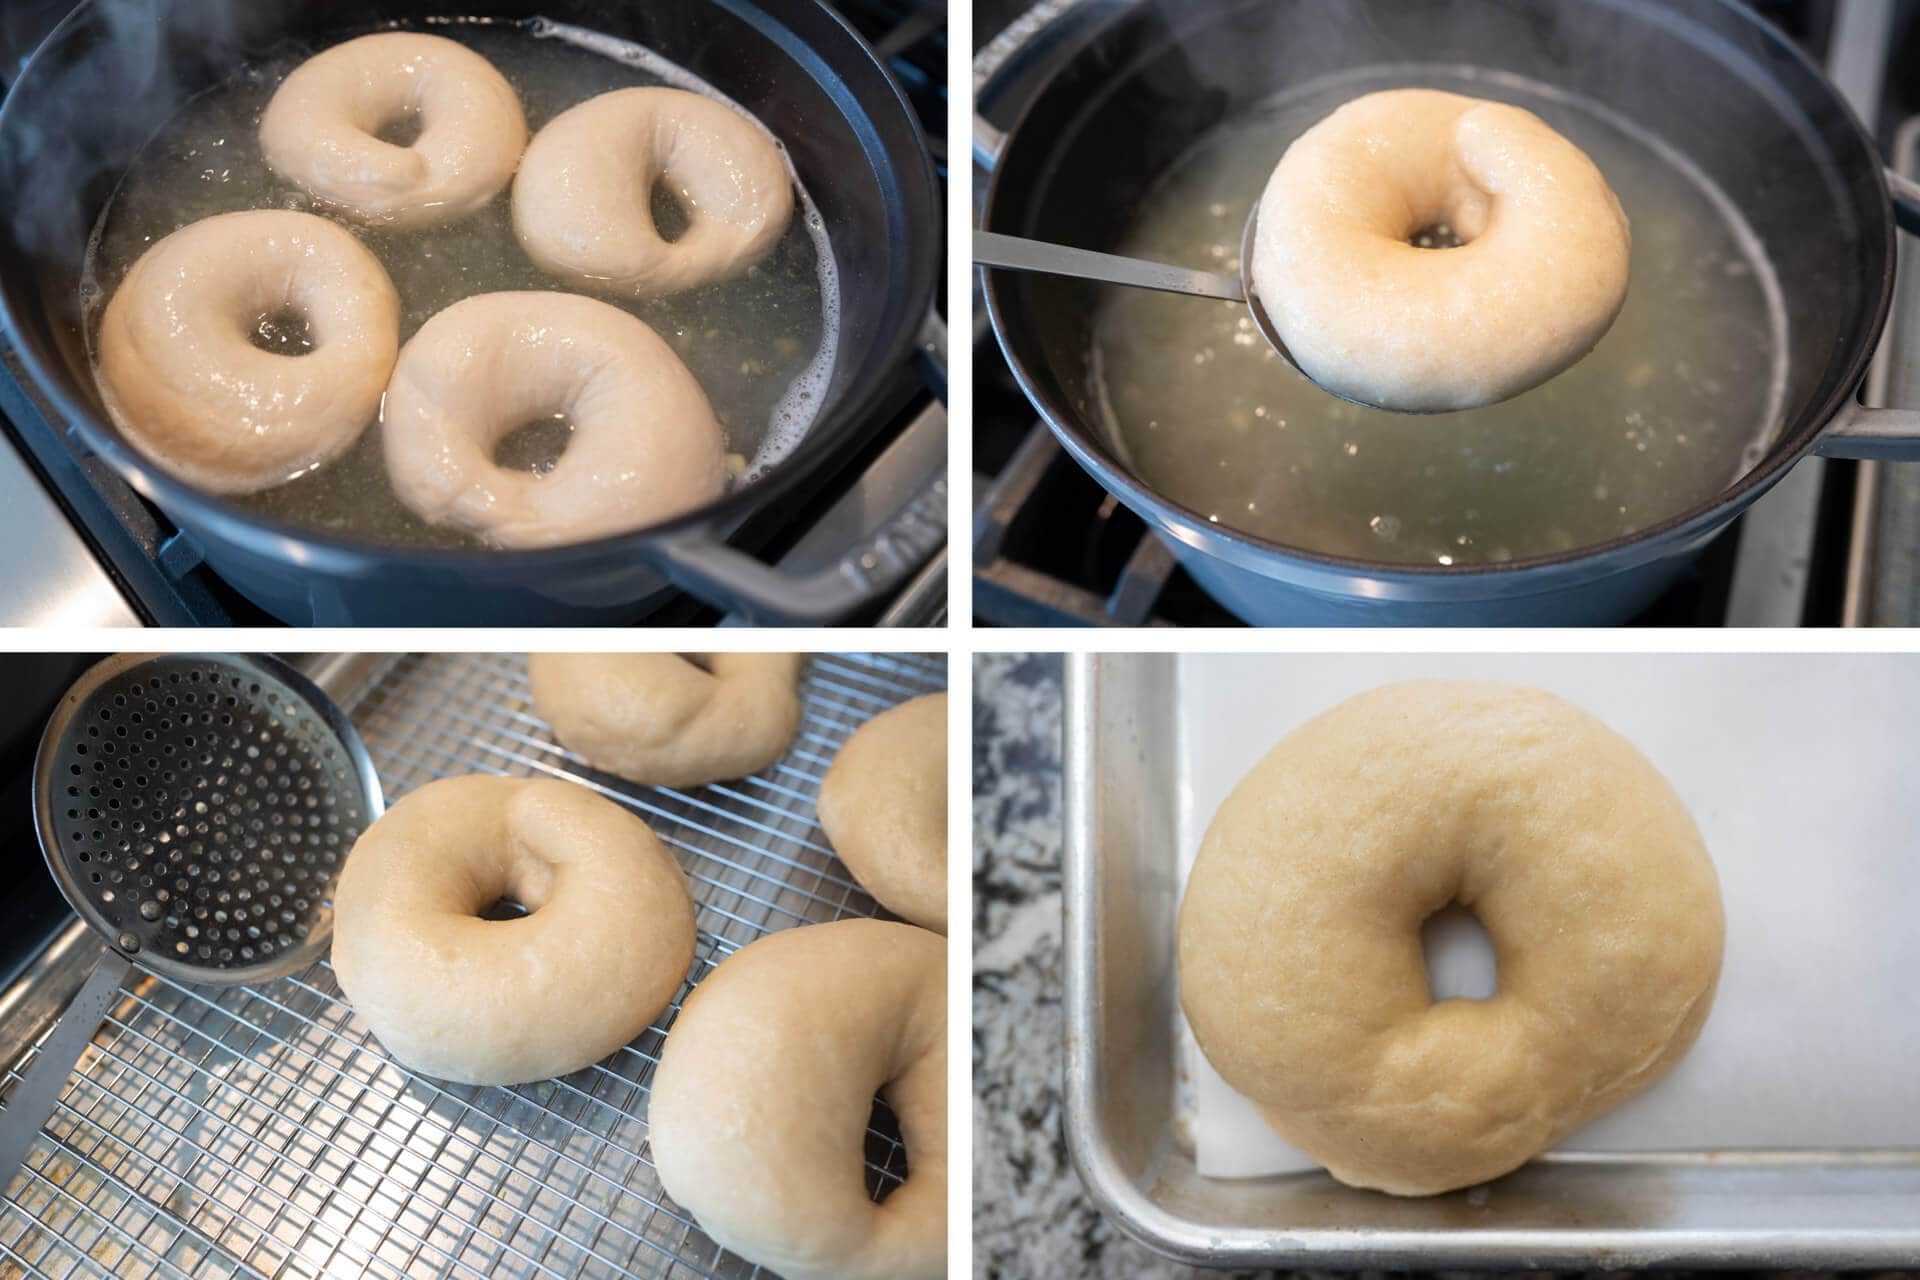
Boiling equipment prep: Fill a wide pot with enough water so the bagel dough can float without touching the bottom (in my 7qt Staub Dutch oven, this was about 1.5 gallons). Bring to a low boil. Next to your stovetop, place a half baking sheet with a cooling rack inside, this will hold the wet bagels for a minute and allow them to drain. Next, line a full baking sheet with parchment paper — this will hold the dough as it bakes. Finally, grab any toppings you’d like (poppy, oat, everything bagel mix, sesame, etc.) and place them in bowls on your work surface.
Boil: Once the water is at a low boil, boil the proofed sourdough bagel dough straight from the fridge, about 40 seconds per side. Using a spider strainer, transfer each piece to the cooling rack inside the baking sheet to drain while you boil the rest of the dough.
Once the pieces are all boiled, move quickly to top them, if desired, and get them onto the final baking sheet.
This dough should float immediately when dropped into the boiling water. If the dough sinks and doesn’t pop up within a few seconds, it’s likely under proofed. Give it more time to proof at warm temperature and try again.
Once the bagels have drained for a minute on the baking rack, transfer them to the full baking sheet lined with parchment paper for baking. Top them with whatever toppings you’d like at this time.
7. Bake – 9:45 a.m.
Slide the full baking sheet with boiled dough into the preheated oven directly onto the baking stone or baking steel. Pour the cup of ice onto the pan with lava rocks and quickly close the oven.
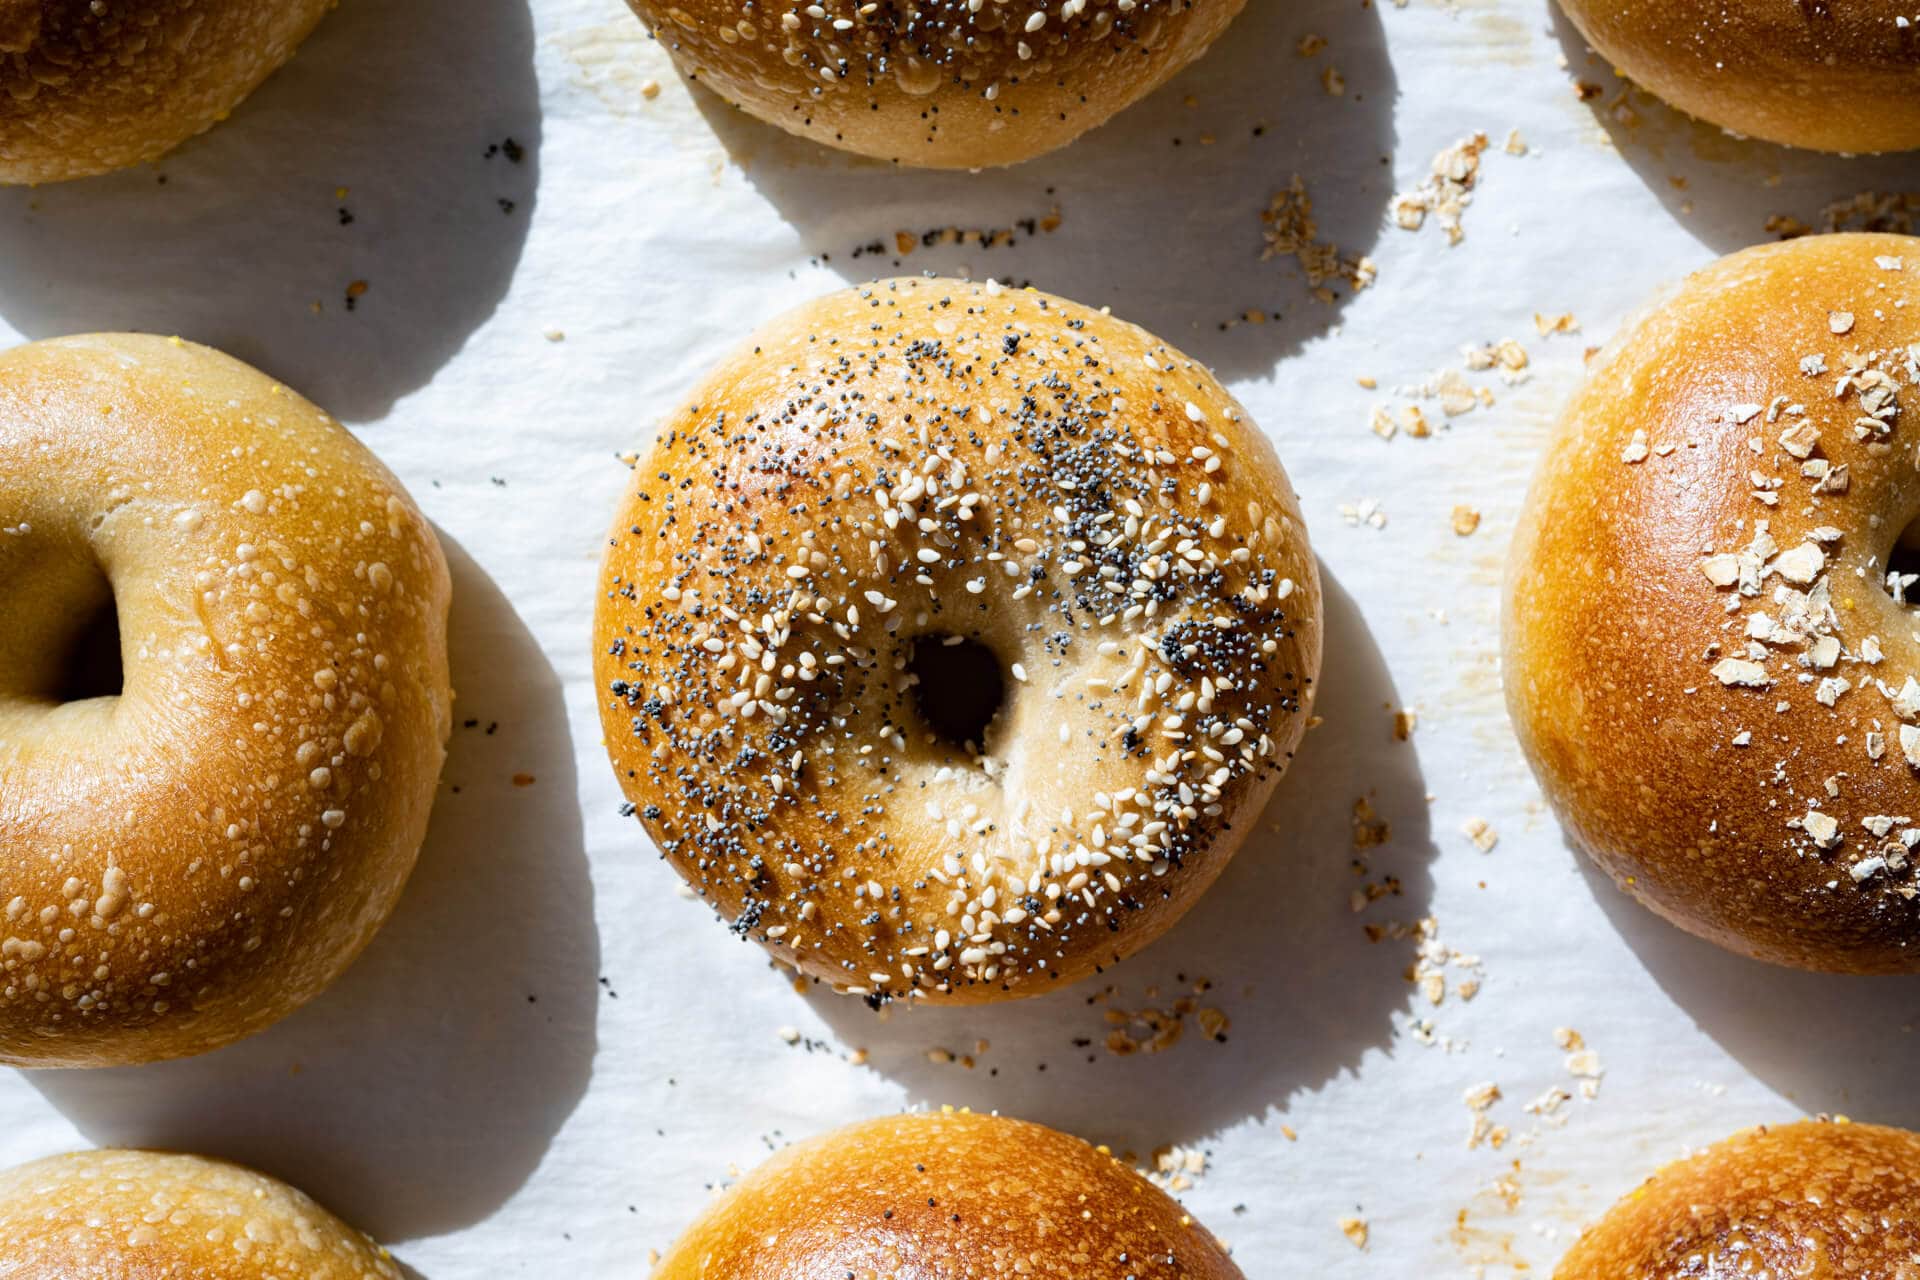
Bake at 475°F (245°C) convection (500°F (260°C) without convection) for 10 minutes with steam. After 10 minutes, vent the oven and remove the steaming pan, rotate the baking sheet 180°, and bake for 5 minutes longer. After this 5 minutes, turn the oven down to 450°F (235°C) and bake for 5 minutes longer for a total of 20 minutes. Remove the sheet when the bagels are nicely colored.
Let cool 15-20 minutes on a wire rack. These are fantastic the first day they’re baked and hold well for a few days after that in a bread box. I also like to wait till they are room temperature, slice in half, and then freeze in a freezer bag. They can be reheated in the toaster, as described in my post on how to store bread.
Conclusion
When you take a bite of these bagels, you’ll first discover a fleeting crispness that gives in to chewiness, a textural dance that eventually leads to a subtle, onset of sourness. This mellow tang creeps in and propels you to keep going with it, to keep taking bite after bite until you’ve finished the entire bagel without the thought of stopping.
The entire eating experience is scary in how it takes over, and it’s exactly what I want in a bagel.
The whole eating experience is scary in how it takes over, and it’s exactly what I want in a bagel. That pop of flavor at the end of the bite is not something you find in mass-produced bagels, and I just love it. And while there are sugar and barley malt syrup added to the dough, it does not carry through to make these bagels sweet. There’s a beautiful balance in the eating experience of these sourdough bagels.
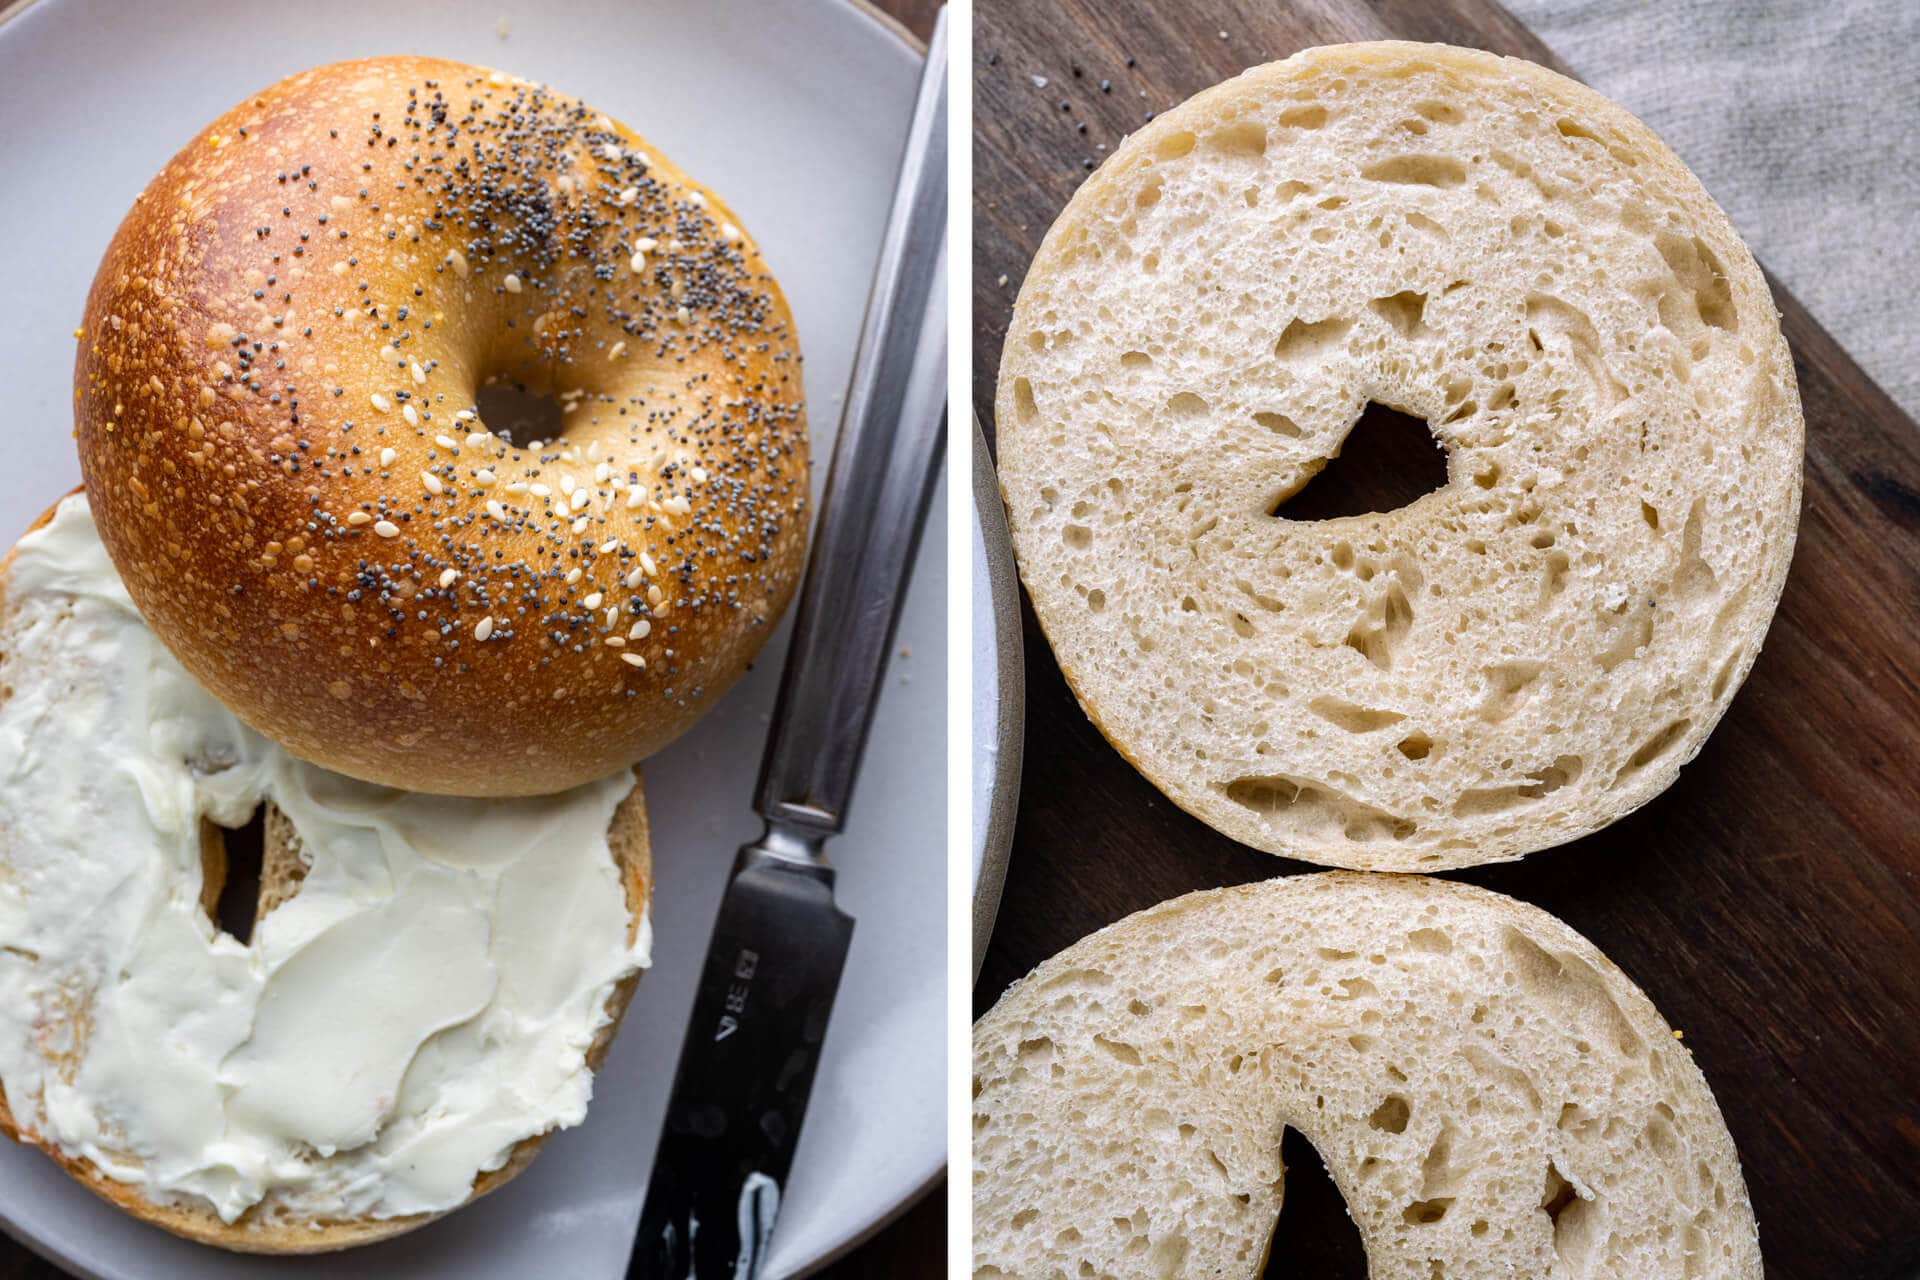
After making these bagels the first time, you’ll get the hang of the process. Subsequent batches become easier and more natural, and it’s no stretch to think these could become a weekly staple—and they freeze incredibly well (I slice them in half and place them in a freezer bag) if, by chance, there’s any left.
Print
Sourdough Bagel
- Prep Time: 24 hours
- Total Time: 24 hours
- Yield: 12 bagels
Description
My recipe for flavorful and chewy sourdough bagels with a thin and slightly crispy crust. Delicious topped with an everything bagel mix, coarse sea salt, oats, seeds, or anything else you can dream up!
Ingredients
Levain
- 116g high protein flour
- 58g water
- 23g sourdough starter, ripe
Main Dough
- 848g high protein flour
- 472g water
- 29g sugar, caster
- 29g barley malt syrup
- 18g salt
- 7g diastatic malt
- 197g levain
Instructions
- Levain (the night before mixing, 9:30 p.m.)
Mix all the Levain ingredients in a container and leave it at a warm temperature for 12 hours. - Mix (9:30 a.m.)
Add a splash of the mixing water, sugar, barley malt syrup, diastatic malt powder, and salt to a small bowl and mix together. To your stand mixer’s mixing bowl, add the malt syrup slurry, flour, water, and ripe levain. Mix on low speed for approximately 5 minutes until the dough strengthens and begins to smooth. Transfer your dough to a bulk fermentation container and cover. - Bulk Fermentation (9:45 a.m. to 12:45 p.m.)
Give this dough a single fold after 1 hour and 30 minutes into bulk fermentation. - Divide and Shape (12:45 p.m.)
Use a half baking sheet (so it fits into your refrigerator) to hold the 12 pieces of shaped dough. Spread a thin layer of cornmeal on the half sheet to prevent sticking. Divide the dough into twelve 125g pieces. First, degas the piece by tamping down a bit with your hand. Then, form the piece into a rough rectangle and cinch down from the top, so the dough ends up in a little tube. Roll the tube out to a 12″ long tube. Wrap the dough around the backside of your hand and pinch it together in the front. Roll a few times on the counter to seal. Transfer to the cornmeal-dusted baking sheet. Repeat for remaining dough pieces. - Proof (1:00 p.m. to 3:00 p.m.)
Cover the baking sheet with a large, reusable plastic bag and seal shut. Let the dough proof at room temperature, around 72-74°F (22-23°C), for 2 hours. The dough should puff up slightly after this time but not excessively. If the dough still feels very dense to the touch, give it another 15-30 minutes and check again. After 2 hours, place the covered baking sheet into the fridge overnight at around 39°F (4°C). - Boil and Top (9:30 a.m., Day Three)
Oven prep: Before you begin boiling your bagel dough, preheat your oven to 475°F (245°C) with convection or 500°F (260°C) without convection. Place one rack at the bottom third of the oven. Place a baking stone or baking steel on the rack to preheat. Place a roasting pan on the bottom filled with lava rocks to prepare to steam. I also fill a cup of ice and place it next to my oven (I will pour this over the lava rocks to steam the oven).
Boiling equipment prep: Fill a wide pot with water and bring to a low boil. Next to your stovetop, place a half baking sheet with a cooling rack inside, this will hold the wet bagels for a minute and allow them to drain. Next, line a full baking sheet with parchment paper — this will hold the dough as it bakes. Finally, grab any toppings you’d like (poppy, oat, everything bagel mix, sesame, etc.) and place them in bowls on your work surface.
Boil: Once the water is at a low boil, boil the proofed sourdough bagel dough straight from the fridge, about 40 seconds per side. Using a spider strainer, transfer each piece to the cooling rack inside the baking sheet to drain while you boil the rest of the dough. Then, transfer the boiled bagels to the full baking sheet and top, if desired. - Bake (9:45 a.m.)
Slide the pan with all the bagel dough into the oven and pour the cup of ice over the roasting pan with lava rocks. Quickly close the oven.
Bake at 475°F (245°C) convection (500°F (260°C) without convection) for 10 minutes with steam. After 10 minutes, vent the oven and remove the steaming pan, rotate the baking sheet 180°, and bake for 5 minutes longer. After this 5 minutes, turn the oven down to 450°F (235°C) and bake for 5 minutes longer for a total of 20 minutes. Remove the sheet when the bagels are nicely colored. Let cool 15-20 minutes on a wire rack.
Notes
- These are wonderful topped with an Everything Bagel mix, rolled oats, sesame seed mixture, or any other topping you’d like.
If you use this sourdough bagel recipe, tag @maurizio on Instagram and use the hashtag #theperfectloaf so I can take a look!
What’s Next?
Regardless of your bagel preferences, I’m confident these sourdough bagels will rank up there with the best you’ve had—and what could be better than making your own with your sourdough starter? And who knows, perhaps they’ll mend that friendship severed by staunch bagel ideals—these could be the olive branch; a crisp and seductively chewy one.
Next up, how about a simple bake like sourdough starter discard sugar cookies?
Buon appetito! 🥯


727 Comments
I followed this recipe to a T. They taste Delicious and have a good chew and a crumb. However they did not puff up like normal bagels and they spread and were a little flat. Not completely just not as high of a rise as normal bagels.
Could it be poor shaping or fermentation issues?
My guess would be fermentation issues here. I would try reducing the proofing time a bit to encourage a little more rise.
Hello again,
What is the desired dough temp for bulk fermentation?
I have this issue too. I am going to take Maurizio’s suggestion and reduce the proofing time (I am assuming he means the bulk proof, not the retard.
My bagels rise a little bit but they seem to come out too flat and with splotches of brown, rather than entirely browned. I have trouble, due to our differences in elevation, determining whether by bagels are under or over proofed.
Same here!
This recipe rocks – I’ve made these bagels at least 12-15 times. Now I wanna try to tweak this to make egg bagels. I found some tips online from Peter Reinhart about adding whole eggs (about 28g of water per egg) or egg yolks (about 14g of water per yolk). Anyone try swapping out some of the water for eggs or egg yolks? I thought I might try 6 egg yolks and reducing water to 388g in the mixing step to keep the bakers ratios the same. But thought I’d reach out to the broader baking space to see if anyone has any tips.
OH! And Peter Reinhart’s advice was one egg or one egg yolk per cup of flour – this recipe is roughly 7 cups of flour
SO glad to hear my recipe is workin’ well for you, Carla! That’s a lot of reps, too, amazing. I love the idea of adding egg… I might have to take your advice and give this a try. I think this would make an amazing bagel with added richness.
Thanks for the update!!
Update: made ’em and they came out amazing. I used 6 egg yolks and a total of 375g of water. Got the right dough texture so didn’t add any more water. The dough was a little bit softer, and the bagels have just a tiny bit less chew. Overall, win win!
Maurizio, where to find diastatic malt syrup? It is not for this recipe. I want to experiment and see the difference. Thank you in advance.
I rarely use diastatic malt syrup, I always use diastatic malt powder, instead.
I’m so thrilled to have found this recipe. I’ve tried so many and have been disappointed. These were amazing and exactly how I wanted them to be. I did have to make an adjustment on the oven temp as my oven must run hot, even with a thermometer, had to dial down by 25 degrees. My next quest will be to figure out how to do these but turn them into pumpernickel. Thank you so much for this fantastic recipe.
Great to hear you liked these, April. Yes, adjust as necessary—these really take dialing in that oven temp until it’s just right. You want them slightly colored and a little crisp, but baked too long and they become hard (and too hot and they’ll burn). Enjoy!
I’ve been practicing bagels recently and finding the perfect recipe. So far I am a fan of this one!! I have bagels that I’m going to bake tomorrow. Though I seem to have made the dough too wet, they still look great! My question is why you chose to add granulated sugar along with the malt syrup. Does it affect texture? Most recipes seem to be one of the other. Thank you!
I add sugar mostly for the textural benefits to this dough—it helps keep them a bit soft. The malt syrup is for that particular flavor.
You can do that, but I find boiling them from cold makes the dough easier to handle (and more flavorful)!
Thank you so much for the comments, Deanna! So glad you liked these bagels 🙂
At first I laughed at the idea that this recipe “could become a weekly staple” but I’ve now been making them every other weekend for a couple of years. I find them to be very forgiving. I like a smaller bagel so make 16 bagels from a batch. I don’t use a thermometer, proofing oven, or lava rocks and sometimes adapt the proofing schedule to fit my weekend plans. But as long as I proof the shaped bagels until the slightly puffy stage before putting them in the fridge, the bagels have turned out great. Even my less than perfect bagels are so much better than store bought. We even decided that ours are preferred over the bagel shop that is supposed to be the best in the Bay Area. Thanks, Maurizio, for your attention to detail and for sharing.
That’s so amazing to hear, Rebecca! I told you, these become a ritual 🙂 I make them often here, and they freeze incredibly well. It’s still fun to go out to a bagel shop, but making them at home is amazing. Happy baking!
I have been using your bagel recipe for a couple of years. Way better than anything sold locally. Really not that difficult, especially with the stiff dough. Originally I mixed entirely by hand, but with the addition of an Ankarsrum mixer to my kitchen I let it do the hard work. I did find buying a full size sheet pan helpful as a half sheet pan is too small. That is a full size pan which fits in a residential oven, not a full commercial sheet pan! The only change I make is adding lye to the water. I tried it without lye, and it is just not the same. I use only 4 grams of lye per liter of water, but it makes a difference. I glove up and wear goggles, but it is a pretty mild solution. Thanks again for your hard work developing these recipes.
I havent tried using lye in the bath, but have tried baking soda (I know, not quite as caustic) and honey. They were good, but easier to go with just water. Still, fun the experiment. Sorry for the delay and thanks so much for the comments, Mark!
Hi Maurizio, your new book arrived & I am jumping in head 1st into making bagels & going a bit rogue by using 75% fresh milled wheat & only 25% Central Milling strong white bread flour. I omitted the diaststic malt(not on purpose but keeping my fingers crossed) and I also did a lamination of powdered freeze dried blueberries w/ some fresh blueberries. It is now ‘bulking up’ in a warm place. I must say that the dough laminated beautifully, nice & strong and no signs of tearing.
Now, here is my question, to use baking soda in the boiling water or not to use it. I am curious as to the reason you do not.
Thanks in advance for your feedback.
LindaAnn
Hi Maurizio, your new book arrived & I am jumping in head 1st into making bagels & going a bit rogue by using 75% fresh milled wheat & only 25% Central Milling strong white bread flour. I omitted the diaststic malt(not on purpose but keeping my fingers crossed) and I also did a lamination of powdered freeze dried blueberries w/ some fresh blueberries. It is now ‘bulking up’ in a warm place. I must say that the dough laminated beautifully, nice & strong and no signs of tearing.
Now, here is my question, to use baking soda in the boiling water or not to use it. I am curious as to the reason you do not.
Thanks in advance for your feedback.
LindaAnn
Wow, lots of changes there! I hope they turned out great for you, love the idea of fresh flour (and you wouldn’t need the malt with that much, too). I find they color just fine without baking soda or malt in the water, but you can use it if you’d like.
The bagels browned up beautifully. Using fresh blueberries was a messy challenge & I have since switched over to using rehydrated sun-dried blueberries along with the pulverized freeze dried for that extra punch of flavor. Thanks again for the base recipe to spring off of!
https://www.instagram.com/p/Cpu_qMUs6I4/?igshid=MzRlODBiNWFlZA==
These NY style bagels are incredible! As Maurizio states in his book, “rightfully chewy with a slightly crisp exterior.” One of the modifications I made was cold proofing for 14 hrs (vs. the called for 17 hrs). When boiled, I had no issues with the bagels floating; 40 seconds per side then topped immediately and put the first 6 in the oven. Kept the other 6 in the fridge until the first batch finished baking then started the process again. I also didn’t have lava rocks or a baking stone/steel so I just used a pan with wet towels and boiling water for steam, that seemed to work just fine. Did the first batch on convection (gauged temp with oven thermometer) at 450F for first 10 minutes, vented oven, rotated pan and noticed uneven browning due to my oven’s convection fan. Finished off another 10 mins at 425F convection. Next batch I baked 475F (no convection) 10 mins, vented and 450F (no convection). Second batch had more even browning so now I know the convection setting on my oven does not distribute the heat evenly and will not use that setting again. So I suggest testing your oven with only 1-2 bagels initially so that you can modify temp and time. Thank you Maurizio for this recipe, it’s a keeper and just what we were looking for in a bagel. The texture is incredible!
*no issues with the bagels sinking. They floated just fine.
Thank you so much, Linda! So happy you like these. Great modifications there. I find adjusting to suit your oven critical with bagels… So many factors there, sounds like you nailed them!
Hi! I love this recipe and it turned out great, but the kneading is labor intensive. Can I replace the kneading with a series of stretch and folds? Thanks!
I find for the best bagels, you need some kneading upfront…
In the 3 hour fermentation phase of my bagels. Is it to late to add blueberries? Thinking maybe rolling out dough as you would for cinnamon rolls and adding blueberries. Do you think that would work?
You could definitely do that!
Hey Maurizio! First off, thank you for all the work you’ve put into creating this website and information. Book is on its way! I’ve had some more time recently to experiment and practice with bagels and higher hydration breads. I have a question on the bagels. I’ve done it a few times now and each time the bagels sink in boiling. I kept everything the same the first couple tries and the third time I gave the bagels an extra 2 hrs proofing AFTER they had been in the fridge. Next i’m going to try a longer initial proof before the fridge. Still seems a bit strange that after even an extra 2 hrs of extra proofing they still sink. Any thoughts here? Does extending the initial proof before the fridge have a bigger impact? I’m also now using the Brod and Taylor proofing box to keep temps as consistent as possible. Have to get these right to start pairing with the homemade lox! Thank you!
You’re very welcome, Dan! Thanks so much for getting my cookbook, I hope you love it. Sorry for the delayed reply. Hmm. Is it possible you’re going too far with the proof and actually overproofing them? I have a hard time believing this might be the issue, but it’s very possible!!
Hey Maurizio! I used to follow you when I was on Instagram and I just got your wonderful book. I love the bagel formula with mostly Central Milling Beehive flour and some malted T70 for a slightly softer chew, all white bagel. I have a question for you that’s not formula specific but more about toppings. Whenever I coat bagels, it sticks well at first but a lot fall off when it’s time to cut/toast/eat, and then I feel like the topping (especially everything) gets kinda wet after bagels are stored overnight. Do you find this as well or am I doing something weird? How would you counteract it?
Hey Kat,
Former bagel-shop baker here, totally a normal problem! My advice, if you place the toppings in a bowl, and then put the bagel in there, give the bagel a gentle bump with your hand. This will press and ingrain the toppings into the bagel just enough so that they should stay on better. Hope this helps!
Thank you! This is the way I currently do it, but I find that after storing the bagels in a container the toppings get sort of wet for lack of a better description. Maybe just too many toppings?
Hello, Kat! Sorry for the delay, and yes, I remember us chatting a long while back! Yeah, I find the toppings fall of as well, I’m not sure what to do about that! Looks like some great suggestions from Jasper below, I’ll be trying myself 🙂
As for the wetness, I find that Everything Bagel topping does get wet, it’s almost like it draws moisture/hydration out of the dough as it sits… The salt perhaps?
Sorry I dont have any great answers for you! I hope all is well, it’s great to hear from you.
Hello! I love your site and your book. The bottom of my bagels burnt. Should I possibly skip the pizza stone? Also, Im curious to know what the purpose of the pizza stone is? Thank you!
Thanks, Marjon! Yes, remove the baking stone. In my oven, the stone really helps the bottom of the bagels color, which I struggle with. If the bottoms are doing fine in your oven, definitely get rid of the stone!
I’m trying to adapt this recipe to make larger bagels. (Family loves the taste, but prefers a higher inside to crust ratio to mimic our favorite local bagelry.) I made the same dough, shaped into eight 200 gram rounds. They seemed to need a bit of a longer proof, and were too soft with 40 sec boil so I increased to 60 sec after the first two. They were good, but a spread out/flat and the bottoms didn’t brown well. Am I on the right track? Any suggestions?
BTW, I found that a wash of equal parts water & egg white seems to hold toppings without much/any change in crust texture.
Great tips there, Laurie! More dough will definitely get you a taller bagel. You might also try proofing them a little less to see if you could encourage more rise. Either less time in the fridge, or better, less time resting before you put them into the fridge the day before.
Hello! I am a long time follower of yours and have preordered your cookbook and am counting down the days till arrival! I have recently began making these bagels, every weekend until I get it down perfectly is the goal. I follow the recipe right down to the FDT and each batch at the boil stage sinks to the bottom but then floats to the top at the first 40 second mark. Is this typical? Should the bagels float when first introduced into the water?
Hey there! By now you’ve probably received my book (hope you’re loving it!), sorry for the delayed reply. So for me, the dough floats immediately when I put it in the bath. It’s a good sign you’re seeing floating, it means there’s fermentation happening. But I’m wondering if your dough isn’t proofed enough? It should be light feeling and airy, not dense or tight (it will be a little tight from the fridge, but it should feel alive and airy).
Yes I received my cookbook and am loving it! I have made this bagel recipe every weekend but seem to have turned a corner for the worst. 😂 I had a couple of batches that I proofed longer but they sunk to the bottom and NEVER floated. The last batch I reset and followed the book and times exactly. The dough seemed better more airy and alive but the house was warmer and this time and I think they may have over proofed Because all but two remained sunk at the boiling stage. How does one determine if the Hangup is over proofing or under proofing? At which stage should I try and correct it, the Room temp proof or cold proof? Both?
Great Q’s. Yeah, sounds like they went too far in proof, cut back the bulk fermentation time a bit, especially if it’s warm. I like to adjust at that point instead of proofing, because the fridge will cool things down quite a bit and almost stop fermentation. You can also cut down any rest time the dough has after shaping them into rings, just put them right into the fridge.
That should help!
That’s fantastic, Andrew. I’ve not tried proofing these that long, now I know it’s possible 🙂
has anyone tried to recreate the sourdough bagel from courage bagels in LA? they are nothing like a conventional ny or even montreal bagel, though she refers to them as california montreal bagels. they are likely a much higher hydration 65%+. they have a shattering glassine crust. i have not been able to come close.
watching them in their window for awhile, i’ve come away with this… they are proofed in pillowy blobs in pizza dough trays. they are coated with lots of powder, presumably flour, but the glassine crust has me wondering if its some other starch ¯_(ツ)_/¯. the holes are not formed until just before boil. they are boiled but i failed to not how long. coated with their toppings and baked on parchment lined sheet trays in jusnky old standard restaurant issue convection ovens to just on the cusp of burnt.
if anyone has other clues, i’d love to hear.
http://www.instagram.com/courage_bagels
What are visual cues to end BF? Double in size?
I wouldn’t say double, maybe 30-40% increase in size.
What are some visual cues in ending BF? Double in size?
What are the visual cues in ending BF? Double in volume?
Hello!
I love all your recipes that I have tried so far.
Although, I’m struggling with the bagel recipe. When it is time for boiling in the water, the 2x I’ve made them they have sunk. Upon reading your post it means they are under proofed. When do I allow extra proofing? In the fridge or on the counter the day before?
To me they seem more dense but if they are under proofed that would make sense.
Thank you, Julie!
If you feel they’re under proofed, you could give them extra time on the counter before placing them into the fridge.
However, if they are puffed up really well going into the fridge and then very deflated the next morning, it’s possible they’ve gone too far.
Is it okay to skip the diastatic malt if I don’t have it? Is there another substitute?
Yes, you can!
Thank you!
Maurizio, many of my bagels came out flattened and I’m not sure what happened. During the overnight proof, they puffed up nicely but stuck together and to the sides of the baking sheet. As soon as I separated them, and moved them to the boiling water, they degassed. Some recovered in the oven, some didn’t. Next time, I’ll use two sheets to keep them separated at night, but it seemed even taking them off the pan with a metal spatula and putting them in the water degassed them. Any clue what went wrong? Was the dough perhaps too wet? It was dense, but not at the point of pasta dough where it takes some effort to fold and knead. Thank you so much!
Hey, John! Hmm, my guess is maybe they over proofed. I’d skip the rest time before the fridge, just pop them right into the fridge after shaping.
Thanks. That may be the problem – even at the end of the ferment the dough was very airy.
Hi Maurizio!
I want to try the Bagel recipe, Can you advice Are Distatic malt flour and extracts the same ?? In my country distatic flour is available but not the extract.
The syrup used in this recipe is non-diastatic, it’s only for flavor. The flour does have diastatic malt added, use your flour that has it!
In the steam oven post you use BOTH lava rocks and the pan with wet towels. The receipe appears to use only the lava rocks. Will this recipe work with just the lava rocks?
Yes, it’ll work with just one of the options!
Does the leaven need to pass the float test before making the dough? Excited to make these but I am a sourdough newbie and wasn’t sure if I should follow the 12 hour timeline with the leaven or just until it passes float test. Thank you
That is not a definitive test, but in this recipe it will!
Just made pumpernickel test batch #2. And YAY! Definitely made good progress. Increased molasses and caraway seeds to about 1/4 cup. Left out cocoa powder so they are not as brown as I’d like. Will add it back next time but maybe less than 1 T. as that aded bitterness. Had to add some flour because the dough was too soft. I didn’t have the full starter amount so increased the proofing time by a lot (which I have to do anyways with Maurizios recipes). Took them out of the fridge about 2 1/2 hours before boiling. (Layered two baking sheets under the bagels, the bottom one insulated, and put a sheet of aluminum foil over them lightly (not crimped down, baked at 400º with fan, left water in, for 20 min. Result a shiny chewy crust but not too thick, soft interior, sweeter flavor. Next time: 1-2 t. cocoa powder, onion powder, more specific measuring 🙂 Shaping needs some work! https://drive.google.com/file/d/1LMt4F1_XEVDWRk8v-T0rXHQe5CFAcKvl/view?usp=sharing
So glad it turned out well for you, Kim!
Just baked my first pumpernickel test batch. Baked a half recipe. 1/3 rye flour which includes 1 T. cocoa powder. Added to the recipe: 1 T. molasses, about 1 T. caraway seeds. Decreased the barley malt syrup to about 1/2 t. This yield a very stiff dough so I made sure to give it plenty of time to do its thing. The color is great. the flavor…lacking. Next time will increase caraway seeds and molasses, and add some dehydrated onion powder. The crust is a little too crispy which detracts from the flavor so I’ll take steps to stop that from happening. Otherwise, happy with the result!
Hi Maurizio,
Just wanted to ask for a clarification on your sourdough bagel recipe. The preparation of the levain calls for 23 grams of ripe sourdough stater which you say is 100% hydration and 40% rye flour and 60% white flour. My primary starter has no rye flour in it. Should I feed it 1-2 times with the 40/60 ratio to establish this?
No, just use whatever starter you maintain!
Hi Maurizio,
Wondering if you could please clarify something about the Sourdough Bagel Recipe. In the preparation of the Levain, the recipe calls for 23 grams of ripe sourdough starter. In the total formula section , you have listed the 23 grams of sourdough starter which is 100% hydration and 40% rye and 60% white flour. Should I make an offshoot of my starter a day or two before that is this 40/60 rye to white ? The starter I have is 100% white and 100% hydration.