

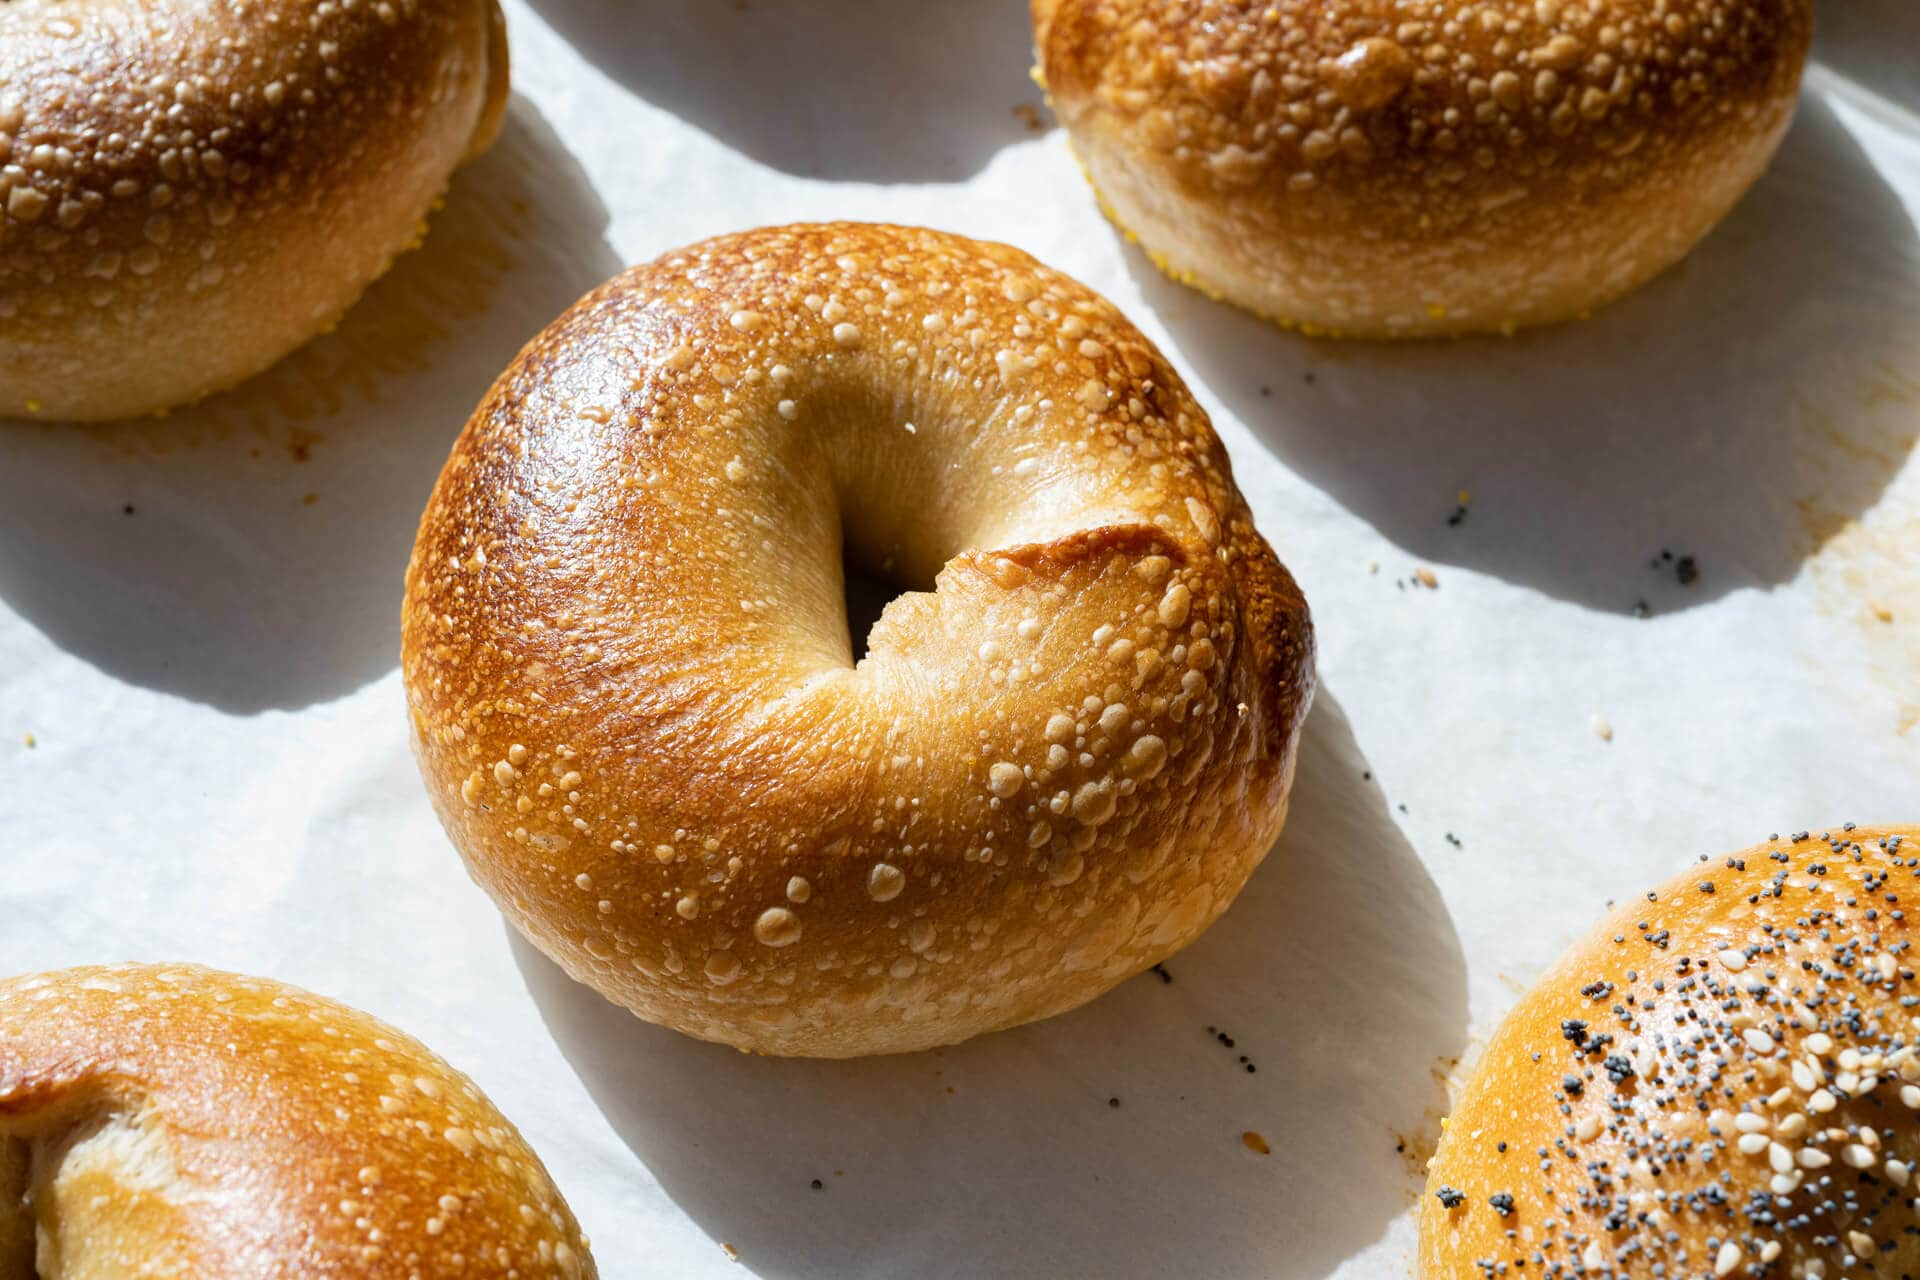
I try not to talk about bagels with friends. Talking about them always starts innocently, a little witty banter about the crust, crumb, and color traits and past eating experiences: “that bagel I had in New York that one time,” or “there was this one bagel shop down the street…” This jovial chat slowly evolves into a friendly argument about more-sweet versus more-savory and crunchy versus soft; maybe one even mentions steaming the bagel instead of baking it (😱).
Finally, the once innocuous chatter results in the participants either forming a stronger friendship over common bagel zealotry or the unfortunate end to the friendship altogether. It’s like the old axiom: never play Risk with a friend you want to keep. Exaggeration? Perhaps. But bagels do seem to rouse an enthusiasm rarely seen with other food (I’d argue pizza might be a solid contender, though). They carry a different meaning depending on where you’ve grown up, what local shops were in the area, and ultimately, where your preferences lie. But these sourdough bagels seem to transcend almost every bagel I’ve had, especially the mass-produced ones—oh yes, definitely those.
While these bagels are more along the New York Bagel style, I’m also a fan of the newer wave bagels with a super thin, glossy, and crispy crust. In fact, I have a recipe for those glossy bagels, too, if that’s more your thing.
I recall occasionally eating those bagels from the bag at the market: that ultra-chewy (from end to end) vehicle was mostly there to convey cream cheese, or schmear, from package to mouth. Rest assured, these sourdough bagels are not that in the slightest. They have a very thin and crisp exterior, not tough or hard, but rather, a little crunch that gives the chewy bagel a textural counterpoint. You see, the interior is as chewy as you’d expect a bagel, but if the entire thing is chewy, you end up with just a big chewy thing. But if you have a contrasting texture, it seems to amplify the chewy thing, much like adding an acid elaborates other flavors.
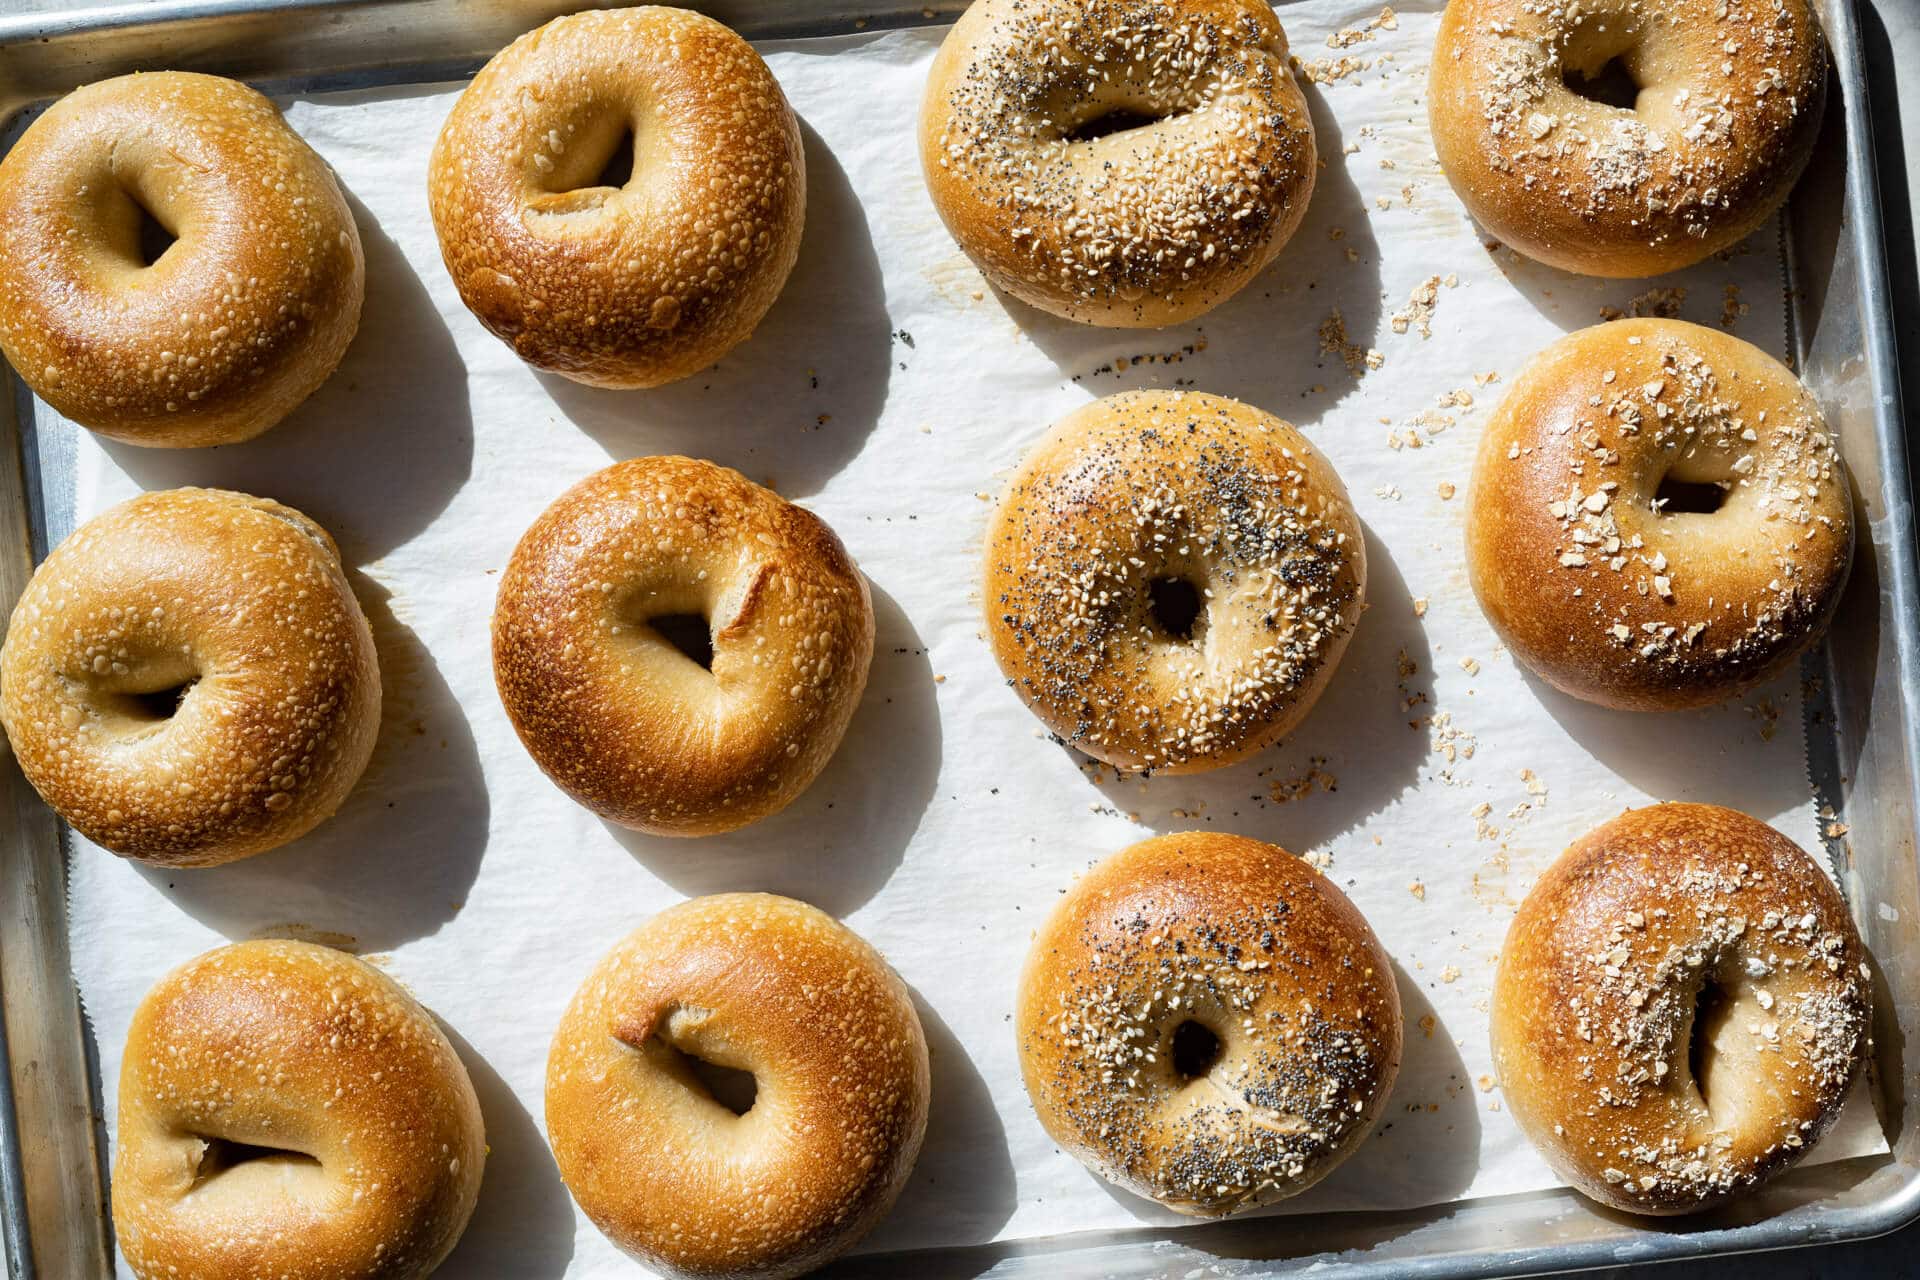
And overall, these bagels are pretty darn easygoing. Unlike bread dough, there’s no need to be overly critical of each motion when shaping, and in the end, the bagel rings puff up uniformly, boil beautifully, and bake easily. Speaking of the boil, perhaps one of the things that keep many from making them, but it’s such a simple thing. And while I often draw parallels between this dough and my sourdough pretzel—mostly in that they each have a stiff dough and a pre-bake step—there’s far less prep before baking bagels than pretzel—not that those sourdough pretzels aren’t worth the effort, because they certainly are.
First, let’s look at some tools I use when making these sourdough bagels.
Tools and Ingredients
First, a few of the tools and ingredients I use for this recipe
- Barley malt syrup – this is the classic sweetener added to a bagel dough and it has a very unique flavor and aroma. I like the Eden brand, but any should work well.
- Diastatic malt powder – see the post on diastatic vs. nondiastatic malt and why it’s used in baking.
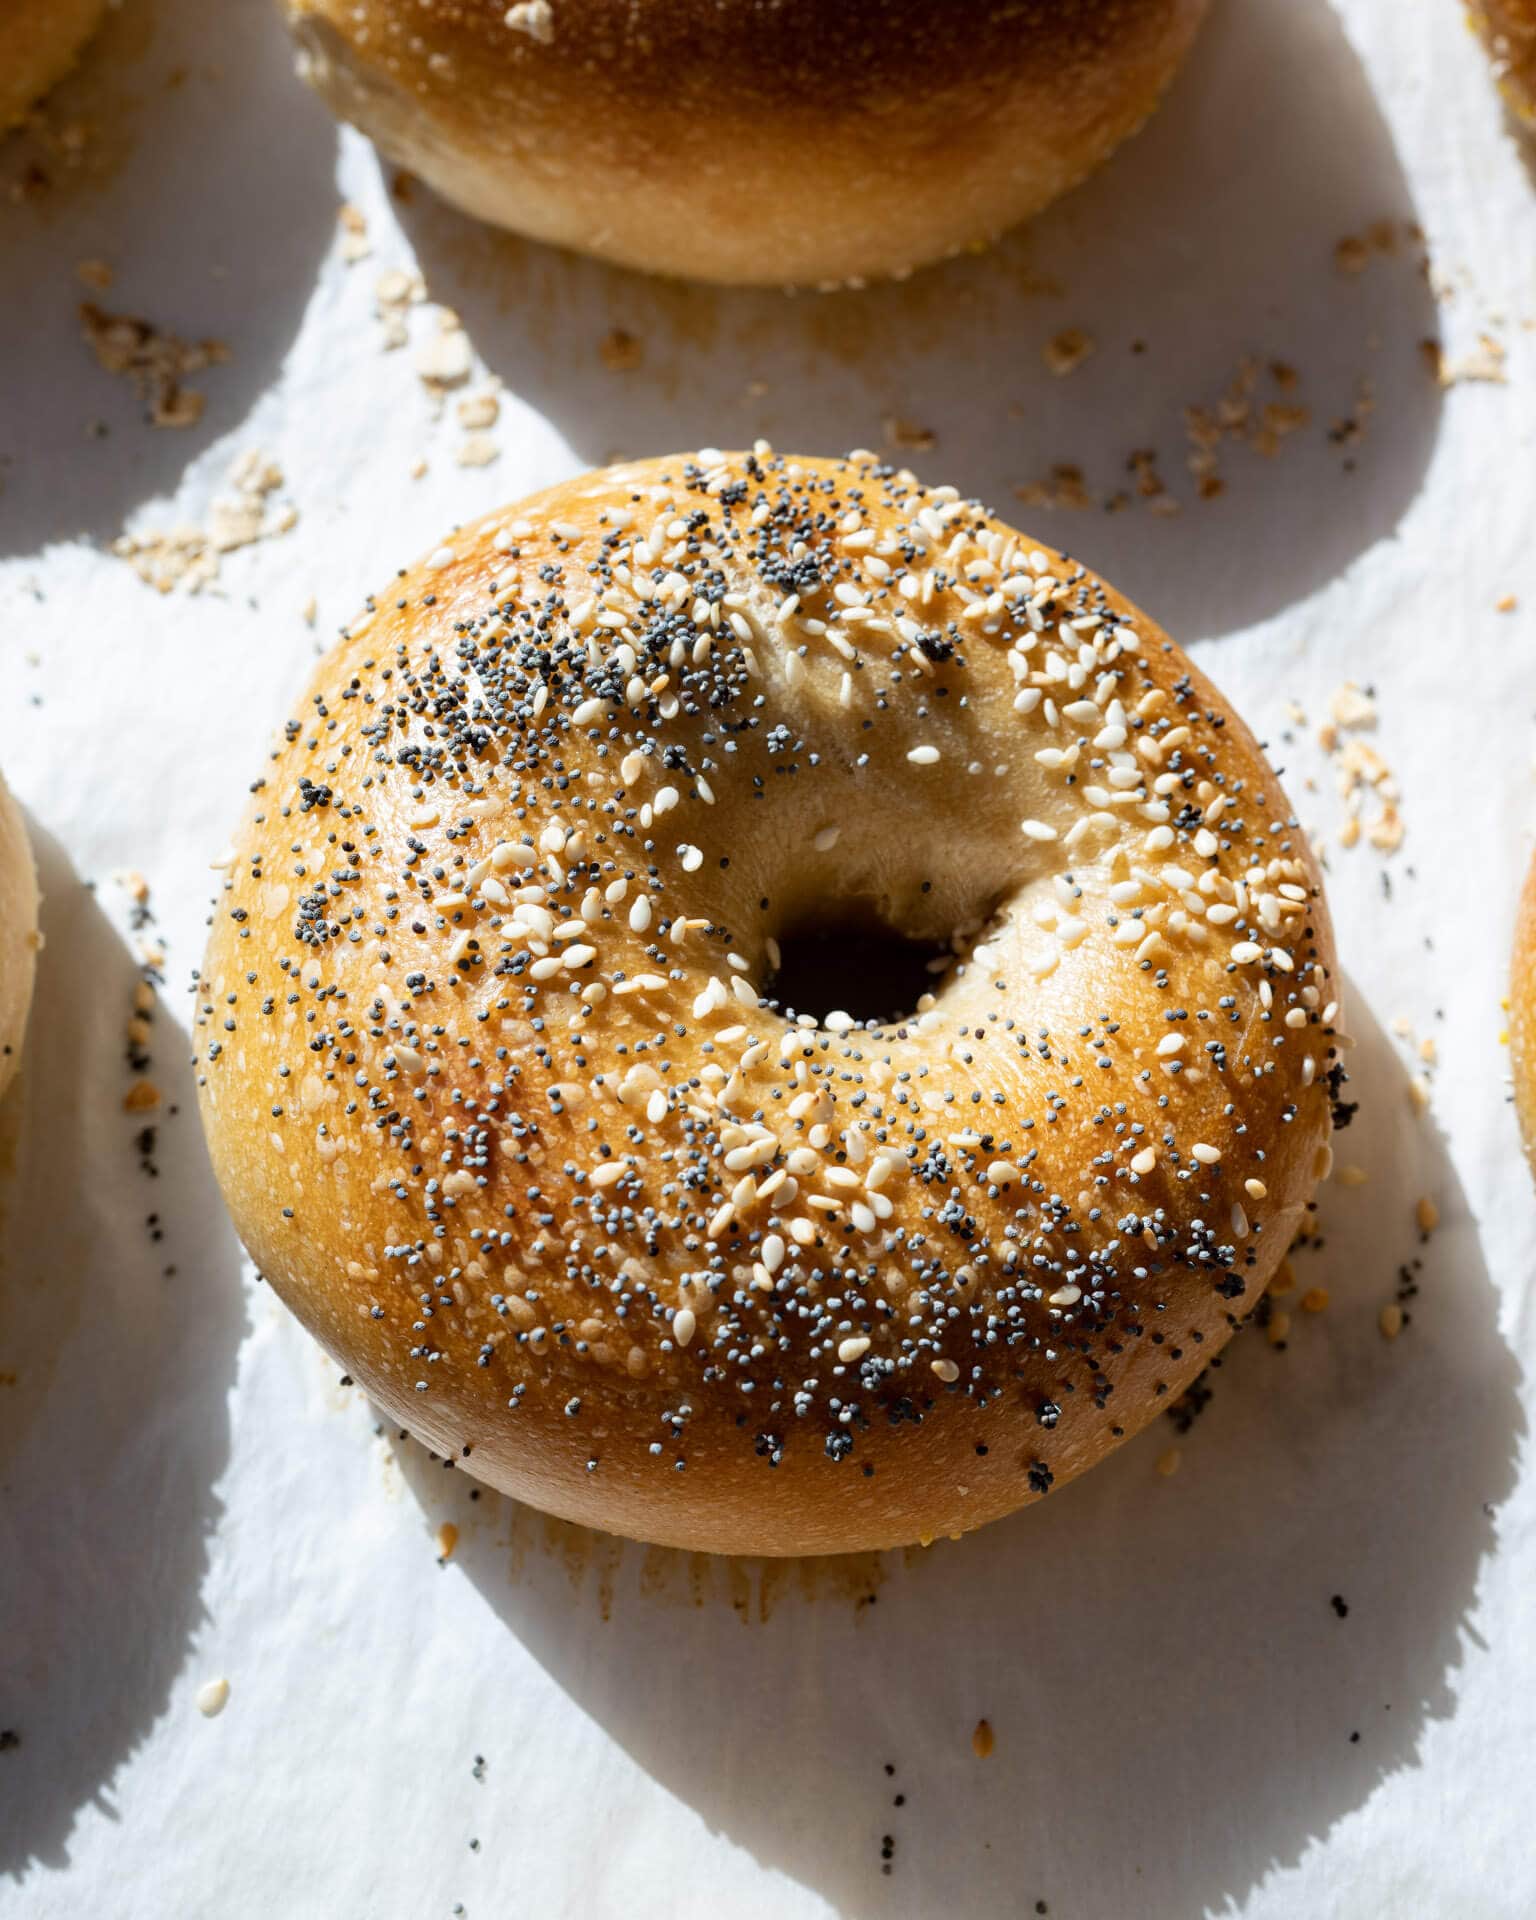
- Everything bagel topping – I love this mix of seeds and dried spices for topping bagels.
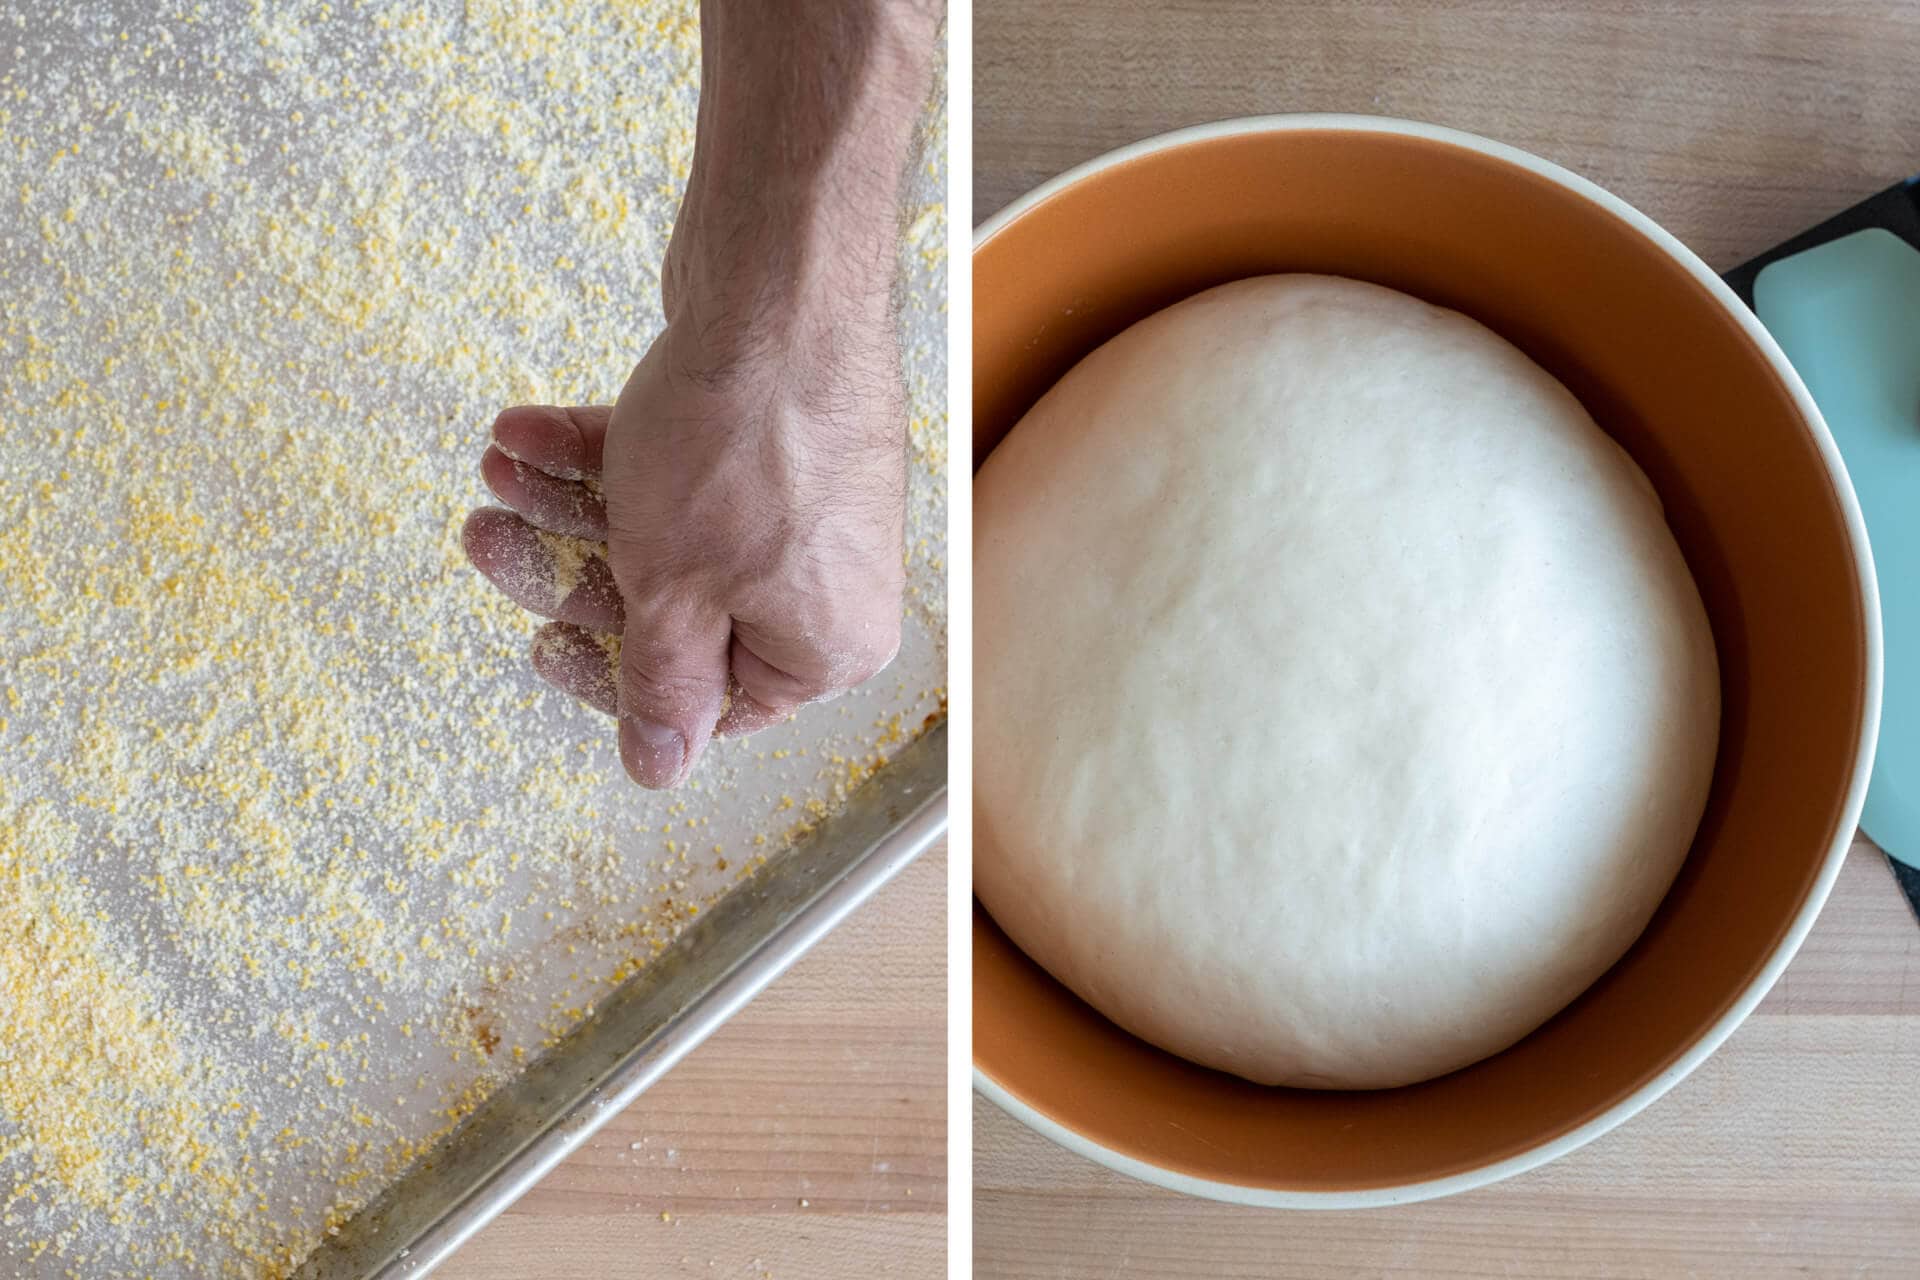
- Cornmeal – traditionally used to keep the bagels from sticking to the baking sheet during proofing (and they add extra starch to the boiling water).
- Half baking sheet – I use this to proof all 12 dough pieces to save space in a home refrigerator.
- Full baking sheet – perfect for baking all 12 bagels, with room in between, on a single baking sheet for even baking.
Flour Selection
Many bagel recipes, mine included, call for high-protein white flour to get that characteristic chew and structure.
I’ve tried this with Tony Gemignani’s Pizza Flour (15% protein), and while there was a bit more chew, I wouldn’t say it was necessary to order some for making sourdough bagels. I like to use Central Milling High Mountain, King Arthur Bread Flour, or Bob’s Red Mill Bread Flour.
Baking Schedule

These sourdough bagels take three days to make: from creating the levain at night on day one to boiling and baking them in the morning on day three. I know—three days!?—but the good news is, most of the time you’re not actively handling the dough, it’s fermenting in one stage or another.
All-in-all, this is a straightforward schedule. It’s also quite flexible by a few hours here and there once the dough is chilled and in the fridge: if you can’t boil and bake first thing on day three, it’ll hold a few more hours (or perhaps longer).
Sourdough Bagel Formula
For tips on how to calculate baker’s percentages or how to modify this formula, see my post on baker’s percentages (baker’s math).
| Total Dough Weight | 1,600 grams |
| Pre-fermented Flour | 12.00% |
| Yield | 12 x 125g bagels |
Total Formula
Desired dough temperature: 78°F (25°C). See my post on the importance of dough temperature for more information on dough temperatures.
| Weight | Ingredient | Baker’s Percentage |
|---|---|---|
| 964g | High-protein white flour (~13% protein, Central Milling High Mountain, King Arthur Flour Bread flour, or Bob’s Red Mill Bread Flour) | 100.00% |
| 530g | Water | 55.00% |
| 29g | Sugar, caster | 3.00% |
| 29g | Barley malt syrup | 3.00% |
| 18g | Salt | 1.90% |
| 7g | Diastatic malt | 0.75% |
| 23g | Sourdough starter (100% hydration; 40% rye, 60% white flour) | 2.40% |
Sourdough Bagel Method
1. Prepare Levain – Night before mixing, 9:30 p.m. (Day one)
Mix the following ingredients together in a container and leave covered to ripen for 12 hours overnight. It mixes up to a stiff consistency so I like to mix and knead the dough in a mixing bowl, then I transfer to a narrow and tall jar.
Try to hit a final dough temperature of 78°F (25°C) for this levain.
| Weight | Ingredient | Baker’s Percentage |
|---|---|---|
| 116g | High protein flour | 100.00% |
| 58g | Water | 50.00% |
| 23g | Ripe sourdough starter | 20.00% |
23.18% Levain In Final Dough Mix.
2. Mix – 9:30 a.m. (Day two)
A note on mechanical mixing: This dough is low hydration and comprised of high protein flour—it’s a firm dough! I used my Haussler Alpha mixer to mix this for 5 minutes on speed one. You could use a KitchenAid stand mixer to mix this dough for a few minutes in the beginning, but I wouldn’t push it too far and risk damaging the mixer—ultimately you make the call. After mixing in the KitchenAid, you could then turn the dough out to the counter to finish kneading like pasta dough, as described below.
| Weight | Ingredient |
|---|---|
| 848g | High protein flour |
| 472g | Water |
| 29g | Sugar, caster |
| 29g | Barley malt syrup |
| 18g | Salt |
| 7g | Diastatic malt |
| 197g | Levain (see Prepare Levain, above) |
Make the malt syrup slurry: This will help the sticky, viscous barley malt syrup incorporate more easily into the dough. To a small mixing bowl, add a bit of the mixing water, barley malt syrup, sugar, diastatic malt powder, and salt. Stir until everything dissolves.
To your mixing bowl, add the malt syrup slurry, flour, water, and ripe levain. If using a mechanical mixer (see the note, above), mix on low speed for approximately 5 minutes until the dough strengthens and begins to smooth. This dough is so firm it doesn’t need much.
If you do choose to use a mechanical mixer, you might need to cool the mixing water to ensure you hit the FDT of 78°F (25°C). I used cold water straight from my fridge.
If mixing by hand, mix everything in the bowl until well incorporated. Turn the dough out to a clean work surface and knead the dough like pasta: fold half over onto itself and push the mass away from you with the palm of your hand. Continue folding over and pushing away for 8-10 minutes until the dough firms up, and it becomes hard to knead any further.
Transfer your dough to a bulk fermentation container and cover.
3. Bulk Fermentation – 9:45 a.m. to 12:45 p.m.
Give this dough a single fold after 1 hour and 30 minutes into bulk fermentation. For the fold, turn the dough out to a clean work surface and do your best to fold it into thirds. Place the dough back into the bulk fermentation container with its seam side down, and cover. Let the dough rest, covered, for the remainder of bulk fermentation.
4. Divide and Shape – 12:45 p.m.
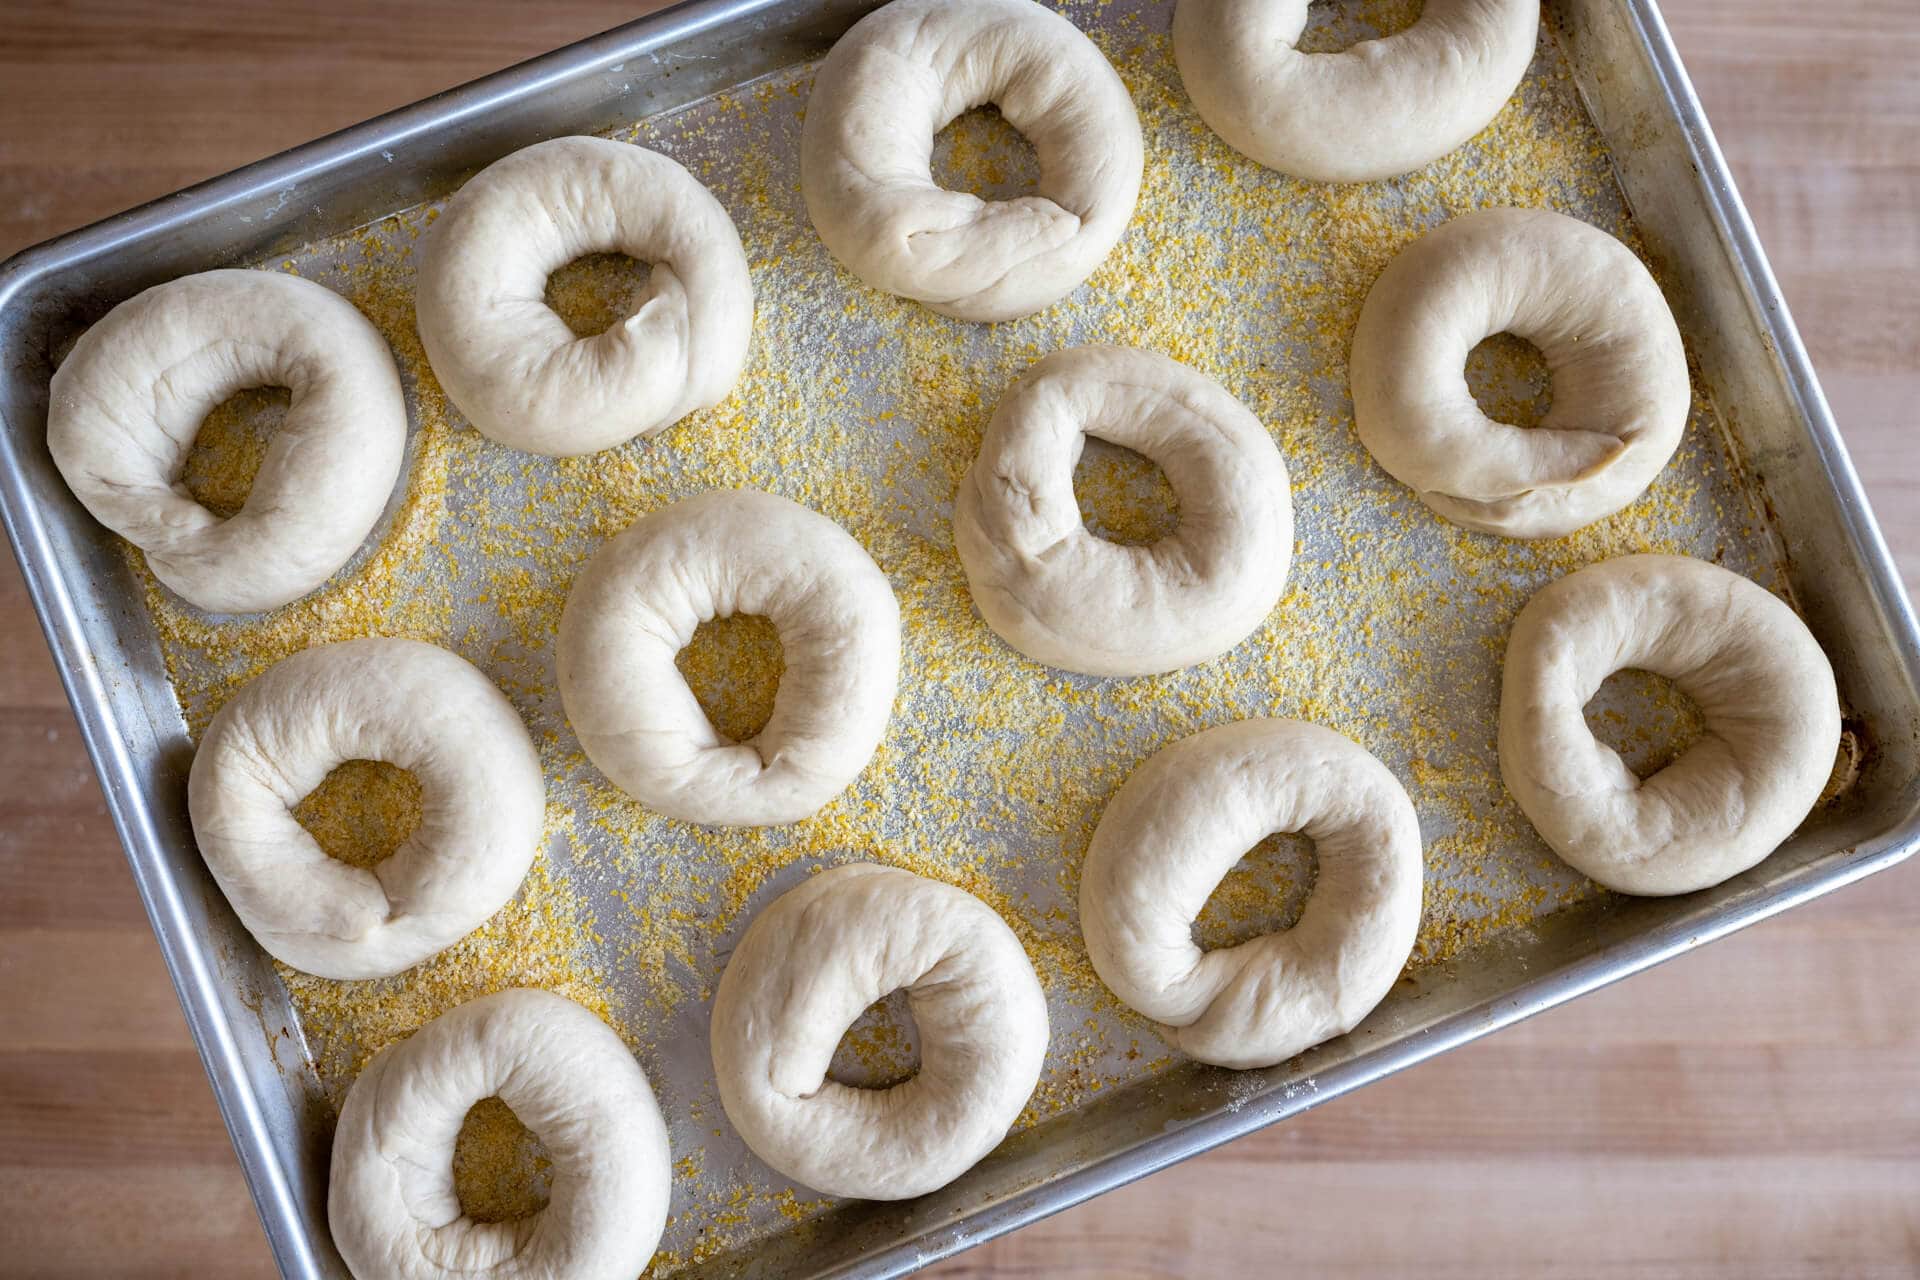
Use a half baking sheet (so it fits into your refrigerator) to hold the 12 pieces of shaped dough. Later, after boiling the dough, I upsize to a full baking sheet to help the dough evenly bake. Spread a thin layer of cornmeal on the half sheet to prevent the bagel dough from sticking during proofing.
Divide the dough into twelve 125g pieces.
First, degas the piece by tamping down a bit with your hand. Then, do your best to form the piece into a rough rectangle and cinch down from the top, so the dough ends up in a little tube. This cinching doesn’t have to be forceful, and it helps to get the dough into a tube shape.
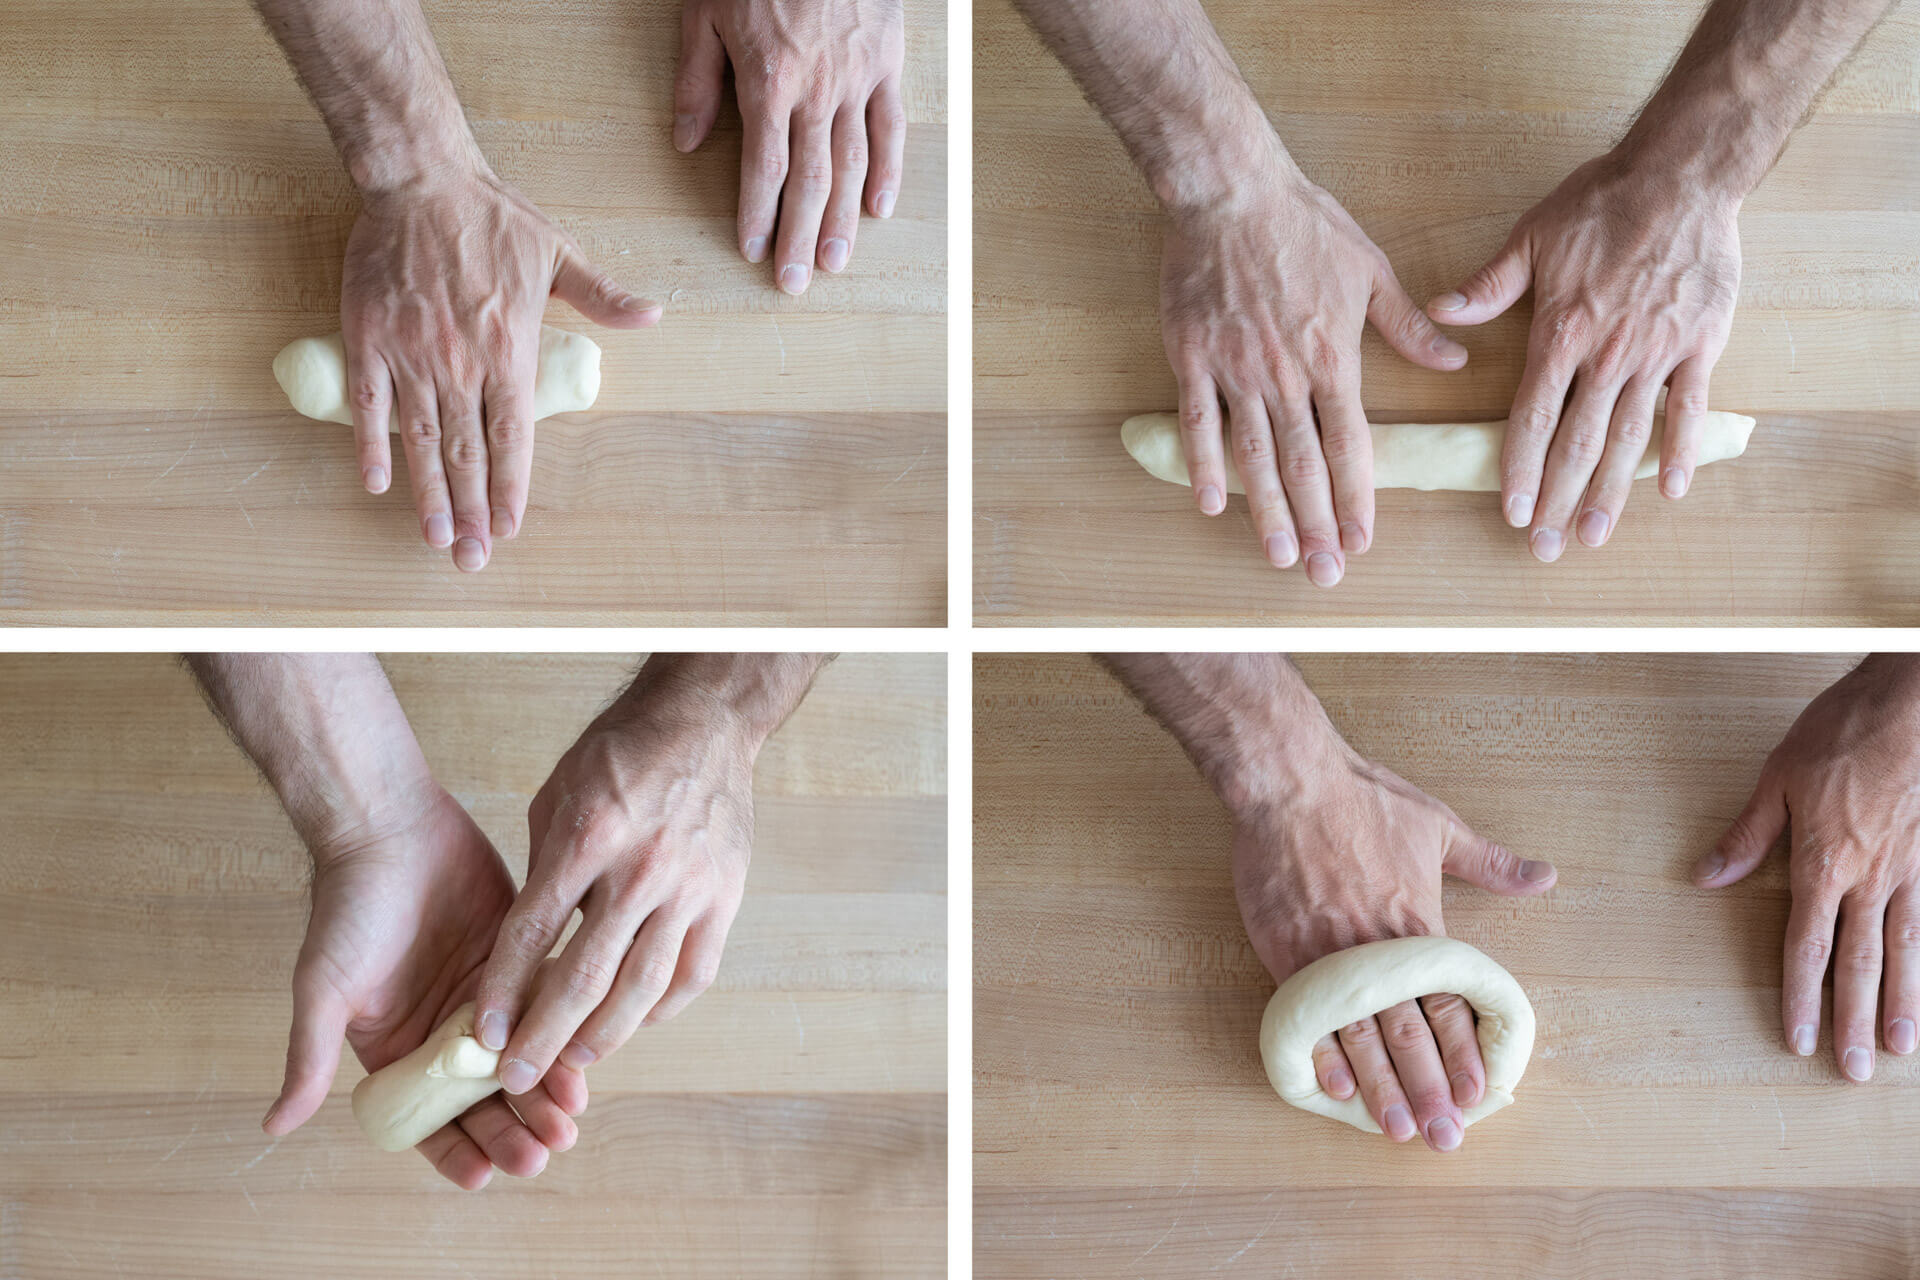
Next, roll your hand in the center a few times to create a bulb at each end. Then, switch to two hands and roll outward to about 12 inches and a tube that’s mostly the same thickness all the way through. If you prefer a bagel with a large hole, roll out the tube, so it’s longer.
Once rolled out to a long tube, wrap it around the backside of your hand between your knuckles and wrist. Overlap the two ends of the dough in the palm of your hand, and gently press the two ends together. Next, press your palm down on the work surface, and in a repetitive motion, roll the dough on the work surface repeatedly to seal.
Here’s a video on my YouTube channel of me shaping one of the pieces
After shaping a piece, transfer it to the cornmeal-dusted baking sheet. Repeat for the remaining pieces, and you will end up with four rows of three.
5. Proof – 1:00 p.m. 3:00 p.m. (2 hours room temperature, then retard overnight)
Cover the baking sheet with a large, reusable plastic bag and seal shut. Let the dough proof at room temperature, around 72-74°F (22-23°C), for 2 hours. The dough should puff up slightly after this time but not excessively. If the dough still feels very dense to the touch, give it another 15-30 minutes and check again.
After 2 hours, place the covered baking sheet into the fridge overnight at around 39°F (4°C).
6. Boil and Top – 9:30 a.m. (Day three)
Oven prep: Before you begin boiling your bagel dough, preheat your oven to 475°F (245°C) with convection or 500°F (260°C) without convection. Place one rack at the bottom third of the oven. Place a baking stone or baking steel on the rack to preheat. I steam my oven as described on my oven steaming method post, so place a roasting pan on the bottom filled with lava rocks to prepare to steam. I also fill a cup of ice and place it next to my oven (I will pour this over the lava rocks to steam the oven).
Bagels are unique because you boil the dough before baking. This boiling gelatinizes the starches in the flour and gives them a little more chew and helps them achieve a shiny crust. This gelatinization is very similar to how you make a tangzhong or roux. But for a bagel, the longer you boil them, the thicker the crust and chewier they will become. There is a limit to the boil duration, though, as they will degrade in the water after a while. I have found boiling the dough 40 seconds on each side, for a total of 1 minute and 20 seconds, to be just right.
Many places like to add barley malt syrup or honey to the boiling water, but in side-by-side testing I didn’t find the added syrup to give them any more shine. The cornmeal brought into the boiling water might also add starches, much like when making pasta.
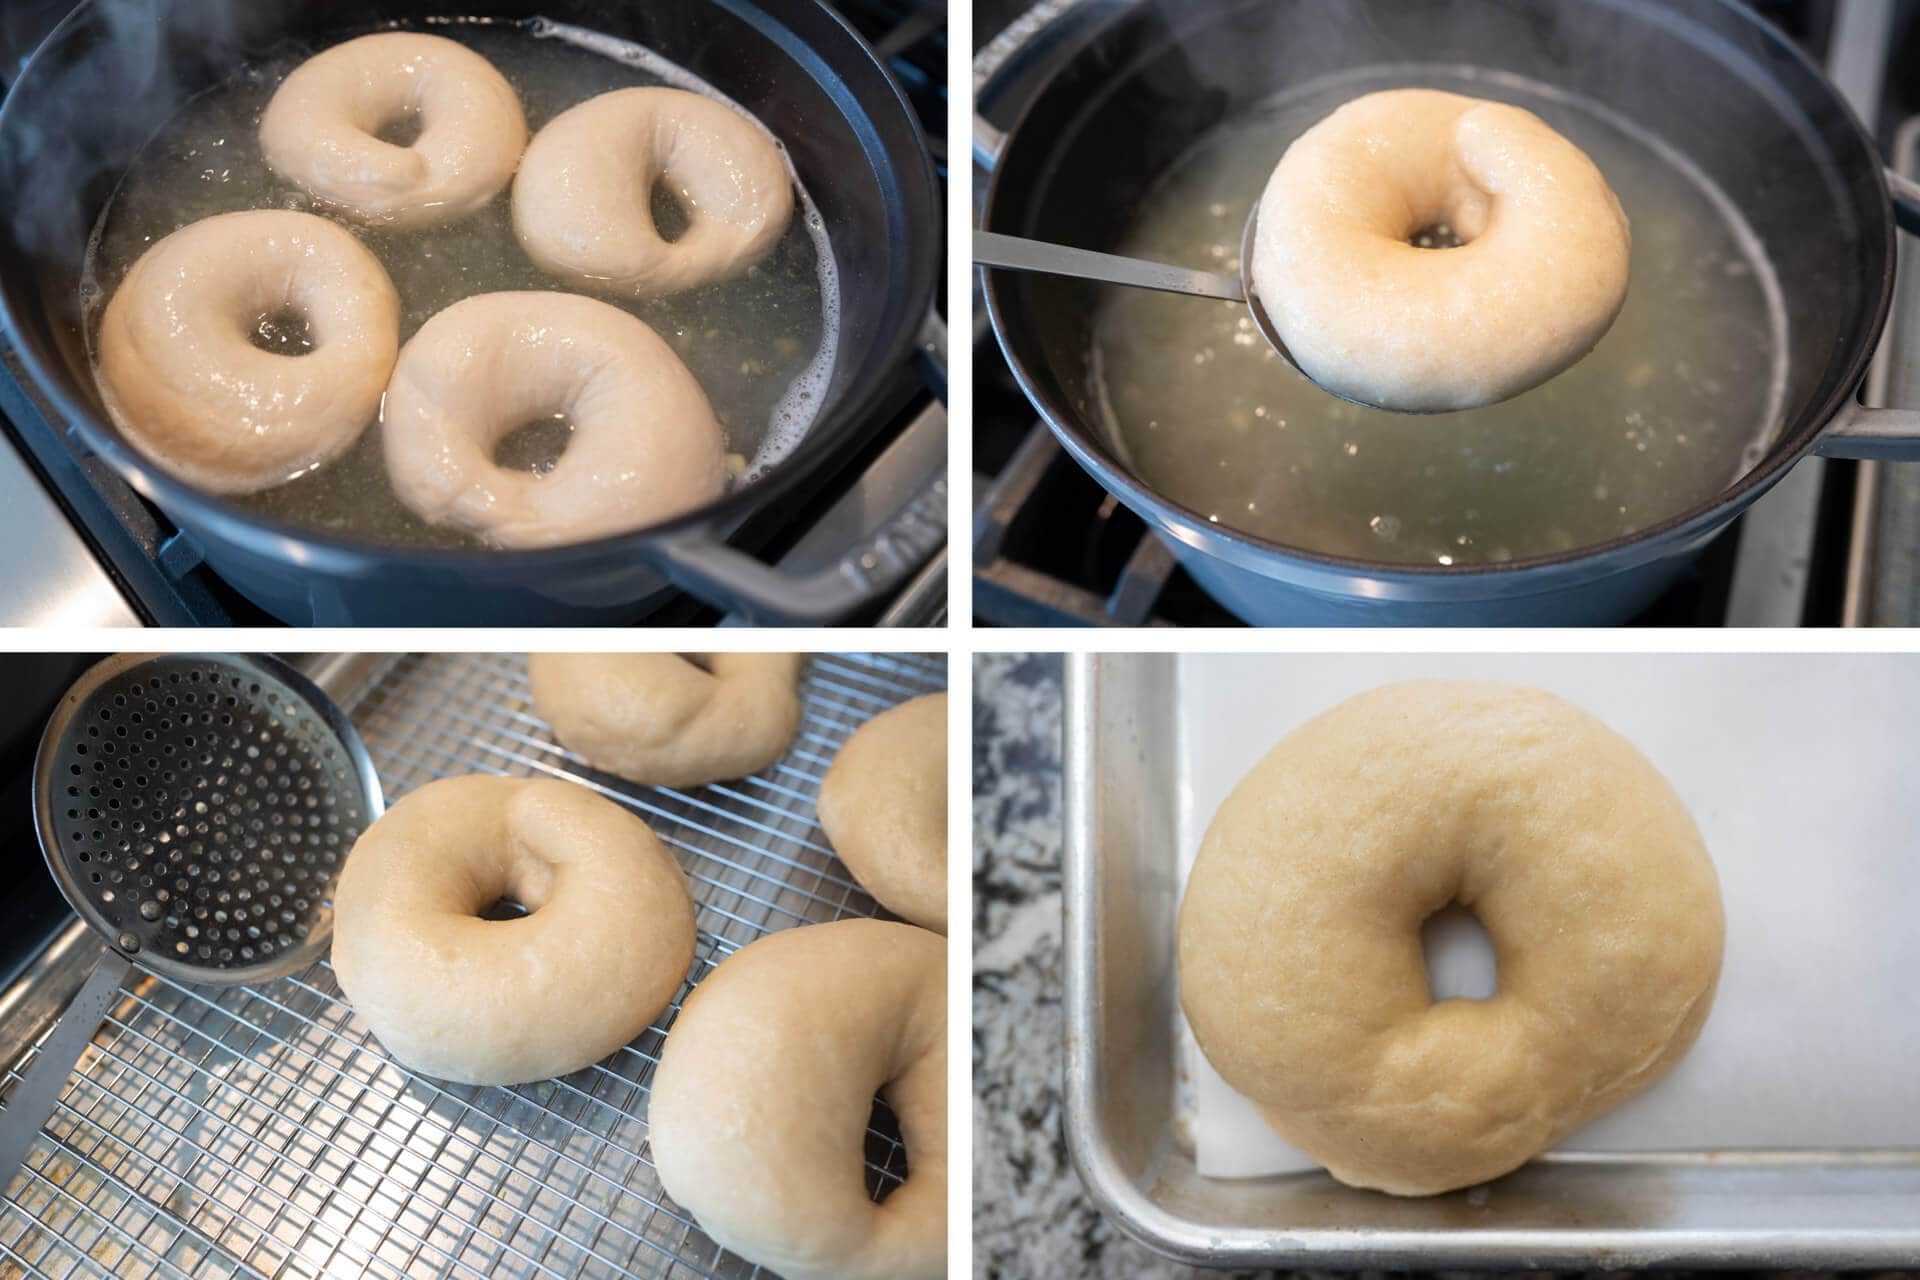
Boiling equipment prep: Fill a wide pot with enough water so the bagel dough can float without touching the bottom (in my 7qt Staub Dutch oven, this was about 1.5 gallons). Bring to a low boil. Next to your stovetop, place a half baking sheet with a cooling rack inside, this will hold the wet bagels for a minute and allow them to drain. Next, line a full baking sheet with parchment paper — this will hold the dough as it bakes. Finally, grab any toppings you’d like (poppy, oat, everything bagel mix, sesame, etc.) and place them in bowls on your work surface.
Boil: Once the water is at a low boil, boil the proofed sourdough bagel dough straight from the fridge, about 40 seconds per side. Using a spider strainer, transfer each piece to the cooling rack inside the baking sheet to drain while you boil the rest of the dough.
Once the pieces are all boiled, move quickly to top them, if desired, and get them onto the final baking sheet.
This dough should float immediately when dropped into the boiling water. If the dough sinks and doesn’t pop up within a few seconds, it’s likely under proofed. Give it more time to proof at warm temperature and try again.
Once the bagels have drained for a minute on the baking rack, transfer them to the full baking sheet lined with parchment paper for baking. Top them with whatever toppings you’d like at this time.
7. Bake – 9:45 a.m.
Slide the full baking sheet with boiled dough into the preheated oven directly onto the baking stone or baking steel. Pour the cup of ice onto the pan with lava rocks and quickly close the oven.
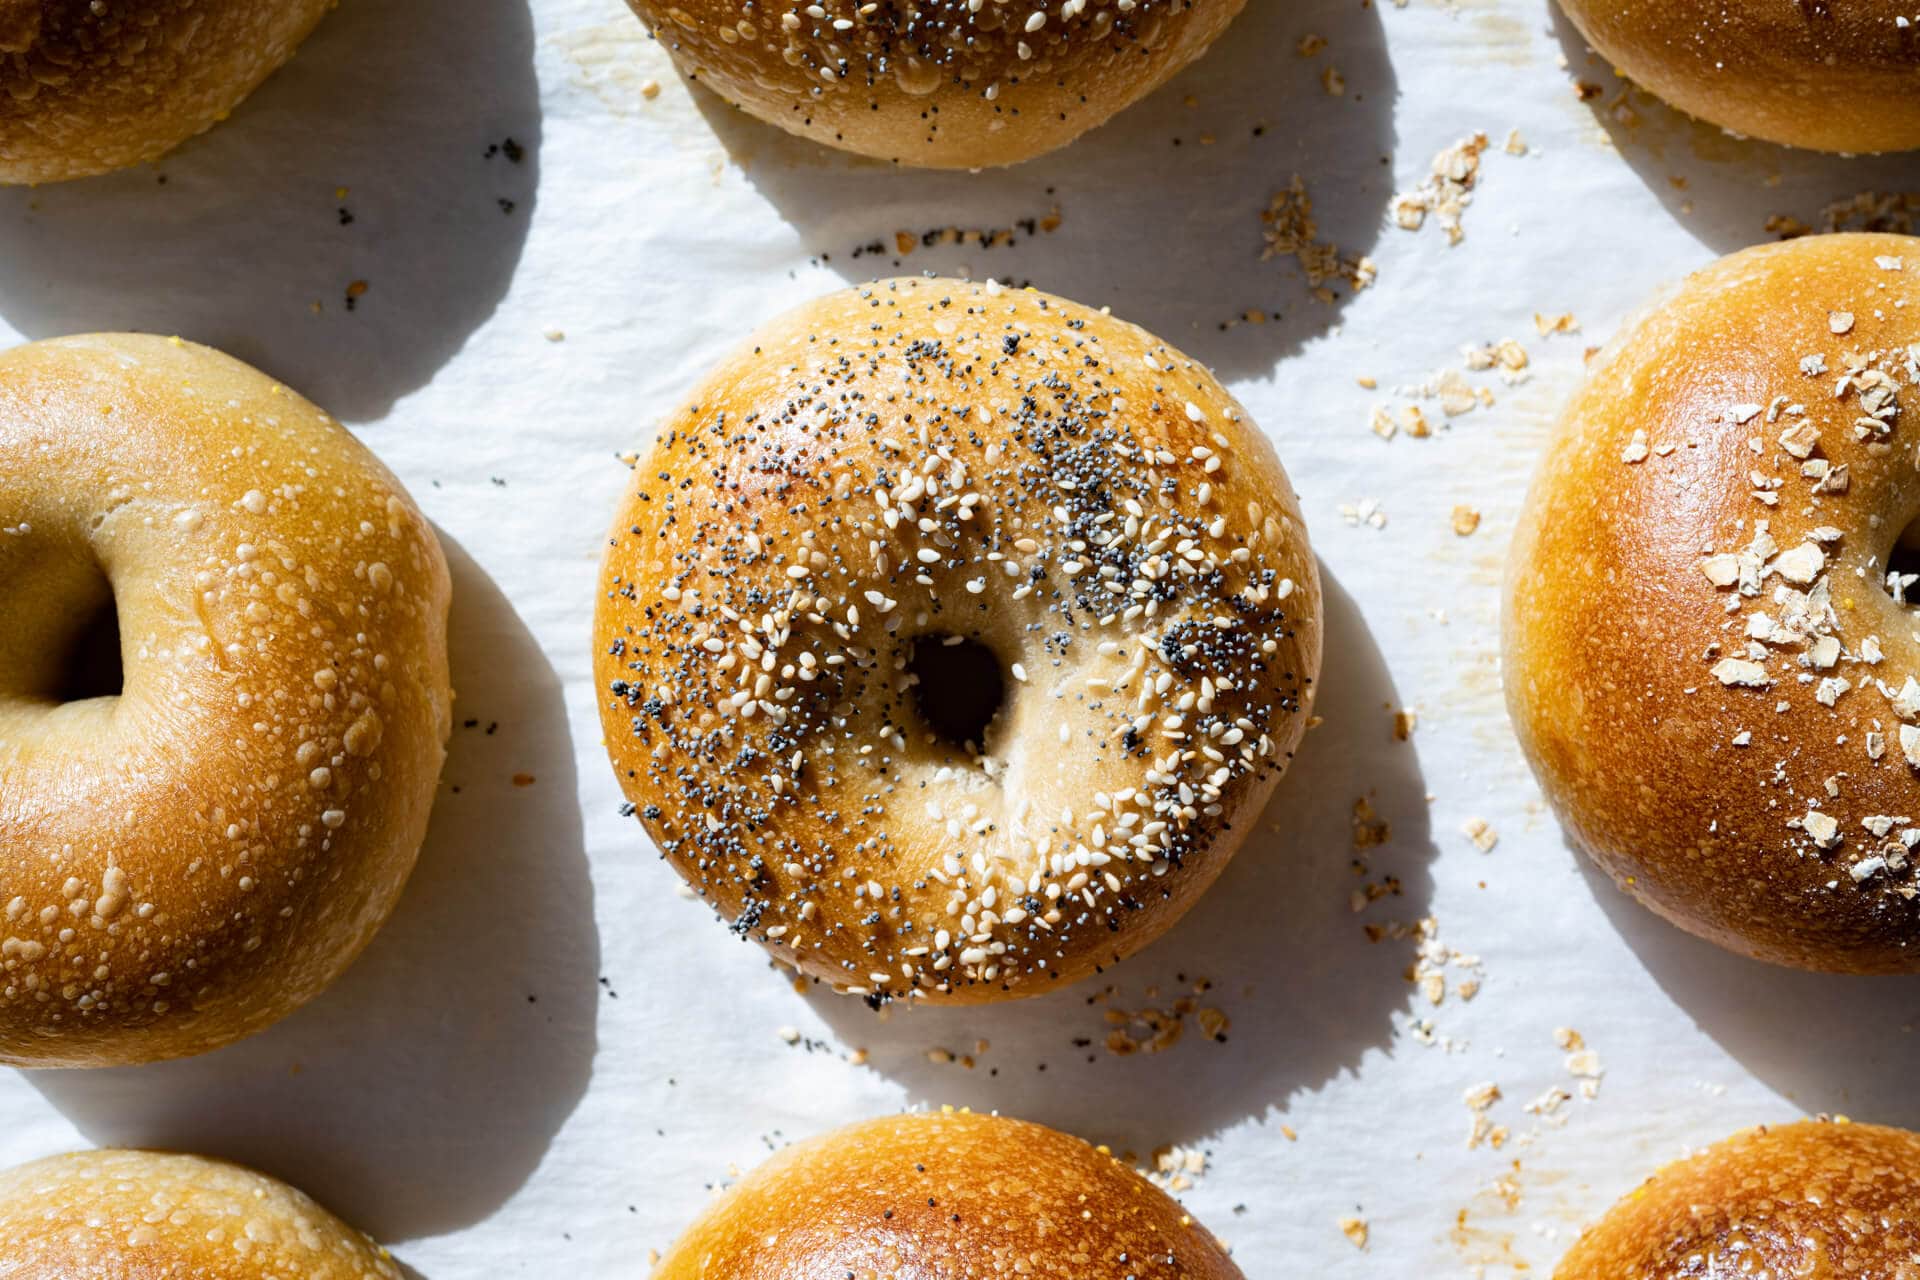
Bake at 475°F (245°C) convection (500°F (260°C) without convection) for 10 minutes with steam. After 10 minutes, vent the oven and remove the steaming pan, rotate the baking sheet 180°, and bake for 5 minutes longer. After this 5 minutes, turn the oven down to 450°F (235°C) and bake for 5 minutes longer for a total of 20 minutes. Remove the sheet when the bagels are nicely colored.
Let cool 15-20 minutes on a wire rack. These are fantastic the first day they’re baked and hold well for a few days after that in a bread box. I also like to wait till they are room temperature, slice in half, and then freeze in a freezer bag. They can be reheated in the toaster, as described in my post on how to store bread.
Conclusion
When you take a bite of these bagels, you’ll first discover a fleeting crispness that gives in to chewiness, a textural dance that eventually leads to a subtle, onset of sourness. This mellow tang creeps in and propels you to keep going with it, to keep taking bite after bite until you’ve finished the entire bagel without the thought of stopping.
The entire eating experience is scary in how it takes over, and it’s exactly what I want in a bagel.
The whole eating experience is scary in how it takes over, and it’s exactly what I want in a bagel. That pop of flavor at the end of the bite is not something you find in mass-produced bagels, and I just love it. And while there are sugar and barley malt syrup added to the dough, it does not carry through to make these bagels sweet. There’s a beautiful balance in the eating experience of these sourdough bagels.
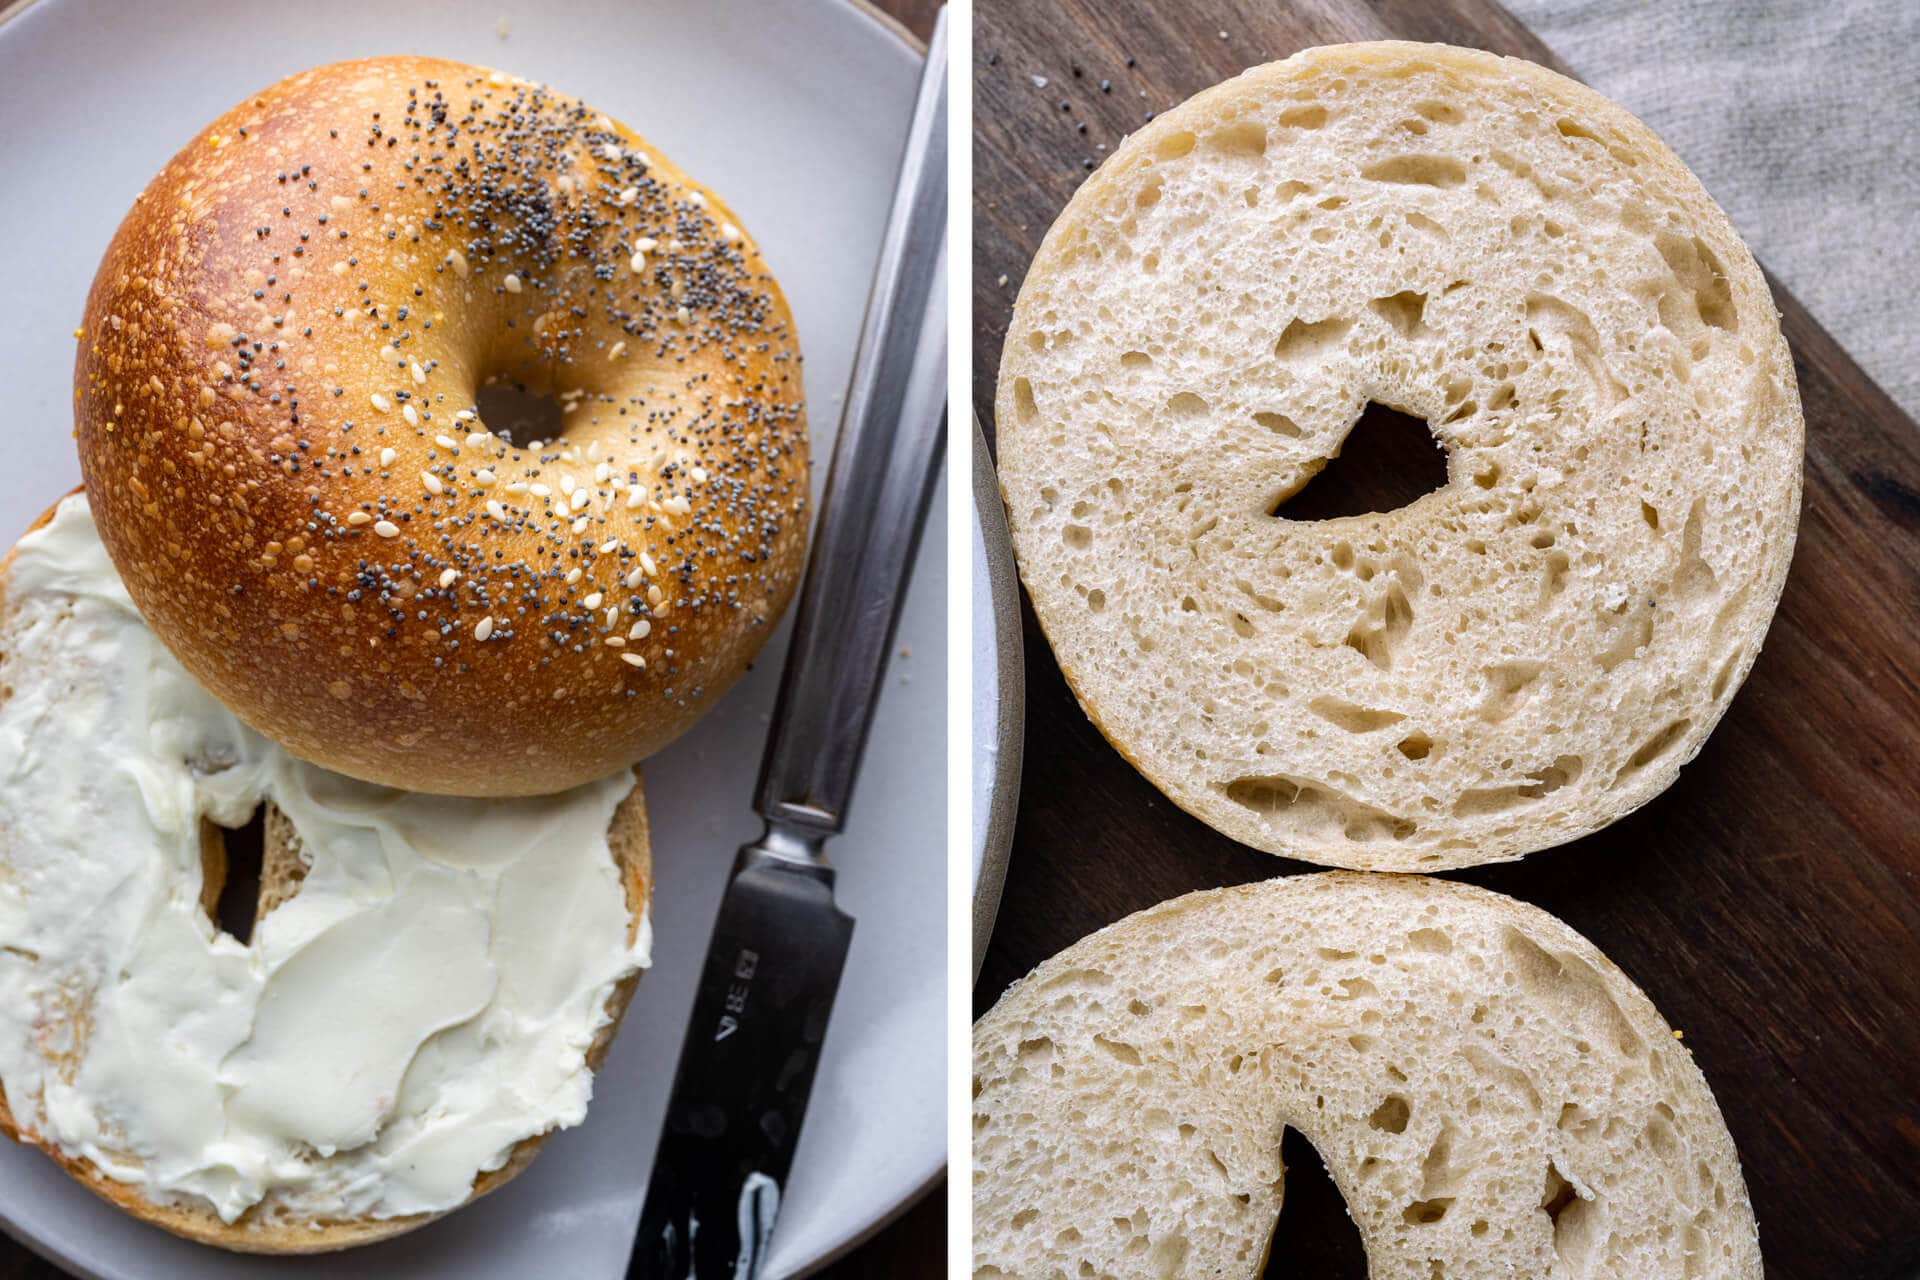
After making these bagels the first time, you’ll get the hang of the process. Subsequent batches become easier and more natural, and it’s no stretch to think these could become a weekly staple—and they freeze incredibly well (I slice them in half and place them in a freezer bag) if, by chance, there’s any left.
Print
Sourdough Bagel
- Prep Time: 24 hours
- Total Time: 24 hours
- Yield: 12 bagels
Description
My recipe for flavorful and chewy sourdough bagels with a thin and slightly crispy crust. Delicious topped with an everything bagel mix, coarse sea salt, oats, seeds, or anything else you can dream up!
Ingredients
Levain
- 116g high protein flour
- 58g water
- 23g sourdough starter, ripe
Main Dough
- 848g high protein flour
- 472g water
- 29g sugar, caster
- 29g barley malt syrup
- 18g salt
- 7g diastatic malt
- 197g levain
Instructions
- Levain (the night before mixing, 9:30 p.m.)
Mix all the Levain ingredients in a container and leave it at a warm temperature for 12 hours. - Mix (9:30 a.m.)
Add a splash of the mixing water, sugar, barley malt syrup, diastatic malt powder, and salt to a small bowl and mix together. To your stand mixer’s mixing bowl, add the malt syrup slurry, flour, water, and ripe levain. Mix on low speed for approximately 5 minutes until the dough strengthens and begins to smooth. Transfer your dough to a bulk fermentation container and cover. - Bulk Fermentation (9:45 a.m. to 12:45 p.m.)
Give this dough a single fold after 1 hour and 30 minutes into bulk fermentation. - Divide and Shape (12:45 p.m.)
Use a half baking sheet (so it fits into your refrigerator) to hold the 12 pieces of shaped dough. Spread a thin layer of cornmeal on the half sheet to prevent sticking. Divide the dough into twelve 125g pieces. First, degas the piece by tamping down a bit with your hand. Then, form the piece into a rough rectangle and cinch down from the top, so the dough ends up in a little tube. Roll the tube out to a 12″ long tube. Wrap the dough around the backside of your hand and pinch it together in the front. Roll a few times on the counter to seal. Transfer to the cornmeal-dusted baking sheet. Repeat for remaining dough pieces. - Proof (1:00 p.m. to 3:00 p.m.)
Cover the baking sheet with a large, reusable plastic bag and seal shut. Let the dough proof at room temperature, around 72-74°F (22-23°C), for 2 hours. The dough should puff up slightly after this time but not excessively. If the dough still feels very dense to the touch, give it another 15-30 minutes and check again. After 2 hours, place the covered baking sheet into the fridge overnight at around 39°F (4°C). - Boil and Top (9:30 a.m., Day Three)
Oven prep: Before you begin boiling your bagel dough, preheat your oven to 475°F (245°C) with convection or 500°F (260°C) without convection. Place one rack at the bottom third of the oven. Place a baking stone or baking steel on the rack to preheat. Place a roasting pan on the bottom filled with lava rocks to prepare to steam. I also fill a cup of ice and place it next to my oven (I will pour this over the lava rocks to steam the oven).
Boiling equipment prep: Fill a wide pot with water and bring to a low boil. Next to your stovetop, place a half baking sheet with a cooling rack inside, this will hold the wet bagels for a minute and allow them to drain. Next, line a full baking sheet with parchment paper — this will hold the dough as it bakes. Finally, grab any toppings you’d like (poppy, oat, everything bagel mix, sesame, etc.) and place them in bowls on your work surface.
Boil: Once the water is at a low boil, boil the proofed sourdough bagel dough straight from the fridge, about 40 seconds per side. Using a spider strainer, transfer each piece to the cooling rack inside the baking sheet to drain while you boil the rest of the dough. Then, transfer the boiled bagels to the full baking sheet and top, if desired. - Bake (9:45 a.m.)
Slide the pan with all the bagel dough into the oven and pour the cup of ice over the roasting pan with lava rocks. Quickly close the oven.
Bake at 475°F (245°C) convection (500°F (260°C) without convection) for 10 minutes with steam. After 10 minutes, vent the oven and remove the steaming pan, rotate the baking sheet 180°, and bake for 5 minutes longer. After this 5 minutes, turn the oven down to 450°F (235°C) and bake for 5 minutes longer for a total of 20 minutes. Remove the sheet when the bagels are nicely colored. Let cool 15-20 minutes on a wire rack.
Notes
- These are wonderful topped with an Everything Bagel mix, rolled oats, sesame seed mixture, or any other topping you’d like.
If you use this sourdough bagel recipe, tag @maurizio on Instagram and use the hashtag #theperfectloaf so I can take a look!
What’s Next?
Regardless of your bagel preferences, I’m confident these sourdough bagels will rank up there with the best you’ve had—and what could be better than making your own with your sourdough starter? And who knows, perhaps they’ll mend that friendship severed by staunch bagel ideals—these could be the olive branch; a crisp and seductively chewy one.
Next up, how about a simple bake like sourdough starter discard sugar cookies?
Buon appetito! 🥯


728 Comments
Hi Maurizio,
First off, I just wanted to say that I have over a dozen bread books in the bookcase, but yours is the first one I always go for when I am ready for a bake. I just finished making bagels from your book and they turned out great. I do have a couple of questions, though: was the dough ring in picture D on page 371 actually shaped using the rolling-in-the-palm method? The hole in the ring is quite small, but when I do it that way, the hole is huge and sometimes it stays huge throughout the bake. Also, any suggestions on how to get the toppings to stay on the bagel post-bake? By the time I handle and slice my Everything bagel, it ends up being a Barely Anything bagel.
Thanks for all your help and info over the years,
Mark
Thanks for your kind words about my book, Mark! Yes, that bagel in the photo was shaped using the palm-rolling method—it's what I always use. It takes some practice to dial in that hole shape. You could try rolling the tube out smaller so you don't have as much wrapping around your hand, this will make a smaller hole.
As for the toppings, many do fall off, yes. Applying them while the bagel is still very wet from the boil is the key, though!
It sounds like you're doing everything right here, Mark. Let me know if you find any tricks to solving these issues!
Thanks for the quick reply, Maurizio. This was my first attempt at your bagel recipe. Like so many bakes, I’m sure the end result will improve the more I practice.
I love this recipe and make it all the time, it's perfection. I even invested in lava rocks just to make these; no regrets. When I add "everything" toppings to the, the toppings seem to burn a little before the bagels themselves are completely done. Any tips for how to get around this bit?
Shannon, I too have noticed that these toppings can be prone to burning, especially the garlic and onion bits that have natural sugars. A simple trick is to cover your bagels loosely with aluminum foil for the last 5-7 minutes of baking once you notice the toppings getting too dark. This shields them from direct heat while allowing the bagels to finish baking properly.
Another approach is to slightly reduce your oven temperature by about 15-25°F and extend the baking time a bit. This gentler heat helps prevent the toppings from burning while still allowing the bagels to bake through completely.
Let me know if these help!
What is the purpose of steaming the bagels in the oven? Doesn't the boiling "set" the crust and prevent more oven spring?
What is the purpose of steaming the bagels in the oven? Doesn't boiling them "set" the crust and prevent more rise in the oven?
Steaming is totally optional, IMO. But what I was trying to emulate is how bagel-makers often bake their bagels on soaked planks, which release steam in the oven as it's baking. However, since they're boiled, they'll still have enough residual water on the exterior.
Hi! I’ve made these twice now. Both so good! Second time was better. However, my crust doesn’t seem to get that thin crisp! It’s thicker and almost too chewy/tough to handle. Any tips??
I would try boiling for slightly less time, Sandy!
Thanks for a great recipe. What is the minimum time the bagels need to be in the refrigerator? I have my shaped dough proofing now with about an hour to go. By 3pm they'll be ready for the fridge. But I'd love to boil and make today/tonight instead of waiting till morning. If they chill for just 2-3 hours will the recipe still work?
You just want them to chill all the way through so boiling is possible. I'd say at least 3-4 hours?
I would like to add fresh blueberries. Should I add them warm? Cold? Room temp? Since they have some added moisture, should I reduce the water in the dough? By how much?
It's hard to say exactly how much water to reduce, but I would leave out some—it really depends on how juice your BBs are. The challenge is there's already so little water it'll make the dough even harder to mix. I might try going with the recipe as is and see how the dough feels!
followed your recipe with my newish rye starter. turned out amazing. perfect crust and texture. nothing beats a fresh malt bagel with garlic butter and cream cheese
So great to hear that, V! I agree with you 🙂
I followed your recipe, including baking times, with the exception of the lava rocks, i just used a stainless steel pan with boiling water. they tasted great, texture was great (except a little overdone) and the bottoms were burned. what would you suggest? lower heat (non-convection), thinner pan (i used my usa pans which are thick aluminum), getting lava rocks, or if it’s cutting the time, which section do i cut? the 500 degree part or after i lower the temperature part? thanks
Hey! For those burnt bottoms, I'd first try reducing the bake time during the initial 500°F stage – try cutting it by about 5 minutes. You can also try placing an empty baking sheet on the rack below your bagels to help shield them from direct bottom heat.
The USA pans are actually great, so I wouldn't change those. The steam setup you're using should work fine too – no need for lava rocks.
If you still find the bottoms browning too quickly after these adjustments, then you could try lowering the initial temperature to 475°F, keeping everything else the same.
Let me know how the next batch turns out! 🥯
great timing! when you replied i had another batch proofing. i placed a pan underneath and i reduced the time a little and they came out much better. i did learn that i should bake the plain and the everything separate, though. i baked in two batches. with 5 minutes less, the plain were perfect and the everything were a tiny bit underdone. with 2-3 minutes less, the plain were a little over and the everything perfect and no burnt bottoms another time. overall i’m really pleased, delicious bagels and definitely something i’ll make often. thank you for the recipe(s) and for your help.
*no burnt bottoms EITHER time
is there any way that you can cut the levain peak time in half? I feel like if you just double the amount of ripe starter when building the levain it will change the hydration. would I be wrong in saying that. love this recipe and your book!!! thanks in advance.
If you do a 3 hour levain, that's the fastest I like to go. Check out my levain worksheet which talks about this.
Means a lot to hear that, thank you Tom. Let me know if you have more Qs.
Do you think this recipe could be enriched/modified to be egg bagels?
Absolutely!
Oh my! These are phenomenal. I cheated a bit with the levanin. I forgot to prep it the night before so I mixed it up early in the morning and proofed it in my oven (turned off) with the light on. I was still able to get all the other steps complete and resting in the fridge by 8pm. This morning I boiled and baked! My bagels look just like your images and taste as you describe!
Side note: I’m not a huge fan of cornmeal so I cut individual squares of parchment for each bagel. I dropped each bagel into the boiling water still attached to the parchment and peeled them off once wet. Worked like a charm.
Right on Mandy, love that process. And great idea with the parchment 🙂 You could also just use flour there, too!
Thanks for the recipe it is very good! I used Normal bread flour last time but want to try with spelt flour. Does it also work?
Thanks a lot!
I like that idea but I wouldn't go 100% spelt to start. Try 20% and see how it goes, then ramp it up slowly through testing.
Hi, followed the recipe and it was really good. I do, however, like a chewier bagel. Should I boil for longer to achieve this? Thanks so much!
Yup, that's what I would try! Also, be sure to use high protein flour, which tends to be chewier.
Made these per my 6 year old daughter’s Christmas wish for bagels. And boy were they great!
Boiled and baked them for Boxing Day and a New Yorker friend declared them better than than her favourite NYC bagel shop’s. Thank you Maurizio! We live in Bermuda so of course couldn’t find Barley Malt Syrup anywhere so used honey with a touch of molasses. Otherwise followed your directions precisely with King Arthur Bread Flour, using the tip to retain some water. I retained 50g and added back 29g when the dough felt a little dry after about a minute at 3 in my FAMAG.
After making 70-75% hydration boules for several years the dough felt odd and dry and I feared we’d have flat frisbees even after the boil. But they puffed up beautifully in the oven!
My daughter and husband are already asking when we’re making these again!
Thank you!
Right on, so happy to hear that. Nice swap with the honey + molasses, that'll do just fine (delicious). Yes, it's a stiff dough and kind of scary at times, hah. I hear you!
My bagels have a tough crust and it's hard to eat. Any recommendations to fix this?
They're baking for too long!
I'm a bit confused about the length of bulk fermentation. 3 hours does not seem like enough to achieve any significant rise in the dough. Is this intentional? I have my dough in a bread proofer set to 78 degrees F and the dough has not risen at all since I did my fold. My starter is very mature and the levain more than doubled overnight.
You should see some rise in bulk, though not a ton. There's still a lot of fermentation time to come with this dough after that. Try going 4 hours to see if that helps.
Fantastic recipe – thank you! I have made these many times. I find that topping immediately out of the boil and letting them rest just for maybe 30 seconds or so allows the toppings to cling more securely. I was tired of the idea that where I live we only get baked bread texture type bagels or bagels with a fairly close crumb but they aren't boiled so the outside is lame. There is a company that makes "kettle boiled" bagels but the crumb is wrong. So I finally decided to give these a go. I do also use a small amount of base (food grade lye) when I boil.
I was watching youtube clips of bagels being made in a long standing NYC bagel maker and during the boil they can tell when the bagels have boiled properly by the tactile feedback of the paddle against the bagels. Although this is loose advice, I have learned how to do so as well – the idea is they will have a spring-y feel against a wooden spoon. It takes some batches to learn this but I would suggest for those interested, monitor your timing and get used to the feel. For whatever reason, doing this based on time alone doesn't always seem to equate to hitting the boil right, at least from what I have experienced. As an aside you can use a similar method when cooking beans or pasta – there is a feel to it.
Really fantastic tips here. I'm going to work more on that boil, too. Great advice!
We have this amazing bagel shop near us that inspired me to start making my own! I love this recipe, but I wondered if you could provide variations on it for the following flavors that we find in our local shop:
• Tzitzelnickel (a pumpernickel-rye mix)
• Egg
I want to work on these soon Parker!
I included cinnamon and raisins… They came came out great. Not perfect because of my shaping needs repetition… But good none the less…
Oh I love that. When did you add those ingredients in?
I will ditto Maurizio's question. When did you add the raisins?
My shaped dough is light and slightly puffed up after an hour bench rest going into the fridge. When I pull them out to put into the boil they feel dense and less puffy. They sink in the boil and then kind of float but never to the top. The bake has ok oven spring but they are kind of saucer shaped. Any idea?
I would cut that rest time before the fridge down to 15m or 30m.
This was my result also. I had to do a 5 hour bulk ferment, shape, bench rest for 45 minutes and then into the fridge. They still take a little to float but they rise beautifully now.
These sound amazing, can't wait to try! One question I have is why you put a baking stone in the oven during preheating? Are we supposed to put the baking sheet on top of the stone or a rack above it?
Bake on top of the stone to help color the bottom of the bagels faster. It's optional, though, it all depends on your oven!
Hi there, I found that the levain mixture was particularly stiff—all the flour didn't incorporate in… I'm sure I weighed everything correctly. Is it perhaps that my starter was too recently fed and not ripe enough?
If it's too stiff, add a bit more liquid to help it come together!
Hello! I'm looking for some guidance. I've made these sourdough bagels more than a few times, and although I love the flavor and texture, the bagels always end up with very large, dark bubbles that appear during the bake. Any thoughts or advice on how to eliminate this frustrating issue would be very much appreciated. Thank you!
Hey Emily! If you're adding steam into the oven when baking these, skip that, it should help prevent those bubbles.
Hi! Wondering why you use both Caster Sugar and Barley Malt Syrup? Could Honey be used? Wondering if both are in there for a reason or if you could just use one for the added sweetness?
You can use honey instead of the BMS (which I think gives a certain flavor that white sugar does not). The BMS is more for the flavor and a little sweetness, whereas the caster sugar is there also to make the dough soft and chewy.
Help! I have used your sourdough bread and pizza recipes with much success (thank you for the videos!), but my bagels look beautiful but are way too airy inside. Missing the chewy. Any recommendations would be so appreciated.
Hey Dana! Try to be a little more heavy handed when rolling and shaping them to degas them a bit. The dough needs a heavy hand at that stage 🙂
everytime i make these, they are DELICIOUS, but they seem to collapse when boiled, any advice?
It might be you're proofing them too long, Megan. I'd reduce (or skip) the time the dough rests before putting it into the fridge overnight!
Hey Maurizio, wondering if you have ever tried these using some % of freshly milled grain? Spelt? Just wanna tinker and wanted to know if you had
Yes, I have! I have tried with freshly milled rye and spelt, they were wonderful. Start with replacing just 5% of the flour, you'll notice it. Increase to 10% once you get the feel for the dough—it's always important this dough is rather stiff, but with more whole grain flour, you might need to increase the water very slightly.
I love this approach! In general I feel like usually less rye is the way to go, or at least many of your freshly milled recipes will have more rye than spelt, so if i am replacing 5% of it to start would you say 4% spelt 1% rye? or am I over thinking it haha. Everyone loves these bagels (as do I). such a hit!
You can do a split like that if you'd like! Any combination will work.
In your book, you say to bake at 450 convection and 475 non-convection respectively- but here you have increased the temperature. also, you say here to reduce to 450…. is that from the convection time of 475 or the non-c of 500?
Sorry for the confusion here, Charlie. I need to update this a bit! I do 450F convection in my oven (and reduce to 425F convection). If you don't have convection, you could try 475F, but do keep an eye on them because they will color quickly!
Basically, if you do convection, drop the temp by 25°.
In your book,The Perfect Loaf, the bagel recipe on p.367 calls for diastatic malt powder. On p.15, it is noted that nondiastatic malt powder is used explicitly in this recipe. Could you clarify? I made them with diastatic malt and while the flavor and texture were top notch, the bagels did not brown or blister. Thank you.
I know, sorry it's a little confusing (but my editor insists it's correct, and she's right 🙂). The way it's worded in the book indicates that malt is used in the recipe, as in, both diastatic and non.
So you'll end up adding both diastatic malt powder AND barley malt syrup. Two forms of malt.
If you find they aren't coloring the oven, you could try a slightly higher oven temp but then bake for less time. A challenge with bagels is finding the right settings in the oven to get them to color without baking them too long!
Do I have to use steam in the oven?
You don't have to, no. The bagels are typically wet enough going in!
These turned out well overall, but I had some serious problems with the baked bagels sticking to the parchment paper, which was frustrating and heavily reduced the appeal of the finished product. Next time I would scatter a little semolina or cornmeal on the parchment paper before putting the boiled bagels on the tray.
That's a good suggestion, Drew. Although, this doesn't happen to me here!
All parchment papers are not the same. I bought a box of precut rectangles and a roll that were different brands from the same store to use on my cookie sheets that are different sizes. The precut was slick and easily peeled off of the cooked bagels but the paper from the roll stuck horribly and wouldn't even peel off. They both say that they are non-stick. My husband is eating the bagels anyway, paper and all.
This is very true. The parchment I have linked up in the post is the best I've found!
I don't see a linked parchment paper. Which do you use?
Hi! help! I have made these bagels previously and they were delicious, but I have really fallen off my sourdough starter game lately. Is there anyway for me to make these with with just a yeast mixture or do I have to use a sourdough starter?
You could use yeast, sure, but it would dramatically alter the recipe!
Hello! I'm in the process of making these, and I'm very excited. I just don't have any diastatic malt and it's hard to get in Norway. So I'm making it without. But I'm wondering why the boiling water doesn't have any baking soda? Doesn't that help with the browning too because of the pH change?
You can totally leave out the malt, no problem. You can add baking soda to the boil if you'd like. Some add barley malt syrup or honey as well (or in addition to). It's up to you. I don't find it's necessary, though a little baking soda will help with color.
So happy you like these, Sally, Thanks for the comments!