

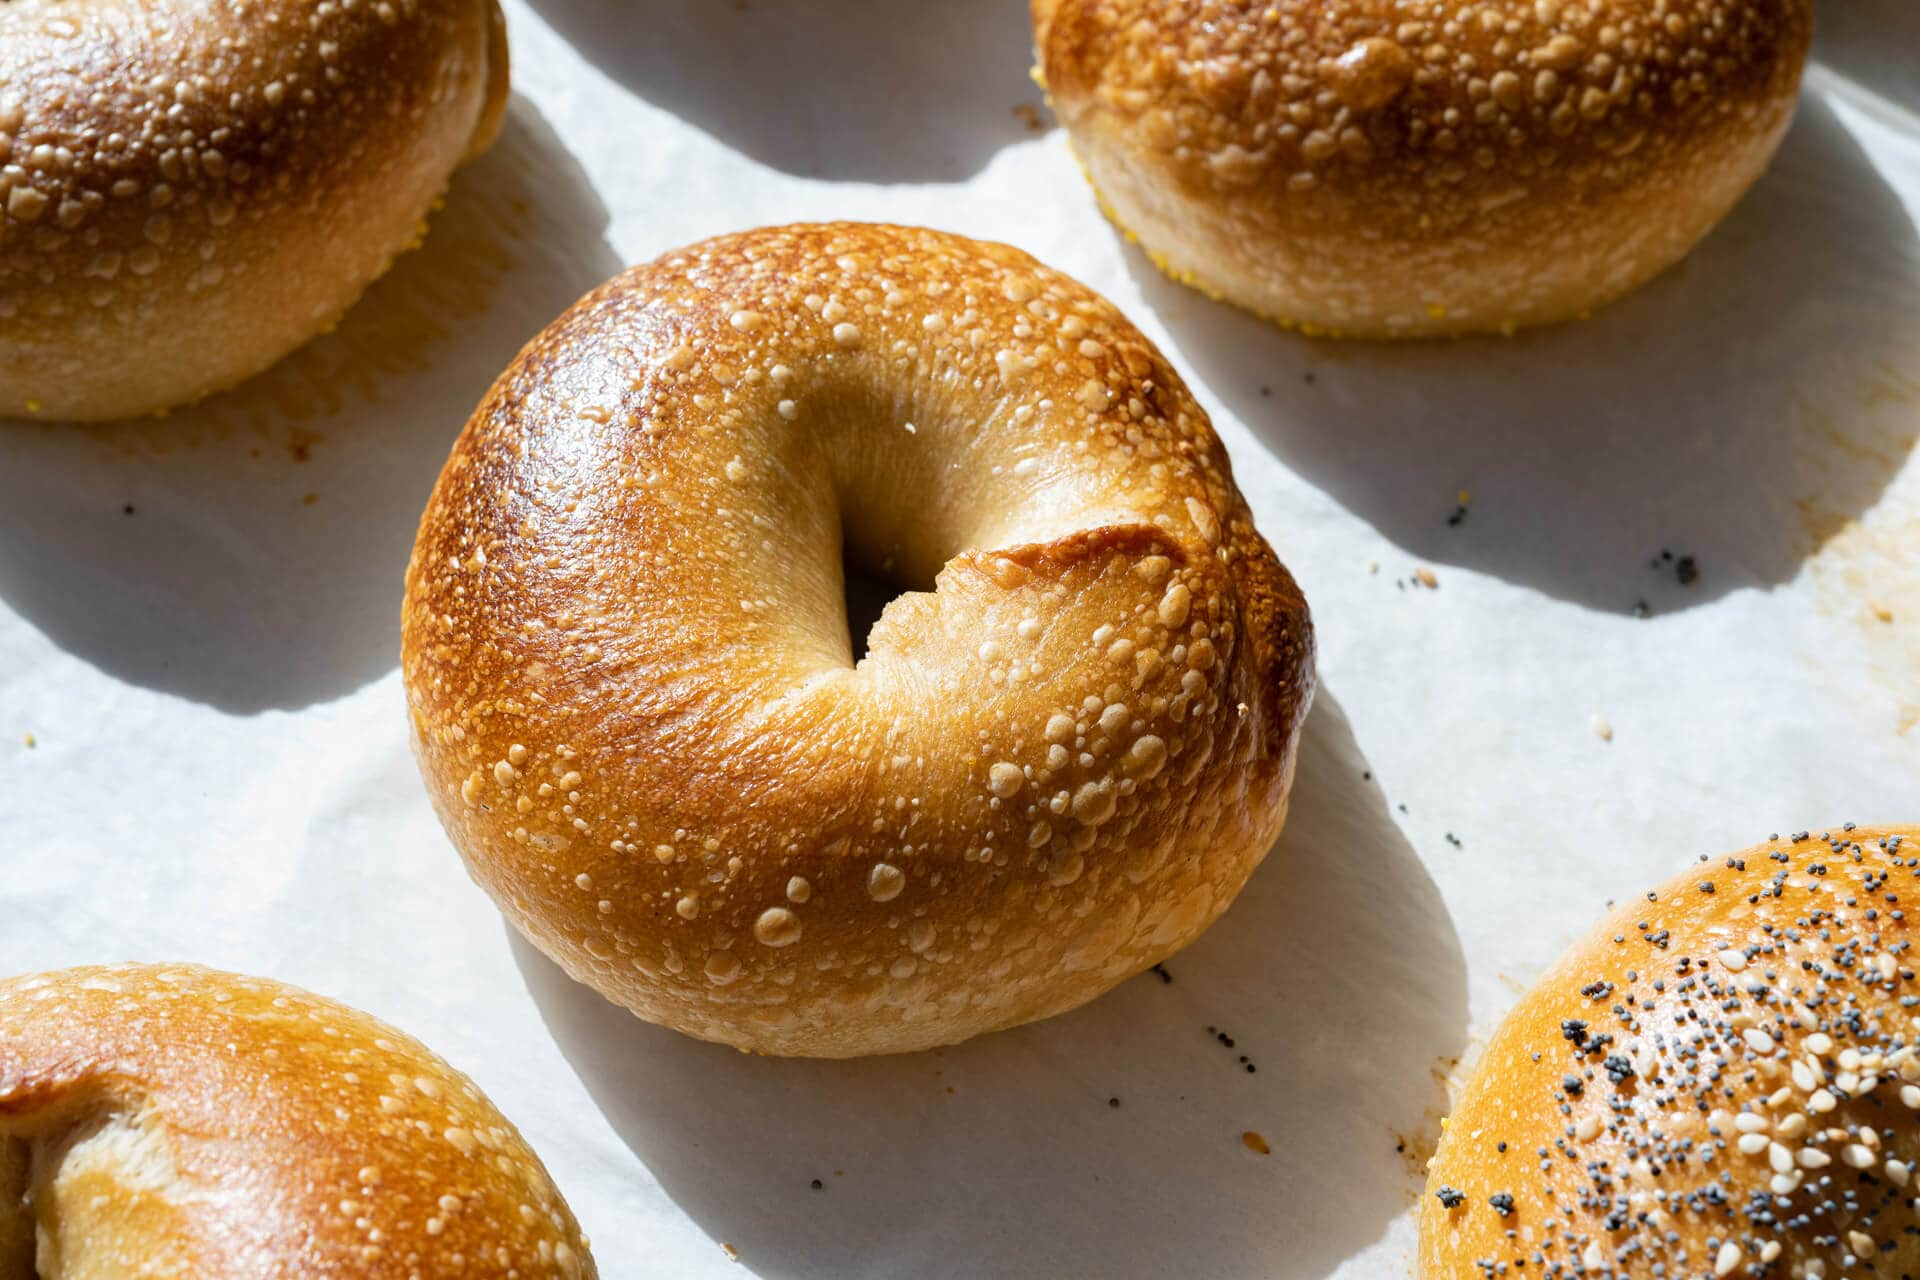
I try not to talk about bagels with friends. Talking about them always starts innocently, a little witty banter about the crust, crumb, and color traits and past eating experiences: “that bagel I had in New York that one time,” or “there was this one bagel shop down the street…” This jovial chat slowly evolves into a friendly argument about more-sweet versus more-savory and crunchy versus soft; maybe one even mentions steaming the bagel instead of baking it (😱).
Finally, the once innocuous chatter results in the participants either forming a stronger friendship over common bagel zealotry or the unfortunate end to the friendship altogether. It’s like the old axiom: never play Risk with a friend you want to keep. Exaggeration? Perhaps. But bagels do seem to rouse an enthusiasm rarely seen with other food (I’d argue pizza might be a solid contender, though). They carry a different meaning depending on where you’ve grown up, what local shops were in the area, and ultimately, where your preferences lie. But these sourdough bagels seem to transcend almost every bagel I’ve had, especially the mass-produced ones—oh yes, definitely those.
While these bagels are more along the New York Bagel style, I’m also a fan of the newer wave bagels with a super thin, glossy, and crispy crust. In fact, I have a recipe for those glossy bagels, too, if that’s more your thing.
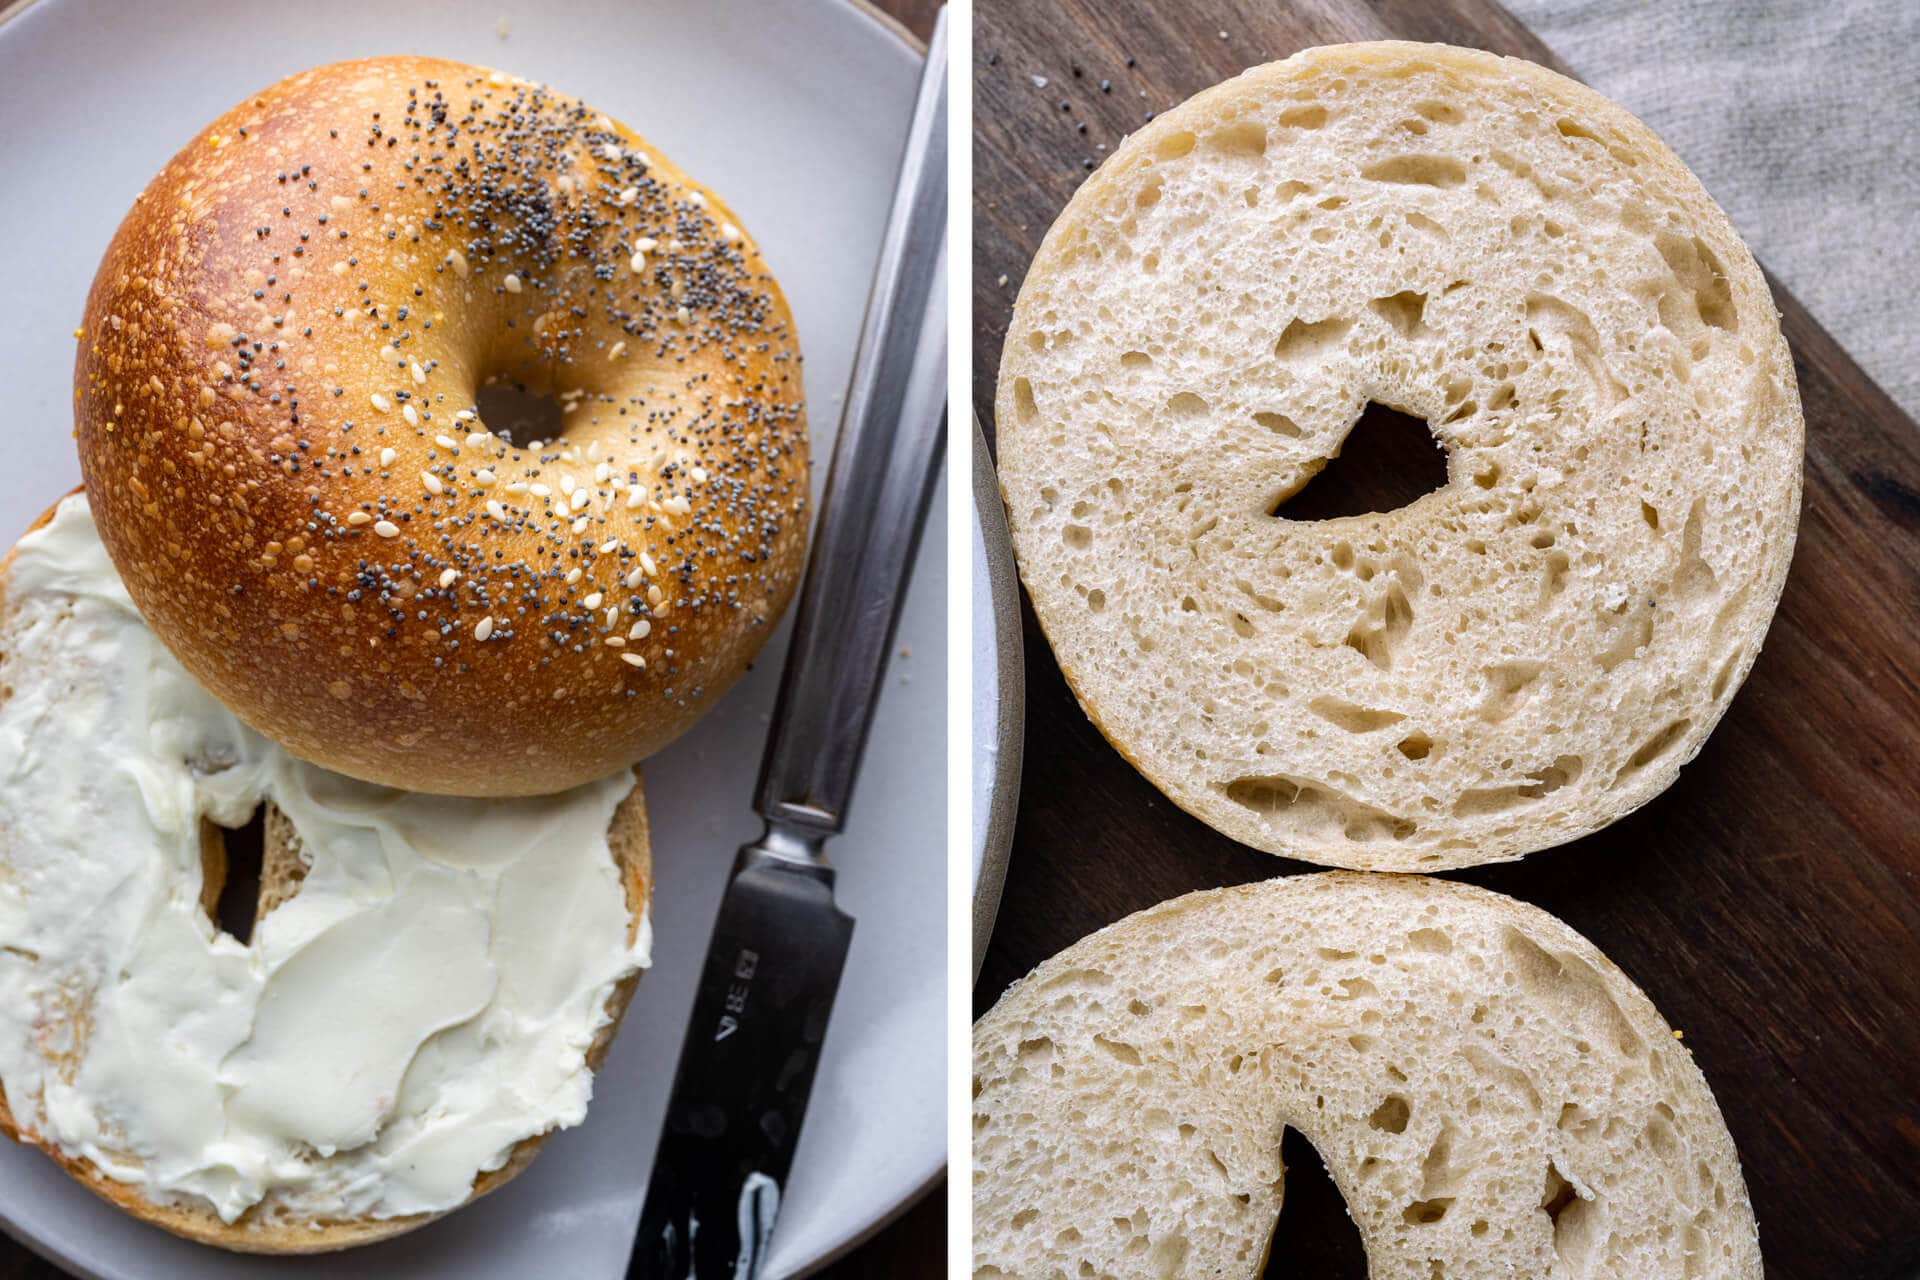
I recall occasionally eating those bagels from the bag at the market: that ultra-chewy (from end to end) vehicle was mostly there to convey cream cheese, or schmear, from package to mouth. Rest assured, these sourdough bagels are not that in the slightest. They have a very thin and crisp exterior, not tough or hard, but rather, a little crunch that gives the chewy bagel a textural counterpoint. You see, the interior is as chewy as you’d expect a bagel, but if the entire thing is chewy, you end up with just a big chewy thing. But if you have a contrasting texture, it seems to amplify the chewy thing, much like adding an acid elaborates other flavors.
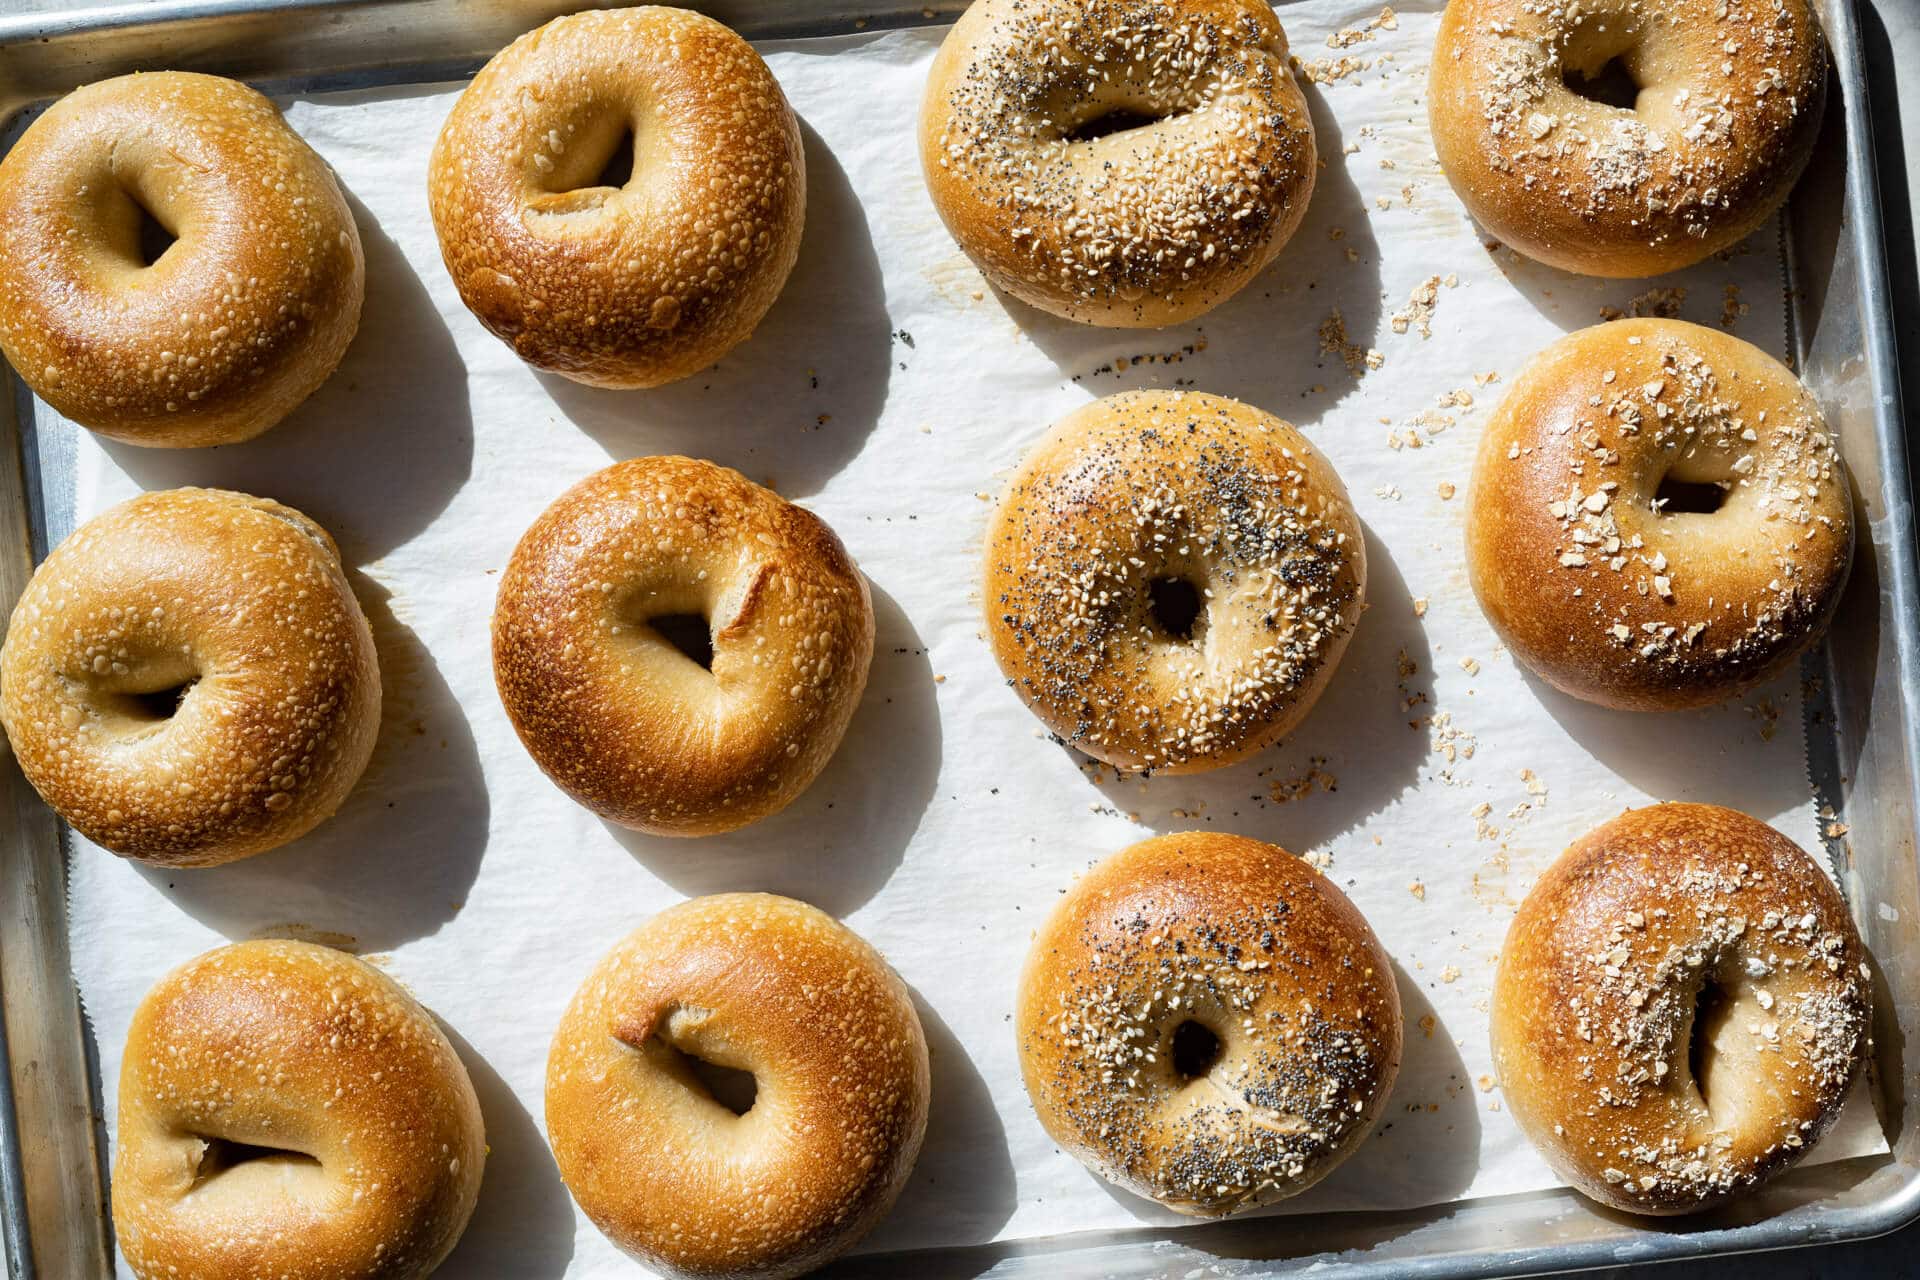
And overall, these bagels are pretty darn easygoing. Unlike bread dough, there’s no need to be overly critical of each motion when shaping, and in the end, the bagel rings puff up uniformly, boil beautifully, and bake easily. Speaking of the boil, perhaps one of the things that keep many from making them, but it’s such a simple thing. And while I often draw parallels between this dough and my sourdough pretzel—mostly in that they each have a stiff dough and a pre-bake step—there’s far less prep before baking bagels than pretzel—not that those sourdough pretzels aren’t worth the effort, because they certainly are.
First, let’s look at some tools I use when making these sourdough bagels.
Tools and Ingredients
First, a few of the tools and ingredients I use for this recipe
- Barley malt syrup – this is the classic sweetener added to a bagel dough and it has a very unique flavor and aroma. I like the Eden brand, but any should work well.
- Diastatic malt powder – see the post on diastatic vs. nondiastatic malt and why it’s used in baking.
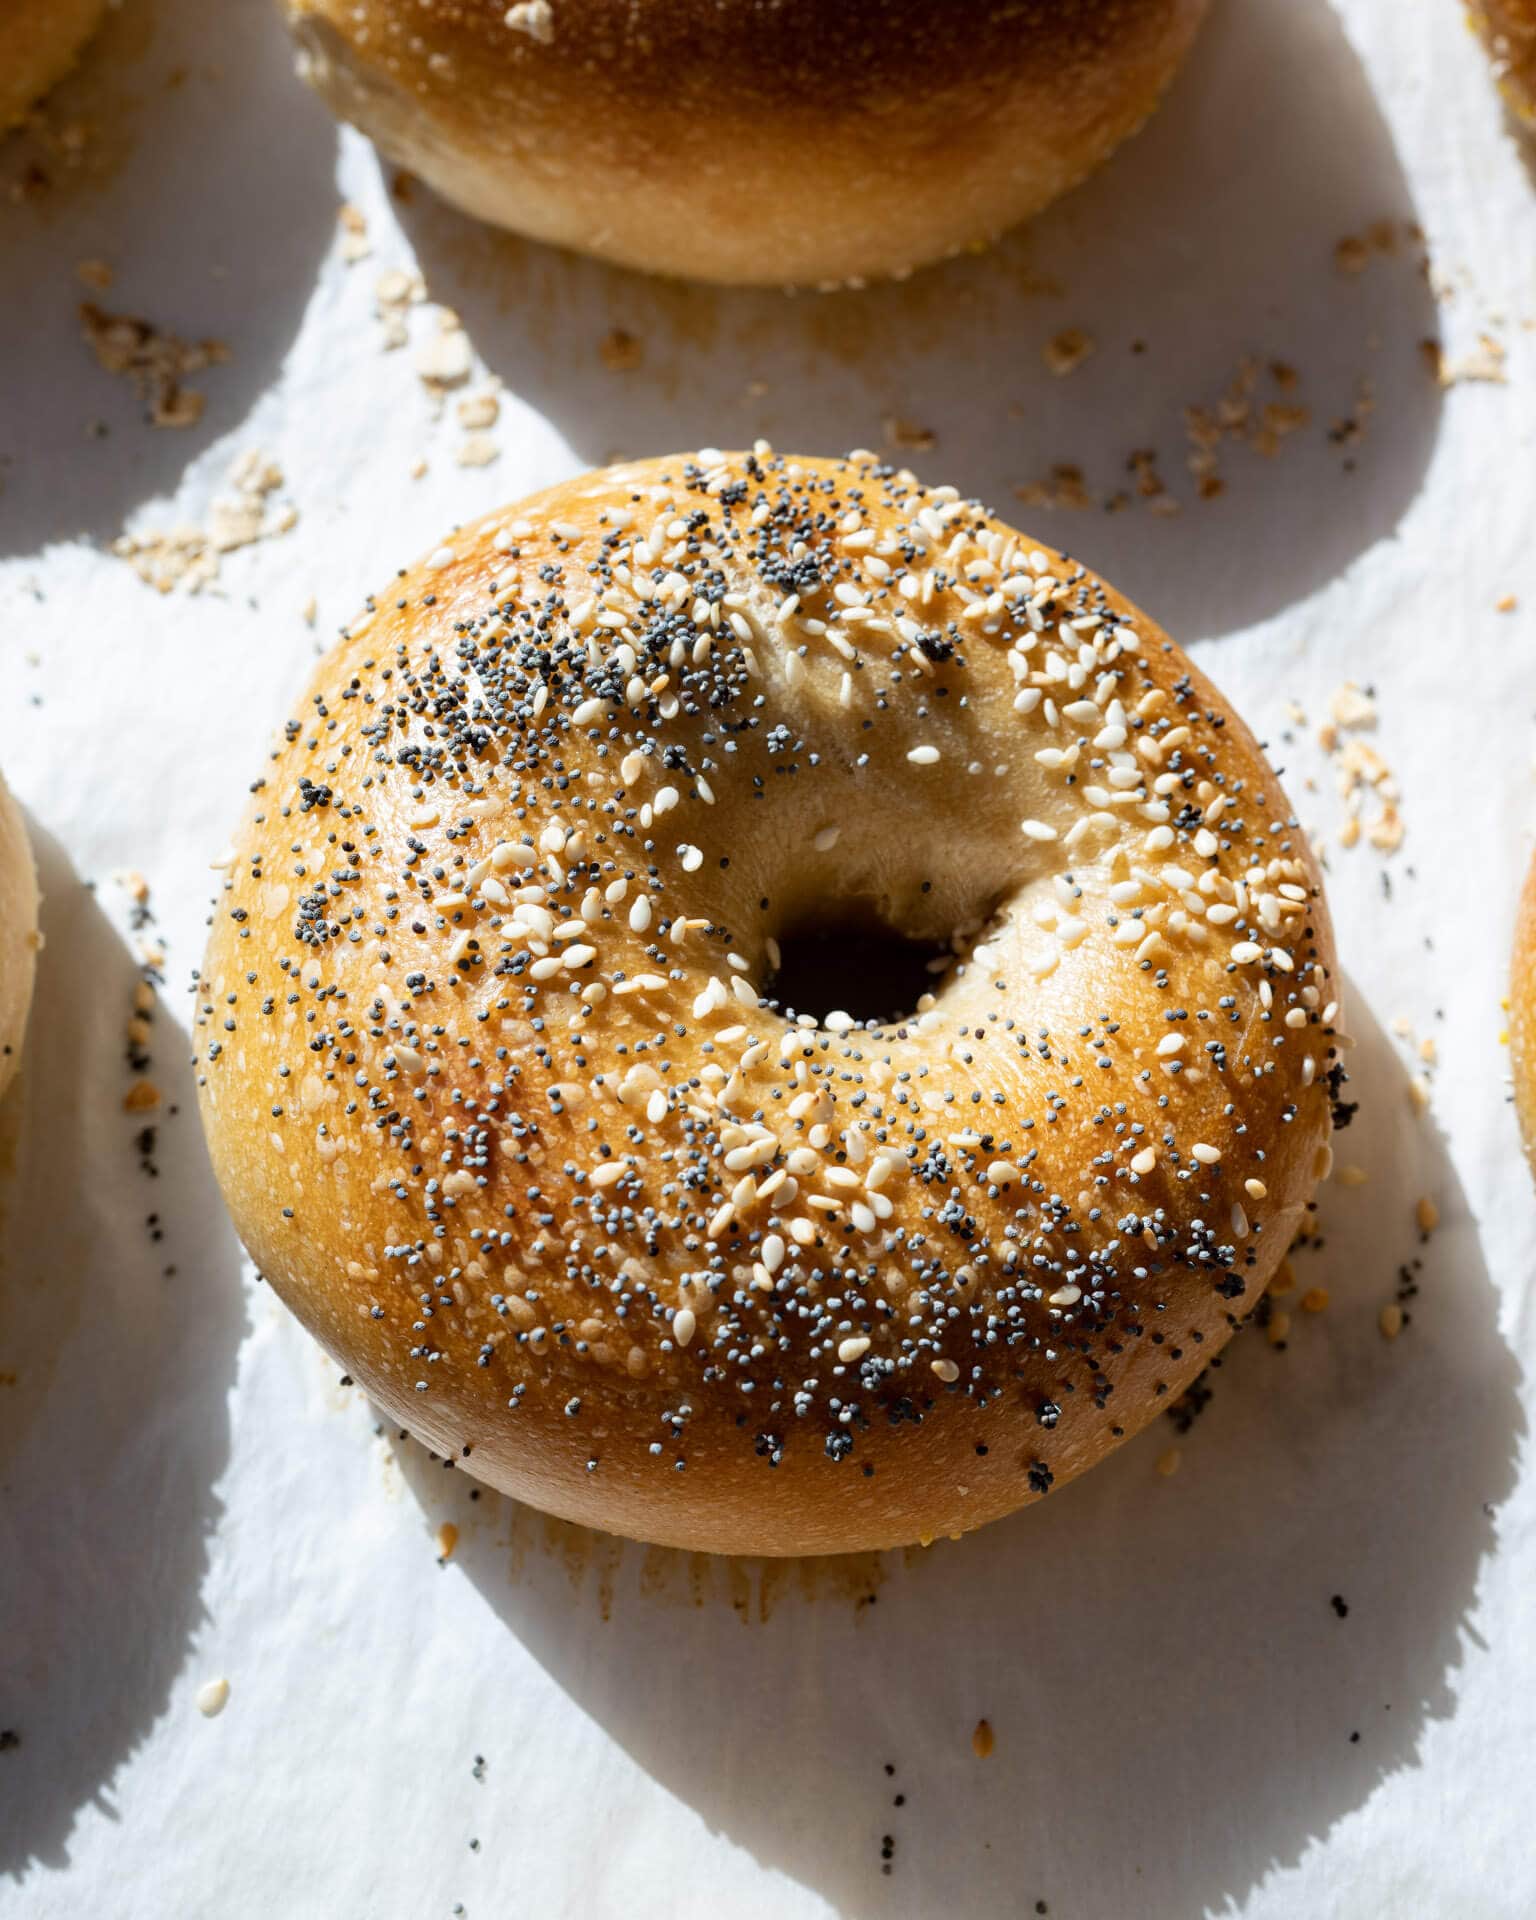
- Everything bagel topping – I love this mix of seeds and dried spices for topping bagels.
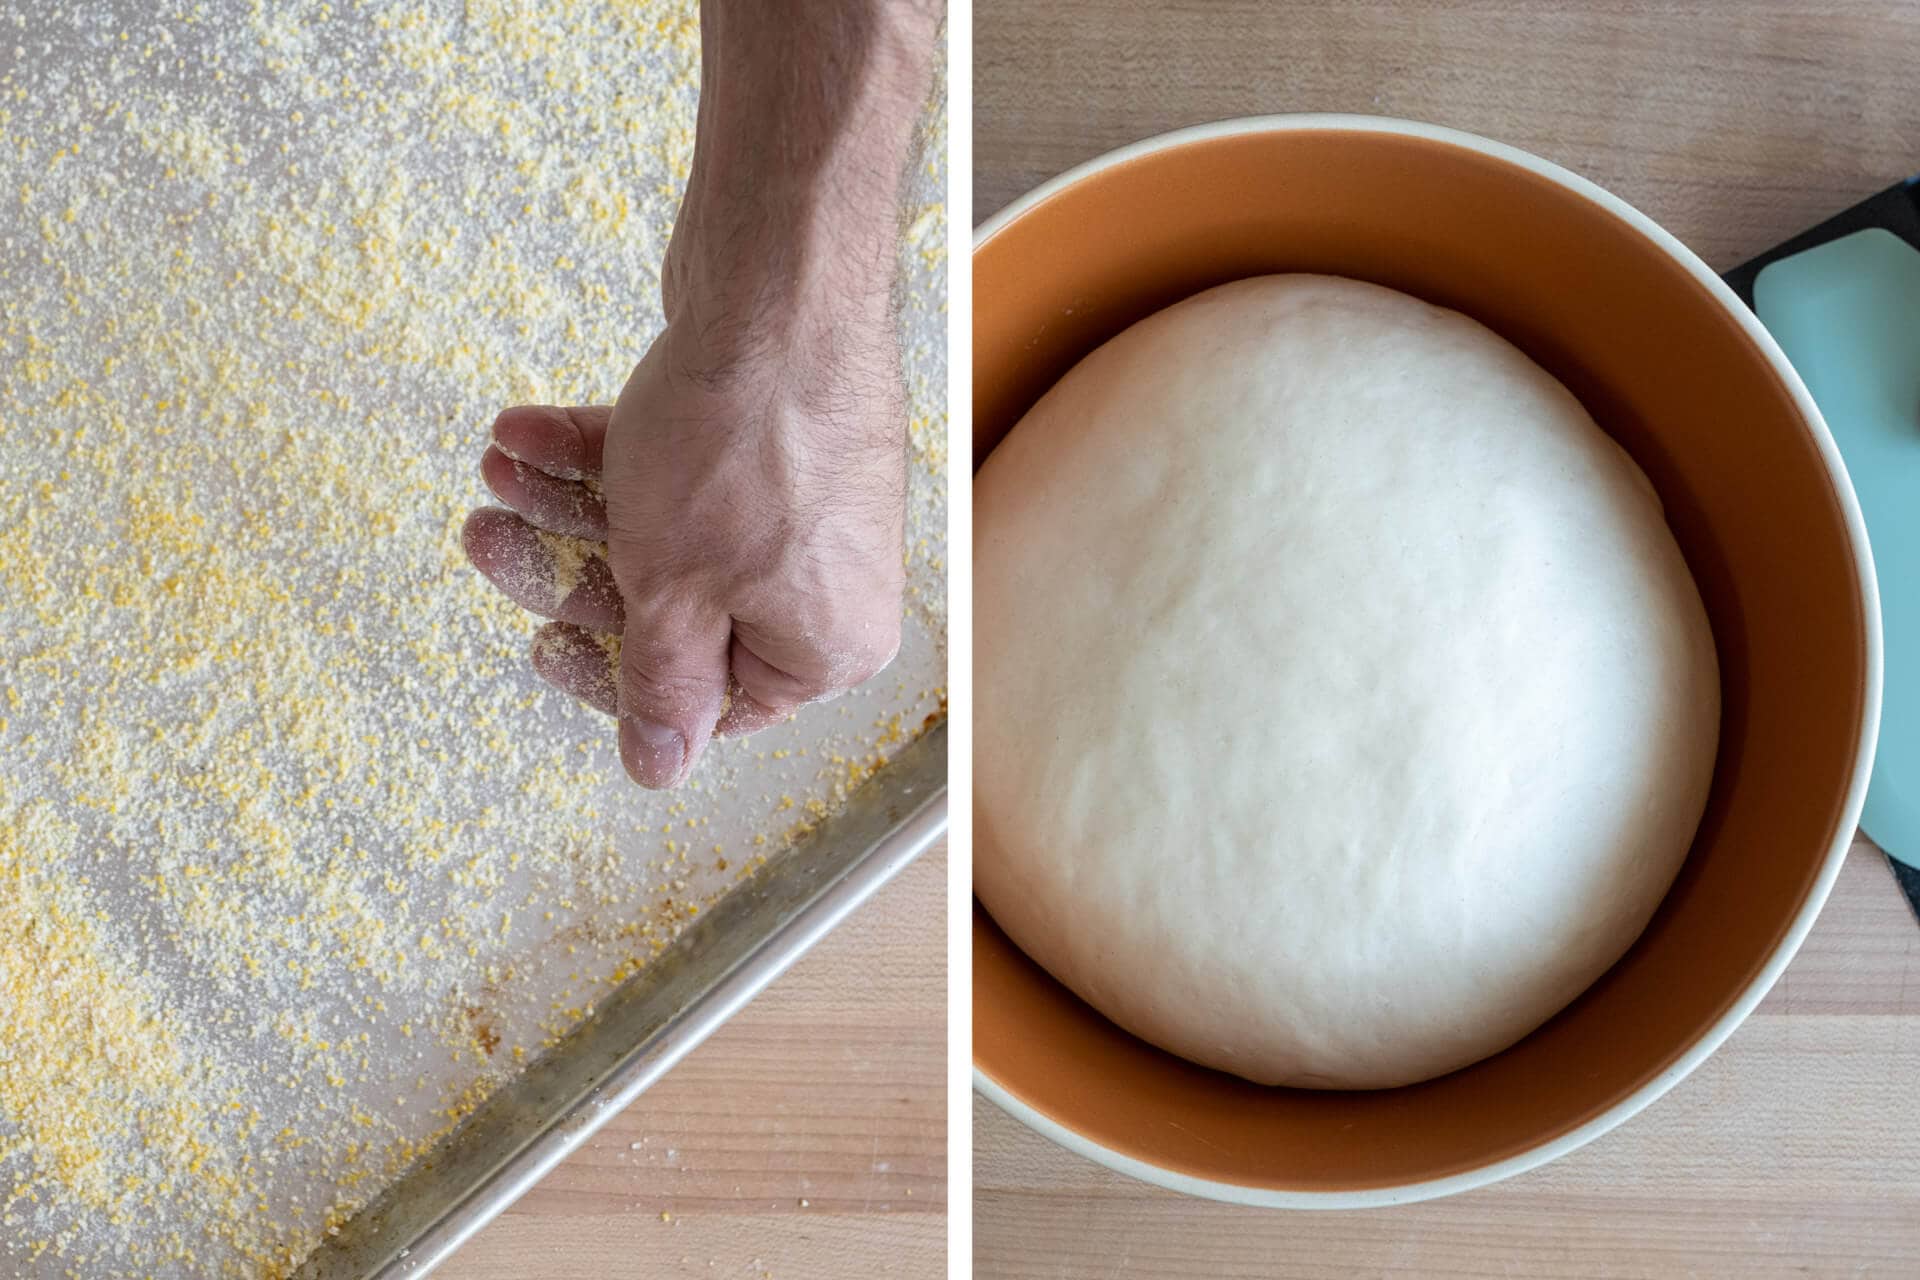
- Cornmeal – traditionally used to keep the bagels from sticking to the baking sheet during proofing (and they add extra starch to the boiling water).
- Half baking sheet – I use this to proof all 12 dough pieces to save space in a home refrigerator.
- Full baking sheet – perfect for baking all 12 bagels, with room in between, on a single baking sheet for even baking.
Flour Selection
Many bagel recipes, mine included, call for high-protein white flour to get that characteristic chew and structure.
I’ve tried this with Tony Gemignani’s Pizza Flour (15% protein), and while there was a bit more chew, I wouldn’t say it was necessary to order some for making sourdough bagels. I like to use Central Milling High Mountain, King Arthur Bread Flour, or Bob’s Red Mill Bread Flour.
Baking Schedule

These sourdough bagels take three days to make: from creating the levain at night on day one to boiling and baking them in the morning on day three. I know—three days!?—but the good news is, most of the time you’re not actively handling the dough, it’s fermenting in one stage or another.
All-in-all, this is a straightforward schedule. It’s also quite flexible by a few hours here and there once the dough is chilled and in the fridge: if you can’t boil and bake first thing on day three, it’ll hold a few more hours (or perhaps longer).
Sourdough Bagel Formula
For tips on how to calculate baker’s percentages or how to modify this formula, see my post on baker’s percentages (baker’s math).
| Total Dough Weight | 1,600 grams |
| Pre-fermented Flour | 12.00% |
| Yield | 12 x 125g bagels |
Total Formula
Desired dough temperature: 78°F (25°C). See my post on the importance of dough temperature for more information on dough temperatures.
| Weight | Ingredient | Baker’s Percentage |
|---|---|---|
| 964g | High-protein white flour (~13% protein, Central Milling High Mountain, King Arthur Flour Bread flour, or Bob’s Red Mill Bread Flour) | 100.00% |
| 530g | Water | 55.00% |
| 29g | Sugar, caster | 3.00% |
| 29g | Barley malt syrup | 3.00% |
| 18g | Salt | 1.90% |
| 7g | Diastatic malt | 0.75% |
| 23g | Sourdough starter (100% hydration; 40% rye, 60% white flour) | 2.40% |
Sourdough Bagel Method
1. Prepare Levain – Night before mixing, 9:30 p.m. (Day one)
Mix the following ingredients together in a container and leave covered to ripen for 12 hours overnight. It mixes up to a stiff consistency so I like to mix and knead the dough in a mixing bowl, then I transfer to a narrow and tall jar.
Try to hit a final dough temperature of 78°F (25°C) for this levain.
| Weight | Ingredient | Baker’s Percentage |
|---|---|---|
| 116g | High protein flour | 100.00% |
| 58g | Water | 50.00% |
| 23g | Ripe sourdough starter | 20.00% |
23.18% Levain In Final Dough Mix.
2. Mix – 9:30 a.m. (Day two)
A note on mechanical mixing: This dough is low hydration and comprised of high protein flour—it’s a firm dough! I used my Haussler Alpha mixer to mix this for 5 minutes on speed one. You could use a KitchenAid stand mixer to mix this dough for a few minutes in the beginning, but I wouldn’t push it too far and risk damaging the mixer—ultimately you make the call. After mixing in the KitchenAid, you could then turn the dough out to the counter to finish kneading like pasta dough, as described below.
| Weight | Ingredient |
|---|---|
| 848g | High protein flour |
| 472g | Water |
| 29g | Sugar, caster |
| 29g | Barley malt syrup |
| 18g | Salt |
| 7g | Diastatic malt |
| 197g | Levain (see Prepare Levain, above) |
Make the malt syrup slurry: This will help the sticky, viscous barley malt syrup incorporate more easily into the dough. To a small mixing bowl, add a bit of the mixing water, barley malt syrup, sugar, diastatic malt powder, and salt. Stir until everything dissolves.
To your mixing bowl, add the malt syrup slurry, flour, water, and ripe levain. If using a mechanical mixer (see the note, above), mix on low speed for approximately 5 minutes until the dough strengthens and begins to smooth. This dough is so firm it doesn’t need much.
If you do choose to use a mechanical mixer, you might need to cool the mixing water to ensure you hit the FDT of 78°F (25°C). I used cold water straight from my fridge.
If mixing by hand, mix everything in the bowl until well incorporated. Turn the dough out to a clean work surface and knead the dough like pasta: fold half over onto itself and push the mass away from you with the palm of your hand. Continue folding over and pushing away for 8-10 minutes until the dough firms up, and it becomes hard to knead any further.
Transfer your dough to a bulk fermentation container and cover.
3. Bulk Fermentation – 9:45 a.m. to 12:45 p.m.
Give this dough a single fold after 1 hour and 30 minutes into bulk fermentation. For the fold, turn the dough out to a clean work surface and do your best to fold it into thirds. Place the dough back into the bulk fermentation container with its seam side down, and cover. Let the dough rest, covered, for the remainder of bulk fermentation.
4. Divide and Shape – 12:45 p.m.
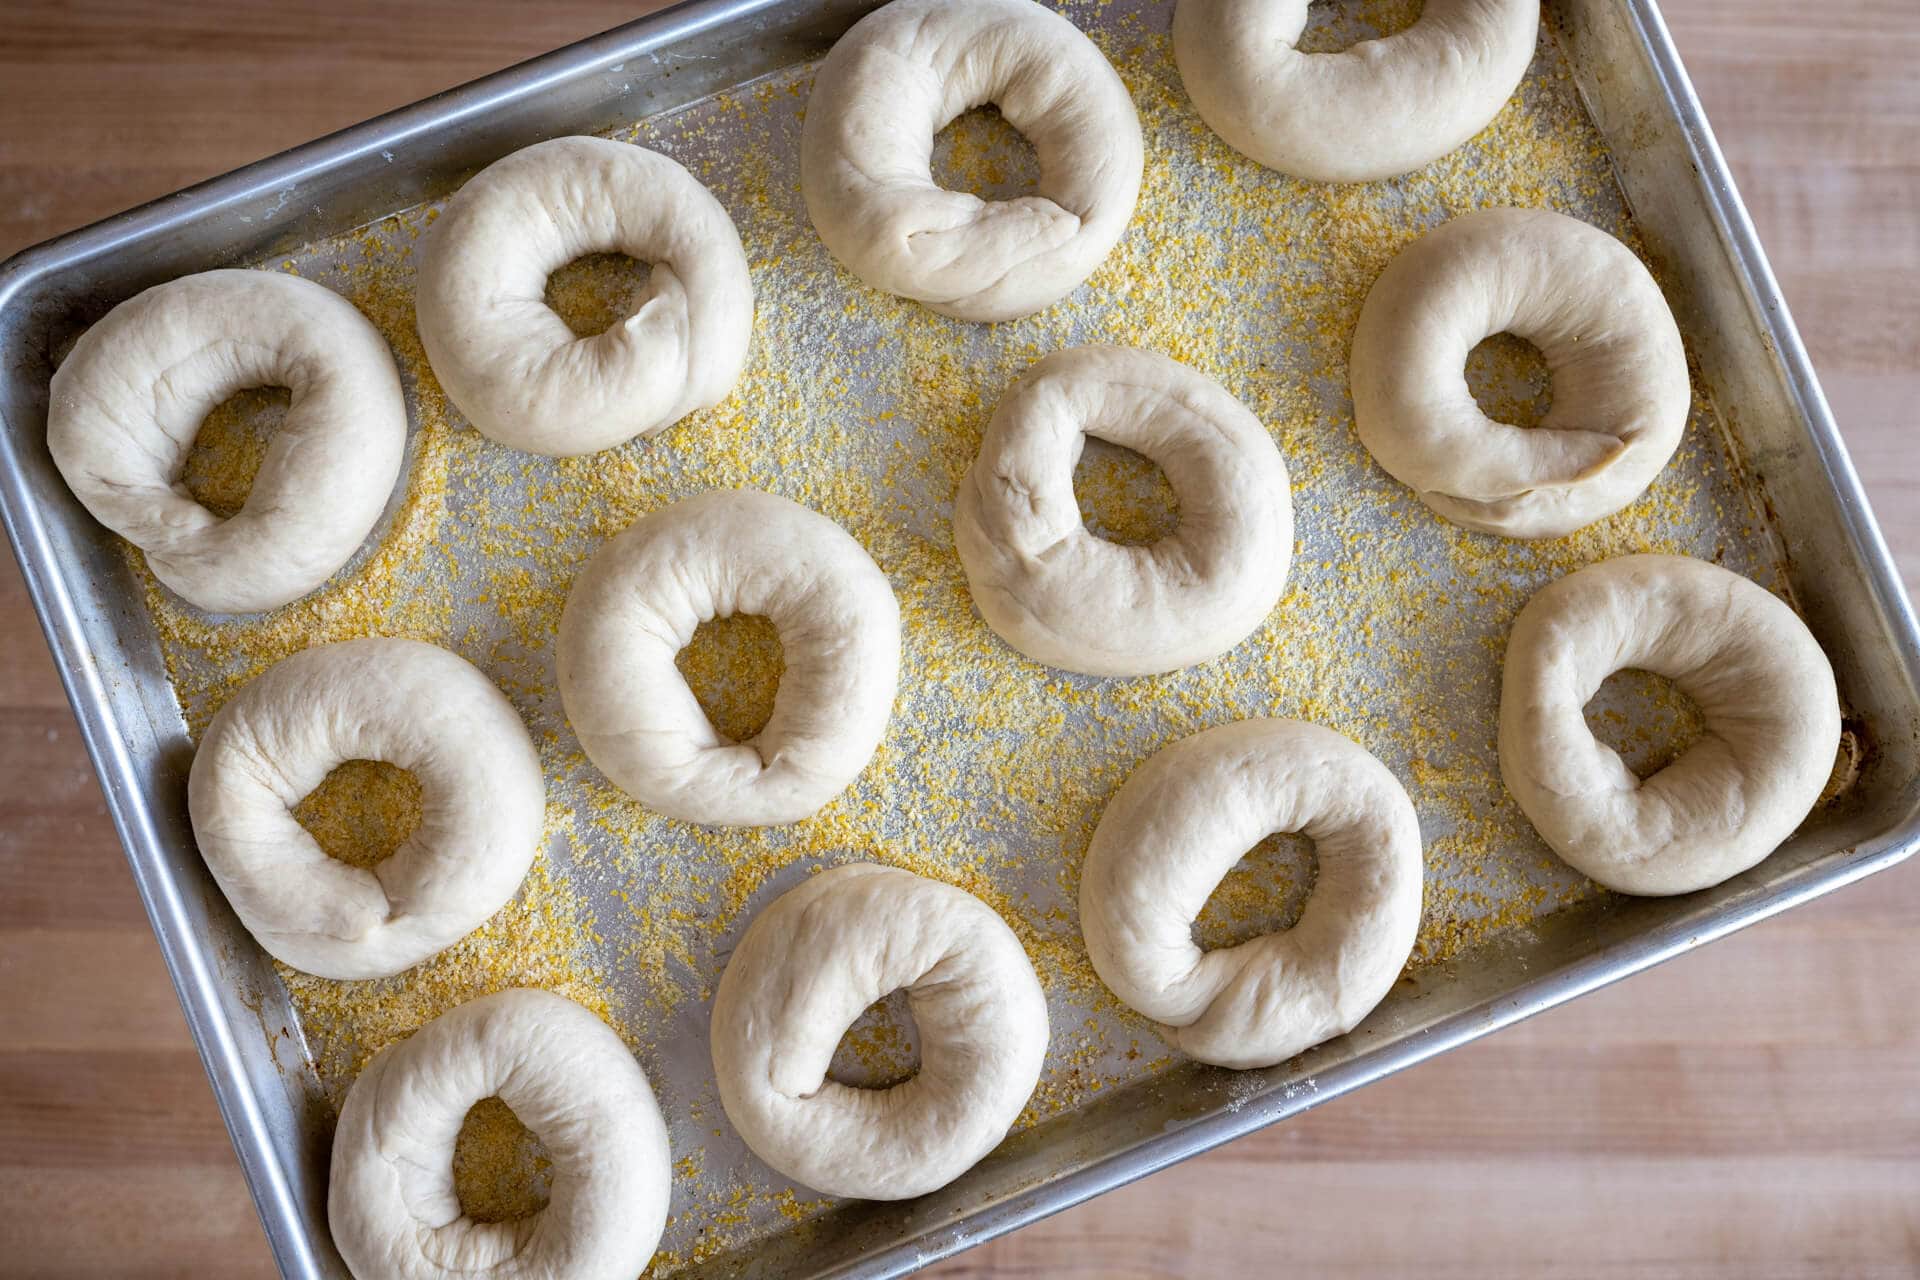
Use a half baking sheet (so it fits into your refrigerator) to hold the 12 pieces of shaped dough. Later, after boiling the dough, I upsize to a full baking sheet to help the dough evenly bake. Spread a thin layer of cornmeal on the half sheet to prevent the bagel dough from sticking during proofing.
Divide the dough into twelve 125g pieces.
First, degas the piece by tamping down a bit with your hand. Then, do your best to form the piece into a rough rectangle and cinch down from the top, so the dough ends up in a little tube. This cinching doesn’t have to be forceful, and it helps to get the dough into a tube shape.
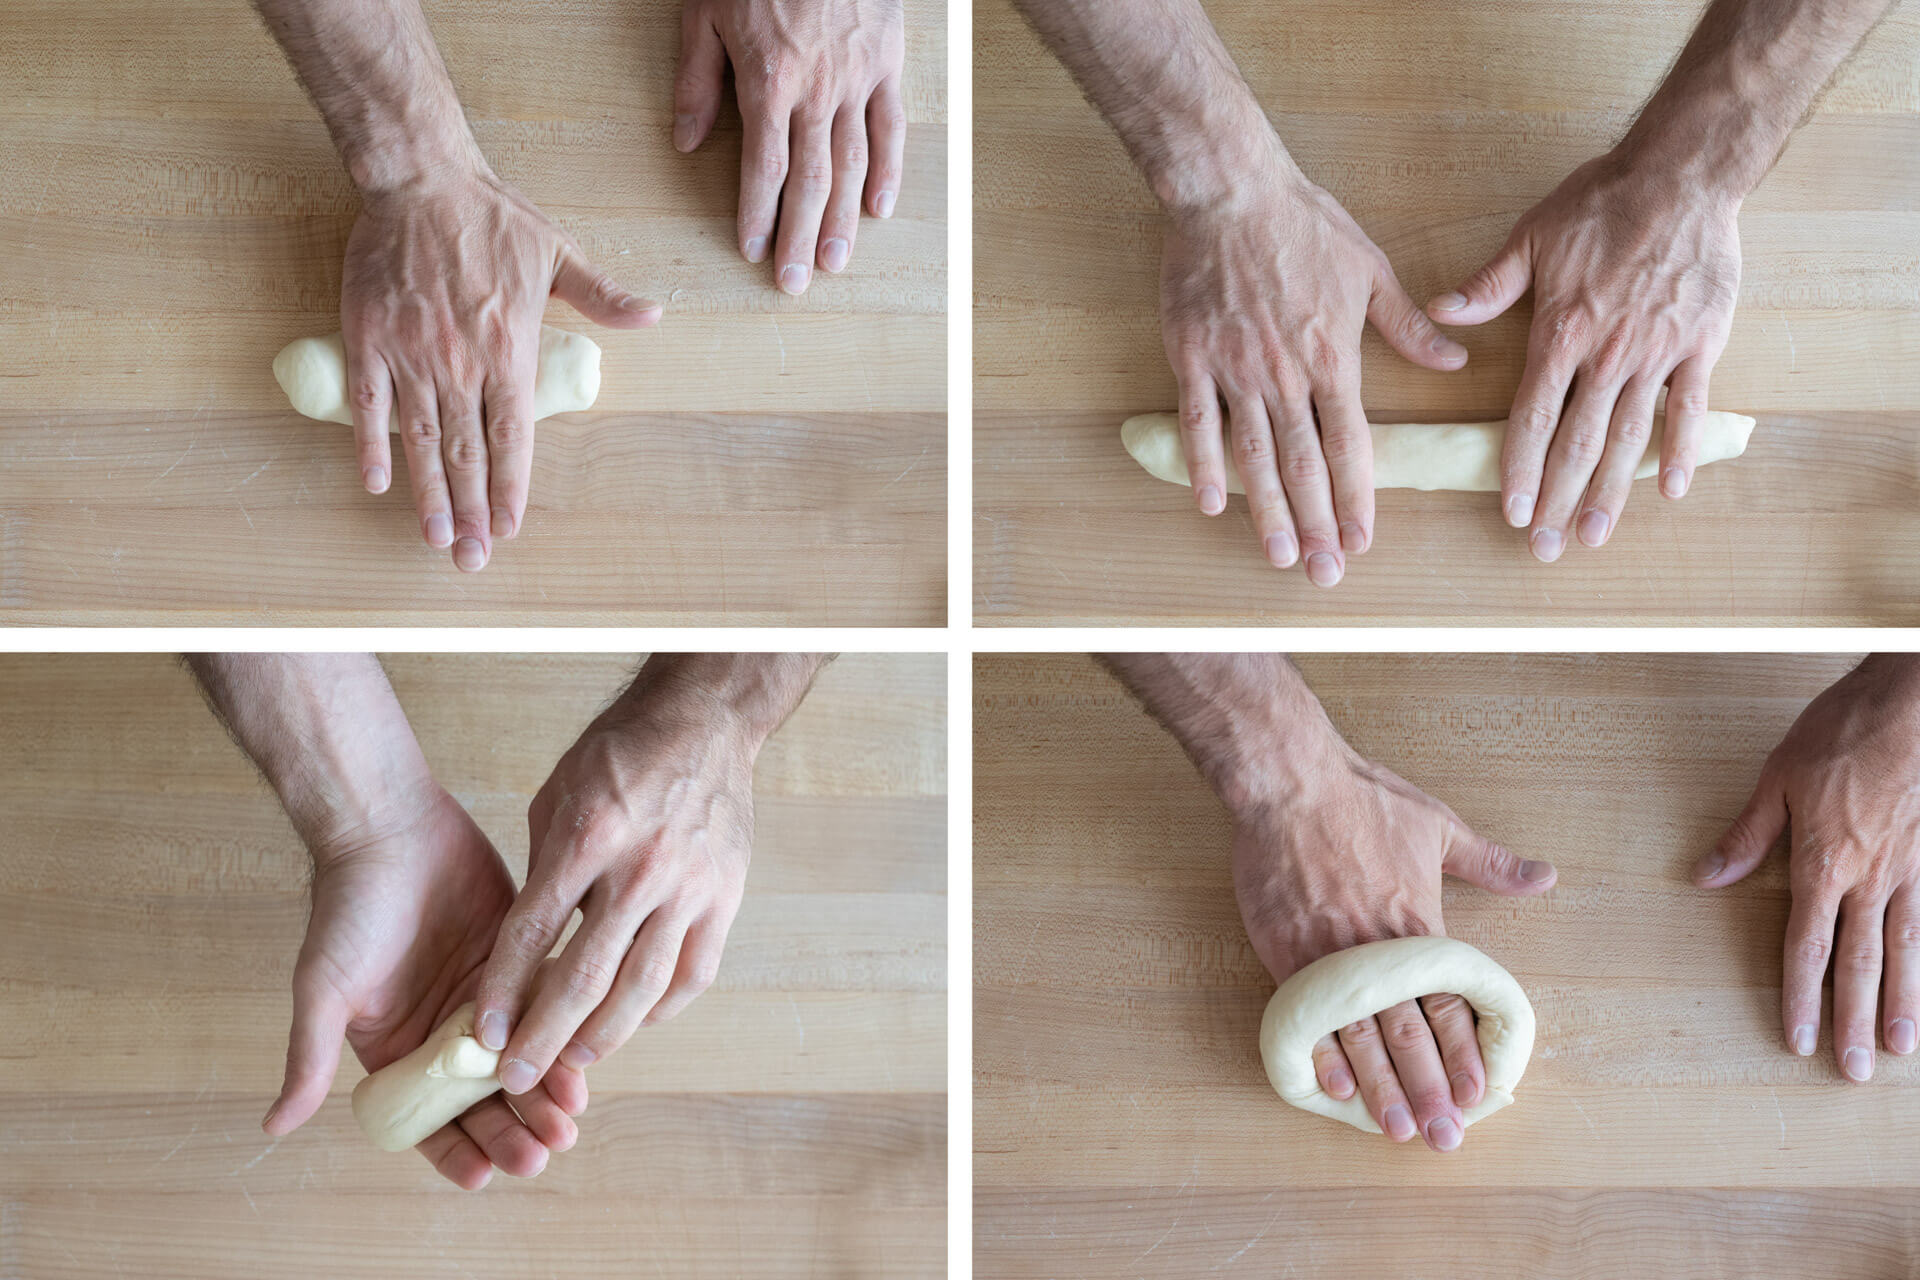
Next, roll your hand in the center a few times to create a bulb at each end. Then, switch to two hands and roll outward to about 12 inches and a tube that’s mostly the same thickness all the way through. If you prefer a bagel with a large hole, roll out the tube, so it’s longer.
Once rolled out to a long tube, wrap it around the backside of your hand between your knuckles and wrist. Overlap the two ends of the dough in the palm of your hand, and gently press the two ends together. Next, press your palm down on the work surface, and in a repetitive motion, roll the dough on the work surface repeatedly to seal.
Here’s a video on my YouTube channel of me shaping one of the pieces
After shaping a piece, transfer it to the cornmeal-dusted baking sheet. Repeat for the remaining pieces, and you will end up with four rows of three.
5. Proof – 1:00 p.m. 3:00 p.m. (2 hours room temperature, then retard overnight)
Cover the baking sheet with a large, reusable plastic bag and seal shut. Let the dough proof at room temperature, around 72-74°F (22-23°C), for 2 hours. The dough should puff up slightly after this time but not excessively. If the dough still feels very dense to the touch, give it another 15-30 minutes and check again.
After 2 hours, place the covered baking sheet into the fridge overnight at around 39°F (4°C).
6. Boil and Top – 9:30 a.m. (Day three)
Oven prep: Before you begin boiling your bagel dough, preheat your oven to 475°F (245°C) with convection or 500°F (260°C) without convection. Place one rack at the bottom third of the oven. Place a baking stone or baking steel on the rack to preheat. I steam my oven as described on my oven steaming method post, so place a roasting pan on the bottom filled with lava rocks to prepare to steam. I also fill a cup of ice and place it next to my oven (I will pour this over the lava rocks to steam the oven).
Bagels are unique because you boil the dough before baking. This boiling gelatinizes the starches in the flour and gives them a little more chew and helps them achieve a shiny crust. This gelatinization is very similar to how you make a tangzhong or roux. But for a bagel, the longer you boil them, the thicker the crust and chewier they will become. There is a limit to the boil duration, though, as they will degrade in the water after a while. I have found boiling the dough 40 seconds on each side, for a total of 1 minute and 20 seconds, to be just right.
Many places like to add barley malt syrup or honey to the boiling water, but in side-by-side testing I didn’t find the added syrup to give them any more shine. The cornmeal brought into the boiling water might also add starches, much like when making pasta.
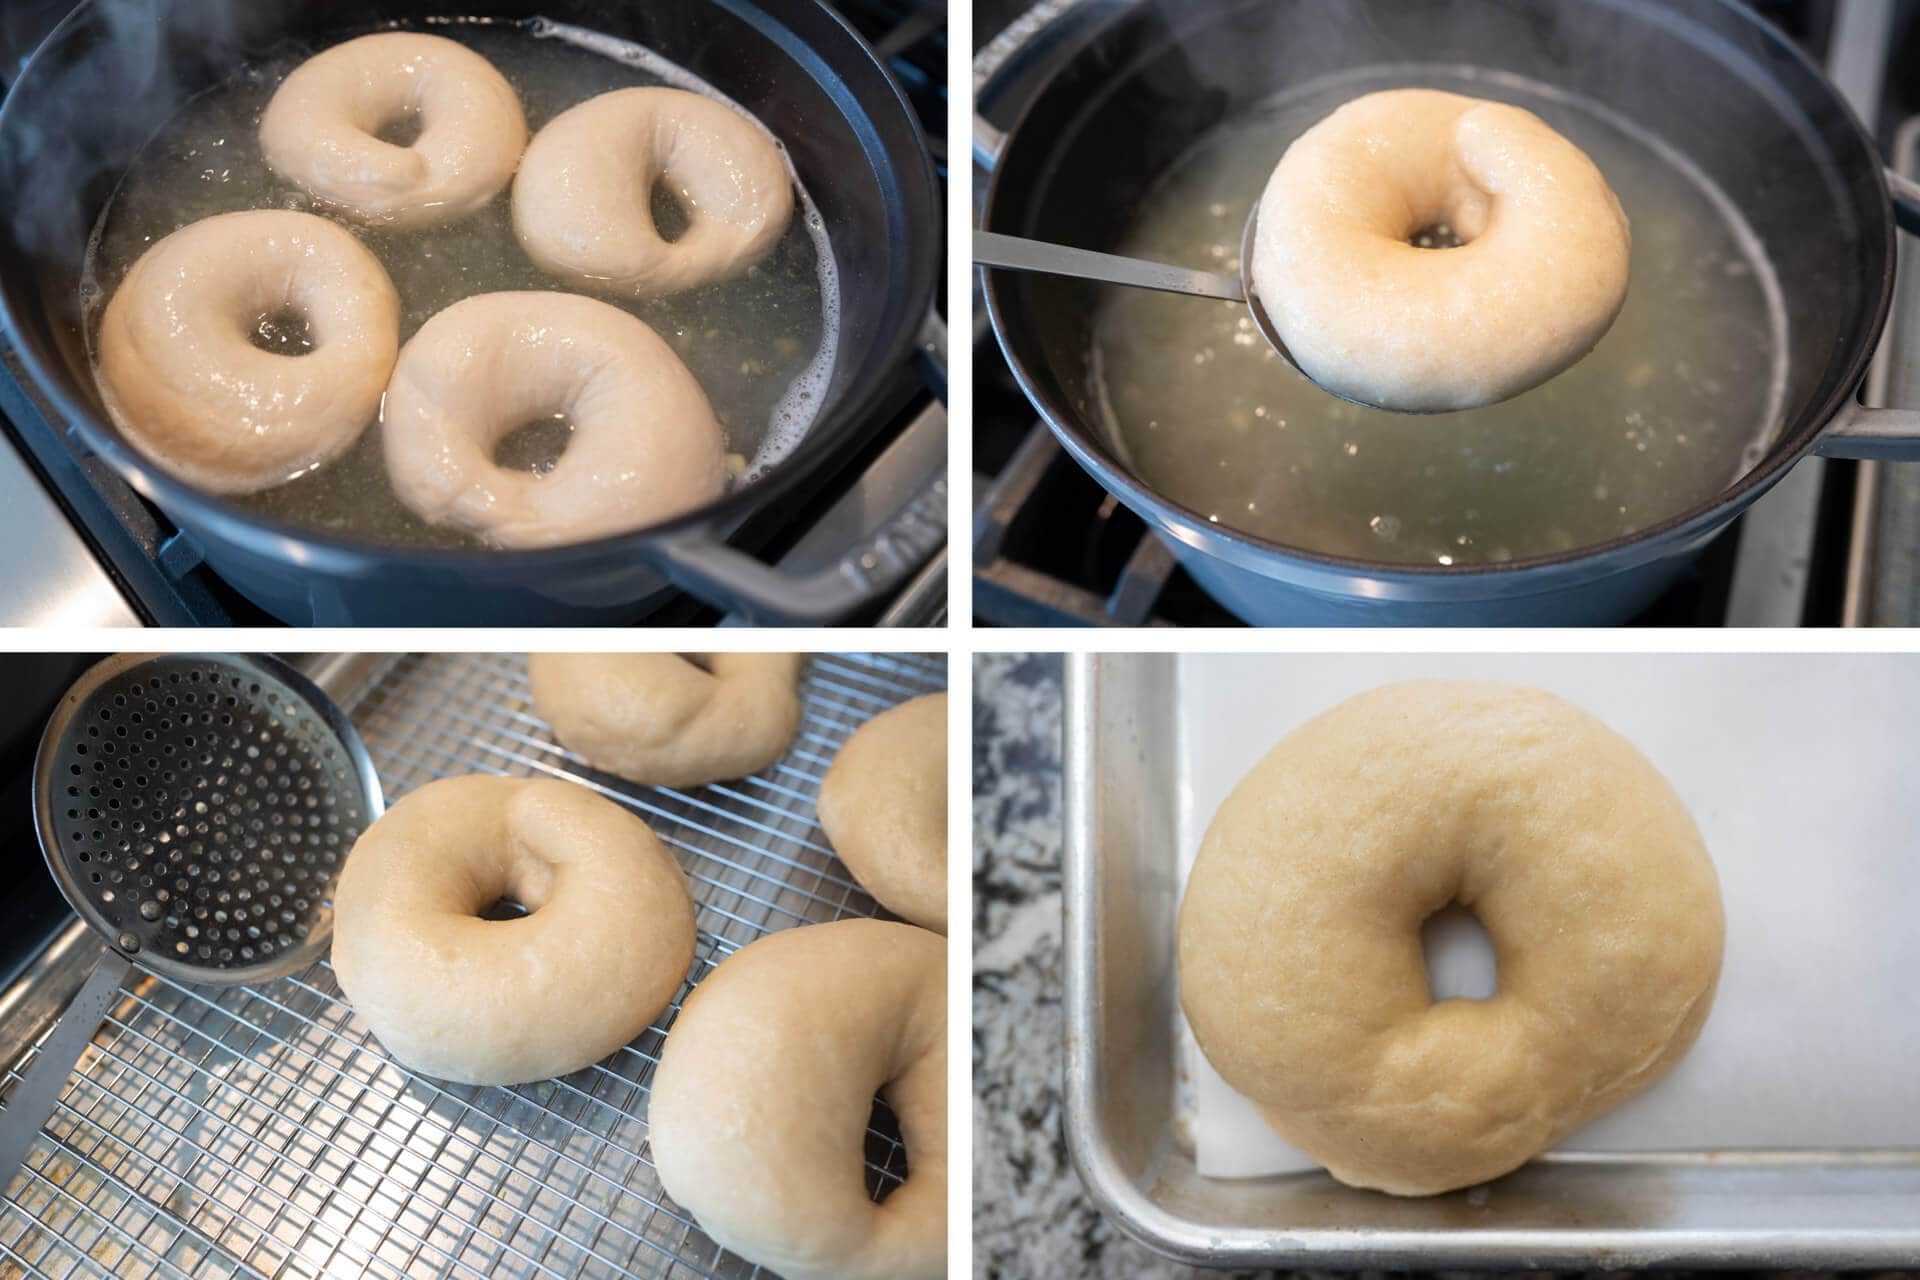
Boiling equipment prep: Fill a wide pot with enough water so the bagel dough can float without touching the bottom (in my 7qt Staub Dutch oven, this was about 1.5 gallons). Bring to a low boil. Next to your stovetop, place a half baking sheet with a cooling rack inside, this will hold the wet bagels for a minute and allow them to drain. Next, line a full baking sheet with parchment paper — this will hold the dough as it bakes. Finally, grab any toppings you’d like (poppy, oat, everything bagel mix, sesame, etc.) and place them in bowls on your work surface.
Boil: Once the water is at a low boil, boil the proofed sourdough bagel dough straight from the fridge, about 40 seconds per side. Using a spider strainer, transfer each piece to the cooling rack inside the baking sheet to drain while you boil the rest of the dough.
Once the pieces are all boiled, move quickly to top them, if desired, and get them onto the final baking sheet.
This dough should float immediately when dropped into the boiling water. If the dough sinks and doesn’t pop up within a few seconds, it’s likely under proofed. Give it more time to proof at warm temperature and try again.
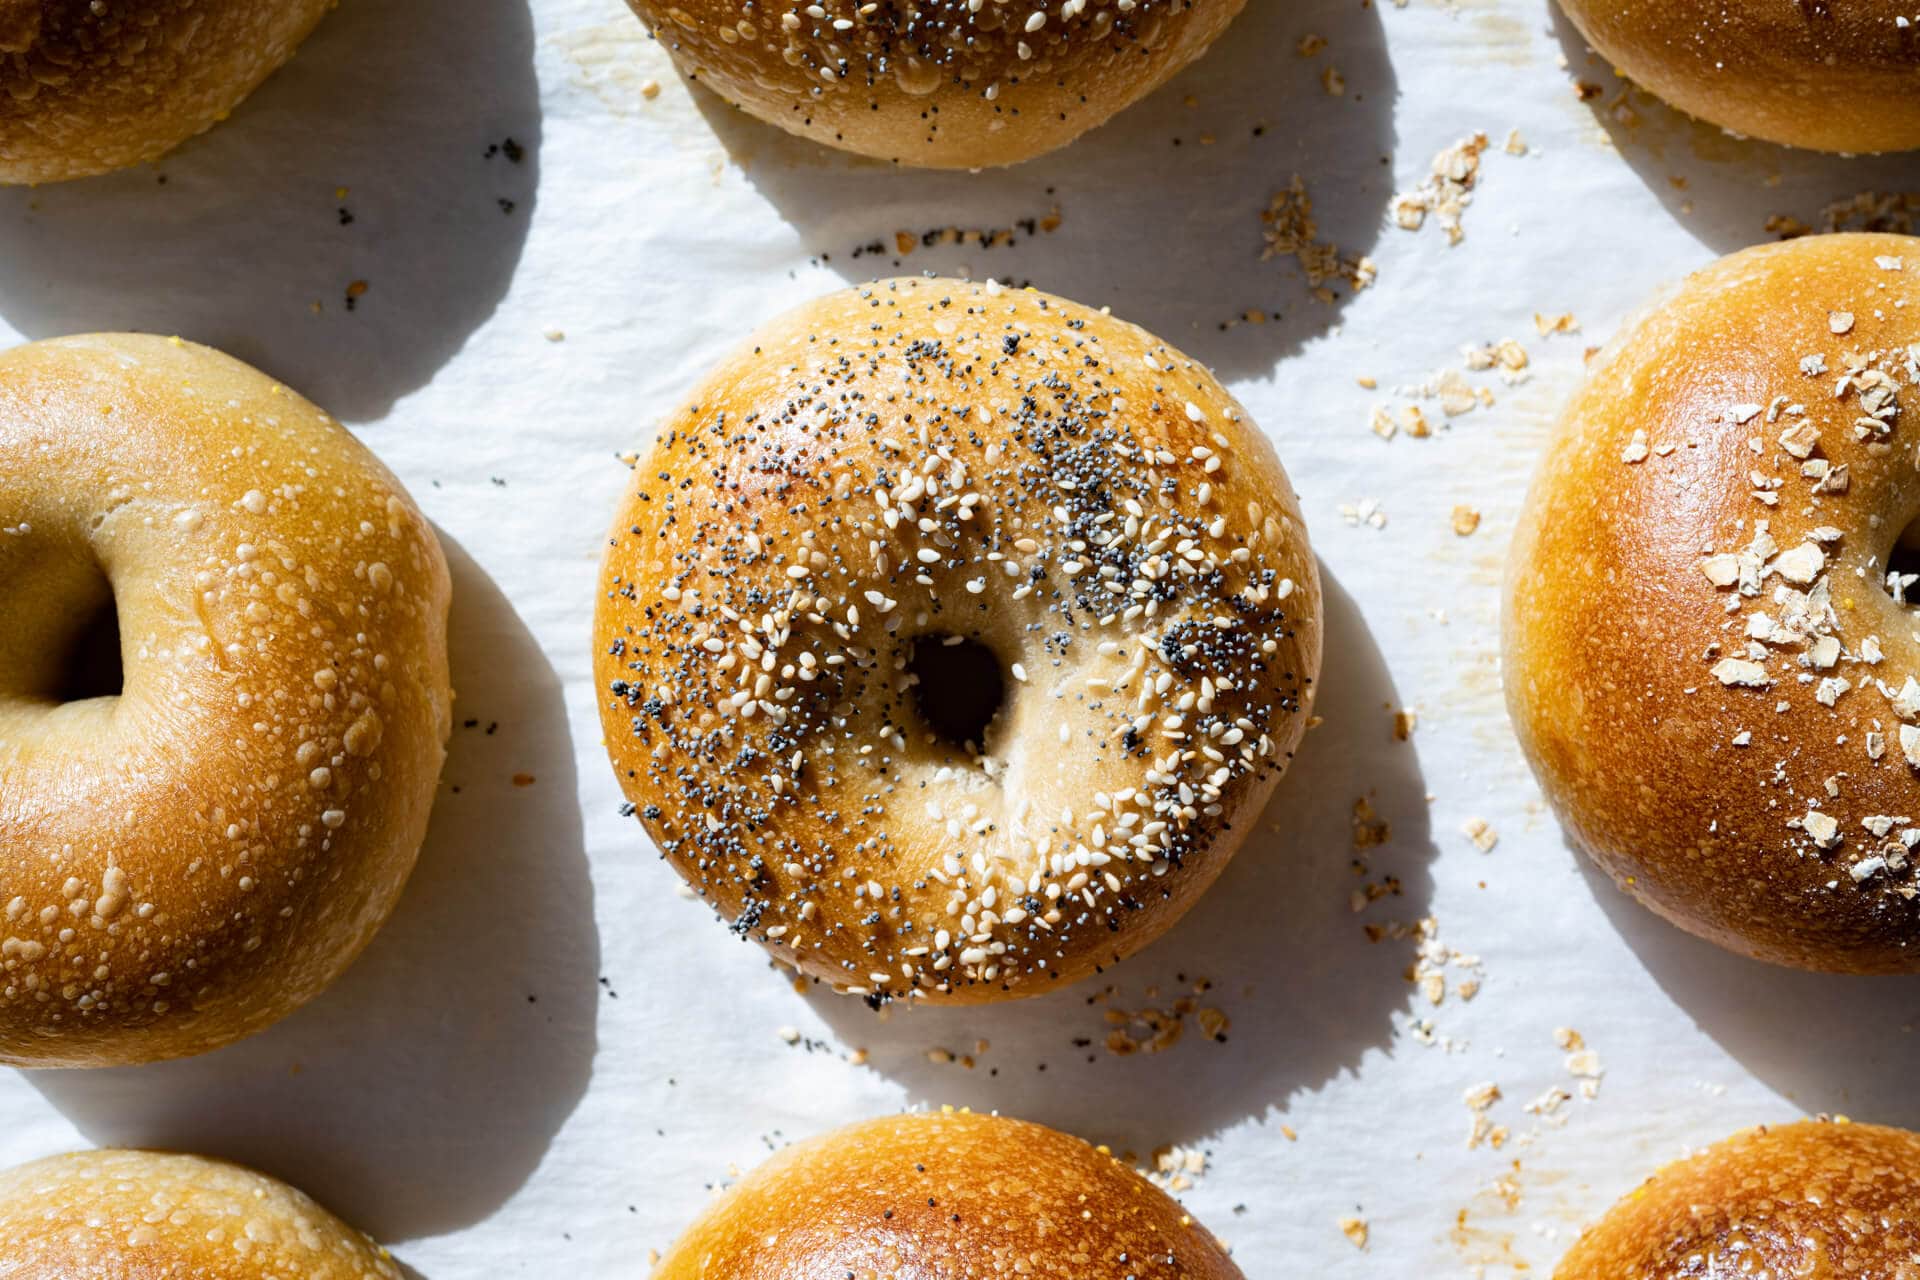
Once the bagels have drained for a minute on the baking rack, transfer them to the full baking sheet lined with parchment paper for baking. Top them with whatever toppings you’d like at this time.
7. Bake – 9:45 a.m.
Slide the full baking sheet with boiled dough into the preheated oven directly onto the baking stone or baking steel. Pour the cup of ice onto the pan with lava rocks and quickly close the oven.
Bake at 475°F (245°C) convection (500°F (260°C) without convection) for 10 minutes with steam. After 10 minutes, vent the oven and remove the steaming pan, rotate the baking sheet 180°, and bake for 5 minutes longer. After this 5 minutes, turn the oven down to 450°F (235°C) and bake for 5 minutes longer for a total of 20 minutes. Remove the sheet when the bagels are nicely colored.
Let cool 15-20 minutes on a wire rack. These are fantastic the first day they’re baked and hold well for a few days after that in a bread box. I also like to wait till they are room temperature, slice in half, and then freeze in a freezer bag. They can be reheated in the toaster, as described in my post on how to store bread.
Conclusion
When you take a bite of these bagels, you’ll first discover a fleeting crispness that gives in to chewiness, a textural dance that eventually leads to a subtle, onset of sourness. This mellow tang creeps in and propels you to keep going with it, to keep taking bite after bite until you’ve finished the entire bagel without the thought of stopping.
The entire eating experience is scary in how it takes over, and it’s exactly what I want in a bagel.
The whole eating experience is scary in how it takes over, and it’s exactly what I want in a bagel. That pop of flavor at the end of the bite is not something you find in mass-produced bagels, and I just love it. And while there are sugar and barley malt syrup added to the dough, it does not carry through to make these bagels sweet. There’s a beautiful balance in the eating experience of these sourdough bagels.
After making these bagels the first time, you’ll get the hang of the process. Subsequent batches become easier and more natural, and it’s no stretch to think these could become a weekly staple—and they freeze incredibly well (I slice them in half and place them in a freezer bag) if, by chance, there’s any left.
Print
Sourdough Bagel
- Prep Time: 24 hours
- Total Time: 24 hours
- Yield: 12 bagels
Description
My recipe for flavorful and chewy sourdough bagels with a thin and slightly crispy crust. Delicious topped with an everything bagel mix, coarse sea salt, oats, seeds, or anything else you can dream up!
Ingredients
Levain
- 116g high protein flour
- 58g water
- 23g sourdough starter, ripe
Main Dough
- 848g high protein flour
- 472g water
- 29g sugar, caster
- 29g barley malt syrup
- 18g salt
- 7g diastatic malt
- 197g levain
Instructions
- Levain (the night before mixing, 9:30 p.m.)
Mix all the Levain ingredients in a container and leave it at a warm temperature for 12 hours. - Mix (9:30 a.m.)
Add a splash of the mixing water, sugar, barley malt syrup, diastatic malt powder, and salt to a small bowl and mix together. To your stand mixer’s mixing bowl, add the malt syrup slurry, flour, water, and ripe levain. Mix on low speed for approximately 5 minutes until the dough strengthens and begins to smooth. Transfer your dough to a bulk fermentation container and cover. - Bulk Fermentation (9:45 a.m. to 12:45 p.m.)
Give this dough a single fold after 1 hour and 30 minutes into bulk fermentation. - Divide and Shape (12:45 p.m.)
Use a half baking sheet (so it fits into your refrigerator) to hold the 12 pieces of shaped dough. Spread a thin layer of cornmeal on the half sheet to prevent sticking. Divide the dough into twelve 125g pieces. First, degas the piece by tamping down a bit with your hand. Then, form the piece into a rough rectangle and cinch down from the top, so the dough ends up in a little tube. Roll the tube out to a 12″ long tube. Wrap the dough around the backside of your hand and pinch it together in the front. Roll a few times on the counter to seal. Transfer to the cornmeal-dusted baking sheet. Repeat for remaining dough pieces. - Proof (1:00 p.m. to 3:00 p.m.)
Cover the baking sheet with a large, reusable plastic bag and seal shut. Let the dough proof at room temperature, around 72-74°F (22-23°C), for 2 hours. The dough should puff up slightly after this time but not excessively. If the dough still feels very dense to the touch, give it another 15-30 minutes and check again. After 2 hours, place the covered baking sheet into the fridge overnight at around 39°F (4°C). - Boil and Top (9:30 a.m., Day Three)
Oven prep: Before you begin boiling your bagel dough, preheat your oven to 475°F (245°C) with convection or 500°F (260°C) without convection. Place one rack at the bottom third of the oven. Place a baking stone or baking steel on the rack to preheat. Place a roasting pan on the bottom filled with lava rocks to prepare to steam. I also fill a cup of ice and place it next to my oven (I will pour this over the lava rocks to steam the oven).
Boiling equipment prep: Fill a wide pot with water and bring to a low boil. Next to your stovetop, place a half baking sheet with a cooling rack inside, this will hold the wet bagels for a minute and allow them to drain. Next, line a full baking sheet with parchment paper — this will hold the dough as it bakes. Finally, grab any toppings you’d like (poppy, oat, everything bagel mix, sesame, etc.) and place them in bowls on your work surface.
Boil: Once the water is at a low boil, boil the proofed sourdough bagel dough straight from the fridge, about 40 seconds per side. Using a spider strainer, transfer each piece to the cooling rack inside the baking sheet to drain while you boil the rest of the dough. Then, transfer the boiled bagels to the full baking sheet and top, if desired. - Bake (9:45 a.m.)
Slide the pan with all the bagel dough into the oven and pour the cup of ice over the roasting pan with lava rocks. Quickly close the oven.
Bake at 475°F (245°C) convection (500°F (260°C) without convection) for 10 minutes with steam. After 10 minutes, vent the oven and remove the steaming pan, rotate the baking sheet 180°, and bake for 5 minutes longer. After this 5 minutes, turn the oven down to 450°F (235°C) and bake for 5 minutes longer for a total of 20 minutes. Remove the sheet when the bagels are nicely colored. Let cool 15-20 minutes on a wire rack.
Notes
- These are wonderful topped with an Everything Bagel mix, rolled oats, sesame seed mixture, or any other topping you’d like.
If you use this sourdough bagel recipe, tag @maurizio on Instagram and use the hashtag #theperfectloaf so I can take a look!
What’s Next?
Regardless of your bagel preferences, I’m confident these sourdough bagels will rank up there with the best you’ve had—and what could be better than making your own with your sourdough starter? And who knows, perhaps they’ll mend that friendship severed by staunch bagel ideals—these could be the olive branch; a crisp and seductively chewy one.
Next up, how about a simple bake like sourdough starter discard sugar cookies?
Buon appetito! 🥯


728 Comments
Two batches done and gone, delicious, yes the perfect initial crunch plus chew. (K.A. AP flour with added gluten. But done all by hand the low moisture dough is a real challenge to mix and knead. After a nice bulk rise (covered) it forms a dry skin that made the bagel shaping difficult. I sprayed it with plain water to try and soften it but rolling it out and getting the two ends to stick together was difficult. I followed your ratio’s very closely but I think I need to significantly elevate the hydration % to make pretty bagels. Perhaps the 00 flour works more easily at this hydration level than the KA flour.
Incidentally, my friend in Portland who’s on The Wine and Food list of top 20 bagel bakeries in the US does a two day refrigerated proof. I’d like to try that.
Yes, this is a stiff dough! It sounds like your dough likely needed just a little more water to keep it tacky and shapable. A longer proof would be great!
When I mentioned to him that I was using your recipe for bagels he replied:
“That Perfect Loaf site was a bible for me last year. Incredible resource.” Previously (and still) a professional saxophonist he now has the top rated bagel bakery in Portland, Oregon, Bernstein’s Bagels.
Wow, huge praise! Thanks for sharing that. My brother lives up in Portland, I’ll have to stop by Bernstein’s next time I’m out there visiting!
I have been using Central Milling Hit protein flour for about a year for my Bagels. Very happy. Would Sir Lancelot flour be the same, better, or not as good.
Thanks for your ongoing support.
I had great success with my first batch, taste and chew perfect. King Arthur A.P flour with a dollop of gluten added. But the dough was so dry that it was hard to get the ends to bind. I kept spraying with water during formation. I’m just now working on my second batch with the same dilemma, overly dry dough not very self adhesive. I followed recipe proportions but I’m inclined to significantly increase the dough hydration next time.
I’ve used King Arther Bread Flour and it’s worked well!
I was thinking of Sir Lancelot, as I thought Bread flour would not have sufficient protein for an outstanding Bagel.
If you have access to SL, that’s even better!
Good morning. I’m about to try making S.D. bagels, thanks for your nicely detailed recipe. My question is: when you call for high protein flour, which of the specific ‘specialty’ flours do you recommend as most authentic? I have King Arthur A.P. flour and was going to add a some gluten powder to kick up the protein. Any comment on that? How much to use?
Thanks!
Lee-In-VT
That should work. I’ve used KA Bread Flour and it’s worked well. For these, I do like higher protein flour for more strength and chew.
Hello Maurizio,
What can I possible substitute 7g diastatic malt with or is it possible not to incorporate it at all.
I do not have it and would like to bake it today. Would greatly appreciate your reply.
Marina—you can omit the malt if you don’t have any on hand!
You’re welcome! Great points here, and mine also are flat on bottom (though, not excessively so!). My guess is that instant yeast is just popping those up much more than sourdough. You could try, as you said, reducing the hydration just a small bit (it’s already pretty low!), and then I’d also try proofing for a shorter time. You could pop them into the fridge once shaped a little earlier, maybe 15 minutes. This slight under proofing might help eke out more spring the next day 🙂
So glad to hear that!!
Honey is the perfect sub! No worries on the under proof, happens to us all 🙂 Let me know how the next batch goes!
I have been baking 24 bagels every week. I give away 22 to friends. Best Bagels ever. Great recipe. I got to 24 Bagels by doubling the recipe. I would like to now make 30 Bagels. Though I have tried bakers math. I have failed same, as Algebra in high school. Could you PLEASE help me out with formula for 30 Bagels? Thanks
OK, I finally was able to figure out the percentages. Only issue I still have is Bagels being a little softer than I would like ,but perfect crumb and taste. Thank you for making it possible for us homemakers to succeed.
You’re welcome, Neil! Glad you got that squared away.
You’re very welcome, Dan! These are not sweet bagels by any means, even with the small amount of sugar added. The sugar helps offset the sourness to some degree, but it’s also a texturizer and texture preserver in a way, helping to bring some softness to the bagel. I tested without any sugar and I found flavor and texture-wise, it was best with it included. If you wanted to leave it out, I’d say just go without any substitute and see what you think in the end, you might be fine with the omission!
Are there any cues for what the dough should look like at the end of the bulk fermentation?
It’s a firm dough so it’ll be very well risen with defined edges. Puffy. Very strong, but airy. If you hit the dough temp listed in the recipe, it should be right at that duration!
Thank you! I have been intimidated by using temperatures in my baking, but I will try it next time. It seems like it will remove the guesswork. In the end bagels turned out great!
This formula looks great. One question, is honey a good substitute for barley malt syrup? Thank you!
Yes!
I’ve been playing with this recipe a lot.
I just made a batch that has (approximately) 25% whole wheat flour. It was very good, and miles better than anything that I can buy near where I live. Of course, I no longer compare bagels to what I can buy, but rather, what I can make using your original recipe — which is perfection. The 25% WW version had a slightly less chewy (and very slightly more bready) interior than the original – but I think this could only be detected by a bagel aficionado.
For the dough, I used substitutions that King Arthur suggested (substituting 113g whole wheat flour for every 120 g white flour, and adding 2 teaspoons for each of those quantities), and had to also wet my hands twice during the kneading process since it was really hard to work. For the levain, I approximated King Arthur’s substitutions. (I always increase my levain percentages by 10% when I made this recipe, because otherwise it falls short; if I have excess, I just discard.)
This method worked for me — the bagels were still moist, despite the addition of whole wheat flour. It had a good color and flavor and wasn’t sweet. I’m going to go ahead and use this 25% WW version for family consumption (and I won’t attempt to push the percentage out further), but I’ll stick with your original recipe (PERFECTION) when giving bagels to others. (But, please let me know if you can think of ways to improve the 25% recipe!)
Levain:
100g bread flour
25g whole wheat flour
65g water
25g starter
Dough
608g bread flour
223g WW flour
all other ingredients the same, BUT
added 4 teaspoons and, um, two wet hands of water
(While I wish that I could include jalapenos, it’s been tricky for me. Too hard to incorporate and roll it when I add it during the shaping stage, and the entire texture is a little off and dense when I add it in the very beginning. But, not a problem – it’s still super yum simply eating it with everything toppings!)
Thanks Sheela, I appreciate that! I love seeing experimentation like this. I really like your approach and I was playing with whole grains in this recipe as well (I have tried ww and rye)—I’ll be getting back to this soon. But your approach looks great to me! I’d say that, yes, with the increase in WW you’ll need to add more water as needed for the dough to be workable—it looks like you did just that. Other than that, you’ll start to effect the fermentation timeline, but not drastically, and you just adjust as needed (reduce bulk time, proof, etc.).
Another thing that might be interesting is to try using white whole wheat (KA has a great line) or 100% type 85 flour for the bagels. On my list 🙂
Thanks for all the feedback and comments, Sheela!
Have you tried making them with whole grain? What would you change in the recipe to make this possible?
It’s on my list to test soon! Check out Sheela’s post above yours, she worked some in. I’d likely expect to increase the hydration a bit, and watch the dough in bulk to ensure it’s not fermenting too fast!
Hi! Have you tried making these without the cold retard?
I don’t have enough room in the fridge for a baking sheet.
Maybe a cold retard before shaping would work? What do you think?
Thanks!
AJ
I haven’t, Aaron. The cold really does help firm up the dough to make boiling easier, though. I’d say it’s possible to skip, but I’ve not tried this myself. The cold does also bring additional flavor, but more than that, it’s prep for the bath.
Maurizio, your bagels look amazing! I’ve fine tuned my own formula but am wondering if you’ve had good luck baking yours in the Rofco?
Thanks, Kat! I have not tried these in my Rofco… I do mean to, though. I haven’t yet because I haven’t done a large enough batch to spin the oven up for just those 🙂
I’ve made these and they are really quite delicious. Funnily enough I’ve also made them with instant yeast to speed up the process and I think I prefer them to the sourdough variety. The taste is not quite as good but I prefer the less chewy/crunchy crust as with sourdough it becomes a bit too much for me.
Second attempt. Bagels got great early rise before I bagged the pan and put it in fridge. Next morning, flat, sank in water. Left out and they rose some, but not full bagel sized. What am I missing? Do they need an hour or 2 to rise out of the fridge before boiling?
Maurizio – I’d like to replace some of the high-protein (white) flour with either whole wheat or rye. Can you recommend a formula for the replacement? I’ve done this with your ‘sourdough with all-purpose flour’, subbing 5% rye or 10% whole wheat. Would this same formula work for the bagels? Thanks!
Very upset. I just baked a dozen bagels for a customer and now I want one and there aren’t any left. LOL I don’t have room in my refrigerator for more than two trays of six bagels each. I bake your bagels and sourdough bread and give it away. The “customer” than makes a nice contribution to the Harry Chapin Food Bank for those who are out of work and hungry. It’s a win/win situation…….except that I don’t get a bagel.
Hi Leo sounds like a great recipe. I’ve been using a different recipe that works really well, or at least I think so. It doesn’t have sugar or diastatic malt or barley malt syrup here, even if it did, they are really expensive here. It has full cream milk powder though. Friends and family like it a lot but some have commented recently that the bagels are too hard. I also find that they shrink when baking even though they are lovely and puffy after the overnight retard. Is this normal? I boil one minute each side with baking soda and brown sugar. I am at nearly 6000 feet so bake at 190°C fan assist (otherwise they will burn outside before being baked through) as but have never used steam. What advice might you have?
Leo,
First of all thank you so much for the wonderful recipe, I religiously follow all your recipes. The bagels did turn out pretty well and very flavourful but there are a couple of things if you could kindly trouble shoot it for me.I followed every exact single thing on your recipe, including fermentation time and ingredients but used toasted barley malt as I can’t being the malt powder that you mentioned.
Problem 1: they didn’t puff up much after the cold bulk fermentation, rather flat even if I left it outside room temp for a further 30 mins before boiling them, after baking them thankfully most of them rise well but one of two was on the flat side
Problem 2: they are on the chewier side, its kind chewier than a normal bagel supposed to me…I wonder if it because of my boiling time? 40 secs on one side and 40 on the other OR is it because I didn’t use sauna stones, I put a regular baking tray underneath the tray of bagel and poured ice water in the beginning while I bake, and refilled with ice water 5 mins after, and refilled again after I turned the tray…too much steam?
Problem 3: I didn’t get a nice hard crust on the top despite the top being nice and shiny, is it because my temperature is too low? I baked for 230 C for 10 mins ( that’s the max for my oven) and lowered to 190 degrees for 12 mins after the rotation as I don’t want to burn the bagels
Overall I am still pretty pleased and I suspect toasting them tmr morning might give it a nice crust for breakfast?
But if you could be so kind to trouble shoot what I did wrong that would be brilliant! its kind of bugging me : (
Nicole
I have made these a few times now and they are amazing. My question is, I want to make egg bagels, could I just add 3 whole eggs to this recipe?
Hi, is there a typo regarding caster sugar and malt syrup? I see that the ingredients has both, but the instructions only mention syrup. Is it supposed to be AND and OR? I JUST PUT BOTH
You’re right, it’s both. Will fix the typo!
Oops sorry for all caps. I just added both to my dough
Well, I’ve been working on my first sourdough bagels for a few days now. I have to say, I panicked when they came out of the refrigerator at the final proofing, because although bubbly, they were kind of flat. I let them sit on the counter for about an hour and decided to check one of my bagle bites. It barely floated on the bottom, so I waited another half hour I boiled the bagels up, then baked them and was pleasantly surprised to see oven spring…yay! My bagels looked like bagels. Now I had to wait for the texture and taste test! Wow!…they are pretty dang close to a Manhatten Bagel Co. Bagel. Very Yummy! Thanks for sharing your recipe.
Yes, it can be a scary sight when those come out of the fridge! But as long as bulk fermentation was long enough, they’ll spring up just fine. Glad to hear they worked out well for you, Margaret! Enjoy 🙂
What temperature do you sent your proofed at for the overnight levain?
It’s around 76-78F (24-25C).
I made these bagels and faithfully followed all of the steps as outlined. I am disappointed because the bagels are very tough. After baking, the crust was very crisp, not soft and chewy as I was expecting. They did soften up after a day or so in a covered container but still very tough. Did I boil them too long? I tried to pull them out of the water after 40 seconds as suggested. I followed the oven steaming method as described. I wonder if the oven might have been too hot? 500 F for 10 minutes and the 450 F for another 10 minutes seems pretty hot.
Hey, Helga! I don’t think you boiled them too long, it might have been too high of a temperature and for too long. I’d say try dropping that 500F bake to 475F for 10m, then, 450F for another 10m. You could also try going for 425F instead of 450F.
I bake 24 bagels every weekend and share with neighbors. I just doubled the recipe to get to 24. My Bagels still feel soft and I cannot slice if they are standing on end. They look and taste great!
Also. tip: I keep about 10 grams of dough and after 2 hrs. try to float in a cup of water. Works perfectly to tell when Bagels are proofed enough. Would appreciate comment on hydration or why Bagels are soft.
That’s interesting, Neil! One thing you could try is lowering the temperature and baking them for longer, that should give them more time to dry and harden before coloring too fast. I think that will help!
Hi there,
Can i skip the diastatic malt? I don’t have any:/
I find it does help bring color to the crust and add a little chew, but yes, skipping should work ok!
Ciao Maurizio! Is it possible to substitute the caster sugar with another type of sugar and if so, what would you recommend? Thanks!
Absolutely. Use the finest white sugar you can find!
Maurizio,
Thank you for this recipe. My son has declared these the best bagels he has ever eaten and always Instagrams them when I make them, which is now 2 -3 weekends a month. This past weekend I had a request for a sweet cinnamon and raisin bagel (I am a devout savory bagel eater). so I made one. I simply rolled out the dough for one of the bagels, sprinkled it with brown sugar, cinnamon and raisins, rolled it up and shaped it . While it leaked a bit because I did not get the edges sealed, I am told it was delicious. The nice thing about the way these are shaped is that one can put add-ins in one or two bagels giving the batch variety. I can have my savory everything bagel and still deliver raisin bagels from the same batch.
Thanks again. These are so good, and I use the recipe so often, I felt compelled to hit “Support!” above!
That’s huge praise, Mark! Super glad to hear they’re a fav. I love that approach to adding mix-ins into the dough. I’ve thought about that many times, and had planned to tackle a cinn/raisin variant soon I’m going to have to give that a shot! I really do appreciate the support, thank you so much and enjoy!
Frank, just wanted to say that after reading your comment I tried your add-in method to make cinnamon raisin, jalapeno cheddar, and onion bagels in my last batch. Thank you for the awesome idea! I’ve just tried the raisin one and it came out so good 🙂
Hi! Yes Would it be possible to use a fully active full hydration sourdough starter instead of the levain?
Yes but you might see some variation in the end bagel. It’ll still be great if you go that route 🙂
Hi Maurizio,
Love all your recipes and have learned so much for your site! Thank you!
Just made these for the first time and although they taste great they do not have the shiny hard crust I was expecting. Is that to do with steam in the oven or the boiling step? I would love some advise. Thank you.
-Margot
Glad to hear that, Margot! Sorry for the delay. That shiny crust does take a bit of fiddling to get. Did they rise ok when boiling and in the oven? If they didn’t rise much, they might have gone too far in proof, and that could impact the final color. Also, yes, steaming is important and helps them get more shine—as does that super hot oven!
Thanks for getting back to me! I’m struggling to really remember how they behaved in the boiling step. They felt really airy and they didn’t rise dramatically! So next time I’ll try a shorter proof and see what happens!
I have seen some other recipes that call for a 50/50 egg white and water wash prior to topping the bagels. Any thoughts or opinions on that?
That will certainly add color to the bagels when baking. I’ve not found this to be necessary, I get plenty of color with just the added steam in the oven! I don’t think there’s anything “wrong” with it at all, I just don’t find the step necessary.
It may help with topping adhesion as well and will give some sheen.
Curious, the link to the barley malt goes to a whiskey link on amazon?!
That is really strange, I don’t see that here. When I click it goes to the correct Barley Malt Syrup! Here’s the link to the barley malt syrup.
Are you outside the USA? It might be directing you to the wrong place.
I’m in Ireland and it goes to a malt whisky! I was curious if that was needed because they are so difficult to make (more for the baker rather than the bagel!) 😂
Ah yes, sometimes it goes to a weird product outside the USA, sorry about that. Although, I wouldn’t mind “accidentally” buying some of that 🙂
I love your bagels and make them religiously, so thank you for that. Was wondering if you had any suggestions for using your recipe as non sourdough and use instant yeast. I ask because sometimes I don’t have a full day to dedicate to sourdough rising and shaping and times and was wondering if you had any suggestions for me. If not I understand, I am a sourdough enthusiast thru and thru, just limited on time sometimes.
Awesome to hear that, Matthew! I totally understand that. I’ve not done this recipe using IY, but I’d imagine somewhere around 1-2% would work (?). Just mix the yeast right into the dough and adjust as necessary through the process. Sorry I don’t have any more concrete tips, like you, I rarely use IY!
Thank you, p.s. your Instagram is awesome keep it up!
These bagels are BOMB. I made them for the first time today, and wow. I did salt, everything, and cheese. And I will say, the cheese bagels came out the best. I used mozzarella because it’s what I had, but I’m sure any cheese will work well. If anyone does this, make sure you put cheese on the pan first, plop the bagel on top, and add more cheese to the top of the bagel. It was AMAZING. The cheese bagels also got bigger than the other ones, I think cause the cheese acted as a “lid” and cooked a bit better. I don’t have any lava rocks or steel to steam my oven, so I just used a water/ice bath. But I don’t think it worked super well because my salt and everything bagels had dark spots where it “burned”. (It didn’t actually burn though, just has spots). Might have to try your way of steaming the oven! Do you think just covering the pan with aluminium foil will work?
Right on, Caitlyn! Happy to hear you liked them. Cheese… Haven’t tried that but now I have to, sounds amazing. Yea you could definitely cover the pan, but it might be a bit of a hassle to deal with the foil—totally up to you, though. You just want that steam to hang out around the bagels to help them rise. However, because the bagels are still wet from the bath, I’d say it’s not suuuper critical you heavily steam your oven. You could likely get away with just spritzing in the oven a few times!