

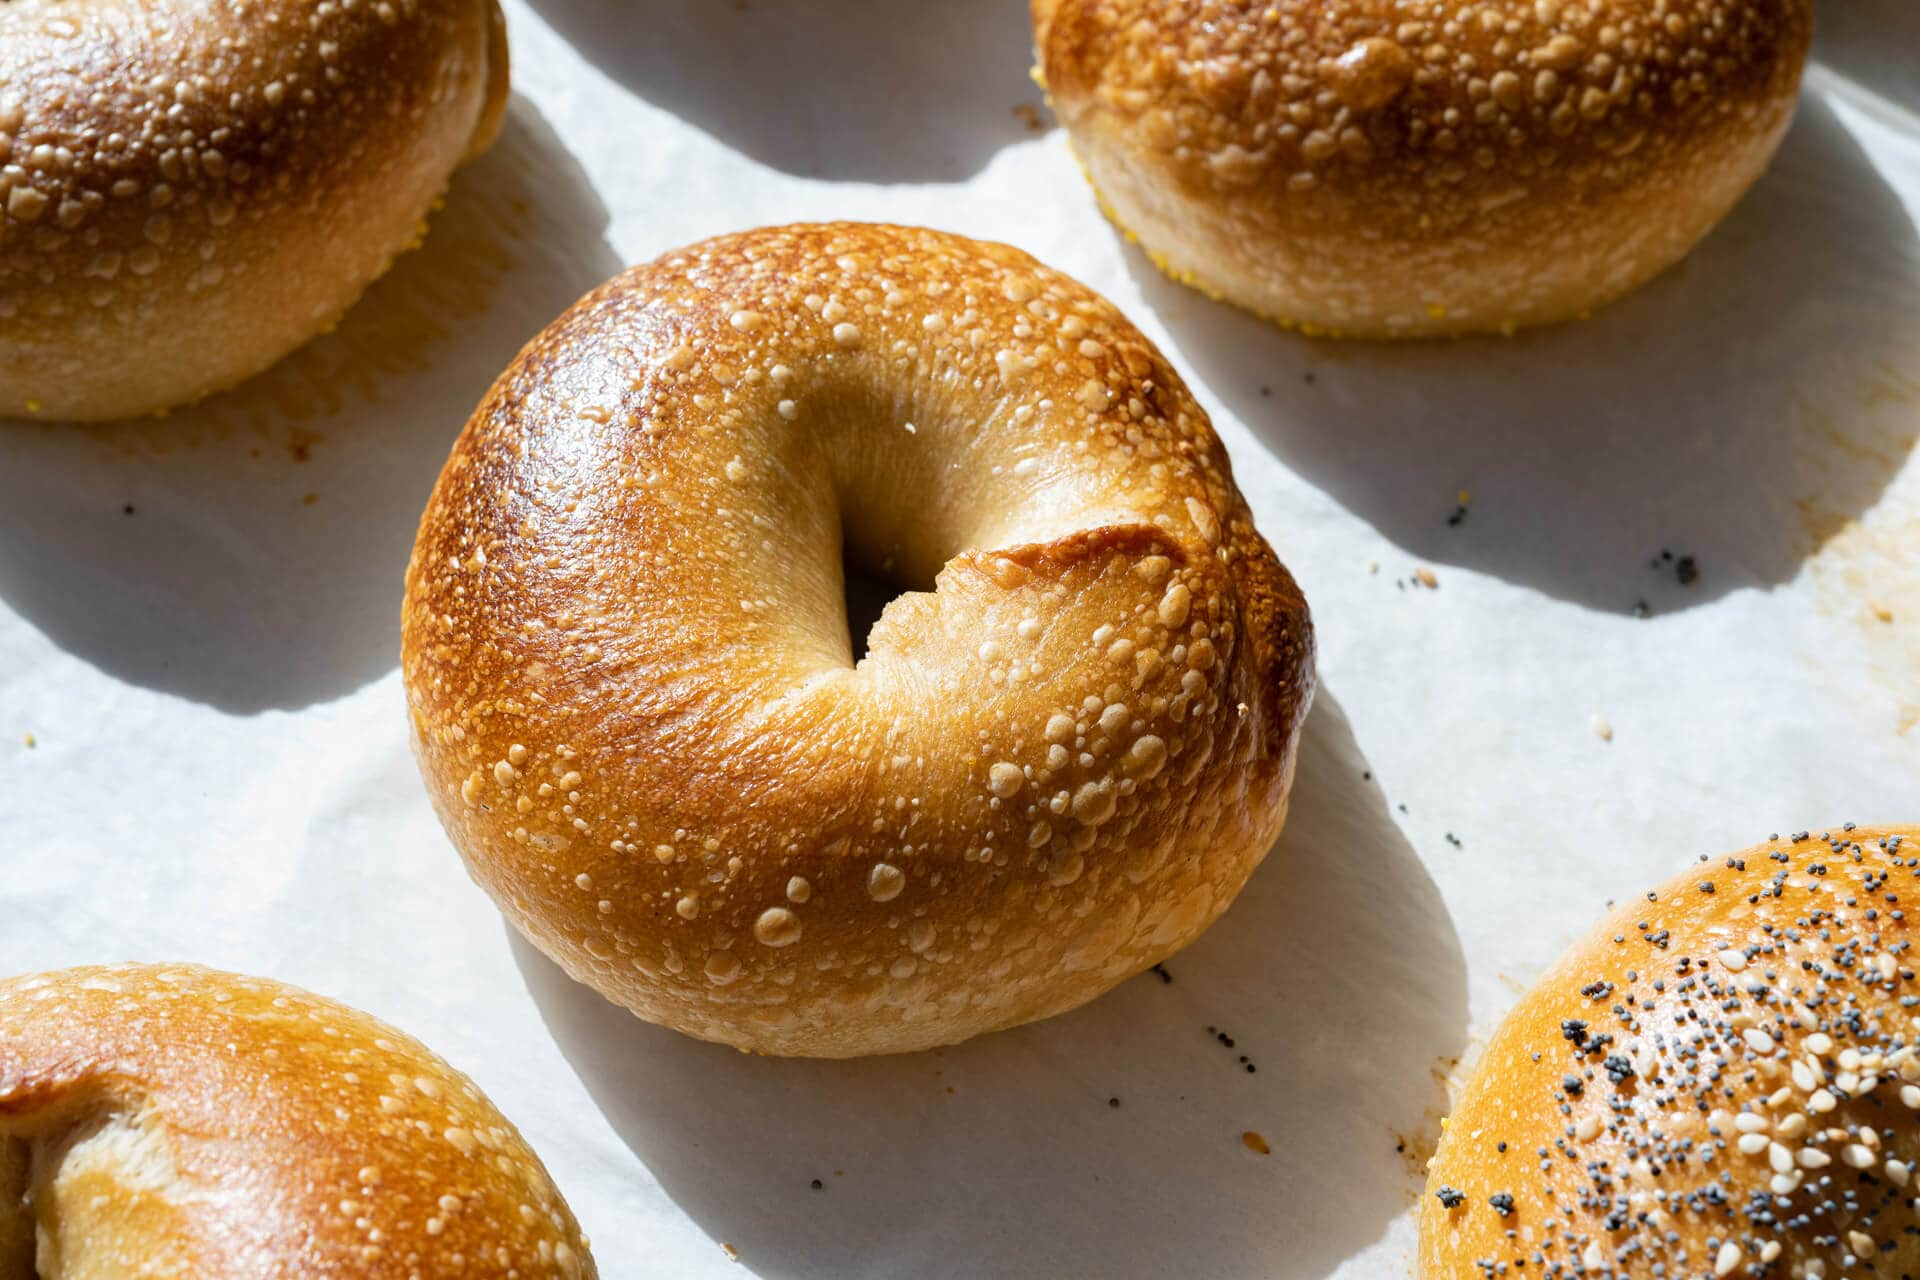
I try not to talk about bagels with friends. Talking about them always starts innocently, a little witty banter about the crust, crumb, and color traits and past eating experiences: “that bagel I had in New York that one time,” or “there was this one bagel shop down the street…” This jovial chat slowly evolves into a friendly argument about more-sweet versus more-savory and crunchy versus soft; maybe one even mentions steaming the bagel instead of baking it (😱).
Finally, the once innocuous chatter results in the participants either forming a stronger friendship over common bagel zealotry or the unfortunate end to the friendship altogether. It’s like the old axiom: never play Risk with a friend you want to keep. Exaggeration? Perhaps. But bagels do seem to rouse an enthusiasm rarely seen with other food (I’d argue pizza might be a solid contender, though). They carry a different meaning depending on where you’ve grown up, what local shops were in the area, and ultimately, where your preferences lie. But these sourdough bagels seem to transcend almost every bagel I’ve had, especially the mass-produced ones—oh yes, definitely those.
While these bagels are more along the New York Bagel style, I’m also a fan of the newer wave bagels with a super thin, glossy, and crispy crust. In fact, I have a recipe for those glossy bagels, too, if that’s more your thing.
I recall occasionally eating those bagels from the bag at the market: that ultra-chewy (from end to end) vehicle was mostly there to convey cream cheese, or schmear, from package to mouth. Rest assured, these sourdough bagels are not that in the slightest. They have a very thin and crisp exterior, not tough or hard, but rather, a little crunch that gives the chewy bagel a textural counterpoint. You see, the interior is as chewy as you’d expect a bagel, but if the entire thing is chewy, you end up with just a big chewy thing. But if you have a contrasting texture, it seems to amplify the chewy thing, much like adding an acid elaborates other flavors.
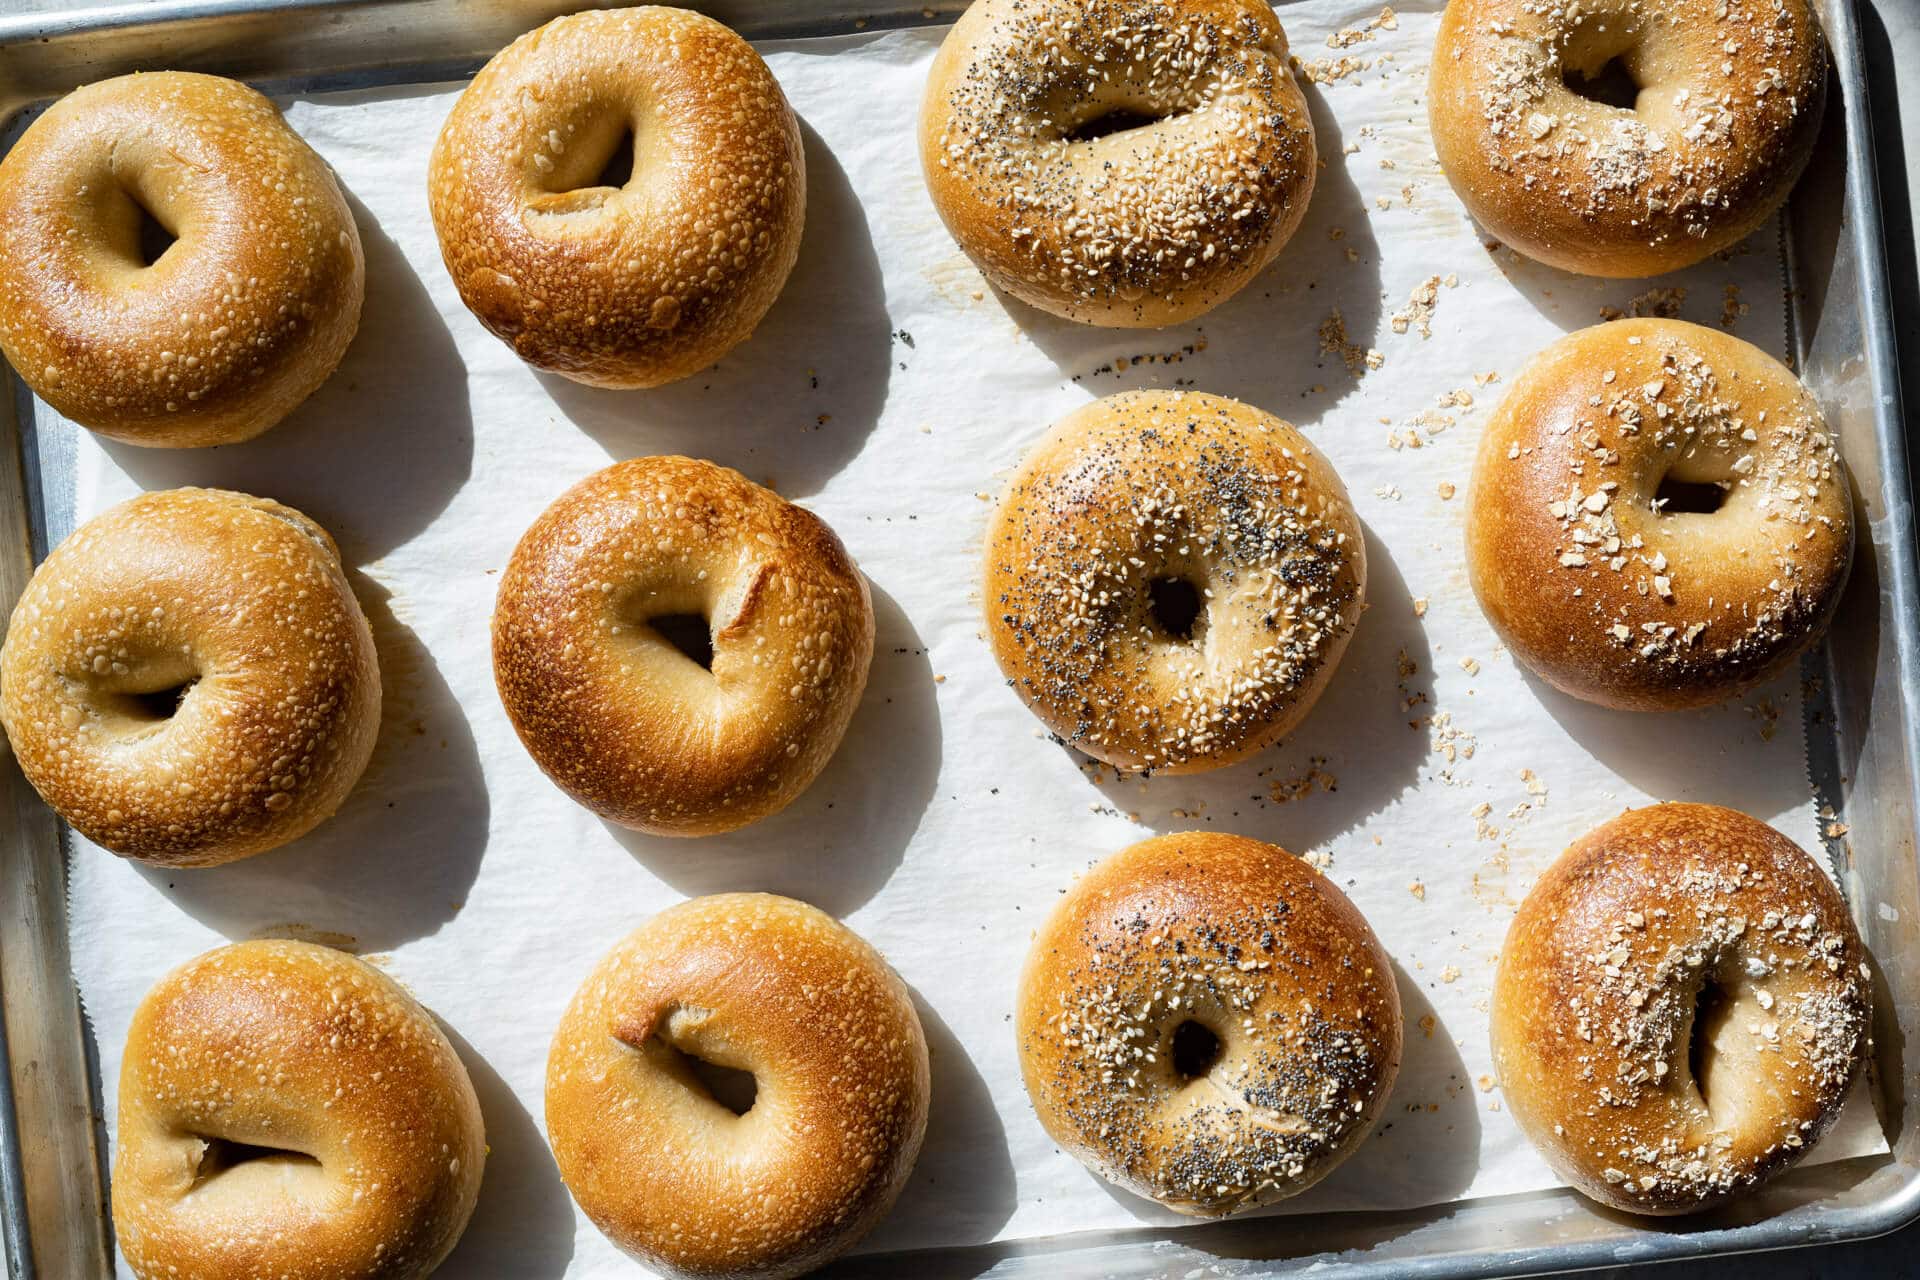
And overall, these bagels are pretty darn easygoing. Unlike bread dough, there’s no need to be overly critical of each motion when shaping, and in the end, the bagel rings puff up uniformly, boil beautifully, and bake easily. Speaking of the boil, perhaps one of the things that keep many from making them, but it’s such a simple thing. And while I often draw parallels between this dough and my sourdough pretzel—mostly in that they each have a stiff dough and a pre-bake step—there’s far less prep before baking bagels than pretzel—not that those sourdough pretzels aren’t worth the effort, because they certainly are.
First, let’s look at some tools I use when making these sourdough bagels.
Tools and Ingredients
First, a few of the tools and ingredients I use for this recipe
- Barley malt syrup – this is the classic sweetener added to a bagel dough and it has a very unique flavor and aroma. I like the Eden brand, but any should work well.
- Diastatic malt powder – see the post on diastatic vs. nondiastatic malt and why it’s used in baking.
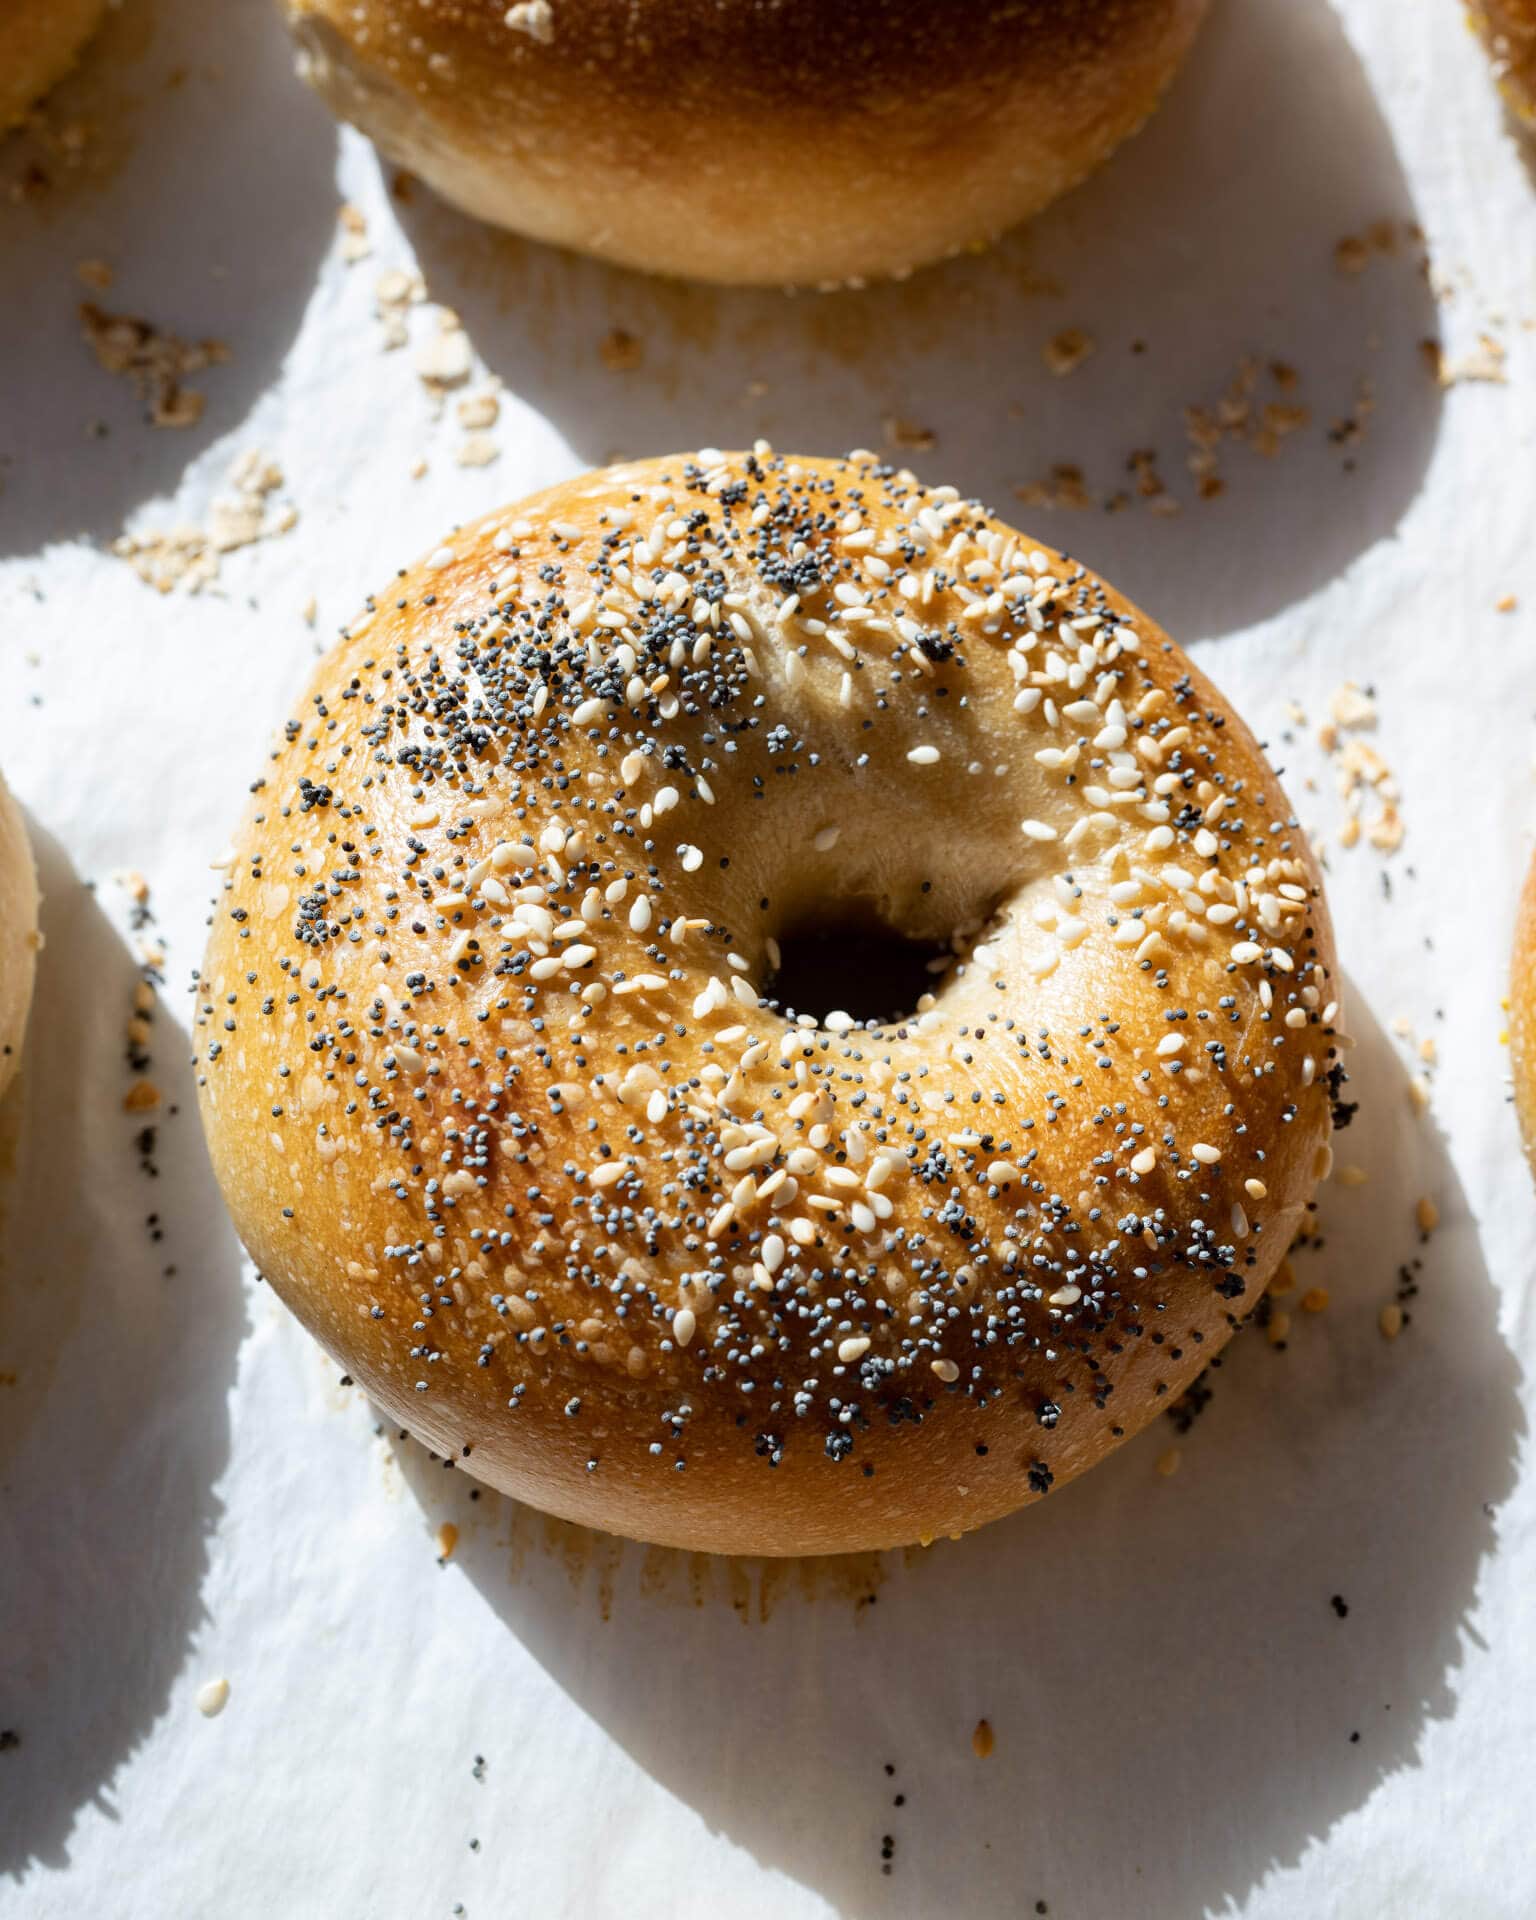
- Everything bagel topping – I love this mix of seeds and dried spices for topping bagels.
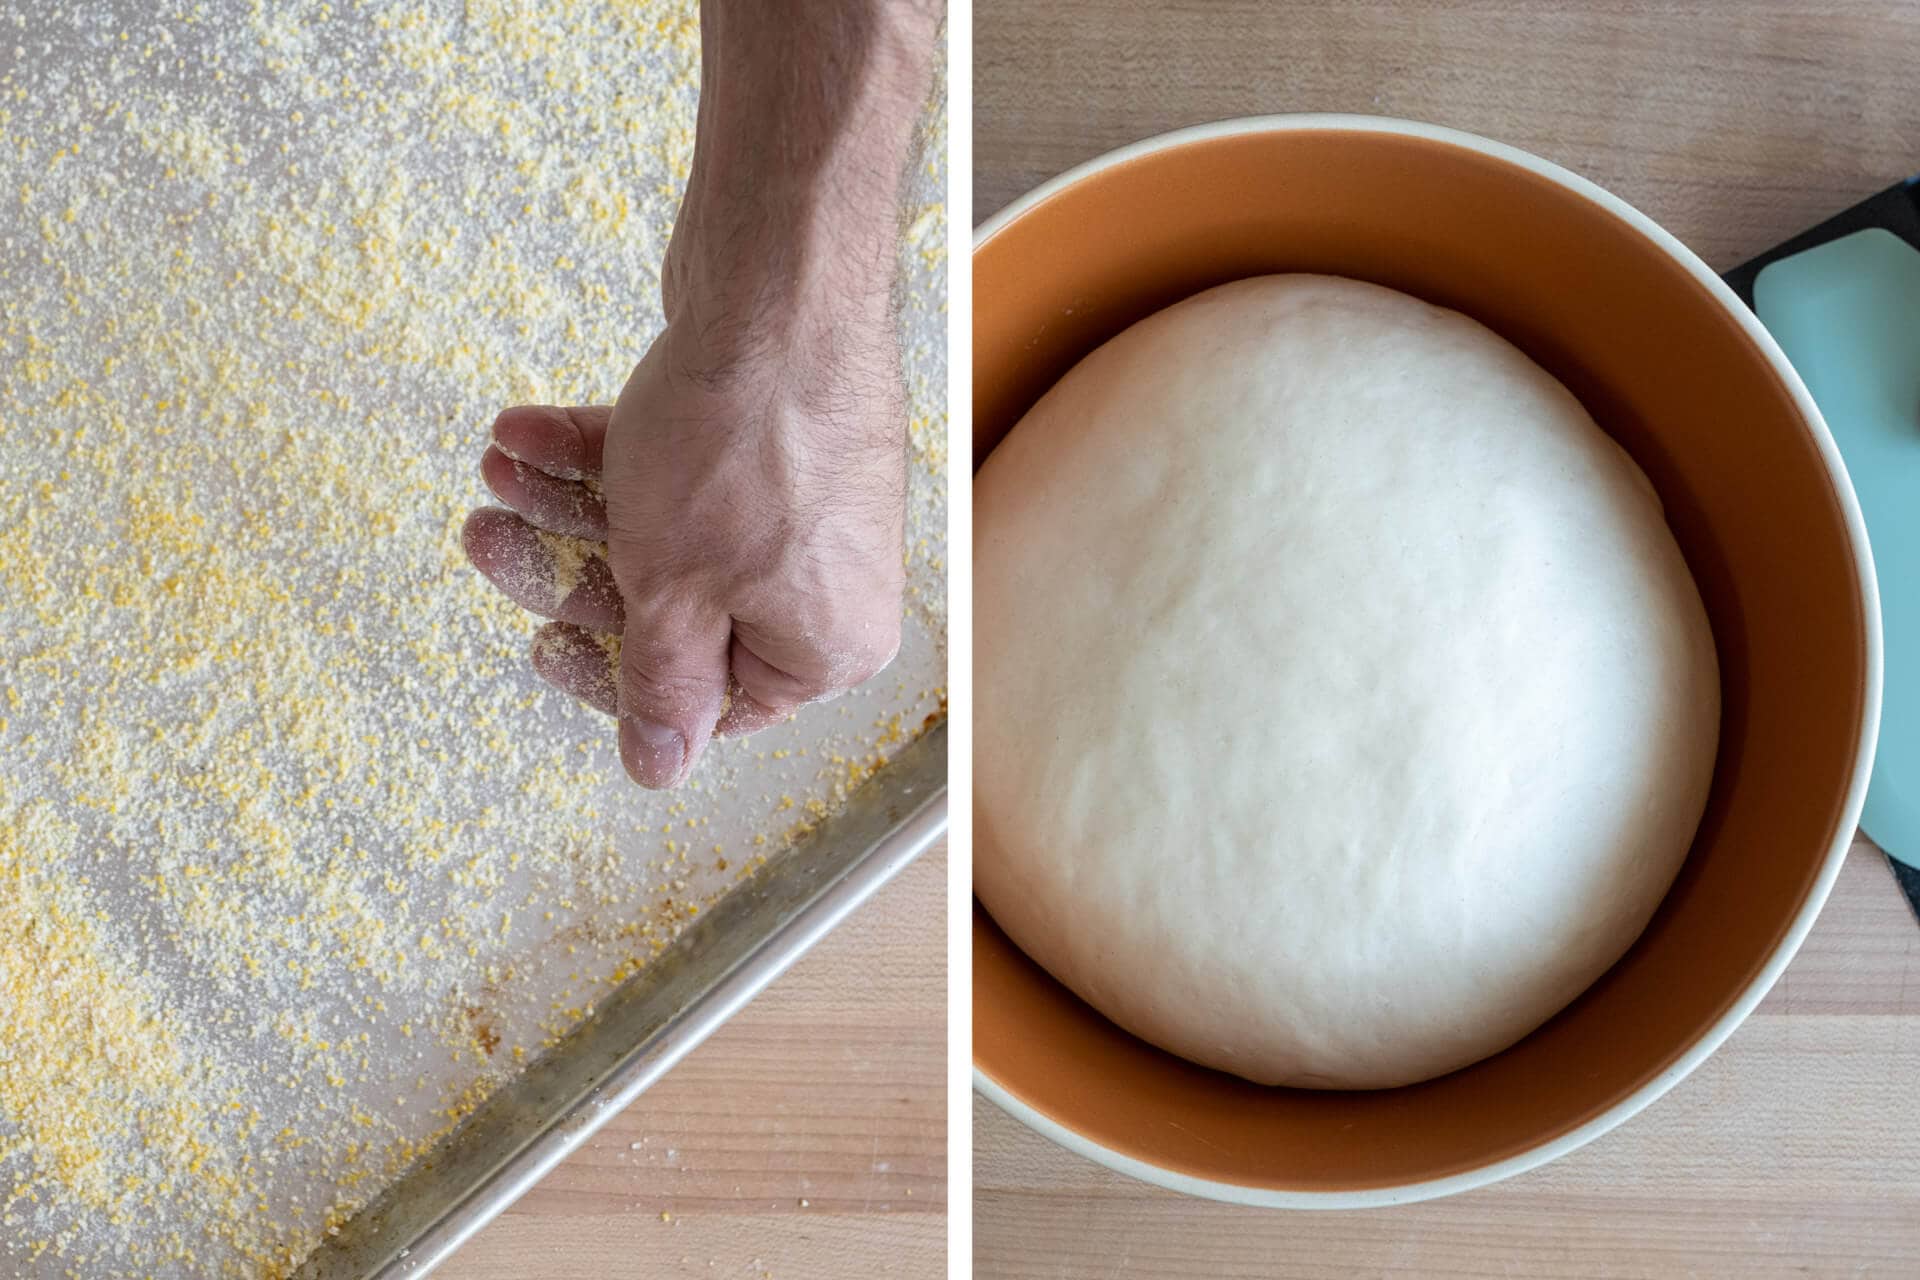
- Cornmeal – traditionally used to keep the bagels from sticking to the baking sheet during proofing (and they add extra starch to the boiling water).
- Half baking sheet – I use this to proof all 12 dough pieces to save space in a home refrigerator.
- Full baking sheet – perfect for baking all 12 bagels, with room in between, on a single baking sheet for even baking.
Flour Selection
Many bagel recipes, mine included, call for high-protein white flour to get that characteristic chew and structure.
I’ve tried this with Tony Gemignani’s Pizza Flour (15% protein), and while there was a bit more chew, I wouldn’t say it was necessary to order some for making sourdough bagels. I like to use Central Milling High Mountain, King Arthur Bread Flour, or Bob’s Red Mill Bread Flour.
Baking Schedule

These sourdough bagels take three days to make: from creating the levain at night on day one to boiling and baking them in the morning on day three. I know—three days!?—but the good news is, most of the time you’re not actively handling the dough, it’s fermenting in one stage or another.
All-in-all, this is a straightforward schedule. It’s also quite flexible by a few hours here and there once the dough is chilled and in the fridge: if you can’t boil and bake first thing on day three, it’ll hold a few more hours (or perhaps longer).
Sourdough Bagel Formula
For tips on how to calculate baker’s percentages or how to modify this formula, see my post on baker’s percentages (baker’s math).
| Total Dough Weight | 1,600 grams |
| Pre-fermented Flour | 12.00% |
| Yield | 12 x 125g bagels |
Total Formula
Desired dough temperature: 78°F (25°C). See my post on the importance of dough temperature for more information on dough temperatures.
| Weight | Ingredient | Baker’s Percentage |
|---|---|---|
| 964g | High-protein white flour (~13% protein, Central Milling High Mountain, King Arthur Flour Bread flour, or Bob’s Red Mill Bread Flour) | 100.00% |
| 530g | Water | 55.00% |
| 29g | Sugar, caster | 3.00% |
| 29g | Barley malt syrup | 3.00% |
| 18g | Salt | 1.90% |
| 7g | Diastatic malt | 0.75% |
| 23g | Sourdough starter (100% hydration; 40% rye, 60% white flour) | 2.40% |
Sourdough Bagel Method
1. Prepare Levain – Night before mixing, 9:30 p.m. (Day one)
Mix the following ingredients together in a container and leave covered to ripen for 12 hours overnight. It mixes up to a stiff consistency so I like to mix and knead the dough in a mixing bowl, then I transfer to a narrow and tall jar.
Try to hit a final dough temperature of 78°F (25°C) for this levain.
| Weight | Ingredient | Baker’s Percentage |
|---|---|---|
| 116g | High protein flour | 100.00% |
| 58g | Water | 50.00% |
| 23g | Ripe sourdough starter | 20.00% |
23.18% Levain In Final Dough Mix.
2. Mix – 9:30 a.m. (Day two)
A note on mechanical mixing: This dough is low hydration and comprised of high protein flour—it’s a firm dough! I used my Haussler Alpha mixer to mix this for 5 minutes on speed one. You could use a KitchenAid stand mixer to mix this dough for a few minutes in the beginning, but I wouldn’t push it too far and risk damaging the mixer—ultimately you make the call. After mixing in the KitchenAid, you could then turn the dough out to the counter to finish kneading like pasta dough, as described below.
| Weight | Ingredient |
|---|---|
| 848g | High protein flour |
| 472g | Water |
| 29g | Sugar, caster |
| 29g | Barley malt syrup |
| 18g | Salt |
| 7g | Diastatic malt |
| 197g | Levain (see Prepare Levain, above) |
Make the malt syrup slurry: This will help the sticky, viscous barley malt syrup incorporate more easily into the dough. To a small mixing bowl, add a bit of the mixing water, barley malt syrup, sugar, diastatic malt powder, and salt. Stir until everything dissolves.
To your mixing bowl, add the malt syrup slurry, flour, water, and ripe levain. If using a mechanical mixer (see the note, above), mix on low speed for approximately 5 minutes until the dough strengthens and begins to smooth. This dough is so firm it doesn’t need much.
If you do choose to use a mechanical mixer, you might need to cool the mixing water to ensure you hit the FDT of 78°F (25°C). I used cold water straight from my fridge.
If mixing by hand, mix everything in the bowl until well incorporated. Turn the dough out to a clean work surface and knead the dough like pasta: fold half over onto itself and push the mass away from you with the palm of your hand. Continue folding over and pushing away for 8-10 minutes until the dough firms up, and it becomes hard to knead any further.
Transfer your dough to a bulk fermentation container and cover.
3. Bulk Fermentation – 9:45 a.m. to 12:45 p.m.
Give this dough a single fold after 1 hour and 30 minutes into bulk fermentation. For the fold, turn the dough out to a clean work surface and do your best to fold it into thirds. Place the dough back into the bulk fermentation container with its seam side down, and cover. Let the dough rest, covered, for the remainder of bulk fermentation.
4. Divide and Shape – 12:45 p.m.
Use a half baking sheet (so it fits into your refrigerator) to hold the 12 pieces of shaped dough. Later, after boiling the dough, I upsize to a full baking sheet to help the dough evenly bake. Spread a thin layer of cornmeal on the half sheet to prevent the bagel dough from sticking during proofing.
Divide the dough into twelve 125g pieces.
First, degas the piece by tamping down a bit with your hand. Then, do your best to form the piece into a rough rectangle and cinch down from the top, so the dough ends up in a little tube. This cinching doesn’t have to be forceful, and it helps to get the dough into a tube shape.
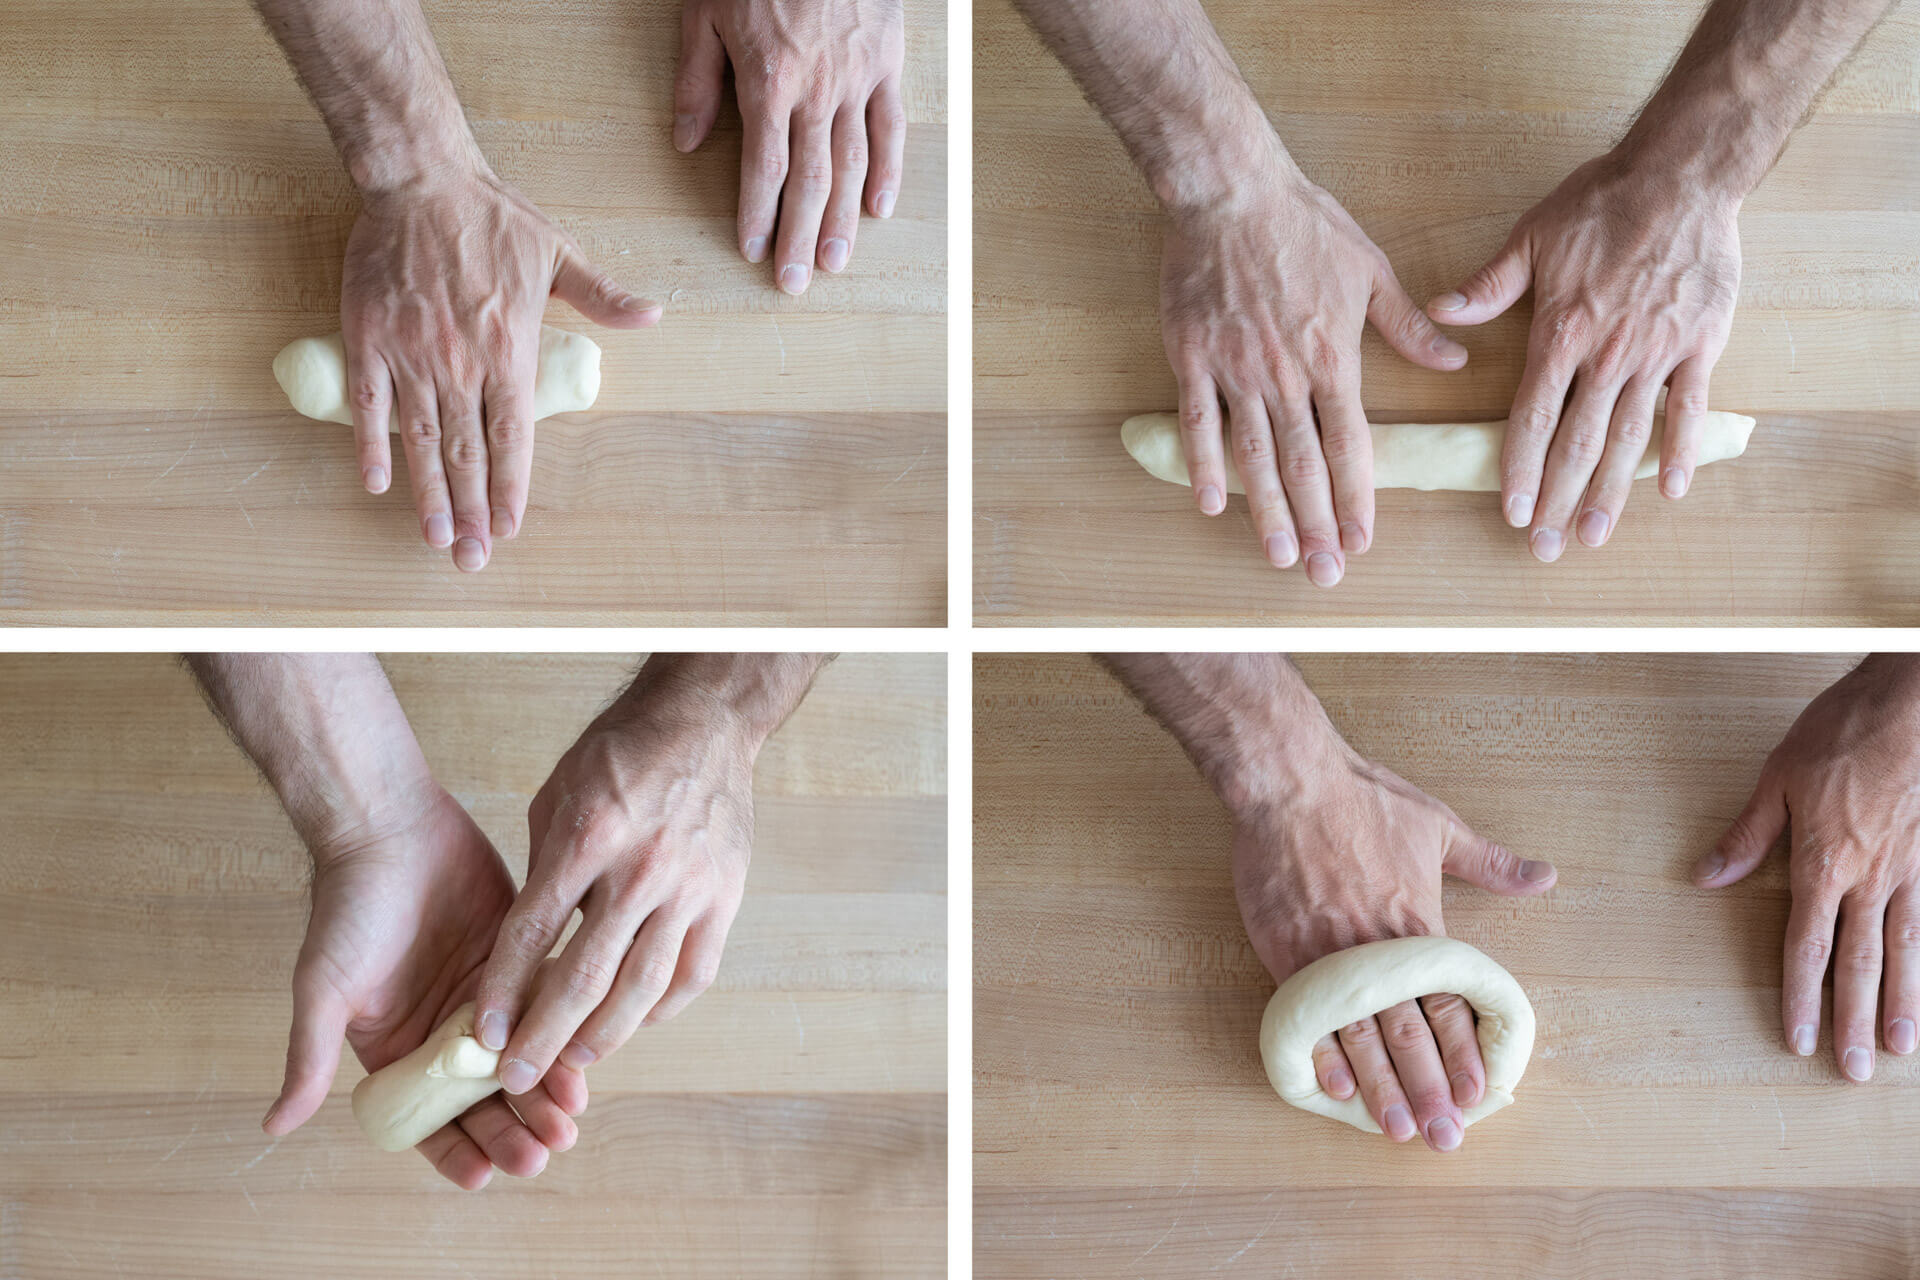
Next, roll your hand in the center a few times to create a bulb at each end. Then, switch to two hands and roll outward to about 12 inches and a tube that’s mostly the same thickness all the way through. If you prefer a bagel with a large hole, roll out the tube, so it’s longer.
Once rolled out to a long tube, wrap it around the backside of your hand between your knuckles and wrist. Overlap the two ends of the dough in the palm of your hand, and gently press the two ends together. Next, press your palm down on the work surface, and in a repetitive motion, roll the dough on the work surface repeatedly to seal.
Here’s a video on my YouTube channel of me shaping one of the pieces
After shaping a piece, transfer it to the cornmeal-dusted baking sheet. Repeat for the remaining pieces, and you will end up with four rows of three.
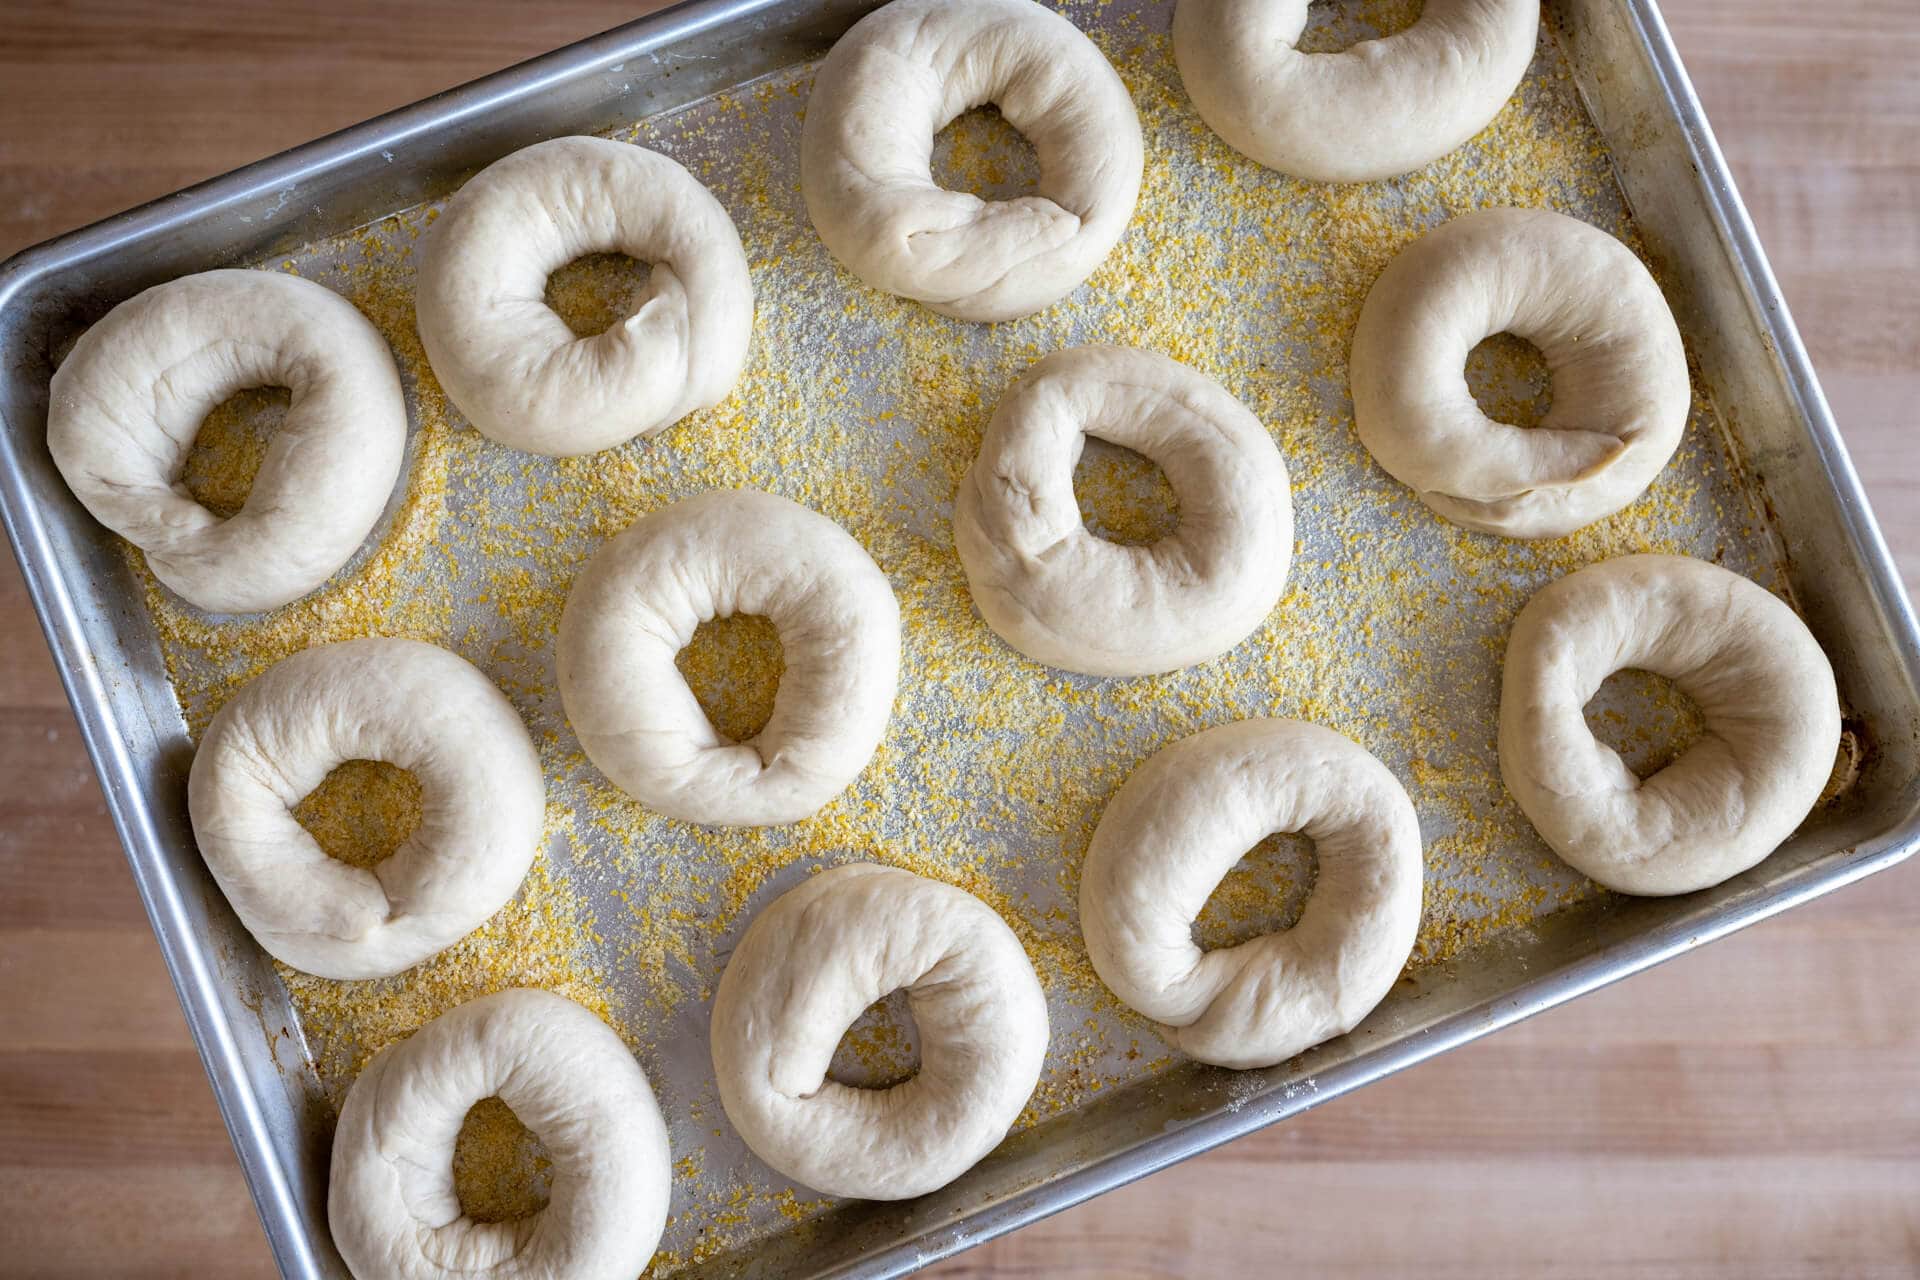
5. Proof – 1:00 p.m. 3:00 p.m. (2 hours room temperature, then retard overnight)
Cover the baking sheet with a large, reusable plastic bag and seal shut. Let the dough proof at room temperature, around 72-74°F (22-23°C), for 2 hours. The dough should puff up slightly after this time but not excessively. If the dough still feels very dense to the touch, give it another 15-30 minutes and check again.
After 2 hours, place the covered baking sheet into the fridge overnight at around 39°F (4°C).
6. Boil and Top – 9:30 a.m. (Day three)
Oven prep: Before you begin boiling your bagel dough, preheat your oven to 475°F (245°C) with convection or 500°F (260°C) without convection. Place one rack at the bottom third of the oven. Place a baking stone or baking steel on the rack to preheat. I steam my oven as described on my oven steaming method post, so place a roasting pan on the bottom filled with lava rocks to prepare to steam. I also fill a cup of ice and place it next to my oven (I will pour this over the lava rocks to steam the oven).
Bagels are unique because you boil the dough before baking. This boiling gelatinizes the starches in the flour and gives them a little more chew and helps them achieve a shiny crust. This gelatinization is very similar to how you make a tangzhong or roux. But for a bagel, the longer you boil them, the thicker the crust and chewier they will become. There is a limit to the boil duration, though, as they will degrade in the water after a while. I have found boiling the dough 40 seconds on each side, for a total of 1 minute and 20 seconds, to be just right.
Many places like to add barley malt syrup or honey to the boiling water, but in side-by-side testing I didn’t find the added syrup to give them any more shine. The cornmeal brought into the boiling water might also add starches, much like when making pasta.
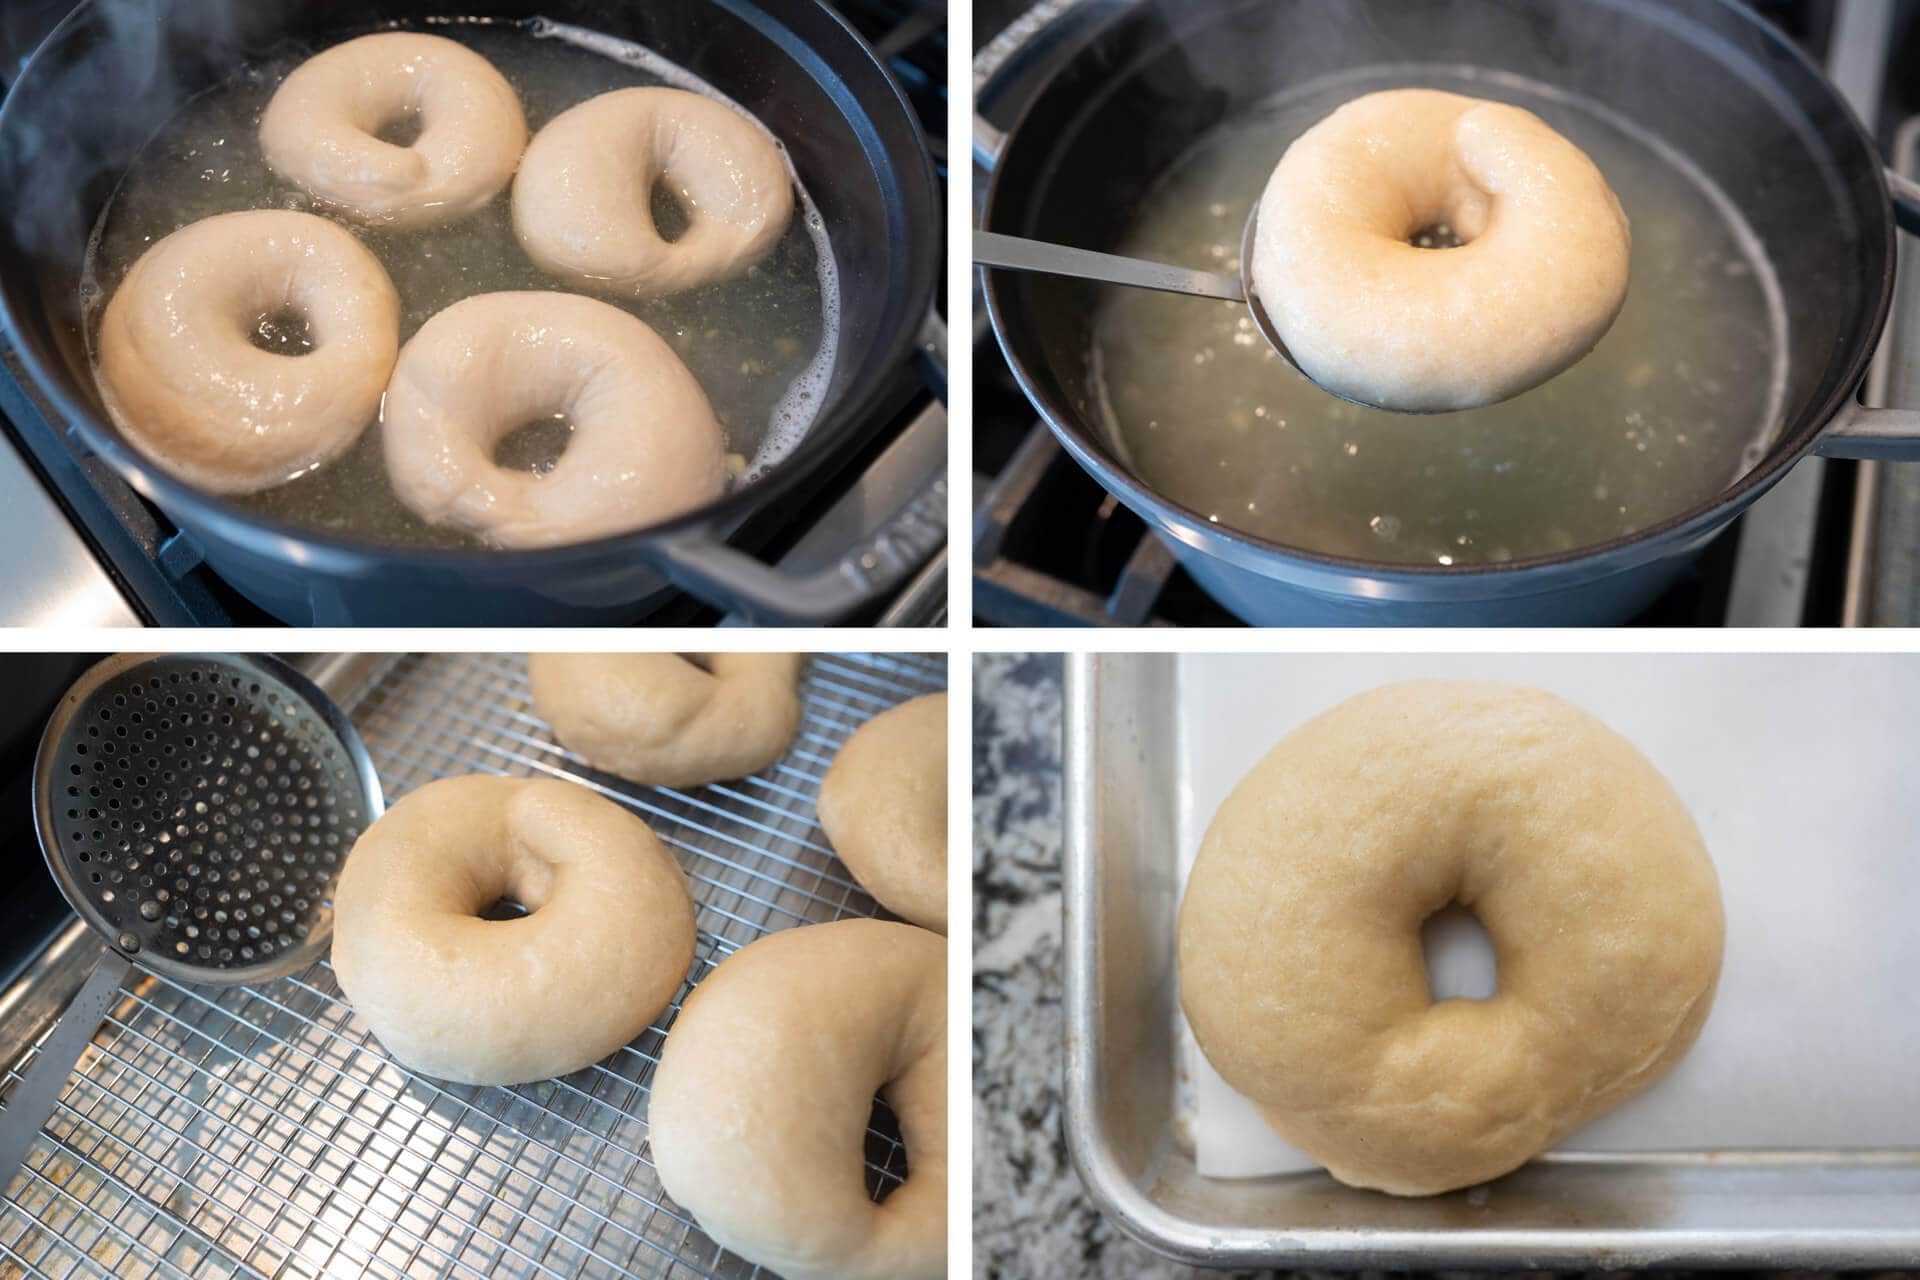
Boiling equipment prep: Fill a wide pot with enough water so the bagel dough can float without touching the bottom (in my 7qt Staub Dutch oven, this was about 1.5 gallons). Bring to a low boil. Next to your stovetop, place a half baking sheet with a cooling rack inside, this will hold the wet bagels for a minute and allow them to drain. Next, line a full baking sheet with parchment paper — this will hold the dough as it bakes. Finally, grab any toppings you’d like (poppy, oat, everything bagel mix, sesame, etc.) and place them in bowls on your work surface.
Boil: Once the water is at a low boil, boil the proofed sourdough bagel dough straight from the fridge, about 40 seconds per side. Using a spider strainer, transfer each piece to the cooling rack inside the baking sheet to drain while you boil the rest of the dough.
Once the pieces are all boiled, move quickly to top them, if desired, and get them onto the final baking sheet.
This dough should float immediately when dropped into the boiling water. If the dough sinks and doesn’t pop up within a few seconds, it’s likely under proofed. Give it more time to proof at warm temperature and try again.
Once the bagels have drained for a minute on the baking rack, transfer them to the full baking sheet lined with parchment paper for baking. Top them with whatever toppings you’d like at this time.
7. Bake – 9:45 a.m.
Slide the full baking sheet with boiled dough into the preheated oven directly onto the baking stone or baking steel. Pour the cup of ice onto the pan with lava rocks and quickly close the oven.
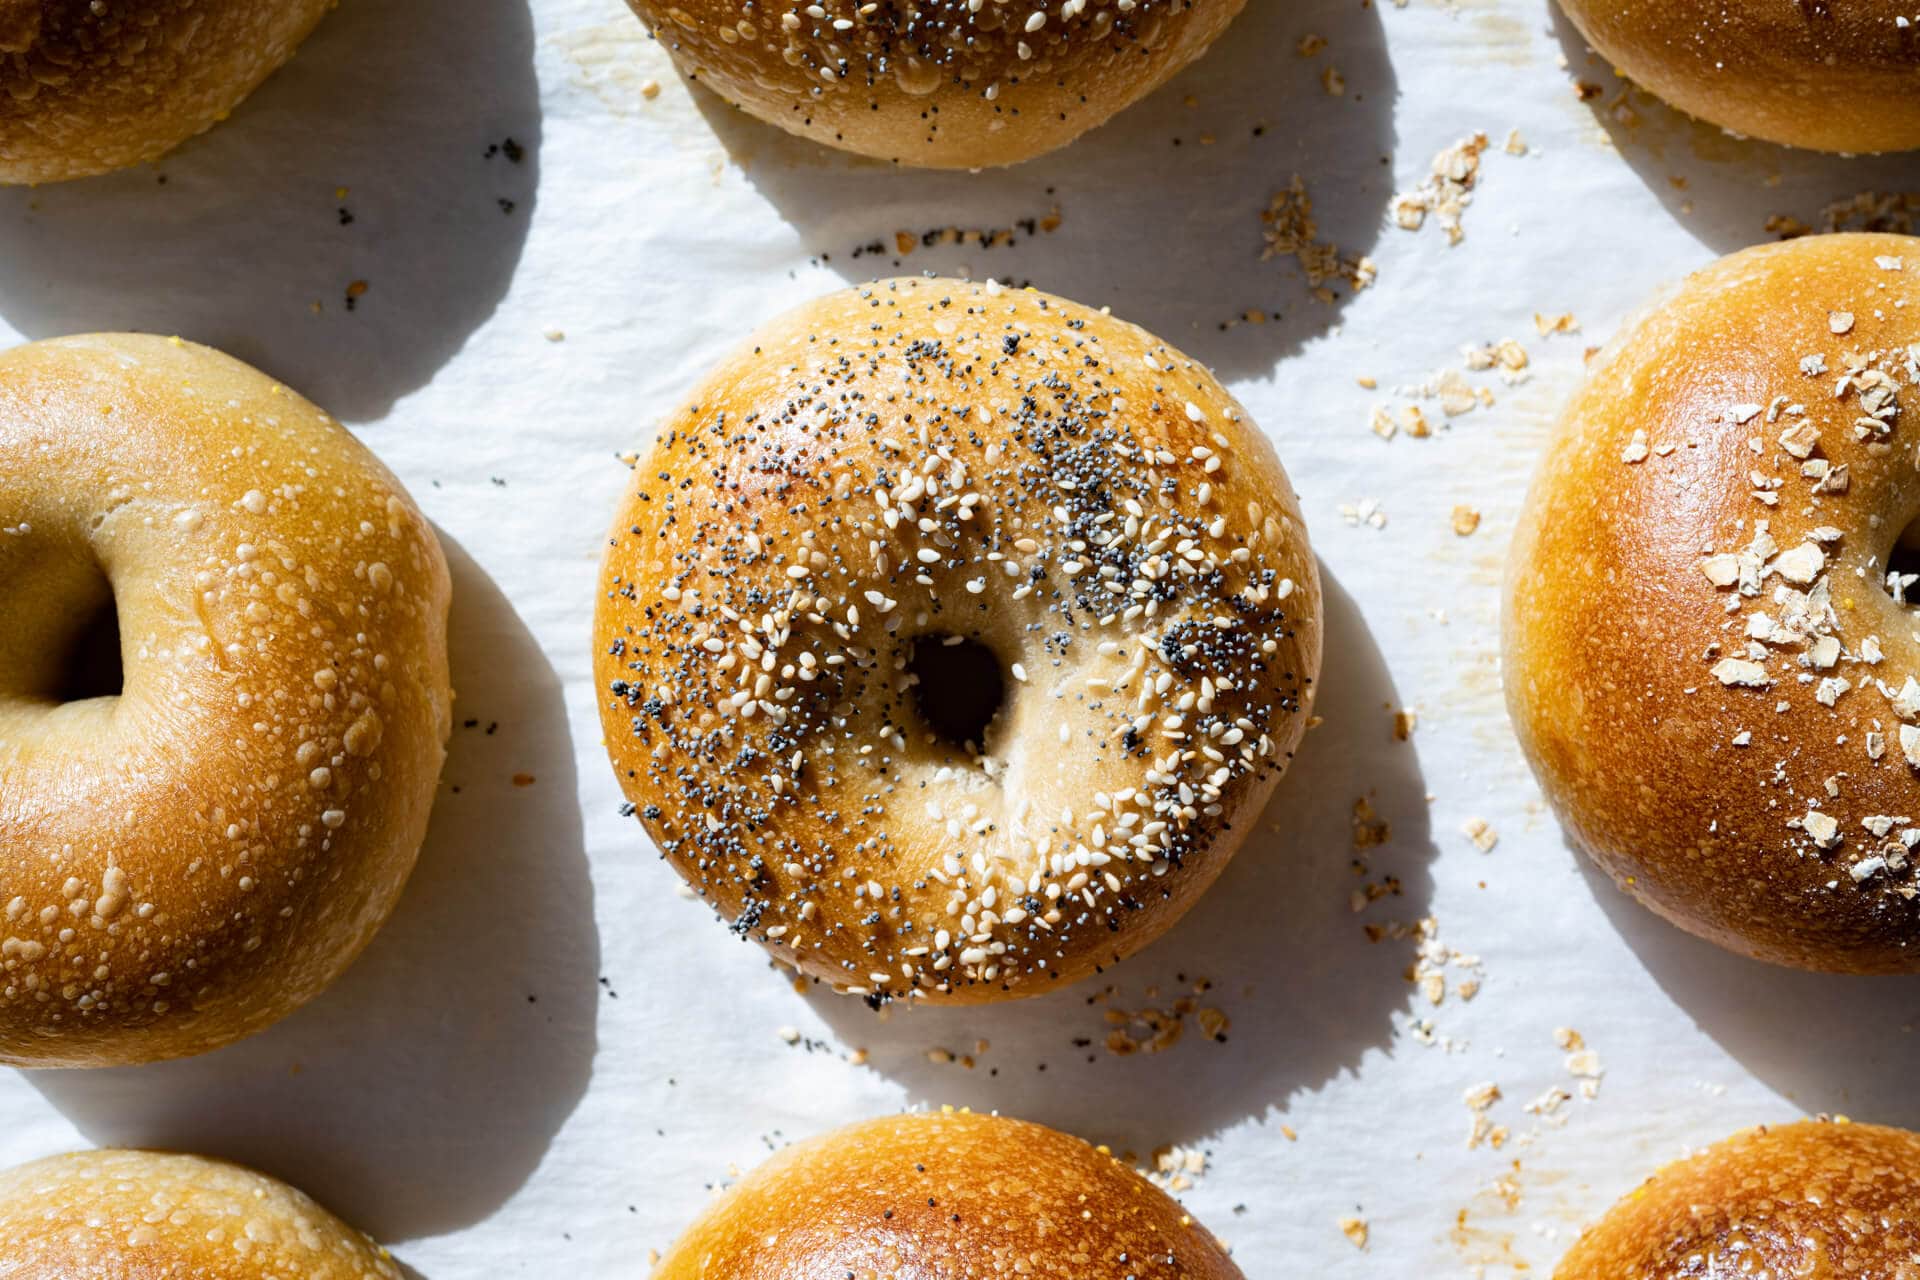
Bake at 475°F (245°C) convection (500°F (260°C) without convection) for 10 minutes with steam. After 10 minutes, vent the oven and remove the steaming pan, rotate the baking sheet 180°, and bake for 5 minutes longer. After this 5 minutes, turn the oven down to 450°F (235°C) and bake for 5 minutes longer for a total of 20 minutes. Remove the sheet when the bagels are nicely colored.
Let cool 15-20 minutes on a wire rack. These are fantastic the first day they’re baked and hold well for a few days after that in a bread box. I also like to wait till they are room temperature, slice in half, and then freeze in a freezer bag. They can be reheated in the toaster, as described in my post on how to store bread.
Conclusion
When you take a bite of these bagels, you’ll first discover a fleeting crispness that gives in to chewiness, a textural dance that eventually leads to a subtle, onset of sourness. This mellow tang creeps in and propels you to keep going with it, to keep taking bite after bite until you’ve finished the entire bagel without the thought of stopping.
The entire eating experience is scary in how it takes over, and it’s exactly what I want in a bagel.
The whole eating experience is scary in how it takes over, and it’s exactly what I want in a bagel. That pop of flavor at the end of the bite is not something you find in mass-produced bagels, and I just love it. And while there are sugar and barley malt syrup added to the dough, it does not carry through to make these bagels sweet. There’s a beautiful balance in the eating experience of these sourdough bagels.
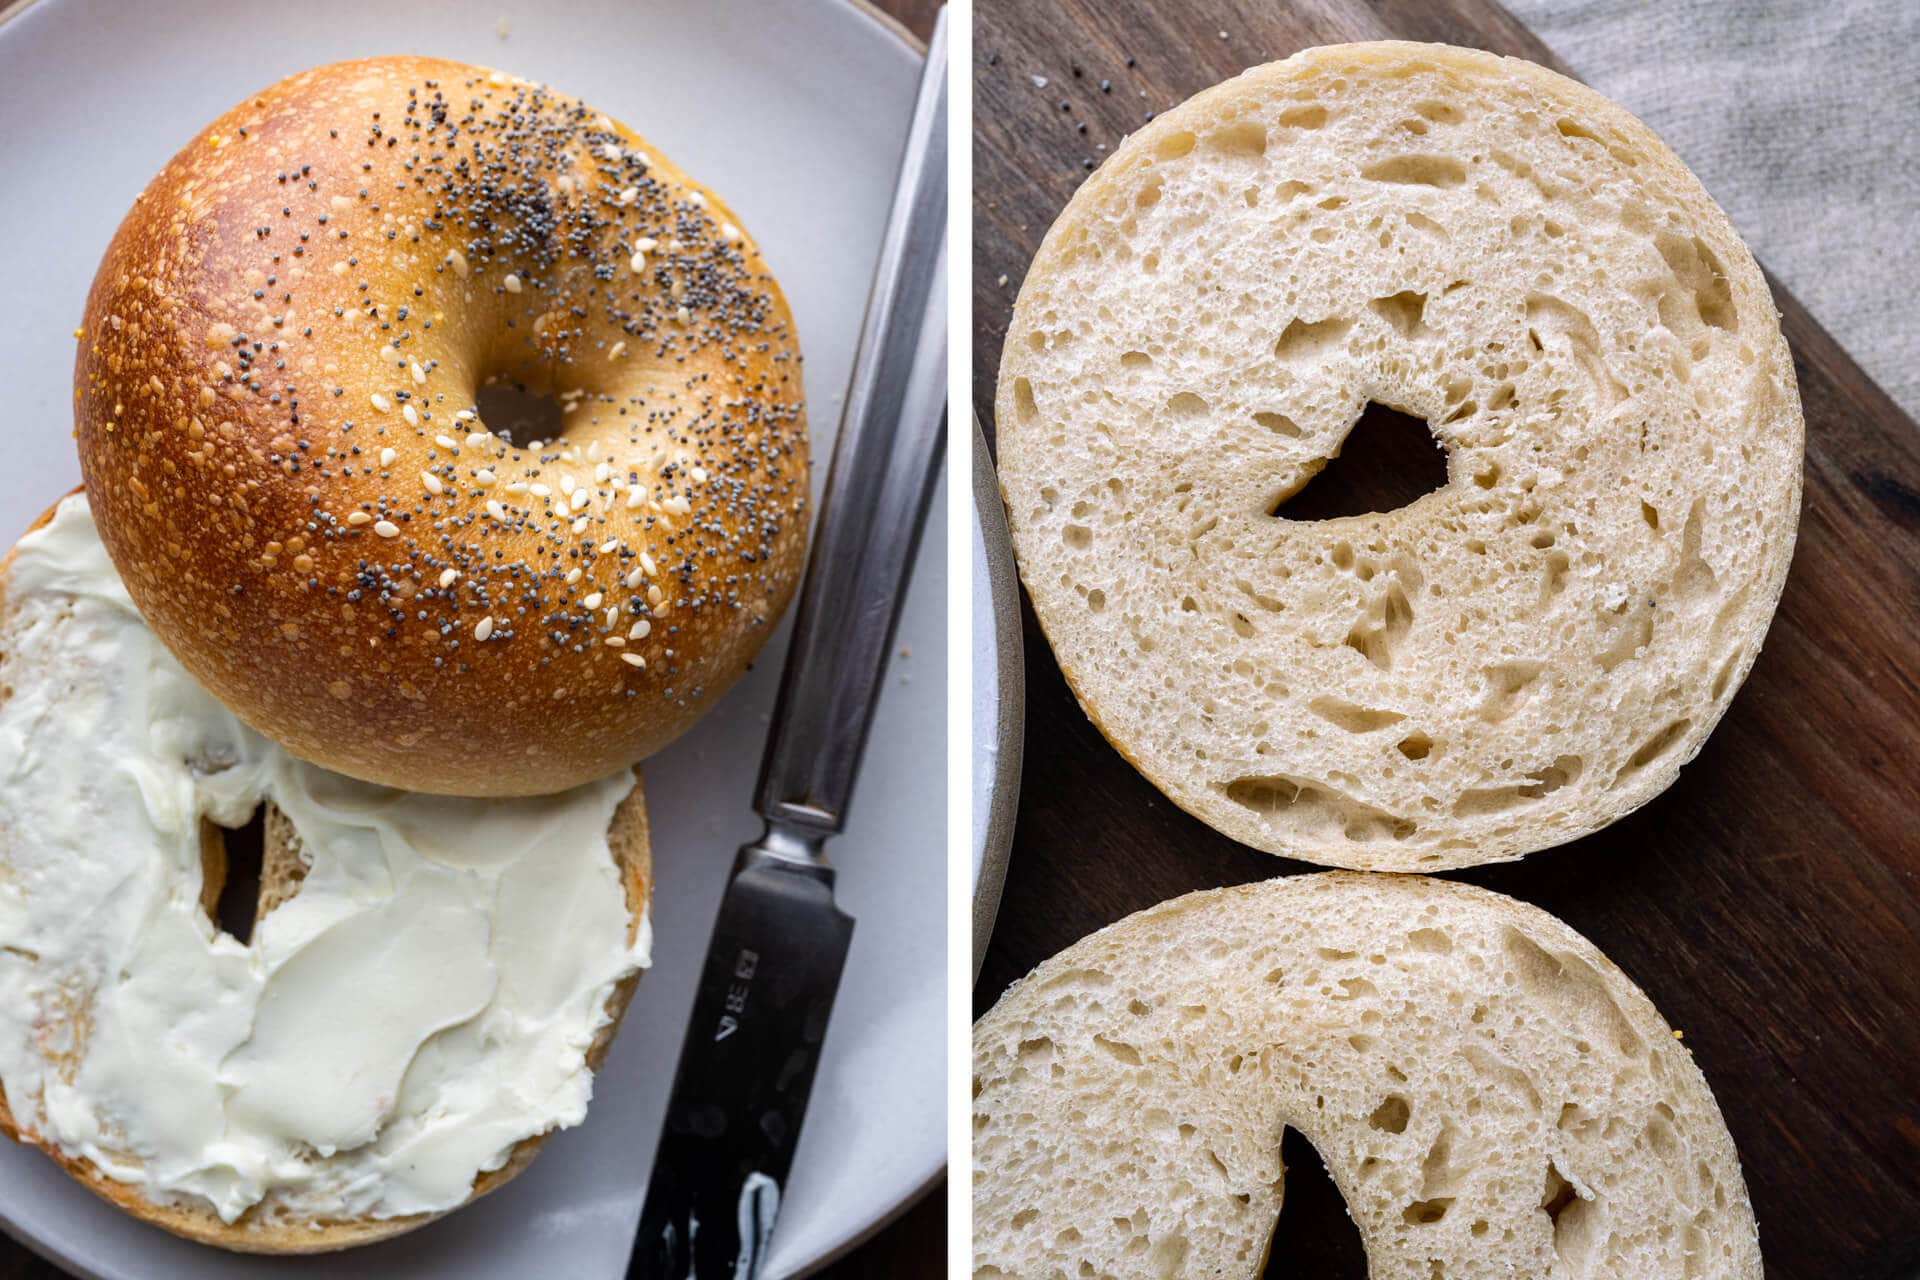
After making these bagels the first time, you’ll get the hang of the process. Subsequent batches become easier and more natural, and it’s no stretch to think these could become a weekly staple—and they freeze incredibly well (I slice them in half and place them in a freezer bag) if, by chance, there’s any left.
Print
Sourdough Bagel
- Prep Time: 24 hours
- Total Time: 24 hours
- Yield: 12 bagels
Description
My recipe for flavorful and chewy sourdough bagels with a thin and slightly crispy crust. Delicious topped with an everything bagel mix, coarse sea salt, oats, seeds, or anything else you can dream up!
Ingredients
Levain
- 116g high protein flour
- 58g water
- 23g sourdough starter, ripe
Main Dough
- 848g high protein flour
- 472g water
- 29g sugar, caster
- 29g barley malt syrup
- 18g salt
- 7g diastatic malt
- 197g levain
Instructions
- Levain (the night before mixing, 9:30 p.m.)
Mix all the Levain ingredients in a container and leave it at a warm temperature for 12 hours. - Mix (9:30 a.m.)
Add a splash of the mixing water, sugar, barley malt syrup, diastatic malt powder, and salt to a small bowl and mix together. To your stand mixer’s mixing bowl, add the malt syrup slurry, flour, water, and ripe levain. Mix on low speed for approximately 5 minutes until the dough strengthens and begins to smooth. Transfer your dough to a bulk fermentation container and cover. - Bulk Fermentation (9:45 a.m. to 12:45 p.m.)
Give this dough a single fold after 1 hour and 30 minutes into bulk fermentation. - Divide and Shape (12:45 p.m.)
Use a half baking sheet (so it fits into your refrigerator) to hold the 12 pieces of shaped dough. Spread a thin layer of cornmeal on the half sheet to prevent sticking. Divide the dough into twelve 125g pieces. First, degas the piece by tamping down a bit with your hand. Then, form the piece into a rough rectangle and cinch down from the top, so the dough ends up in a little tube. Roll the tube out to a 12″ long tube. Wrap the dough around the backside of your hand and pinch it together in the front. Roll a few times on the counter to seal. Transfer to the cornmeal-dusted baking sheet. Repeat for remaining dough pieces. - Proof (1:00 p.m. to 3:00 p.m.)
Cover the baking sheet with a large, reusable plastic bag and seal shut. Let the dough proof at room temperature, around 72-74°F (22-23°C), for 2 hours. The dough should puff up slightly after this time but not excessively. If the dough still feels very dense to the touch, give it another 15-30 minutes and check again. After 2 hours, place the covered baking sheet into the fridge overnight at around 39°F (4°C). - Boil and Top (9:30 a.m., Day Three)
Oven prep: Before you begin boiling your bagel dough, preheat your oven to 475°F (245°C) with convection or 500°F (260°C) without convection. Place one rack at the bottom third of the oven. Place a baking stone or baking steel on the rack to preheat. Place a roasting pan on the bottom filled with lava rocks to prepare to steam. I also fill a cup of ice and place it next to my oven (I will pour this over the lava rocks to steam the oven).
Boiling equipment prep: Fill a wide pot with water and bring to a low boil. Next to your stovetop, place a half baking sheet with a cooling rack inside, this will hold the wet bagels for a minute and allow them to drain. Next, line a full baking sheet with parchment paper — this will hold the dough as it bakes. Finally, grab any toppings you’d like (poppy, oat, everything bagel mix, sesame, etc.) and place them in bowls on your work surface.
Boil: Once the water is at a low boil, boil the proofed sourdough bagel dough straight from the fridge, about 40 seconds per side. Using a spider strainer, transfer each piece to the cooling rack inside the baking sheet to drain while you boil the rest of the dough. Then, transfer the boiled bagels to the full baking sheet and top, if desired. - Bake (9:45 a.m.)
Slide the pan with all the bagel dough into the oven and pour the cup of ice over the roasting pan with lava rocks. Quickly close the oven.
Bake at 475°F (245°C) convection (500°F (260°C) without convection) for 10 minutes with steam. After 10 minutes, vent the oven and remove the steaming pan, rotate the baking sheet 180°, and bake for 5 minutes longer. After this 5 minutes, turn the oven down to 450°F (235°C) and bake for 5 minutes longer for a total of 20 minutes. Remove the sheet when the bagels are nicely colored. Let cool 15-20 minutes on a wire rack.
Notes
- These are wonderful topped with an Everything Bagel mix, rolled oats, sesame seed mixture, or any other topping you’d like.
If you use this sourdough bagel recipe, tag @maurizio on Instagram and use the hashtag #theperfectloaf so I can take a look!
What’s Next?
Regardless of your bagel preferences, I’m confident these sourdough bagels will rank up there with the best you’ve had—and what could be better than making your own with your sourdough starter? And who knows, perhaps they’ll mend that friendship severed by staunch bagel ideals—these could be the olive branch; a crisp and seductively chewy one.
Next up, how about a simple bake like sourdough starter discard sugar cookies?
Buon appetito! 🥯


727 Comments
First, thanks for all your great recipes—I’m enjoying learning how to make some sourdough breads! I made the bagels this weekend and they’re so chewy my jaw hurts (bc I still ate two!)! They’re like leather! Help! What did I do wrong? I have re-read the recipe and I did all the things you said. 🤷🏻♀️ They taste good but they’re just too hard to eat.
Strange! I haven’t seen this. I have baked them a bit too long and they became a little harder — be sure to bake them very hot and rather short, to ensure they don’t become more like bread than bagel. It could also be the flour you’re using and/or the hydration, and finally, if they are under proofed they’d likely be extra gummy. If the dough was super dry and touch, you could also try increasing the hydration 1-2% and see if that helps!
Thank you! I’ll try those things. I used King Arthur Bread Flour. I’m confident I did something strange—I’m VERY new to this baking bread thing. Could I have over-boiled them? Two of them sank but the rest floated immediately.
If they sank when you dropped them in they might have been under proofed. Be sure to use your starter when it’s very ripe (when you’d normally give it a refreshment) to make the levain, and similarly, when it’s very ripe to mix into the dough. Give it more time if needed. And also for the dough, by the time you go to put the shaped rings into the fridge overnight, they should be puffed up and airy. If they still feel dense, give them more time to rise and warm, room temp before placing them in the fridge.
I made these bagels over the weekend, completing the final boil/bake this morning…what an amazing recipe! Toasted with a shmear of cream cheese immediately sent my taste buds back in time, reminding me of bagels I used to eat from the lower east side of Manhattan (Ess-a-Bagel being my family’s favorite spot). Thank you so much, Maurizo, for posting this, along with all your other recipes, pointers, etc. I am a lab scientist and I find your attention to detail to be quite familiar and appealing to read!
Thanks so much for the kind words and for reporting back, Dave! Glad to hear these worked for you and the fact that they compared to Ess-A-Bagel is a huge compliment! Happy baking 🙂
Ess-A-Bagel is my favorite! Now even more excited to taste these — just put my proofed dough in the fridge.
I made these over the weekend – used honey in place of the barley malt syrup but otherwise the ingredients were the same. I totally screwed up the timings but also didn’t worry about the dough temperatures and it seemed to work out for me since I mostly wound up leaving things longer. I only have half sheet pans and need to use a smaller than half sheet pan to get it into our very stuffed,- small fridge so they wound up a little snuggled after they rose – we had to cut them apart, but they turned out great – best bagels I’ve ever made for sure! As always, Thank You!
Right on, Lauren! Sounds like you’re baking intuition guided you to the right outcome — which is great. Thanks for reporting back and enjoy!
I just made these incredible bagels. I have made many bagels in the past but this is without a doubt the best batch ever. Thank you so much for this recipe.I took photos but can’t see to figure out a way to post them.
So glad to hear that, Franco! I don’t have a way to upload photos here at the moment. Enjoy and thanks for reporting back!
Maurizio, you are the God of sourdough. I made these bagels this weekend and they are phenomenal. I still haven’t mastered the blistered exterior yet–any advice would be great. I made my bagels in half batches in my Challenger cast iron baker–it fit 6 bagels perfectly, so I didn’t need to steam the oven. Thank you, thank you for developing these wonderful recipes/processes and sharing them with us. I eagerly await your next submittal!
Awesome, Debbie! Those blisters come from ample steam in the oven when baking. If you’re using your Challenger, add a few ice cubes in the pan when you put in the dough, then put on the lid. This should help give them a bit more steam. You’re very welcome and have fun!
Do you have any suggestions for substitutions of diastatic malt and barley malt syrup? I can’t seem to get them in my country
I’m not Maurizio but I substituted maple syrup for barley malt syrup and it was fantastic. I went to a local wine and beer maker’s store and got barley malt from there. I guessed it would be diastatic because brewers would want the fermenting power intact and it was a lucky guess! I’m sure he’ll have better suggestions than I will, but I had great success with my workarounds. Good luck to you!
thank you!! will try and see how it goes
I’d use honey but @disqus_Xuw15IBGBH:disqus said maple syrup worked for her as well!
I’ve been making PR’s bagels for years, both yeasted and sourdough. But I tried these and wow! They are gorgeous and taste fantastic. I think I misunderstood tho and baked them on the rack after boiling. They stuck a teeny bit, but after baking, the bottoms weren’t done. So I put them back for a time in the off-oven and it did the trick. Are they meant to be “drained” on the rack and then baked on the original cornmeal-dusted parchment half sheet?
Glad to hear you liked them, Nikki! Yes, just drained on the rack then transferred to another sheet with parchment for baking. I’ll go up and see if I can make that more clear — sorry for any confusion!
I probably should have known. Fantastic results (except for the not quite brown bottoms). Absolutely the only ones I will ever make from now on.
I take them out of the boiling water, place them on a dry linen cloth. The excess water is absorbed by the cloth. I sprinkle them with whatever I have chosen for that batch and then simply life them with my fingers and place them on the baking sheet with parchment paper. Hope that helps some. I did that because I did not like the look that the rack gave the bottom of the bagels.
Super excited about this recipe, I’ve been waiting for a great sourdough bagel recipe! I would like to make this with some white whole wheat flour, specifically Central Milling hard white whole wheat. If I used 50% WWW, what hydration changes would you recommend? And would you expect faster fermentation? Thanks!
You’d likely have to increase the water in the dough, you’d have to adjust during mixing to feel. And yes, I’d expect a faster moving dough as well, you could drop the levain percentage to help counter this a bit, then keep an eye on the dough and adjust the timeline as necessary. I’m hoping to work with some whole grains in the future as well!
Thanks! I have never has such good results with sourdough recipes as with yours. In your pain de mie, I followed another commenter’s variation of using 35% whole wheat, and it comes out very well.
Thanks Cynthia, much appreciated! Yes, CM HM has been working very well for me with these. I’ve also tried King Arthur Flour Bread Flour and will do a few more tests — that also works well (but I have been playing with the hydration a bit there). Next up I want to try adding some whole rye and to work a bit on chocolate and cinnamon/raisin. Hope all is well and happy baking! OH! I love your recent pizza posts as well 🙂
No egg wash?
Nope, no egg wash; color on the top comes from the dough itself.
Hi! Thank you for the recipe! I just made these and they are delicious. I would however like to amp up the sour flavor. How would you suggest doing this? Longer proof at room temp? My inclination is to leave them in the fridge for another day—what do you suggest? Thanks again!
Oh, also forgot to note that I didn’t have any diastatic malt so omitted it, as well as substituting honey for the malt syrup. Maybe this could have affected the flavor?
That should be just fine.
You could try cold proofing longer, or you could try adding in some whole grains into the recipe, perhaps start at 5% whole wheat and work up from there to 10% if things work well. This is something I’m going to test in the future as well.
Thank you for the response! I think for the next batch I’m going to try adding some whole wheat flour and do a longer cold proof 🙂
For the mechanical mixing method, you don’t specify when to add the remaining amount of mixing water. I only see reference to adding a small amount of water to the malt syrup to make a slurry. Do you just add all the water to the mixing bowl?
Sorry about that. Yes, add it all in the mixing bowl together!
Hi Maurizio, i got really excited about this bagel recipe and printed out the recipe until I had a chance to read the instructions in detail…then you lost me on the lava rocks/steam…yikes! Going to try to follow your recipe to the ‘T’ except for the steaming part with the lava rocks. Hoping that by turning on the convection fan on my oven and using a pizza stone, I can get the same result as yours. Or perhaps if I use a Emile Henry bread cloche and that will create some steam internally to give it that beautiful crust and blister. (fingers crossed). I just can’t see myself buying lava rocks to make a few bagels. :). That said, I did buy everything else from your link to try this bagel recipe….if all else fails, can you give a link to where you got your lava rocks. HA!
The dough should we wet enough to forgo the steaming if you want to make it easier. You could also simply spritz water into the oven after you load the dough then close the door quickly.
If you want to heavily steam the oven, check out my post on steaming a home oven — you can also skip the lava rocks and just use a roasting pan at the bottom of the oven with ice thrown in!
Nice and strong flour there, Jim! That shaping method also works very well and I tested that approach but this way was more natural to me — whatever works! Hope you like these and happy baking!
I made this recipe today, and I have to say that this has probably ruined all other bagels for me for the rest of my life! So grateful you created this terrific recipe.
Glad to hear that, Fred! And I have to agree with you, and not because I made the recipe, but because they’re just good! Enjoy and thanks for reporting back 🙂
Thanks for the great post! I’m excited to try these out. But, is baking with steam necessary? How much of a difference does it make? A lot of other bagel recipes don’t require this step.
Also, any advice on preventing the onion/garlic in an everything bagel seasoning form burning? I’ve already tried rehydrating them, but it hasn’t made much of a difference.
I have had trouble with this as well and haven’t yet found a solution!
You could skip steaming — you will likely get a little less color on the crust and fewer blisters, but they should still be wet/damp enough from the boil to get good rise and color.
I’m really excited to try these! I’ve been making Martin’s Bagels from KAF for a while now and they’ve been turning out well, but it’s always fun to try a new recipe. A few questions though:
1) The KAF recipe calls for non-diastatic malt powder, but yours calls for diastatic malt powder. Can I use the one I have without any modifications, or do I have to change something?
2) Can the barley malt syrup be replaced by plain sugar, brown sugar, maple syrup, or honey (or simply omitted)?
3) I’ve been modifying the KAF bagels to cinnamon raisin bagels successfully by just kneading in raisins and the cinnamon sugar by hand right before the kneading is done. Of course, the raisins and sugar make the dough significantly more wet, but it hasn’t been too much of an issue. Would doing this similarly work here, or would you recommend a different approach?
Thanks!
Oh I should look at his recipe, love his work!
1) I’m using diastatic malt in this recipe mostly to achieve a nice brown color when baking (and to a lesser degree some added chew to the crumb) instead of how non-diastatic malt is used mostly as a flavor additive. If you’re using King Arthur Bread Flour it already has some diastatic malt added so you should be fine leaving out the extra addition I call for.
2) I would sub out the barley malt syrup for honey.
3) Sugar will have an adverse effect on this dough given that it’s 100% naturally leavened (no commercial yeast). If other recipes you’ve been working on use instant yeast (especially osmotolerant) the added sugar won’t cause any issue. All this is to say be careful adding too much more sugar to this recipe as it will likely slow fermentation and lengthen the timeline overall — it can still be done, just be ready to adjust as necessary. Of course, you could always just add cinnamon and raisins without any more sugar and see how it goes! Cinnamon in high percentages can also cause issues with fermentation, but it’s not likely you’ll be adding an excessive amount. I do hope to tackle cinn/raisin at some point as well!
Great, thanks! I’ll report back when I end up trying it.
And just to reduce your googling time, here’s Martin’s recipe: https://www.kingarthurflour.com/recipes/martins-bagels-recipe
Thank you!
Can I substitute King Arthur all purpose flour for the high protein? Would the ratio be the same?
I haven’t tried KA AP, but it might work just fine. If you did this, I would hold back some of the mixing water, perhaps 5%.
Where the hell is the print button???
Bottom of the post, says “Print Sourdough Recipe.”
I am having issues..only prints one page
Yes! You’re awesome for posting a bagel recipe. I’ve been enjoying your recipes over quarantine. You’re the man!
Appreciate that, Robert! Happy baking 🙂
They sound heavenly!! Is there any way I could bake these a few at a time in a Dutch Oven, or on a cookie sheet? I cannot afford a baking stone or steel or lava rocks at this time.
Yes, using a covered pot would work, or what I’d do instead, is if you have a large rectangular roasting pan you could invert that over the bagels to help create a steamy environment.
Thanks ever sooo much, Maurizio!! 🙂
You’re welcome and happy baking, Mare!
Hi and thank you for all the great recipes. I have your book and have been baking your sourdough bread for some time now. I make about two loaves a day for the last four months for families who find themselves out of work during this pandemic. I am excited to try your bagels. One question. My oven has a fan that helps regulate the temperature. How do I build steam in a situation like this for baking my bagels. Bread I do in a Dutch oven. Thanks for any suggestions you may have. Again thank you so much. All the best…..Franco
Hey there! I didn’t know I had a book!? Really though, no book out 🙂 But you’re definitely welcome.
I steamed my oven as I mentioned up in the post with my fan assist (convection) and it worked just fine!
Thanks for your answer. Just what I wanted to know. The cloth is a great idea. I also try to bake as much bread as I can in Dutch ovens. I get much better results hands-down. The easiest steaming solution, when a Dutch oven isn’t possible, is the cast iron skillet filled with lava rocks and pre-heated with the oven, onto which you toss ice cubes (or ice water if you’re especially quick). That what I did for my first batch of bagels. These are really the best I’ve made, after years of Reinhardt’s, which until now now seemed just fine.
I am excited to try this recipe out. I do have a couple of questions. First, if I wanted to do these as mini bagels and make them half the size you have in your post, will I need t adjust the boiling and baking times to accommodate the change is size? And the second question is I am having a hard time finding Barley Malt Syrup in Canada so I wanted to know if you had any recommendations for a substitute. Do you think i could use molasses instead? Or would it be too strong?
Thanks again for all your posting and wonderful recipes. I have just started as a new sourdough baker this year and have followed your blog and as a fellow engineer, truly appreciate your detailed recipes and measurements. Follows my own hear!
As I mentioned up in the post, I’m boiling in just straight water. I’m not sure I’d use molasses, but honey could work. Let me know how this works out if you give it a try! And you’re very welcome, happy to help 🙂
Sorry, I was asking about the barley malt syrup within the dough recipe. If I can’t find it, do you have recommendations for a substitute instead? And as for the smaller bagel sizes, is boiling for 40s on each side still okay? Or would I need to shorten the time? Thanks again
Similarly, use honey in the dough in its place. It should bring plenty of sweetness, but you won’t have that malty flavor that can come through (they’ll still be awesome). It’s hard to say on boiling. I’d shoot for 30s each side, see how they hold up. If you see them start to want to unravel or break apart, cut the time down. My feeling is, at least with all the tests I’ve done, they should be just fine.
Amazon.ca has a few barley malt extracts (same as syrup, I believe) but they’re kinda pricey. Home brew stores such as https://homebrewsupplies.ca/category/liquid-malt-1/ carry a variety of malt extracts.
Barley Malt Syrup was available at Bulk Barn in Toronto the last time I needed it. I believe you can also find it at Healthy Planet (a health food store).
Looking forward to giving these a try! Are you boiling in straight water, no baking soda or food grade lye added? And are you doing an egg wash before adding your toppings, or are they being added to the slightly wet bagel before baking?
Boiling in water only as mentioned up in the post. No egg wash before adding toppings, the toppings stick to the just-boiled bagel just fine!
Hi Maurizio, wondering why you haven’t adapted the alkali methods you published in your pretzel recipe. I haven’t tried this (not being the OCD experimenter that you are 😉 but I would think that adding some “baked” baking soda (i.e., homemade sodium carbonate) to the boiling water would have a beneficial effect on the crunchy/chewy exteriors. https://www.nytimes.com/2010/09/15/dining/15curious.html
https://www.seriouseats.com/recipes/2018/11/baked-baking-soda.html
Cheers!
Hey! That would work just fine, however, I didn’t do this because I wasn’t after that “pretzel” flavor with these bagel! You’d certainly get that flavor with baking soda or lye, even if the color would be pretty awesome.
Used another recipe that calls for a counter rise of up to 5 hours and then do a float test before going into fridge overnight.Mine always take way longer to float..cold space I guess.Wonder if you think I should increase that wait time.
That recipe might call for a reduce pre-fermented flour percentage, leading to a longer timeline overall. It also could be temperature related. But yes, if it’s cooler in your location (and you’re significantly below the final dough temperature I have listed in the recipe) you’ll need to lengthen the time in each step (especially bulk fermentation and that counter proof) as necessary.
Thank you
Oooh, I can’t wait to try this! I’ve been making overnight sourdough bagels for a while (just boiled and baked this morning actually!) and I’m always excited to improve my recipes! I’m intolerant to wheat and bake exclusively with spelt. I know I’ll need to adjust hydration and that I can’t expect exactly the same rise. Any other suggestions before I try this out? It’ll take me a couple of days to gather these ingredients so I’m looking forward to baking soon!
That’s awesome to hear, Christy! As you said, definitely drop the hydration, spelt is finicky with too much water. You might also have to play with the prefermented flour percentage depending on whether you’re using whole or white spelt, but I’d really have to do some trials to determine what would work there. If you’re white (sifted) spelt, maybe try a run with lower hydration and see how they come out!
I love both white spelt and 50/50 whole-white bagels and I keep notes on both. I started your recipe with 100% white and dropped the water to 80% of your recipe (378 g). Since I’m a low FODMAP girl all around I subbed in maple syrup for barley malt syrup but kept the dry extract because it doesn’t have the concentrated fructose. I finished this this morning…BAM! They rose so much I couldn’t fit them on a single baking sheet! (That made the oven a bit crowded but it worked out.) The results were so tasty that my two ADHD children were SILENT while consuming theirs. My husband and I had to practice serious restraint not to go right back to the counter for a second!
One thing I’ve done with bagels to ensure they’re proofed is a cold water float test at the end of the shaping rise (pre-retard). If they float in a small bowl of very cold water they’ll float when you boil them the next morning. I don’t know if you have a similar trick; I didn’t see one in this article.
Thanks so much for this recipe! It’s definitely brought my bagel game up. I’d love to hear if you experiment with spelt; the texture is delicate and the flavor’s fantastic!
Can’t wait to try this on the weekend. One thing that’s not clear to me is how you get the toppings to stick. I’ve made NY Overnight Bagels several times, and after boiling I brush with egg white to get toppings to stick. Are you just relying on the tacky wet dough to get them to stick here?
Yup, that’s right. After they are boiled they’re plenty wet and the toppings just stick right on. I prefer to sprinkle the toppings on instead of dunking the dough into a bowl to keep the toppings light, but that’s up to you! Happy baking, Andrew.
This is a great point, and I did do one batch this way but I did it in my dough retarder I built which keeps humidity locked in the fridge. I do this with my pretzel dough, leaving them exposed to the air in the fridge, and yes, it could definitely help dry out that thin layer on the exterior to add a bit more crunch. I would be worried about overnight, though — would they dry too much? I have to test!
Maurizio – This looks terrific, and even though I live in NY, I’m inspired to make my own. One question – I alway thought that boiling bagels involved a lye bath. I’ve made your sourdough pretzels, so I know you’re not lye averse. Did you experiment with it and reject it or am I simply mistaken? Thanks –
Great question. Some are boiled in a lye or baking soda solution but they will take on a very “pretzel-y” flavor if done this way, which isn’t what I was after. I did test with boiling with barley malt syrup, which is commonly done in NY, but I personally didn’t see a huge benefit from it. Let me know how these go when you give them a try — they’re awesome!
These look SO GOOD! I know you are at altitude. That makes me wonder if those of us at sea level would cut down on the boiling time as the boiling water temp is higher at sea level?
Great suggestion, yes I’m up at 5280 ft. You could try 20-30s per side and see how that goes. If you want more chew and a thicker crust, push the boil even farther.
As always, thank you for your amazing recipes. Would it be possible to use the Central Milling Artisan Craft Plus since it contains malt or is the protein content not high enough?
I haven’t tried these with CM ABC but I feel like using High Mountain is the way to go with these. If you went with ABC, I’d drop the hydration down to 50-52% and try to mix a bit longer.
Thank you!
My only foray into the homemade bagel world has been made from a recipe in the “Baker’s Apprentice” book and wasn’t sourdough. I used high gluten flour and diastatic malt syrup. My shaping wasn’t perfect, but the flavor was excellent. They didn’t last a day. I look forward to trying some using sourdough!
I haven’t tried those (I don’t have that book, sadly!) but you’re right, making these at home are the way to go. Let me know how they turn out!
Those look delicious. I will try them. I’m curious about the diastatic malt. I notice that many commercial flours already have it added. I used to add it to my bread dough, but stopped when I switched to baking with sourdough. I wondered why the results were no longer good, and then read that diastatic malt and sourdough both break down starch so it can be used by yeast. Duh! Too much of a good thing? Since then I have also made sure not to buy flour that has it added. But yet you have both sourdough and diastatic malt here and it seems to work fine.
Yes, too much diastatic malt can result in a sticky dough, gummy interior, and overly reddish crust — it’s a delicate thing and really shouldn’t be added in high quantity. It’s not related to sourdough itself, that’s just fine, the issue is if you have too much added it can cause unwanted side effects. Fermentation itself is the process of breaking down starches to fuel the bacteria and yeast which creates organic acids and leavens the dough, respectively, whether you’re using commercial yeast or sourdough.
This recipe is what dreams are made of! Question- we are driving 3.5-4 hrs to visit a friend with a new baby this weekend (don’t worry, we’ve all been careful with quarantine!). I’d love to bring some of these bagels. Do you recommend baking them before we leave (driving in the afternoon so, eating them day-old for breakfast that next day) or transporting the dough in a cooler with ice (?) so that we can bake them fresh at her house? Thanks again!
Thanks, Christina 🙂 I’d bake them before leaving, too many places for error transporting dough!
Hi ,
Thank you for sharing the recipe.
I wanted to check is there any substitute for Malt syrup and Malt powder.
Can i use Date syrup instead of Malt syrup.
Pls advise
Thank you
Hey, Jui! I’m not sure on that, I’ve not tried with date syrup. You could likely use honey in place of the barley malt syrup and omit the diastatic malt in the dough, but the result will be different (still great, though!).