

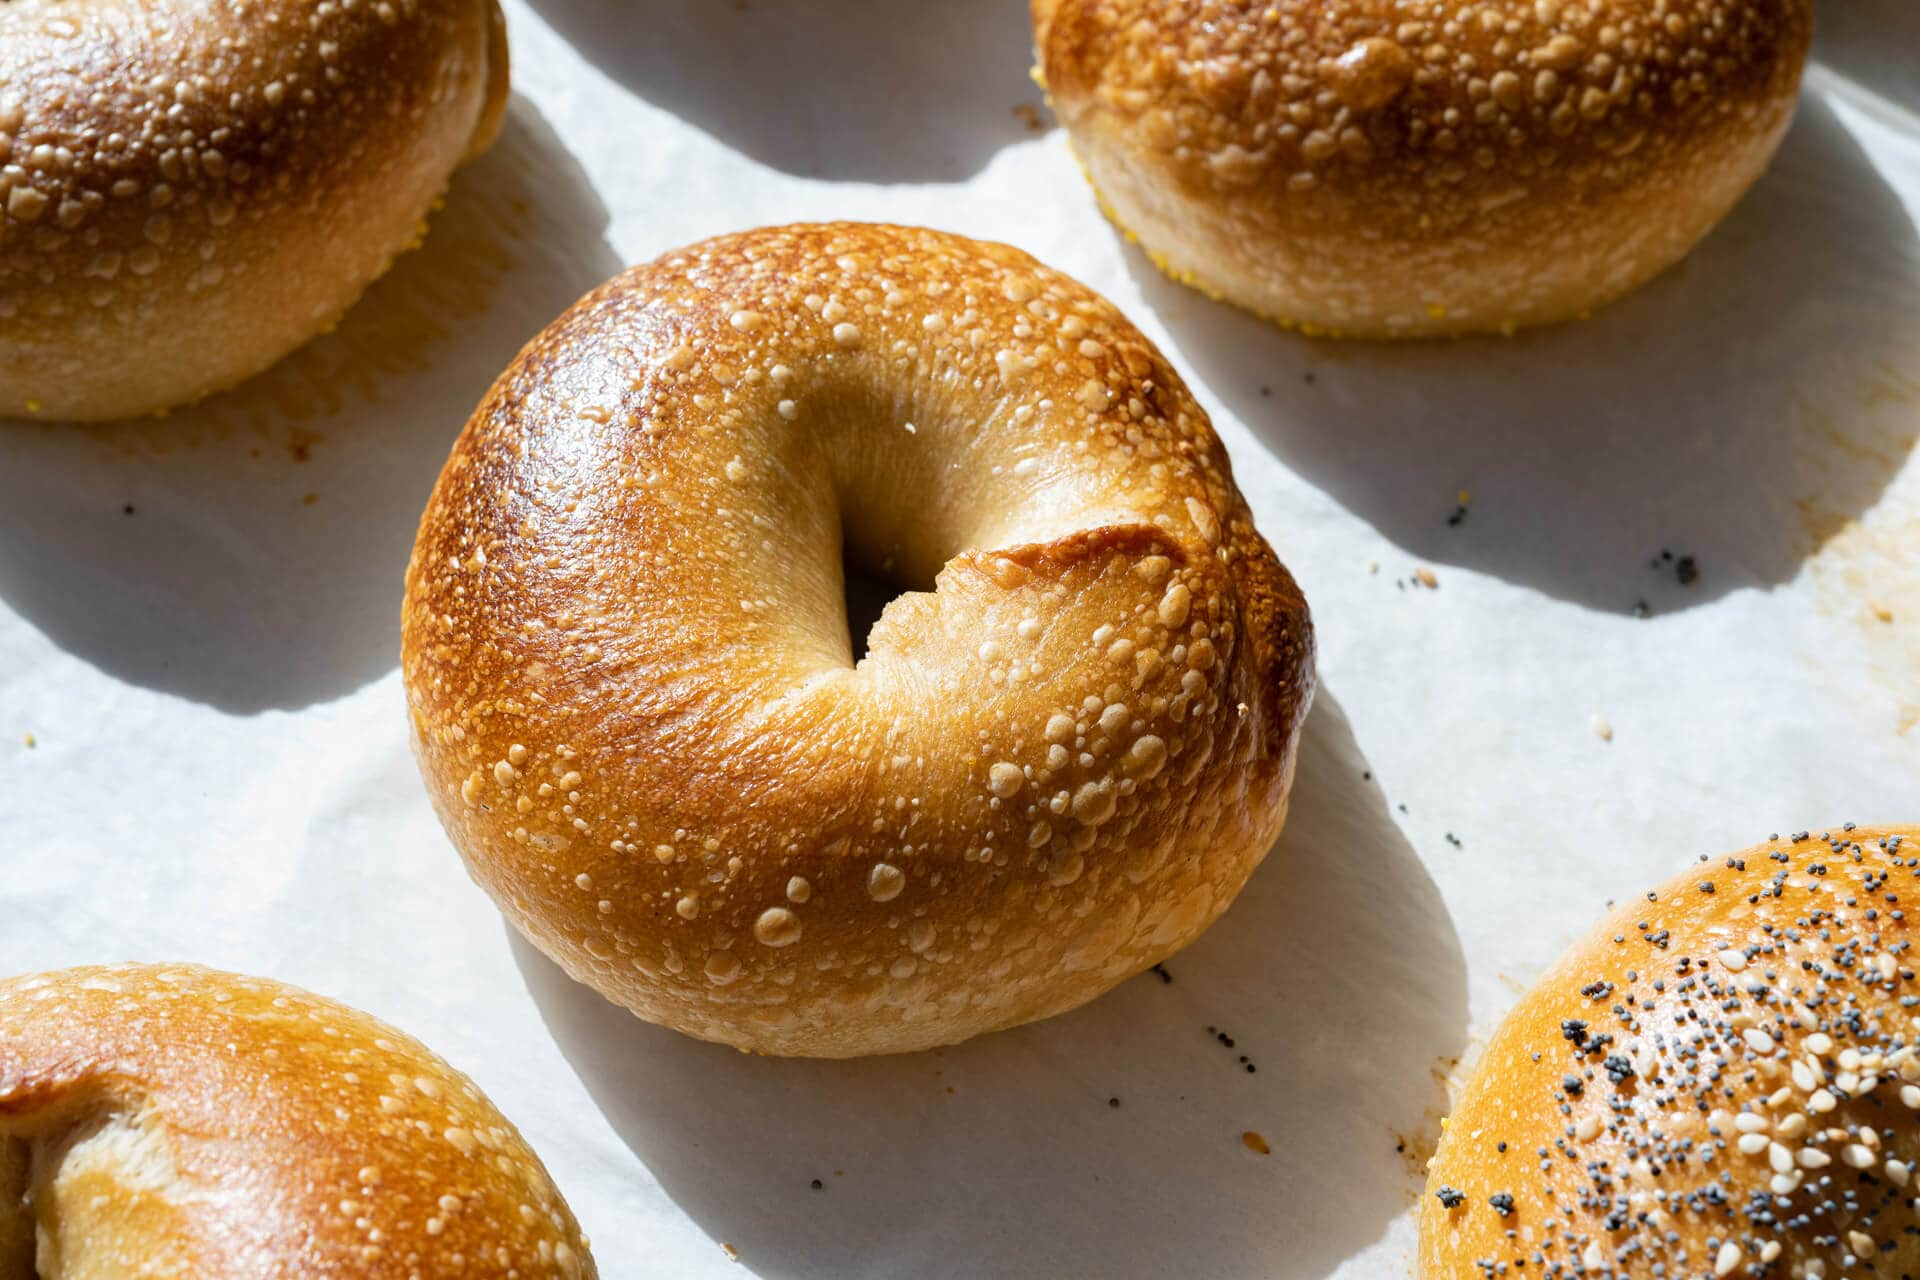
I try not to talk about bagels with friends. Talking about them always starts innocently, a little witty banter about the crust, crumb, and color traits and past eating experiences: “that bagel I had in New York that one time,” or “there was this one bagel shop down the street…” This jovial chat slowly evolves into a friendly argument about more-sweet versus more-savory and crunchy versus soft; maybe one even mentions steaming the bagel instead of baking it (😱).
Finally, the once innocuous chatter results in the participants either forming a stronger friendship over common bagel zealotry or the unfortunate end to the friendship altogether. It’s like the old axiom: never play Risk with a friend you want to keep. Exaggeration? Perhaps. But bagels do seem to rouse an enthusiasm rarely seen with other food (I’d argue pizza might be a solid contender, though). They carry a different meaning depending on where you’ve grown up, what local shops were in the area, and ultimately, where your preferences lie. But these sourdough bagels seem to transcend almost every bagel I’ve had, especially the mass-produced ones—oh yes, definitely those.
While these bagels are more along the New York Bagel style, I’m also a fan of the newer wave bagels with a super thin, glossy, and crispy crust. In fact, I have a recipe for those glossy bagels, too, if that’s more your thing.
I recall occasionally eating those bagels from the bag at the market: that ultra-chewy (from end to end) vehicle was mostly there to convey cream cheese, or schmear, from package to mouth. Rest assured, these sourdough bagels are not that in the slightest. They have a very thin and crisp exterior, not tough or hard, but rather, a little crunch that gives the chewy bagel a textural counterpoint. You see, the interior is as chewy as you’d expect a bagel, but if the entire thing is chewy, you end up with just a big chewy thing. But if you have a contrasting texture, it seems to amplify the chewy thing, much like adding an acid elaborates other flavors.
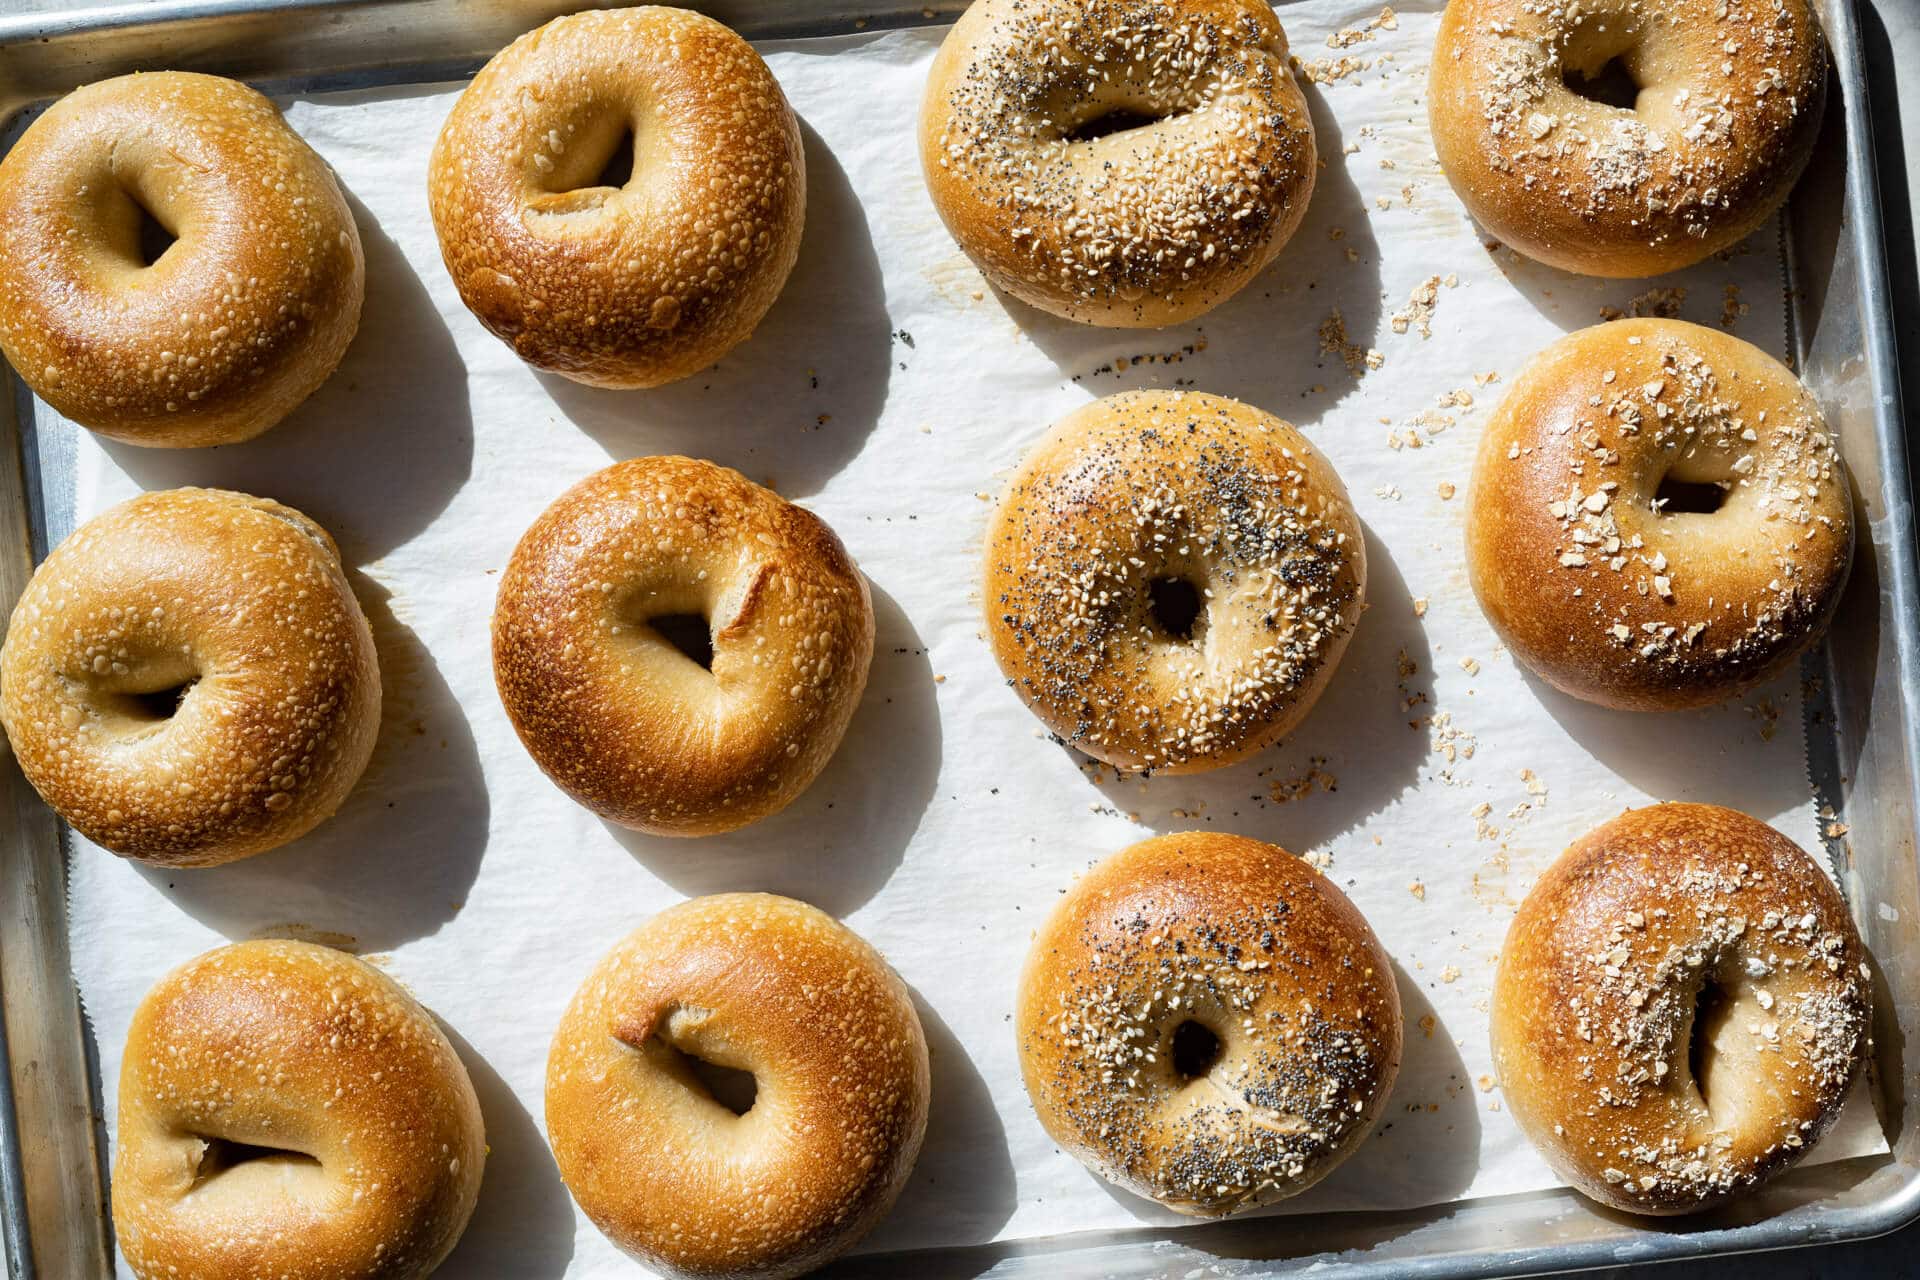
And overall, these bagels are pretty darn easygoing. Unlike bread dough, there’s no need to be overly critical of each motion when shaping, and in the end, the bagel rings puff up uniformly, boil beautifully, and bake easily. Speaking of the boil, perhaps one of the things that keep many from making them, but it’s such a simple thing. And while I often draw parallels between this dough and my sourdough pretzel—mostly in that they each have a stiff dough and a pre-bake step—there’s far less prep before baking bagels than pretzel—not that those sourdough pretzels aren’t worth the effort, because they certainly are.
First, let’s look at some tools I use when making these sourdough bagels.
Tools and Ingredients
First, a few of the tools and ingredients I use for this recipe
- Barley malt syrup – this is the classic sweetener added to a bagel dough and it has a very unique flavor and aroma. I like the Eden brand, but any should work well.
- Diastatic malt powder – see the post on diastatic vs. nondiastatic malt and why it’s used in baking.
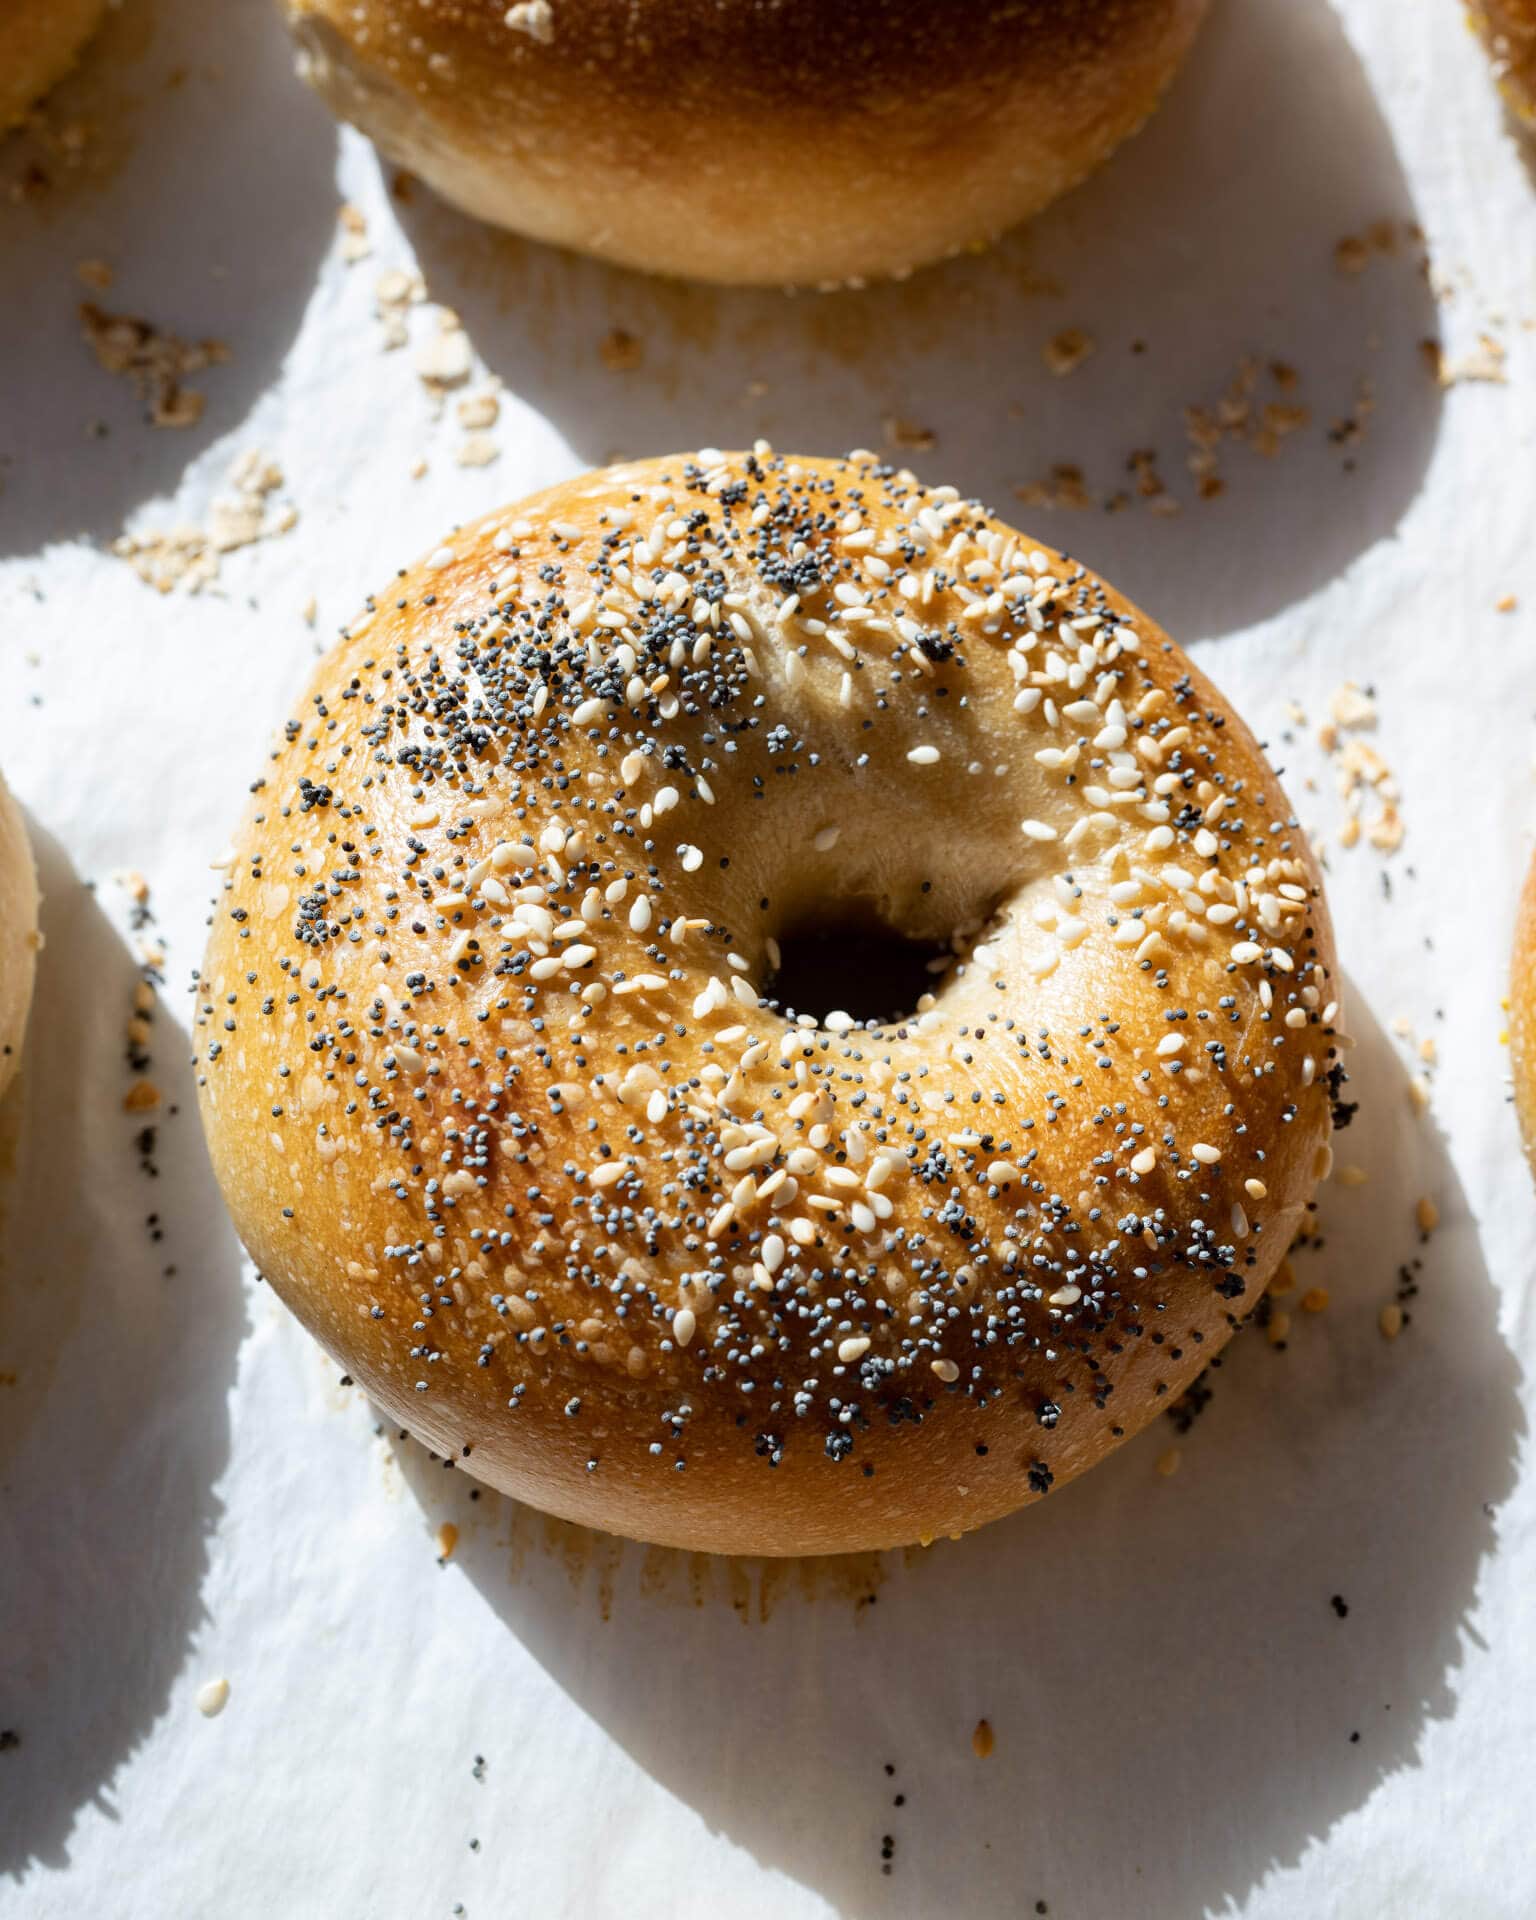
- Everything bagel topping – I love this mix of seeds and dried spices for topping bagels.
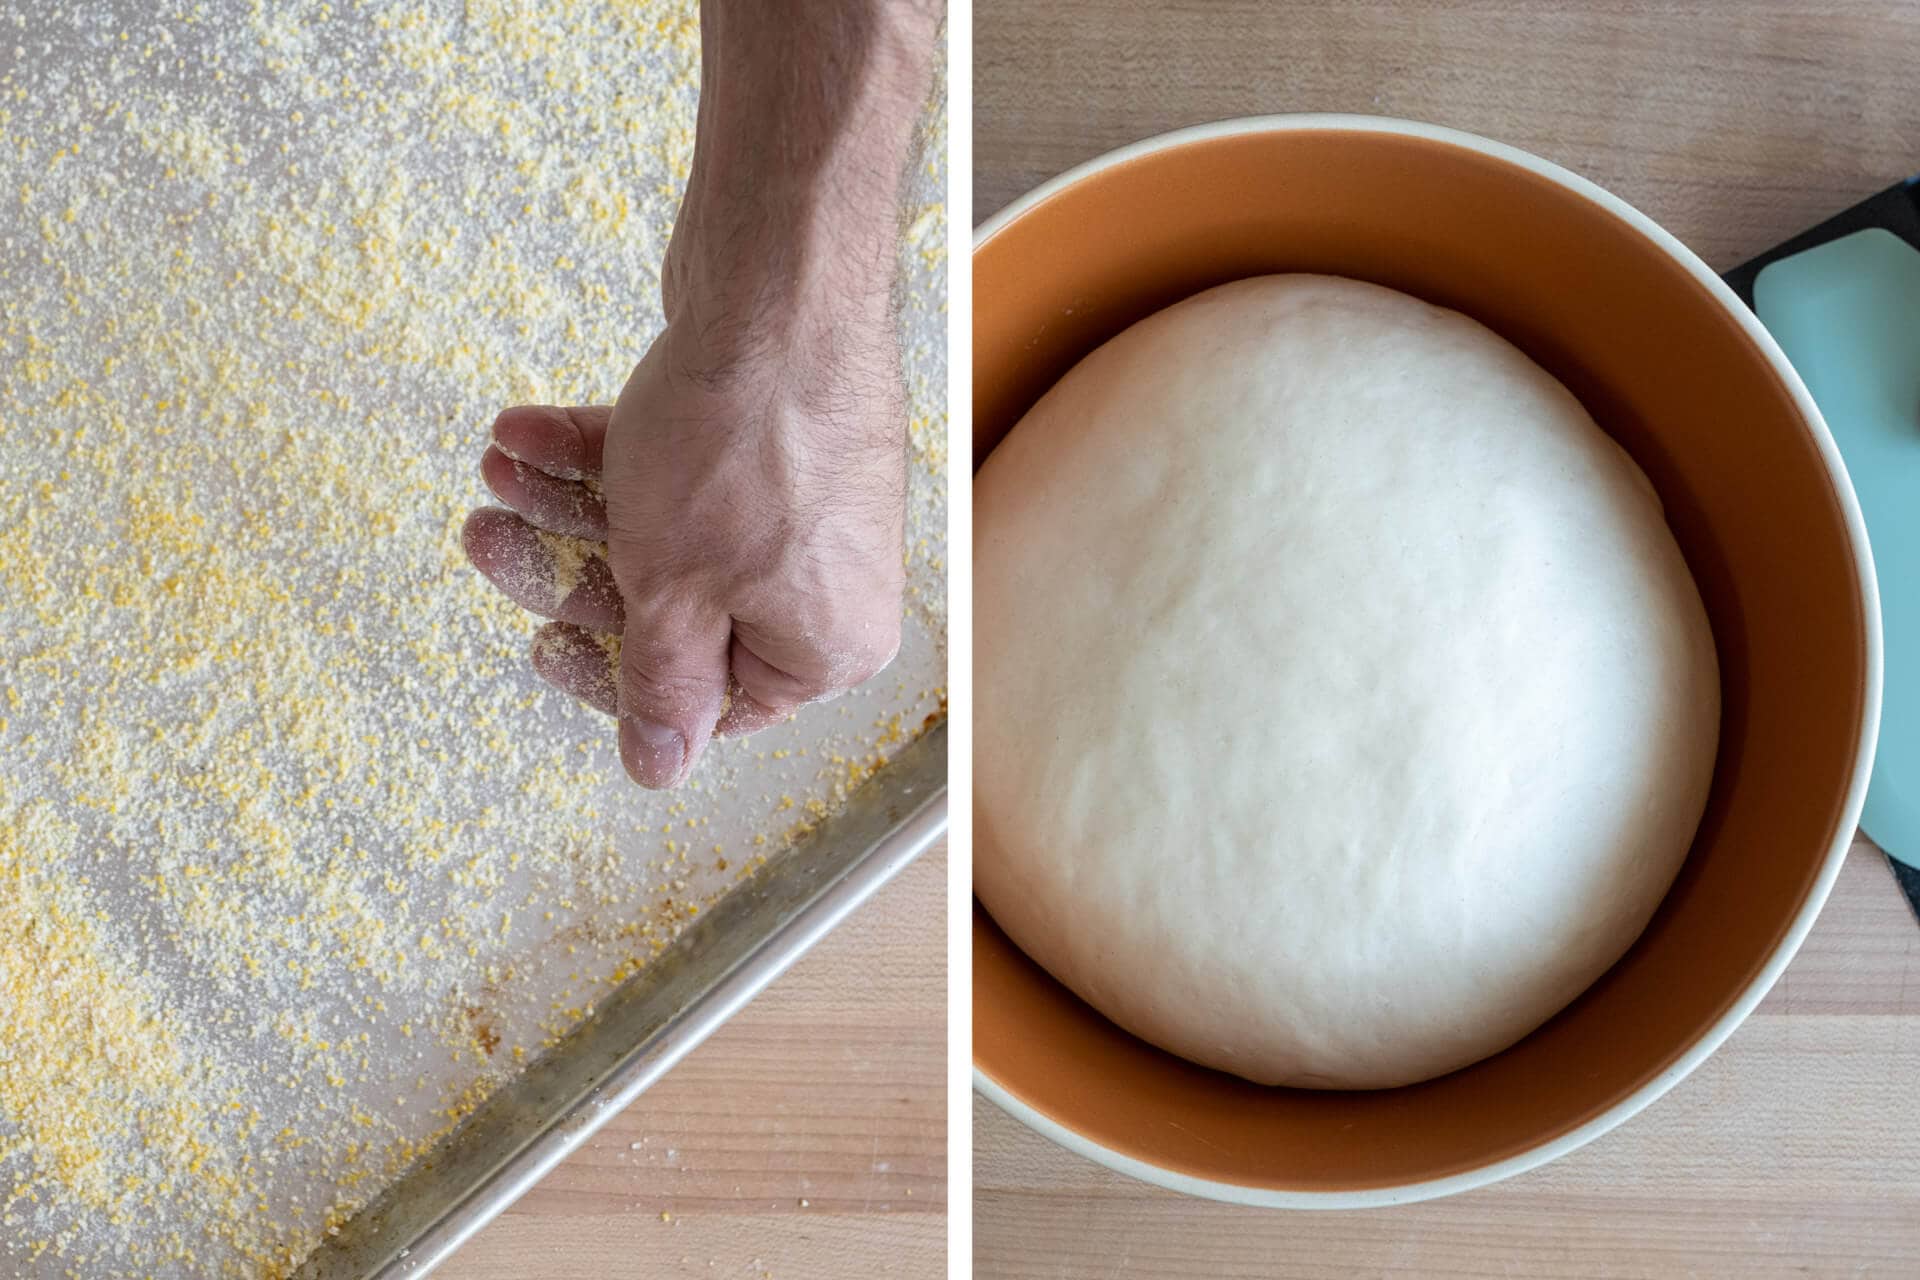
- Cornmeal – traditionally used to keep the bagels from sticking to the baking sheet during proofing (and they add extra starch to the boiling water).
- Half baking sheet – I use this to proof all 12 dough pieces to save space in a home refrigerator.
- Full baking sheet – perfect for baking all 12 bagels, with room in between, on a single baking sheet for even baking.
Flour Selection
Many bagel recipes, mine included, call for high-protein white flour to get that characteristic chew and structure.
I’ve tried this with Tony Gemignani’s Pizza Flour (15% protein), and while there was a bit more chew, I wouldn’t say it was necessary to order some for making sourdough bagels. I like to use Central Milling High Mountain, King Arthur Bread Flour, or Bob’s Red Mill Bread Flour.
Baking Schedule

These sourdough bagels take three days to make: from creating the levain at night on day one to boiling and baking them in the morning on day three. I know—three days!?—but the good news is, most of the time you’re not actively handling the dough, it’s fermenting in one stage or another.
All-in-all, this is a straightforward schedule. It’s also quite flexible by a few hours here and there once the dough is chilled and in the fridge: if you can’t boil and bake first thing on day three, it’ll hold a few more hours (or perhaps longer).
Sourdough Bagel Formula
For tips on how to calculate baker’s percentages or how to modify this formula, see my post on baker’s percentages (baker’s math).
| Total Dough Weight | 1,600 grams |
| Pre-fermented Flour | 12.00% |
| Yield | 12 x 125g bagels |
Total Formula
Desired dough temperature: 78°F (25°C). See my post on the importance of dough temperature for more information on dough temperatures.
| Weight | Ingredient | Baker’s Percentage |
|---|---|---|
| 964g | High-protein white flour (~13% protein, Central Milling High Mountain, King Arthur Flour Bread flour, or Bob’s Red Mill Bread Flour) | 100.00% |
| 530g | Water | 55.00% |
| 29g | Sugar, caster | 3.00% |
| 29g | Barley malt syrup | 3.00% |
| 18g | Salt | 1.90% |
| 7g | Diastatic malt | 0.75% |
| 23g | Sourdough starter (100% hydration; 40% rye, 60% white flour) | 2.40% |
Sourdough Bagel Method
1. Prepare Levain – Night before mixing, 9:30 p.m. (Day one)
Mix the following ingredients together in a container and leave covered to ripen for 12 hours overnight. It mixes up to a stiff consistency so I like to mix and knead the dough in a mixing bowl, then I transfer to a narrow and tall jar.
Try to hit a final dough temperature of 78°F (25°C) for this levain.
| Weight | Ingredient | Baker’s Percentage |
|---|---|---|
| 116g | High protein flour | 100.00% |
| 58g | Water | 50.00% |
| 23g | Ripe sourdough starter | 20.00% |
23.18% Levain In Final Dough Mix.
2. Mix – 9:30 a.m. (Day two)
A note on mechanical mixing: This dough is low hydration and comprised of high protein flour—it’s a firm dough! I used my Haussler Alpha mixer to mix this for 5 minutes on speed one. You could use a KitchenAid stand mixer to mix this dough for a few minutes in the beginning, but I wouldn’t push it too far and risk damaging the mixer—ultimately you make the call. After mixing in the KitchenAid, you could then turn the dough out to the counter to finish kneading like pasta dough, as described below.
| Weight | Ingredient |
|---|---|
| 848g | High protein flour |
| 472g | Water |
| 29g | Sugar, caster |
| 29g | Barley malt syrup |
| 18g | Salt |
| 7g | Diastatic malt |
| 197g | Levain (see Prepare Levain, above) |
Make the malt syrup slurry: This will help the sticky, viscous barley malt syrup incorporate more easily into the dough. To a small mixing bowl, add a bit of the mixing water, barley malt syrup, sugar, diastatic malt powder, and salt. Stir until everything dissolves.
To your mixing bowl, add the malt syrup slurry, flour, water, and ripe levain. If using a mechanical mixer (see the note, above), mix on low speed for approximately 5 minutes until the dough strengthens and begins to smooth. This dough is so firm it doesn’t need much.
If you do choose to use a mechanical mixer, you might need to cool the mixing water to ensure you hit the FDT of 78°F (25°C). I used cold water straight from my fridge.
If mixing by hand, mix everything in the bowl until well incorporated. Turn the dough out to a clean work surface and knead the dough like pasta: fold half over onto itself and push the mass away from you with the palm of your hand. Continue folding over and pushing away for 8-10 minutes until the dough firms up, and it becomes hard to knead any further.
Transfer your dough to a bulk fermentation container and cover.
3. Bulk Fermentation – 9:45 a.m. to 12:45 p.m.
Give this dough a single fold after 1 hour and 30 minutes into bulk fermentation. For the fold, turn the dough out to a clean work surface and do your best to fold it into thirds. Place the dough back into the bulk fermentation container with its seam side down, and cover. Let the dough rest, covered, for the remainder of bulk fermentation.
4. Divide and Shape – 12:45 p.m.
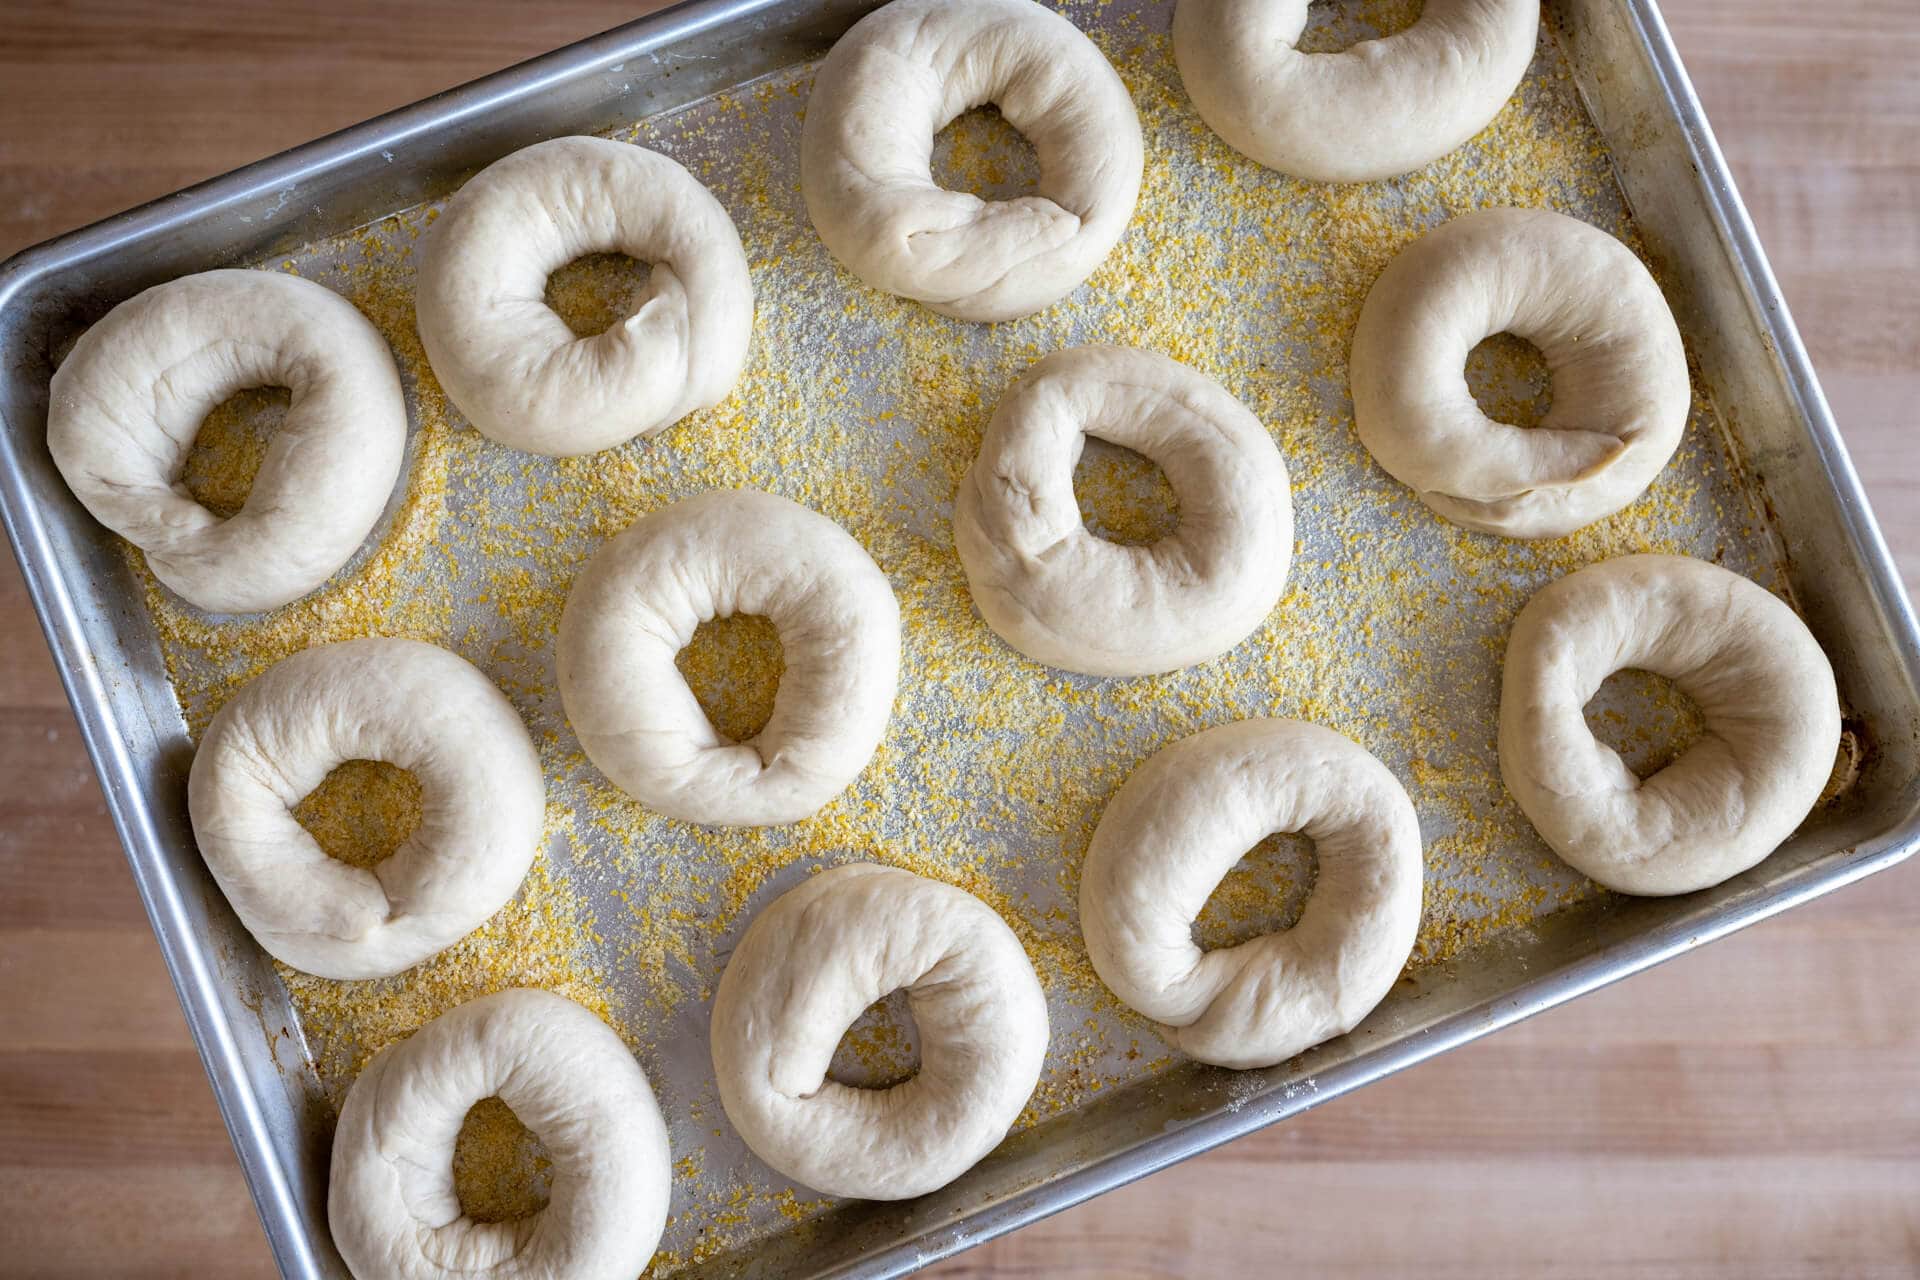
Use a half baking sheet (so it fits into your refrigerator) to hold the 12 pieces of shaped dough. Later, after boiling the dough, I upsize to a full baking sheet to help the dough evenly bake. Spread a thin layer of cornmeal on the half sheet to prevent the bagel dough from sticking during proofing.
Divide the dough into twelve 125g pieces.
First, degas the piece by tamping down a bit with your hand. Then, do your best to form the piece into a rough rectangle and cinch down from the top, so the dough ends up in a little tube. This cinching doesn’t have to be forceful, and it helps to get the dough into a tube shape.
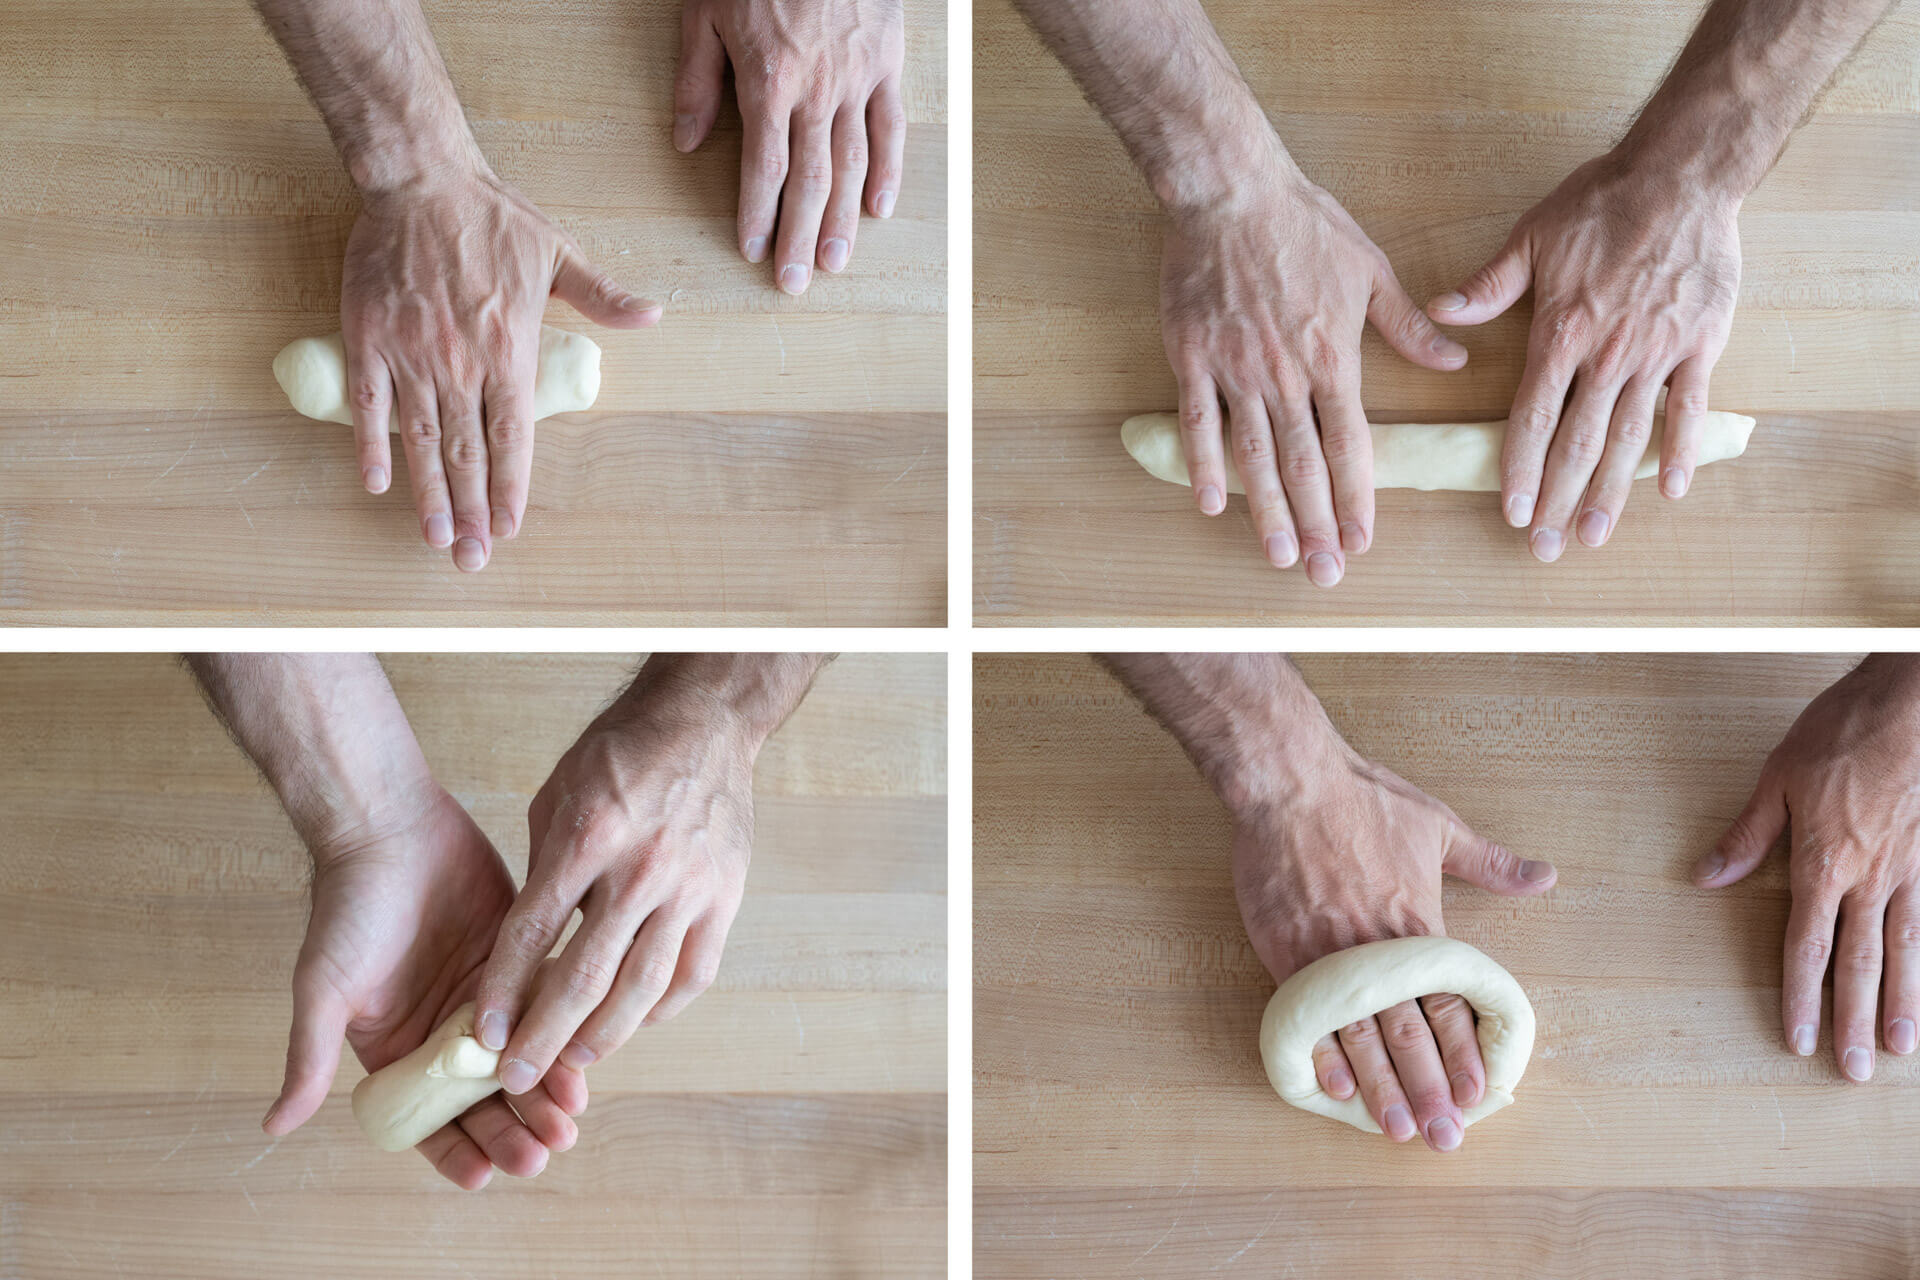
Next, roll your hand in the center a few times to create a bulb at each end. Then, switch to two hands and roll outward to about 12 inches and a tube that’s mostly the same thickness all the way through. If you prefer a bagel with a large hole, roll out the tube, so it’s longer.
Once rolled out to a long tube, wrap it around the backside of your hand between your knuckles and wrist. Overlap the two ends of the dough in the palm of your hand, and gently press the two ends together. Next, press your palm down on the work surface, and in a repetitive motion, roll the dough on the work surface repeatedly to seal.
Here’s a video on my YouTube channel of me shaping one of the pieces
After shaping a piece, transfer it to the cornmeal-dusted baking sheet. Repeat for the remaining pieces, and you will end up with four rows of three.
5. Proof – 1:00 p.m. 3:00 p.m. (2 hours room temperature, then retard overnight)
Cover the baking sheet with a large, reusable plastic bag and seal shut. Let the dough proof at room temperature, around 72-74°F (22-23°C), for 2 hours. The dough should puff up slightly after this time but not excessively. If the dough still feels very dense to the touch, give it another 15-30 minutes and check again.
After 2 hours, place the covered baking sheet into the fridge overnight at around 39°F (4°C).
6. Boil and Top – 9:30 a.m. (Day three)
Oven prep: Before you begin boiling your bagel dough, preheat your oven to 475°F (245°C) with convection or 500°F (260°C) without convection. Place one rack at the bottom third of the oven. Place a baking stone or baking steel on the rack to preheat. I steam my oven as described on my oven steaming method post, so place a roasting pan on the bottom filled with lava rocks to prepare to steam. I also fill a cup of ice and place it next to my oven (I will pour this over the lava rocks to steam the oven).
Bagels are unique because you boil the dough before baking. This boiling gelatinizes the starches in the flour and gives them a little more chew and helps them achieve a shiny crust. This gelatinization is very similar to how you make a tangzhong or roux. But for a bagel, the longer you boil them, the thicker the crust and chewier they will become. There is a limit to the boil duration, though, as they will degrade in the water after a while. I have found boiling the dough 40 seconds on each side, for a total of 1 minute and 20 seconds, to be just right.
Many places like to add barley malt syrup or honey to the boiling water, but in side-by-side testing I didn’t find the added syrup to give them any more shine. The cornmeal brought into the boiling water might also add starches, much like when making pasta.
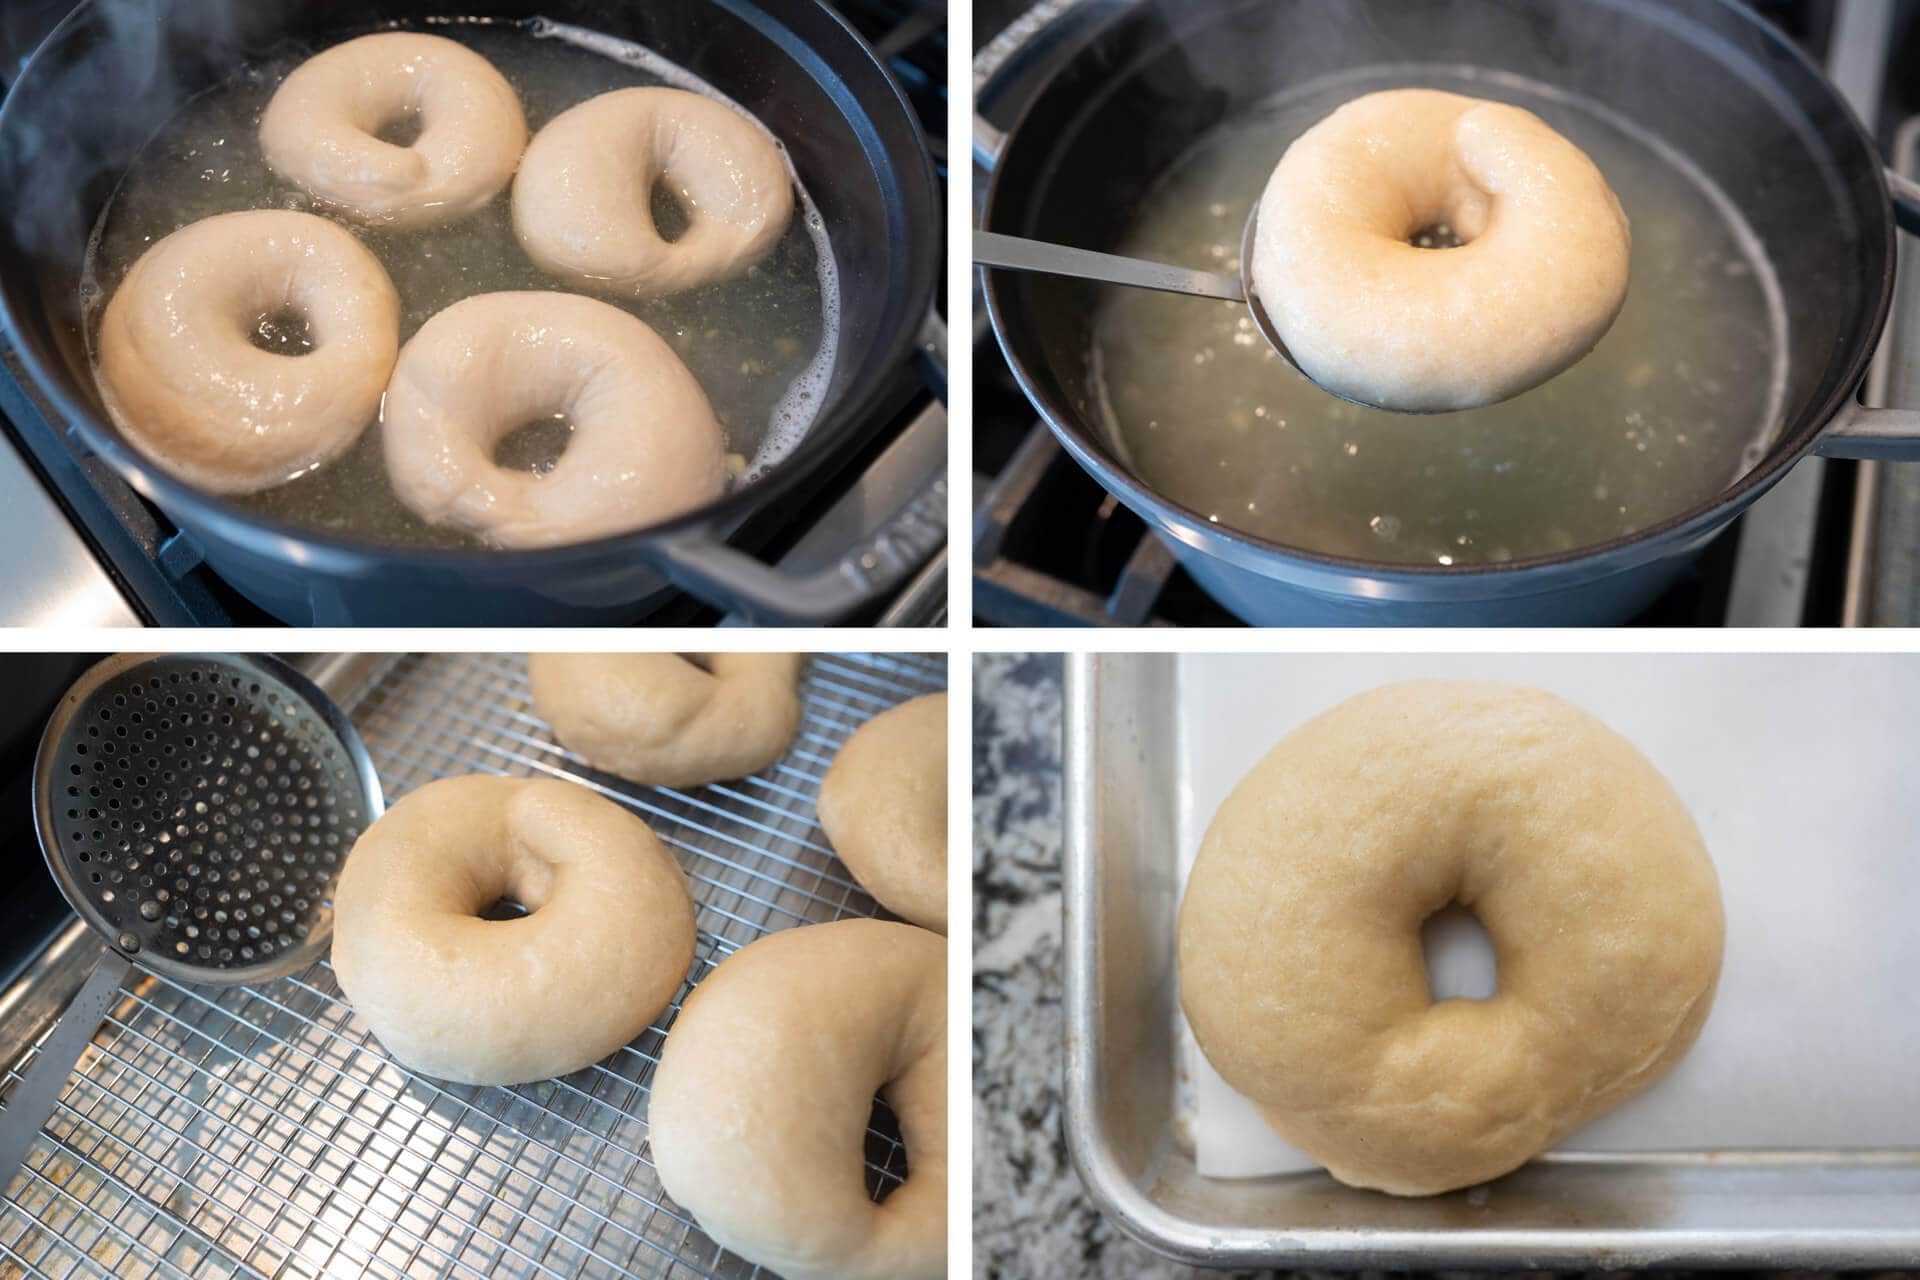
Boiling equipment prep: Fill a wide pot with enough water so the bagel dough can float without touching the bottom (in my 7qt Staub Dutch oven, this was about 1.5 gallons). Bring to a low boil. Next to your stovetop, place a half baking sheet with a cooling rack inside, this will hold the wet bagels for a minute and allow them to drain. Next, line a full baking sheet with parchment paper — this will hold the dough as it bakes. Finally, grab any toppings you’d like (poppy, oat, everything bagel mix, sesame, etc.) and place them in bowls on your work surface.
Boil: Once the water is at a low boil, boil the proofed sourdough bagel dough straight from the fridge, about 40 seconds per side. Using a spider strainer, transfer each piece to the cooling rack inside the baking sheet to drain while you boil the rest of the dough.
Once the pieces are all boiled, move quickly to top them, if desired, and get them onto the final baking sheet.
This dough should float immediately when dropped into the boiling water. If the dough sinks and doesn’t pop up within a few seconds, it’s likely under proofed. Give it more time to proof at warm temperature and try again.
Once the bagels have drained for a minute on the baking rack, transfer them to the full baking sheet lined with parchment paper for baking. Top them with whatever toppings you’d like at this time.
7. Bake – 9:45 a.m.
Slide the full baking sheet with boiled dough into the preheated oven directly onto the baking stone or baking steel. Pour the cup of ice onto the pan with lava rocks and quickly close the oven.
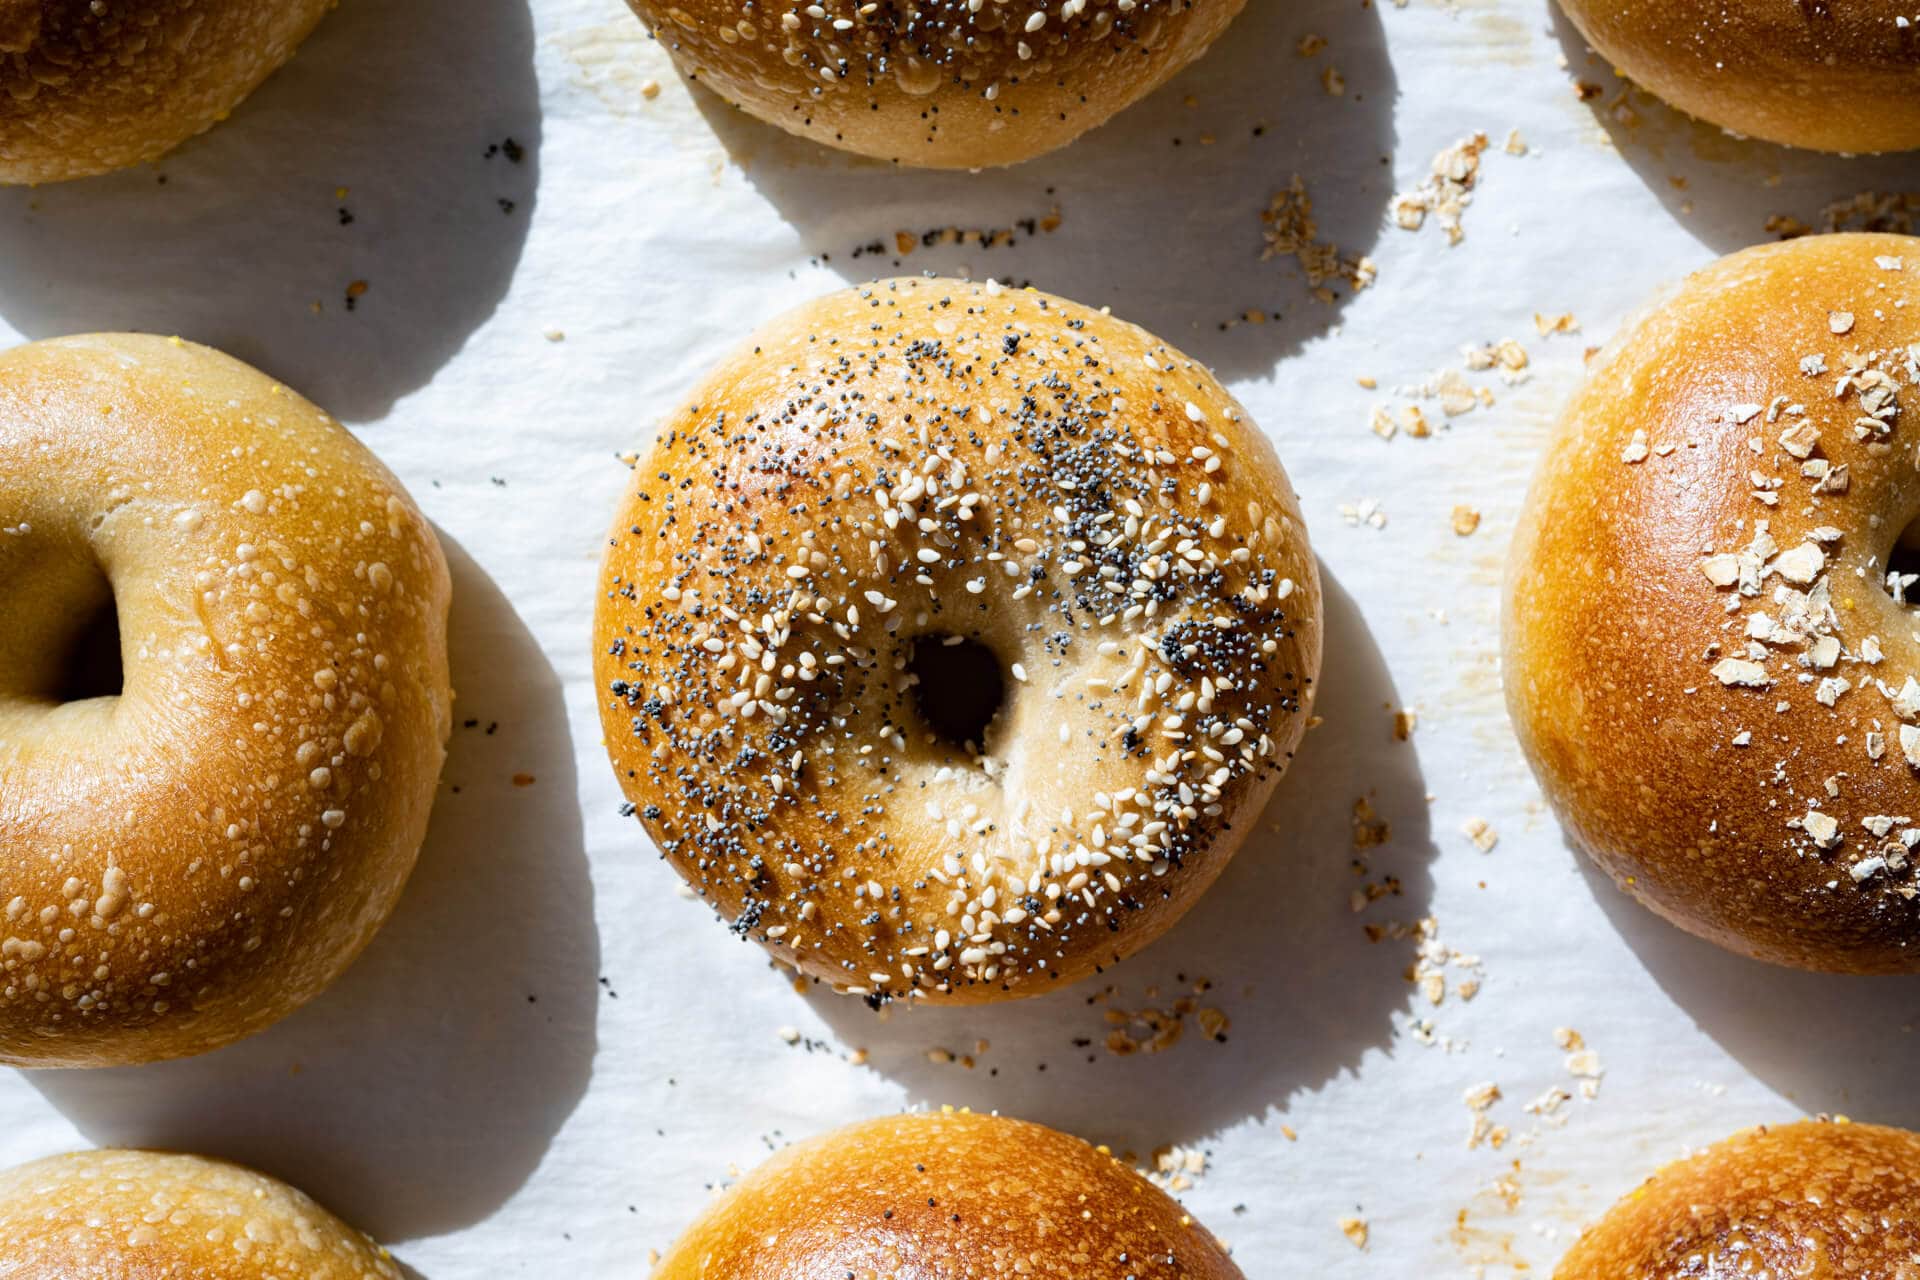
Bake at 475°F (245°C) convection (500°F (260°C) without convection) for 10 minutes with steam. After 10 minutes, vent the oven and remove the steaming pan, rotate the baking sheet 180°, and bake for 5 minutes longer. After this 5 minutes, turn the oven down to 450°F (235°C) and bake for 5 minutes longer for a total of 20 minutes. Remove the sheet when the bagels are nicely colored.
Let cool 15-20 minutes on a wire rack. These are fantastic the first day they’re baked and hold well for a few days after that in a bread box. I also like to wait till they are room temperature, slice in half, and then freeze in a freezer bag. They can be reheated in the toaster, as described in my post on how to store bread.
Conclusion
When you take a bite of these bagels, you’ll first discover a fleeting crispness that gives in to chewiness, a textural dance that eventually leads to a subtle, onset of sourness. This mellow tang creeps in and propels you to keep going with it, to keep taking bite after bite until you’ve finished the entire bagel without the thought of stopping.
The entire eating experience is scary in how it takes over, and it’s exactly what I want in a bagel.
The whole eating experience is scary in how it takes over, and it’s exactly what I want in a bagel. That pop of flavor at the end of the bite is not something you find in mass-produced bagels, and I just love it. And while there are sugar and barley malt syrup added to the dough, it does not carry through to make these bagels sweet. There’s a beautiful balance in the eating experience of these sourdough bagels.
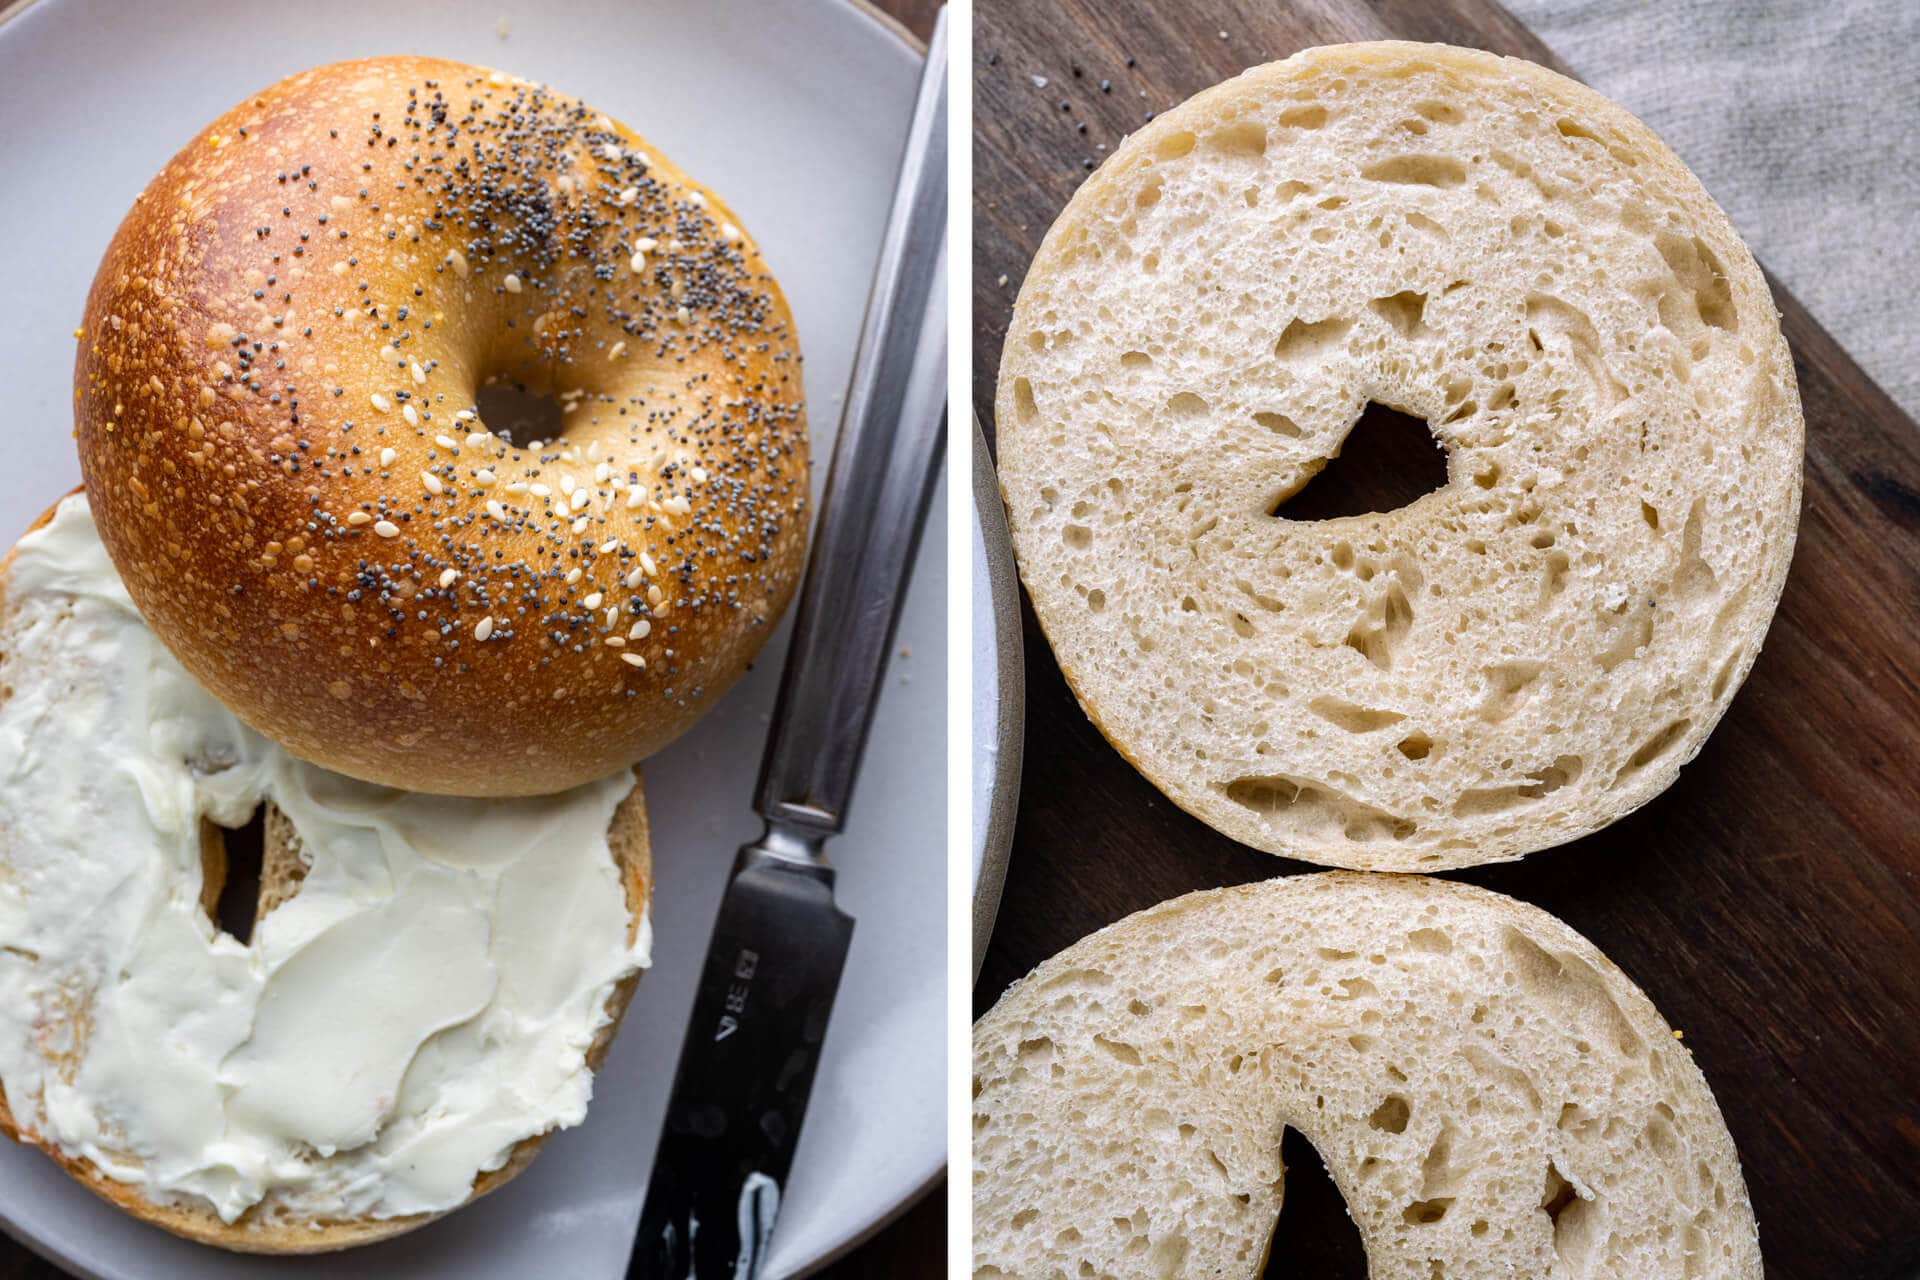
After making these bagels the first time, you’ll get the hang of the process. Subsequent batches become easier and more natural, and it’s no stretch to think these could become a weekly staple—and they freeze incredibly well (I slice them in half and place them in a freezer bag) if, by chance, there’s any left.
Print
Sourdough Bagel
- Prep Time: 24 hours
- Total Time: 24 hours
- Yield: 12 bagels
Description
My recipe for flavorful and chewy sourdough bagels with a thin and slightly crispy crust. Delicious topped with an everything bagel mix, coarse sea salt, oats, seeds, or anything else you can dream up!
Ingredients
Levain
- 116g high protein flour
- 58g water
- 23g sourdough starter, ripe
Main Dough
- 848g high protein flour
- 472g water
- 29g sugar, caster
- 29g barley malt syrup
- 18g salt
- 7g diastatic malt
- 197g levain
Instructions
- Levain (the night before mixing, 9:30 p.m.)
Mix all the Levain ingredients in a container and leave it at a warm temperature for 12 hours. - Mix (9:30 a.m.)
Add a splash of the mixing water, sugar, barley malt syrup, diastatic malt powder, and salt to a small bowl and mix together. To your stand mixer’s mixing bowl, add the malt syrup slurry, flour, water, and ripe levain. Mix on low speed for approximately 5 minutes until the dough strengthens and begins to smooth. Transfer your dough to a bulk fermentation container and cover. - Bulk Fermentation (9:45 a.m. to 12:45 p.m.)
Give this dough a single fold after 1 hour and 30 minutes into bulk fermentation. - Divide and Shape (12:45 p.m.)
Use a half baking sheet (so it fits into your refrigerator) to hold the 12 pieces of shaped dough. Spread a thin layer of cornmeal on the half sheet to prevent sticking. Divide the dough into twelve 125g pieces. First, degas the piece by tamping down a bit with your hand. Then, form the piece into a rough rectangle and cinch down from the top, so the dough ends up in a little tube. Roll the tube out to a 12″ long tube. Wrap the dough around the backside of your hand and pinch it together in the front. Roll a few times on the counter to seal. Transfer to the cornmeal-dusted baking sheet. Repeat for remaining dough pieces. - Proof (1:00 p.m. to 3:00 p.m.)
Cover the baking sheet with a large, reusable plastic bag and seal shut. Let the dough proof at room temperature, around 72-74°F (22-23°C), for 2 hours. The dough should puff up slightly after this time but not excessively. If the dough still feels very dense to the touch, give it another 15-30 minutes and check again. After 2 hours, place the covered baking sheet into the fridge overnight at around 39°F (4°C). - Boil and Top (9:30 a.m., Day Three)
Oven prep: Before you begin boiling your bagel dough, preheat your oven to 475°F (245°C) with convection or 500°F (260°C) without convection. Place one rack at the bottom third of the oven. Place a baking stone or baking steel on the rack to preheat. Place a roasting pan on the bottom filled with lava rocks to prepare to steam. I also fill a cup of ice and place it next to my oven (I will pour this over the lava rocks to steam the oven).
Boiling equipment prep: Fill a wide pot with water and bring to a low boil. Next to your stovetop, place a half baking sheet with a cooling rack inside, this will hold the wet bagels for a minute and allow them to drain. Next, line a full baking sheet with parchment paper — this will hold the dough as it bakes. Finally, grab any toppings you’d like (poppy, oat, everything bagel mix, sesame, etc.) and place them in bowls on your work surface.
Boil: Once the water is at a low boil, boil the proofed sourdough bagel dough straight from the fridge, about 40 seconds per side. Using a spider strainer, transfer each piece to the cooling rack inside the baking sheet to drain while you boil the rest of the dough. Then, transfer the boiled bagels to the full baking sheet and top, if desired. - Bake (9:45 a.m.)
Slide the pan with all the bagel dough into the oven and pour the cup of ice over the roasting pan with lava rocks. Quickly close the oven.
Bake at 475°F (245°C) convection (500°F (260°C) without convection) for 10 minutes with steam. After 10 minutes, vent the oven and remove the steaming pan, rotate the baking sheet 180°, and bake for 5 minutes longer. After this 5 minutes, turn the oven down to 450°F (235°C) and bake for 5 minutes longer for a total of 20 minutes. Remove the sheet when the bagels are nicely colored. Let cool 15-20 minutes on a wire rack.
Notes
- These are wonderful topped with an Everything Bagel mix, rolled oats, sesame seed mixture, or any other topping you’d like.
If you use this sourdough bagel recipe, tag @maurizio on Instagram and use the hashtag #theperfectloaf so I can take a look!
What’s Next?
Regardless of your bagel preferences, I’m confident these sourdough bagels will rank up there with the best you’ve had—and what could be better than making your own with your sourdough starter? And who knows, perhaps they’ll mend that friendship severed by staunch bagel ideals—these could be the olive branch; a crisp and seductively chewy one.
Next up, how about a simple bake like sourdough starter discard sugar cookies?
Buon appetito! 🥯


728 Comments
Best laid plans…. I started the process by the letter. On Fri night. Sat was going to be my mix and bulk ferment. It all went as planned but then “left field “ happened. I had to abort the next step on the schedule. Rather that risking all the work and ingredients I decided to take the bulk dough and place it in a bag and place it in the refrigerator. Therefore, hoping to slow down the rise. I now have to wait until Mon. Am to start up,again. 🤷🏻♀️I will take it out in the morning. Let it rest in room temp. Test the
Degrees of the dough. And then start the process again. That would be dividing it up etc. I really don’t know if I made the right decision. Due to a family issue I didn’t have any other choice. 🤞. Any comments will be welcomed! Btw Amazon has the Barley Malt syrup and the drastic malt. One more thing. King Arthur flour Is my go to for all baking needs. I did notice that the BF is not as high i protein as I though it should be. As recommended I reduced the h20 5% . I also used bread salt instead of regular salt.
This will be quite an experiment! But isn’ baking that in itself!
Thanks for reading. I really hope ther is an input to my bred making soap opera!
,
.
Those sound like good adjustments to me! I hope they turned out great, Karen.
Thank you for your 👍🏻. I will let you know. Still a bit nervous.
I’m finding it hard to time when my sourdough start and levain are ready with work during winter. Can we every just replace the 197g of levain with our mature sourdough starter? Is it basically the same thing if we have enough starter?
Thanks!
Hey, Maddie! You’ll likely end up with a different intended flavor profile in the resulting bagel, but they’ll still be delicious I’m sure. If you want to adjust the timing of your starter, leave less starter in the jar to lengthen how long it takes to ripen, or leave more in the jar to shorten that timeline. Even a 5g difference there will adjust things significantly!
So great to see this! I’ve been trying to get my recipe for sourdough bagels right for the past few years. The one thing I can’t seem to get down is the shiny crust. Any sense for what leads to this shine/blistering? I’ve tried your recipe and many variations along the way but can’t seem to get that shine!
That’s partly from the diastatic malt (adds color, among other aspects), the boil in the starchy water, and mostly from the steam in the oven!
Looking forward to trying these out. I’m seeing if I can find the malt barley syrup here in Germany. One question (and apologies if you’ve already answered this; I searched but couldn’t find an instance of it): how important is caster sugar vs other sugar types? Thanks!
Hey, Geoff. You can use any sugar, I just fine the caster sugar absorbs more easily into the dough!
I made the bagels, following the recipe, directions and timing to the letter except that I used half King Arthur bread flour and half King Arthur high gluten flour. The dough was sticky and finally became tacky after 10 minutes of kneading by hand. The dough was also shiny. The texture was very different from the bagel doughs I’ve made in the past. The dough was tacky and shiny when I did the shaping (12 about 132 grams each). I proofed the shaped bagels at room temp (78 degrees) for 2 hours and then in the fridge overnight. I removed the bagels from the fridge and they were firm but flat. Boiled (bagels rose to the top immediately) and baked (on a sheet pan placed on a preheated baking steel with steam) and the end result tastes really good with a slightly sour taste, nice open crumb, really chewy, and with a nice crust. But the bagels are pretty much flat and somewhat misshapen. So, they taste really good but look not so good. Why did I end up with flat bagels? I live in Houston (hot and humid) but I used my proffer set at 78 degrees for the levin and the dough prior to shaping.
Hey, Jan! I’d try dropping the water in the recipe to see if that helps. This is likely necessary in your humid environment. Try 50% hydration and see how that goes, I’ve noticed that’s a good hydration for King Arthur flour.
Thanks for the reply. I will try the bagels this weekend with about 425 grams of water and see what happens.
Hi, do you think I can make it without refrigeration overnight? So leave it on the counter longer and make it the same day?
You could, but the cold temp helps to keep the dough firm when boiling. I’d probably proof them longer on the counter, then place them in the fridge for 15-30m until they firm up, then proceed. You might have to adjust this time based on how you’re dough is progressing!
I want to make these tomorrow… I have a steam oven so should i use this instead of my normal oven? I made baguettes in the steam oven and I did not love the way they turned out. Do you have any experience with these kind of ovens and any tips/tricks? Also, I don’t have a baking steel so what should i use instead? Could i bake them in a preheated dutch oven to create a steam effect with a crispy bottom? Thanks!
You could use the steam oven, but unfortunately I don’t have any experience in using them. These don’t require a large amount of steam because the dough is wet coming from the boil. But, the steam helps them color a little more, have a thinner crust, and get some blistering as a side effect (if you like that sort of thing). So I’d say if you use your steam oven, just steam it gently, nothing too extensive. If you’re using a traditional oven, even just a few spritz inside with a mister will help, you could do two sets of sprays in the oven (one at starter and one 5m later).
If you don’t have a baking steel I’d go with a baking stone. If you don’t have either, just go with your baking sheet! You will likely get less coloring on the bottom and will have to see how the bake is going, perhaps baking a tad longer.
Thank you for your response! Would a preheated Dutch oven produce a similar effect as the steam and baking steel would?
Update** I tested my first 2 seeing if Dutch oven or preheated sheet pan would work better. Decided to go with the sheet pan. They turned out flawless thank you so much for the recipe!
Wonderful to hear that, Emma!
Again, amazing, Maurizio! I used a combo of honey and molasses b/c I couldn’t get my hands on the barley malt syrup. Still fantastic! I second the need for a sourdough pita recipe when you have the inclination. Thank you!
Super happy to hear they worked out well for you! Haven’t tried using molasses, interesting idea — but yes, barley malt syrup can be hard to find. Pita are on my to-do list! Happy baking and thanks for the feedback, Nic.
I just baked this recipe this morning and such great bagels, thank you! I reduced the water amount to about 430 g based on some of the reviews here and that worked out perfectly. I will scale down each bagel to about 95 g instead of the 125 g for a smaller bagels and reduce the boiling time to 20 seconds per side to reduce the chewiness and see how that works as well. Thanks again, I would love to see a recipe for pita bread from you one day! I cannot get such a simple recipe down 🙂
Glad to hear that! Good move on the modifications, do what works for you and the flour you’re using 🙂 I’ll work on that in the future!
Made these – yum! Very good. Followed the directions precisely except was not able to wait 20 minutes after baking to eat one. Great recipe! Kind of wished I had a mixer at one point because the dough was pretty thick. But doesn’t seem like the taste was impacted.
Awesome, Renee! Yes, a mixer helps quite a bit with this stiff dough, but doing it by hand is reminiscent of making pasta — which is also fun and awesome 🙂 Enjoy!
Thank you for the response. We devoured them and I’m making another batch now….so good! Wondering if you would develop a 50/50 white/wheat sourdough recipe or share some hints on how this might be altered? I prefer to bake with 50% whole grains since it’s healthier.
Glad to hear that!
I have a recipe just like that, check out my fifty-fifty sourdough bread. Enjoy!
Thanks, I’m a fan of the bread recipe you mention and have made it many times. Meant 50/50 sourdough bagels. So I went for it and made them: Used a 50/50 levain with KAF white flour and Community Grains red wheat. Then subbed in half whole wheat for the white flour, with 425g water as others have said. Delicious!
I am about to embark on these tonight. I just want to thank you for the visual baking schedule at the start of the recipes. this eases so many anxieties around new recipes!
You’re very welcome, Mollie! I hope the bagels turned out great.
Thank you again for another deeply thoughtful recipe, Maurizio. Do you think it would be possible to do the divide and shape after the refrigerated long proof? I truly don’t have the room for trays of bagels in my fridge. Also, where did you get your gorgeous stone mixing bowl? Thank you so much for your time and dedication!
I think you might be able to modify the recipe to accommodate this: I’d probably just put the dough in its bulk container in the fridge overnight to proof, then take out, divide and shape, proof, and boil/bake. I have to say, though, that I think the cold proof after shaping helps them achieve a slight crust that stays through to the end. Another approach might be to skip the cold fermentation altogether and make these all in one day. You’ll lose a bit of flavor in the end, most likely, but they’ll be awesome!
Hello,
Just want to make sure…Does the levain stay out to proof at room temperature or is it supposed to be refrigerated? I may be getting this mixed up with another recipe. I’ve reread about three times, but would like to quadruple check.
Thanks so much!
Thea
I never refrigerate my levain. Happy baking!
I had to… Clearly I need to work on my reading skills…I made the levain in the morning instead of the evening. I left it at room temperature for about ten hours then refrigerated it overnight. Made the dough the next day after letting it rest for a couple hours, and it turned out lovely. The bagels this morning are best I’ve ever made! Thank you for a killer recipe!! Out of curiosity, especially since I’m pretty new to all things sourdough and I have a book with a recipe that requires refrigerating the levain, is there a particular reason you do not refrigerate yours?
I find refrigeration reduces the activity and performance of my starter and levain. For me, it’s ok to use the fridge when I’m not baking for an extended period, but I always follow this up with a few timely refreshments before baking with it again. Perhaps that’s just my starter! Glad to hear the bagels turned out great as well — I’m itching to make these again this week 🙂
Hi Maurizio! So I want to make these, but I can’t find the barley malt syrup anywhere locally, and I’m trying to avoid spending money on shipping. Is this a critical ingredient, or could I easily sub it for some other syrup? I’ve got honey, maple syrup, corn syrup, etc… Do you have any other easier-to-find recommendations, or would those be good? Thanks!
I’d go with honey!
Hi Maurizio! Usually when i follow your recipes i have to make several adjustments (i suppose that flours here in Greece are much different than the ones you are using, less protein gluten content, lower water absorption capability)
This time i did not change much (except using the whole 1kg pack of flour instead of 964g, thus lowering hydration from 55% to 53% & using maple syrup instead of barley malt syrup which was difficult to find) and the result was very successful, actually too successful for my expectations!
(Last deviation from your recipe is that i did not use a mixer (it would not be able to handle it), so i performed hand kneading, but after 8-10minutes it had turned out to a sticky shoggy mess, shattering into sticker pieces. I had to knead hard for about 25-30 minutes in total (without adding any more flour) to achieve a nice strong and smooth dough)
I am considering to repeat this recipe but with some WW flour added. How would the timings & hydration change in this case?
Also, i have some stock of dark (brown) malt powder, would that make any difference?
Some representative photos:
Crumb
Crust
Hi Maurizio, thanks so much for the great recipe. I’ve made these twice now and although they pass the float test, they haven’t turned out as puffed and round as yours. Any thoughts as to what went wrong?
Hey, Leah! It could be insufficient dough strength or perhaps over proofing. Does the dough feel very stiff and strong to you when you go to shape?
Sounds like it’s the dough strength – thanks!
Aloha Maurizio!
Thank you for a wonderful site.
I am well on my way with basic sourdough due to your great instructions.
Today i made the bagels but with less success.
I created a very stiff levain. Almost like a ball of pizza dough.
Next morning I was surprised that it had grown perfectly.
So then i made the dough and I think that is where I may have failed.
I used KA Bread Flower and I think it might not be strong enough.
After shaping I saw that they were flattening out. To the point that i could not get them all on a sheet.
After proofing they were still very flat. They had risen but they were so wide!
After baking they were good but flat and overly chewy.
Mahalo!
Sorry to hear that, Ray! Try dropping the hydration of the dough with KAF BF by 5%. This should help bring strength!
Thank you very much, Maurizio, for posting this detailed bagel recipe- I’ve been ogling your bagels on Instagram and waiting for the post! I don’t have barley malt syrup but do have rice malt syrup- do you think that substitution will work? Also, I bought lye to make your pretzels and was anticipating using them for your bagel recipe, but now I see you chose to leave it out. Would you please explain why? I’m just curious and new to the sourdough world! Thanks so much for sharing all your baking knowledge!
Hey, Cathy! That would be an interesting substitution. I’m not familiar with rice malt syrup, that might work. I’d probably go with honey, though! I don’t use lye with these because I was more after a NY style bagel, adding lye would impart a “pretzel” flavor to the bagel which is a different way to go about making them. Hope that helps and happy baking!
Love this recipe! My only issue when making them is I don’t seem to be getting as much spring as I’d like. My bagels have a bit of a “corner” along the edge. Could this be due to undermixing or not getting enough gluten development? After proofing they seem to spread a tiny bit.
Sounds like your dough might need more strength during mixing — which I know can be hard because the dough is so stiff.
See my reply above, Ju!
Hi Maurizio,
On this note, is it possible for a dough to be smooth and satiny and pass the ol’ windowpane test while still lacking the requisite strength for a recipe like this? I have also run into this issue, albeit with a lower protein flower (Central Millings ABC), but I wonder in this case if it makes sense to overshoot those normal markers for a finished dough, and keep kneading until there’s a good amount of elasticity built up in the dough.
I plan to experiment with the above this week, but was curious if you had any thoughts on the matter.
Thank you for all you do!
I’ve never actually mixed so far as to go past this level, to be honest. I almost always under-mix doughs and with this dough, it comes out so strong and stiff I’m not sure I could even go past 5 minutes. If you’re using a lower protein flour, though, at some point you’ll reach the limit of the flour and it may just not be strong enough to make these. However, I think ABC should work, but you might want to try dropping the water a bit (5%?) and mix until very stiff and elastic, as you said. It might take longer than 5 minutes, depending.
Please let me know how it goes!
Well, mine were definitely just under developed. Stuck with the same hydration, but ended up taking the dough for a ride in the food processor – 3x 20s spins around the bowl, with about 10 minutes rest in the freezer in between to keep the dough temp manageable. Still haven’t nailed the proof, but I’m not too far off at this point. Marked difference in dough strength with this method vs. what I was able (or willing?) to achieve by hand.
Hi Maurizio, thanks for providing so many great recipes! Your website is an essential resource for any Baker 🙂 I have a question, does initially baking the bagels in steam help improve the rise? Is it essential? My oven has too many vents so steam retention is quite difficult. If there is not a big difference I might omit the steam as it would make my life a lot easier. Thanks!
You’re very welcome, Andrew! Appreciate that. I would say you can omit the steaming. You will likely get a smidge less color and no blistering, but they’ll still be amazing. Try it out and let me know how it goes! I’m so used to steaming my oven it’s routine 🙂
I have been using this recipe for 5 weeks now. The bagels are fantastic. Thanks for the recipe. When I take the bagels out and put into seeds they are very hot to handle. I notice that in large bakery video’s they wear a glove. Can you enlighten me as what kind of flexible glove they wear?
I usually let them rest a minute on the wire rack until cool enough to grab, but it’s hard to say what kind of glove they use. I have flexible oven mitts that could work, but maybe just regular rubber gloves for the kitchen would work well.
I made these this weekend and they were fantastic. I subbed honey and non-diastatic malt powder for the syrup and diastatic malt. I had trouble getting a distinct hole for bagel shaping. I tried rolling the dough out longer before joining using your method, but they dough was very elastic and kept shrinking back. By the time I got to boiling and baking, most of them just had a dimple resembling the hole. Any thoughts on how I can improve this next time?
You could try mixing just a little less or adding 1% more water to the dough to try and soften it some. I find I have to be pretty forceful with the dough to get it to elongate. If you want to keep the formula as is, try shaping the dough so it rolls out longer, then overlap less when you go to shape. In other words, when you wrap the dough around your hand give it more slack so the hole is larger (this will require shaping the long tube outwards more to create a longer shape). Hope that makes sense!
Thanks for this amazing recipe!
If I wanted to squeeze this into 2 days and make the levain morning-of, what would you suggest FDT to be to speed up the rise? Should the levain double in size? How would expediting the levain affect the taste at the end (more/less sour, n/a)?
You could build the levain with a 100% inoculation of your ripe starter and shorten the timeline down to 3-4 hours or so, depending on temperature. I’d expect it to be slightly less sour in the end, assuming all else equal! I haven’t tested this with a fast, warm build (yet 🙂). If you give that a go, please report back!
I ended up almost doubling the ripe starter in my levain (~40g) and leaving it in a higher temperature environment than normal, likely close to ~90 degrees F FDT (but I didn’t measure it – just consistently put a mug of boiling water in the oven with it haha). Timeline was close to 5-6 hours to get it to >2x its original size. I am really freestyling it over here 🙂
The bagels ended up having a nice rise (although more significant in bulk fermentation than after shaping and in the oven, oddly), a chewy + crispy texture, and some serious blistering! You were right, it was slightly less sour, but still had that nice sourdough taste.
Thank you again for sharing this recipe!
Thanks for reporting back, Ross! Sounds like your modifications worked for you in your kitchen, and that’s what matters. Free styling is what we’re after in the end, adapting as necessary to suit the conditions — and the dough — that day. Enjoy!
Glad to hear that!
Great recipe Maurizio! I had a question regarding the levain. I’ve never worked with such a stiff levain. While it rose overnight, it didn’t develop the typical intricate structure or have much bubble formation as the more hydrated levains I typically use. When I then added the levain to the water/malt syrup slurry, it was pretty much impossible to break down and incorporate into the liquid. I went ahead and added the flour anyway and mixed and things looked visually ok after that. And when all said and done the dough rose, floated when put in the boiling water, and the bagels tasted and looked great. So I just want to confirm this consistency is to be expected of a levain with such a low hydration. Thanks!
Yes, definitely a different consistency with the stiff starter. It should have risen overnight, show bubbles at the side of the container, and feel soft (but still stiff). It should also have a sour aroma. It might help to wet your hands and breakup the stiff levain over the top of your flour before mixing if you felt it was hard for it to incorporate. Sounds like it still went well — enjoy!
I used King Arthur Bread Flour. My first batch failed miserably – the dough was sticky, had to flour it to shape, they really flattened out during proofing, stuck to the pan, and overall just did not work. I reduced water in the mix from 472 g to 425 g, and that made a HUGE difference. The second batch came out beautifully. Dough was not sticky (consistency much more like in your shaping video), easy to shape, nice rise in the oven, taste was terrific. I’ve had similar hydration problems with some of your other recipes, I wonder if it’s something about my water (filtered from a stream, fairly hard water). Anyway, worked beautifully with the reduced hydration.
I used KA bread flour so going to reduce water as you did on my next attempt.
Sorry to hear that, Benjamin! It’s totally subjective to the flour you’re using and your environment. Drop that water as necessary!
No need to apologize, I’m learning so much and am grateful for all your effort 🙂
Hi – my bagels looked just like your pictures before I put in the fridge overnight…. now this a.m. I’m ready to bake and they are really flat and did not float when put in boiling water… could this be a hydration issue in my dough? Thanks. ** Update ** I let them sit at room temp for about 20 mins and now they float…. ! Fingers crossed for a successful bake…. Baked…..and pretty flat :(. BUT they taste amazing…. Last recipe I tried had the same issue so next time I guess I should try to cut the water back a bit.
Don’t be alarmed by that, mine also looked flat when taking out. But if they never did pop up it sounds like they were likely over proofed. Instead of leaving out for two hours before the fridge, cut that back to 1-1.5 hours and see how that goes!
Thank you ..will try that next time. It appears I made flagels unintentionally but they’re great for a sandwich 🙂
Hi Maurizio, I accidentally bought the non diastatic malt for bagels – and now I am not sure what to do with the bag. Is there something I can use to convert it or supplement the malt I got? (I did read you diastatic / non diastactic malt page, but still not sure what to do with what I have. Thank you in advance!
You can omit the diastatic malt and these will still turn out great (a little less crust color and some chew, perhaps). You can use non-diastatic as a flavoring additive!
Thank you!
thanks again for the awesome recipe! i moved to omaha, ne from long island, ny a year ago, and looked high and low for good bagel but wasn’t happy with anything i found. i’m done searching for bagels now because these taste absolutely amazing! fresh bagel with just a schmear of cream cheese taste like heaven 😀
Awesome, Andrea! Glad they worked out so well for you, and I agree, they’re great. I’m kind of ruined now for any other bagels 🙂 Happy baking!
Hi – these look great! Two quick questions – any suggestions for proofing stage if you don’t have big plastic bags that fit over the half sheet tray? I used plastic film and tried to wrap it loosely so the dough has room to expand. Also, any reason why you couldn’t apply toppings to both sides before baking in the oven? Thanks!!
Thanks! I buy a big pack of these proofing bags and keep them on hand for baking. They’re reusable and I’m still on the first pack I bought years ago!
You can absolutely dunk the bagels in the toppings — I prefer lighter toppings so I just sprinkle on.
Thank you Maurizio! These bagels were delicious. I used KA bread flour and subbed maple syrup for the malt syrup, and didn’t have any non-diastatic malt (have since ordered some). Nonetheless bagels turned out great. Fantastic sour flavor, good chew, nice aeration. Beautiful!
Awesome to hear that, Lora! Enjoy 🙂
That time period is pretty important as-is to get the dough going on the right track. For me, I’d make it when I was around 🙂
I’m curious why your levain step calls for such a dry mix. I followed that recipe and had a still mostly firm wad this morning for levain. Since the recipe mentioned everything needing to be so stiff, I figured maybe so should my levain this time, so I went ahead and mixed that into my dough. I waited for those 3 (now 5.5) hours to let it rise but it never did. Now I’m realizing it’s my own fault for not waiting for it to be bubbly like normal, but in case other people are confused like me, you may consider just clarifying that part. I’ll try again once I can find more bread flour- looking forward to it!
Yes, it’s a stiff levain! I opted for a stiff variant to primarily bring more strength to the bagel dough. The build also should carry just a hint of sourness in the end as well. I usually mix a stiff levain by hand and knead it a bit to make sure it’s fully mixed together. On the day of mixing, you can break it up over the rest of the ingredients if you find it’s not incorporating well during mixing. Have fun!
Hi Maurizio, thanks so much for sharing this recipe! I’m very excited to try it out. However, I would love to make egg bagels, and was thinking of substituting some of the water for egg yolks or whole eggs. Do you think a 1:1 substitution would work?
I don’t think a 1:1 substitution would work, adding eggs will change the character of the dough and would require adjustment!
I ended up making a half batch with 2 whole eggs and 2 egg yolks, and 1/4 tsp turmeric (for color), and it worked out really well! I weighed the whole eggs and egg yolks, and subtracted that weight from the water (so, 1:1). I think the eggs provided extra lift to the bagels as they were quite high in the end. I used a 50/50 mix of King Arthur Special Patent and King Arthur Sir Lancelot for the dough, but all KASL for the stiff levain.
Since I made a half batch, I was able to use my Kitchenaid mixer for about 95% of the mixing.
Thanks so much for the recipe Maurizio!
First attempt at these bagels and it was mostly a disaster. fortunately tasted great!. I used all the recommended ingredient. I did have a new, never used brand of bread flour called Great River lily white bread flour which is very white and very soft so may have contributed to my problem. The Levain seemed perfect. Problem started with bulk fermentation and continued down hill from there. I made the malt syrup slurry no problem then added all the other ingredients. I used my Kitchen Aid mixer for at least 10 minutes and the dough was VERY sticky. I then hand kneaded and kept adding lots of flour to get some firmness. On to the folding – I folded after 1hr and 15min but still VERY sticky. Time to divide and shape into 125g pieces. super sticky and hard to roll but finally got them into good bagel shapes and after 2 hour proof into the refrigerator. Ready to go in morning but bagels would not cooperate. First they did not float so I ended up leaving them at room temp for a couple hours until I could get a piece to float. The bagels had spread out to fill the whole sheet touching sides losing almost all their shape including hole. Almost impossible to get off sheet in decent shape as they were almost glued to the bottom even though I used cornmeal on the tray. Basically scraped into the water and continued per directions. They ended up looking crazy but tasting great even though sort of flat and spread out. I want to try again right away and am eager to know what went wrong. I feel there is something about the flour. I have made non sour dough bagels before with out any major problem. I have a 25 lb sack of Great Lakes bread flour so also want to use it again. My thought is to reduce the water from the beginning and not have to keep trying to add flour as I kneaded. I am a pretty new baker and very new to sour dough. My starter seems very robust so I do not think that is the problem. Hoping some can help point me in the right direction. Thanks
Candice
Yup, sounds like over hydration to me, Candice. I’d try reducing the water by 10% and give it another try. The dough should be very stiff and strong, in fact, it will stress any mixer. Check out how the dough looks in my posted video, it’s very strong and stiff, almost hard for me to roll out. This is the consistency you should have at the end of the process.
It’s possible it’s the flour, but if it’s sifted and relatively strong, it should work fine with a reduced hydration.
Sorry for the frustrating result! I’m sure with a stronger dough you’ll get a better result this next go.
I had similar problems with my first batch (see my post above), and reducing water in the mix from 472 to 425 g made an incredible difference for the second go. Came out great.
Hi Candice – Haven’t made these yet, but I make a similar bagel recipe on a regular basis. I do have the Great River Lily White flour and love it (especially because I can get 25lb. bags on Amazon Subscribe and Save) – but NOT for bagels. If you look at their specs, it’s an 11.5% protein flour, so it’s better for breads.. You’ll need a higher protein flour for bagels.