
Flour at the market is hard to come by these days, but even if it is at the market, this recipe comes together so quickly and with such little effort it’s hard to imagine not wanting to throw this together every day during the week (since we’re home anyway, right?). I’ve received many emails and comments from readers asking for a straightforward recipe using 100% all-purpose flour since that’s what many of us have in the pantry right now. But even when abundant flour choices return to the market, this same-day sourdough bread with all-purpose flour might become a weekly staple in your kitchen.
This recipe makes a single 900g loaf of bread all in a single day. It begins with your mature starter in the morning and ends in the late afternoon with a fresh loaf of bread ready for dinner. What could be better? And while it’s similar to my recent simple weekday sourdough, it’s just a bit different, using different flour and a modified timeline. They’re different, but both practical ways to sneak baking in more often than not.
What Makes This Sourdough Bread Recipe Easy?
- It uses only one type of flour: all-purpose white flour
- It’s a same-day bread, meaning the day you mix is the day you bake
- There is no need for a levain, use your sourdough starter in the mix
- It makes a single loaf of bread, no scaling or dividing dough
- You can add up to 15% mix-ins: walnuts, pecans, seeds, or dried fruit
- You can substitute flour: use 5% (23g) whole grain rye, or 10% (46g) whole wheat flour (remove that amount of AP flour) without modifying the rest of the formula
Flour Selection
One essential modification in this recipe versus my simple weekday sourdough (which uses all high-protein bread flour) is slightly reducing the hydration, especially if there are no whole grains in the recipe. Because all-purpose tends to mix up to a softer, slack dough, lowering the hydration brings strength and makes for a loaf with more rise and a crunchier crust.
Additionally, I reduced the autolyse time for this recipe. If you’d like to give this dough a little more strength and reduce mixing time (which is already minimal!), you could autolyse the dough for 30 minutes: Mix the flour and water in the mixing bowl and let sit, covered, until your sourdough starter is ripe and ready to use.
Flour note: If your “all-purpose” flour is lower in protein than the flour I used, King Arthur Flour Unbleached All-Purpose at 11.7% protein, you might want to keep an eye on the hydration as you’re adding water in the mix and add less if the dough feels overly wet. Also, strengthen the dough up front, either through folds in the fold or a more intensive strengthening technique.
Baking Schedule

The intention for this recipe is for it to be a same-day dough, meaning you mix in the morning, and you bake in the late afternoon. However, you can also place the shaped and covered dough into the refrigerator to finish the proof overnight (instead of on the counter). This way, you can have fresh bread for dinner on day one or fresh bread for lunch on day two.
Sourdough Bread with All-purpose Flour
For tips on how to calculate baker’s percentages or how to modify this formula, see my post on baker’s percentages (baker’s math).
| Total Dough Weight | 900 grams |
| Pre-fermented Flour | 10.0% |
| Hydration | 76.0% (this takes the water in the sourdough starter, which is about 50%, into account) |
| Yield | One 900g loaf |
Total Formula
My final dough temperature for this dough was 78°F (26°C). See my post on the importance of dough temperature for more information.
| Weight | Ingredient | Baker’s Percentage |
|---|---|---|
| 460g | All-purpose white flour, ~ 11.7% protein (King Arthur Unbleached All-Purpose Flour) | 100.0% |
| 340g | Water | 74.0% |
| 9g | Salt (sea salt) | 1.9% |
| 92g | Ripe sourdough starter (100% hydration) | 20.0% |
Sourdough Bread with All-purpose Flour Method
1. Mix – 9:00 a.m.
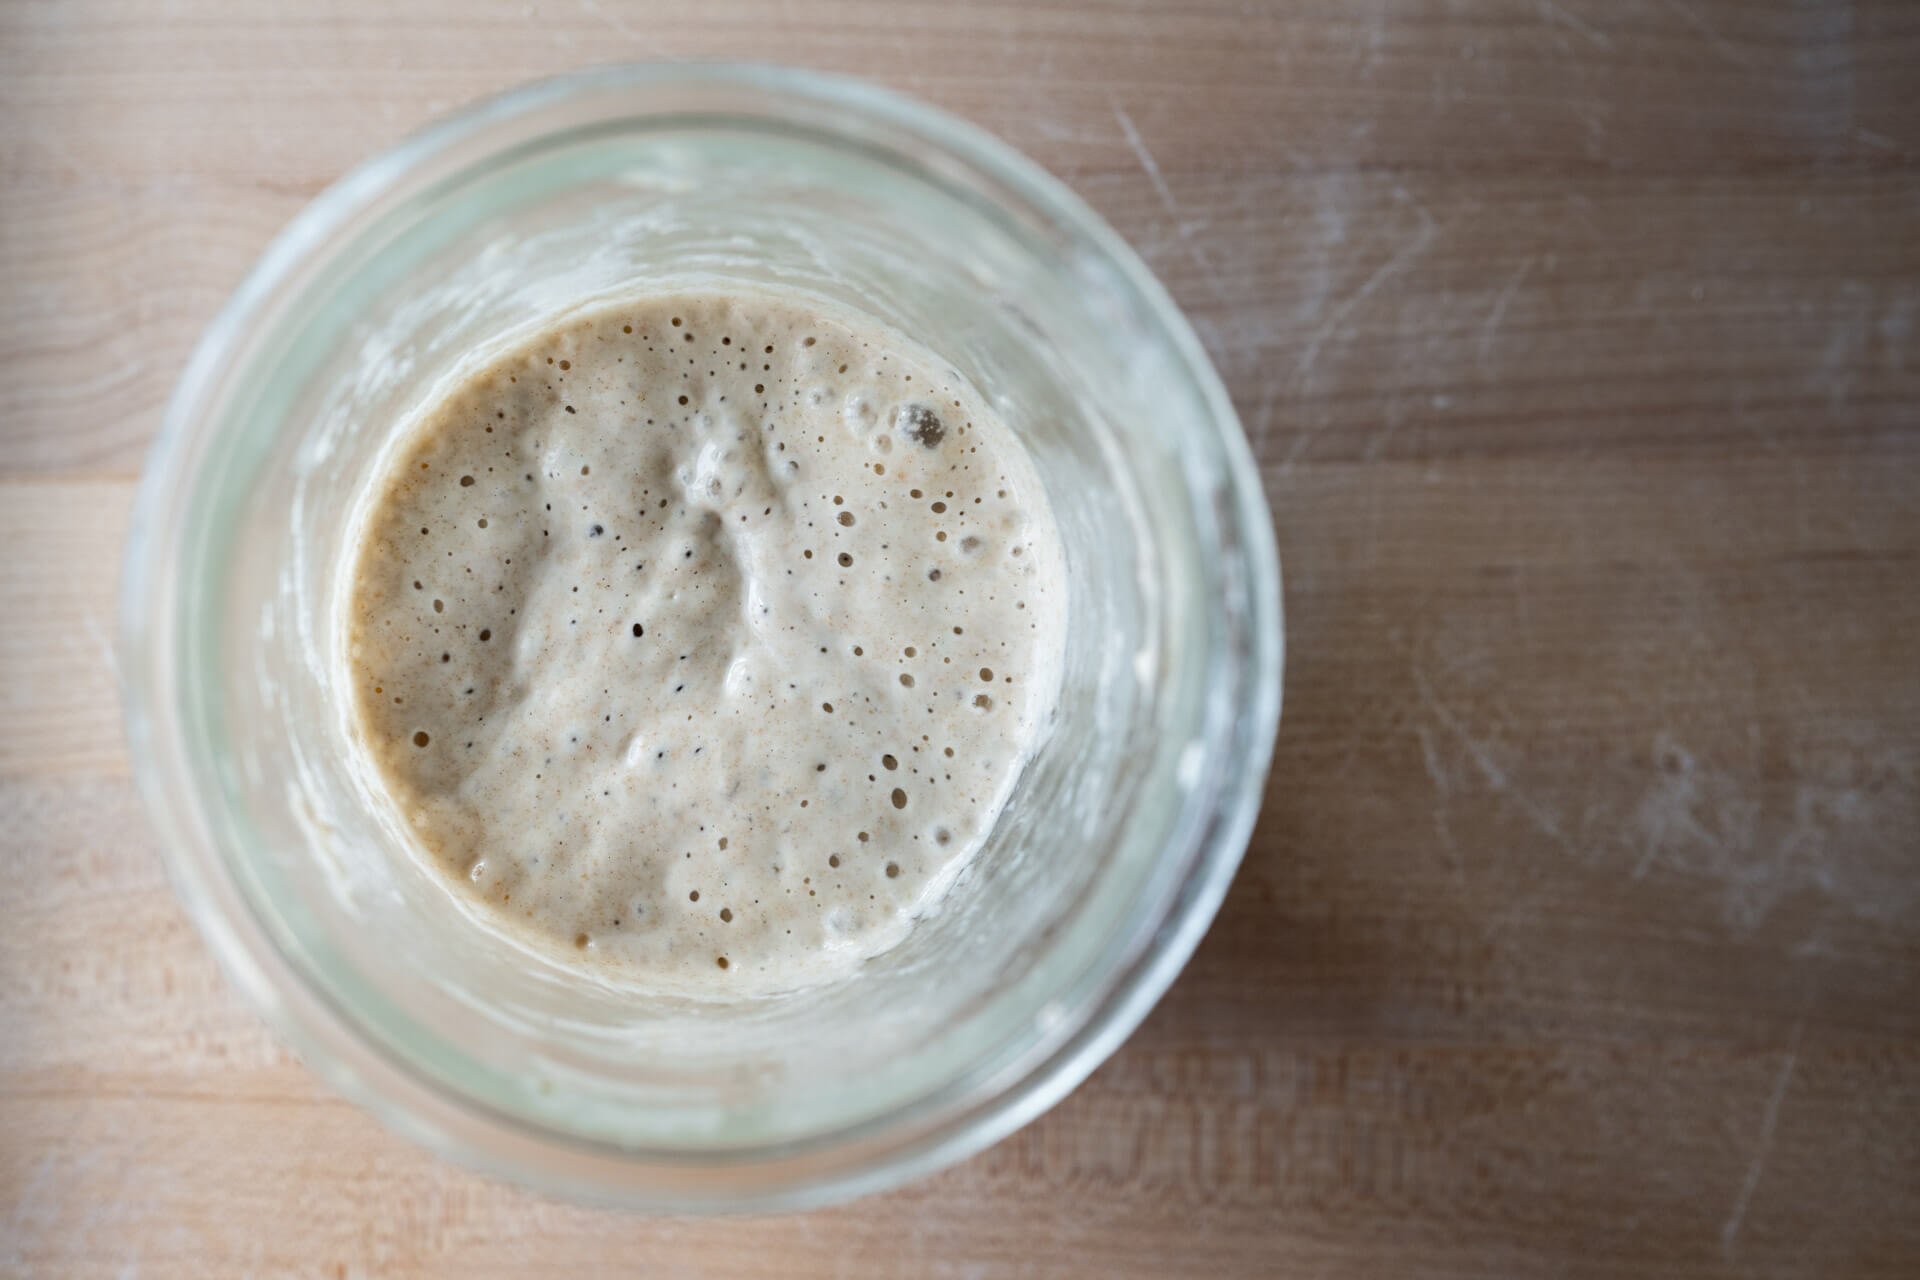
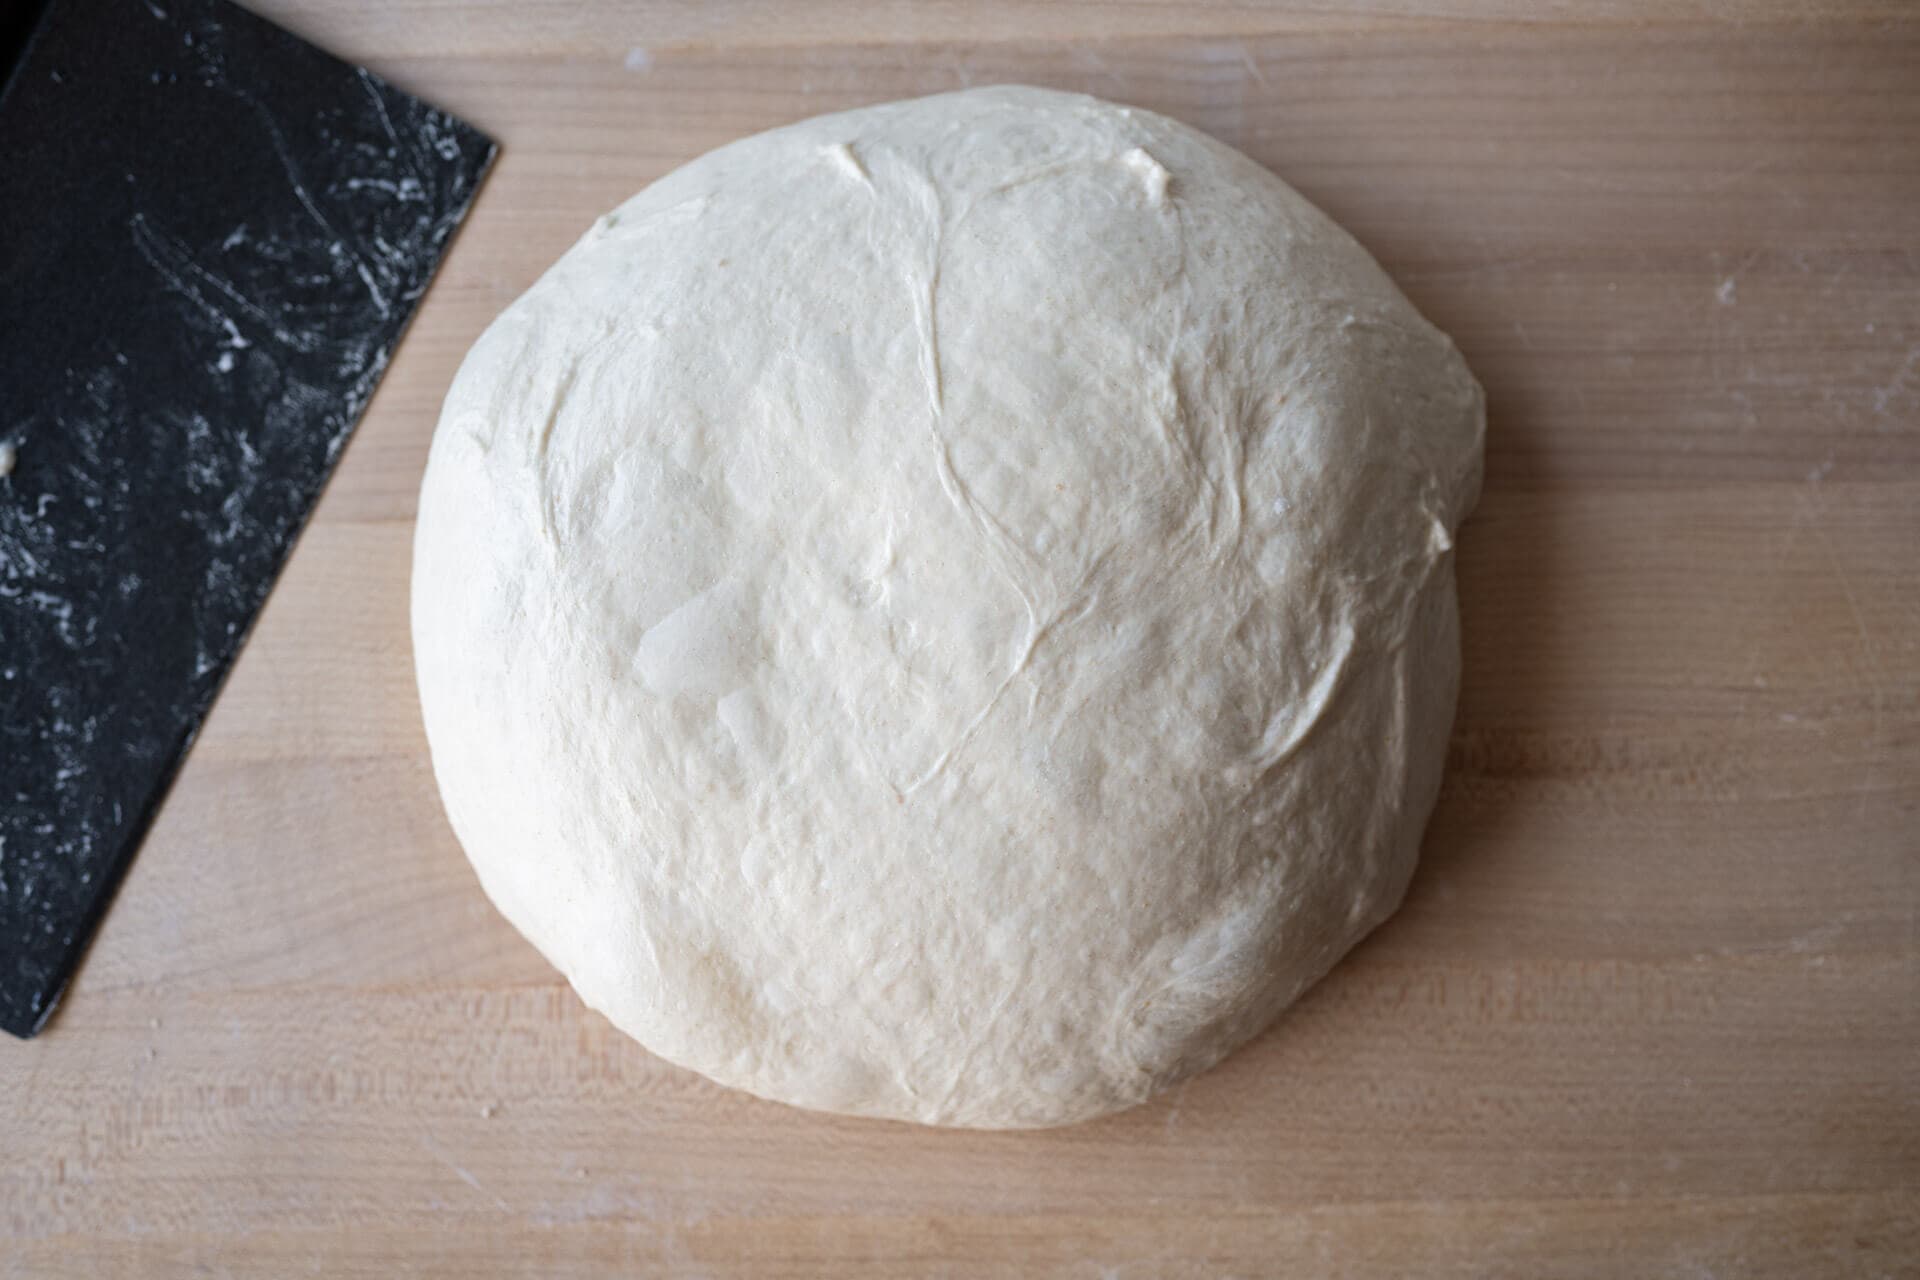
When your sourdough starter is mature (see the image, above), add the ingredients below to a large mixing bowl:
| Weight | Ingredient |
|---|---|
| 460g | All-purpose white flour (King Arthur Unbleached All-Purpose Flour) |
| 340g | Water |
| 9g | Salt (sea salt) |
| 92g | Sourdough starter (100% hydration) |
Using wet hands, mix everything — except 50g of the water (add 290g and hold back 50g) — until it comes together into a shaggy mass. I like to hold back a little of this water when mixing to pause and assess the dough: does it feel super wet and “soupy?” If so, omit the reserved 50g. If it still feels manageable, add it in slowly as your strengthening the dough in the bowl with folds.
This dough doesn’t require intensive kneading (like slap and fold) but do give it a series of folds (pickup one side and fold it over, rotate the bowl and repeat) in the bowl for 2-5 minutes until it smooths slightly and comes together in a cohesive ball.
I like to fold this dough more than my simple weekday sourdough, even though they both don’t require kneading on the counter, because this recipe is comprised of 100% all-purpose flour. I find this dough benefits from a little extra strength before bulk fermentation by performing these folds.
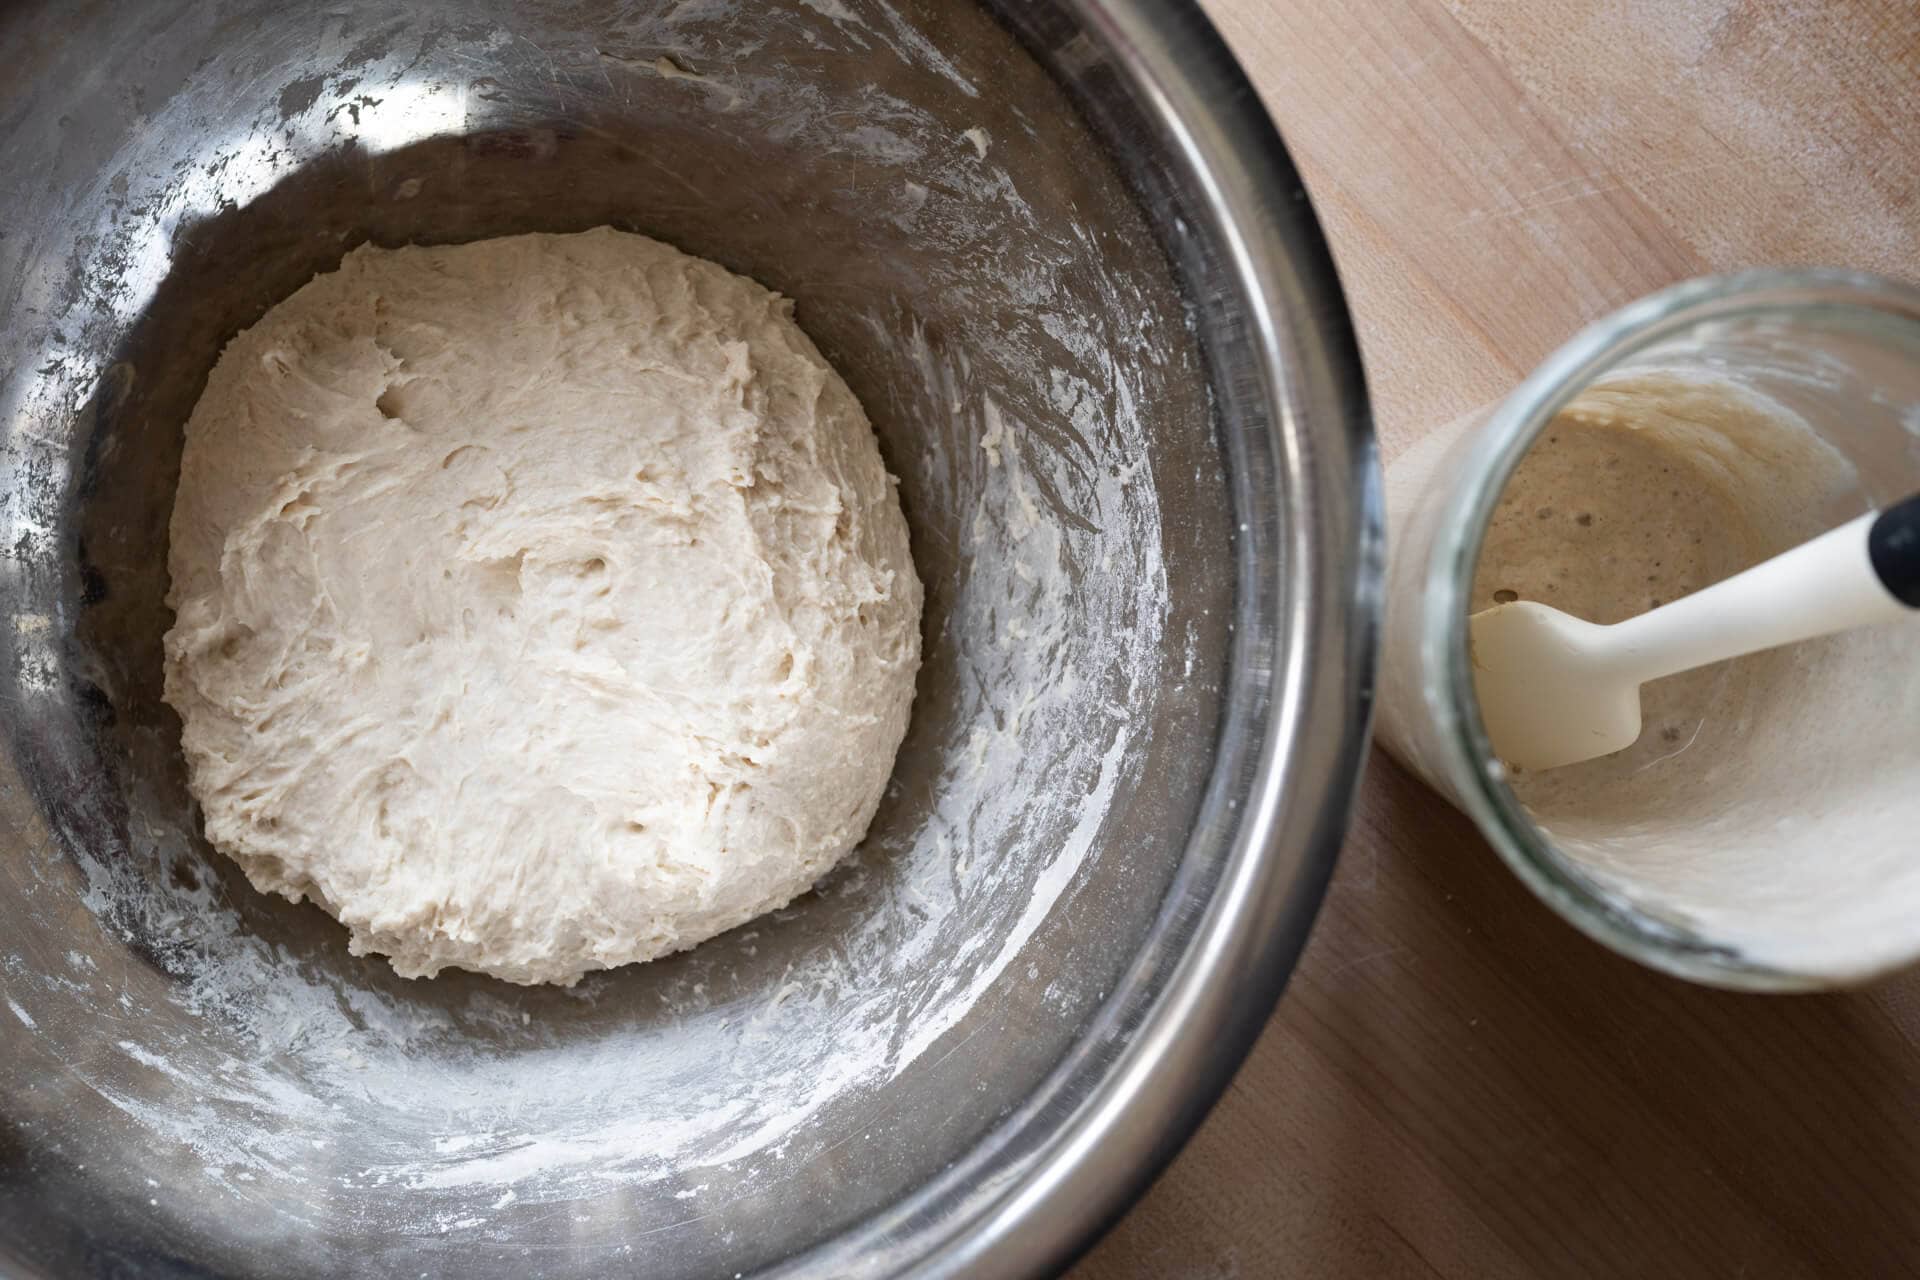
Cover the bowl with reusable plastic and keep somewhere warm in your kitchen for bulk fermentation.
2. Bulk Fermentation – 9:15 a.m. to 12:45 p.m. (3.5 hours)
At 75°F (24°C), bulk fermentation should take 3.5 hours. During this time, we will strengthen the dough through a series of stretch and folds directly in the bowl.
For each set wet your hands, grab one side and stretch it up and over the dough to the other side. Rotate the bowl 180° and perform another stretch and fold (this forms a long rectangle in the bowl). Then, rotate the bowl 90° and do another stretch and fold. Finally, rotate the bowl 180° and do one last stretch and fold.
Give the dough 4-5 sets of stretch and folds as indicated below:
| Set | Time |
|---|---|
| Fold set 1 | 9:30 a.m. (15 minutes after the start of bulk fermentation) |
| Fold set 2 | 9:45 a.m. (15 minutes after fold set 1) |
| Fold set 3 | 10:15 a.m. |
| Fold set 4 | 10:45 a.m. |
| Fold set 5 (as needed) | 11:15 a.m. (if the dough still looks slack, weak, and not showing any signs of defined edges, give it this fifth set) |
After the last set of stretch and folds, let the dough rest, covered, until the next step.
3. Preshape – 12:45 p.m.
After 3.5 hours, the dough should have risen in your bulk fermentation container, smoothed out, and show bubbles on the sides and surface. You want the dough to feel more elastic and strong. It should also feel alive and aerated. I also like to look at the edge of the dough in the bulk container: it should be domed, not flat, indicating the dough needs more time to rise. A flat surface with bubbles on the dough can also indicate it was over-hydrated and too slack/weak.

Fill a bowl with some water and place it on your work surface — I use water to keep the dough from sticking on my hands and my bench knife. Scrape out your dough from the bulk container onto your dry counter. Wet your hand and top of the bench knife and gently preshape the dough into a loose round.
Let the dough rest, uncovered, for 20 minutes until its relaxed outward.
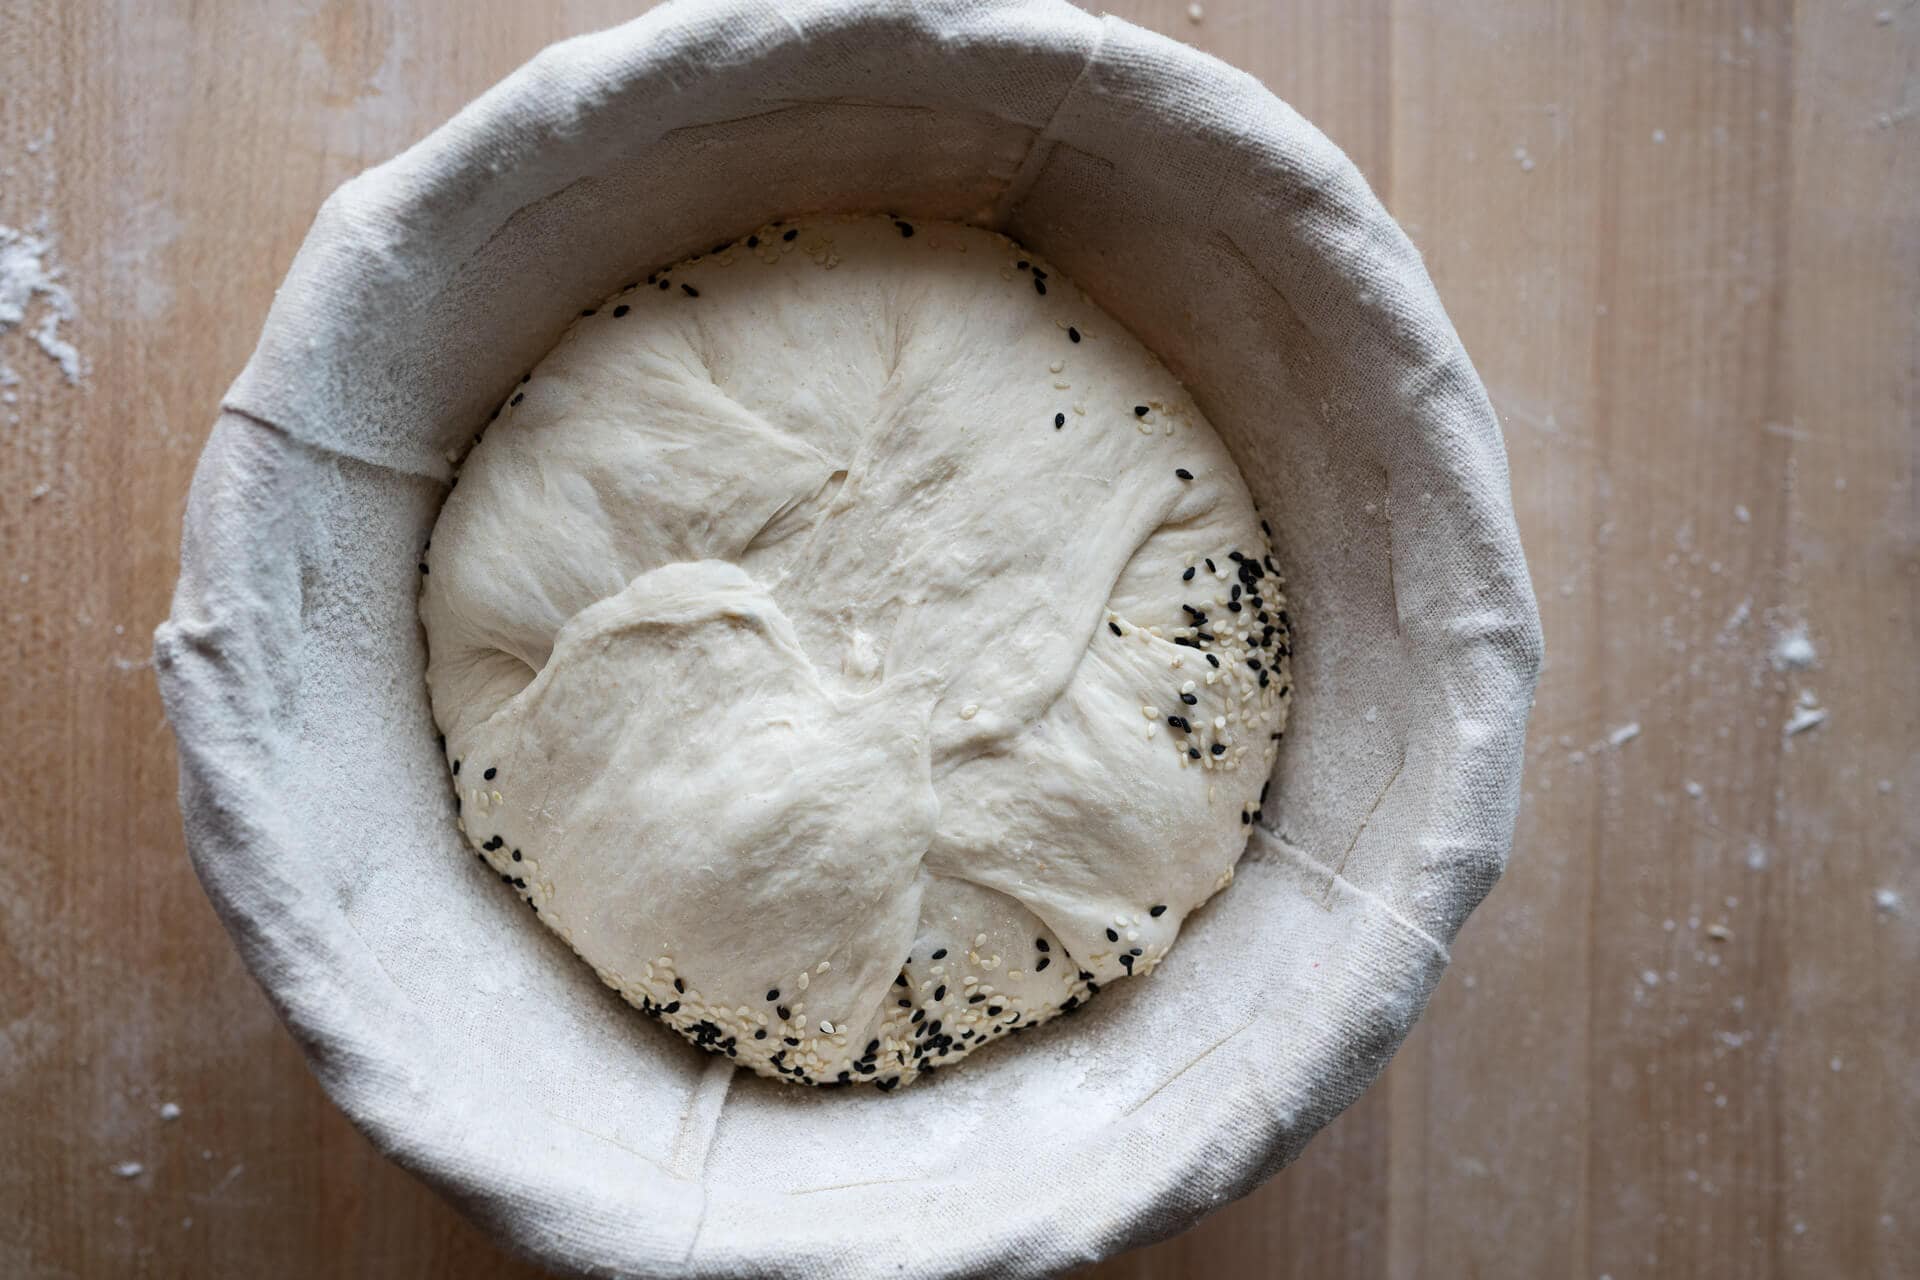
4. Shape – 1:05 p.m.
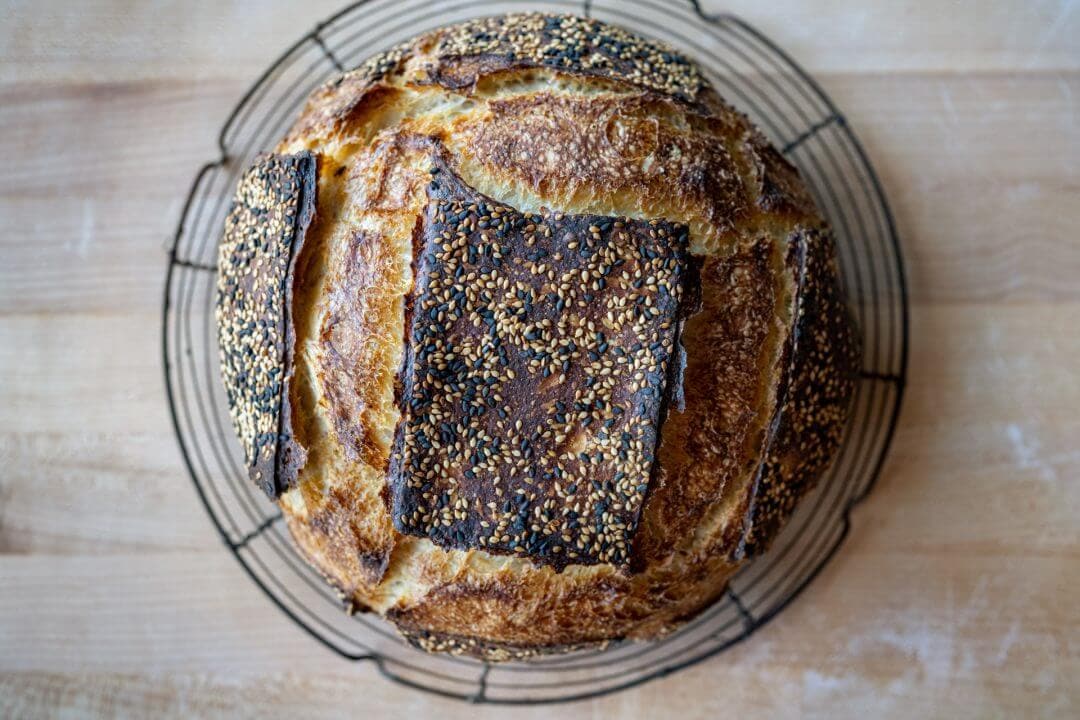
I went an extra step with this dough and coated it with a mixture of black and white sesame seeds for flavor. You can omit toppings altogether or use sesame as I did, rolled oats, flaked barley, pumpkin seeds, or anything you think would taste wonderfully toasted in the oven. Lay a towel next to your work surface and spread the topping out thinly. After you shape the dough, roll the smooth side on the towel to pick up these toppings (as shown in the video below).
Flour the work surface, your hands, and the top of the rested dough. Using your bench knife flip the round over onto the floured work surface. Next, take the left edge and fold it over midway to the right. Take the right side and fold it over the left. Take the top edge and fold it down to the middle. Pick up the bottom edge (closest to you) and fold it up over to the top of the dough but keep going until it touches the work surface, flipping everything over so the seams are now on the bottom.
Next, using both hands drag the dough down toward your body using your pinky fingers to pinch the dough between your fingers and the work surface. Rotate the dough and continue dragging to create tension on the top and outside of the dough. It’s not necessary to excessively tighten this dough (unless it feels fragile and slack to you), and as you can see in the video below, my dough was strong and did not require a firm hand to fully shape.
Read through to my guide to shaping a boule for more in-depth instruction on shaping boules.
5. Proof – 1:15 p.m. 3:45 p.m. (or when dough is ready)
Cover the proofing basket entirely and let it sit out on the counter for 2 to 4 hours, temperature depending. My dough was ready after 2.5 hours at about 75°F (23°C).
Overnight option: At this point, you can also place the covered proofing basket directly into your refrigerator and continue the process the next morning, afternoon, or even the next evening.
Use the “poke test” (as seen below) to determine when the dough is ready. While this test is not appropriate for all doughs, it’s a good test for this one because it’s made from all-white flour, has moderate hydration, and was proofed at room temperature. Notice how my pokes slowly spring back and don’t always fill in the indentation. Additional signs it’s ready are that it is well-risen in the proofing basket and quite gassy.
6. Bake – 3:45 p.m. (pre-heat oven at 3:00 p.m.)
Preheat your oven with the rack at the bottom third to 450°F (232°C). Place your combo cooker or Dutch oven inside, open, with the lid and bottom side-by-side. Review my guide to baking in a Dutch oven for in-depth details.
Cut a piece of parchment paper to fit over the proofing basket and place a pizza peel (or large cutting board) on top. Using both hands, flip the entire stack over and remove the basket.
Score the dough and load it into the Dutch oven; then, bake for 20 minutes covered. After this time, remove the lid and finish baking for 30-35 minutes or until done. The internal temp should be around 205-210°F (96-99°C).
Remove the loaf to a cooling rack for 1-2 hours before slicing. Follow my guide to storing sourdough bread to keep it fresh for the next week (or freeze for longer!).
Conclusion
What a wonderfully simple loaf of sourdough bread. I rarely bake a single loaf (unless it’s a miche), but this was so simple and so easy to put together I wonder what keeps me from making a loaf like this every day. Baking sourdough bread doesn’t have to be overly complicated; it can be as easy as mixing flour, water, salt, and your sourdough starter and giving it some guidance and time to mature into a delicious loaf of bread.
Crust
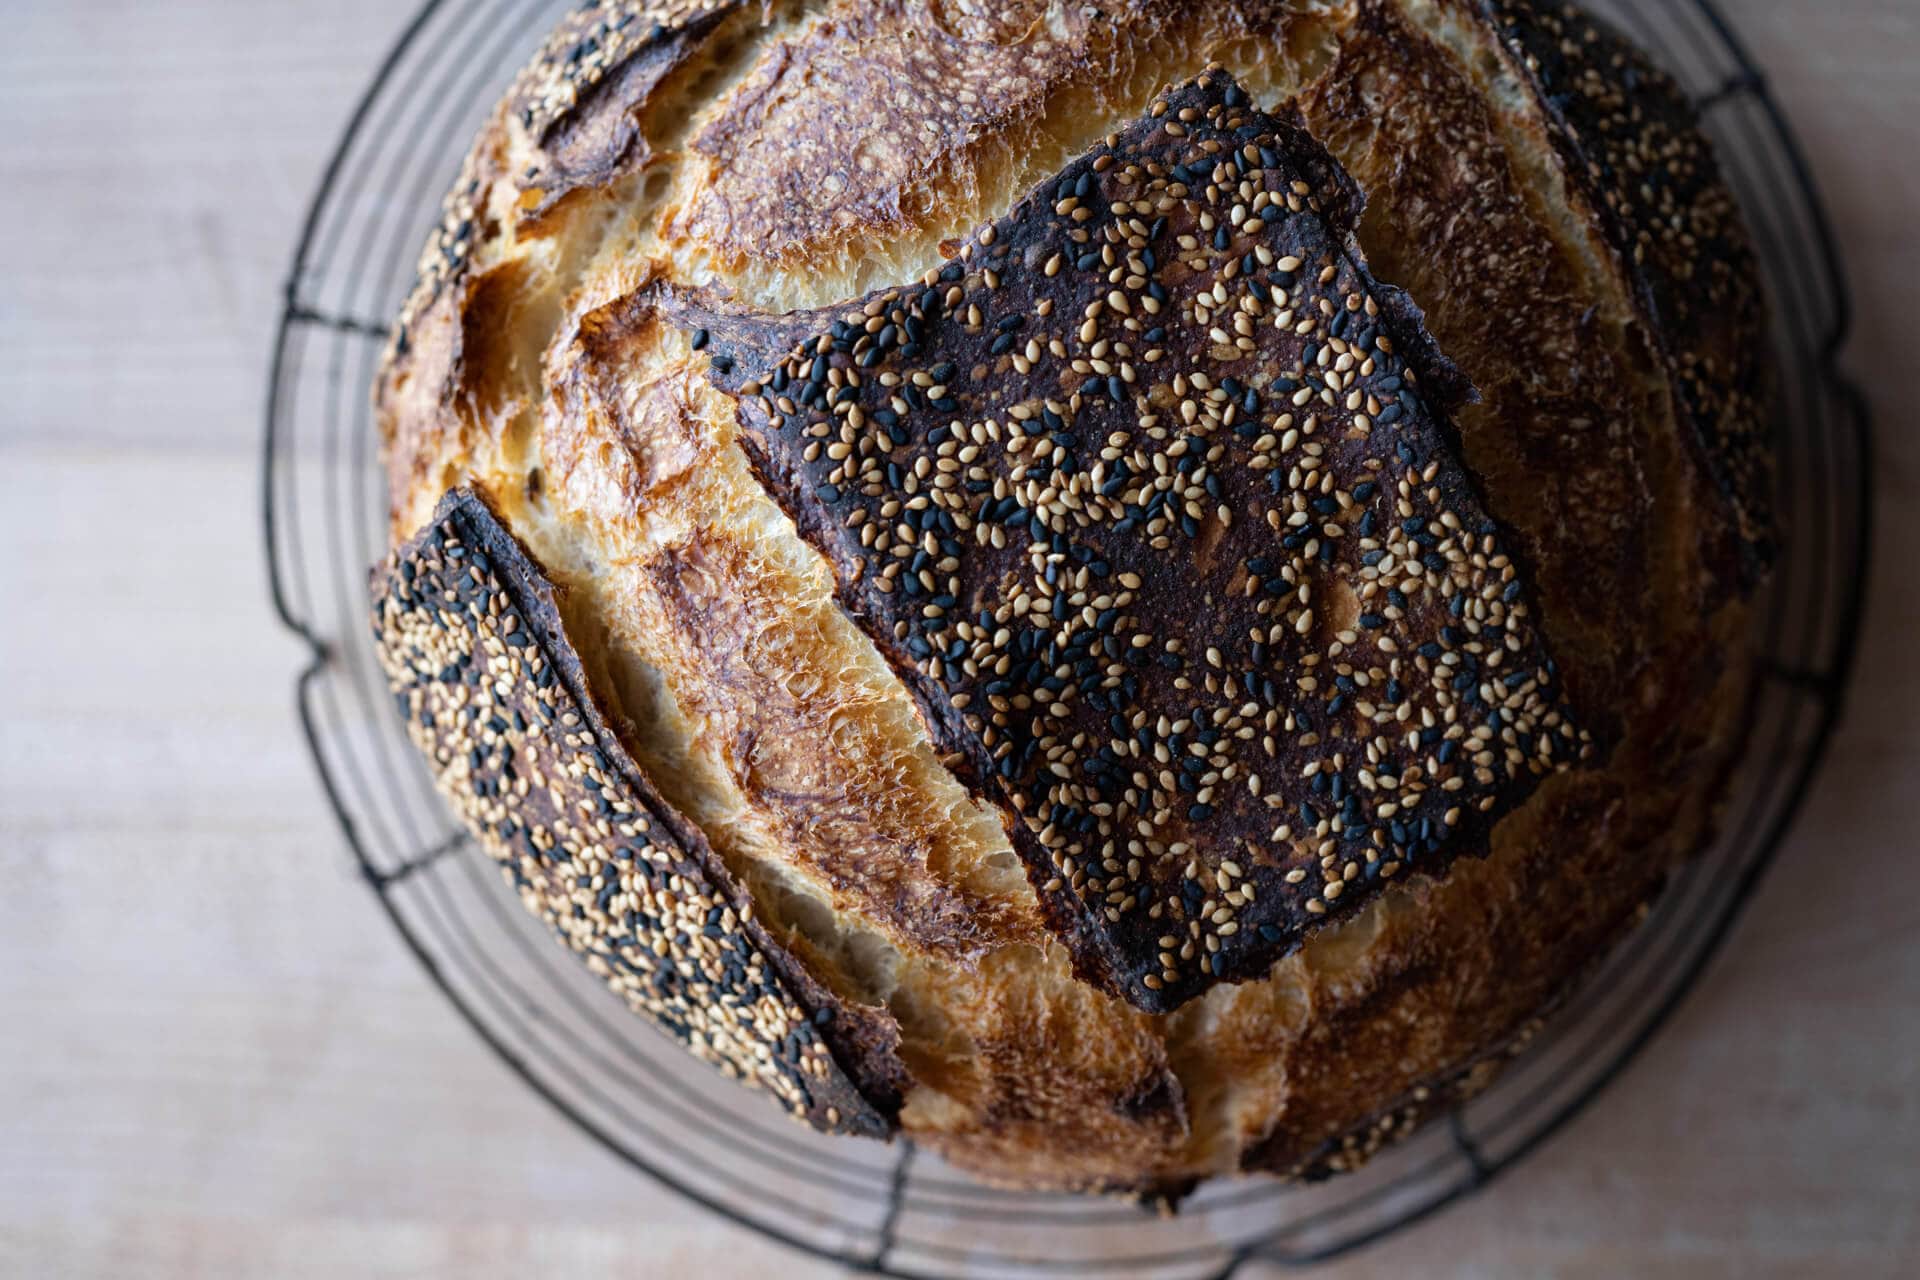
The crust was a rugged one, something I don’t mind one bit. The variegated colors from the sesame add some visual interest—not to mention tons of umami—but the color on the crust would be enough to satisfy my visual appetite. And the crust itself has all the appreciable crunch I look for in one of my sourdough loaves. And perhaps most importantly, the crust tastes incredible dipped in some olive oil—this has me yearning for the middle of summer when tomatoes will be ready in the garden.
Crumb
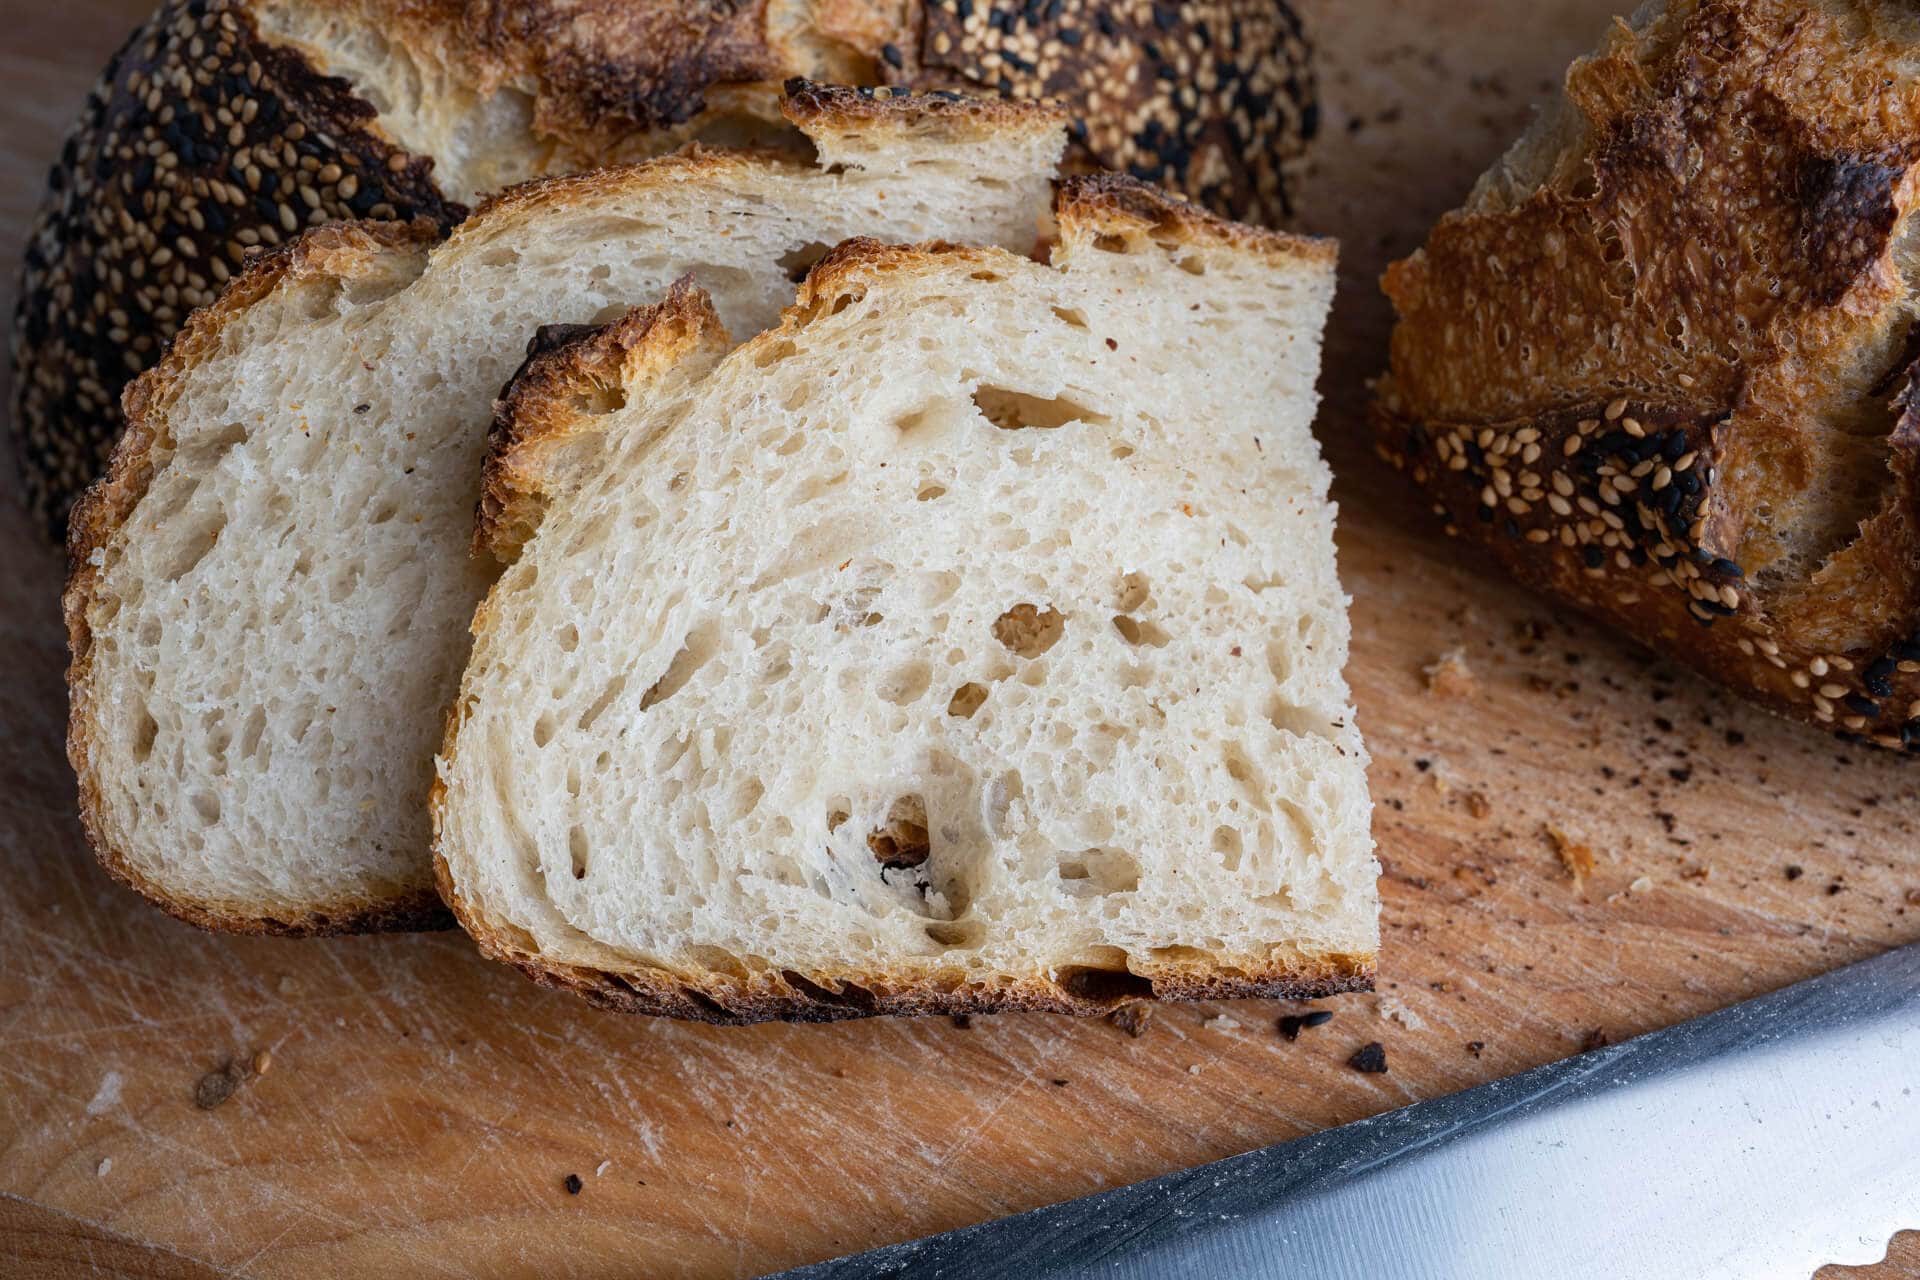
The crumb was tender, light, and wonderfully chewy. A good honest loaf of bread this is, and while not dramatically open, it’s evenly fermented and just what you’d expect—and want—from a straightforward bread recipe with minimal fuss.
Taste
Same day sourdough loaves tend to exhibit a milder flavor with reduced sourness and complexity — but this doesn’t mean it is flavorless. It’s a delicately flavored loaf with wheat flavor standing tall at the front. It still has some tinge of sourness to it, one that arrives at the very end of a bite and serves to remind you of the natural fermentation process, how healthy this bread is, and how delicious it can be when we give the dough the time to ferment properly.
Print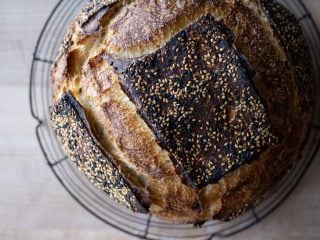
Sourdough Bread with All-Purpose Flour
- Prep Time: 12 hours
- Cook Time: 1 hour
- Total Time: 13 hours
- Yield: 1 loaf
- Cuisine: American
Description
My recipe for an easy loaf of healthy and nutritious sourdough bread made with all-purpose flour—all made in one day. No complicated levain steps with this recipe; just get mixing with your ripe sourdough starter!
Ingredients
Main Dough
- 460g all-purpose flour
- 340g water
- 9g salt
- 92g ripe sourdough starter
Instructions
- Mix (9:00 a.m.)
Add the Main Dough ingredients, reserving 50g of water, to a mixing bowl and mix with wet hands. Mix and strengthen the dough for 2-5 minutes, pinching the ingredients together and folding the dough over itself repeatedly until it’s cohesive and smooths. During this time, slowly add in the 50g of the reserved water if the dough feels like it can handle it: it shouldn’t be soupy or extremely wet, if it is, don’t add the remainder of the reserved water. - Bulk Fermentation (9:15 a.m. to 12:45 p.m.)
This dough will need 4 to 5 sets of stretch and folds during bulk fermentation, the first set 15 minutes after bulk fermentation begins, the second set 15 minutes after that. Then, perform the rest of them at 30-minute intervals as needed. After the last set, let the dough rest the remainder of bulk fermentation. - Preshape (12:45 p.m.)
Lightly flour your work surface and scrape out your dough. Using your bench knife, lightly shape the dough into a round shape. Let the dough rest for 20 minutes, uncovered. - Shape (1:05 p.m.)
Shape the dough into a round (boule) or oval (batard), then place the dough in proofing baskets. - Proof (1:15 p.m. to 3:45 p.m.)
Cover the proofing basket entirely and let it sit out on the counter for 2 – 4 hours, temperature depending. My dough was ready after 2.5 hours at about 75°F (23°C). - Bake (3:45 p.m., preheat oven at 3:00 p.m.)
Preheat your oven with a baking surface or combo cooker/Dutch oven inside to 450°F (230°C).When the oven is preheated, remove your dough from the fridge, score it, and transfer it to the preheated baking surface or combo cooker. Bake for 20 minutes with steam. After this time, vent the steam in the oven or remove the lid (you can keep it in the oven or remove it) and continue to bake for 30 minutes longer. When done, the internal temperature should be around 204°F (95°C).
Let the loaves cool for 2 hours on a wire rack before slicing.
Notes
- The dough can be placed into the refrigerator at the Proof step in its proofing basket and sealed bag to proof overnight. The next day, take it out and bake it straight away in a preheated oven as indicated in the Bake step.
If you use this recipe, tag @maurizio on Instagram so I can take a look!
What’s Next?
This sourdough bread with all-purpose flour is straightforward, but no less delicious, than those with complicated flour blends. If you want an even more hands-off approach to baking sourdough bread, check out my no-knead sourdough bread recipe.
On the other hand, it can be fun to experiment and discover what other flavor profiles we can draw out with a whole wheat sourdough sandwich loaf, or a fifty-fifty sourdough with 50% whole wheat—that is, once we readily have these flour choices at the market!


437 Comments
Maurizio, this bread is lovely! The only problem is that the crust hasn’t been too crusty. It could be due to the sesame seeds, but will changing the ratio of lid-on versus lid-off help? Thank you!
Try baking a little longer after the lid is removed, but at a lower temperature. Drop the oven by 25F and bake longer until well colored. You could also crack the oven door open a bit for the last 5 minutes of the bake to help finish in a hot, dry oven.
I made this for the first time yesterday, adding golden raisins and fennel, from your recipe with those add-ins. I wanted a one-day bread but started late In the morning so upped the levain and temps. Delicious! Nice touch of sweetness from fruit and rich, earthy flavor from fennel. Thanks yet again, Maurizio!
Like others, it was a slack dough, despite extra folds and slight water reduction. But that’s been a consistent problem for me since using all AP flour with pandemic shortages. Dutch oven gives enough support that it’s manageable. I discovered I prefer the tender, soft crumb of the all AP and can live with a slighter flatter loaf. Another winner with our family!
Right on, Sheila! Sounds tasty. Yes, some AP flour is low in protein and requires some adjustments. You could try dropping the hydration a bit, but as you said, you might lose some tenderness there — but maybe not! Give it a try 🙂
I’ve baked with this recipe several times now with great success, thank you! Now, my mother-in-law is gluten-sensitive, and has heard that a longer fermentation of the dough (36 hours) can help sourdough bread become a lot more gluten-friendly. Can I try that by still following this recipe and, at the optional fridge stage, just leave it in the fridge for longer? Will there be any other effects or things I should watch out for? Thanks again!
Yes, you can certainly leave it longer just be aware the longer it sits in the fridge the less rise you’ll get, and perhaps a little more sour flavor in the end. It’ll still be totally fine!
Do you have any suggestions for what to do if I’m not using a proofing basket? I don’t have one, and I’m wondering if I could just use a bowl to proof. Thanks for your help!
A bowl lined with a clean kitchen towel works super well!
Hey @maurizioleo:disqus . I just baked this for the first time, and had the same issue as some others around here. It did not rise, and could not create surface tension in it. I kept it in the fridge overnight, and when flipped over, it did not held its shape. It did bake nicely, but did not rise as expected. The inside still feels a bit “wet”. Any thoughts, please? This is how it looks like: https://ibb.co/828Vr6f
Based on the description of your loaves it could be that they are slightly under proofed. There are a few indicators your dough could be under: explosive rise in the oven, dense interior with potentially scattered large holes, and gummy texture to the interior. Finally, it’s possible the bottom of the loaf might be slightly bowed upward (like the letter “U” — the top will kind of dome).
Make sure to build your levain from a starter that’s strong and mature (meaning it’s risen to it’s peak height before you take some to use). From there, bulk fermentation is very important! Make sure your bulk fermentation goes sufficiently far, you want the dough to look smooth, it should have risen considerably, and have bubbles here and there — it should look alive. If you tug on the dough a bit it should offer resistance to your tugging, it’ll feel stronger. Give the dough the time it needs in bulk fermentation! If you have to give it another 30m or hour to see these signs, do so. It’s important for this step to go sufficiently far for the dough to have enough fermentation activity before its proof.
Thanks for the tips. Since last time I posted I switched to a new (better) flour and my starter looks a lot better. I followed your “weekday” recipe and this is what I ended up with. https://ibb.co/5vSqMvS 😀
Lookin great!
The 1st 3 loaves I made with this recipe came out perfect but since then the last 3 loaves have been a sticky mess and refuse to create surface tension.
As a result they pancake out and don’t rise in the oven, way too slack.
I have no idea what the F I am doing differently?
I am using the same flour, same dosages, and water at 290g and yet not getting the same results 🙁
Adding additional stretch and folds to try and build a stronger gluten network but it just will not take and just tears.
Any suggestions?
Cheers
Are you using different flour? Is the temperature in your kitchen drastically higher? I’d recommend dropping the water in the recipe a bit, perhaps just 5%, to see if that helps bring strength to the dough. If your kitchen (and more importantly, your dough) is warmer, watch it so it doesn’t over proof! Sticky dough is typically from over hydration or over proofing. Let me know if that helps!
Ah ha, it must be over proofing!
It had been rising way more than it usually does, getting all cobweb like in structure.
Making some raisin cinnamon SD right now, keeping it cooler and so far so good.
Thanks mate, appreciate it.
I just came to complain about exactly the same as Zoidbort. Thank you for the reply, I think mine was also overproofed. I got frustrated and stuck the bread in the fridge, maybe I shouldn’t have done it, based on the possible cause for my sticky dough… I will bake my mistake tomorrow morning anyway. Either that or throw it away right now. We’ll see.
The best way I have found to do it is mix your starter with water 1st so it dissolves well then add your flour.
Mix it together & let it sit covered for 40 minutes and follow up with adding your salt and mix it together well.
Over the course of 3 hours, every 30 minutes (6 times total), do the routine 4 sided stretch and fold.
Once that is complete, as long as you are getting a nice elasticity to it and it window panes, you can let it rest on the counter for 30 mins.
Once that’s done you then shape it and put it in your proofing basket, cover with a towel and put it in the fridge overnight.
In the morning take it out, score it (easier to do so when it’s cold and firmer), and throw it in the oven and you should be good to go!
I’ve tried this recipe twice in two days with varying levels of success. The first time, I proofed overnight in the fridge for about 10 hours, during which time the loaf spread out. I briefly reshaped before putting it into the over. The loaf came out tasty, but very flat. I’m guessing it was under-proofed. The second time, I did a longer overnight proof (14 hours). Same thing happened with flattening overnight so I did another quick shape. The bread rose a bit more this time, but unevenly. Any suggestions on what I might be doing wrong? I also noticed the second time that during my bulk fermentation the dough didn’t get very bubbly even after 4 hours.
Thanks for these recipes and keeping me busy at home!
Sounds like the dough could use a bit more strength and/or reduced hydration. I’d say try giving it two more sets of stretch and folds during bulk fermentation to give it more strength, then be sure to preshape and shape it tightly! You need to impart enough strength during shaping to ensure the loaf holds this shape all the way to the oven. Let me know how that goes!
My electronic scale measures weight in ounces, I used a conversion website to make the conversions and I ended up with what could be consider a huge starter. I guess I will have to buy a better scale to work with grams. My conversions were as follows, would like to hear back if any were inaccurate: 460g=16.22 oz, 340g=12oz, 9g=1.5tsp, 92g=3.25oz.
Those look correct from here!
I’ve made this the last two days. Yesterday’s was really good. Today I topped it with everything bagel seasoning and it was amazing.
Sounds fantastic to me! Glad to hear this, John. Enjoy!
If I were to double the recipe, do I double everything, including the starter? I LOVE this recipe, thank you!
That’s right, double everything. Check out my baker’s percentage post for more on how to do this!
Just made this yesterday and wanted to thank you, it turned out amazing for my very first sourdough!
I ended up adding 20-30g less water than the full amount as the dough seemed wet enough and I wanted it to maintain its shape. I also used 75% AP and 25% organic stone ground hard WW.
The flavour is absolutely wonderful, almost sweet with maybe just a hint of sourness at the end. It spread out for me since my proofing bowl was a bit too wide and it almost got stuck without a liner (I used flour and rice flour). But it looked beautiful, has a nice crust and it is definitely very chewy, not sure if it’s chewier than it’s supposed to be…
The bottom definitely got too crusty though, hard to cut through. I will try your suggestions to make it a bit thinner. I used a Cuisinart cast iron dutch oven and the baking was very even (and I preheated it in the oven but only to 350F then took out). Awesome recipe, now I have good bread flour so trying your weekday sourdough next week!
Right on, Natalie! Makes me happy to hear this. Yes, check out my post on baking with a Dutch oven for some tips on reducing bottom burning. Happy baking!
Buongiorno Maurizio! I wanted to thank you for this simple but delicious AP flour sourdough. I am a pandemic beginner sourdough starter and bread baker. I was always a little too intimidated to try all of this before but I am falling in love with it. Your tips on creating and maintaining a starter have been so helpful. I very much like this simple recipe and it created the best loaf I’ve made yet. I didn’t have a razor blade so I used some sharp kitchen scissors to make a criss cross design which worked but left some sharp points. Love the parchment for ease of transfer and still got a lovely crust all around. I wish I could post a picture here.
Glad to hear things are going well for you, Lesli! Scissors do make a wonderful scoring pattern, especially when there’s dramatic rise in the oven. Enjoy!
Why oh why are you telling people to bake on a piece of parchment? Bread goes directly on the hearth or in this instance on your dutch oven. Parchment is completely unnecessary and in fact not recommended.
Been doing it this way for years here to help the transfer of bread into the scorching hot cast iron pan — just a convenience thing, really. Not mandatory, but helpful.
I 100% apologize for sounding dismissive. Not very nice of me at all. I’m glad it works for you!
On this note – is it possible to use aluminum foil in place of parchment? I’m all out and my starter is getting pretty ripe. thanks!
It will stick to the foil for sure, do not do it.
If I do the overnight proof in the fridge does it go straight into the oven or warmup at room temperature and if so, for how long? If warming up at room temp, wait until it passes the poke test?
It would be fine to bake right out of the fridge, in fact handling and scoring it even would be easier since the dough would be less slack.
I bake straight from the fridge, and as @angelscotch:disqus said below, a cold dough makes scoring much easier!
Thank you Maurizio for the video in shape step.
Also I ask that why dou you prefer starter instead of levain. could you give some details? Sometimes, I also use starter for the other recipes. and then the bread can be tastier and crustier than of levain. I like this recipe. the shelf life is longer, 6 days. If we didnot consume all slices, may be it would be longer:)
A starter and levain really are the same thing in the end, and for this bread, it was mostly just a convenience thing. Many of my other recipes do call for a levain to be made specifically for the bake! And yes, with natural fermentation this bread will easily last a week — but it almost always gone before that 🙂 Happy baking!
Hi Maurizio, I would like to try this same-day, sourdough process. One question…Instead of making just one loaf, I think I would like to make mini boules. Can this recipe be used for that as well? Any alteration required? Thanks!
Yes, absolutely. Divide the dough in half and then shape each piece separately. The only alteration I’d make is you’d have to adjust the bake time: I’d keep temperature the same, but you’ll likely have to cut the second half of the bake (still do 20 minutes covered with steam) short based on how it’s baking.
For the mix-ins, has anyone tried olives? Or would the salt keep the bread from rising as much? Would you need to decrease the salt in the bread? How many grams of olives would this be? So many questions!
Considering we need mature ‘peaking’ starter for this recipe at 9am would you feed the starter late at night before bed and keep the starter in a cool place to slow the ferment down…. or…. wake up at say 06:30am feed starter and then place in a warm location to speed up the ferment.
Thanks in advance
Another alternative is to feed your starter the night before with less starter, so it takes longer to peak. For example, if you normally add 50 g starter, 50 ml water, and 50 g flour, try using 30 g starter instead. That worked for me.
I’d use it after a long ferment overnight.
Is there a way to bake the bread without a Dutch oven?
I believe yes you can. But you need to put ice at the bottom of the oven to make a steam which is what the Dutch oven does. I dont know the intricates but that’s what I’ve seen when researching before getting my DO
Check out my guide to baking with steam in a home oven for a technique on how to do this!
Got too cocky on my sourdough skills. Made this loaf but it did not rise and and had a large air pocket at the top. Reading through the comments, it looks like the reason it may not have risen is because I proofed on the counter for an hour after shaping, then refrigerated over night, so it may have been over-proofed. However, isn’t an air pocket the sign of an under-proofed dough? Any thoughts? Tastes good regardless, but I’m eager to try again!
Usually a large “tunnel” with super dense areas is a sign of under proofing, but it can also be over proofing — the difference is usually those dense spots show up as areas with tiny little bubbles all over, no solid, dense spots. It can be hard to determine between the two with out more details, but if you saw good fermentation activity and rise in the dough during bulk fermentation, it’s likely over proofing.
If i where to mix 60% ap flour and 40% bf for the dough, how will it affect the crumbs? And crust?
Im trying to achieve my ideal loaf such as having a very thin crsipy crust (so that i dont have to saw my way through the loaf) and soft open crump structure, not too chewy.
That’ll work, but I’d likely increase the hydration in this case. I find bread flour typically needs more water to gain extensibility in the dough to let it stretch and open more in the oven.
Would love to try this– any suggestions about how much extra water to add?
Hi! I tried to search to see if this question had already been asked, but apologies if this is a repeat question:
Can you double the recipe and make 2 loaves with this method? Thank you!
Yes, definitely.
Yes you can! Check out my guide to baker’s percentages for more information on scaling a recipe.
Hey Maurizio. Made this bread the other day, came out delicious. A couple things…the dough seemed pretty wet, never was able to get it “strong”. Always wanted to spread out on my counter. I worked with it though and overnight proofed (14 hours). Still was soft (proof test seemed OK) when it went into the Dutchie (think the DO helped it from spreading too much in the oven). It popped really nicely. Crust wound up pretty tough, hard to cut. Crumb was nice, soft and chewy. Baked it at 450 for 20 mins covered, 40 uncovered with the last 20 turned down to 425. What do you think may have caused the crust to be so tough? Love the site and your insight…Chris
Glad to hear that, Chris! I’d say try spritzing the dough a bit after you plop it into the DO (or place an ice cube in there on the side). A little more steam can go a long way to getting a thinner crust!
It says we can add up to 15 % mix ins. Is this 15% of the initial (900g)? So It would be 135g of mix-ins? I wanted to experiment with some different flavors today.
It is 15% bakers percentage. So you could do 69g mix ins. That’s what I understood at least.
Hi Maurizio! Thank you so much for helping to make sheltering-in-place a far more enjoyable activity by baking. I have an established starter that is rising and falling and has wonderful aroma and a nice tang. I prefer my sourdough bread with a more aggressive “sour” than my starter is providing. Is there a way to alter the sourness? Also, I have a question about using the starter on baking day. When you say use “fully hydrated starter”, does that mean I feed it first and then use it, or use the starter that has risen throughout the night? If you could clarify that would be wonderful. Many thanks! Maureen
There are a few things you can do to try and increase the sourness of your bread. First, you want to use your starter, and levain, when it’s very ripe. If it rises up to a certain height, let it sit there for a bit before you use it. If it starts to fall that’s ok too, just try to use it after it falls. That mature, ripe starter/levain has much more acidity than if used when it’s more on the “younger” side. Just be weary that your dough fermentation rate might be a bit faster than previous, keep an eye on it during bulk fermentation and divide the dough when it looks ready.
Additionally, you could try using some rye flour in your final dough mix. Just know that the more rye you include the more dense your loaf will be as rye does have the same gas-trapping capabilities as traditional wheat. It’s up to you on the percentage, but even 5% plays a big role.
Finally, if you can try to push the cold proof in the fridge. There’s a limit of course, but if you could go even a few more hours you should notice more sourness.
You want to use your starter when it’s at its peak height in the jar, so do not feed it first, it needs to be fully fermented! If you used it soon after feeding, you’d mostly be taking raw flour and water instead of a teeming population of bacteria and yeast — which is what we want.
Hope this helps!