

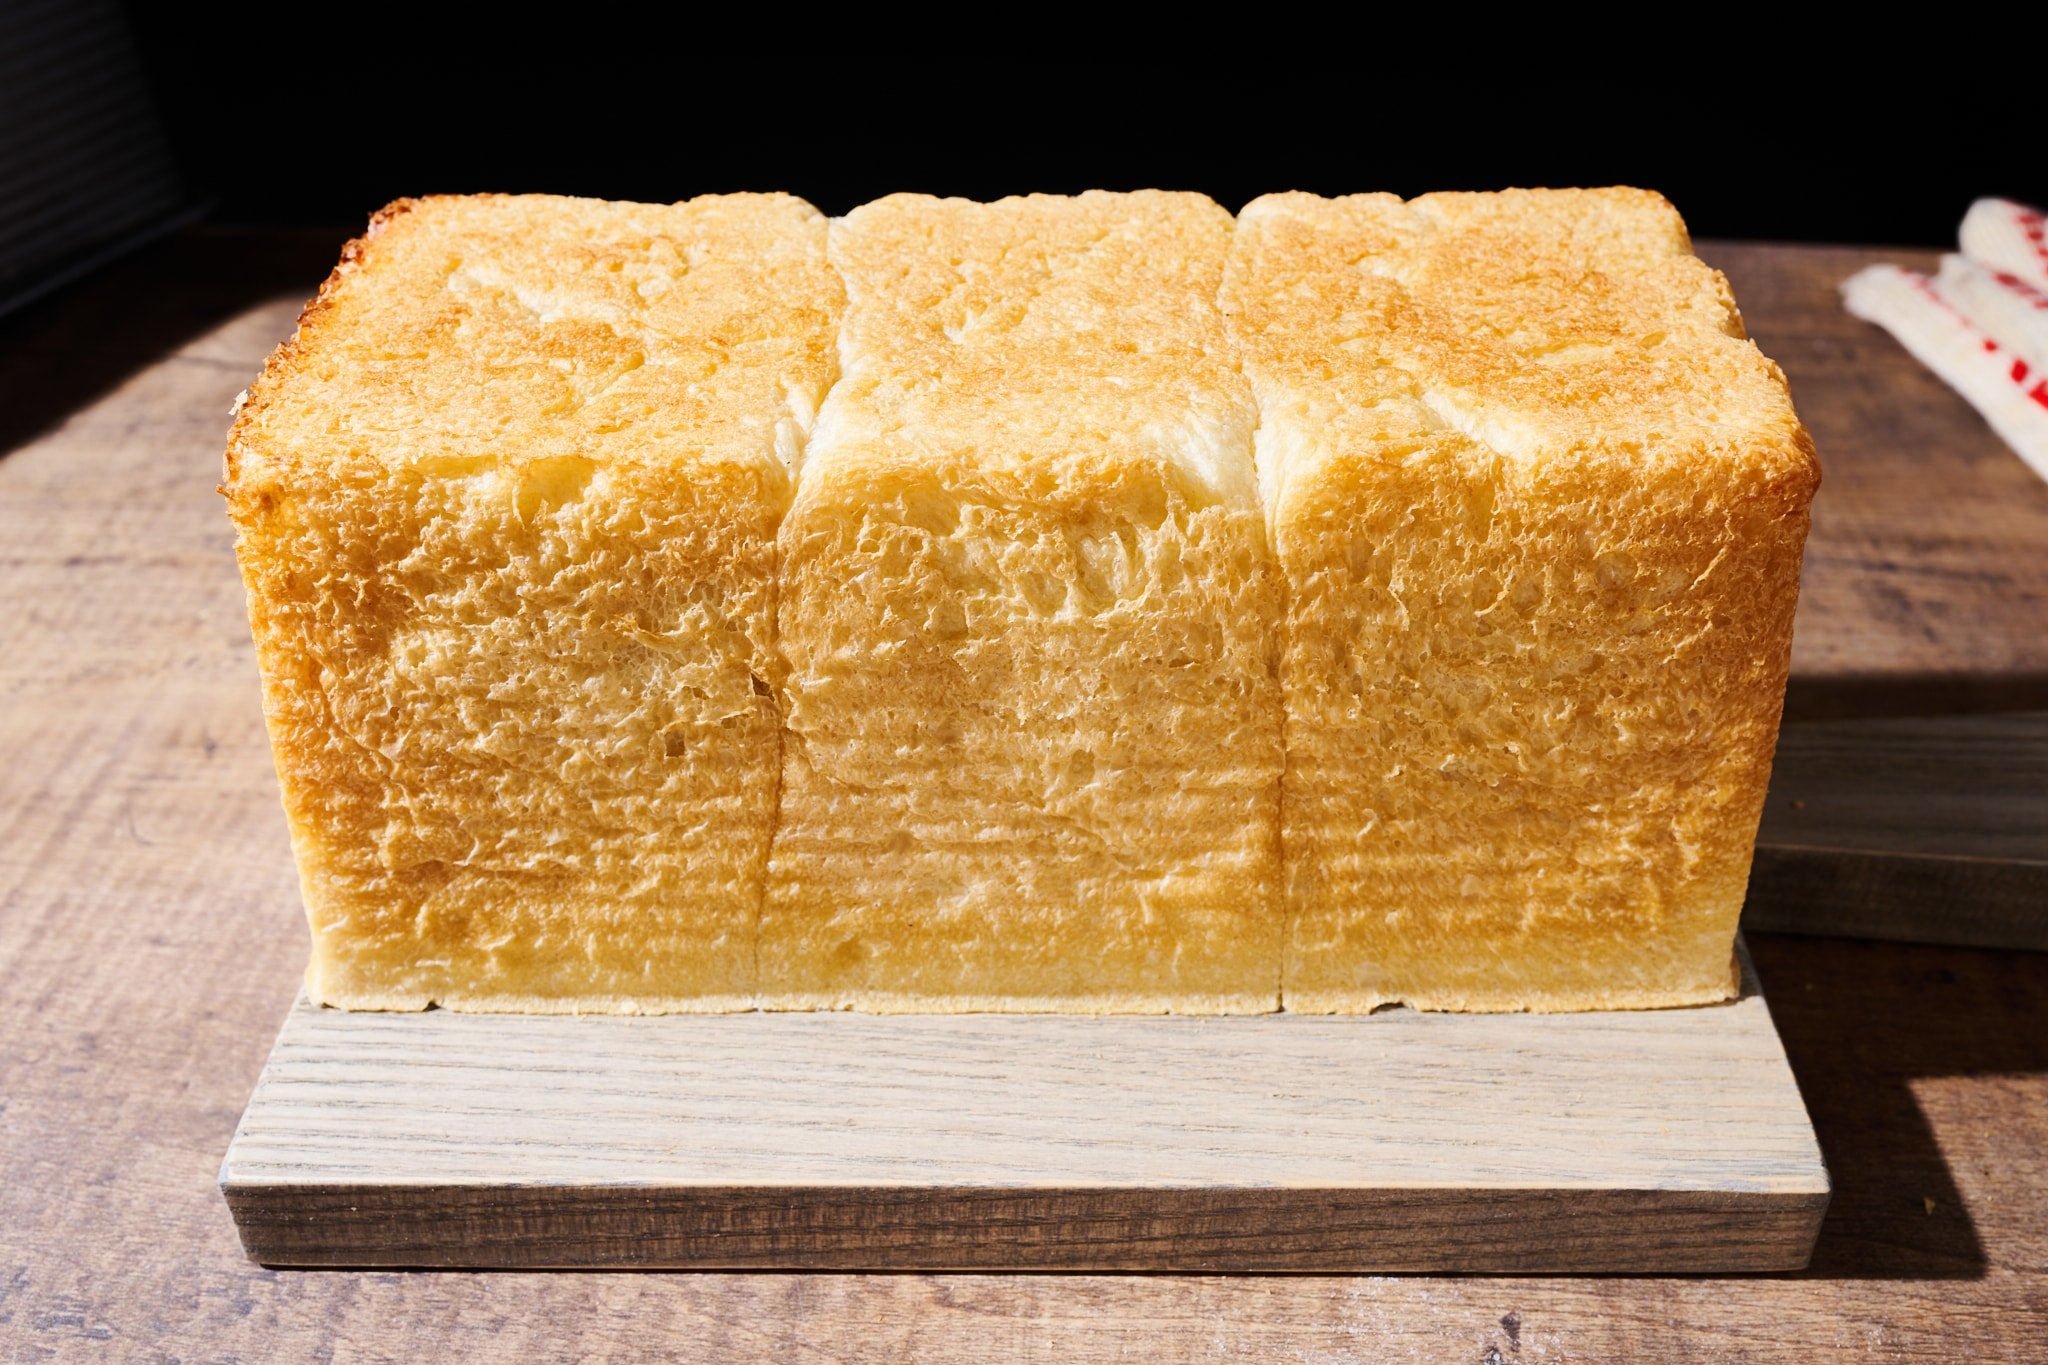
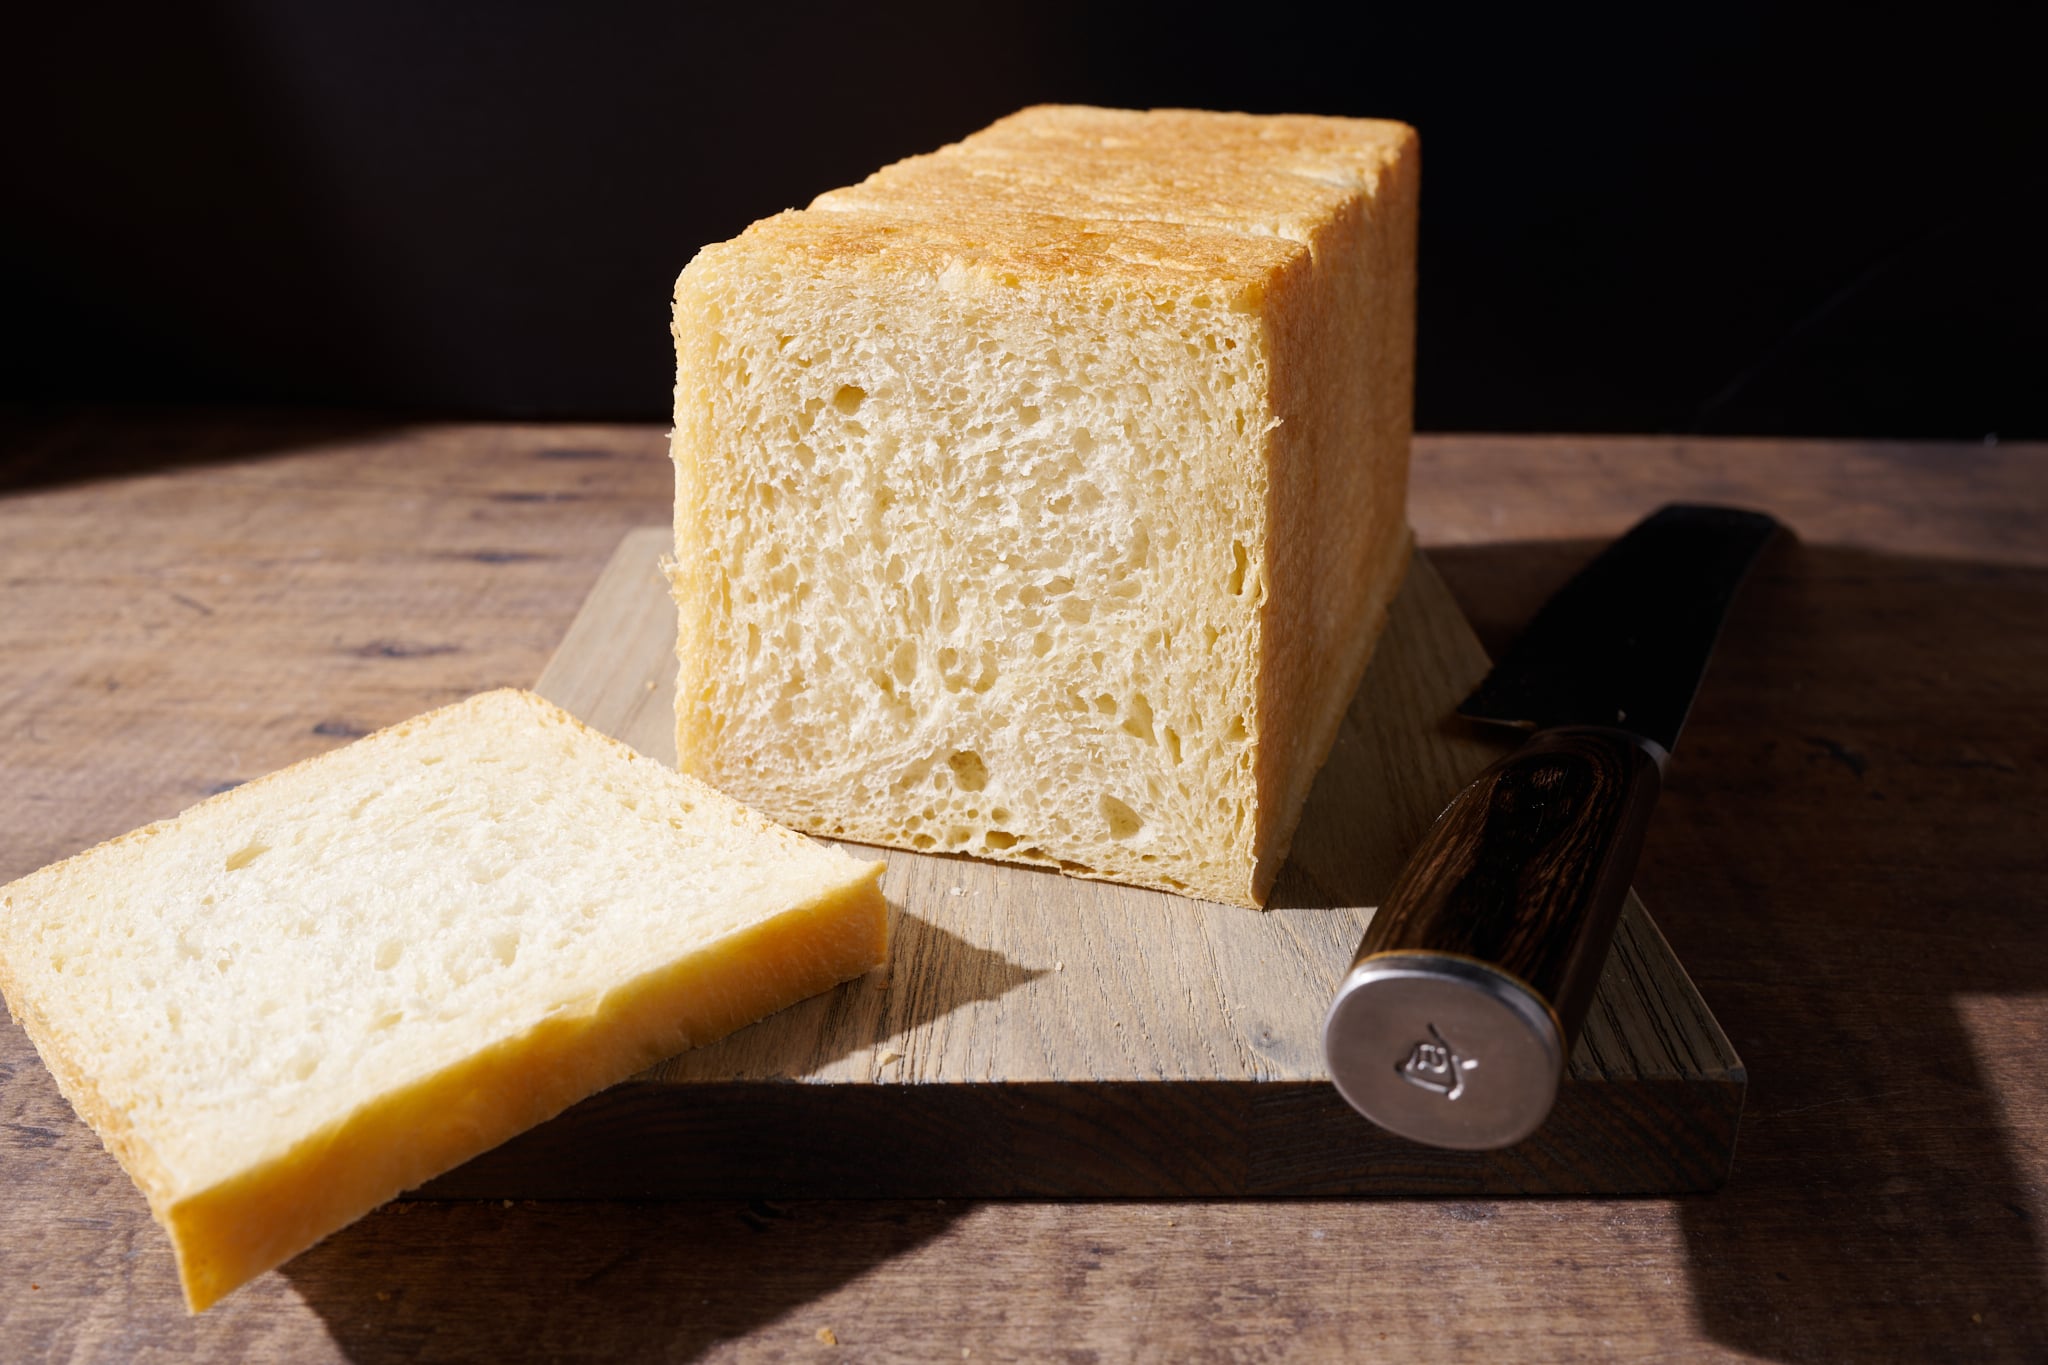
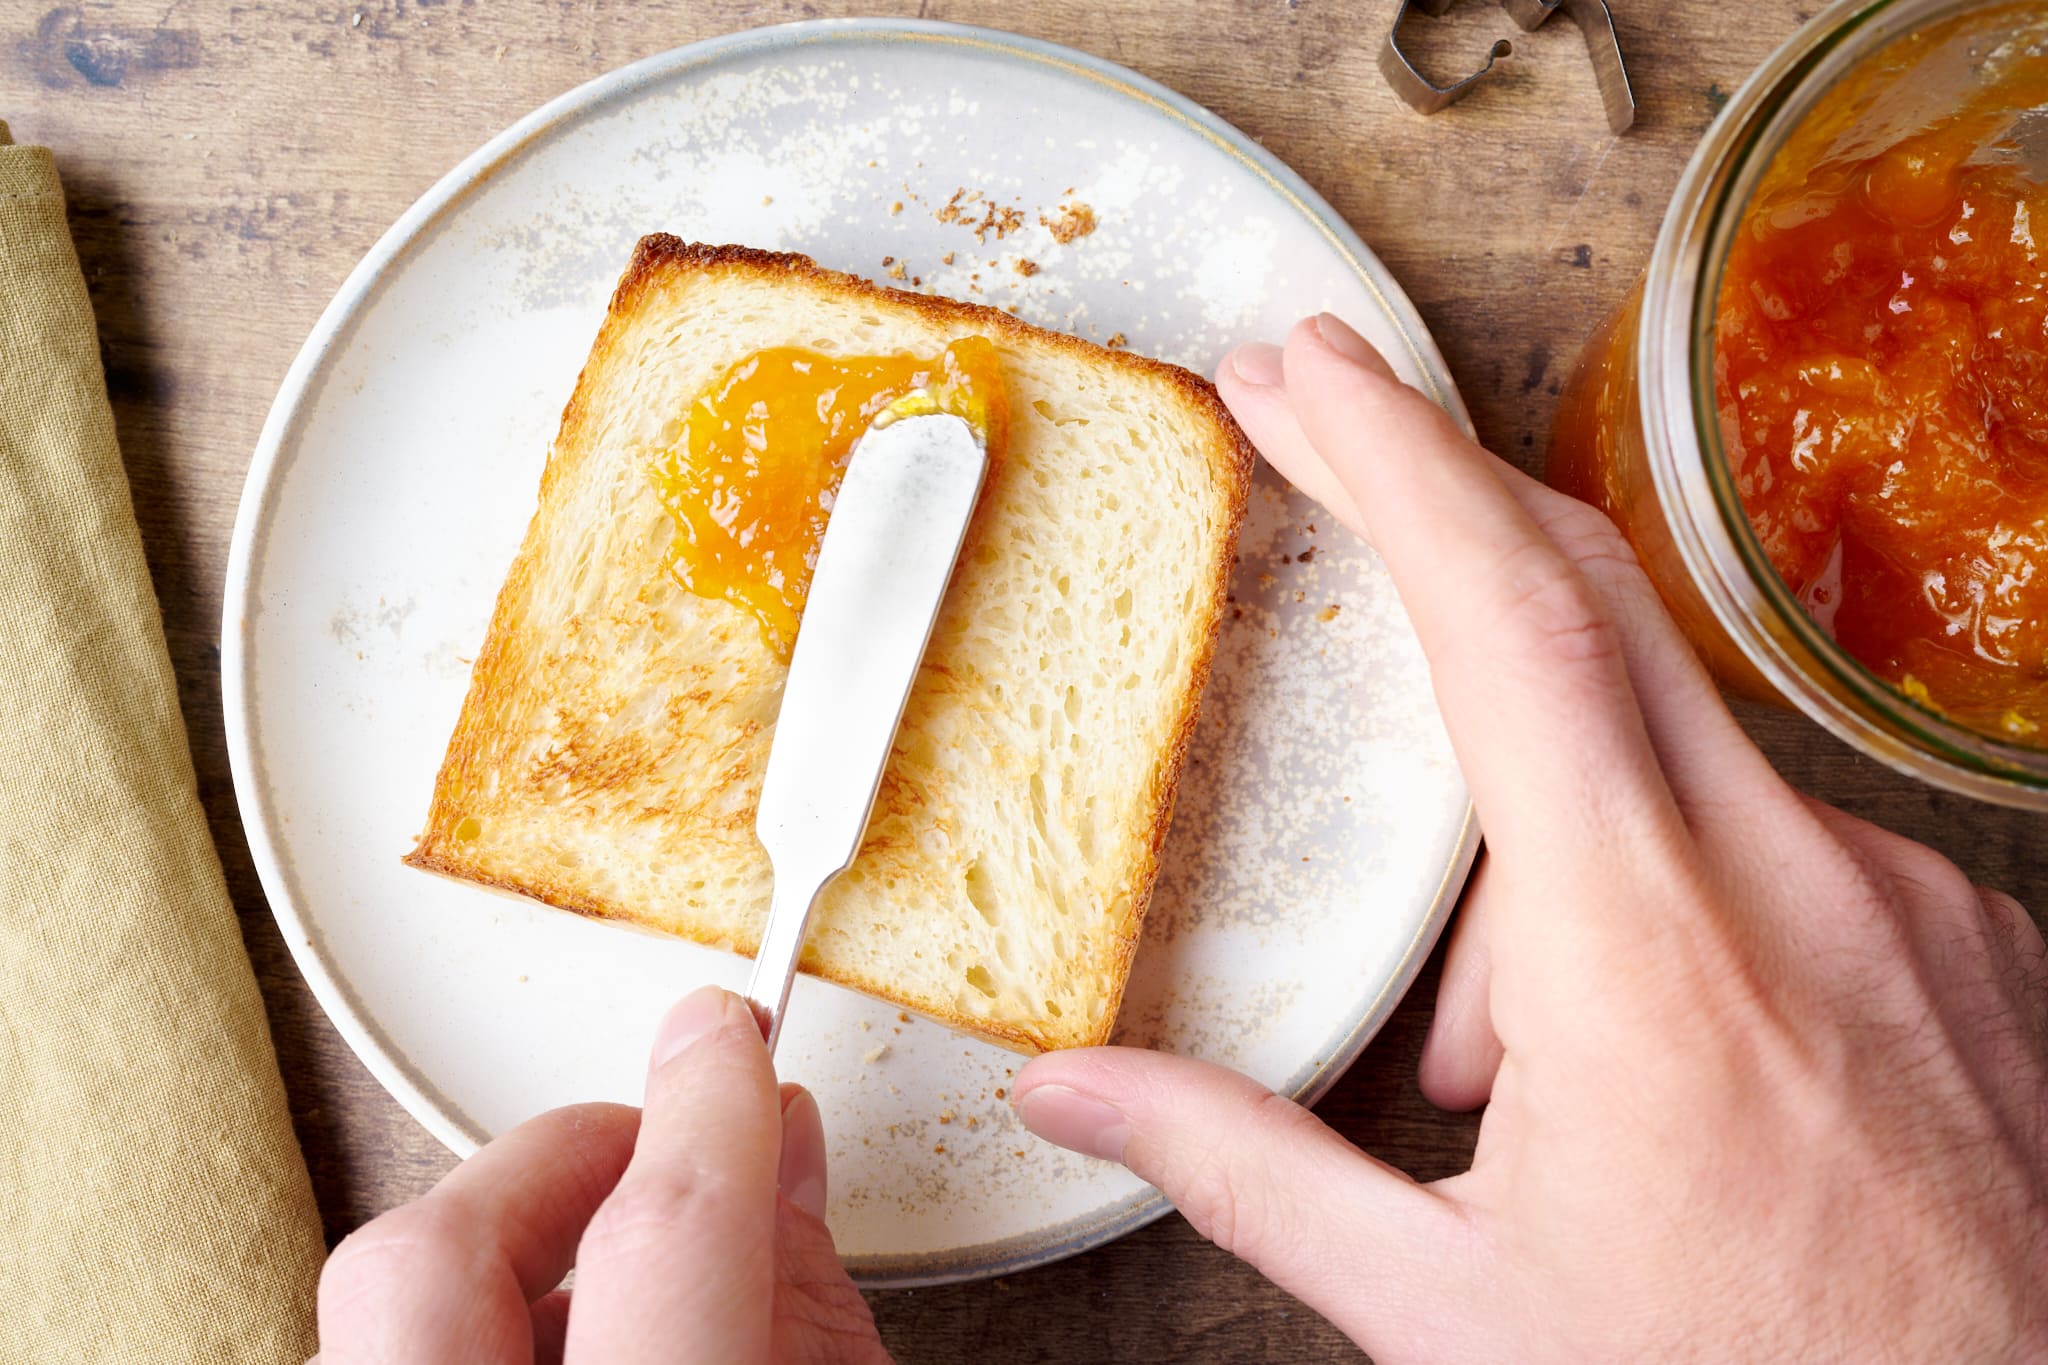
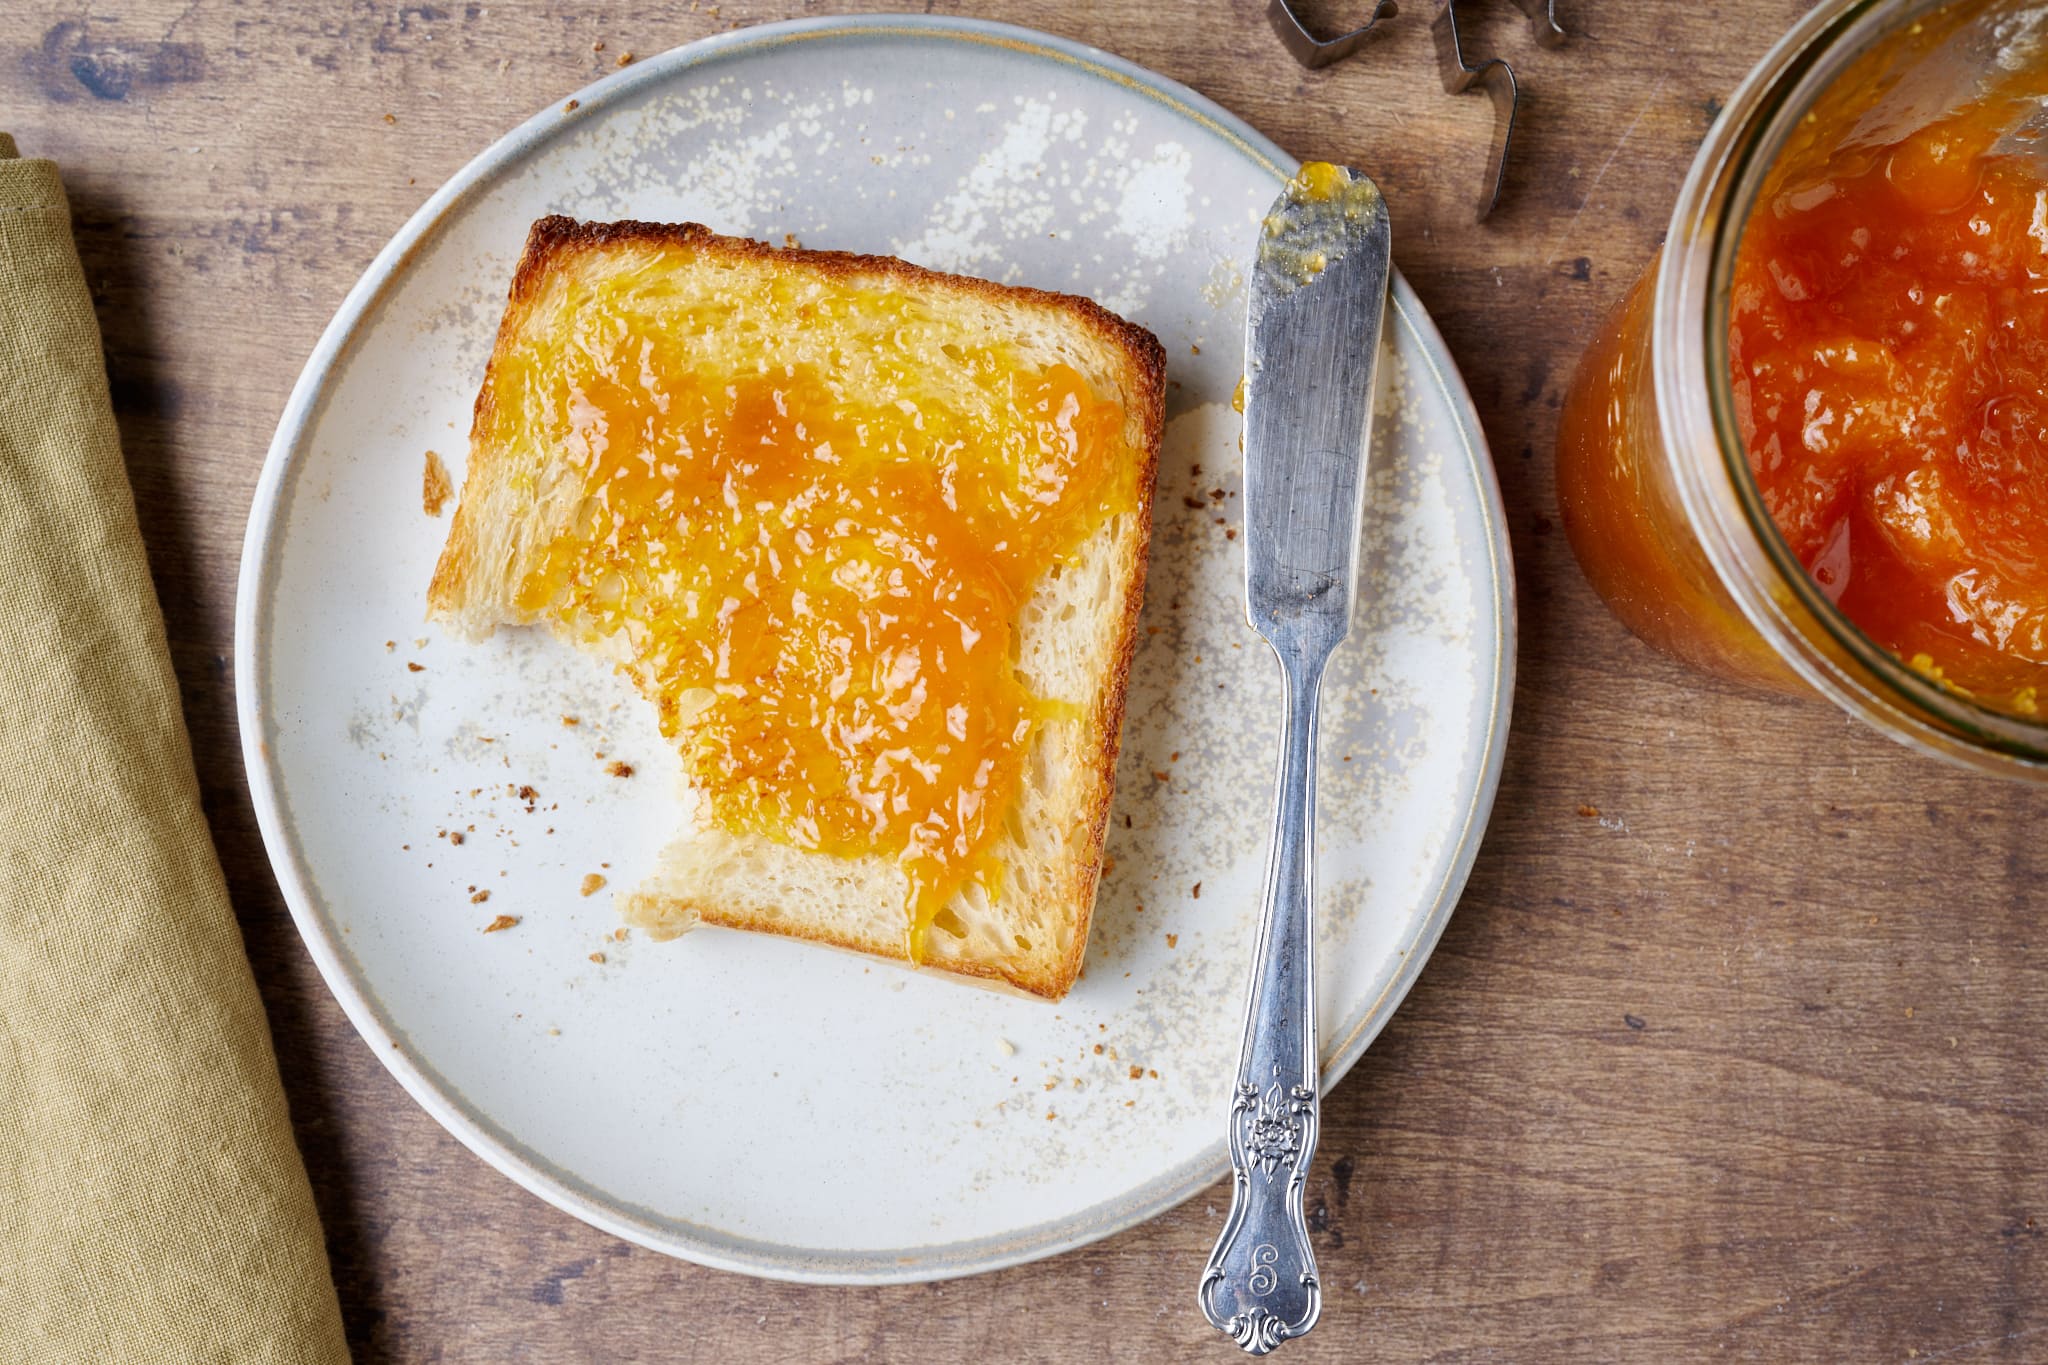
I typically associate fluffy, packaged white bread with something that has a complete lack of flavor and texture, but this sourdough shokupan is anything but. The lengthy natural fermentation process imbues the loaf with subtle sour notes—that are tempered just enough by a sweet levain—resulting in a nice balance of depth and complexity. The gentle aroma of butter is warm and pervasive, bringing a touch of savoriness. And while the texture of this bread is soft to the extreme, when sliced thick and heavily toasted, it’s perfect for a sando (sandwich), or even… pizza toast?
In one of my previous newsletters, I mentioned that I treasure Craig Mod’s insightful and quirky newsletter. He self-published a book about the famed pizza toast available throughout Japan, and I haven’t been able to shake the idea of the gooey, cheesy toast ever since. Unfortunately, both times that I traveled Japan, I didn’t get to taste the delectable snack, but it’s just what it sounds like: a thick slice of fluffy Japanese milk bread topped with tomato sauce, cheese, and other toppings, and then baked.

And after making the above pizza toast, it is just as good as you’d imagine. But back to this naturally leavened shokupan—which is what, exactly?
What is shokupan (Japanese milk bread)?
Shokupan is a Japanese-style bread sometimes called Hokkaido milk bread, or simply Japanese milk bread. The hallmarks of this bread are its soft, aromatic, and golden crust and an interior that’s ultra-tender. If you could make bread from gathering clouds from the sky, this would be it.
Shokupan calls for adding a high percentage of milk or cream to the dough. Part of this liquid is used to make a tangzhong (more on this below), which is added to the dough during mixing. In addition to the small percentages of butter, sugar, and more milk, the tangzhong brings copious tenderness to the loaf—all without the need for artificial additives or extreme proportions of enrichments (fat, sugar, and/or egg).
My shokupan dough is much softer than what you might find in other shokupan recipes due to the dough’s relatively high level of milk and enrichments. Because of this, the dough is not easily divided and rolled out with a rolling pin. However, I find this soft and slightly sticky dough results in a loaf that’s extra tender. And this is also the reason why you won’t get the spiraled sides sometimes seen in Japanese milk bread, but it’s worth it.
If you thought my soft sourdough dinner rolls were soft, this bread takes the idea into entirely new territory.
What is tangzhong or yudane?
Tangzhong and yudane are similar techniques in which you pre-cook a portion of the flour into a paste, then add this paste to the dough during mixing. Tangzhong calls for actively cooking flour over the stove, whereas yudane simply combines a boiling liquid with the flour and lets the mixture rest, typically overnight. Both methods result in a gelatinized starch-paste that achieves the same end goal: bringing extreme tenderness to the final bread without the need for a high level of enrichment.
See my guide to using tangzhong or yudane for a thorough look at both of these techniques.
Flour and ingredient selection
For this recipe, I prefer using high-protein white flour to bring strength to the dough and attain ample volume with an open interior. Therefore, I used King Arthur Baking Bread Flour at 12.7% protein.
If you don’t have high-protein white flour, all-purpose flour will work, but you may want to hold back 10-20 grams of the milk during mixing, only adding it in at the end only if the dough feels cohesive and strong.
Baking schedule
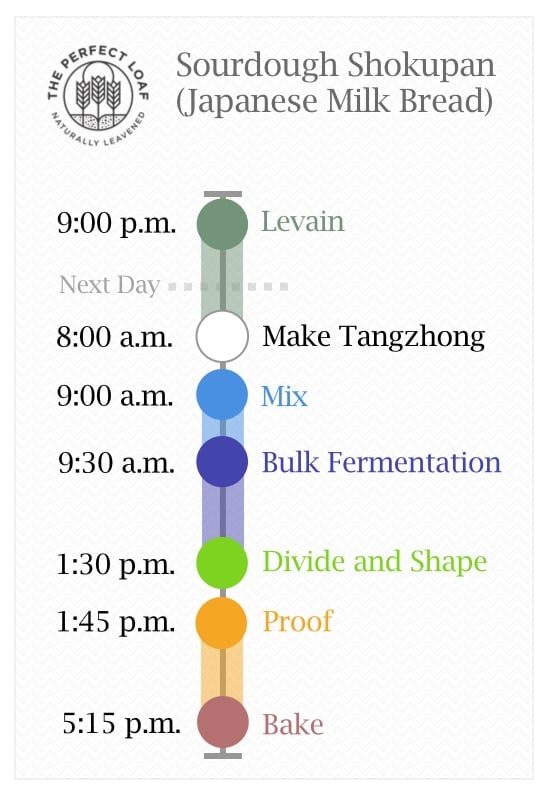
This lightly-enriched sourdough shokupan is mixed and baked the same day to ensure a minimally sour flavor profile. It is possible to spread the bake out over two days, but know that the flavor might be slightly different than intended (more sourness and complexity). To bake over two days, right after shaping, retard (cold-proof) the dough overnight in the pan, covered.
Sourdough shokupan formula
Vitals
| Total dough weight | 680 grams |
| Pre-fermented flour | 11.0% |
| Levain in final dough | 32.1% |
| Yield | One loaf |
Total formula
Desired dough temperature: 78°F (25°C) (see my post on the importance of dough temperature).
| Weight | Ingredient | Baker’s percentage |
| 275g | High-protein white flour (King Arthur Bread Flour) | 90.0% |
| 31g | Tangzhong: High-protein white flour (King Arthur Bread Flour) | 10.0% |
| 122g | Tangzhong: Whole milk | 40.0% |
| 79g | Whole milk | 26.0% |
| 50g | Egg, beaten (about one medium) | 16.5% |
| 49g | Unsalted butter | 16.0% |
| 22g | Superfine sugar (Caster sugar) | 7.0% |
| 34g | Water | 11.0% |
| 6g | Fine sea salt | 1.9% |
| 13g | Ripe sourdough starter, 100% hydration | 4.4% |
Sourdough shokupan method
1. Prepare the levain – 9:00 p.m., the night before mixing
Mix the following ingredients in a container and leave them covered at a warm temperature, 74-76°F (23-24°C), to ripen overnight.
| Weight | Ingredient | Baker’s percentage |
| 34g | High-protein white flour | 100.0% |
| 7g | Superfine sugar | 20.0% |
| 34g | Water | 100.0% |
| 13g | Ripe sourdough starter, 100% hydration | 40.0% |
2. Make the tangzhong – 8:00 a.m., the day of mixing
In a medium saucepan over medium-low heat, add the 31 grams tangzhong flour and 122 grams tangzhong milk. Cook, whisking continuously, until the mixture thickens and becomes a paste (like mashed potatoes), 4 to 6 minutes. Because the tangzhong is very small, keep a close watch on it as it will thicken quickly. Remove the pan from the heat and spread the tangzhong out on a small plate to expedite cooling. Set aside.
3. Mix – 9:00 a.m.
There is no autolyse step for this dough (see my guide to the autolyse technique for when and why I like to use the technique) because the dough is quickly and effectively strengthened in my KitchenAid stand mixer.
| Weight | Ingredient |
| 241g | High-protein white flour |
| 79g | Whole milk |
| 50g | Egg, beaten (about one medium) |
| 49g | Unsalted butter |
| 15g | Superfine sugar |
| 6g | Fine sea salt |
| 87g | Levain |
| All | Tangzhong (from Step 2) |
Note: Warm the milk in the microwave or over the stove, as necessary, to help meet the final dough temperature of 78°F (25°C). See my post on how to bake sourdough bread in the winter for tips to keeping your dough warm.
First, cut the butter into 1/2″ pats. Set them on a plate to warm to room temperature.
To the bowl of a stand mixer fitted with the paddle attachment, add the flour, milk, egg, sugar, salt, ripe levain, and tangzhong. Mix on low speed (STIR on a KitchenAid) for 1 to 2 minutes until the ingredients come together and no dry bits remain. Next, switch to the dough hook attachment and mix on medium speed (2 to 3 on a KitchenAid) for 4 to 5 minutes until the dough smooths and begins to cling slightly to the hook. This is a very soft dough and won’t completely clear the sides of the bowl at this point.
Let the dough rest in the bowl for 10 minutes.
Turn the mixer on low speed (STIR on a KitchenAid) and mix for 2 to 4 minutes until the dough gains more strength and begins to cling once again to the dough hook. Next, with the mixer running, add the room temperature butter, one pat at a time, waiting to add each pat until the previous one is fully absorbed. Adding all the butter will take 5 to 8 minutes. In the end, the dough will still be very soft, and it won’t altogether remove from the sides of the bowl. Transfer the dough to a bulk fermentation container and cover.
3. Bulk fermentation – 9:30 a.m. to 1:30 p.m. (4 hours)
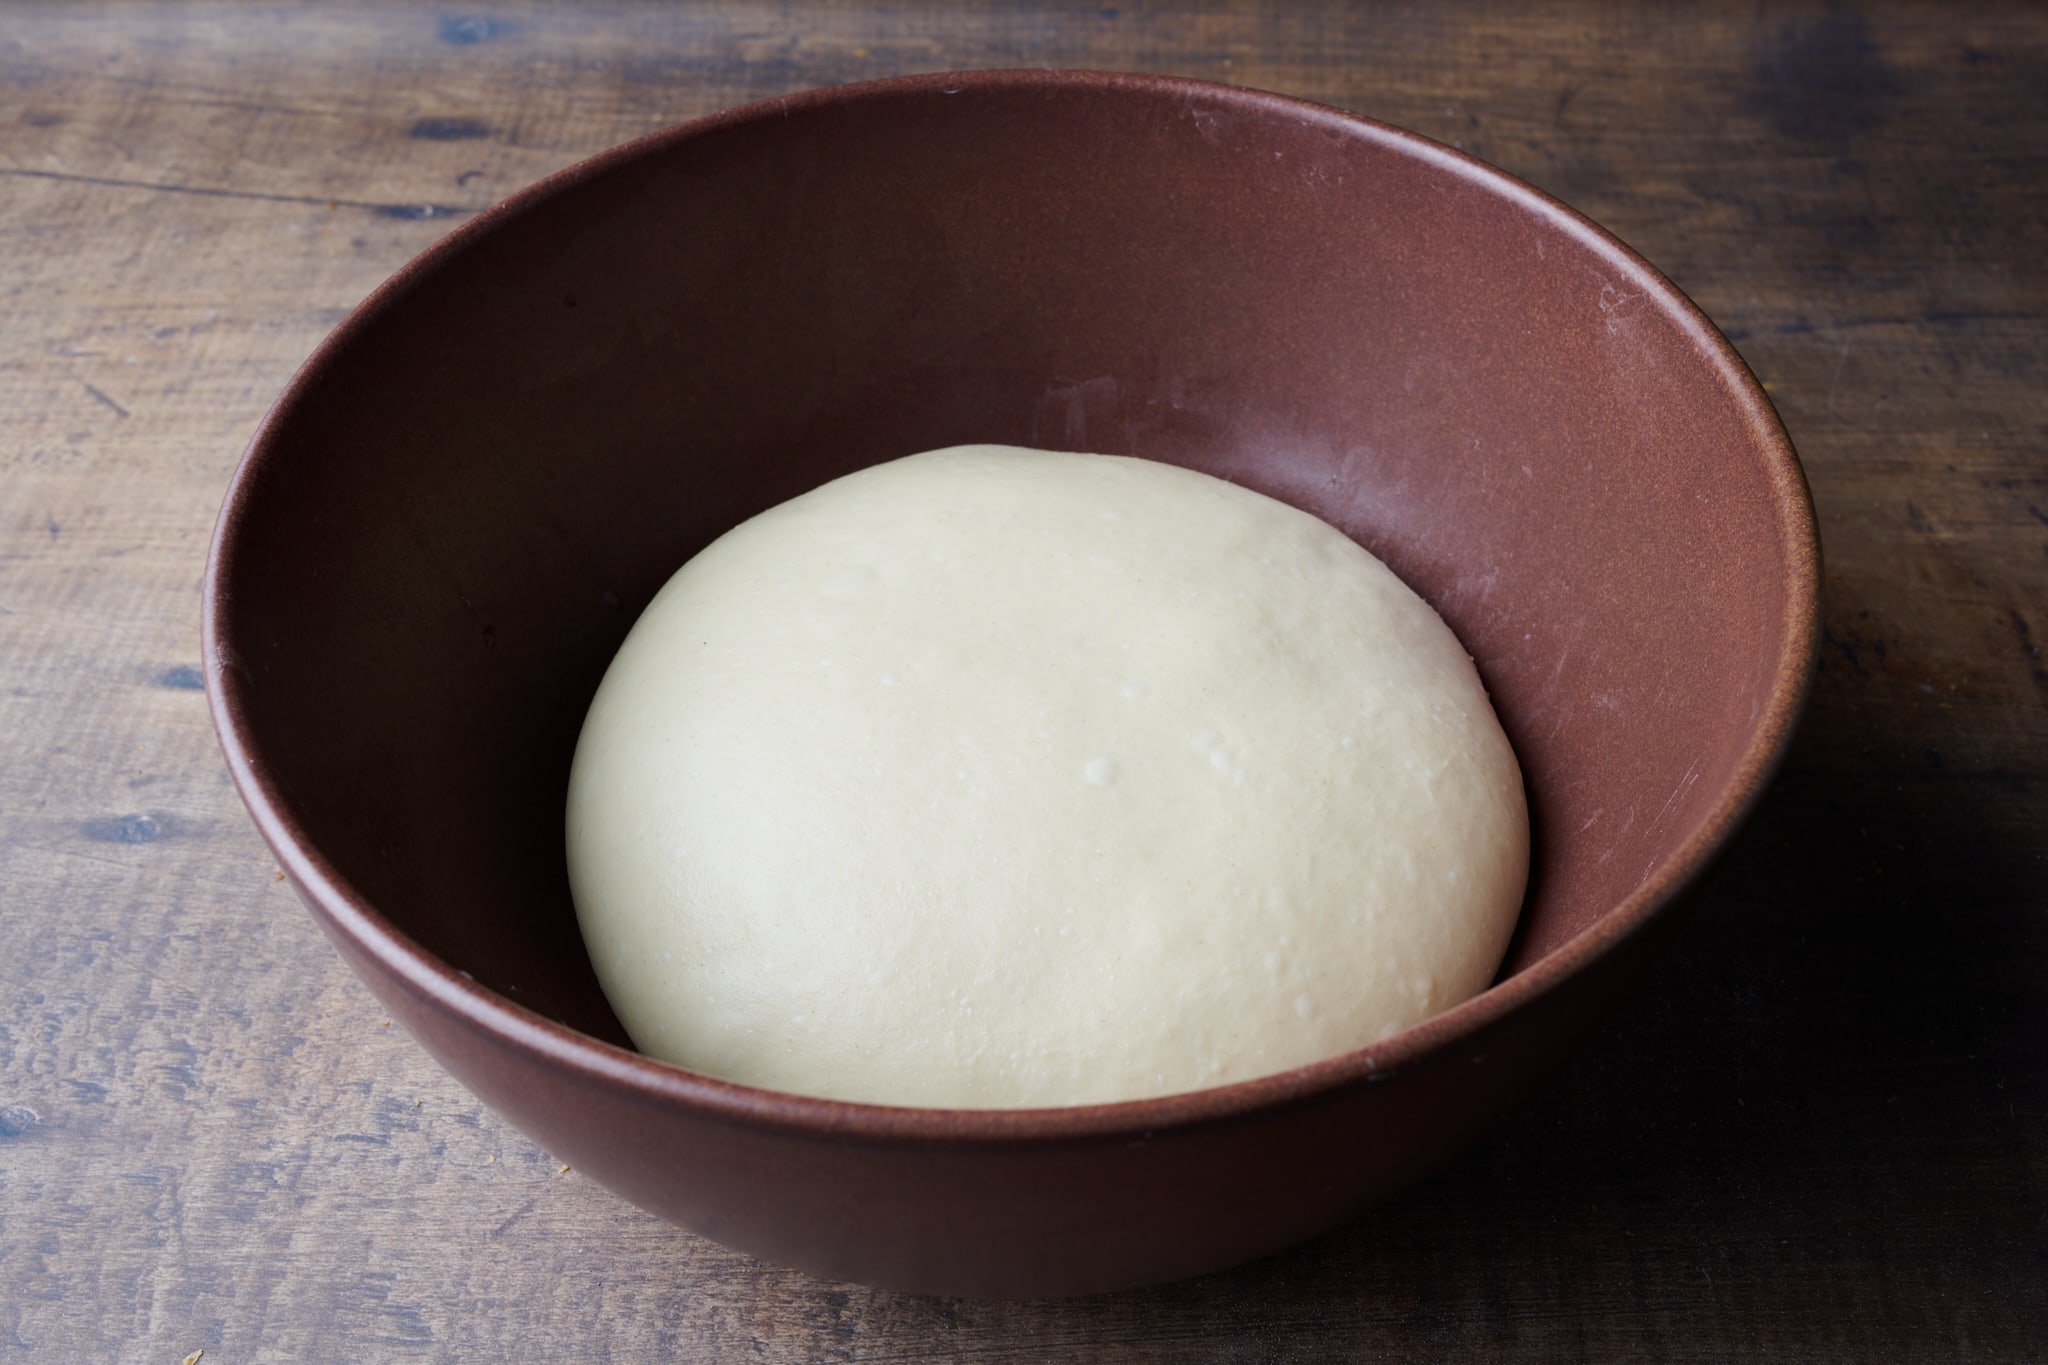
At a warm room temperature, 74-76°F (23-24°C), bulk fermentation should take about 4 hours. If your kitchen is cooler, place your bulk container in a small home dough proofer, or extend the bulk fermentation time to give the dough more time to ferment. The dough is ready when it is smooth, puffy, and well-risen.
Give this dough two strengthening sets at 30-minute intervals. The first set starts after 30 minutes from the start of bulk fermentation. Give the dough a series of stretches and folds for the first set. Wet your hands, grab one side, and stretch it up and over the dough to the other side. Next, rotate the bowl 180° and perform another stretch and fold (this forms a long rectangle in the bowl). Then, rotate the bowl 90° and do another stretch and fold. Finally, turn the bowl 180° and do one last stretch and fold. The dough should be neatly folded up in the bowl.
For the second set, which starts 30 minutes after the completion of the first set, scrape the dough onto a clean counter. With wet hands, perform a few slaps and folds until the dough tightens and smooths. Then, rotate the dough with a bench scraper to form a tight ball (similar to how you’d shape a boule). Finally, transfer the dough back to the bulk fermentation container, cover, and rest for the remainder of bulk fermentation.
4. Divide and shape – 1:30 p.m.
Grease a 9 x 4 x 4-inch Pullman pan with neutral oil.
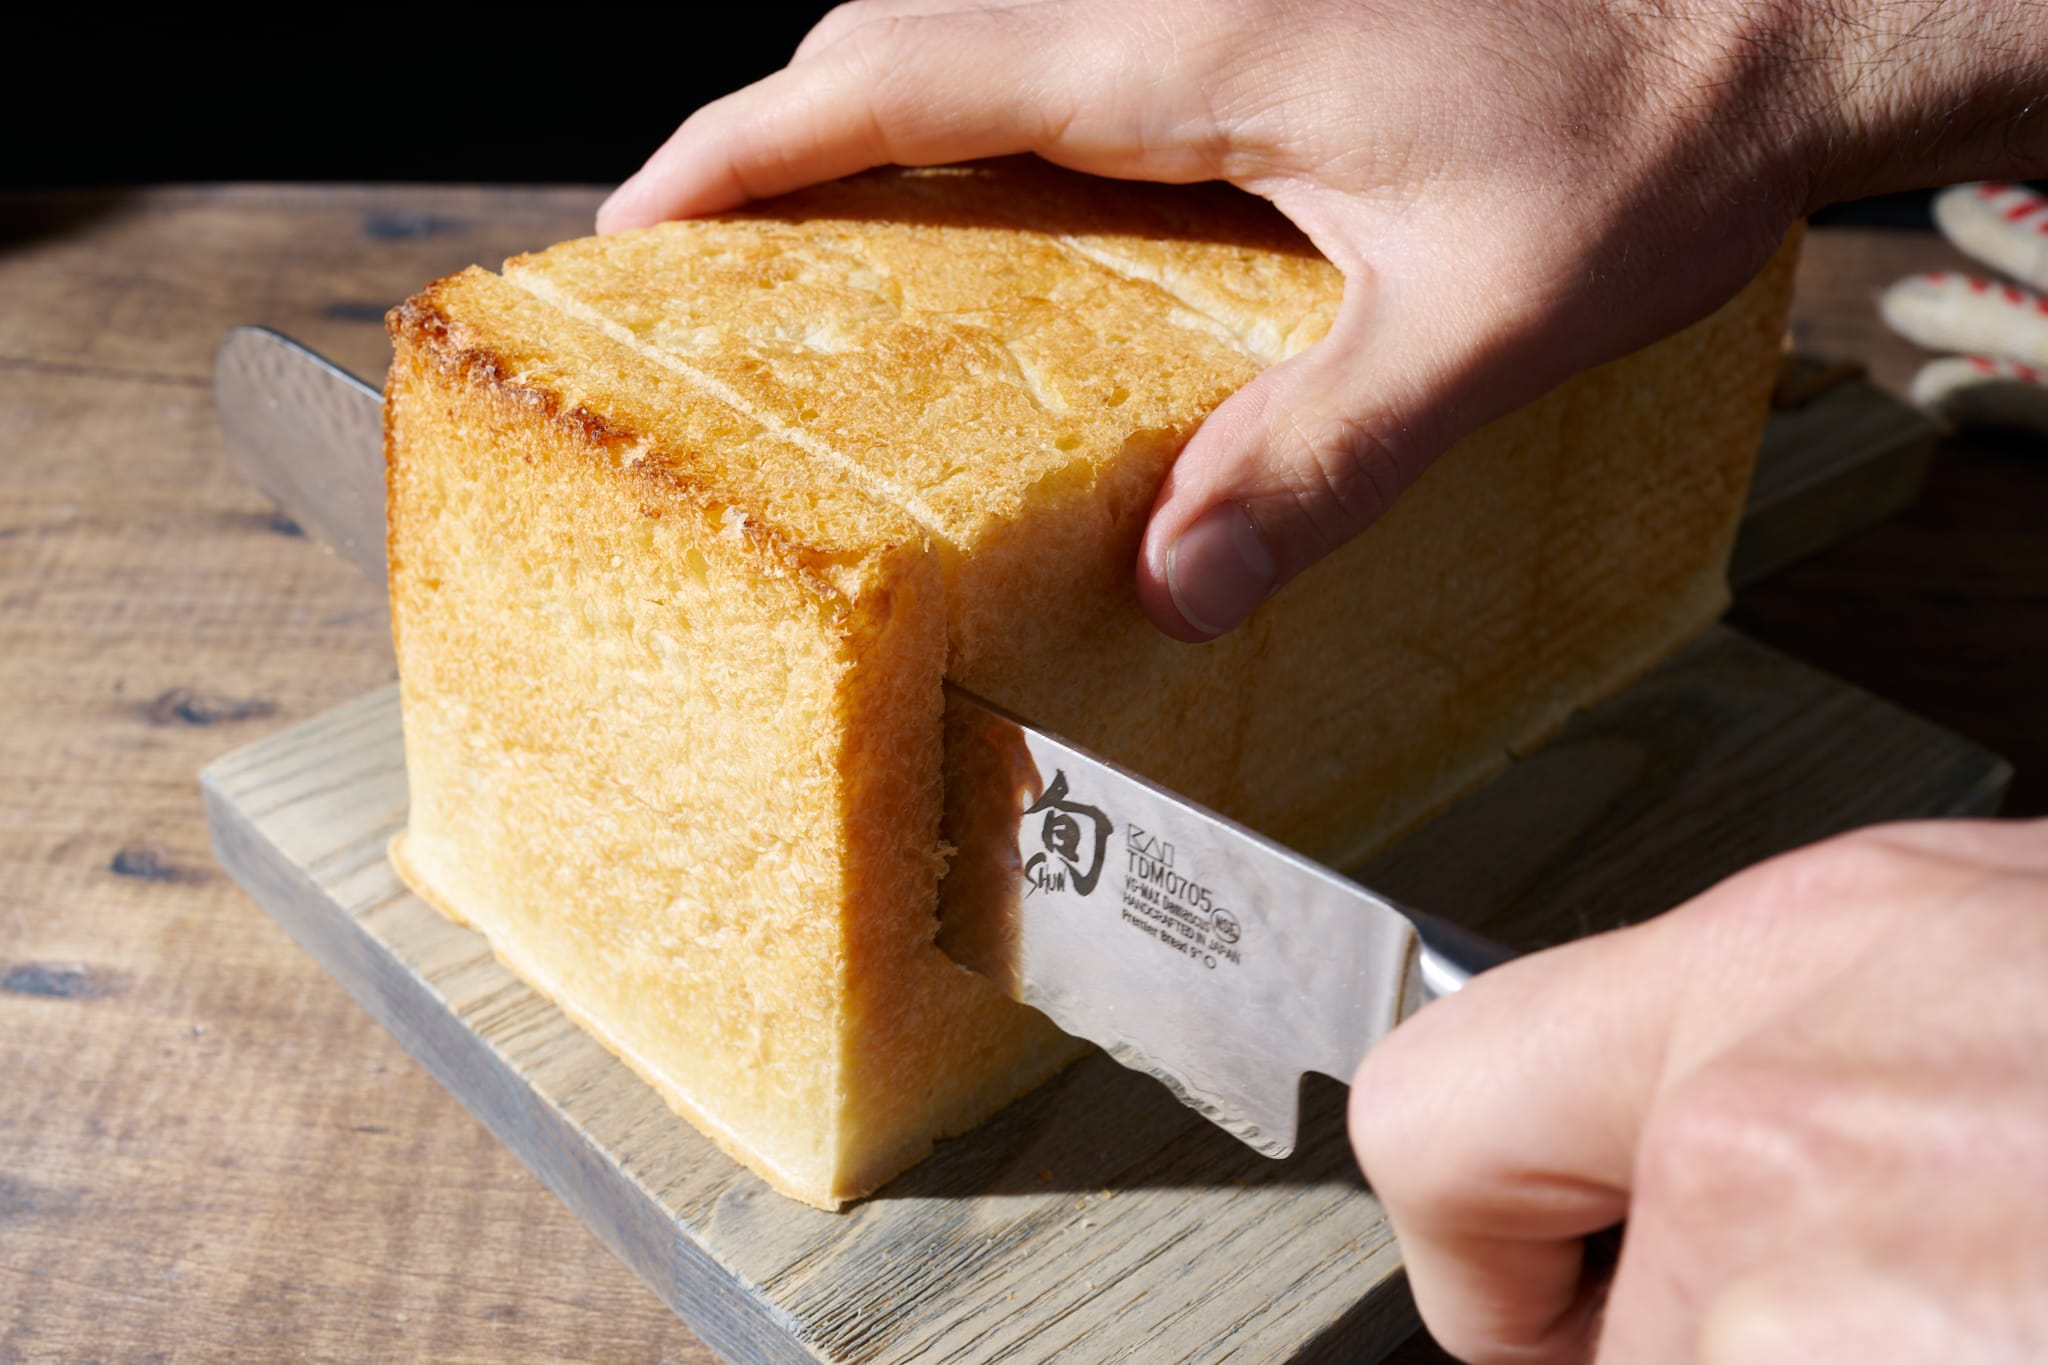
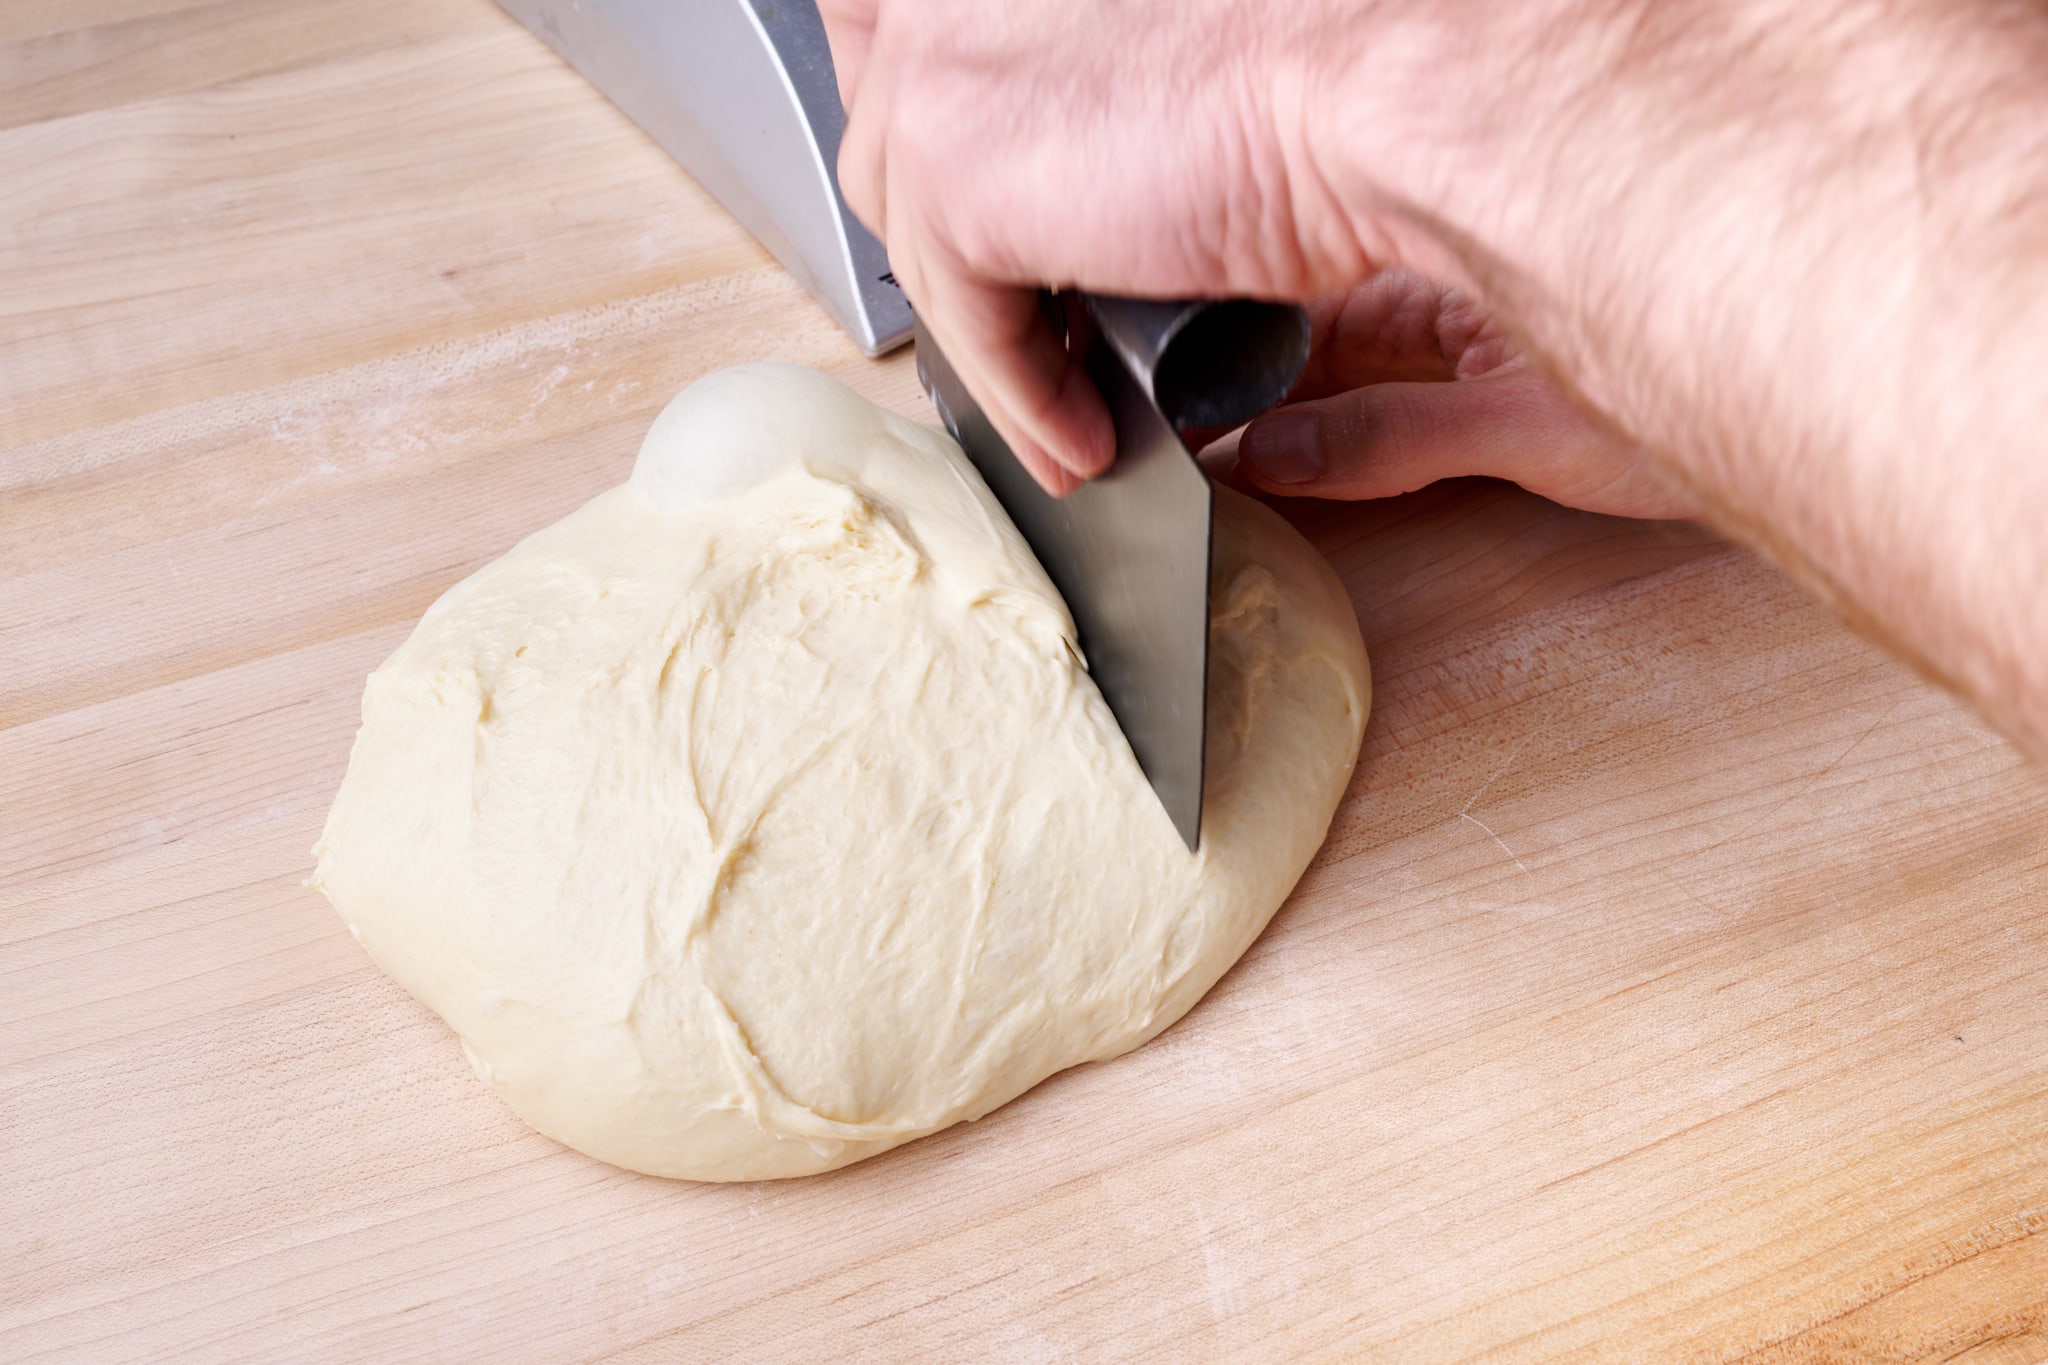
Fill a small bowl with water and place it next to your work surface. Scrape the dough onto a clean counter. Using a bench scraper in your dominant hand and other hand wet, divide the dough into three pieces, each weighing 200 grams (you will have a tiny bit of scrap leftover).
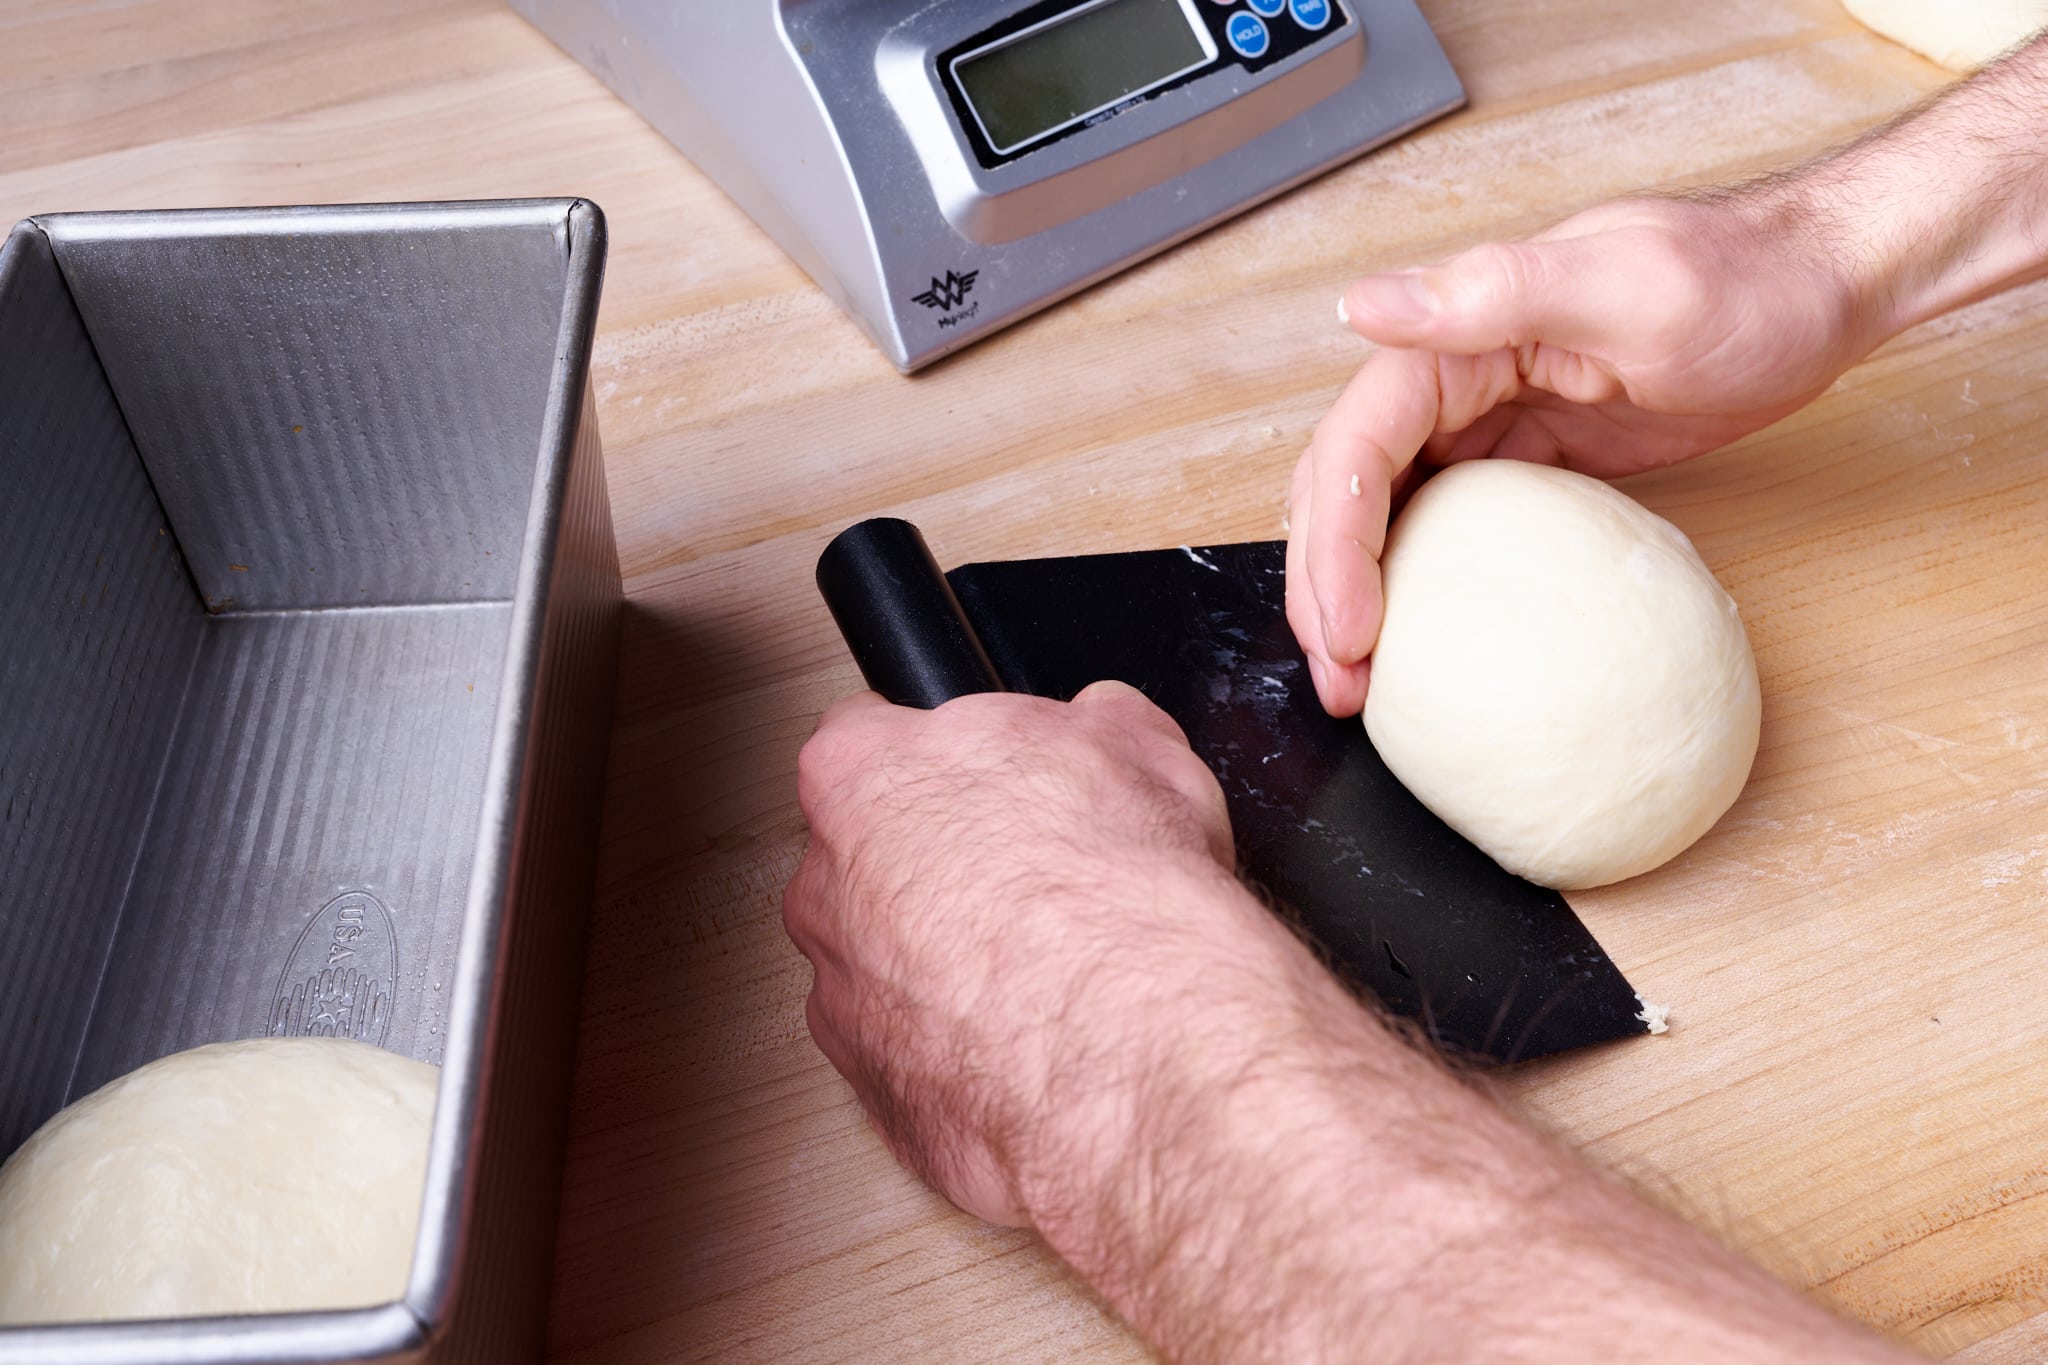
Then, shape each piece into a very taut round. As you shape each piece, place it into the Pullman pan, tucking it in tight so that each subsequent piece fits.
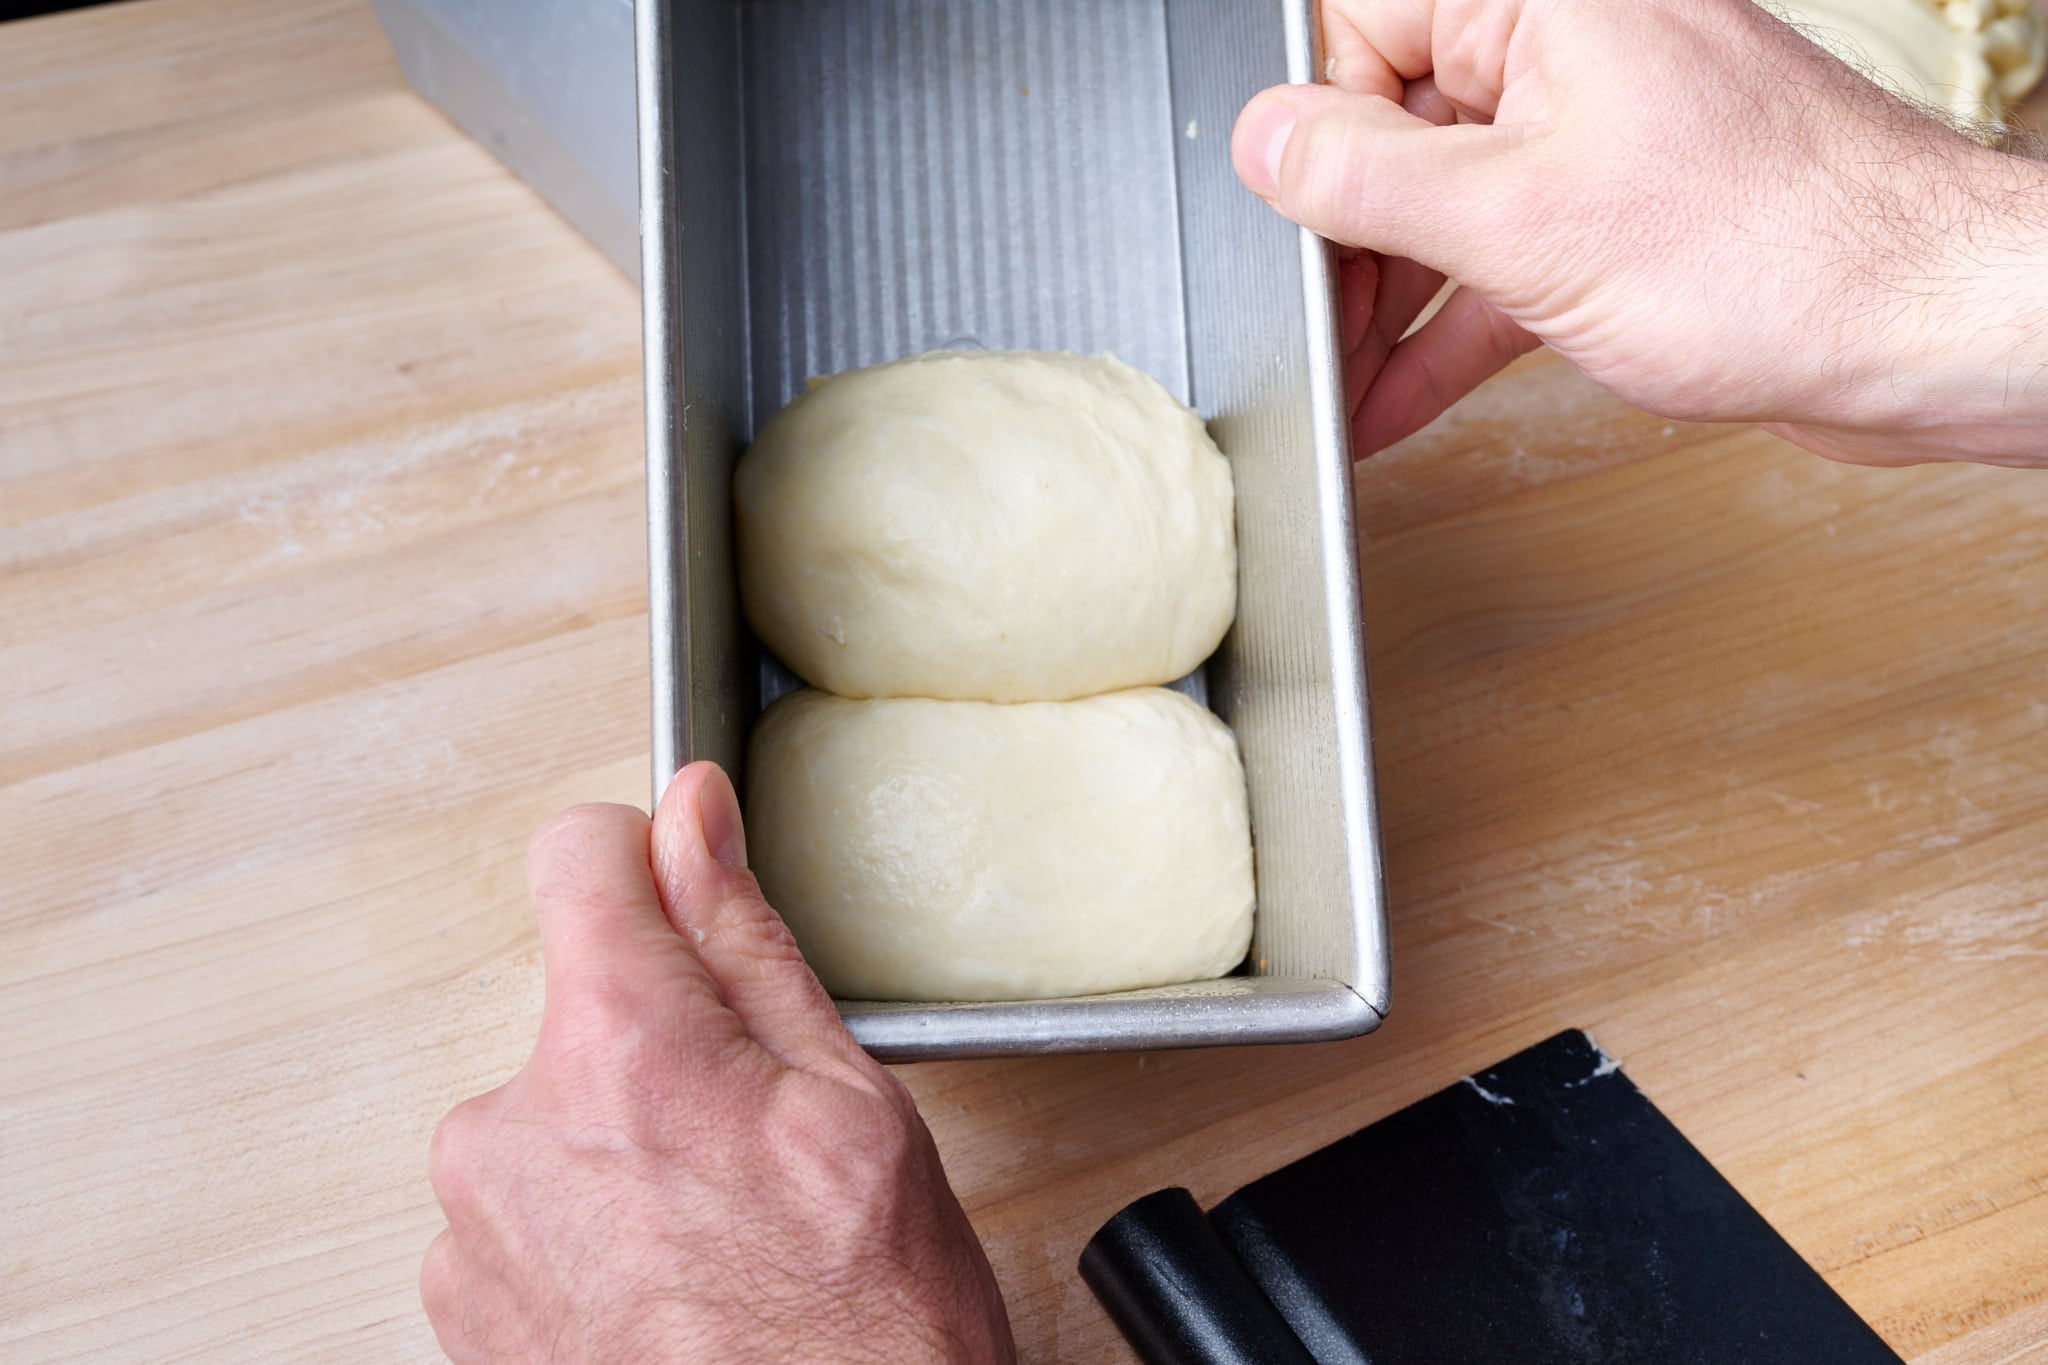
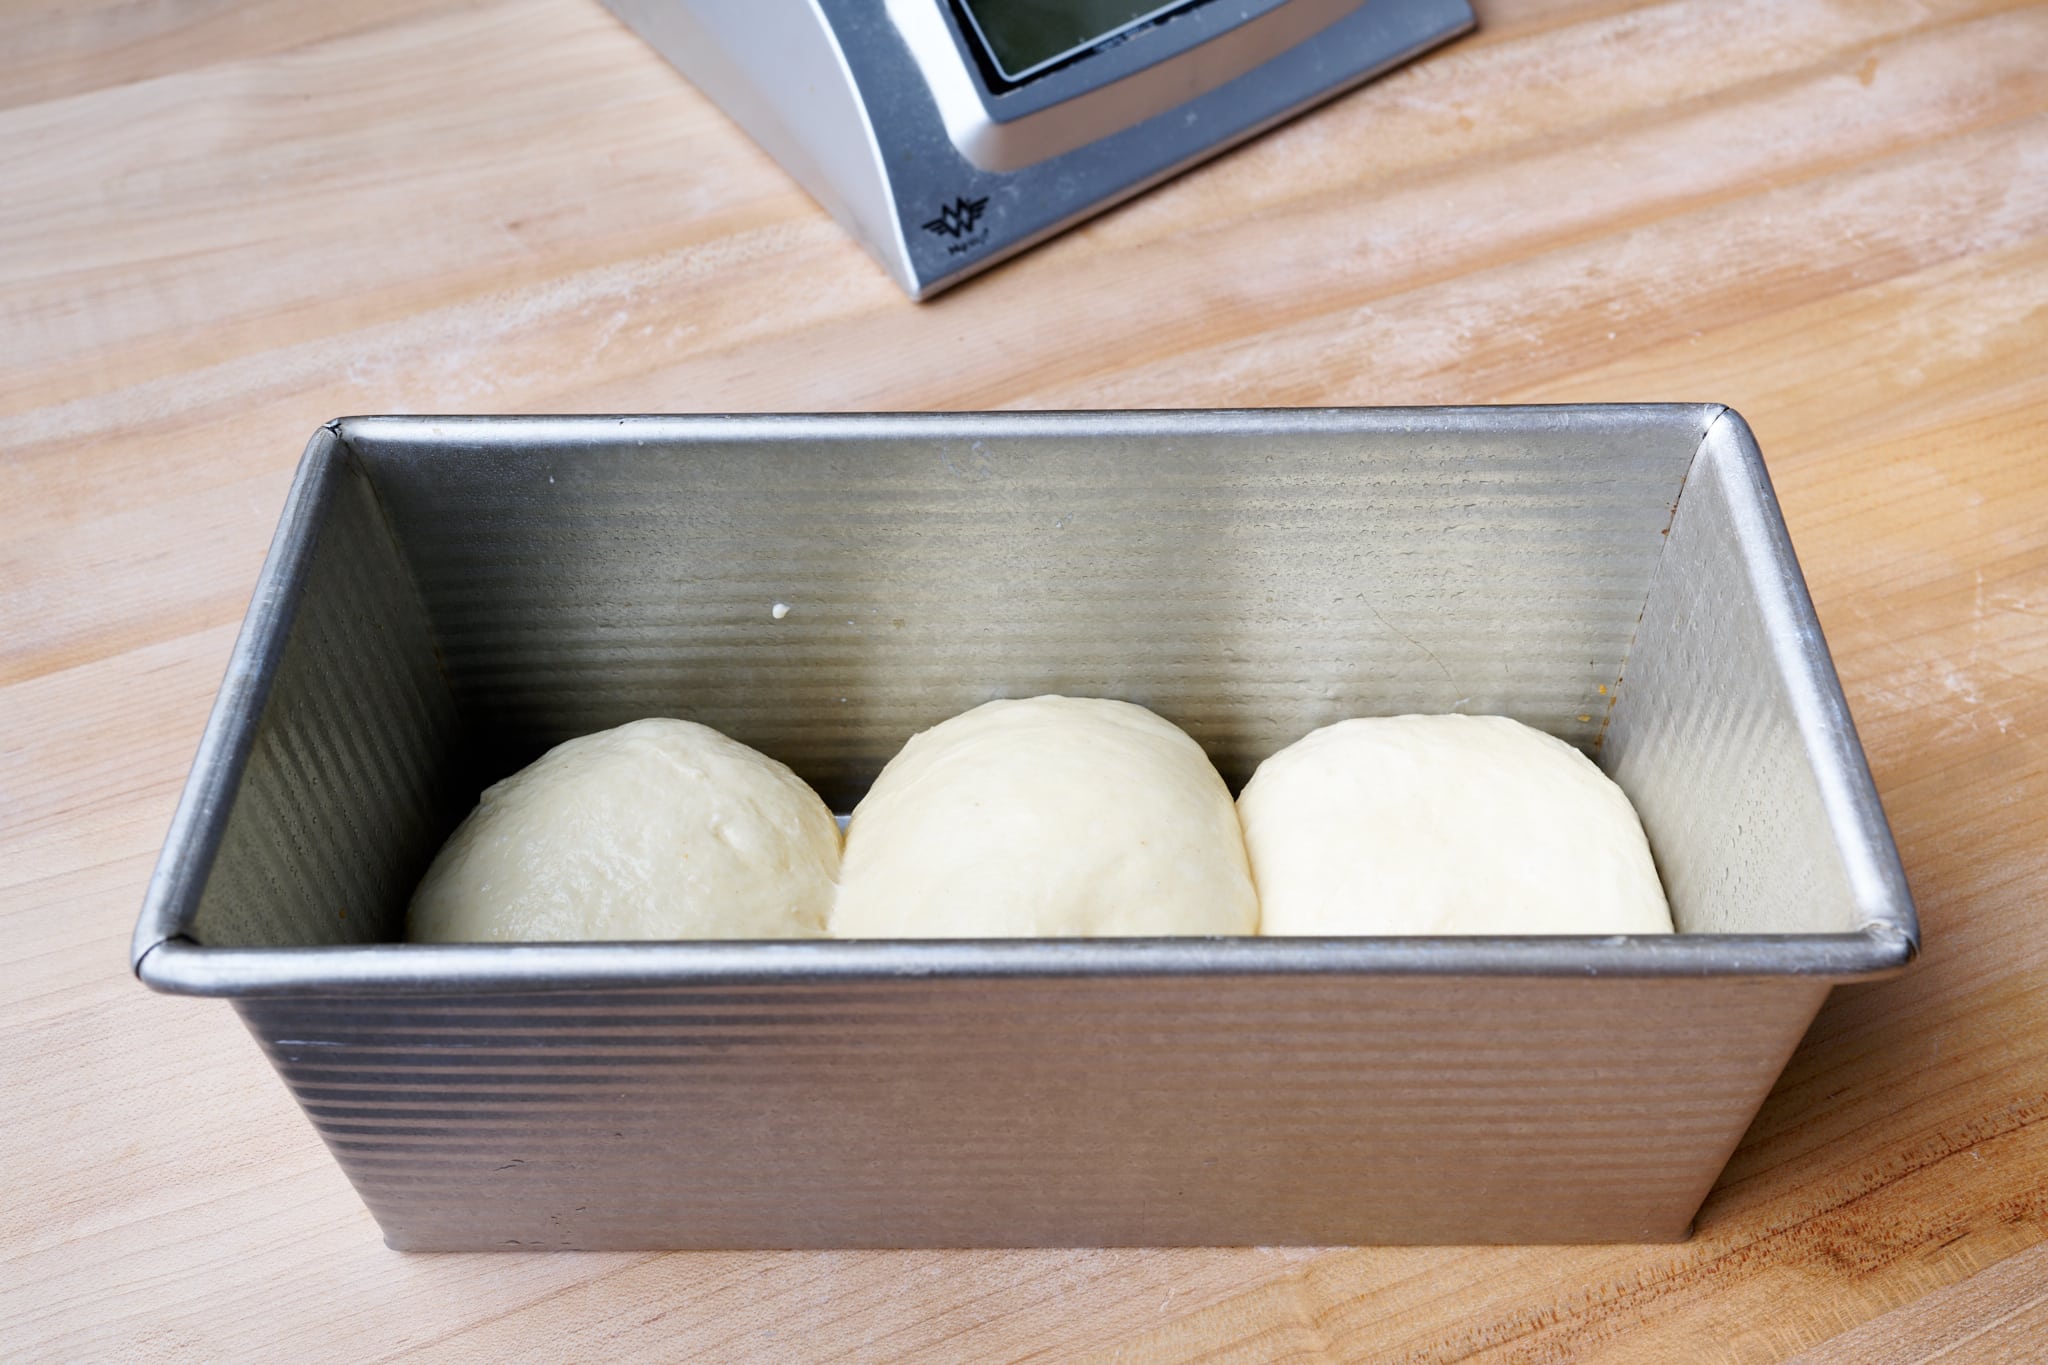
Cover the pan with a large, reusable plastic bag and seal.
5. Proof – 1:45 p.m. to 5:15 p.m.
At warm room temperature, 74-76°F (23-24°C), this dough should take 3 ½ hours to fully proof. If your kitchen is cooler, expect it to take longer.
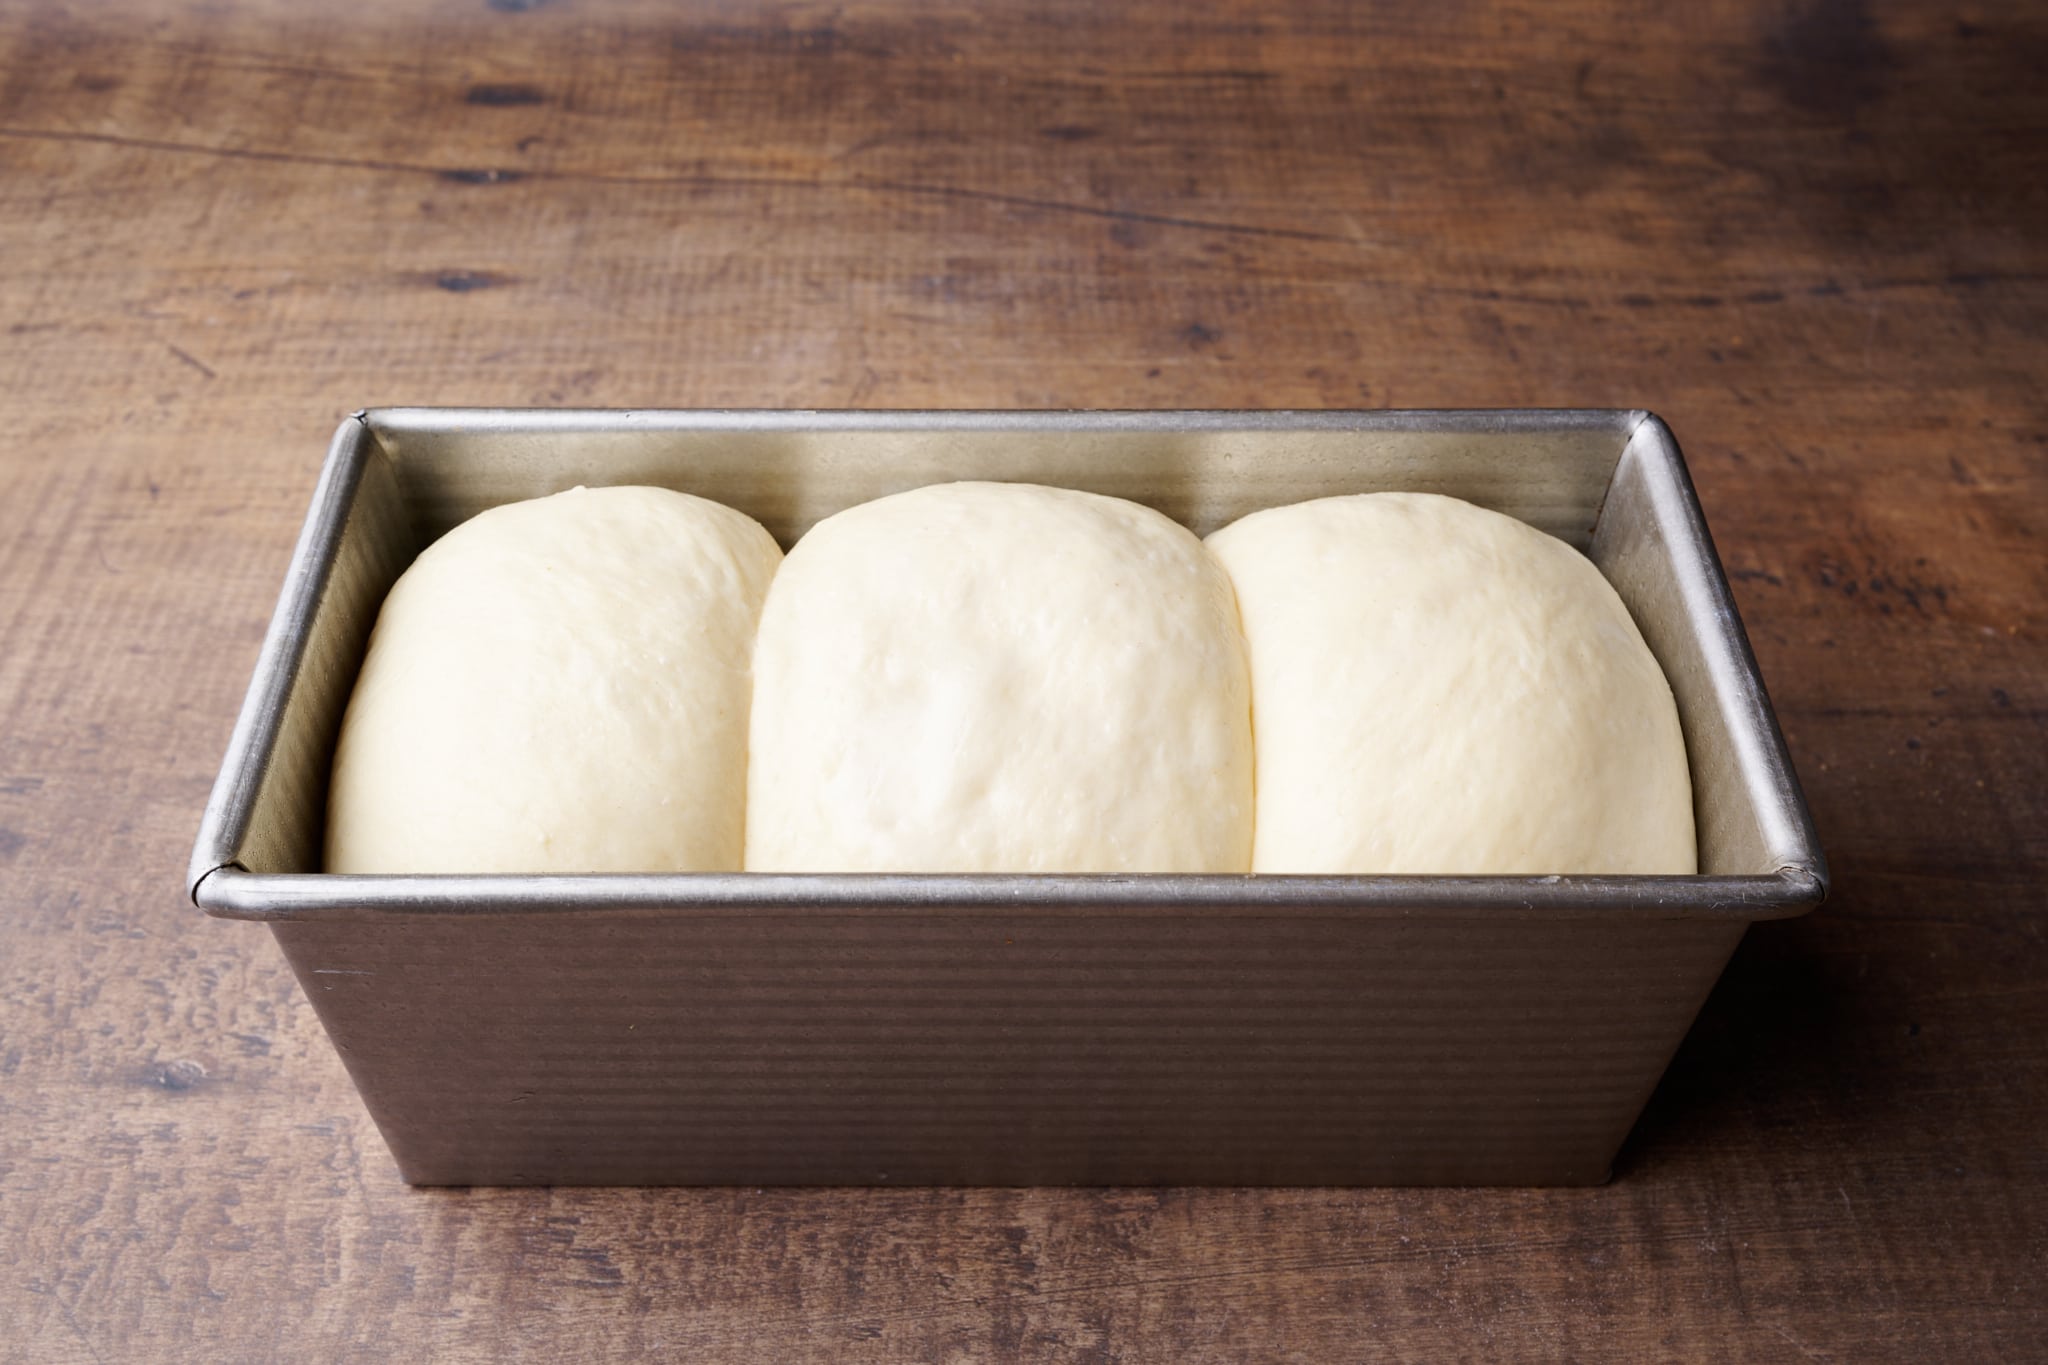
When fully proofed, the dough should rise almost to the rim of the Pullman pan.
6. Bake – 5:15 p.m.
This sourdough shokupan can be baked without the Pullman pan lid. With the lid on, no egg wash is necessary; just slide the lid into place and bake the loaf. The result will be bread with four completely straight sides. Alternatively, you can brush the top of the dough with an egg wash (which is a blended mixture of 1 whole egg and a splash of whole milk) just before baking, then leave the lid off. Wait until the oven is preheated to put the lid on or brush with egg wash.
Preheat the oven with a rack in the bottom-third to 350°F (175°C).
Place the pan into the oven and bake for 30-40 minutes. Then, take the pan out of the oven and carefully remove the lid. The crust should be a light golden brown and the loaf should have an internal temperature of around 200°F (93°C). If the temperature is lower, slide the cover back on, return the pan to the oven, and bake for 5 minutes longer. Then, check the internal temperature again.
Remove the pan from the oven, uncover, and let the loaf rest in the pan for 10 minutes. Then, turn the loaf out onto a wire rack and let cool completely (I prefer to let it cool overnight).
This sourdough shokupan will stay soft and moist for up to a week if the bread is stored properly.
Print
Sourdough Shokupan (Japanese Milk Bread)
- Prep Time: 8 hours
- Cook Time: 30 minutes
- Total Time: 8 hours 30 minutes
- Yield: 1 loaf
Description
A Japanese-style bread with an incredibly thin, aromatic crust and super-soft interior. Perfect for sandwiches, toast, and pizza toast (yes, pizza toast). This naturally leavened bread has very subtle sour notes with a buttery finish and is as delicious as it is golden in color.
Ingredients
Levain
- 34g high-protein white flour (King Arthur Baking Bread Flour)
- 7g superfine sugar
- 34g water
- 13g ripe sourdough starter, 100% hydration
Tangzhong
- 31g high-protein white flour
- 122g whole milk
Main Dough
- 241g high-protein white flour
- 79g whole milk
- 50g egg (about one medium)
- 49g unsalted butter, at room temperature
- 15g superfine sugar
- 6g salt
- 87g ripe levain
Topping
- If not using the Pullman pan lid, one whole egg and splash of whole milk for egg wash
Instructions
- Levain (9:00 p.m.)
In a medium jar mix together the Levain ingredients. Cover the jar and keep it at a warm temperature overnight. - Make the tangzhong (8:00 a.m. the next day)
In a medium saucepan, add the flour and milk. Turn the heat to medium-low and cook, whisking continuously, until the mixture thickens and becomes like a paste, about 3-4 minutes. Let cool before mixing with other ingredients. - Mix (9:00 am)
To the bowl of a stand mixer fitted with the paddle attachment, add the flour, milk, egg, sugar, salt, ripe levain, and tangzhong. Mix on low speed for 1 to 2 minutes until the ingredients come together and no dry bits remain. Next, switch to the dough hook attachment and mix on medium speed for 4 to 5 minutes until the dough smooths and begins to cling slightly to the hook. Let the dough rest in the bowl for 10 minutes. Turn the mixer on low speed and mix for 2 to 4 minutes until the dough gains more strength and begins to cling once again to the dough hook. Next, with the mixer running, add the room temperature butter, one pat at a time (dding all the butter will take 5 to 8 minutes). Transfer the dough to a bulk fermentation container and cover.
-
Bulk Fermentation (9:30 a.m. to 1:30 p.m.)
This dough will need 2 sets of stretches and folds during bulk fermentation where the first set starts after 30 minutes into bulk fermentation and the subsequent set is 30-minutes later. For the second set, I like to do a few light slap and folds on the counter to finish strengthening the dough. After the second set of stretches and folds, let the dough rest, covered, for the remainder of bulk fermentation.
- Divide and shape (1:30 p.m.)
Grease a 9 x 4 x 4 Pullman pan with neutral oil. Using a bench scraper in your dominant hand and other hand wet, divide the dough into three pieces, each weighing 200 grams (you will have a tiny bit of scrap leftover). Then, shape each piece into a very taut round. As you shape each piece, place it into the Pullman pan, tucking it in tight so each subsequent piece fits. Cover the pan with a reusable plastic bag and seal. - Warm Proof (1:45 p.m. to 5:15 p.m.)
Let the dough proof at warm temperature for about 3 1/2 hours until the dough rises just to the rim of the Pullman pan. - Bake (5:15 p.m.)
Preheat your oven to 350°F (175°C). Slide the lid of the Pullman pan on and bake for 30-40 minutes. Then, take the pan out of the oven and carefully remove the lid. The crust should be a light golden brown and have an internal temperature of around 200°F (93°C). If the temperature is lower, slide the cover back on and return the pan to the oven to bake for 5 minutes longer, and check again. Once baked, remove the pan from the oven, uncover, and let the loaf rest in the pan for 10 minutes. Then, turn the loaf out to a wire rack to cool completely (I prefer to let the loaf cool overnight).
Notes
- To make this sourdough shokupan vegan, use a butter alternative and nut milk in place of the dairy.
Sourdough shokupan (Japanese milk bread) Frequently Asked Questions
Can I proof this shokupan dough overnight in the refrigerator?
Yes, but know that the flavor might be slightly sourer given the longer proof time. Here’s how to do it: When you have finished shaping the dough and it’s in the Pullman pan, cover the pan with a large plastic bag, seal, and place in the refrigerator overnight. The next day, remove the pan from the fridge and let the dough finish proofing on the counter until it’s risen to the rim of the pan, 4 to 5 hours.
Can I make this sourdough shokupan without a stand mixer?
Yes, but given the added egg, butter, and sugar, I prefer using a stand mixer to develop the dough efficiently. If mixing by hand, hold back the butter and use the slap and fold technique to significantly strengthen the dough before massaging the room-temperature butter into the dough.
Can I use nut milk instead of dairy milk and make this Japanese milk bread vegan?
Yes, you absolutely can. See my guide to tangzhong and yudane for more on why this works.
Can I bake this without a Pullman pan?
Yes! If you don’t have a Pullman pan or pan with a lid, use a standard loaf pan (9 x 5 x 2.75-inches) instead. Then whisk together an egg wash (beat together 1 whole egg and a splash of whole milk) and gently brush the top of the dough with the wash before baking.
Can I use all-purpose flour instead of bread flour for this milk bread recipe?
All-purpose flour will work, but you may want to hold back 10-20 grams of the milk during mixing, only adding it in at the end if the dough feels cohesive and strong.
What’s next?
While there’s no denying this sourdough shokupan is delicious, sometimes a more wholesome bread hits the spot: look at my honey whole wheat pan loaf that also uses pre-cooked flour for extra tenderness.


163 Comments
First time making this after getting a Pullman pan for a gift. I only had salted butter so just reduced the salt by a couple grams. Kitchen was cold so it took a full 5 hours for the warm proof. Turned out PERFECT. So tender and delicious. My kids new fav for sandwich bread! Thanks, Maurizio!
Great adjustments there, Lisa! Enjoy 🙂
Can I use just starter instead of levain…?
could I add 5 g of vital gluten for each cup of APF to make bread flour for this recipe?
Will this freeze well? I feel like we can go through this loaf way too fast, I’m going to need more on hand!! It came out amaaazing
This recipe is a keeper. I doubled it and made one a garlic butter pull-apart loaf. I cold fermented the other and baked it the next day. Both were exceptional. I've made other shokupan with the more involved shaping process. This was so much more simple for achieving a great result.
Wet and sticky dough issue- it was my fault- my solution was to oil dough and do the slap and fold a few more times. Finally the dough is holding shape and I am baking at 3am…
Here I am, at 2:40am baking my loaf in my cold kitchen because it took that long for it to rise nearly to the top of my loaf pan. My dough was too wet and sticky at first (due to using AP flour from KAF and also I do not have the kitchen space or money for a dough mixer- I also have a small child and couldn't follow all the directions too carefully so I missed withholding the few g of water). I'm still a rookie sourdough baker, and maybe I'm doing the wrong things still but here is how I troubleshooted my sticky too wet dough- I found that the only way I was able to handle the dough was lightly oiling it (kind of like pizza dough) and then doing some extra rounds of slap and folds until the dough finally started to hold a bit of shape. I thought this might be ok to use oil since you had to grease the loaf pan anyway. My dough was too wet to keep wetting my hands and shaping. Adding flour made it stickier and I didn't want to mess the ratio too much. I hope also this doesn't make my bread taste weird… I guess I'll find out tomorrow.
So oiling the wet sticky dough and doing some slap folds actually worked. The bread is delicious. I should have made more… Now I need to time this better so that I don’t end up baking at 3am again.
I made this yesterday – it’s so soft and delicious but for me it’s slightly too sweet. If I left out the sugar would it still work?
the directions call for baking at 350 for 45 minutes. The summary of recipe refers to 30 min baking time.
I baked the loaf for 45 min. at 350 in a calibrated oven in a light color pan and the loaf is quite dark.
next time I will check after 30 minutes. did anyone else experience similar problem?
Sorry about that, Ale. It should be 30m!
I'm not sure this ever got updated – is it possible to update the recipe? I've just made this for the first time and done 45 mins
Wondering the same. Did 45 minutes work out for you?
Yeah but it feels a little overdone, quite a brown and crunchy crust, but still perfectly edible!
Can I forgo the egg in this recipe? If so, should I add extra liquid in lieu of it? Also, are the baking instructions the same for baking without the top?
I would swap out for a vegan egg (like a flax egg)!
You want to use your starter when it's ripe to make the levain, then the levain when it's ripe to mix into the dough. Here's what I look for in a ripe starter (and levain):
https://www.theperfectloaf.com/how-do-i-feed-my-sourdough-starter/
This is my new favorite sandwich bread recipe! I doubled the batch last time and will probably continue doing that. Rises beautifully everytime, nice soft texture and the flavor is slightly buttery, win win win in my book!
So glad to hear that, James! Enjoy 🙂
How do we make this taste a tad sweeter to counter the overnight proofing method? How much extra sugar can we safely add??
It's hard to say without testing… I'd say try increasing it by 2% to total flour to start.
Thank you for pointing me in the right direction. I loved the recipe and nailed it on the first try, so I will test this and report the tasting differences. At 20h overnight proof I tasted the extreme of extremes!!! I will now try 8h overnight to taste the difference, and then 8h overnight +2% sugar.
How did the experiment go?
Could I make this into rolls?
I’m Here for the same question. Did you manage to turn it into rolls?
Yes, bread doughs are often very forgiving and allow you to shape into different designs. Times will vary from instructions of course.
-Use poke test to make sure rolls have risen enough.
-Use internal temperature check for doneness or look underneath for golden brown color
The rolls recipe from this website is very good too this so maybe you can try that first!
See my reply above, Ahmed!
This is very soft dough, but yes, you could. However, check out my milk bread (shokupan) rolls recipe !
Good morning! I have an 8x4x4 pullman pan. How would I adjust the recipe for this? I have no clue. Help?
You could put in about 100g less dough into that pan and do a test bake!
I am planning to start this tonight and have a USA loaf pan but not the Pullman version. I have been very successful using the loaf pan inside my cast iron dutch oven with the standard Perfect Loaf sourdough recipe.
One Question – should I put this in my Dutch oven when baking it since I don’t have the Pullman version of the pan?
I used the Dutch Oven with lid on for 20 minutes and then took it off. Used the recommended egg wash. Probably the best loaf of bread I have ever made.
Woo hooo!!
What size Pullman pan did you use to use lid with it
He lists the precise pan and has links here……….. https://www.theperfectloaf.com/guides/shaping-a-pan-loaf/
Turned out great on my first attempt. Everyone finished the loaf 15 minutes out of the oven 🤫. Soooo warm soft and moist like a pillow. But because I cold proofed it for 20h it came out more sour than we expected or wanted. Nothing a bit of jam can’t resolve. And In fact, I’ve never had sourdough anything taste this sour!!! How do I modify the recipe so that it taste more sweet and milky, if cold proofing?? Can I just double or triple the sugar content??
Hi! I believe I got this from Tartine Bread, but it is thought that if you have a young sourdough starter when baking bread, it will have a more mild flavor. I bake once a week and keep the starter refrigerated in between. On bread mixing days in the morning, I discard most of it and leave about two table spoons (some small amount) to feed with about 20g of water and 20g of bread flour. I then use this starter when it has doubled in size for the levain. From experience, the dough also seems stronger in the final bake giving it nice holes and perfect shape. It is an extra step, but it helps!
An offshoot starter, or levain in your case, is still coming from a mature starter, so I don't think it'll make a difference here. I often discard my starter down to one spoon anyways when I feed – same as taking one spoon out and starting a new batch. The question is how do we get more sugar into this recipe? Traditionally there is decent amount of sugar and condensed milk in the recipes.
Can I double the recipe and use a longer Pullman? Or would that impact the outcome?
Hello Maurizio, I have tried doing this bread today, started my levain the night before, did everything according to your recipe, but no it was a disaster I had to add at least 400 grams more of the flour to your recipe where it says only to add 241 grams way to wet, so very disappointed.
This will be the 2nd recipe I’ve tried to make. And already the dough was extremely unmanageable. Not enough flour for all that liquid. I am well beyond the 3-5 hour mark for the rise. I am well beyond 7 hours of bulk ferment, and there is no sign of this growing and I used very active starter. I’ll be back to give the 2nd half of my review. But so far this is a dud recipe.
Dough is very shaggy. Using CM Artisan bread flour.
Hi Maurizio! I want to get rid of the egg in my main dough – how would I adjust the ingredients? or can I just nix the egg and keep all the rest the same amounts?
Hi Maurizio! I want to get rid of the egg in the dough – what would I replace it with? more liquid?
Hello again, Maurizio!
This is yet another recipe from your website that makes me feel deliriously happy! Previous to this one, I had made all of your sandwich bread recipes with success. However, my 9-year-old son told me that peanut butter and jelly doesn’t belong on bread that has whole wheat in it, and that store-bought bread was better because it is fluffy. I lectured him on all of the virtues of your other classic sandwich bread recipes, and then I proceeded to prove to him that homemade sourdough sandwich bread can beat store-bought bread hands down–even in the fluffiness department (thanks to this amazing shokupan recipe)! Now I’ve got to figure out how to make whole wheat bread this fluffy…
My slap and folds weren’t as pretty as yours, but the final loaf looks perfect and tastes even better.
hai, i’d like to ask abaout cold retard for this shokupan, is it okey, if i have at least 48 hours cold retard in the refrigerator?
Made this today using Central Milling Old World Bread Flour type 80. Beautiful crumb, perfect rise, and delicious!! Doubled the recipe and used a 13 x 4 x4 Pullman pan. The one thing I messed up in the recipe, was I added the butter with my sourdough levain, milk, flour etc. Oops. If I added it as the recipe states, what would the difference have been? This was pretty perfect as it is.
I like the efforts you have put in this, regards for all the great content.
I’m not sure what I’m doing wrong, if anything, but this dough is SO sticky. I can’t get it to strengthen at all.
I started the Pain de mie recipe at the same time, and that ones almost done the bulk fermentation but so far it looks and feels good.
Every other shokupan recipe I’ve looked at, the dough looks much more stiff and smooth than mine does. I’m just wondering if there’s any saving it at this point.
This is the most delicious and softest bread I’ve ever made and eaten. The past several times I’ve made it, I made my tangzhong thick like tomato paste, and then realized from a YouTube video that that was too thick. Now realizing it just needs to be a cake batter like consistency this bread is even more soft and amazing. It was already delicious with my prior fluke. At any rate, if I had to make one sourdough bread the rest of my life it would be this one. I have it printed and also written on a post it note taped to my kitchen wall (where all the grand recipes goes). Thank you Maurizio for a splendid recipe!
Amazing, Kathryn! So glad you like this one. I agree with you, it ranks up there as one of my favorite breads of all time… Enjoy!
Hi! Do I bake for the same time without a pullman loaf?
Yes, should be similar time with a different pan, though do keep an eye near the end!
Thank you! Turned out great – beautifully soft & fluffy! 🙌🏼
My Pullman loaf pan is 13 x 4, instead of the 9 x 4 in this recipe. How would you adjust the recipe for the larger pan? Just increase everything proportionally (I believe the volume of mine is about 1/3 larger), or some other adjustment? Thanks.
Yes, increase proportionally. Usually, I find about 1300g fits perfect in that pan.
Hey Maurizio! What are your thoughts on converting this formula to using a stiff starter? I’m looking to cut back on some of the overall sourness for this particular loaf- would you recommend the same percentage of starter if I were to try a stiff starter?
A stiff starter with all white flour would work really well.
Thank you for this recipe and the pain de mie. I love them all.
My only observation is that if you don’t cook the tanzhong to a thick paste, you might have more water than you want.
I am Asian and I remember this bread is a little sweeter, so some might need to add a little more sugar.
I love the pain de mie with the honey instead of sugar. So may be next time I tried that. My grand daughters love these and I love to bake sour dough bread.
Thanks.
Great suggestions, Kim!
The bread comes out beautiful but when it’s time to toast it and spread something on it the bread just breaks as gentle as I am i don’t know how to fix this.
I also happens with your pain de mie recipe and most sandwich bread recipes. The only one that has not problem are those regular boules. My flour is regular but I adjust the liquid accordingly. Any advice?
A reduction in water in the dough might help with this!