The Perfect Loaf
Best Honey Whole Wheat Bread Recipe

The Best Honey Whole Wheat Bread Recipe

Post might include affiliate links. See policy.

This half-whole-grain sourdough pan loaf ranks as one of the softest and tastiest I’ve concocted. I might sound a bit highfalutin, and generally, I’m not a fan of unnecessary superlatives. But there comes a time when you finally nail something you’ve been working on for a long while, and all the adjectives are earned. I think the title of “the best honey whole wheat bread recipe” could do with a few more adjectives thrown in–it’s that good–but I’ll keep it right there.

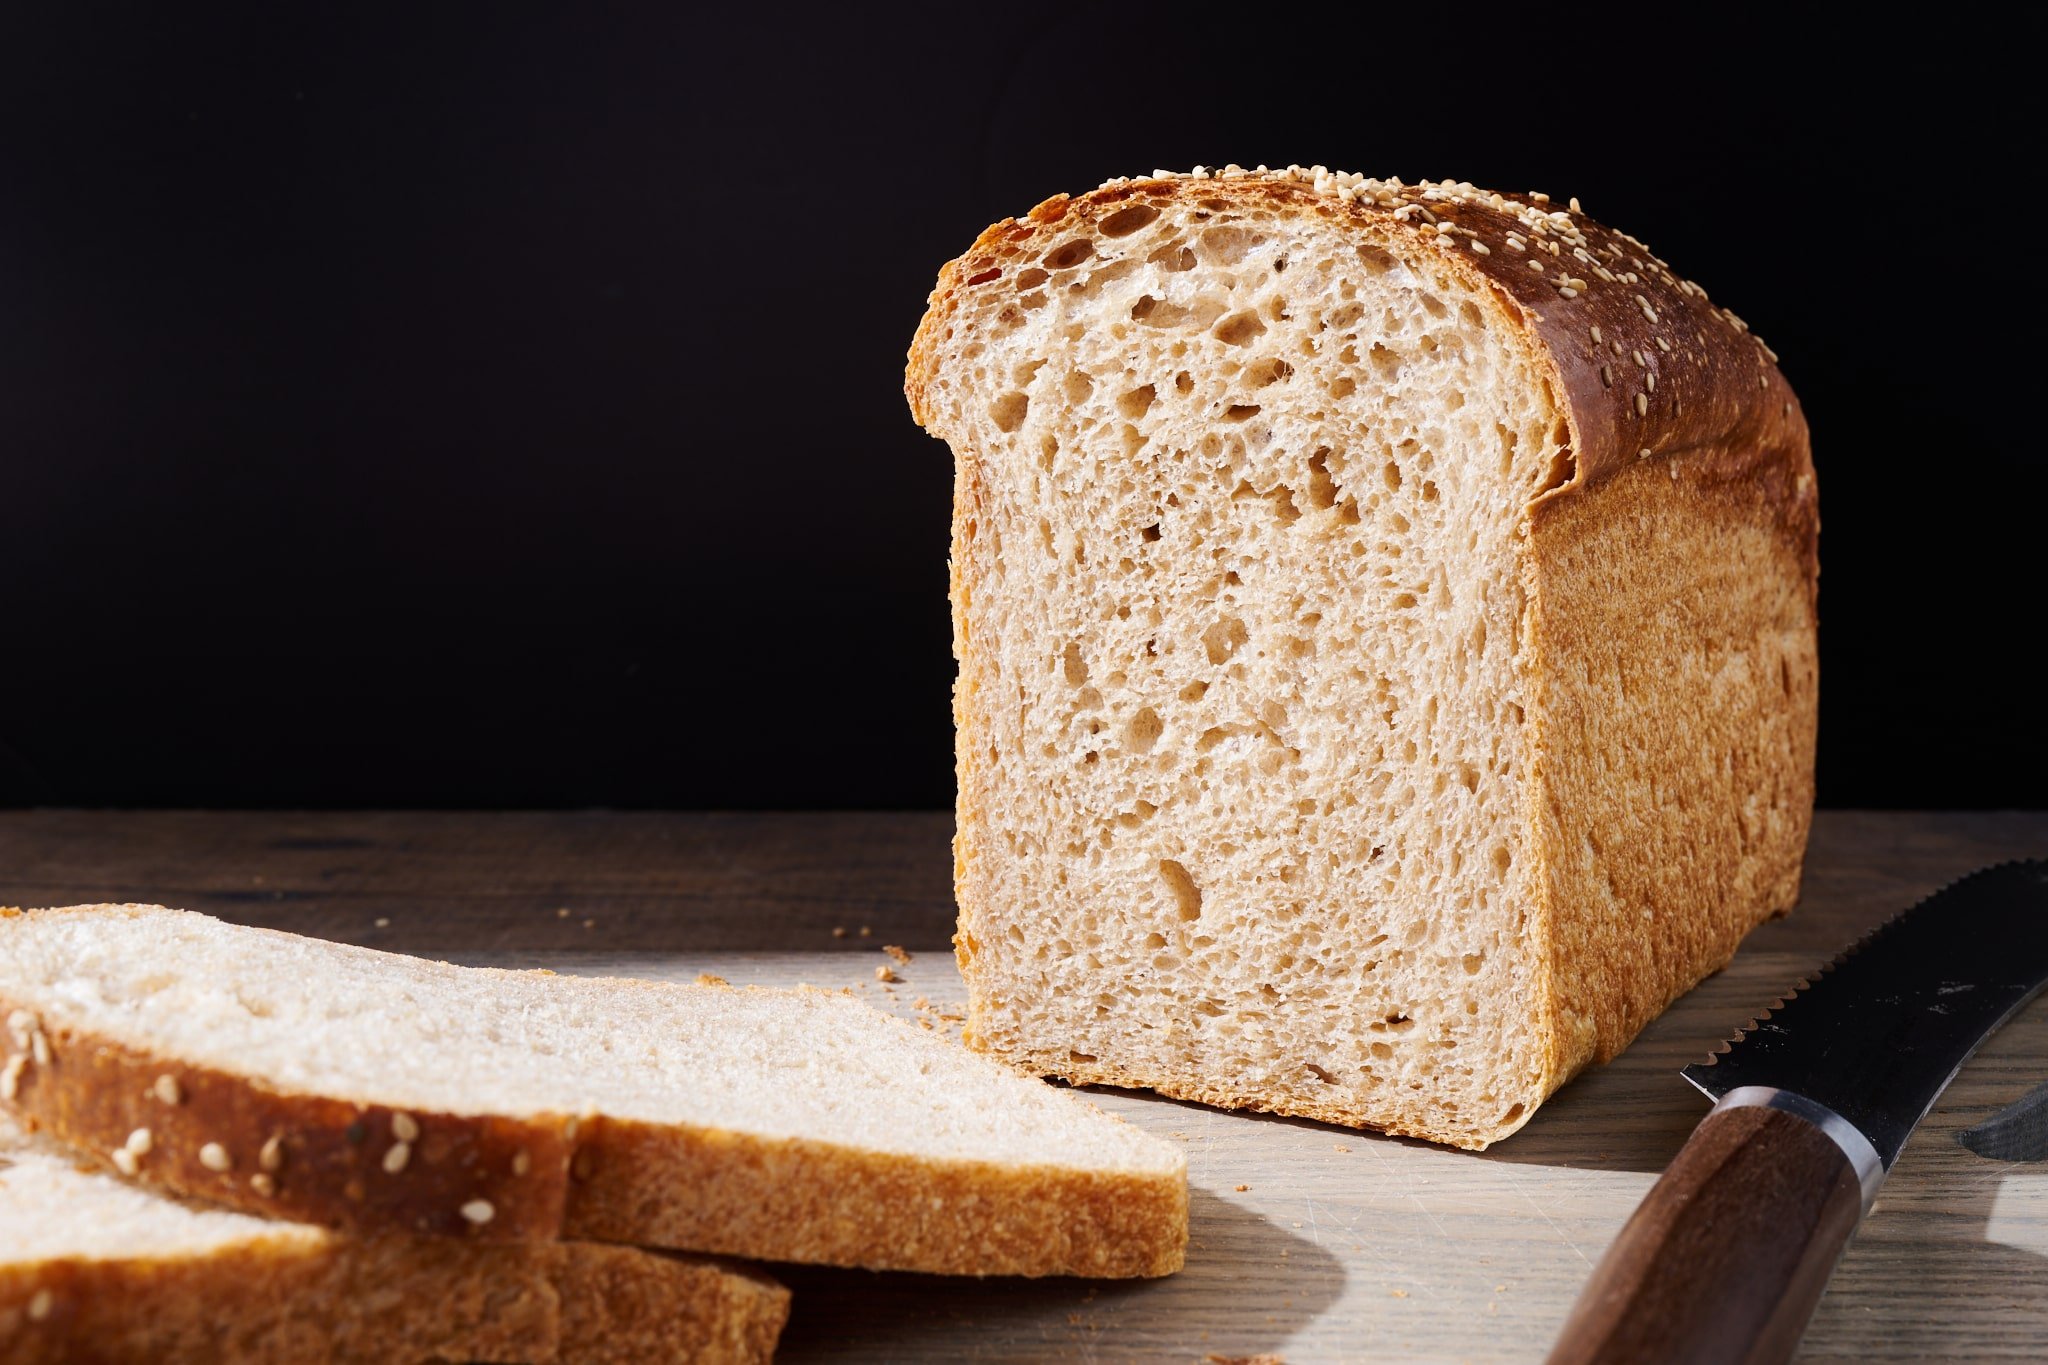
This pan loaf has an appropriately tight texture for hanging on to all those toast or sandwich ingredients, but it’s also light, soft, and squishy—a sometimes elusive dichotomy that you want in a pan loaf. And with this bread, I sort of pull all the technical levers—in a reserved way, mind you, to keep it healthy—to get softness despite the high whole-grain percentage: fats and pre-cooked flour.

On the flavor front, it’s mild with subtle sweetness from the honey, and it has just a kiss of buttery savoriness—a magical combination that fills the kitchen with a wonderful aroma when toasted.

To sum it all up, why is this honey whole wheat sourdough sandwich bread special?

  • It’s 50% whole grain
  • It has a flexible baking schedule
  • The texture, flavor, and nutritional value are hard to beat
  • It uses the yudane technique, which is simpler than tangzhong (more on this below)
  • It makes the best toast 
  • There’s no refined white sugar 
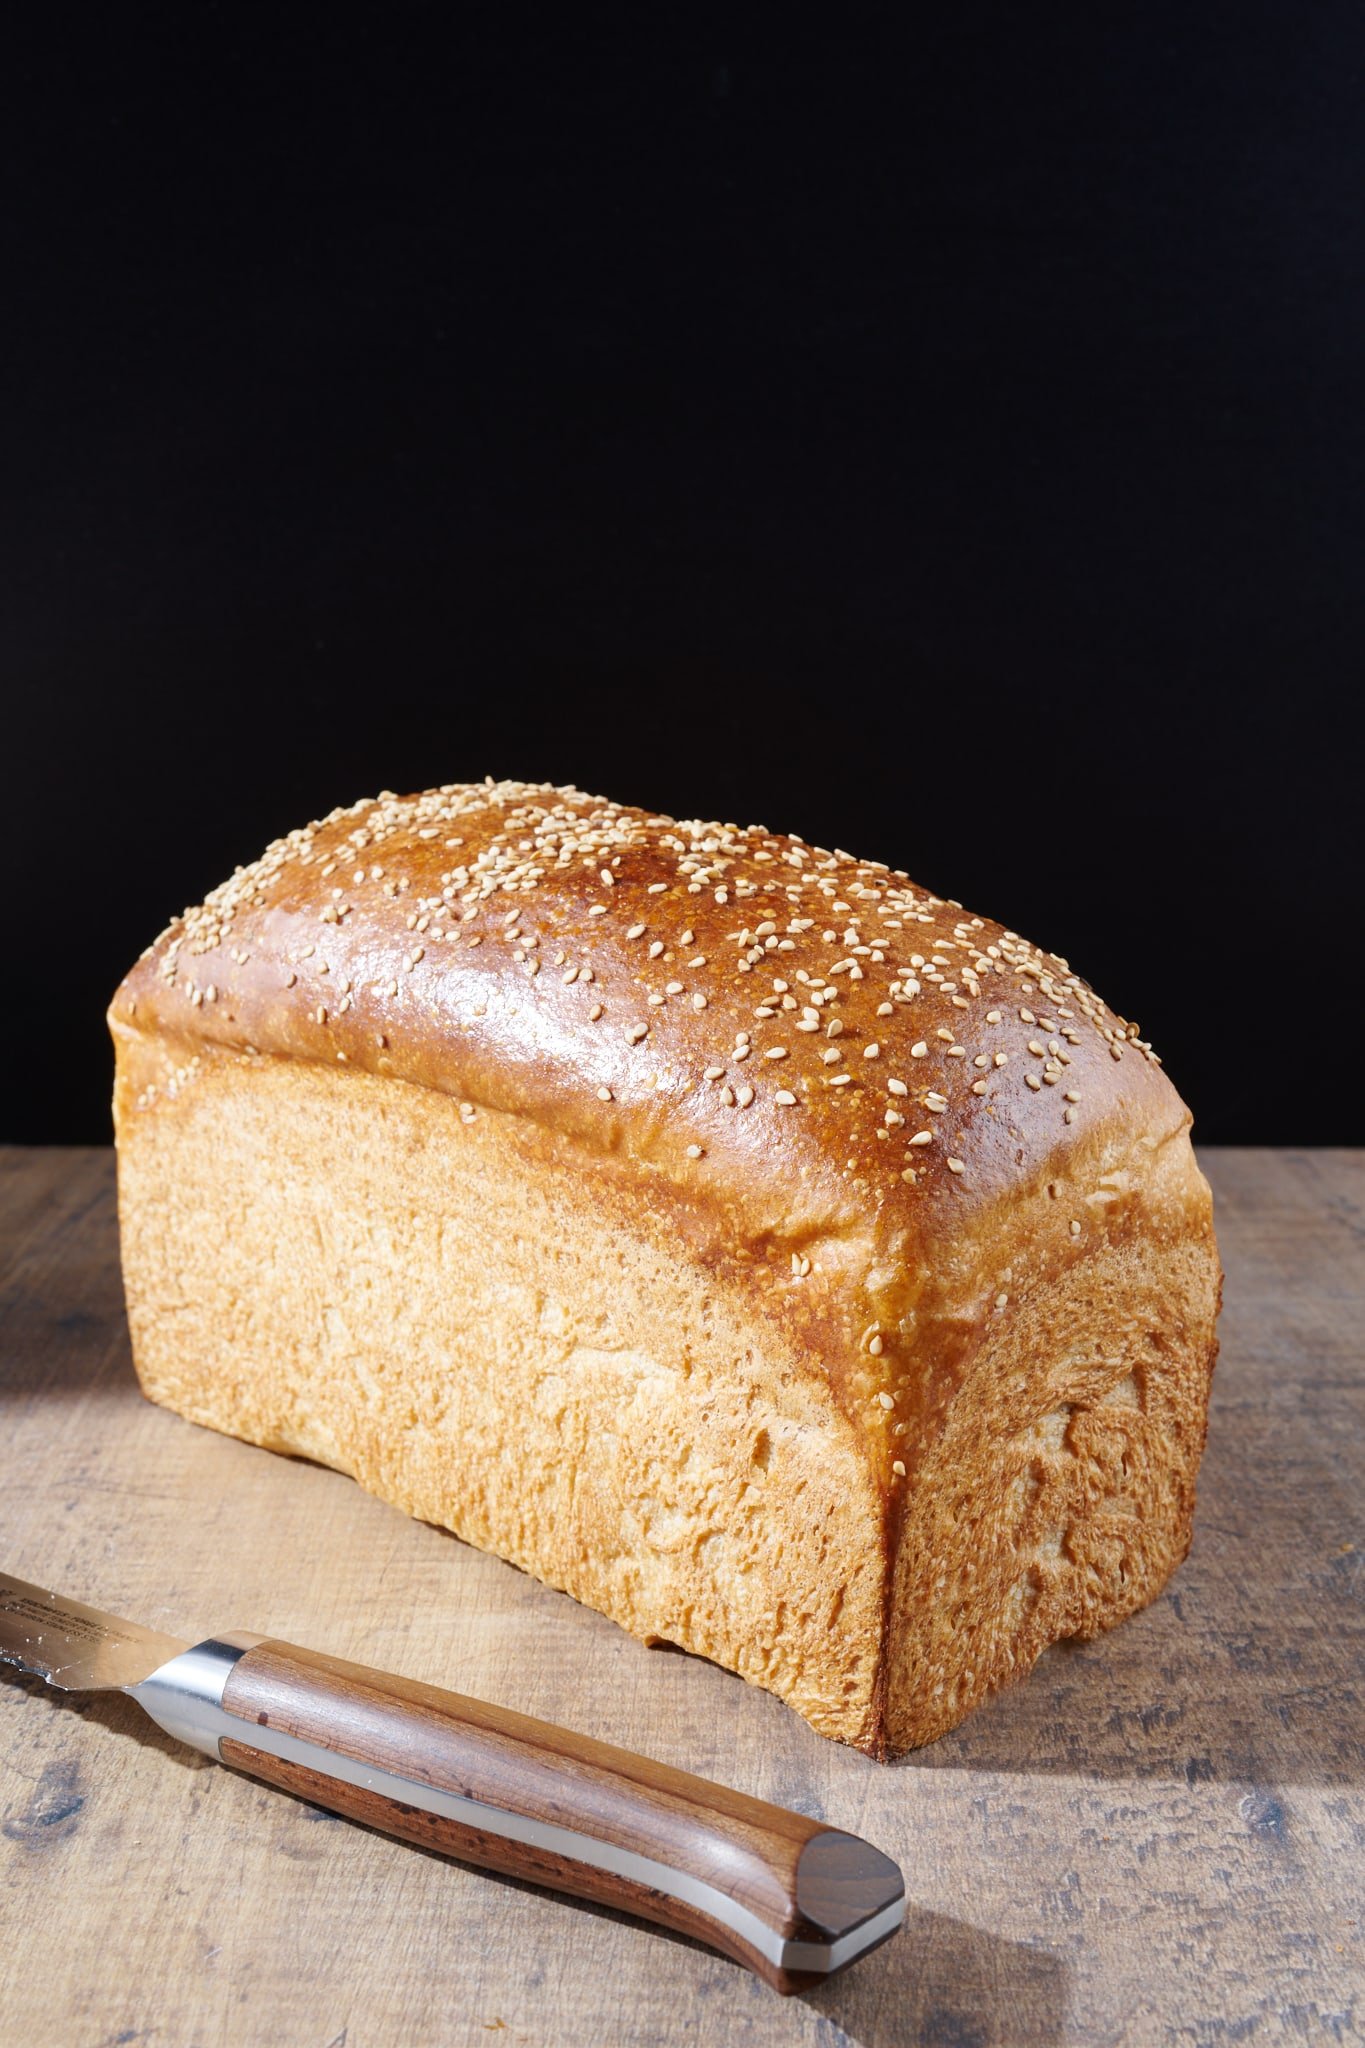
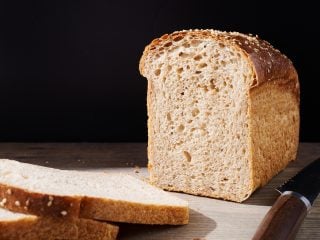
The best honey whole wheat bread recipe crust

Flour and ingredient selection

This bread was inspired by my recent work on my sourdough shokupan, but unlike that super-soft bread made with all white flour, this one is sturdier and has a notable percentage of whole grains. But similarly, it incorporates pre-cooked flour; for this recipe, I use the yudane technique (similar to tangzhong). This technique couldn’t be any simpler: boil some of the water in the recipe and pour it over some of the flour–in this case, 10% of the total flour, all of which is whole wheat. Pre-cooking the whole wheat flour in this way almost feels like cheating. It softens the flour and helps make the dough stronger, more open, and softer.

Read more about the yudane (and tangzhong) technique →

Pre-cooking the whole wheat flour makes the dough easier to handle and results in bread that’s softer and more open.

Illustration of honey in Weck jar
Illustration by Michael Hoeweler

You’ll see that I have topped this bread with benne seeds, giving it a toasty flavor and extra crunchy crust. I also like to top these loaves with sesame seeds and oats, though you can also choose not to use a topping (but I’d still recommend using an egg wash if you want to skip steaming your oven).
The best honey whole wheat baking timeline

Baking schedule

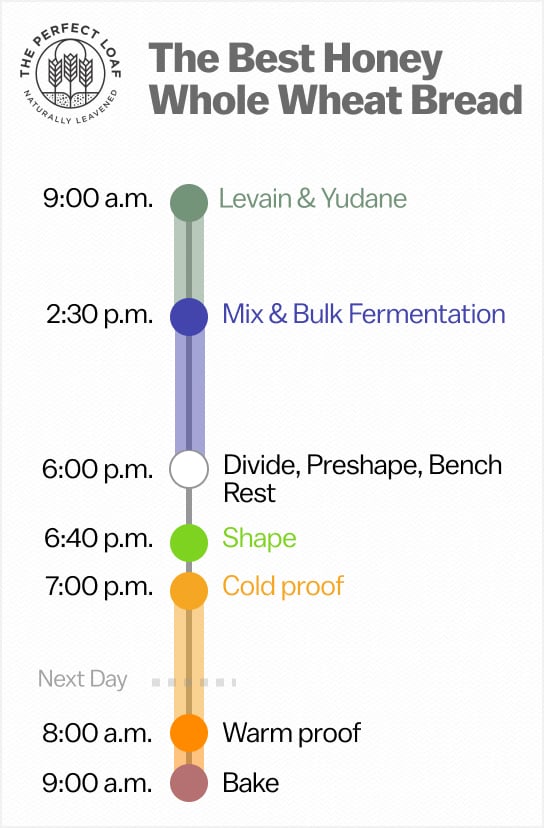
This wouldn’t be the best honey whole wheat bread recipe if it didn’t also have a flexible baking schedule. I like to make it over two days, retarding the dough in shape overnight. You can also bake it same-day if you want fresh bread the day you start the baking process: After shaping and placing the dough in the pans, cover the pans and let proof at room temperature until the dough rises to the rim of the pans and a gentle poke very slowly springs back, 1 ½ to 3 hours.
Honey whole wheat sandwich bread
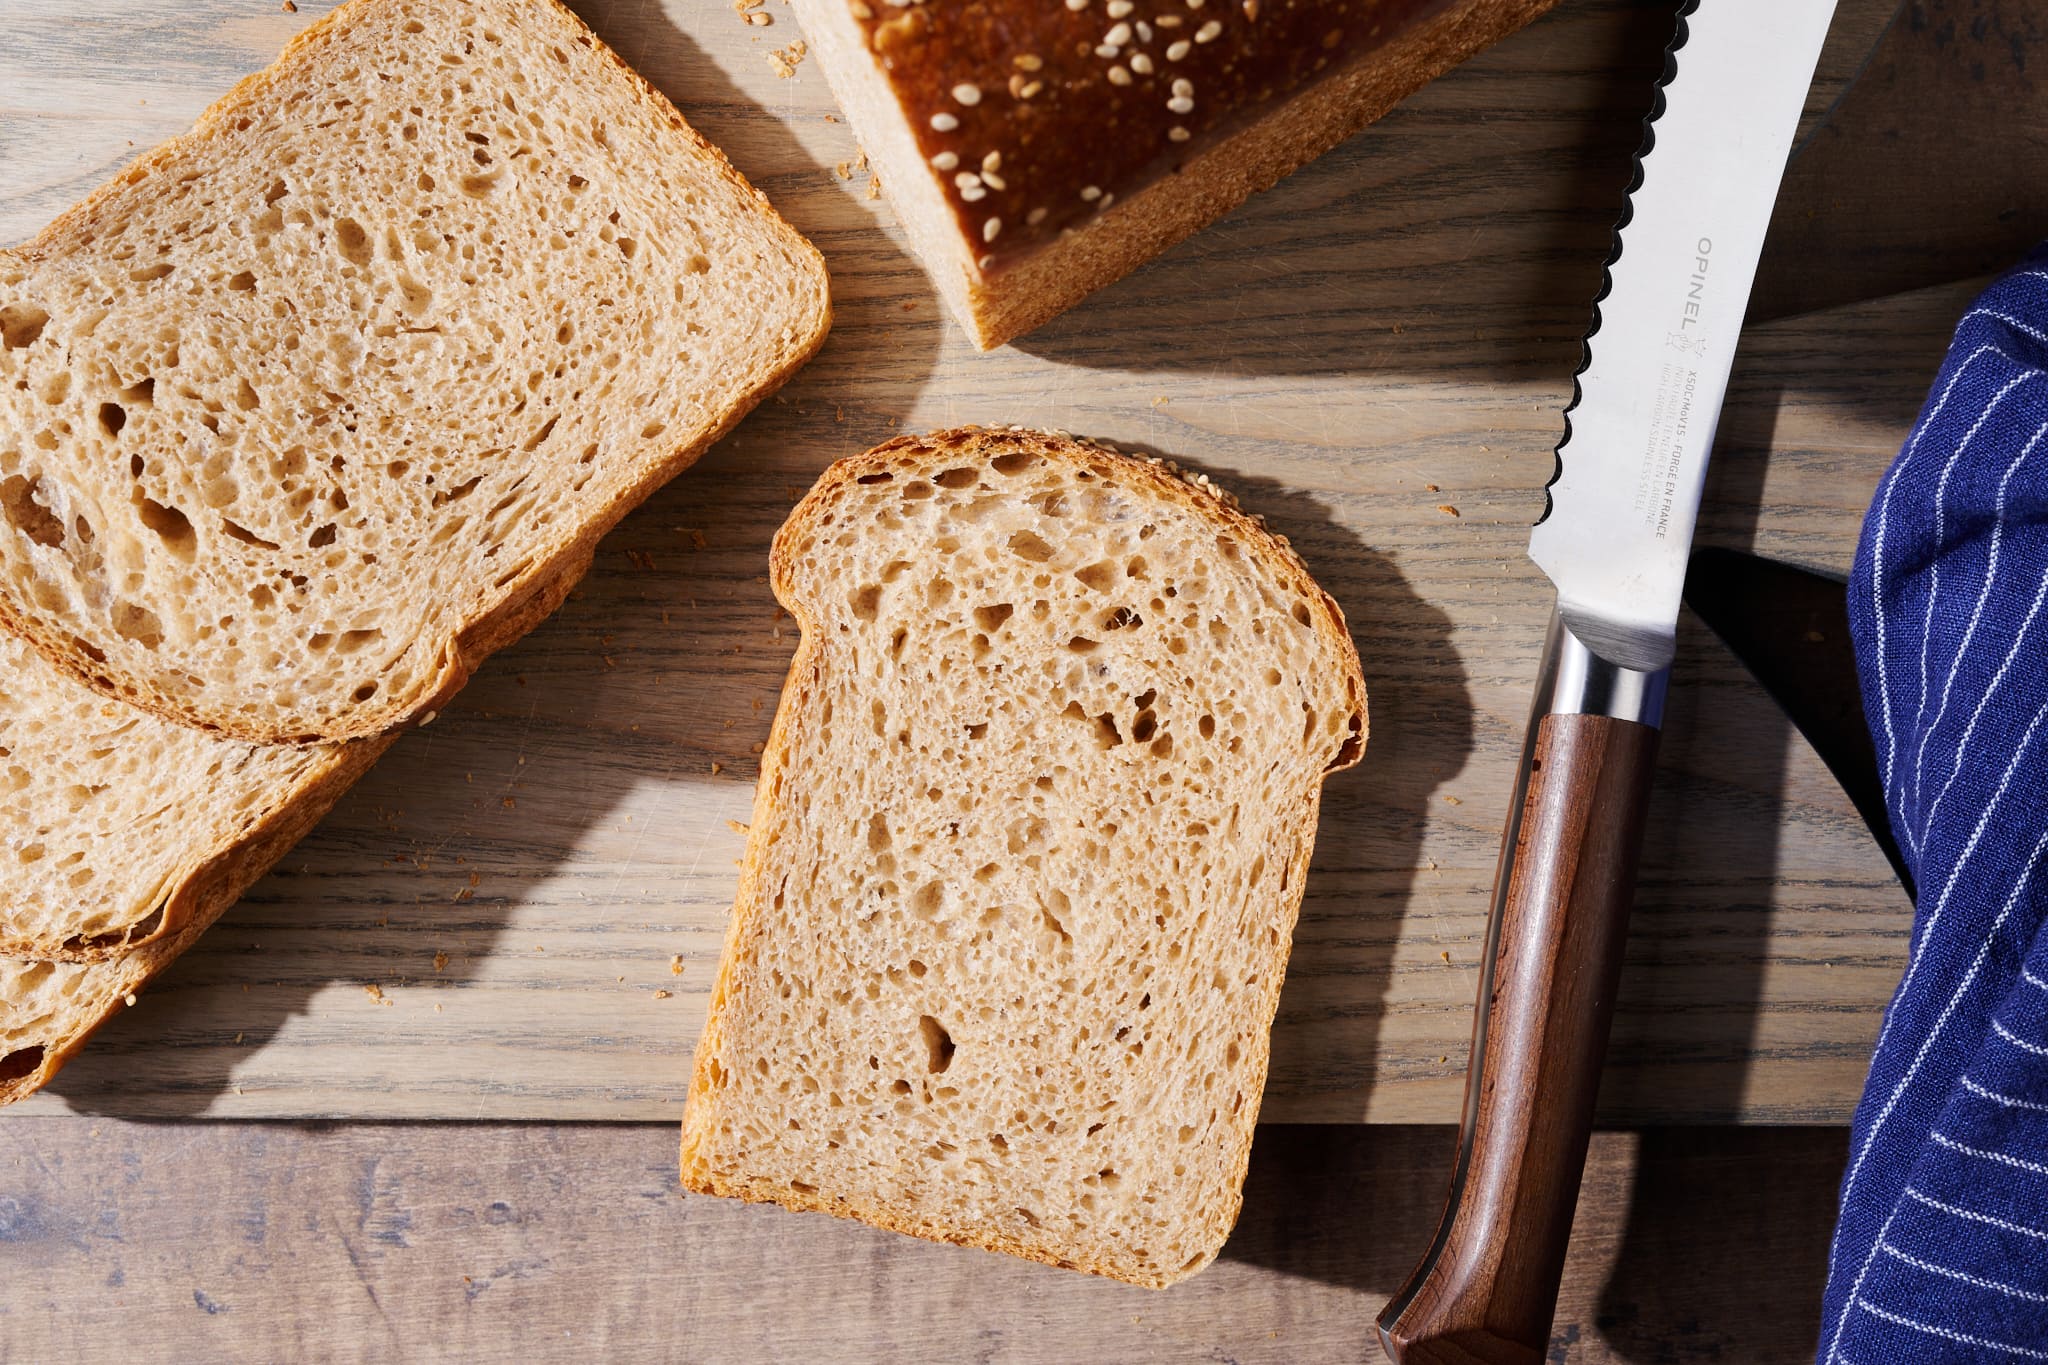
Depending on how you divide the dough, your loaf may not slightly form the “muffin” top like you see above (I added a little extra dough to one pan).

The best honey whole wheat bread formula

Note: See the FAQ at the end of this post to convert this recipe to a vegan honey whole wheat bread recipe.

Vitals

Total dough weight1,800 grams
Pre-fermented flour10.0%
Hydration57.0% (water)
Levain in the final dough27.8%
YieldTwo loaves each in a 9 x 4 x 4-inch Pullman pan

Total formula

Desired dough temperature: 78°F (25°C) (see my post on the importance of dough temperature).

WeightIngredientBaker’s percentage
450gWhite flour (about 11.5% protein; Central Milling Artisan Baker’s Craft)50.0%
360gWhole wheat flour (Central Milling Hi-Pro Whole Wheat)40.0%
90gYudane: Whole wheat flour (Central Milling Hi-Pro Whole Wheat)10.0%
135gYudane: Water, boiling15.0%
54gEgg, beaten (about 1 large)6.0% 
54gUnsalted butter6.0%
36gExtra-virgin olive oil4.0%
45gHoney5.0%
513gWater57.0%
17gFine sea salt1.9%
45gRipe sourdough starter, 100% hydration5.0%

Additional ingredients:

Benne seeds, sesame seeds, or oats, for topping (optional)

Egg wash: 1 large egg, 1 tablespoon whole milk, and a pinch of fine sea salt, for brushing

The best honey whole wheat bread method

1. Prepare the levain – 9:00 a.m.

Mix the following ingredients in a jar and leave them covered at a warm temperature, 74-76°F (23-24°C), to ripen for 5 hours.

WeightIngredientBaker’s percentage
90gWhite flour (about 11.5% protein)100.0%
90gWater100.0%
45gRipe sourdough starter, 100% hydration50.0%

2. Prepare the yudane – 9:10 a.m.

Put the 90g whole wheat flour in a medium heat-proof bowl. Pour the 135g boiling yudane water over the flour and mix with a small spatula until a paste forms. If the mixture is very dry, add a splash of water to help moisten the flour. Cover and set aside.

Read my guide to the yudane and tangzhong method for more on this technique →

4. Mix – 2:00 p.m.

I mixed and strengthened this dough in my KitchenAid stand mixer, but you could also mix it by hand using the slap and fold technique (make sure to hold back the butter until the end of mixing).

WeightIngredient
360gWhite flour (about 11.5% protein; Central Milling Artisan Baker’s Craft)
360gWhole wheat flour (Central Milling Hi-Pro Whole Wheat)
54gEgg, beaten (about 1 large)
54gUnsalted butter
36gExtra-virgin olive oil
45gHoney
423gWater
17gFine sea salt
225gRipe levain (from Step 1)
AllYudane (from Step 2)

First, cut the butter into ½-inch pats. Set them on a plate to warm to room temperature.

To the bowl of a stand mixer fitted with the dough hook attachment, add the flour, water, egg, olive oil, honey, salt, ripe levain, and yudane. Mix on low speed (STIR on a KitchenAid) for 1 to 2 minutes until the ingredients come together and no dry bits remain. Increase the speed to medium (2 to 3 on a KitchenAid) and mix for 5 to 7 minutes until the dough smooths and begins to cling to the hook. If the dough is too dry, add a splash of water to soften, but be conservative.

Let the dough rest in the bowl for 10 minutes.

Even though there are several stretches and folds during bulk fermentation, it is important to mix this dough until it’s smooth, elastic, and clinging to the dough hook.

Turn the mixer on low speed (STIR on a KitchenAid) and mix for 2 to 4 minutes until the dough gains more strength and clings again to the dough hook. Next, with the mixer running, add the room temperature butter, one pat at a time, waiting to add each pat until the previous one is fully absorbed. Adding all the butter will take 4 to 6 minutes. In the end, the dough will be soft and mostly clinging to the dough hook. Transfer the dough to a bulk fermentation container and cover.

3. Bulk fermentation – 2:30 p.m. to 6:00 p.m. (3 ½ hours)

At a warm room temperature, 74-76°F (23-24°C), bulk fermentation should take about 3 ½ hours. The dough is ready when it is smooth, puffy, and well-risen.

This dough requires 2 sets of stretches and folds during bulk fermentation. After the first 30 minutes of bulk fermentation, wet your hands, grab the side of the dough farthest from you, and stretch it over it to the other side. Rotate the bowl 180-degrees and perform another stretch and fold. Rotate the bowl 90-degrees, and do another stretch and fold. Finally, turn the bowl 180-degrees, do one last stretch and fold. The dough should be neatly folded up in the bulk fermentation container.

Perform one more set of stretches and folds 30-minutes later. Then let the dough rest, covered, for the remainder of bulk fermentation.

4. Divide and preshape – 6:00 p.m.

After 3 ½ hours, the dough should be well-risen in the bulk fermentation container and be puffy to the touch. Thanks to the yudane addition, this is a relatively strong dough and doesn’t need a heavy hand when preshaping.

Fill a small bowl with water and place it next to your work surface. Scrape the dough onto a clean counter. Divide the dough into 2 equal pieces. Then, preshape each piece into a loose round.

Let the dough rest, uncovered, for 35 minutes.

5. Shape – 6:40 p.m.

Grease a 9 x 4 x 4-inch Pullman pan with a neutral-flavored oil.

I shaped this dough like I typically do for a pan loaf: I fold the sides in and roll down from top to bottom (see the video below). For information on baking in different pans, shaping pan loaves, and more, see my guide to pan loaves.

6. Cold proof – 7:00 p.m. to 8:00 a.m. (overnight)

Put the pans in a large, reusable plastic bag and seal it shut. Place the pans in the refrigerator to proof overnight.

7. Warm proof – 8:00 a.m. to 9:00 a.m., the next day

Remove the covered pans from the refrigerator and let them proof, at room temperature, for about 1 hour, depending on the temperature in your kitchen. The dough is ready to bake when it is puffy to the touch and about 1-inch below the rim of the pan.

If you see any large bubbles form on the surface, gently pat them down to disperse.

8. Bake – 9:00 a.m.

Place an oven rack in the middle of the oven. Preheat the oven to 400°F (200°C).

In a small bowl, whisk together the egg, milk, and salt. 

Uncover the pans and brush an even layer of the egg wash on the top of each. Next, sprinkle on any desired toppings: oats, sesame seeds, or benne seeds. (See my guide to topping bread dough for more information on egg washes and other toppings.) 

Slide the pans into the oven. Bake for 20 minutes. Then, reduce the oven temperature to 350°F (175°C), rotate the pans back to front, and continue to bake for 25 to 30 minutes more. When done, the loaves should have an internal temperature of around 204°F (95°C), and the crust should be deeply colored and shiny.

Remove the pans from the oven. Gently remove the loaves from the pans and put them on a wire rack. Let the loaves cool for 1 to 2 hours before slicing. See my post on the best way to store bread to keep it fresh for a week or longer.

Print
clock clock iconcutlery cutlery iconflag flag iconfolder folder iconinstagram instagram iconpinterest pinterest iconfacebook facebook iconprint print iconsquares squares iconheart heart iconheart solid heart solid icon
Best Honey Whole Wheat Bread Recipe

The Best Honey Whole Wheat Bread Recipe

5 Stars 4 Stars 3 Stars 2 Stars 1 Star No reviews
  • Author: Maurizio Leo
  • Prep Time: 24 hours
  • Cook Time: 55 minutes
  • Total Time: 24 hours 55 minutes
  • Yield: 2 loaves
  • Category: Sourdough, Bread
  • Cuisine: American
Save Recipe

Description

My recipe for a slightly sweet pan loaf (thanks to the added honey) with a large whole grain percentage yet a soft crumb and crust—it’s perfect for toast and sandwiches.


Ingredients

Levain

  • 90g white flour
  • 90g water
  • 45g ripe sourdough starter, 100% hydration

Yudane

  • 90g whole wheat flour
  • 135g boiling water

Main Dough

  • 360g white flour
  • 360g whole wheat flour
  • 54g egg, beaten (About 1 large)
  • 54g unsalted butter
  • 36g extra-virgin olive oil
  • 45g honey
  • 423g water
  • 17g fine sea salt
  • 225g ripe levain
  • all of the yudane

Topping

Benne seeds, sesame seeds, or oats.

Egg wash: 1 large egg, 1 tablespoon whole milk, and a pinch of fine sea salt.


Instructions

  1. Levain – 9:00 a.m.
    Mix the levain ingredients in a jar and leave them covered at a warm temperature, 74-76°F (23-24°C), to ripen for 5 hours.
  2. Yudane – 9:10 a.m.
    Mix the yudane ingredients in a small heat-proof bowl until a paste forms. Cover and set aside.
  3. Mix – 2:00 p.m.
    Cut the butter into ½-inch pats and let warm to room temperature. To the bowl of a stand mixer with the dough hook attachment, add the flour, water, egg, olive oil, honey, salt, ripe levain, and yudane. Mix on low speed for 1 to 2 minutes until the ingredients come together. Increase the speed to medium and mix for 5 to 7 minutes until the dough smooths and begins to cling to the hook. If the dough is too dry, add a splash of water to soften, but be conservative. Let the dough rest in the bowl for 10 minutes. Turn the mixer on low speed and mix for 2 to 4 minutes until the dough gains more strength and begins to cling once again to the dough hook. Next, with the mixer running, add the room temperature butter, one pat at a time. Adding all the butter will take 4 to 6 minutes. Transfer the dough to a bulk fermentation container and cover.
  4. Bulk fermentation – 2:30 p.m. to 6:00 p.m. (3 1/2 hours)
    Give the dough 2 sets of stretches and folds during this time, in 30 minute intervals. After the second set, let the dough rest, covered, for the remainder of bulk fermentation. The dough is ready when it is smooth, puffy, and well-risen.
  5. Divide and preshape – 6:00 p.m.
    Fill a small bowl with water and place it next to your work surface. Scrape the dough onto a clean counter and divide the dough into 2 equal pieces. Then, preshape each piece into a loose round. Let the dough rest, uncovered, for 35 minutes.
  6. Shape – 6:40 p.m.
    Grease a 9 x 4 x 4-inch Pullman pan with a neutral-flavored oil. Shape into a long tube and place in the pan.
  7. Cold proof – 7:00 p.m. to 8:00 a.m. (overnight)
    Put the pans in a large, reusable plastic bag and seal shut. Place the pans in the refrigerator to proof overnight.
  8. Warm proof – 8:00 a.m. to 9:00 a.m., the next day
    Remove the covered pans from the refrigerator and let them proof, at room temperature, for about 1 hour, depending on the temperature in your kitchen. The dough is ready to bake when it is puffy to the touch and about 1-inch below the rim of the pan. If you see any large bubbles form on the surface, gently pat them down to disperse.
  9. Bake – 9:00 a.m., the next day
    Preheat the oven to 400°F (200°C). In a small bowl, whisk together the egg, milk, and salt. Uncover the dough and brush on the egg wash. Next, sprinkle on any desired toppings: oats, sesame seeds, or benne seeds. Slide the pans into the oven and bake for 20 minutes. Then, reduce the oven temperature to 350°F (175°C), rotate the pans back to front, and continue to bake for 25 to 30 minutes more. When done, the loaves should have an internal temperature of around 204°F (95°C), and the crust should be deeply colored and shiny.

Notes

  • To bake only a single loaf, divide all the ingredients in half (even the levain and yudane).

The Best Honey Whole Wheat Bread FAQ

The top part of my loaf separated from the crust!

Best honey whole wheat bread over proofed

You likely over-proofed the dough, especially if you see this coupled with a dense interior crumb (see the image at the right of an early test!). Next attempt, reduce the time the dough is left on the counter before baking.

What is a good egg substitute for this bread?

A flax egg is a good substitute for the whole egg in this bread recipe: Mix one tablespoon of ground flaxseed meal and three tablespoons of water in a small bowl. Allow the mixture to rest for 5 minutes before using. Instead of using an egg wash on the top of the dough, simply omit it and steam your oven instead.

How can I make this bread recipe vegan?

Swap out the egg for a flax egg, and substitute the butter with a vegan butter alternative.

Can I use the lid of the Pullman pan to bake this sandwich bread?

No. The dough weight is too high to use the lid for the 9 x 4 x 4-inch Pullman pan; the dough would leak out of the pan during baking.

Can I make one loaf instead of two?

Yes: Halve all ingredients in the recipe to bake only a single loaf in a 9 x 4 x 4-inch Pullman pan.

Can I use tangzhong instead of yudane?

Yes, absolutely. Instead of simply covering the whole wheat flour with boiling water, cook the flour and water mixture over medium heat until the mixture thickens. Let the tangzhong cool to room temperature before adding it to the dough mix.


What’s next?

One of the keys to making my best honey whole wheat bread is to have a strong and healthy sourdough starter. If you’re having trouble, review my top questions and answers on sourdough starter health to ensure yours is as strong as possible.

Next, if you want to make another healthy loaf with even more fiber and many seeds, check out my high-fiber seeded sourdough bread. My sourdough shokupan (Japanese milk bread) is the ticket if you’re in the mood for something even softer!

Buon appetito 🙂

Picture of Maurizio Leo
Maurizio Leo
Maurizio Leo is the creator of The Perfect Loaf, the leading independent resource for baking sourdough bread and pizza at home, and the James Beard Award-winning, New York Times bestselling author of The Perfect Loaf and The Perfect Pizza. He lives in Albuquerque, NM, with his wife and two sons, and he's been labeled "Bob Ross but for bread." Read his full story →

Do sourdough posts like this help you in your baking? Join The Baker’s Corner for only $60 a year, and get:

  • Come chat with me and other bakers and get baking help
  • Remove all ads on website
  • Get my bakers tools & discounts
  • Get the full recipe archive in editable spreadsheets

159 Comments

Leave a Reply

Your email address will not be published. Required fields are marked *

Recipe rating 5 Stars 4 Stars 3 Stars 2 Stars 1 Star

This site uses Akismet to reduce spam. Learn how your comment data is processed.

  1. I’m doing this and all my baking, by hand.
    I wonder, do I really need all the butter incorporated? Can I leave the 1/2 out and still have great quality?

  2. I’ve been making this bread almost since you posted the recipe. It’s a family favourite and I have to bake it at least twice a week. My only problem is that I have to rearrange my schedule to make the timing fit. Is there any way I can make the levain at night at about 10.00pm and mix the dough early in the morning at 5.00am? What changes would I need to make to the quantities/temperature?
    Thank you Maurizio for your wonderful recipes and advice on achieving the Perfect Loaf.

    1. Awesome to hear, Jay! For an overnight levain, I generally feed it with about 20% starter to flour and water. Using less starter this way expands the fermentation time needed. What I might also suggest is you can simply use your sourdough starter for this bread if you keep it well-fed (fed around every day, at least). Feed it the night before, then use it in the morning to mix the bread (skip the levain step). Add the same amount of starter as you would have levain.

  3. I had problems with the dough not gathering enough on the hook and with it not rising enough during a 1 hour warm proof. After reading the comments, I continued warm proof for another two hours, and the dough rose to almost 1” from the top of the pan. It rose nicely in the oven. When I rotated the pans I forgot to reduce the temp to 350° (oops) but realized this after 20 min. They were 204° (yay) and nicely browned. Once sliced, they looked like the overproofed photo in the recipe.

    My takeaways from reading comments and Maurizio’s responses:
    – hold back 10% of the water and add if needed (I never use all of water #2 in his recipes)
    – mix for less time (I overcompensated for too much moisture/dough not clinging to the hook by longer mixing)
    – I had my proofing box at 75° but my cold dough needed a less drawn out wake up period. I’ll boost it to 77° next time.
    – I didn’t have a neutral oil and used salted butter to prep the pans; it added great flavor and I’ll do that again.

    Sorry for the wall of text but I hope it will help others who make this bread. The flavor and texture were fantastic.

    1. Great comments there, Leslie. Yes, that holding back the water is key. You could even hold back the water, strengthen the dough, then add it in slowly at the very end if you wanted to push it higher. I do this “bassinage” every time I mix.

  4. What a beautiful loaf of bread! I can’t wait to taste it! Thank you so much Maurizio! Love love the perfect loaf recipes!

  5. Maurizio doesn’t disappoint and this recipe is deeply satisfying and hearty. It will be my go to sandwich bread.
    Maurizio, what accommodations would you advise for baking this recipe in a standard loaf pan?

  6. I've made this twice and both times, the dough has been more like batter and has barely risen. It does rise somewhat when I bake it. I have a robust starter, so I don't know what the issue is. Could it be the quantity of whole wheat flour?

  7. I know they are different…but which one do you do? The book or the website? Very different recipes…so just wondering?

  8. So is there an error in the book's recipe? Here you use 45g of starter whereas in the book you only use 4. Which, plainly, doesn't work. 4g of starter adding 86g of flour and only 42g water doesnt ferment but turn into a brick in my kitchen overnight. What can I do?

  9. IIs there a printing error in the book? This recipe calls for 45g of starter, while the book only uses 4g. Which just doesn't work as the 85g of flour and 42g of water just turn into a brick overnight with only 4g of starter.

  10. Heya Maurizio,
    I would like to cook this bad boy with the lid of the pullman, but I noticed in the FAQ that the total dough weight exceeded what the pan with the lid would be able to handle. Approximately how much would I have to reduce the total recipe to be able to bake with the lid on?
    Thanks for all that you do, you're the man!

  11. Would milk or cream work in place of the egg wash, or should I steam my oven instead? My egg-allergic daughter tolerates eggs baked into foods, but I am not sure if egg wash would be tolerated and would rather play it safe!

  12. Hi! I’ve baked this twice now and though both times they came out great the second batch had collapsed sides. What would cause this? How can I prevent it next time?

    1. Collapsed sides usually point to either overproofing or not enough dough strength. Make sure you're building good strength during mixing and stretch and folds, and watch the dough closely during bulk fermentation – it should be puffy but not overly inflated. Also check that your shaping is creating good surface tension. Let me know if you need any other troubleshooting tips!

  13. Hi! I was wondering if the overnight cold proof is critical for the nature of this recipe, or if the final proof could be done at room temperature for same day baking. Thanks!
    Edit: silly me I just saw that you address this in the text. Sweet I'll try it

  14. Ciao Maurizio!
    I have a question but first I wanted to say how much delving into your book and getting my hands in the dough again have revived my interest for making my own sourdough everything! From the Sunday waffles to the pain de mie to the focaccia etc etc it's been both an exciting and yummy Summer! Let's put it this way -I've been super picky with how I choose my calories since I started baking again!
    Moreover, carefully following your recipes page after page, along with watching you executing your own instructions in the videos is starting to give me much more confidence and a deeper understanding of how the dough behaves. Before that, I'd watch xYouTubers' videos, would exchange with a couple people who are into baking too, would follow directions from other bakers such as Nancy Silverton (got her book four years ago) but every time I made a loaf, I'd be hesitant not really knowing why I'd be doing this or that etc So I'd often end up with different results for the same recipe. Now, it all feels, seems, and tastes much better and I must say it's great to put that recently purchased oven to good use!

    So, here's my question. As I'm upgrading "a couple" of my baking tools, I bought two cast iron loaf pans thinking I was getting long lasting, reliable pans but now I'm second guessing myself… Won't baking with these tend to create a thicker (and brown) bottom crust when I'm making a soft type of loaf such as this one here or pain-de-mie? What's your opinion on cast iron in this case?

    In advance, thank you so much, Maurizio, for taking the time to read this and for sharing your ideas 🙏🏻🍞🥐🥖🤩

    1. Oh my thank you so much, Leslie! Thanks for getting my cookbook and glad to hear you're enjoying it 🙂

      Those cast iron pans will be great for large, crusty loaves, but yes, you won't want to use them with this Pain de mie or other pan loaves. Just bake them in their own pan, no need to cover them in any way if they have an egg wash on top!

      If you're baking pan loaves without an egg wash, which would then require steaming, use my oven steaming method .

      Hope this helps and keep me posted on how it's going!

  15. Hi! First of all, your website has been my all time favourite sourdough resource since I started making sourdough years ago, so, thank you! I'm vegan but I really dislike using margarine and vegan butter alternatives. Is there any chance I could substitute the butter with olive oil or some other kind of oil? I know they're not the same, and maybe the result wouldn't exactly be the same, but could it work?

  16. I love this recipe, delicious and awesome crumb. Do you have the fiber count for each loaf? Thank you!

  17. I have a clay ovel put to bake it in. do i needs to cover my bread while baking if using a topping?

    1. I was also wondering about how to use the 13" pan with this – do you think one could just put the whole two-loaf recipe into it for one large loaf? Thx!

  18. Hi Maurizio,

    What is a good honey substitute for this bread? Can I skip using honey without changing the hydration of the recipe? We don’t like sweet bread.

  19. Good morning Maurizio,

    The recipe has been working great so far except my dough doesn’t really rise after cold proof. I’ve tried to put it at warm temperature but it’s already been 2 1/2 hours. Would should I do at this point?

    1. I had the same problem.
      I ended up putting it into the oven (inside the plastic bag) using the “plate warming” setting at 30°C, and it took 4 1/2 hours of “warm proofing”. Eventually, it rose as high as it should.

    2. I have been working with sourdough for years. My bread also did not rise after the cold proof. I tried to activate some instant yeast and knead it into the dough to save it!

    3. If your dough is still on the dense side in the morning, take it out and let it proof another hour on the counter and check again. It might have needed more time to bulk ferment/proof!

  20. Awesome recipe. Just made for the first time and will make this on a regular basis. Since it was cool in my house, i did a 2 hour warm proof before putting in the oven. Turned out great.

  21. these turned out great. I almost had a burst on one loaf. . . maybe I’ll leave them just a bit longer on the bulk. My starter also was ready sooner than the recipe predicted. I wish I could have this kind of success with the 50% whole wheat batard recipe. And for the ones calling for fresh milled. It’s in my bulk rise and mixing issues with the whole wheat, i.e. I over mix, then over stretch and folds. It’s doing something to the gluten structure when I do that.

  22. Hi Maurizio,

    thanks for your inspiring
    recipes. Can you recommend a way to adapt your recipes in a way so that the
    main work is done between 8am and 1pm? I am thinking about preparing levain and
    yudane in the evening (around 9pm) rather cold and let it sit overnight. Then,
    I can start the next day 8am (after 11 hours) with the following steps. Around
    1pm I would be finished with cold proof – again overnight. And baking the
    following day. What do you think?

    Thanks
    Jenny

  23. Hi Maurizio,
    My bread totally split open near the top. I wish I could upload a photo. The whole upper side split as it rose in the oven. Any ideas what happened? under-proofed? Over proofed? Thanks!

    1. I wonder if he will say underproofed. There was still too much extra unspent yeast when it hit the oven and it literally explodes. Tight shaping too.

  24. I’ve been wanting to make a good, soft Sourdough bread, and I thought this was it. Then I saw it calls for ripe, sourdough starter…..nope, can’t make it!!

  25. I was making this recipe for a second time. Hoping to correct some of my mistakes from the last time. After I got the dough into the pans last night, I kept thinking about how small the dough looked in the Pullman pan. I couldn’t imagine how it could possibly rise to the height that your pictures show. As I was looking back through the post and the pictures, I noticed that on one of the captions you mentioned that the only reason you got that muffin top was because you put extra dough in that pan. So now I’m wondering what is the realistic expectation for how high it should rise when it bakes? And also when you say it should get to roughly an inch below the rim by the time it’s ready to bake, was that based on the extra dough or is that based on the original amount of dough that should have been in the pan from the recipe?

      1. Well, this is good to know. I would suggest adding that information to the narrative of the actual recipe.

  26. If everything seemed to go right in terms of my bulk ferment and my final proof, but in the oven the bread didn’t rise quite as much as it looks like yours did in the pictures, what is the likely thing that went wrong for me? I did the egg wash but I just feel like maybe using steam in the oven would have helped get a better rise.

    1. I think I figured out that I slightly overproofed based on a smallish gap just under the top crust when I sliced through the bread. It was just a bit dense, and looked like a less severe version of overproofed pictures I’ve seen here and elsewhere.
      Follow up question though: what are the reasons for incorporating butter into the dough in soft pats, rather that melting it and incorporating it as you do liquid oils such as the olive oil in this recipe? What is the benefit?

  27. Hoping for help… I’ve made this today and it seemed very loose and soft in the mixer. I let the KitchenAid mixer run longer than recommended but still seemed thin. It clung to the hook but not completely, the other half was stuck to the bottom. I’ve never made enriched dough before so after letting the mixer run for a few minutes more than the recipe calls for I decided to add the butter and then go to bulk ferment. I did the two sets of folds and then let it rise for the remaining time, but it raised only about 10-15% and is extremely sticky and loose. I did another set of folds and put it back in the container to raise more. Am I overdoing it or should it have more structure?

    1. I ended up flouring my table well and dumped the dough out. I split it in half and made taut rounds out of them. They rested as instructed and I shaped them and put them in the pans with great apprehension that they’d ever rise enough. I got them in the bags and in the fridge and today took them out. They looked like they didn’t rise at all. I was disappointed but determined to see it through to the end. I left them at room temp and let them naturally rise. It took about 4 hours to rise to an inch from the top. I was excited and baked them and they turned out beautifully. An hour later and it seems perfect. Soft and sour with a great wheat flavor and subtly sweet. My recommendation is to stay the course even if it’s overly sticky and seems ruined.

      1. Thanks so much for the update, Wallace! Yes, this is a very deceptive dough and I should probably mention that. Because of the high whole grain percentage and hydration, it can look like nothing’s happening for a long while.

        If you want, next time you can reduce the hydration a bit, it may also help (at the cost of some tenderness in the final product).

        Enjoy and thanks for the comments!

  28. Hi,

    I’ve made this bread 3x now, two times I have had a very hard time getting it to ever cling to the dough hook, one time it mixed up and clung great. Does a higher protein flour help it form better, or should I add more flour if that happens again? What should I look at tweaking?

    Thank you!

    1. Hey, Heidi! Hold back more of the water during mixing, keep it in reserve until the dough strengthens in the mixer, then slowly add it in as your mixer is running. Adding water too quickly before the gluten is strengthened in the mixer will just make the dough spread out and not clump. If it never comes together, add a little more flour to bring strength, and next time, dont add as much (your flour might not be able totake as much, and that’s okay!).

  29. Hello Maurizio,

    I’m in the process of making this bread now. My dough is been bulk fermenting for a little more than 3 hours and is almost ready for dividing and shaping. Its still early afternoon and temperatures are around 100 out there.
    I was wondering if I can do bench proofing instead of the cold proof. I would like to bake, if possible, late at night today. Thank you !

    1. You can do that, let it proof on the counter and bake when ready. That is very warm out there, though, so keep an eye on the dough it might need to be baked rather quickly!

  30. Hi Maurizio,

    I’m new to sourdough and have been trying many of the free form loaves on your site and book with success. But I’ve somehow failed at every enriched dough! I just made this honey whole wheat loaf and it turned out chewy and dense (kinda like the texture of the “beginner’s sourdough recipe” on this site). I followed the recipe exactly except I didn’t let it cold proof – I left it at 74° for 3.5 hours after shaping into the loaf pan. The dough didn’t rise quite as high as your recipe stated as it was getting very late so I decided to bake it. Could it be from underproofing? Or maybe the dough is under strengthened? I used a KitchenAid mixer.
    Is it easy to over mix the enriched doughs? When I tried another recipe from you, it was taking forever to incorporate the butter, so I wonder if this was the same issue?

    Thank you so much for all your recipes and insight!

    1. It’s hard to say what’s happening here, Harmony. I am almost feeling like it overproofed… That’s a long time to proof at a relatively warm temp.

      However, it’s also possible it was underproofed, too!

  31. Hi Maurizio,

    I’ve been making your Shokupan regularly since you posted the recipe and it’s a family favourite! I’d really like to try this healthier version but the only good quality flours we get here in Hong Kong are the King Arthur ones – bread flour, all purpose and whole wheat. Could I substitute these for the Central Milling ones? Also how much could I reduce the honey and still get a good result. We eat a lot of bread and the sugar grams would add up. I’ really looking forward to making this bread for my grandkids so thanks in advance for your advice.

Contents