
Mix whole dark rye flour and water with your hands, and you’re immediately plunged into an intense sensory experience. Earthy aromas swirl about as a dough texture that’s not unlike wet concrete starts to form. When the gray paste squishes and squashes through your fingers, you begin to hear whispers from somewhere in your head: How can this dense, shreddy coalescence make a cohesive, airy, and crusty loaf of sourdough rye bread?
This bread steals your attention—it’s all you’ll think about at breakfast, lunch, and dinner.
The answer, as is the case with many of the recipes you’ll find here, is fermentation. But also, while all rye flour lacks the same glutenous characteristics of wheat flour (especially high-protein white flour), it has pentosans. Pentosans are polysaccharides that absorb copious amounts of water, which steam in the oven during baking, puffing up the dough. They also form a gel network that helps trap the gaseous byproducts of fermentation. Finally, pentosans help the starches gelatinize during baking, which sets the soft, airy structure of rye-based bakes.
But the stars of the show with rye bread (as I’ve come to sincerely appreciate over the years I’ve baked it at home), are its captivating aroma and robust malty flavor. This bread steals your attention—it’s all you’ll think about at breakfast, lunch, and dinner. If you work from home, be prepared to hear its call from the kitchen when you least expect it. You’ll want it sliced thin and topped simply with good salted butter. You’ll want it to accompany your smoked salmon. You’ll begin to want it with just about anything you have in the fridge.
Here are a few important details I’ve found when making any sourdough rye bread:
- Use a large preferment; at least 40% of the total flour is fermented ahead of time
- When using whole-grain rye flour, increase the hydration dramatically for the best texture
- Employ a short bulk fermentation and short final proof

Instagram Walkthrough
Click play below to watch me make this sourdough rye bread on Instagram.
Why is a Large Preferment Necessary with Rye Bread?
One thing you’ll notice with this sourdough rye bread, and with almost every sourdough rye bread, is the incredibly large preferment relative to the total flour in the recipe. When making proper rye, it’s necessary to ferment a large percentage of the flour in the recipe beforehand.
Why? The large preferment ensures that when the dough is mixed (either by hand or machine), it has a high acidity (low pH) from the start. This low pH inhibits excessive amylase enzyme activity, preventing excessive starch breakdown, especially during baking. If rye doughs are not properly acidified with sourdough, this starch breakdown will result in bread with a gummy interior and a separation between the top crust and interior of the loaf.
In this recipe, I call for 45% of the total flour in the levain, and while this may seem like a lot compared to other sourdough recipes here at The Perfect Loaf, it’s actually rather moderate compared to other rye recipes such as a multi-stage vollkornbrot or 100% whole-grain rye like the roggenvollkornbrot in my cookbook.
Finally, the large preferment also means that much of the flour in the recipe has fermented for a long period of time, which gives it time to build up copious amounts of organic flavor compounds. This flavorful mixture directly translates into the final dough.
Flour Selection
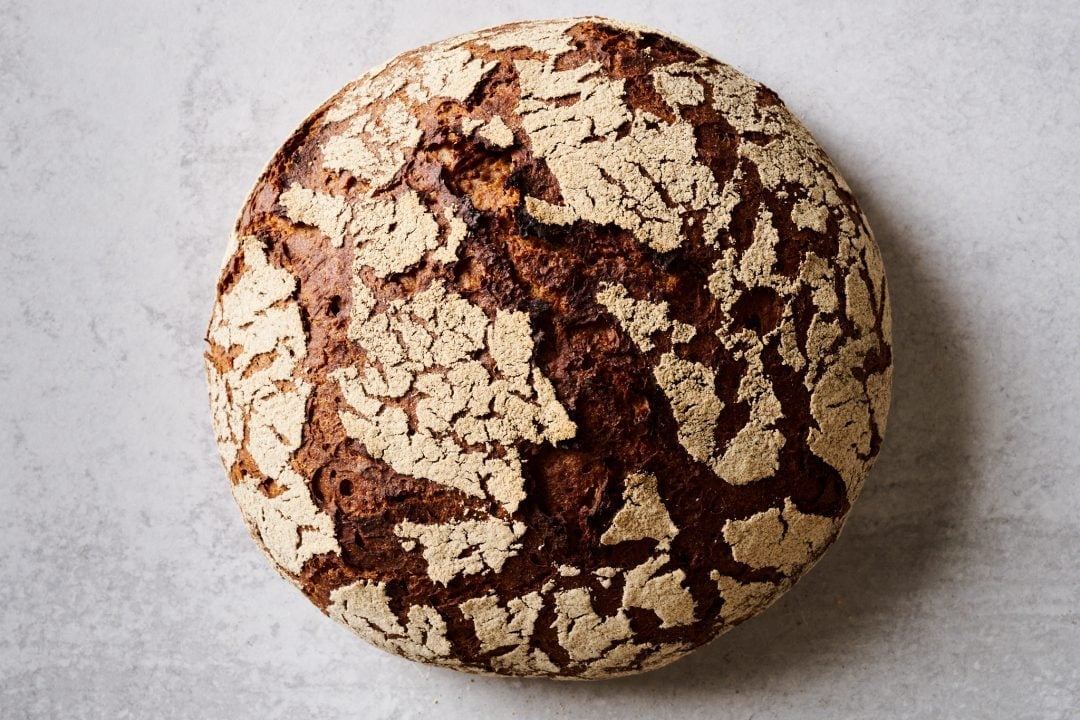
This sourdough rye bread calls for whole dark rye (the same flour you might find in rugbrød, Danish rye bread). This means the flour is not sifted and contains the entire rye berry. Keeping the bran and germ brings increased flavor to the final loaf, specifically, a more earthy and robust flavor profile that’s a touch nutty. Additionally, by keeping the bran and germ, the resulting sourdough rye bread will have more fiber, be richer in nutrients, and keep you full longer.
In addition to the whole rye, I call for 10% high-protein white bread flour to help lighten the loaf just a bit. This higher protein flour brings a touch of airiness and openness to this rye, making for the perfect counterbalance to the dark, heavy rye. If you don’t have any high-protein white flour on hand, feel free to use medium-protein or all-purpose flour.
For a closer look at what makes rye so great (and so delicious), see The Whys of Ryes →
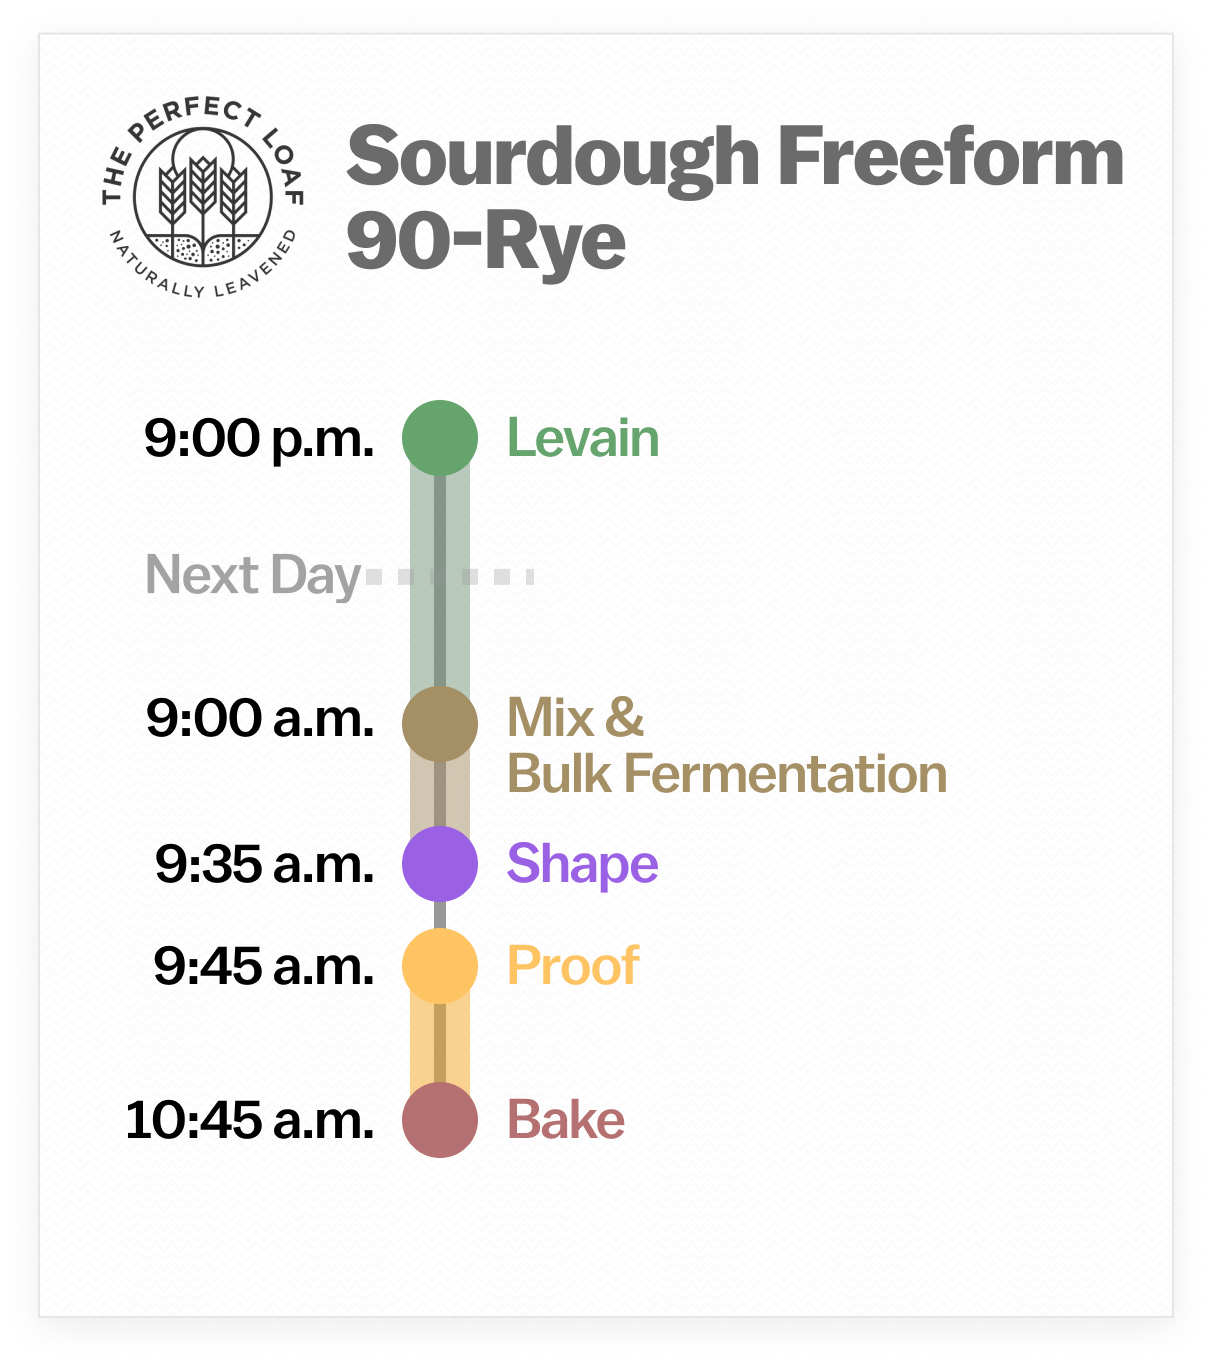
Baking Schedule
The incredible thing about making sourdough rye bread with lots of rye flour and a large preferment is that the schedule is relatively short and the loaf is easy to make. The preferment (levain) runs overnight for 12 hours; the next day, after a short mix, fermentation time, and bake, you’ll have a loaf of rye bread cooling on your countertop.

Sourdough 90-Rye Bread Recipe
This 1,200-gram loaf is large, but it’s the perfect size for a week of eating. If you want to scale the recipe up, including doubling the recipe, use baker’s percentages.
Vitals
| Total dough weight | 1,200 grams |
| Pre-fermented flour | 45.0% |
| Hydration | 90.0% |
| Yield | 1 loaf |
Total Formula
This total formula table shows all the ingredients you need to make this sourdough rye bread. In the Method, below, the ingredients will be broken down into exactly what you need for each step.
Desired dough temperature: 82°F (28°C).
| Weight | Ingredient | Baker’s Percentage |
|---|---|---|
| 544g | Whole rye flour (Central Milling Organic Whole Dark Rye) | 90.0% |
| 60g | High-protein white bread flour (~12.7% protein, King Arthur Bread Flour) | 10.0% |
| 544g | Water | 90.0% |
| 11g | Fine sea salt | 1.8% |
| 41g | Ripe sourdough starter, 100% hydration | 6.8% |
Sourdough 90-Rye Bread Method
1. Prepare the levain – 9:00 p.m. (the day before mixing)
| Weight | Ingredient | Baker’s percentage |
| 272g | Whole rye flour | 100.0% |
| 272g | Water 1 (levain) | 100.0% |
| 41g | Ripe sourdough starter, 100% hydration | 15.0% |
Mix the ingredients in the chart above in a large jar or medium bowl and leave them covered with a lid or reusable plastic bowl cover at a warm temperature, 74-76°F (23-24°C), to ripen overnight.
Note that this is a very large levain, so be sure your container can hold the ingredients plus a little room for expansion overnight. My favorite container for this size levain, seed soakers, and other large preferments, are 1-quart round Cambro Camwear containers.
2. Mix – 9:00 a.m. (the next day)
| Weight | Ingredient |
| 272g | Whole rye flour |
| 60g | High-protein white bread flour |
| 272g | Water |
| 11g | Fine sea salt |
| 585g | Ripe levain (from Step 1) |
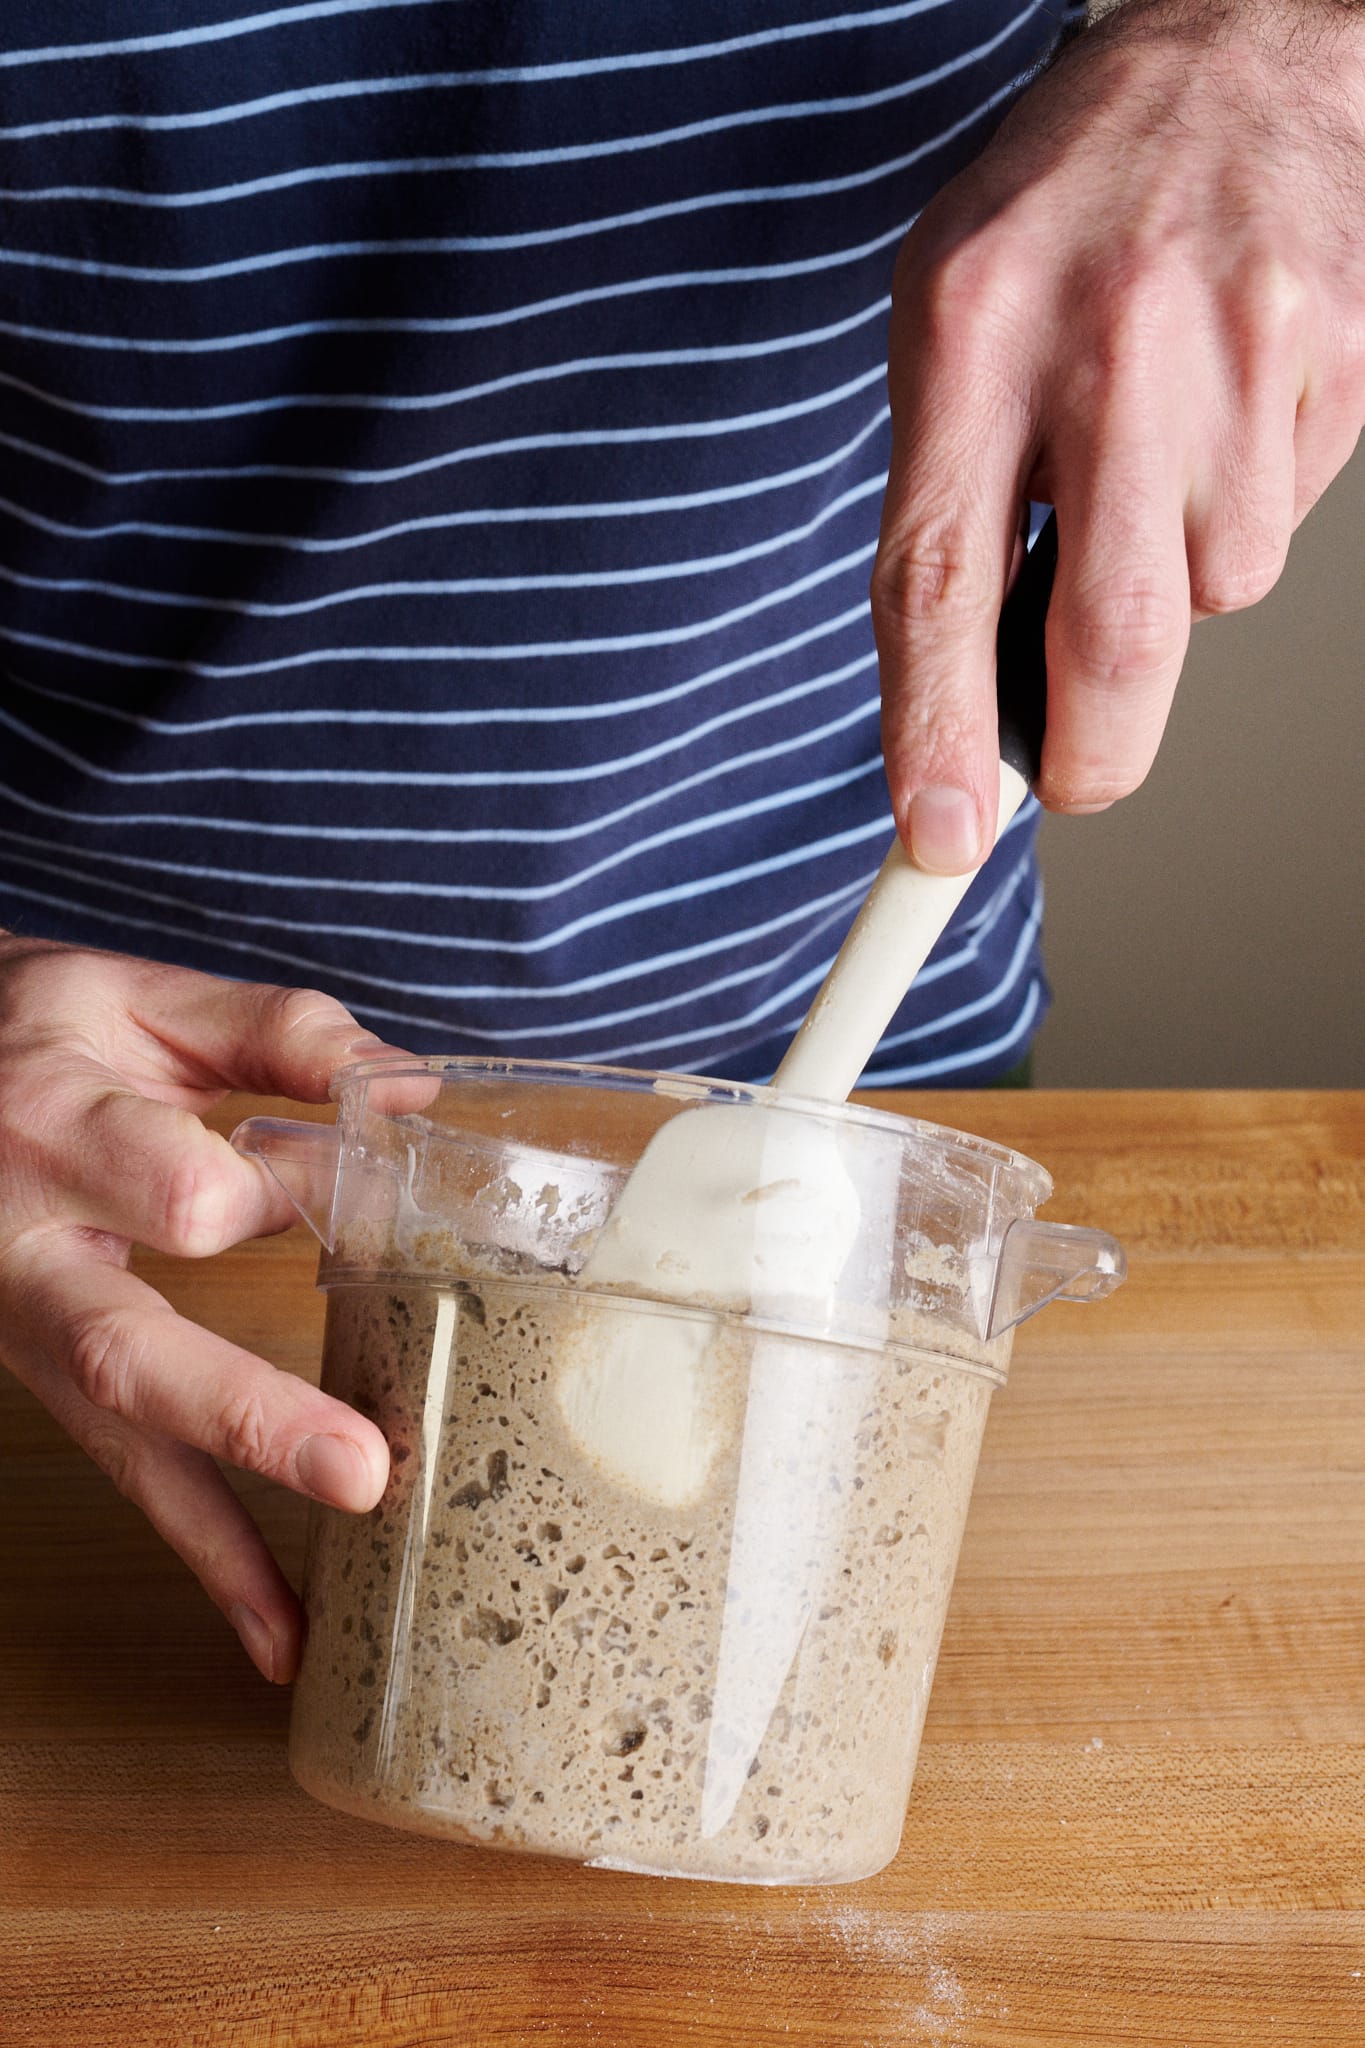
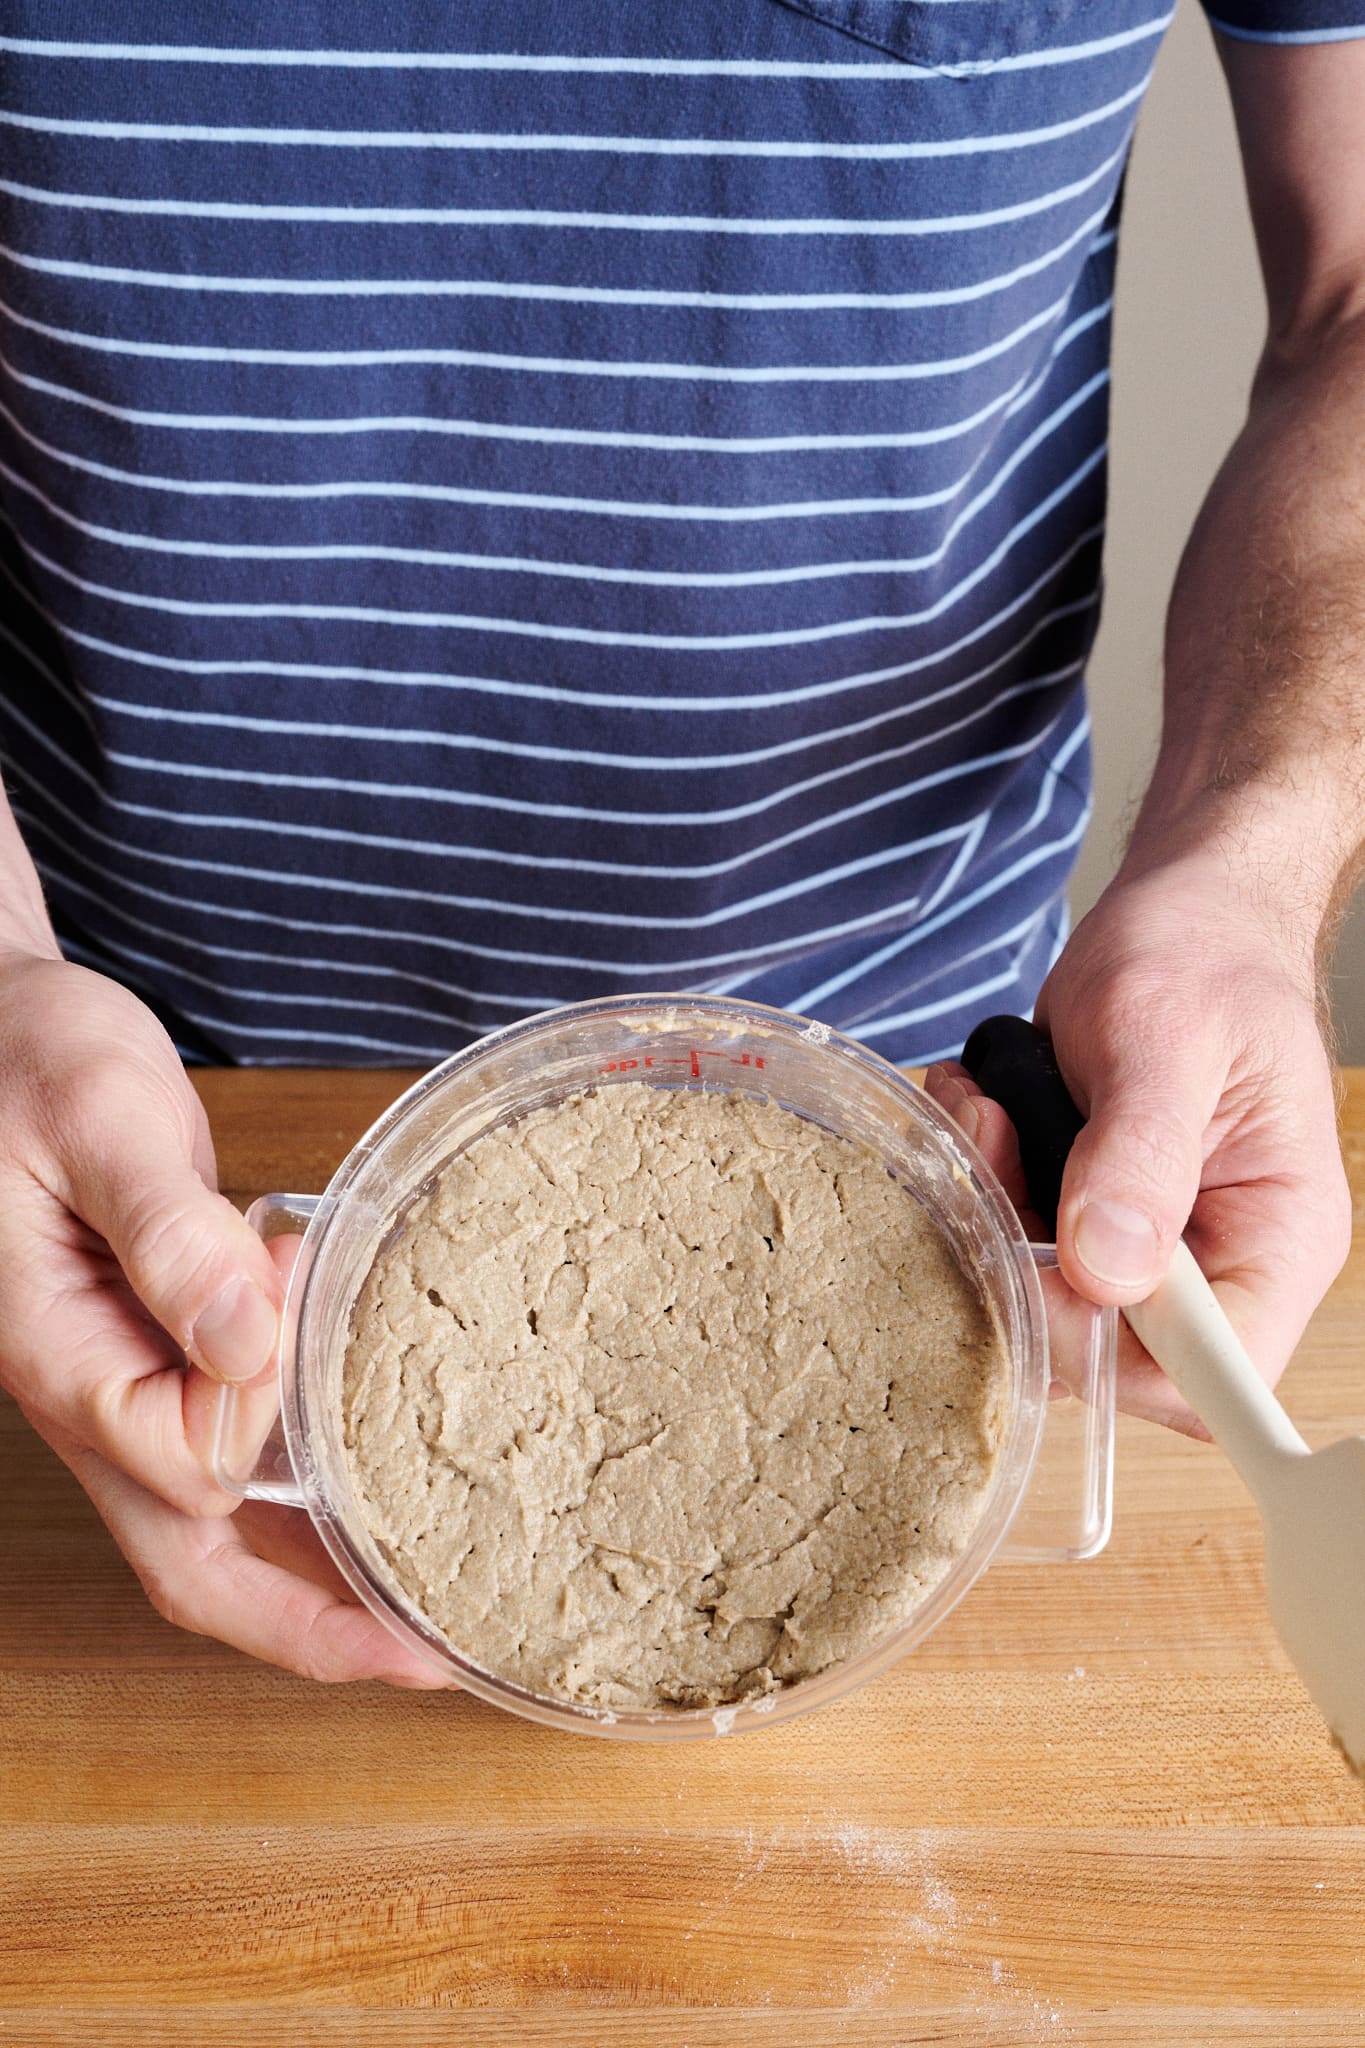
In the morning, the levain should have risen and aerated significantly (see below). The aroma of the levain will almost be earthy with fruity overtones, similar in a way to dark red wine.
With this rye dough, it’s important to hit the desired dough temperature (DDT) of 82°F (28°C). This is warmer than typical bulk fermentation temperatures here at The Perfect Loaf, so warm the mixing water as necessary to ensure the dough ends up at that temperature (see the guide to dough temperatures for a handy chart and calculator for figuring out this water temperature).
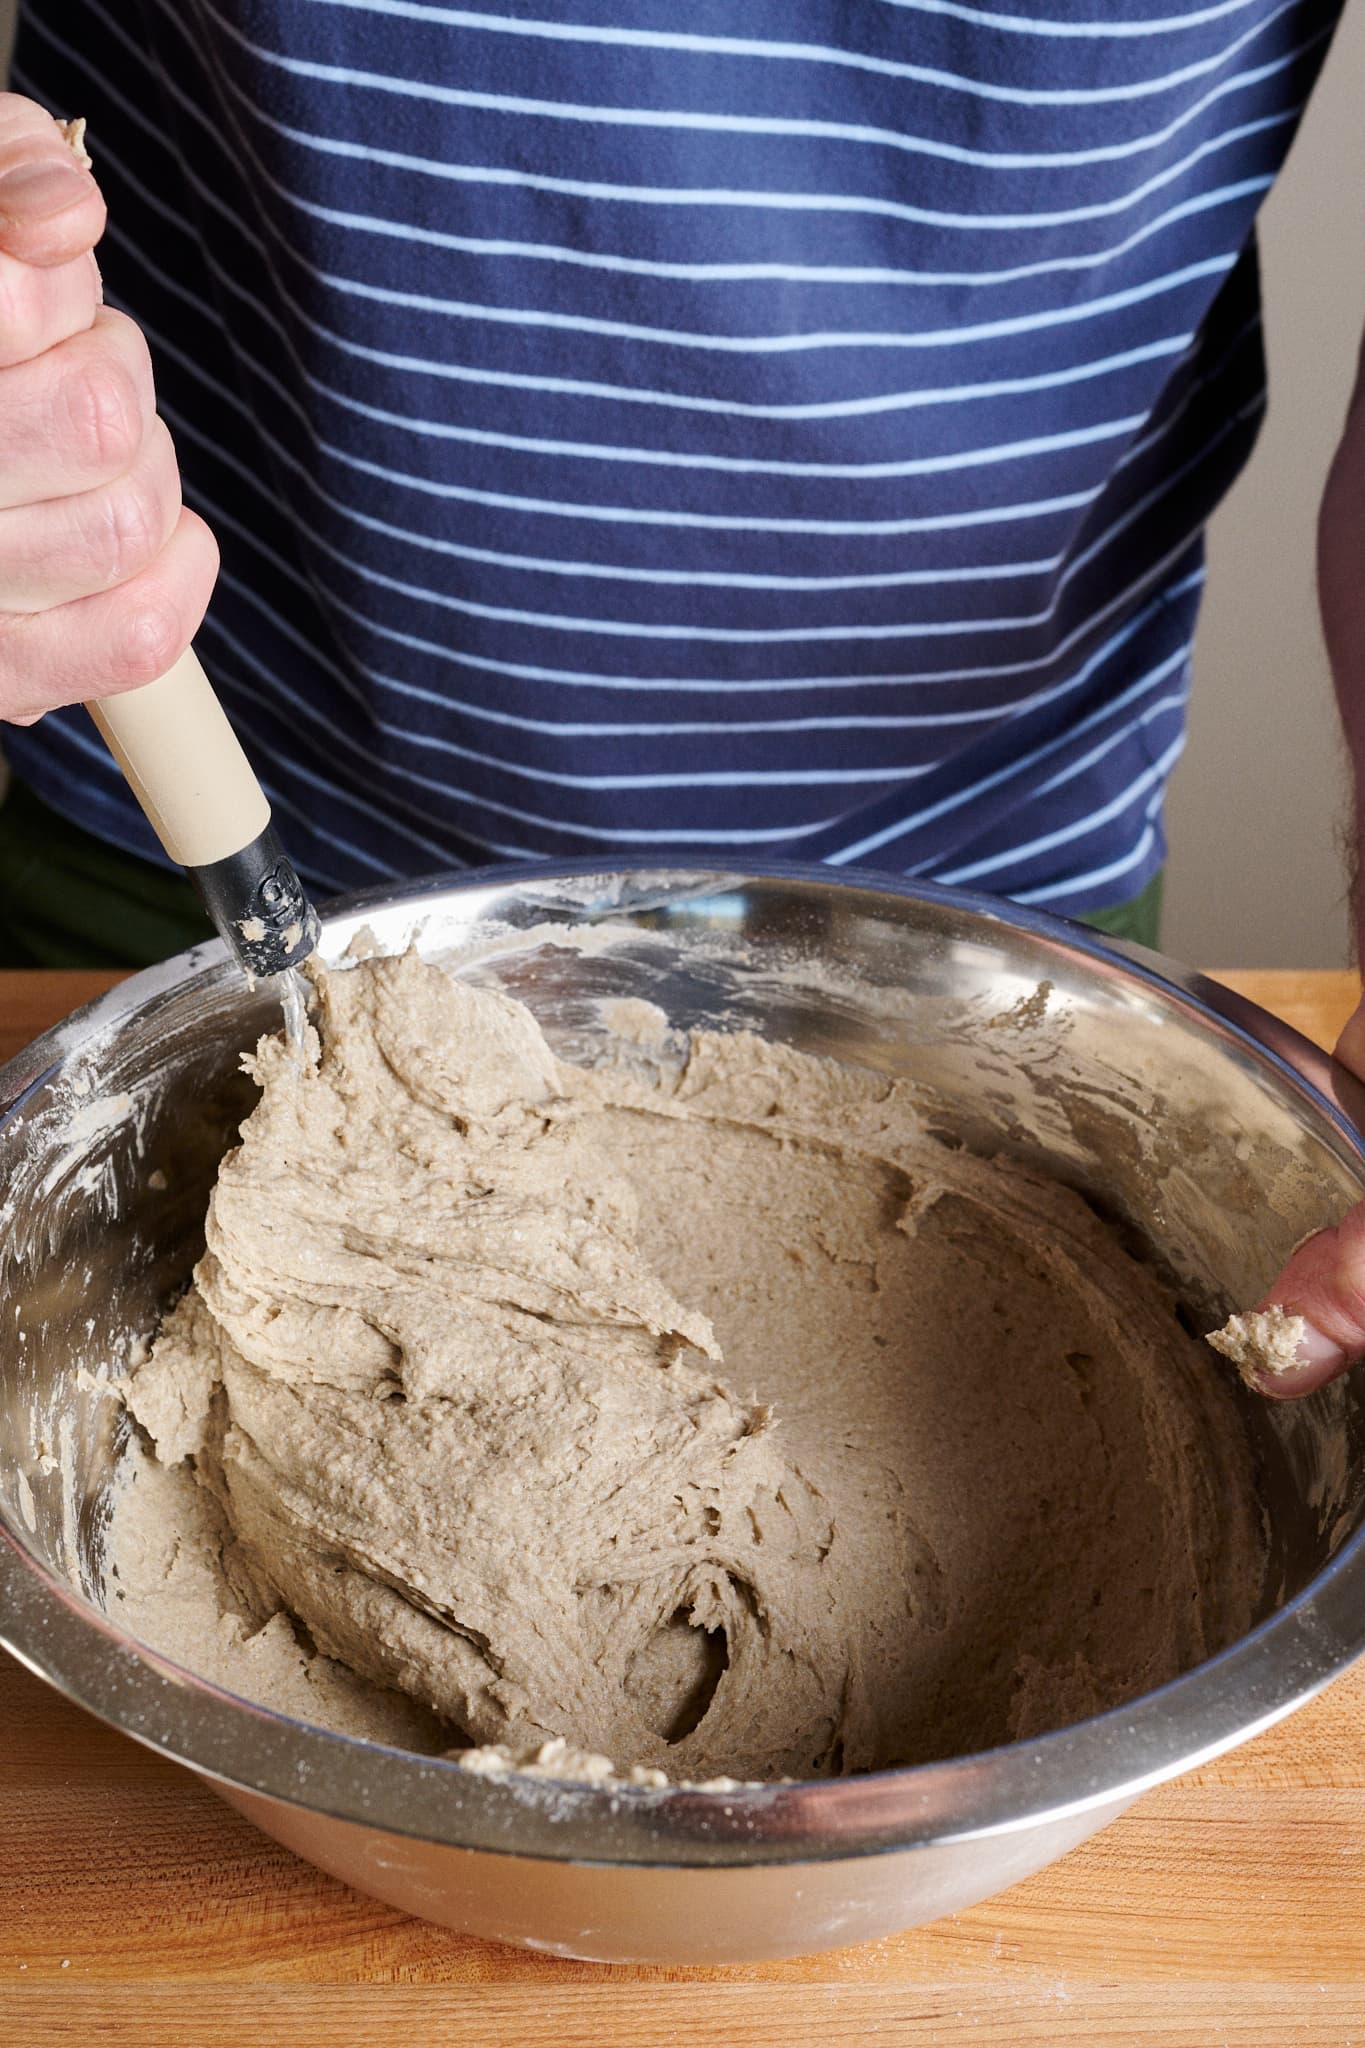
Hydration Note: As with any bread recipe, you might need to adjust the dough’s hydration to suit your flour (especially if baking in a humid environment. When mixing, hold back a little of the water and add it only if the dough feels like it can handle it (look at the images below to help judge the consistency).
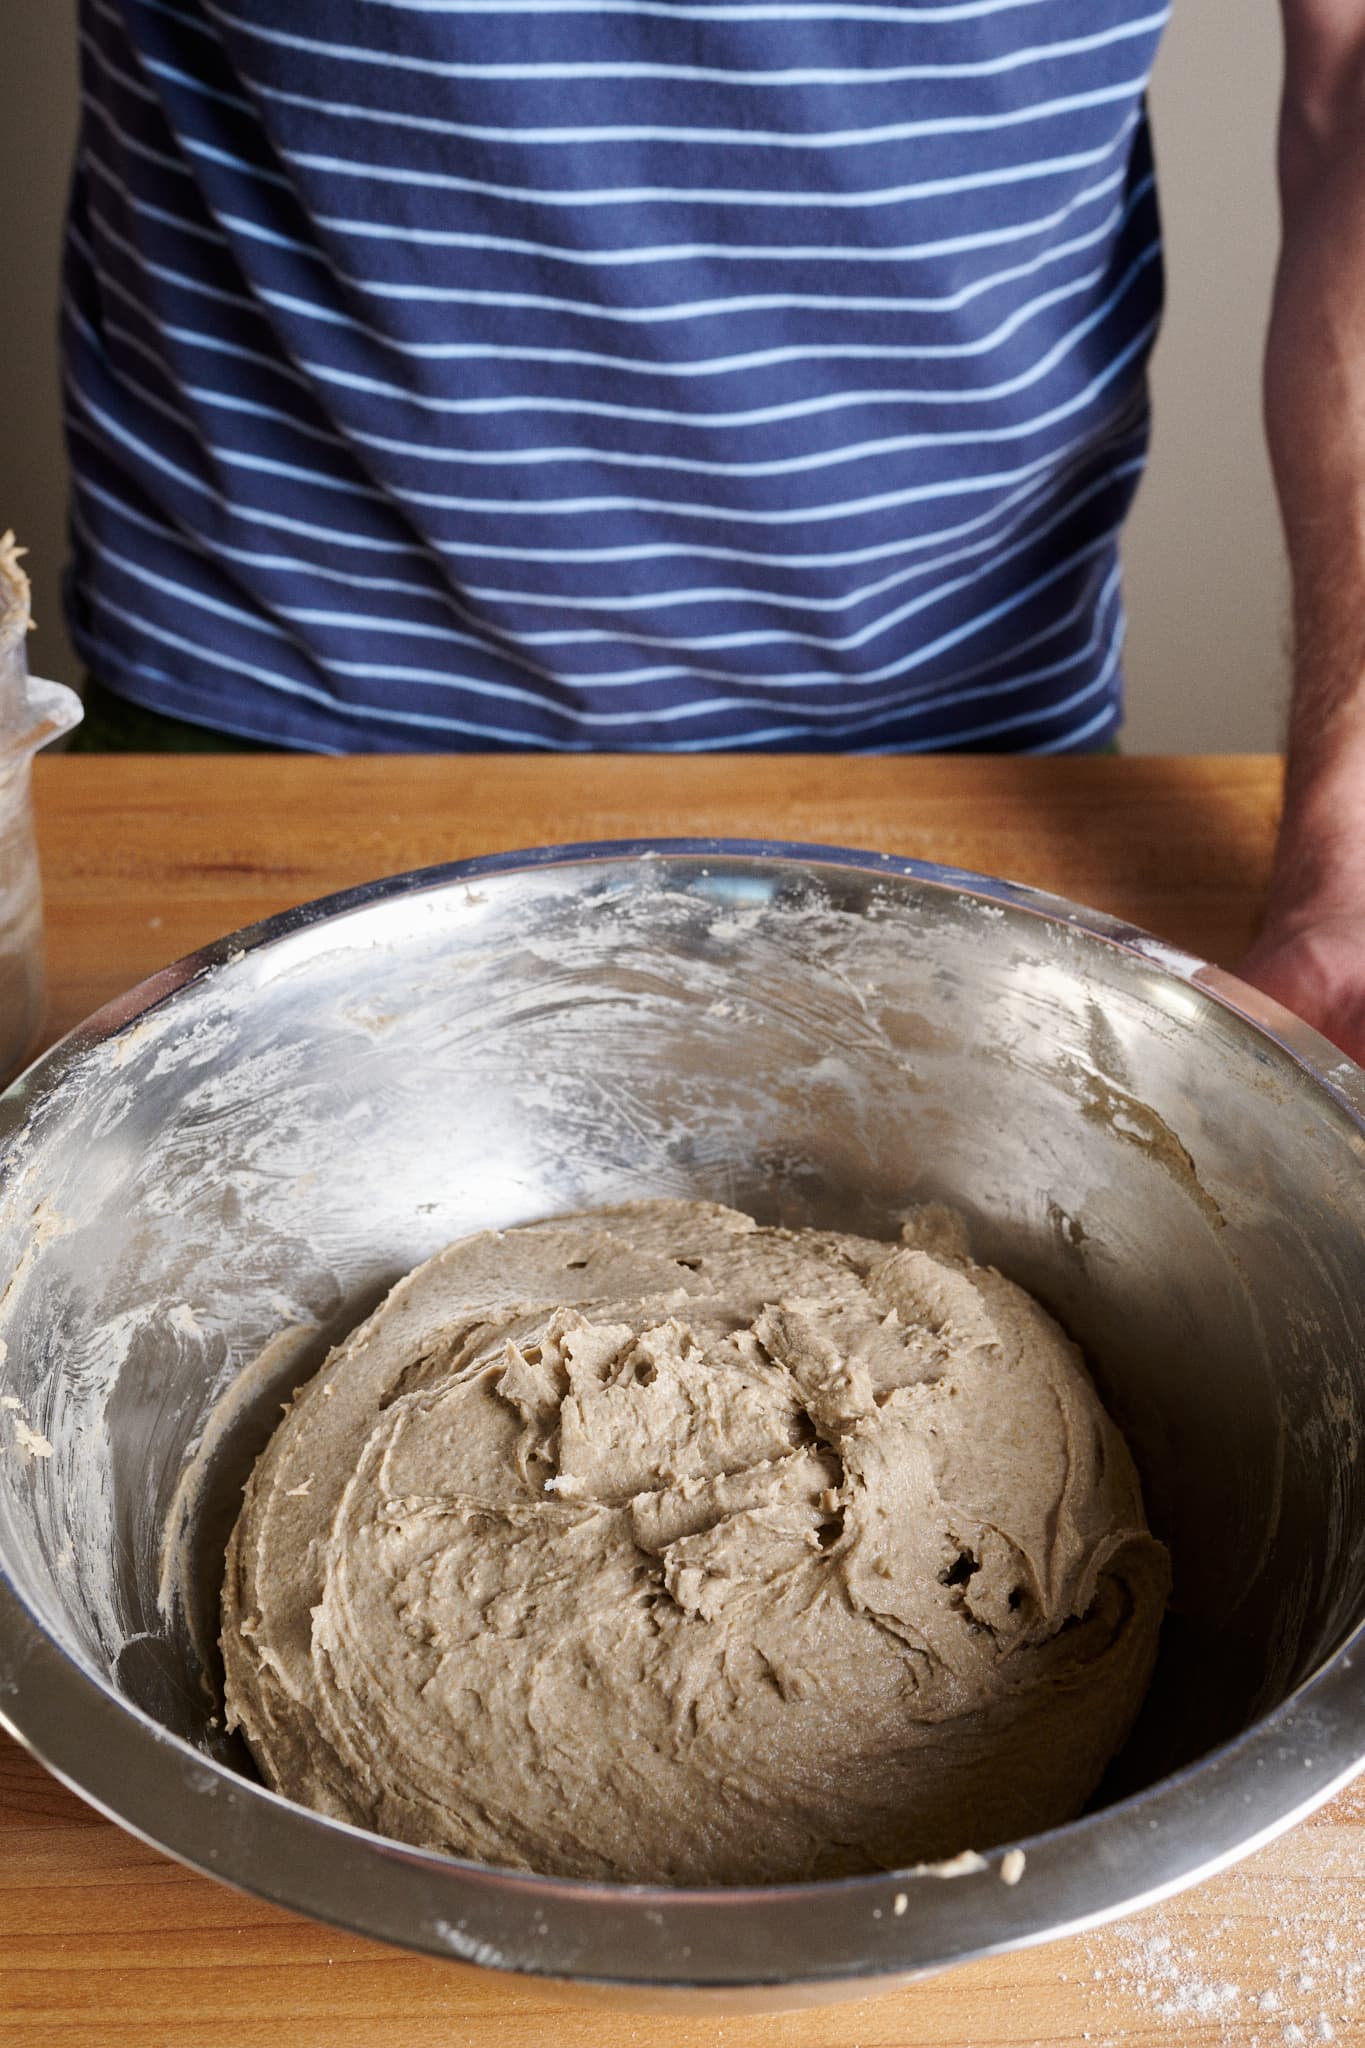
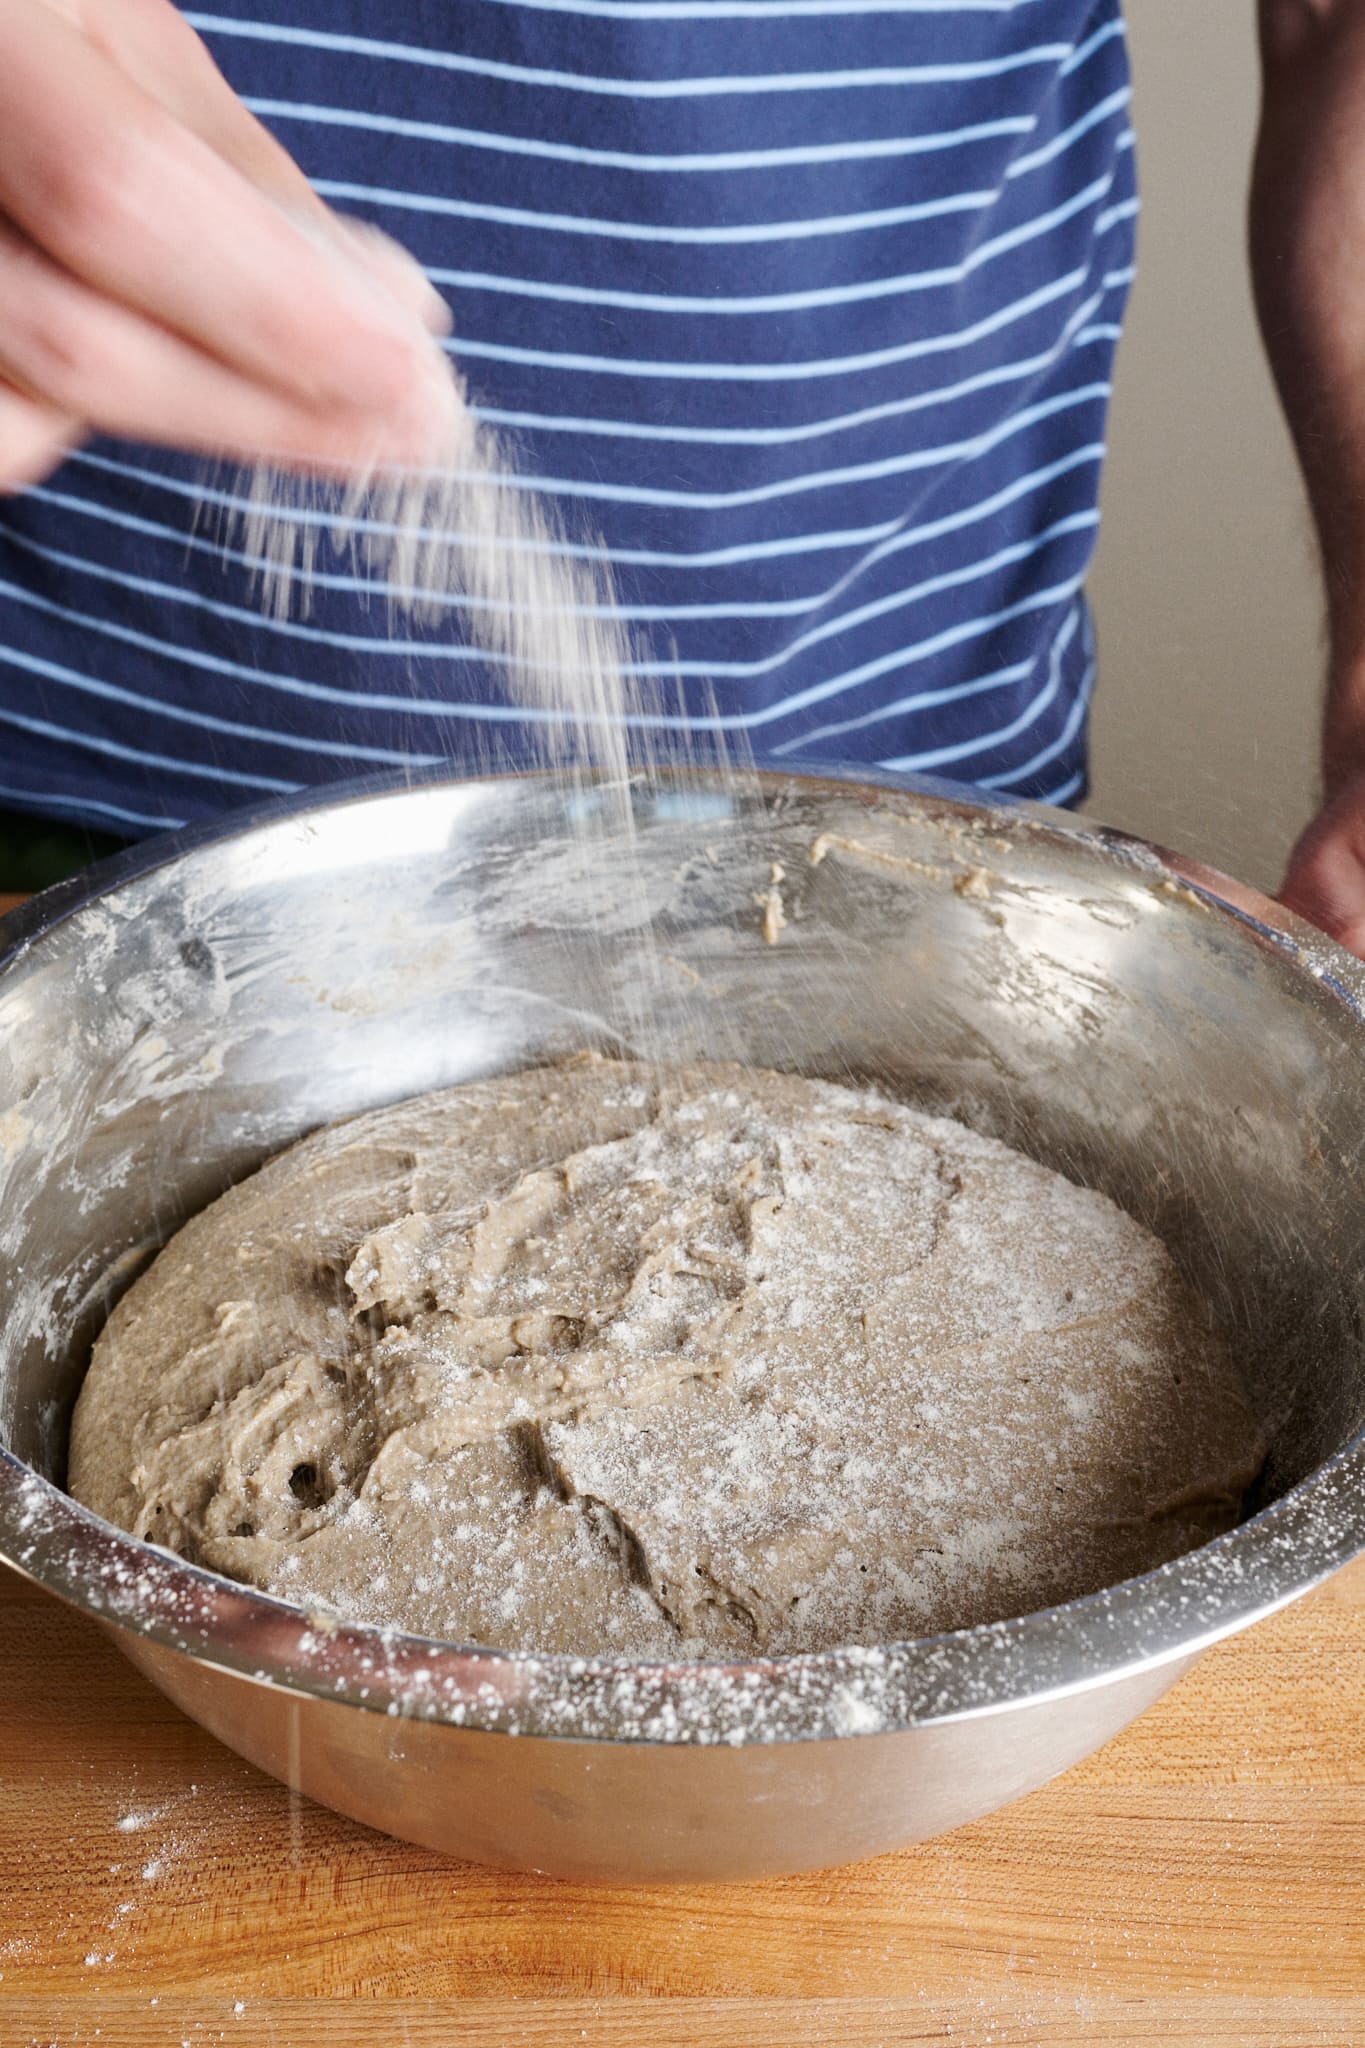
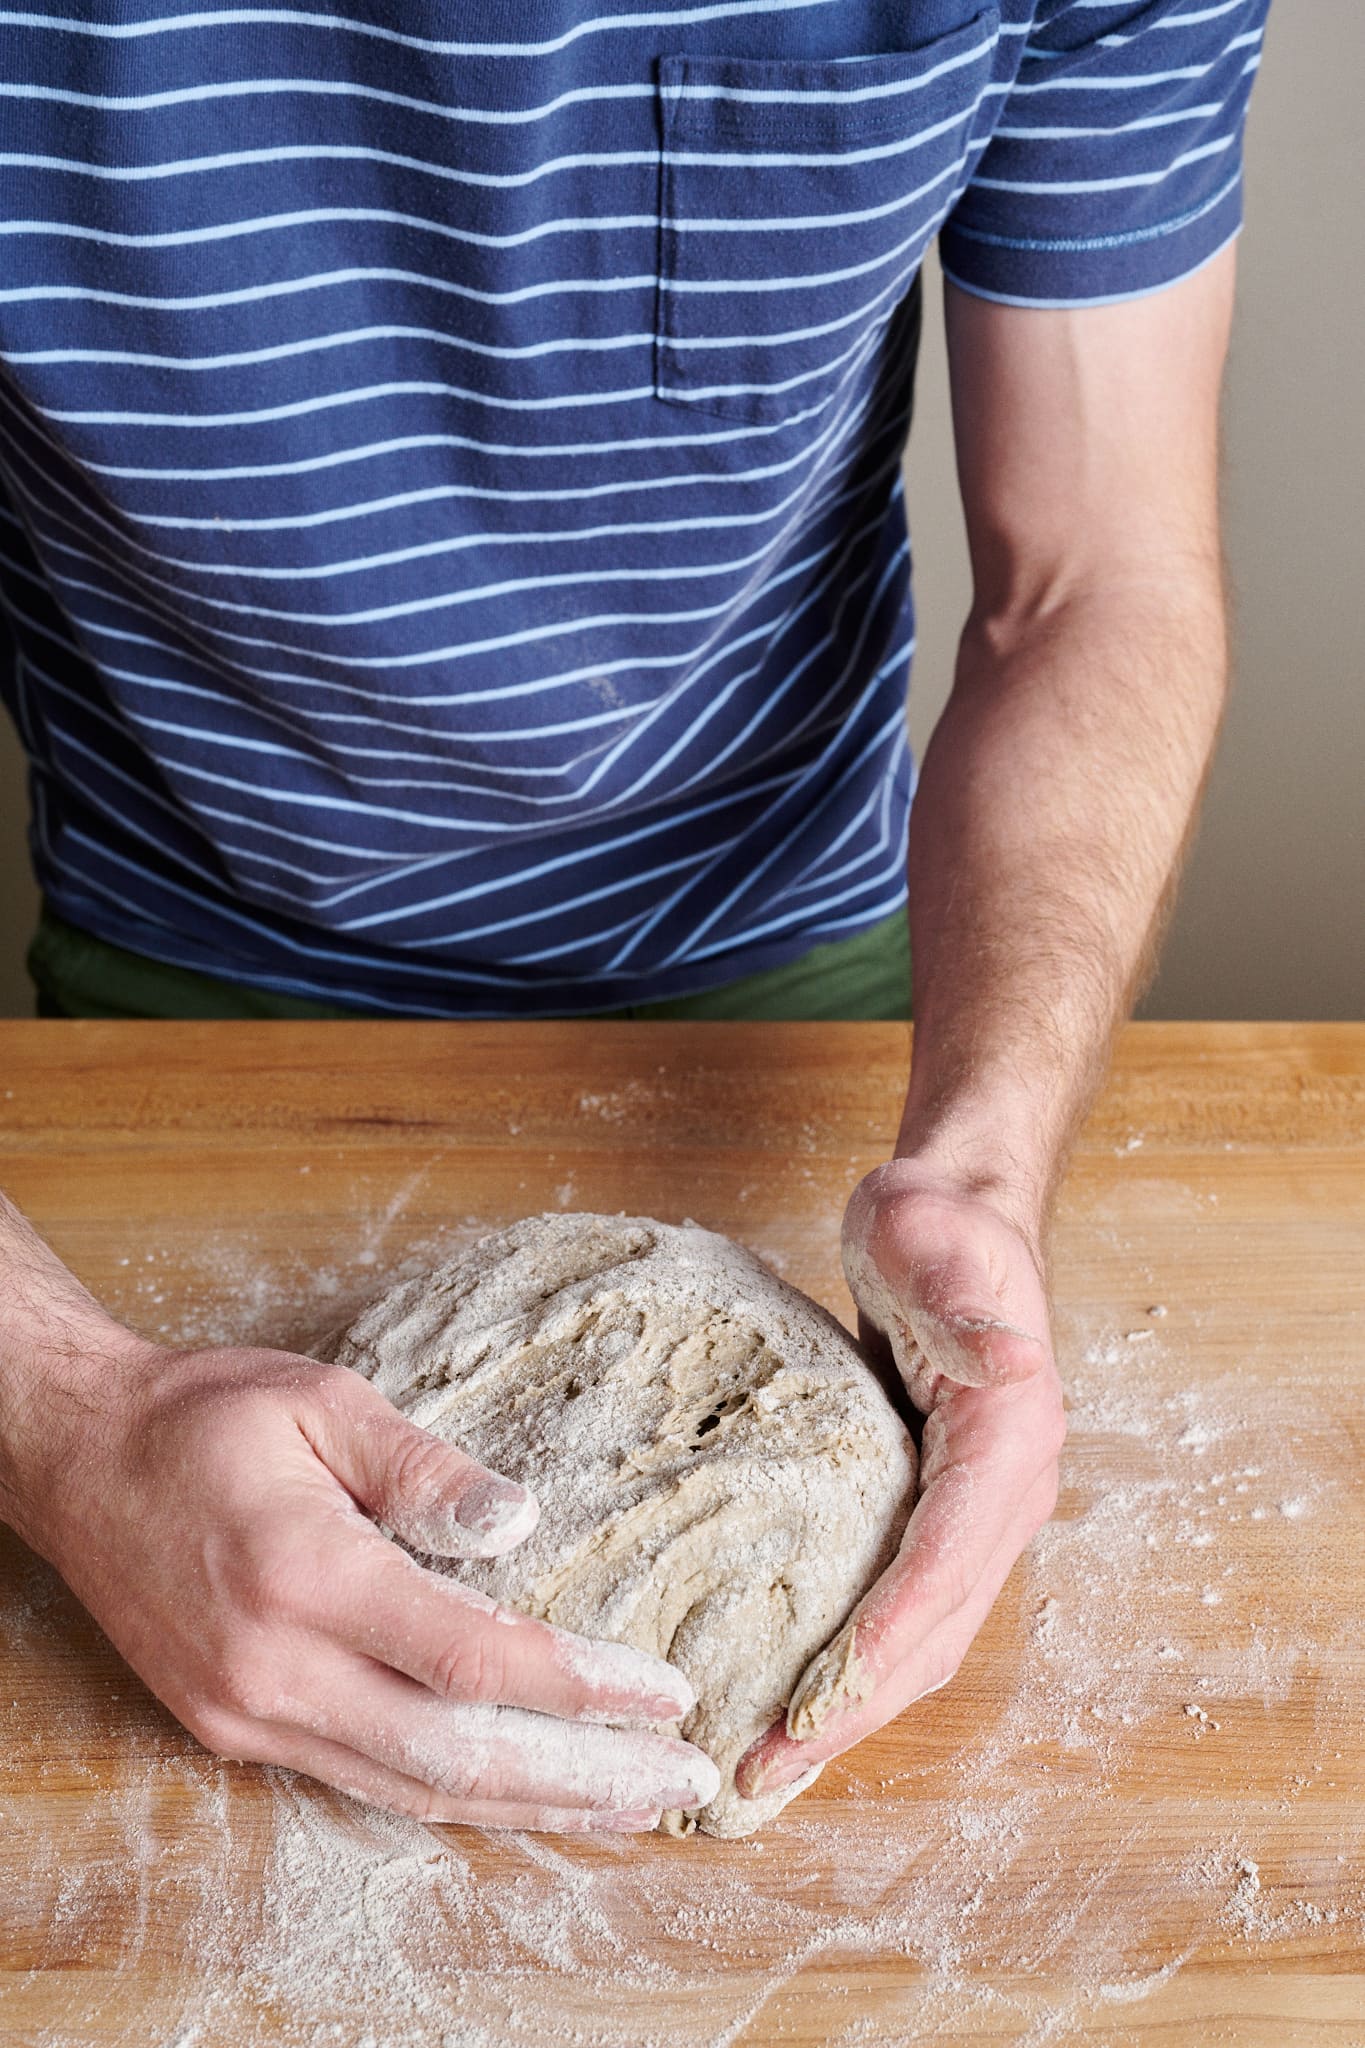
Place the flour, water (see note above), salt, and levain in a large bowl. With wet hands (or, my preference, using a sturdy dough whisk), mix thoroughly until no dry bits remain (see below, left). Rye does not benefit from mixing and kneading in the same way as wheat due to its low gluten content. Therefore, it’s only necessary to mix this dough until no dry flour remains.
Gather up the dough into a ball in the center of the mixing bowl (see below, right). Take the dough’s temperature to record the final dough temperature, and then cover.
3. Bulk Fermentation – 9:15 a.m. to 9:35 a.m. (20 minutes)
At a warm room temperature, 74-76°F (23-24°C), bulk fermentation should take 20 minutes (yes, it’s short!). Because this dough is primarily rye flour, it doesn’t benefit from strengthening and therefore does not require any stretches and folds during this time.
4. Shape – 9:35 a.m.
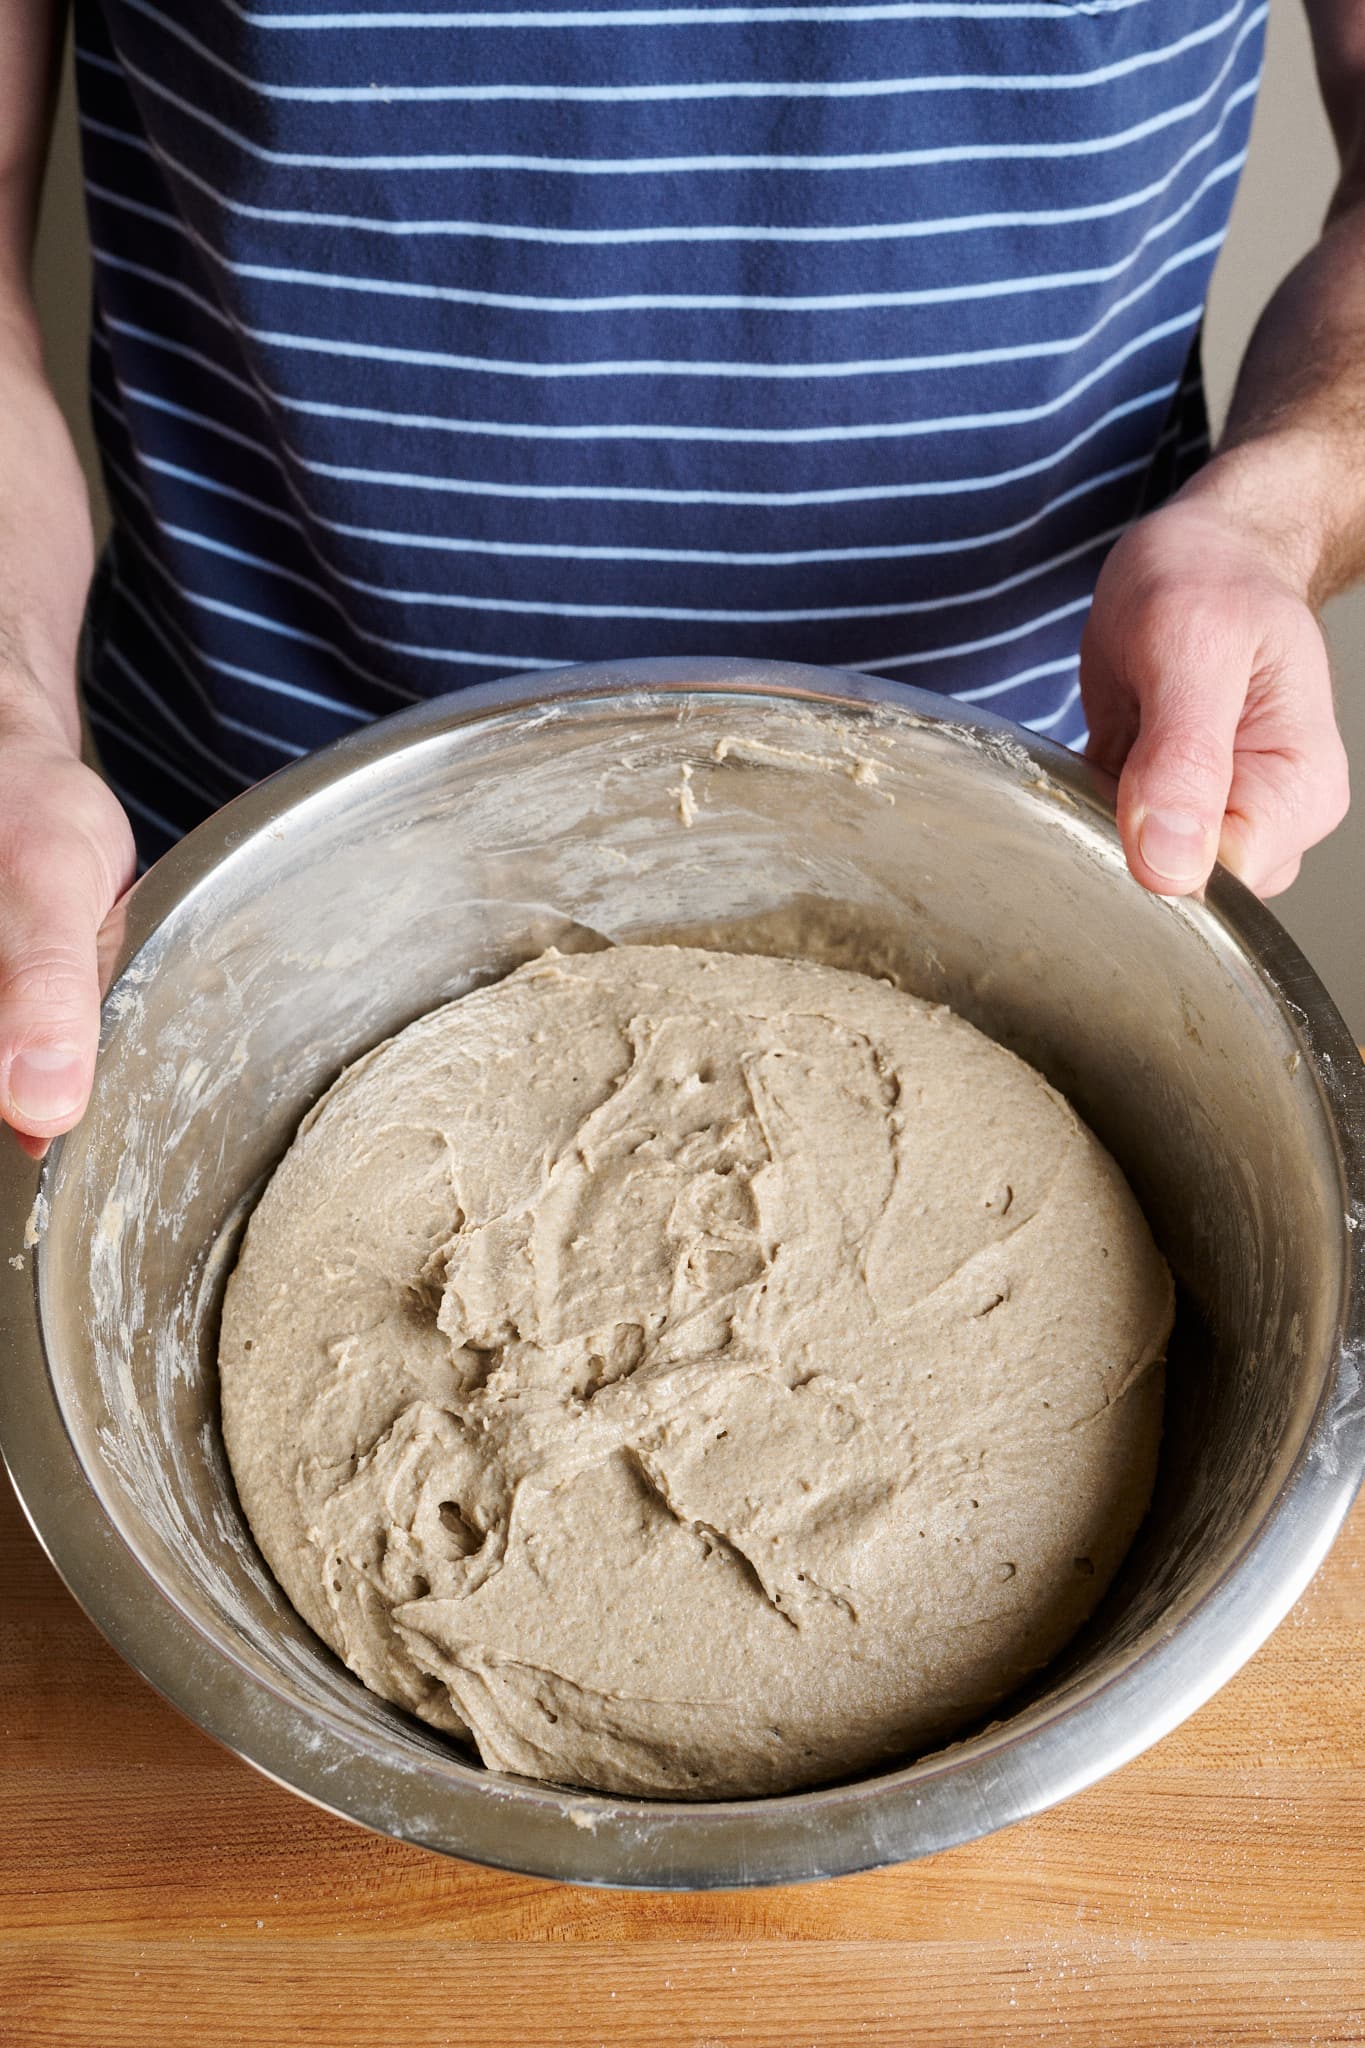
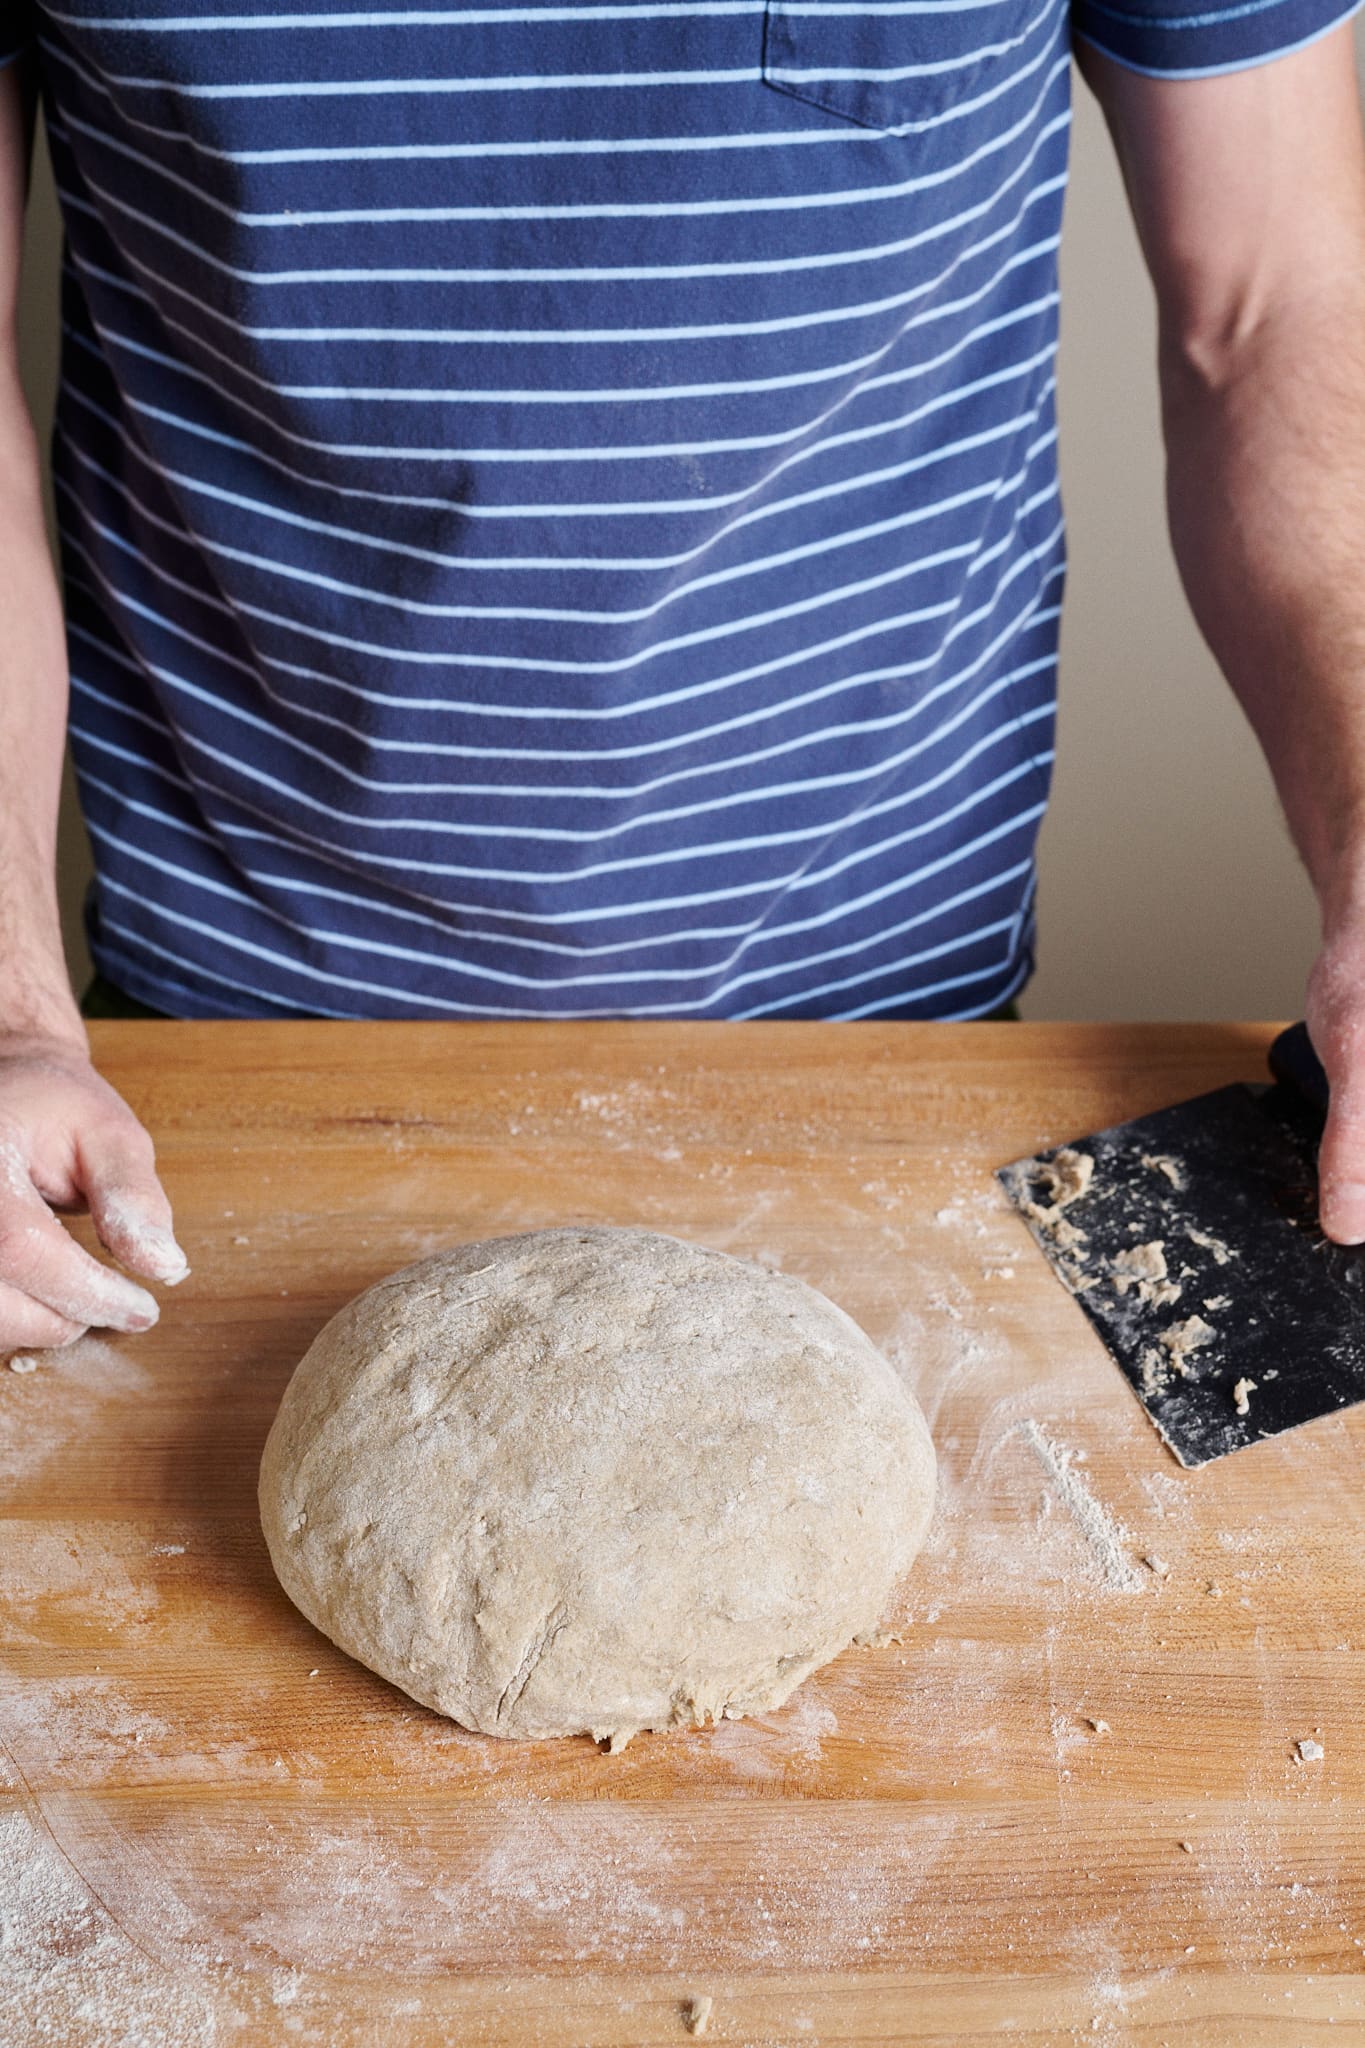
Note that if your final dough temperature was below 82°F (28°C), you might need to extend bulk fermentation. The dough is ready to shape when it has expanded (about 20%), has smoothed, and feels slightly puffy to the touch (see below).
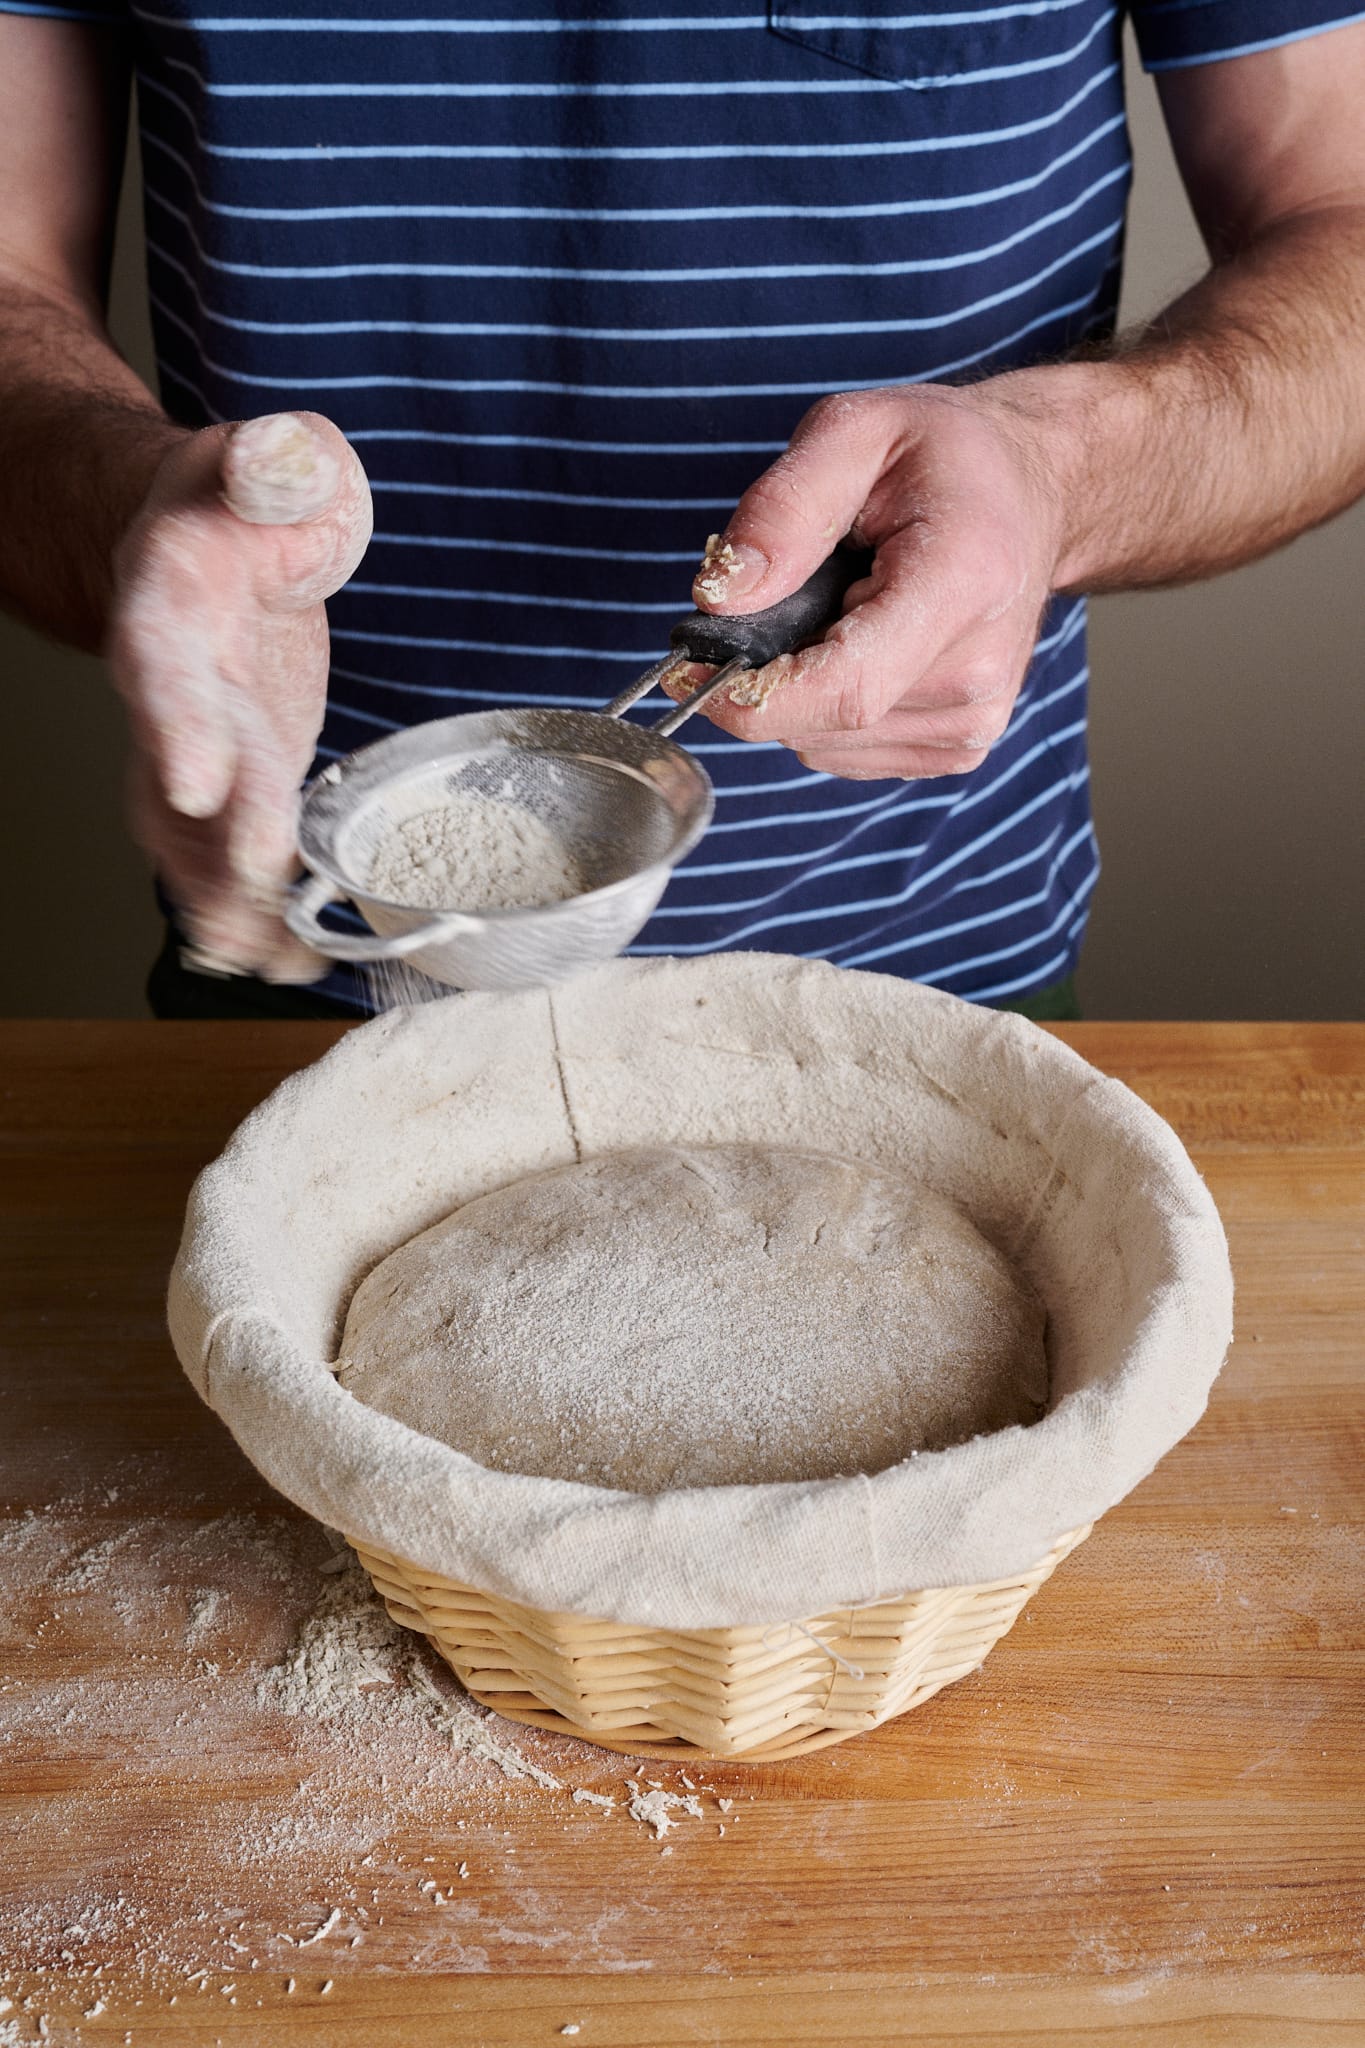
Prepare an 8-inch round proofing basket or banneton by liberally dusting on whole rye flour. Be sure the entire surface area of the basket’s interior is covered with flour.
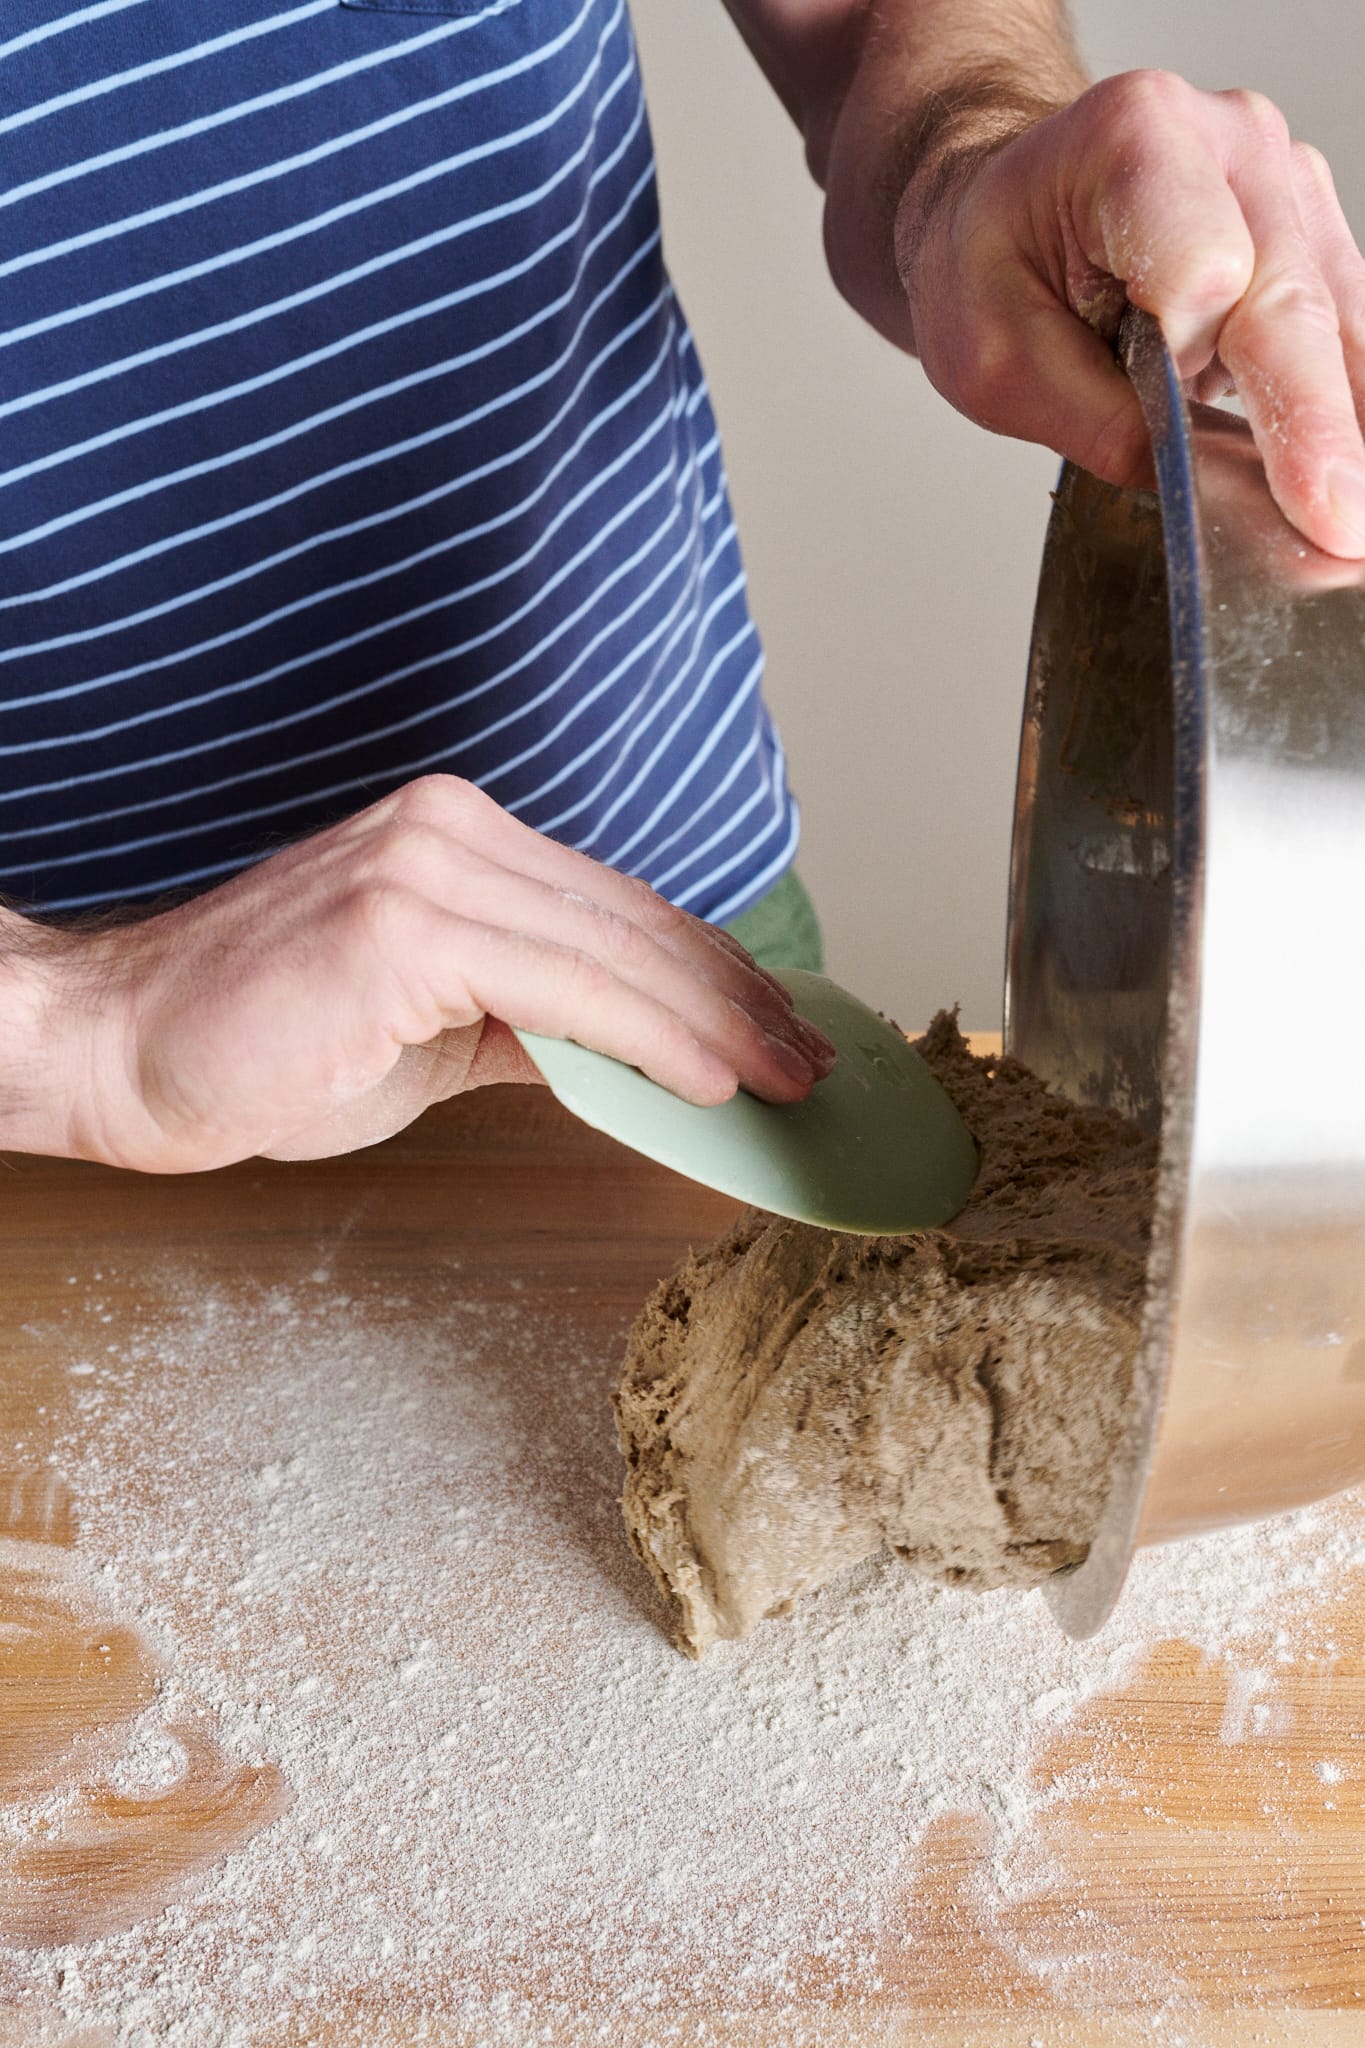
This dough is very sticky, so it’s important to use enough rye flour on your work surface and handle the dough as little as possible. The more you handle the dough, the faster it absorbs the dusting flour and becomes sticky.
Flour your work surface, the top of the dough in the large bowl, and your hands. Scrape the dough onto the floured work surface with the floured top of the dough facing down.
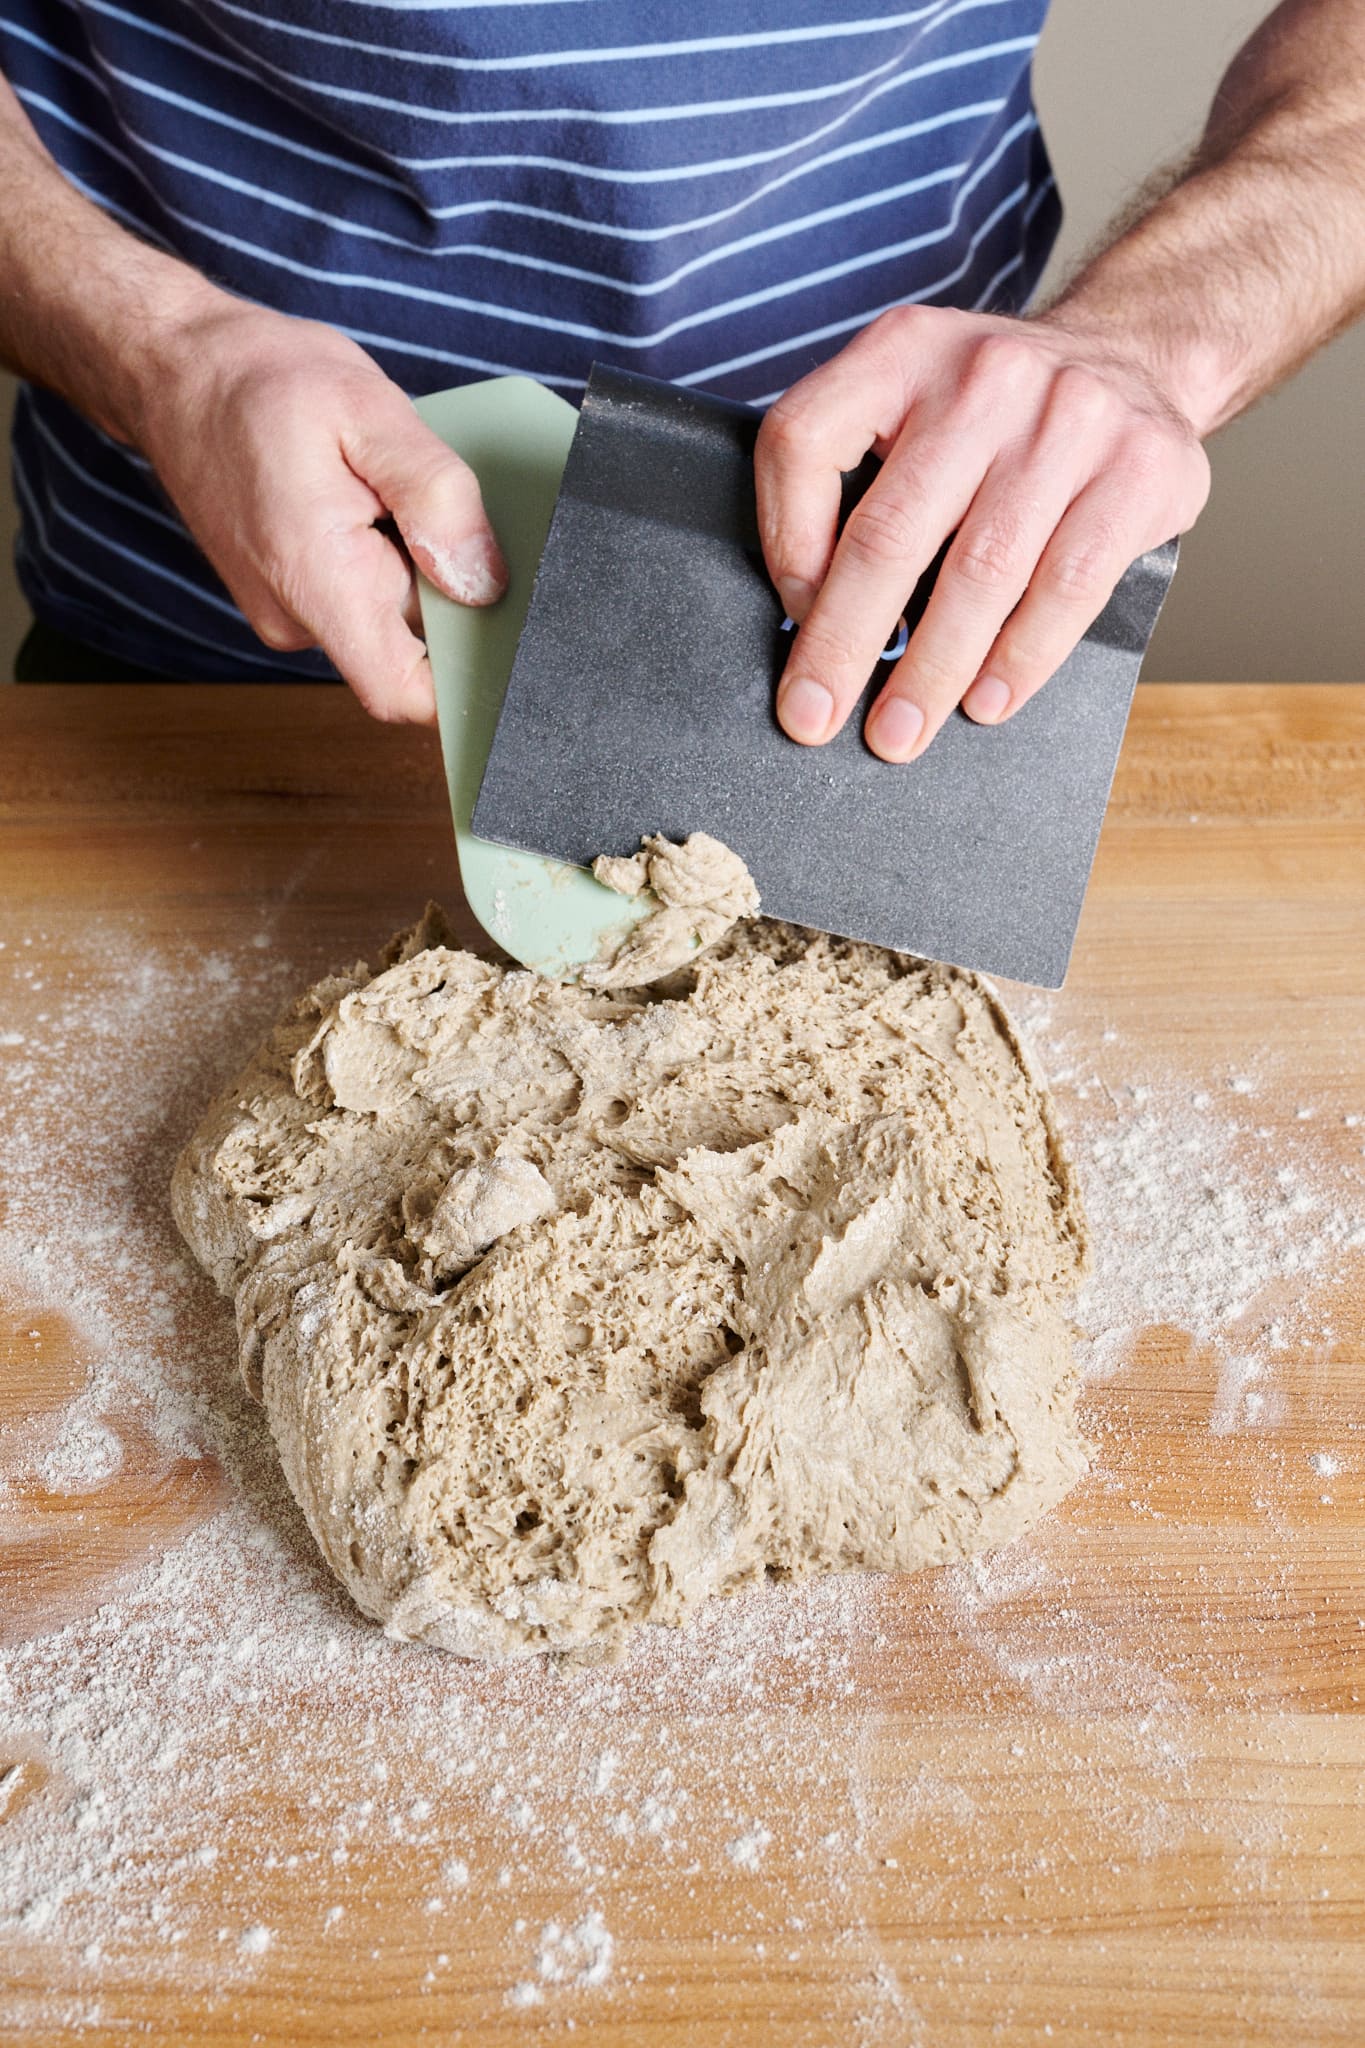
Using your bench scraper, fold the left side of the dough over to about the middle. Then, use the scraper to fold the top (twelve o’clock) down to the middle. Repeat for the right side and bottom. You should now have a folded-up shape that loosely resembles a square in front of you.
Using your floured hands, flip the dough over and quickly and confidently round it until it gets into a rough ball shape. It does not have to be a perfect ball. Just do your best to gather it with as few motions as possible.
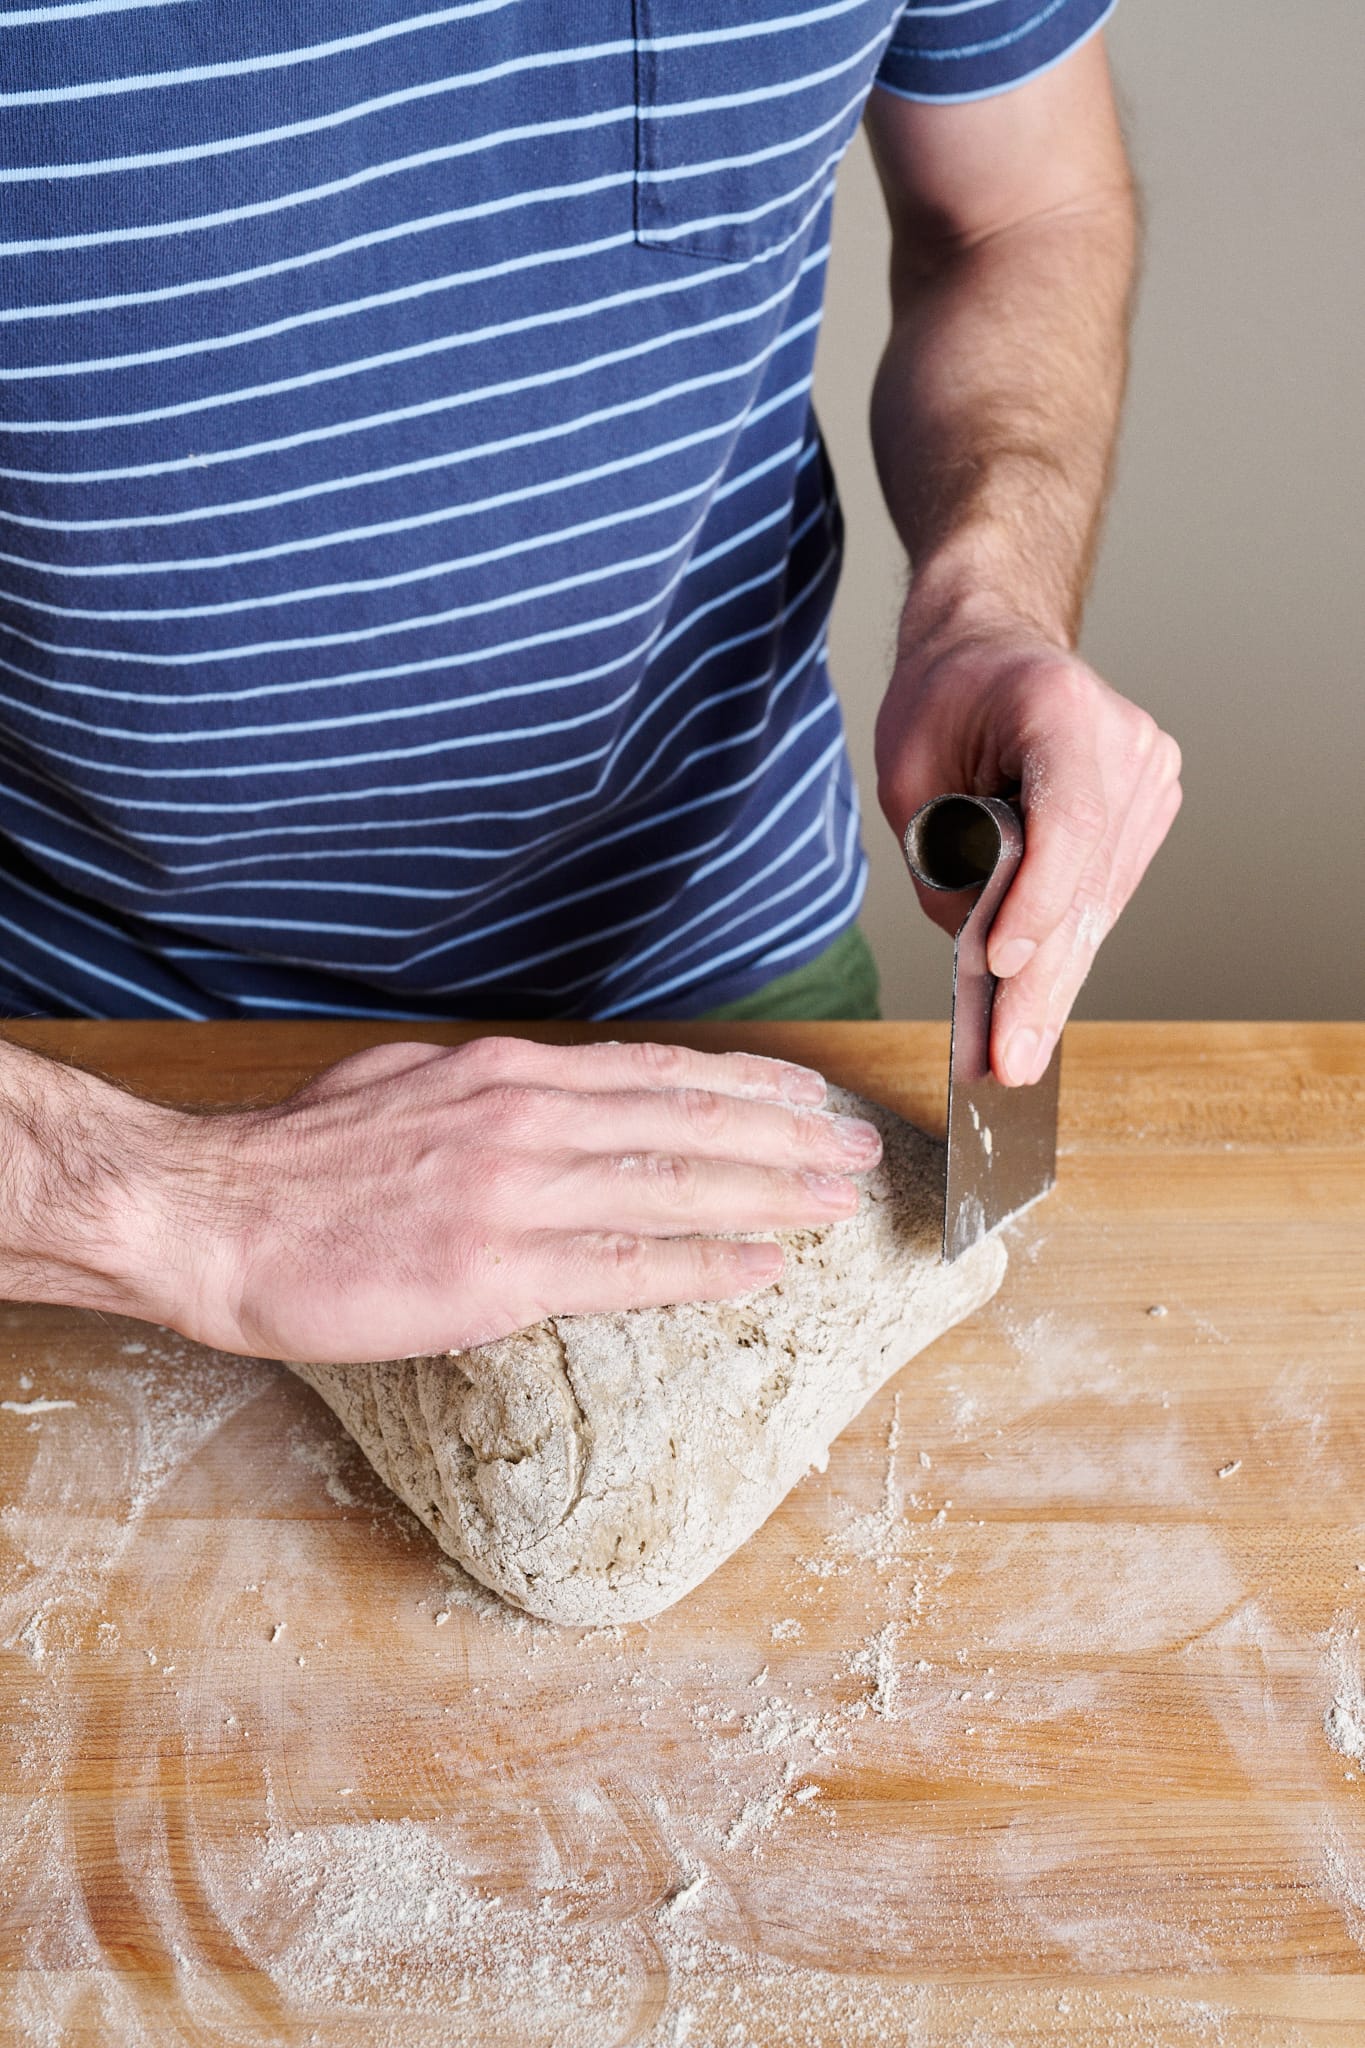
Using your bench scraper, scoop up the dough and place it seam-side-down into the prepared proofing basket.
Dust the top of the dough with more whole rye flour in an even layer. This will eventually crack open as the dough proofs. Cover the basket with a reusable plastic cover for an air-tight seal.
5. Proof – 9:45 a.m. to 10:45 a.m.
At room temperature, this rye sourdough bread will take 1 hour to proof.
During this time, preheat your oven with a baking stone or steel on a rack in the bottom third to 450°F (230°C).
6. Bake – 10:45 a.m.
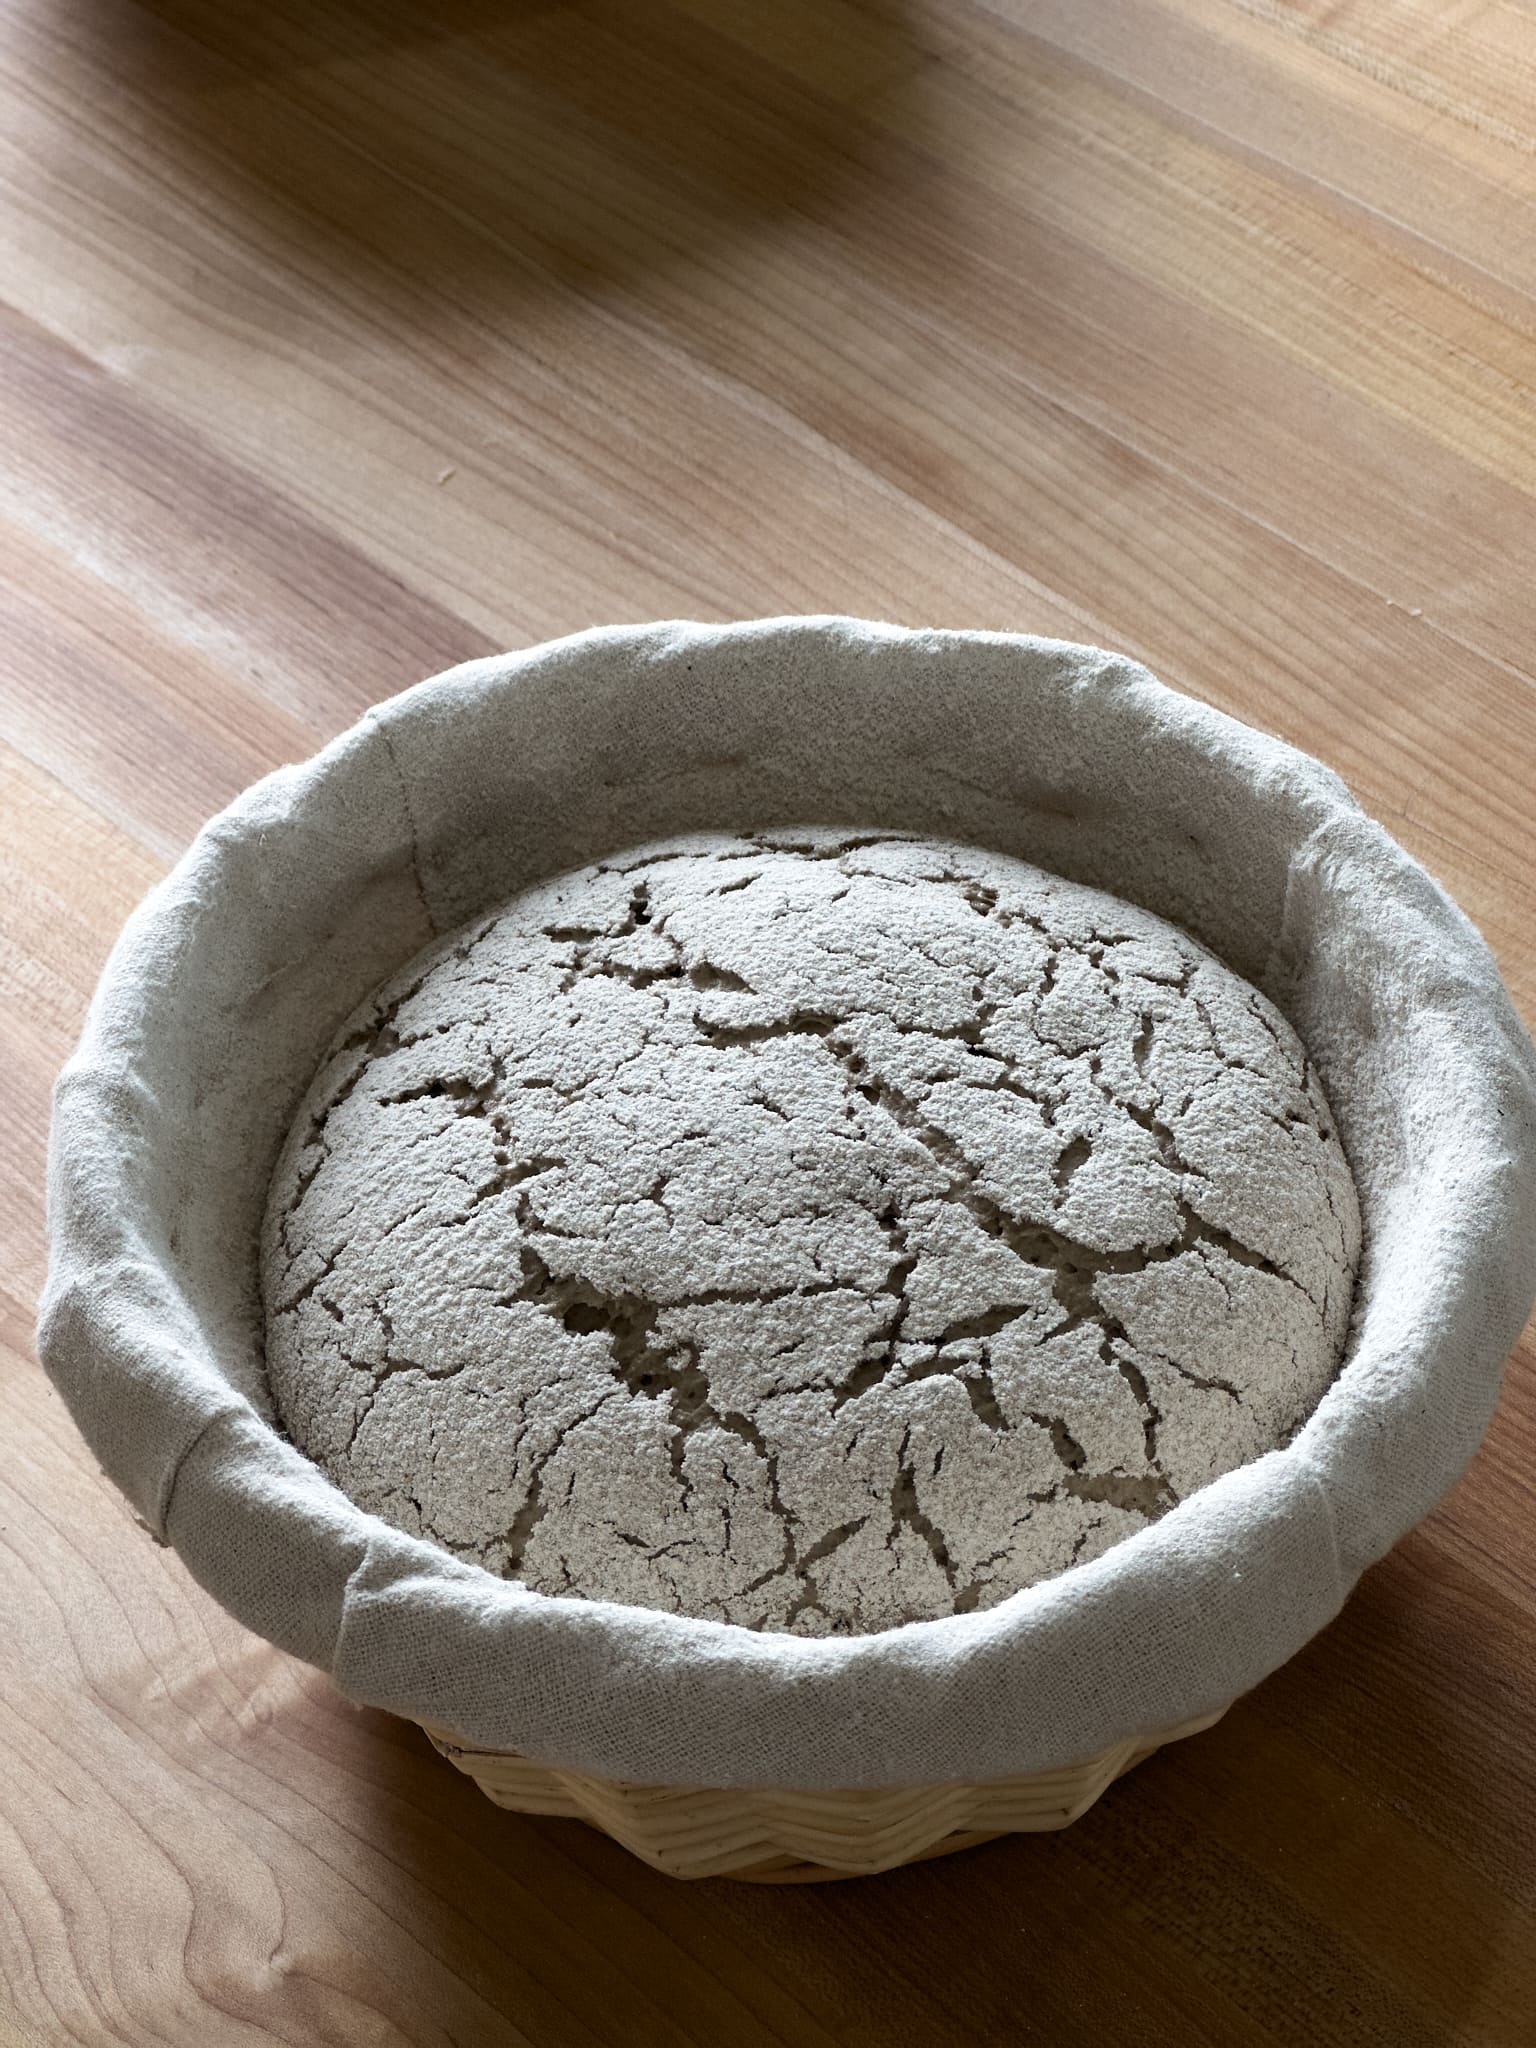
The rye dough is ready to bake when it is puffy to the touch and has cracks that are at least ½-inch wide all over the top (see below).
Place a piece of parchment paper on a pizza peel or inverted baking sheet. Tip the dough out of the basket into your hand and quickly invert it over the parchment paper seam-side down.
Slide the dough onto the preheated baking surface, steam the oven, and bake for 30 minutes. After this time, reduce the temperature of the oven to 400°F (205°C) and bake for 30 to 35 minutes longer, until the crust is deep golden brown and a knock to the bottom sounds a bit hollow.
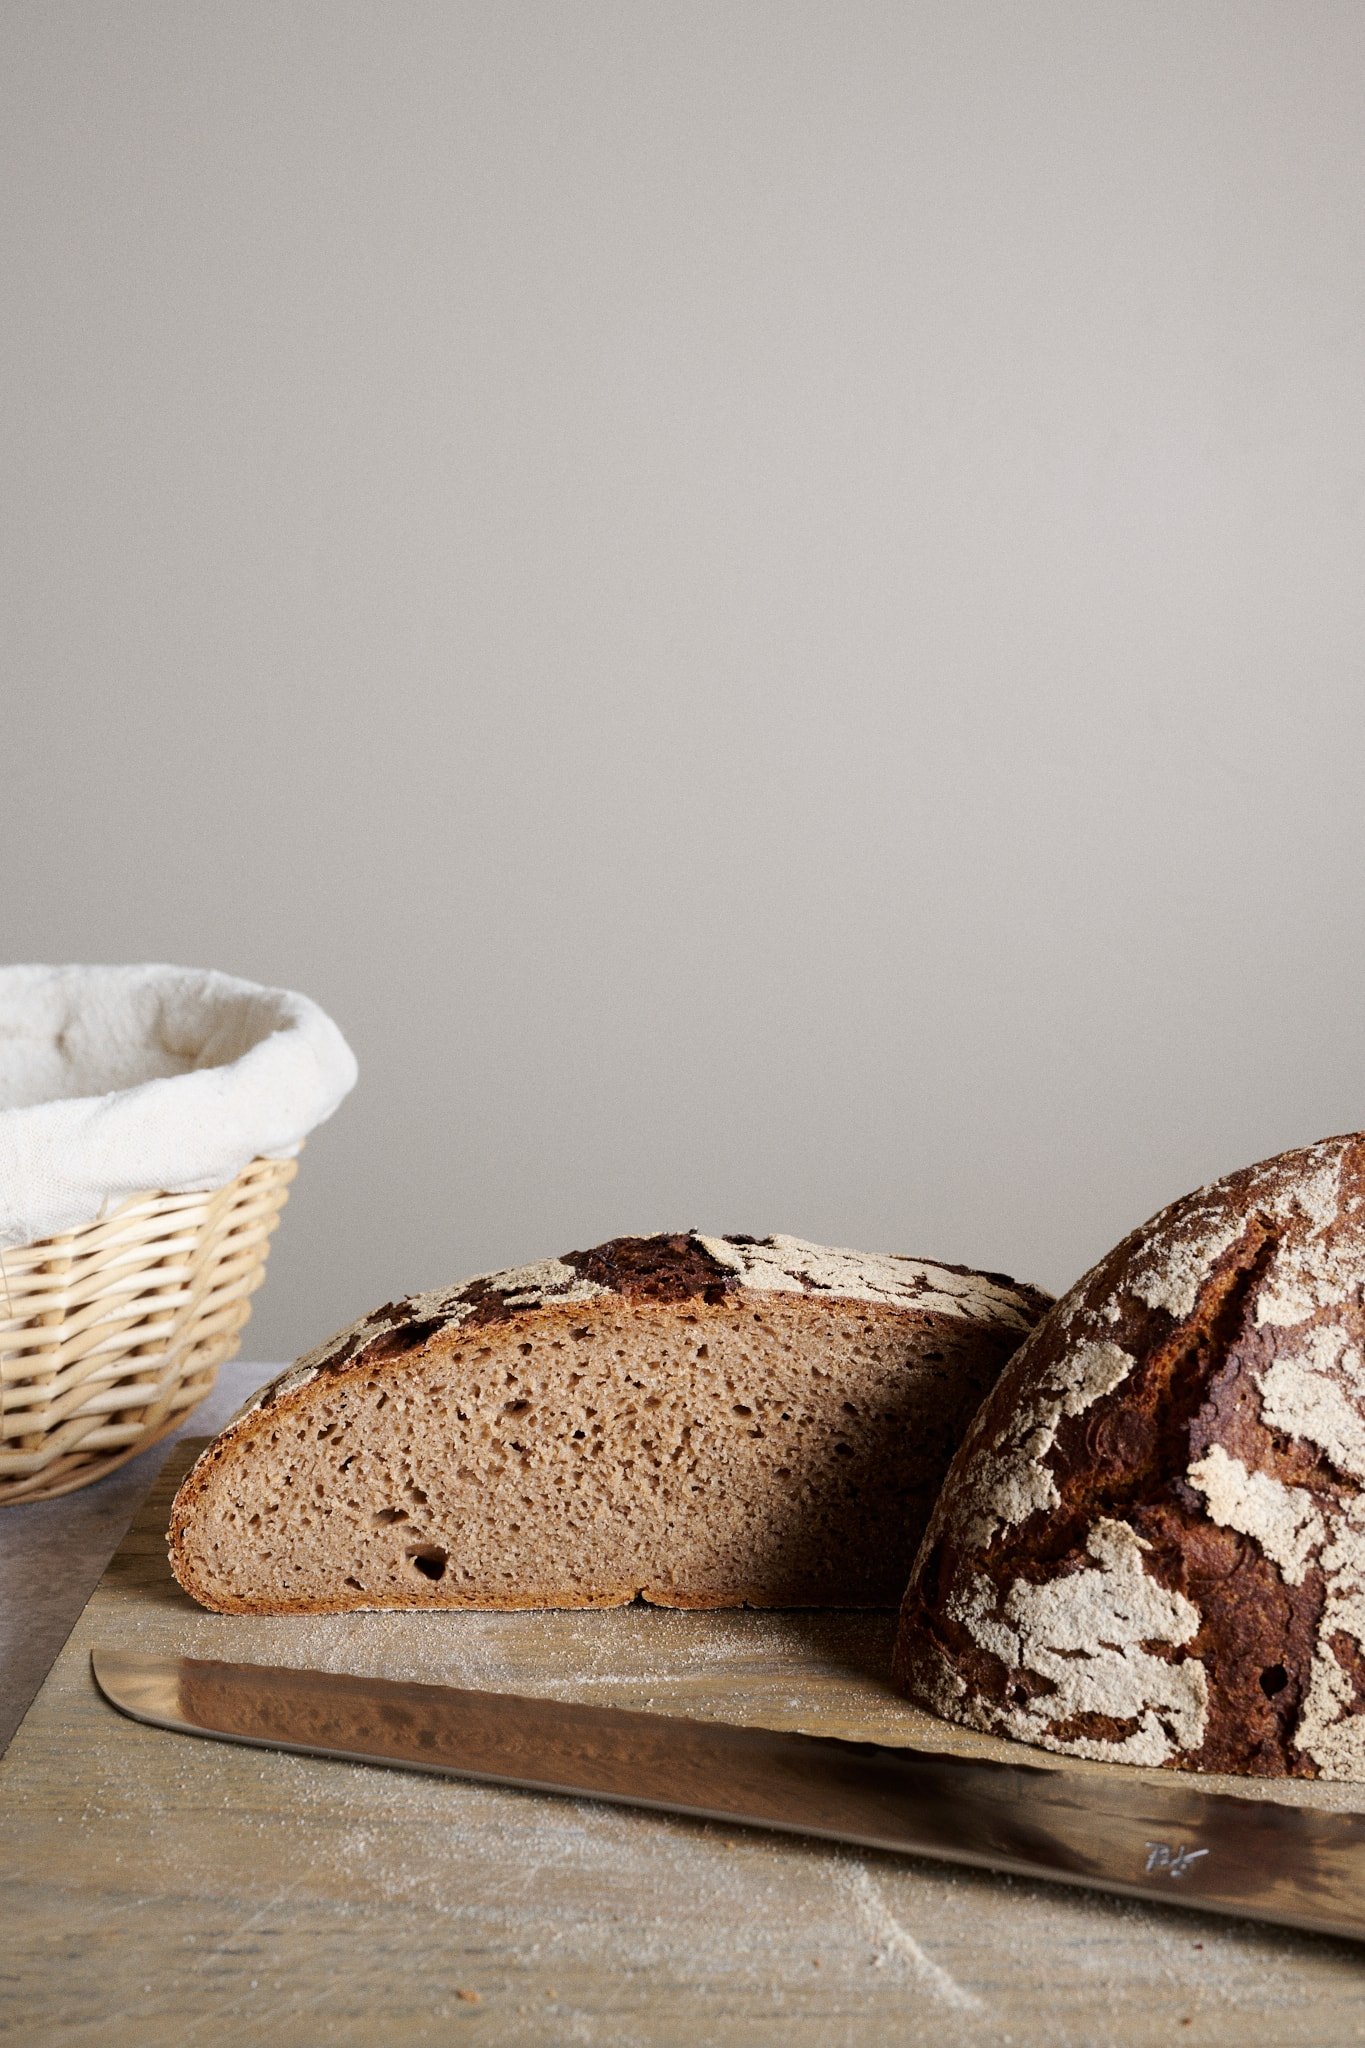
Let the bread cool on a wire rack for 30 minutes. Then, to ensure the interior is fully set, place it inside a plastic bag or cover it with baker’s linen and let it rest for 24 hours before slicing.
Print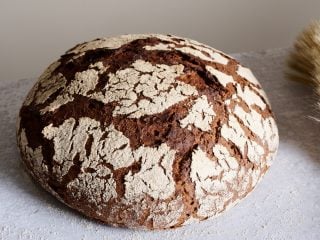
Sourdough 90-Rye Bread Recipe
- Prep Time: 14 hours
- Cook Time: 1 hour
- Total Time: 15 hours
- Yield: 1 loaf
- Category: Lunch, Dinner
- Cuisine: German, Danish
Description
This freeform rye is made with 90% whole-grain rye flour for an intensely aromatic and flavorful loaf of bread. Perfect for open-faced sandwiches or topped with good salted butter, it’ll be an instant favorite and a new staple in your baking quiver.
Ingredients
Levain
- 272g whole rye flour
- 272g water
- 41g ripe sourdough starter (100% hydration)
Main Dough
- 272g whole rye flour
- 60g high-protein white bread flour
- 272g water
- 11g fine sea salt
- All the levain
Instructions
- Prepare the levain – 9:00 p.m.
Mix the Levain ingredients in a large jar or medium bowl and leave them covered with a lid or reusable plastic bowl cover at a warm temperature, 74-76°F (23-24°C), to ripen overnight. - Mix – 9:00 a.m. (the next day)
Warm the mixing water to 82°F (28°C). Place the flour, water, salt, and levain in a large bowl. With wet hands (or, my preference, using a sturdy dough whisk), mix thoroughly until no dry bits remain. Gather up the dough into a ball in the center of the mixing bowl (see below, right). - Bulk fermentation – 9:15 a.m. to 9:35 a.m.
At a warm room temperature, 74-76°F (23-24°C), bulk fermentation should take 20 minutes (yes, it’s short!). No stretches and folds are necessary. - Shape – 9:35 a.m.
Prepare an 8-inch round proofing basket or banneton by liberally dusting on whole rye flour. Be sure the entire surface area of the basket’s interior is covered with flour. Flour your work surface, the top of the dough in the large bowl, and your hands. Scrape the dough onto the floured work surface with the floured top of the dough facing down. Using your bench scraper, fold the left side of the dough over to about the middle. Then, use the scraper to fold the top (twelve o’clock) down to the middle. Repeat for the right side and bottom. You should now have a folded-up shape that loosely resembles a square in front of you. Using your floured hands, flip the dough over and quickly and confidently round it until it gets into a rough ball shape. Using your bench scraper, scoop up the dough and place it seam-side-down into the prepared proofing basket. Dust the top of the dough with more whole rye flour in an even layer. Cover the basket with a reusable plastic cover for an air-tight seal. - Proof – 9:45 a.m. to 10:45 a.m.
At room temperature, this rye sourdough bread will take 1 hour to proof. During this time, preheat your oven with a baking stone or steel on a rack in the bottom third to 450°F (230°C). - Bake – 10:45 a.m.
Place a piece of parchment paper on a pizza peel or inverted baking sheet. Tip the dough out of the basket into your hand and quickly invert it over the parchment paper seam-side down. Slide the dough onto the preheated baking surface, steam the oven, and bake for 30 minutes. After this time, reduce the temperature of the oven to 400°F (205°C) and bake for 30 to 35 minutes longer, until the crust is deep golden brown and a knock to the bottom sounds a bit hollow. Let the bread cool on a wire rack for 30 minutes. Then, to ensure the interior is fully set, place it inside a plastic bag or cover it with baker’s linen and let it rest for 24 hours before slicing.
Notes
Be sure to let the loaf cool at least overnight before cutting to ensure the interior isn’t gummy.
Hydration Note: As with any bread recipe, you might need to adjust the dough’s hydration to suit your flour (especially if baking in a humid environment. When mixing, hold back a little of the water and add it only if the dough feels like it can handle it (look at the images below to help judge the consistency).
Sourdough Rye Bread FAQs
Why did the top crust of my rye bread separate from the interior?
The top crust, also known as the “flying crust,” can separate if the levain (preferment) is not fully ripe when it’s mixed into the dough. Be sure the levain has a full 12 hours at a warm temperature to ripen, erring on the side of overly ripe than under. Another cause of the flying crust is dough that’s overhydrated. The dough should feel soft, wet, and sticky but not soupy or loose (more like hummus than pancake batter).
Can I use pumpernickel flour for this rye bread recipe?
My preference for this recipe is finely milled whole dark rye flour, but whole grain pumpernickel, which is usually milled a little more coarsely, will also work well. If using pumpernickel flour, consider increasing the hydration of the recipe by 2 to 5%.
Why is the interior of my rye bread gummy?
If rye bread is cut too early before it has had a chance to set fully, typically 24 hours or more, the interior can be gummy and stick to, or streak, the sides of your knife when slicing. Additionally, this can also happen if your dough was not properly acidified. This can happen if your levain was not fully ripe when it was used or your dough was not proofed long enough.
Is rye gluten-free?
No, rye is not gluten-free. While it does not have the same gluten content and characteristics of wheat flour, resulting in tall loaves of bread, it still contains gluten.
Can I bake this rye bread in a Dutch oven?
Yes, absolutely. Steam this dough the same way you would any other. This means keeping the lid on and tightly sealed for the first 20m of the bake. Keep an eye on the loaf near the end to ensure the bottom of the crust doesn’t get too colored in the Dutch oven (which can happen, especially with a longer bake time).
What’s Next?
For a rye pan loaf intended for Danish-style open-faced sandwiches, see my Rye Sourdough and Smørrebrød recipe.
Or, if you’re looking for a large freeform loaf with just a touch of rye, my Spelt, Rye, and Whole Wheat Sourdough Bread is loaded with flavor but light and airy.
Thank you to Michael Shulze (Brotbruder) for your help with this recipe!


224 Comments
https://uploads.disquscdn.com/images/5f067050818cad214d23ae44b523621cc69d90e6d5eb7a2f53655ea46a3aa085.jpg https://uploads.disquscdn.com/images/d5563329dc03bc084d7a12b5273268ebff6774b94726293436c3670ea8cc9ec6.jpg This was the easiest sourdough I've ever made, i mean the process. But the bread came out perfectly, and oh my God the smell from it. Can't wait 24 hours to pass, for me to try it.
Thanks for the explicit steps from the recipe. You made it so easy to follow it.
I made this for the first time today—it seemed to proof very well. Had nice cracks in the crust and was very rounded. But, when I tipped it out of the bread basket and inverted it onto the paddle to place in my Dutch oven, it flattened out quite a bit 🙁 . https://uploads.disquscdn.com/images/28d0a0a8685b99631dce8b034692146810b661e24b12b4d070518d42e5e5cff8.jpg
If I am not ready to bake, can I put into the refrigerator after the 1 hour proof?
You can but it's really risky with this bread, it can quickly overproof!
If I am not ready to bake, can I let reat in the refrigerator after the 1 hour proof?
I made this but my gas oven is very temperamental and doesn't hold a consistent temperature, so I usually rely on inner bread temperature to figure out when a loaf is done. However this recipe doesn't have a temperature and I have overcooked it twice. Any advice on the temperature this loaf would be inside when it's ready to take out of the oven?
I would say about 200-204F internal. The crust should be well colored, but not super dark/burned.
Made this with pumpernickel and it was so sticky I could barely handle it. It’s in the oven now so I’ll come back to report results but it was a nightmare lol. What did I do wrong? I feel I followed the times almost exactly.
It's a very sticky dough—this is how rye is 🙂 You have to handle it very minimally and keep it floured (nonstick). How did it go?
I just finished baking this one and it came out gorgeous! It is now in a a bag for it's overnight rest, poised to become Rueben sandwiches for tomorrow's dinner.
https://uploads.disquscdn.com/images/1bf66d5ca6e9bc4bbe2b48080f4c92a399f6abddd8c8f092ccccd910fd268517.jpg
You absolutely nailed this Carmine. Nice work! Picture perfect.
I used dutch oven: 30 min covered with a couple of ice bricks placed inside (under teflon cover) with 230 C, then 30 min uncovered with 200 C. Very nice receipt – thanks! https://uploads.disquscdn.com/images/4b6ac4bc443b9e6d487ff513aa316393fef3758d18dd772c611cf5b4444da5d3.jpg
Looking great, Ivan!
I baked this; sadly it was flat. It didn’t rise at all. I followed the recipe; my starter was at its peak. I baked in a Dutch oven. It tastes good, but it very dense. Only 2” high. ☹️
Looking better Bert. It's hard to say what went wrong with your sourdough version, it's very important you use a ripe starter to make the levain, which is very ripe when going into the main dough!
Great sour flavor. My 80 year old Finnish born friend was overwhelmed with memories of his grandmother feeding him this after school. He hadn't tasted it since emigrating to Canada as a child. He went home with the rest of it with profuse thanks. So we thank you!
Means a lot to hear that, thank you Warris!
Thank you for the great recipe and site. Very pedagogic and my bread turned out amazing. I am one of those people who almost compulsively deviate from any recipe but this one I managed to follow for some reason.
Fantastic Emma, thank you for the kind words. Sounds like I convinced you to follow it somehow 🙂 Now you can deviate and experiment!
Hi! how do I get my bread with a good crust? I baked it in the dutch oven, first with lid, then without. Any tip?
Thanks
Cecilia
If the crust is too soft, try baking less time with steam.
https://uploads.disquscdn.com/images/6bf8d126761eb256b243ee2c9f597615fbc4c1cc54715f2da07fef1e69e02c86.jpg https://uploads.disquscdn.com/images/78eabdeef18dc17e162d9fef69fb285d8df2c4e3885bb4978a9ab71fc1dfb9b5.jpg I got my hands on some organic, dark rye flour and made this yesterday. No exaggeration, it is absolutely fantastic. It makes a beautiful loaf, and the flavor and crumb is excellent – not stodgy at all. I can get nice, thin slices, too. The only variation I made in the recipe was to make it an oval loaf and bake it in a coated cast iron cloche. For my oven, that meant placing the loaf on parchment and placing it all in the preheated pan. Cover (with preheated cover) and bake at 450 degrees for 25 minutes. Uncover, reduce heat to 400 degrees, and bake another 25 minutes. I checked my loaf with an instant read thermometer, and it was ready at 208 internal degrees. Remove from pan to a rack to cool. The hardest part is waiting another 20 hours or so to cut it, but please do to get the perfect rye crumb.
Absolutely perfect, nice bake! Happy you like this one 🙂
If I use dutch oven :
Should I bake 30 minutes WITHOUT the lid at 450ºF then another 30 min WITHOUT the lid at 400ºF or bake 20 min WITH the lid at 450ºF then another 30 minutes WITHOUT the lid at 400ºF?
Iris, I would do the latter. I just made this for the first time in an oval cast iron cloche and baked it at 450 degrees (F), covered, for 25 minutes. Then uncover, reduce heat to 400 degrees and continue baking for approximately 25 minutes. I checked the internal temperature at that point, and it was done at 208 degrees. Make sure the pan base and lid are preheated before (carefully) placing the dough (on parchment) in the pan before baking. (I plan to make this again soon, because I don’t think this first loaf will last very long here.)
30m with the lid on, the rest of the time without.
I made this exactly using home milled rye. I did however make it pans. I made 3 mini loaf pans for ‘cocktail rye’ size. In one loaf I incorporated some candied ginger bits and walnuts for a stand alone snacking loaf. This is an excellent recipe. It could not be easier. I got a nice rise, too.
Love the idea of adapting this to a pan loaf, I think I'm going to do just that this weekend!
Did you ever do that? Does it work in a loaf pan?
This recipe looks so great!
I have 2 questions:
1. I know you mentioned in this page that this bread could be baked in a Dutch oven. Could you kindly please write the specific instructions for baking this bread in a Dutch oven? I want to make sure I am going to use the right temperature / timing.
2. The recipe mentions to use part bread flour. Can this bread flour be “whole wheat” or it has to be regular “wheat” bread flour? It is possible to use whole wheat bread flour and would it require any changes if using it?
Thank you so much in advance 🙂
Hi, I have searched the site but can find no clarification about oven settings. My home oven has a fan bake option, bottom element only or top and bottom elements. There's a 15-20deg C adjustment to be made depending on whether I'm using the fan or not. This recipe only notes 230C. I don't know if I should be reducing that to 215C if using fan bake. I baked this loaf at 230C fan and it cooked way faster than the recipe stated. Clarification would be greatly appreciated. (American recipes often don't specify whether the temp is for fan bake or conventional bake – is fan bake not a standard setting in American home ovens?)
Fan bake is not typical for American ovens. I would recommend the assumption be made it is a conventional bake for any American recipes you come across, for future reference. I hope this helps.
Your My Best Sourdough Recipe has worked incredibly well for me, but this one beat me. I tried to shape it and the dough stuck to everything even though I heavily floured my hands and surface. Ended up throwing away the dough. Not sure what I did wrong. Maybe should have used less water?
I see that a few people have commented about using a loaf pan for this, but are there any particular details necessary to do so?
Since it will be baked in a loaf pan, should I still use a proofing basket or switch to a bowl?
Should I use the old standard 9×5" load pan or the 8.5×4.5" that seems more common nowadays?
Should the temperature be the same?
Since the loaf will not be as fully exposed to the air, is steaming the oven still necessary?
If I wish to add caraway seeds to this, what would be a good amount without affecting any of the other percentages?
Some of these questions are addressed, in part, by some of the comments, but I'd like to know as much as possible before getting started so that there will be fewer adjustments the next time, if any are needed at all.
Thank you!
I used 4 grams of caraway seeds and 4 grams of coriander seeds.
To bake in a pan, after the first, 20-minute rise, scrape the dough into the loaf pan and smooth it into shape with wet hands.
No need to steam the oven while baking.
I like a narrower pan for this amount of dough. I use a Pullman pan.
I used this recipe as the basis of a Borodinsky pan loaf. I've been searching for years for the right recipe that would have the same chewy bite, dense texture, and massive rye flavor I remember from Moscow.
I kept percentages the same, but replaced the 60 grams of white flour with red rye malt, called солод (solod) in Russian. I added 4 grams each of crushed caraway and coriander seeds. I baked it at the prescribed temps and time, but in a Pullman pan.
It came out pretty nearly perfect! I am over the moon with joy. And I never knew rye bread was so easy to work with!
https://uploads.disquscdn.com/images/6e43b388857b20ae091d09317eaaa97f86a77c3c0f46ad5514475a40bbb1a455.jpg I baked this morning using my new starter (which ripened fully in 19 days). Followed your instructions but had to use a larger banneton so bread is a bit wider. Aroma during baking was delightful! I used my Lodge combo cooker for the Dutch oven.
I’m looking forward to the first slice tomorrow. Thanks again for your thoughtful and detailed instructions.
Hello Maurizio, Can I use the baking shell (batard shape) for this rye bread, without steaming my oven?
Yes!
I added caraway seeds.
I like that, Bill 🙂
Can I use a mix of dark rye flour, coarse rye meal and cracked rye berries for the whole rye flour for the levain and / or the dough?
The rye components of this bread serve specific purposes, so while you can use a mix, you'll want to be strategic about it. For the levain, stick with dark rye flour rather than the coarser options – this ensures proper fermentation since the finer particles provide better food access for the microorganisms.
For the main dough portion, you can use a blend of these different rye forms, but I'd suggest keeping at least half as dark rye flour to maintain proper hydration and dough consistency. The coarse meal and cracked berries will add wonderful texture and flavor, but they absorb water differently and can affect the dough structure if used in too high a proportion.
Start conservatively – perhaps try replacing 25% of the main dough's rye flour with a mixture of the coarser components. You may need to adjust the hydration slightly upward since the coarse particles will absorb water more slowly.
Keep an eye on the dough consistency during mixing and bulk fermentation – you're looking for the same general feel as when using all dark rye flour.
Let me know how these adjustments work out, Daniel!
I am wondering if tipping the bread out of the basket and then turning it back on the seam side accentuates the flatter profile instead of having the larger expanded top to be placed on the bottom?
Yes, you've got to be extra gentle when flipping the dough at this stage – any rough handling can impact the final profile. If you're after that beautiful crackled crust pattern though, flipping is necessary. Just try to maintain tension in the dough as you transfer it. Take your time with it!
My second time making this. First time was too flat so I extended the proofing 30 minutes (my starter tends to be slow and my house is cold). It rose beautifully. It came out of the basket cleanly and then flattened in my hand. It's going to be my second flat loaf.