
Having sufficient, but not excessive, dough strength is important when making sourdough bread. We want our bread dough to be strong enough to hold on to the gaseous byproducts of fermentation but not so strong it’s unable to expand and relax outward and upward in the oven. This guide on stretching and folding sourdough bread dough focuses on techniques to effectively strengthen dough during bulk fermentation. But also, I’ll talk about finding a dough’s strength sweet spot, the point that eventually yields a loaf with a tall rise and a beautiful internal structure.
Before we go in-depth, it’s helpful to state why the stretch and fold technique is useful. With each set of stretches and folds, you:
- Strengthen the sourdough bread dough
- Help equalize dough temperature
- Check the dough’s progress (fermentation and strength)
- Trap a little air in the dough
I like to think of dough as soft taffy (although technically, bread dough is foam). Gasses can get trapped in this sticky and amorphous substance, get pushed and moved around, sometimes coalesce into larger bubbles, and sometimes smash and turn into smaller ones.
If the blob is too stiff—like a thick and dried taffy, it resists stretching outward (high elasticity). If the blob is exceptionally stretchy—like taffy that’s warm or fresh—it spreads outward without resistance (high extensibility).
So the goal is to get the balance right, to allow for some spread and expansion, but not too much. When the dough is first mixed, it’s shaggy, weak, and falls apart readily (although not as much if you autolyse beforehand). After mixing and some kneading, the dough becomes stronger and can hold shape.
If the dough isn’t mixed or kneaded to full development (e.g., full windowpane), adding in sets of stretch and folds during bulk fermentation will help continue its progress toward a firmer, more cohesive dough that’s able to trap gas and hold its shape all the way to bake time.
First, look at stretches and folds and how to do them.
What Are Stretches and Folds?
Performing stretches and folds is a dough-strengthening technique performed at a set interval on bread dough during bulk fermentation. Each set typically calls for four stretches and four folds, one in each cardinal direction (North, South, East, and West). With each fold, the bread dough is strengthened, temperature is equalized, air is incorporated, and you’re given a chance to see how it’s fermenting.
In nearly every sourdough bread recipe (and usually sweet sourdough recipes, too) at this website, you’ll find at least one set of stretch and folds during bulk fermentation.
What Does Stretching and Folding Sourdough Bread Dough Do?
Strengthens the Dough
First and foremost, these sets are performed to strengthen the dough after the mixing dough step. Stretching the bread dough up and over further develops the dough’s gluten, bringing increased elasticity.
Compared to more intensive dough strengthening, like the slap and fold kneading technique, these folds may feel like they aren’t doing much. But in fact, they are. Even a single set of stretches and folds adds a significant amount of strength to your dough, and the vigor of the stretches and folds also plays a role (more on this later).
Equalizes Dough Temperature
Sets of stretches and folds also allow you to equalize the dough’s temperature. Think, for example, about a dough that’s sitting on a warm surface; the dough at the bottom of the container will be warmer than the top, which could mean varying fermentation rates throughout the dough (because, as we know, dough temperature is critical in bread baking).
Prompts Checking In With the Dough
Each stretch and fold set allows us to check in with the dough to see how it’s progressing through bulk fermentation. Instead of just letting it sit there for the 2 to 4-hour bulk fermentation, we are somewhat forced to look in on the dough, feel it, and decide if it’s moving quickly that day or is a little sluggish. These little opportunities are valuable moments to step back and assess the dough.
Incorporates Air
To a lesser degree, stretches and folds also incorporate a small measure of air into the dough at each fold.
How to Stretch and Fold Sourdough Bread Dough During Bulk Fermentation
There are many ways to perform the stretching and folding. In the end, it comes down to preference. Some methods are better for rectangular tubs, some with round bowls, and others for deep containers. While most of the photos in this post show my dough in a round container, the folding styles will also work for a square or rectangular tub. When using a dough tub for larger dough quantities (4kg+), I typically opt for the “gentle” folding approach in the video below.
I generally perform two different methods for stretching and folding: a vigorous method and a gentle method. I choose between the two based on the dough’s state: a vigorous set is appropriate if the dough is weak and slack. If the dough is already strong, a gentle set will suffice.
When I mix or knead the dough up front, I do more gentle sets than strong ones, as the dough is already well on its way to its ideal strength (more on this later).
Conversely, if I’m mixing minimally or making a no-knead sourdough bread recipe, I might opt for more stretching and folding during bulk fermentation to effectively strengthen the dough in a much easier manner.
Let’s first look at how to perform a vigorous set of stretches and folds.
Stretches and Folds: Vigorous Method
Strong sets involve a little more stretch of the dough and impart significant strength. Yet they are simple, quick, and effective.
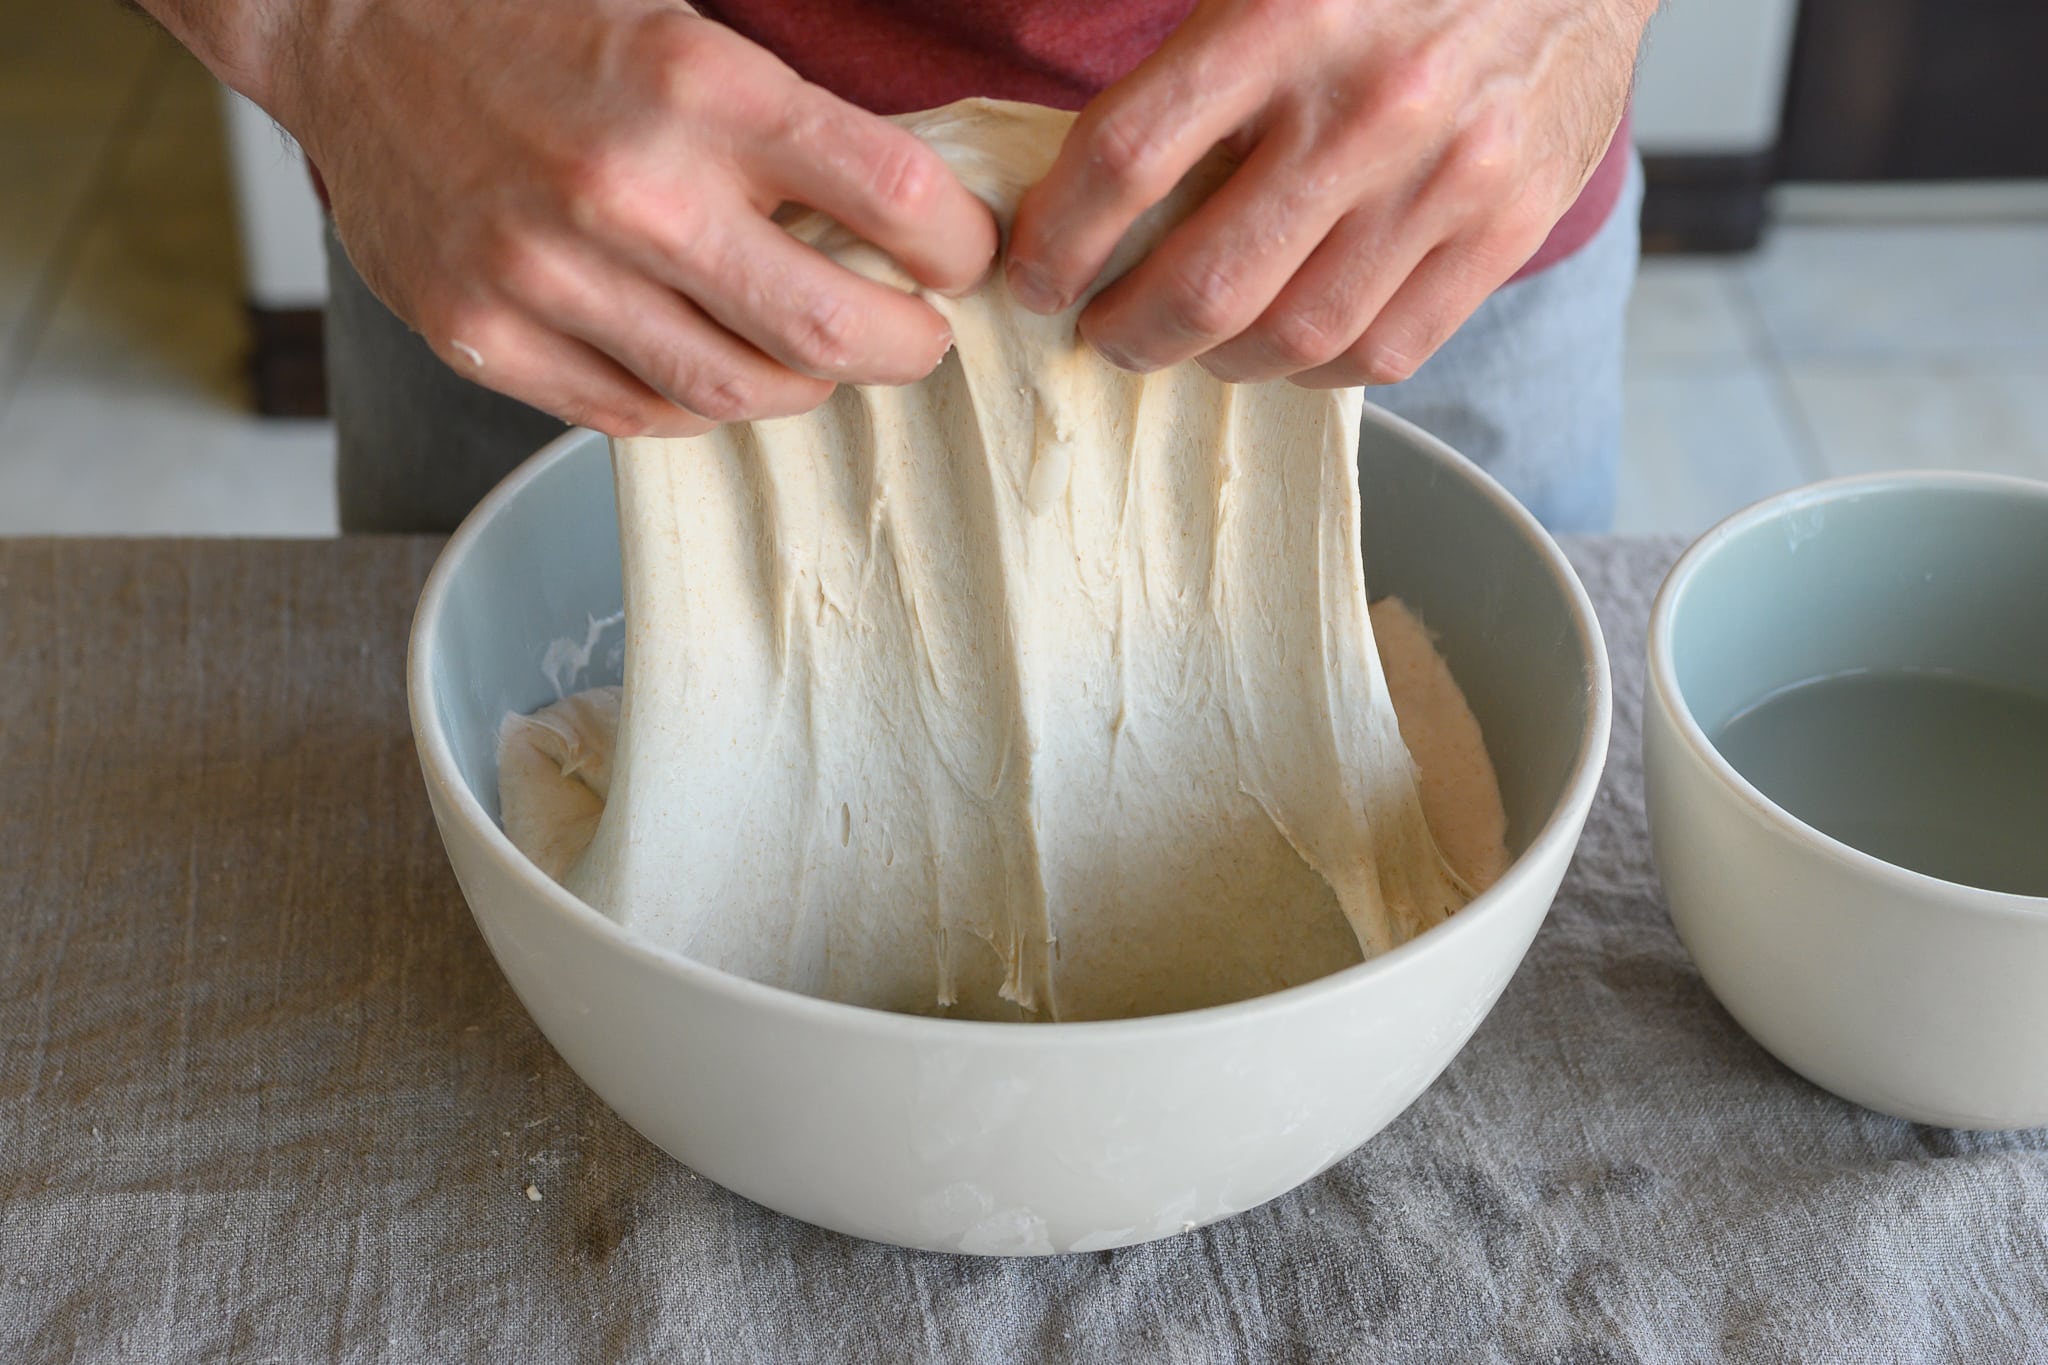

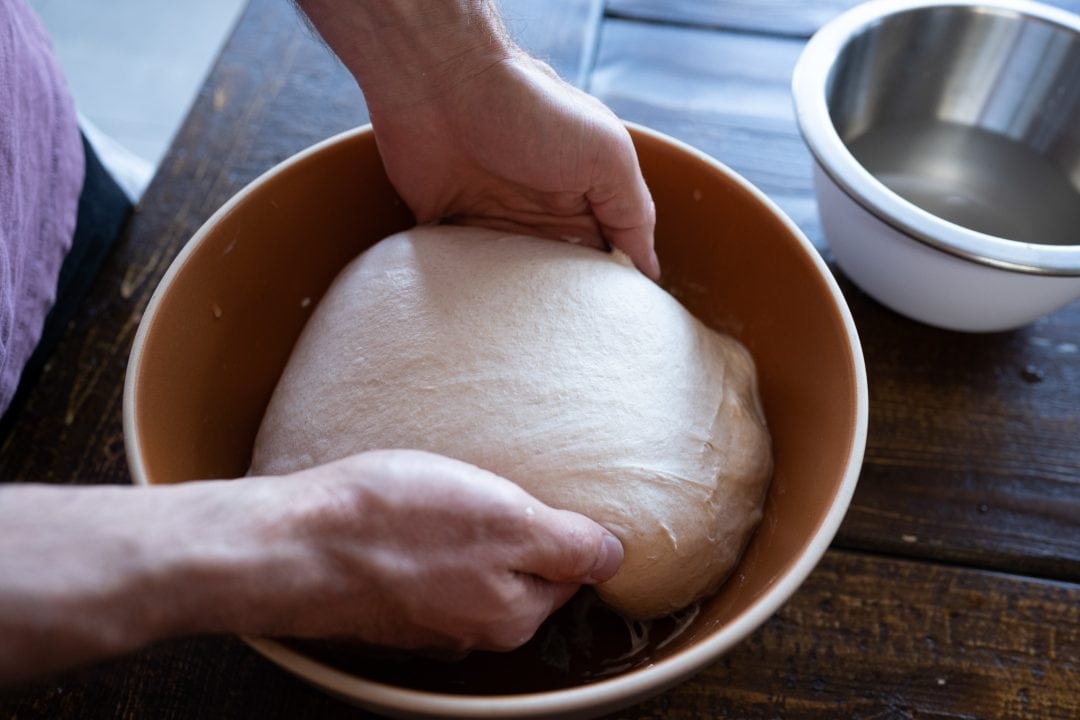
First, I dip my hands in water to make them nonstick.
Then, I use my wet hands to pick up a side of the dough, stretch it, and fold it over. That’s one of four for the set. Next, I rotate the bowl 180° (turn it so you’re now looking at the opposite side you just folded) and repeat. This results in a sort of tube shape in the container. Then, I rotate the bowl 90° and do another stretch and fold. Finally, rotate the bowl 180°, do the last stretch, and fold over.
Finally, you’ll have a neat package folded up in the container. Cover the dough, set a timer, and wait until the next set.
Stretches and Folds: Gentle Method
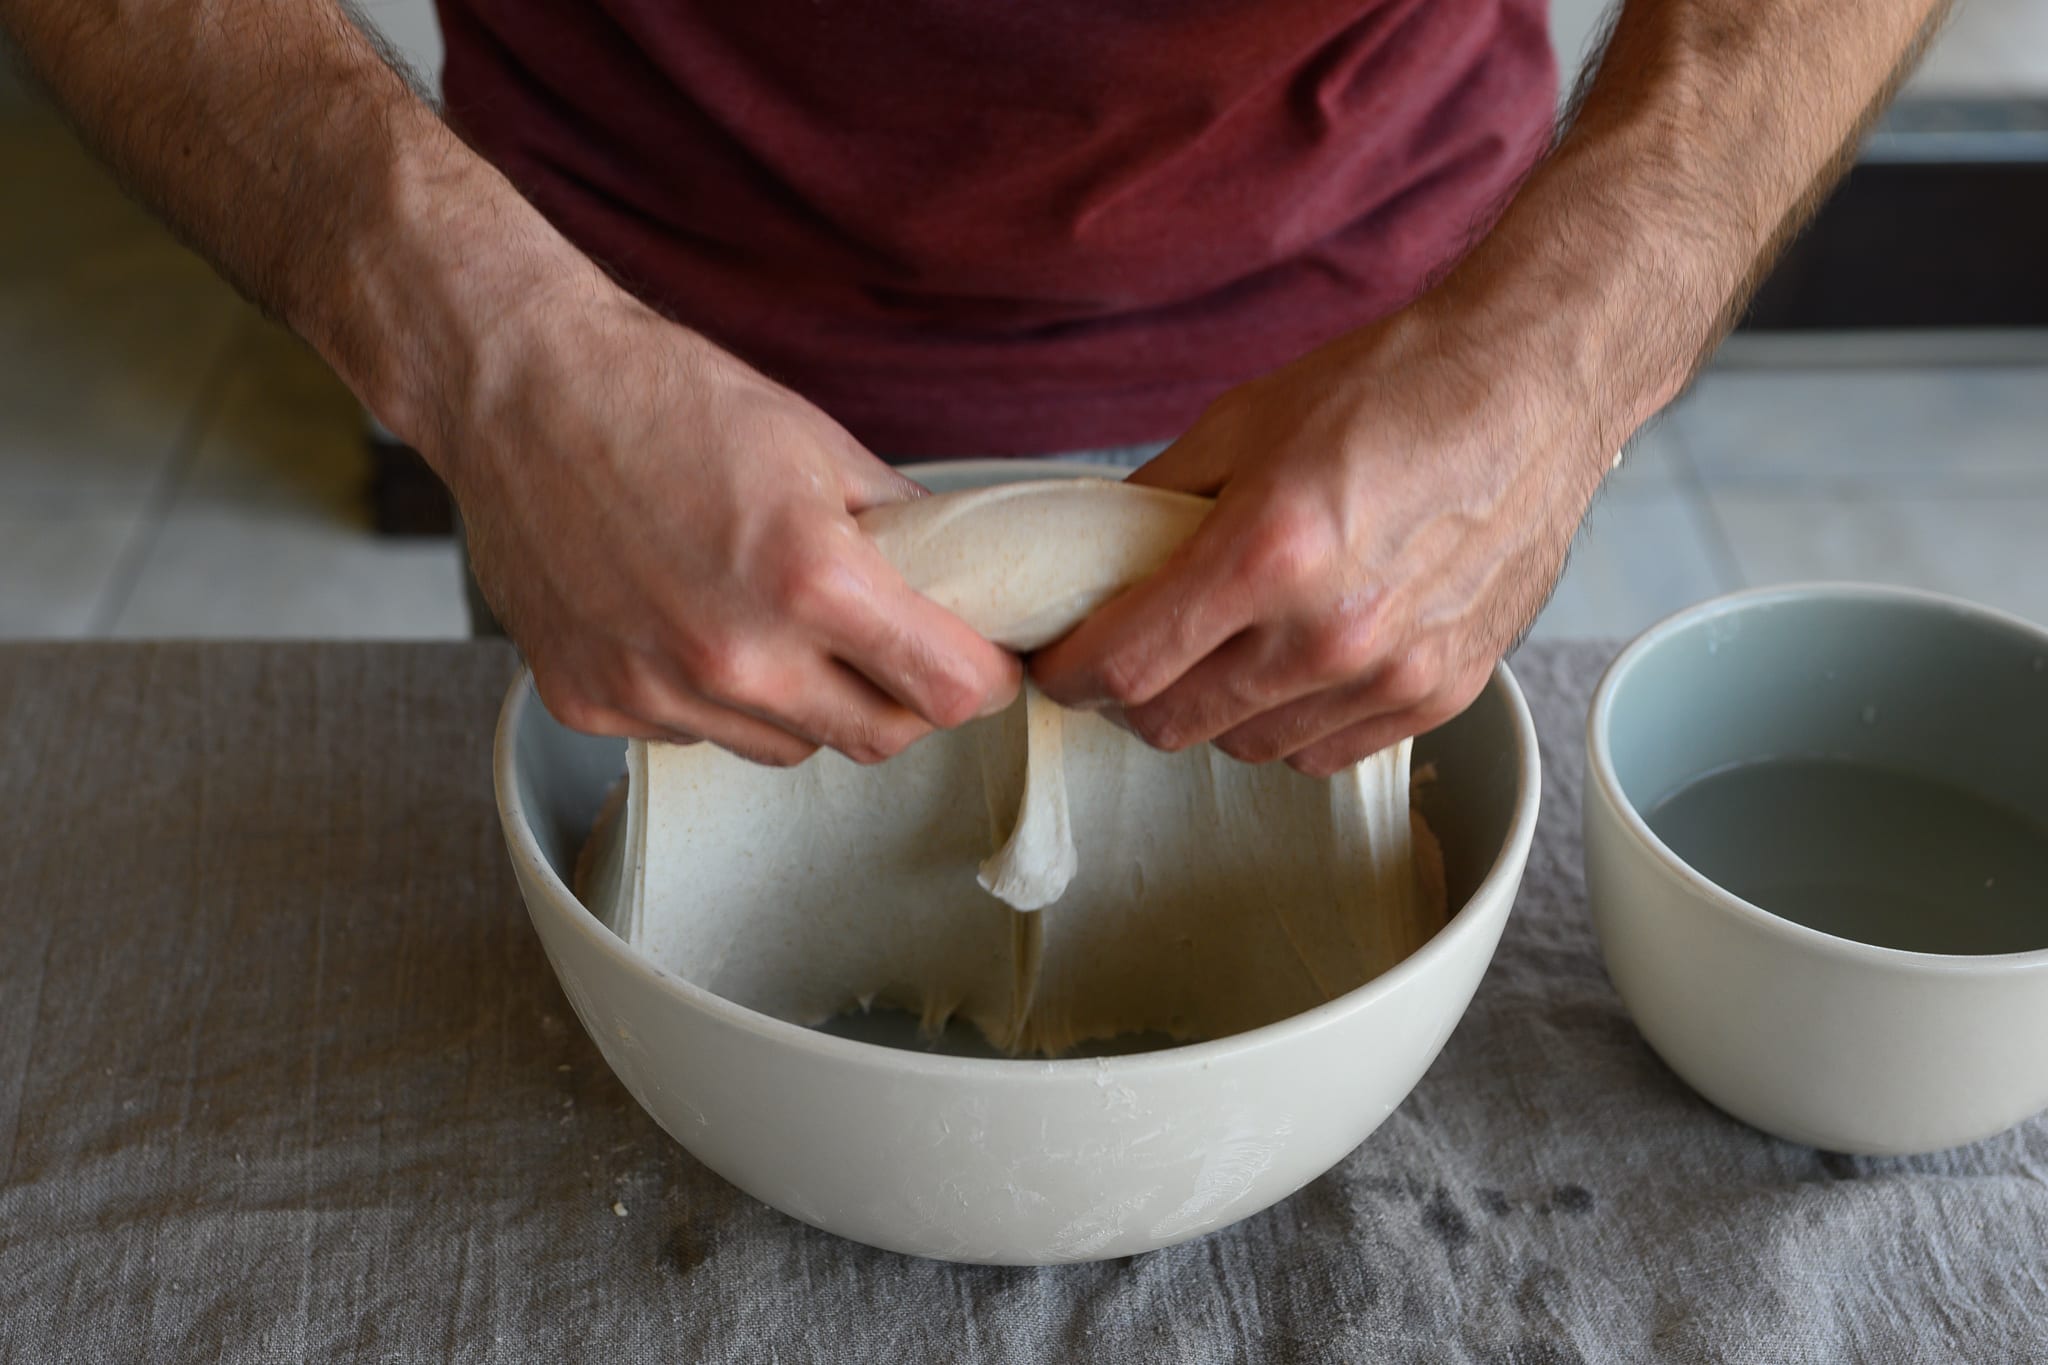
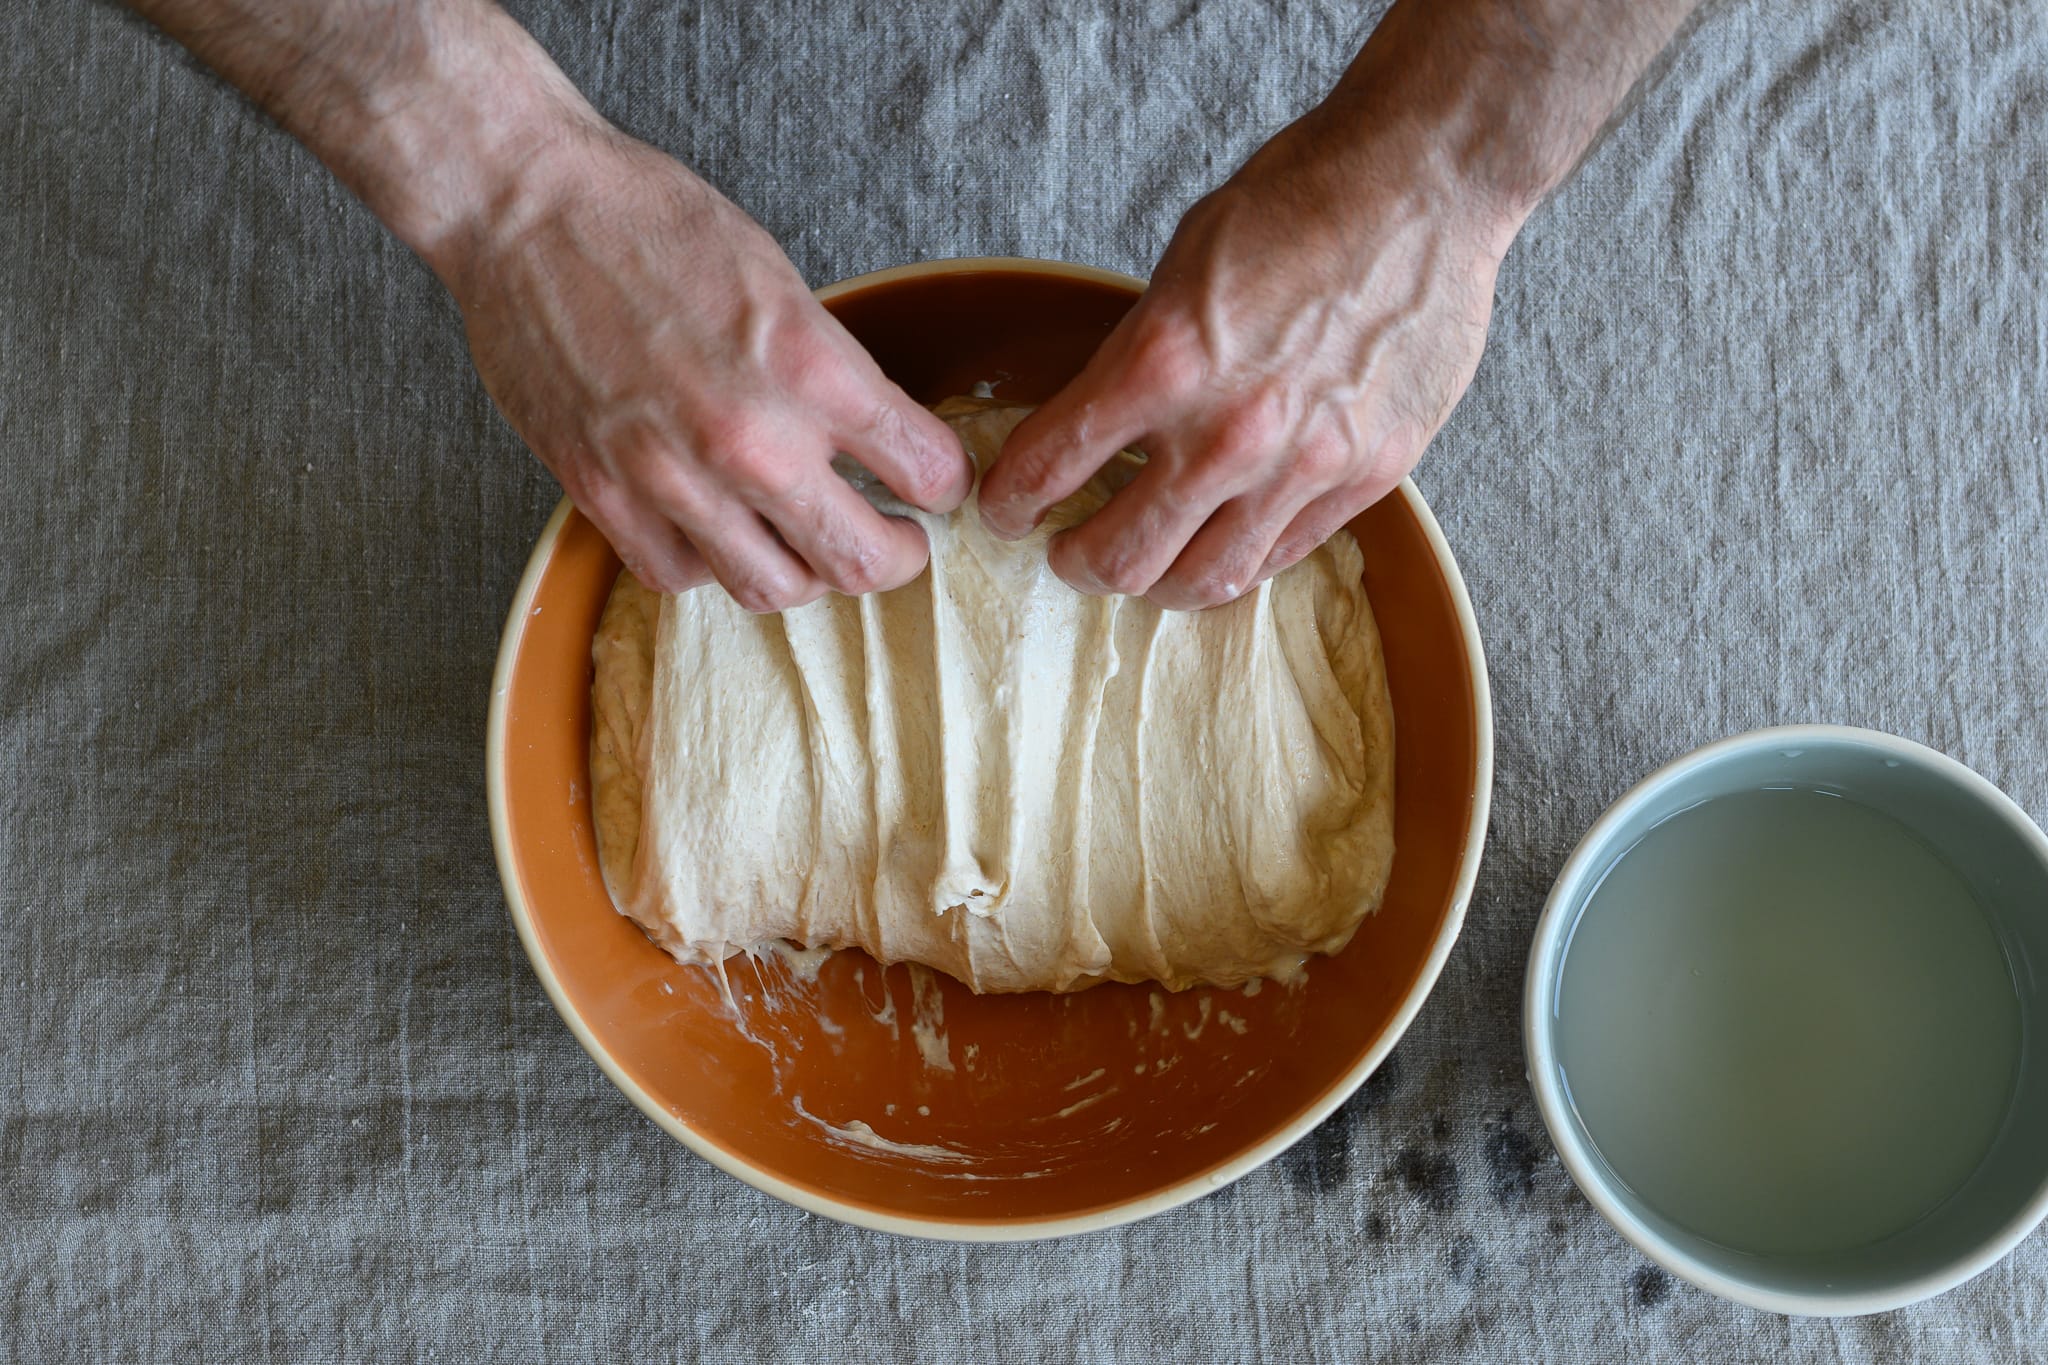
I’ve heard these gentle stretches and folds called “coil folds,” but as long as I’ve been baking, I’ve called them folding under. But the important thing is they’re very gentle yet still effective. The dough is already relatively strong before I start folding, so a gentle set is more than adequate. In the end, the dough is also neatly gathered in the container.
Instead of stretching the dough up and over to the other side, you pick up the dough in the middle and let the ends fold in under itself. I perform these folds one for each side of the dough.
After Stretching and Folding, Leave the Dough Organized
Regardless of how you stretch out and fold your dough, I find it’s always beneficial to leave the dough gathered up neatly in the bulk fermentation container. This means the dough has a smooth surface on top with the sides tucked in and down.
I find it’s helpful to leave the dough neatly gathered up in the bulk fermentation container.
Then, when the dough rises for the remainder of the first rise, the dough cleanly moves up in one solid mass instead of having some sections move up at one side and some on the other. Cleanly bundled dough allows you to assess it better as it rises during bulk fermentation.
In addition to helping you assess the dough’s fermentation time when it comes to dividing it, you’re working with a clean, smooth top that divides neatly and is easier to work with.
How Many Stretches and Folds Should I Do?
Ultimately, the number of sets of stretch and folds will depend on the dough’s composition. If the dough has a high percentage of high-protein white bread flour, the dough’s hydration, and the amount of levain or starter added—all of these factors play a role. These sets move your dough along the spectrum from weak to strong, ever closer to the right amount of dough strength (which I call the “ideal dough strength” below). Some doughs need more help to get there; others are strong enough and need less help.
For most dough recipes, I start with a baseline of 3 sets of stretches and folds. If the dough comes from mixing on the weak side, I’ll increase that number. I’ll skip stretches and folds if the dough is firm and elastic.
The best way I can help visualize this is with the diagram below. I see the dough as always moving from left to right, starting as a shaggy, weak mess. As you mix, knead, and strengthen, you quickly move the dough toward the stronger side (the arrow’s length below shows the rapid strengthening). During bulk fermentation, each set of stretches and folds (S & F) moves the dough to the right. As discussed above, the strong sets move the dough farther, and the gentle ones move slightly less.
Eventually, your dough reaches the spot where it’s strong enough, the ideal point at which it can rest for the remainder of bulk fermentation without intervention.

What is the ideal dough strength anyway? There’s no ideal; that’s my imaginary point where I feel the dough is strong enough. As I’ll discuss soon, that point depends on what’s to come for the dough in the rest of the process. For example, if you’re preshaping (which adds more strength to the dough), that ideal dough strength dashed line will move to the left as it needs less strengthening later.
Note that what’s not shown in the diagram is the strengthening of the dough organically due to fermentation. I’m choosing to mostly ignore that concept as we focus on mechanical strengthening.
How Long to Wait Between Sets of Stretches and Folds
The amount of time isn’t super significant; what is essential is the dough state when you go to do your stretches and fold. You want the dough to have relaxed outward, possibly spreading to fill your bulk fermentation container.
Consider for a moment a dough that’s been stretched and folded 30 minutes ago, but when you go to give it another set, it’s still gathered up in the center of your bowl, looking strong with defined edges. If you tried to give this strong dough a stretch and a fold-over, you’d be fighting the dough, forcing it to comply. Instead, give the dough more time to rest, let the gluten relax and become extensible again, and then perform another set (if at all).
Generally, I like to wait around 30 minutes between sets. Thirty minutes seems the right time for most doughs to relax and spread out in the bulk fermentation container—precisely when you want to give it another set.
However, if you’ve minimally mixed or kneaded the dough and the dough is very slack and weak, you might need only 10 to 15 minutes of rest between sets. In this case, sometimes I’ll perform a few early sets spaced out by 15 minutes, then increase that time later as the dough strengthens.
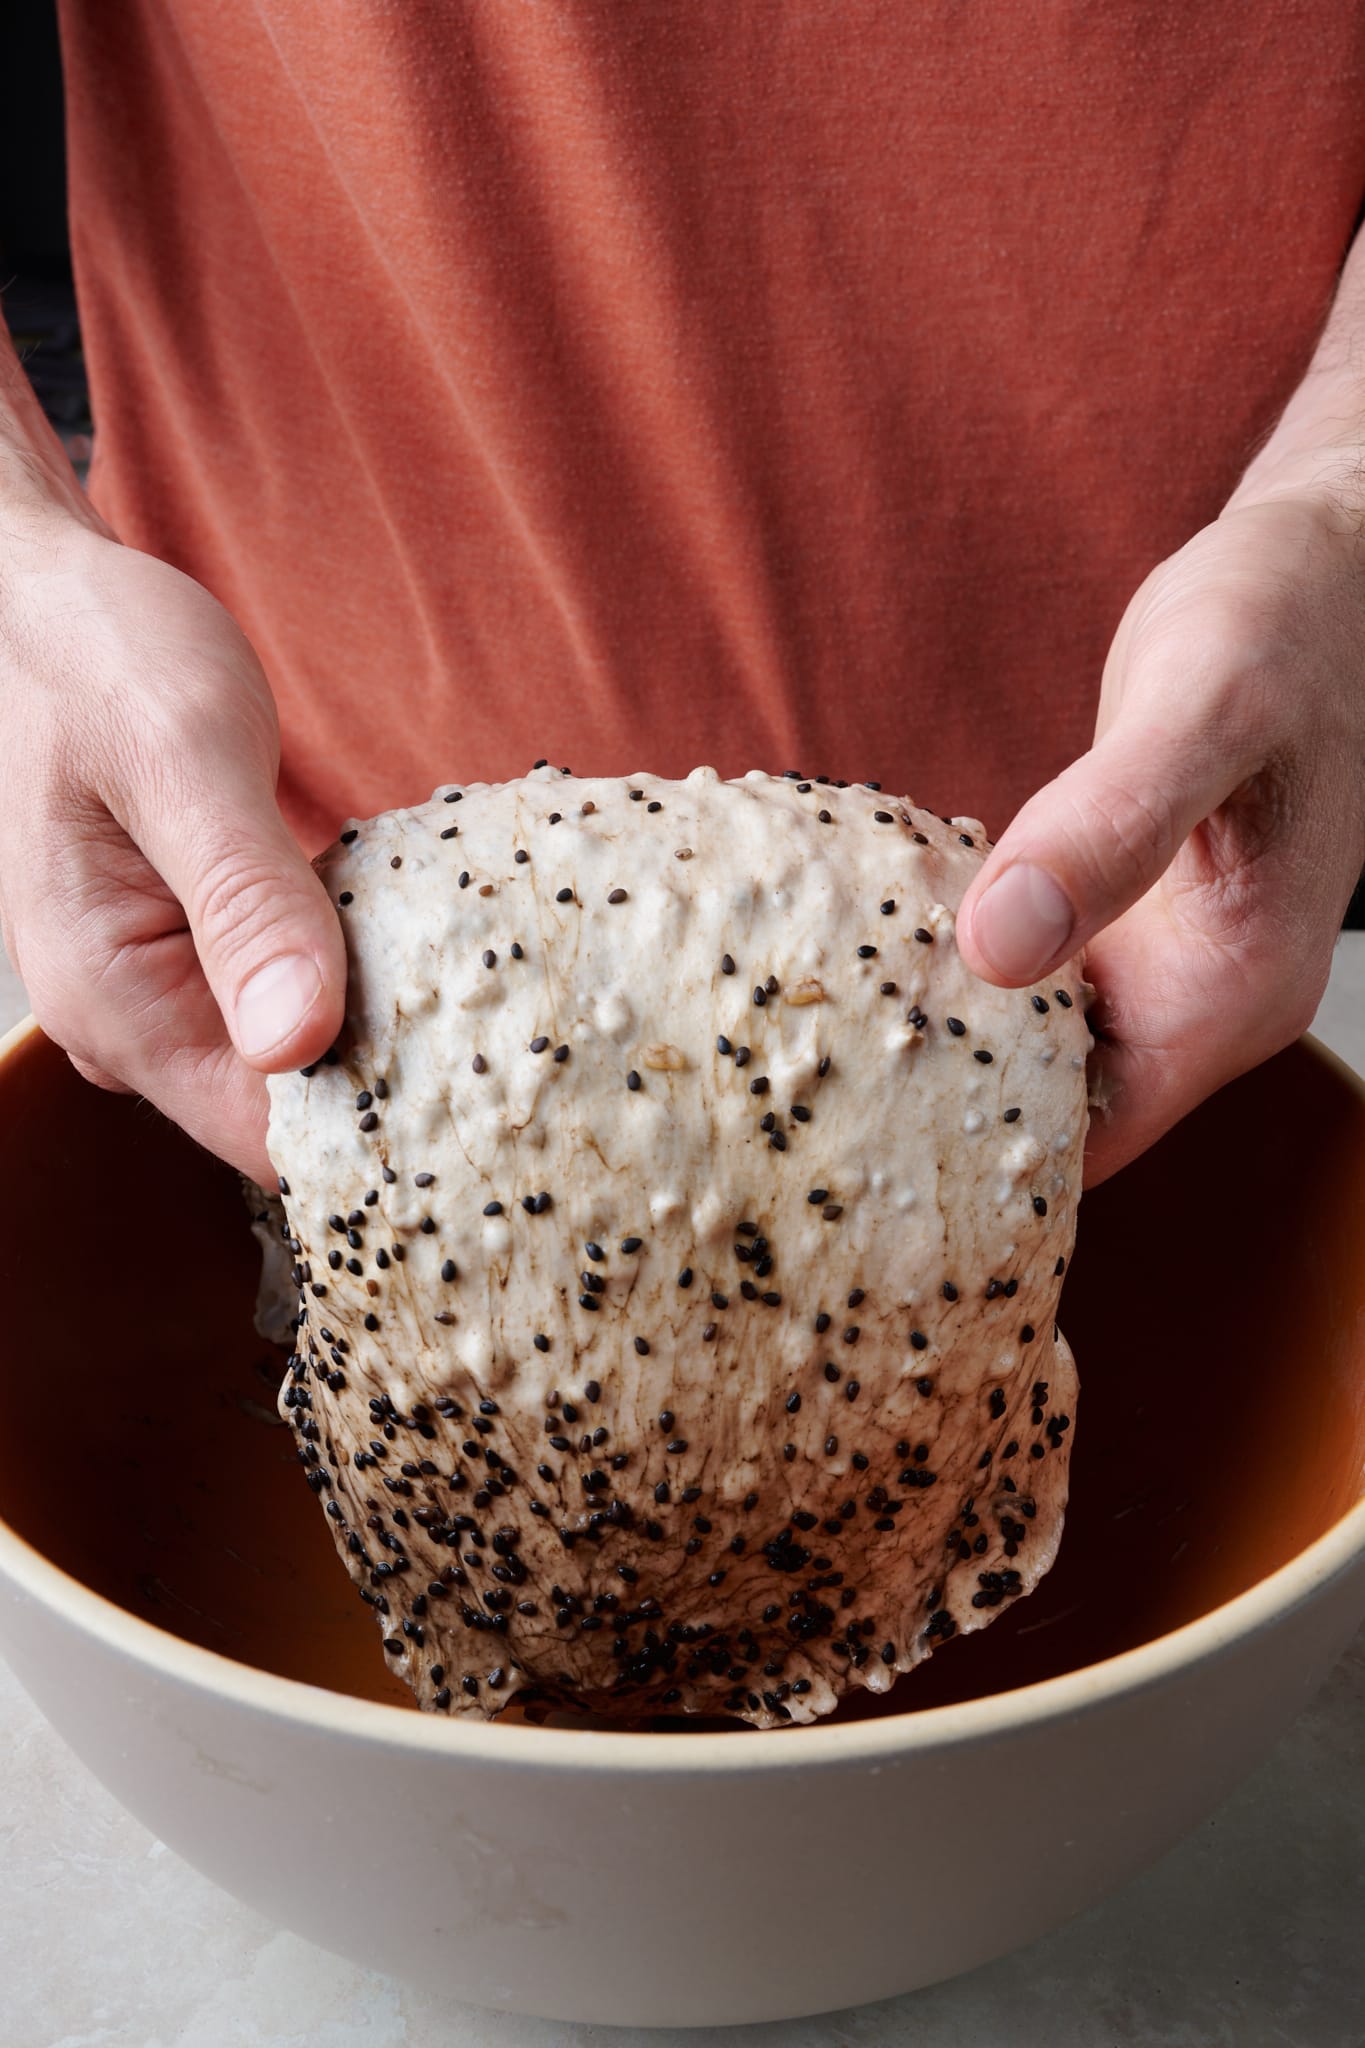
A great example of this in action is My Best Sourdough Bread recipe (image at right), which is a very highly hydrated dough. Because of the high amount of water added, it’s slack and very extensible. In this recipe, I choose to give it several short sets of stretches and folds—each separated by 15 minutes—at the start of bulk fermentation to strengthen the dough quickly.
How to Know When to Stop Doing Stretches and Folds
This can sometimes be a tricky call to make, and you have to consider your entire baking process. You must consider what else is happening to your dough after bulk fermentation: are you preshaping (if so, fewer sets are needed)? Do you intend to shape the dough lightly or with a heavier hand (more sets and fewer sets needed, respectively)? Is the dough going to be retarded in the fridge overnight (potentially fewer sets as the cold temperature will bring strength)?
All of this goes back to the strengthening diagram I showed above. If you’re moving that dashed ideal dough strength line to the left or right, you can adjust the number of sets required.
Before performing a set, I use my judgment right there and then. I ask myself whether the dough was mixed/kneaded longer than usual, if it has several sets already, if it has defined edges and looks gathered up in the bowl, or how I am handling the dough later down the line—all of these help me assess whether I think the dough needs more strength.
Let’s take a look at two examples. First, let’s look at a weaker dough, one that is very early in bulk fermentation.
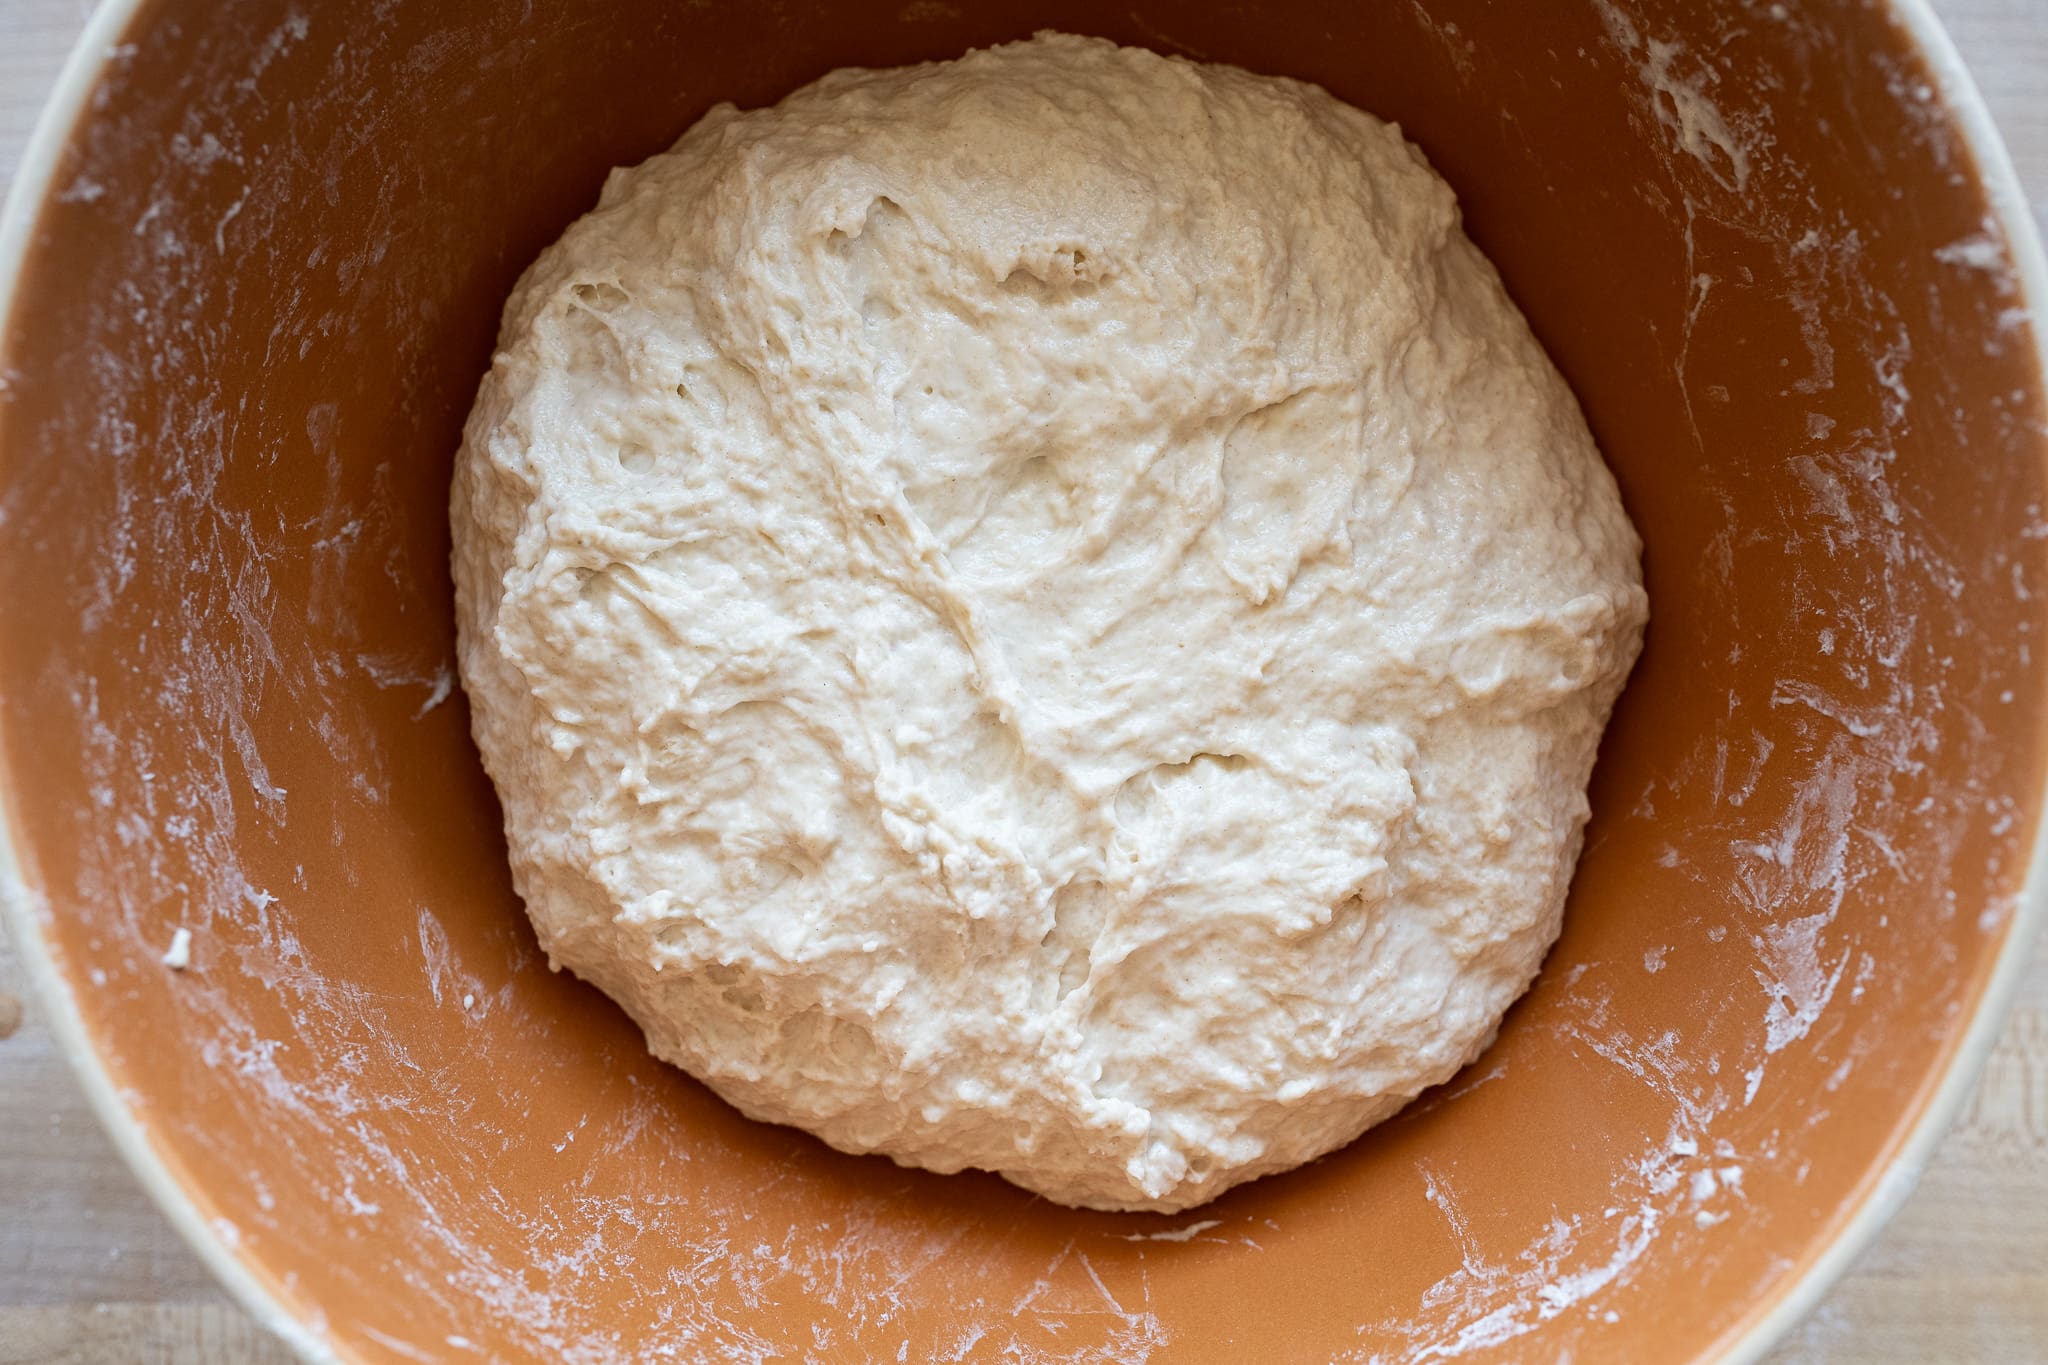
As you can see, the weak dough above still looks shaggy and sloppy; it doesn’t have sufficient structure. It needs a set of stretch and folds (and I’d likely give it a strong set).
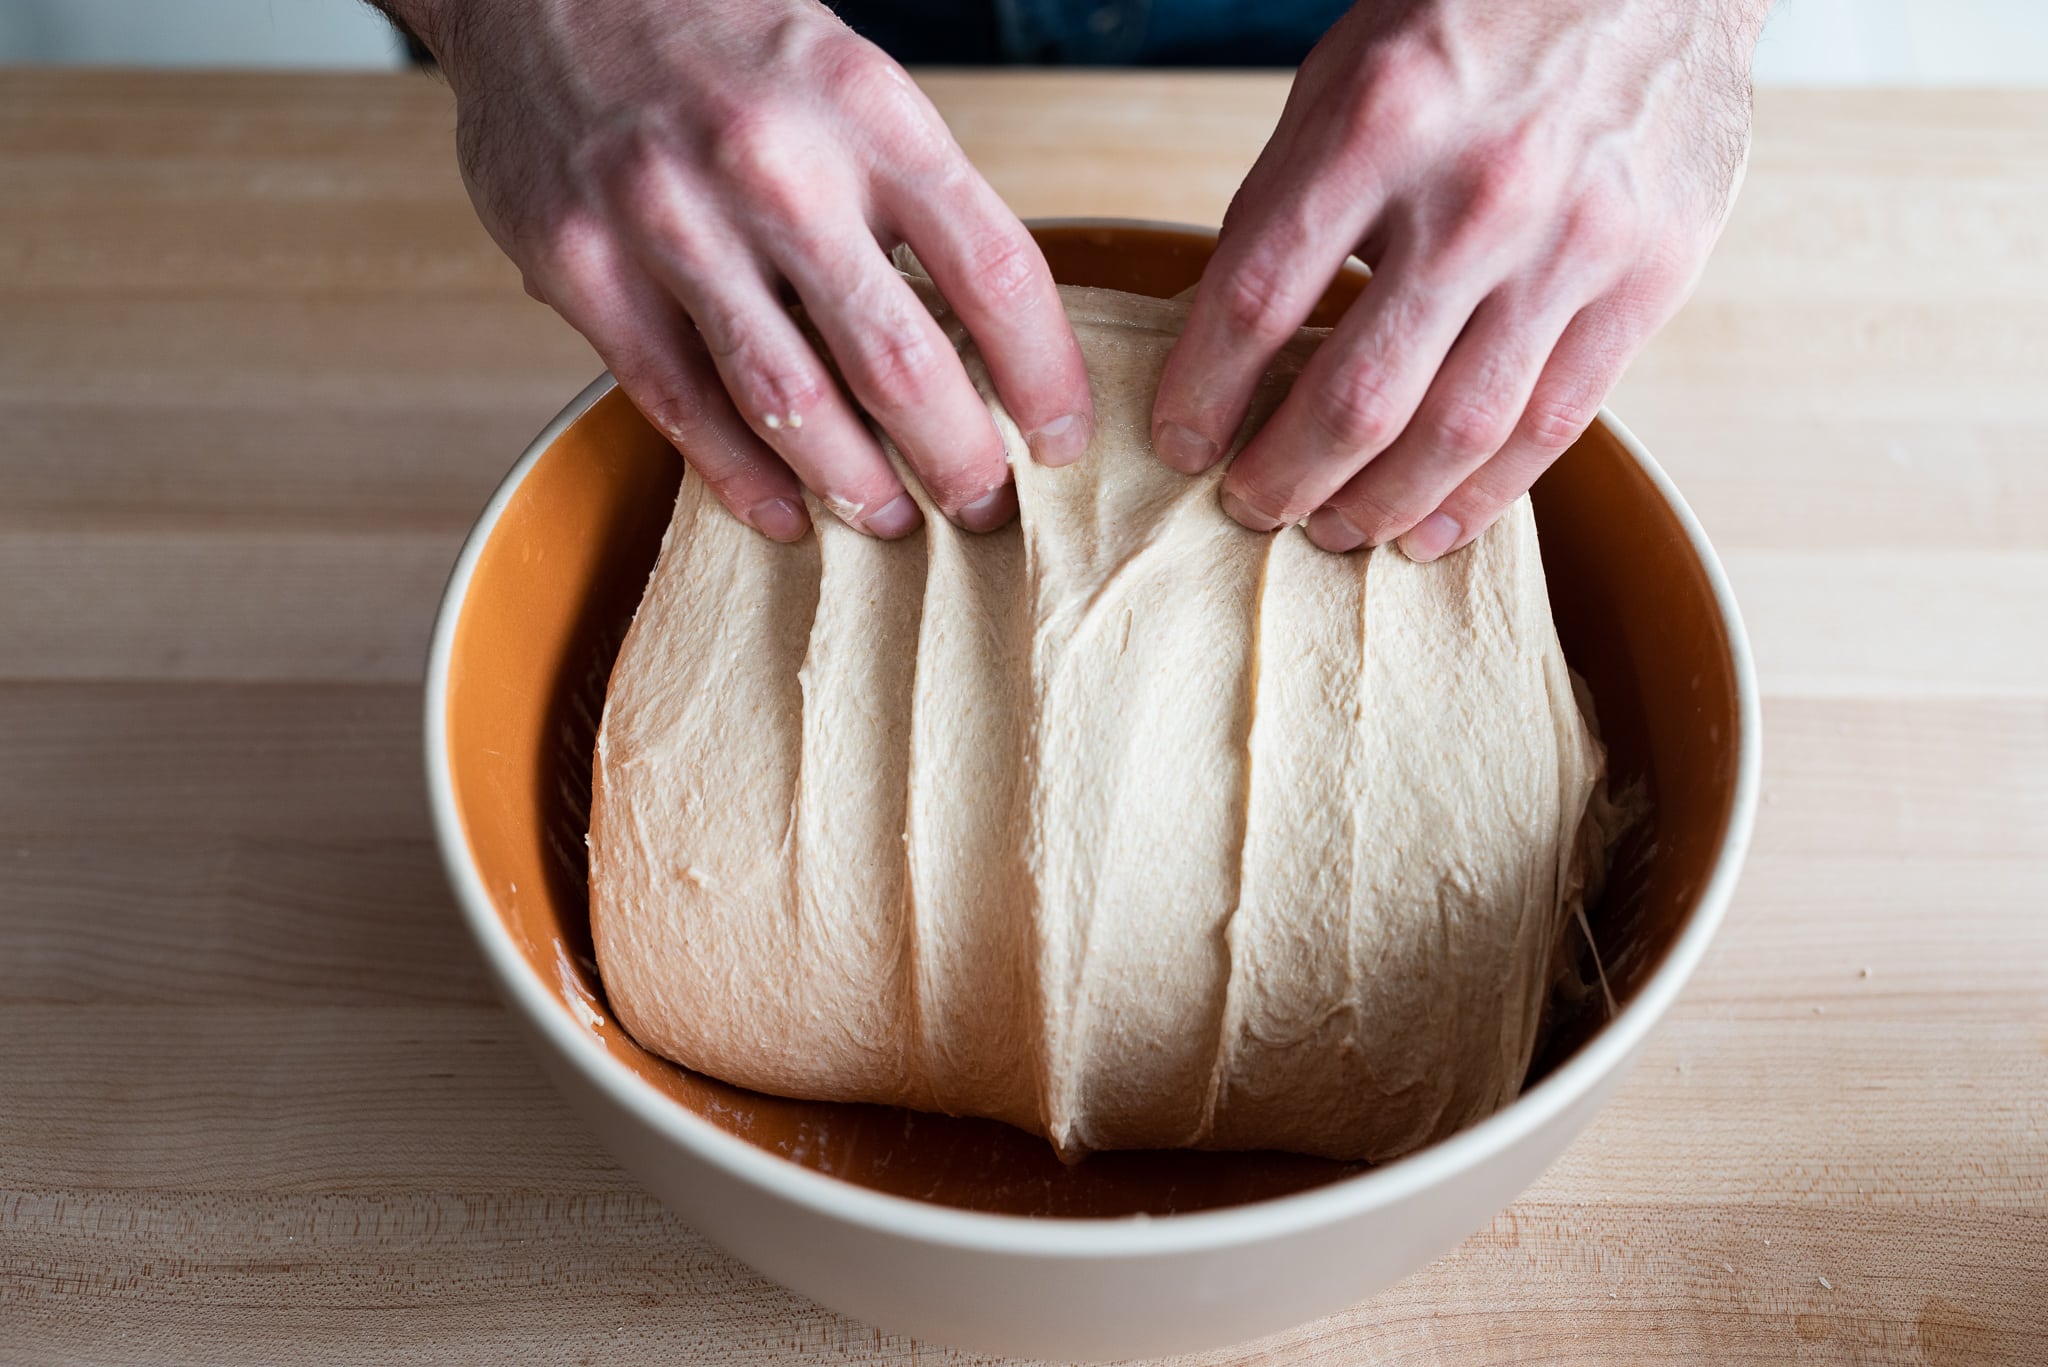
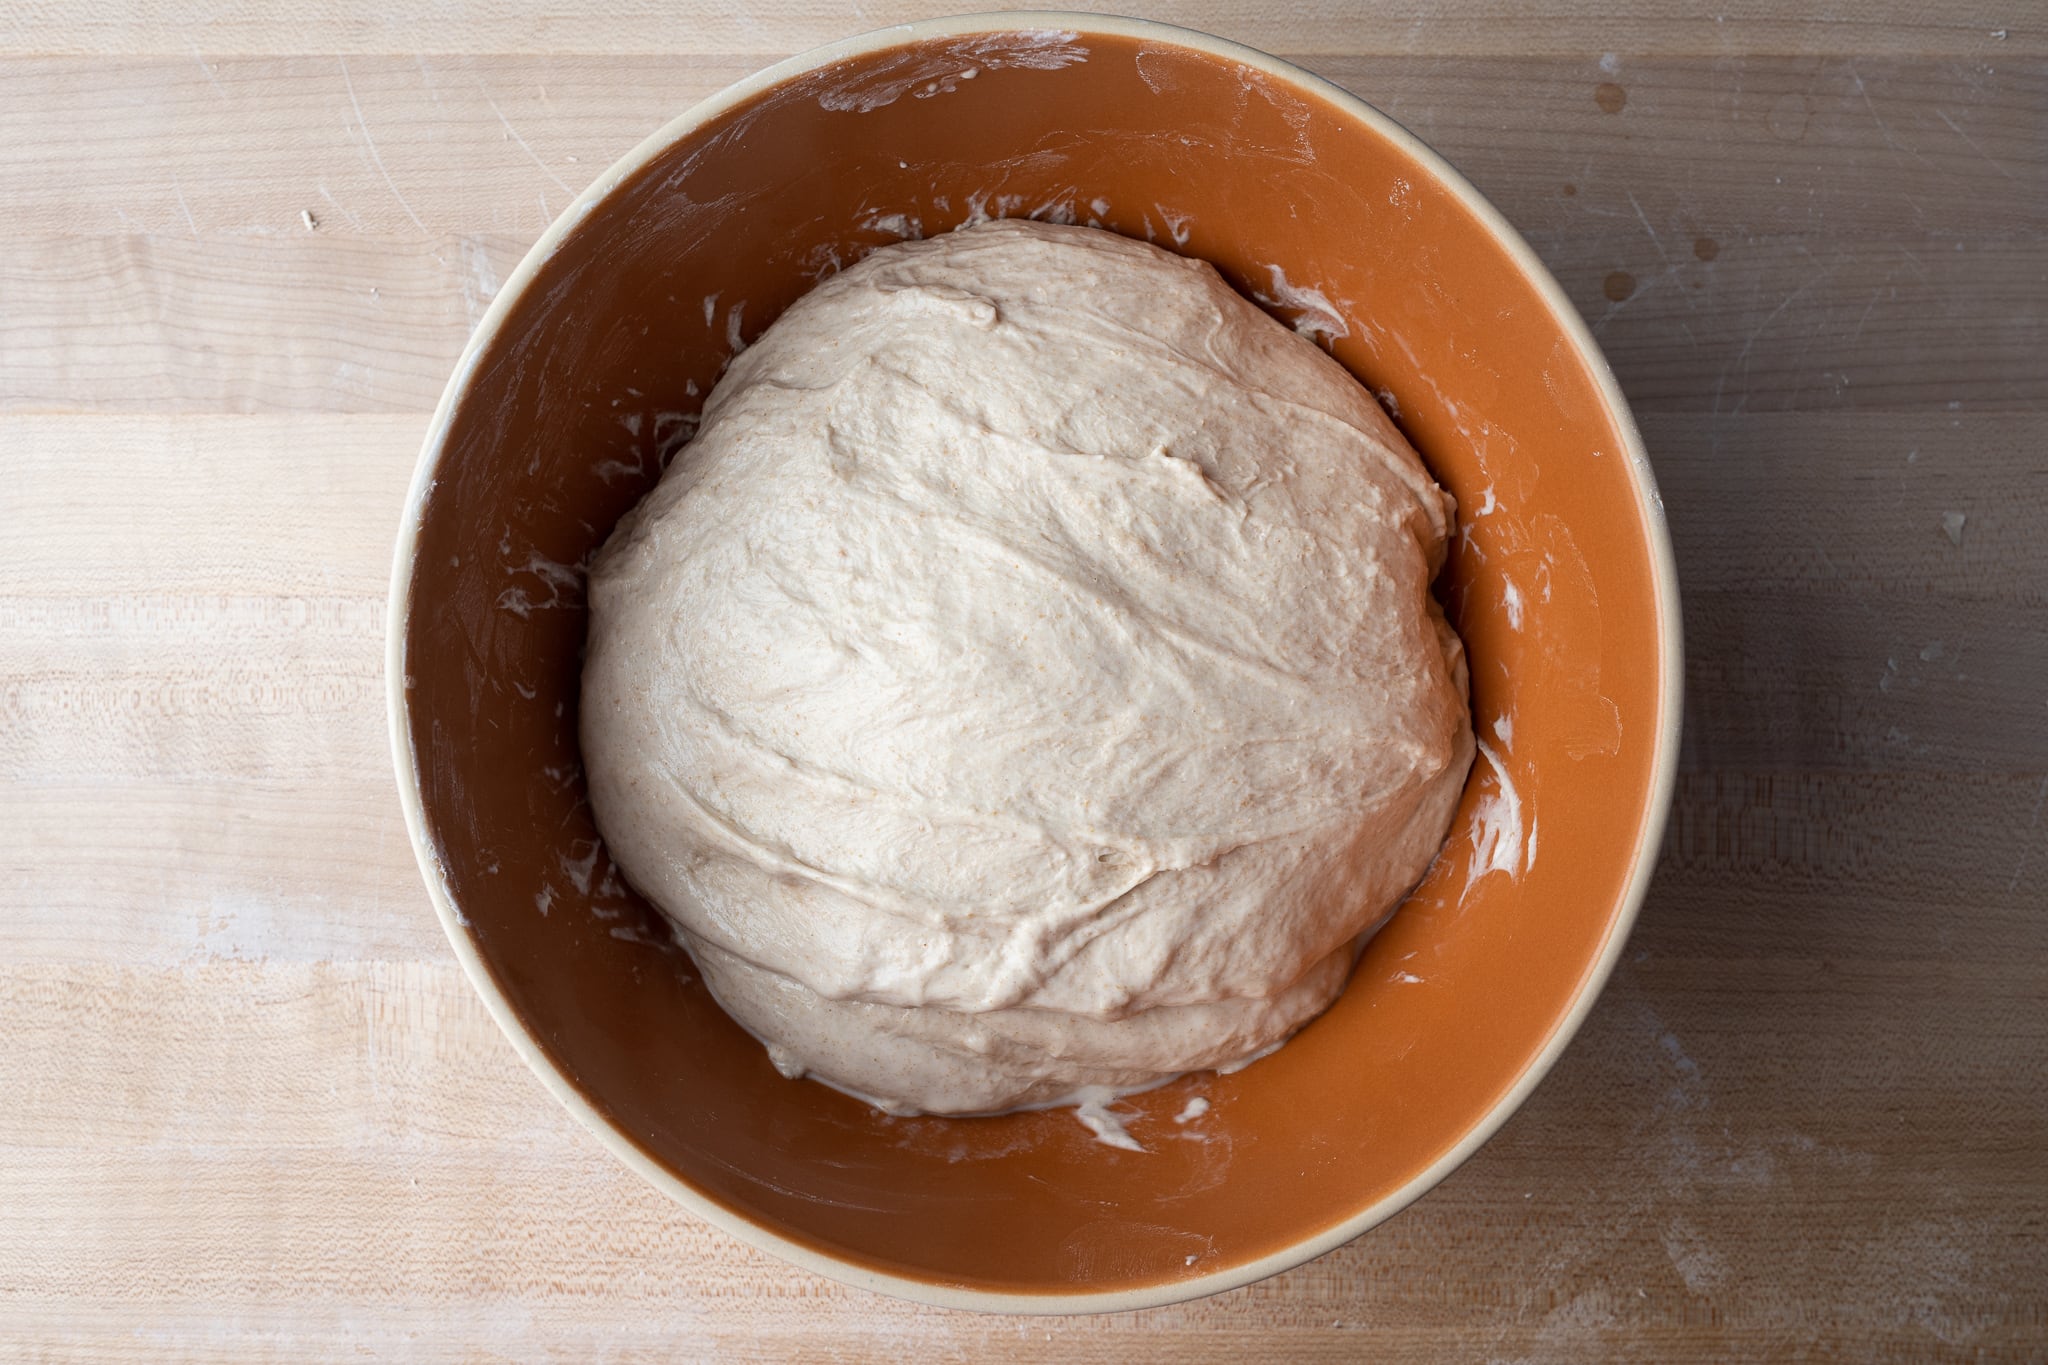
On the other hand, let’s look at stronger dough.
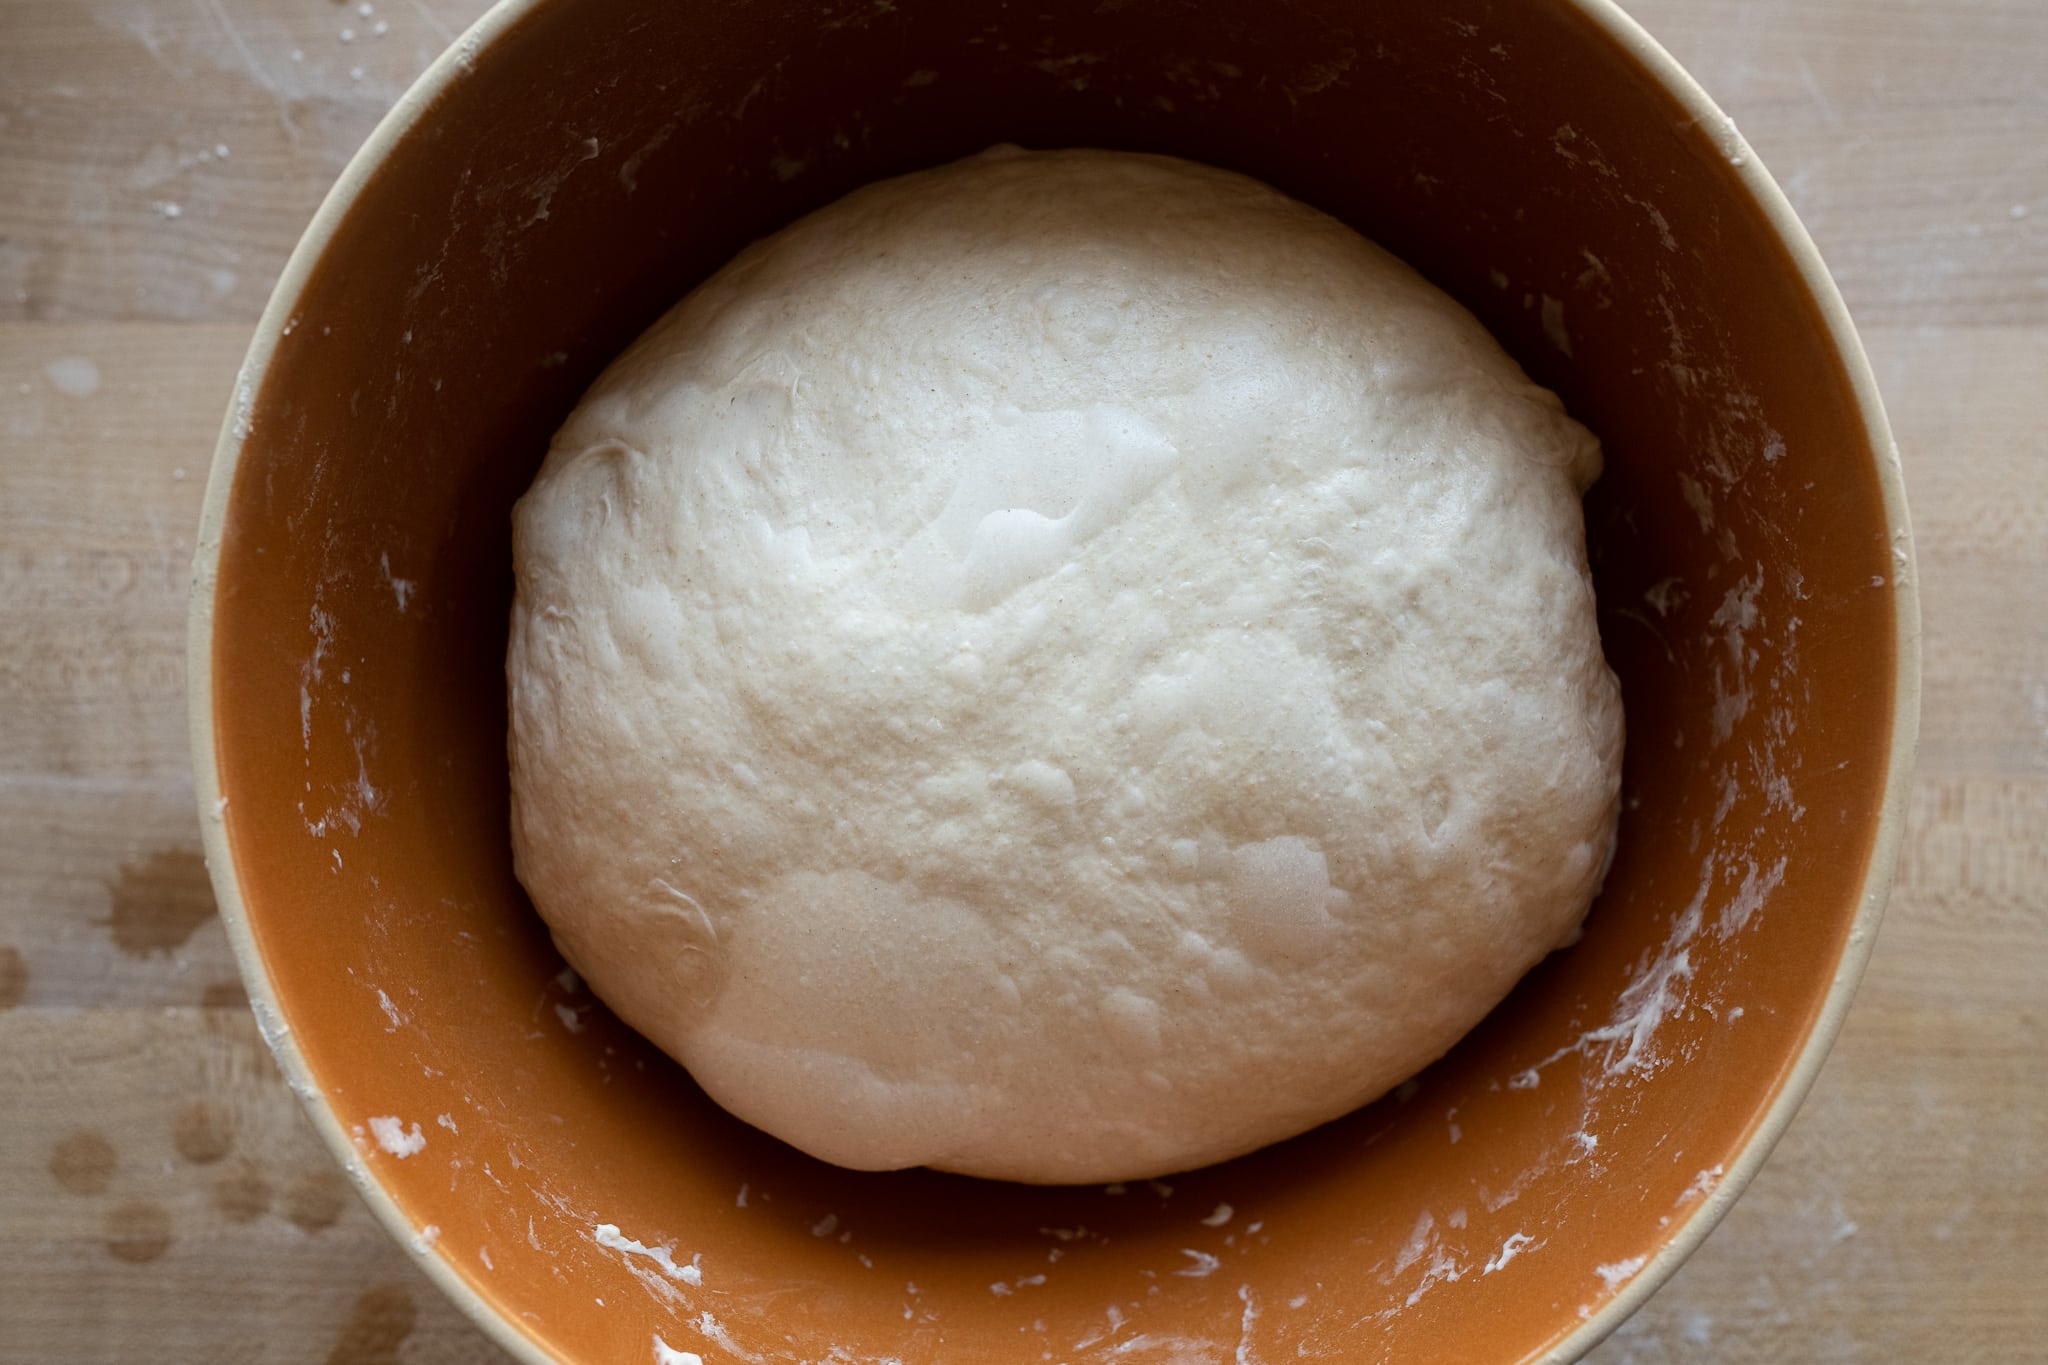
The dough in the image above looks smoother has defined edges, and (drastically) domes downward at the edges. You can feel that it’s stronger just by looking at the image. If I had already done a set or two with the above dough, I’d leave it to rest until divide time.
How Does the Autolyse Technique Effect Stretching and Folding?
In my guide to using the autolyse technique, I talk about how performing an autolyse can lead to a dough that’s already stronger out of the gate. Usually, when I autolyse, I can get away with less mixing up front, and that’s the point at which I usually adjust. But again, dough strength moves along a continuous spectrum. If I autolyse and mix for a long time, I’ll likely need a few (if any) sets of stretch and folds. Alternatively, if I autolyse and mix gently, I might still need a set or two.
So, it all depends! Having an autolyse doesn’t necessarily mean I need more or fewer stretch and fold sets, but it starts the dough at a stronger state.
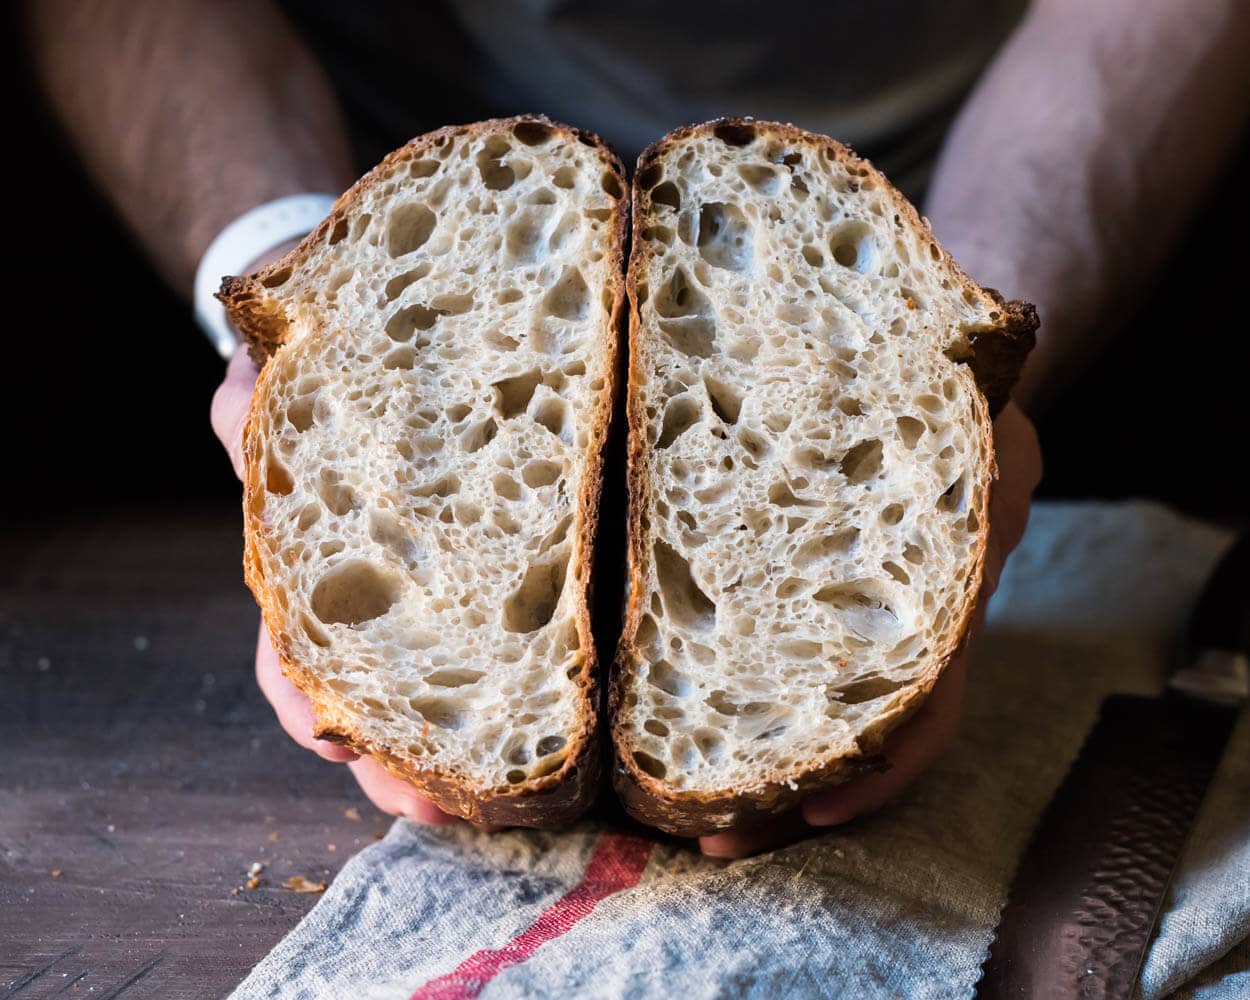
Do More Stretches and Folds Give My Bread an Open Crumb?
I talk about this (and a whole lot more) in my Bread Baker’s Handbook. Note that performing more sets of stretches and folds does not mean you’ll have bread with a more open crumb.
…performing more sets of stretches and folds does not mean you’ll have bread with a more open crumb.
This is a common misconception: the belief that a stronger dough will yield a loaf with a wildly open crumb and interior. This goes back to what I said in the beginning: you want to find that ideal dough strength at which your dough is strong enough to trap gas and hold its shape but not so strong that it can’t expand optimally in the oven.
For more, see my guide to baking sourdough bread with an open crumb.
What’s Next?
Next, check out my guide to proofing bread dough, which will be the baking step right after you shape the dough at the end of bulk fermentation.
If you’re new to baking sourdough bread, check out my new baker, start here guide.


28 Comments
Hi Maurizio, I really enjoyed your explanations, thank you.
I generally make wholemeal (supermarket bread flour so not fresh) loaves, and have tried 50-50 white & wholemeal, I am struggling to get my dough to achieve good strength, even with additional folding and proofing. It rises, but remains quite peaky and uneven on the surface.
I am unable to define if it's the flour or the temperature of the proof?
My kitchen is about 19-21 degrees, depending on the weather. Could it be the length of the initial mix?
Thank you
Andy
Hey Andy, sorry for the delay. It sounds like things might be okay; that unevenness on the top might just be from how the dough is left at the end of stretches and folds. As long as the dough is smoothing out, rising, gaining strength (elasticity) through bulk, it's probably just fine.
Thanks Maurizio, I appreciate you sharing your baking wisdom!
You bet, Tom!
Hey Maurizio! I usually have the problem with high hydration dough that no matter how often I stretch and fold, I feel like the dough still ends up being too weak. I'm very exact with the dough temperature. Anyways it mostly ends up being to soft and not having defined edges. Also at the preshape after 15 minutes they go quite flat. Is it just too much water? Or is it possible that I slap and folded and stretched and folded too much? And another question: is is necessary that the dough has some time of rest in bulk fermentation without s&f before preshaping?
Yes, sounds like too much water for the flour you're using, Rosa!
Seriously?!?!? There are so many dang ads on this site they get in the way…big time. If I was even considering a membership it just got smashed because of the ads. Was watching your vid on your other sourdough recipe – a 4 min vid – and every minute or so it cycled into another ad. I'll say it again..Seriously!!!
Hey Greg sorry about the ads. I'm working to reduce them toward a better balance so they're not so cumbersome. Also, all my full length videos are on my YouTube channel to watch, too!
Awesome THANK! Happy Holidays. Love your stuff it’s helping me be a better Baker!
Mauricio,
Thank you for tips. I am me w at baking SD. My friend who taught me says mix, do 4 stretch n folds , let sit at room
Temp for 3-4 hours, then place in fridge overnight. After remove from fridge let sit at room temp for 2 hours, then flatten and add butter and sugar of sweet bread. Then shape with flour. mine is not expanding as it should! It seems before the refrigeration in looks great. Next morning it has shrunk and hardened . Is refrigeration necessary? Thoughts? By the way her s comes out great!
It sounds like you likely over proofed the dough. There are a few signs your dough could have gone over: sluggish rise in the oven, the score on top of the dough might not open with a nice “ear” and instead just kind of fuse together, the interior will have lots of small holes and perhaps one or two large ones near the top (but no dense areas of unfermented flour), and finally the loaf could be a little on the sour side. Try reducing the proofing period.
Check out my guide to proofing for a bit more help, too:
https://www.theperfectloaf.com/guides/proofing-bread-dough/
In regard to the shaggy dough picture(stage) is this the time to do the slap and fold technique to strengthen and smooth up the dough for bulk fermentation?
At this point, the dough is past the mixing/strengthening stage and you're in bulk fermentation. So I would do stretches and folds, like talked about in this post!
In my case working with my first loaf. Each time I stretch and fold my dough gets stickier, much sticker. Is this normal? Having a hard time getting it to shape as it went from not sticking to my bowl to sticking to everything. Thanks.
It should get smoother and smoother. Try to stretch and fold the dough so it ends up with a smooth surface on top. I like to tuck the sides down a bit so the top is like a smooth, inverted U shape.
Hi! May I ask where you got the bowl you are using in this article? What material is it? Thank you!
I got his same bowl from Heath Ceramics. At the time it was 165.
Thanks!
I like the way you explain the process. I wondered about how many times to do folds and reading the above explanations gives me confirmation of what I thought the conditions of the dough should be. I’ve been making sourdough bread for about a year and half and I’m still experimenting with the processes. I had a stroke 2 years ago this April and making bread has helped me progress pretty dam good. I apriciate your web site, your explanations of how to proceed in the baking process. Great site!
Glad it was helpful and thank you Michael!
Hi Maurizio, thank you for sharing your tips on stretching the dough. I am currently dealing with a weaker than usual bread flour as the last years crops here in Poland produce weak flour. Even with 2 hours autolyse I end up with a very weak dough. I have already extended the initial kneeing time to 4 minutes (hand mixing) and I do 6 sets of s&f 3x15min + 3x30min. The results are not so bad but the rise is noticeably weaker. Is my only potion to add less water to the dough?
Hey there! I would try actually removing the autolyse period, but then also mix longer. With flours like this, I find they struggle with longer fermentation times, especially as acidity builds up (it’s good up to a point, then can cause issues with rise). After that trial, yes, I would reduce the hydration to suit the flour!
Thank you so much, Maurizio! I will give it a try.
Hey Andrzej, if you are looking for a great and quite strong bread flour in Poland, try „Mlyn Ciechanowiec”
What are your thoughts on lamination after the first stretch and fold?
I was thinking the same thing?
Reply is above!
Sure, that works just fine. I don’t often do this because I find the dough is plenty strong and it’s not mandatory. But if you like the process, go for it!