
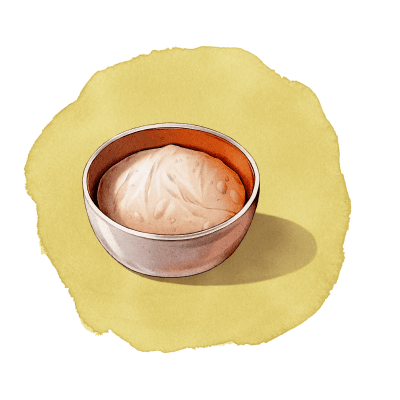
Bulk fermentation begins after a preferment (starter or levain) is added to bread dough and lasts until it’s divided and preshaped. As the term suggests, bulk fermentation is the time when dough is fermenting in bulk, or one large mass. It’s an important step in the bread-making process wherein the dough is strengthened, generates acidity (flavor), and rises.
When performed correctly, a successful bulk fermentation will result in bread dough that’s smooth, strong, and easy to handle; as well as well-risen with considerable yeast and bacteria populations.
Ultimately, understanding how to bulk ferment dough is the key to making sourdough bread successfully. This is exactly what you’ll learn in this guide.
Bulk Fermentation Guide Contents
- Bulk fermentation basics
- Strengthening the dough during bulk fermentation
- When is bulk fermentation done?
Your Ultimate Guide to Sourdough
This guide is part of a series, tap to learn about each step of the bread-making process from starter to finished loaf.
What is Bulk Fermentation?
Bulk fermentation, or a dough’s first rise, is the period between mixing and preshaping dough. During this essential time, carbon dioxide and other compounds are produced as the dough ferments in a single large mass. Carbon dioxide production ensures a light and airy loaf of bread, while organic acids and other compounds bring desirable flavors, storage qualities, and improved texture. Skipping or shortening this step can result in underdeveloped flavors and an undesirably tight crumb structure.
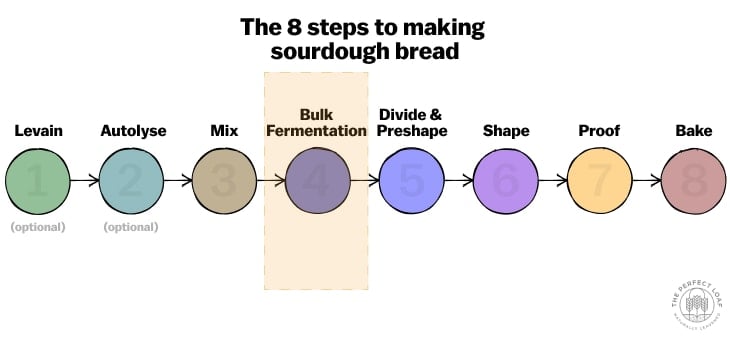
In my cookbook, I talk about the eight steps to making sourdough bread, from creating a levain (which is an offshoot of a sourdough starter) to baking. Bulk fermentation is the fourth step in the bread-making process, right before dividing and preshaping. This is also the time when, if needed, the dough is further strengthened through stretching and folding.
What is the Difference Between Bulk Fermentation and Proofing?
Proofing is frequently mistaken for bulk fermentation. While both involve resting and rising the dough during fermentation, proofing occurs once the dough is shaped for baking. Unlike bulk fermentation, where it’s a large mass, in proofing, the dough is preshaped, shaped, and put in its final container to rise.
Read more about proofing in my Ultimate Guide to Proofing Bread Dough.
What Temperature is Best For Bulk Fermentation?
There is no universal best temperature for bread dough in bulk fermentation because the best temperature depends on the particular dough you’re working with and the schedule you’re after. Typically, I try to keep my dough around 74 to 76°F (23 to 24°C), which is an effective temperature for fermentation and results in bulk fermentation times between 2 and 5 hours.
As we’ll discuss later on determining when to end bulk fermentation, the duration highly depends on the dough’s temperature. Warmer temperatures mean faster fermentation and a shorter bulk fermentation, whereas cooler temperatures mean slower fermentation and a longer bulk fermentation.
There are two types of bulk fermentation I typically do with my sourdough bread: Warm bulk fermentation, which is done at ambient—or warmer—temperatures, and cold bulk fermentation, which is done at refrigerated temperatures (or sometimes slightly warmer).
Warm Bulk Fermentation
Warm bulk fermentation is when bread dough is fermented at a temperature warmer than typical refrigerator temperatures. This is the most common type of fermentation and generally lasts between 2 and 5 hours.
Bulk fermentation at warmer temperatures encourages strong yeast and bacterial fermentation that results in an active and flavorful bread dough.
- Temperature: 74 to 78°F (23 to 25°C)
- Typical duration: 2 to 5 hours
- Example recipe: Beginner’s Sourdough Bread
Cold Bulk Fermentation (Bulk Retarding)
Cold bulk fermentation, also called bulk retarding, calls for fermenting dough at a warm temperature before refrigerating it, often overnight. This technique spreads the baking process over two days, enhances flavor, and makes handling the dough easier because it’s cold and firm.
The challenge with bulk retarding is timing. It’s crucial to warm bulk ferment the dough enough to start fermentation, and then finish, but not overproof, in the fridge, especially since large dough masses cool slowly, prolonging fermentation. Generally, I like to bulk ferment for half the required time once the dough starts to visibly rise and get puffy. For instance, if a recipe calls for 4 hours in bulk fermentation, I would warm bulk ferment for 2 hours, then put it into the fridge.
- Temperature: 38 to 40°F (3 to 4°C)
- Typical duration: 4 to 24 hours (often overnight)
- Example recipe: Sourdough Ciabatta
What’s the Best Dough Container for Bulk Fermentation?
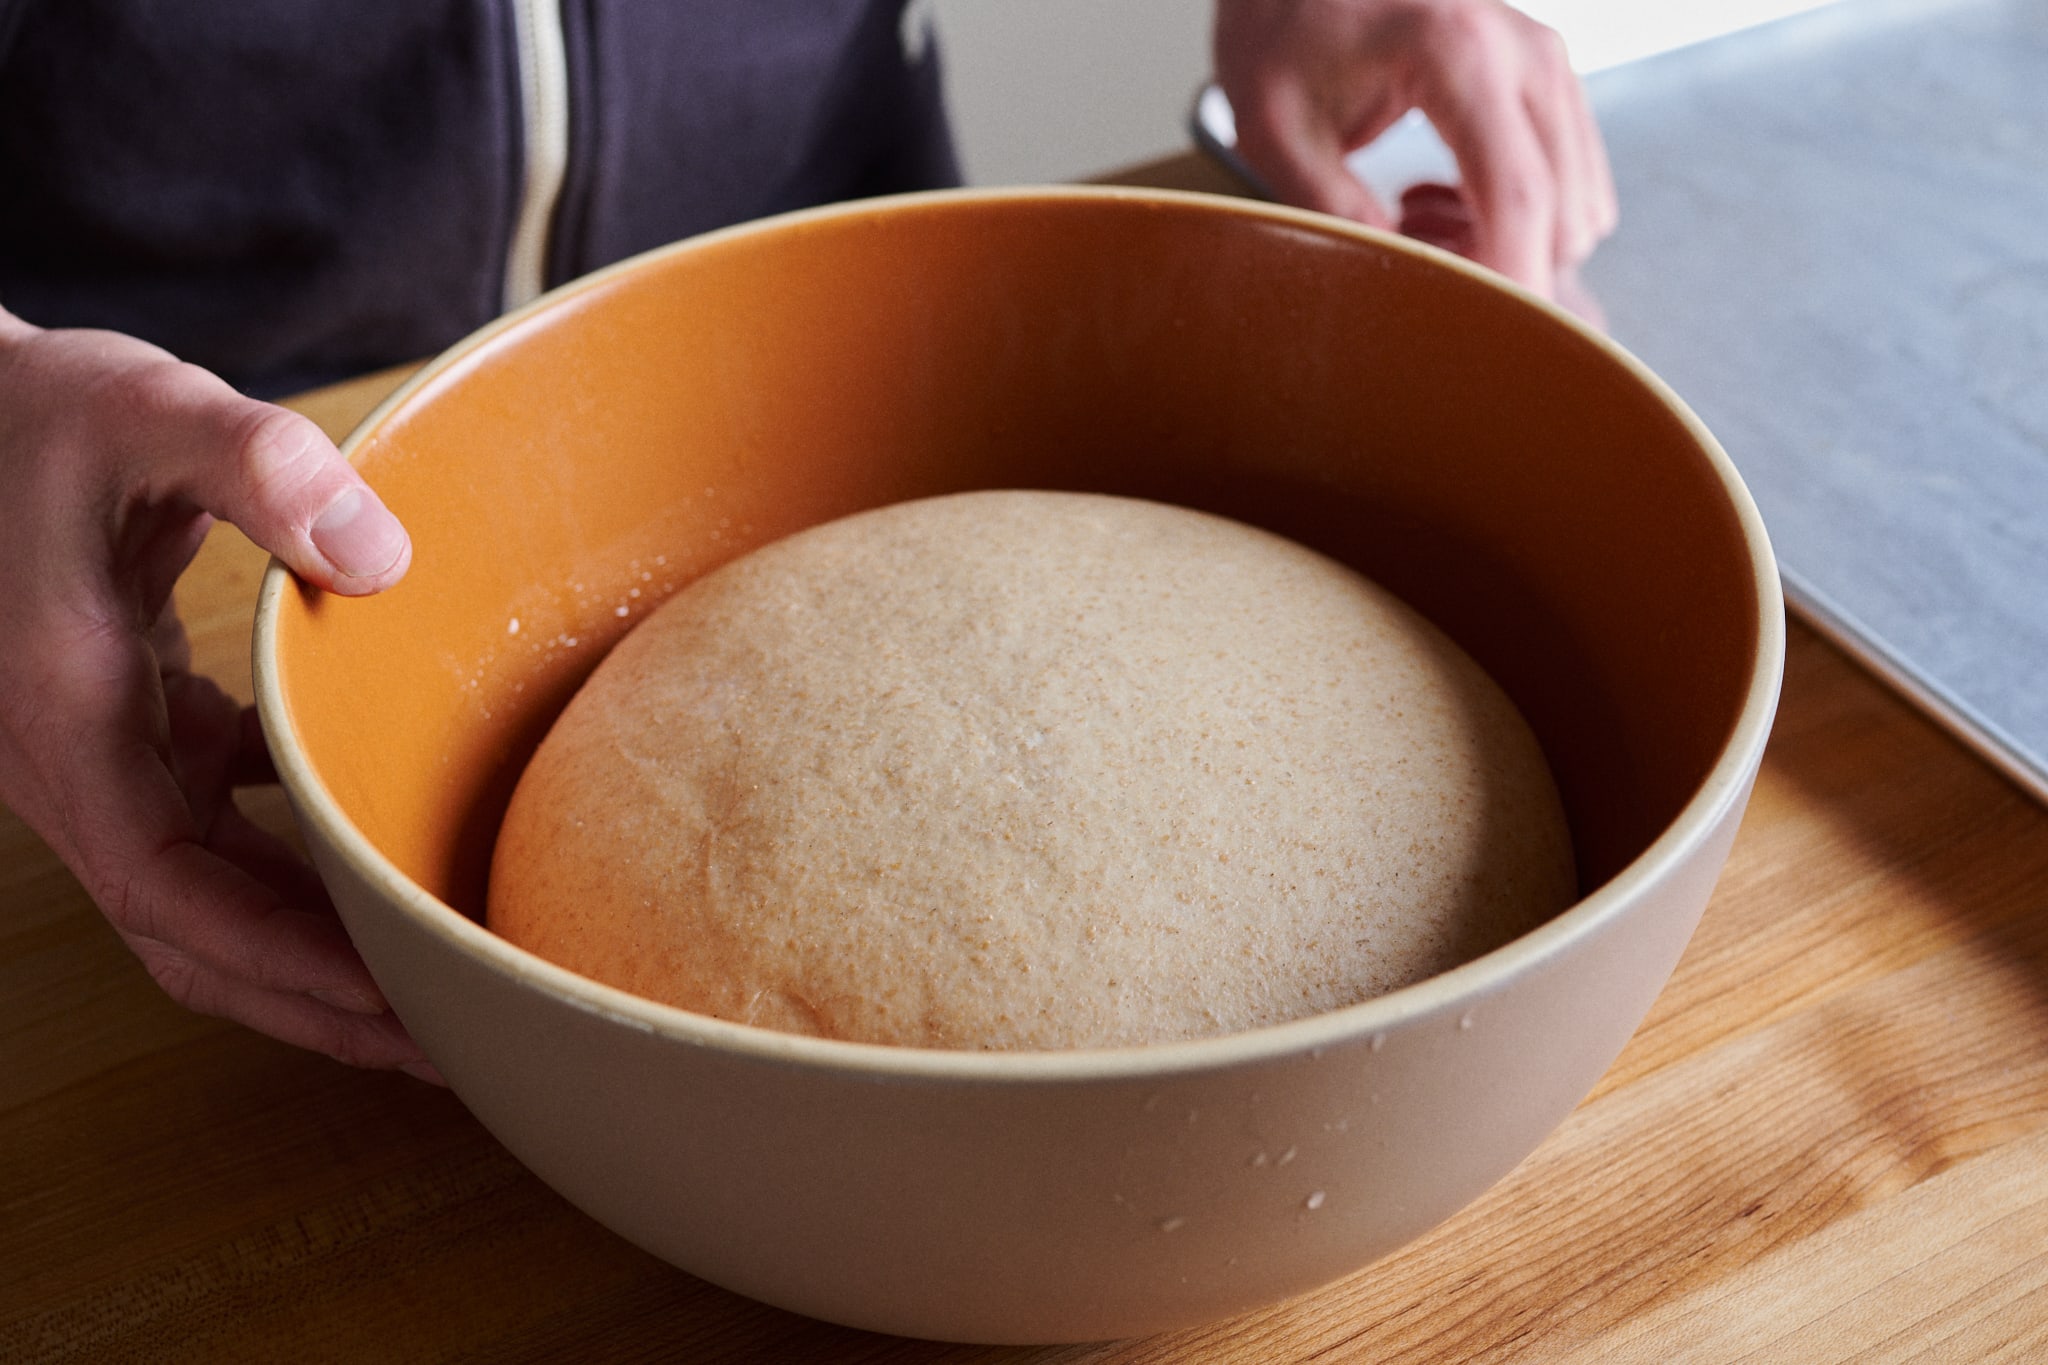
Over the years, I’ve tried dozens of containers to hold sourdough bread dough during bulk fermentation. I’ve tried every shape and material and, ultimately, settled on two containers I use over everything else: a ceramic bowl for making one or two loaves, and a large plastic tub for larger dough quantities.
The container should be sized to suit the amount of your dough. A container that’s too large will encourage the dough to spread too much, and a too-small container will inevitably have the dough spilling over the side. Additionally, the material of the container has implications on dough temperature throughout bulk fermentation.
Let’s look at the material, thickness, and size, and finally, a few containers I highly recommend.
Bulk Container Material
The best bulk fermentation container for your bread dough will be smooth and essentially nonstick. Ceramic, glass, plastic, and nonreactive stainless steel all work well.
Bulk Container Thickness
Thick or thin containers are suitable, but remember their impact on dough temperature. Thick containers maintain constant dough temperature, while thin ones align with the ambient temperature.
Bulk Container Size
Ultimately, the size of your bulk fermentation container will depend on how much dough you are working with. I have two containers I use often that will work with total dough weights from 500 grams to 8 kilograms.
| Total Dough Weight | Bulk Fermentation Container | Notes |
|---|---|---|
| 500 to 1000 grams | Rectangular glass dish | If you prefer glass, this is a great container for making a single loaf. |
| 500 to 2000 grams | Heath Ceramics Large Serving Bowl (4.5 inches tall, 10-inch diameter) | The perfect container when making one or two loaves. I’ve been using these bowls in my kitchen for 10 years, and they fit any two-loaf recipe perfectly. |
| 2000 grams to 8 kilograms | Rubbermaid tub (14 x 12 x 5.5 inches) | The perfect container when making larger quantities of dough. This tub can fit inside the Brod and Taylor proofer. |
Should Sourdough Bread Dough Be Covered During Bulk Fermentation?
Yes, covering your bread dough with a lid or airtight cover will prevent skin from forming on the dough, which could limit its rise.
Should I Oil My Bulk Fermentation Container?
Oiling your bulk fermentation can make removing the dough much easier, but it depends on the material of the container. A ceramic container rarely needs to be oiled; instead, I moisten the bowl with water. If my bulk fermentation container is plastic, I will lightly oil it with olive oil or a neutral-flavored oil.
Where is the Best Place to Bulk Ferment Bread Dough?
Depending on container size, use a dedicated dough proofer or your oven with light on.
Strengthening the Dough During Bulk Fermentation
When mixing bread dough, I prefer to strengthen the dough only until “medium development,” which means the dough is not intensively strengthened (also known as an “improved mix”). It’s strengthened enough to begin organizing the gluten matrix but not so much that it doesn’t need additional strengthening during bulk fermentation—this is where stretches and folds come in.
In some cases, when dough is fully strengthened in a mixer (like with brioche), or the dough uses a very strong flour (potentially with low hydration, like with sourdough pretzels), it may not need stretches and folds during bulk fermentation at all.
But why not fully strengthen the dough during mixing so you don’t have to do anything during bulk fermentation?
Stretching and folding during bulk fermentation helps:
- Easily and effectively strengthen the dough
- Equalize the dough’s temperature
- Give you an opportunity to check in on the dough and assess fermentation
- Trap a small amount of air into the dough
Since sourdough bread dough needs bulk fermentation time to properly ferment the flour in a formula, each set of stretches and folds gives you the opportunity to fine-tune the dough’s strength, equalize its temperature, and check in on its progress at a set cadence.
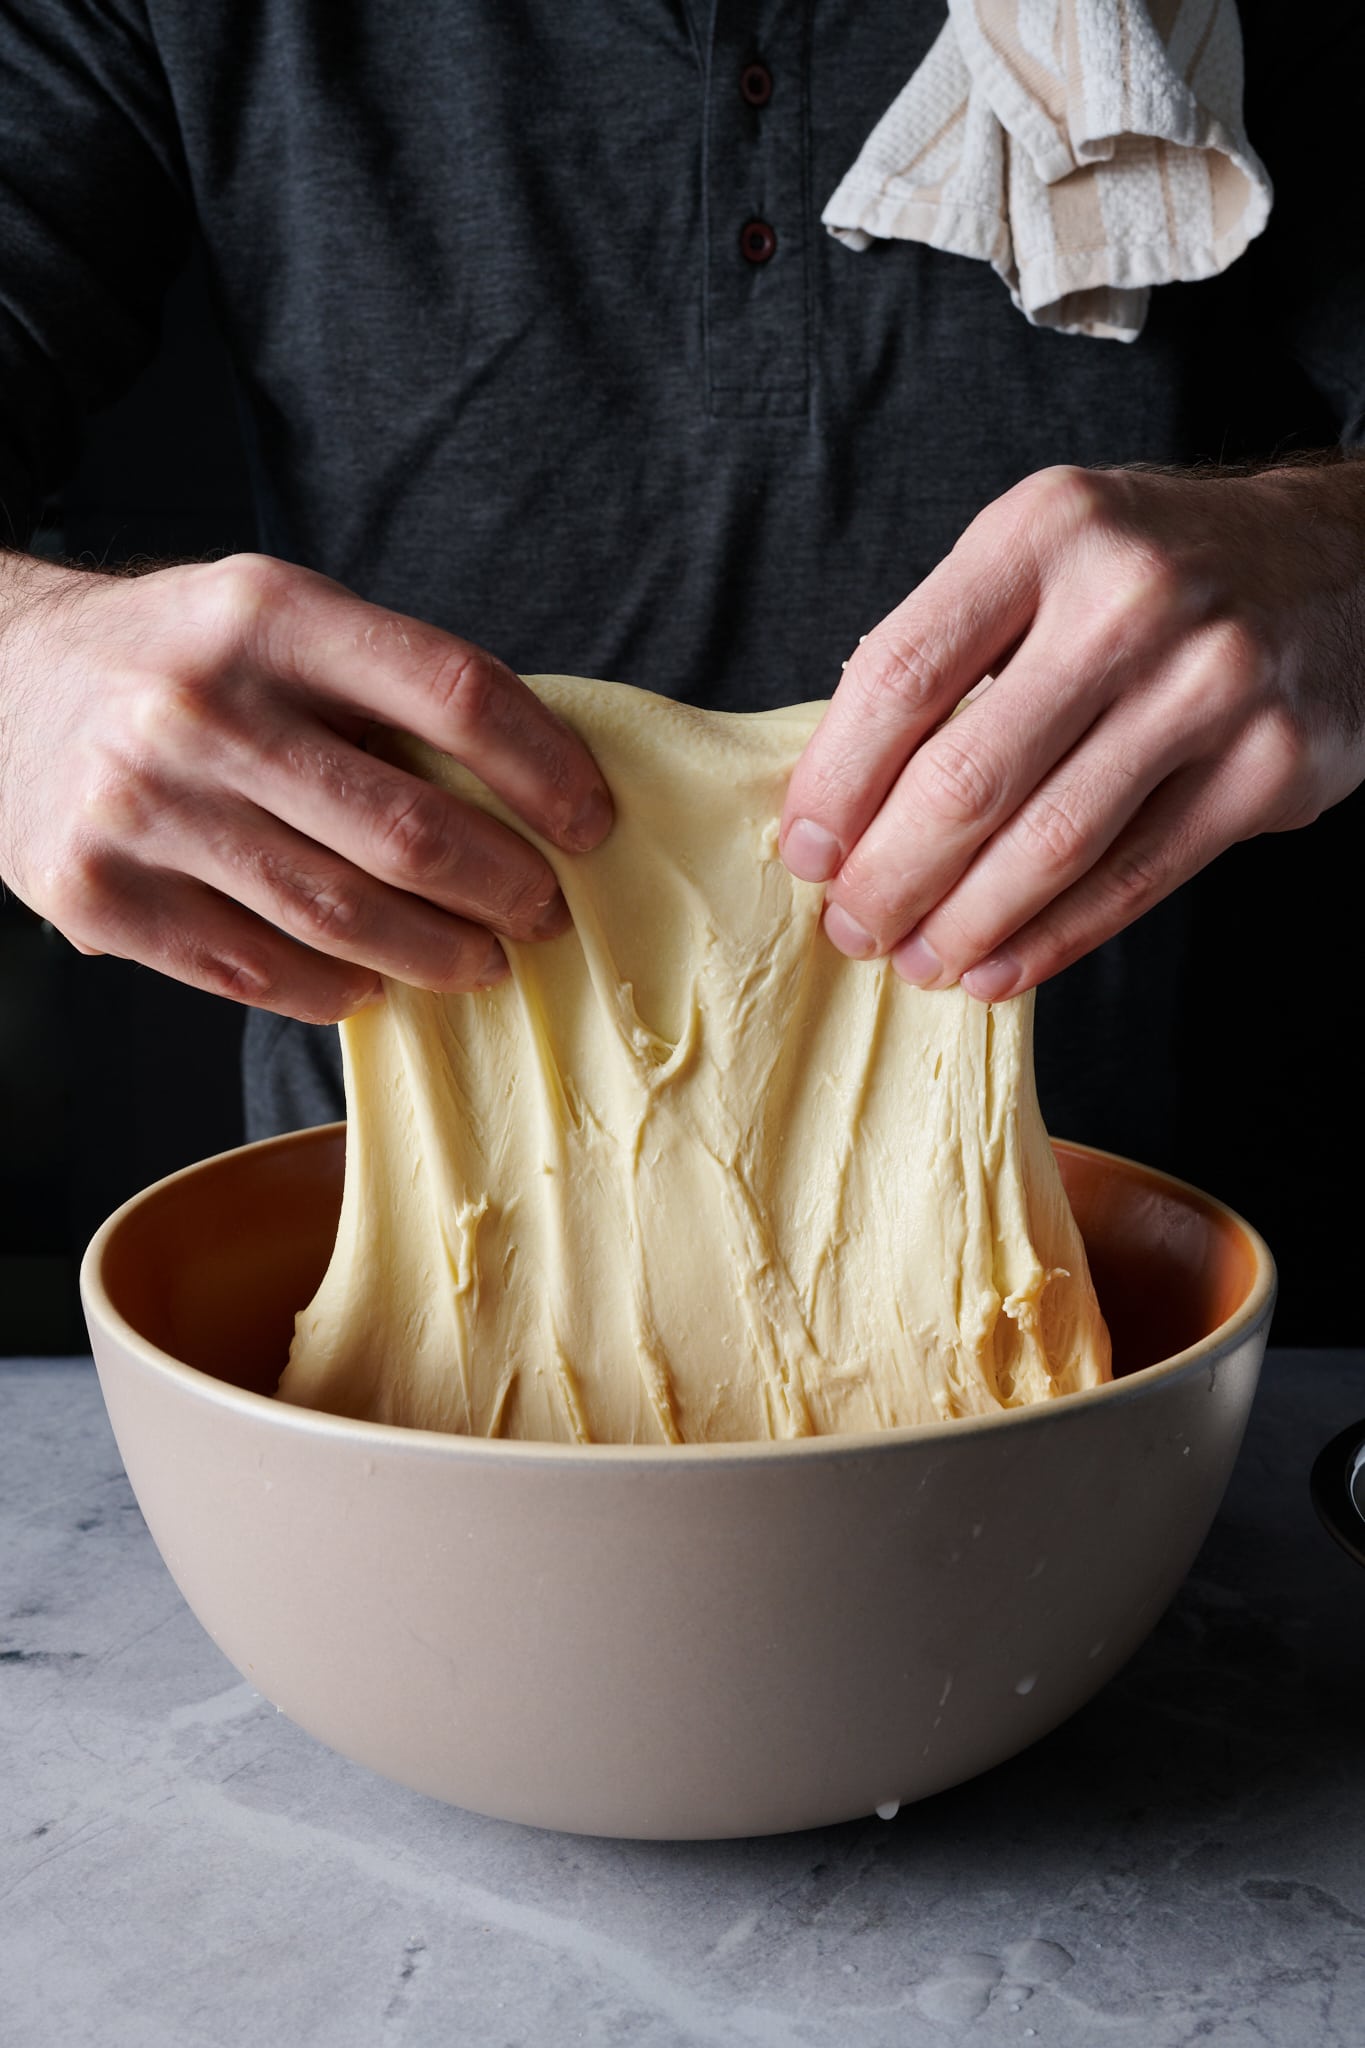
How Do I Perform Stretches and Folds?
Stretching and folding is exactly what it sounds like: With wet hands, stretch the dough from one side up and over to the other side. Typically, each set includes four stretches and folds. If my dough is well mixed, I’ll often give it sets of gentle stretches and folds, otherwise, a more vigorous stretch and fold approach is called for.
See my full guide to stretching and folding for more information on how many sets are needed, how often to perform them, and ways to make this step easier.
How Do I Know When Bulk Fermentation Is Done?
For many bakers, determining when to end bulk fermentation is one of the most challenging parts of making sourdough bread. It’s difficult to assess just how much fermentation has happened in bread dough, and there is no clear-cut sign it’s time to end bulk fermentation and divide the dough.
Determining when to end bulk fermentation is one of the most challenging parts of making sourdough bread.
The truth is, there is no perfect point at which to end bulk fermentation. It requires a holistic assessment of the dough and the process. Further, if the dough is divided a little early, which is very common, you can adjust by allowing the dough to rest before it’s placed into the fridge for cold proofing (retarding). This will give the dough additional warm-temperature fermentation time to help get it back on schedule.
I’m going to walk you through exactly what I look for. These are the four cues I use to determine when to end bulk fermentation.
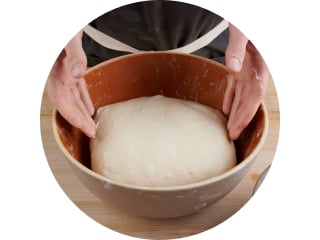
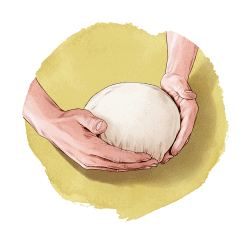
1. Look For an Elastic, Strong Dough
Similar to its change during stretches and folds, the dough should progress from shaggy to smooth, elastic, with defined edges. When tugged, it should resist stretching, indicating elasticity.
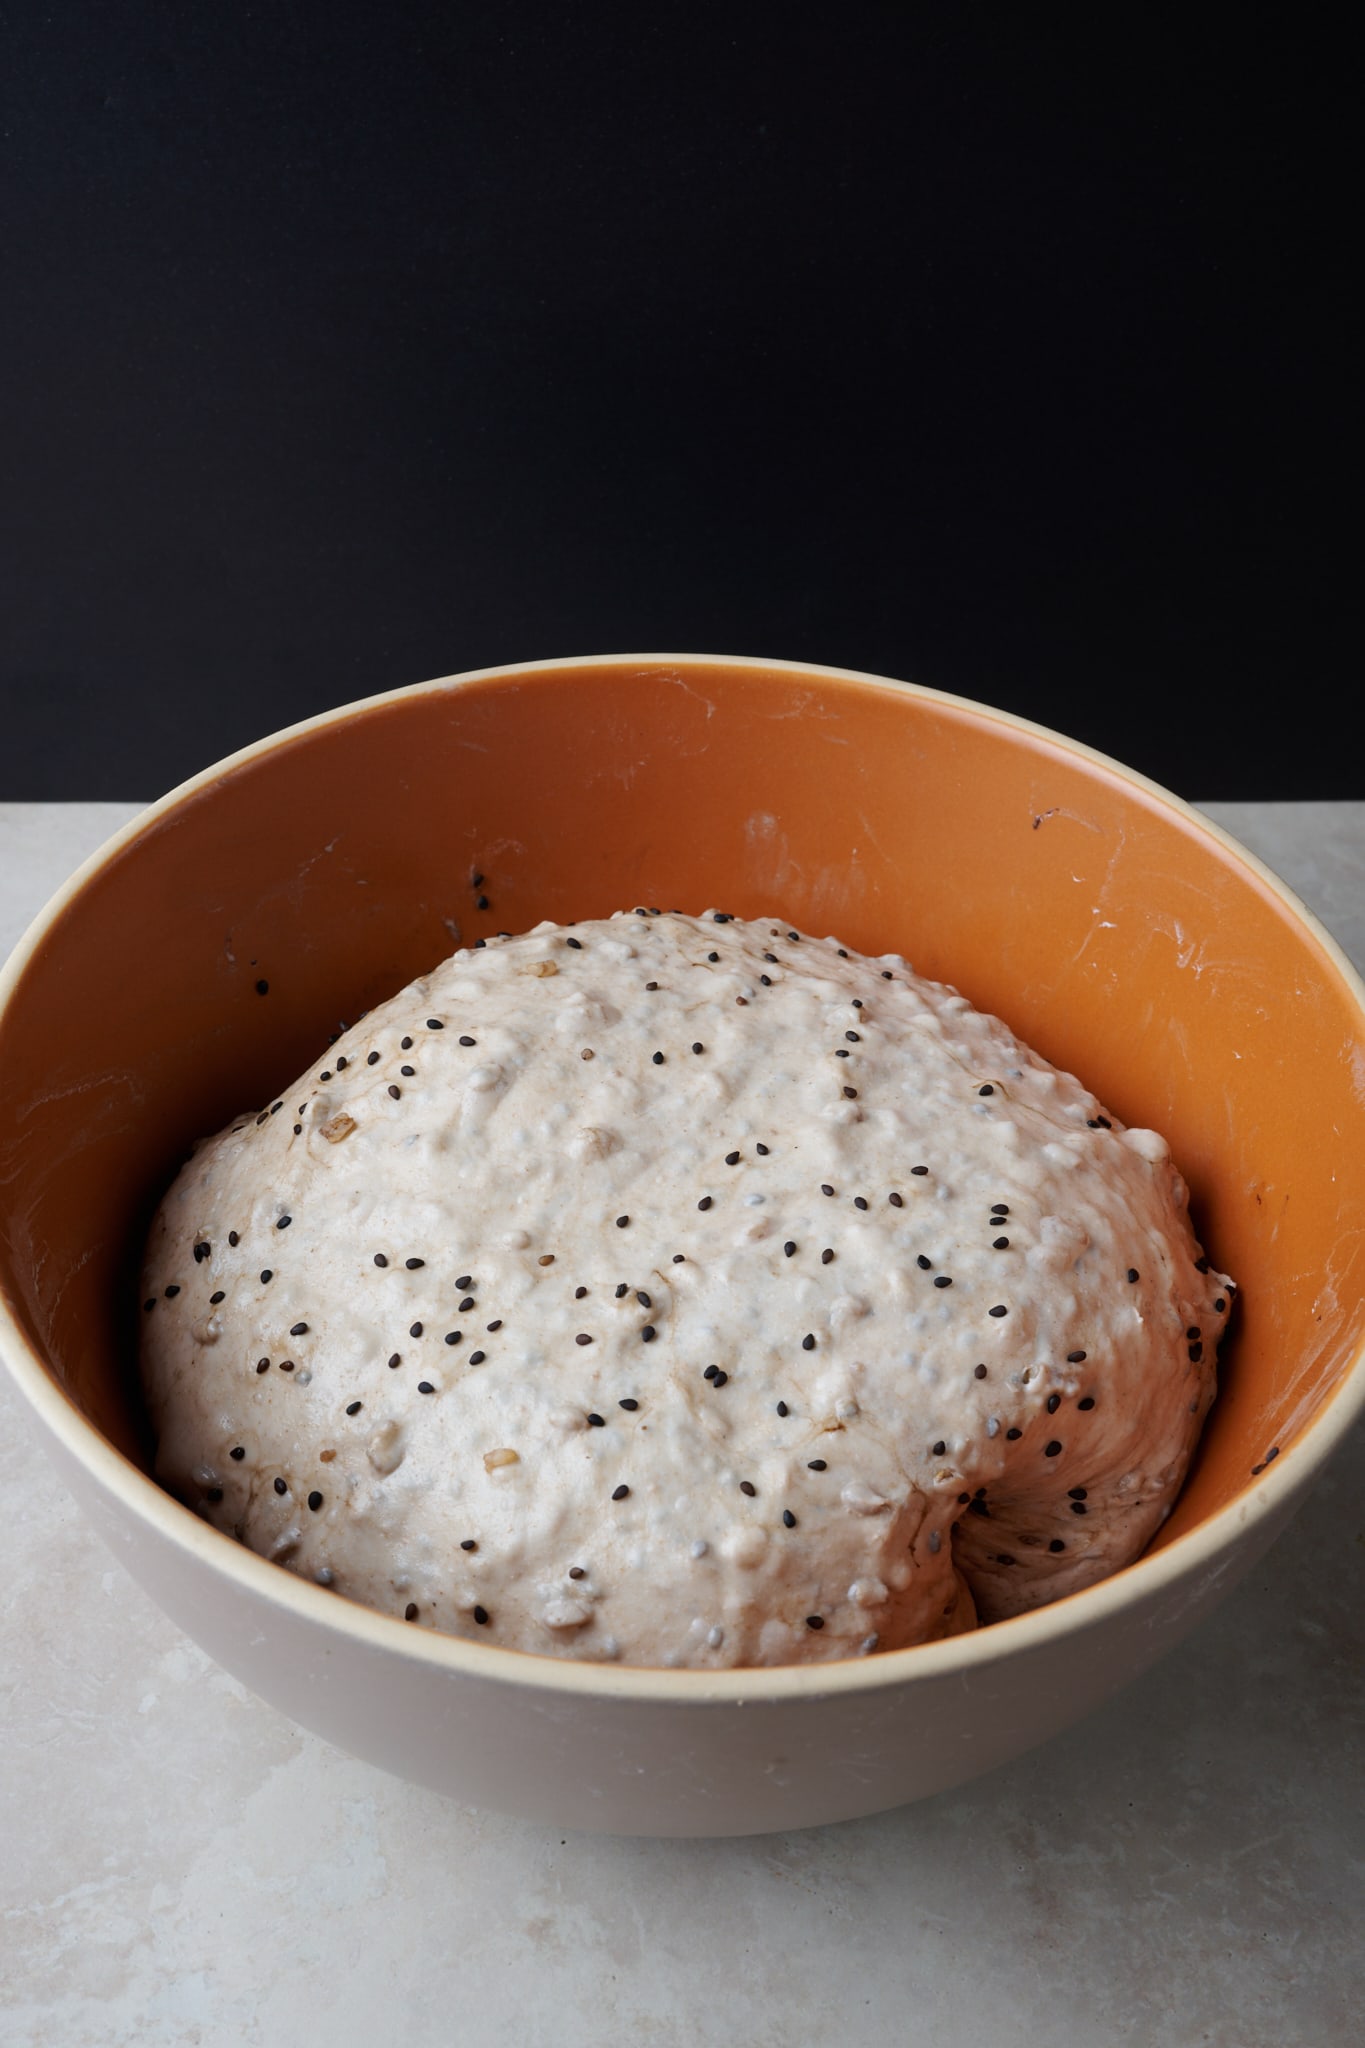
2. The Dough Should Have Risen and Have Domed edges

The dough in the container should be puffy and jiggle when shaken gently. Its rise, influenced by hydration and flour type, is secondary to looking ‘alive’ and airy.
For normal hydration levels, it shouldn’t be flat during bulk fermentation and should have rounded edges where it touches the container sides.
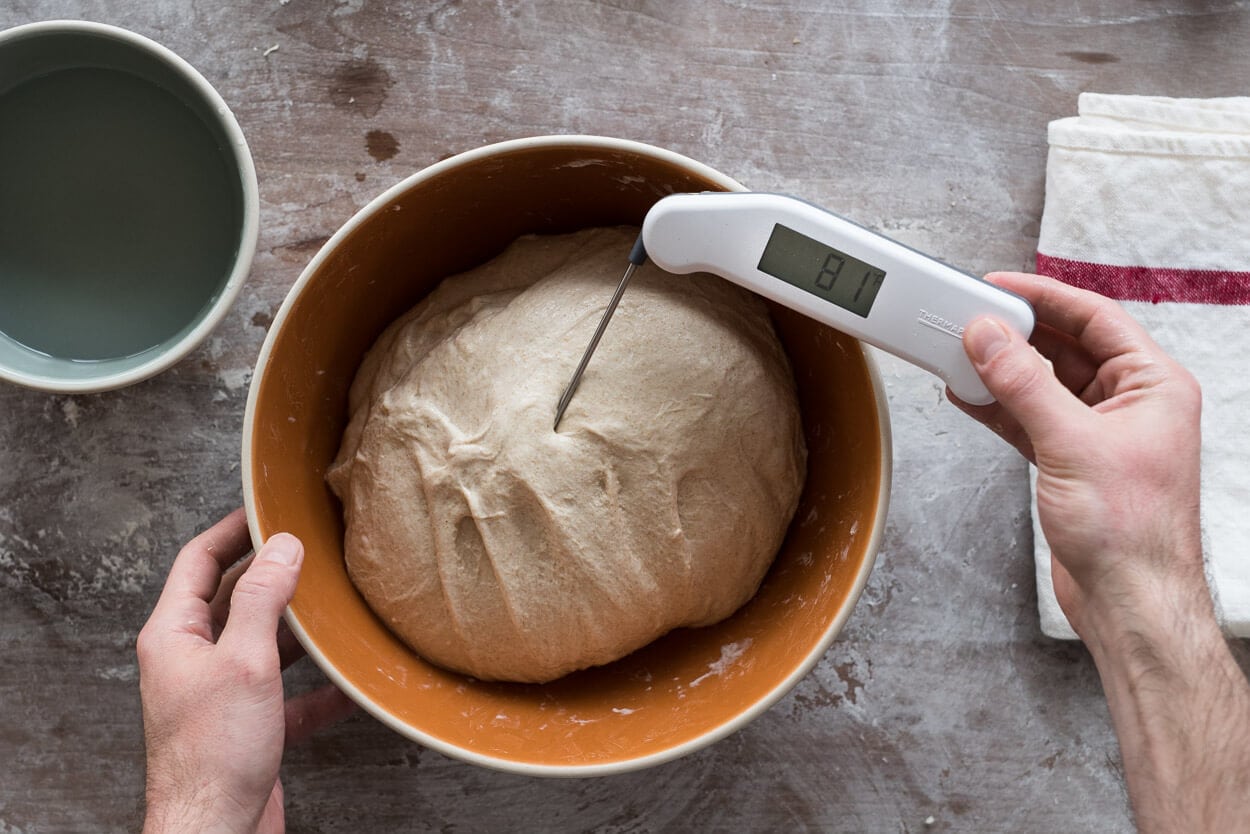
3. Consider the Dough Temperature
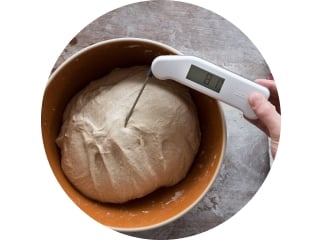
Temperature crucially dictates bulk fermentation time. If the dough’s final dough temperature (FDT) at the end of mixing is below the recipe’s target, lengthen the fermentation. Conversely, a slightly higher temperature means dividing the dough earlier.
For most recipes at The Perfect Loaf, the FDT is around 78°F (25°C). If the FDT comes higher, say around 80 or 82°F (26 to 27°C), expect to need to shorten bulk fermentation due to increased fermentation activity. And vice versa.
4. Use Your Intuition and Baking Experience
Consider the dough’s composition (flour, hydration, pre-ferment) to intuitively judge the right time to divide it, a skill that develops with experience. For instance, overripe levain might require an earlier division due to faster fermentation.
How Much Should Sourdough Rise During Bulk Fermentation?
Judging when to end bulk fermentation based on how much the dough rises (volumetric increase) can be misleading. For instance, consider the amount of rise difference between a 70% hydration all-white bread dough (lots of rise) versus a 100% hydration whole wheat bread dough (much less rise).
Due to the improved gas-trapping capabilities of white flour, the all-white dough will potentially double in volume, whereas the whole grain dough may only increase by 20% to 30%—yet both will be ready for dividing.
Example Video: Ending Bulk Fermentation in My Best Sourdough Bread Recipe
In My Best Sourdough Recipe YouTube video, I show all the signs for when the dough has finished bulk fermentation and is ready to be divided.
Bulk Fermentation FAQs
When does bulk fermentation start?
Bulk fermentation starts right after mixing is finished.
When does bulk fermentation end?
Bulk fermentation ends when the dough is divided. When a recipe only makes a single loaf of bread, dividing is unnecessary. Bulk fermentation ends when the dough is shaped.
Is bulk fermentation necessary for bread dough?
Yes, bulk fermentation is a necessary step in making sourdough bread. This process allows the dough to ferment in a single mass before dividing, shaping, and proofing. During bulk fermentation, yeasts and bacteria in the sourdough starter (or levain) work to ferment the flour, developing the dough’s flavor and structure. Skipping or shortening this step can result in underdeveloped flavors and a poor crumb structure.
How much should my dough rise during bulk fermentation?
Determining the end of bulk fermentation by the dough’s rise (volume increase) can often be deceptive. For example, the rise in a 70% hydration all-white bread dough (significant increase) contrasts sharply with that of a 100% hydration whole wheat bread dough (noticeably lesser increase).
How long should bulk fermentation take?
For most sourdough recipes, expect bulk fermentation to take 2 to 5 hours.
What is the poke test for sourdough bulk fermentation?
The poke test is not used to determine when bulk fermentation is complete; it’s used to determine when bread dough has finished proofing and is ready for baking.
Why is my bread dough sticky at the end of bulk fermentation?
This is an incredibly common question I receive, and it’s usually due to one (or a combination of) the dough being over-hydrated, under-mixed, or divided too early. First, I recommend reducing the amount of water in the dough. Try holding back 5% water to total flour. Next, strengthen the dough with another set or two of stretches and folds. And last, try letting the dough bulk ferment for 15 to 30 minutes longer until you see it smooth and gain elasticity.
How can I speed up or slow down bulk fermentation?
Dough temperature is the regulating factor when it comes to bulk fermentation speed. To speed up bulk fermentation, keep your dough warmer (though I would not exceed 85°F/29°C). Conversely, to slow bulk fermentation, keep your bread dough cooler (I would not cool lower than 39°F/4°C).
What’s Next?
Now that bulk fermentation is over, check out the next step in the process: Dividing and Preshaping Bread Dough.
For a look at every step of the sourdough process, read through the Beginner’s Guide to Sourdough Bread.
