
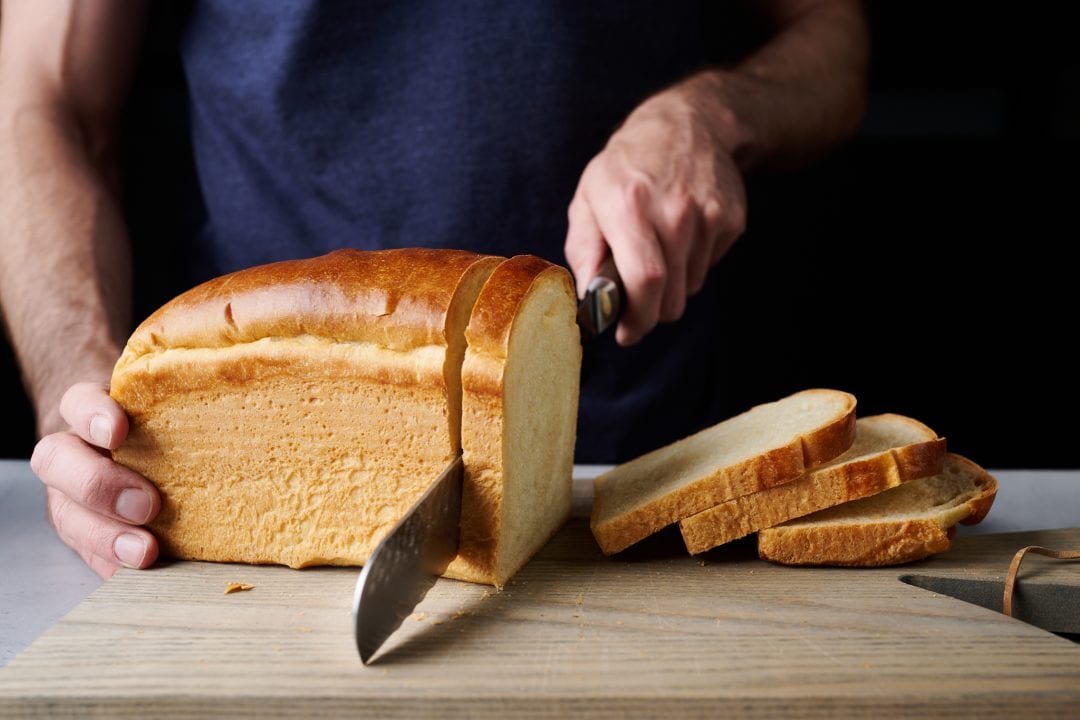
My sourdough pain de mie sandwich bread is pure white bread in all its glory–and it’s the toast lover’s best friend. Each slice is remarkably soft and light, with the thinnest possible crust, but when toasted, the slice crisps and frizzles in an absolutely ideal fashion. A few slices of this bread toasted within an inch of burning and served with a thick pat of butter on top might just be your new favorite breakfast. But there’s a depth of flavor to be found here, too, that sets it far apart from any supermarket white loaf: mild fermentation flavors and a touch of sweetness, all with the slightest hint of tang.
This style of bread is often called a Pullman Loaf, owing to the use of the Pullman pan, which purportedly was invented to be used in Pullman cars on a train to save space when baking. If you’re a frequent visitor here at The Perfect Loaf, you’ll know that the Pullman pan has pretty much supplanted all my other sandwich bread baking vessels. I love that bread baked in this pan has very straight sides, and that using the lid when baking results in a loaf that has an ultra-thin crust.
Sourdough Pain de Mie Video Walkthrough
Flour Selection
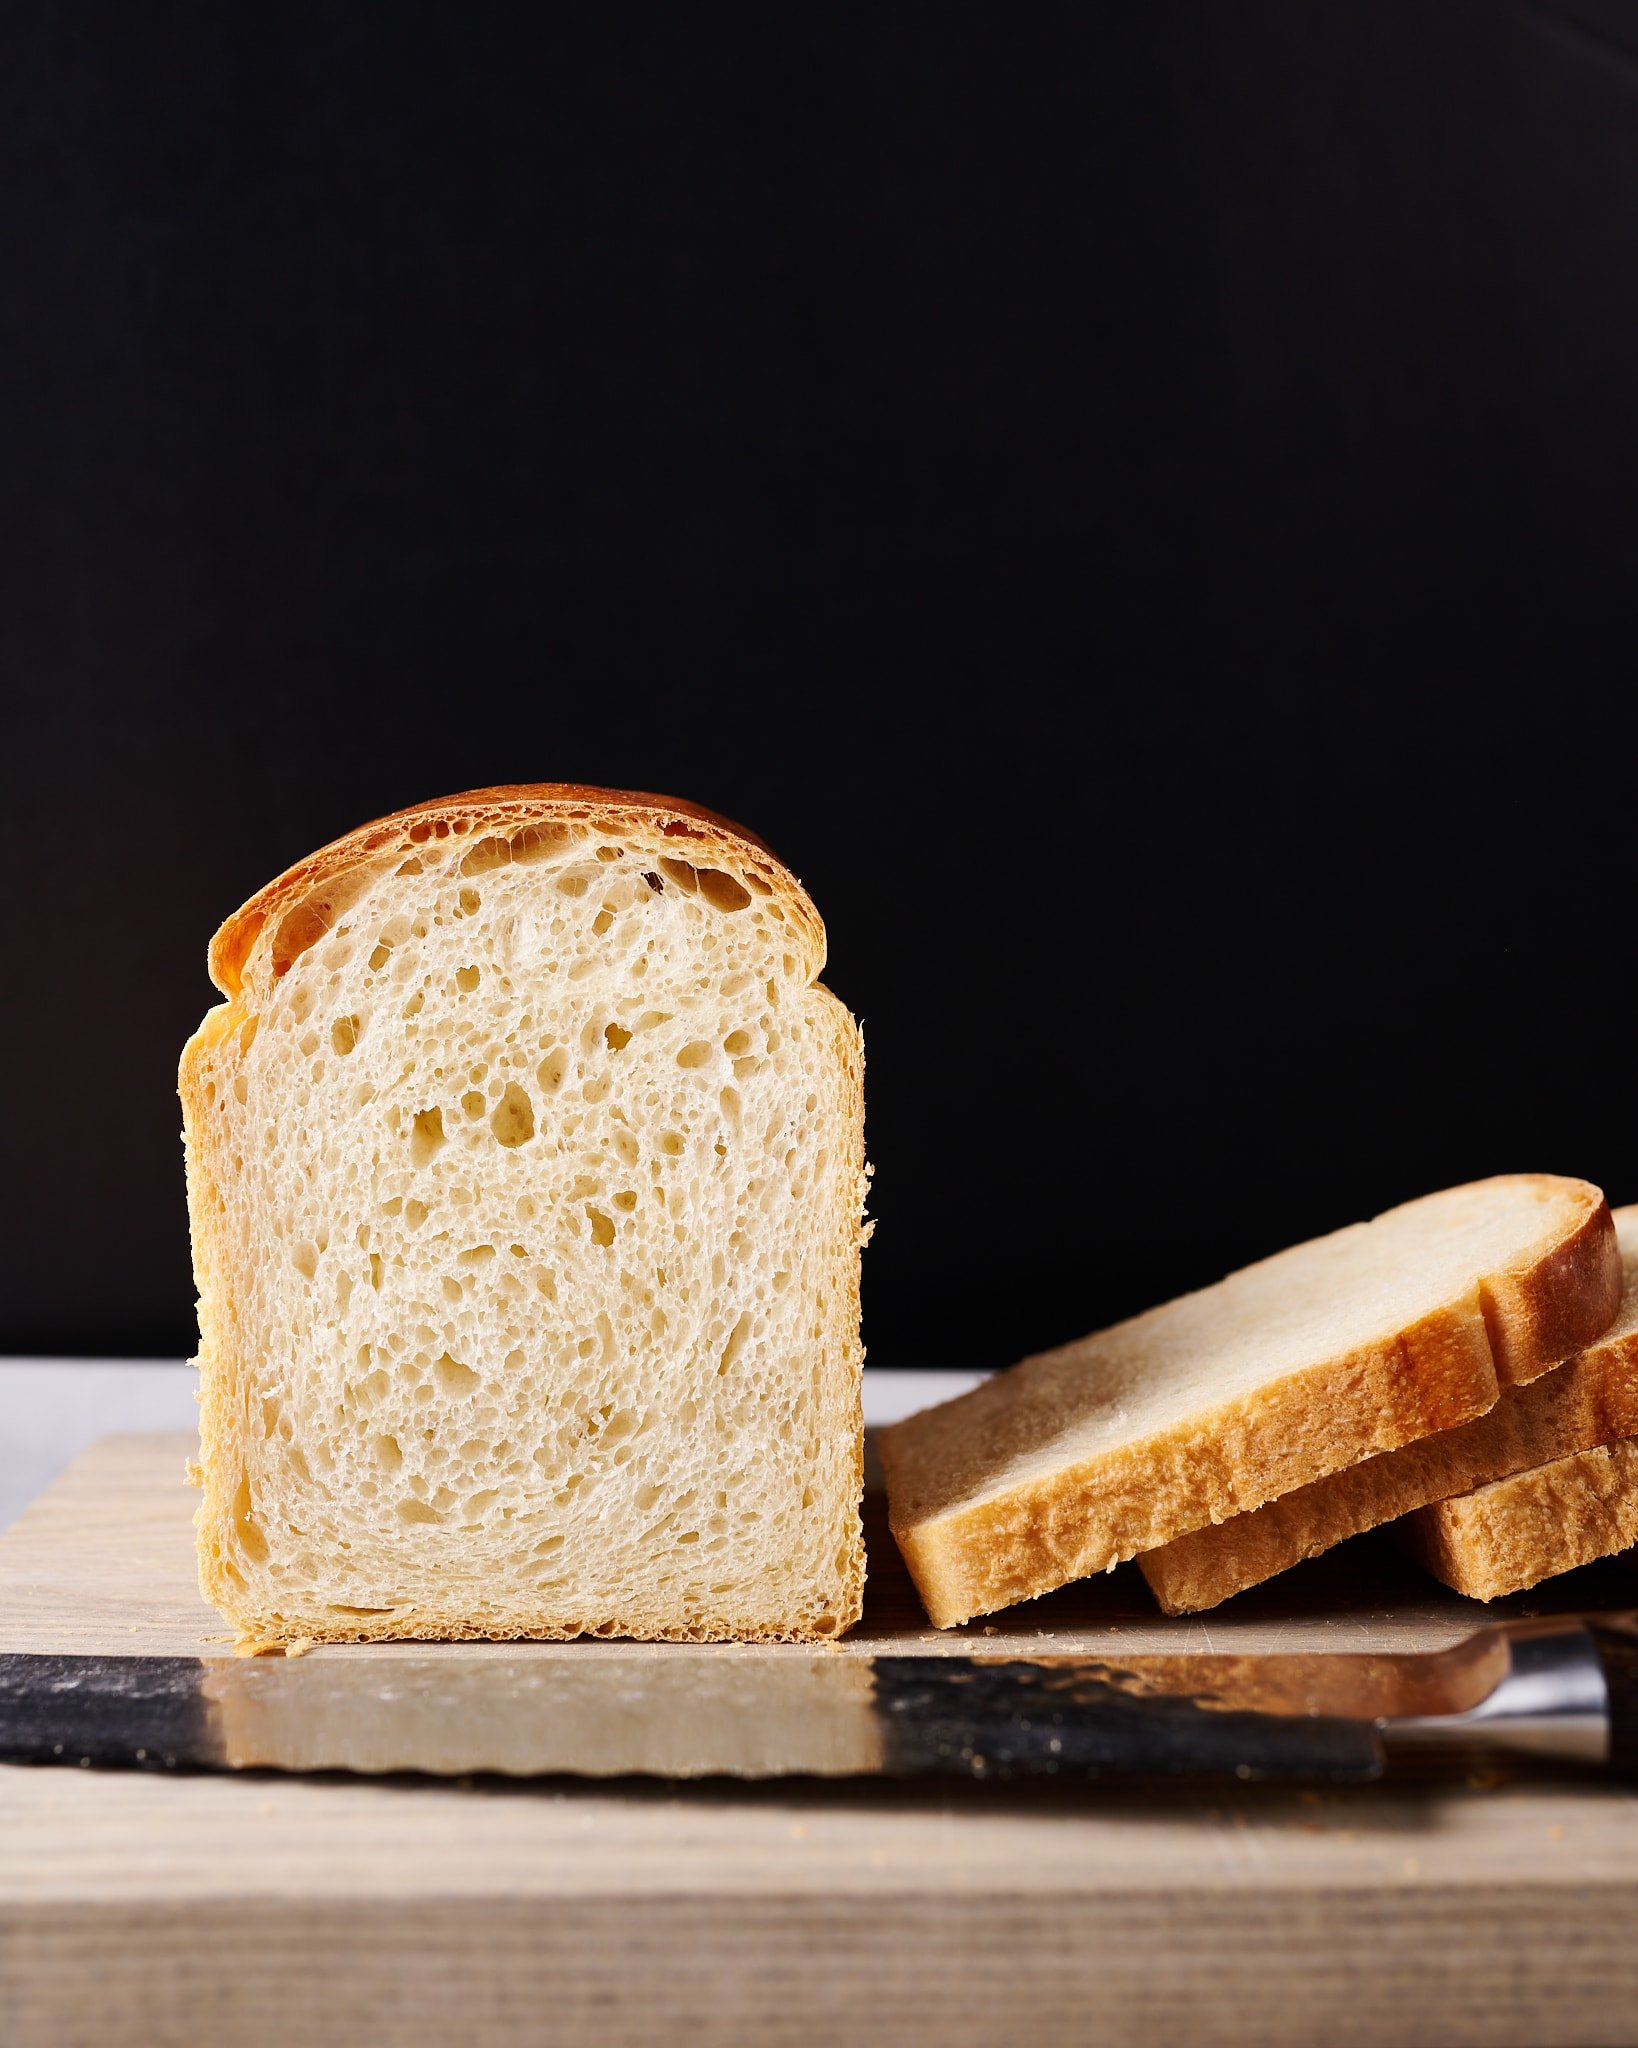
It’s rare for me to bake bread without any whole grain flour, but I make an exception with this recipe. In testing, I played with many flour blends, but in the end, I settled on using only all-purpose flour. By not using any whole grain flour in the dough (and the levain), you end up with bread that has reduced sourness and the lightest and most open interior possible.
Special Pans and Preparation
You can bake this bread in almost any pan that’s the right size, but I love the straight sides and nonstick liner of my USA Pan Pullman Loaf Pan (9″ x 4″ x 4″). If you slide on the cover before baking, you’ll end up with a loaf with four perfectly straight sides.
I’ve created a table of alternate pans with corresponding dough weights for each so that you can use what pan(s) you have and/or experiment with different sizes and shapes of loaves. Feel free to halve the recipe ingredients below to fit one pan, or even double the recipe and split it among 2 to 3 smaller pans.
| Pan (Dimensions in inches) | Total Dough Weight |
| 9 x 4 x 4 (Pullman pan shown in this post) | 800-900g |
| 8.5 x 4.5 x 2.5 (small loaf pan) | 600-700g |
| 9 x 5 x 2.75 (medium loaf pan) | 700-800g |
| 13 x 4 x 4 (large Pullman pan) | 1,100-1,200g |
Regardless of the pan you use, be sure to liberally grease the inside of the pan to ensure that the bread will come out cleanly after baking. Additionally, check out my post on shaping a pan loaf for tips on shaping, pans, and more.
Note: If using a large 13-inch Pullman pan, during shaping divide the dough into three equal-sized balls and shape them tightly. Then, place them into the pan side-by-side. Shaping the dough in this way (similar to how I shape a shokupan) will help prevent any sagging or collapsing while the loaf is baking.

Sourdough Pain de Mie Baking Schedule
This Pullman bread is baked the same day (except for the overnight levain that you make the night before) with a room temperature proof for a mild-flavored result. However, if you’re ok with a slight increase in sourness, feel free to retard the dough overnight by proofing it, covered, in the refrigerator right after shaping.
Sourdough Pain de Mie Formula
Note that this formula has been slightly modified since I first published it in 2019. I wanted to increase the fermentation activity in the dough, so I upped the pre-fermented flour percentage from 7.25% to 8.5%. This change ensures that bulk fermentation will be completed in around 4 hours, as listed in the recipe.
Vitals
| Total Dough Weight | 1,600 grams |
| Pre-fermented Flour | 8.5% |
| Levain percentage in final dough | 19.5% |
| Hydration (water only) | 48.0% |
| Yield | Two 800g loaves |
Total Formula
Desired dough temperature: 78°F (25°C) (see my post on the importance of dough temperature).
| Weight | Ingredient | Baker’s Percentage |
|---|---|---|
| 835g | White flour (11.7% protein; King Arthur All-Purpose Flour) | 100.0% |
| 184g | Whole milk | 22.0% |
| 100g | Unsalted butter | 12.0% |
| 376g | Water 1 (levain and autolyse) | 45.0% |
| 25g | Water 2 (mix) | 3.0% |
| 58g | Honey | 7.0% |
| 15g | Fine sea salt | 1.8% |
| 7g | Ripe sourdough starter, 100% hydration | 0.9% |
Sourdough Pain de Mie Method
1. Levain – 9:00 p.m., night before baking
Mix the following ingredients in a container and leave them covered at a warm temperature, 74-76°F (23-24°C), to ripen overnight.
| Weight | Ingredient | Baker’s Percentage |
|---|---|---|
| 71g | White flour | 100.0% |
| 71g | Water 1 | 100.0% |
| 7g | Ripe sourdough starter, 100% hydration | 10.0% |
2. Autolyse (with levain) – 8:30 a.m.
| Weight | Ingredient |
|---|---|
| 764g | White flour |
| 184g | Whole milk |
| 305g | Water 1 (autolyse) |
| 149g | Ripe levain (from step 1) |
NOTE: I’ve recently updated this recipe to be like my cookbook version, which produces an even better result! One of the changes is to include this autolyse step with included levain.
I use the autolyse technique for this recipe to help reduce the total mixing time required, but I also find it helps aid in the dough’s extensibility.
Warm or cool the autolyse water so that the temperature of the mixed dough meets the final dough temperature (FDT) of 78°F (25°C) for this recipe. Place the flour, milk, water, and ripe levain in the bowl of a stand mixer fitted with the dough hook. Mix on low speed until just incorporated. Cover the bowl and let sit for 30 minutes.
Typically, I do not autolyse with levain added, but with this dough, it helps make mixing the dough easier since there’s a large portion of water in the levain.
3. Mix – 9:00 a.m.
| Weight | Ingredient |
|---|---|
| 100g | Unsalted butter |
| 25g | Water 2 (mix) |
| 58g | Honey |
| 15g | Fine sea salt |
Note: If it’s cold in your kitchen, warm the milk in the microwave or over the stove to help meet the final dough temperature of 78°F (25°C). See my post on how to bake sourdough bread in the winter for tips on encouraging strong fermentation in colder temperatures. Conversely, if it’s starting to warm in your area, use the milk cold from the fridge and see my tips for baking bread in the summer.
First, cut the butter into ½-inch pats. Set them on a plate to warm to room temperature.
Put the honey and salt on top of the dough in autolyse and pour the water over it to help dissolve. Mix the dough on low speed until the salt and water are incorporated, then increase to medium speed and mix, stopping to scrape the sides of the bowl as needed, until the dough comes together and, while still shaggy, starts to cling to the dough hook, about 6 minutes.
Turn the mixer on low speed (STIR on a KitchenAid) and mix for 2 to 4 minutes until the dough gains more strength and begins to cling once again to the dough hook. Next, with the mixer running, add the room temperature butter, one pat at a time, waiting to add each pat until the previous one is fully absorbed. Adding all the butter will take 5 to 8 minutes. In the end, the dough will still be very soft, and it won’t altogether remove from the sides of the bowl. Transfer the dough to a bulk fermentation container and cover.
4. Bulk Fermentation 9:15 a.m. to 1:15 p.m. (4 hours)
At a warm room temperature, 74-76°F (23-24°C), bulk fermentation should take about 4 hours. If your kitchen is cooler, place your bulk container in a small home dough proofer, or extend the bulk fermentation time to give the dough more time to ferment. The dough is ready when it is smooth, puffy, and well-risen.
Give this dough three strengthening sets at 30-minute intervals. The first set starts 30 minutes after the start of bulk fermentation. Give the dough a series of stretches and folds for the first set. Wet your hands, grab one side, and stretch it up and over the dough to the other side. Next, rotate the bowl 180° and perform another stretch and fold (this forms a long rectangle in the bowl). Then, rotate the bowl 90° and do another stretch and fold. Finally, turn the bowl 180° and do one last stretch and fold. The dough should be neatly folded up in the bowl.
Set a timer for 30 minutes, and perform the remaining two sets at 30-minute intervals. Then let the dough rest, covered, for the remainder of bulk fermentation.
5. Divide and Preshape – 1:15 p.m.
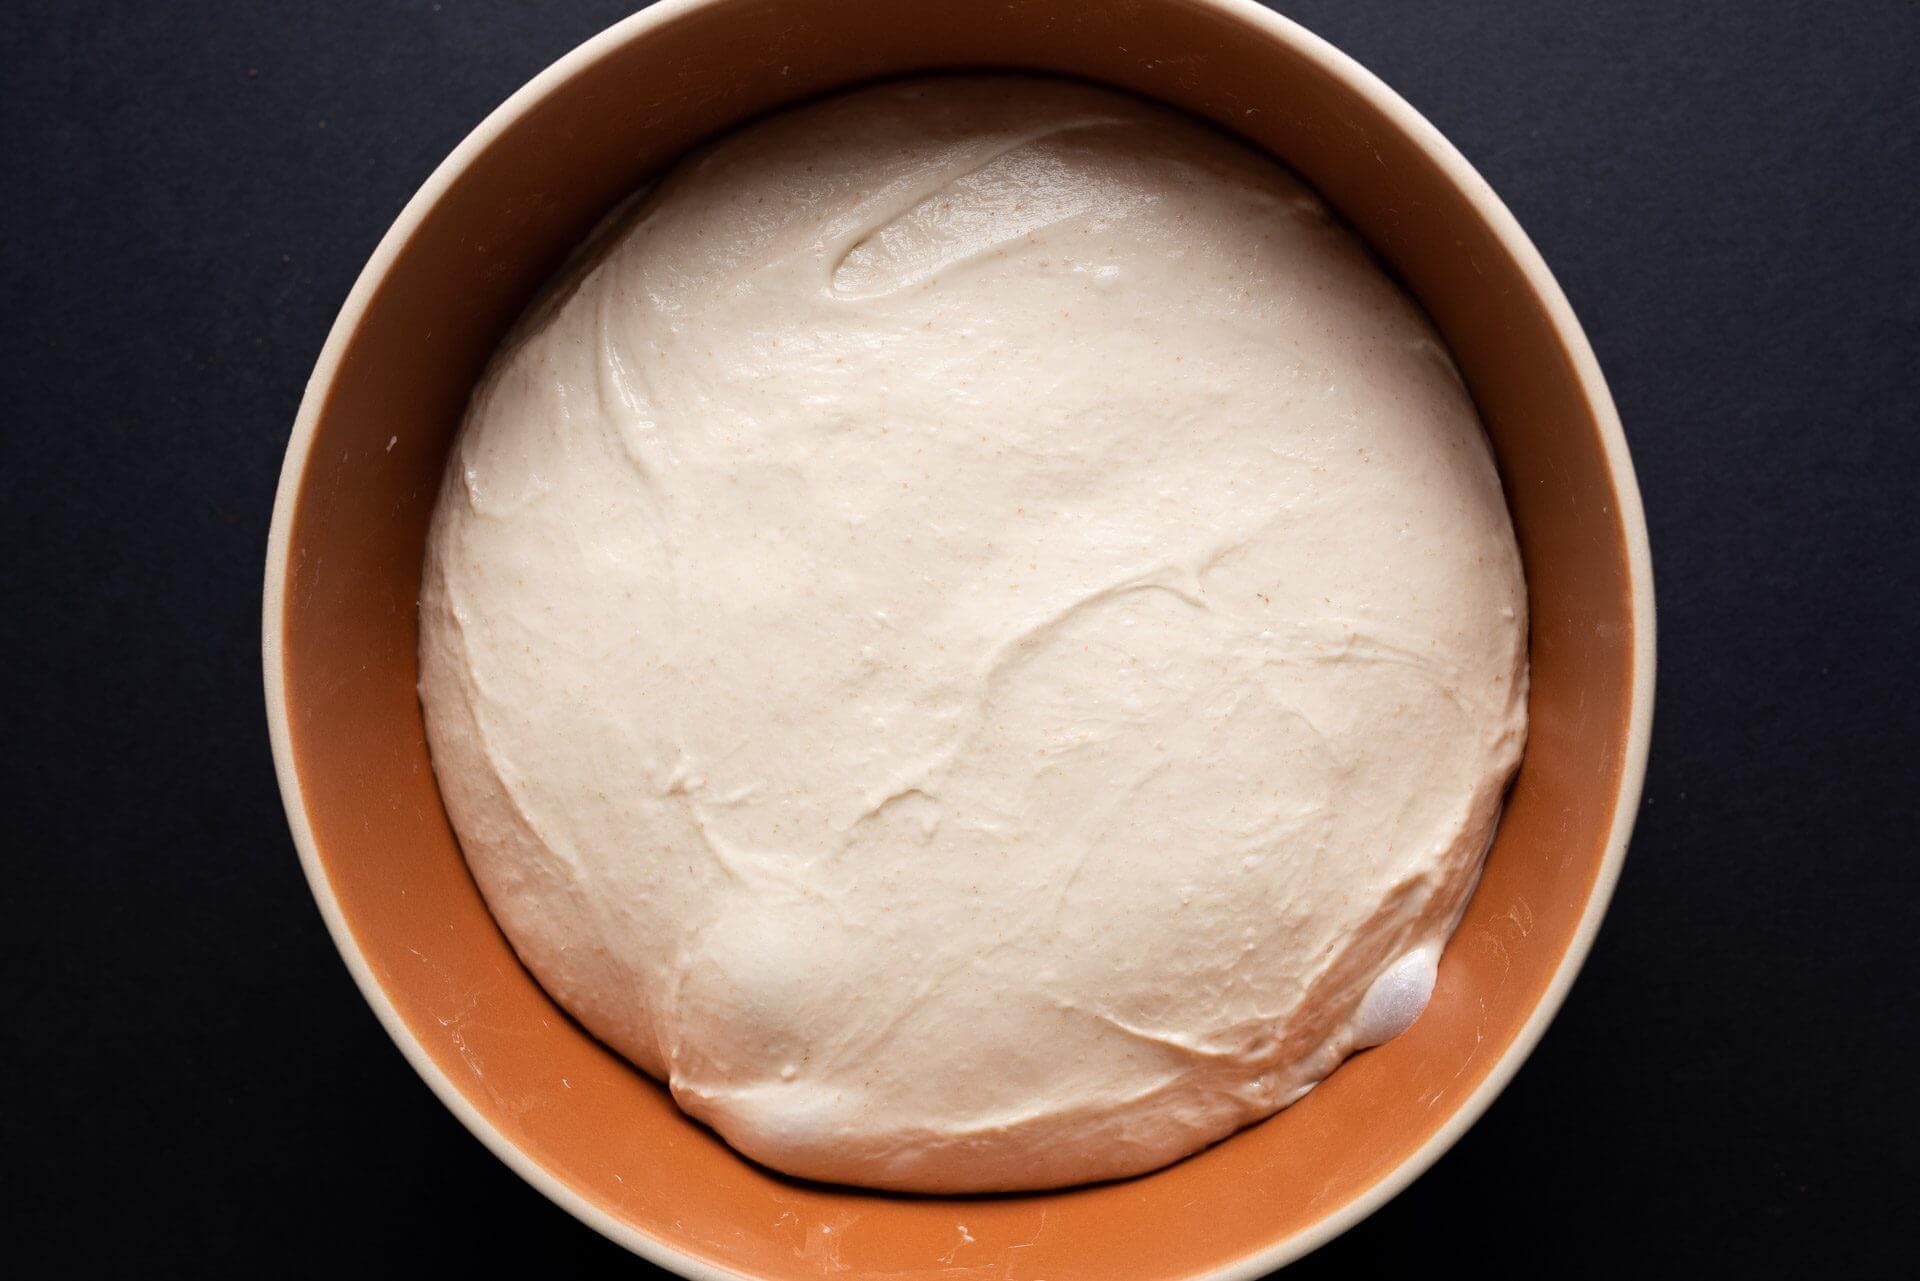
At the end of bulk fermentation, the dough will have risen in the bulk fermentation container (perhaps around 40% volume increase), be smooth and elastic, have bubbles on top, and a domed edge where the dough meets the bulk container. If the dough is not showing these signs, give it an additional 15 minutes and check again.
Fill a small bowl with water and place it next to your work surface. Scrape the dough onto a clean counter. Using a bench scraper in your dominant hand and the other hand wet, divide the dough in half. Then, preshape each piece of dough into a moderately tight round.
Let the dough rest, uncovered, for 30 minutes until it has relaxed and is ready to be shaped.
6. Shape – 1:45 p.m.
Grease two 9 x 4 x 4-inch Pullman pans with neutral oil.
I shaped these loaves as shown in my guide to shaping a pan loaf. Lightly flour the work surface and the top of a rested round. Using a bench knife, flip the round over onto the floured work surface. Fold the left and right sides of the dough toward the middle with a slight overlap. Then beginning at the side of the dough farthest from you, begin rolling the dough down to form a tight cylinder. Scoop the dough up with your bench knife and drop it into one of the prepared Pullman pans, seam side down. Repeat with the other piece of dough.
Cover the pans with a large, reusable plastic bag and seal.
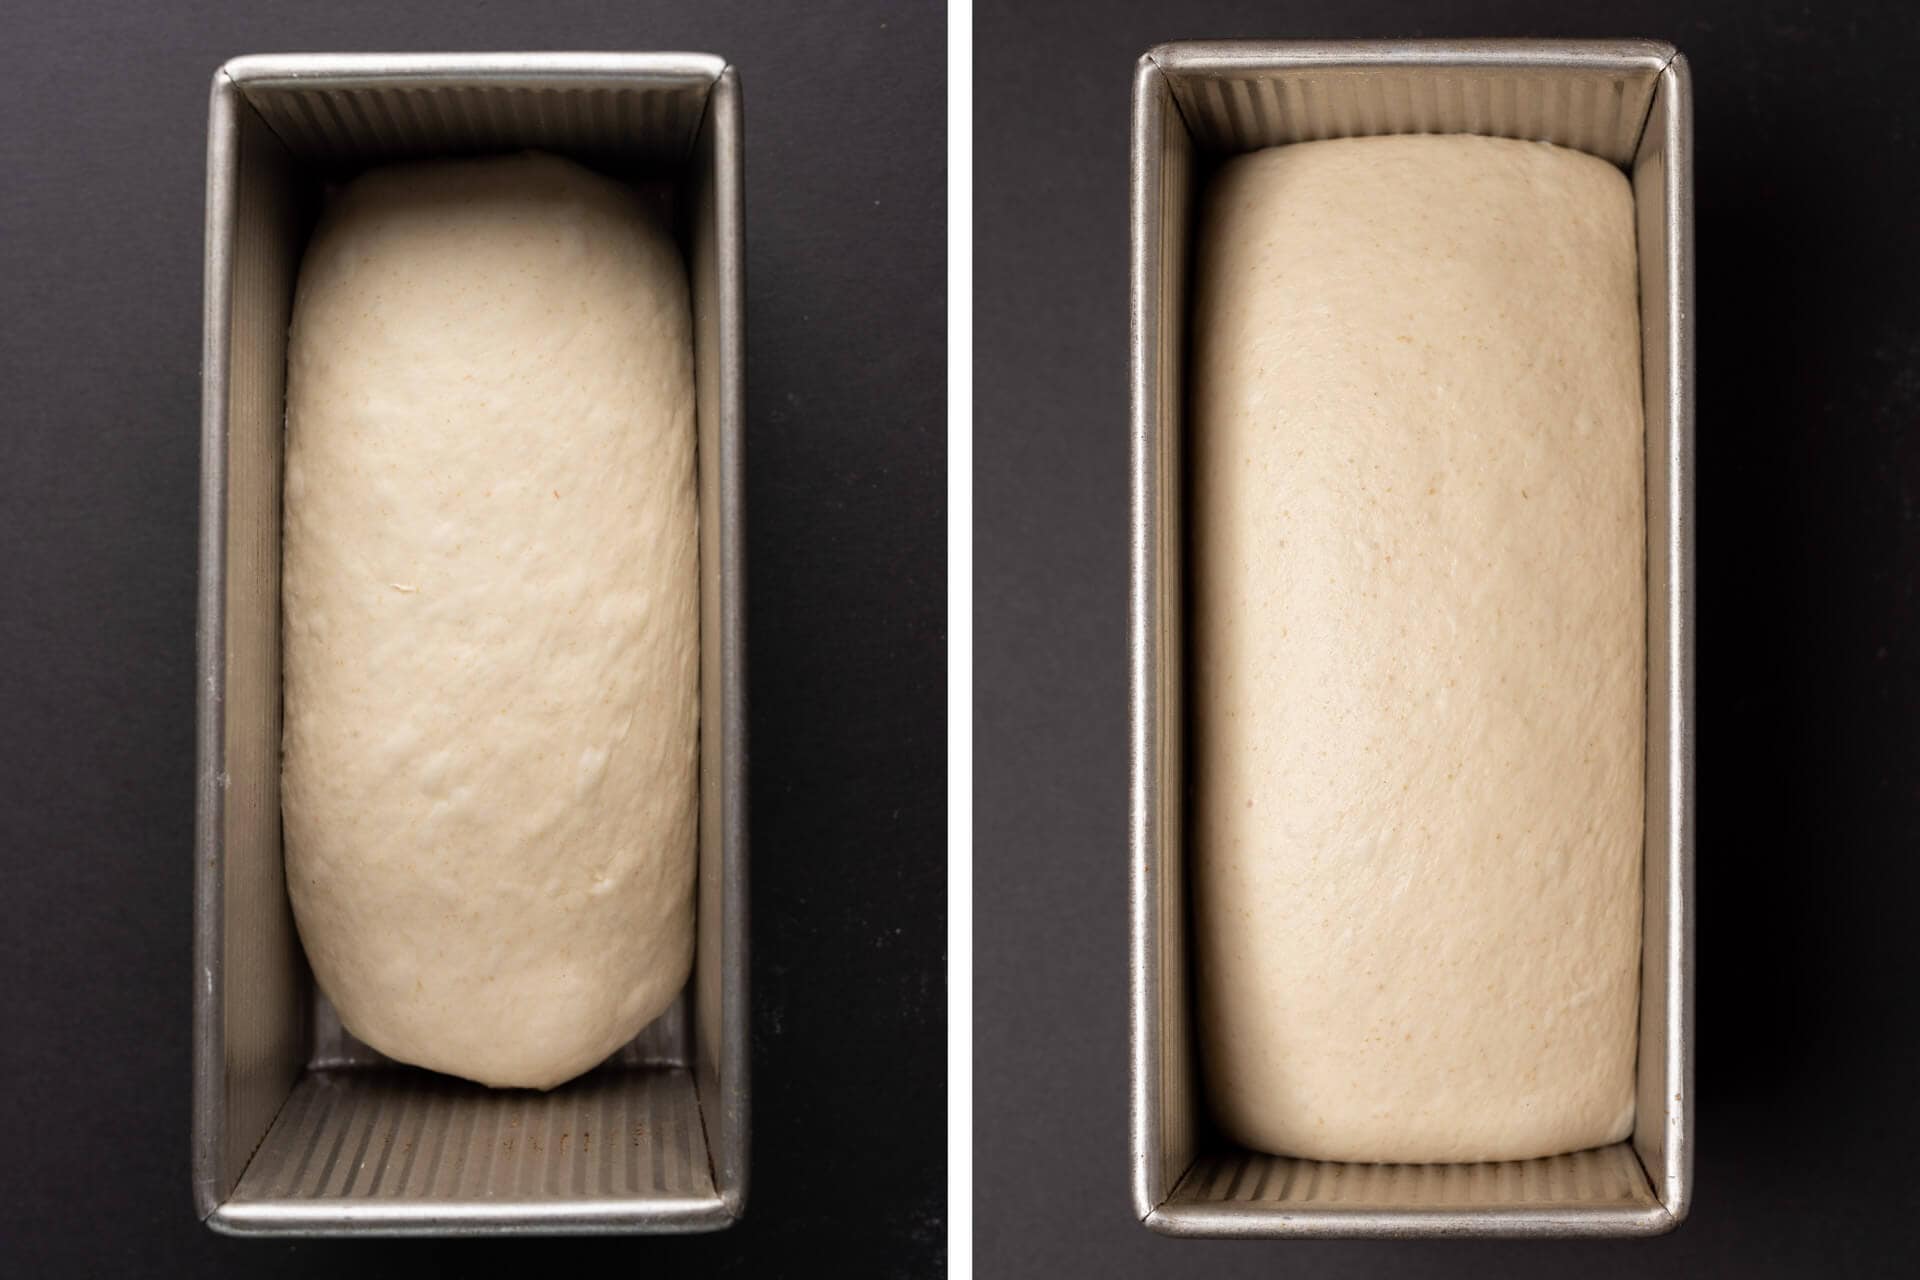
7. Proof – 2:00 p.m. to 4:45 p.m.
Be sure to give your dough the time it needs to fully proof; your dough might need more time if your kitchen is cold
At warm room temperature, 74-76°F (23-24°C), this dough should take 2 hours and 45 minutes to 3 hours to fully proof. If your kitchen is cooler, expect it to take longer.
When fully proofed, the dough should rise almost to the rim of the Pullman pan.
8. Bake – 4:45 p.m.
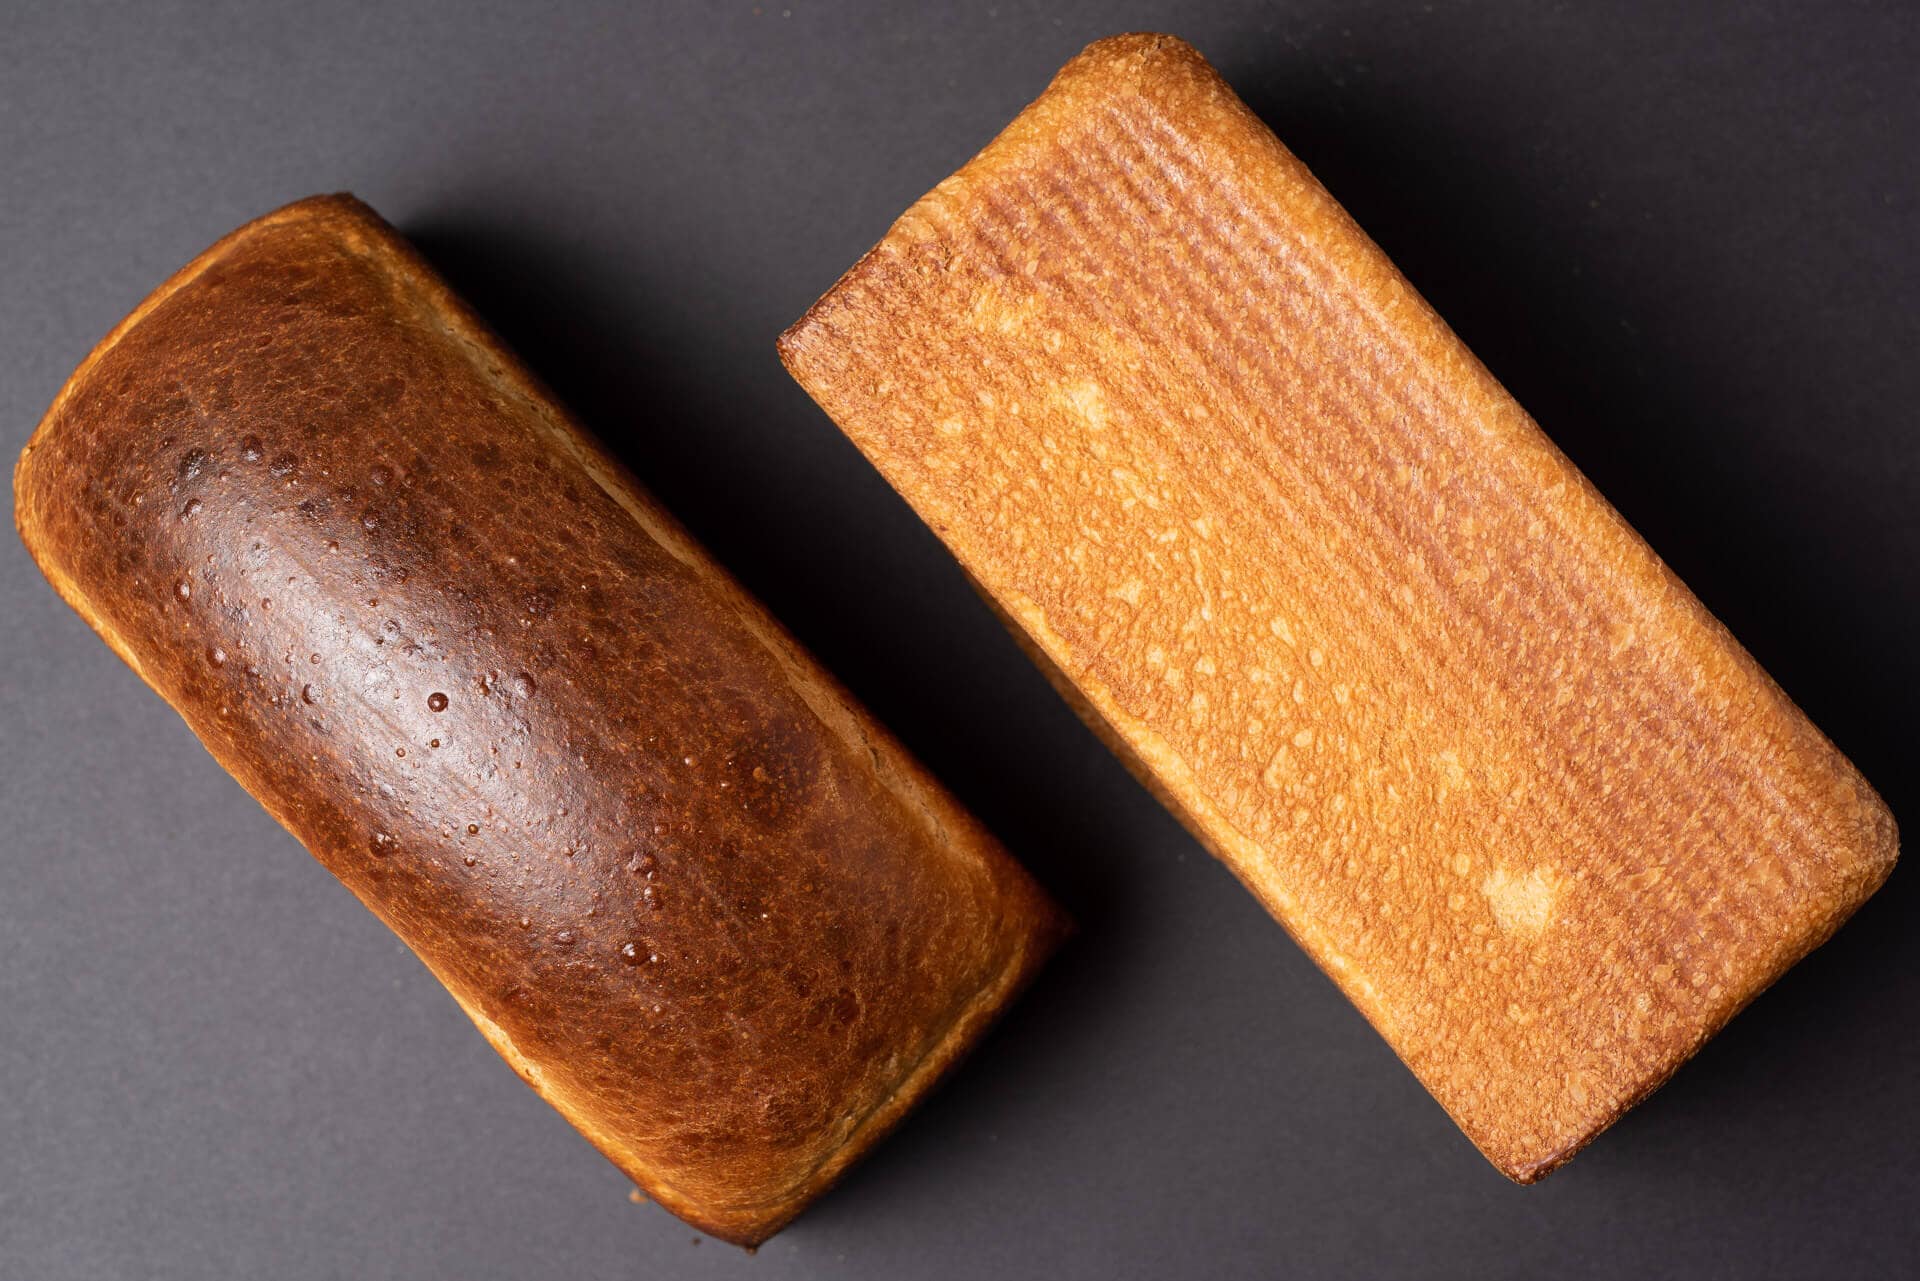
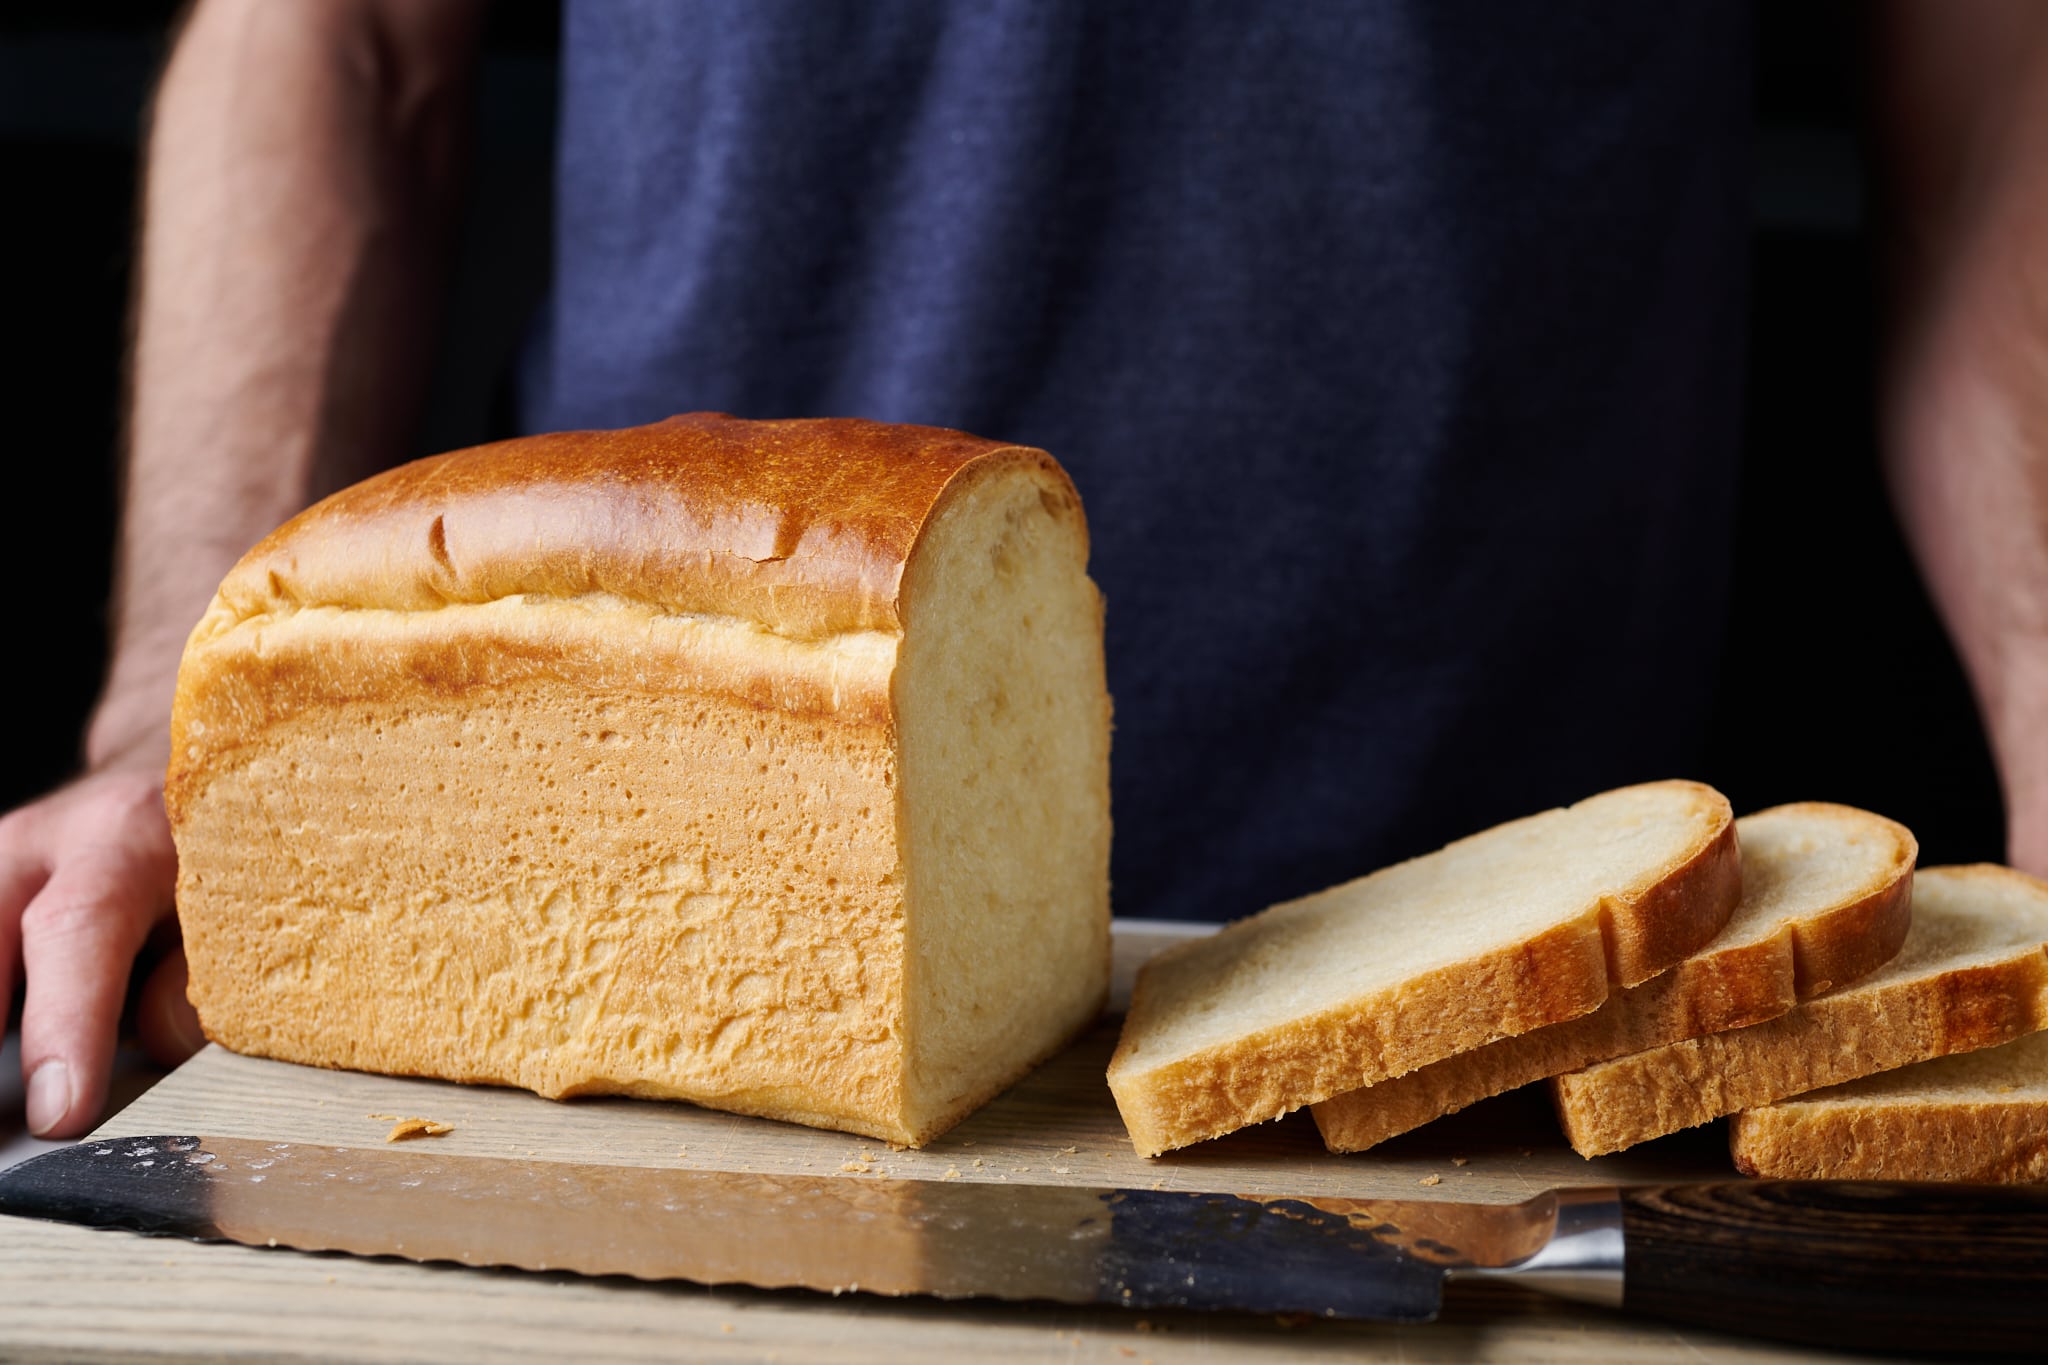
As you can see above, this loaf can take one of two different forms:
- On the left, I didn’t use the lid and the dough rose naturally in the oven. I brushed the top of the dough with a simple egg wash (about 1 teaspoon of whole milk whisked with one egg) before baking. See my guide to topping bread dough for more details.
- On the right, I slid on the snug lid of the pan before baking, and no egg wash was used.
Place an oven rack in the bottom-third of the oven, and preheat the oven to 425°F (220°C).
Place the pan into the oven and bake for 15 minutes. Reduce the oven temperature to 350°F (175°C) and bake for an additional 30 to 35 minutes. If using the lid, the crusts should be a light golden brown; if baking without the lid, the top crust will be a deep golden color. The loaves should have internal temperatures of around 200°F (93°C). If the temperature is lower, slide the covers back on (or not), return the pans to the oven, and bake 5 minutes longer. Then check the internal temperature again.
Remove the pans from the oven, uncover, and let the loaves rest in the pan for 10 minutes. Then, turn the loaves out onto a wire rack and let cool completely, 1 to 2 hours.
This sourdough pain de mie will stay soft and moist for up to a week if the bread is stored properly.
Print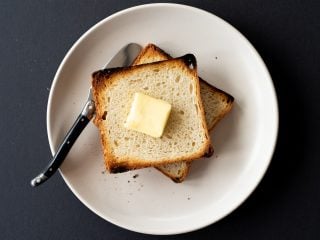
Pain de Mie Sandwich Bread
- Prep Time: 20 hours
- Cook Time: 45 minutes
- Total Time: 20 hours 45 minutes
- Yield: 2 loaves
- Cuisine: American, French
Description
My sourdough pain de mie sandwich bread is pure white bread in all its glory–and it’s the toast lover’s best friend. Each slice is remarkably soft and light, with the thinnest possible crust, but when toasted, the slice crisps and frizzles in an absolutely ideal fashion.
Ingredients
Levain
- 71g white flour (medium-protein white flour or all-purpose flour)
- 71g water
- 7g ripe sourdough starter, 100% hydration
Autolyse
- 764g white flour (medium-protein white flour or all-purpose flour)
- 184g whole milk
- 305g water 1
- 149g ripe levain
Main Dough
- 100g unsalted butter
- 25g water 2
- 58g honey
- 15g fine sea salt
Instructions
- Levain – 9:00 p.m. (overnight)
Mix the levain ingredients in a jar and leave them covered at a warm temperature, 74-76°F (23-24°C), to ripen overnight. - Autolyse – 8:30 a.m.
Warm or cool the autolyse water (see page 138 on how to calculate) so the temperature of the mixed dough meets the DDT for this recipe. Place the flour, milk, water, and ripe levain in the bowl of a stand mixer fitted with the dough hook. Mix on low speed until just incorporated. Cover the bowl and let sit for 30 minutes. - Mix – 9:00 a.m.
Cut the butter into ½-inch pats. Set aside. To the bowl holding the autolyse dough, add the honey, salt, and water. Mix on low speed (STIR on a KitchenAid) for 2 to 3 minutes until the ingredients come together and no dry bits remain. Next, mix on medium speed (2 to 3 on a KitchenAid) for 4 to 5 minutes until the dough smooths and begins to cling slightly to the hook. Turn the mixer on low speed (STIR on a KitchenAid) and mix for 2 to 4 minutes until the dough gains more strength and begins to cling once again to the dough hook. Next, with the mixer running, add the room temperature butter, one pat at a time, waiting to add each pat until the previous one is fully absorbed. Adding all the butter will take 5 to 8 minutes. Transfer the dough to a bulk fermentation container and cover. - Bulk fermentation – 9:15 a.m. to 1:15 p.m. (4 hours)
At a warm room temperature, 74-76°F (23-24°C), bulk fermentation should take about 4 hours. Give the dough 3 sets of stretches and folds at 30-minute intervals where the first set is 30-minutes after bulk fermentation start. - Divide and preshape – 1:15 p.m.
Scrape the dough out of the bulk fermentation container, divide it directly in half, and preshape each half into a taut round. Let rest for 30 to 35 minutes. - Shape – 1:45 p.m.
Shape one round into a tight tube, and place in the pan seam side down. Repeat with the other piece of dough. Cover the pans with a large, reusable plastic bag and seal. - Proof – 2:00 p.m. to 4:45 p.m.
At warm room temperature, 74-76°F (23-24°C), this dough should take 2 hours and 45 minutes to fully proof. If your kitchen is cooler, expect it to take longer. - Bake – 4:45 p.m.
Place an oven rack in the bottom-third of the oven, and preheat the oven to 425°F (220°C).
Place the pan into the oven and bake for 15 minutes. Reduce the oven temperature to 350°F (175°C) and bake for an additional 30 to 35 minutes. The loaves should have internal temperatures of around 204°F (95°C). Remove the pans from the oven, uncover, and let the loaves rest in the pan for 10 minutes. Then, turn the loaves out onto a wire rack and let cool completely, 1 to 2 hours.
Notes
Use the Pullman pan lid for a thinner crust.
Pain de Mie FAQ
Why do Pullman loaf pans have lids?
The lids help ensure that the resulting loaf has the thinnest possible crust.
How do you unmold a loaf made in a Pullman pan?
If you’ve sufficiently greased your pan, the loaf should simply fall right out when you turn the loaf pan over and knock on the bottom. If the bread is stuck at any point on the sides, use a thin plastic spatula (to avoid scratching the pan) to help gently release the sides of the loaf from the pan.
Do I need to grease a Pullman tin?
If your tin does not have a nonstick liner, then yes, you should grease the interior with a neutral-flavored oil. Even if it has a nonstick liner, greasing the interior will ensure that the loaf will come out easily after baking.
Can I mix this dough by hand?
Yes, but adding in the butter can be challenging. I’d follow the same mixing procedure above but knead the dough using slap and fold or folds in the bowl.
Why is my loaf rising erratically and splitting at the top when it’s baked?
This can be a sign of under-proofed dough. Make sure you give the dough sufficient time in bulk fermentation and proof. If your kitchen is cool, your dough might need more fermentation time!
Can I use white sugar instead of honey?
Yes; in fact, that’s actually more traditional than my approach. I would say start with 5% sugar in the dough and adjust up/down to your liking. Note that high percentages of sugar can impede natural fermentation, so the dough might require more time in bulk fermentation and/or proof.
Can I proof this dough overnight in the fridge?
You certainly can, just know that the result might be a bit sourer than what I intended here. Fermentation will continue in the fridge overnight, even though dramatically reduced, and will likely lead to more of that signature tang that you get with natural leavening.
Can I halve this recipe and bake only one loaf?
Yes! Halve all the ingredients in the recipe above (as described in my guide to baker’s percentages) and proceed as indicated.
How much dough goes into a large Pullman loaf pan?
To bake this sourdough Pain de Mie in the large Pullman pan (13” long), I would scale the dough up to 1200g per loaf. When shaping, divide the dough into three equal-sized balls and shape them tightly. Then, place them into the pan side-by-side. Shaping the dough in this way will help prevent any sagging or collapsing while the loaf is baking.
Why are the sides of my Pain de Mie caving in?
Sinking or caving in at the sides can be from a few things. First, try decreasing the dough’s hydration to suit your flour better. I would leave out 20g of water or milk and see the result. Second, let the dough cool in the pan for 5 to 10 minutes before removing it to give it more time to set when it’s out of the oven. Finally, several bakers have reported that the loaf needed to be baked longer to ensure it’s fully baked through and set—try baking 5 to 10 minutes more.
What’s Next?
For a real treat, use this pain de mie, sliced thick with your favorite bread knife, as a base for French toast on the weekend—you won’t regret sacrificing some toast for this treat.
For another super-soft pan loaf, check out my sourdough shokupan (Japanese milk bread) which uses the tangzhong technique to bring even more tenderness to the crust and crumb.
Buon appetito!
Last updated March 13, 2025: The starter weight was incorrectly reported as 8g when it should have been 7g.


702 Comments
Hi Maurizio, Thank you so much for sharing your wealth of knowledge and expertise! When making the autolyse, what temperature should the milk be?
Nico, for the autolyse, you'll want your milk at room temperature, around 72-75°F (22-24°C). If you're taking milk straight from the fridge, let it sit out for about 30 minutes to warm up, or you can gently warm it to speed things up. Cold milk will make your final dough temperature too low for optimal fermentation.
For even more control over your final dough temperature, you can actually calculate your milk temperature based on your desired dough temperature (DDT). Check out my guide on dough temperatures here: https://www.theperfectloaf.com/the-importance-of-dough-temperature/
Let me know if you have any other questions!
i succeed first time today thank you for the recipe . it was delicious. wondering can I reduce the butter to half ? would it affect the taste ? eating 100g of butter a week prob isnt good for my health lol
Hah! You can, but know the loaf won't be quite as soft.
I made this following video, didn’t see the updated instructions until after. I’ll follow these next time. A couple of things. I noticed when I was mixing in the stand mixer, it never fully came together, I was nervous about adding more flour and I was past the timing suggested. The dough seemed pretty strong though at the end. I started later in the day, so I had to proof overnight in the fridge. About 8 hours. I baked and it looked good and temperature was correct. After cooling I noticed the sides were caved in a bit and the bottom was gummy. Any thoughts on what may have caused this? I just cut off the bottoms and toasted and it’s delicious still. Thanks for the great recipe!
Josiah, the caved sides likely mean your dough needs more mixing time to develop strength – let the mixer run until the dough really comes together, even if it takes longer than suggested. For the gummy bottom, focus on shaping the dough tightly but placing it gently in the pan rather than stuffing it in. This prevents compacting that can cause gummy spots.
You're already getting good flavor, which is a great start. Let me know how the next bake goes!
Thank you for the tips! This didn’t trick. Just needed that extra time kneading in the mixer. No caved in sides, no gummy bottoms. My loaves have turned out pretty perfect. I usually make this every other week, put one in the freezer for later. Family love them for toast and sandwiches. We no longer buy store bought bread. ❤️
*this did the trick 😆
Hi Maurizio, I’m such a fan of your work here, it’s taught me so much. I’ve been using your recipes for almost 2 years almost exclusively. Thanks for your work!
I’m wondering how I can make this loaf a little sweeter without compromising the integrity of the dough. This is one of my favorite sandwich loaves but my kids need it a little sweeter to be happy with it, so I will compromise on that to give them the benefits from fermentation. Is the honey considered a liquid, and if so, should I increasing the % of honey and decreasing the % of milk? I can switch to sugar but would prefer honey. If I do switch to sugar, should I just swap out the honey and use the same % sugar? And if I increase the sugar, what percent should it replace since that’s a dry ingredient?
Thanks for your dedication to baking with my recipes, Annette! Let me help you adjust the sweetness while keeping the dough balanced.
For more sweetness with honey: You can increase the honey amount, but reduce the milk slightly to maintain proper hydration. Since honey contains water, this adjustment helps keep the dough structure intact while adding more sweetness.
If you prefer switching to sugar: Sugar will also soften the dough and behave somewhat like a liquid, so you might need to reduce the milk slightly. Just keep in mind that sugar levels above 7-8% of total flour weight will start affecting fermentation more significantly. The main difference you'll notice is that honey provides more complex flavor notes while sugar gives a cleaner sweetness.
Let me know which way you decide to go and how your kids enjoy the sweeter version!
Hi Maurizio, this is my family’s fav sourdough recipe! Could you help me with the timing for a weekday bake? I can be home by 3:30.
Hey Mae! You could essentially follow my Simple Weekday Sourdough recipe with this dough:
https://www.theperfectloaf.com/simple-weekday-sourdough-bread/
I'd love to see the site include nutrition info as some others do. In these days of Noom and LoseIt and MyFitnessPal for keeping track of calories and other nutrition data, it would be of interest to a lot of people.
I made this recipe recently – as a 13" pullman loaf – and like it a lot for everyday sandwich bread. So I calculated the nutrition data per slice, where 1 slice = 34 grams. I won't put it all here but the basics are:
Calories: 90
Fat: 1.9 g
Saturated fat: 1.2 g
Cholesterol: 5.1 mg
Sodium: 143.4 mg
Carbohydrates: 14.8 g
Fiber: 0.6 g
Sugar: 1.9 g
Protein: 2.6 g
Hey Jeff. Yes, this is something I'm looking hard at including!
What level of rise do you typically expect to see at the end of bulk fermentation with this recipe? My dough was 79° and always kept in a proofing box. At the end of 4 hours it had risen 30% but was surprisingly stiff and not at all wobbly or loose. So I let it bulk ferment for another hour. After 5 hours of bulk fermenting it had risen 40%, but was still not loose or wobbly. Nonetheless, I proceeded to preshape, shape, and proof the dough. After only 2 hours and 10 minutes, the dough was loose and wobbly, and the poke test showed that it was more than ready to go in the oven. The bread came out fine. Overall, the total time of bulk fermentation plus proofing was about the same as the recipe. But I’m still curious about the behavior of the dough and it being so stiff after 5 hours of bulk fermentation. I wonder if you have any thoughts?
I do usually go for 30-40% rise, but it really depends on the formula (and the flour). Try going a bit longer if the dough didn't feel airy to you. Also, it's super important that the dough temp is what I specify in the recipe if you want to stick to this timeline. But what you did is correct: adjust the bulk time to suit the temperature and how the dough is doing that day—extend if necessary!
Why is my dough very sticky after 4 hours of fermentation? When I split the dough in half it is still sticky that I cannot form it to a log. Help!
Hey Jennifer! Did fermentation go too far? If you see lots of tiny little bubbled underneath the dough when you take it out of the container, it went too far in bulk fermentation, reduce the time by 30 mins!
Hey Jennifer! Did fermentation go too far? If you see lots of tiny little bubbled underneath the dough when you take it out of the container, it went too far in bulk fermentation, reduce the time by 30 mins!
I've been making sourdough loaves/boule's for over a year. This is such a goooood loaf! I have a 13" pullman and I shaped one long loaf instead of the 3 small rounds that meld together and it's still a beautiful loaf. There is more sour flavor than in my loaves that call for more starter. Easy recipe! Thanks!
So glad to hear that, Karen!
Hi Maurizio. First, I want to thank you for this amazing recipe. It is now my family's most favorite bread. Thank you. I am a new baker and I do not understand the Baker's math. Could you please upscale this recipe for the 13 inch Pullman Pan? 🙏
Hey David! Sorry for the delay, I talk about dough weights for different pans, here:
https://www.theperfectloaf.com/guides/shaping-bread-dough/
I just finished baking this recipe. I had refrigerated the proofed and shaped dough in the pan for 12 hours. I removed it from the
refridgerator. I let it sit for about 45 minutes. The dough baked flat and pale. What happened?
Sounds like it overproofed to me, Daniel. I would reduce bulk fermentation time to make sure this doesnt happen!
Thank you! It is an incredible recipe and bread!
Glad you like it, Katya 🙂
Hi Sir, a lot of video showing once out from the oven, the bread must be remove out from the baking pan. Any reason for you to let the bread rest in the 'hot' pan (right after out from oven) before you remove it out from the baking pan ? Thank you Sir. <<Remove the pans from the oven, uncover, and let the loaves rest in the pan for 10 minutes. Then, turn the loaves out onto a wire rack and let cool completely, 1 to 2 hours>>.
I let it rest in the pan just for a 5-10 mins, then remove to ensure the loaf has set fully.
Hi, Maurizio!
Is this recipe suitable for cold proofing overnight in the fridge? Thank you! <3
Yes, but it'll have a slightly more sour flavor to it (not bad, just different).
Hi, I don't understand the note about scaling up to 1,200 for a large Pullman pan. The recipe as written says I would scale the dough up to 1200g per loaf. The recipe says Total Dough Weight 1,600 grams — so wouldn't I have to scale down?
Hey Douglas! Yes, if you want to bake just one loaf, then yes, scale down.
I meant to still bake two loaves but with the larger pan, you'd have to scale up to 2400g.
Not good at scaling. Any chance you could publish recipe for the large pan? I would greatly appreciate it.
Yes, I will work on this! In the meantime, you can use the spreadsheets provided in the membership here (no pressure, but they are helpful, they do all the math for you and took me considerable time to create!).
Hi Maurizio. Would you maybe consider adding a monthly payment option for your membership?
Thanks for your consideration 😊 Kindly, Cherish
Hey Cherish! I used to have a monthly, but removed it. Just all got too complicated and I had hoped the cost was easily justified by the perks (which I'm constantly adding to!). Would love to hear why a monthly is preferable (feel free to email me, too, I'd love to hear from you!). maurizio at theperfectloaf.com
Maurizio, there are two things that I’ve not seen you address in your videos or tutorials. One, what to do if one’s DDT is not at the desired level. Too high put it in the fridge; too low microwave it 🤗 (just kidding)? Second, what if one’s dough is not coming together the way it is shown on your video?
I just finished making the dough for this recipe and after adding butter it was very, very shaggy, not clinging to the dough hook the way yours is in the video. I added 3 Tbs of flour and that helped some, but still not perfect. Did not want to add more because I feared it would be too dense. Also, DDT was 84F. FYI, my room temp is at 78F.
I’ve now done 3 stretch and folds and it is still not looking anything like yours. Will do a couple more in the hopes that it will get strong.
Would really appreciate you comments.
Hey Bobby! I talk about that a bit in my cookbook . Yes, if the FDT is too warm, use the fridge just for 15-30m (depending on dough temp) to cool it a bit. Alternatively, if it's too warm, use the oven with a light on to warm it a bit. In the end, just keep in mind the temp difference might mean it needs to be divided earlier, or later, respectively.
If you find it's not coming together well with mixing, give it another set or two of stretches and folds during bulk fermentation. This is always an adjustment you can use to add more strength to the dough!
Give it a couple more past 3.
Let me know how it turns out!
Hello Maurizio !
I love this recipe, thank you for sharing. I was wondering if I could use it with Kamut flour with the same ratios, what do you think?
I love Khorasan; I think it would be wonderful in this recipe. If you use it as whole grain flour it'll be a denser loaf, but since this is sandwich bread, I think really great.
Success!!!!!!! OMG it's wonderful, I just had to add a little more milk and water. I recommend you try it 🙂
Adding to my to-bake list!!
Hey Maurizio!
I have been making this recipe for over a year, I use a variation of it with brown butter for my bakery. I also use your old recipe when I make this.
A few months ago, my loaves started having an issue and collapsing after I baked them. It doesn’t seem to matter if I let them set for 5 minutes or 20 minutes, they just keep falling once they come out of the pan. It’s not even just the sides collapsing, the whole loaf falls like panettone that’s not cooked upside down. I can’t imagine why all of a sudden I would need to decrease the water in the recipe when I made it for so long with success.
The only process I did change was starter to do part of my cold proof in the fridge overnight. I proof for 2 hours on the counter, then into the fridge overnight. I pull out the next day and let it finish proofing and then bake it. I also make this dough and use it for hamburger and hot dog buns and never have any issues with collapsing.
Do you have any insight into this?
Kind regards,
Gina
Hey, Gina! It's hard to say, but there have been a few others who have had this issue. Usually, it's either 1) over hydration as you suspected (maybe your flour has changed without you realizing it!), and/or 2) overproofed dough.
I would try slightly reducing the liquid in the recipe, and if you're making two loaves, try doing one with the 2hr then fridge, and one according to the recipe. This is a little more work, but it will no doubt answer your question whether the cold proof method is proofing too far!
Hi Maurizio,
Thank you for taking the time to reply – I greatly appreciate it.
I will try out both of these methods that you suggested to see if my issue gets resolved. I just wanted to come back and say that I did have this issue again yesterday. I made 6 loaves and baked until they were about 202 F. I pulled them out, let them set and tried to take one out the pan. To my dismay, it immediately started to collapse in my hands.
I put it right back into the pan and decided to (on a hunch from a similar experience with a completely different dough) throw them all back in the oven at 375 until they reached 220 F internally.
Once they had reach this temp, I pulled them all out, let them set about 5-10 minute and took the rest out of the pans. Amazingly, the rest of the loaves did not collapse at all and this over baking them did not seem to affect their texture or anything else I can see or taste at the moment. They were all still so soft when pressed down but retained their structure.
Not sure why I had needed to bake to such a hot temperature internally but glad it worked and wanted to come let others know in the comments section in case anyone finds this information useful.
Have a good day!
Amazing, great work there, Gina. Okay, so it sounds like you need to bake these longer to a higher internal temp. I'm going to add this to the post in case anyone else encounters this issue. Thank you for debugging this and reporting back!
Hey, Maurizio
I’m curious if you’ve ever made this Pain de Mie with a stiff starter rather than the usual liquid starter? Stiff starters, particularly ones that are sweetened with a little honey, are heavier on the yeast action while lower on the bacterial action, so the dough should have little-to-no sourness to it.
Yup, I have done this. It worked really well! However, I usually just use my liquid starter here because I'm looking for a little complexity (sourness) in this loaf. But you're right, a stiff starter with sugar will amplify yeast activity (I talk about this in my cookbook ).
I only have one Pullman pan, a 13 inch. Is this recipe appropriate for that size pan? Or how should I alter it to fit?
For a 13" pan, you need to do 1.5x the recipe weight.
Can I use Semolina flour instead of A/P flour?
I am subscribed.
Hmm. That's a great question. I probably wouldn't use 100% semolina for this bread, though a blend of semolina and white bread flour would be fantastic. I bet you'd get a wonderful flavor, crispness, and color with semolina.
Thank you. I’m thinking 30% Semolina & the rest A/P.
Interesting, but I do not have any intention of building a site, Thanks for the info!
TGC
Maurizio, Any thoughts of using buttermilk in lieu of whole milk?
I'm trying this for my next white sandwich loaf!
Works fantastically!
I have tried this bread twice and both times the dough didnt rise an and looks undercooked inside – I am in Florida and wonder if the temperatures are too high killing the yeast (Dough Temp ~80). I also wonder if the dough is not sufficient for my pans (8.3 x 4.8 x 4.5 inches), should I adjust the amounts by 1.2, since I would need about 1918 grams for both pans. Any help appreciated I am a novice to bread. Thanks!
A temp of 80F is just fine, no worry about harming the yeast/bacteria (that'll happen around 126F). You can definitely scale up the recipe a bit if you find you need to!
I made this today using still rising sourdough starter (ph was in the sweet spot) vs levain, scalded milk, dough temp average was 78 to 80F and all came together on schedule with spectacular loaf results. Thanks Maurizo!
So glad it worked out well for ya, Kim! You nailed the dough temp, it's important for this loaf 🙂
This recipe is now my standard sandwich loaf. I use Pullman pans with the lid on, which makes the perfect sized loaf for sandwiches. I have played around with substituting rye flour for the whole wheat, and it turns out great. I always let my dough ferment for two days in the fridge to get a more sour profile, and this dough is handles it perfectly. Thank you!
Glad you like this one Gary! I really do think it's the perfect sandwich bread 🙂