
Hey there, new baker! My name is Maurizio, and I’m the baker here; welcome.
This new baker, start here page has a rollup of resources that’ll help you get baking sourdough bread quickly in your home kitchen. It begins with creating a sourdough starter from scratch (just flour and water!), your first sourdough bread, a few guides, and some of my favorite (and reader’s favorite) recipes.
Sourdough can be intimidating for new bakers, but it doesn’t have to be. With a few essential basics, you’ll be baking crusty and healthy loaves of bread in short order. And if you get stuck? I’m almost always lurking around here, answering questions and providing help—leave a comment, and I’ll get back to you.
Step 1. Create Your Sourdough Starter
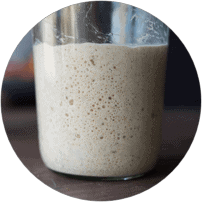
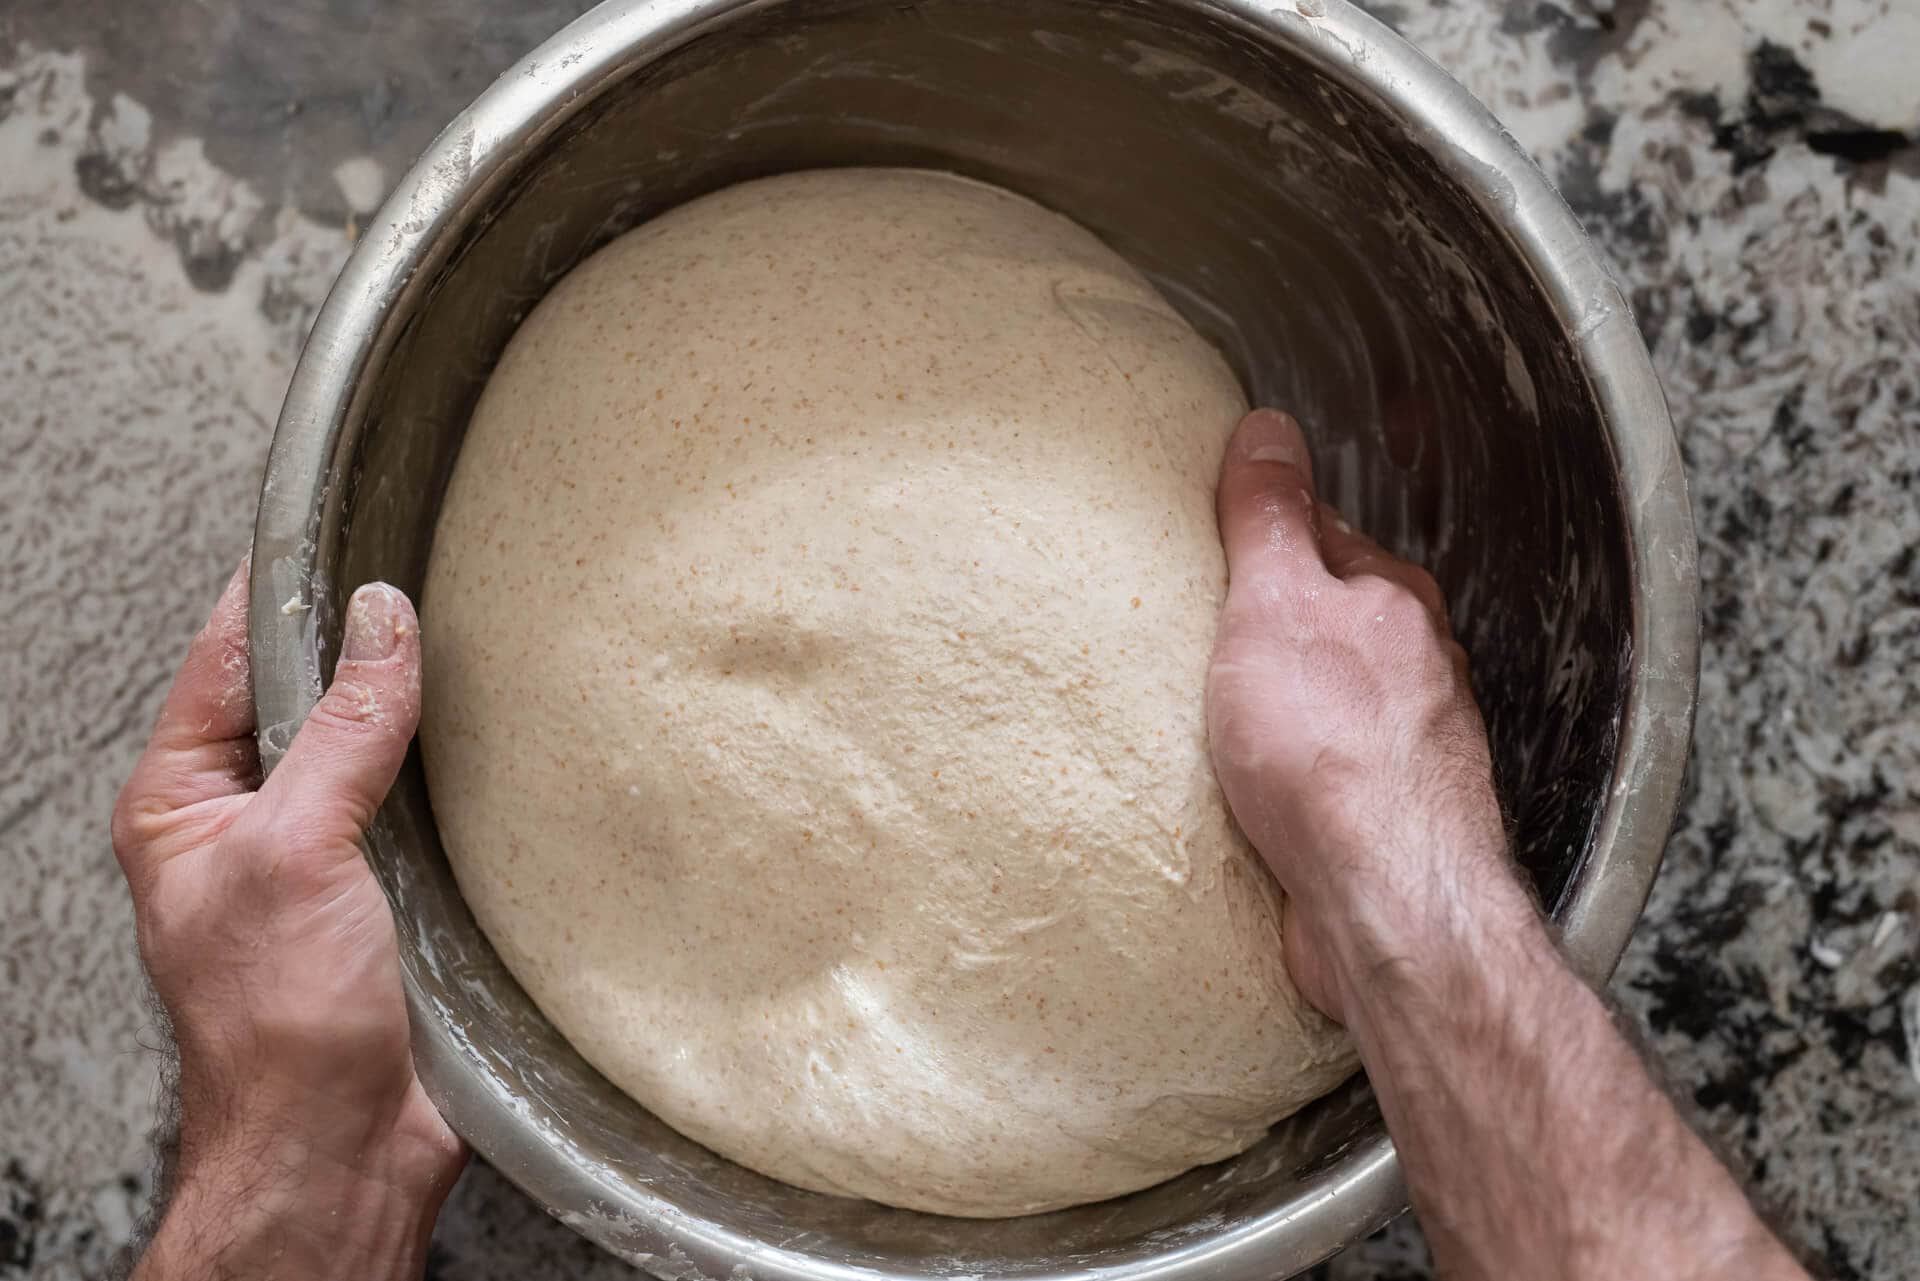
A sourdough starter is the most important aspect of baking sourdough bread at home, and without it, you’d have flour and water mixed. It takes a little care to keep it alive, but it’ll reward you with countless loaves of bread, pizza, and more.
It takes about 5-7 days to get a starter going from scratch, using only flour and water. But, of course, if you have a friend who is a sourdough baker, you can always ask if they’ll give you a bit of theirs to get going. If not:
Check out my guide to creating a sourdough starter from scratch →
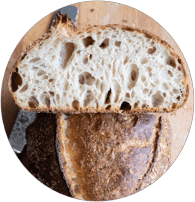
Step 2. Review the Baking Process
While your sourdough starter is starting up, review my eight steps to making sourdough bread. In this beginner’s guide, you can see a high-level view of each step of the bread-making process with detailed explanations of each step.
Read the Beginner’s Guide to Sourdough Bread →
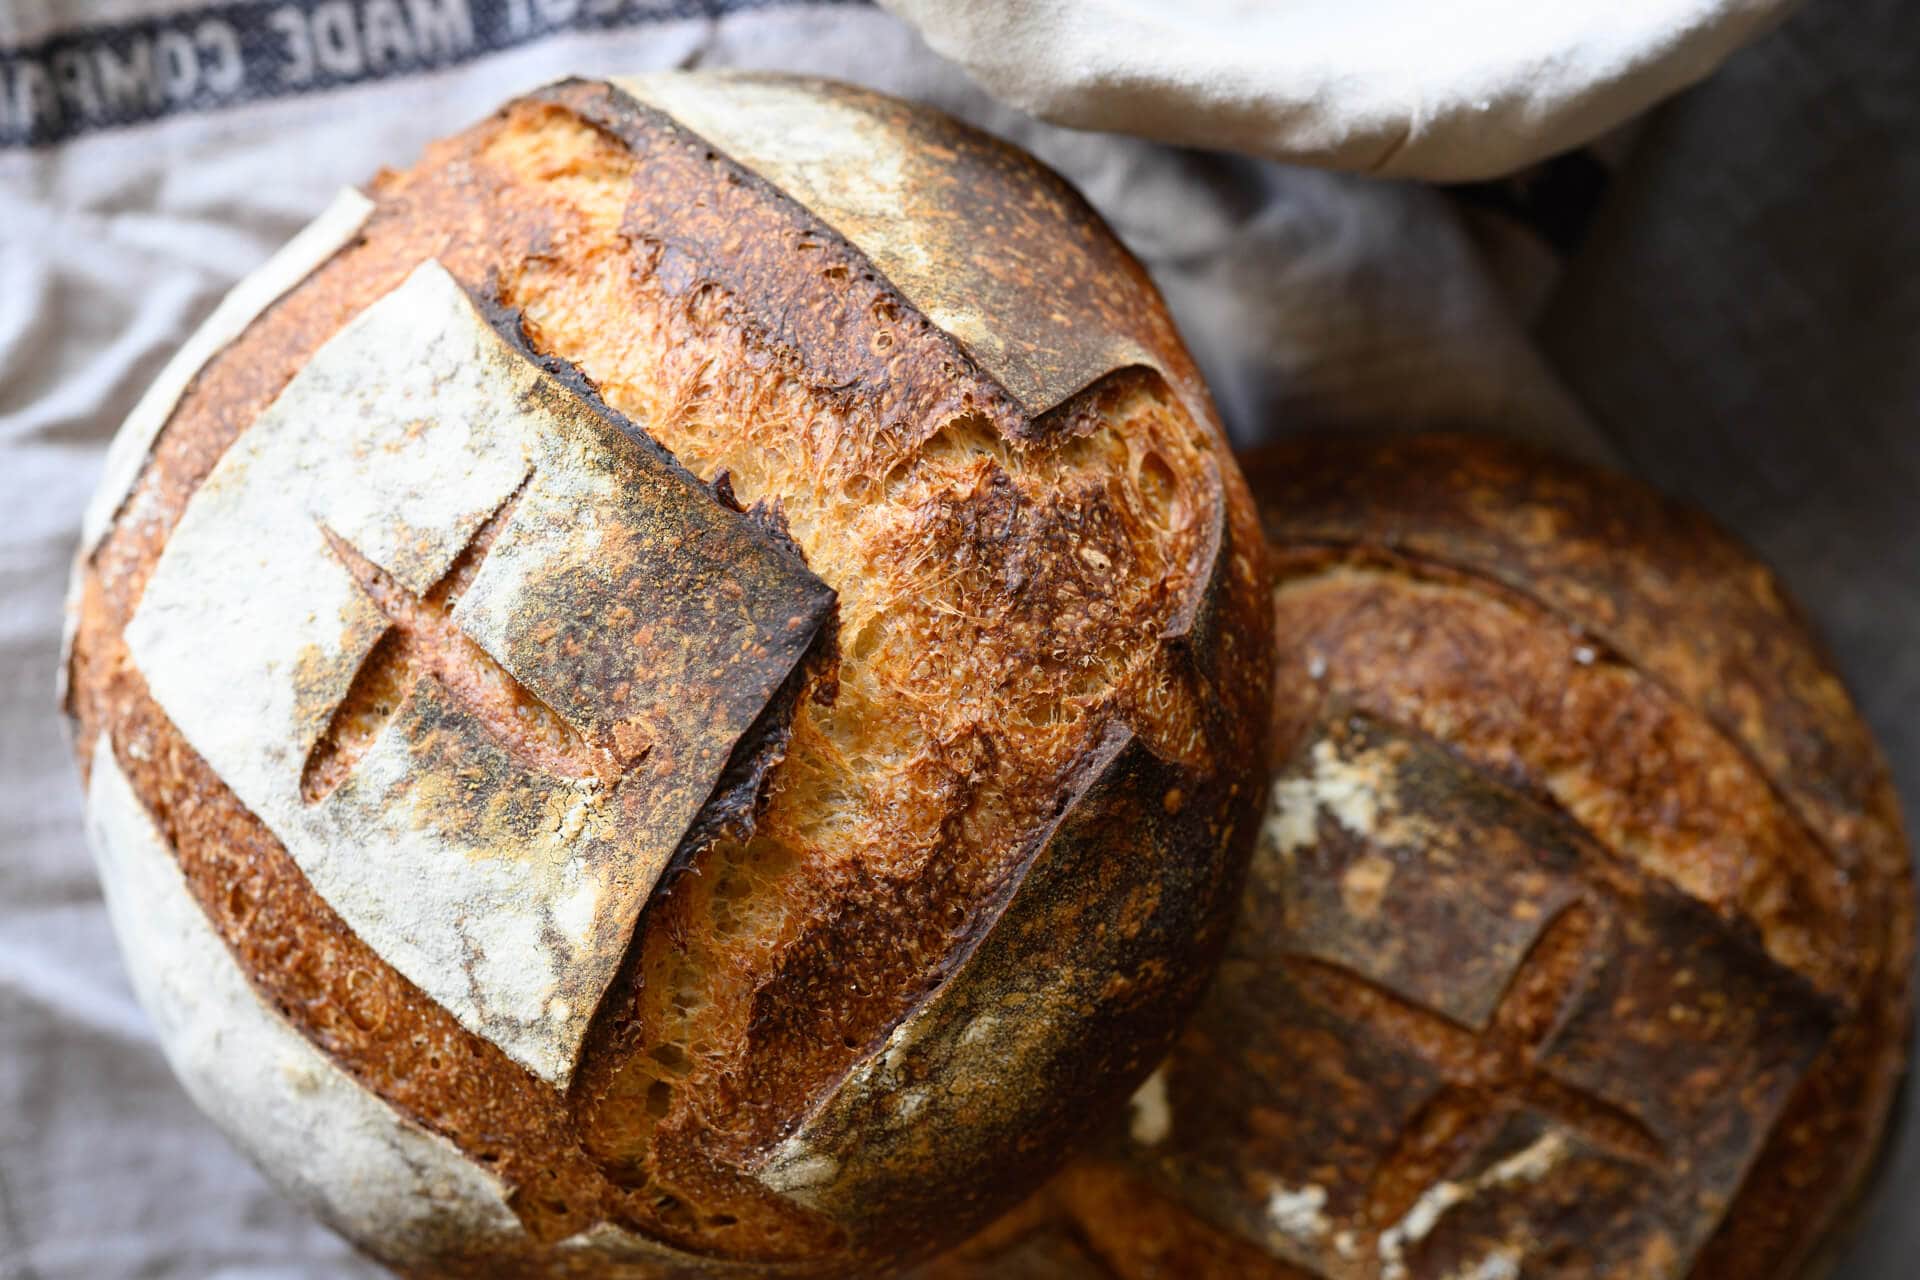
Step 3. Bake Your First Loaf of Bread
Here. We. Go!
Once your sourdough starter consistently shows the same signs of fermentation each day, it should be strong enough to bake a loaf of bread. I have two recipes here that are great introductions to baking sourdough at home.
Most Detailed Recipe: Bake my Beginner’s Sourdough Bread Recipe →
If you want a more condensed recipe that gets straight to baking, have a look at my simple weekday sourdough bread:
Easiest: Bake my Easy No-knead Sourdough Bread →
Step 4. Review More Baking Guides
Once you have that loaf of bread crackling on the counter as it cools, review more of my baking guides to increase baking consistency and confidence. These guides have in-depth tips on maintaining a sourdough starter (with video walkthrough), creating baking schedules around your busy work week, working with baker’s percentages (baker’s math) to scale up and down recipes, and numerous guides to shaping bread dough.
My Guides Page is a great place to bookmark and return to from time to time to review the basics and expand your baking toolset:
Explore my baking guides page →
Step 5. Use Your Sourdough Starter For Other Things
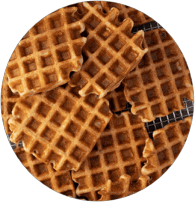
Because a sourdough starter requires fresh flour and water each day (or less if you’re keeping it in the fridge), we tend to have sourdough starter discard—don’t throw it away! Instead, I like to save up the discard in a container in the fridge during the week, then use this to make sourdough pancakes, sourdough waffles, and sourdough banana bread.
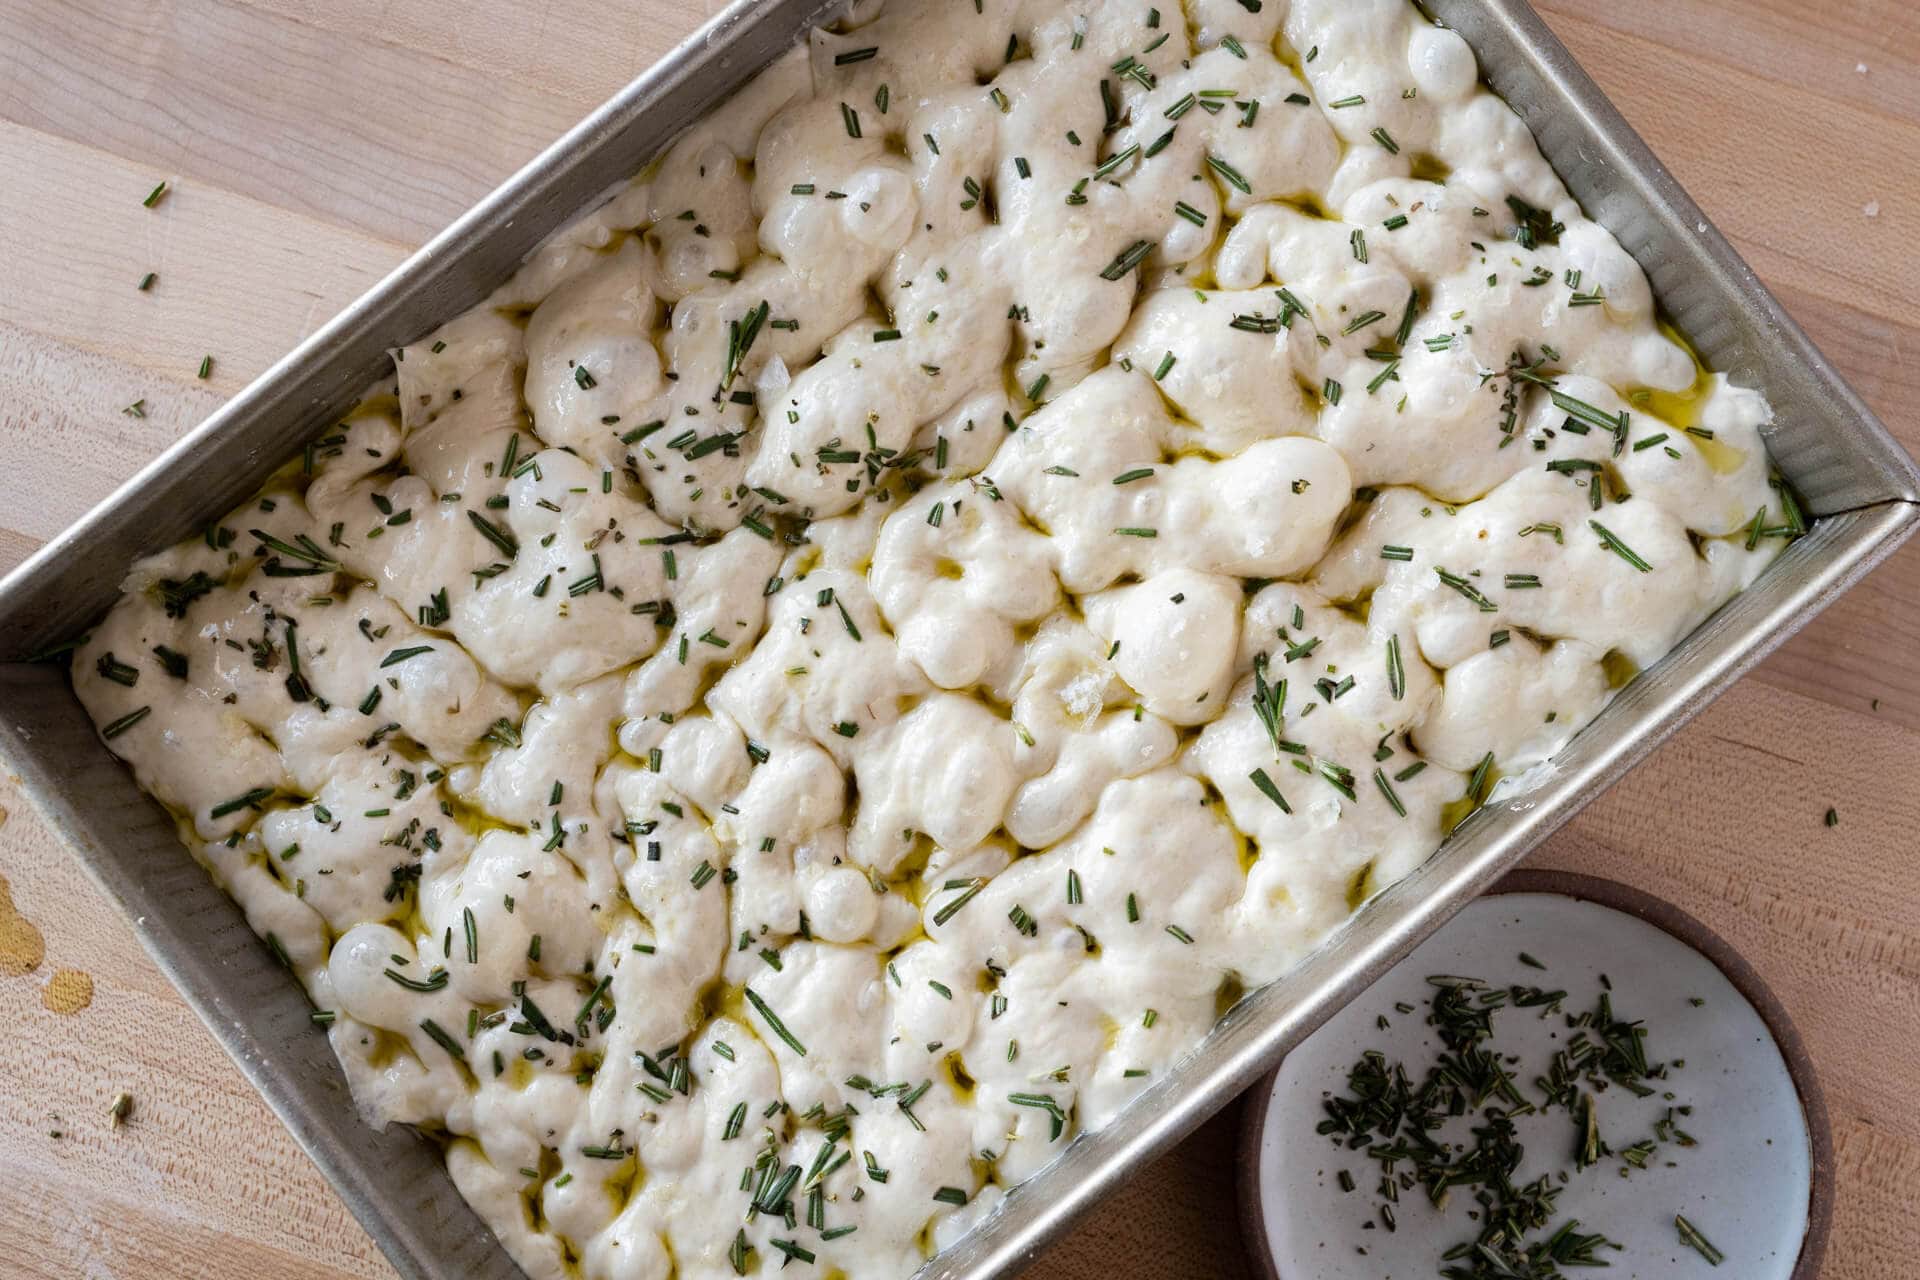
I’m also a huge fan of focaccia. This is one of the most-baked items in my kitchen, and my recipe couldn’t be easier. Use all of your sourdough starter discard one morning, and you’ll have fresh sourdough focaccia for dinner (and it’s an amazing canvas for any veggies in season!).
See my collection of sourdough starter discard recipes →
Step 6. Upgrade Your Baking Tools
One of the challenges of baking at home is consistency. It can be hard to bake consistently great loaves when the environment—our hectic home kitchens!—is always changing. I’ve collected my tried-and-true tools in one place, and they’ll help you make the bread easier and more repeatable in your home kitchen.
My top 3 recommended tools (read: if you’re going to buy anything, get these):
- A simple kitchen scale to accurately measure ingredients
- An instant-read thermometer to quickly and accurately measure dough temperature
- A foldable dough proofer to keep your dough warm and fermentation activity high
Explore all my favorite baking tools →
Step 7. My Top 10 Favorite Sourdough Recipes
- A Simple Weekday Sourdough Bread
- My Best Sourdough Bread Recipe
- Spelt, Rye, and Whole Wheat Sourdough Bread (50% whole grain)
- Fifty-fifty Whole Wheat Sourdough (50% whole grain)
- Sourdough Pizza
- Pain de Mie (super soft sandwich bread)
- A Simple Focaccia
- Whole Grain Spelt Pan Loaf
- Super Soft Sourdough Rolls
- Sourdough Cinnamon Rolls
Step 8. Join The 2500+ Member Community and Come Chat

Want to take your baking to the next level or get help with an issue you’re running into? Join the community here at The Perfect Loaf and get:
- Remove all ads from the website
- Instantly download my recipe archive and baking spreadsheets, plus other baking tools
- Join our private community to share photos, talk baking tips, tricks, and get help (I’m chatting there daily!)
- Access exclusive tool and flour discounts
- First access to live baking events
- And more!
Check out the baking community and membership →
Step 9. Experiment, Have Fun, and Happy Baking
One last note: don’t be afraid to experiment and have fun—after all, what’s the worst that can happen? No matter what comes out of your oven in almost every case, it’s perfectly edible and delicious. Some of my most significant baking improvements came from accidents that turned into opportunities for me to learn and grow as a baker.
Happy baking!

365 Comments
I received my copy of The Perfect Loaf yesterday. Beautiful! I’ve been making your Sourdough Bread with All Purpose Flour for two years but it didn’t make the cut! I’ve made other recipes from your website and look forward to trying new recipes.
Congratulations on the book!
Thank you, Cathryn! That AP Sourdough is a wonderful recipe, but I have the “Simple SD” in the book, which is very similar, if just a little different 🙂 Both make great bread. Hope you continue to bake through and love the book, thanks for the comments!!
Very good! Thanks, I’ll surely try Simple SD next!
I tried the beginner’s sourdough bread recipe. Fed my starter and made the levain according to the recipe timeline, however I had to leave right after autolyse so I decided to let the dough sit and it ended up having about a 5 hour autolyse. When I returned I chose to go forward with adding the levain, salt and remaining water, and under the advice of a friend, decided to use my stand mixer for the stretch and fold portion to save time. That took about 20 minutes to get a good windowpane. Left on the counter overnight and let proof until about 3 am and then did a preshape, wait 30 minutes and finished shaping. Put it in a banneton and covered and left on the counter for a second proof. Around 6 am it passed a poke test so in the fridge for 8 hours. I got some good oven spring but there is cracking on my bread. I have not cut the bread yet. Wish I could upload a photo. What caused the cracking?
Hey, Karen! Hmm. Really hard to say. It could be under hydrated (sometimes a dough with too little water is stiff and can crack, in my experience), over proofed, or even under proofed (which would show as huge rise and potential ruptures on the side).
Thank you for responding! I did use all of the water in the recipe and I cut the recipe in half. I also used King Arthur bread flour. I will probably switch over to bob’s red mill when this bag is finished. I’m trying again today using KA bread flour. I mixed and proofed yesterday and getting ready to bake now.
Good Morning. Been baking non sourdough for years and always grind my own grain and add egg, olive oil etc.
Have gas oven so must use covered baking pan to keep in moisture. Everything looks good when I finally put in oven but round top partially collapses before bread has reached final temperature. Any suggestions appreciated.
Thanks.
It sounds like you likely over proofed the dough. There are a few signs your dough could have gone over: sluggish rise in the oven, the score on top of the dough might not open with a nice “ear” and instead just kind of fuse together, the interior will have lots of small holes and perhaps one or two large ones near the top (but no dense areas of unfermented flour), and finally the loaf could be a little on the sour side. Try reducing the proofing period!
My bread is coming out dense on the bottom, flat, with large air pockets on the top half of the loaf. Any advice?
Hey, Greg! These are telltale signs of over proofing. Try reducing your bulk fermentation time and/or proofing time!
Could you share the link for the mixing bowl you use in your demos. Specifically the one that has a dark orange color. Thx so much
Hi, Margaret! It’s a Heath Ceramics bowl, the large serving bowl 🙂
Hi Maurizio, you probably already know this, but your website isn’t working correctly since a couple of days. The menu “blocks” the screen, so I’m not able to read any recipe unfortunately.
Ive since fixed this, I hope it’s working well for you now!
Is there a way to determine nutritional value for what is baked?
I don’t currently have a way to do this, sorry!
Hello Maurizio,
I love your sourdough website! It has been so much fun learning everything there is to know about sourdough bread baking. I am new at this and have a question. I am currently working on my second try at making sourdough bread. I am using your “No Knead Sourdough Bread” recipe. My first try was okay except that my dough did not rise. So, I thought my starter wasn’t very active. On this second attempt I fed my starter the night before and then again twelve hours later. I left it alone for a couple hours and when I came back to check on it, it was quite active. I then started working on the recipe. As of this writing, my dough is still not rising. What is going on with my starter/dough?
Thanks so much, Pamela! You want to use your starter after it’s had a number of hours to ferment, for me, that’s usually 12 hours (overnight). Once it’s ripe after this time, you can use it to mix into your dough. Try to follow my starter maintenance guide for a week, using it in the morning to bake with after it’s fermented for a long while, is bubbly, and has a sour aroma.
It could be that you’re simply not giving your dough enough time to ferment, which will be longer if you use your starter too early before it’s ripe (again, check out that guide above, I go into detail on what to look for!).
Hey Maurizio, your website is a blessing to me, thank you so much for all your guidance.
In my latest 3 bakes I have been disappointed in getting my bread moist in the sense that I have to wash away from the bread knife sticky crumb after every slice I cut. At first I blamed it on the hydration as I dared go up from 75% to 78% – 80%. But going down to 75% made no improvement. So what I’m wondering if it’s EITHER the flour: I use Caputo but whereas before I was using Chef with 13g protein, now that’s it not in stock anymore, had to turn to Pizzeria that’s 12.5g protein. Mind you I mix this flour with semola rimacinata di grano duro, 14g protein, and whole wheat, 11g protein, to get an end result of 50% whole grain mix.
OR it’s because I retard my bread in ceramic pan loafers Emile Henry overnight in the fridge so when I put them in the pre-heated oven 250 degrees to bake, obviously the pan loafers are also cold. in fact I bake high at 250 deg. for the first 45′, then 10′ @ 230 degrees- all the time covered. Finally I switch off, uncover and crank the oven door for 10′. The internal temp reaches 210 degrees & with a beautiful golden brown colour, but the thermometer needle does not come out clean.
The funny thing is that this only happened lately, that is why I tend to blame it on the flour, even if the protein difference is minimal. Both taste and texture are delicious but there’s something wrong. Btw with the same dough I also made a free standing batard and the alveoli is evenly distributed, got the oven spring, the ear and dark crust colour. Although not as much as the pan loafers but it still dirtied my knife with sticky, moist crumb.
I would greatly appreciate any enlightenment as to what I should do.
thanks in anticipation,
Brgds,
Malu
So glad my site has helped you, Malu! It sounds like your dough may be over hydrated—your flour likely isn’t able to take on quite a much water, and that’s ok! Try reducing the hydration by 5% and give it another go—the reduced water should bring strength to the dough and you’ll feel it immediately. Once you find a suitable hydration, you can try to push it back up (if desired), but as you do, take note of how the consistency of the dough changes: the dough will start to slacken out as you add more and more water, this means you’ll likely have to mix more upfront or add another set or two of stretch and folds during bulk fermentation.
Generally, with an increased hydration, you need to mix longer to develop the gluten in the dough to sufficiently support the water added, but this only goes so far. At some point, the flour you’re using just isn’t able to take on any more water and you’ll essentially have a weak and slack dough. It’s always best to start conservatively and work your way up with hydration as you feel out your flour. This is typically why I recommend holding back water during mixing, adding it in as the dough handles it.
Also, do be sure to leave your loaves for 1-2 hours after baking before cutting, otherwise you’ll get a gummy interior!
Try to keep everything else as consistent as possible and let me know how the next attempt goes!
THANK YOU! I’m just starting out and keep hesitating so i need all the help I can get!
You got this!! Email me if you have any questions, you’re going to do great.
I added salt to the autolyse. I realized my mistake before adding the water. I would not like to waste all that flour … Is there some other use for it?
I will be measuring out a new bunch of flour for the autolyse.
Just continue with it!
Hi Maurizio. I mill my own flours so they really absorb all the water called for in a recipe. Dough is then stiff, not very pliable. Question, about how much extra water, a starting point amount, to add above what the recipe calls for so dough is more like it should be. Would that starting point amount be the same for soft, hard white, hard red and einkorn flours? I saw this question asked before but now can’t find the post. Thanx for your wealth of knowledge. Cindy
Hey, Cindy. Yes, fresh flour tends to require more water. Add as much water as necessary to get the dough to the correct consistency.
Check out my guide to baking with freshly milled flour, I discuss this (and more)!
Excellent article. My Komo mill does an excellent job of grinding. Really like using fresh milled flour. I do miss not having the big holes that look so delicious in the photos. Would adding vital wheat gluten or a natural dough enhancer help create some holes? Thanx oodles for the reference article.
It really is all about the flavor and nutrition on the end! Adding stronger flour will help you open it up, yes. I wouldn’t personally use VWG, but a strong bread flour (about 12% protein) will definitely help. Even just 10%.
Yes, overall the flavor, and nutrition, is what counts. I did cheat and purchase some San Francisco yeast on ebay earlier this year. Quite pleased with it and that particular flavor is what I like, really tangy sour. Making a loaf tomorrow with hard white berries and will be excited to see the outcome with the water experiment. Then on to cinnamon buns, Thanx again Maurizio for your wealth of knowledge and sharing it with us beginners.
Hello,
I’m new here and love this website and all your recipes! Can’t wait to try some! I love baking sourdough everything!! Since most sourdough recipes don’t require much kneading, why do a lot of bakers have a dough kneading machine? Asking because my children would like to get me one for my birthday, but wondering if I would use it & would like your advice? I do have an upright kitchenaid but with the sourdough recipes I have used there’s no kneading involved.
Thanks so much!
Mary Beth
A mixer is definitely a great investment! The KitchenAid you have should work well enough. If you’re looking for a more advanced/professional style bread dough mixer, a Famag or other is a great choice. Check out my in-depth guide to the Famag mixer to see if that’s what you’re looking for!
are courses scheduled at your place?
I do not have any classes at the moment.
New at making bread. How can I prevent over proofing my dough if I added my Leavin in at the autolyse?
Keep it cool!
Started using my IP pot as my bulk fermenting place. Works really well with a consistent temp of 27°C.
Love that idea!
I downloaded the app for discord and was able to join the conversation. Thanks
I joined TPL about a month ago. I joined the first day I found this site because I could tell it was special I’m learning so much here, just having some trouble joining the discord conversation. I have signed up with discord also. I have a user name which shows whether I’m online or not. Just don’t see a way to send a message When I signed up with discord and tried to follow TPL it said I must have the 4 digits to be able to follow. I’m still looking for the link to get in but keep getting sidetracked reading these questions and answers. So interesting! I’d still like to be able to post pictures on discord with questions. It’s probably easy and I’m missing something
Welcome, San! Glad to hear you go Discord up and running.
Hello. I’m fairly new to this awesome site. I’ve baked the beginners sourdough bread and sourdough waffles, pancakes and sourdough banana bread. My question is how do I join the conversation on discord? I’ve signed up and have a user name that is listed as online. I just don’t see a way to add a comment. Thanks
Hey, San! Glad my site has helped! To chat on Discord, you need to become a TPL Member, once you do, an email will be sent over to you with a link to the community chat. Here’s more info on the membership:
https://www.theperfectloaf.com/membership/
I hope you’ll join! See you there 🙂
Thanks. Now I need to have the #four digits for the perfect loaf to be able to dial it up. I’ve been searching over the website for a link to the community so I can find the four digits
As so many others have said, I want to start out and thank you for such a wealth of information on sourdough baking. I have a question: I have tried your “My Best Sourdough Bread Recipe” several times and my loaves, while tasting VERY GOOD, fail to get much spring at all. In fact they seem to spread out like a pancake and the score looks like a bad gaping scar after the loaf is baked. That was NOT the case when I made your loaf using the Beginner’s recipe. I believe it isn’t my starter– that thing triples in size with no difficulty, and before baking, I feed it several times. I am using KA flour (bread, AP, and WW). Is there just too much water? My brother experienced the same thing. We both use the Challenger bread pan. What is going on?? Thanks in advance for your response. Much appreciated!
You’re very welcome, Carren! Sorry for the late reply. It sounds like your dough is most likely over hydrated—your flour likely isn’t able to take on quite a much water, and that’s ok! Try reducing the hydration by 5% and give it another go—the reduced water should bring strength to the dough and you’ll feel it immediately. Once you find a suitable hydration, you can try to push it back up (if desired), but as you do, take note of how the consistency of the dough changes: the dough will start to slacken out as you add more and more water, this means you’ll likely have to mix more upfront or add another set or two of stretch and folds during bulk fermentation.
Generally, with an increased hydration, you need to mix longer to develop the gluten in the dough to sufficiently support the water added, but this only goes so far. At some point, the flour you’re using just isn’t able to take on any more water and you’ll essentially have a weak and slack dough. It’s always best to start conservatively and work your way up with hydration as you feel out your flour. This is typically why I recommend holding back water during mixing, adding it in as the dough handles it.
Try to keep everything else as consistent as possible and let me know how the next attempt goes!
Thank you Maurizio, for your amazing recipes. I have been baking for almost two years according to your recipes and can’t stop. My husband and I have long retired and bakig bread is like a small holiday for us. Thanks a lot and good luck to you.
You’ bet, Anna! Thanks so much for the comments and glad you’re enjoying my site! (sorry for the late reply.)
Love your site! Beginner here. Tried some a while ago in clay baker where you proofed in the clay pot then put in cold oven so it wouldn’t crack then baked. Have your simple recipe bulk fermenting now. That work ok with this recipe? Thanks!
That should work just fine with most of my recipes here, Bruce!
Ciao Maurizio, I have been following you for quite some time and have also bought the Famag dough mixer after reading your article. I have tried your Rustic Italian sourdough loaves was very disappointed as they turned out heavy, moist and gummy. I don’t know if I can send you a photo to show you the result but I so wish to find out where I went wrong as I followed your recipe step by step.
Very interesting, Malu! I wonder if there was a lack of fermentation or it over proofed. I have my email address on the About page, you can send there, or join the membership and send to the group of us!
Hi Maurizio. Just baking your soft dinner rolls for the first time. Could you just confirm whether your oven temperatures are for fan assisted or convection please? Thanks.
Hey, Richard. All my recipes here are without convection (no fan assist), unless otherwise specified. Happy baking!
Thanks Maurizio. Brilliant result from your recipe – I have no trouble with my S/D loaves but rolls have never been right. These were lovely and very straightforward.
So glad to hear that, Richard! Enjoy 🙂
I am thrilled with the breads I make with your starter and recipes. I’ve tried 11 different recipes so far, and repeated our favorites several times. I’m wondering if you have a recipe for English Muffins. Thanks!
So happy to hear my site has helped and you’re liking the recipes! English muffin work in progress 🙂 Until then, happy baking and enjoy!
Just made your “best sour dough” for the second time, after the first was a bit flat. This time it is truly perfect! The difference was paying attention by eye to bulk fermentation, instead of just timing it. Thanks for the videos and photos. Those were key in getting my awesome results this time.