

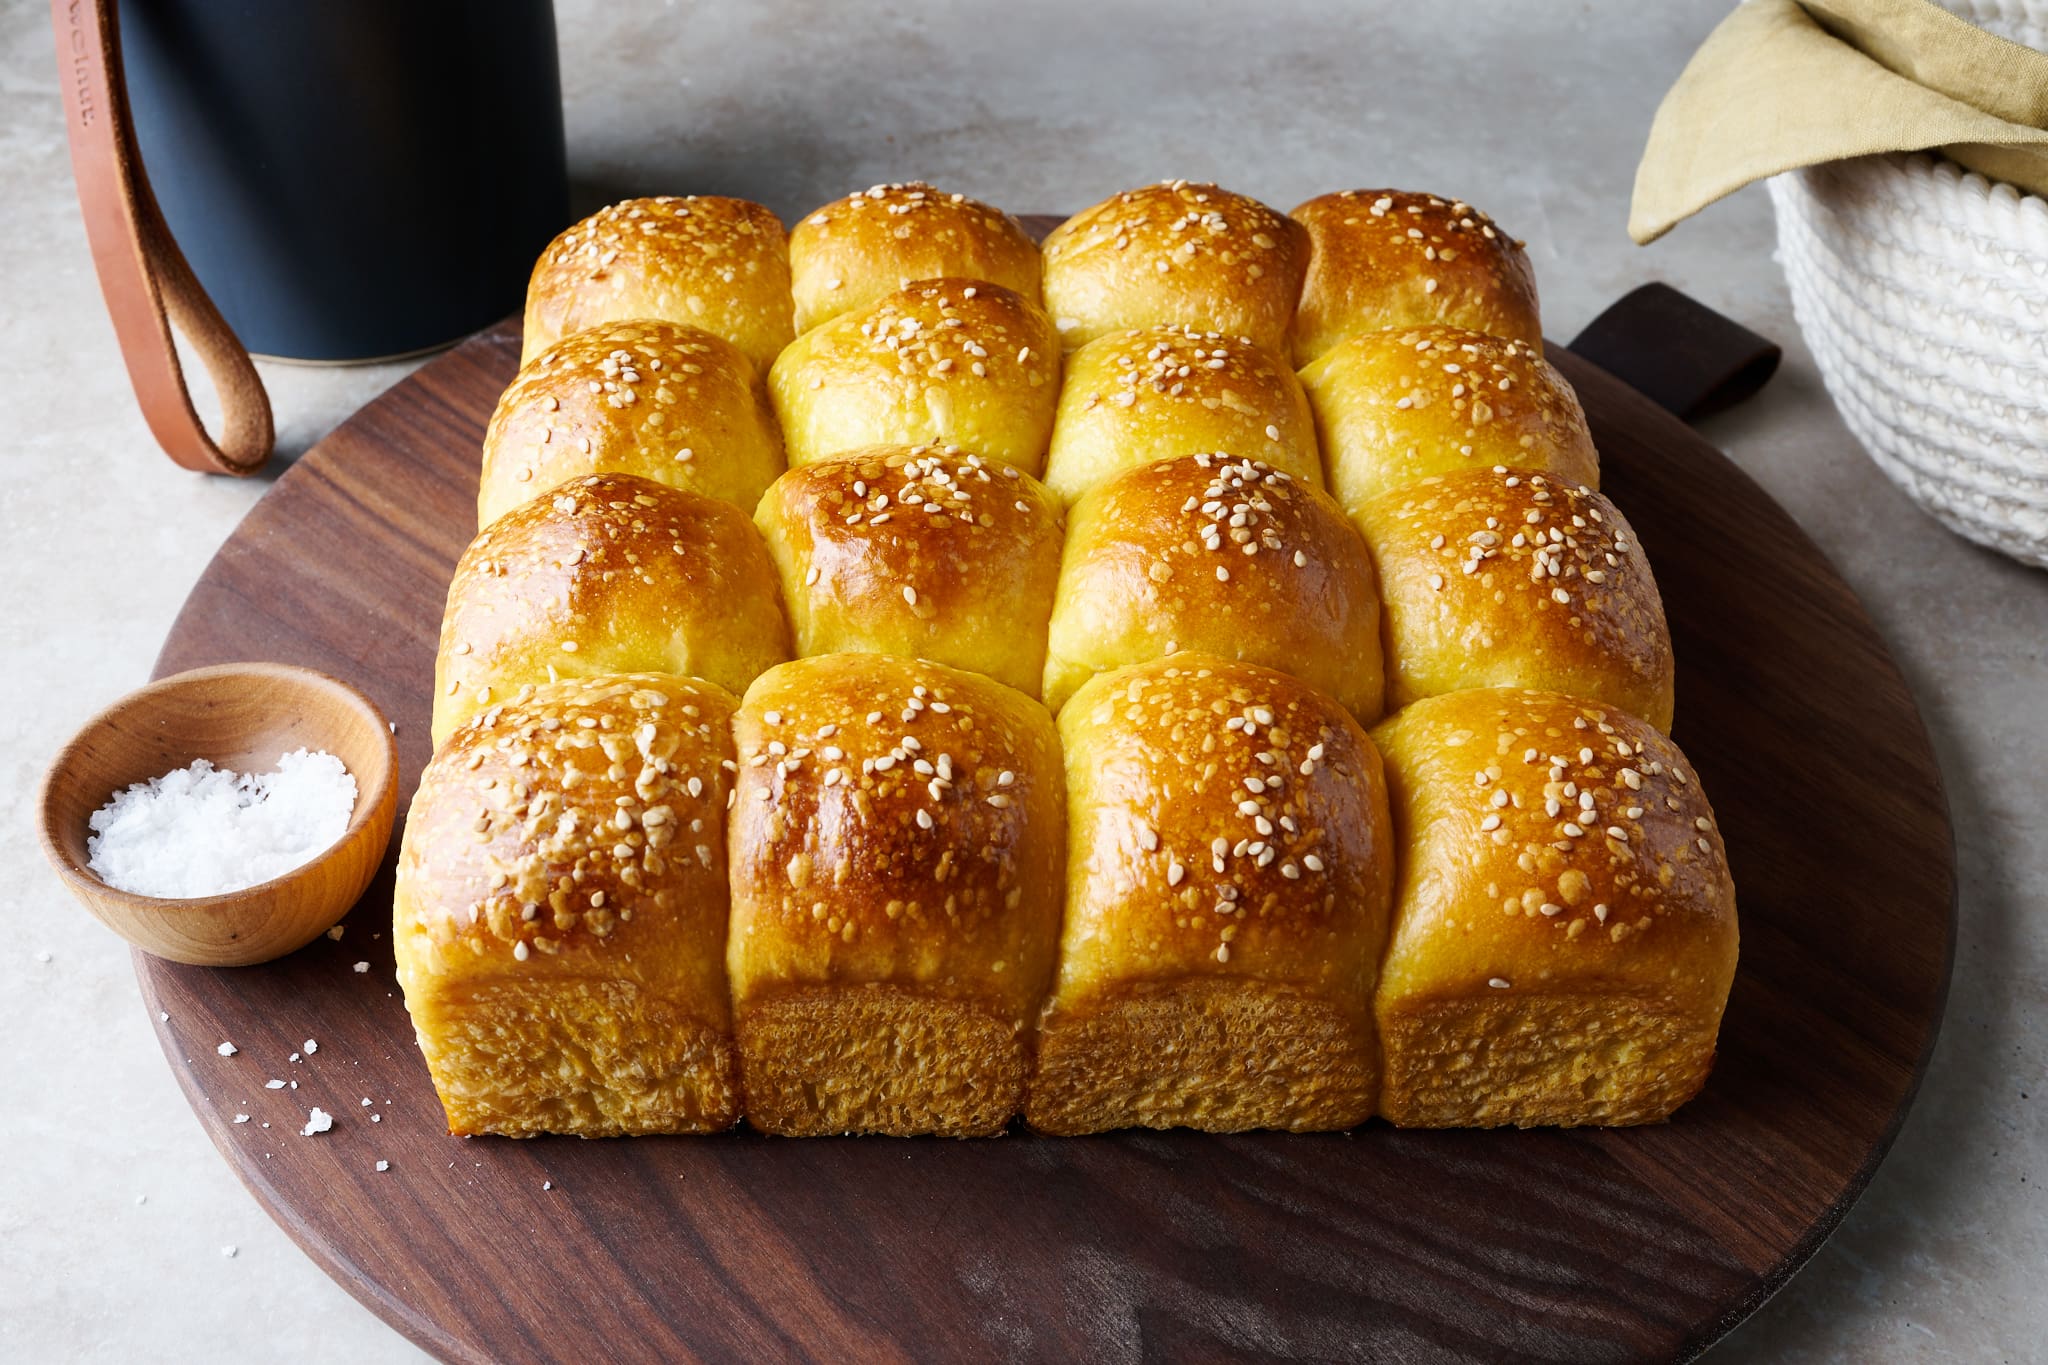
Near the end of the year, I start stockpiling pumpkin puree from the market. The cans appear and I can’t help myself but grab an armful and start thinking about all the things it’ll find its way into: pancakes, waffles, pies, and of course, bread. This year, I wanted to take the puree into a softer, chewier direction: sourdough pumpkin dinner rolls.
Pumpkin acts very similar to adding potato to a dough. It brings copious tenderness and a melt-in-your-mouth quality that’s utterly addictive. But the pumpkin also adds such a beautiful color—the rolls almost look like gold nuggets. The rich luster heightens the eating experience, a golden hue of shining expectation.
The flavor is slightly reminiscent of pumpkin pie in a way, but not totally so, as the usual mix of spices (ginger, allspice, nutmeg, etc.), dare I say pumpkin spice, are not invited to this party. The recipe also calls for a large percentage of honey, which brings sweetness, sure, but also richness and floral notes. The aroma of the baked rolls hints at the pumpkin contained therein, but in a very remote way; my 4-year-old son put it best: “these rolls remind me of Thanksgiving.”
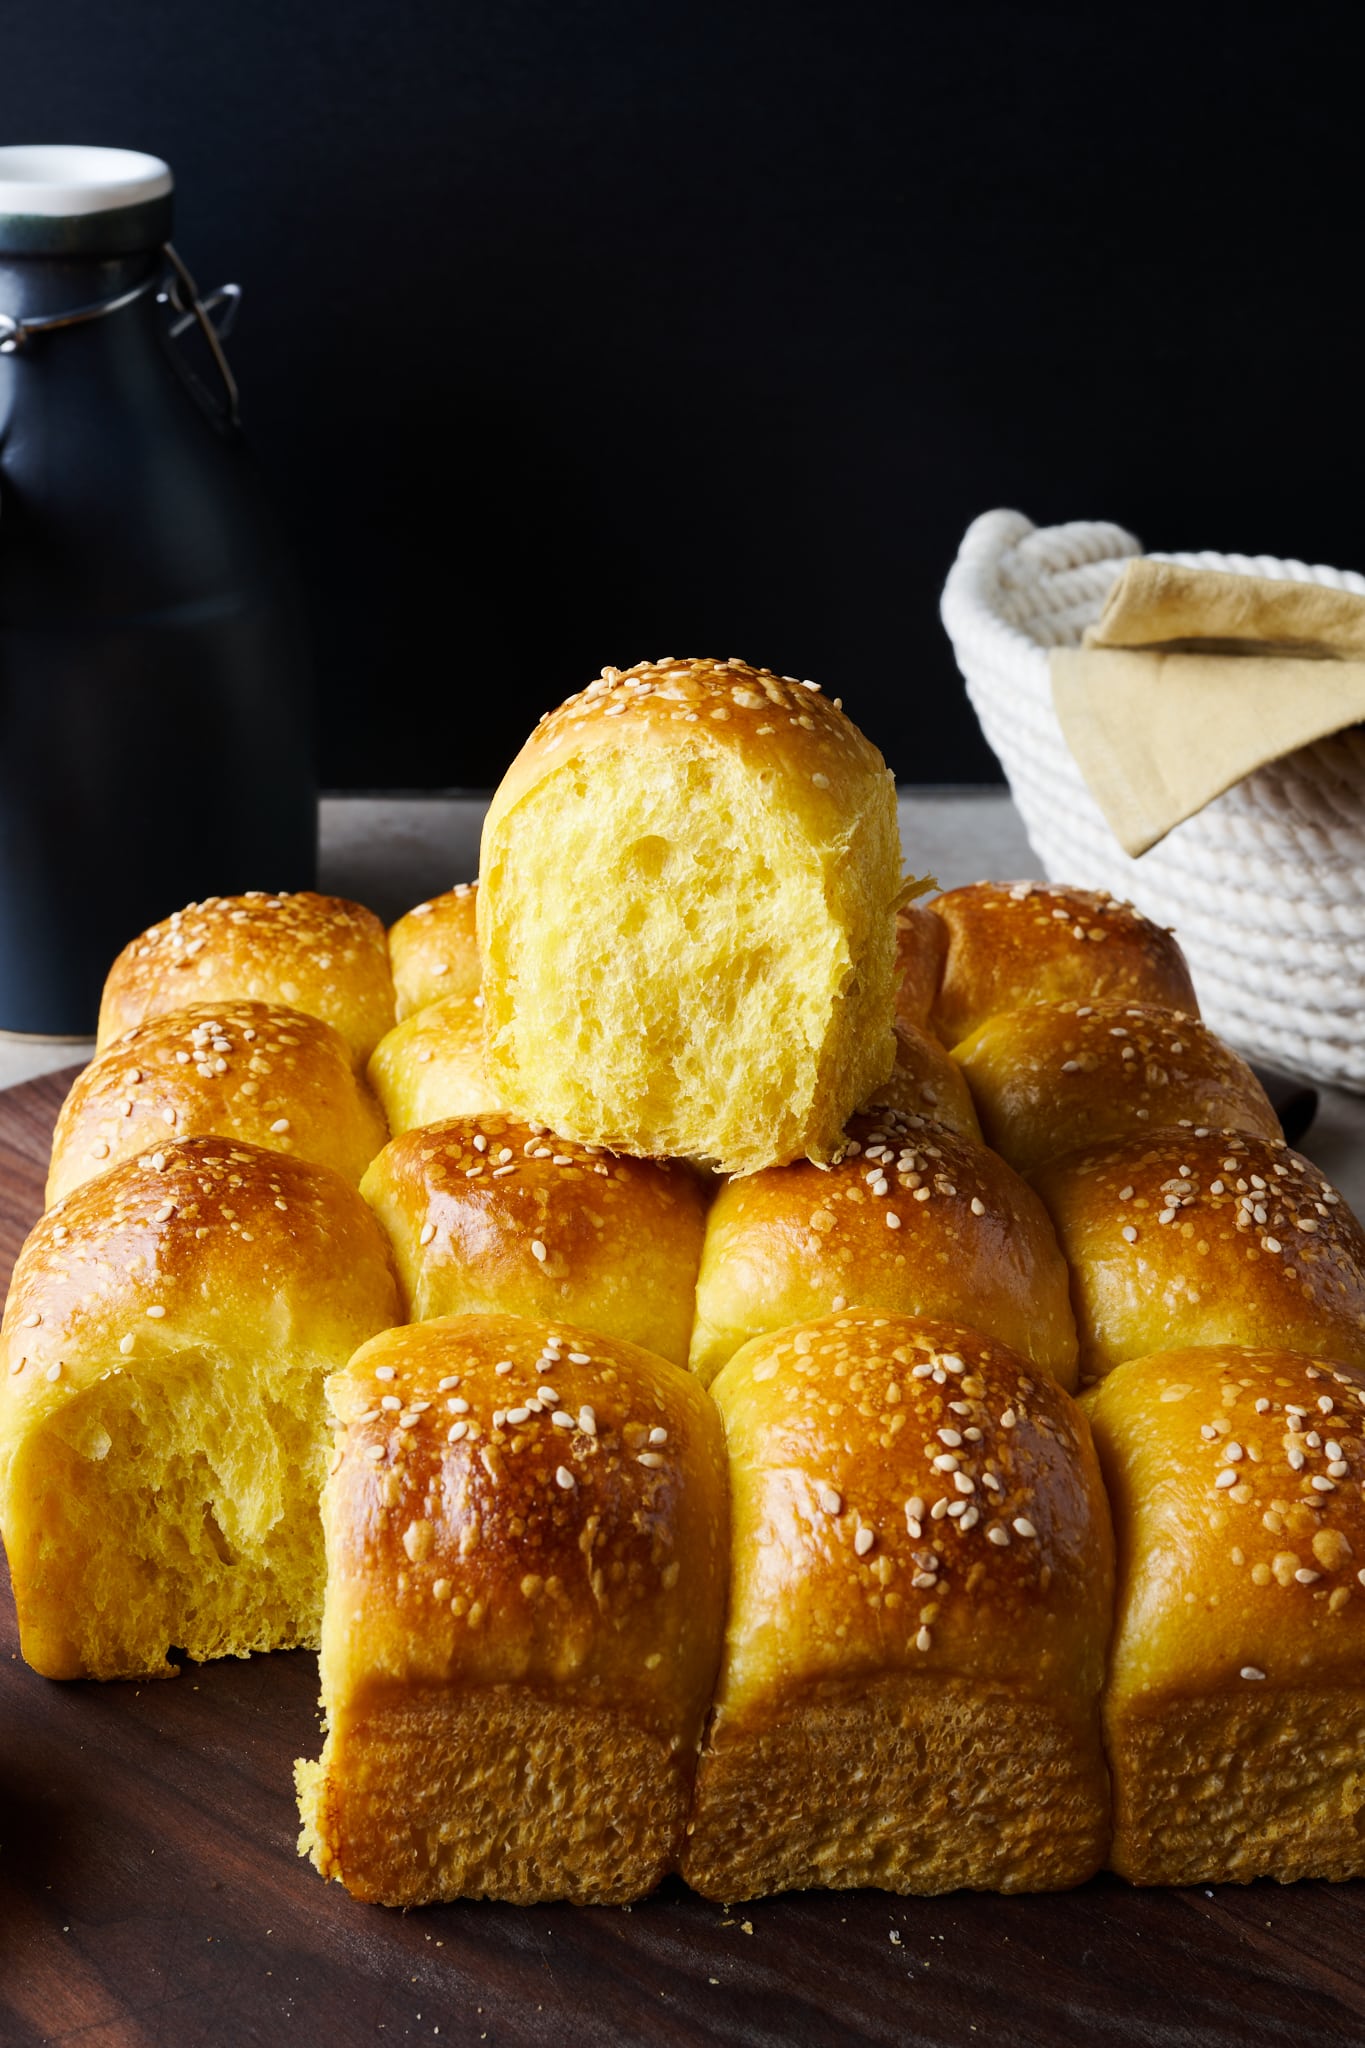
Let’s look at how to make these chewy sourdough pumpkin rolls.
Flour and ingredient selection
Flour
This recipe calls for 100% higher protein bread flour to help support the added pumpkin puree, butter, milk, and even honey. I’ve found King Arthur Baking Bread Flour works really well with this recipe, it has plenty of strength for support, and the slightly chewy texture is welcome in these soft dinner rolls.
Pumpkin puree
Any plain pumpkin puree will work well with this recipe. I tend to go with Libby’s Pumpkin Puree, but any variety you have access to will work.
Another option: sweet potato puree
If you wanted to take a different approach, roasted, cooled, and pureed sweet potato would work very well in this recipe.
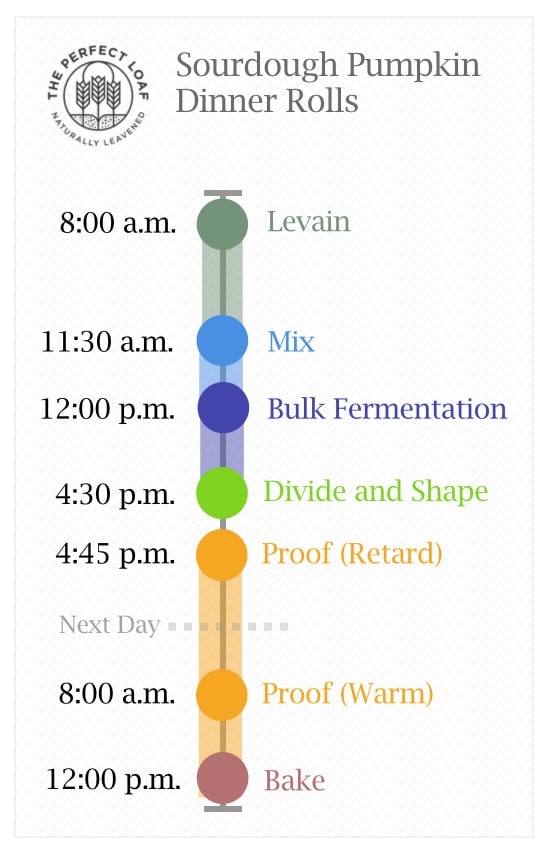
Baking schedule
These sourdough pumpkin dinner rolls can be made in a single day or spread over the course of two. This is a rather slow-moving dough (and made worse if your kitchen is cold in the winter) and the rolls need extra time in bulk and proof. Be sure not to rush the proof, the rolls need to be very, very soft to the touch before they’re baked.
The benefit to cold proofing the rolls in shape is if you’re making these for Thanksgiving, you can prep the rolls all the way until just after you shape them, then cover and place the pan into the refrigerator. The next day, take them out in the morning and let them finish proofing on the counter (for me this took about 3-4 hours) and bake them early in the day on Thanksgiving to have them fresh for the big day.
Cold proofing this dough brings added flavor complexity, but the overall flavor is still quite balanced and the rolls don’t become overly sour.
Sourdough pumpkin dinner rolls formula
Vitals
| Total Dough Weight | 1,200 grams |
| Pre-fermented Flour | 8.00% |
| Levain in final dough | 26.09% |
| Yield | Sixteen 70-gram rolls |
Total formula
Desired dough temperature: 78°F (25°C). See my post on the importance of dough temperature for more information on dough temperatures.
| Weight | Ingredient | Baker’s Percentage |
|---|---|---|
| 597g | High-protein white flour (12.7% protein, King Arthur Baking Bread Flour) | 100.0% |
| 119g | Pumpkin puree | 20.0% |
| 113g (one stick) | Butter, unsalted | 19.0% |
| 90g | Whole milk | 15.0% |
| 42g | Honey | 7.0% |
| 179g | Water | 30.0% |
| 12g | Fine sea salt | 2.0% |
| 48g | Ripe sourdough starter | 8.0% |

Sourdough pumpkin dinner rolls method
1. Prepare the levain – 8:00 a.m.
Mix the following ingredients in a container and leave them covered to ripen at a warm temperature, about 74-76°F (23-24°C) for 3 1/2 to 4 hours until ripe.
| Weight | Ingredient | Baker’s Percentage |
|---|---|---|
| 48g | High-protein white flour | 100.00% |
| 48g | Water | 100.00% |
| 48g | Ripe sourdough starter | 100.00% |
2. Mix – 11:30 a.m.
There is no autolyse step for this dough. See my guide to the autolyse technique for when and why I like to use the technique (and why it’s not strictly necessary).
I used my KitchenAid stand mixer to mix this dough.
| Weight | Ingredient |
|---|---|
| 549g | High-protein white flour |
| 119g | Pumpkin puree |
| 113g | Butter, unsalted |
| 90g | Whole milk |
| 42g | Honey |
| 131g | Water |
| 12g | Salt |
| 143g | Levain (see Prepare the levain, above) |
First, take out your butter and cut it into 1/2″ pats. Set the butter on a plate to warm to room temperature and reserve until the end of mixing.
To the bowl of a stand mixer fitted with the paddle attachment, add the water, milk, flour, ripe levain, honey, pumpkin puree, and salt. Mix on speed 1 (STIR on a KitchenAid) for 1 to 2 minutes until the ingredients come together and no dry bits remain. Switch to the dough hook attachment and mix on medium speed (2 on a KitchenAid) for 4-5 minutes until the dough starts to strengthen and clump around the hook. This is a firm dough at this point, it will clump to the dough hook and completely clear the sides of the mixing bowl.
Let the dough rest in the mixing bowl for 10 minutes.
Your butter should now be at room temperature; a finger will easily slide in and leave an impression. Turn the mixer on to speed 1 and add the butter, one pat at a time, waiting to add each pat until the previous one is fully absorbed. Adding all the butter might take 5 to 8 minutes.
In the end, the dough will still be very soft and not completely removed from the sides of the mixing bowl—we will continue to strengthen the dough during bulk fermentation.
Transfer your dough to a bulk fermentation container and cover.
3. Bulk fermentation – 12:00 p.m. to 4:30 p.m. (4 1/2 hours)
At a warm room temperature, around 74-76°F (23-24°C), bulk fermentation should take about 4 1/2 hours. If your kitchen is cooler, place your bulk container in a small home dough proofer, or extend the bulk fermentation time to give the dough more time to ferment.
Give this dough two sets of stretch and folds during bulk fermentation at 30-minute intervals. The first set starts after 30 minutes from the start of bulk fermentation. For each set, wet your hands, grab one side and stretch it up and over the dough to the other side. Rotate the bowl 180° and perform another stretch and fold (this forms a long rectangle in the bowl). Then, rotate the bowl 90° and do another stretch and fold. Finally, turn the bowl 180° and do one last stretch and fold. You should have the dough neatly folded up in the bowl.
After the second set, let the dough rest, covered, for the remainder of bulk fermentation.
4. Divide and shape – 4:30 p.m.
At the end of bulk fermentation, your dough should have risen in the container, but not a great deal. You should see signs of strong fermentation: a smooth texture, and an increase in elasticity (strength), and general puffiness.
First, butter your baking pan (even if it’s nonstick) to ensure the rolls remove cleanly after baking. I like to use my 8 x 8-inch USA pan (which is also nonstick) for this recipe, but you could also use a round pan or any pan you’d like to fit the rolls.
Lightly flour the top of the dough in the bulk fermentation bowl and your work surface. Gently scrape out the dough to the work surface and divide it into sixteen 70-gram pieces.
Because of the dough texture, I prefer using my bench knife to help shape each roll. Use the knife to drag the dough toward your body as your other hand rounds the dough, tucking the edge down under the ball. Repeat this dragging and tucking with the knife and your other hand until you have a uniformly round ball.
See the following video and my guide to shaping buns and rolls for shaping help.
7. Cold Proof – 4:45 p.m. to 8:00 a.m. (next day)
Cover the pan with a large, reusable plastic bag and seal it shut.
Cover the pan and place it into the refrigerator. The next day, take them out about 3-4 hours before you want to bake them and let them proof on the counter until they’ve risen all the way to the rim of the pan and are extremely soft to the touch.
Same day bake option: For a milder flavor profile and to bake them the same day, proof them in a warm spot in your kitchen and skip the cold-proof. My kitchen was on the cooler side, around 72-74°F (22-23°C), and the dough took about 3 hours to fully proof when doing a same-day bake. Use the same cues as below to determine when they’re finished proofing.
8. Warm Proof – 8:00 a.m. to 12:00 p.m. (temperature depending)
Take the covered pan out of the refrigerator and proof at warm room temperature, 73-74°F (22-23°C), for 4 to 5 hours. Give the rolls plenty of time to proof at this stage, it will take them time to warm from the cold refrigerator and finish proofing.
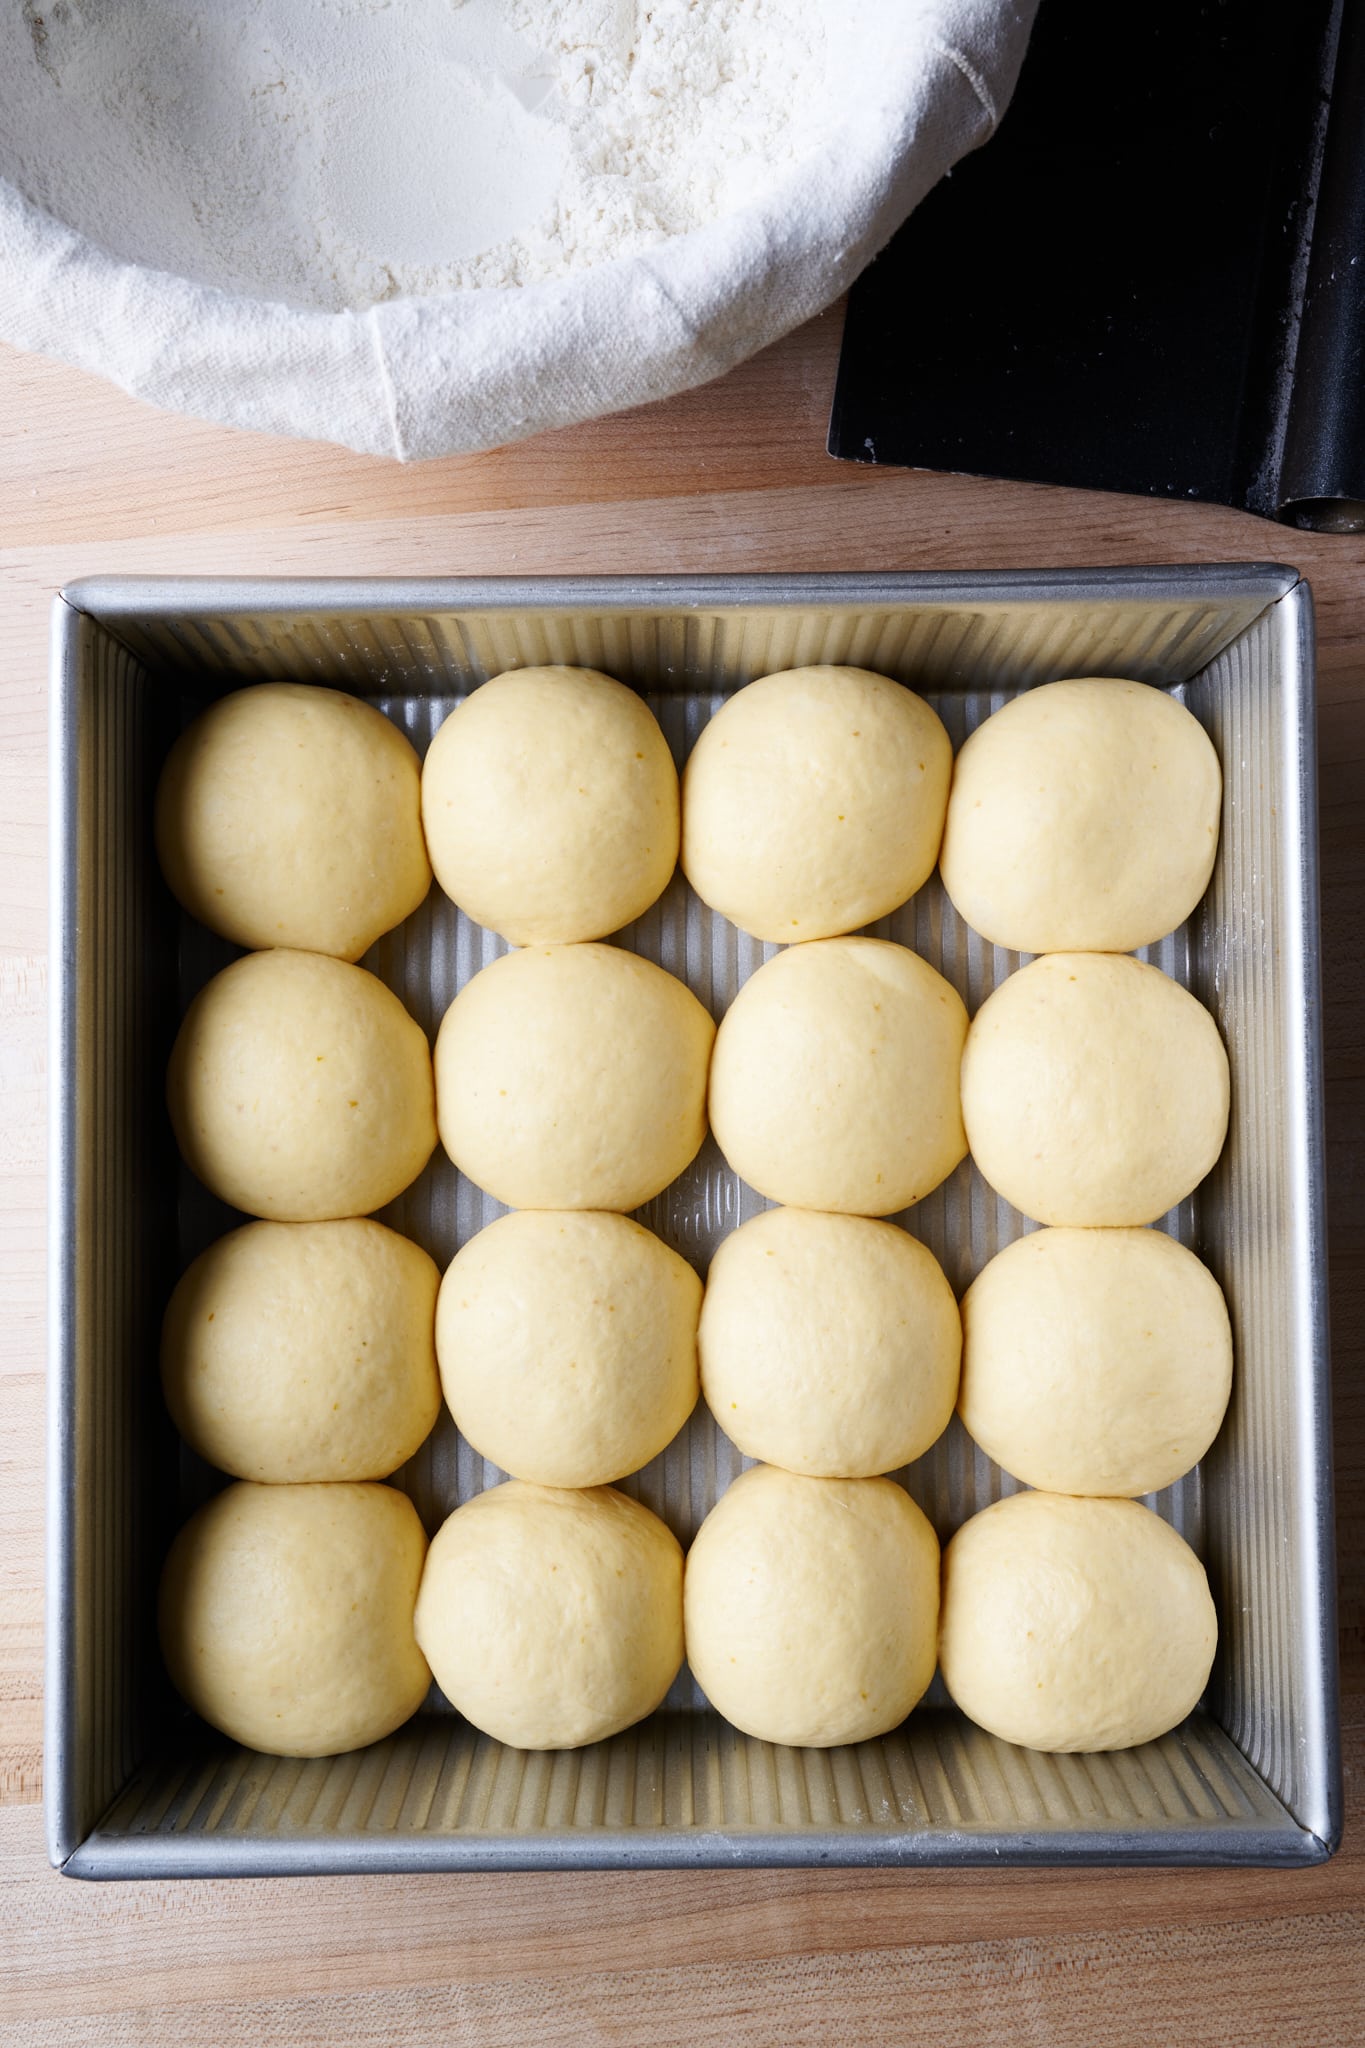
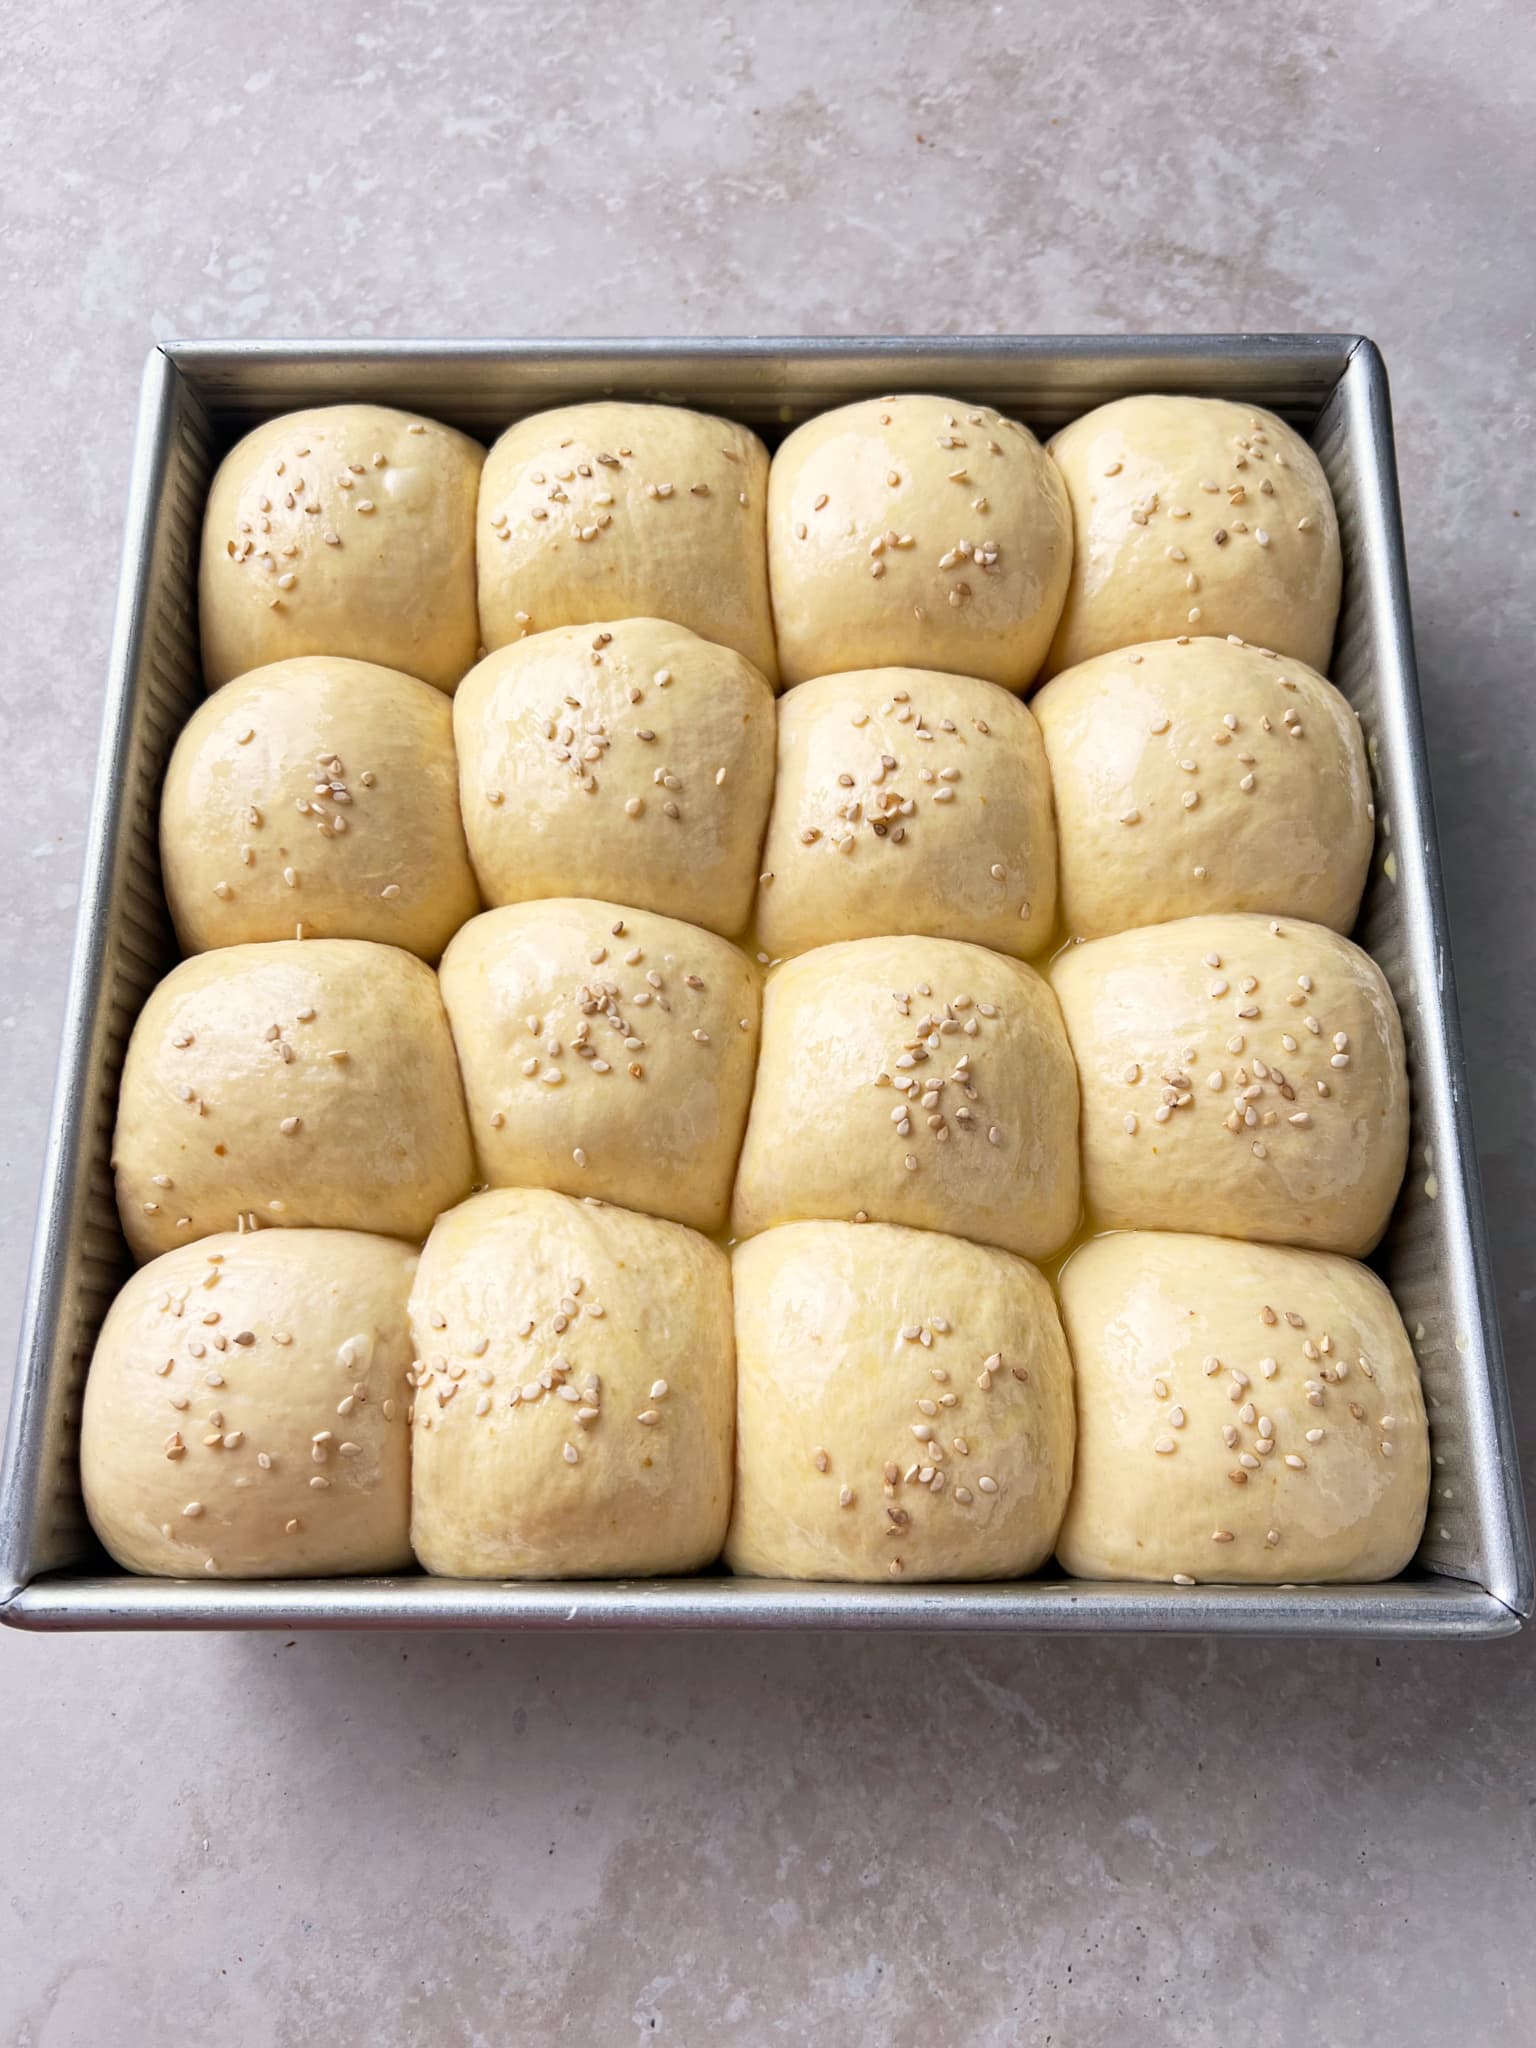
Be sure to give these rolls plenty of time to proof, they need to be very soft to the touch before baking.
When they’re ready to bake, the dough will have risen to the rim of the baking pan and be very soft to the touch.
9. Bake – 12:00 p.m.
Preheat your oven, with rack in the middle, to 425°F (220°C).
Uncover your dough and gently press the tops of a few rolls. You shouldn’t feel any dense spots or tight areas—the dough should be very light and airy. If you do, cover the pan and give your dough another 30 minutes to proof and check again.
There’s no need to steam the oven for this bake because we’ll use an egg wash to top the dough. In a small bowl, whisk together a whole egg and a splash (about 1 tbsp) of whole milk.
Once your oven is preheated, remove your pan from its bag, evenly brush on the egg wash, sprinkle on coarse sea salt (optional) and white sesame seeds, and slide the pan into the oven.
Bake at 425°F (220°C) for 10 minutes. After this time, rotate the pan 180° in the oven and reduce the temperature to 350°F (175°C). Bake for an additional 20-25 minutes until the tops of the rolls are golden, and the internal temperature is around 204°F (95°C). When finished, remove the pan from the oven and let rest for 10 minutes. Then, remove the rolls from the pan to a wire rack to finish cooling.
These are wonderful warm from the oven, but I like to let them cool for at least 30 minutes before eating. These rolls are best the day they’re made but are still great the day after (if stored according to my post on storing bread).

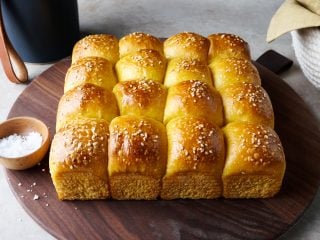
Sourdough Pumpkin Rolls
- Prep Time: 25 hours
- Cook Time: 35 minutes
- Total Time: 25 hours 35 minutes
- Yield: 16 rolls
- Cuisine: American
Description
Super soft and ultra tender, these sourdough pumpkin dinner rolls are a little buttery and a little savory, perfect for family gatherings (especially Thanksgiving!).
Ingredients
Levain
- 48g high-protein white flour (King Arthur Baking Bread Flour)
- 48g water
- 48g ripe sourdough starter
Main Dough
- 549g high-protein white flour
- 120g pumpkin puree
- 113g butter, unsalted and at room temperature
- 90g whole milk
- 42g honey
- 131g water
- 12g salt
- 143g ripe levain
Topping
- one whole egg and splash of whole milk for egg wash
- coarse sea salt (optional)
- white sesame seeds (optional)
Instructions
- Levain (8:00 a.m.)
In a small bowl or jar, mix the Levain ingredients. Cover the jar and keep it at a warm temperature for 3 1/2 to 4 hours until ripe. - Mix (11:30 am)
To the bowl of a stand mixer fitted with the paddle attachment, add the 549g high-protein white flour, 120g pumpkin puree, 90g milk, 42g honey, 131g water, 12g salt, and 143g ripe levain. Mix on low speed for 1 minute until incorporated. Then, switch to the dough hook attachment and mix on medium speed (KA Speed 2) for 4 for 5 minutes until dough clumps around the dough hook and clears the sides. Let the dough rest in the mixing bowl for 10 minutes. Next, add the 113g butter, one pat at a time, while the mixer is running on low speed. Continue this for 5 to 8 minutes until all butter is added and the dough is cohesive and soft but still tacky to the touch. Transfer the dough to a bulk fermentation container and cover. - Bulk Fermentation (12:00 p.m. to 4:30 p.m.)
This dough will need 2 sets of stretches and folds during bulk fermentation where the first set starts after 30 minutes into bulk fermentation and the subsequent set is 30-minutes later. After the second set of stretches and folds, let the dough rest, covered, for the remainder of bulk fermentation. - Divide and Preshape (4:30 p.m.)
Butter your 8×8-inch square pan. Divide the dough into sixteen 70-gram pieces and shape each as a very tight ball. Place the balls in the buttered pan to proof. - Cold Proof (4:45 p.m. to 8:00 a.m.)
Cover pan with reusable plastic and seal shut. Place the covered pan in the refrigerator until the next day (take out of the fridge and let proof on the counter for 3 to 4 hours, temperature depending). - Warm Proof (8:00 a.m. to 11:00 a.m.)
Remove the covered pan from the refrigerator and proof at warm room temperature (73-74°F/23-24°C) for 4 to 5 hours until the rolls have risen to the rim of the pan and are very soft to the touch with no dense or tight spots. - Bake (12:00 p.m.)
Preheat your oven to 425°F (220°C). For the egg wash, whisk together one egg and a splash of whole milk. When the oven is preheated, brush on the egg wash, sprinkle on coarse sea salt and white sesame seeds(optional), and bake for 10 minutes. Then, rotate the pan 180° in the oven and reduce the temperature to 350°F (175°C). Bake for an additional 20-25 minutes until the tops are well-colored and the rolls have reached around 204°F (95°C) internally. Remove from the oven and let cool in the baking pan for 10 minutes. Then knock the rolls out to cool on a wire rack. Let rest for 10 minutes, then enjoy.
Notes
- Instead of pumpkin puree, a sweet potato puree would also work well with this recipe.
What’s Next?
Check out my sourdough pumpkin bread with cinnamon and raisins (and optional spices) for another outlet for that pumpkin puree you may or may not be stockpiling.
My classic super soft sourdough rolls with tangzhong are perhaps the softest dinner rolls I’ve ever made.
And, of course, during this time of year sourdough pumpkin pancakes are happening just about every weekend (and are perfect with the leftover pumpkin puree from this recipe!).
Buon appetito!


140 Comments
Hello! I wanted to know whether these can be made ahead of time and frozen to then thaw and bake later? If so, any tips?
I just made this recipe and it's wonderful! It was absolutely delicious and goes with everything, sweet, savory, plain! A real treat and I gave some to my neighbors and relatives, and they all loved it. I wasn't familiar with this type of bread in France and I'll be making this recipe again for sure !
I learned how to make sourdough bread thanks to you, and I am very grateful, thank you so much for your recipes !!
I made it with a little homemade butternut squash purée, quickly steamed and simply mashed with a fork. I followed the recipe from start to finish and everything was absolutely perfect (the only difference is that I used plant-based milk (soy this time), and it works perfectly for anyone wondering).
Maurizio, how is this recipe so different from the classic dinner rolls in your book?
Also, can you explain this to me, I'm not sure I understand what you mean: “There’s no need to steam the oven for this bake because we’ll use an egg wash to top the dough.” If next time I don't use beaten egg and just milk instead for example, does that change anything? Will I need steam? I'm not sure I understand. Thank you! 🙂
However, I had to use a larger pan because I couldn't fit the rolls in the smaller one. I used a 35x23cm (around 9“x13”) glass dish. I had a dish that was the recommended size, but I don't know how you do it 🙂
Hello
Thank you for all your great recipes and clear instructions.
I tried the pumpkin buns – Delicious
Yes Thank you for omitting the spices –
Is it possible to double the recipe ?
Fériale
I have made these rolls and the super soft plain dinner rolls and I’m looking for a mix of both- I love the color of these, I could not taste any pumpkin flavor, but I think your soft dinner rolls are better but would love to make them with some flavor- can you make rolls with tangzhomg, pumpkin purée and some spices? Would that work? Thank you for any insight.
You've gotta love pumpkin bread and these rolls are superb. Used my own, home-made puree and with the overnight proof the depth of flavour was amazing. Thanks.
Curious about a non dairy alternative (soy, oat milk?)
It works ! 🙂 I just made them with soy milk and they were delicious ! But every milk works, for all preparations I always replace cow milk because I don't buy it by any alternative I have on the fridge (soy, coco, almond, oat…) and never had issues.
Hello, am I missing it or do recipes posted not include nutritional values?
Can you do this also rolls using the Tangzhong method as well? and if so what adjustments would you advise?
Yes, I think it would work really well, Ana. Just follow the same procedure for the rolls, then divide it for the right amount for your pan (you can follow the weights above), and follow the process on this page for shaping into a loaf. It'll be great!
hello what can I sub for Honey our daughter is allergic to Honey?
You can just leave it out completely! Or if you want to maintain sweetness, add 1/4 the weight of honey as white sugar.
Is it possible (advisable) to bake these in a Dutch Oven?
I’ve done it and they turned out really well. Treat it like a baking pan (butter it) and don’t put the cover on it to bake. The orange color is gorgeous against the black pan too.
Yup just like @jacquie said below!
Huge success! Roasted a local squash! Wish I could post a picture. They are gorgeous. Fun “new” recipe for our Thanksgiving challenge.
So glad these turned out well for you, Molly! Sorry, I don’t have a picture posting option here (working on this), but you can in our membership chat! Hope you had a great Thanksgiving 🙂
Prepared these and they are lovely! I had to add a bit extra water likely due to the dry conditions in Cincinnati last week. Room temp proof after overnight cold took longer, too. I cooled, wrapped and froze the rolls for Thanksgiving. Can’t wait to share with my family!
Happy to hear they worked out well for you, Joyce!
Thanks for all the amazing recipes and guidance! Which rolls are softer—these or the tangzong dinner rolls?
Hmm, it’s a toss up. I would say the super soft sourdough rolls with tangzhong, but these have a different flavor profile 🙂
This looks perfect for a Backrahmen!
I like this idea 🙂
I typically love your recipes, but this one was just alright for me. The rolls came out nice, puffy, and buttery, but we could not taste the pumpkin at all. IMO, canned pumpkin is too watery to carry much flavor. And the recipe calls for only about 1/3 cup of pumpkin. If I tried to bake these again, I’d use a roasted squash of a more flavorful variety, like kabocha, and use 2-3 times as much as in the original recipe.
I do like the idea of trying squash with this!
Hello Maurizio and Happy TG!
Made your breads for a while now (even have your Hayden flour mix) and going to try these pumpkin rolls this year. I’d like to order the bread pan via the link you provide…but, is the 8 x 8 inch size really big enough for 16 rolls? Do you use the 8 x 8 or a larger size?
Thanks
You can go with the same pan, but the 9×9 option. Yes, I use the 8×8 linked above!
I love how you put “times” on your recipes. It truly helps!!!
Happy to hear that, Angel!
I just tried these to see if I wanted to do them for Thanksgiving. I did 10 minutes at 425 then lowered to 350 for 28 minutes before I got internal temp of 204. My rolls are much darker though…almost too dark. I have a large GE Monogram electric oven. Any recommendations?
Start baking at 400F!
Hi in NZ pumpkin purée isn’t something we have. Would I just mash pumpkin or does it have milk or cream added to it? What sort of consistency should it be please?
Thanks Pip
Should just be pumpkin, no dairy added! It’s a smooth paste.
Hmmm. Mine baked to an internal temp of 204ish in the first 20 minutes. Hope they turn out ok — or no rolls today for Thanksgiving.
I’ve made these multiple times and they are ALWAYS done in half the time the recipe suggests. They are so delicious; I’ve just adjusted my own recipe to 10 minutes @ 425, and then lower to 400 for 10-12 more minutes. Maybe it depends on altitude?
I made these last year for Thanksgiving and they were phenomenal! This year, I’d like to make them more in advance. How long do you think I could get away with sticking the dough in the fridge for the cold proof?
Follow up question – since I’m going to try extending the cold proof by a day or two, would it work better to cold proof the dough before shaping or stick to the recipe and shape before cold shaping?
I’d go with shaping then into the fridge!
Hi Maurizio, I think I’m going to try these for thanksgiving but the turkey will be set at a lower temp in the oven all day so I was thinking of using our convection microwave oven for these. How do you think they would do in a convection oven? Thanks!
I’ve never used an oven like that to bake with… As long as it acts like a normal oven it should work okay? Sorry for the late reply!
Just made a batch yesterday and cooled out of the pan and wrapped and froze. Taking for Thanksgiving, I’ll let you know.
Fantastic, Carol!
Ok, anyone make ahead and freeze or bake and freeze. I love these but not sure I have time to devote day before and day of Thanksgiving . Thanks!
Andrea, see Carol’s comment above!
I will, of course, be making these again for TG, but wondered if the recipe might be even more improved by adding a bit of tangzhong to the mix. Have you tried it? Would it be overdoing it?
These are fantastic for TG. So I made a variant of these with tangzhong, and they’re my fav rolls (I have a YouTube video coming next week on them!). They’re also in my cookbook, and the recipe is here, too.
Hi. Something I am recently noticing is that things seem to bake a little different in my new oven. This range, electric, does not cook from the bottom like my old oven, but I believe from the back where the fan is. Should I adjust when baking, if a recipe says the middle, bottom, etc? Or is it just a matter of me learning how to use this thing! Thanks in advance.
Yes, definitely change things up to suit your oven! This is something us bakers have to always deal with… Equipment differences! Play around with placement and try to find the best spot, it’ll vary for you like it does for me 🙂
I just got an oven that has a proofing setting (so excited!) BUT the lowest it goes is 85. I live in a very drafty cold New Mexico home (at 6k feet). I’d really really love to use this setting on the oven for this recipe (and all of your others) because my kitchen is honestly on average in the high 60s. Any modifications you’d suggest (shorter period of time in the proof…) Or is my elevation a counter to this issue…
I am curious as to an answer for this, too. I was the same as you, excited when my new oven had this feature, then disappointed when I realized it is too warm! I have found if I leave just the light on in the oven, it will get up to the mid 70s in the oven. But if I leave it on too long, it will get over 80 if I don’t keep an eye on it, but not much over.
I’ve heard about the light trick, I’m a little worried about burning out the bulb….
I use the light trick constantly here and it works super well. If you want to use your oven setting, turn it on to 85F, let it come to temp, then just turn it off and keep the door closed. That 85F will likely keep warm for many hours! (FWIW, I’m here in Albuquerque 🙂)
You’re absolutely right, Ryan, it can get too warm. See my reply below.
Just made these this weekend, The dough was a joy to work with, and my family (who was worried about too much pumpkin taste) could not detect a “pumpkin pie” effect. I did make them into little pumpkins when I shaped them, baked them not touching on sheet pans. Less time in the oven than you recommended, I think it was because of the air flow. Soft, but sturdy–if that even makes sense. I like that I could give the long ferment overnight, it will work perfectly for the Thanksgiving menu. I may be heading over to that pumpkin bread recipe next since these rolls were not overly sweet. Thanks again, you make me look like a rock star every week when I bake.
Yes, airflow would definitely cause them to bake a little faster (and possibly be a little more “crusty”). My pumpkin cinnamon sourdough bread is definitely more on the sweet side; more like a dessert bread, even. I love it, too!
So glad these worked out well for you Patty!
Can these be baked early, frozen, thawed and reheated? Should I half bake, freeze or full bake and freeze?
Thanks!
Melissa
I’ve not tried to freeze these. I’m not sure how well they’d reheat after the egg wash and bake, but my feeling is as long as you freeze without too much air inside the package, they’d probably thaw well in the fridge, then warm up nicely in a low oven!