
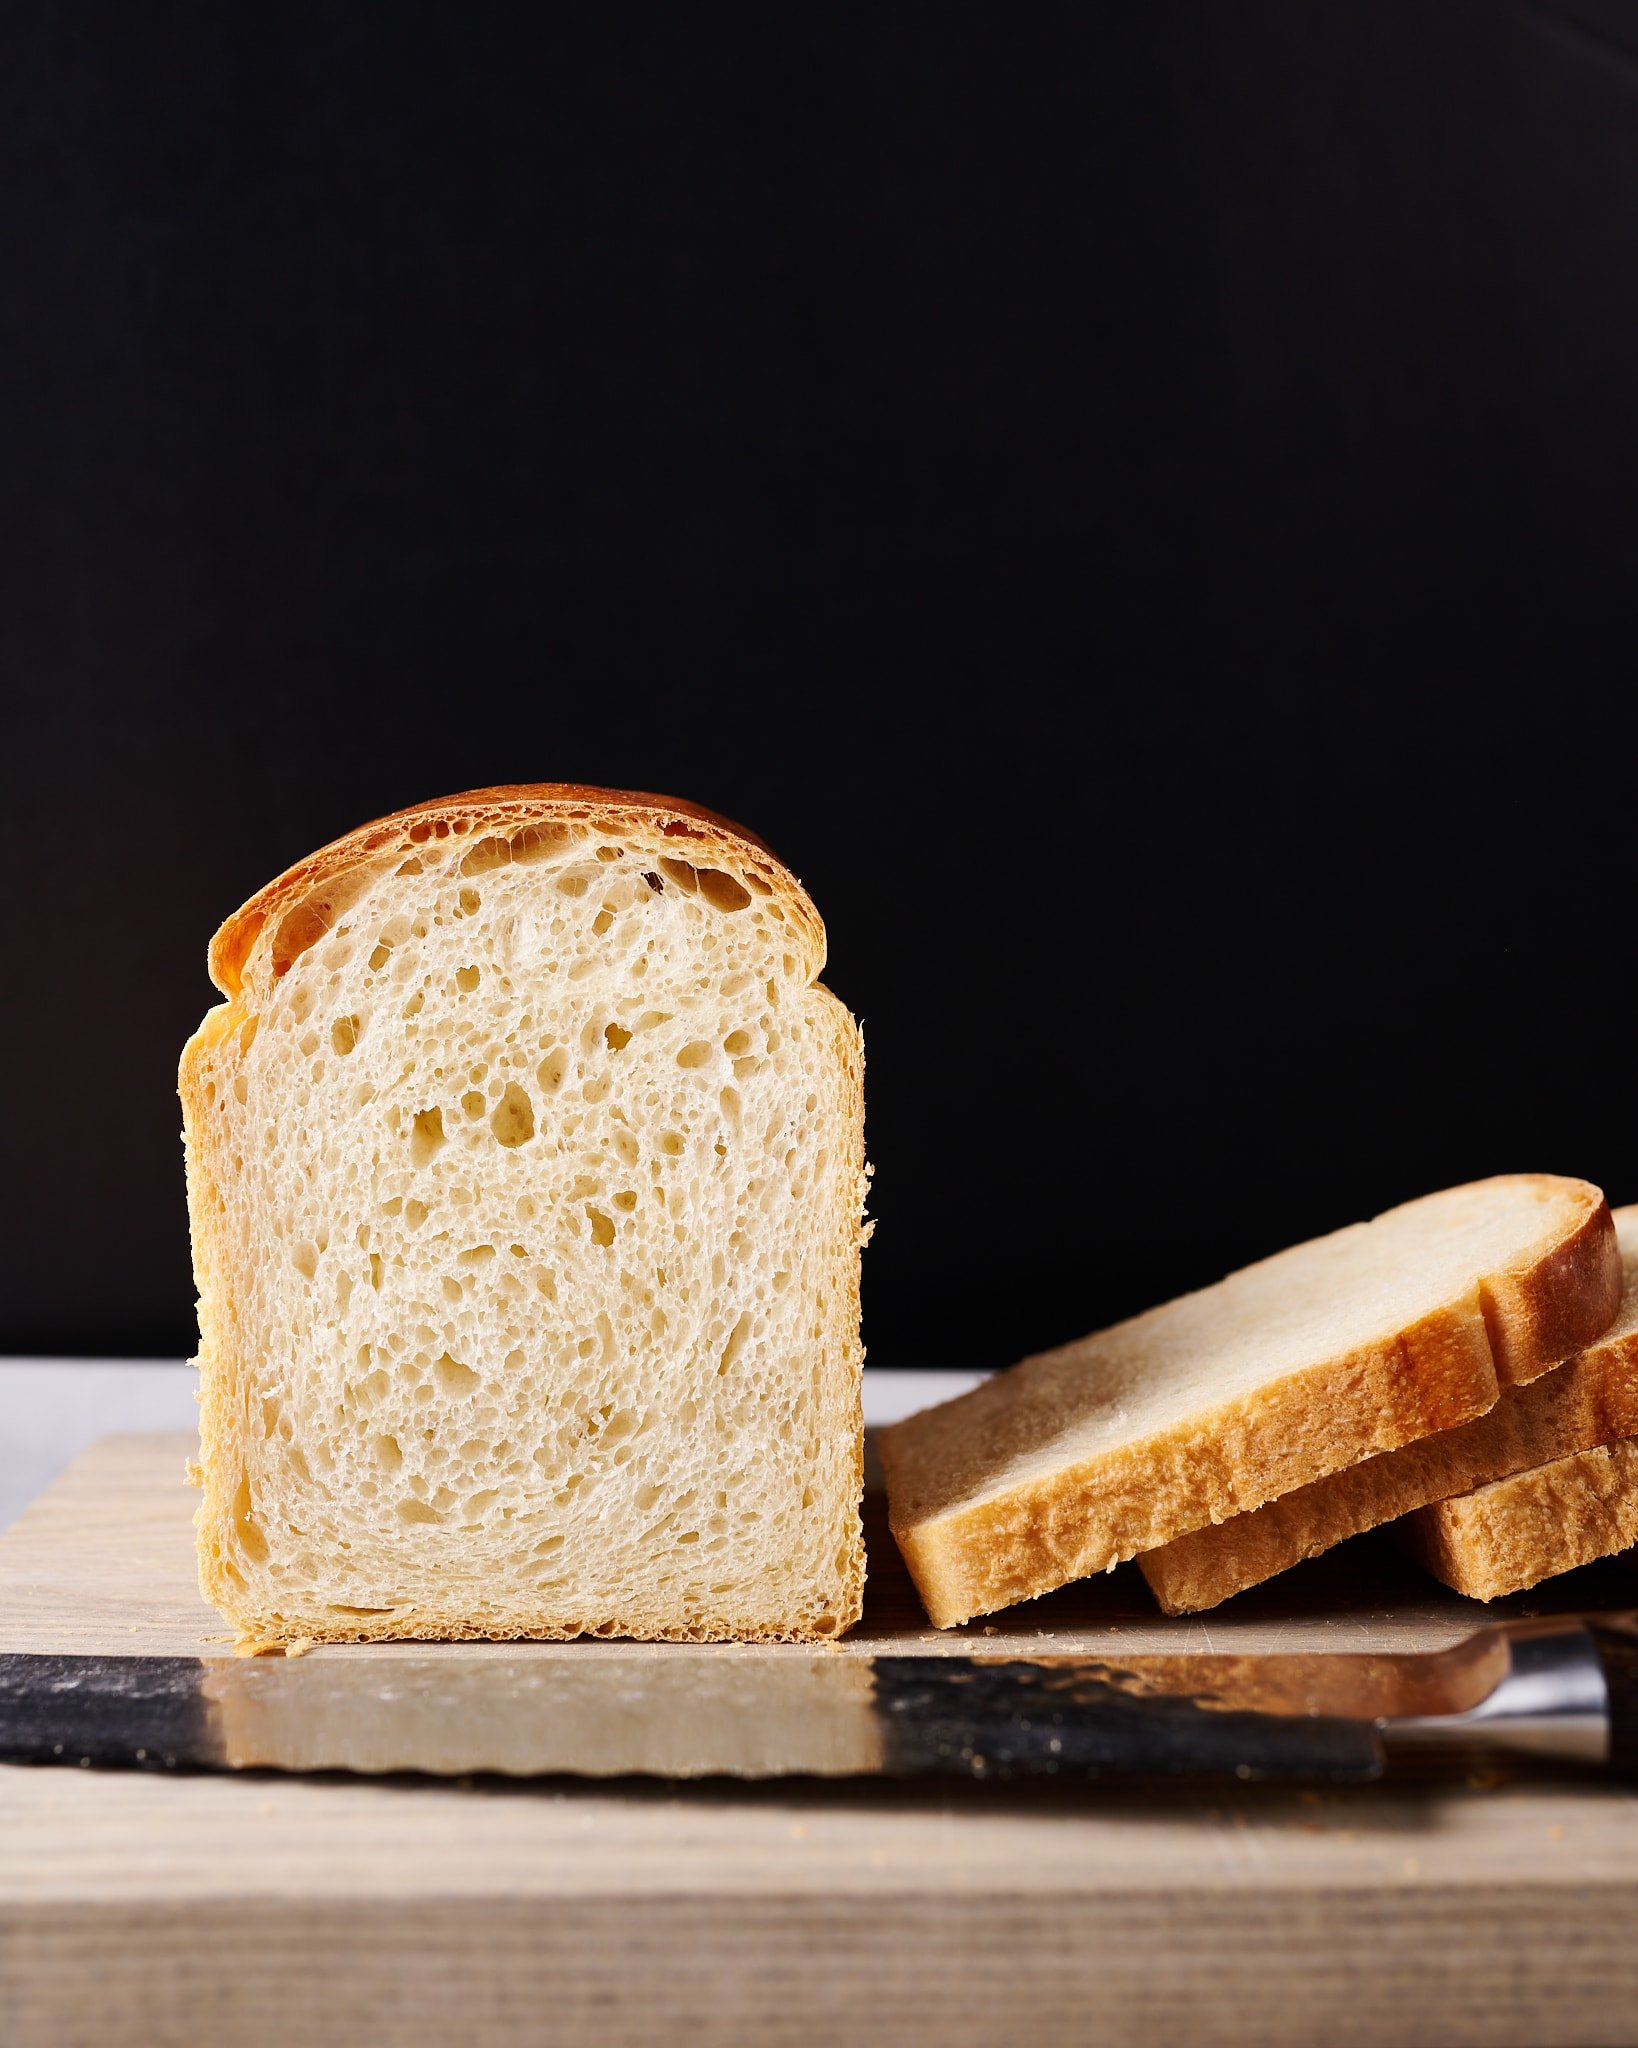
My sourdough pain de mie sandwich bread is pure white bread in all its glory–and it’s the toast lover’s best friend. Each slice is remarkably soft and light, with the thinnest possible crust, but when toasted, the slice crisps and frizzles in an absolutely ideal fashion. A few slices of this bread toasted within an inch of burning and served with a thick pat of butter on top might just be your new favorite breakfast. But there’s a depth of flavor to be found here, too, that sets it far apart from any supermarket white loaf: mild fermentation flavors and a touch of sweetness, all with the slightest hint of tang.
This style of bread is often called a Pullman Loaf, owing to the use of the Pullman pan, which purportedly was invented to be used in Pullman cars on a train to save space when baking. If you’re a frequent visitor here at The Perfect Loaf, you’ll know that the Pullman pan has pretty much supplanted all my other sandwich bread baking vessels. I love that bread baked in this pan has very straight sides, and that using the lid when baking results in a loaf that has an ultra-thin crust.
Sourdough Pain de Mie Video Walkthrough
Flour Selection
It’s rare for me to bake bread without any whole grain flour, but I make an exception with this recipe. In testing, I played with many flour blends, but in the end, I settled on using only all-purpose flour. By not using any whole grain flour in the dough (and the levain), you end up with bread that has reduced sourness and the lightest and most open interior possible.
Special Pans and Preparation
You can bake this bread in almost any pan that’s the right size, but I love the straight sides and nonstick liner of my USA Pan Pullman Loaf Pan (9″ x 4″ x 4″). If you slide on the cover before baking, you’ll end up with a loaf with four perfectly straight sides.
I’ve created a table of alternate pans with corresponding dough weights for each so that you can use what pan(s) you have and/or experiment with different sizes and shapes of loaves. Feel free to halve the recipe ingredients below to fit one pan, or even double the recipe and split it among 2 to 3 smaller pans.
| Pan (Dimensions in inches) | Total Dough Weight |
| 9 x 4 x 4 (Pullman pan shown in this post) | 800-900g |
| 8.5 x 4.5 x 2.5 (small loaf pan) | 600-700g |
| 9 x 5 x 2.75 (medium loaf pan) | 700-800g |
| 13 x 4 x 4 (large Pullman pan) | 1,100-1,200g |
Regardless of the pan you use, be sure to liberally grease the inside of the pan to ensure that the bread will come out cleanly after baking. Additionally, check out my post on shaping a pan loaf for tips on shaping, pans, and more.
Note: If using a large 13-inch Pullman pan, during shaping divide the dough into three equal-sized balls and shape them tightly. Then, place them into the pan side-by-side. Shaping the dough in this way (similar to how I shape a shokupan) will help prevent any sagging or collapsing while the loaf is baking.

Sourdough Pain de Mie Baking Schedule
This Pullman bread is baked the same day (except for the overnight levain that you make the night before) with a room temperature proof for a mild-flavored result. However, if you’re ok with a slight increase in sourness, feel free to retard the dough overnight by proofing it, covered, in the refrigerator right after shaping.
Sourdough Pain de Mie Formula
Note that this formula has been slightly modified since I first published it in 2019. I wanted to increase the fermentation activity in the dough, so I upped the pre-fermented flour percentage from 7.25% to 8.5%. This change ensures that bulk fermentation will be completed in around 4 hours, as listed in the recipe.
Vitals
| Total Dough Weight | 1,600 grams |
| Pre-fermented Flour | 8.5% |
| Levain percentage in final dough | 19.5% |
| Hydration (water only) | 48.0% |
| Yield | Two 800g loaves |
Total Formula
Desired dough temperature: 78°F (25°C) (see my post on the importance of dough temperature).
| Weight | Ingredient | Baker’s Percentage |
|---|---|---|
| 835g | White flour (11.7% protein; King Arthur All-Purpose Flour) | 100.0% |
| 184g | Whole milk | 22.0% |
| 100g | Unsalted butter | 12.0% |
| 376g | Water 1 (levain and autolyse) | 45.0% |
| 25g | Water 2 (mix) | 3.0% |
| 58g | Honey | 7.0% |
| 15g | Fine sea salt | 1.8% |
| 7g | Ripe sourdough starter, 100% hydration | 0.9% |
Sourdough Pain de Mie Method
1. Levain – 9:00 p.m., night before baking
Mix the following ingredients in a container and leave them covered at a warm temperature, 74-76°F (23-24°C), to ripen overnight.
| Weight | Ingredient | Baker’s Percentage |
|---|---|---|
| 71g | White flour | 100.0% |
| 71g | Water 1 | 100.0% |
| 7g | Ripe sourdough starter, 100% hydration | 10.0% |
2. Autolyse (with levain) – 8:30 a.m.
| Weight | Ingredient |
|---|---|
| 764g | White flour |
| 184g | Whole milk |
| 305g | Water 1 (autolyse) |
| 149g | Ripe levain (from step 1) |
NOTE: I’ve recently updated this recipe to be like my cookbook version, which produces an even better result! One of the changes is to include this autolyse step with included levain.
I use the autolyse technique for this recipe to help reduce the total mixing time required, but I also find it helps aid in the dough’s extensibility.
Warm or cool the autolyse water so that the temperature of the mixed dough meets the final dough temperature (FDT) of 78°F (25°C) for this recipe. Place the flour, milk, water, and ripe levain in the bowl of a stand mixer fitted with the dough hook. Mix on low speed until just incorporated. Cover the bowl and let sit for 30 minutes.
Typically, I do not autolyse with levain added, but with this dough, it helps make mixing the dough easier since there’s a large portion of water in the levain.
3. Mix – 9:00 a.m.
| Weight | Ingredient |
|---|---|
| 100g | Unsalted butter |
| 25g | Water 2 (mix) |
| 58g | Honey |
| 15g | Fine sea salt |
Note: If it’s cold in your kitchen, warm the milk in the microwave or over the stove to help meet the final dough temperature of 78°F (25°C). See my post on how to bake sourdough bread in the winter for tips on encouraging strong fermentation in colder temperatures. Conversely, if it’s starting to warm in your area, use the milk cold from the fridge and see my tips for baking bread in the summer.
First, cut the butter into ½-inch pats. Set them on a plate to warm to room temperature.
Put the honey and salt on top of the dough in autolyse and pour the water over it to help dissolve. Mix the dough on low speed until the salt and water are incorporated, then increase to medium speed and mix, stopping to scrape the sides of the bowl as needed, until the dough comes together and, while still shaggy, starts to cling to the dough hook, about 6 minutes.
Turn the mixer on low speed (STIR on a KitchenAid) and mix for 2 to 4 minutes until the dough gains more strength and begins to cling once again to the dough hook. Next, with the mixer running, add the room temperature butter, one pat at a time, waiting to add each pat until the previous one is fully absorbed. Adding all the butter will take 5 to 8 minutes. In the end, the dough will still be very soft, and it won’t altogether remove from the sides of the bowl. Transfer the dough to a bulk fermentation container and cover.
4. Bulk Fermentation 9:15 a.m. to 1:15 p.m. (4 hours)
At a warm room temperature, 74-76°F (23-24°C), bulk fermentation should take about 4 hours. If your kitchen is cooler, place your bulk container in a small home dough proofer, or extend the bulk fermentation time to give the dough more time to ferment. The dough is ready when it is smooth, puffy, and well-risen.
Give this dough three strengthening sets at 30-minute intervals. The first set starts 30 minutes after the start of bulk fermentation. Give the dough a series of stretches and folds for the first set. Wet your hands, grab one side, and stretch it up and over the dough to the other side. Next, rotate the bowl 180° and perform another stretch and fold (this forms a long rectangle in the bowl). Then, rotate the bowl 90° and do another stretch and fold. Finally, turn the bowl 180° and do one last stretch and fold. The dough should be neatly folded up in the bowl.
Set a timer for 30 minutes, and perform the remaining two sets at 30-minute intervals. Then let the dough rest, covered, for the remainder of bulk fermentation.
5. Divide and Preshape – 1:15 p.m.
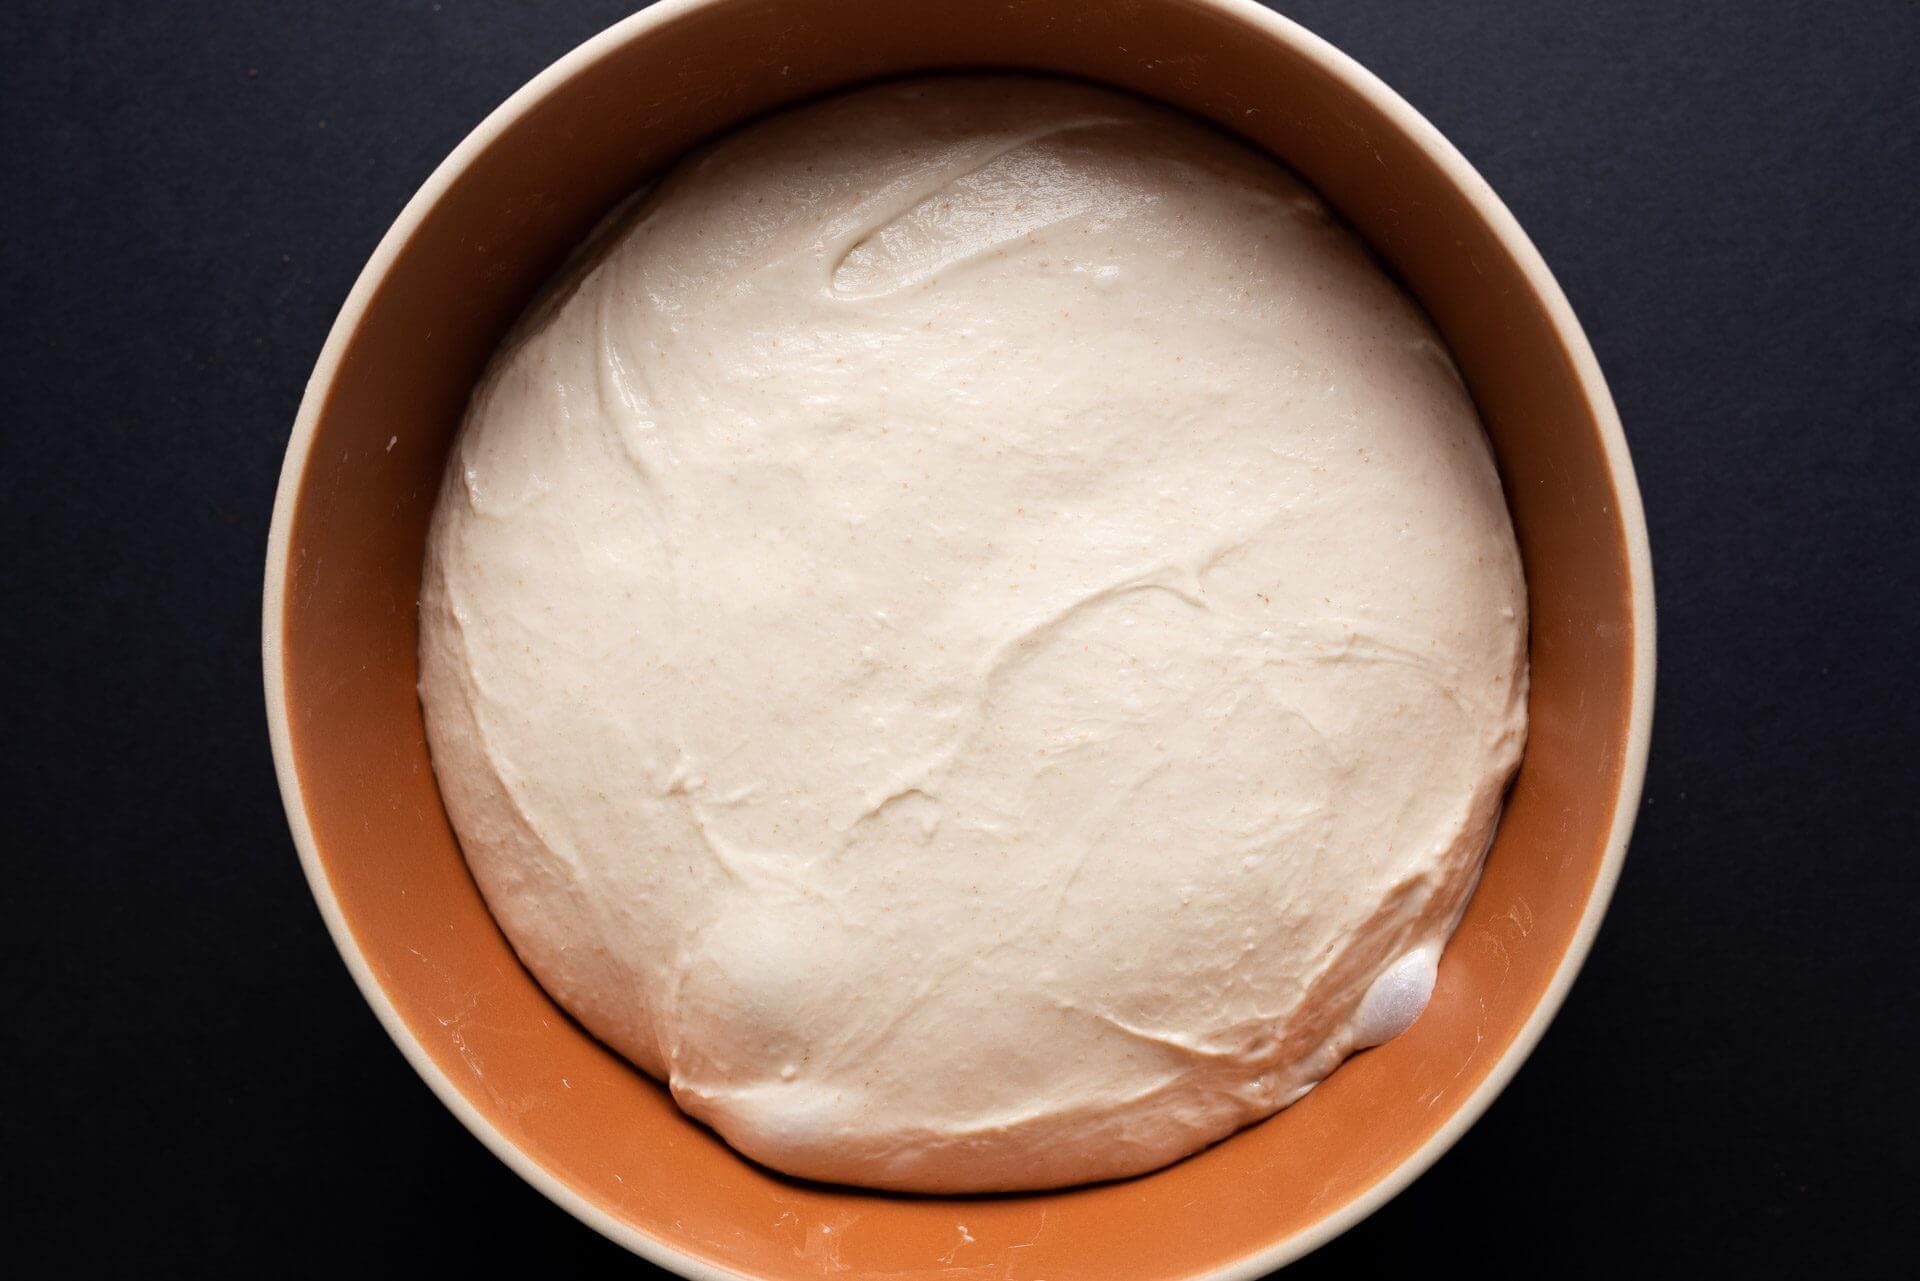
At the end of bulk fermentation, the dough will have risen in the bulk fermentation container (perhaps around 40% volume increase), be smooth and elastic, have bubbles on top, and a domed edge where the dough meets the bulk container. If the dough is not showing these signs, give it an additional 15 minutes and check again.
Fill a small bowl with water and place it next to your work surface. Scrape the dough onto a clean counter. Using a bench scraper in your dominant hand and the other hand wet, divide the dough in half. Then, preshape each piece of dough into a moderately tight round.
Let the dough rest, uncovered, for 30 minutes until it has relaxed and is ready to be shaped.
6. Shape – 1:45 p.m.
Grease two 9 x 4 x 4-inch Pullman pans with neutral oil.
I shaped these loaves as shown in my guide to shaping a pan loaf. Lightly flour the work surface and the top of a rested round. Using a bench knife, flip the round over onto the floured work surface. Fold the left and right sides of the dough toward the middle with a slight overlap. Then beginning at the side of the dough farthest from you, begin rolling the dough down to form a tight cylinder. Scoop the dough up with your bench knife and drop it into one of the prepared Pullman pans, seam side down. Repeat with the other piece of dough.
Cover the pans with a large, reusable plastic bag and seal.
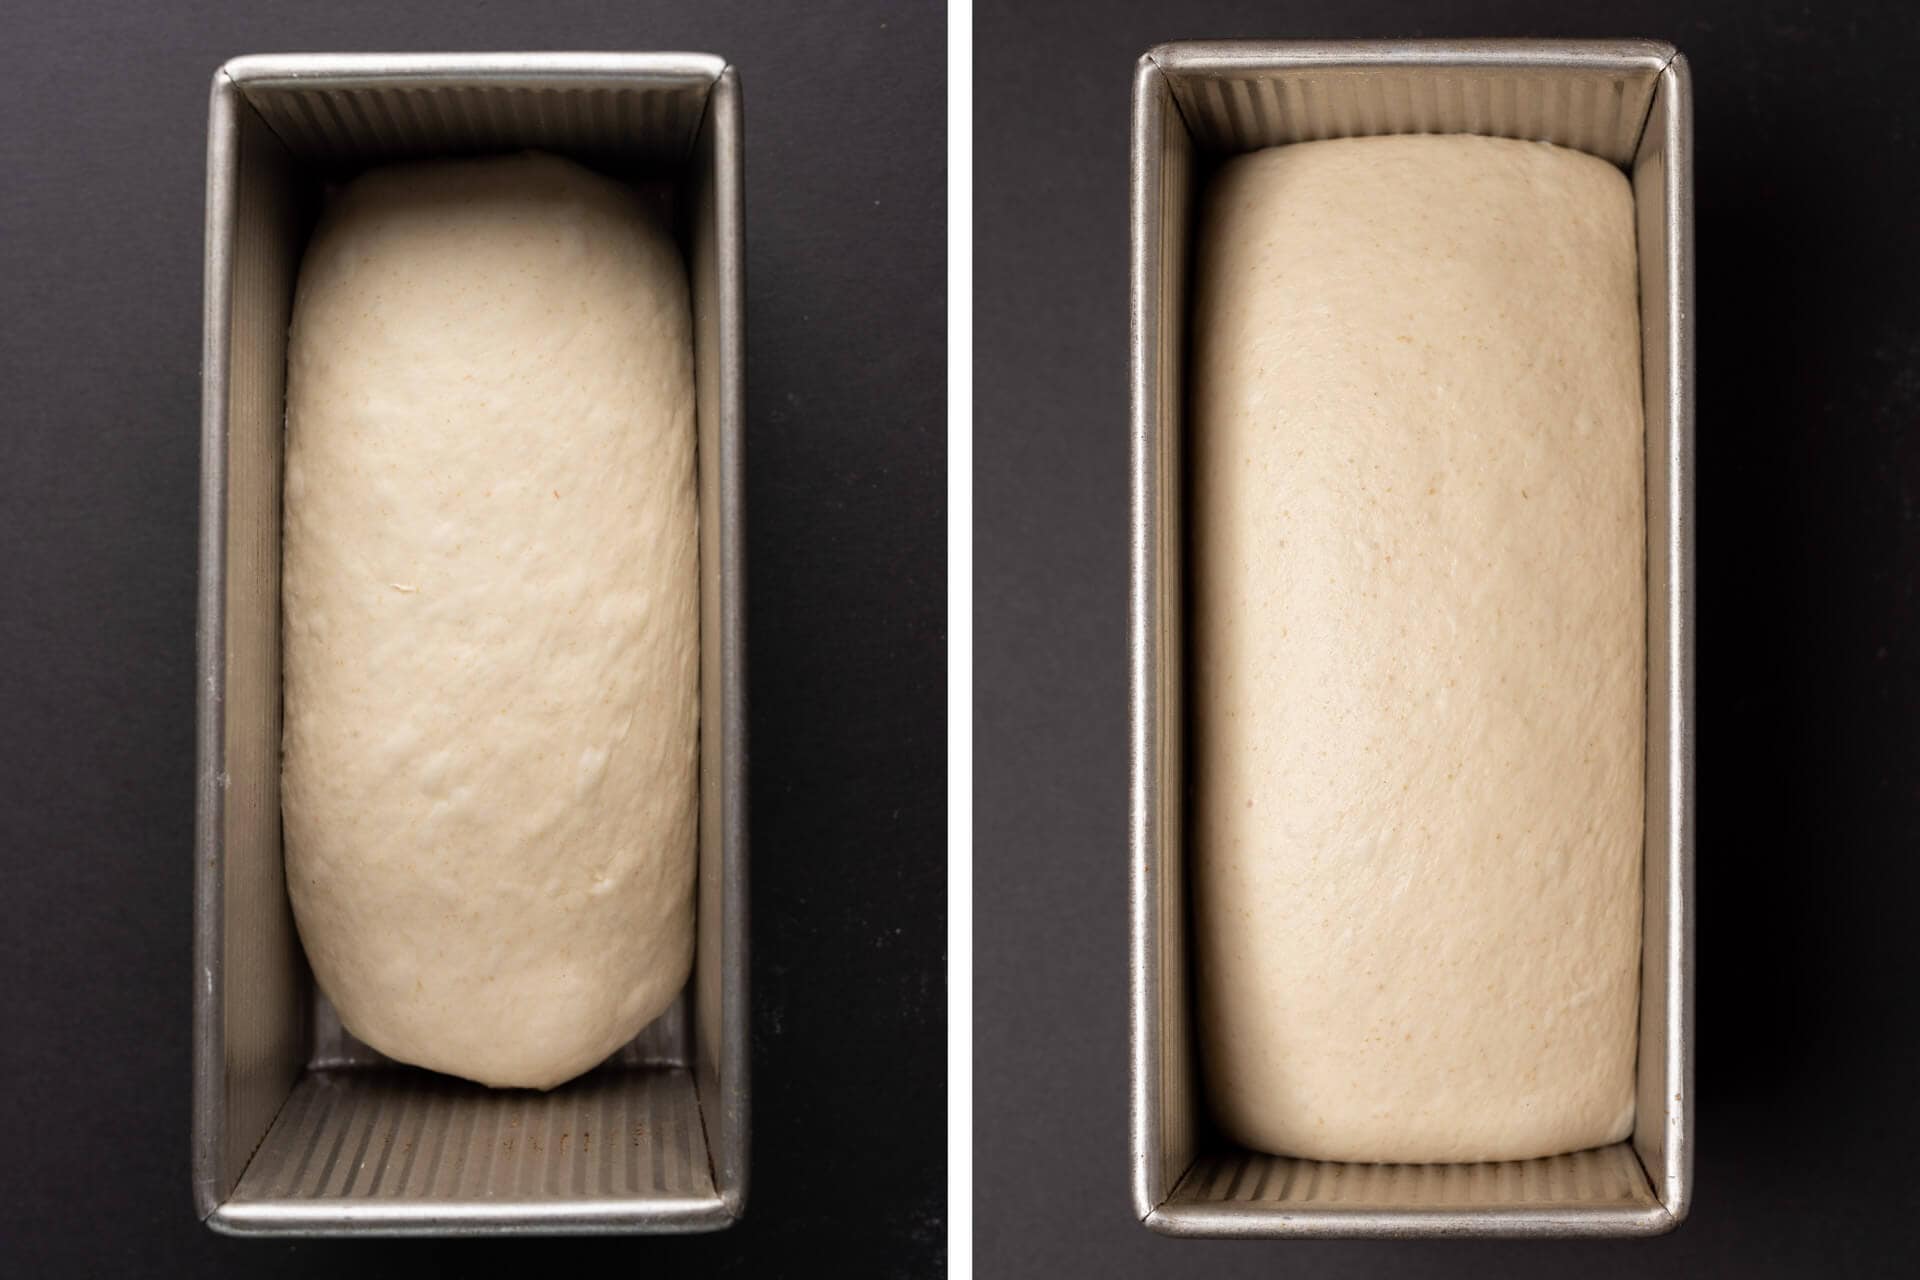
7. Proof – 2:00 p.m. to 4:45 p.m.
Be sure to give your dough the time it needs to fully proof; your dough might need more time if your kitchen is cold
At warm room temperature, 74-76°F (23-24°C), this dough should take 2 hours and 45 minutes to 3 hours to fully proof. If your kitchen is cooler, expect it to take longer.
When fully proofed, the dough should rise almost to the rim of the Pullman pan.
8. Bake – 4:45 p.m.
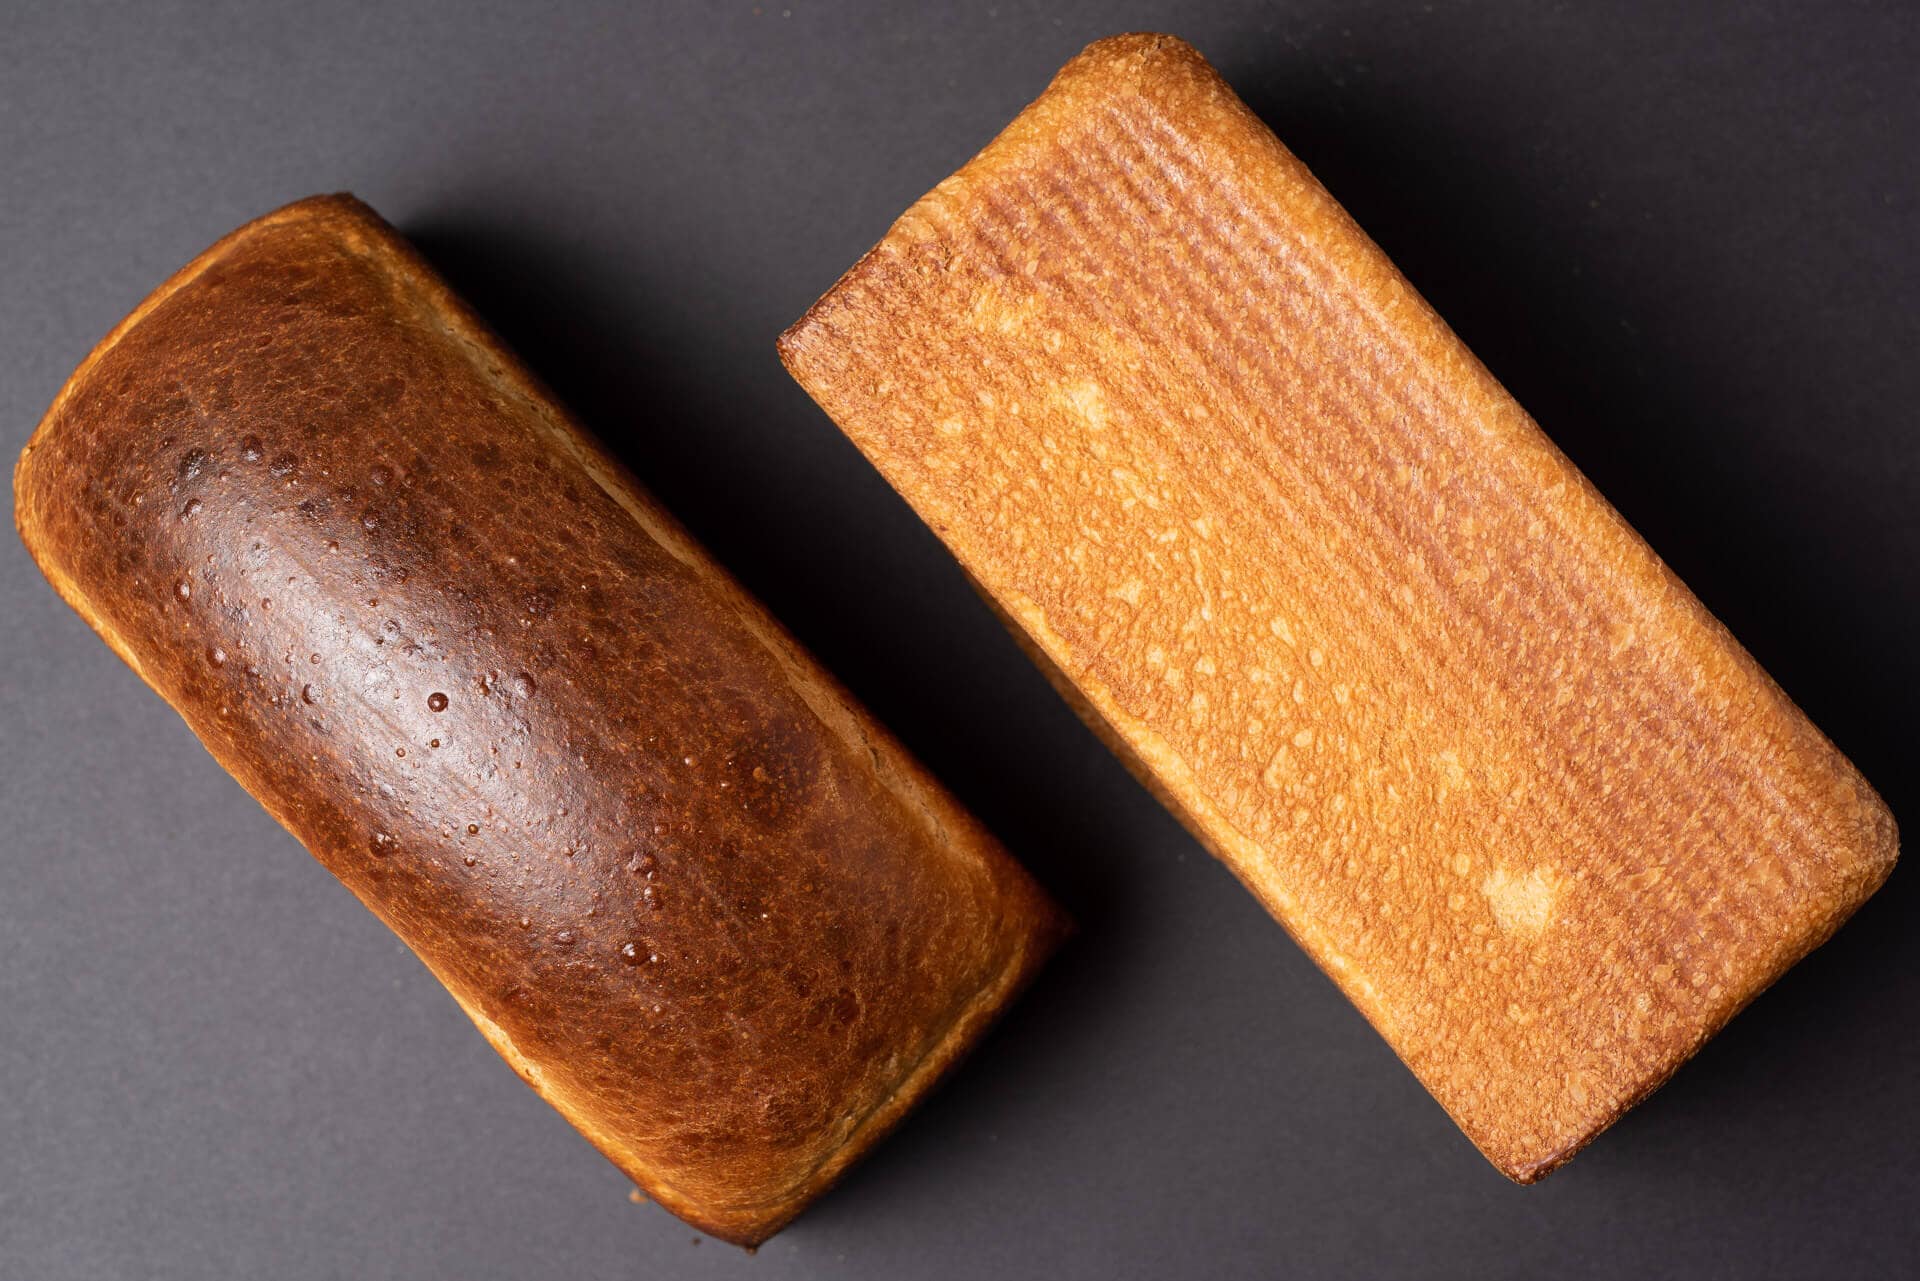
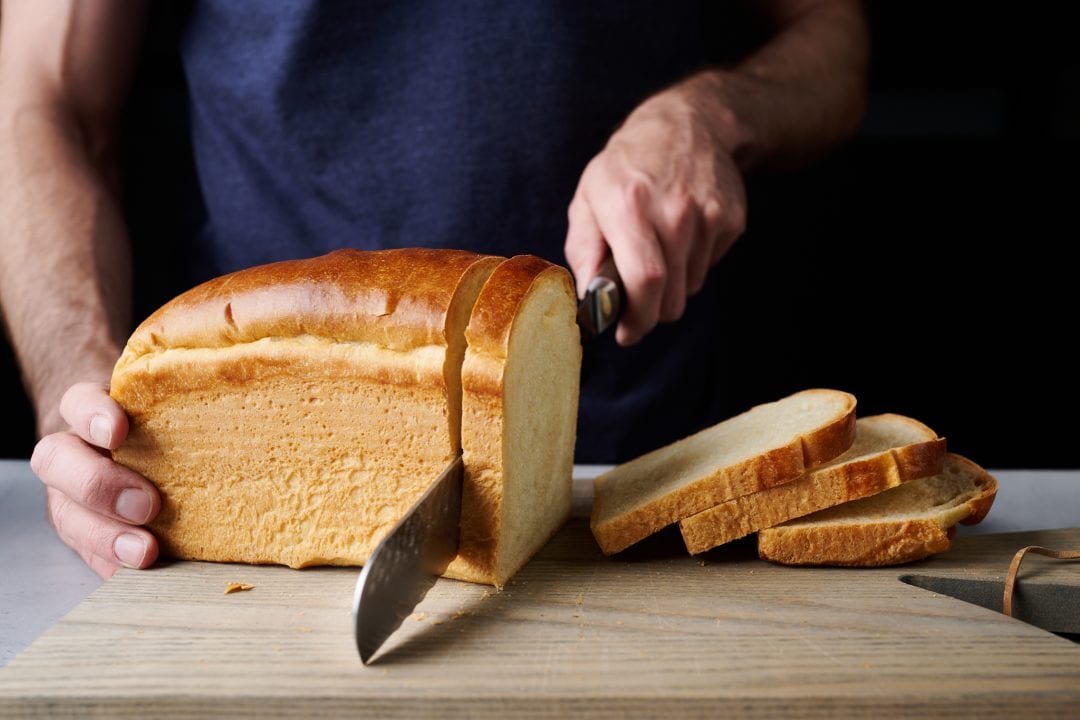
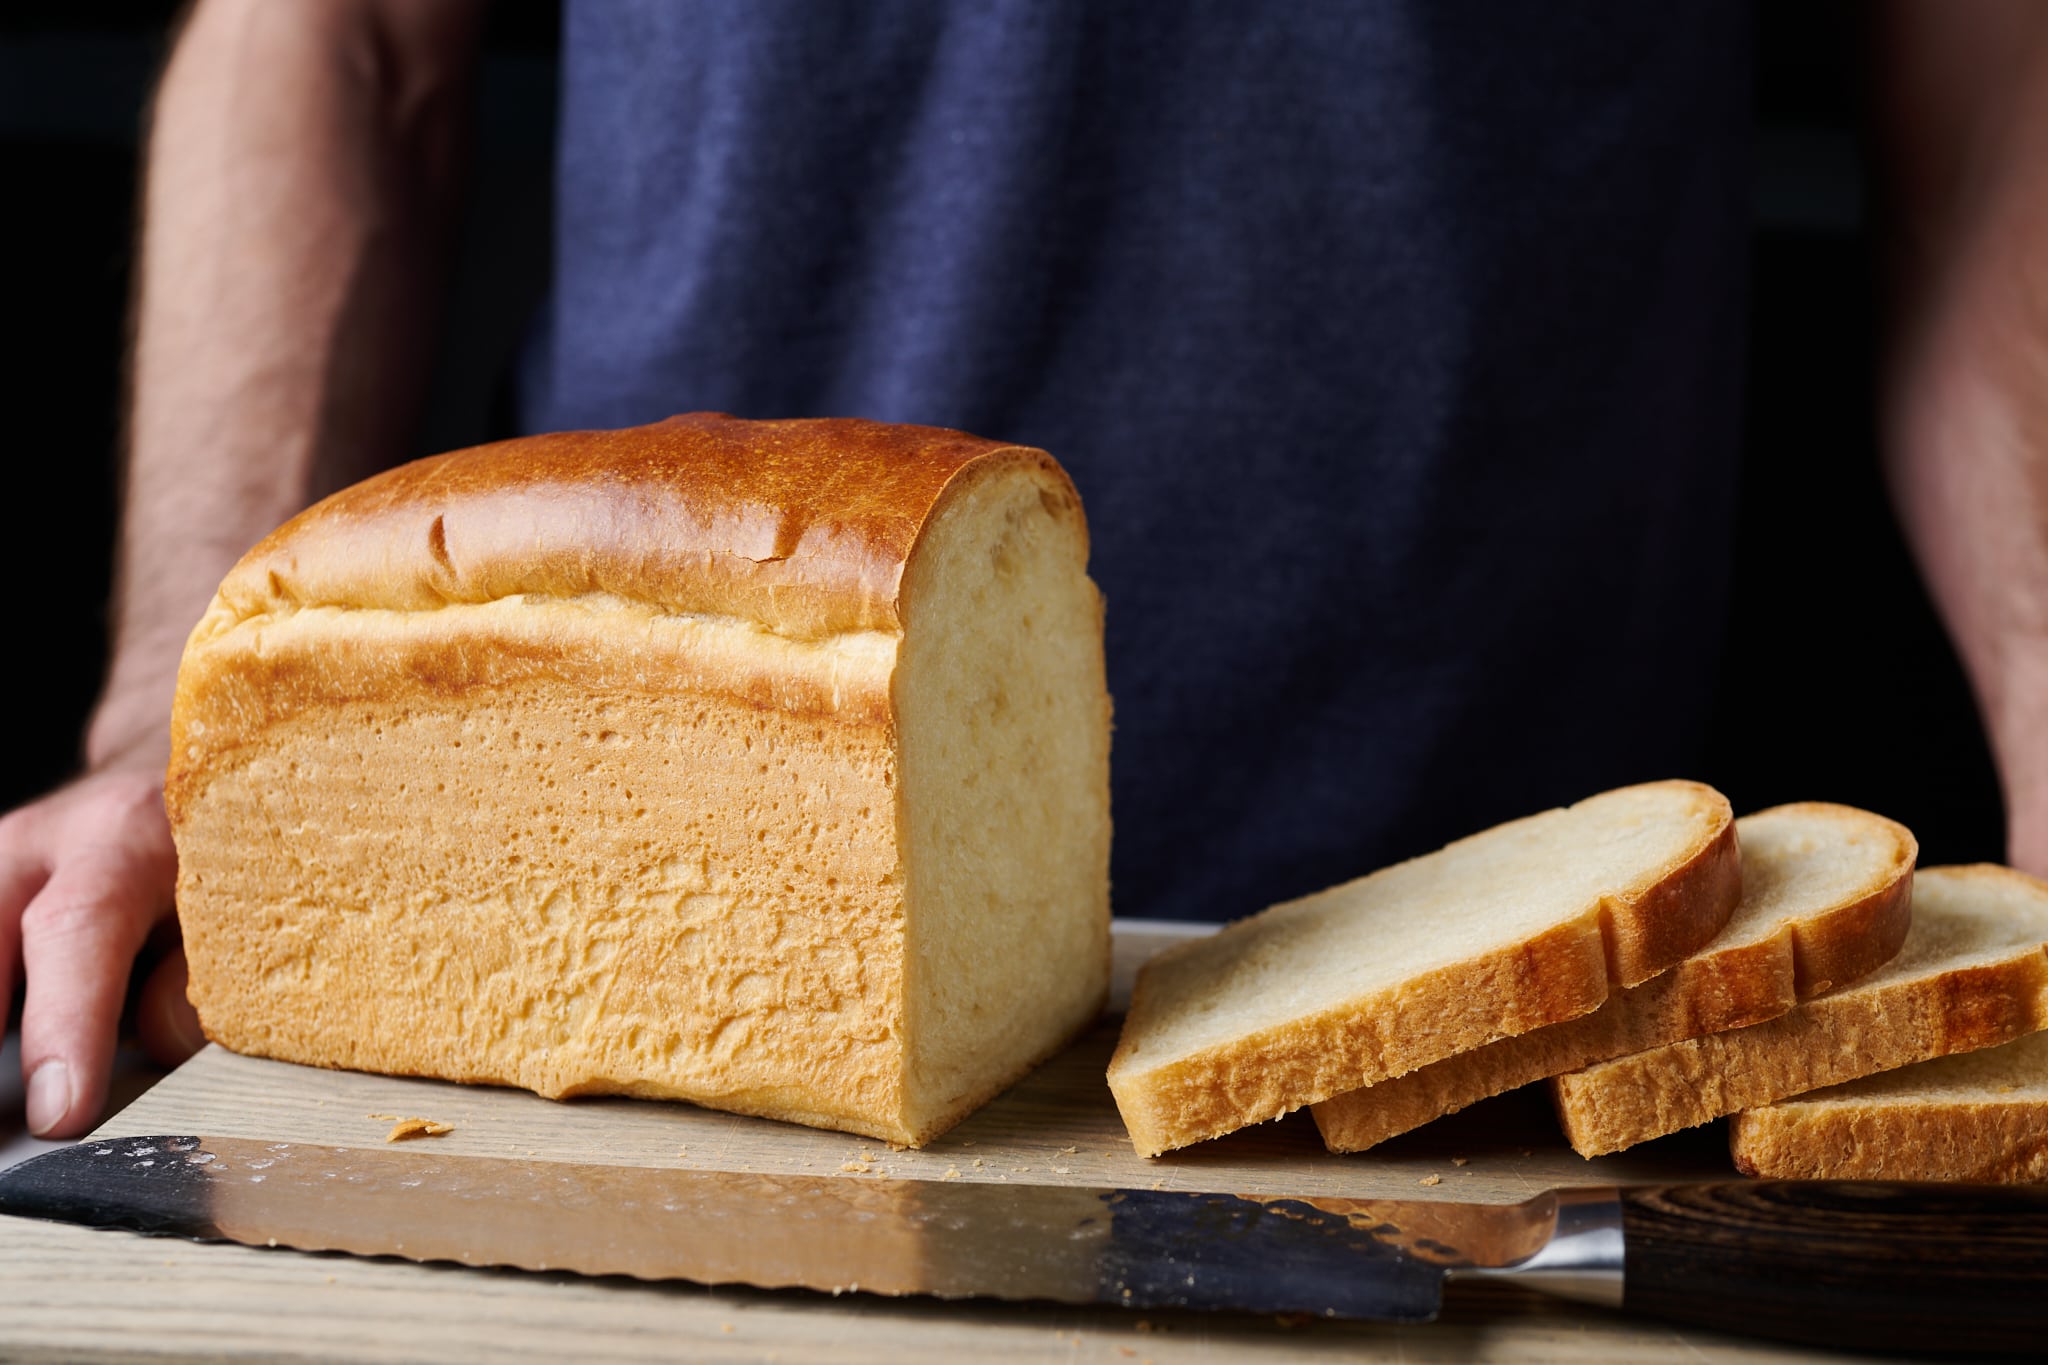
As you can see above, this loaf can take one of two different forms:
- On the left, I didn’t use the lid and the dough rose naturally in the oven. I brushed the top of the dough with a simple egg wash (about 1 teaspoon of whole milk whisked with one egg) before baking. See my guide to topping bread dough for more details.
- On the right, I slid on the snug lid of the pan before baking, and no egg wash was used.
Place an oven rack in the bottom-third of the oven, and preheat the oven to 425°F (220°C).
Place the pan into the oven and bake for 15 minutes. Reduce the oven temperature to 350°F (175°C) and bake for an additional 30 to 35 minutes. If using the lid, the crusts should be a light golden brown; if baking without the lid, the top crust will be a deep golden color. The loaves should have internal temperatures of around 200°F (93°C). If the temperature is lower, slide the covers back on (or not), return the pans to the oven, and bake 5 minutes longer. Then check the internal temperature again.
Remove the pans from the oven, uncover, and let the loaves rest in the pan for 10 minutes. Then, turn the loaves out onto a wire rack and let cool completely, 1 to 2 hours.
This sourdough pain de mie will stay soft and moist for up to a week if the bread is stored properly.
Print
Pain de Mie Sandwich Bread
- Prep Time: 20 hours
- Cook Time: 45 minutes
- Total Time: 20 hours 45 minutes
- Yield: 2 loaves
- Cuisine: American, French
Description
My sourdough pain de mie sandwich bread is pure white bread in all its glory–and it’s the toast lover’s best friend. Each slice is remarkably soft and light, with the thinnest possible crust, but when toasted, the slice crisps and frizzles in an absolutely ideal fashion.
Ingredients
Levain
- 71g white flour (medium-protein white flour or all-purpose flour)
- 71g water
- 7g ripe sourdough starter, 100% hydration
Autolyse
- 764g white flour (medium-protein white flour or all-purpose flour)
- 184g whole milk
- 305g water 1
- 149g ripe levain
Main Dough
- 100g unsalted butter
- 25g water 2
- 58g honey
- 15g fine sea salt
Instructions
- Levain – 9:00 p.m. (overnight)
Mix the levain ingredients in a jar and leave them covered at a warm temperature, 74-76°F (23-24°C), to ripen overnight. - Autolyse – 8:30 a.m.
Warm or cool the autolyse water (see page 138 on how to calculate) so the temperature of the mixed dough meets the DDT for this recipe. Place the flour, milk, water, and ripe levain in the bowl of a stand mixer fitted with the dough hook. Mix on low speed until just incorporated. Cover the bowl and let sit for 30 minutes. - Mix – 9:00 a.m.
Cut the butter into ½-inch pats. Set aside. To the bowl holding the autolyse dough, add the honey, salt, and water. Mix on low speed (STIR on a KitchenAid) for 2 to 3 minutes until the ingredients come together and no dry bits remain. Next, mix on medium speed (2 to 3 on a KitchenAid) for 4 to 5 minutes until the dough smooths and begins to cling slightly to the hook. Turn the mixer on low speed (STIR on a KitchenAid) and mix for 2 to 4 minutes until the dough gains more strength and begins to cling once again to the dough hook. Next, with the mixer running, add the room temperature butter, one pat at a time, waiting to add each pat until the previous one is fully absorbed. Adding all the butter will take 5 to 8 minutes. Transfer the dough to a bulk fermentation container and cover. - Bulk fermentation – 9:15 a.m. to 1:15 p.m. (4 hours)
At a warm room temperature, 74-76°F (23-24°C), bulk fermentation should take about 4 hours. Give the dough 3 sets of stretches and folds at 30-minute intervals where the first set is 30-minutes after bulk fermentation start. - Divide and preshape – 1:15 p.m.
Scrape the dough out of the bulk fermentation container, divide it directly in half, and preshape each half into a taut round. Let rest for 30 to 35 minutes. - Shape – 1:45 p.m.
Shape one round into a tight tube, and place in the pan seam side down. Repeat with the other piece of dough. Cover the pans with a large, reusable plastic bag and seal. - Proof – 2:00 p.m. to 4:45 p.m.
At warm room temperature, 74-76°F (23-24°C), this dough should take 2 hours and 45 minutes to fully proof. If your kitchen is cooler, expect it to take longer. - Bake – 4:45 p.m.
Place an oven rack in the bottom-third of the oven, and preheat the oven to 425°F (220°C).
Place the pan into the oven and bake for 15 minutes. Reduce the oven temperature to 350°F (175°C) and bake for an additional 30 to 35 minutes. The loaves should have internal temperatures of around 204°F (95°C). Remove the pans from the oven, uncover, and let the loaves rest in the pan for 10 minutes. Then, turn the loaves out onto a wire rack and let cool completely, 1 to 2 hours.
Notes
Use the Pullman pan lid for a thinner crust.
Pain de Mie FAQ
Why do Pullman loaf pans have lids?
The lids help ensure that the resulting loaf has the thinnest possible crust.
How do you unmold a loaf made in a Pullman pan?
If you’ve sufficiently greased your pan, the loaf should simply fall right out when you turn the loaf pan over and knock on the bottom. If the bread is stuck at any point on the sides, use a thin plastic spatula (to avoid scratching the pan) to help gently release the sides of the loaf from the pan.
Do I need to grease a Pullman tin?
If your tin does not have a nonstick liner, then yes, you should grease the interior with a neutral-flavored oil. Even if it has a nonstick liner, greasing the interior will ensure that the loaf will come out easily after baking.
Can I mix this dough by hand?
Yes, but adding in the butter can be challenging. I’d follow the same mixing procedure above but knead the dough using slap and fold or folds in the bowl.
Why is my loaf rising erratically and splitting at the top when it’s baked?
This can be a sign of under-proofed dough. Make sure you give the dough sufficient time in bulk fermentation and proof. If your kitchen is cool, your dough might need more fermentation time!
Can I use white sugar instead of honey?
Yes; in fact, that’s actually more traditional than my approach. I would say start with 5% sugar in the dough and adjust up/down to your liking. Note that high percentages of sugar can impede natural fermentation, so the dough might require more time in bulk fermentation and/or proof.
Can I proof this dough overnight in the fridge?
You certainly can, just know that the result might be a bit sourer than what I intended here. Fermentation will continue in the fridge overnight, even though dramatically reduced, and will likely lead to more of that signature tang that you get with natural leavening.
Can I halve this recipe and bake only one loaf?
Yes! Halve all the ingredients in the recipe above (as described in my guide to baker’s percentages) and proceed as indicated.
How much dough goes into a large Pullman loaf pan?
To bake this sourdough Pain de Mie in the large Pullman pan (13” long), I would scale the dough up to 1200g per loaf. When shaping, divide the dough into three equal-sized balls and shape them tightly. Then, place them into the pan side-by-side. Shaping the dough in this way will help prevent any sagging or collapsing while the loaf is baking.
Why are the sides of my Pain de Mie caving in?
Sinking or caving in at the sides can be from a few things. First, try decreasing the dough’s hydration to suit your flour better. I would leave out 20g of water or milk and see the result. Second, let the dough cool in the pan for 5 to 10 minutes before removing it to give it more time to set when it’s out of the oven. Finally, several bakers have reported that the loaf needed to be baked longer to ensure it’s fully baked through and set—try baking 5 to 10 minutes more.
What’s Next?
For a real treat, use this pain de mie, sliced thick with your favorite bread knife, as a base for French toast on the weekend—you won’t regret sacrificing some toast for this treat.
For another super-soft pan loaf, check out my sourdough shokupan (Japanese milk bread) which uses the tangzhong technique to bring even more tenderness to the crust and crumb.
Buon appetito!
Last updated March 13, 2025: The starter weight was incorrectly reported as 8g when it should have been 7g.


702 Comments
Hi Maurizio, so this is the second time I make this bread;
first time was terrible as i substituted some ingredients and it was pretty dense and very small. This time it was much better however it still didn’t rise enough to what I see yours does or many other people therefore was also slightly dense. I gave it plenty of time in bulk and proofing as I didn’t see signs of it being very active. Once shaped I still gave it plenty of time to rise but once baked it came out overproofed (big hole between the bread and the crust). I have realised that most of your recipes have very high hydration for where I live (UK) and I have started reducing it little by little and seem to be getting better results but I don’t know if that’s a big factor here too?
I’m wondering if the liquid in this recipe is too cold? It’s still not that warm here yet and my house is on the cool side always. Do you think I’d get a better result having the milk room temp?
Also about my starter, I have had to switch to feeding it only plain flour, I’d always fed it it’s some rye but it’s getting active way too early and i can’t be feeding it more than twice a day, do you recommend sticking to plain and rye but carrying less starter or making it a bit more dry.(I usually carry 10g starter, 20 water and 20 flour).
Here is a link to my bake, thanks!https://www.instagram.com/p/BycXm5bg38o/?igshid=dlyqswjcnckp
Hey, Myriam! Ah yes, I remember seeing your post on IG. Your pictures do look like classical over proofed dough, but it could also be over hydration as well (especially since you indicate this is sometimes and issue for you — most UK flour has much lower absorbency than US flour!).
You definitely want to try and hit the Final Dough Temperature I have listed above in the recipe. This might mean leaving the milk out to come up to room temp if that works for you. Alternatively you could warm the water to counter the cold ingredients (this is typically what I’ll do). Have a look at my post on the importance of dough temperature for more on this.
That’s ok if you don’t want to use rye flour in your starter, just be sure to give it a feeding when it starts to fall in the jar. If you need to adjust when it’s ready and mature, reduce the amount of starter you leave in the jar to slow it down, or conversely, leave more in the jar to speed it up. Play with the amounts a little each day and adjust as necessary.
My suggestion would be to reduce the hydration of this recipe by 5-10% (remove water), really try to hit the Final Dough Temperature I have listed in the recipe, and adjust everything as the dough requires: if it’s moving very slow because it’s extra cold, give it more time.
Let me know how it goes next time!
I made this recipe today and I see a lot of potential in it, but it didn’t turn out well for me.
The end result was the bread was physically flatter than I’d have expected it to be. I figure it was about 2″-3″ tall after baking. My first hint it wouldn’t rise much was during proofing when rise was minimal.
Also, the flavor was bland. It’s possible the honey would be missed if it wasn’t there, but I didn’t pick up the sweetness. Crumb was even but a little dense and spongy. In a way it reminded me visually of a heavier angel foodcake.
I can provide pictures if needed. Any ideas where I went wrong?
Hey, Kevin! Yes, pictures will definitely help. Send me an email through the Contact link above if you would, then I can take a look and see what’s going on. My feeling is it’s likely underproofed dough — based on the density, lack of rise, and even the lack of flavor. We’ll get it sorted, this is delicious bread!
Hi Maurizio,
Thanks for this great recipe! My loaves turned out almost perfect – am wondering if you can provide some guidance. My dough bulk fermented for 7 (!) hours at ~73-75F to achieve the smooth top/surface bubbles. I then followed everything else as per your instructions, including the 2hr45 final proof. The loaves came out looking great, but while cooling, the crusts deflated. The crumb generally looks good – except there are some holes at the top of the loaves where the crust domes. Would these be slightly overproofed? Would you decrease the bulk ferment and/or the final proof next time?
Thanks!!
Awesome, Meredith! Yes, based on that description it sounds like they might have over proofed on you: large bubbles at the top between the crust and interior usually indicate dough that’s proofed a bit too long (it can also be over hydration but in this case I’m guessing over proof). Your bread still will be wonderful, though! Just back off a bit on the bulk time, perhaps just 30m or so, and see if that helps. Enjoy!
Oh man. This is a delicious one! For bulk, I did 3 hours at 75ish. I then moved the dough to the basement where it’s in the mid 50s. Proofed and baked according to your instructions the next morning. It’s dangerously good, Maurizio. Nice one.
Perfect modifications, Jason! I haven’t tried a long proof in the 50’s, I love that idea. Thanks and enjoy!
Thank you so much for this post! I made this bread last weekend and it really is the perfect bread. My timing was similar to yours – bulk ferment was 4 hours, and only 2 hour proof. But I added my starter in at the beginning (I find this works best for me unless I’m doing a really long autolyse), and it was a fairly warm and humid day. The flavor of the bread was amazing. And the texture was soft but still could be sliced very thin. Made for great cucumber tea sandwiches. I’d been looking for just the right bread for those, and this is it!
That’s awesome, Francis! Sounds like your conditions and dough were just like mine — excellent. Enjoy and thank you for the feedback!
Maurizio,
Just wanted to let you know that thanks to your guidance, I have a good working starter.
I’ve made this recipe several times now and everyone I’ve given it to has raved about it. One even ate a whole loaf by herself in a day.
Just wish I had a stand mixer as doing this all by hand take some effort. But it allows me to practice my slap and fold.
The bulk fermentation takes much longer that your time line – 4-6 hours for sure. But I just let it go and it always turns out excellent!
Thanks!
Marshal
Right on, Marshal! Fantastic to hear your starter is up and running and this bread turned out so well for ya. Yes, a stand mixer definitely helps with recipes calling for butter, but it’s not 100% mandatory. Thanks so much for the feedback and happy baking!
Hello Maurizio,
I would like to do a vegan version of this. Can I leave out the milk and substitute with water? and the butter with olive oil?
Thanks,
Sarah
Not really. Butter helps give the dough its soft airiness. It’s similar to what happens with gluten and butter when making puff pastry. Using water instead of milk would also affect fat content and crumb. You might be able to use some kind of plant based milk, and some kind of solid fat. My suggestion is to head over to King Arthur Flour and see what they have over there – or even call the bakers hotline.
thanks!
I agree with @adrienneboswell:disqus’s comments below. Removing the butter/milk from this recipe will drastically change the nature of the bread. I know some have had success with coconut oil as a fat but I haven’t tried this myself. King Arthur might have some great suggestions here!
Thank you! will check them out.
I tried swapping 35% of whole wheat (300g), to great results. Still has great crumb and mouthfeel. How far have others pushed the whole wheat on this recipe?
That’s awesome, Sean! I have tried 20% whole grain einkorn and it worked out incredibly well. I do plan to keep going up and up with the whole grain percentage, I’ll keep you posted (and please do the same)!
Hi Maurizio, thankyou for this recipe. It is a beautiful and delicious bread. I have made it twice now and I love it.
I am wanting to make hot cross buns for easter and am wondering if I could use this dough with added fruit and spices to make my buns. I haven’t seen a recipe on your site so wondering if I could substitute this dough.
You’re very welcome! Glad to hear you’re liking it. Unfortunately I have very little experience in making hot cross buns. If the base is an enriched dough I’d say this would work well. Do note that my guess is those buns likely use white sugar instead of honey, so the flavor might be just a tad different, but still delicious, I’d say!
I’ve made this four times since you posted it (1/2 recipes) and haven’t had a loaf last more than 12 hours before it’s devoured. I keep telling my partner that I want to keep it overnight for French Toast, but he just can’t seem to stop eating it fresh. I have had to practically double the BF and proof times, but we keep the house in the low 60’s so it’s to be expected. Last time, I rolled the bread out and covered it with your cinnamon roll filling mixture, rolled it up, then wrangled it into the pan for its final rise. AMAZING. Thank you so much for this recipe and the thoughtful explanations behind your methods, it makes it really easy to customize and experiment with the loaf!
That’s a huge compliment, thank you! My kids (and admittedly, me) will go through an entire loaf the day it’s baked with no problem whatsoever — that’s why I make two 😀 Great idea using my cinnamon recipe, I need to try this ASAP!
Thanks for the update, Sienna, and happy baking!
After nailing my first effort with this recipe (delicious!!), I tried making dinner rolls with the same method. Simply divided into small-ish balls during the preshape, but otherwise followed exactly. Cook time was about 18 minutes at 425 and they turned out deliciously.
That’s excellent; nice job repurposing this dough for rolls! I’ve actually got this on my “to-bake” list soon — thanks for the details, I’ll try your bake temps and times 🙂 Enjoy!
Hi Maurizio,
Well – – what a wonderfully successful first attempt with your wonderful recipe!
I used an extremely cost-economical bread flour (a local supermarked brand that only costs 59p ( 75c for 3lbs!)), protein is 11.58% so is reasonable too.
I thought I’d make life difficult for myself – so didn’t start the process until early afternoon, and then had the final proofing overnight in the cool wheelhouse (about 36F that night). – And everything progressed perfectly, mixing was straightforward, I gave it 4 stretch and folds at 30 minute intervals until it felt right – but then allowed a much extended bulk fermentation (7 hours in total) for it was cool in our galley. It was obvious that was correct, for the dough felt delightfully billowy when I divided, then shaped.
Proofing was overnight in cling-film (Saran?) wrapped loaf tins, with just a perfect rise to ythe dough -and the baking the following morning was straightforward – though I did introduce a little steam to the bake.
The final result was perfect – a nicely risen loaf, thin deep golden crust and a well balanced aerated crumb.
And the flavour was just ‘perfect’
This will now be included in my collection of regular recipes, though the percentage of sourdough in my diet is rising alarmingly ! ( 🙂 )
Thank you.
Dave
Dave — thanks for the update and all the information regarding your bake. Great job adjusting bulk given your temps — sounds like many are adjusting similarly which is awesome to see. Happy to hear this is taking a spot in your regular recipe list, that means a lot!
In my opinion, eating more sourdough cannot be a bad thing 😀
Hi Maurizio, Thank you for the recipe. I made it twice but somehow just can’t get it right. Maybe it’s where I live (Malaysia), hot and humid. In both of my attempts, the dough turned into a very very thick pancake batter-like dough. During the autolyse step, the dough looked fine but as I added the honey the dough became extremely wet. Is it because of the honey? Maybe I should reduce the water amount? The first try I followed the steps accordingly, except when I got frustrated and just threw it into the fridge for bulk ferment (and then shaped them into buns). This batch was too sour. Probably due to the overnight rest. but overall I thought the failure was due to the flour I used (my a.p flour was quite low in protein content). So I used bread flour in my next attempt. The second batch looked fine at first, but I couldn’t get the gluten to strengthen up (which made me really confused and frustrated). It was the same from the start til the end. Maybe it was too wet to even get some strength. I baked them anyway and just poured the batter into loaf pans (it was that bad, I couldnt even shape the dough). Tasted the bread this morning, the taste was good buuuut, the texture was extremely off. Like overmixed cake batter. Gummy. Maybe it was because I overworked the dough? Or did I underwork it? Oh well, thanks so much for the recipe. I just needed to tell my experience somewhere. I will try it again someday when I get better at making bread! 🙂
Yes, sounds like the dough was way over hydrated, likely due to your humid environment (I live in the desert!). I’d reduce the water 10% and see how it goes. When you’re mixing, if the dough feels runny, soupy, and just doesn’t want to come together, add a bit of flour into the mix to dry it up a bit. Alternatively, hold back water from the mix and add it in slowly throughout mixing if it looks like the dough can take more (this is how I do things).
Let me know how it goes next time, sorry to hear it didn’t turn out well!
Hi Maurizio, Thank you so much for posting this recipe. I have been using your basic sourdough recipe for the past year with amazing success. I tried the Pain de Mie recipe this weekend for the first time. While the taste and texture of the bread was perfect, my bread didn’t rise all the way up in the Pullman covered pan (9x4x4). It only rose about half way up the sides of the pan and a domed top. Do you know what I can do to get that perfect square shape. Do you think increasing the total weight of the dough would work or perhaps increasing the amount/weight of the levain? I appreciate any help you can give me! again thank you so much! Nadia
It’s hard to say why there wasn’t as much rise, it might have also been that the loaf was over proofed and rose up but they collapsed — however, I have a hard time believing that was the issue as this bread is a bit slow to ferment and if you stayed somewhat close to my timeline it’s very likely it did not over proof. I’d say try increasing the total dough weight like you said until things work just right in your pan. Be careful not to increase it too drastically each test, though, as when I first started working on this recipe my pan filled so much it leaked out the side 🙂 Not a huge problem, just a bit funny. Speaking of which, be sure to put a baking sheet under your pan in case it does rise out the sides!
Hope that helps and happy baking, Nadia!
I made this last weekend and it was perfect! I would like to attempt it as a potato bread as it seems a wonderful consistency and texture for potatoes. If you have any suggestions, I will take them. Otherwise, I will just do an experiment. Thank you so much for this blog!
Awesome, super great to hear that, Melanie! Potatoes might be really nice in this bread. You could try to combine my previous potato sourdough recipe with this one and see how it goes. I’d probably start at a low-ish percentage of potato and work up to your preference. Let me know how it goes!
As indicated in the post, let the dough rest after the last set of stretch and folds until it’s ready to be divided. The times are listed at each step as well.
Yes, that full and sufficient proof is critical for this (and just about all) bread! Great tests you’ve got going on there, I like the idea of popping it into the oven while waiting for it to heat. I wonder if a little piece of parchment paper at the sides of the pan would also help reduce that cracking as well. Regardless, awesome work!
Use an instant read thermometer to check the bread temperature near the end of baking, if it’s not at or above 208°F keep baking until it gets there. If you change the pan in which it’s baked you’ll likely have to adjust the baking times I have listed in the recipe.
I did three, but do as many (or few) as necessary.
Maurizio, I made this yesterday. It turned out great! It did take a lot longer to see rise in bulk fermentation. It took 3 additional hours. My kitchen was not extraordinarily cool. There is some question in my mind as to whether or not I added salt. The final product seemed like it could use more salt, but the taste was still good. If I had not added salt, would this cause the proof to take longer? I am excited about this bread recipe! Thank you.
Three hours is quite a long time, but I’m really happy to hear you gave the dough the time it needed! Even a few degrees cooler than my listed final dough temp can drastically affect the bulk/proof times. I’m also hearing from other readers their dough did take longer to fully proof than mine listed here, I’m starting to think a slight increase in levain percentage might alleviate these issues for many (perhaps an increase of just 2.5% will help).
If you didn’t add salt you’d definitely be able to tell in the end: the bread will taste incredibly bland. Additionally, if you didn’t add salt fermentation activity actually would increase as salt acts as a fermentation inhibitor. In other words, without salt there would be no tempering agent to control fermentation and bring it into a consistent and manageable rate — you would have had dough that fermented much faster than what you saw!
I hope this helps. Let me know how the next bake goes!
Hi Maurizio. Great blog, fantastic information, thank you so much for sharing your knowledge.
I have a question about the Pain de mie recipe. I tried making this today and I was immediately unsuccessful. When I tried to mix the flour, whole milk, and water in my large KitchenAid stand mixer with the paddle the dough became so thick and dense that the mixer almost seized a couple of times. This happened very quickly, before all the ingredients were incorporated. I let it sit for 30 minutes and then added the levain, salt and the reserved 25g water.
When I tried mixing the dough it immediately stuck to the paddle and so it simply spun around instead of actually mixing. When I tried pulling the dough from the paddle it was like glue, incredibly strong with zero give. I tried adding the butter at this point but absolutely none of it was being incorporated into the dough and I ended up throwing it out.
I’m going to try again next week but I thought I would reach out to you to see if maybe you think I did something wrong. Maybe I added the liquids to the flour too quick? The only deviation I made was that I substituted around 50 gm of whole milk with half & half because I ran out of milk. I was extra careful to measure out all the ingredients properly but who knows, maybe I made an error somewhere…
Thanks for the kind words, David! I wonder if the half and half, which I believe has a higher fat content, stiffened things up — regardless, it sounds like your dough definitely needed a higher hydration. Next time, if the dough feels far too stiff, add in a splash of water, a little at a time, until the dough mixes a bit easier. Be cautious here, though, don’t add too much at any single time otherwise you might over hydrate the dough.
Another thing you can do is actually add in the levain to the autolyse. Because there’s a significant amount of water in the levain it might help things come together in the beginning. Just move the levain to the first mixing step with the water, milk, and flour (don’t add salt, honey, or butter at this point). Then, autolyse for 30 minutes and continue with the recipe/steps. If the dough still feels very stiff, switch to the dough hook attachment (you can do this at any time, actually), and add a splash of water here and there as mixing continues.
I hope that helps, let me know how it goes next time!
I definitely will, thanks for the advice!
Fantastic. This is a keeper. Cant wait to make my PB&J with it for lunch tomorrow. Came out perfectly. As usual, I find that in my house I need about 20-25% more starter than your recipes call for. Even then, bulk and proof a tad longer at 78 degrees. I used covered pullman pans, Sadly I don’t see how to add a photo, They are beautiful. I did use about 50% of the honey. Seemed like a lot to me. Made incredible french toast. Now I want to figure out how to use einkorn for this. I am afraid that the machine mixing to add the butter will break down the einkorn. Any thoughts?
Right on, Wouter! I’m really happy to hear you made the mods needed for this to work for you in your kitchen. It does sound like many have had sluggish dough with the amount of levain listed. I’d say einkorn would work really well for this recipe, but I would replace the white flour here with einkorn in stages over the course of a few bakes to see how it adjusts. For example, start with 80% wheat flour and 20% einkorn. If things bake up nicely keep increasing that 20% until you get to where you want. But yes, einkorn would be wonderful with this bread!
Ah the beauty of this bread! It is everything I have been chasing in a loaf like this. It’s not my son just eating grilled cheese regularly now. After autolyse, I definitely have to switch to the dough hook with my KA, and I have found it easier to just squish the levain/starter, salt and bit of water with my hands to help get it started incorporating and then back to the KA with the hook. And for whatever reason, Seymour (my starter) is very active but my bulk fermentation is a few hours longer than yours. My second batch is baking now. Both times, I get to 20 minutes at 425 F and have to drop to 375 F for another 10 minutes only so they don’t get too dark but are baked through. It’s a significant time difference at temps. I’ve also been misting the tops of the loaves with water just before baking and put a few ice cubes in the bottom of the oven at the beginning of the bake instead of egg wash. That shouldn’t really cause that significant a difference in browning that early on, should it? The only thing I hate? Waiting 2 hrs to slice it! Bravo!
Amy thanks so much for the notes and the feedback! I’m really happy to hear the bread turned out great and that you’ve adjusted as necessary. It does sound like this dough is sluggish for others — I’ve added a few notes in the post to indicate this. Also, nice work switching to the dough hook, I’ve done this as well when the dough strengthened up quicker than expected (the paddle isn’t as effective with stiff dough).
You likely won’t get the same browning on top without the egg wash but that’s totally fine — there’s enough butter in the dough to help with that in addition to steaming!
Yes, the wait is brutal, especially with that incredible smell permeating the kitchen… I cut one of these too early in a moment of weakness and it just didn’t taste right until it had fully cooled.
Thanks again Amy and enjoy!
Hi Maurizio, I just got done making this loaf (it tastes amazing) but it came out shorter than yours and not tall enough for sandwiches. Any tips on what I can do to fix this? Do I let it proof longer?
Right on, Mark! If you used the same sized pan as I did in the recipe, it might be that your dough was either very under proofed or over proofed. It’s hard to say without photos and more details but a lack of rise is either lack of strength in your starter/levain or over proofed dough. There are a few indicators your dough could be going over: sluggish rise in the oven, the score on top of the dough might not open with a nice “ear” and instead just kind of fuse together, the interior will have lots of small holes and perhaps one or two large ones near the top (but no dense areas of unfermented flour), and finally the loaf could be a little on the sour side.
If you do feel it was over proofed, cut back on that final proof time a bit and see if that helps with rise. If it does help, keep cutting back with each subsequent bake until you get it just right.
Also, if this happens again feel free to take some photos and email them over to me via the Contact link up top and I can try to help further!
Yes, of course!
I absolutely love your recipes and am looking forward to trying this one!
Do you have tips for using a mixer for dough? I’ve searched your website and do see any tips for mixing dough in a mixer. Other than your cinnamon rolls, I usually mix by hand but would love to use my mixer more often.
Thank you!
Thank you, Conni! This recipe actually does employ a mixer, as do most of my enriched dough recipes (bomboloni, brioche, etc). I’m not sure what mixer you have but I don’t find typical KitchenAid mixers to be very efficient at mixing/kneading traditional bread doughs, but they’re great for enriched doughs and even pizza (for pizza I mix a bit in the mixer to make things easy, then finish strengthening by hand). The process is similar between mixing with a mixer and by hand, though: you want to build enough strength at that time to complement the number of stretch and folds you plan to do during bulk fermentation. In other words, if you want to only do, say, 2 sets of stretch and folds, mix longer than you would if you planed to do 5 sets. The other way to look at it, and the approach I usually take, is to use my mixer to strengthen the dough just enough to where 2 sets of stretch and folds during bulk is sufficient to finish strengthening the dough before preshaping.
I hope that helps!
Yes, that does help. Thank you!!