
After the past few weeks, I’m not sure I want to move ever again. Throughout the last year as our new house has been under construction, we’ve been steadily reducing anything superfluous around the house. My wife and I don’t have much “fluff” to start with (we try only to buy what we need), and yet, this move (just across town mind you) has been a sprint from start to finish. We had only a few weeks to fix all the small issues found by the inspector, prepare all the paperwork required, pack up our belongings, and finally do the last cleaning. Toss on a graduation trip one of the weekends plus visiting family, and that leaves only a smidgen of time to get all this done. But as is always true with me when it comes to baking, making this oat porridge sourdough bread was a priority.
We finally finished packing the track to the brim; furniture on top of furniture, kitchen stuff on top of bedroom stuff, clothes on top of everything else, but one sure thing was my starter acted as a co-pilot up front in the moving truck where I could keep a close eye on it.

Somehow we pulled it off and are now in a temporary abode until our home is finished hopefully only a few more weeks. Baking for the rest of the month is going to be tough, but it’s going to make moving into a home with a double oven that much better. I cannot wait to double my bread baking experiments.
Now that the moving gripes are out of the way let’s get started with this entry. I’ve been working on it for quite a while now through several attempts, failures, and successes. Let’s talk about oats.
My wife typically gives me dirty looks when she catches me finishing off the household’s supply of rolled oats before she can even get a few days of breakfasts in (since writing this I’ve started to stock these oats in bulk so we always have supply). I eat them just about every morning for breakfast with cut fresh fruit, pecans/walnuts/almonds, honey and either currants or raisins. It’s one of the only things I can eat in the morning that keeps me completely full until lunch. Given my high activity level (running, gym, dog walking, hiking, etc.) I almost always wake up ravenous, and oats do the trick.
A while back when I was flipping through Tartine No. 3, I stumbled on their oat porridge recipe and immediately read it with unwavering attention. So let me get this straight, oat porridge, my favorite breakfast concoction, cooked into a loaf of my already favorite sourdough recipe? I tell you I was ready to grab the package of oats from the cabinet and get baking straight away.
Despite my fervor for cooking this loaf, I’ve been hesitant to share my progress on until I finally tinkered and tested enough to discover some insight, with a bit of luck here and there, and a process that will deliver worthy results. Now that I’m happy with the outcome, and I’ve consistently made some exceptional tasting loaves, it’s time for me to share my findings with you.
Your first attempt at this bread might be more challenging than previous the recipes I’ve written in the past. I have never made a porridge bread before this, and I wasn’t sure what to expect, but really, what could be so hard about folding in some cooked oats? I’ve added all kinds of ingredients (walnuts, olives, sesame seeds, stout beer, etc.) and had smashing results so this shouldn’t be any different… Well, it turns out those cooked oats come with a lot of surprises. First and foremost, cooked oats do hold on to a lot of water, so you have to take that into account when hydrating your dough.
Additionally, the simple act of cooking oats pushes them into releasing much of their starches which in turn makes them very, very sticky (ever noticed if you leave your morning oatmeal in the bowl the oats stick to the bowl like glue?). Not only these two things but since they are sticky and hold together tightly after they are cooked, they can be quite difficult to properly mix through your fermenting dough without destroying the gluten network built up during bulk fermentation. Don’t worry though; we’ll work through each of these issues in turn.
Aside from all the doom and gloom, this is one incredibly moist, tender, light and tasty loaf. Once you get the hang of dealing with the porridge and the effect it has on your dough, you’ll be hooked on the results. This bread is one that’ll cause people to line up outside your door in the rain, hoping to get a loaf.
I’ve received a few comments and emails asking for me to show you a few of my “failed attempts” and the process from beginning to end, not just the final results. For this oat porridge bread, I chronicled each attempt, the results, and any notes and lessons learned. The method and ingredients directly below represent my best effort thus far, and the entries afterward show those that didn’t quite hit the mark. If you’re interested, read on as they might provide some added insight for those struggling with this tricky recipe.
Prepare the levain – 6:30 a.m.
The levain used for this bread is the same young levain I described in my last post. Start this in the morning when you wake, and it’ll be ready in around 5-6 hours.
| Weight | Ingredient |
|---|---|
| 18g | Ripe starter |
| 35g | Whole wheat flour (King Arthur whole wheat flour) |
| 35g | White bread flour, ~13% protein (Sangre de Cristo, a local high protein flour) |
| 70g | Water |
I try to keep the levain somewhere warm in the kitchen, at around 78°F (25°C). One handy little trick rick I’ll use if my house is still a tad on the cool side, especially in the early morning, is to put the levain in the oven and turn the interior light on until it warms up slightly (not the actual oven!). This setup provides a fairly sealed environment where the levain can do its thing for about 5 hours. If you’d like even more control, a home dough proofer is a way to go.
When your levain build is ready for use after its ~ 5-hour rest, first cook your oat porridge.
Oat porridge – 11:30 a.m.:
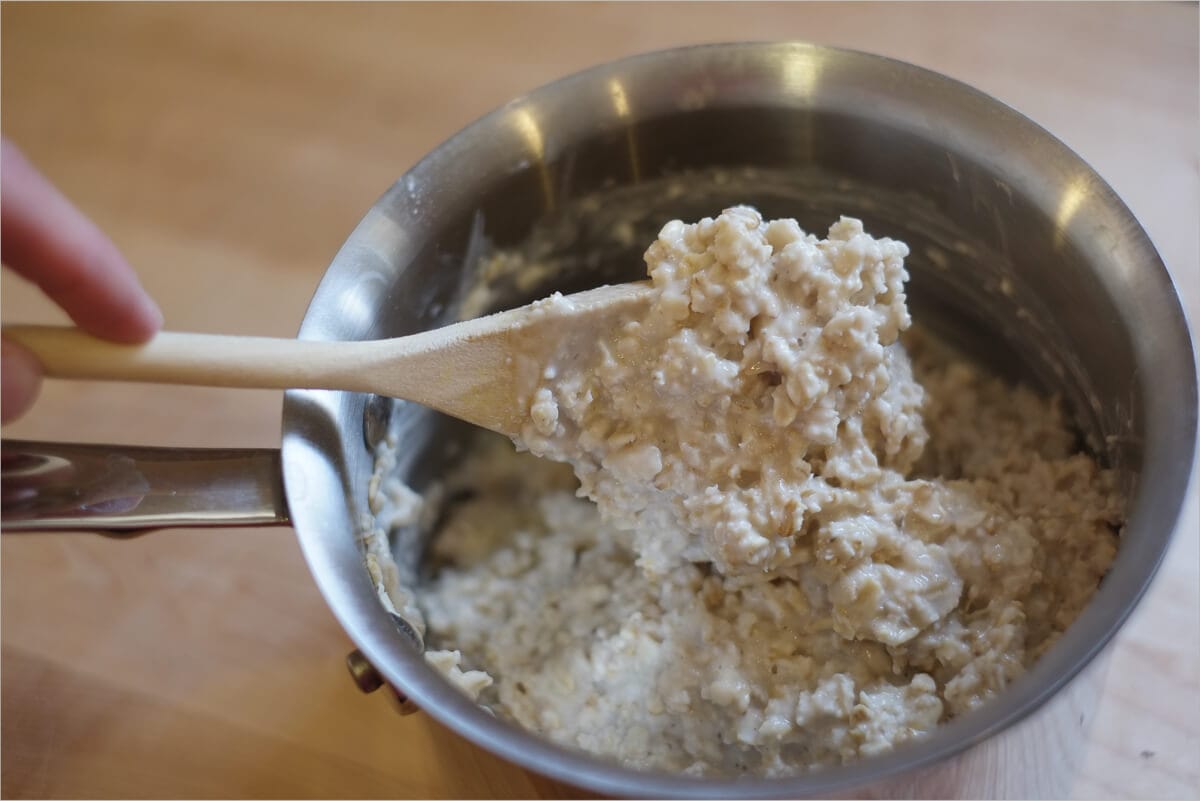
I cooked the following in a covered saucepan over the lower end of medium-low heat for about 16 minutes. You want the porridge to be creamy and ever so slightly on the liquid side. Don’t cook for too long or at too high a high a heat or the porridge will dry out and become very stiff. I’ve found that cooking this porridge requires a bit of trial and error; each person has a different idea of what “porridge” means and typically for me, it’s more on the dry side. When I made the porridge for this bread at a lower heat and only for 16 minutes, it was creamy with a whitish color that was easy to later fold and incorporate into the dough.
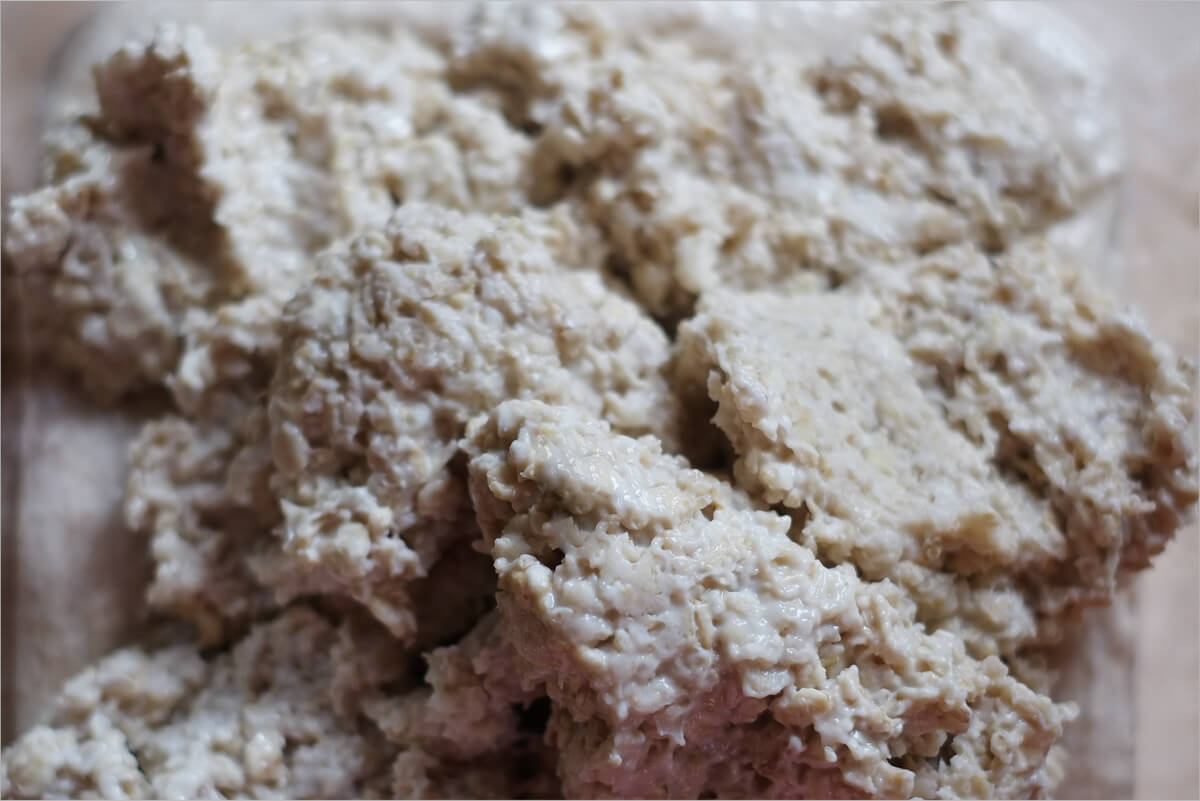
After this cooking time, I scooped out the porridge onto a baking sheet and covered with aluminum foil to cool but not dry out.
| Weight | Ingredient |
|---|---|
| 500g | Water |
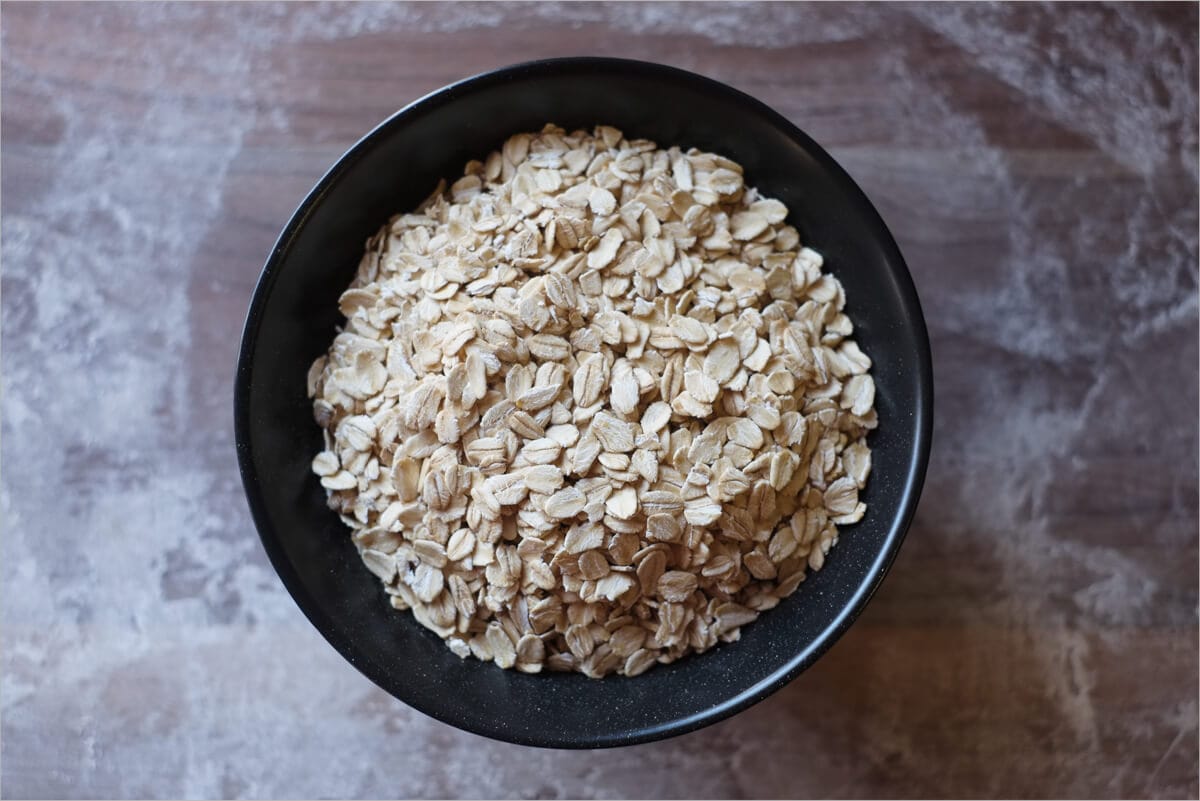
| 250g | Bob’s Red Mill old fashioned regular rolled oats |
| A Pinch | Fine sea salt |
You’ll want to cook this far enough in advance to ensure it cools sufficiently before mixing into your dough right before the first set of stretch and folds during bulk fermentation. You don’t want to mix warm/hot oats into your dough; fermentation will pick up at a rapid pace I have nightmares about dough like this. I cook the porridge right before I start the 1 hour autolyse to give it much needed cooling time.
Now that the porridge is cooked and cooling let’s start our 1 hour autolyse.
Pseudo-autolyse & Mix – 11:30 a.m.
For this bread, I’ve found the best results with a 1 hour autolyse, which increases the extensibility of the dough. This leads to a more relaxed dough to help incorporate the oat porridge later in bulk fermentation.
I label this a “pseudo-autolyse” because it does include my preferment (levain), which isn’t typically added to an autolyse. For this mix, it makes sense for me to add my levain to the autolyse because the dough is rather stiff due to the lower hydration. Adding the levain, and all of its water, is necessary so I can effectively mix the dough.
Gather the following:
| Weight | Ingredient | Baker’s Percentage |
|---|---|---|
| 700g | White bread flour, ~13% protein (Sangre de Cristo, a local high protein flour) | 70% |
| 300g | Whole wheat flour (King Arthur Flour Whole Wheat flour) | 30% |
| 750g | Water | 75% |
| 150g | Ripe levain | 15% |
Then:
- In a thick bowl add in your 150g levain
- Add 700g of your total water to your mixing bowl and mix with your hand until the levain is wholly dissolved
- Add in your white and whole wheat flours
- Mix by hand until all the dry ingredients are incorporated
- Cover with wrap and keep covered in a warmish place in your kitchen at around 78°F (25°C) for 1 hour
After your one hour pseudo-autolyse, add to your mass:
- 25g sea salt
- 25g of the remaining water
Cut the salt through your dough with your hand and mix everything until it comes back together and becomes sticky.
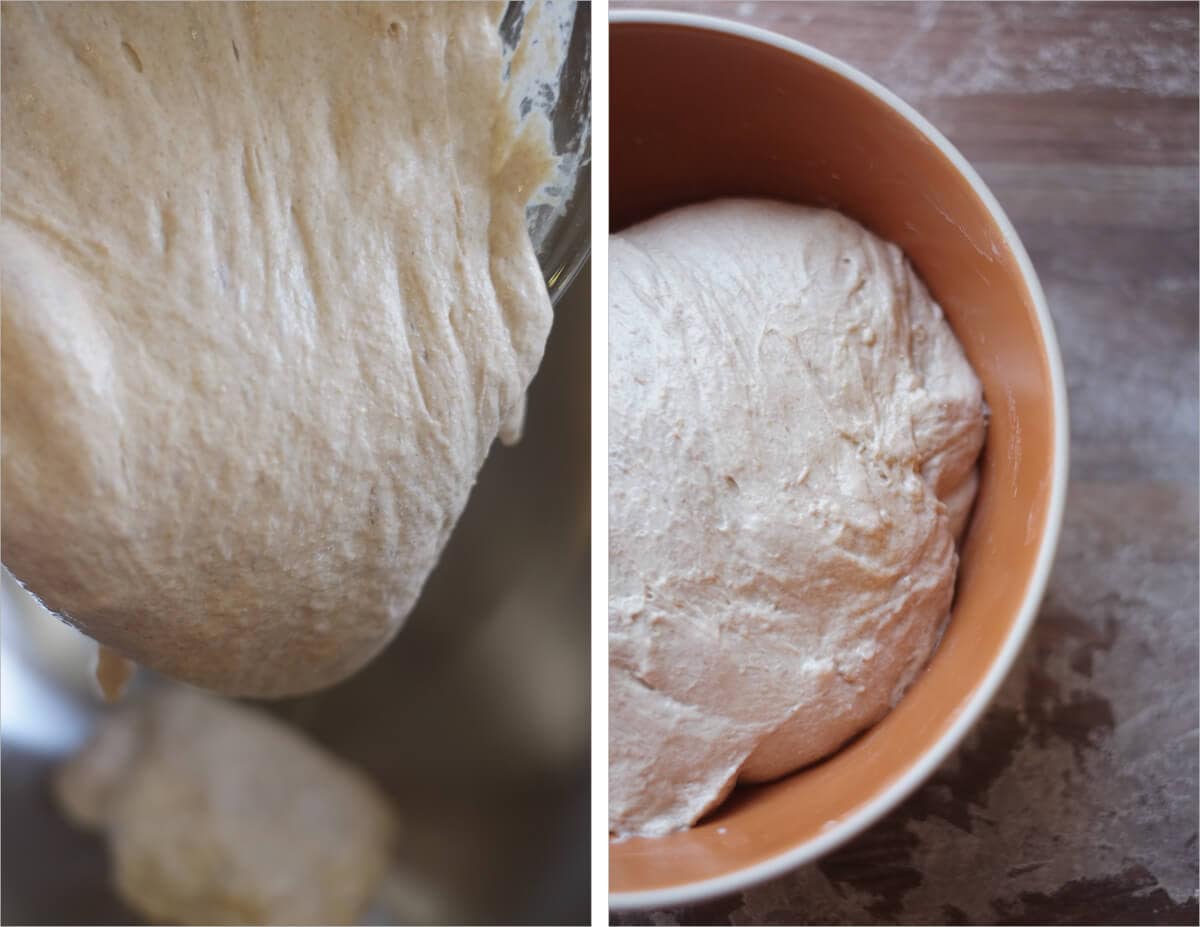
At this point, as I was mixing in the 25g salt and 25g water, I started to feel a little anxious… I wanted to add more water; things just felt strangely stiff. You must fight the urge to add more water here, trust me. Once you add in your cooked oat porridge later in the process, the oats will release quite a bit of water into your dough, dramatically increasing hydration. Early attempts at this bread had me sweating as I was trying to shape hydrations that were undoubtedly more than 100%.
| Final dough temperature: | 79°F (25°C) |
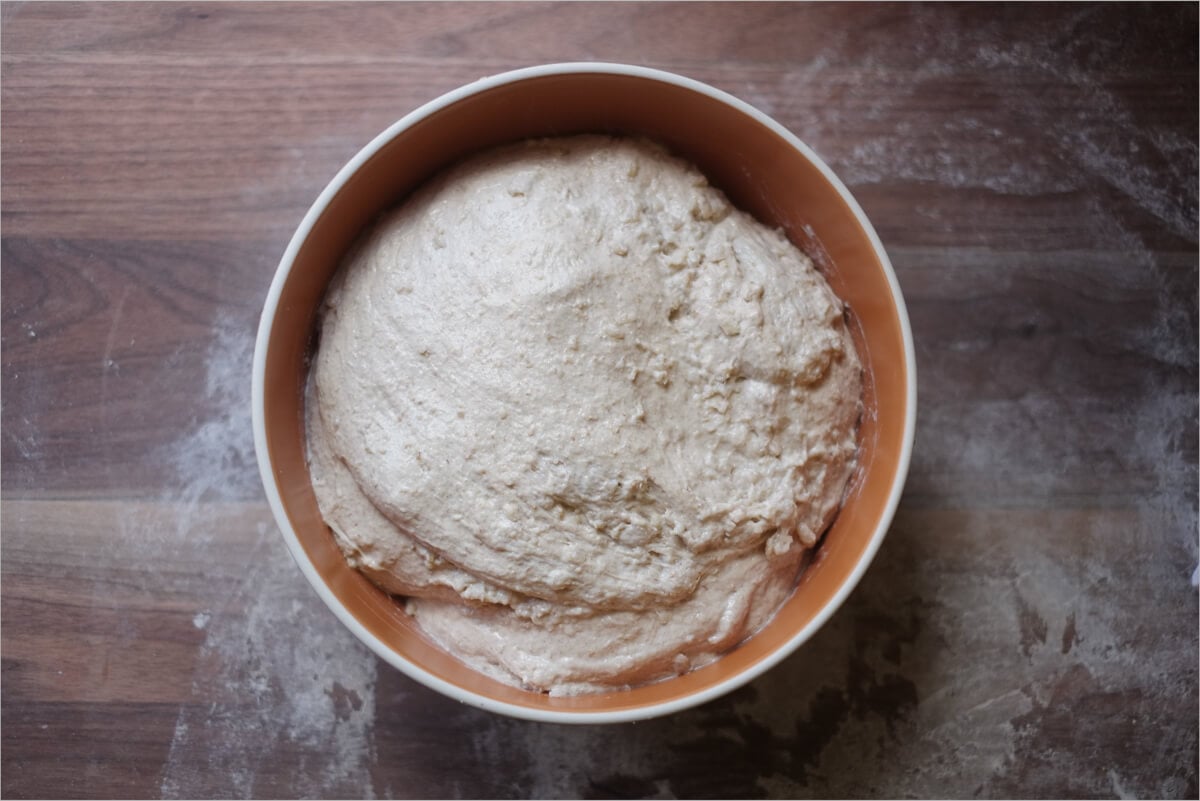
Bulk Fermentation – 12:30 p.m. to 6:00 p.m.
Transfer your dough to a clear container to be used during bulk fermentation and let rest for the first 30 minutes.
After the first 30 minutes and right before your first set of stretches and folds, add in the oat porridge a little bit at a time folding well after each addition (as I show in my guide to stretches and folds). Use splashes of your remaining 25g of water a little at a time as your folding the porridge into your dough. You’ll have to make the judgment call here whether you’ll need the entire 25g based on how your dough feels. I ended up using it all, but it has been quite dry lately here in New Mexico.
Now that the porridge is incorporated perform the first turn set, and each subsequent, in 30-minute intervals. When performing each set, pinch any large clumps of oats with your fingers to break them up; we want a fairly uniform distribution of porridge throughout the dough and very, very few pockets of porridge hiding in your final loaves.
- 1:00 p.m. – Turn Set 1
- 1:30 p.m. – Turn Set 2
- 2:00 p.m. – Turn Set 3
- 2:30 p.m. – Turn Set 4
- 3:00 p.m. – Turn Set 5
- 3:30 p.m. – Turn Set 6
- 4:00 p.m. – 6:00 p.m. – Rest on counter untouched
The dough was so wet I felt like I could have just kept strengthening it until the sun set. You’ll need to judge when the dough has reached sufficient strength to stop the stretch and folds. Six sets did the trick for me.
Pre-shape – 6:00 p.m.
Take the dough out of the container onto your work surface and sprinkle some flour on top before dividing. Divide into two halves and lightly scoot the dough in little circles across your work surface with your bench knife in one hand and your other empty hand. Let this pre-shape rest, covered with a damp towel or inverted bowls, for 20 minutes.
You want to do the pre-shape rather tight, a little tighter than you’d typically do for my standard country sourdough. The tight pre-shape will help strengthen the dough just a little bit more before your final shaping.
Lightly dust your proofing bowls/baskets with white or brown rice flour in preparation for the next step.
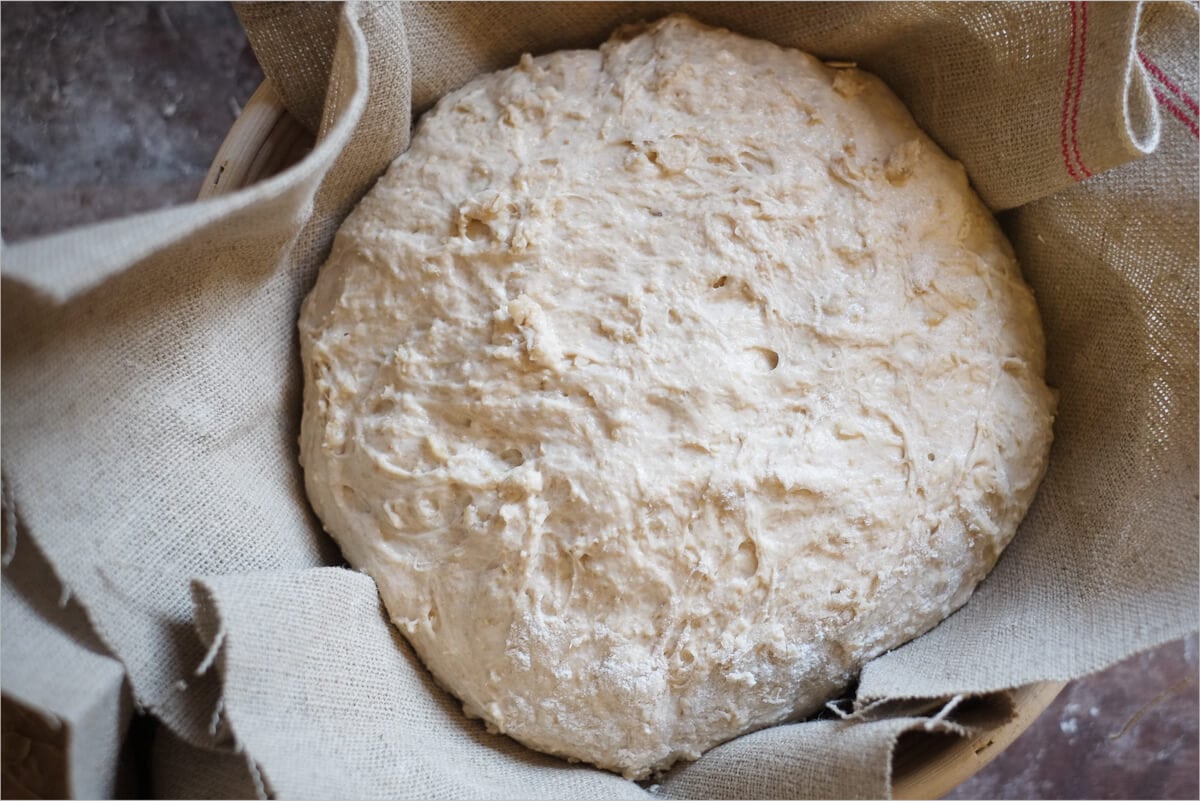
Shape + Proof – 6:30 p.m.
Take a clean kitchen towel and lay it on the counter. Spread flat some of the uncooked rolled oats onto the towel in a circle about the size of your desired finished boules. After shaping, you’ll quickly plop the shaped boule on top of these oats to coat the surface before placing into your proofing baskets, creating a nice dotted surface with a touch of crunch after baking.
Make sure you shape these boules tight to give them added structure during their overnight proof in the fridge.
For this wet porridge dough, I find shaping into tight boules produces a much better result than using Tartine’s “structural shaping” technique for a batard shape. Shaping here is your typical procedure, folding the dough up like a package and then twisting on the work surface to create tension. For a detailed explanation see this post’s section on shaping.
After each boule is shaped tight and resting on the counter, scrape up the first boule and gently invert and drop onto the resting rolled oats. Pick up the boule with both hands and gently lower into the proofing basket, seam side up. Spread out some more rolled oats for the next boule and repeat.
I found that this bread requires a little more proof time to get that fermentation active. After doing the final shape, I left these loaves out on the kitchen counter (ambient temp was around 74°F/23°C) for an hour.
Score + Bake – 9:00 a.m. (next day)
In the morning, preheat your oven with Dutch oven inside to 450°F (230°C). I usually leave the shallow side facing up on the left, and the deeper side on the right facing down. This way when it’s time to load the bread I can quickly grab the shallow side, slide in the dough, and then place back on the stone and place the deep side on top to cover.
See my guide to baking with a Dutch oven for more pictures and instruction.
After one hour, take one of your baskets out of the fridge and cut a piece of parchment paper to place on top. Take your peel and then put it on top of those two and quickly invert it, so the dough is now resting on the parchment paper and the peel.
For these oat porridge loaves, I have taken quite a liking to Tartine’s “zipper” like scoring. Grab your kitchen shears and do 3-4 snips across the top of the dough so that the shears are almost entirely parallel to the surface. This score opens up so beautifully and creates a very rustic feel to these loaves, which contrasts elegantly with the dotted rolled oat surface.
Wait at least 1-2 hours before cutting into the finished loaves to let the interior fully set.
Take out the shallow side of your Dutch oven and drag in your boule. Quickly place the pan back in the oven, cover with the deep side, and bake for 20 minutes. After this time, open the oven and take off the deep lid of the Dutch oven (set it next to the other half inside the oven, which will help regulate oven temperature for the rest of the bake), then bake for an additional 35 minutes or so, until the bread is to your desired doneness.
This oat porridge sourdough requires a little longer bake time to get that nice dark outer crust. Additionally, the interior, extremely hydrated by the porridge, takes several additional minutes to bake thoroughly. For this dough you’ll want to experiment with bake times and temperatures, potentially decreasing the heat towards the end of the bake to extend the bake time without scorching the crust. I ended up baking for a total of 35 minutes for the last uncovered portion.
Once your bake is finished, be sure to wait to slice it, and store it properly to keep it fresh for up to a week.
Conclusion
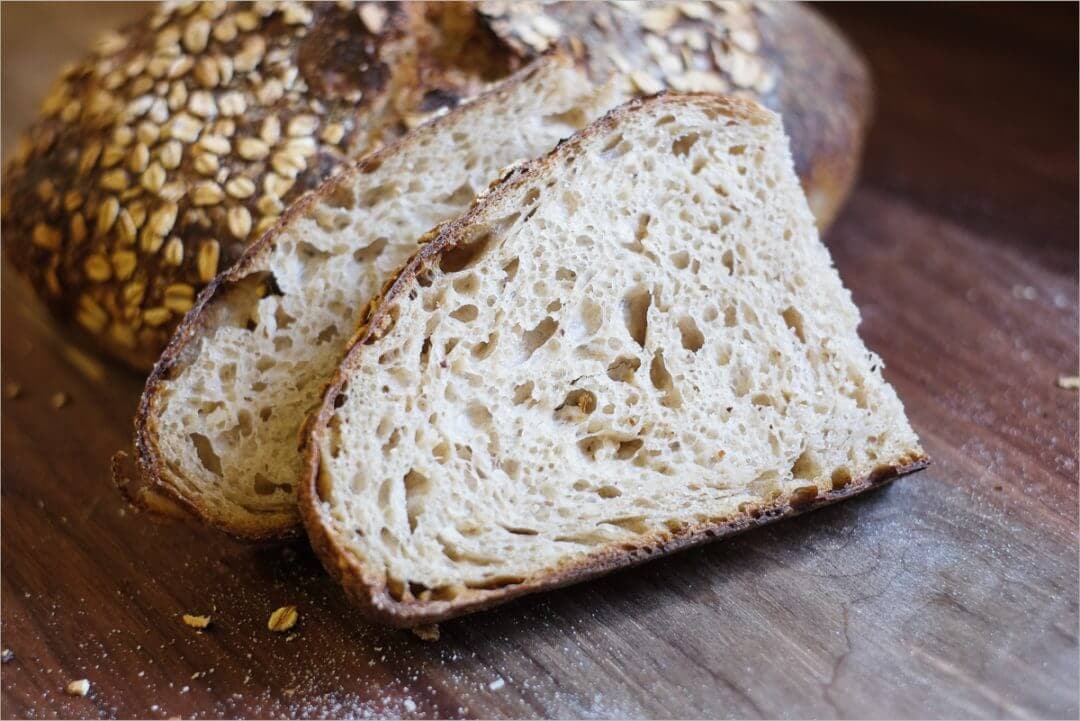
This first venture into porridge bread was a challenge for me; adding in another type of grain that has been cooked with additional hydration threw a wrench into my process and had me experimenting until things came out how I was hoping. The results, though, are pretty darn great. This bread has a very, very moist crumb with a fragile crust that stays good for many days after baking. I made toast almost a week after and the bread still tasted fresh to me.
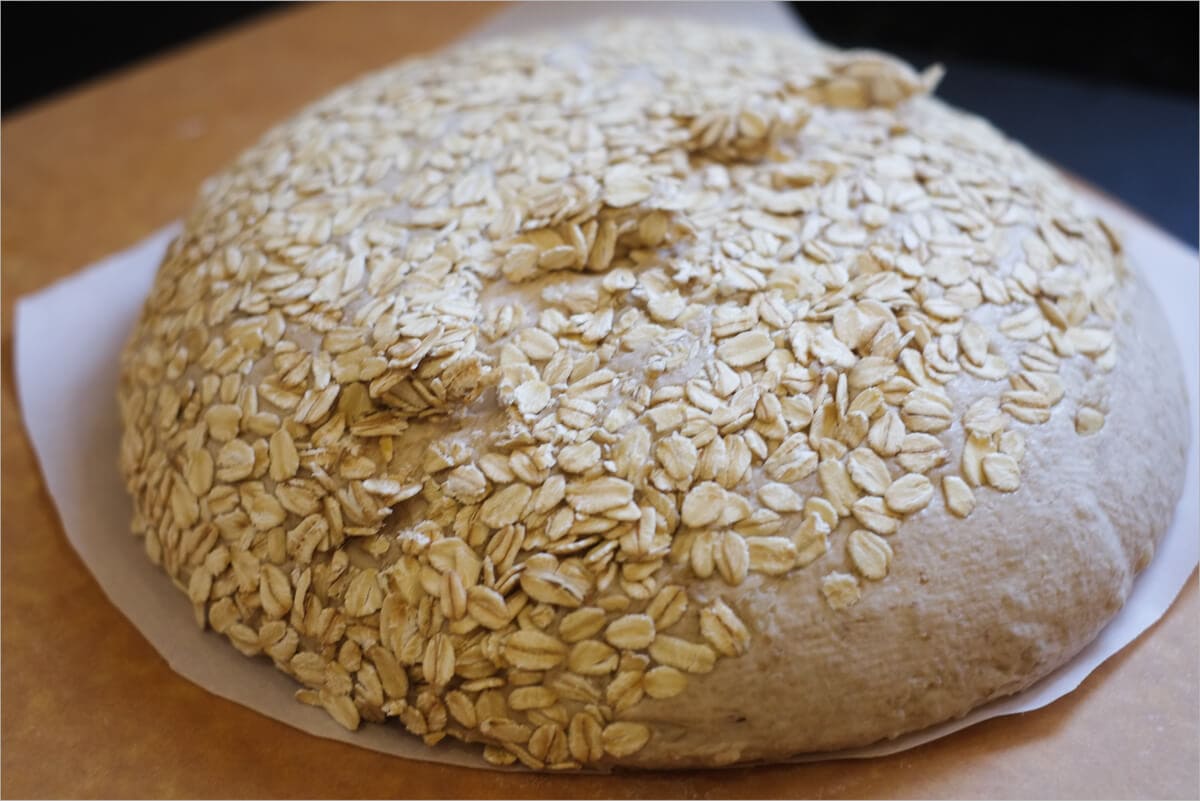
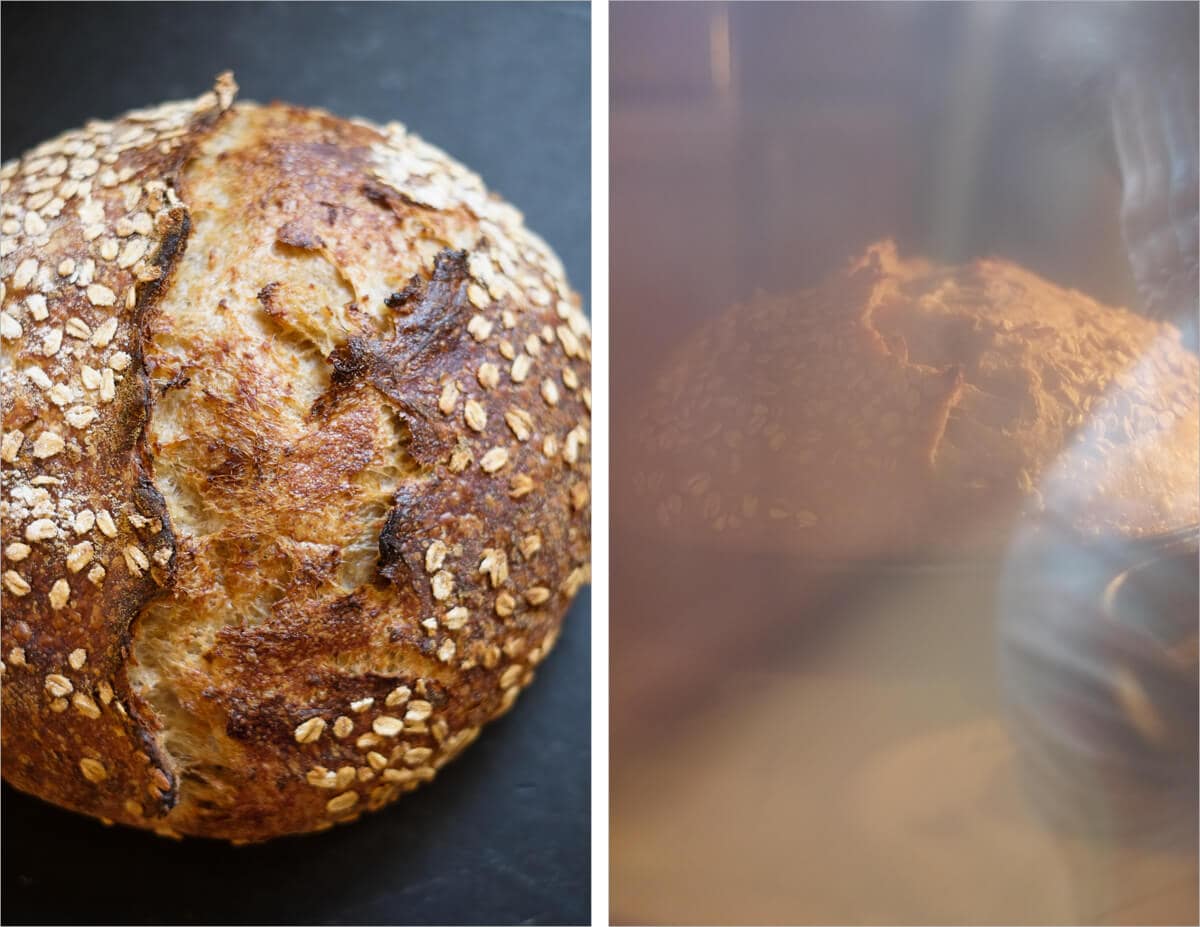
Crust
Marvelously thin and unexpectedly soft, this crust was colored so well and had such a unique taste. It’s something different than the other bread I’ve made, hard to put into words, but if I had to sum it up, I’d say soft like silk. The super high hydration must leave its mark and the mark is very welcomed.
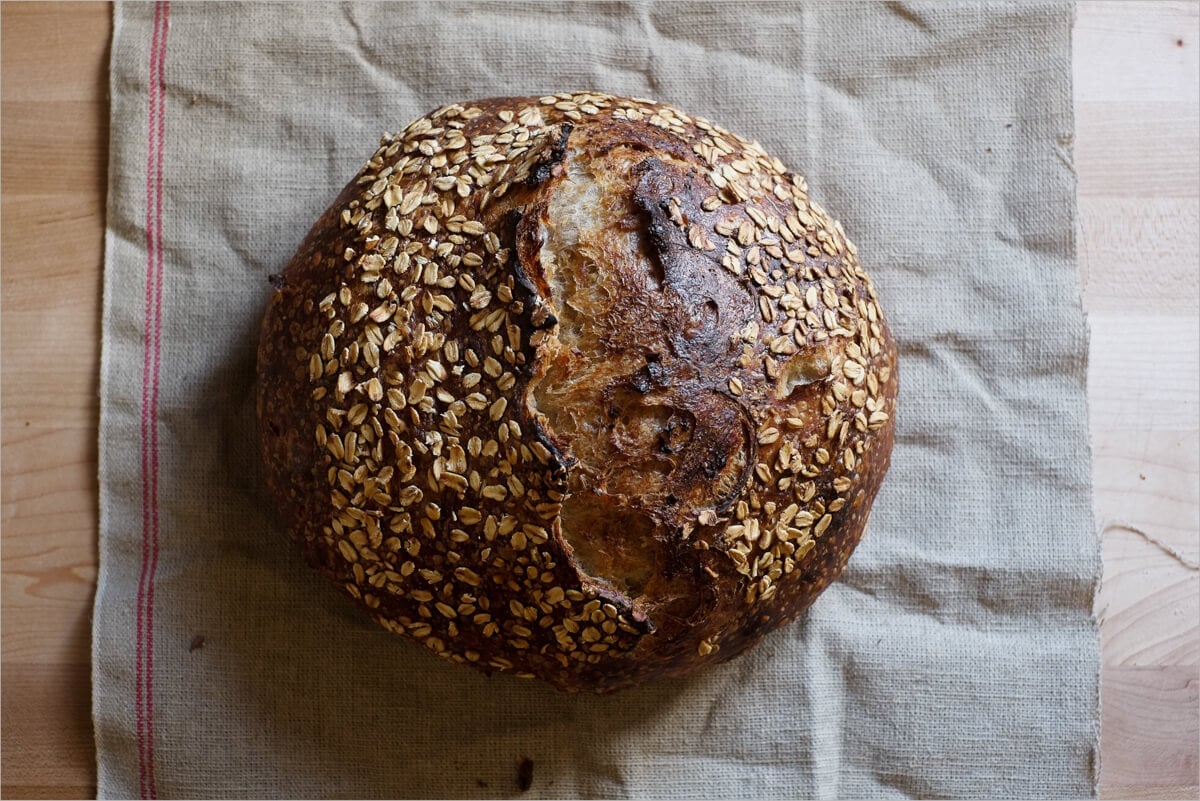
Just look at those colors. I heard myself saying “oooooh” in my head as I first saw that picture from my camera roll. I love the sheen and the shine, the striations of color, the dark spots and the light spots. The crunchy baked oats on top impart a nice crispness to the outside when you bite into the bread, I wouldn’t bake this bread without them.
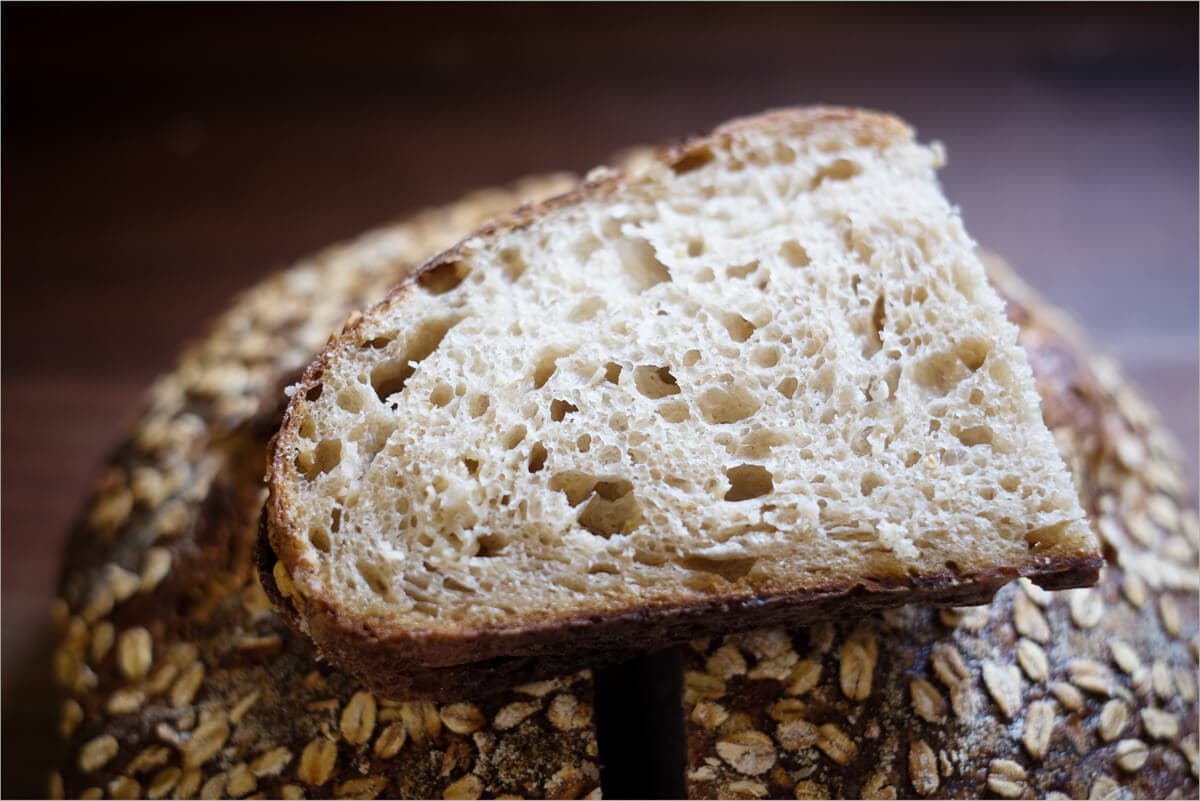
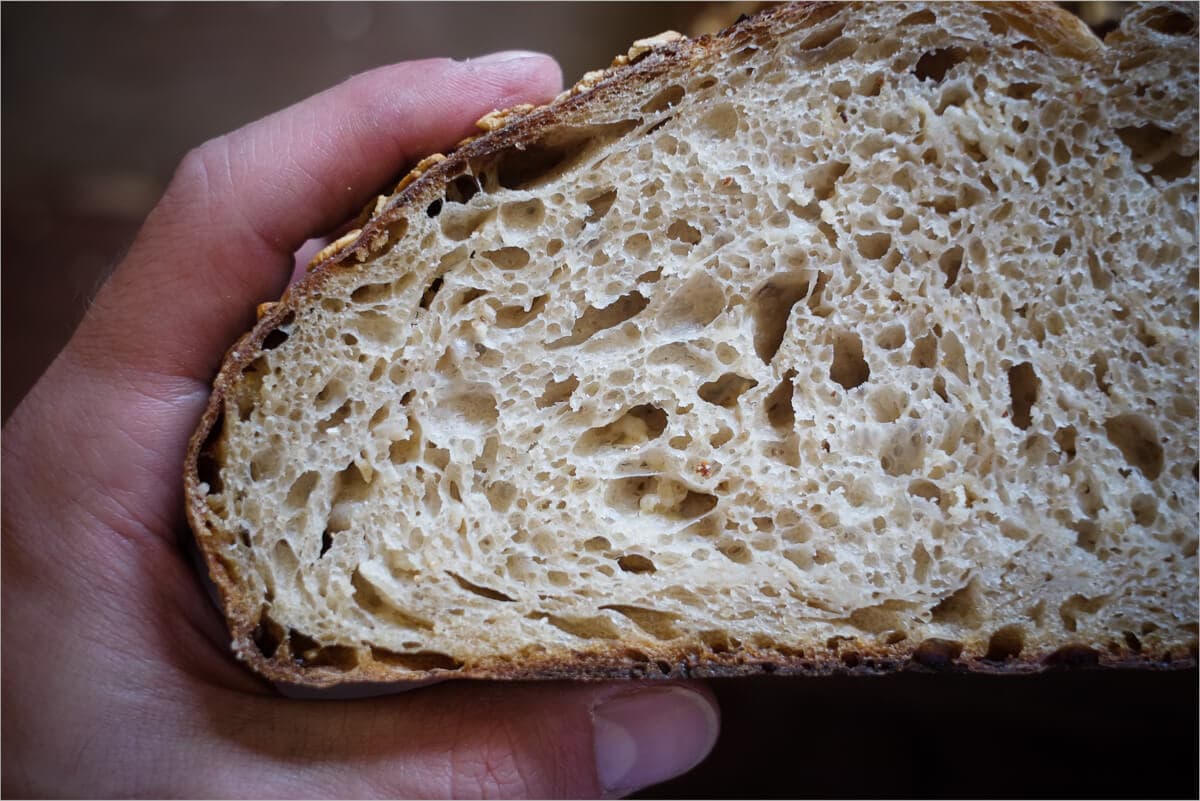
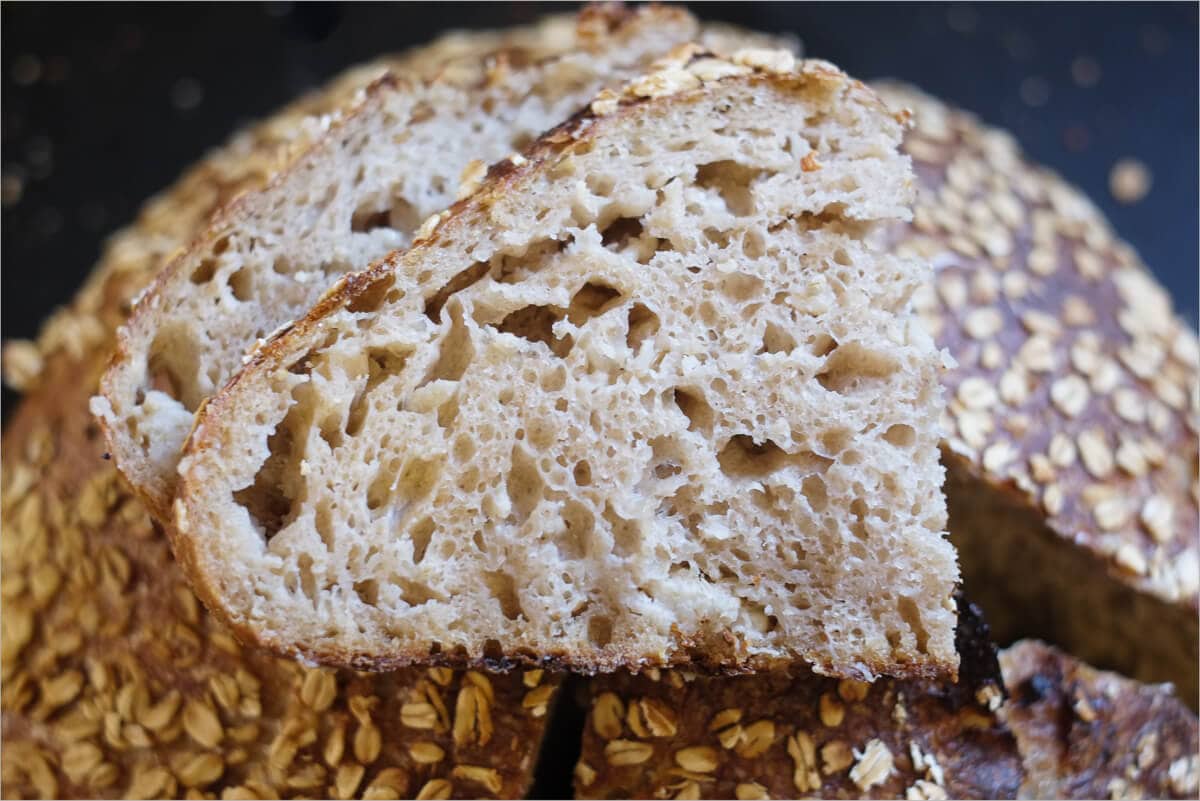
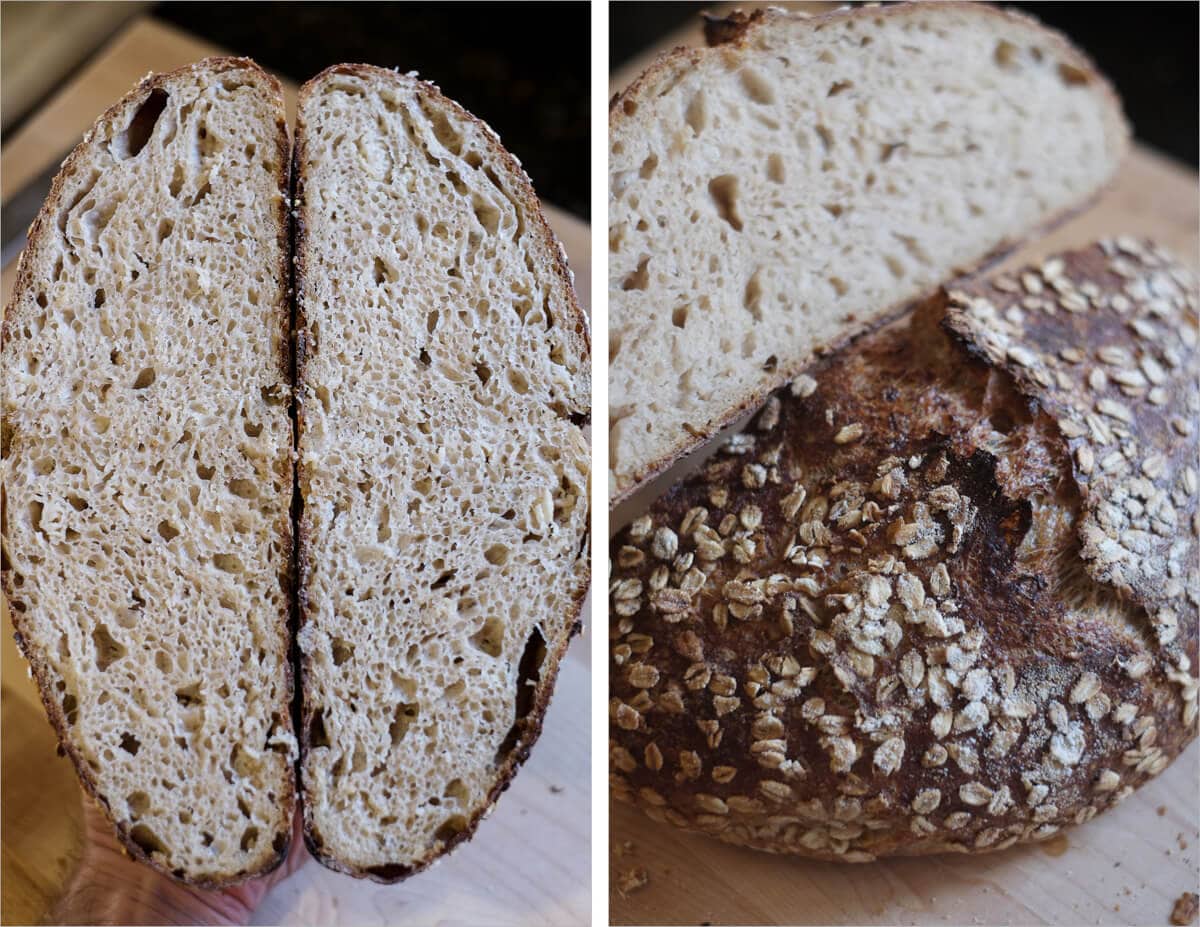
Crumb
The crumb is just straight tender. Nothing I’ve had can compare to this light, stretchy and custard-like interior. My latest attempt produced an excellent and open result.

You can see in this shot the crumb was quite light and airy, I love this aspect of this bread. With my mixing and stretch and folding, I finally was able to sufficiently incorporate the oat porridge throughout the loaf.
Taste
Not much more to say here than already stated: it’s remarkable. This cooked oat porridge does not impart a particularly heavy “oat” taste to the bread, but rather, adds moistness and tenderness that hints at a light nutty flavor. For days after the bread remained moist inside, and when toasted, became crisp and continued to have that fresh-baked-bread taste.
I highly recommend trying this bread! If you have any issues or questions, drop me a post below, and I shall do my best to get you on track. For the curious, read on for some of my “missed” attempts including some notes, pictures, and my hypotheses on why things didn’t quite pan out.
Previous Oat Porridge Attempts
Attempt #1 – The Strong Dough
The following bake was my very first attempt at this recipe and my first endeavor into the world of porridge bread. As you can see in the following pictures, the results were less than stellar. I did not sufficiently mix the porridge through the dough, the crust was on the pale side, and hardly any oven spring. Also, there was almost no openness to the crumb — a rather dense product.
Yikes, that’s ugly! I followed the Tartine No. 3 Oat Porridge Bread recipe nearly precisely, except for two deviations: I only had Bob’s Red Mill Thick Rolled Oats on hand (this is what I typically eat for breakfast) instead of traditional rolled oats which are much thinner, and I upped the levain amount by 25g (to a total of 175g).
Using thick oats and cooking them uncovered at medium heat most definitely overcooked them and dried them out to the point where they became stiff & hard to integrate into the dough. These rigid pockets of oats were scattered throughout the final loaf and were both unsightly and not very pleasant.
For this attempt, I also only performed a 40 minute autolyse and the resulting dough was not extensible enough, adding to the difficult task of mixing in the dry and stiff porridge.
Key Lessons Learned from Attempt #1
- Don’t use thick rolled oats, instead opt for traditional rolled oats
- Dough needs at least a 1 hour autolyse to increase extensibility
- Mix in the porridge until it’s thoroughly incorporated
- Cook porridge covered to prevent it from drying out
Attempt #2 – The Hydrated Surprise
For my second go at this recipe, I vowed to rectify the stiff porridge by using regular rolled oats and upping the amount of water used during cooking. Instead of 500g for the porridge, I ended up using 800g, added in 100g increments after the 500g at the start. This was cooked again at medium heat in an uncovered saucepan.
In addition to adding more water to the porridge, I also increased the autolyse time to a full 1 hour. This length of time did help to increase extensibility in the dough to make oat incorporation easier.
When it came to adding in the porridge everything was looking good: the dough was rather tight, and strength was there, but there was some excellent extensibility thanks to the increased autolyse. A few turn sets into the bulk fermentation, and that’s when I noticed things were starting to go south on me… The dough became extraordinarily slack and was failing to hold any shape after stretching and folding. It was quickly turning into a nightmare scenario where hydration levels are pushed too far for the flour to handle. Cooked oats can absorb a significantly large amount of water, about 84% by weight, and that water is coaxed out of the grain later as bulk fermentation progresses. I ended up cobbling together some decently shaped boules, but at hydration that must have exceeded 100%, I was seriously having trouble.
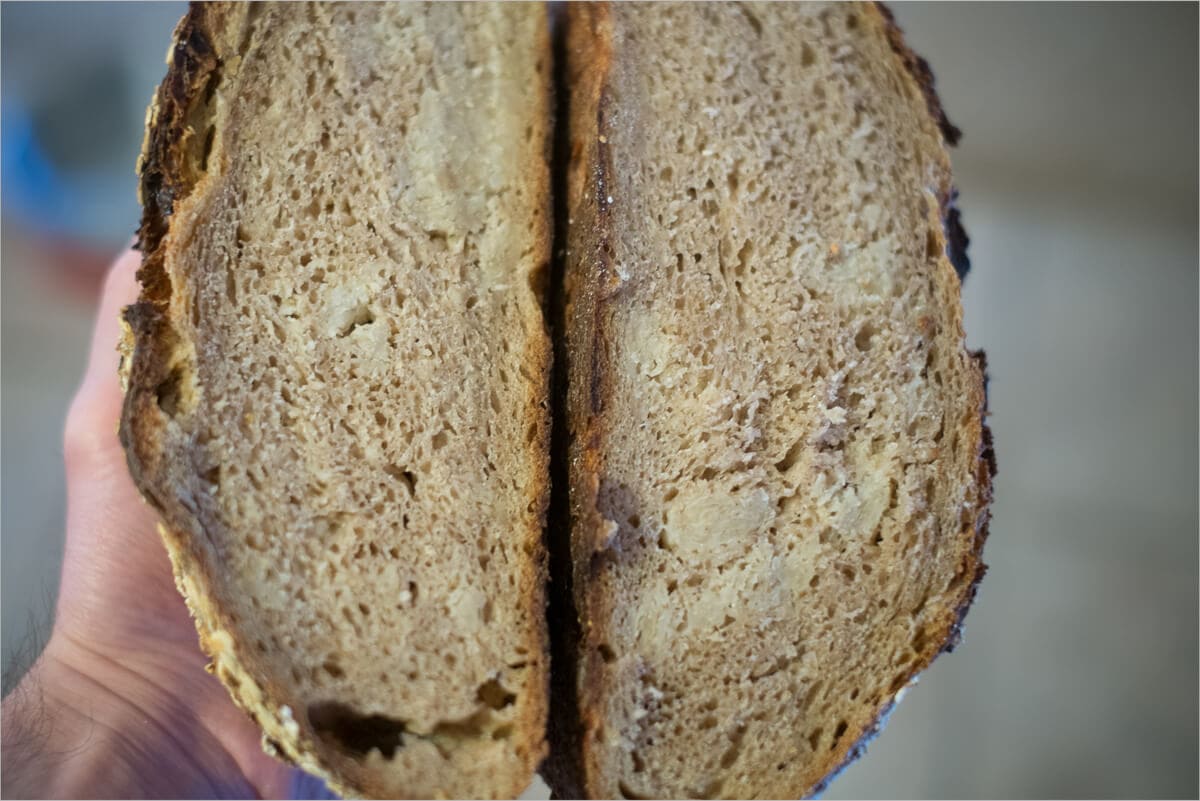
The result was again abysmal. The crust was pale, displaying almost no caramelization during the bake and little dynamic oven spring.
The crumb was marginally open, but it was far too wet. After cutting into the bread, it had a shine to it that almost looked damp to me. The actual taste of it was not that bad, but it needed a good solid run through the toaster to firm things up, perhaps the loaf required a little bit more baking time.
Key Lessons Learned from Attempt #2
- Do not add excess water to the porridge. Shoot for the 500g outlined in the successful recipe above
- Cook the oats on medium-low heat to prevent burning and rapid cooking
- The oat porridge was incorporated more thoroughly but not quite enough; we’ll need to do more pinching and folding
- Because of the extremely high hydration here, there was not enough strength in the dough, causing poor oven spring
- 1 hour autolyse time right on the money
Attempt #3 – Oh The Beautiful Crust
My hopes and energies were high at the start of my third attempt. I felt like I had successfully flanked the two sides of this bread: one side was under hydrated with a stiff porridge, and the other side was way over hydrated with an almost soupy mess of porridge and flours. At this point, I surely could find the middle point and create something magnificent.
I reduced the amount of water in the porridge down to 500g but cooked it on medium-low heat, covered, for 18 minutes. The result was a more creamy porridge which was much easier to fold into the dough and thoroughly incorporate. There was still some work to do here though; I needed to continue to pinch any oat pockets found during subsequent stretch and folds to break them up and do a more intensive job of incorporating.
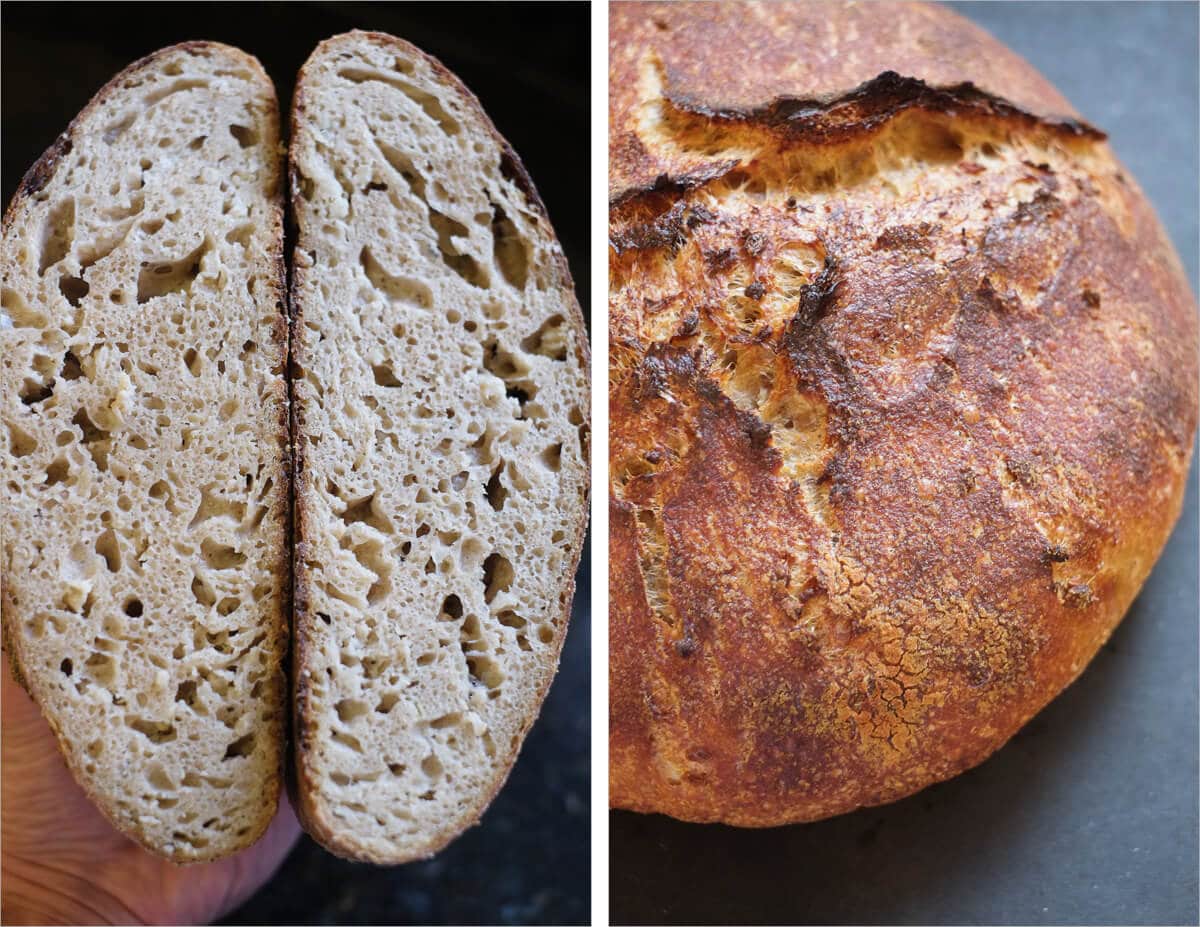
As I lifted the top part of the Dutch oven off, I noticed the oven spring for this attempt was respectable, but it did not hit my self-imposed goal. Crumb, well, there was some excellent openness to it, but it was still far too tight more deep holes and pockets, please.
I was happily surprised at the beautiful color and caramelization of the crust when baking these loaves. Beautiful dark colors at the edges and light centers where the scissors had left their marks. Gorgeous.
All-in-all it was a solid attempt with some excellent improvements on the outward appearance. With notes scribbled down in my notebook, I was determined to adjust a few parameters and give this another shot.
Key Lessons Learned from Attempt #3
- Cover the oat porridge while cooking to prevent burning and water evaporation
- Wait as long as possible before cutting into the baked loaves, at least 1 (seriously!) hour and preferably overnight
- Oats were incorporated much more uniformly, but still had some room for improvement here
Attempt #4 – Just Roll With It
I was eager, excited, and confident at the start. Keen to cook the oats to the correct creamy consistency, excited to get the hydration level spot on, and confident the result was going to be what I had been searching for the previous attempts. So. Close. Oh so close. My results had much promise, but there still were a few tweaks needed.
I found that the key is to cook the oats at the lower end of medium-low for a full 16 minutes, and covered. 500g is the correct amount of water for 250g of oats, and you want to add the pinch of salt at the beginning of the cook, right when you put the water and oats together.
The crumb for this attempt was really splendid! I think things could have opened up a bit more with larger pockets given additional proof time. Since I reduce the levain to a meager 150g I should have realized the proof time should have been extended until I noticed things were moving along far enough.
The crust on this loaf came out gorgeous, yet again. Perfect caramelization, dynamic movement from the excellent oven spring and the scissor snips again showed a great zig-zag all the way down with dark colors on one side and light on the other.
Key Lessons Learned from Attempt #4
- Cook oats covered on the low end of medium-low for 16 minutes, you want a creamy consistency
- Add porridge before the first turn of bulk, incorporate well
- The dough will become pretty slack, do vigorous turns
- The 50g you hold back should be used cautiously. If your dough starts to feel slack, don’t add it all in.
- Pre-shape tight and shape tight
- Ensure fully proofed
Fin
And so that’s all we have, folks. Many attempts led up to what I believe was the best loaf yet. I know there will be more and more improvements as I continue to bake this bread, and don’t worry, those will be chronicled and entered into a future post if the loaf improves sufficiently.
Even though some of these bakes were not encouraging, especially at the outset, this craft is one that takes patience and persistence. Sometimes I almost forget this axiom but then I’m reminded I always have something exceptional to eat, and my troubled thoughts vanish as I take the first bite. I think it was best said by Hamelman:
Experiment, play, realize that failure isn’t really a failure, it’s an edible part of your evolution as a baker.
Jeffrey Hamelman
Buon appetito!
If you use this recipe, tag @maurizio on Instagram so I can take a look!


239 Comments
Maurizio, can you reconcile the online recipe with the book please. You’ve said in the past that the book is the most current recipe for other breads I’ve made, but this one is very different. I made this bread last week (using the book) and found it not really rising sufficiently in the Bulk stage – dry and dense. I left it in the fridge for about 15 hours and then 2 hours at room temperature to get to a dough that seemed ready to bake. As it turned out, it was absolutely great, but the whole rising process seemed too short in the book. The book has no autolyse step at all. I’m in the middle of making it again, same as last week, but might add more hydration prior to bulk. Ps. I also throw in 150g of soaked raisins too – just seems a natural with oat bread.
Hi Maurizio — Love your website and book! They are my favorite bread-baking sources. I'd love to try this recipe, but I'm wondering whether I can bake the loaves in loaf pans to use for sandwiches and toast. And if so, would this change the baking temperature?
Hi Maurizio, Love your website and book — they are my favorite bread-baking resources! I was wondering whether I can bake these loaves in loaf pans so I can use them as sandwich loaves. And would that change the baking temperature?
Thanks, Mary. Yes a pan loaf will work really well. Same temps, but you might have to bake longer.
This has been my go-to loaf for a few months now. Love it! Any suggestions on how to incorporate the oat porridge into a sourdough brioche formula (for cinnamon rolls), or adapt this recipe for enrichment?
Glad to hear that CC! It would take quite a bit of adjustment to do either of these things… I'd have to thoroughly test a solution for this (and it gives me some ideas for a new recipe 🙂)!
Hi, you mentioned the fermentation can take longer with this recipe. Have you tried to add 50 g of levain (200 g vs. 150 g) or 2 g of yeast to speed up the fermentation process? If so, what was the result? If not, how would you think this would affect the final bread? Thank you, Pascal
I haven't tried either of those, but they will help, Pascal! I'd probably opt to add a little more levain.
I just made koji porridge bread, following the Tartine 3 book recipe. I had Oat Amazake and cooked that down a bit. The dough was so wet , I ended up adding more flour, to firm it up, then let it sit for an hour, turned it a few more times…8 total.. I put the loaves in baskets, overnight , in my fridge, baked the next morning. They turned out great! Next time, I think I'll add the porridge bit by bit and the last 50g of water too. All of it together seemed like too much…maybe I didn't need all that water. I love the sweet tanginess of the loaf!
Oh wow, I have always wanted to make that loaf… Kudos to you! Really cool. Nice work on the adjustments, too. It's difficult to nail the hydration on these loaves.
This was absolutely delicious and a joy to put together! Thank you!
So glad you liked it, Libby!
Have you ever fermented the oats raw? I used to do that years ago when I had more spare time but didn’t make any notes…
Yes. What I used to do was soak the oats overnight in water with a little sourdough starter. It's great!
I possed this question in regards to your polenta recipe, but is there a reason to wait to add the oatmeal porridge after the autolyse/pseudo-autolyse? Albeit it’s easier to add in the oatmeal earlier because of its extra hydration, but can adding it too early interfere with gluten development, which could require extra kneading or beating later? But if it does interfere with gluten development, why do most people seem to add a cooked yudane mixture with the initial mix if they are one and the same…..cooked flour vs cooked oats? Thank you, Maurizio, for your time and help! 🙏🏻
Oats + bread = magic! Certainly one of the best add-ins!
I think the oats are a little more chunky and dense, so I like to add them later in mixing. You could add them earlier, but there's no gluten in oats and so mixing them for a long period won't do much. Totally agree, oats in bread is magic.
Hey, just wanted to say this is the second time I’ve made this recipe, and this time, I finished bulk ferment in the fridge, and the dough being cold made it WAY easier to shape.
Yes, it sure does! That’s a great tactic.
I am in the middle of bulk fermentation with your Oat Porridge bread in your “The Perfect Loaf” book, page 229. I am questioning the amount of water. It seemed like the dough was very firm when I was strengthening it. Knowing that I would add the oatmeal/water mix later, I didn’t want to add more water at that point. The oatmeal/water mix turned out to be rather dry, so it didn’t add any moisture. Stretching and folding is very different from other doughs. I thought I had measured the water incorrectly, but the dough weight is correct.
I noticed Louis had the same problem a month ago and I didn’t see an answer.
Hey, Inge! Because the oats absorb a different amount of water, I would adjust as necessary. In your case, definitely add more water next time to compensate!
I was able to add some water during stretch and fold. Maybe 40ml.
Ended up baking around 1160g in my 13″ pain de mie pan with lid and the remainder in the pot. Both turned out pretty good. Actually liked the loaf pan option a lot.
Hi Inge, I’m in the process of making this bread and found the same problem: dough very stiff and dry before adding the oat porridge. I had a look to the online recipe, and found it was completely different. But the reason I decided to buy the book was because thought it contained Maurizio’s updated recipes. Following your suggestion, I will add some water during stretch and fold and see what happen.
Hi Maurizio! Thank you for all your terrific instruction and delicious recipes. Since you say the consistency of the oat porridge is important to this recipe, would you happen to have the weight of the cooked porridge when it is done properly? Would that be a way to ensure it is consistent from batch to batch, since it seems like it would be possible to aim for the same amount of water evaporation each time?
I don’t Vince, I will try to get this next time!
That would be super helpful. Great idea!
Maurizio, I’m well into making the recipe in your book and thought I would have a look online as my dough seems pretty stiff. Wow – the online recipe is very very different from the book. But this online recipe says it was last updated in September 2022. So what’s the current recipe ? Thanks for your book and all the great learning info.
Hey, Louis! Use the book, but do increase the hydration of the dough as necessary. As I mentioned to Igne above, the amount of water the oats absorb is very different almost every time!
Can this be made with KAF bread flour and The Perfect Loaf Blend??
Absolutely, Ellen!
If I don’t have instant oats, can I use rolled oats as the topper?
Yes!
I’ve made a 100% whole wheat sourdough using an oatmeal soaker where you add boiling water to the oats the night before at the same time you make the levain. Do you think this method would work in your recipe instead of cooking the oats?
Yes, that works just as well, too. In fact, in my cookbook, this is how I now prepare the oats!
Maurizio, in your book, p.230, for the recipe oat porridge, you write to take 200g of water for 160g of oats. Is it OK? it seems very little to me.
It does depend on the oats, sometimes I need to add a little more, but usually that amount works just fine!
I was in a rut. I needed a stretch bake, so I made this. At first, the oatmeal was lumpy. The dough was stiff, I thought I would never get the gross chunks of oatmeal evenly distributed. The first few stretch and folds looked awful. But I persevered, and the dough started looking (and acting) like something close to what I saw in your photos (thanks for them, BTW). When I finished the stretch and folds (I needed 7), the bubbles were already forming. At the end of bf I had a bowl full of jiggly jelly. The dough was a bit sticky and I may not have gotten the pre-shape as tight as I needed.. But after fridge time the next day, I could tell the loaves had enough oomph to get a decent spring. They did. Truly beautiful, and the aroma out of the oven was bread, but something more. When I finally got to cut it open, the crumb was not as open as I had hoped, but it was decent. And soft. And the crust – there are no words. I will be making this again. It is a great stretch bake, and it probably will remain that for me for the next few rounds as I tweak it here and there. But I will happily eat every single effort, toasted when I can, and always slathered with butter. This is bread Nirvana.
Huge and wonderful feedback, thank you Patty! This is a challenging dough to work with, but as you said, 100% worth the effort. Thanks again and happy baking 🙂
Hi Maurizio, I have made this recipe several times before and my notes indicate to add only 500g of the cooked porridge. Is that still correct for this updated recipe? I don’t see any notes of how much to add, so I added it all and it did seem like a lot. My loaves in turn were huge! I did just soak the oats in the boiling water and they were perfect. I usually had a problem of them being too dry. My bake did turn out great. Very moist and makes the best toast!!
That does seem like a lot, I would reduce the amount! I’m going to update this post soon with more clarification there.
Glad you mentioned soaking the oats instead of cooking them…I am going to give that a try the next go-round!
Maurizio – what diameter pot do you cook the oats in? My oats were too dry at 16min, so I added 75g more water, but then the dough was a little wet. Total dough weight was about 75g over yours. I loved this bread and will make again but want to get the oats right! I used wild yeast water and a preferment in place of sourdough starter. It worked great! (photos of the dough and bake on my IG @reciperose)
I use a small saucepan!
I’m curious to try this recipe, but there seems to be a few tweaks mentioned in the comments. For example, if soaking the oats in boiling water, would I use the same ratio (1:2 oats:water) and then how much of this mixture should be added to the dough? Wondering if an updated recipe will be available soon…
If you used boiling water instead, just add everything to the bread (the oats will absorb all the water). Working on an update, though this version is still fantastic as-is!
That will definitely work!
I made this loaf a number of times in the past two weeks and I have to say it makes an absolutely lovely pan bread that is wonderful for slicing, sandwiches and toasting!
Awesome to hear that, Elizabeth!
I’m going to give this recipe a try this weekend, though I will probably increase the ratio of whole wheat to white flour (trying to do half whole wheat as often as possible). I tried this once before when all I had were steel cut oats. Have you ever tried them? The attempt came out extremely stiff (and nearly burned out the motor of my stand mixer), but the results were delicious with a fairly tight but ultra tender crumb. Being in my third trimester of pregnancy and chasing after a toddler doesn’t leave me as much time and energy to experiment with my bread as I would like, so if you have any recipes with steel cut oats, I would love to see them!
Hey, Lani! My guess is the steel cut oats took on too much water and you needed to increase the hydration of the dough overall. It should work just fine with those oats, just increase the hydration (conservatively) until the dough consistency is more workable!
I spray water on a shaped loaf then roll my loaf in a rolled oats, then put it in a basket to proof overnight. But the oats topping come off easily when I slice my bread. How do you make the oats stick permanently on the bread? Thank you for your advice!
Hey, Anna! This is common, and one reason why I use scissors sometimes to score loaves like this, it helps prevent the toppings from coming off!
Could this be split up into more than two loaves? Like 3 medium size?
Certainly. The only thing to be aware of there is the bake time, which will likely be less (smaller loaves usually bake faster). Just keep an eye on the bake and pull them from the oven early if they’re looking finished.