

Our sleep was always broken by a small, three-wheeled cart scurrying down the stone streets with a large megaphone strapped to the roof. Political ramblings poured unrestricted out of that speaker, echoing off buildings and stone-paved streets as it ran down the length of each avenue—faster and louder than I’m sure anyone in our family’s hometown in Southern Italy cared for. Without the desire for air conditioning, every house had its window open overnight to let in the cool breeze. And the opportunistic man in the speedy cart was keenly aware of this situation. As a kid traveling to visit family, waking early wasn’t nearly as bad as going to bed early; after all, it just meant you’d get to play sooner.
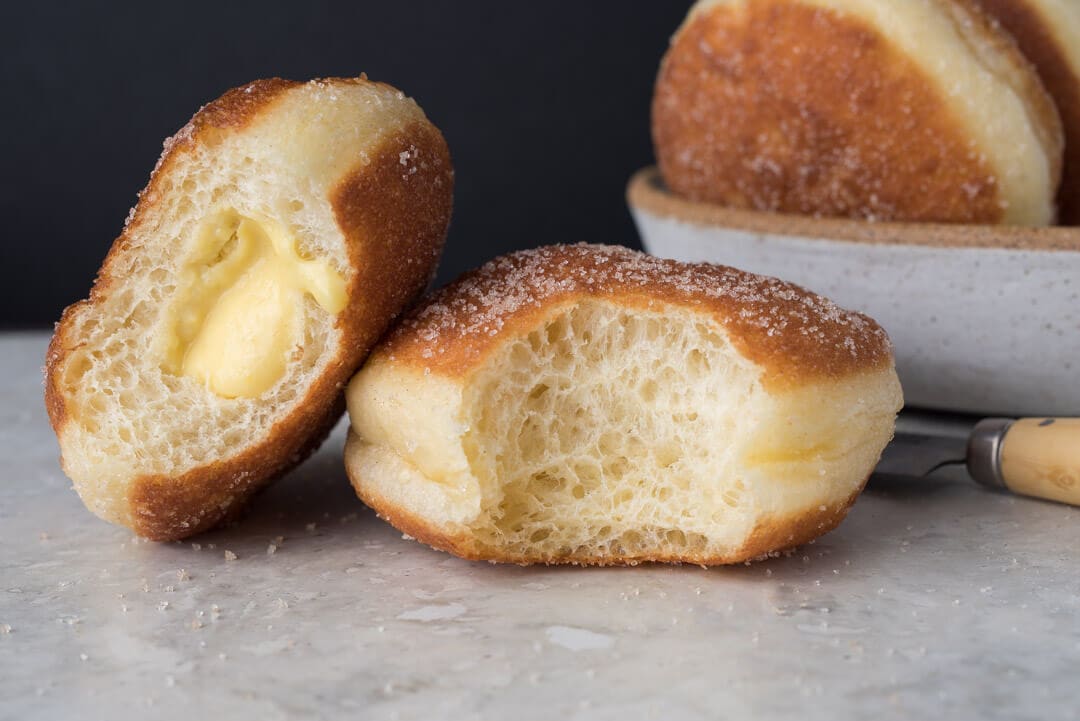
But probably my favorite thing of all, and the reason I secretly hoped that man would drive by even earlier, was it meant heading out early with my dad and brother to the local baker for fresh naturally leavened bomboloni (doughnuts).
Back then, I didn’t quite appreciate the lives these bakers led. For them to sell fresh baked goods first thing in the morning, they likely worked through the night: mixing, folding, shaping dough, and finally baking in the old ovens just as the sun streamed through the city streets. We’d walk in oblivious to all of this, instead focused acutely on which pastry to buy and devour on the walk back. I like to think our enthusiasm for their baked goods somehow validated their long night of hard work. I do know they were there every morning, ready to discuss a recent soccer game, wrap the pastry in a paper, and send us back on our way.
Naturally leavened bomboloni are essentially sourdough doughnuts (with no sourness). They’re also known as berliner, krapfen, ballen, pączki, donut, and many more names all over the world. It seems everyone at some point figured out that frying enriched dough was incredibly delicious. I’m sure glad they did.
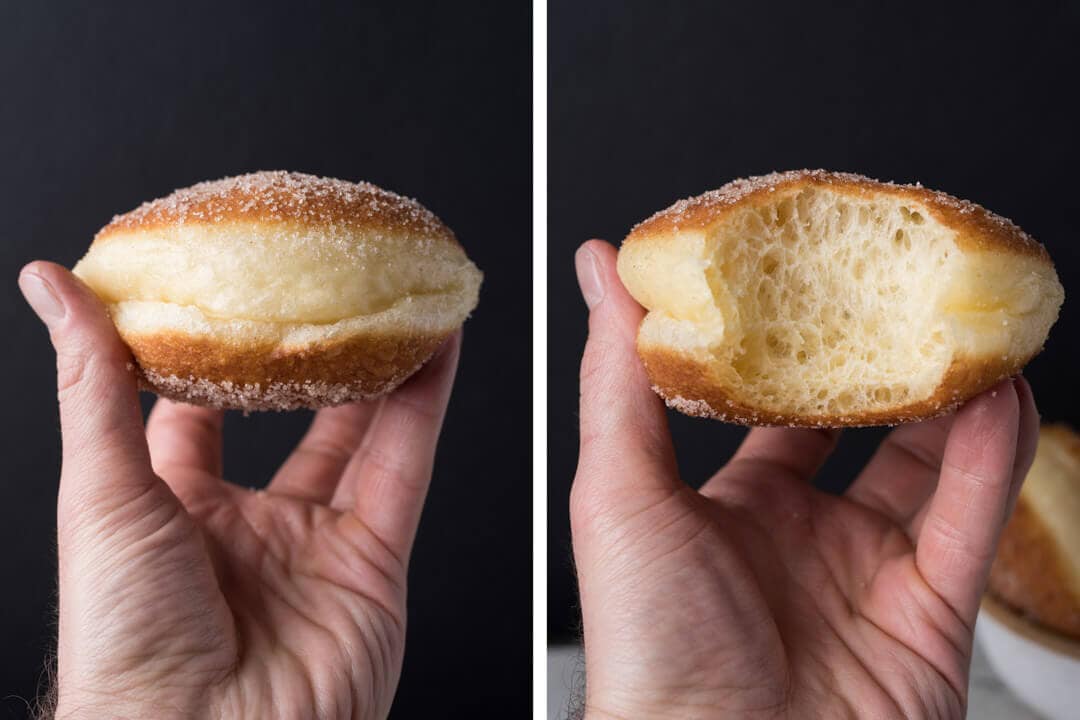
These bomboloni fry up so light and airy you can see why almost every culture has had their own incarnation. When I filled the first one with pastry cream (read on for the recipe) and took that first bite I was instantly transported back to my childhood in Italy. I almost always opted for the cream-filled variety but in the off chance they didn’t have one, the jelly ones came in at second choice. Let’s get frying.
Be sure to read to the end for a new troubleshooting section, a recipe for crema pasticerra, and a recipe for the sugar/cinnamon coating.
Naturally Leavened Bomboloni (Doughnuts) Recipe
These can be challenging to execute properly and do take some practice. Use the photos in this post and the following four extremely important details to ensure success. To make these as light as air, you will need:
- A strong levain
- Sufficient dough strength (lots of mixing, almost to full “windowpane”)
- Lengthy, warm bulk fermentation and final proof (see my post on the Importance of Dough Temperature for more)
- Delicate handling when transferring from proof tray to frying oil
I’ll delve more into each of the above during their step in the process below, but I want to highlight these important elements at the start. First and foremost, strong fermentation is absolutely critical. This begins with your sourdough starter and, subsequently, your levain. Make sure your starter is fed regularly, and you use a ripe starter to create your levain.
Due to the sugar and other enrichments in this dough, overall fermentation activity will be reduced. To counter this, the bulk fermentation and proof steps will need to be lengthened. In addition, it’s also very important to keep the dough warm during each of these steps!
Vitals
If you’d like to double this recipe to make more doughnuts just multiply everything in the Build and Formula section by two. I would not recommend halving the recipe, a total dough weight of 1200g is already quite small for a stand mixer and to ensure sufficient dough mass for fermentation.
| Total Dough Weight | 1200 grams |
| Yield | 18 x 65 gram bomboloni |
Levain Build
A 100% hydration levain made with all white flour will be very mild and not overly acidic. Be sure to use this levain when it’s strong and ripe but not overly so: it should be used right about when it reaches its peak height and looks very active.
| Weight | Ingredient | Baker’s Percentage |
|---|---|---|
| 45g | Mature 100% hydration starter | 50% |
| 90g | All-Purpose White Flour (King Arthur Unbleached All Purpose) | 100% |
| 90g | Water | 100% |
Dough Formula
Target final dough temperature (FDT) is 76-78°F (24-25°C). If your FDT is slightly lower than this, that’s fine, just be sure to keep the dough around 78°F (25°C) during bulk, and it should get back up to temperature rather quickly.
| Weight | Ingredient | Baker’s Percentage |
|---|---|---|
| 253g | All-Purpose White Flour (King Arthur Unbleached All Purpose) | 50.00% |
| 253g | High Protein Bread Flour (King Arthur Bread Flour) | 50.00% |
| 187g | Eggs (about 3 large + 1 yolk, cold from the fridge) | 37.00% |
| 101g | Unsalted Butter (European Style, Kerrygold) | 20.00% |
| 101g | Fine White Sugar | 20.00% |
| 91g | Water | 18.00% |
| 10g | Salt | 2.00% |
| 203g | Mature 100% hydration levain | 40.00% |
Method
1. Levain – 9:30 a.m.
Using a ripe sourdough starter, build the levain (everything listed in the Levain Build section, above) in the morning and store somewhere around 78°F (25°C) ambient until ripe, about 5 hours.
2. Mix – 2:00 p.m.
First, measure out the required butter and cut into 1/2” chunks. Leave this out at room temperature to soften while mixing the other ingredients.
Measure out the called for eggs: crack three full eggs into a small bowl on a scale. If the weight is close to the requirement, add only the yolk of the remaining fourth egg to get to the required amount, if not add the entire egg. Lightly whisk to break the yolks and incorporate.
The paddle attachment is far more efficient at strengthening this type enriched dough. As it’s mixing you’ll notice the dough will tend to cling to the middle of the paddle and press to the sides of the bowl. Stop periodically during mixing to scrape the paddle and sides to reincorporate. At the end of the second phase of mixing the dough should almost pass the “windowpane” test (full development). We will do a few sets of stretch and folds during bulk to finish strengthening the dough.
To the bowl of a stand mixer fitted with the paddle attachment, add the flour, sugar, eggs, levain, salt, and water. If the dough is overly dry add in a little bit more water (be cautious doing so, we don’t want to have a dough that’s too wet).
Set the mixer to STIR and mix for about a minute until everything comes together. Set mixer to SPEED TWO and mix for 5 minutes. At the end of this time, the dough will still stick to the bottom and sides of the bowl but it will start to clump up around the paddle.
Let the dough rest for 10 minutes.
Check your butter. It should be pliable and show a finger indent when lightly pressed. If it’s still cold, place in the microwave for 10 seconds or so. It shouldn’t be melted, just pliable.
Set your mixer to SPEED THREE and mix for 9-10 minutes. During this time add the butter to the bowl, one small chunk at a time. Wait until each chunk is absorbed into the dough before adding the next.
The slow-motion video to the right shows my dough midway through the second phase of mixing after the butter has been incorporated. You can see the dough has balled up around the paddle but overall it still needs further development. At this point stop the mixer, scrape down the sides and paddle and continue mixing. You will have to do this several times throughout mixing.
Near the end of this mixing, the dough will almost pass the windowpane test. Using wet hands grab a chunk of dough and gently spread it out with your fingers. If mixed sufficiently, you’ll see a thin membrane that will barely start to rip when stretched out.
When finished, transfer the dough to a container for warm bulk fermentation.
3. Warm Bulk Fermentation – 2:30 p.m. to 8:30 p.m.
This dough requires a long and warm bulk fermentation. At 78°F (25°C), the dough will ferment 6 hours before it’s placed in the fridge overnight. I place my entire bulk container in my dough proofer set to this temperature (see my guide to using a dough proofer if you’re unfamiliar with their use)
Perform a total of 4 sets of stretch and folds during bulk, spaced out by 30 minutes (starting 30 minutes after mixing finishes).
After the last set (2 hours into bulk), let the dough rest for the remaining 4 hours. By the end of the 6 hours, the dough should have risen by at least 30%. Ensure the bulk container is covered and place it in the refrigerator overnight for cold bulk fermentation.
4. Cold Bulk Fermentation – 8:30 p.m. to 8:00 a.m. (next day)
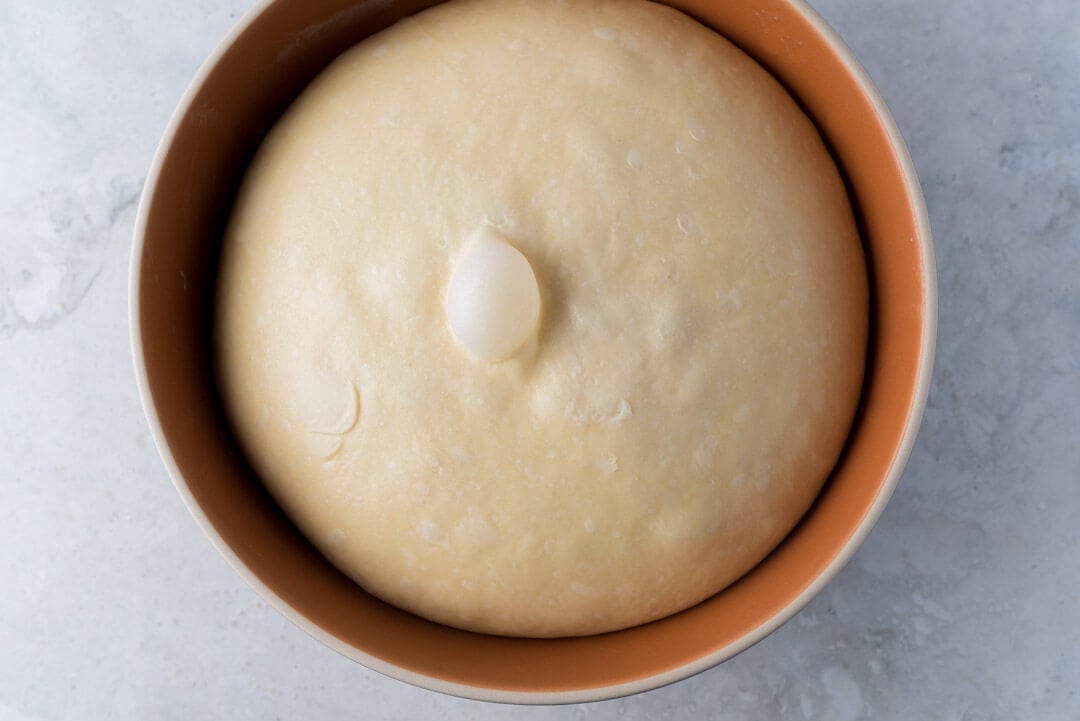
The duration of this cold bulk fermentation step is very flexible. The dough can continue to rest in the fridge several more hours (or perhaps even more) after I have listed here if desired. Take it out and proceed with the rest of the process when convenient.
Above, you can see the activity in my dough after the warm and cold bulk steps—it’s active and alive, even though at this point it’s cold and firm from the fridge.
5. Divide & Shape – 8:00 a.m.
Take the cold bulk fermentation container out of the fridge, uncover, and dump the dough to an un-floured work surface. The dough will feel very cold and stiff, which is exactly what we want. You might need a little flour on your hands to prevent sticking but keep this to a minimum: we’re looking for maximum friction between the dough and the work surface to create very tight rounds.
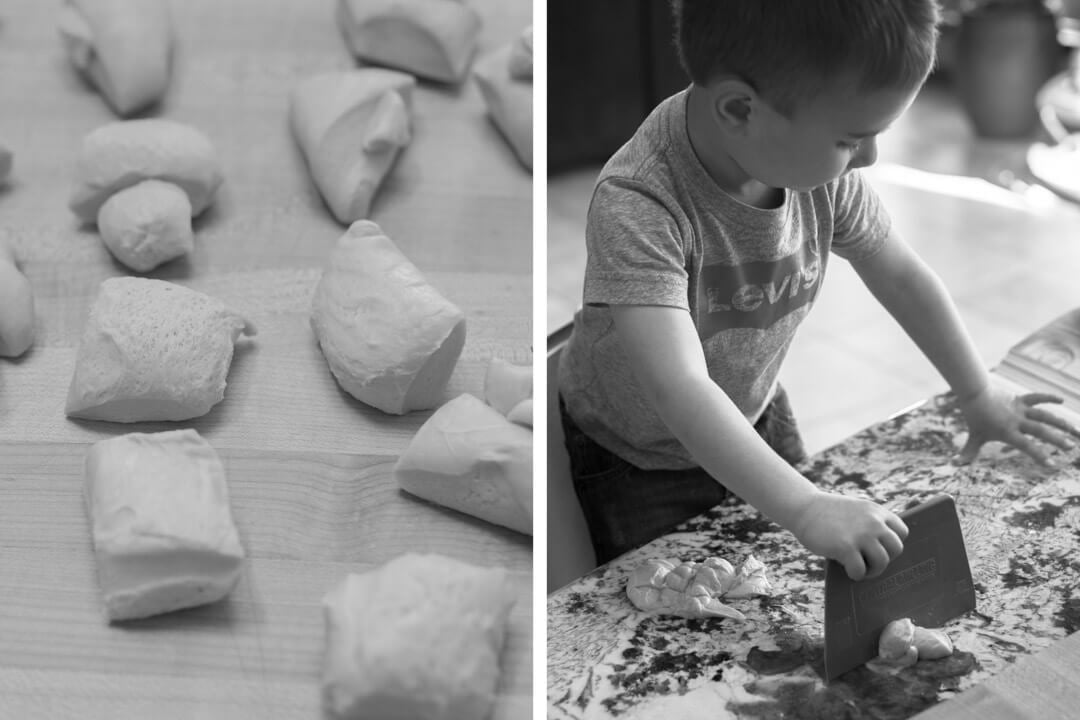
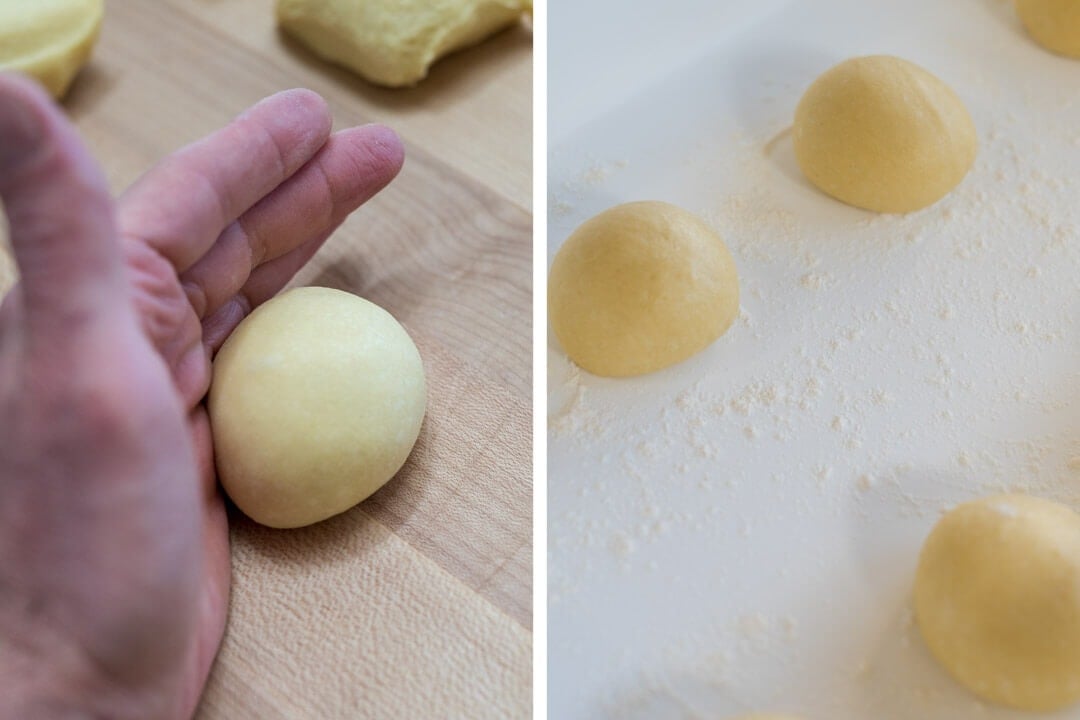
Using your scale, divide the mass of dough into eighteen 65g pieces. You might have a little leftover dough, perfect for engaging a little helper in the kitchen, as you can see below.
Using your hands preshape the dough pieces into rounds. Each round needs to have a very taut surface and no seam on the bottom. Use the side of your hand to push the round against the surface to tighten the surface.
Shaping these naturally leavened bomboloni is very similar to how I shape buns and rolls.
6. Proof – 8:15 a.m. to 7:30 p.m. (appx. 12 hours)
To proof these rounds I use two rectangular pizza trays (a covered baking sheet will also work well) dusted liberally with flour. I can fit 8 rounds in each tray with room for them to expand during the proof. The remaining two rounds I place in two floured Pyrex storage containers (these are good to test with when you start frying).
Place the covered trays with the rounds in a warm spot, around 78°F (25°C), for 12 hours. Since the trays are too large for my dough proofer, I keep them in my oven with the light on and periodically check to ensure they’re kept warm.
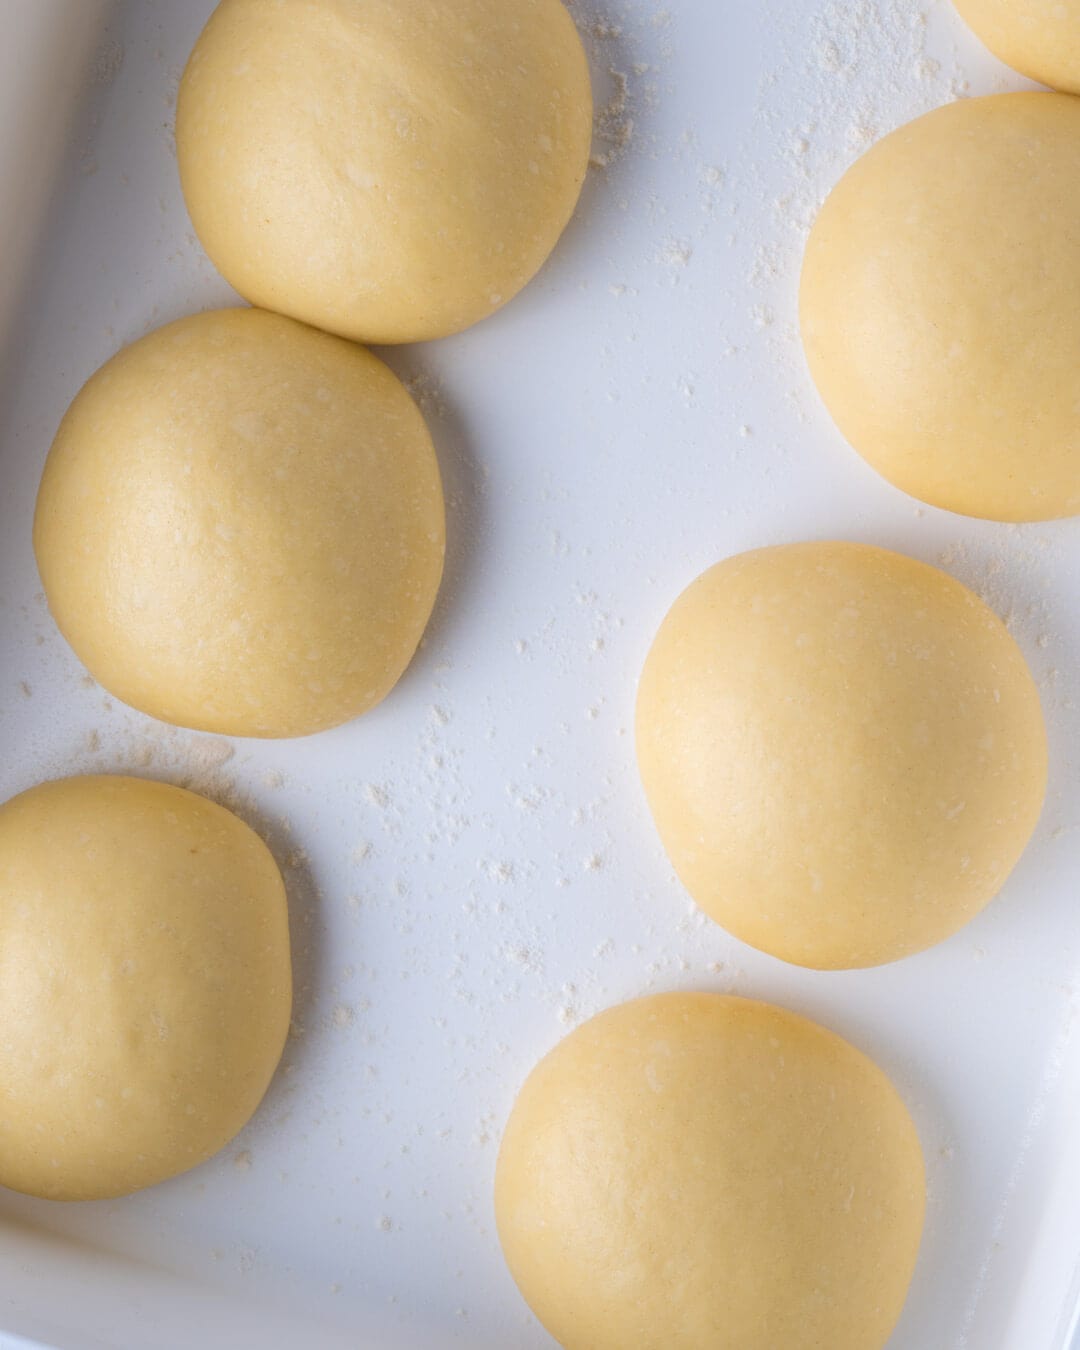
Let the dough proof for about 12 hours. It’s very important the dough is fully proofed before you begin to fry these. They should almost double in size and be very puffy and delicate. If you gently poke them they will feel like they are completely filled with air. Below, you can see the difference between the just-shaped rounds in the image in the previous step.
If you’d rather fry these in the morning you could stop the proof a few hours before completion and finish proofing them in the morning. If you refrigerate them when they are fully proofed, the bomboloni might not fry with quite the same height the next day as they would if frying at night (the longer the proof, the less rise you’ll see).
You can also refrigerate the proofed dough at this point and fry them first thing in the morning for breakfast.
I’ve done both ways, including splitting the batch into two sessions, making one batch the night they’re mixed and one the next day, and they both turn out beautifully.
7. Fry – 7:30 p.m. (or put in the fridge until next day)
Frying Tools
- Vegetable oil, refined coconut oil (my preference), or any frying oil
- Lodge 3.2 qt combo cooker (the same one I use to bake bread!) to hold the frying oil
- Thermoworks ChefAlarm frying thermometer (or a standard Frying thermometer)
- Timer (I love my Thermoworks Big & Loud timer)
- Frying spoon
- Baking sheet lined with paper towels and a cooling rack inside
Frying Oil, Type & Temperature
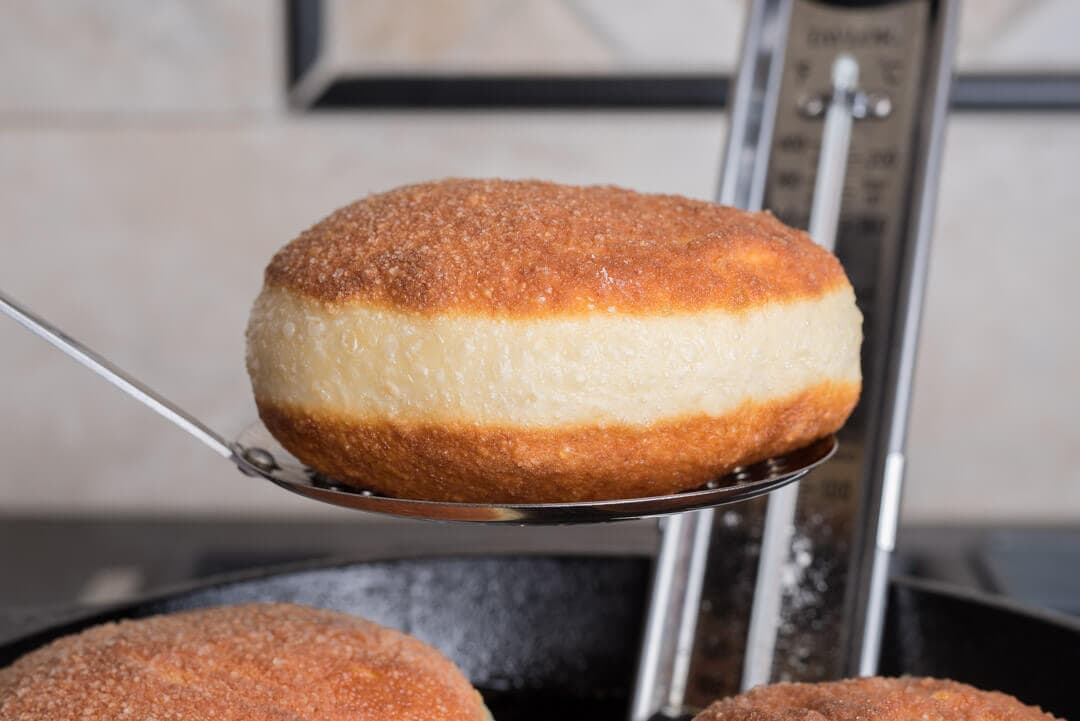
I’ve experimented with both canola and vegetable oil for frying these naturally leavened bomboloni (doughnuts), and much prefer vegetable between the two (but I will be using coconut oil from here on out, see Update below). Canola imparted a slightly odd flavor to my initial test batch and it has an off-putting smell to me. You will have to experiment with the frying temperature. At an oil temperature of 360-370°F (182-187°C) mine cook to a nice golden brown in 2.5 minutes per side.
Update:
I recently tried frying with refined coconut oil (I purchased this tub of refined coconut oil, which should last quite a while (be sure to get refined oil as the smoke point is high enough for frying) and the results were very, very good. Because this oil is solid at room temperature, once the bomboloni cool, they become even crispier and have a little oily feeling to them. Additionally, when frying, the oil doesn’t give off unwanted smells in the kitchen. The resulting bomboloni tasted very similar to vegetable oil and did not have any coconut flavor to them.
You can see a shot of my coconut-oil-fried-bomboloni on Instagram.
Fry
Before beginning, place the trays with fully proofed dough in the refrigerator while you get the frying station setup. It’s much easier to transfer the delicate rounds from tray to oil when they’re a little more firm.
Meanwhile, fill the deep side of the combo cooker to about 2/3 full with frying oil and set over medium heat. The heavy cast iron combo cooker will help keep the oil at a more consistent temperature, even after adding the cool rounds of dough. Place the frying thermometer on the side of the pot and heat until the oil registers 360-370°F (182-187°C).
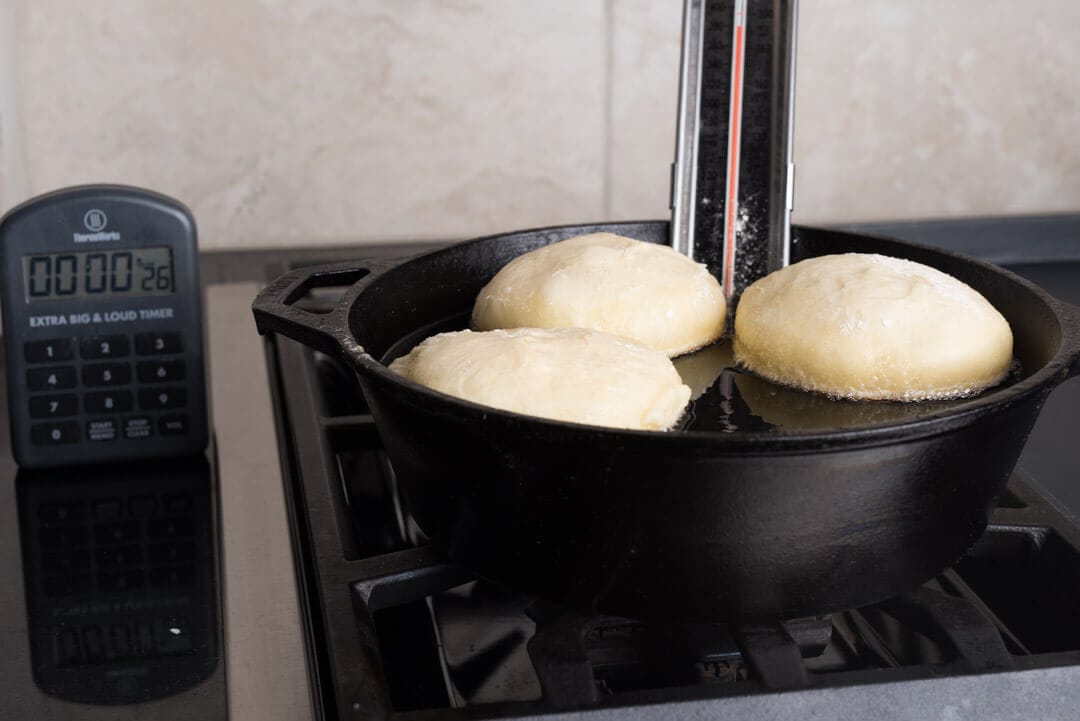
Set your timer for 2.5 minutes. Gently transfer one round from the proofing tray to oil using the frying spoon so the smooth top of the dough is down in the oil first. Flipping the dough over helps to get a nice uniform roundness on the bottom and encourages initial upward expansion.
Keep a close eye on the frying thermometer, the oil temperature will drop each time you add new dough to fry. Constantly monitor and adjust the heat on your range to keep the oil at just the right temperature. I can comfortably fry 3 rounds of dough at a time in the Lodge Combo Cooker. If you have a larger Dutch oven you could accommodate more.
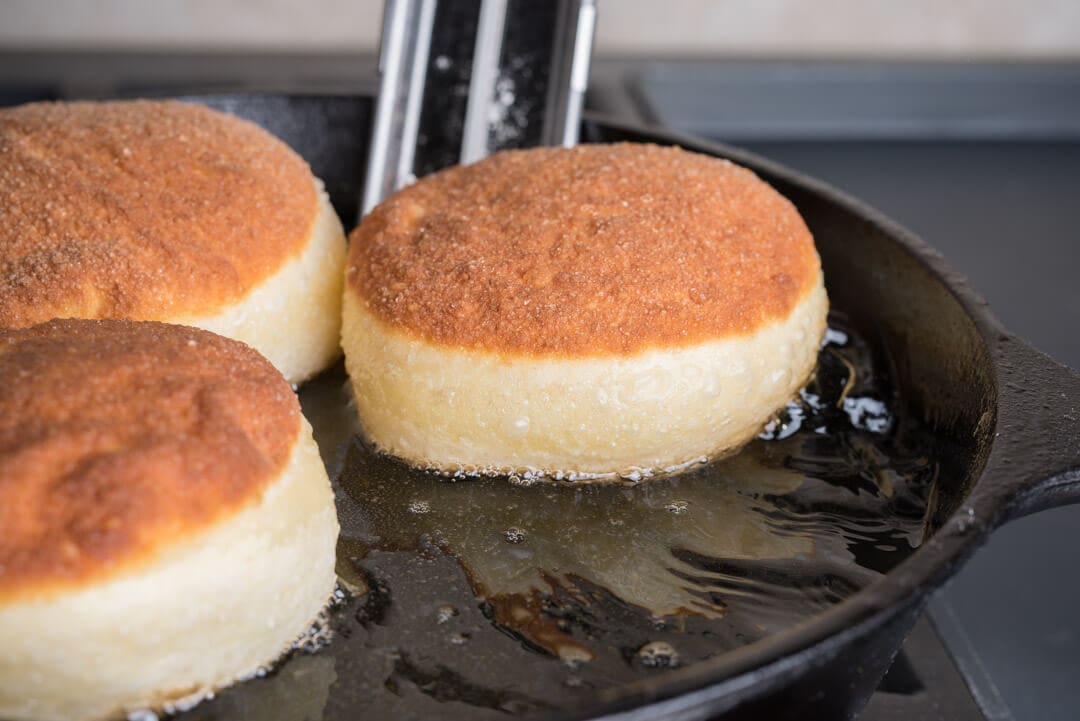
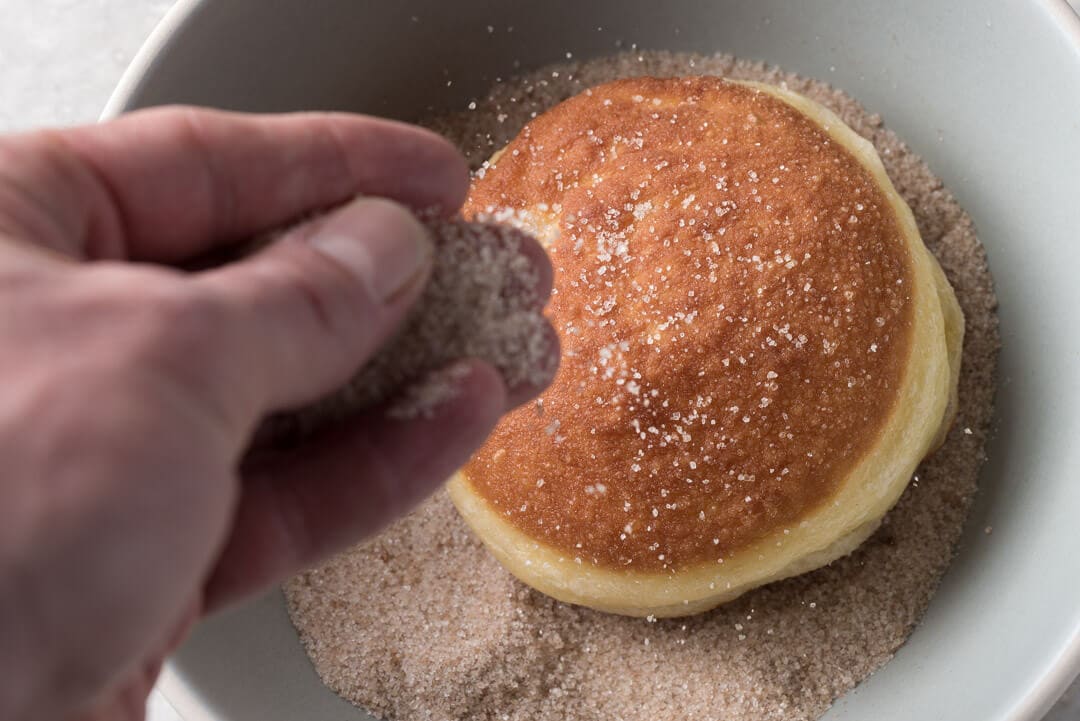
I prefer the look and texture after frying these for 2.5 minutes per side, but if you’d like them lighter reduce the fry time. When fully cooked, use your frying spoon to transfer each bomboloni to the baking sheet lined with a paper towel and cooling rack inside. Let cool several few minutes then toss in a mixture of sugar & cinnamon. Later, pipe with crema pasticcera (recipe below), if desired.
Cinnamon & Sugar Coating
This couldn’t be more simple. Mix the following in a bowl and when the bomboloni are still slightly warm, toss to coat several times. I prefer large, granulated sugar for the coating but you could also use fine sugar.
| Weight | Ingredient |
|---|---|
| 2g (1 teaspoon) | Cinnamon, ground |
| 200g (1 cup) | Sugar, coarse or fine granulation |
Crema Pasticcera (Pastry Cream) Recipe
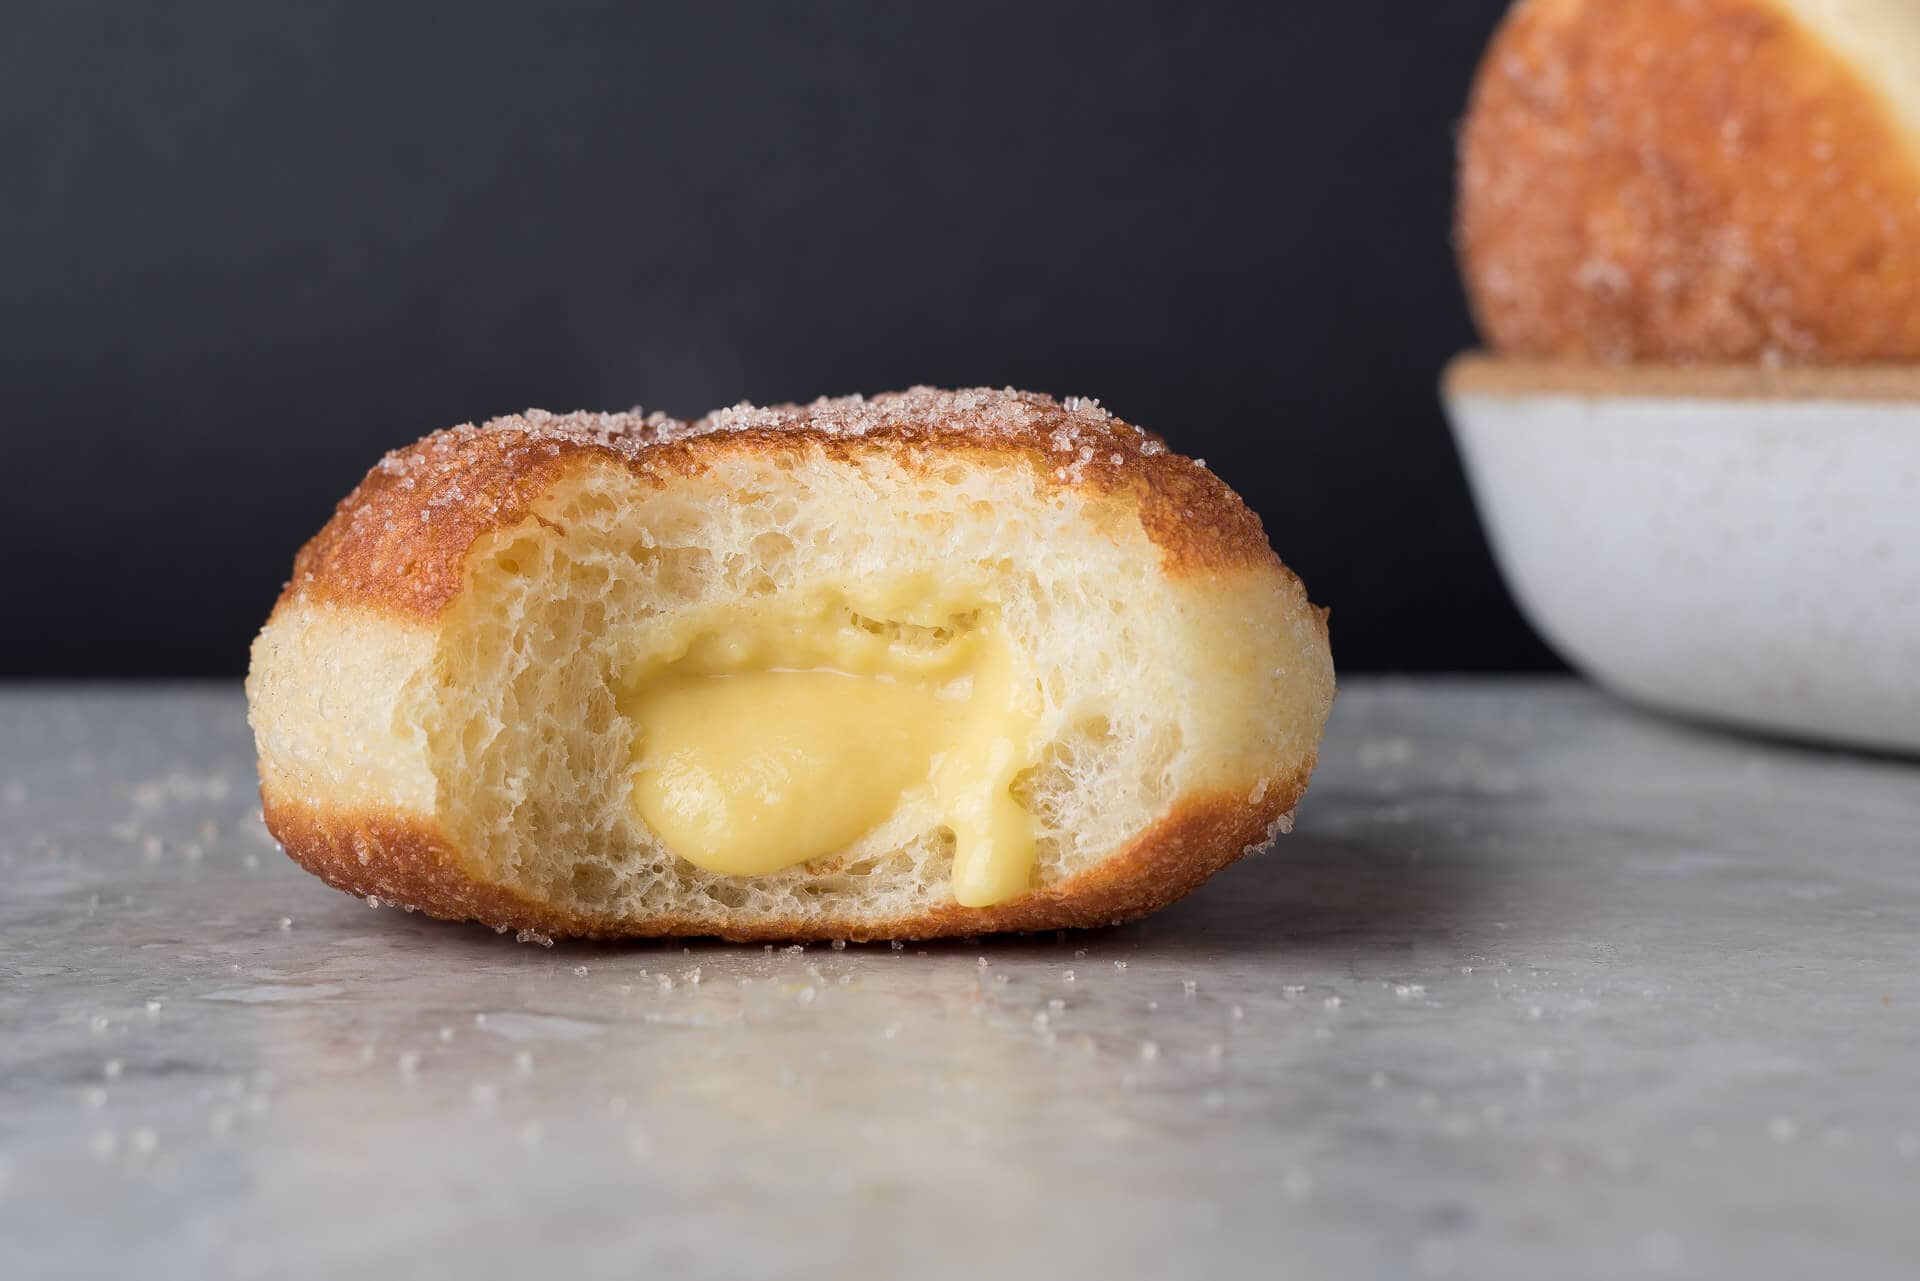
I adore adding lemon zest to this pastry cream. It’s subtle but noticeable, and somehow reminds me of the summer days spent back in Italy. Additionally, this recipe is a great base for many other types of creams (coffee, chocolate, fruit-flavored, etc.).
This recipe makes enough crema to fill half the bomboloni, depending on how much you pipe in and it can easily be doubled.
Ingredients
| Weight | Ingredient |
|---|---|
| 365g | Whole milk |
| 30g | All-purpose white flour (King Arthur Unbleached All Purpose) |
| 100g | Fine white sugar |
| 4 | Large egg yolks |
| 1g | Salt |
| 4g | Vanilla extract |
| 1 lemon | Lemon zest (optional but encouraged) |
Method
Gather a whisk, strainer, saucepan, and two medium mixing bowls.
- Place the milk in a saucepan over medium heat. Warm until bubbles start to form on the sides (just before boiling but do not boil)
- In a medium mixing bowl mix together flour, salt, and sugar. Add the egg yolks and whisk everything until incorporated. It’ll form a thick paste — just make sure everything is mixed together
- Pour the warm milk into the egg mixture a little bit at a time, whisking to incorporate after each addition
- Pour everything in the mixing bowl back into the saucepan over medium heat. Whisk constantly as the mixture heats. Continue heating and whisking until the contents just begin to boil (you’ll see large bubbles popping when you pause to whisk)
- Strain the mixture into another bowl. You’ll have to press and stir the thickened cream through the strainer
- Add the vanilla extract and lemon zest and stir to incorporate
- Cover the bowl with plastic wrap pressed to the surface of the cream (to prevent a skin from forming in the fridge) and refrigerate until firm
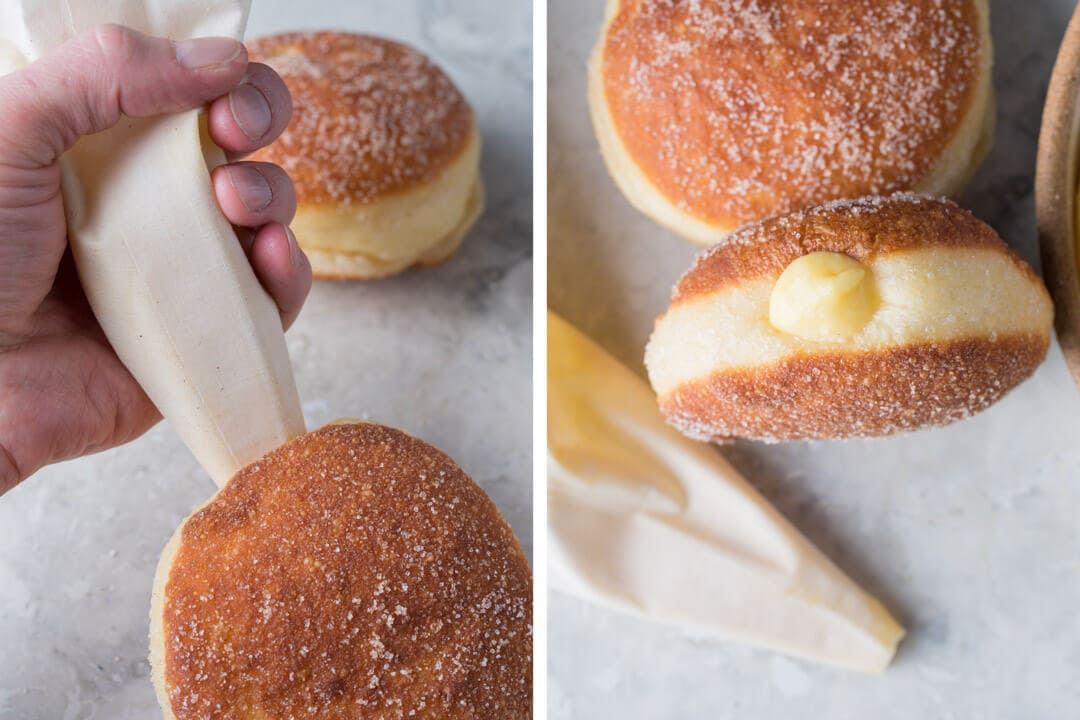
The crema will keep well for 3-4 days in the fridge. Use a piping bag and paring knife to fill the bomboloni just before serving. Make a small cut on the side with the knife, insert the piping bag, and squeeze in the desired amount.
Conclusion
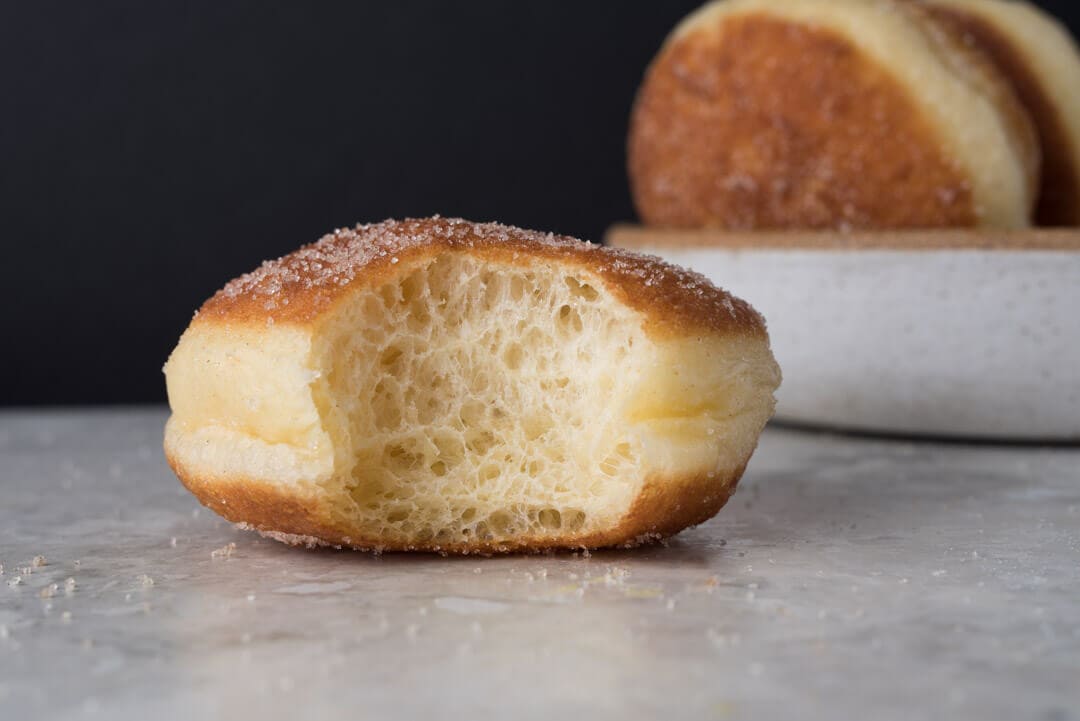
These are such a treat; I love making them for special events (birthdays!), holiday weekends, or group gatherings. With my recipes for sourdough waffles and pancakes, I have lots of options for weekend breakfasts. It’s easy enough to prepare the dough a day or two in advance, proof overnight, and have fresh bomboloni first thing in the morning. Because the dough is rather flexible, once you dial in the bulk and proof times, and develop a sense for when they are ready, you can adjust the schedule to make these in advance until ready to fry. And because frying is such a straightforward process, they’re a quick and easy thing to whip up once the dough is ready.
Crust, Crumb, and Texture
Impossibly light is the perfect adjective to describe these naturally leavened bomboloni. They are soft, pliant, and have just the slightest hint of crisp at the top and bottom. I like to fry them just a touch toward the darker side to emphasize the contrast between crispy crust and tender interior — it works well to further emphasize the overall lightness of each doughnut.
The coarse sugar coating adds a little extra crunch with each bite, even if the sugar tends to scatter readily, and the ones filled with crema pasticerra are in a league of their own. Each person seems to have a preference for just how much crema they want inside, but there’s really no wrong answer. Go big, no one is going to complain!
Taste

With no sourness at all, these bomboloni are, to me, the perfect breakfast indulgence. My target was for a result that wasn’t overly sweet or rich but rather one that was just on the edge of each of these. The end result is one that certainly tastes fantastic on its own with a light dusting of sugar, but transforms to something truly magical when filled with crema.
These bomboloni embody my childhood trips to Italy and our visits to the local town baker. Each morning as I take a bite into one fresh from frying, I’m whisked away back to traveling Southern Italy to visit family. The only thing missing, for better or worse, is the morning visit from the three-wheeled cart with megaphone rigged to the top. Although, now at home, I simply use my alarm clock — at least it has a snooze button.
Buon appetito!
If you use this recipe, tag @maurizio on Instagram so I can take a look!
Troubleshooting & How I Got Here
I spent a significant amount of time testing and developing this method and process. This recipe started with my brioche-like hamburger buns formula. That enriched dough was a good jumping off point but I knew the percentages would have to be changed. I tested various amounts for sugar, butter, and eggs and settled on the formula above. The result is a doughnut that fries up well and isn’t overly sweet on its own: it’s light and airy with requisite richness and sweetness. And they’re so, so perfect for filling with cream.
Below are a few common problems you might run into when attempting this recipe (and are the same things I struggled with in the beginning). Click on the symptom to reveal possible causes with suggested fixes.
Why is there no rise while the dough is proofing?
The time and temperature required to bulk ferment and final proof this dough is very critical. If the dough is not warm enough and left to bulk ferment long enough there will not be sufficient activity in the dough before it’s placed in the fridge overnight (retarded). Ensure the dough rises at least 30% during bulk fermentation, push out bulk as long as necessary until the dough achieves this. Typically, this takes between 5 and 6 hours at 78-80°F (25-26°C).
When frying, why do I get large bubbles on the top or sides?
I’ve noticed there are a few things that could lead to massive bubbles forming when frying a bomboloni. The first is a dough that is not strong enough and required more mixing. The dough should almost pass the windowpane test when done mixing, and the four sets of stretch and folds during bulk will finish imparting the required strength. From there, the dough needs to be lightly degassed during shaping and shaped tight. There should be no seams on each shaped round. Finally, the under-proofed dough can cause erratic, uncontrolled bubbles to form. The rounds need to be fully proofed and, when poked, feel like very gassy and light pillows. They will seem almost over proofed.
Why does butter leak out of the dough?
The butter should be incorporated into the already-strengthened dough when it’s at room temperature, not melted. When pressed with a finger, you’ll see an indentation but it shouldn’t be a puddle of liquid butter. If the butter has melted, place it back into the fridge and let it firm up before adding to the dough.
Why does the butter never mix into the dough?
If the butter is too cold and not pliable, it won’t incorporate easily into the dough when mixing. See the question above for how the butter should look and feel.
I can’t keep my dough at 78°F (25°C) during bulk and proof, what can I do?
As I mentioned in the post above, bulk and proof temperatures are very important with this recipe. If you’re not able to keep the dough warm enough during these steps, it could take several hours longer at each step before it’s ready to proceed to the next. Watch the dough and give it the time it needs!
Can I freeze this dough?
I have not tried to freeze this dough but others have reported successfully freezing my brioche hamburger buns. I would be wary to do this, though, and would first like to test before saying yes/no!


320 Comments
https://uploads.disquscdn.com/images/fead75c8a8c8db88f3aee778b9223b1e499bb0dc0f28e4fb10e91c098cab2070.jpg When I mixed the ingredients initially to be mixed it gathered together really quickly and then proceeded to break my kitchen aid because of how firm the dough was. I ended up continuing with the dough by hand because my mixer refused to continue with it. I have it in bf now but I have accepted it’s probably a lost cause. I used just one kind of all-purpose flour, could that have been the issue? I use Costco’s 25lb Harvest brand flour. I am not sure how important these high protein flours are for these recipes. I also didn’t start using the levain until thirteen hours after making it, not twelve. This is my dough in bf, should I trash it or is it worth saving
Sorry Laurn, I’m late to reply. How did they turn out?
You Have a online Book on Google Play Books?
My hardcorver cookbook should be there, “The Perfect Loaf”.
My family is from Molise and one of our traditions (for generations) is donuts on Christmas Eve. Would there be any reason I should not make my donuts with a whole in the center? It sounds like the dough may be sticky and I wouldn't be able to roll them; but I was thinking of poking a whole in the center. I'm wondering if that would be a bad idea since I've never tried this recipe before?
Thanks you and Merry Christmas!
*hole
You can certainly use this dough to do that!
can you make these with regular instant or bakers yeast?
Yes, but you’ll have to determine how much yeast and replace the sourdough starter with flour and water.
hi there so confused with the different recipes this one on ;ine and the one in the book. Read the comments below and still confused. This recipe was updated in April 2025 but yet you say the book is the most recent updated recipe? I've had my book for 3 – 4 years now so which recipe is the right recipe?
Hey Michele! Both are really great recipes. The book version I find has less sourness in the final doughnut, which I prefer. I’m in the process of updating this post to be just like the book! Sorry for the confusion, let me know how they turn out, you’re going to love em 🙂 Also hope you’re enjoying my book!
I realized I didn’t have enough starter and used only 150g. Is that going to be okay, any adjustments I need to make to make it work?
Just let the dough ferment longer in bulk fermentation.
Is the overnight cold retard necessary? could I let the dough proof until doubled and then shape similar to your dinner roll recipe?
Also, you let the shaped dough fully rise on their second proof before putting in the fridge? I’d be concerned they’d overproof.
You can let them proof on the counter instead of cold proofing. This is such a slow moving dough that there’s no worry about overproofing before putting them in the fridge, in fact, they need that extra time.
This recipe is horridly different than what is in his cookbook. I am incredibly disappointed and think I recovered the dough as best I could when I discovered the discrepancies, but I am very disappointed.
Sorry about that, Nick. Yes the book is the most updated version. I am overdue on updating this one to match the book! I’ll tackle it soon, sorry to hear about this.
Thank you for the reply. The book says 32 grams of water, which was simply not enough as the dough was incredibly tough. I added 59 additional grams to equal the 91 grams in this recipe. Can you confirm if you have noticed these issues?
Yes, and please update the misprint in the book. 32g of water cannot be right. The dough is so stiff!
The dough recipe in the book is correct, the dough should be stiff when mixing before adding the butter. But if you find it’s *too* stiff, add a splash of water!
Silly question, but would you be able to air fry these rather than deep fat fry them?
I haven't tried but I would say yes. You might not get quite the same texture, but worth a shot. I know some bakers who have baked these instead of fry!
What happens when you don't let it
BF up to 30% during the first rise and you place it in the fridge? Does your starter die will your dough not rise? I bulk fermented for about 7 hrs, didn't have much rise and then placed it in the fridge. I sat the dough out the next day for an hour to get to room temperature and then I divided they're on day two of no rise. I haven't had any issues with my starter before, I also used the recipe from the book.
That works just fine, as long as you get enough fermentation in the dough before you put it in the fridge. Though, even if you don't, it'll still pick back up the next day, it'll just take a lot longer.
Check out how I do this with my sourdough baguettes . I do a 2 hour warm room temp bulk, then pop it into the fridge. (It's in the book , too).
I just made these for the first time and they were great.
Only issue I had was removing the Bombolini from the cookie sheet after the proof. I think they stuck to the floured parchment paper I used, and I will try a floured cookie sheet next time.
I successfully made a half recipe, but it require a bit of flexibility with the stand mixer. I started out thinking I could mud by hand, but this is far too sticky of a dough for that.
Don’t worry if the dough is sticky after mixing. It relaxes a lot during the folding.
Great tips Paul. Yea, you need a good dusting of flour on that pan!
Are these best made with a liquid starter or a stiff starter? I have both here: a regular liquid starter and a pasta madre and am wondering which would yield the better results.
Technically, a stiff starter would be better, but I use a liquid!
When I make these I consistently get a very blistery top and a very dull untextured bottom. Why the difference? How do you manage to get the consistent appearance on both bottom and top? (This is me being picky — these were delicious!)
Glad they turned out great, Joshua! I sometimes get the blisters too. I'm not fully sure why, I think it has to do with the cold fermentation with this dough… Still investigating this! (And if anyone knows, I'd love to hear 🙂)
In directions you advise against cutting the recipe in half because this will not be a ‘sufficient dough mass for bulk fermentation’. Could you please explain?
A smaller dough mass is so very susceptible to temperature changes, and I find the dough ferments "better/efficiently" with a larger dough. That said, you can definitely halve the dough, just keep an eye on it and lengthen bulk/proof as necessary (which you'll have to do anyway!).
Hello!
Question about making these in larger batches – have you made a whole bunch with the same pot of oil (like 50-60 or so?). Wondering if I’d be able to make that many in one go-round, or if I would have to plan on cleaning/replacing the oil midway through?
It's hard to say and it really depends on the oil you're using. I've done about 30 in one batch without problems! Once you start seeing the bombo come out with a dull color or kind of greasy, it's time to change.
I made the doughnuts but mine puffed up into balls rather than having a slightly flatter surface on the top and bottom
They might have needed to proof longer to relax a bit more. You could also gently pat them down after shaping so they're more of a disc shape.
The only problem I came up against with this recipe was the oil temp, just had to try to get it to stay at the right temperature in order to cook through but once I did these came out delicious! The dough came out so nicely, I was pleasantly surprised with myself that I was able to stick to these instructions and end up with amazing donuts! I made the filling too and that is so good! I didn’t do the cinnamon sugar topping though. A fun weekend sourdough project for sure! Looking forward to trying out more recipes from The Perfect Loaf!
That oil temp is definitely challenging. It's easier with a larger pot and more oil, which is trouble at home!
For some reason I’m getting very little rise using your recipe.i tried twice and same result. Letting them rise in 28c and using a very strong starter I use for my bread daily… Can’t figure it out
Try doubling the amount of levain you're using, this will help.
My bomboloni come out of the fryer as lovely plump balls, complete with golden top/bottom and the light middle ring, but very quicky collapse. Any tips on what might be causing this? Inside they are still very light and fluffy, they just don’t retain their shape too well.
I’m sure Maurizio will have more insight, if they are puffing up perfectly while frying and then deflate after sitting for a bit, its most likely a lac of dough strength. are you checking for a windowpane and making sure the dough is properly developed before adding the butter?
Like Lori said, I would mix the dough longer to ensure it’s fully strengthened!
I am wondering if we can bake them instead of deep trying them. What do you think?
It’s possible, but they will likely be harder! Though, maybe a cake style donut would be nice, too.
I have made these twice and the second time decided to experiment with the freezer. I found the 65g being far too large so I shaped them into 30g balls. Before they got a chance to proof I put about 2/3 of the balls onto a baking sheet, covered in cling film and put in the freezer. A few days later I took half of them out and let them proof for about a day room temp on individual baking sheet squares. Dropped them into oil with the paper as I didn’t want them to stick to the fingers. They came out absolutely fantastic. I’m working on my third batch and most certainly they will be going into the freezer again.
THANK YOU for reporting this back, Carol. I’ve been wanting to try this myself, now I know how. Happy baking!
30g balls sound perfect! Do you by chance remember how long you fried these for?
I wish that there were doughnut and doughnut-type sourdough recipes online that didn’t assume a stand mixer; I wasn’t able to get the dough to build sufficient gluten when mixing by hand.
Even though the dough was sticky and weak all through the process, in the end I was able to still shape the dough and make delicious treats. The results were light and fluffy, very airy inside, with subtle flavors that went perfectly with a cinnamon-sugar coating or with a thin glaze. I experimented with shaping some round, making others into doughnut shapes, and even squeezing some out of the cut corner of a Ziploc bag directly into the oil. All those methods worked out fine, with similar results.
I will try this again and lower the hydration a bit or add in whole wheat flour to soak up some of it, and see if that makes it easier to work by hand.
You can certainly make these by hand, though it is a bit more work! Glad it worked out well for you, Jessica. Yea, a lower hydration and maybe slightly less butter will help the dough come together by hand. Enjoy 🙂
I have made these not sourdough a few times to be sure I got the steps down and finally tried the sourdough version this week. I made the dough Sunday and let it proof over night, the next morning it had risen some but not by much. I let it sit most of the day and it was still not close to 30% risen. I finally decided to to shape and proof as the other items I made had risen and proofed just fine. Again let go over night and there wasn’t much growth. I had made sourdough boules, rolls and other things that same day so I know my starter was active and fine. I finally put in the fridge on Tuesday as I had other things to do. Wednesday morning there was still no change. I then had a ton of sourdough goods to make for my customers and forgot about them until Friday. I pulled the pan out of the fridge Friday night to throw away but noticed they had grown some. Just for fun I let sit out overnight again and low and behold they were light and fluffy and risen the next morning. I was a bit afraid to try frying them as they had been in and out of the fridge going on 6 days but they fried up beautifully, light, fluffy, airy. Absolute dream. They are SUPER sour from 6 days of fermentation but the cinnamon sugar helps with that. Any idea why they would take so long to rise? I bake just about every day for my Cottage Bakery and have never had this happen before. Will definitely try again as they are delicious.
Wow, Aimee!! That’s quite a long fermentation time. As you likely know, dough temperature is absolutely critical here with this recipe as they do take a long time to rise. You can try shooting for a higher dough temp of 82-84F. Also, try leaving to bulk ferment longer before you divide the dough, this will help them get a good start before they’re divided.
Thank you!!
Hi there! Thanks for giving this community such great support and recipes. I have made these quite a few times and I always struggle getting them off the lightly floured surface. Each doughnut sticks and morphs as I pick them up losing that nice dome shape.
My next plan is to cut 16 individual squares of parchment and butter the parchment so that each can be put directly into the fryer spoon. However, I was wondering if you had any other tips?
Thanks!
You’re very welcome, Laura! Yup, parchment like that will work just fine, I’ve done it. The dough is very fragile, but it might be you’re not mixing/developing it enough. I would try mixing a little longer for a stronger dough. It should remove a little more cleanly. Also, be sure to shape tightly!
In Russia we call them ponchiki .
Seems like every country and every culture has a variation, which I think is amazing!
Hello! I am was hoping to fry mine in the morning but I was a bit confused about how to do that. The post states “If you refrigerate them when they are fully proofed, the bomboloni might not fry with quite the same height the next day as they would if frying at night (the longer the proof, the less rise you’ll see).” But then also “You can also refrigerate the proofed dough at this point and fry them first thing in the morning for breakfast.”
So do can I refrigerate the fully proofed donuts? Or is it best to pop them in the fridge before completely proofed and finish in the am? Or do I refrigerate them after I’ve shaped them, then pull them out to leave proof overnight?
Sorry for the confusion. Best to pop them into the fridge before they’re fully proofed.
Can you only add the filling right before eating? Or can I fill and just keep refrigerated if I’m giving away?
I would fill near when you want to eat. You could do it in the morning, then eat them a few hrs later.
Hello! Could there possibly be an error in the cookbook for the bombolini? Only 32g water? The dough does not look right at all.
Hi, I made the recipe as described in the book today, and while I was also skeptical because I thought the dough looked to dense at first, the doughnuts came out perfect.
In case anyone is curious, I filled them with strawberry jam and it was awesome.
This recipe is completely different than the cookbook version and I also found the cookbook version way too dry. I added more water to mine. It’s still in warm bulk fermenting stage so hopefully these turn out.
I should add that the dough was so dense that my mixer struggled with the paddle. I had to use the dough hook and it still had a hard time.
Well…verdict is in and mine are amazing too. Yay. I tried 2 in air-fryer as others had suggested and they worked but we didn’t care for them that way…so rest were done in deep fryer and we love them.
What’s your recommendation to store?
The detail and troubleshooting is great. I wanted just to say I put the oven tray on top of the proofer base (B&T) and then a large plastic bin inverted, so creates a huge proofer. One question – I used rice bran oil and all my donuts were covered in bubbles like bubblewrap? Any idea? (I know the oil was too hot for the first 3 but all donuts looked like this even when the right temp was reached) I can only think of moisture on the surface of the dough from the proofer.
Great idea, Trish!
I’ve noticed with some oils I get bubbles like this as well. It’s partly do to the cold fermentation happening with this dough, too. Yes, if there’s moisture on the outside of the dough, it also promotes these bubbles!
Hi Maurizio! First of all, thank you for all of your amazing recipes. I’ve made so many of them, and they always turn out great. My question today is mid-bake, so I don’t expect you’ll get to it in time, but I may as well try. I made the dough for the bomboloni with a very strong starter and very strong levain, but the dough has been in warm bulk fermentation for about 18 hours and it has not increased 30% (but I do see some activity). I had to start cold bulk fermentation in order to have donuts in time for brunch tomorrow…do you have any tips for best results at this point? Such as cutting the cold fermentation short and increasing the time for the final proof? Or should I cut my losses and make a new batch with commercial yeast if I want donuts 24 hours from now? Thank you again! Can’t wait for your cookbook to come out.
You’re very welcome, Gina! Sorry for the delay—and way past your making of these! Yes, if you’re not seeing enough activity, give the dough more time at warm room temp. I bet you they would have turned out great—I hope so!
Hi maurizio! I’ve made these before with success. They were little balls of cloudy heaven.
I’d like to make them
Again using pasta madre. I keep mine at 45% hydration.
Do you think i need to increase the water quantity ? Also, should i decrease the bulk fermentation time?( Im thinking that maybe the pasta madre could ferment the dough faster )
Your thoughts and expertise on this would be a great help! Thanks!
Awesome, Maria! No, I don’t think you’d need to increase the hydration of your PM, that’ll work just fine. Hard to say on the bulk fermentation time, it really depends on the temperature of the dough and how active your PM is when you use it. Use your judgement there!
I made some tasty dough balls. I have a picture but how to post? I think they need more mixing and better shaping. Maybe more proofing. No white line, blew out one side.
But nice thin crust, soft. I’ll just have to keep trying
Update: 11 hours of warm proofing later and we have donuts! I had cooked half and thought to just leave the rest of the shaped dough to see what happens on the counter. They looked so good I had to try and cook them. They were great! A little tangy but soft and good!
I don’t have any way to post photos here, sorry Christine! (On our community chat for members we have a sway to swap photos there!).
So glad to hear they turned out well for ya with the long proof!! This dough definitely does need more time.
Thanks
I’m a member. I’ll have to look for it
My dough isn’t strong enough so the first test the balls turned into disks during 12 hr proof. Did get some erratic bubbles when cooked but they were still pretty tasty. Should I knead the remaining dough more? I followed all measurements but feel the dough is way too soft/sticky. Dough has been in frig for several days. Let it come to room temp, knead and fold again an/or add a small amount of flour?
Another perfect recipe! They came out heavenly! Worth the wait. Mine were totally like you were describing in the recipe. I proof the dough in the oven on the dough proof setting at 85F, because mine doesn’t go lower than that. The final proof was only 8 hours (I would have waited the entire 12 hrs, but my kids were all over me to fry some), but that turned out to be enough. I’m thinking the higher temp made up for the shorter time. I’m your fan for life! Thank you!
So glad to hear these turned out well for you, Laura! Sorry for the late reply. It sounds like you timed it just right, that warmer temp likely sped things along perfectly. Thanks for the comments and happy baking!