This past weekend, I had the wonderful opportunity to attend a workshop by the one and only Sandor Ellix Katz, author of The Art of Fermentation (essential reading!). I walked away from the workshop infused with inspiration and a head full of fermentation ideas. Of course, it wouldn’t be a hands-on workshop if I didn’t leave with a jar of bubbling veggies — a relish of sorts.
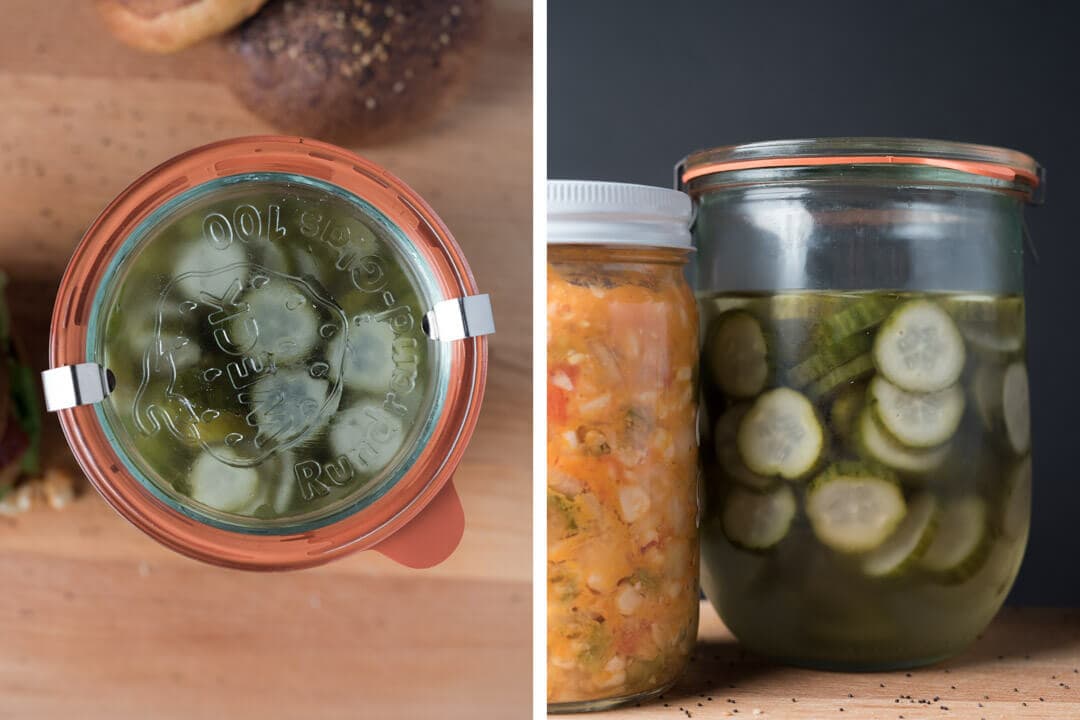
The fermenting relish we created by hand during the workshop had numerous spicy New Mexico chiles (as is the custom here in New Mexico, if it’s not spicy, let’s first make it spicy, then figure out the rest of the details), onion, corn, tomato, sweet potato (cooked), and garlic added to the mix. After getting my hands dirty with mixing, mashing, and packing, I began to ponder what I’d like to use this spicy concoction on, and then it came to me: hamburgers with brioche hamburger buns!
Coincidentally, the upcoming weekend of July 4th has always been a big grilling weekend out here, and what better way to celebrate our Nation’s independence than to fire up the grill and throw on some burgers and veggies?
I’ve made hamburger buns several times but have yet to formalize a recipe for my favorite version. This formula has evolved and is similar to my cinnamon roll recipe in that it’s based on an enriched brioche dough but with changes to butter, milk, and flour types.
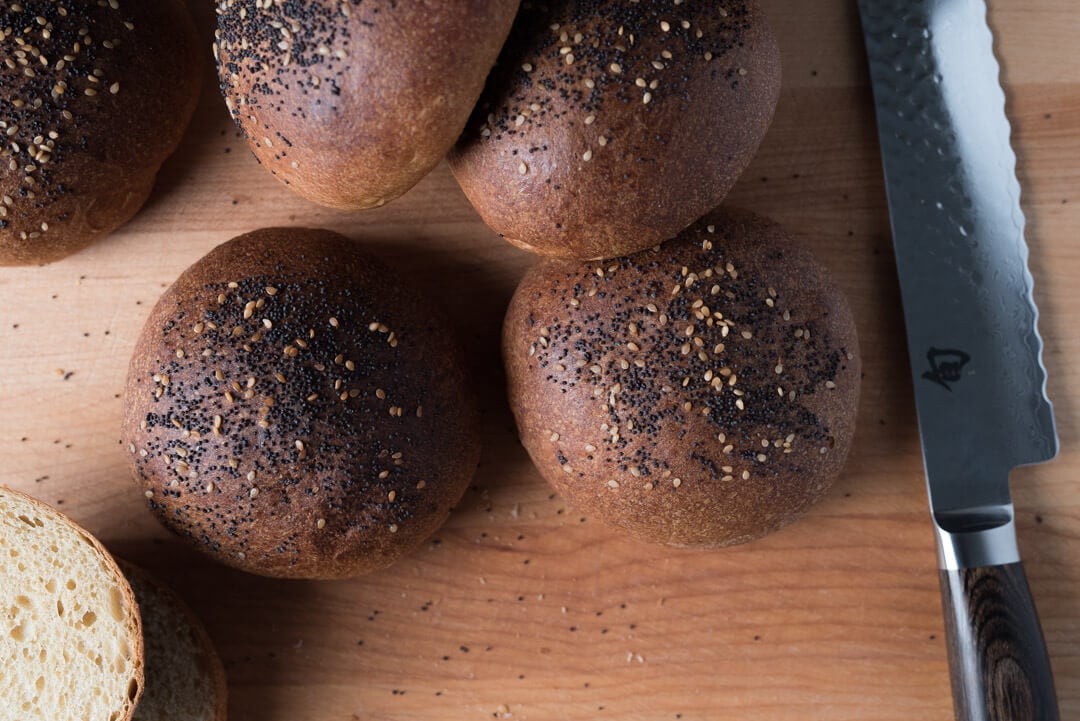
What I like most about this brioche hamburger bun recipe is its versatility. Not only can the dough be chilled in the fridge (similar to my fluffy milk bread hamburger buns) at multiple points before baking, once baked, but these buns also keep very, very well for days after. If you are planning an event, you can easily make these a day or two beforehand and keep them wrapped up so they stay pliable and ready to slice the morning of.
Additionally, these brioche hamburger buns can be used for many more things around the kitchen than just hamburgers—they are secretly a dinner roll that’ll blow those store-bought ones out of the water.
Let’s break out the butter.
Brioche Hamburger Bun Recipe
When compared to my cinnamon roll recipe, you’ll first notice I reduced the butter a smidgen and worked in a significant percentage of whole wheat flour. The added white whole wheat adds a subtle flavor boost to these, promoting them from just another hamburger bun to more of a central player in the overall meal. Further, the whole wheat gives the buns more rigidity after they’re baked, helping them to support the hamburger patty, toppings, and condiments.
However, this brioche hamburger bun recipe would work very well with 100% white flour or a different type of whole grain for the white wheat component—be sure to adjust the milk percentage up or down to suit.
Feel free to change the flour variety used, but be sure to adjust the hydration to suit.
The schedule outlined below has times and temperatures listed for the same day bake. Meaning the dough is started in the morning and then baked in the late afternoon, ready for a late grilling session or early dinner. However, the dough can be retarded overnight in bulk to add even more flavor and make scheduling easier (more on this below).
Note that you don’t have to make a levain for this recipe, just use your ripe sourdough starter (see the difference between the two here). However, make sure the night before when you refresh your starter you build up enough to cover the starter requirement below (185g).
Vitals
| Total Dough Weight | 1200 grams |
| Yield | 10 x 120-gram buns |
Dough Formula
The target final dough temperature (FDT) is 74°F (23°C).
| Weight | Ingredient | Baker’s Percentage |
|---|---|---|
| 278g | White Bread Flour (~11.5% protein), Malted (Central Milling Artisan Baker’s Craft) | 60.00% |
| 185g | White Whole Wheat (King Arthur Flour White Whole Wheat) | 40.00% |
| 162g | Unsalted European Style Butter (Kerrygold Unsalted) | 35.00% |
| 185g | Eggs (about 4 large) | 40.00% |
| 46g | Fine White Sugar | 10.00% |
| 148g | Whole Milk (cold, from the fridge) | 32.00% |
| 10g | Salt | 2.30% |
| 185g | Ripe sourdough starter | 40.00% |
Method
I used my Kitchen Aid mixer to mix this brioche dough. It’s possible to mix this all by hand but it gets a little tricky with the added butter. If you choose to do it by hand you could knead the dough in a bowl with a wet hand or even slap/fold on the counter.
1. Incorporation – 8:45 a.m.
Take out the butter from the fridge and cut into 1/2” thick pats and place in a small bowl. Let the butter come up to room temperature while mixing the rest of the ingredients.
Add the sugar, eggs (from the fridge), milk (from the fridge), and mature sourdough starter to the bowl of a stand mixer. Whisk everything together until incorporated.
Add the salt and flour to the mixing bowl. Using the dough hook attachment, mix the dough on STIR (lowest setting) for 3 minutes until all the flour is hydrated and everything is incorporated. The dough should look very shaggy at this point but should not be overly stiff. You might need to add more milk, a little at a time if the mixture is too dry.
Let the dough rest 10 minutes, covered.
2. Mixing & Butter Incorporation
After the 10 minute rest, the dough will be strengthened further before adding the butter.
Mix 4-6 minutes on speed 4 (4 notches above STIR for me on my Kitchen Aid, medium speed) until the dough comes together and starts to pull from the sides of the bowl. It will most likely still stick to the bottom, but you’ll notice the dough will strengthen up and become slightly more smooth.
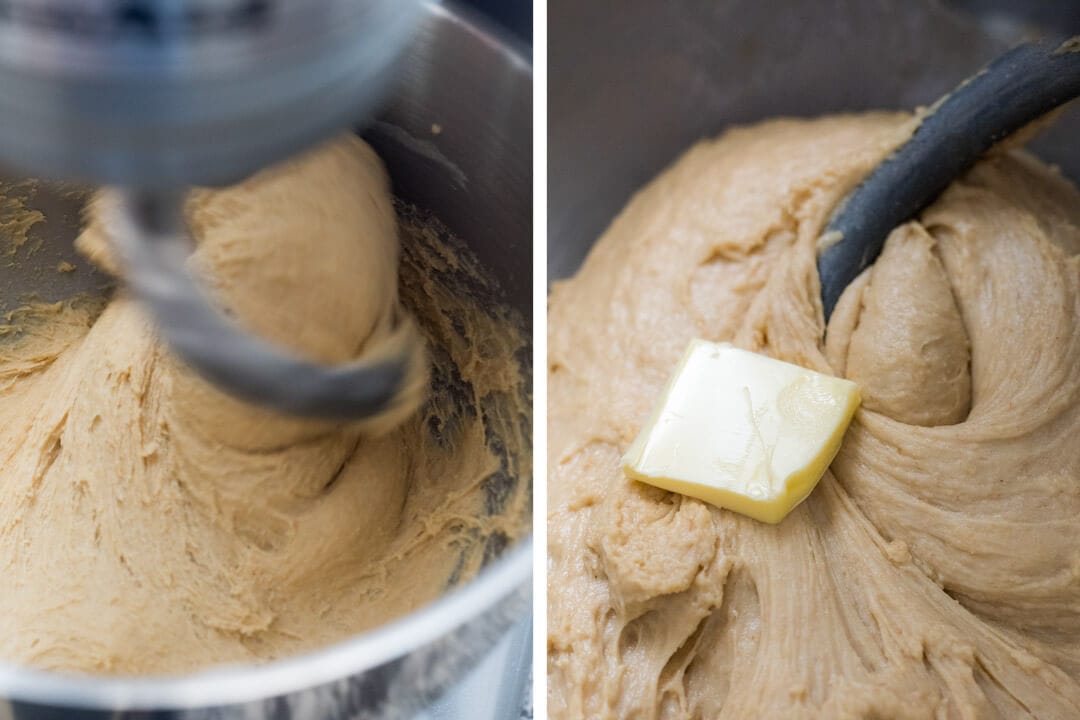
Butter temperature is important! At this point, it should be soft to the touch but not melted (see above, right). It should not be too cold or it won’t incorporate easily, and conversely, if it’s too warm it’ll get greasy and melt. Use the freezer or the microwave (in short increments) to adjust the butter temperature if necessary.
Turn the mixer down to speed 3 and start adding the butter one pat at a time right where the dough hook meets the dough mass. Wait to add the next pat until the previous one is fully incorporated and continue until all the butter is worked into the dough.
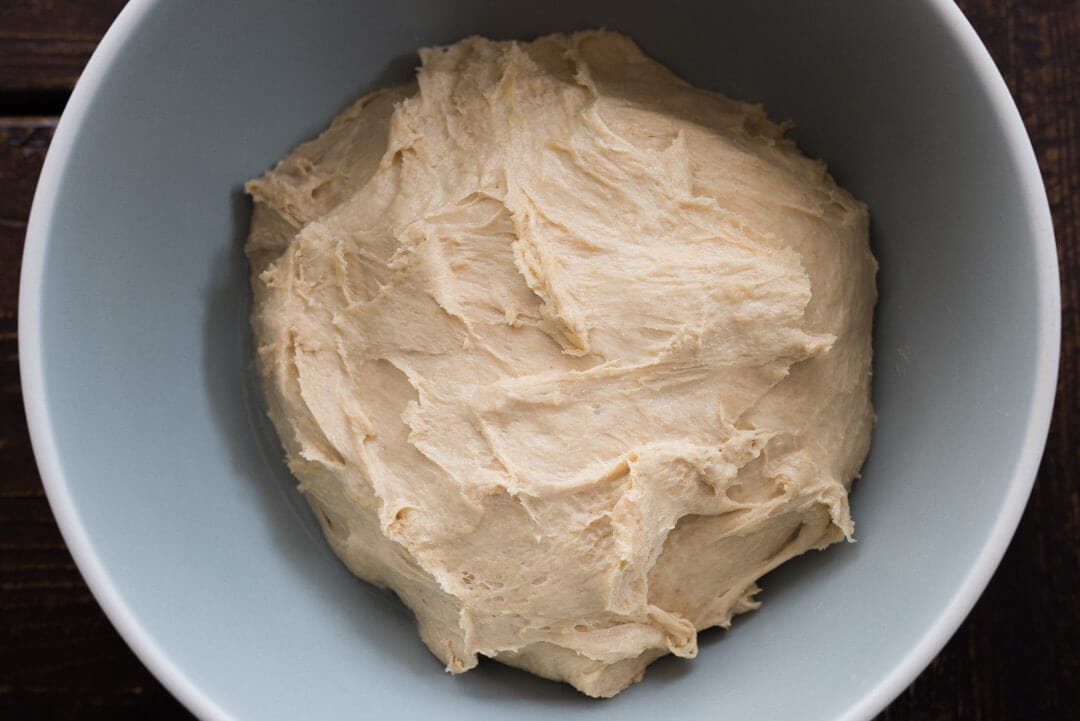
Total mixing time for this step could take 8-10 minutes. The dough will still be slightly shaggy (see below) but this is ok because we will perform a couple of sets of stretch and folds during bulk to further add strength. Additionally, you can see the dough does not look greasy from any melting butter. If your dough temperature is too high, pop it into the fridge for 15 minutes to help cool it down.
Once the butter is added, transfer the dough to a tub or thick-walled bowl for bulk fermentation.
3. Bulk Fermentation – 9:45 a.m. to 12:45 p.m.
As the dough is bulk fermenting on the counter, perform a total of 2 sets of stretch and folds, spaced out by 30 minutes (the first one 30 minutes after you finish mixing). For each set do a letter fold with wet hands (pick up the Northside and stretch up and fold over to the South, and so on).
After the second set of stretch and folds, place the covered bulk container into the refrigerator; chilling the dough for 1-2 hours in the fridge will make shaping much, much easier.
Here’s where the flexibility I mentioned earlier comes into play. You can let the dough chill in the fridge for 2 hours like I typically do, or you could leave it in the fridge overnight and shape the buns early in the morning to bake the next day.
4. Divide & Shape – 12:45 p.m.
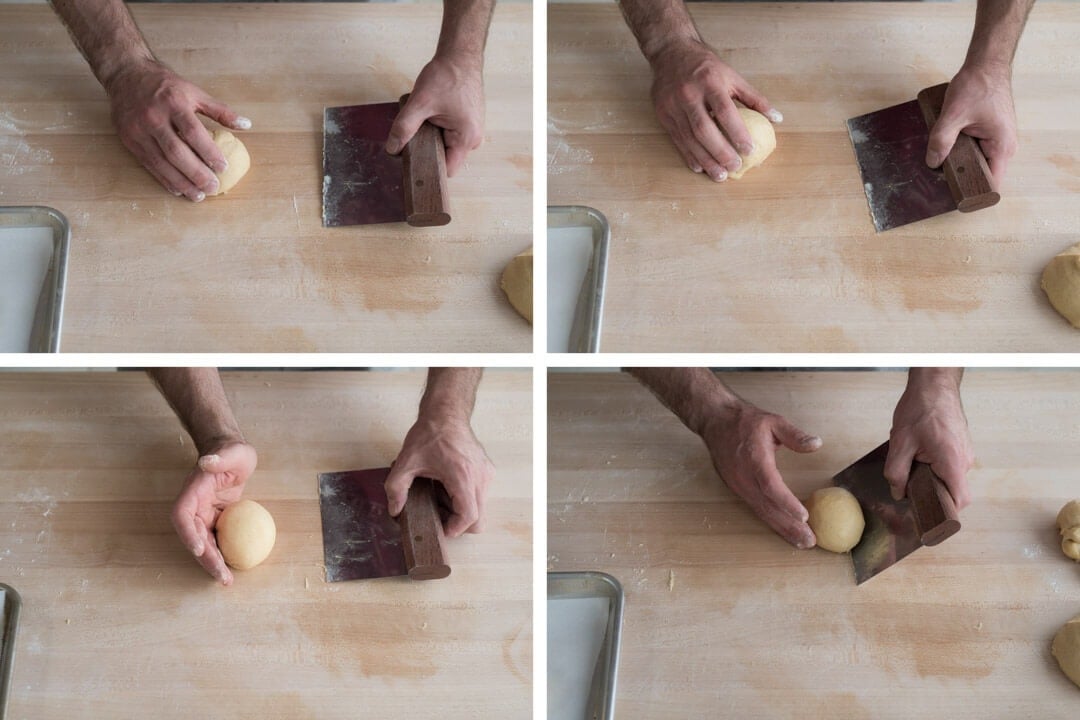
There’s no need to preshape this dough because we’re shaping it directly into small balls for final proofing. Prepare a full-sized baking sheet and another half sheet by lining them with parchment paper.
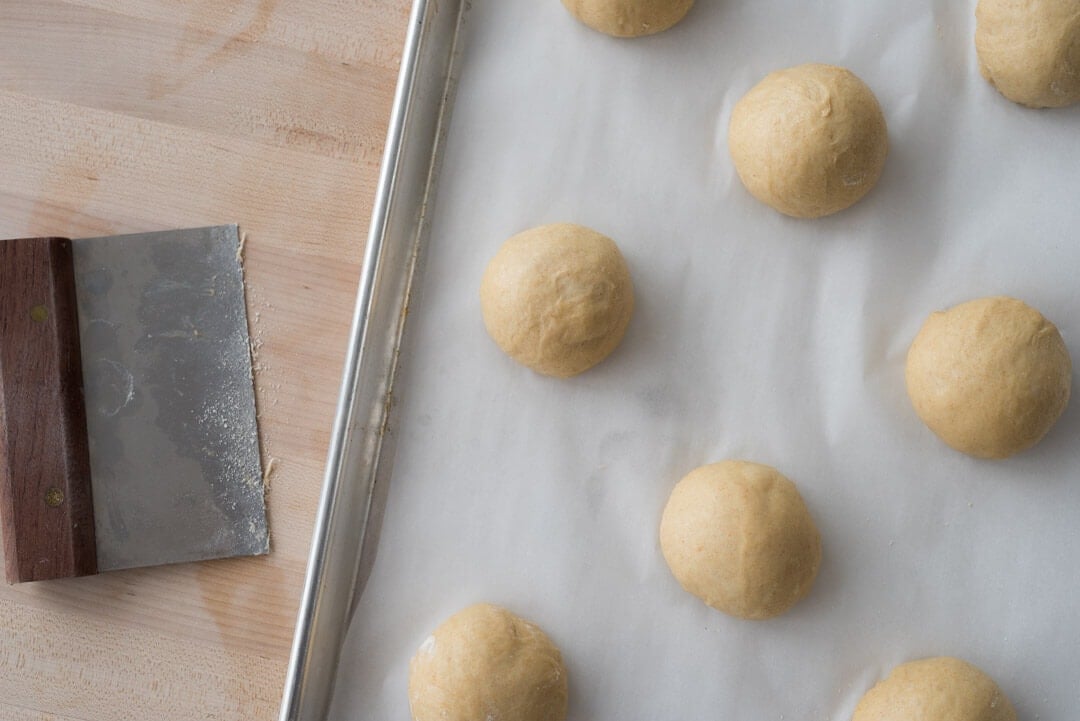
Remove the dough from the fridge and gently dump it to a lightly floured work surface. Using a scale and bench knife, divide the dough into 10 pieces. Then, using lightly floured hands, shape each piece into a taught ball.
I find shaping these to be very similar to how I shape pizza dough balls, but another method is to use a single hand and cup the dough ball down against the work surface. Then, move your hand in a small circle slightly pressing down on the dough as it moves around and slightly anchors to the bench (see above). Alternatively, you could shape each ball like you would a boule. Either way, be sure the dough has a fairly taut surface.
For more shaping instruction, see my guide page to shaping buns and rolls.
Once a ball is shaped, place it on the baking sheet so each is spaced out by 3″-4” or so. Using your hand gently flatten out each ball so they increase in diameter just a bit.
Cover the baking sheet with plastic to proof on the counter. I use these large plastic liners to cover my proofing baking sheets, they are even large enough to fit a full-sized baking sheet inside.
5. Proof – 1:00 p.m. to 3:30 p.m.
Covered and on the counter at about 73-76ºF (22-24°C), these trays of dough should proof for about 2.5 hours.
6. Bake – Preheat oven at 2:30 p.m., Bake at 3:30 p.m.
Preheat your oven to 425°F (220°C).
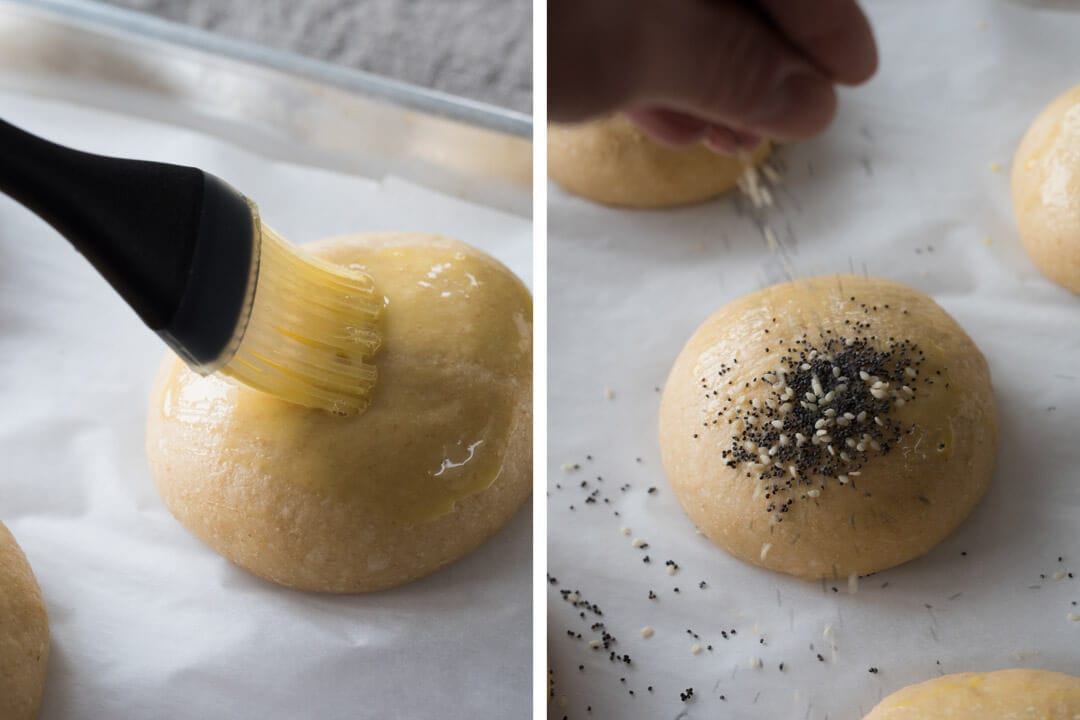
Make an egg wash by whisking a whole egg and a splash of heavy cream or whole milk. When the dough is ready to be baked, uncover the trays and paint on the egg wash with a pastry brush.
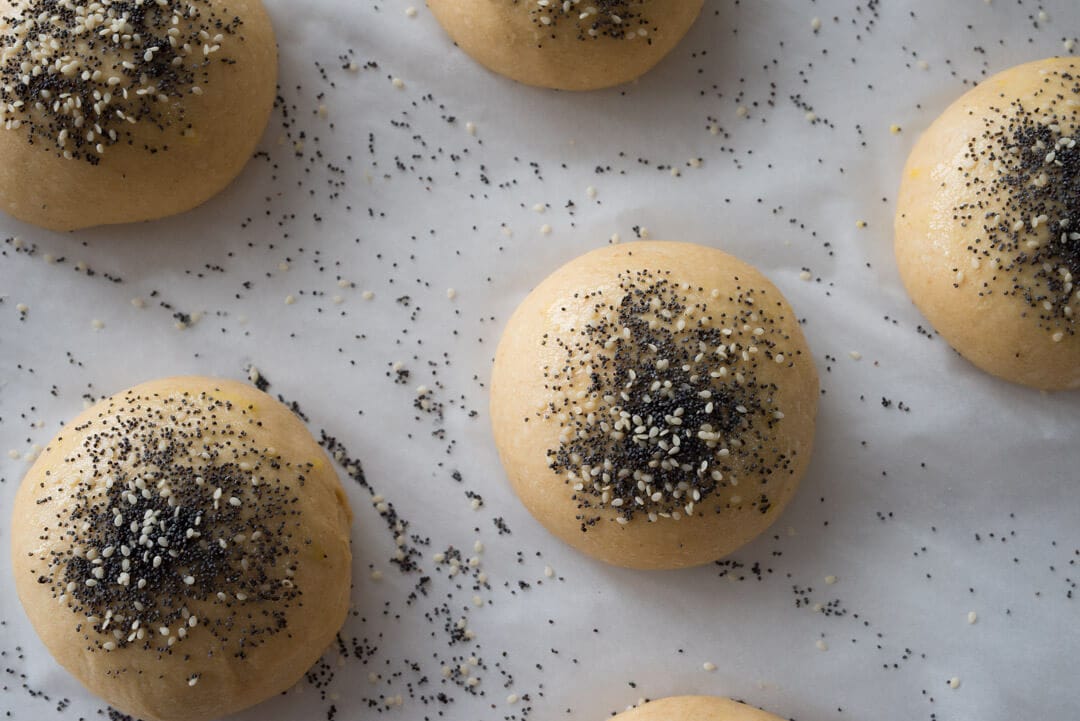
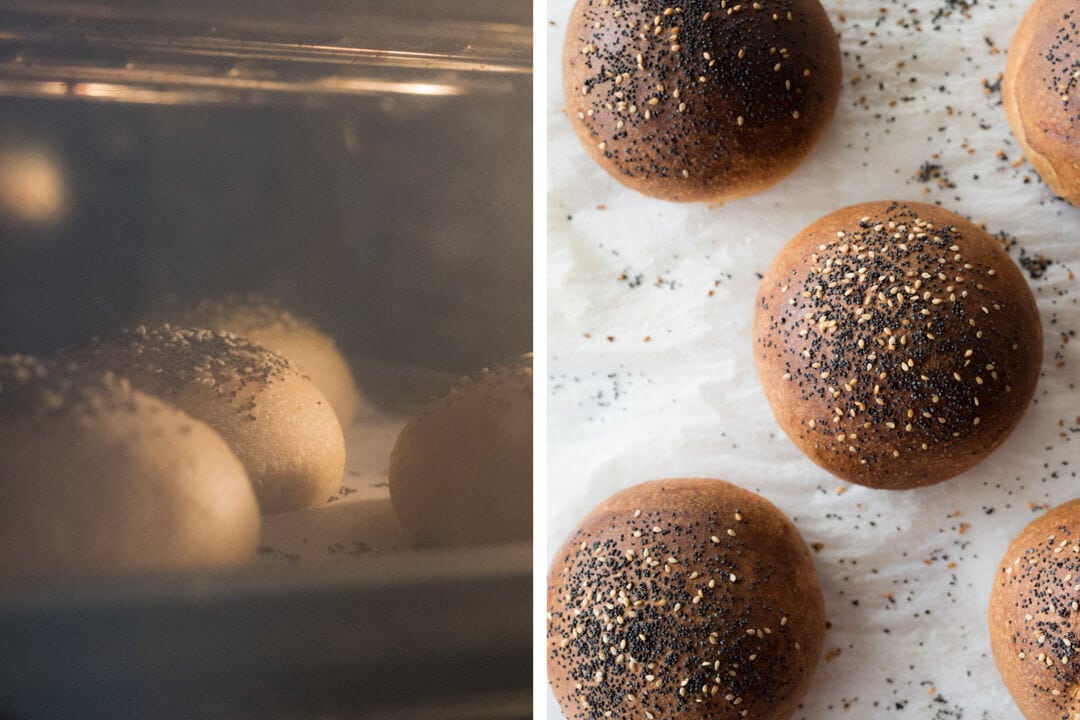
I mixed together 50% white sesame seeds and 50% poppy seeds for the topping of each bun. After the egg wash is applied spread some seeds on top as desired.
You don’t need to bake these on a pizza stone or Baking Steel, they’ll bake right on their own baking sheet. Because these brioche hamburger buns are topped with an egg wash, there is no need to steam the oven.
Slide in the baking sheets and bake the buns for 25 minutes. After the first 15 minutes rotate the trays, front to back, and top to bottom. Do keep an eye on these near the end, they may need more or less time depending on your oven.
Once baked, remove from the oven and let the buns cool on wire racks.
Conclusion
As I mentioned earlier, this was the perfect storm of motivation for me to finalize this brioche hamburger buns recipe and grill some hamburgers: the creation of a fermented relish, a holiday weekend approaching, homemade pickles in the fridge, and the pièce de résistance: homemade brioche hamburger buns.
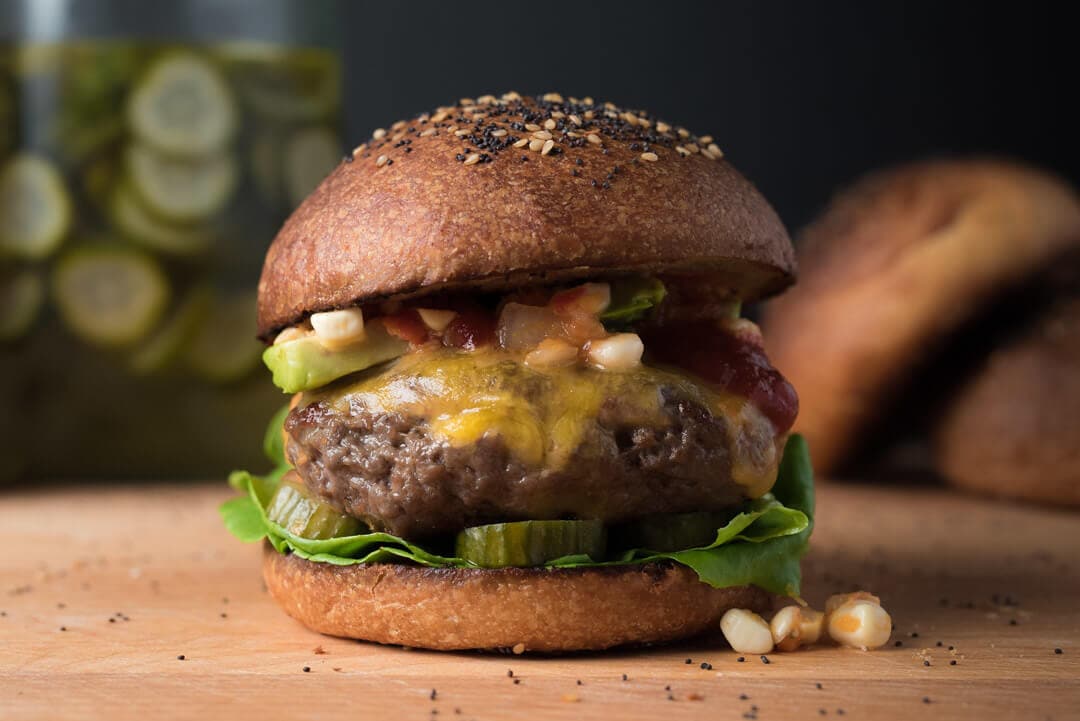
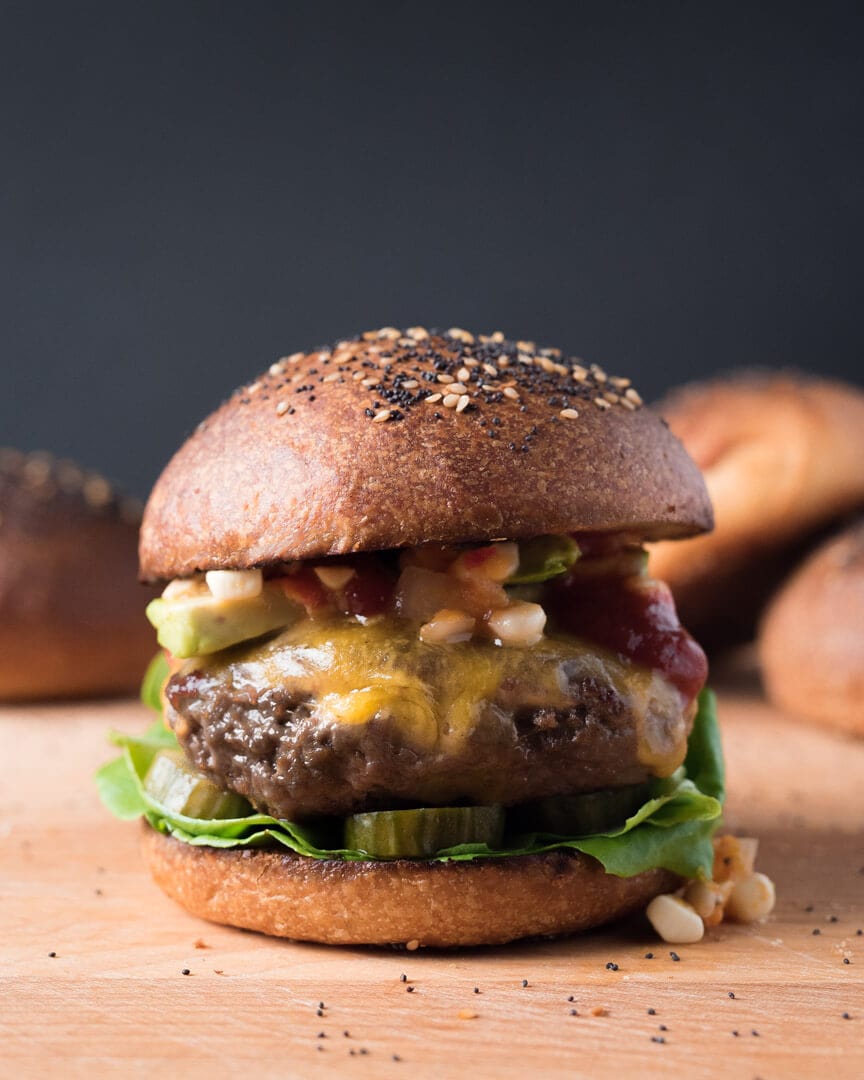
For my hamburger, I sliced each bun in half and spread on some butter before placing them crumb side down on the grill for a few minutes to get nice and crispy. I mixed up some grass-fed beef with a dash of salt and sriracha and grilled each to medium. Then the burgers were topped with my Katz-fermented relish, homemade pickles, avocado, ketchup, and finally enrobed in the grilled buns. Mighty, mighty tasty indeed.
Crust & Crumb
The crust on these brioche hamburger buns is crispy but not tough or unduly firm. There’s nothing more off-putting for me than a hamburger bun that’s totally soft and mushy; I want some texture! Happy to say these definitely do deliver, and grilling them for a few minutes with butter further amplifies this.
I like seeds as a topping for these, not only for the added splash of flavor but they add a desirable texture to the top. If you don’t like seeds or prefer a different type, by all means, omit or change the toppings to suit.
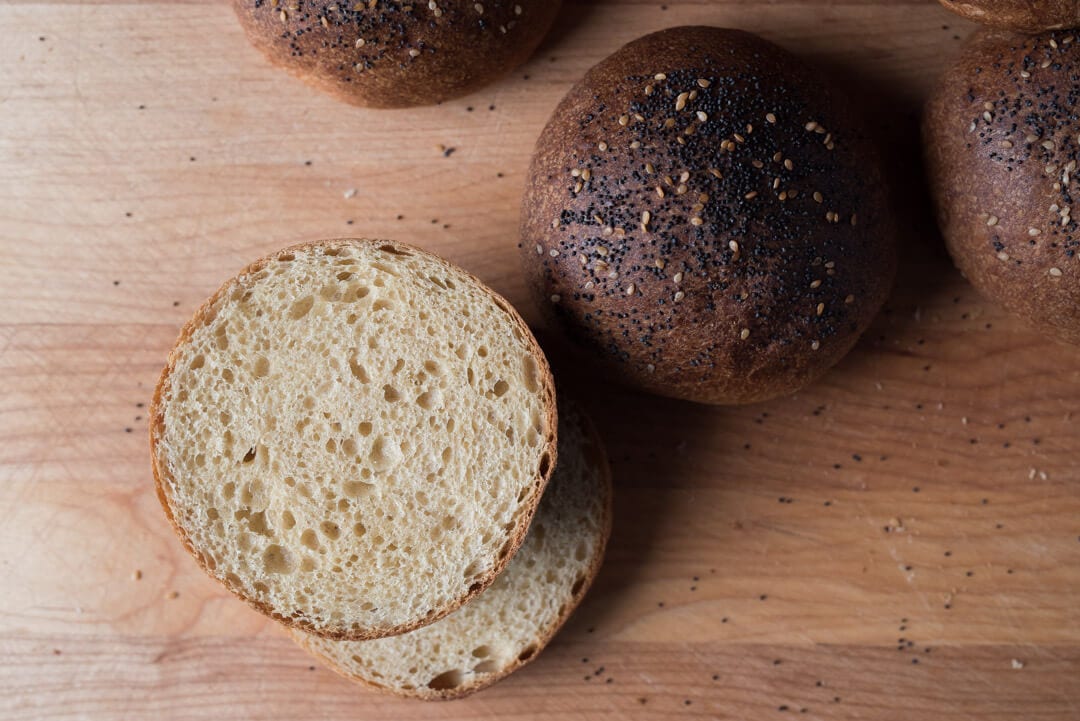
The interior is soft and open with a wonderful yellow tint from the white whole wheat flour and rich butter. You definitely don’t want the interior of these to be too open, but even, full fermentation is key to a light and airy bun. No dense spots and no gaping holes—the middle road.
Taste
With this same-day brioche hamburger bun dough, there’s just a hint of sourness. The added acidity brings additional flavor but is not overwhelming. The buns add subtle wheat and butter flavor to the overall hamburger, which is just what I wanted: a bun that brings more flavor to the stage without overpowering the other ingredients—a well-tuned concert of flavors and textures. And I think the added flavor from Mr. Katz’s well-fermented condiment just pushed these over the top into crazy good territory.
What’s Next?
If something better exists for a weekend by the grill, I might not want to hear about it. These brioche hamburger buns and burgers were heaven, and I’m looking to do a repeat in the next few days. I can now safely say this formula finalizes my question of how to make buns at home.
If you’re looking for another option, check out my sourdough potato hamburger buns, or if you’re making hot dogs, my homemade hot dog buns.
Nice buns ya got there! Had to say it—buon appetito!
If you use this recipe, tag @maurizio on Instagram so I can take a look!


