

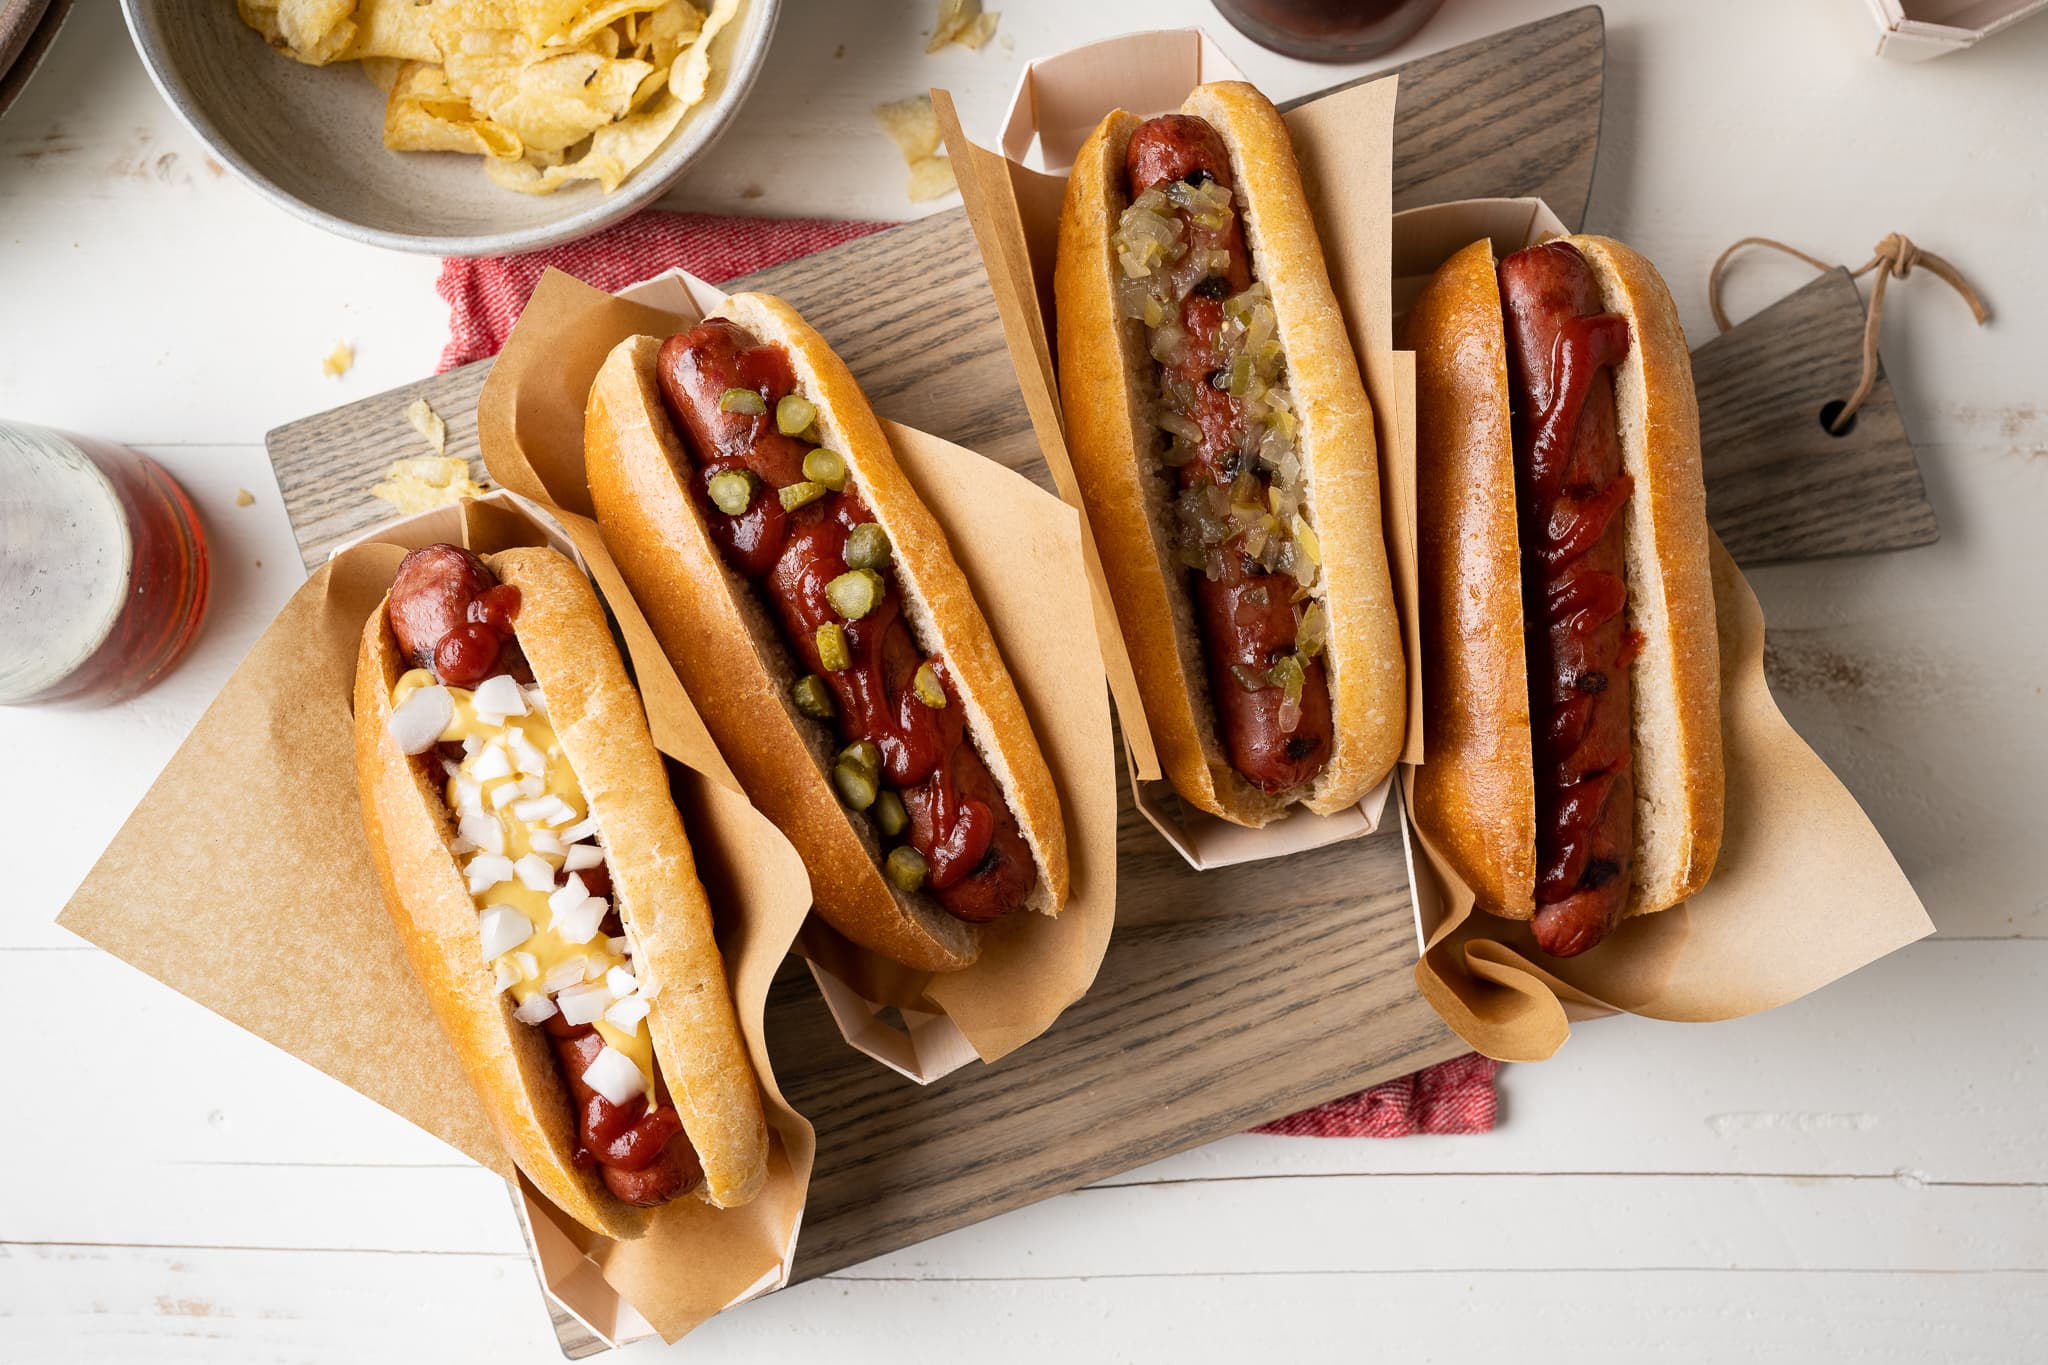
Hot dogs fill a particular nostalgic sweet spot in my childhood. They remind me of summer days with prickly heat at the pool, birthday parties with water balloons and a slip ‘n slide, and the occasional get-together around a smoking hot grill just for the sake of it. While we never had homemade hot dog buns, our grill almost always had at least one pack of “American hot dogs,” as my grandmother used to call them. Sadly, the buns we did have for the delicious sausage were almost always mass-produced buns that would invariably fail to hold up their end of the bargain.
The flavorless vehicle was either dry, mealy, or overly moist and apt to lose all structural integrity the minute ketchup was introduced. They were always an afterthought: the bread no one wanted but everyone needed.
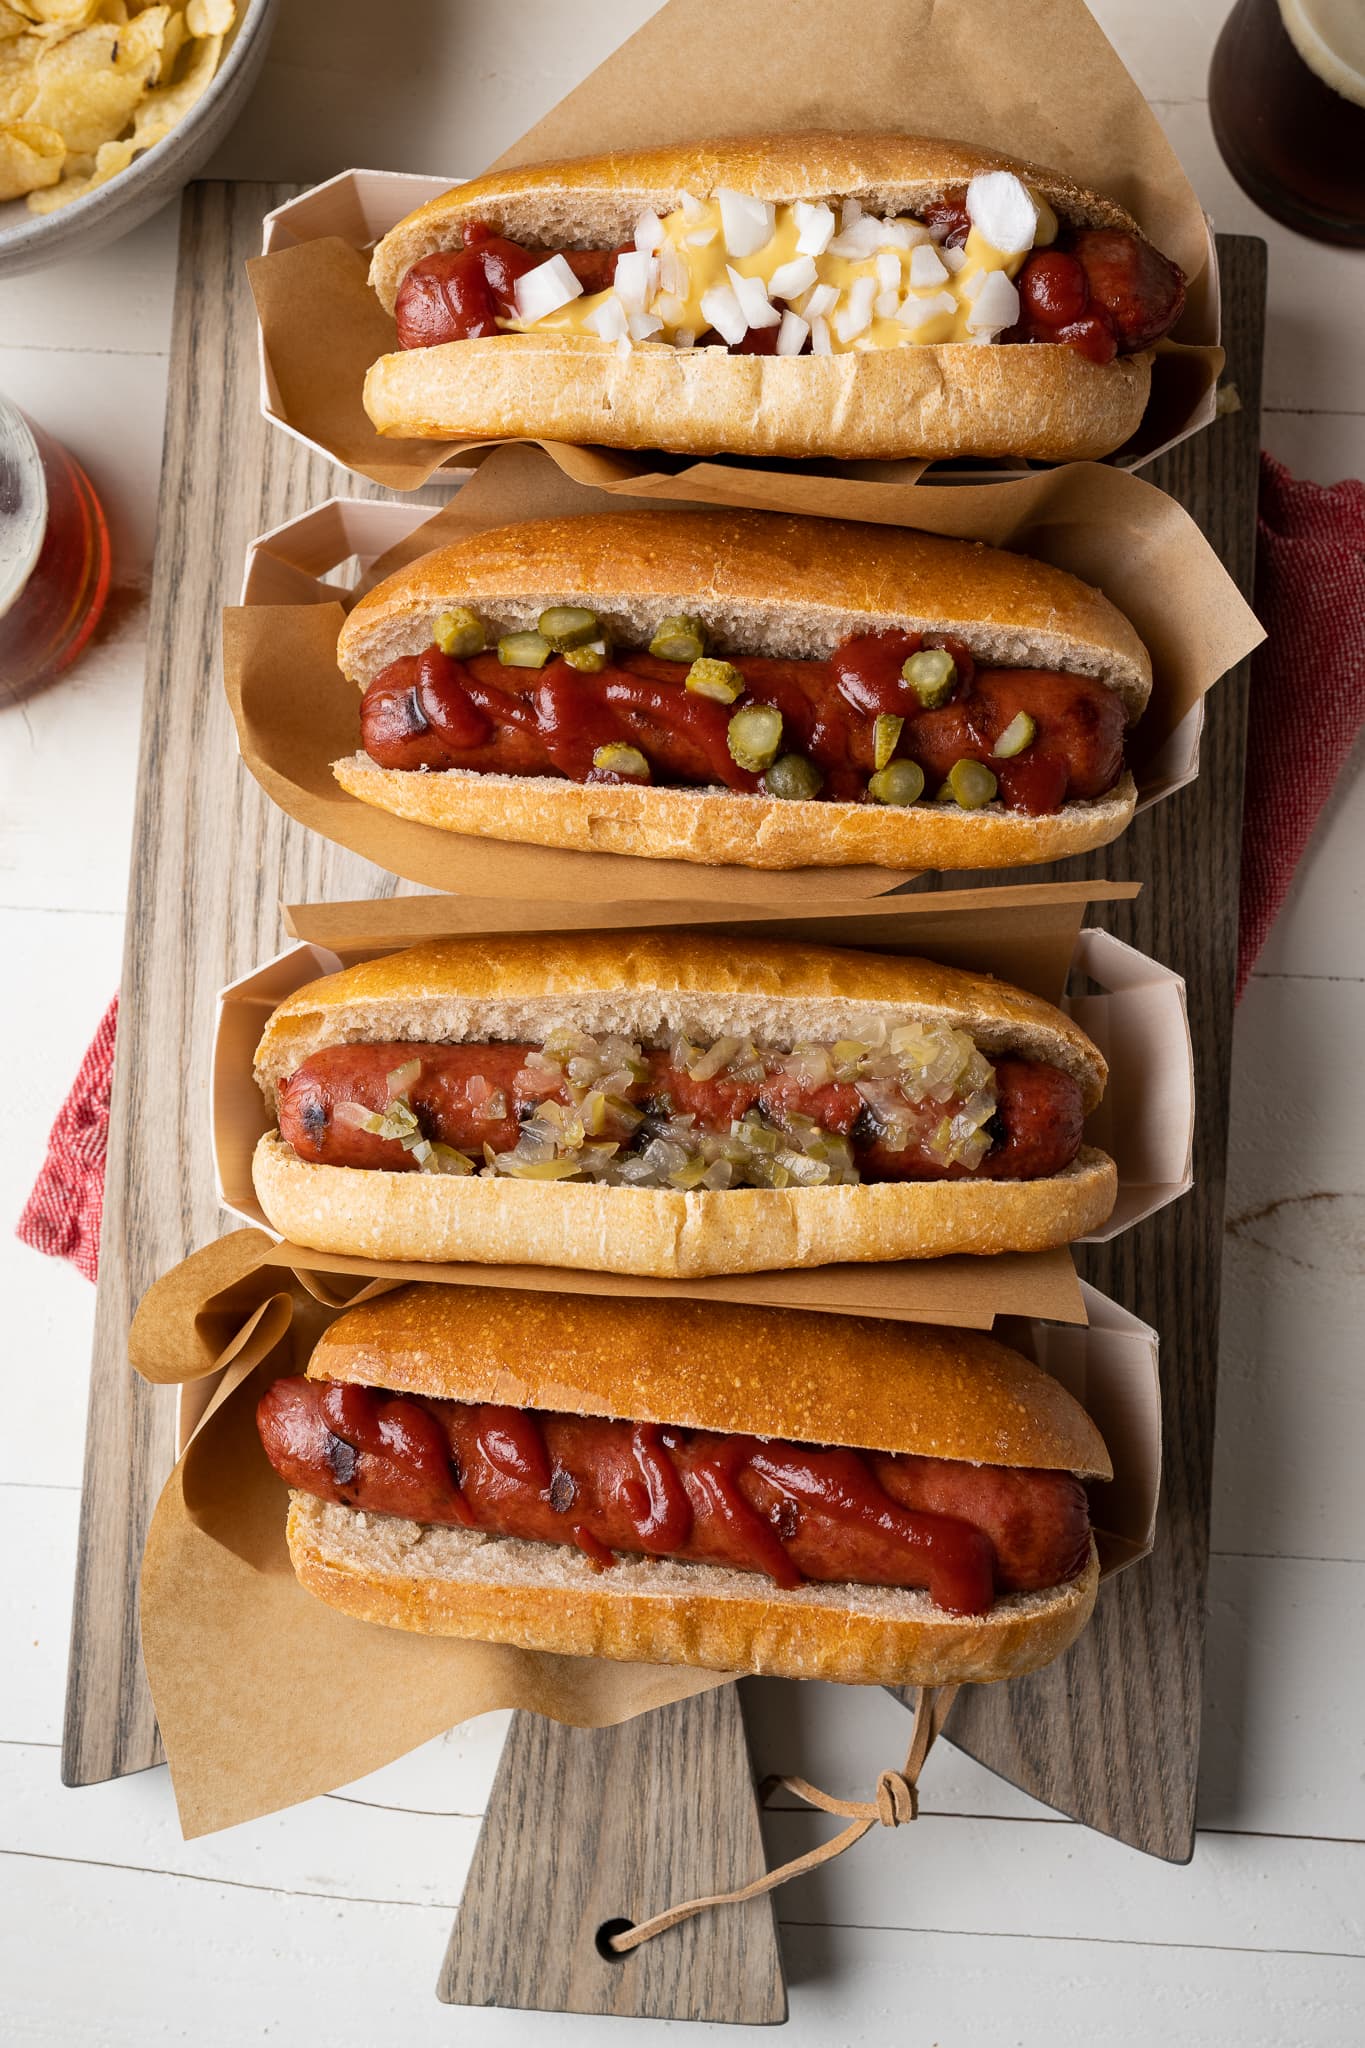
In the past, I’ve experimented with making sourdough hot dog buns using my brioche hamburger bun recipe (a little too buttery) and my fluffy milk bread hamburger buns (a little too light) with good—but not great—results. Also, shaping the narrow tubes to accommodate hot dogs can be a little tricky if the dough is soft and tacky, which is usually the case with a dough destined for hamburgers (in my opinion, it’s easier to shape a round shape versus an oval if the dough is sticky).
This recipe finds the right spot to satisfy; the homemade hot dog buns are airy yet sturdy, a touch buttery and sweet, and with deeper flavor thanks to the long fermentation time inherent with natural leavening—all from a dough that’s much easier to handle.
Let’s change course on the storebought hot dog bun. Instead, let’s make our own sturdier version with loads more flavor and a light and airy texture.
Homemade New England Hot Dog Buns
First, a note about regular hot dog buns versus New England hot dog buns: if you’re familiar with the famed New England style buns, which are rectangular and the cut is on the top part of the bun, this recipe can be adapted to work in that way as well. These buns Are a little more rectangular in shape instead of the oval for other hot dog buns and are traditionally eaten with lobster rolls, crab rolls, and even clam rolls.
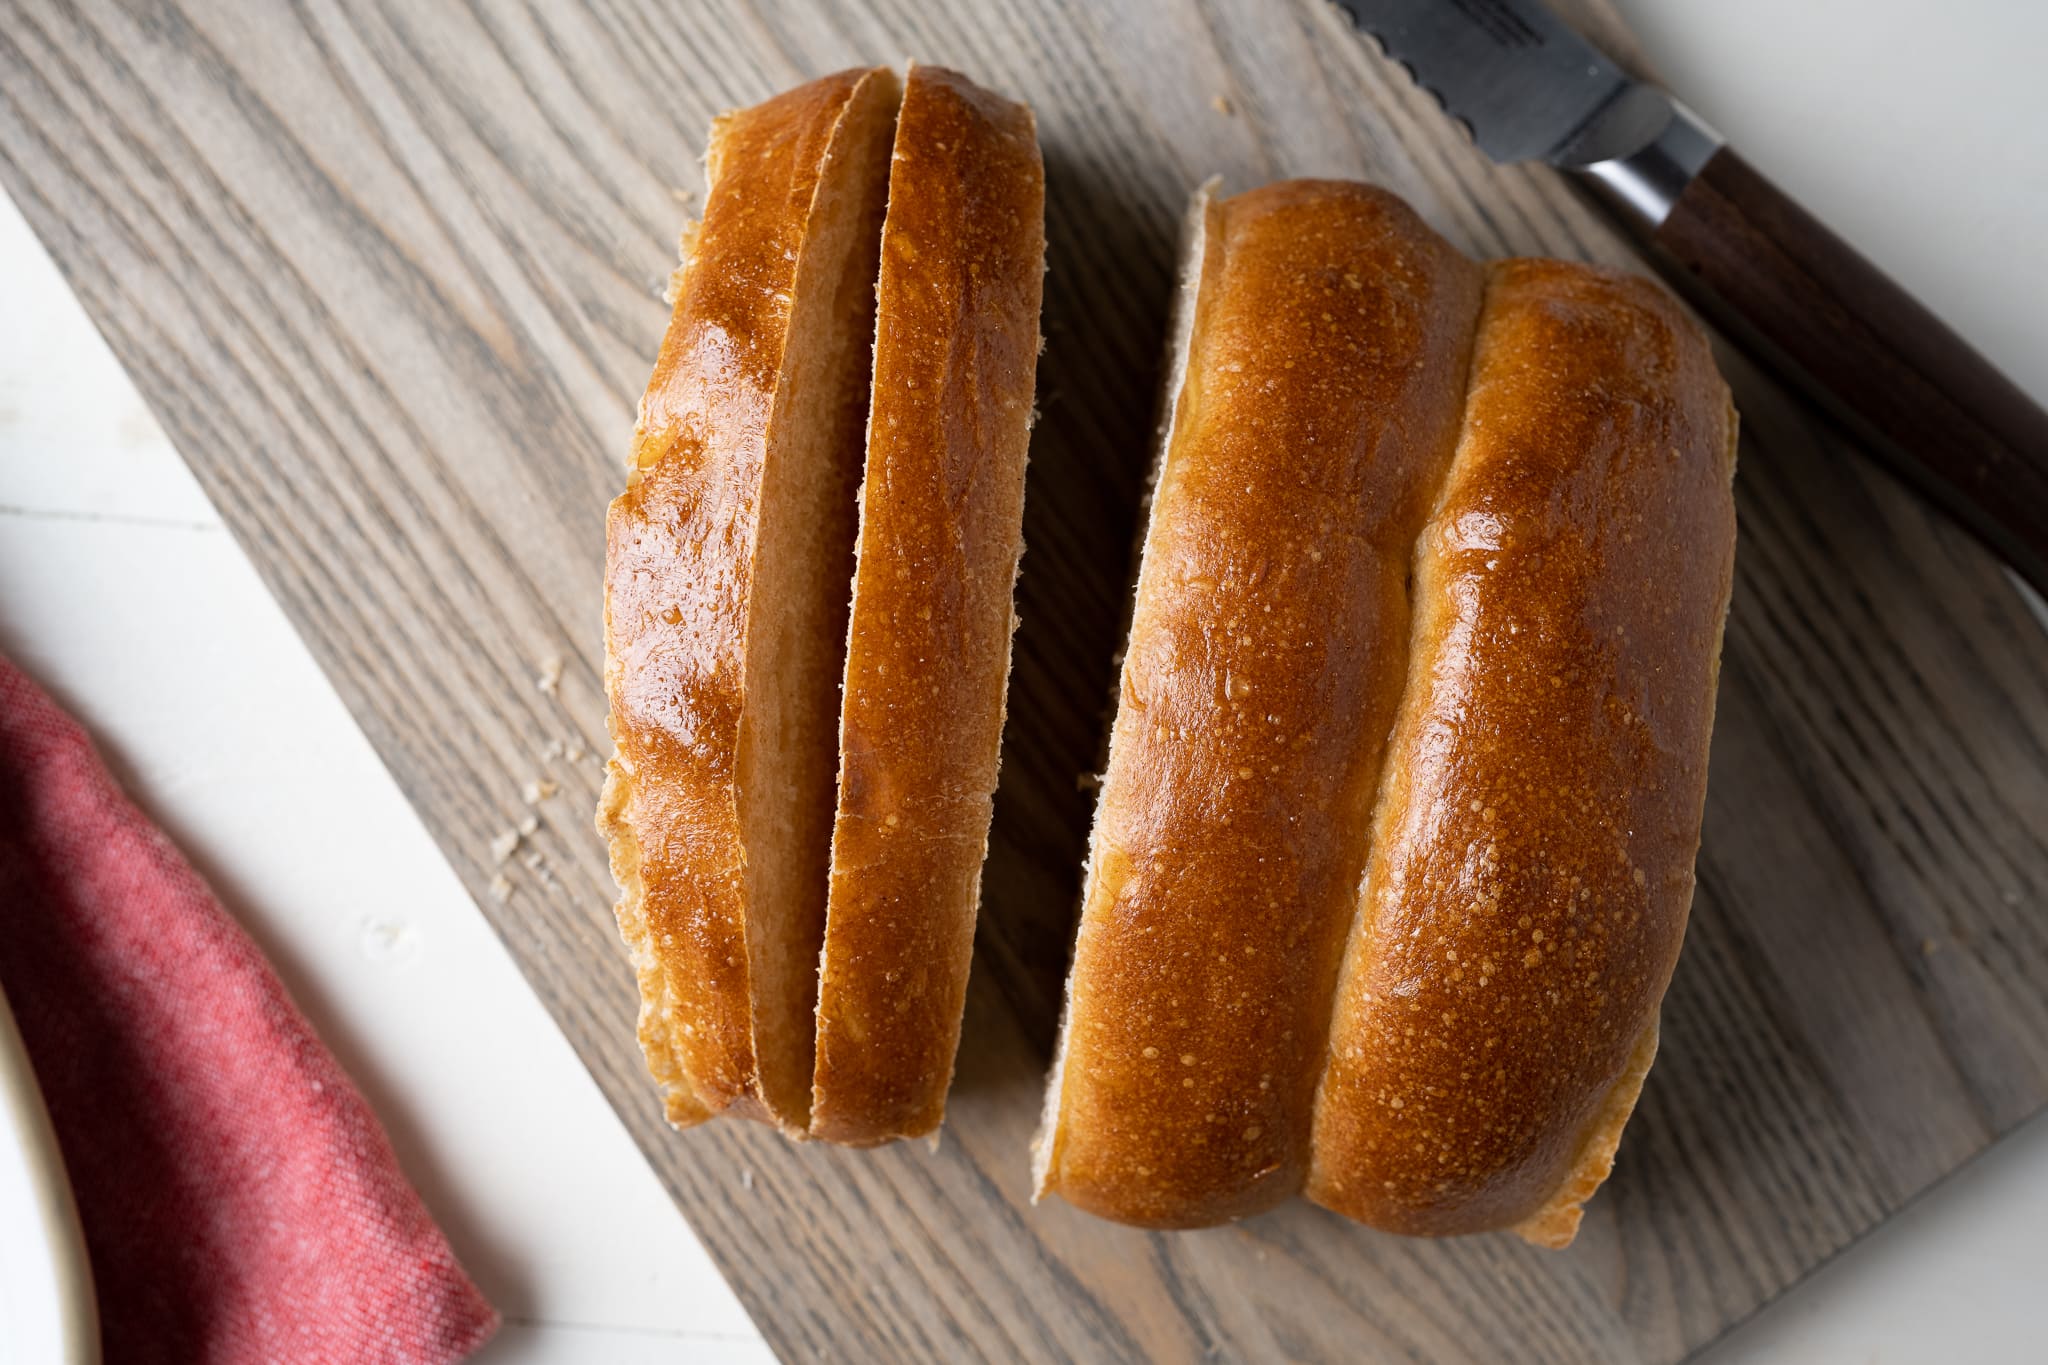
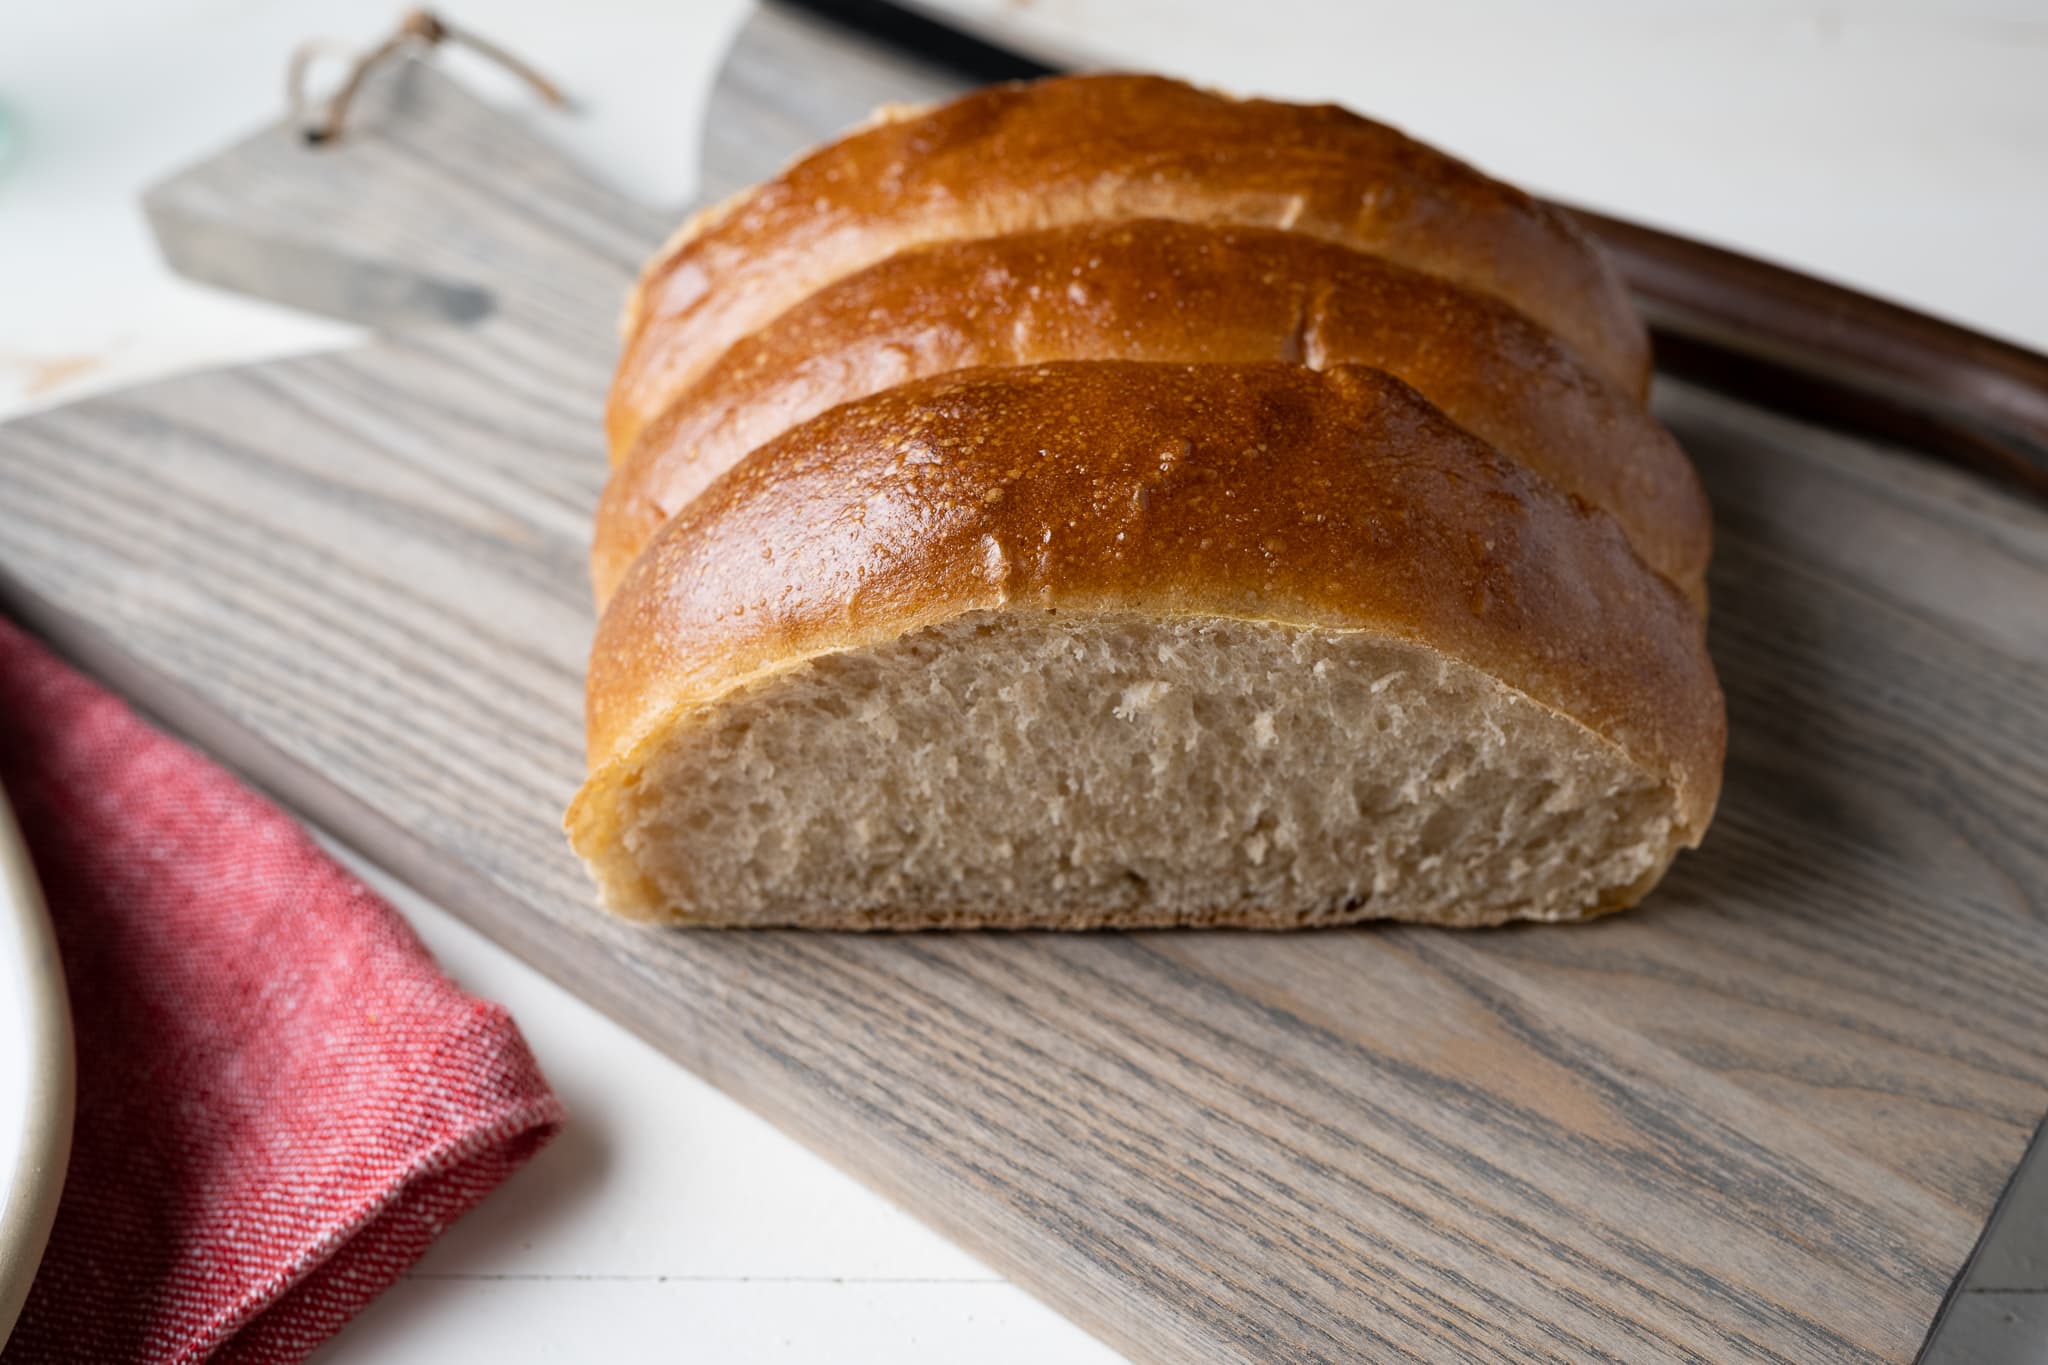
To adapt this recipe to make a New England-style hot dog bun, follow the recipe as directed, but instead of proofing them with space in-between on a half sheet pan, place them in a single row side by side (just about touching) in the middle of the same pan. As they rise during proofing, the dough will press against the pieces to the left and right, causing the entire thing to fuse and rise as one large rectangle.
Flour Selection
Traditional hot dog buns are made with all white flour, but I like to work in 20% whole wheat into these buns. Using a mix of all-purpose white flour and whole wheat flour makes for a sturdier—and a little more healthy—bun. The whole wheat also brings additional flavor in terms of the flour itself and the additional organic acids created as a byproduct of fermentation.
If you don’t want to use whole wheat in these buns, swap out the whole wheat flour for more all-purpose flour. Similarly, you could experiment with whole spelt flour (with perhaps a small reduction in hydration as necessary) or even a flavorful and nutritious type-85 flour.
Baking Schedule
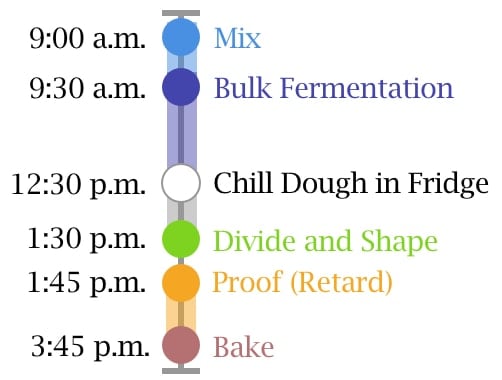
This is a straightforward recipe for those impromptu weekend grill sessions that always seem to pop up during the summer. There’s no lengthy levain to make and no autolyse; use your ripe sourdough starter and mix it straight into a dough. The homemade hot dog buns will be ready for you in the later afternoon, just as the grill gets warm.
If you want to make these ahead of time, I suggest retarding the dough in bulk at the end of the called for 3-hour room temperature fermentation. Cover the bulk fermentation container with an airtight cover and place it in the fridge. The next day, remove the container and shape the dough as directed. Proof them on the counter until they’re very soft and light, which could be 2 to 3 hours, temperature depending.
Homemade Hot Dog Buns Formula
Vitals
| Total dough weight | 1,050 grams |
| Sourdough starter in final dough | 28.00% |
| Yield | 10 x 100g hot dog buns |
Total Formula
Desired dough temperature: 75°F (24°C). Check out my guide to dough temperatures for more information on the desired and final dough temperatures.
In addition to the ingredients below, you’ll also need one whole egg and about a tablespoon of whole milk for the egg wash.
| Weight | Ingredient | Baker’s Percentage |
|---|---|---|
| 398g | Medium-protein bread flour or All-purpose flour (~11% protein, Central Milling Artisan Baker’s Craft or King Arthur Baking All-Purpose) | 80.00% |
| 100g | Whole wheat flour (Central Milling High Pro Fine or King Arthur Baking Whole Wheat Flour) | 20.00% |
| 274g | Water | 55.00% |
| 55g (one whole egg) | Egg | 11.00% |
| 50g | Butter, unsalted | 10.00% |
| 25g | Caster sugar | 5.00% |
| 9g | Fine sea salt | 1.90% |
| 139g | Ripe sourdough starter (100% hydration) | 28.00% |
Oh, if you’re curious about the swanky hot dog holders I have in the photo above, they’re compostable wooden hot dog trays that hold your homemade sourdough hot dog bun, sausage, and all the fillings you could muster.
Homemade Hot Dog Buns Method
1. Mix – 9:00 a.m.
First, take out your butter and cut it into 1/2″ pats. Set the butter on a plate to warm to room temperature and reserve until the end of mixing.
To the bowl of a stand mixer (or home-sized spiral mixer) fitted with the dough hook attachment, add the water, flour, sourdough starter, egg, sugar, and salt. Mix on speed 1 (STIR on a KitchenAid) for 1 to 2 minutes until the ingredients come together. Increase the mixer to speed 2 (2 on a KitchenAid) and mix for 4 to 5 minutes until the dough starts to strengthen and clump around the dough hook.
This dough doesn’t need to be fully developed in the mixer, but it’s better to mix longer than shorter—you want a strong dough before adding the butter. It won’t completely remove from the bottom of the bowl, and it will still be shaggy, but the majority of the dough should clump up around the dough hook.
Let the dough rest in the mixing bowl for 10 minutes.
Your butter should now be at room temperature; a finger will easily slide in and leave an impression. Turn the mixer on to speed 1 and add the butter, one pat at a time, waiting to add each pat until the previous one is fully absorbed. This is a fairly strong dough so it won’t take long to add all the butter and for the dough to come back together and smooth, somewhere around 3 to 5 minutes.
Transfer the dough to a container for bulk fermentation and cover.
2. Bulk fermentation – 9:30 a.m. to 12:30 p.m.
At a warm room temperature, around 74-76°F (23-24°C), bulk should take about 3 hours. Give the dough three sets of stretches and folds at 30-minute intervals where the first set is 30-minutes into bulk fermentation. See my guide to stretching and folding dough during bulk fermentation for detail on this technique.
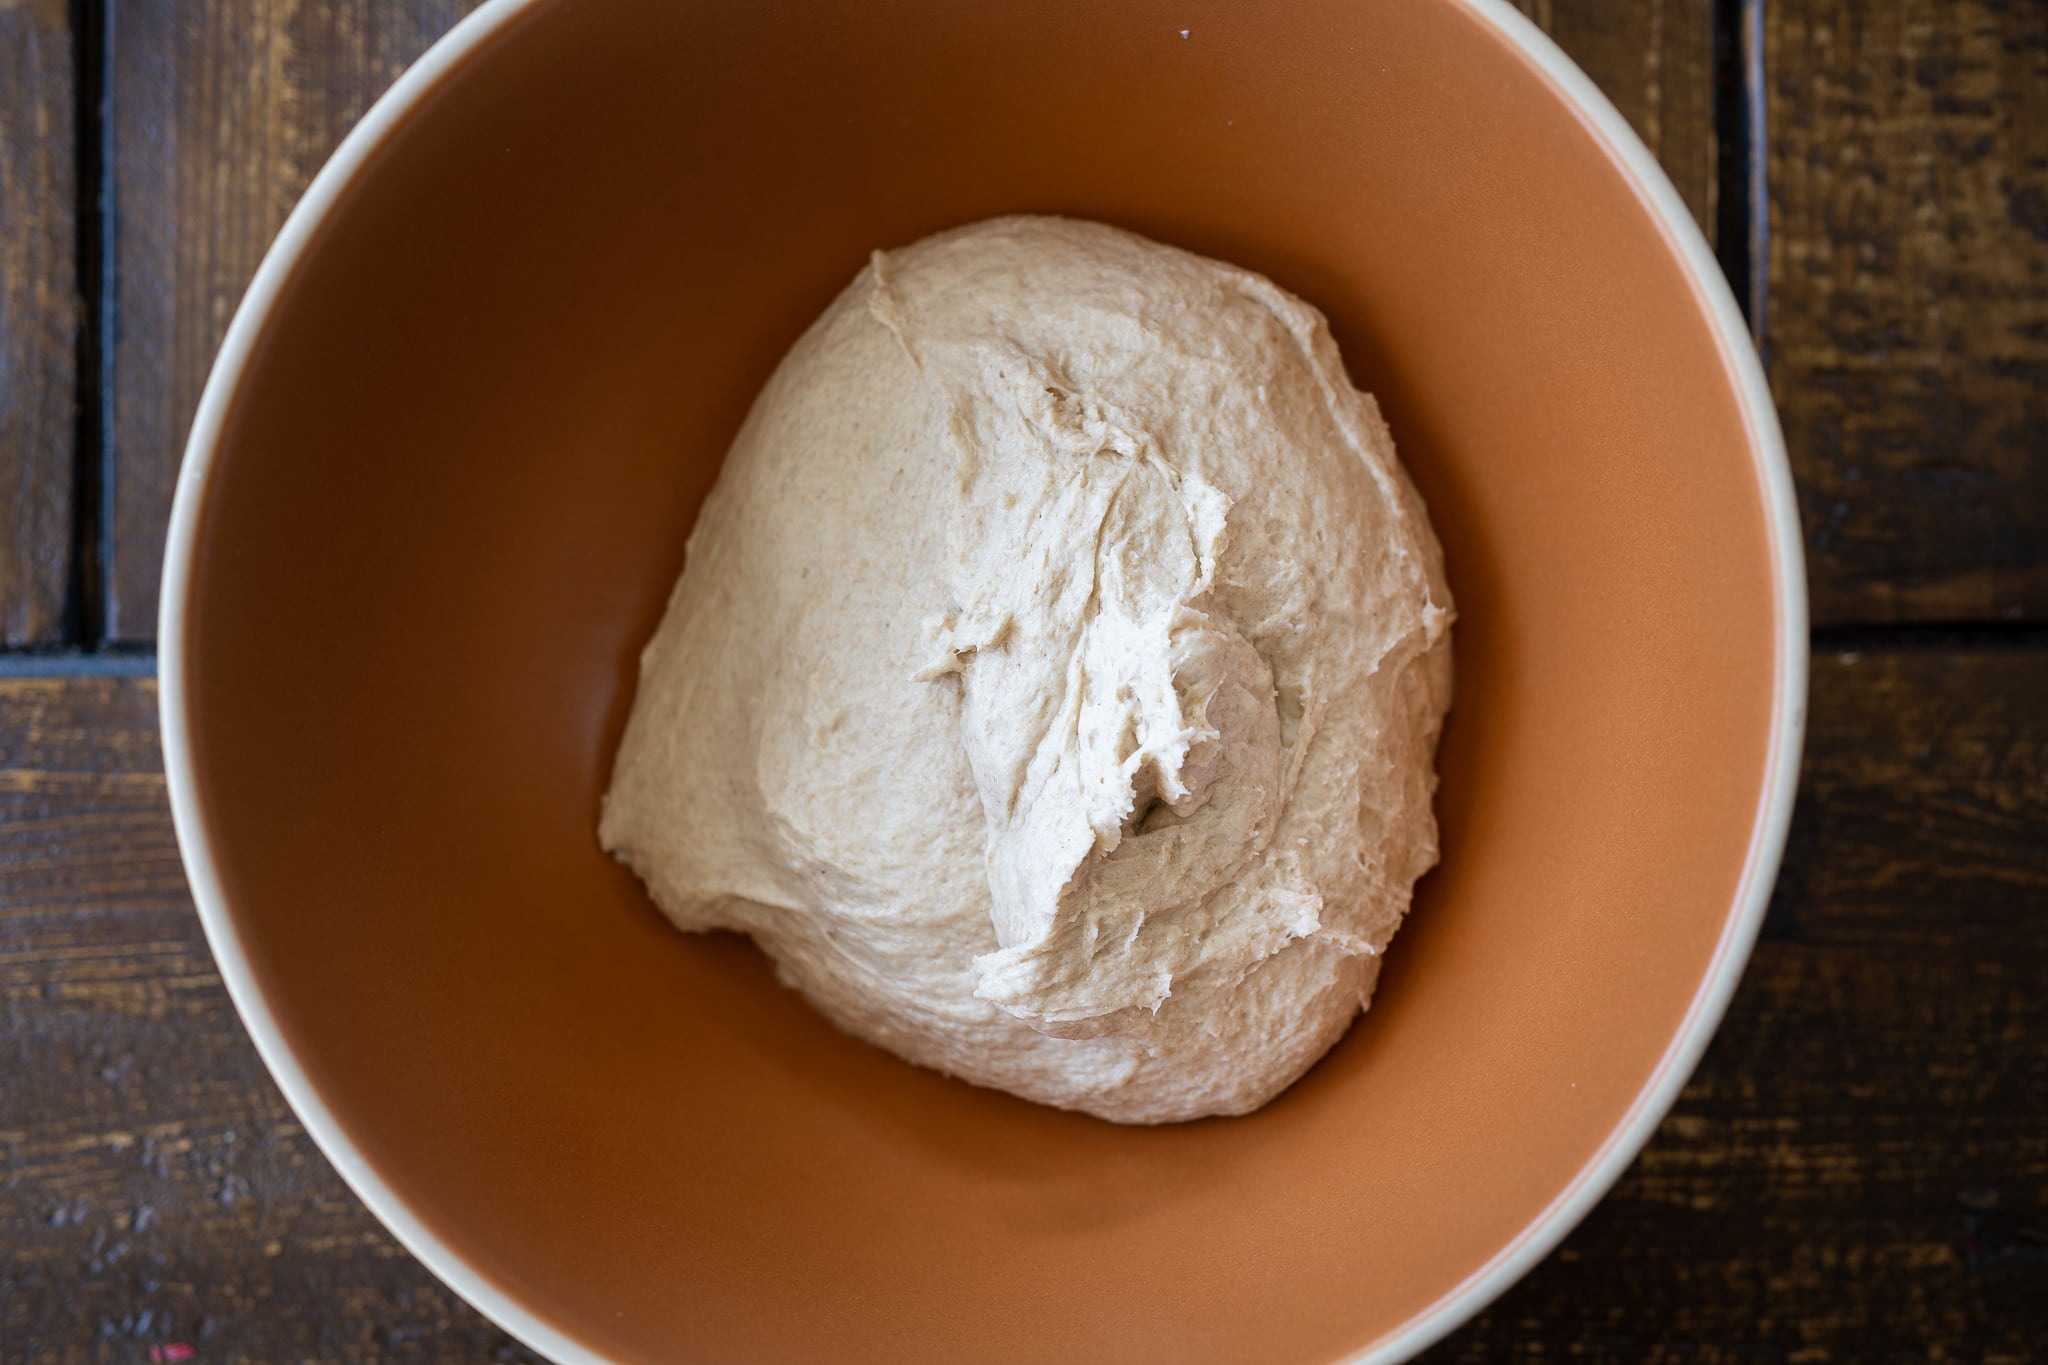
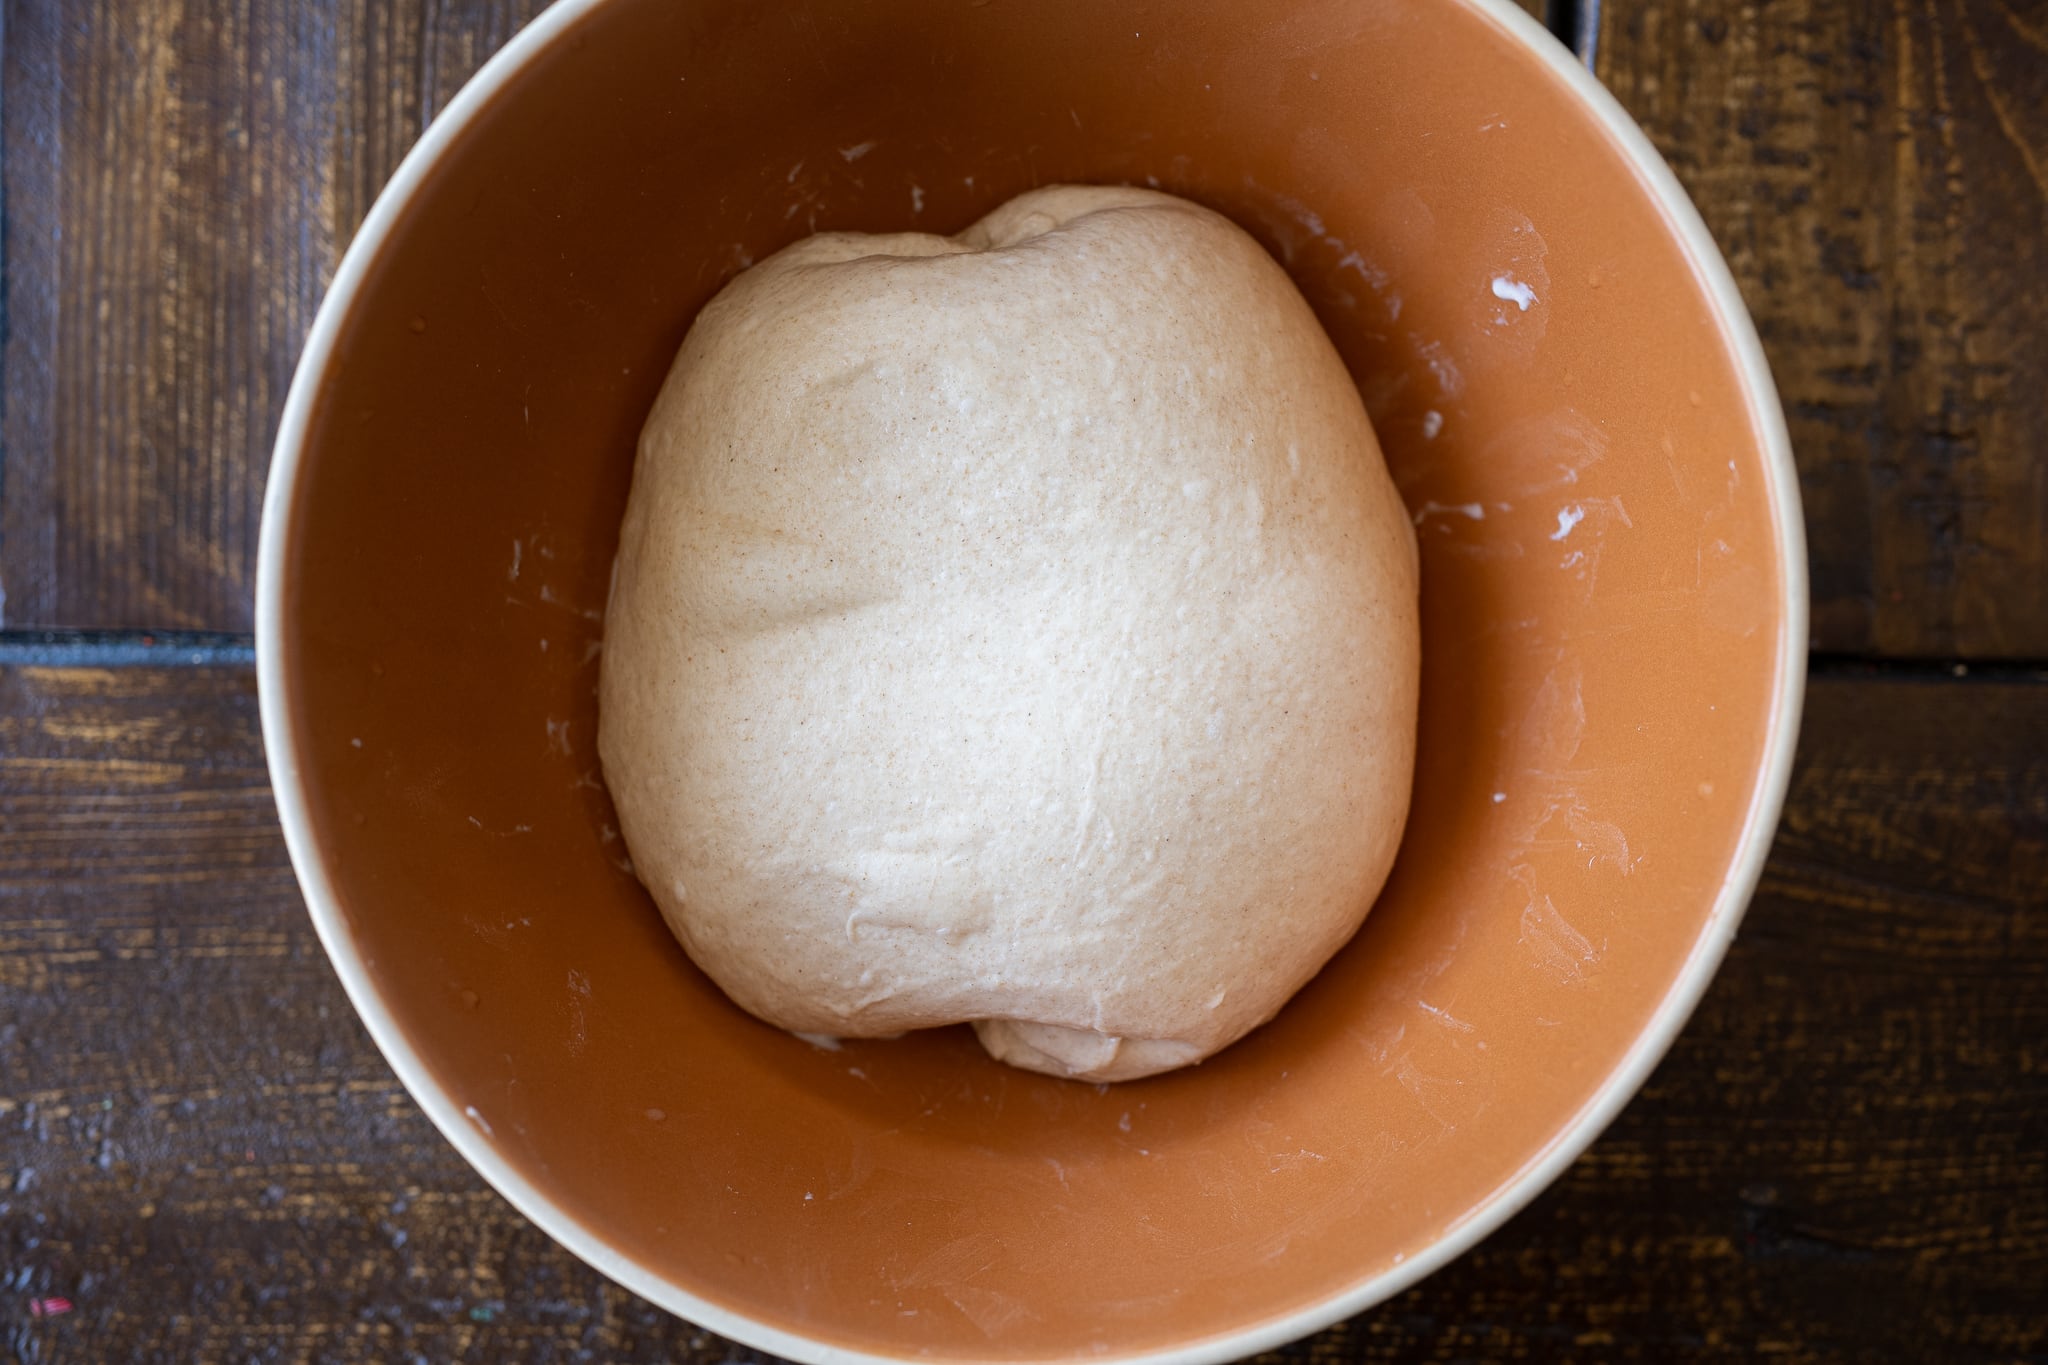
After the last set, cover the homemade hot dog bun dough and let it rest until the end of bulk fermentation.
3. Chill dough – 12:30 p.m. to 1:30 p.m.
Place the covered bulk fermentation container holding the dough into the refrigerator for one hour to chill the dough, which will make it easier to shape. If you’re in a rush, you can skip this step and go straight to shaping, knowing it might be a bit more challenging (I’ve done it with no problem, though).
4. Divide and shape – 1:30 p.m.
Line a full sheet pan, or two half sheet pans, with parchment paper and set near your work surface.
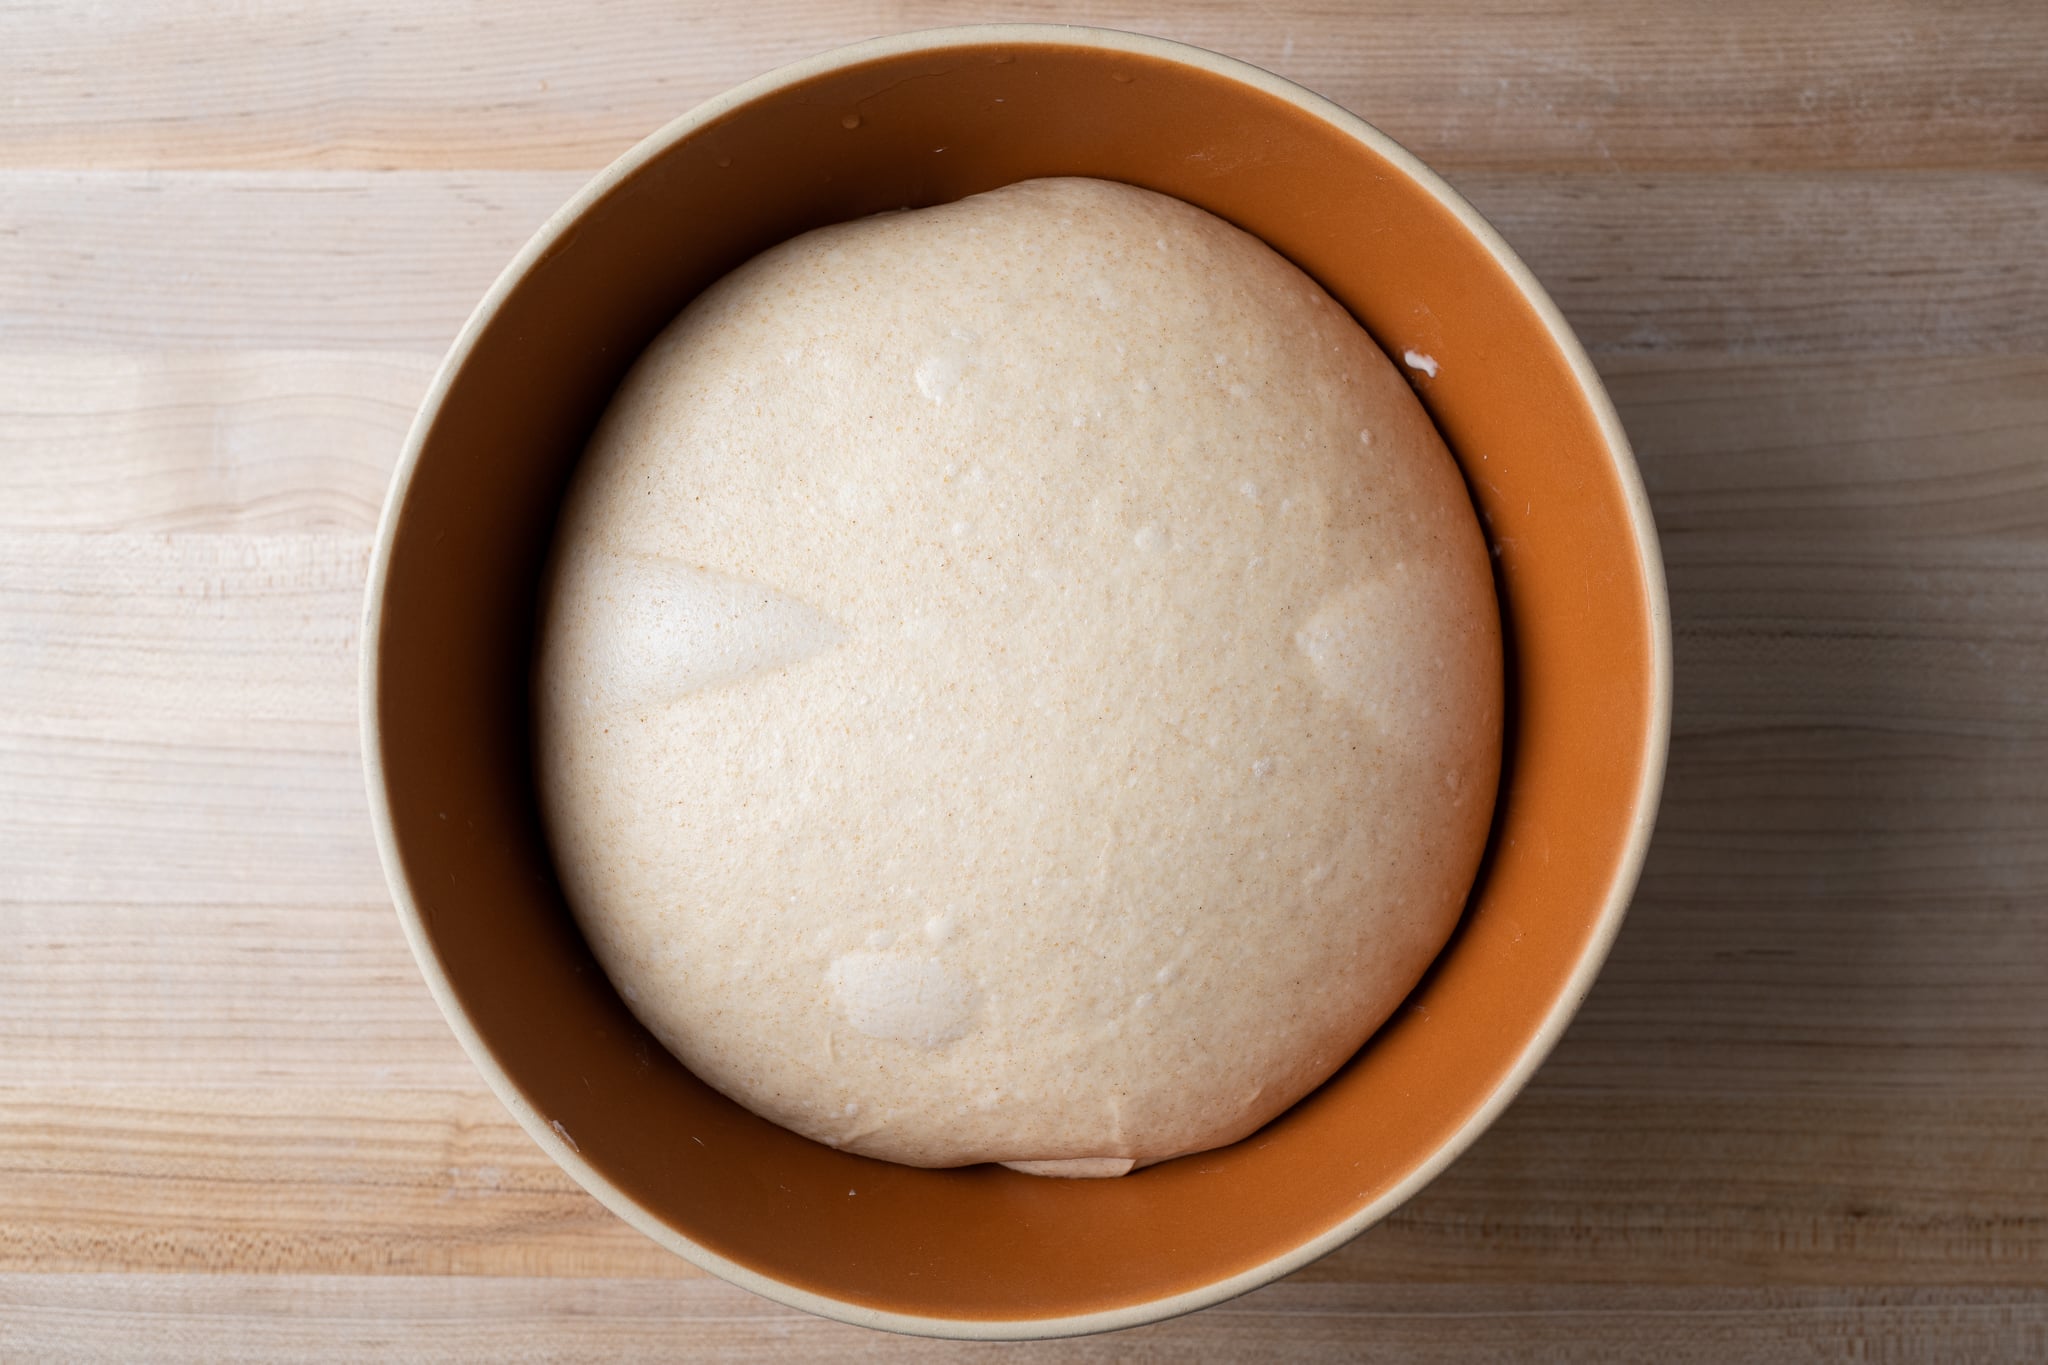
Below you can see my dough after its 3-hour bulk fermentation and 1-hour in the fridge. It’s well-risen, bubbly, and light, but it’s also firm and cool to the touch.
Remove the bulk fermentation container from the fridge, uncover, and lightly flour the top. Gently scrape the dough out to your work surface and divide it into ten pieces, each weighing 100g (you will have very little scrap dough left). It’s best to try and divide the dough into small rectangles to make shaping easier.
To shape each piece of dough, begin by stretching or patting the piece into a rough rectangle with short sides to your left and right. Then, take the top edge (the farthest side from your body) and begin rolling it down toward your body. With each roll, press the dough into itself away from you, similar to how you’d preshape a pretzel. Continue to roll and press, roll and press, forming a tube. Once you’ve reached the bottom of the dough, seal the seam, and if the piece is a little squat, roll out a few times using the palm of your hand to elongate.
When each piece is shaped, place it on the prepared sheet pan with space between each piece. I like to stagger the pieces to allow for even airflow and prevent the eventual buns from touching, as you can see below.
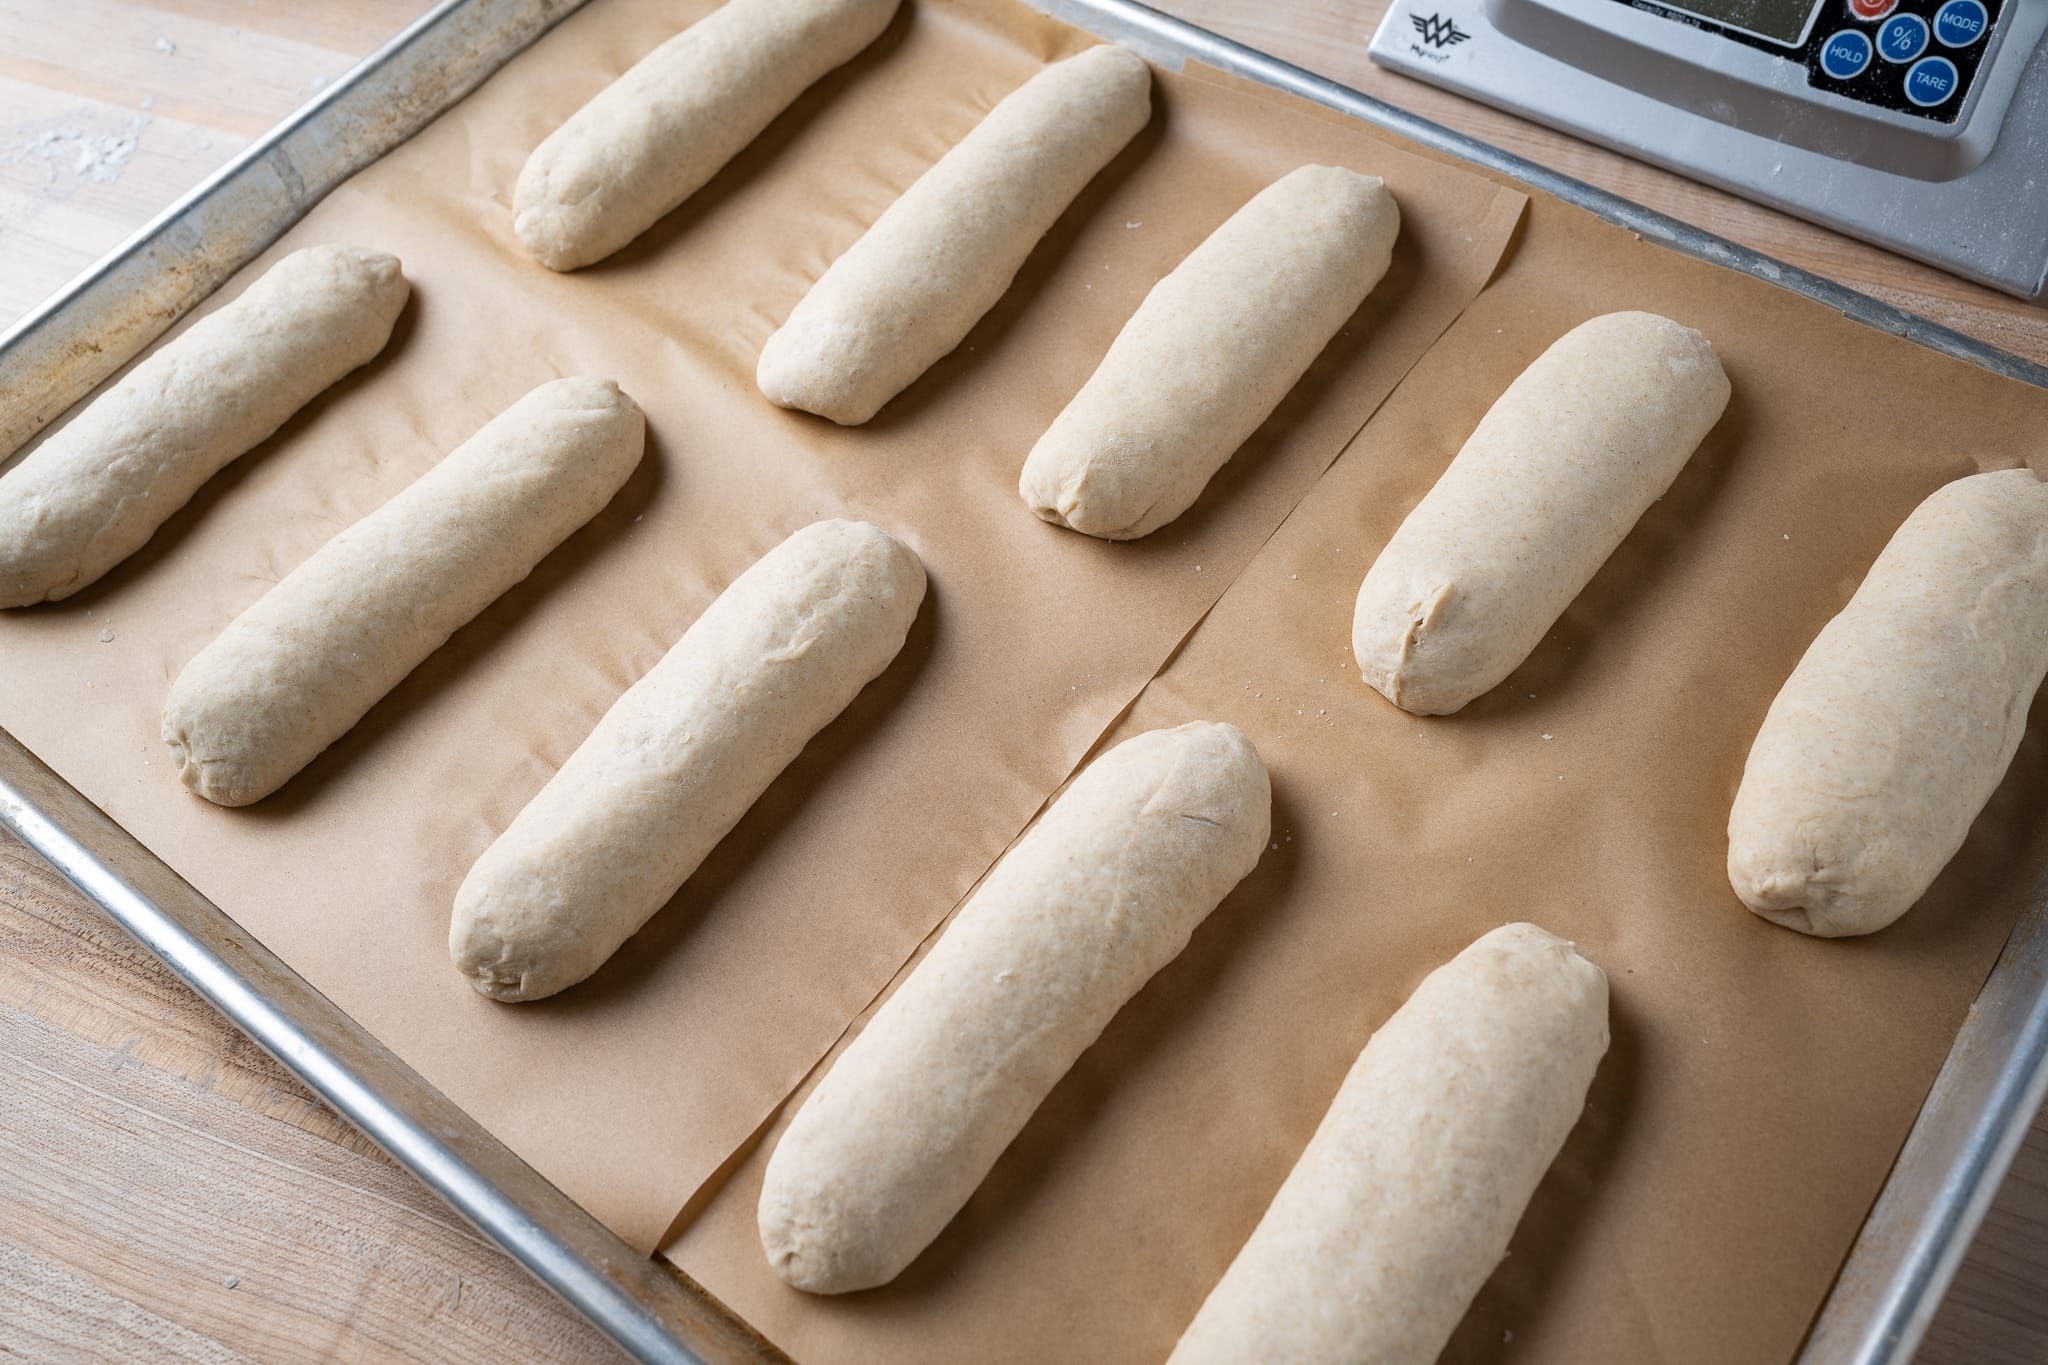
7. Proof – 1:45 p.m. to 3:45 p.m.
Cover the sheet pan with a large, reusable plastic bag and seal it shut. Let the dough proof on the counter for two hours (be sure to preheat the oven about 30 minutes before the end of this time).
8. Bake – 3:45 p.m.
Preheat an empty oven with a rack in the bottom-third to 425°F (220°C). In a small bowl, whisk one whole egg and one tablespoon of whole milk for the egg wash.
When the oven is preheated, uncover your fully proofed dough and brush on a thin layer of the egg wash. Slide the sheet pan into the oven and bake for 20 minutes—be sure to keep an eye on them near the end of this range, reducing the oven temperature if they color too fast.. After this time, rotate the pan back to front and reduce the oven temperature to 350°F (175°C). Bake for 10 minutes longer until the tops of the buns are golden brown, but the sides are still pale yellow.
Once fully baked, remove the buns from the oven and cool them on a wire rack for 15 to 30 minutes before slicing. These buns are fantastic buttered and grilled before serving.
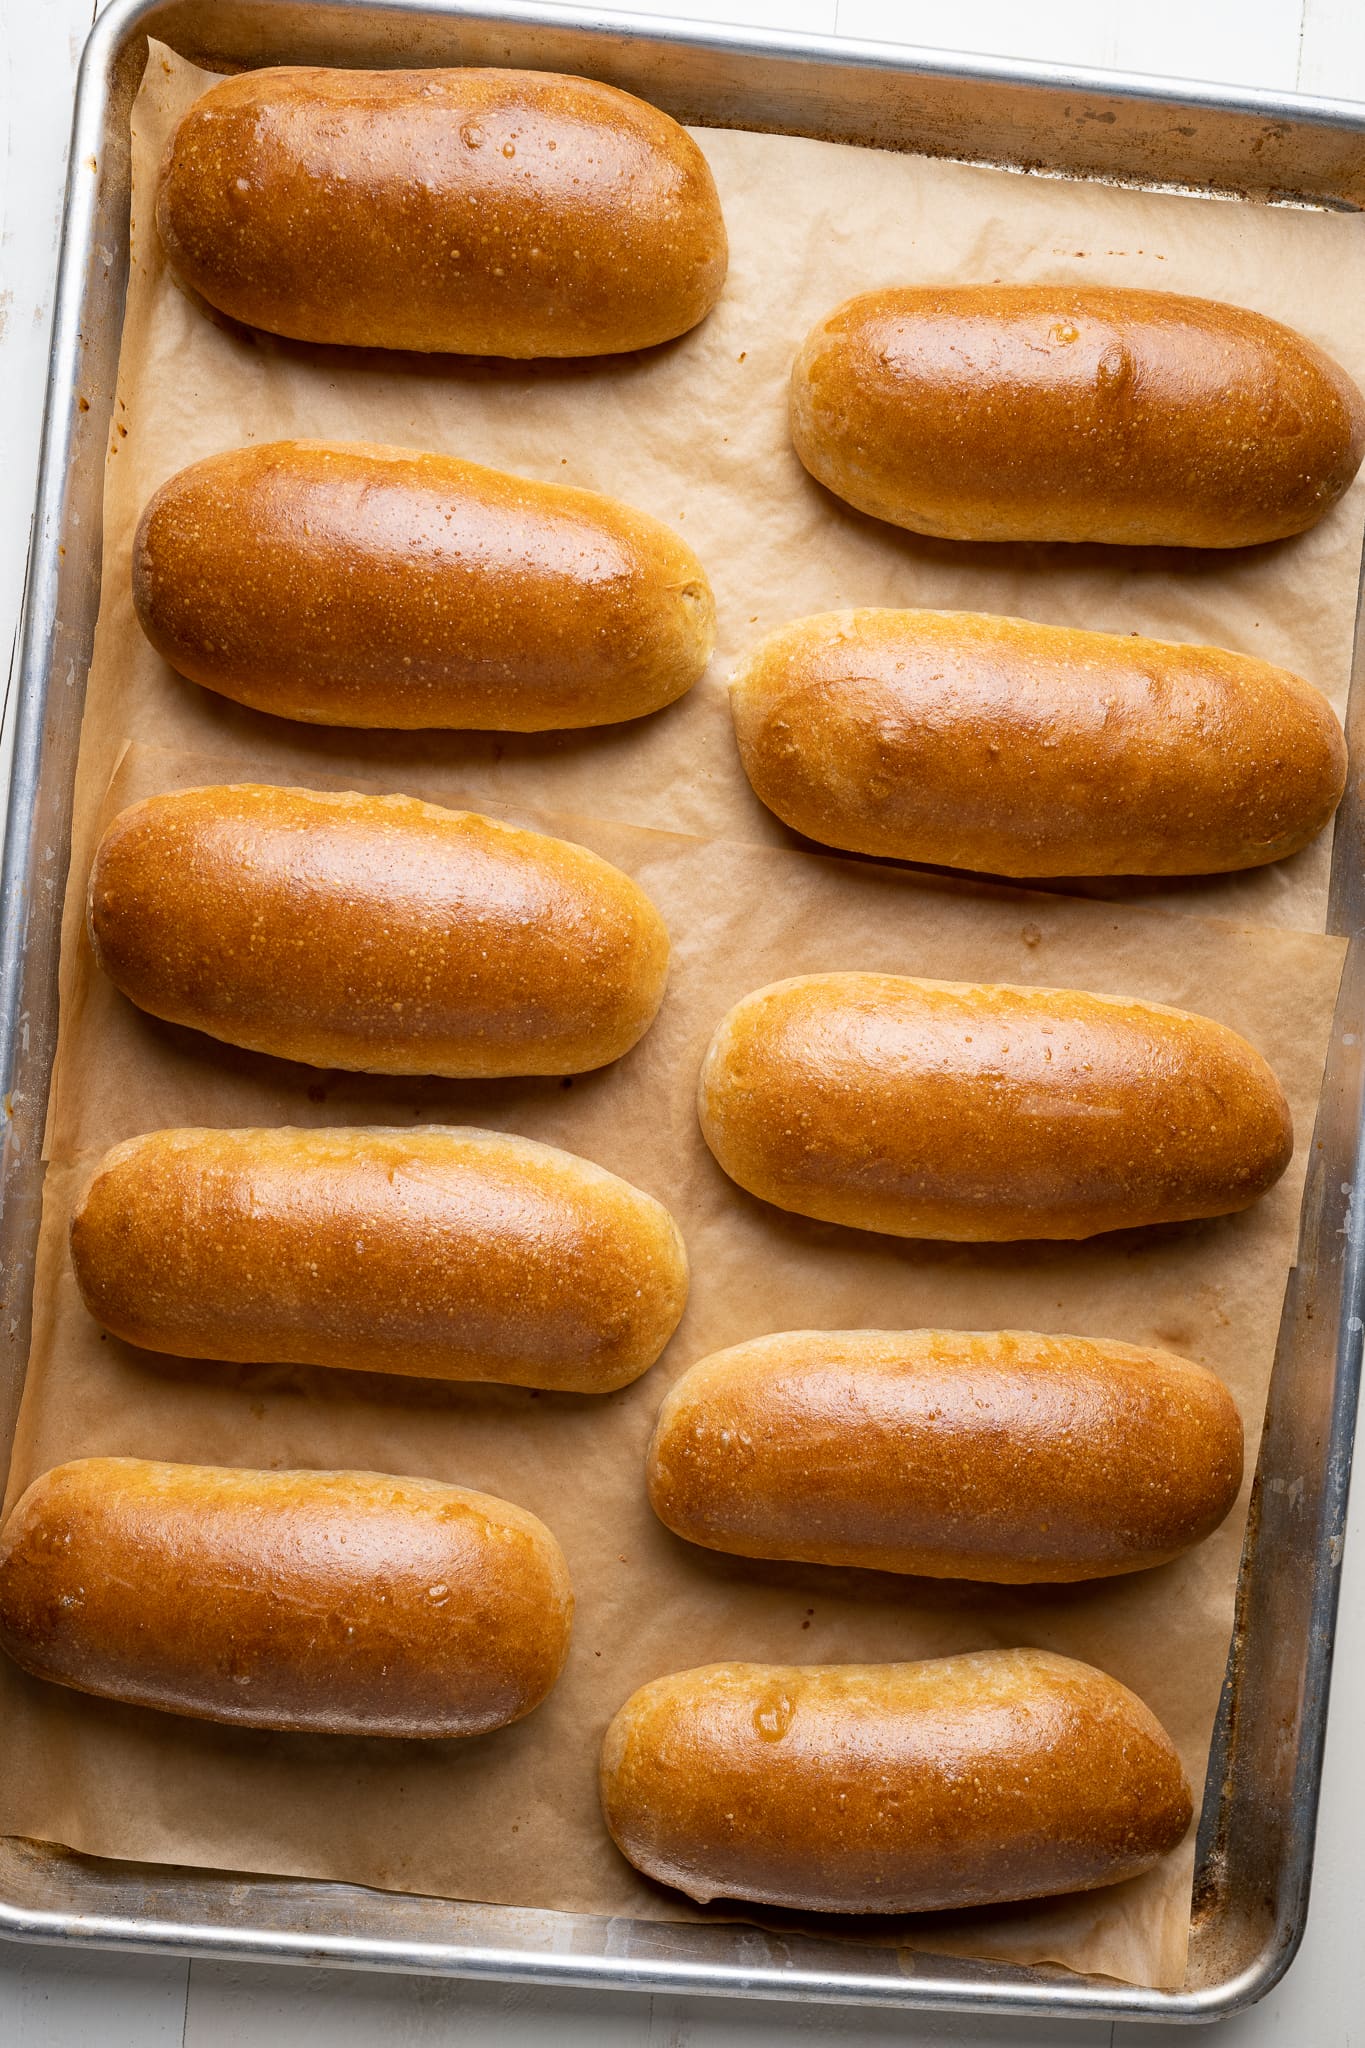

Homemade Hot Dog Buns
- Prep Time: 6 hours
- Cook Time: 35 minutes
- Total Time: 6 hours 35 minutes
- Yield: 10 hot dog buns
- Cuisine: American
Description
Sturdy, light, airy, and absolutely delicious, these homemade sourdough hot dog buns will take your next hot dog to the next level.
Ingredients
Main dough
- 398g medium-protein bread flour or all-purpose flour
- 100g whole wheat flour
- 274g water
- 55g (one whole egg) egg
- 50g butter, unsalted
- 25g caster sugar
- 9g fine sea salt
- 139g ripe sourdough starter (100% hydration)
Egg wash
- 1 whole egg
- 1 tablespoon whole milk
Instructions
- Mix (9:00 a.m.)
Cut the butter into 1/2″ pats and let warm to room temperature while mixing the ingredients. In the bowl of a stand mixer fitted with the dough hook attachment, add the water, flour, sourdough starter, egg, sugar, and salt. Mix on speed 1 for 1 to 2 minutes until the ingredients come together. Increase the mixer to speed 2 and mix for 4 to 5 minutes until the dough starts to strengthen and clump around the dough hook. Let the dough rest in the mixing bowl for 10 minutes. Turn the mixer on to speed 1 and add the room temperature butter, one pat at a time, waiting to add each pat until the previous one is fully absorbed. This is a fairly strong dough, so it won’t take long to add all the butter and the dough to come back together and smooth, somewhere around 3 to 5 minutes. - Bulk fermentation (9:30 a.m. to 12:30 p.m.)
Transfer the mixed dough to a bulk container and ferment for 3 hours at 75ºF (23°C). Perform 3 sets of stretch and folds at 30-minute intervals. - Chill dough (12:30 p.m. to 1:30 p.m.)
Place the covered bulk fermentation container into the fridge for at least 1 hour to thoroughly chill. - Divide and shape rolls (1:30 p.m.)
Line a full sheet pan, or two half sheet pans, with parchment paper and set near your work surface. Divide the dough into ten pieces, each weighing 100g. Shape each into a tube about 4-inches long and place them on the prepared sheet pan with space between. - Proof (1:45 p.m. to 3:45 p.m.)
Cover the proofing dough with a large, airtight cover ensuring the cover doesn’t contact the dough (grease it with oil if necessary to prevent sticking). Let the dough proof at room temperature for two hours. - Bake (3:45 p.m.)
Preheat an empty oven with a rack in the bottom-third to 425°F (220°C). In a small bowl, whisk one whole egg and one tablespoon of whole milk for the egg wash. When the oven is preheated, uncover the dough and brush on a thin layer of the egg wash. Slide the sheet pan into the oven and bake for 20 minutes. After this time, rotate the pan back to front and reduce the oven temperature to 350°F (175°C). Bake for 10 minutes longer until the tops of the buns are golden brown, but the sides are still pale yellow. Once fully baked, remove the buns from the oven and cool them on a wire rack for 15 to 30 minutes before slicing. These buns are fantastic buttered and grilled before serving.
Notes
- These buns can be made New England-style by proofing them side-by-side in a single row on a full sheet pan.
What’s Next?
While making your own sourdough hot dog buns might seem like a tall order for such a humble food, in terms of difficulty, they aren’t more challenging than a good hamburger bun. What’s more, the flavor and texture are leagues ahead of what you find at the market in a plastic bag.
Regardless of how you cook your hot dog, with these homemade hot dog buns, your next summer gathering will be even better than your childhood memories—but don’t forget the water balloons. We’re never too old for those.
Buon appetito!


73 Comments
Maurizio,
I’m sure I’m not the only one that has a stand mixer that can’t handle bread dough (an old Kitchen Aid that just doesn’t have the horsepower) — Do you have advice for making these by hand? I’d love make them this weekend.
Thanks so much,
Gail
Hey Gail. For this recipe, I used my KitchenAid stand mixer. This dough is much, much softer than other bread dough recipes and my guess is your mixer can handle it. However, you can also mix it by hand: mix everything except the butter until the dough is smooth, elastic, and cohesive (it will almost pass the windowpane test, or if you want to take it farther, go all the way to full windowpane for the best results). Then, smear the softened, room temp butter onto the dough and pinch and work it in. This will work well, it’s just a bit more work!
I used a hand mixer successfully.
Glad to hear it, Elizabeth!
What’s the maximum amount of time I can store the dough in the fridge before shaping?
The longer it’s in there, the more sour the final buns. Overnight is the safe bet.
Hi @maurizioleo:disqus ! Would you recommend/have you tried using a water tangzhong on this recipe?
You can definitely add a tang to the recipe for even more softness. I’d say up to 5% of the flour.
Hi! I love this recipe! What is the best way of freezing these and reheating them for a birthday party we are doing next week??
Thank you for your wonderful recipes!
Hi Can I make only half of the recipe ? Will it work?
Yes, you can divide everything in half!
Hi Maurizio,
Made these yesterday and they turned out "pretty" good. I used 300g Central Milling Artisan's Craft Bread Flour and another 98g CM AP flour along with the Artisan Craft whole wheat. The dough was pretty wet even though it was definitely pillowy. They crumb was nice, but these were definitely "sturdy" buns. Is that what you got? Flavor was fabulous. Thanks for all your work. My NY Style pizza rocks now – and it's a because of you! 🙂
Right on, glad these came out pretty good! Yes, they should be rather sturdy to stand up to the hot dogs. If the dough was too soft/wet, you might want to drop the liquid a bit, though that will mean an even sturdier dough. It might be that you baked them too long? That's always something that needs adjustment!
Glad to hear that about the pizza!!
Thanks for the guidance. We're having a couple again tonight :). I'll definitely cook them a few minutes less next time and keep them lower in the oven. The wetness was overcome with just a slight bit of bench flour. They proofed up beautifully. The batch that was in the middle came out nearly perfectly! I have to say Maurizio, the NY pizza dough recipe has changed my pizza making forever – not to mention the sauce! I started draining and squeezing the Marzano's and just adding a little olive oil, oregano and salt – it's really great. On to some more experiments. Love your Tangzhong dinner rolls – my family now expects them at Thanksgiving. <3
Thanks for all those comments, Evan! Glad you're liking the pizza and those rolls—two of my favs 🙂 Have fun!
Ooh, glad to hear that Carol!! Such a versatile recipe 🙂
I am very new to sourdough and tried this recipe. They taste great, but came out a bit more tough than I expected. Any idea where I might have messed up to cause this? Thanks!
You don’t want to bake these for too long. They’re better when baked hot and fast!
This is a fabulous recipe I just find the dough a bit loose. Any tips on how to tighten it up a bit? Could you use whole wheat bread flour instead of the all purpose?
Thanks, Patti! I would reduce the liquid in the recipe just a bit, so the dough mixes up to a firmer consistency. I would try 2-5% reduction.
Yay! You must have read my mind! Tip: Buy a NE hotdog pan if you’re leaning in that direction.
Will look for this!!
Fantastic recipe! I opted for the NE
style and it turned out beautiful. We had Italian sausages and they could have been a tad bigger, maybe 8 instead of 10 but still workable. Great way to elevate your hot dog/sausage game. The recipe was quite simple and quick. Thank you Maurizio!
So glad to hear that, Samuel!
Maurizio, can you clarify size of pan for New England style? At top of post, you say half sheet, at bottom full sheet. Thanks so much. Want to try the New England style.
Sorry about that, Anne! For the NE style, I used a half-sheet because you want them to be grouped together in a smaller space. Happy baking!
TY!
Hey Maurizio – these look amazing but since I don’t yet have a stand mixer, can these be mixed and kneaded by hand or would that just lead to frustration? I’m aware that the butter temperature would need to be managed to avoid a greasy dough, but wondering if you have any other tips or thoughts about hand kneading these. Thanks!!
It’s definitely possible! It’ll be a bit of work to get that butter into the dough, but it’s not a major percentage (unlike something like brioche).
Great recipe! I made 8 large buns which were slightly larger than needed, but they were perfect with spicy Italian sausages.
Excellent, so glad to hear they worked out for you, Genny!
When do you feed your sourdough starter so that it is ripe at 9am? I keep only 60g of starter. So when I make a recipe like this I feed it several days in a row to get enough. It takes about 2 to 3 hours to more than double in size. Thank you.
You can just feed a 1:2:2 ratio (starter, flour, water) at bedtime, and it will be ready and ripe for use in the morning (room temp 65-70 deg). (That works for me anyway)
Thank you.
How many grams is each for 1,2,2 ratio?
I usually keep around 20% of starter each feeding (refreshment) and it’s ready after 12 hours. I do include 30% whole rye in my feedings along with 70% all purpose.
Check out my in-depth post on how I feed my sourdough starter for more 🙂
Thank you.
I fed mine with about 70g flour & 70g water the night before. It was ready the next day.
Thank you.
Ansd how many starter did you use?
@Andrea Hofer – I learned that it's not necessary to keep feeding & discarding starter to bake occasionally. Just keep a little in the fridge. Feed it the day before you need to use it with flour/water to make the amount of starter needed. I came across Bake with Jack's video first and other similar content online. Here's a discussion: https://www.reddit.com/r/Sourdough/comments/ec1gws/i_highly_highly_recommend_the_scrapings_method/
Would you make any changes (other than shaping, of course) to make these into burger buns instead? Thanks!
I think as-is, they’d make awesome hamburger buns. If you want something more dedicated and a little softer, though, check out my sourdough potato buns, they’re awesome, too!
Awesome. Thank you!
I also had to cut back on the time. I did 15 minutes on 425, rotated the pan, dropped the temp to 350, then maybe another 5-7 minutes because they were getting very dark. Temp was way above 208 so pulled them out. I need to calibrate my oven, for sure. I also really need practice with my tube rolling, lol. Once they are cut they don’t look as bad. I didn’t have medium protein bread flour, so did a 50/50 KA bread flour/KA AP. I held a little water back – maybe 10 – 15 g – I’m in southwest Florida – and even then the dough was a tad sticky, but was fine after being in the fridge. I was a little vigorous with the stretch and folds, and it responded. My sourdough starter was also past prime, but it all turned out fine. I also needed them in time for dinner, so made 4 of them after a one hour proof. Very forgiving! The rest I made after a two hour proof, rotated the pan after 10 minutes, dropped the temp, another 10 minutes at 350, perfect.
Good adjustments there, Susan. I’ve measured my oven many times to ensure temps are right on (a sensible thing to do since I write this website! 🙂) but my altitude at 5280ft can mean things generally have to be hotter and longer.
I think your flour blend is a good idea, it’s likely what I would do as well, but you might also be able to get away with just KA AP with a reduction in hydration.
Glad they turned out pretty well overall, nice work Susan!
I also wondered about the temps. I thought maybe baking in the upper 1/3 of the oven means hotter temps? I stopped after 25 min @ 425F as the buns were getting quite brown. Does baking on the bottom 1/3 result in less browning?
It really depends on where the heating elements are in your oven (they’re usually at the bottom, but I have some on top in mine). I think the consensus has been the temps are a little too hot for these buns, I think I’m going to update the recipe to reduce the baking time at the higher temp!
Thanks for updating the recipe. Just made these after along absence. The colour guidance is really helpful since we are working at different altitudes and with various ovens. The recipe would also make great dinner rolls or sandwich buns.
Made them today. Went great with Brats! My dough seemed a little slack. I used King Arthur Bread flour. Should I use their All Purpose next time? Where can I post my picture?
Hey, Dawhna! No, using all-purpose would have the opposite effect and likely make them more slack. I would reduce the water in the recipe next time just a bit, perhaps just 20-25g, to bring more strength to the dough. You could also try mixing a bit longer to strengthen it as well.
I don’t have a way to upload pictures here, but members are shaping over in our membership chat!
HI! I love your recipes! At the chill in the fridge step- could these be left over night?
Glad to hear that, Dev! Yes, you can leave it in, covered, overnight and then shaped and proofed the next day.
Hi Maurizio, thanks for the recipe. I tried it today. Mine didn’t hold shape and flattened out too much. Recipes always need some adjusting with Dutch flour. Will try again soon.
Ahh, yeah it sounds like you likely need to drop the water in the recipe! Let me know how attempt #2 goes.
The second attempt I added 250 g of water and baked them 20 minutes at 425, 8 minutes at 350. They are much better. Just still a little bit on the dark side. But 3 times is a charm. Keep you posted.
Hey @maurizioleo:disqus, glad to see you mentioning the exact Central Milling products used in your recipes (and that I have them on hand). I find their products to be the most consistent — readily shippable for reasonable prices anywhere in the US — of any retail brand. Now if they could only get up on Prime for free shipping 😀
I plan on making these in a New England bun baking pan. Any recommendations there? I could just put the entire dough batch and let it come to rest and proof in there, right?
Yes, I’ve used CM flour for a long time, it’s great! Very consistent.
Yes, once you divide and roll the pieces (you still want to have separation between the pieces so you can pull/cut them apart), just place them in the pan as I did on the sheet pan. Proof right in there!
Hi Maurizio,
I am really looking forward to making these buns. I had two questions: 1) What percent rise should I expected to see at the end of bulk fermentation and 2) Do you think this recipe would also work for a good hoagie or sub sandwich roll?
As always, thanks for help and all that you share.
Hey, Bruce. I don’t typically go by rise height, but I’d say 30-40% or so is about right. Be aware if you’re chilling the dough in the fridge, it will continue to rise in there until it cools down.
Yes, these would be awesome as sandwich/hoagie rolls!
Let me know what you think—happy baking 🙂
I saw them on IG, Liz! They look great, but yes, the first batch was a touch dark. I have to say, I bake brioche and pan loaves at 425F, 350F seems a little low for me, but it could 100% be oven and altitude differences there. Adjust as necessary for your oven, it sounds like 350F is more appropriate for you.
Thanks for the comments and for posting those photos! Enjoy 🙂
Nothing wrong with these buns for breakfast! I’d be lying if I said I didn’t make an egg sandwich with one the other day 🙂
Glad to hear you like them, Liz!
Hi, can you proof the dough overnight and shape in the morning?
Yes, exactly. Simply keep the covered bulk fermentation container in the fridge and take it out when you’re ready to shape and proof.
Another great recipe and just in time for the 4th. Thanks! Any idea how long ahead of time these can be made and still remain fresh? Are they freezer friendly?
Thanks, John! I’ve had them here for at least three days and they’re still great, stored in a bread box or covered box. I have not tried freezing them!
Three days is plenty of advance prep time. Thanks for sharing.
You bet, happy baking, John!
Excellent advice.
Can you substitute the butter with coconut oil?
I do think that will work well!
Looks so good! My problem with hotdog rolls had always been getting the perfect shape. Hopefully these will work out for me!
Thanks, Leah! Yes, shaping requires focus on developing that “skin” on the outside of the tub to ensure it proofs and bakes nice and tight. Check out the video in the post and let me know how they turn out—happy baking!