

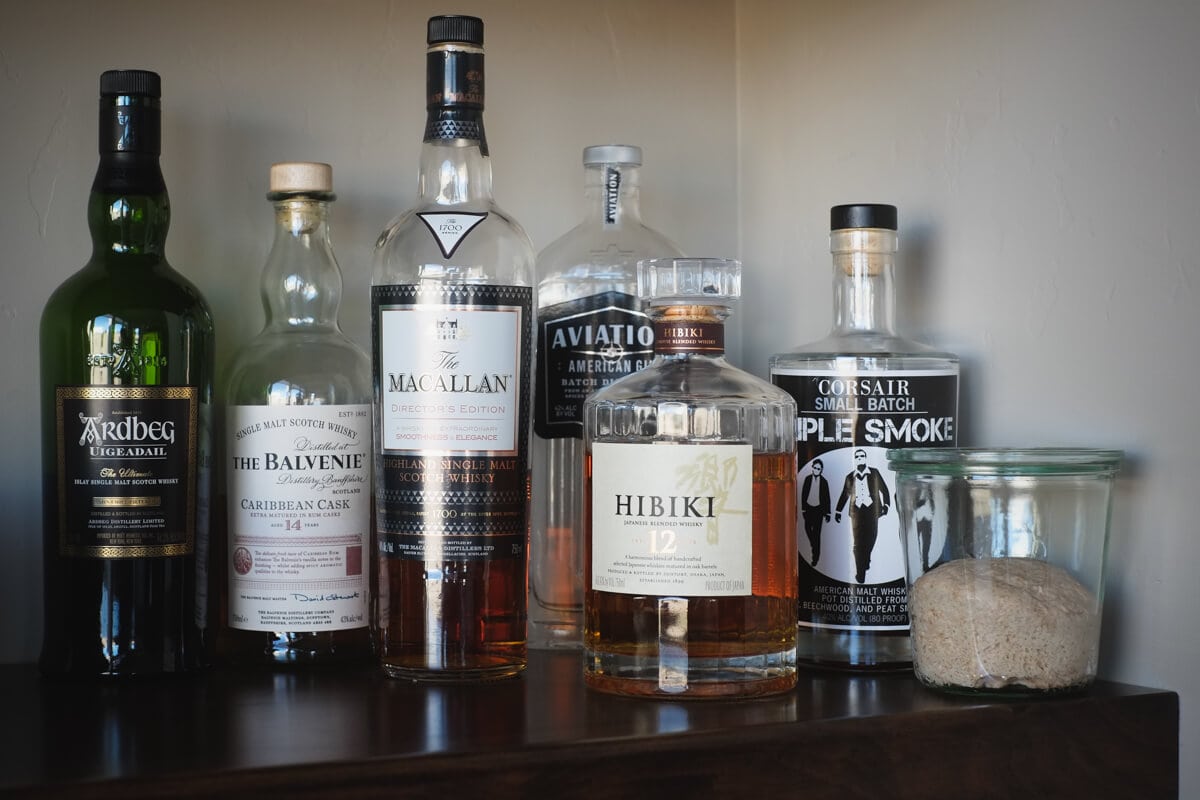
Baking sourdough bread in the winter, even with a stiff starter, always presents problems here at my house: it’s cold! Probably not quite the cold you get in other parts of the world, but it sure is cold to me, and my starter. Kitchen temperatures are consistently hovering around 70°F (21°C) which slows fermentation activity. I’ll typically offset this by changing the percentage of mature starter carryover or by heating the water used in my feedings (a dough proofer is another great option), but I like to try to keep my starter around 76-78°F (24-25°C). Keeping my starter at that temperature is not easy to do when winter is bombarding your area! You have to make do with the warmest spot you can find in your kitchen, for me this is next to my whiskey collection. Almost poetic.
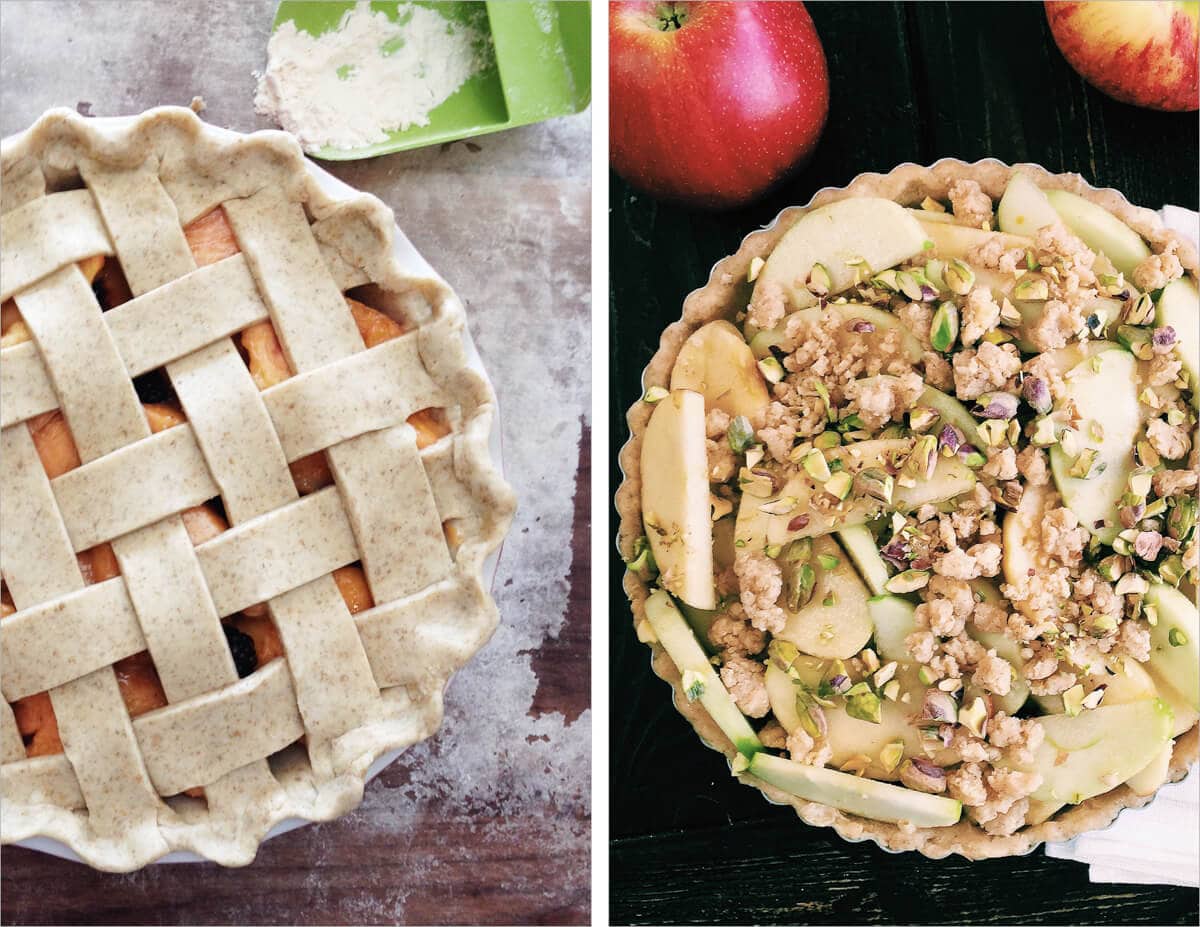
A short aside… In the winter with all the holiday events and cold weather, I find myself baking pies and cakes more and more. I recently baked an excellent lattice pie, an apple/pistachio tart, and the famous Cook’s Illustrated pecan pie, each received with equal high praise. Making a pie crust by hand becomes more accessible the more you do it (like most things), but even when it doesn’t turn out great, it’s always delicious. Butter makes life worth living, as they say. Anyway, here’s a couple of shots of two of these beauties, lots of fun to take a break from bread baking and bake something sweet.
Ok back on task here… During this challenging baking season, I’ve been experimenting with a much more stiff starter than my typical “liquid” one I’ve described thus far (outlined by Chad Robertson at Tartine Bakery). It seems many bakers argue over the differences between stiff and liquid starters, their benefits, differences, and similarities. I’ll first give a few high-level characteristics of each and then go into some things I’ve noticed after a month or more from a more personal perspective.
Frequent starter refreshments will generally lead to lower acidity, whether you’re working with a stiff or liquid starter.
Let’s first look at a very brief overview of some chemistry and biology happening inside our sourdough starters. A mature and healthy starter, and the beneficial bacteria contained within, will break down the complex carbohydrates in flour into sugars. These sugars are consumed by the yeast and bacteria, creating carbon dioxide and two types of acids as metabolic byproducts: lactic (adds a mild yogurt-like taste) and acetic (adds a more sour, vinegar taste). This symbiotic relationship between bacteria and yeast is what gives our dough leavening power in the form of CO2, and complex and layered flavors in the form of a mixture of lactic and acetic acids. You can control the production of each by the method in which you maintain your starter (frequency of feedings, water temperature, ambient temperature, etc.), the temperature it’s kept at, and the flour used when feeding. Liquid starters maintained at warmer temperature will produce more lactic acid, whereas stiff starters held at slightly cooler temperatures will make more acetic acid.
However, does this mean you’ll end up with a super sour loaf when using a stiff starter? No, not at all. Whether you’re using a stiff or liquid starter the final taste in your bread is up to you and how you decide to manage fermentation. It’s just as possible to make a sour-tasting loaf using a liquid levain (by increasing fermentation time or using a higher percentage of levain) as it is to produce a very mellow, sweet-tasting loaf using a stiff starter (which is what I prefer and always strive for).
Now let’s take a high-level look at the differences (and similarities) between a liquid and stiff starter.

Liquid Starter
Characteristics:
- hydration at, or higher than, 65% water-to-flour
- typically “sweet” or “milky” smelling if refreshed frequently as I do
- incorporating in dough mix is very easy due to its liquid nature
- refreshing is similar to stirring a thick milkshake
My liquid starter, originally started by following the guidelines set out in Tartine Bread, is a “sweet” and “milky” starter that is very loose and amorphous. I’ve maintained this high hydration starter for numerous years, and it creates bread that is very creamy tasting with a subtle sour tang to it. Many references suggest that a liquid starter will produce a final loaf that has more of a sour tang to it, but of course that all depends on how you manage other aspects of your starter (timing, temperature, etc.). More on this below.
Stiff Starter
Characteristics:
- hydration at, or less than, 65% water-to-flour
- incorporating into dough mix is a little more difficult due to the thick, tough nature
- refreshing is similar to kneading a dough
- produces a more subdued acidic taste in final loaves if maintained correctly
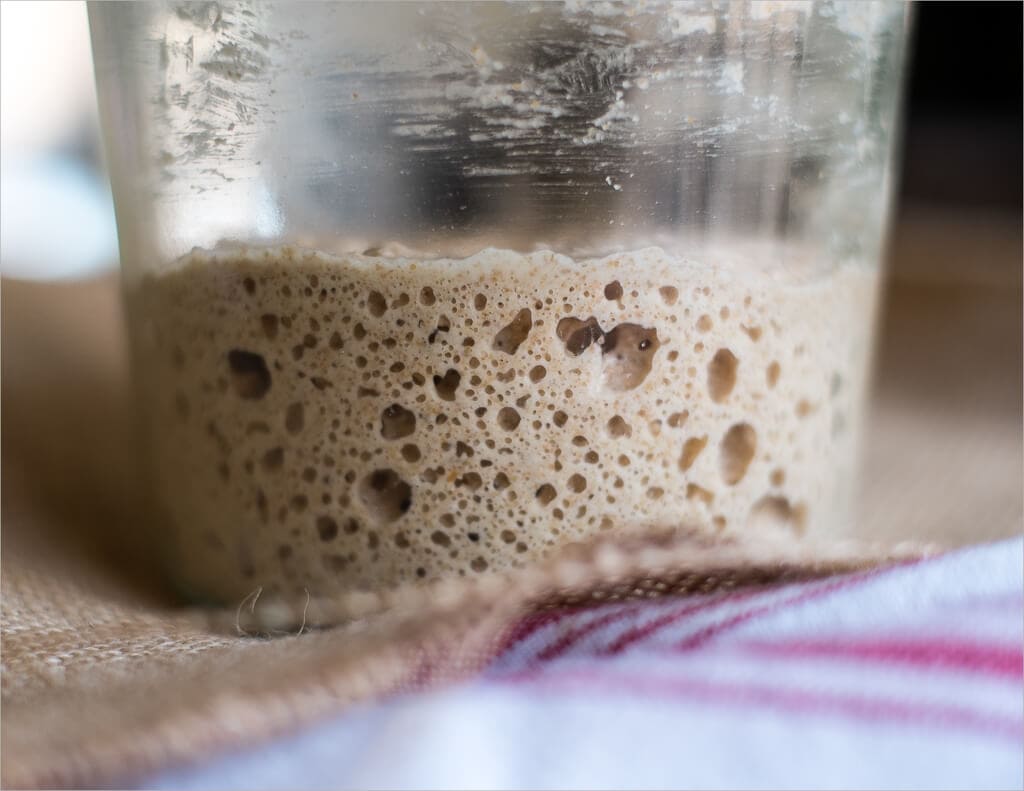
A stiff starter is a little more forgiving when it comes to refreshment (feeding) due to the delayed “falling” (when compared to a liquid starter which falls when food is exhausted) of the dome on top when rising. Think of it as a rising balloon in a jar that eventually runs out of helium and then suddenly the top caves in and the entire top begins to fall. There have been a few instances where I wasn’t able to attend to my starter until many hours after my regular refreshment time, and the starter was just fine — no deep vinegar smell and it was well before the total acidic breakdown of the flour.
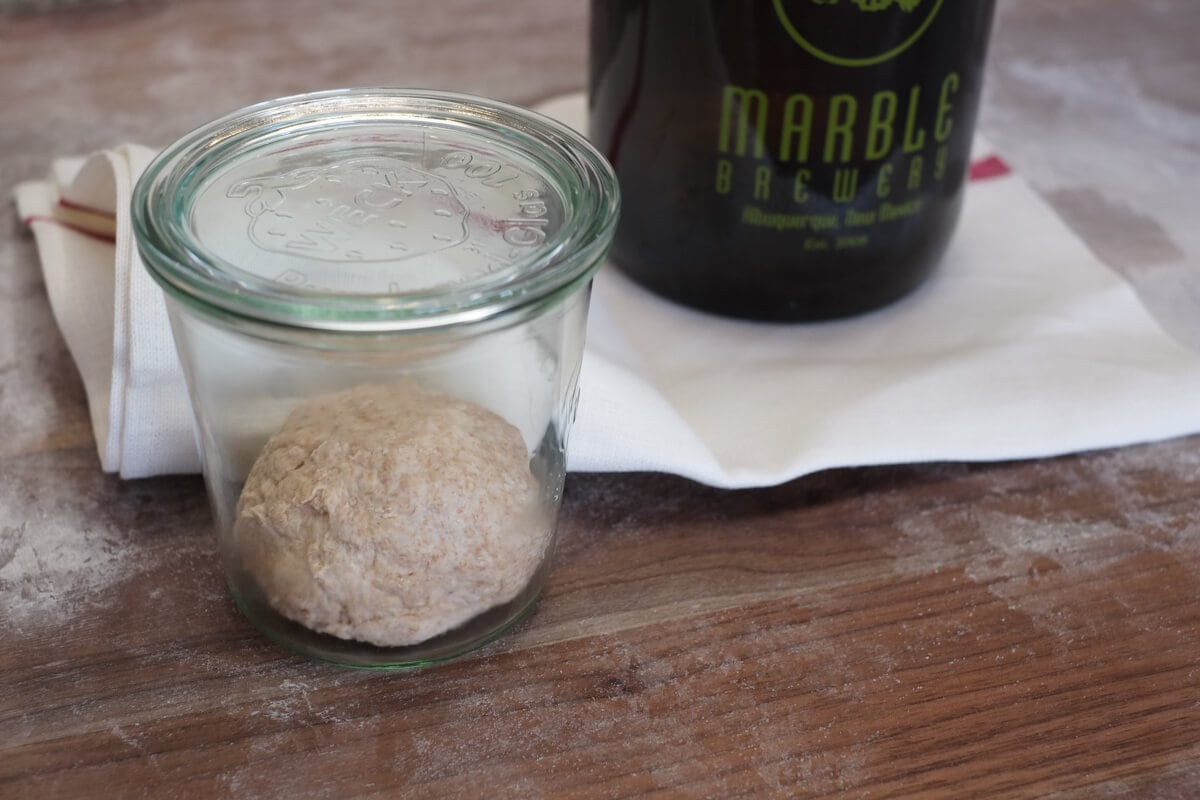
Starter Conclusions
Experimenting with a stiff starter has been a very worthwhile endeavor for me, I’ve learned about the different feel, fermentation behavior and taste between using the two types of starters and levain types. Honestly, in the end, I think the choice between the two mostly comes down to your personal preference: do you like to stir your levain like a milkshake when refreshing or do you want to scoop it out and quickly knead & mix by hand? I find myself preferring the latter, surprisingly. It’s quick and easy for me to drop in some flour, water, and knead out the dough on my work surface, then drop the dry ball back into its rising jar. No messy soup to deal with. Additionally, when mixing up a high hydration recipe (like below) the stiff starter does seem to impart more strength to the final dough, giving the bread a bit more rise and making shaping a little easier. Maybe because in the end there is a little less hydration in the levain, and because of the increased acidity in the stiff starter which helps to strengthen and condition gluten.
Update:
After baking with my stiff starter for a while now, I can safely say the misconception that a stiff starter/levain produces a more sour bread is unfounded. I’ve now baked some of the most incredible tasting bread that only has a small hint of sour, probably even less than my liquid version. A stiff starter, if also fed with 100% whole wheat flour, will produce significant acidity (both lactic and acetic) but the actual transfer of these acids to your final dough is very minimal as the amount of levain used in a recipe is usually rather small
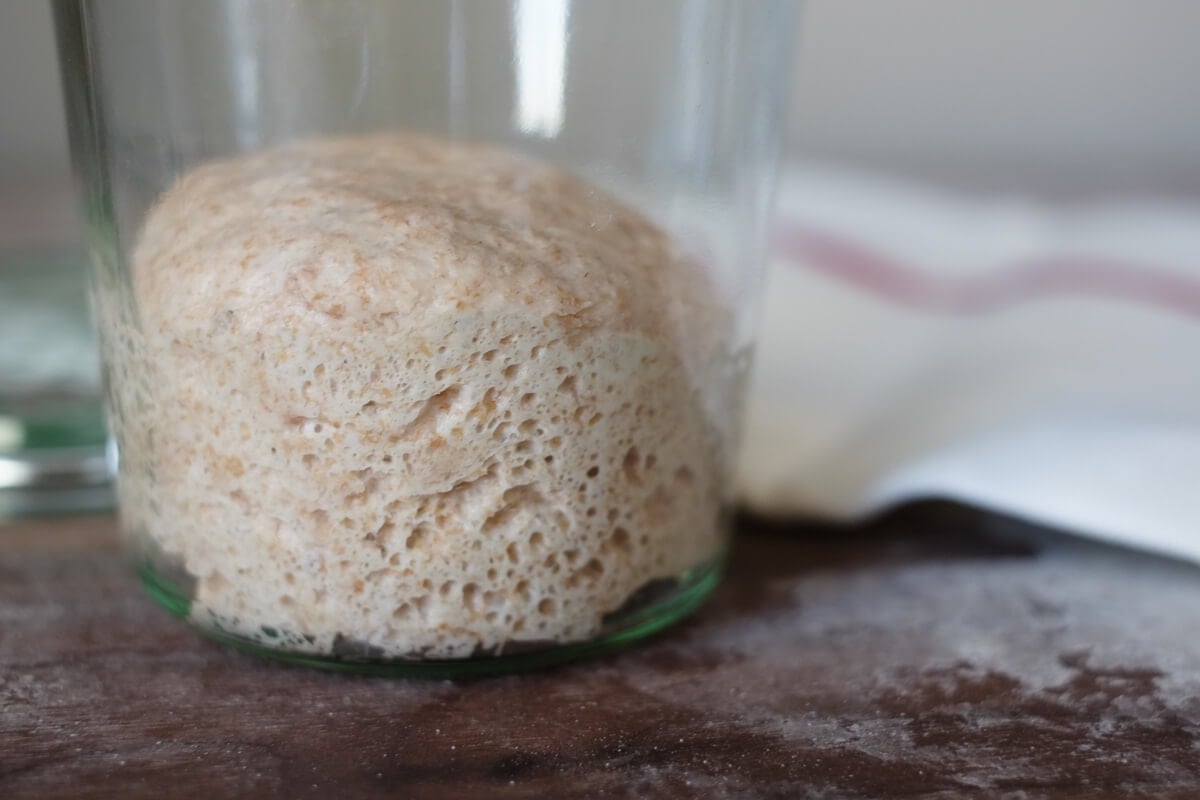
For more information, see my next post on how I maintain my sourdough starter for information on feeding (refreshment) times, flour types, and much more.
See my guide to the differences between a sourdough starter and a levain for information on how these two differ.
Prepare the stiff levain – 8:00 a.m.
Note that the quantities and temperatures in this entry have been adjusted to compensate for the cold environment in my house (around 70°F/21°C).
| Weight | Ingredient |
|---|---|
| 50g | Ripe starter |
| 50g | Giusto’s whole wheat flour |
| 50g | Central Milling Organic Artisan Bakers Craft (malted) |
| 65g | Water |
I keep the levain in the oven with the light on until the interior temperature reaches 78-80°F (25-26°C). Leave this to build acidity and strength for 4 or 5 hours. With a stiff levain, you’ll know it’s ready when the domed area on top begins to cave in, but after 5 hours it should be good to go.
Autolyse & Mix – 12:00 p.m.
Ingredients:
Gather the following:
| Weight | Ingredient | Baker’s Percentage |
|---|---|---|
| 100g | Giusto’s whole wheat flour | 10% |
| 50g | Whole rye flour (Bob’s Red Mill Dark Rye Flour) | 5% |
| 850g | Central Milling Organic Artisan Bakers Craft (malted) | 85% |
| 875g | Water | 87.5% |
| 20g | Fine sea salt | 2% |
| 200g | Ripe, stiff levain (amount increased 5% from last entry due to cold weather) | 20% |
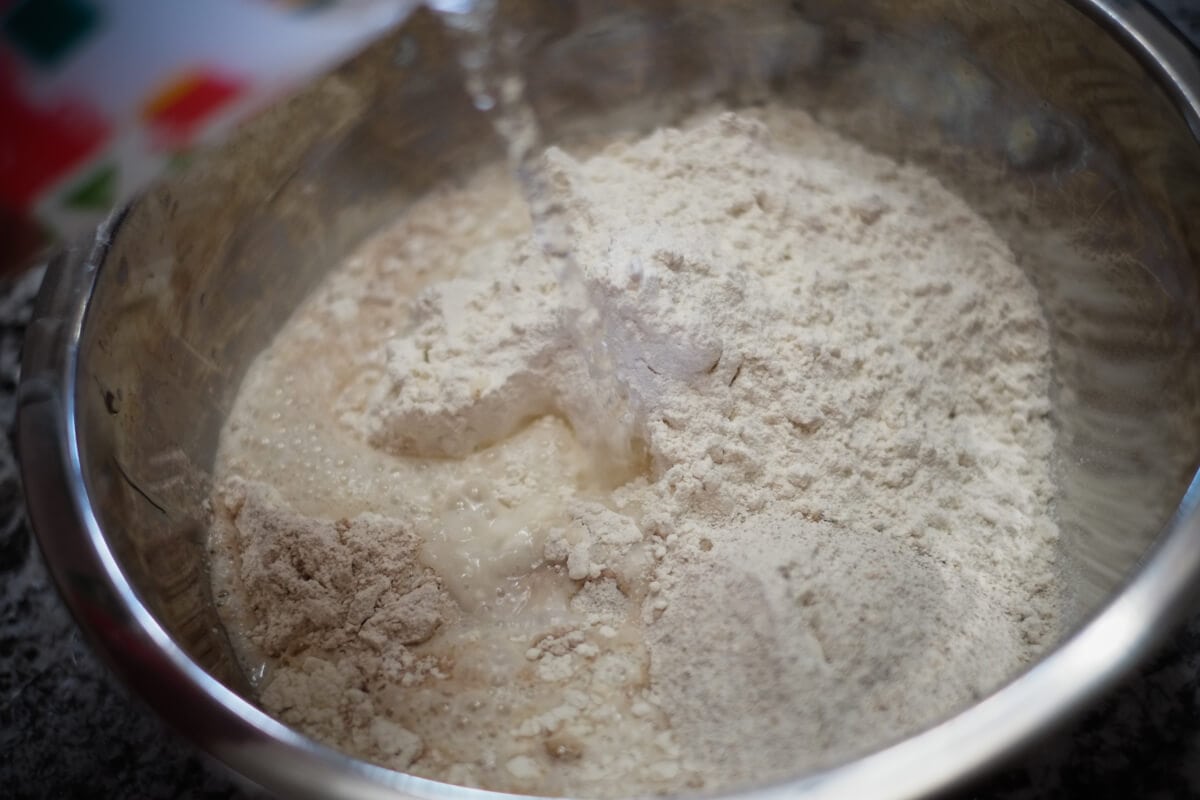
Perform the following for your autolyse:
- In a thick bowl add the flour
- Add 750g of your heated water (the rest is reserved until later when we add in the levain & salt after the autolyse)
- Mix these ingredients by hand until incorporated. Remember at this stage we are not looking for any gluten development, make sure all the dry bits of flour are incorporated
- Cover with wrap and keep near your levain for 1 hour (in my case in the oven to keep warm)
Slap & Fold Mix After Autolyse – 1:00 p.m.
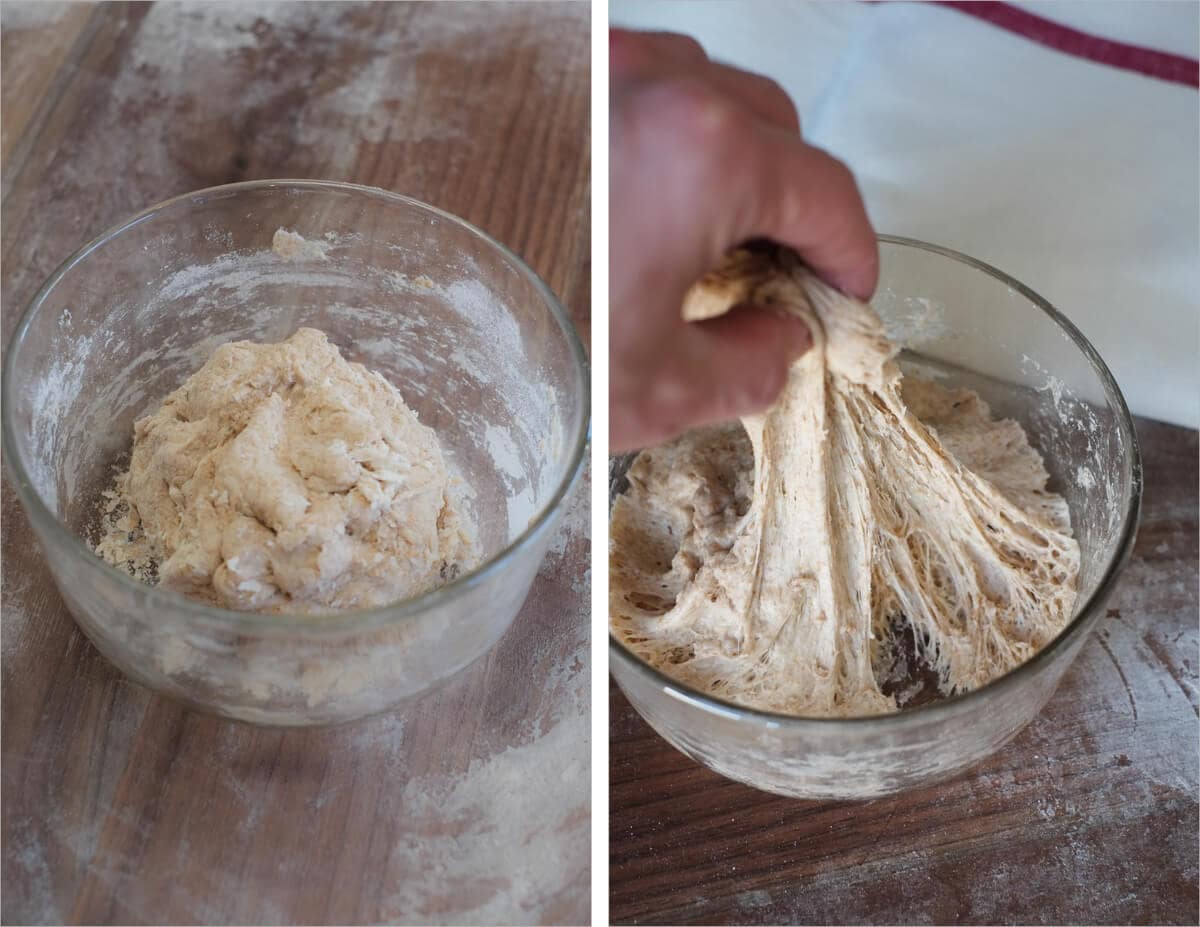
After your one hour or so autolyse, take your dough in the bowl, break up the stiff levain on top, pour on about half the remaining water (warm water if it has cooled) and slap and fold for about 5-8 minutes until the dough looks smooth and doesn’t stick to the counter.
Return dough to the bowl and let rest for just a minute, then pour on top the salt and remaining water and do another slap and fold session for about 5 minutes until the dough again looks smooth and has some strength to it. “Strength to it” is a loaded term and this is an intuitive judgement call. After a few tries if you remain observant, you’ll start to build up a feel for “strong enough” and know when to stop your slapping & folding.
At this point, the dough should look smoother, feel elastic and strong.
| Final dough temperature: | 71°F (21°C) |
My final dough temperature was VERY cold at 71°F (21°C) (typical would be 78°F/25°C). Even with the extremely warm water having the dough exposed to air during the two slap and fold sessions cooled things off considerably. I was a bit worried at this point but performing bulk fermentation in my oven with the light on (around 80°F/26°C) let the dough proceed with fermentation, although a bit slower.
Bulk Fermentation – 1:10 p.m.
Transfer your dough to a clear container to be used during bulk fermentation and let rest for the first 30 minutes. After the first 30 minutes have passed, at 1:40 p.m., do your first set of stretch and folds. Then do two more sets, each 30 minutes after the last.
I stopped at three sets but you will need to make the call based on how your dough looks and feels. If it’s holding shape in the container, turns become a little harder to perform because the dough bundles up and it pulls easily from the sides it’s most likely strong enough and you can let rest for the remainder of the bulk fermentation.
Pre-shape – 5:10 p.m.
Take the dough out of the container onto your work surface. Divide into two halves and lightly spin the dough in little circles across your work surface with your bench knife in one hand and your other empty hand—kind of like turning a car’s steering wheel. No need to overwork the dough here! You want to gently form them into two boules, just enough to hold their shape for a 30 minddute rest, uncovered.
Shape + Proof – In Fridge at 8:40 p.m.
Shape each resting dough to your liking and place them into their flour-dusted bannetons. See my guides page for tips on shaping boules and batards. Now place these into plastic bags and let rest on the counter for 2 hours at room temperature to start proofing.
I found this rest to be necessary based on how my dough was developing and how cold it was in my kitchen—70°F (21°C)—but if it’s warmer in yours, you might want to shorten this proof period to compensate.
After this initial proof on the counter, you should have noticed your dough rise just a bit, place your bannetons with wrap into the fridge to proof overnight.
Score + Bake – around 6:00 p.m. (Next Evening)
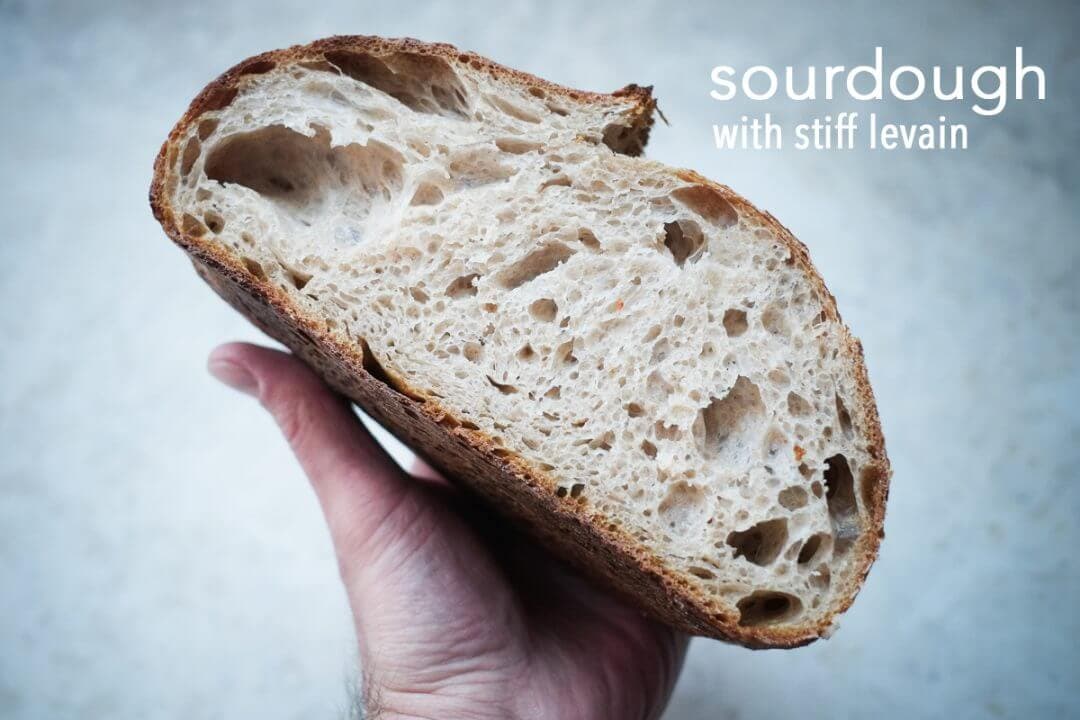
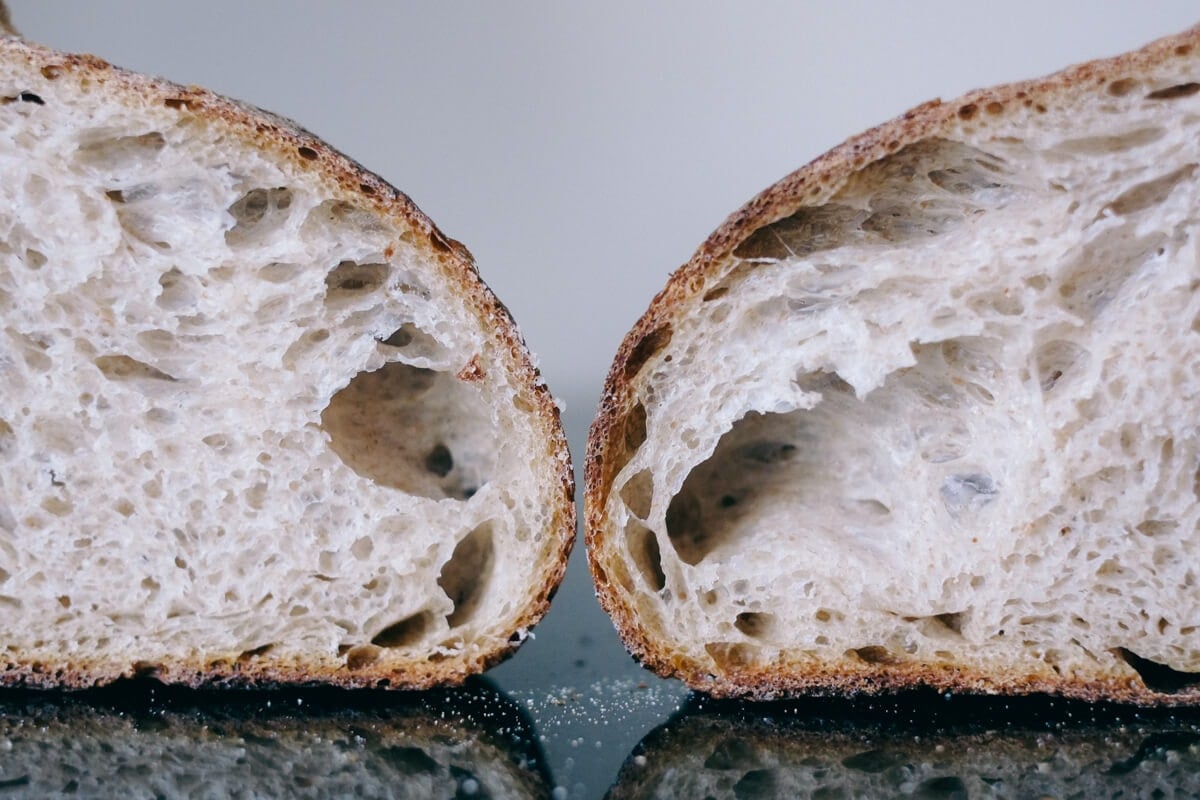
I went for a long proof this time: about 22 hours! My theory on my fridge being too cold at 39°F (4°C) is spot-on, and you can see in the results here as there was a much more open crumb than usual due in part to the long proof. Next bake I’m going to leave the dough out even longer, perhaps 3 hours, before placing into the fridge.
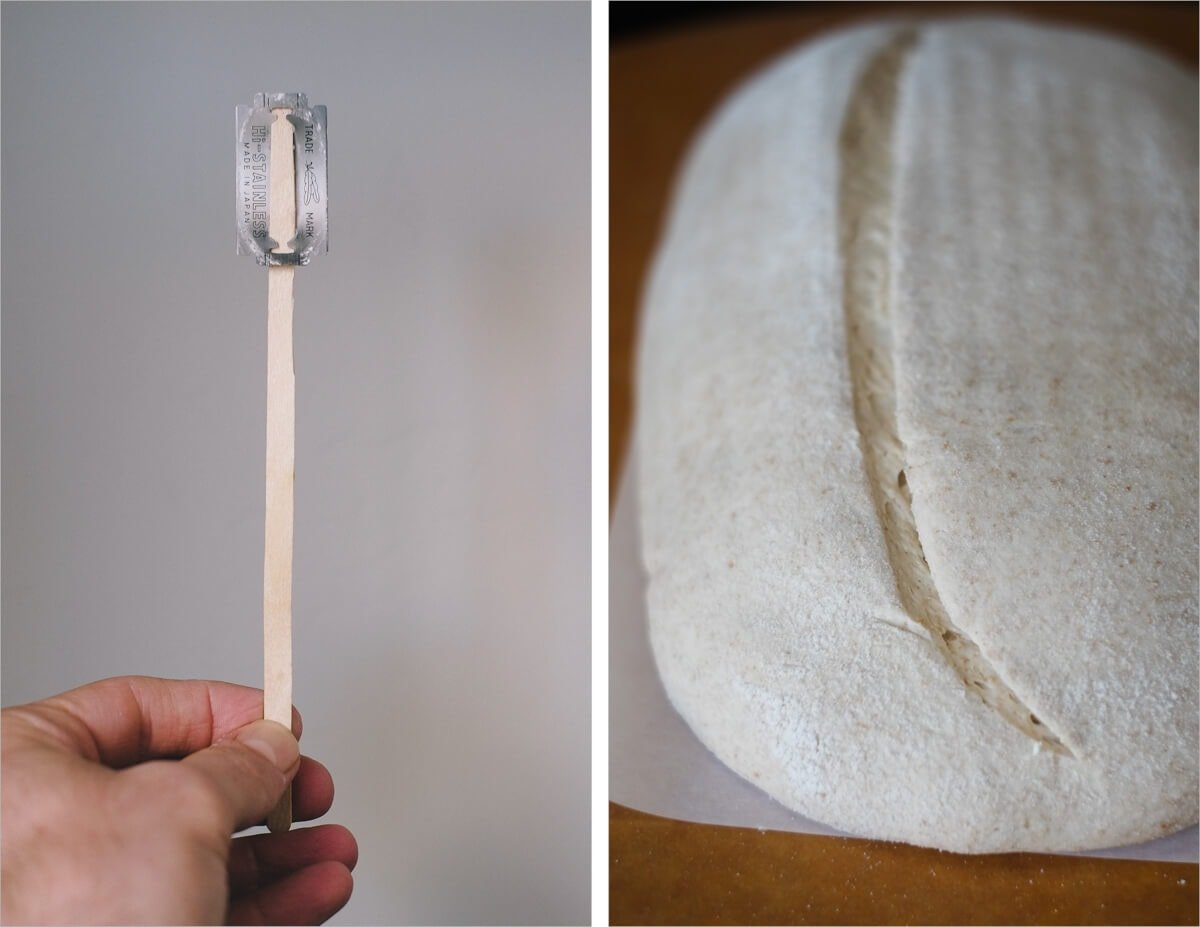
Preheat your oven with a Dutch oven (or combo cooker) inside to 450°F (230°C). Once preheated, take one of your bannetons out of the fridge and cut a piece of parchment paper to place on top. Take your peel and then put it on top of those two and quickly invert it, so the dough is now resting on the parchment paper which is resting on the peel. Score the top of the dough with your desired pattern. Take out the shallow side of your Dutch oven and drag in your dough. Quickly place the pan back in the oven, cover with the deep side, and bake for 20 minutes. After 20 minutes, open the oven and take off the deep lid of the Dutch oven (set it next to the other half inside the oven), then bake for an additional 35 minutes or so, until the bread is to your desired doneness.
For more tips with baking, have a look at my guide to baking with a Dutch oven.
Conclusion
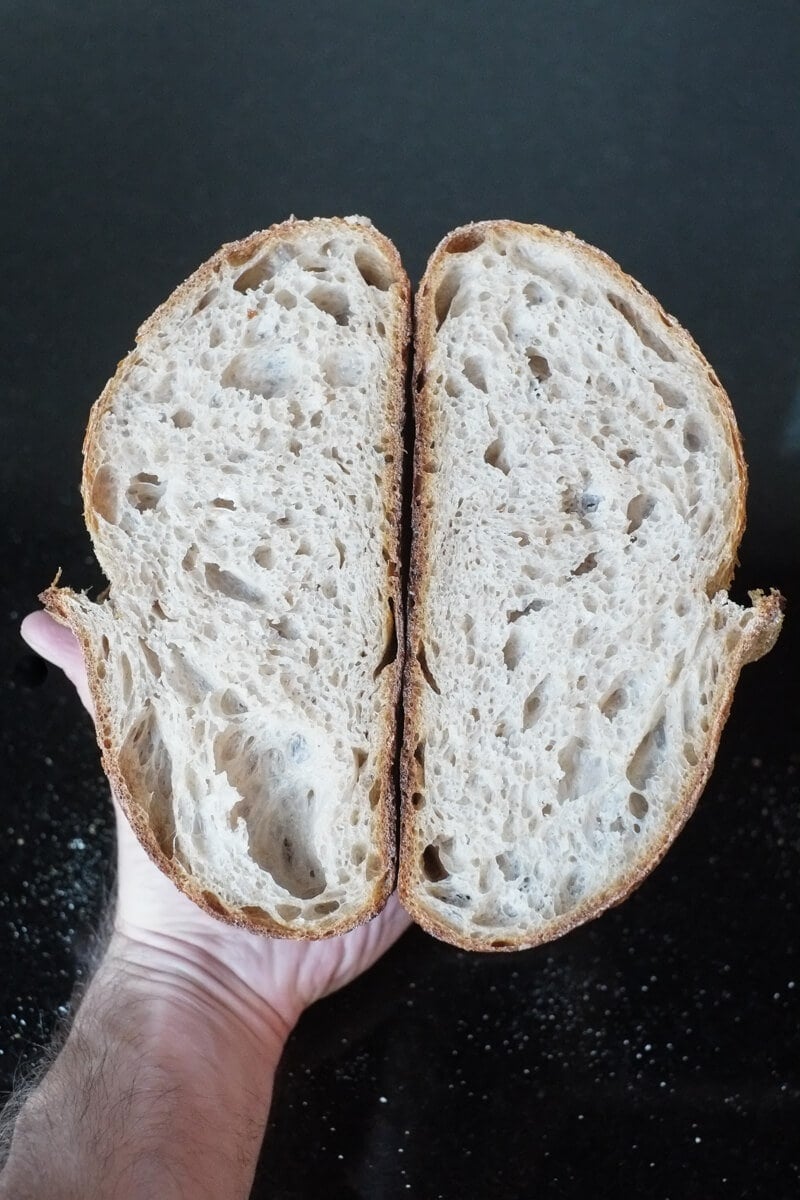
What a beautiful bake! I was happy when I sliced into these. I was pleasantly surprised by the beautiful open crumb inside, and I’m confident I can open things up a bit more next time. I’m slowly inching closer to my ideal loaf for each experiment and each trial. Sure, there are bakes that fall short, but the general progression for my bakes has been in the right direction. I’m still looking for that loaf that looks like a spider web inside with large holes and dynamic movement, almost like an explosion went off surrounded by sticky, gooey, custard.
My next attempt will be using the same procedure almost precisely as outlined above but I’ll take half and attempt a longer proof on the counter before retarding. It’s hard to say just how long will open things up more, and you don’t want to overproof, but it is an experiment after all. I’m sure it will still make excellent toast.
Crust
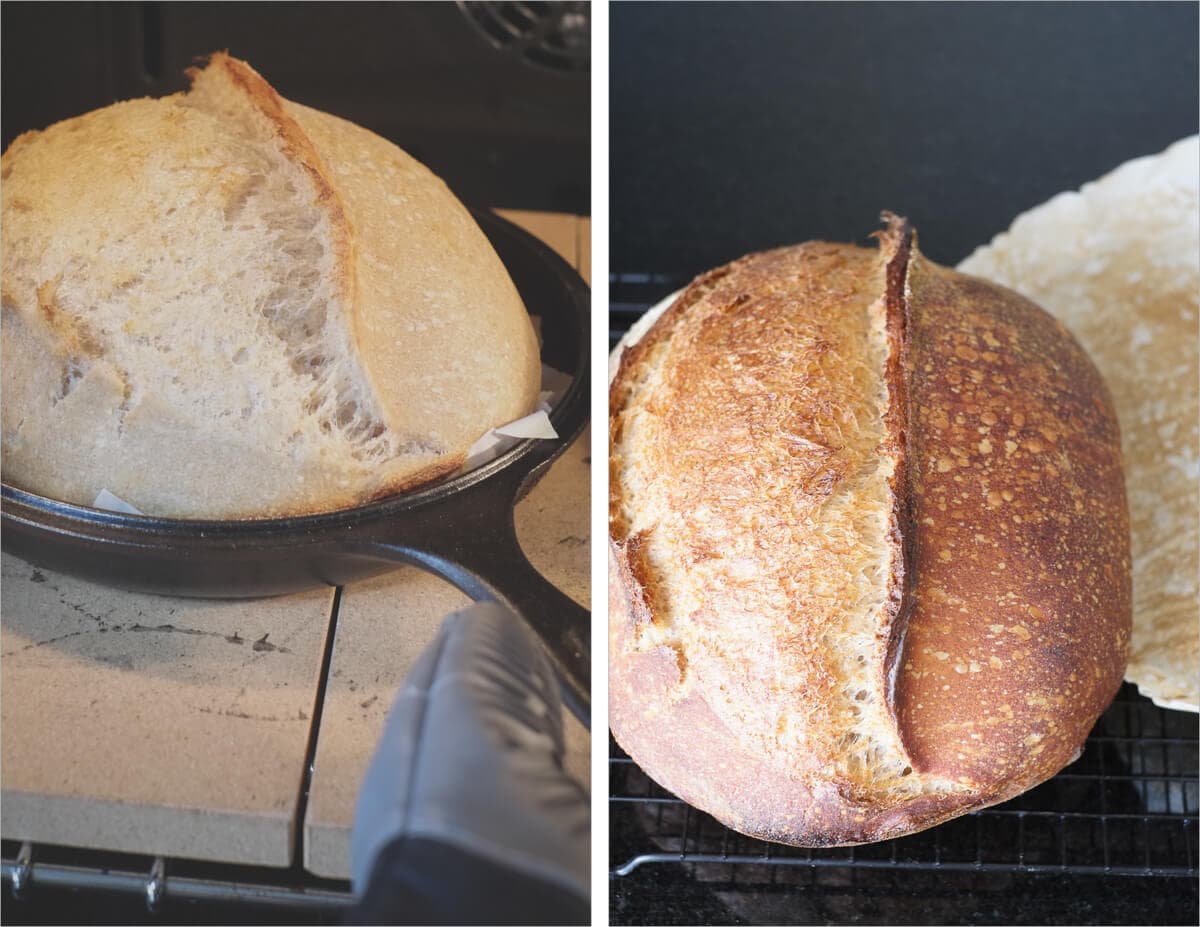
Thin, brittle, snaps under the lightest of pressure. Beautiful coloring throughout and excellent oven spring on these. I was a little afraid spring would suffer due to the high hydration, but the strengthening of the dough through using a stiff starter/levain and the slap and folds helped to keep things in check. Sublime coloring on the outside ranging from light brown to dark brown and signs of caramelization on the exterior. Cracks, small bubbles, tears, and rips.
Crumb
Super open, but still a little room for improvement (mostly in the bottom middle area). Tender and moist with a slightly nutty flavor likely from the whole wheat and tiny bit of rye. This bread is my current favorite sandwich bread. You can see in the image below that ghosting or shiny look to some areas where it looks like a thin sheet is being stretched wide — this is the look I want throughout.
Taste
Startling taste! My ritualistic late afternoon sandwich. With freshly baked bread shined, I couldn’t even take a minute to snap a picture to post here — it was gone. The stiff starter and managed proof did not impart an overly sour flavor to this bread; it was a mild taste that slightly lingered after finishing a bite. I like it this way, as you may know by now.
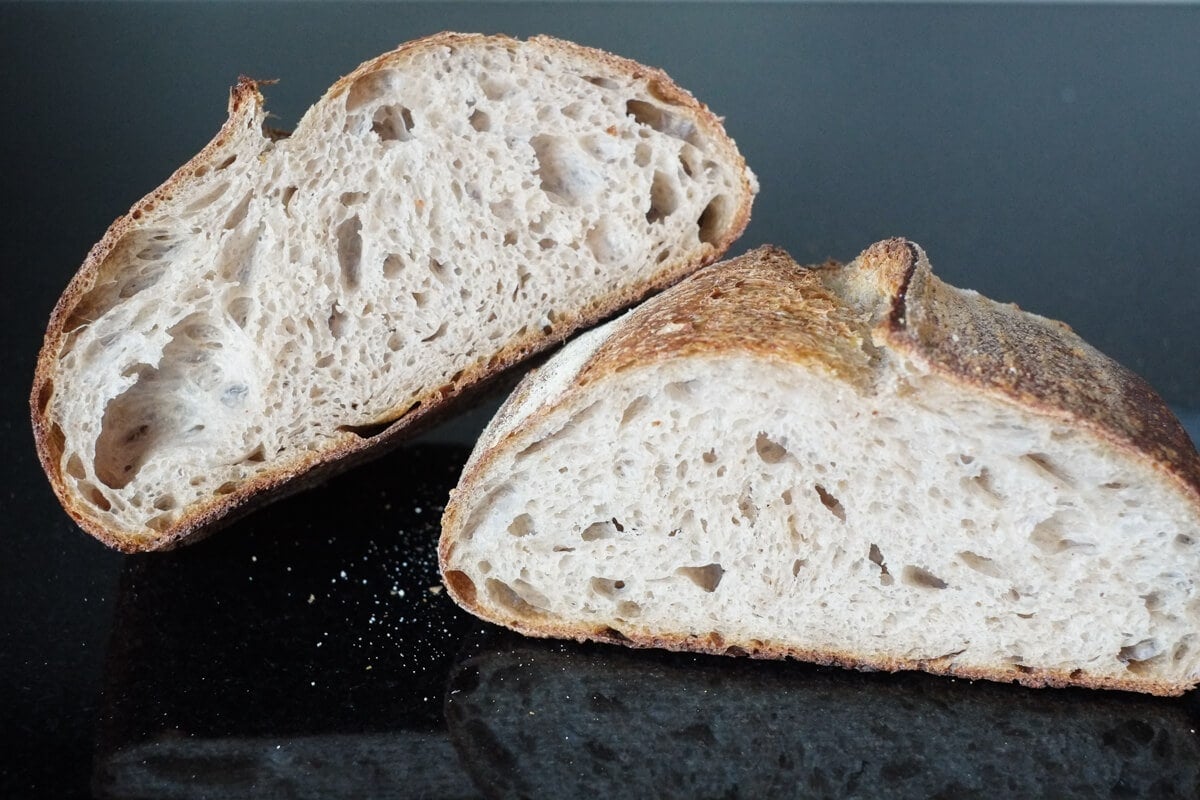
Happy New Year everyone, I hope you enjoyed this look into baking sourdough bread with a stiff starter, and I hope you join me through next year where I hope to bake and write even more—happy baking!
If you use this recipe, tag @maurizio on Instagram so I can take a look!


130 Comments
Hi Mate
I love your work.
Can you tell me what ratio starter did you use for this recipe please.
I’m trying your 20%, 65%, 100% starter but wondering if this is what you e used for this recipe please ?
It would be brilliant to have this as a printable recipe as I want to work with a stiff starter.
It's very different than your Beginners sourdough bread recipe so easy reference to bake with would be fab..
Great information. I can enjoy no sour to somewhat sour bread but my wife hates the sour note. I’ve had on/off success with Wild Yeast Water which, when it does not produce a gummy loaf, produces an almost zero sour bread. I’ve been in a loop thanks to the internet with liquid = more/less sour and stiff starter = more/less sour. I’ve been able to make a wife friendly, low sour, SD bread with a stiff starter [scrapings & 40g flour & 25g water] so that’s what I’m using.
So far the ONLY thing rock solid, works every time, is the Yudane method in yeasted breads. When I use fresh milled flour, it lowers the bitterness of the bran, and makes for a long lasting, moist loaf. I have to try Yudane with Sourdough [stiff starter] to see if that reduces the sour notes. I see no reason Yudane would NOT work with SD but I’ve failed before..
please tell me how to maintenance this stiff starter. . . how do you add the water and flour, how often, how much? Do you keep a 100% AND a stiff starter going at all times?
Are any adjustments needed for fresh milled wheat?
I have only one question. For your bulk fermentation, in this recipe, do you go for a certain % of rise? I ask this because if I’m using a proofer set to 78° I won’t have to wait as long as you do in your cold kitchen.
When I do mostly white flour sourdough I go for a 30% rise.
Btw, I have made this recipe twice with excellent results. I must say I don’t use all of the suggested water. The flavor and texture are Spot on!! Thanks so much :-))
I mention up in the post that a stiff starter does *not* imply more sourness all on its own, lots of factors to consider as well (temperature, fermentation time, flour choice…). With bread, so many things are interrelated it’s really hard to draw conclusions from just one thing (hence my “update” statement above), it all needs to be taken into consideration 🙂
A stiff starter made from 100% whole grain, in my experience, and how I almost always use it, will have increased acidity compared to a stiff starter made with white flour. In my baking, reducing the hydration on it’s own doesn’t imply more more sourness. However, I have read that reducing hydration could increase the amount of acetic acid produced vs. lactic, yes.
What’s also missing here is temperature, and fermentation time for the starter. For example, a starter/lev that’s refreshed frequently with high inoculation can lead to less acidity overall (due to lag times of bacteria vs yeast), even when prepared as a stiff starter. A good example of this is a typical panettone build, which results in extremely low acidity in the end.
I don’t see a recipe for a more liquid starter. I would like to try it and hope that you will share that recipe with me.
https://www.theperfectloaf.com/7-easy-steps-making-incredible-sourdough-starter-scratch/
I made this recipe a few days ago as well as others. I always use the amount of water in your recipe and don’t even use what I reserve to add later. I always use a scale to measure ingredients, including tare weight first. On this recipe, I performed Slap/Folds as directed, hoping it would help the dough to cooperate but it didn’t. Dough still stuck to the counter, my hands, etc., until I added more + more flour. (I hate to change the recipe by doing that.) I used a bowl of water on the counter for my hands in order to manage the dough but still often come up with dough too wet. So I feel I must add flour in order to create a ball of dough which holds its shape. I did Stretch/Folds also, which usually work for me but not this time. I wonder if my starter isn’t/wasn’t 100% hydration…or if it isn’t ripe enough, even though it has doubled in size, is very bubbly, and floats. Should it take a few minutes for it to float? My 2 baked loaves didn’t have ears, rose about 3 inches, had nice-looking crusts, some small open crumb, and texture was chewy and taste was good. But I also don’t seem to get light, airy loaves. I am frustrated.
Hey Mare! Sorry for the delay. It sounds like your dough is most likely over hydrated—your flour likely isn’t able to take on quite a much water, and that’s ok! Try reducing the hydration by 5% and give it another go—the reduced water should bring strength to the dough and you’ll feel it immediately. Once you find a suitable hydration, you can try to push it back up (if desired), but as you do, take note of how the consistency of the dough changes: the dough will start to slacken out as you add more and more water, this means you’ll likely have to mix more upfront or add another set or two of stretch and folds during bulk fermentation.
Generally, with an increased hydration, you need to mix longer to develop the gluten in the dough to sufficiently support the water added, but this only goes so far. At some point, the flour you’re using just isn’t able to take on any more water and you’ll essentially have a weak and slack dough. It’s always best to start conservatively and work your way up with hydration as you feel out your flour. This is typically why I recommend holding back water during mixing, adding it in as the dough handles it.
Try to keep everything else as consistent as possible and let me know how the next attempt goes
Thank you so much!!! My next 2 loaves at the same bake were sooo much better!! The dough was so much easier to handle, they rose quite high, had no gumminess whatever, had ears, were not dense or heavy, and had great flavor! That made us really happy!
why do you say that the stiff starter is more acidic than the liquid one? Italians use lievito madre a.k.a. stiff sourdough because it´s not acidic at all, its more sweet and the liquid itps more tangy, even when feeded regularly
Yes, it’s true, a stiff starter does not specifically imply it will be more acidic!
Hi there – with a stuff starter, in a 70-72 degree kitchen (same as mine), at what point do you find your starter is ready to be added to a levain? What time difference do you find there is between “mature” for liquid vs. stiff? I work 12.5 hour shifts, so experimenting with stiff to allow myself to feed in the am at 6 but not start levain until about 10pm so it’s ready for next day, but still young. Thanks!
I’m having a hell of a time trying to get a sour loaf. I want a strong sour note, but it has been unattainable. I have a 100% hydration starter with organic rye flour, it’s pretty thick but not thick to where I could knead it. I’ve experimented with different dough innoculation rates (10% to 20%) and therefore bulk fermentation times, but no matter what I do, I get a barely perceptible sour note. I’ve taken little pieces of my fermented dough and put them in my mouth, and I perceive quite a bit of sourness, but it never makes it into the baked loaf. Any insight on what else I should change to get more sourness would be much appreciated!!
Hey, Andrew! For more sourness, use your starter and levain when they’re a little overripe. It also helps to work in whole wheat to the recipe, and do not skip the overnight proof in the fridge. You could actually push this for an additional 12 hours in the fridge, which may help. I have a post coming here to help with all of this!
I’m wondering your thoughts on keeping a small liquid starter (I find it’s easier to mix and uses less flour), and mixing a stiff levain? Also, I want to inquire about your fridge temp- you said that 39° is too cold in your fridge. I was under the impression that 37-38° F is standard for fridges and was surprised to read that you felt it hindered your cold proofing. This summer it has been quite warm in my house and I had a few loaves over ferment. When I checked my bread log I noticed these loaves proofed in the fridge for 16+ hours. The one loaf that didn’t over ferment was only in the fridge for 10 hours. I checked my fridge and it was 40° (even higher during the evening when I’m cooking and opening/closing the door often). Though there were many other variables (likely I over fermented these in the bulk fermentation phase) but I thought maybe it’s because the ‘warmer’ fridge temp.
Yes, a small liquid starter will work well, indeed!
My fridge normally runs around 38-39°F here. I’d say anywhere around there, though, is considered “normal” for a home fridge, and like you said, that can vary depending on how packed the fridge is and how often it’s opened/closed. It’s possible your dough over proofed because of the warmer fridge, but my guess is it was probably pushed too far in bulk fermentation—try cutting that 15-30m short next time to see if that helps!
I love that you have a bread log, by the way!
If it does not already have a handle, yes I do! It’s not 100% necessary, though, it’s to your preference.
Hey Maurizio,
Following on from your article…
What inoculation/amount of seed do you recommend for a 100% stoneground whole-wheat stiff starter, 60% hydration, refreshed every 12 hours?
I’m keeping mine in a proofer, set to a constant around 82F.
Thanks so much!
That’s very warm! I would say the seed would have to be quite small, maybe only 5% or so? That’s where I would start, and I might also be tempted to drop the temperature down to 78F or so.
Maurizio, You must have seen some bakers, eg autumn.kitchen, using sweet stiff starter in sweet bread like panettone, croissants, and brioche. The resulting baked goods can withstand long proofing process without getting sour. Do you have an exploration on the science of it? Thank you. Selena
Yes, I follow her! Adding sugar to the starter will help reduce bacteria numbers (and in the end, activity) which is primarily responsible for the acetic and lactic acid built up over time through fermentation.
I mean come on, what an amazing read!! Winter baking in upstate NY has me feeling deflated, just like my bakes. Haha. Thank you for guiding me through how to handle my starter next weekend!
Thank you, Laura! Yes, the winter always poses challenges. I have a new post coming soon on using a warm proofer to help offset the cold temperatures. Until then, stay warm and happy baking!
I am a bit confused about stiff starter versus liquid starter! I read that stiff starter favors yeast over bacteria due to the lack of water and this creates a less sour environment and gives a less acidic flavor. What do you think?
I’ve never heard it put quite that way! Typically, I find a stiff starter can be either sour or not as sour, it really depends on all the parameters in the equation. More whole grains will bring more sourness, as will a warmer temperature. Reducing the hydration with those two will mean even more sourness. I’m currently working on a guide page to all of this I hope to be posted soon!
Hi- How long can you realistically leave the loaves in the fridge to proof before they start go bad? I would love to do this recipe on a Sunday so I have one loaf to start the week then leave the other loaf in the fridge until Wednesday/Thursday.
Hey, Timothy. I’d say 24 hours later is the longest I’ve pushed it. Eventually you’ll get significantly less rise. It might be worth an experiment! Make two loaves, put them in the fridge, bake one 24 hours later and one 48 hours later.
Sounds good. Thanks!
Hi Maurizio,
Can I dilute the stiff starter in the beginning of the autolyse with the water and then add the flour and start the autolyse with all three like I usually do for a liquid starter?
Yes, absolutely.
Hello all. Wanted to get your thoughts about how you think about hydration when you switch to a stiff starter. I typically use 20% of the flour weight for the starter/levain. My starter is 100% but I am interested in experimenting with a stiff starter. Do you just use your typical amounts (for me 500g flour, 400g water, 100g starter, 12g salt) and add some more water if you think it is too dry or do you think about it some other way?
For me, a “stiff” levain is typically around 50-65% hydration. For example, with 100g of flour in the levain, I’d typically add 55g water.
Hi Maurizio, your blog and baking my bread has been my obsession throughout COVID, I’m so grateful! I live in Portland, Oregon and I honestly haven’t baked a bad loaf using your simple week day recipe. I have felt the need to bake to keep sane, so I started making loafs just to give away. It’s honestly been the best.
But here is my question. I just drove for a straight 24 hours to Santa Fe to spend a month with my mother. Of course I brought the starter (she’s obsessed with the bread, I’ve been shipping it). Now that I’m here, I think my starter has turned from a liquid to a stiff starter. The smell is totally different, no longer sweet like banana. And my pour off crumpet dough is really thick. Should I up my water?? I use Bobs Red Mill all purpose and whole wheat (50g each) and 50g starter, 100 g water. any suggestion? Did the elevation or dry dessert air change some of the chemistry?
I’m really excited to be here, can’t wait to make my first loaf fresh for my family! Thank you again for all your wonderful work on this blog.
So glad to hear that, Zoe! Yes, you can certainly change the water content if you’d like. Add more water until it gets to the consistency you’re after. The dry climate here (I live an hour south in ABQ) will certainly change your starter’s conssitency!
I have just started making bread with “old dough” stiff starter. My starter is doing well and the loaf I made using a King Arthur recipe resulted in a nice loaf with good flavor and crumb. I use several of your sourdough recipes and they always work well so I want to try this recipe. Can I add aged asiago cubes and rosemary? If so, how much to you recommend and when in the process should the ingredients be added?
I’d start around 15% of each and go up/down to taste!
I’ve been making sourdough for a few months now. I started before we were all stuck at home. I always feed 1:1:1 but I would consider still my starter fairly stiff. It triples in volume in 2-4 hours. I’ve actually never seen it fall. Nor get liquid on top. Years ago I witnessed those things. But that was a different starter. I keep this one in the fridge between bakes and it very quickly recovers. I have to try your baguettes again. They were super crunchy last time, but the crust was too thick.
HI. I have just been reading your article about a stiff starter. I am new to the sourdough world! I have a stiff starter (no idea if was meant to be!), 6 days old now and it smells good, rises and has air bubbles but when I do the float test it does not rise…..do I persevere or start again?
Keep going! It often takes 4-6 weeks for a new starter to reach maturity.
As long as you’re seeing consistent signs of fermentation each day your starter should be fine to bake with. With a stiff starter you might not see it float, depending. Also, the float test is not a definitive test — it can be misleading!
The float test is not very important. You can make bread with levain in any state. Anything that itself rises and ferments will make your bread dough rise and ferment. If it has yeast in it then it’s all good.
t. Baker
Hi Maurizio, What does it mean if my bread is really heavy, and the air bubbles inside the loaf are smallish, compared to the ones in your loaf?
Hard to say just with that description — could be over proofed, over hydrated, a difference in flour…
Hi Maurizio, Given that I might run out of rye flour and have whole wheat flour, how much whole wheat flour should I substitute for rye use to maintain starter given your standard formula.
I would substitute it one-for-one. I also just posted a guide to keeping a smaller sourdough starter to reduce waste you might find interesting! Hope all is well and happy baking.
Thanks! Will look into the smaller one too!