

I call this batch number 33 of the Tartine sourdough country bread recipe, while it may actually be my thirty-third pair of these I’m not 100% positive. I know for sure it can’t be any less, but it’s probably more. On to the entry.
Another Sunday, another pair of Tartine sourdough country loaves shaped and proofing. My family has come to expect this bread to be on hand during the week, and in the rare case where we have to buy some bread from the grocery store, we are always disappointed. Baking bread is a relatively simple act when you boil it down, and yet getting that perfect loaf out of the oven does not always work out — but I still strive forward.
If you’re brand new to baking sourdough, read my Beginner’s Sourdough recipe post first, it has longer in-depth explanations on every step in the baking process!
Sunday started out a bit lazy; waking in the later morning after attending a friend’s birthday party the night before. I stumbled into the kitchen and took a look outside to see completely clear skies—a good sign a warm day was ahead. Given the rising temperature, I knew Sunday would be a day of quick dough handling and preparation. As you can see, even my German shepherd Arya (yes, that Arya) was a bit lazy this morning. I suppose too many rabbits, pigeons, and tennis balls chased the day before; oh, what a life.

Although the leaven was prepared later than usual on Saturday night, it was ready to go (left-hand side image below). As you can see, the bubbles on top indicate there was significant fermentation activity overnight, and judging by the smell (like ripe fruit, almost a hint of vinegar), hopefully, it didn’t go too far.
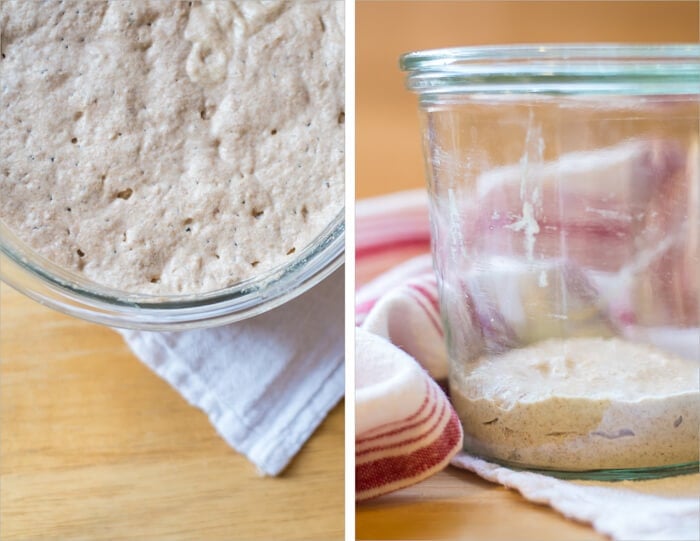
Over my starter’s lifetime, I’ve experimented with using different flour and grains and have settled on a formula that my particular strain seems to thrive on. Instead of following Chad Robertson’s Tartine starter formula in his book where he feeds 50% whole wheat, and 50% all-purpose, I feed my starter 100% rye flour. I’ve found that my starter shows noticeable activity when fed rye exclusively. If you’re interested in reading about how to create and manage a sourdough starter like mine, head over there and read on.
Also, if you’re one who frequents Instagram, head over and check out my Instagram feed. I typically post many “daily bakes” and those behind-the-scenes shots that sometimes don’t make it into these posts!
Tartine Sourdough Country Bread Recipe
Prepare the leaven – 12:00 a.m.
The night before you plan to prepare your dough, mix the following, lightly cover, and set out on the counter overnight:
| Weight | Ingredient | Baker’s Percentage |
|---|---|---|
| 31g | Mature sourdough starter (100% hydration) | 28% |
| 110g | Whole Wheat Flour | 100% |
| 116g | Water | 105% |
Mix the flour + water, autolyse – 9:00 a.m.
For this loaf, I decided to try and tweak the whole wheat to white bread flour percentages. I still wanted some of the WW taste and texture, but a bit more “white” in this loaf. Due to the WW reduction (from the last Tartine recipe), I’ve also reduced the amount of water to 79%.
Note that this is not a traditional “autolyse,” which only has water and flour mixed, but this is how Chad performs this step in Tartine—let’s follow suit for this bake. In my more recent baking adventures, I no longer mix flour, water, and levain for this step.
Gather the following:
- 250g of your new leaven
- 300g whole wheat flour (I’m currently using Great River Organic whole wheat flour)
- 700g unbleached all-purpose white flour (King Arthur)
- 20g salt
- 740g water and 50g water (reserved for step 5, below)
Method:
- Add 250g leaven to your large mixing bowl
- Pour in 740g water and mix with your hands until the leaven is completely dispersed
- Add 700g white flour and 300g whole wheat flour and mix with your hand until all the dry bits of flour are gone
- Cover your bowl with a towel, or if in a dry climate, plastic wrap and let autolyse for 30 minutes
- After 30 minutes, add 20g salt on top of the dough and slowly pour the remaining 50g of your reserved water on top. Squeeze the dough with your hand to incorporate the salt throughout
- Now reach your hand under the dough and pull the side up and over onto itself. Continue to do this as you spin the bowl; grab, pull, and push. Do this just until the dough comes together and becomes super sticky. Generally, this will only be between 5-10 turns
- Transfer your dough to your plastic or glass container, set a timer for 30 minutes
Next, we tackle the bulk fermentation step.
Bulk Fermentation
At this stage, we want to do four sets of turns, plus 1 – 2 hours of rest on the counter. A “turn” consists of reaching under your dough, grab the bottom and pull up the dough on top of itself. Do this four times, one of each side of your container (if it’s square, that is). Additionally, you want to do this rather vigorously. The stretch up and down on itself is what gives the dough strength.
- 10:10 a.m. – Turn 1
- 10:40 a.m. – Turn 2
- 11:10 a.m. – Turn 3
- 11:40 a.m. – Turn 4
- 11:40 a.m. to 1:40pm – Rest on Counter
Pre-shape – 1:40 p.m.
When the dough has risen about 20-30%, and you see a bunch of little air pockets throughout, it’s ready for pre-shaping. Take the dough out of the container onto your *unfloured* work surface.
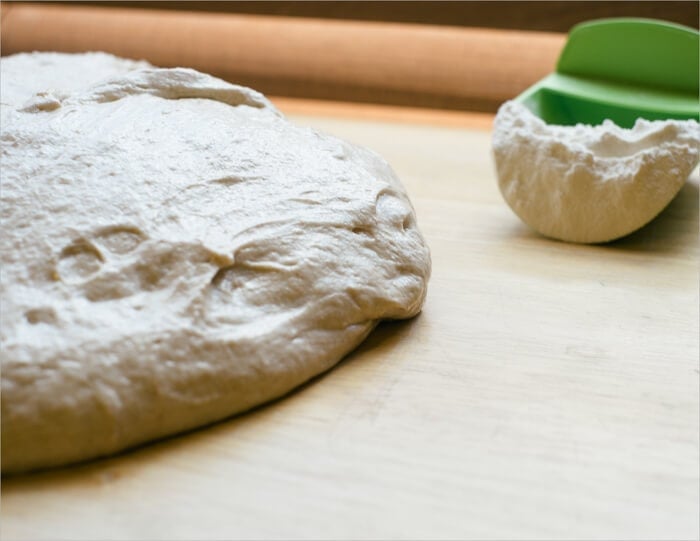
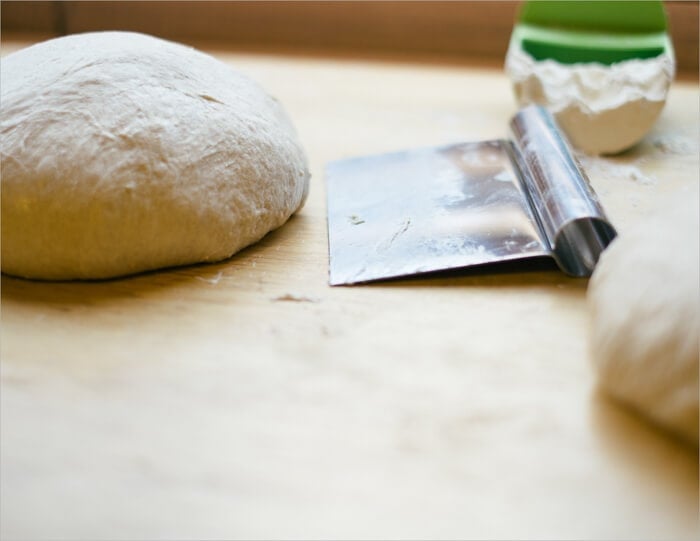
Sprinkle some flour on top of your dough and divide into two halves. Take a half, flip it over and pull each of 4 edges from under onto the top. Then, flip the folded dough over, so the seam is on your work surface. You want to form loose boules here by using your hand and your dough knife. Your work surface grabs the bottom of the dough slightly as you spin the dough around to make a little ball. Repeat with the other half and cover (I cover with two inverted mixing bowls) for 30 minutes.
Shape – 2:10 p.m.
The resting dough should have spread out, but not quite into a pancake shape. If it has formed a pancake, you can strengthen it by pre-shaping one more time and waiting another 40 minutes.
Flour the top of one of the boules and flip it over with your lightly floured hand and dough knife. Take the part of the dough that’s closest to you and fold it up and over in half. Take the part that’s to the right, stretch it out as far as it will stretch, and fold it up and to the left. Repeat with the left side and the side of the dough farthest from you. Then take the edge that’s closest to you, pull it up and over again towards the back. When performing this last motion, you will lift the entire dough up and over until the seam side is now down on your work surface.
Spin the dough using your two hands to shape into a boule. As you slightly pick up the dough and spin it, the bottom snags the unfloured work surface and creates tension. I do this several times to create a very taught surface on the top of the boule. Sometimes small air bubbles will be visible.
If you’d like to shape this dough as a batard instead of a boule, check out my batard shaping guide.
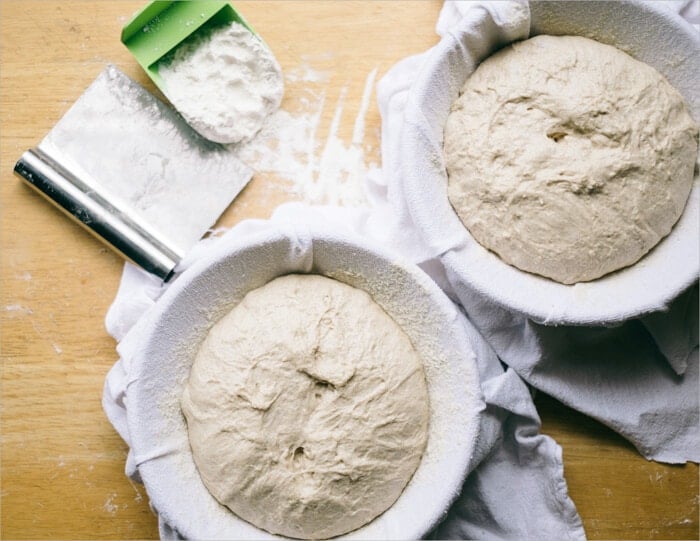
Proof – 2:20 p.m.
Place towels into small mixing bowls or proofing baskets and dust with white rice flour. These bowls will hold the dough as they proof in the fridge overnight. Take your taught boules and place them into the floured bowls with the seam *up* facing you. I place each of my bowls into plastic bags and then into the fridge.
Score + Bake – 9:00 a.m.
Gather your tools:
Speaking of tools, if you’d like to see all the tools, I use when baking head over to my tools page and take a look.
The first of these sourdough loaves was retarded for 18 hours. The Tartine formula lists an 8-hour cool fermentation in the fridge but 18-20 hours seems to be the sweet spot for me as my bread takes on a complex flavor with this extended fermentation time. It also seems to help open up the crumb more than what you would typically see; I strive for that light and soft interior.
In the morning you first want to get your oven ready. I place the rack in the bottom third of the oven. Turn your oven on to 450°F (230°C) and let it preheat.
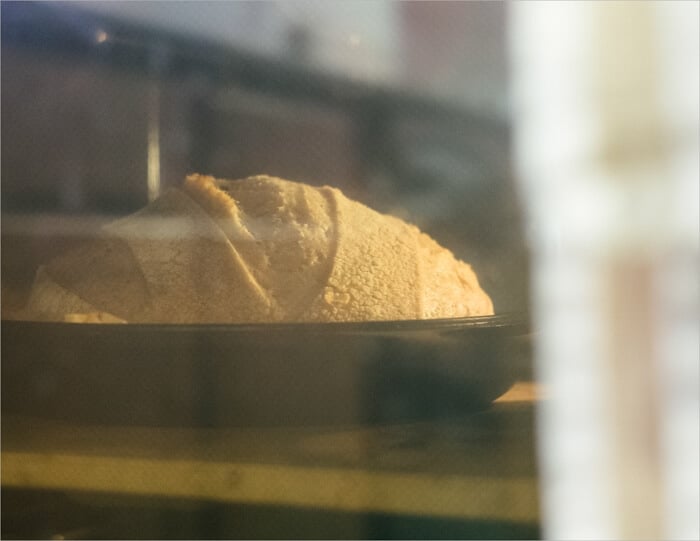
Once your oven is preheated, get your dough ready. I bake this dough straight from the refrigerator—no warmup time is necessary. Take one of your loaves out of the fridge, cut a circular piece of parchment paper, and place it on top of the bowl. I then place a pizza peel on top of the parchment paper (and bowl) and invert the whole thing quickly to get the dough out of the bowl and onto the paper + peel. Get your razor blade out and score the top of the loaf to allow the bread to expand while rising in the oven. For these sets of loaves, I scored one with my “Roman numeral three” pattern and the other with a single long slash.
Quickly take out the shallow half of your hot combo cooker and drag in the parchment paper and dough.
Cover with the other half of the combo cooker and bake for 20 minutes with the lid on. After this time, open the oven and lift off the combo cooker lid (you can leave it in the oven to the side), close the oven, and bake for an additional 35 minutes. These times and temps are a drastic change from the Tartine book, but I’ve found them necessary due to my elevation and climate. I want the crust to be nice and dark brown.
After pulling the loaves from the oven, I cool them on a wire rack for at least one hour before cutting into them. Cutting too soon can cause the crust to harden drastically and the inside to become quite dense. Easier said than done, however.
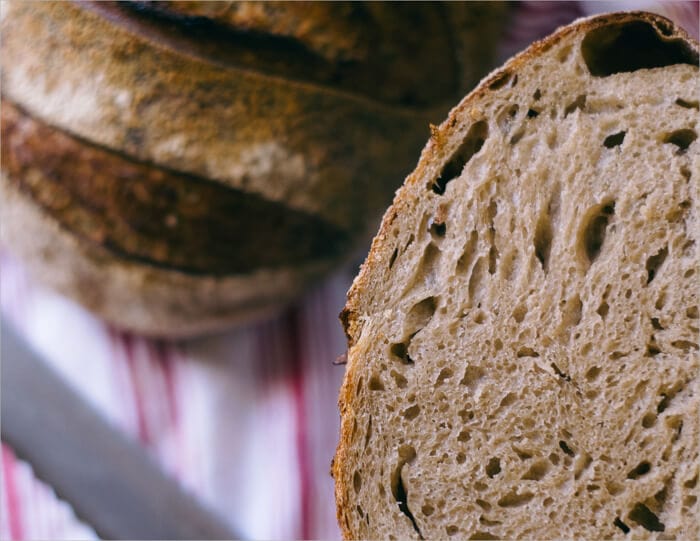

What a pair of beautiful loaves this morning. There’s no doubt the lazy Sunday morning/afternoon turned out to be a success in the kitchen, and this Tartine sourdough country bread recipe couldn’t be more delicious.
Buon appetito!
Now that you’ve attempted this recipe try your hand at the higher hydration version for a bit more challenge, and an even better tasting loaf!
If you use this recipe, tag @maurizio on Instagram so I can take a look!


374 Comments
Hi I have being following your recipes for basic sourdough bread and have tried to use a 50/50 white and wholemeal flour to get more fiber but alas I don't get the bread to rise as it should even using 80% hydration, any help would be great thanks.
Gerry
This is the best one of your breads I’ve ever made. The complex flavor, the crunch on the crust, the look, everything about this bread is magical. Worth the effort!!
Can I split these into 4 smaller loaves instead of 2?
Hello Maurizio,
Today I am making the Tartine Rye Bread (the recipes in perfect loaf for a are a bit too rye for us). However, I am following your techique with autolyse for an hour before adding the levain and water, and then the water with the salt. I'm going to proof overnight and I hope that the it all turns out well. I have the Tartine Bread Book and had been frustrated with my sourdough breads until I came across your methods. BTW, rather than the slap and fold that tires me out (I'm 73), I now use the kitchenaid on low speed for 5 minutes (I learned this from your pullman white bread recipe) and it worked great with the lavender apricot walnut loaf (in fact, it produced a much better crumb that I get with the slap and fold. I'm probably not doing the slap and fold correctly or enough.)
Again, I want to thank you for providing me with a method to make sourdough that produces very satisfactory loaves.
Fantastic, Mary! Using the KitchenAid, not a problem at all and works well, as you've found out. Hope the loaves turn out great for you, let me know! Happy to help 🙂
I'm looking to change some recipes in a bakery where I am consulting. I want to use this recipe as my base bread and mix the flour and water in a 30 qt. mixer, and then autolyse with the salt and water. Then, before bulk rising, split the dough for each different addition. Any things I should do differently?
The "bakers" have been bulk rising at coolish kitchen temp for over 12 hours and their bread is like a brick! Mixing everything, making a couple turns one night and finishing the next night. There are other techniques that aren't helping either.
Should be okay to split the dough, as long as it's mixed thoroughly to ensure the preferment is distributed throughout the dough evenly (the biggest risk is there).
It’s Chad Robertson, not Chad Robinson.
Oof. That's embarrassing, given how long I've followed him, his writing, and his baking. I can only say it must have been autocorrect!
Found this to be a fascinating article. Used to work across the street from the Tartine Manufactory in SF and absolutely loved the Old World Loaf and will be interested to see how close I can get to their bread. Lately, I’ve been trying to follow a little of Alton Brown’s philosophy of not purchasing single task items and a combo cooker would likely fall in that camp. Thoughts on just a pizza stone (used for pizzas, some baked goods, etc) and a preheated inverted mixing bowl to achieve the same effect of the combo cooker? Also, I noticed no additional moisture being added during cooking, thoughts on using 4-5 ice cubes to increase the moisture content in the oven?
I’ve done the inverted mixing bowl thing and it works fine, great even. I prefer it to the combo cooker. I put in one ice cube in for the first 20 minutes while the loaf is covered. I think more than one or two ice cubes would cool the vessel down too much and over steam, but I don’t know for sure.
The combo cooker is so useful for so many other things! It's essentially a cast iron pan AND pot. I use it for tons of stuff. But yes, you can always just bake directly on a baking surface, too (which is great for many things, including pizza). My tips to that are here: https://www.theperfectloaf.com/guides/the-ultimate-guide-to-baking-bread-dough/
Very novice baker here – I've used 3L cast-iron pot I have due same reason Matt mentioned. Works perfectly, but a bit limited on size and ofc you can do only boules.
You don’t mention the temperature of the dough or of the room where the dough is fermenting. Are you saying it doesn’t matter if your kitchen is 68 degrees or 76 degrees? That it doesn’t matter if the water is cool or warm? I would have thought these “details” were crucial to the success of the bake, yet the recipe doesn’t seem to place any importance on these make-or-break matters. (Chad Robertson, of course, does specify that the dough should be maintained at a 78-82 degree range. That’s a temperature that’s a lot warmer than most kitchens, especially in the winter, so proceeding with the recipe with 70 degree dough would not be likely to yield success). By not mentioning temperature, you’re going to have a LOT of people trying to follow your guidance and not knowing why their bread turned out so bad.
Usually, my kitchen is between 74-76F!
Hi Maurizio! Happy New year! Love all of your info! I have a question about flour. I mill all of my grains, mostly ancient grains (Spelt, Kamut, Einkorn, etc). Can I still use this recipe as is, or should I change the hydration since whole grains sucks more water. Will it turns ok? less rise I suppose due to the heaviness of the flour, but very tasty! Thanks!
If you're fresh milling and using that flour as whole grain flour, you're right, it may require more water to properly hydrate your dough! I trust you've probably figured this out by now, sorry for the late reply Neta!
Just returned from San Francisco, where we visited–thank you, Maurizio–Tartine Bakery. A great lunch experience, and their croque monsieur on a big slab of sourdough was divine. Another check off the sourdough bucket list. We also lunched at Boudoin with clam chowder in sourdough bowls. I’m home now and planning to combine the two with chowder in Tartine 33 bowls. Cheers, and Happy New Year.
It's such a wonderful place! glad you enjoyed, Glenn 🙂
Some confusion in the bake portion of this-unless I am missing something, and that is a distinct possibility! You state to preheat the oven with a pizza stone on top of the middle rack, yet then go on to say, “Quickly take out the shallow half of your hot combo cooker and drag in the parchment paper and dough” without ever talking about using the combo cooker.
What am I missing here?
A typo, sorry about that! If you’re baking with a pot or DO, you don’t need the stones 🙂 Will update!
Hello, I’ve been enjoying this recipe (sometimes with great success and sometimes I mess it up) but overall it’s fun and definitely gets eaten around my house. If I don’t want to proof overnight is there another way? Can I simply proof it on the counter for half an hour and then bake? Would love suggestions for same day baking.
Check out his piece on proofing: https://www.theperfectloaf.com/guides/proofing-bread-dough/; you can do this same day!
Yes, proof on the counter 2-4 hours until the dough is ready for baking. Use the poke test to determine when:
https://www.theperfectloaf.com/how-to-use-the-dough-poke-test/
Good morning! I have a question about halving this recipe, because in a two person house, two loaves is a lot. Do we halve the ingredients right down the middle, or are other adjustments to be made for making just one boule? Thanks for any advice!
Yup, just divide all the ingredients by 2.
Hi Maurizio! Love all the info, but I do have a flour question. In the tartine book, it says ‘bread flour’ and then in the detailed section he said that bread flour makes a tougher crumb. Do you ever use bread flour, and what are your thoughts? Thanks!
Jenny
I agree with this. I talk about it in my guide to higher protein flour, here:
https://www.theperfectloaf.com/sourdough-bread-high-protein-white-bread-flour/
Hey, Maurizio! First things first – I’m a huge fan of your site, style, and work. That said.. I’m a little confused about something in this recipe and was wondering if you could please help? For reference, I’m somewhere between brand new and intermediate.
Here’s the ask: could you please help check my math for calculating hydration between two of your recipes?
The first is this receipt, the “Tartine Sourdough Country Loaf”, and the second is your “High Hydration Sourdough” recipe, referenced at the end of the first as the potential higher hydration challenge for readers. The confusion results when I attempt to calculate the hydration for the first recipe (Tartine) as it wasn’t mentioned explicitly. My result of my calculation is 82.6% hydration, whereas you call out the second ripe (High Hydration) as 80%. Immediately, I see that my calculation’s including the leaven and realizing that I don’t know how to factor that in, haha. So, I recalculate the Tartine and end up with 79%; lower than the other recipe so that makes way more sense. However, the 1% difference still didn’t seem like a substantial difference to me. Does 1% really make that much of a difference? Reaching here.. it seems like maybe you’re pushing some boundaries with hydration, so the difference is more dramatic between 79>80% than it would be between 69-70%. Is that the idea? Going further, Is there an additional variable affecting the second recipe, such as the type of flour being less absorbent of the water?
Sorry, none of the above is meant to be smart-alecky! I’m genuinely curious.
Cheers,
John
Thanks for the kind words, John! Sorry about the late reply. Everything you said is correct, the hydration does become more meaningful, in a way, as you get higher. I need to update these posts to have my typical hydration calculation (especially the Tartine posts!)—stand by and I’ll try to do that soon!
As far as the hydration with the levain, I do take that water into account in the overall recipe. If you haven’t yet, check out my guide to baker’s percentage where I try to break all these things down and go into them in detail.
Let me know if you still have Q’s!
Hi Maurizio! Thanks for all your recipes. You’ve changed my life! I was wondering about the Tartine autolyse. It says to include the Levain. I see that you only use the flour and water, as I want to do. How long should I autolyse before adding the Levain and salt?
Hey Lisa! Sorry for the late reply. All is answered in my guide to the autolyse technique!
Hello, what temperature is your refrigerator at for the overnight proof? Thanks!
It’s around 39°F (4°C). Happy baking, Sarah!
Thank you! That is perfect. Mine seems to be around 40°F. I just finished the two hour rest after the four turns; however, the top of the dough does not look very bubbly so I was going to left bulk fermentation go a little longer. Looks like it has increased in size though. Thank you for responding so quickly! All your resources are very helpful.
Hi Maurizo, Thank you for this incredibly detailed, and helpful take on the Tartine Country Bread recipe which I’ve tried many times to varying success. You’ve filled in the gaps in the Tartine recipe! This last attempt with your help was almost perfect! Sadly, my bread as to as sour as I would have liked, so next time I’ll do the final rise in the refrigerator. One question, I live at 6000 feet. You say you adjust your recipe based on your altitude and climate. At what altitude do you live? Any suggestions for altitude adjustments? Thank you so much for this fantastic website and for help with my question!
Hey there! I live at 5280 ft–anything here should work well for you! Also, check out my guide to high altitude baking for more tips!
What temperature would you recommend the water be to mix with the discard?
It depends on your kitchen temperature! The water can be used to cool or warm as necessary. I typically like my resulting mixtures to end up around 76-78F.
Hi Maurizio,
I’ve been baking bread for many years, but recently had a string of failures with sourdough bread. For the most part, I use the Forkish “Overnight Blonde/Brown” methods with some success. I thought that I would give this method a try. It appears to me that the biggest overall difference in this method vs. Forkish method is the fact that there is a long bulk fermentation time in the Forkish method (overnight) and with your method (Tartine), bulk fermentation is fairly short with a very long retarded proofing time. I followed your instructions exactly, except that I pre-shaped twice (the dough seemed a bit too slack on the first pre-shape). To be frank, when I went to bake this morning, I thought that the loaves would turn out to be under proofed and flat. They only appeared to have risen maybe 20% overnight.
When I took the lids off of my Dutch ovens after the first 20 minutes of baking, I couldn’t believe the oven spring, maybe 50 percent! These loaves are the best I’ve baked in a long time. I got the sense with the Forkish method that there wasn’t much ooompf left during proofing, and I probably over proofed when they turned out flat. With your method, proofing seems to be foolproof. The other main difference is that you proof seam side up and with the Forkish method, it’s seam side down.
Thank you! I’ll keep using this recipe. Happy Baking!
Rick
Glad to hear the bake went well for ya, Rick! Yes, sounds like your dough with Forkish (big fan, btw) was likely going over. If you’re seeing massive rise with. my formulas, you might want to try pushing the bulk just a bit longer, perhaps just 15m to 30m. That should help temper that explosive rise a bit. No worries though, delicious regardless— happy baking!