

I call this batch number 33 of the Tartine sourdough country bread recipe, while it may actually be my thirty-third pair of these I’m not 100% positive. I know for sure it can’t be any less, but it’s probably more. On to the entry.
Another Sunday, another pair of Tartine sourdough country loaves shaped and proofing. My family has come to expect this bread to be on hand during the week, and in the rare case where we have to buy some bread from the grocery store, we are always disappointed. Baking bread is a relatively simple act when you boil it down, and yet getting that perfect loaf out of the oven does not always work out — but I still strive forward.
If you’re brand new to baking sourdough, read my Beginner’s Sourdough recipe post first, it has longer in-depth explanations on every step in the baking process!
Sunday started out a bit lazy; waking in the later morning after attending a friend’s birthday party the night before. I stumbled into the kitchen and took a look outside to see completely clear skies—a good sign a warm day was ahead. Given the rising temperature, I knew Sunday would be a day of quick dough handling and preparation. As you can see, even my German shepherd Arya (yes, that Arya) was a bit lazy this morning. I suppose too many rabbits, pigeons, and tennis balls chased the day before; oh, what a life.

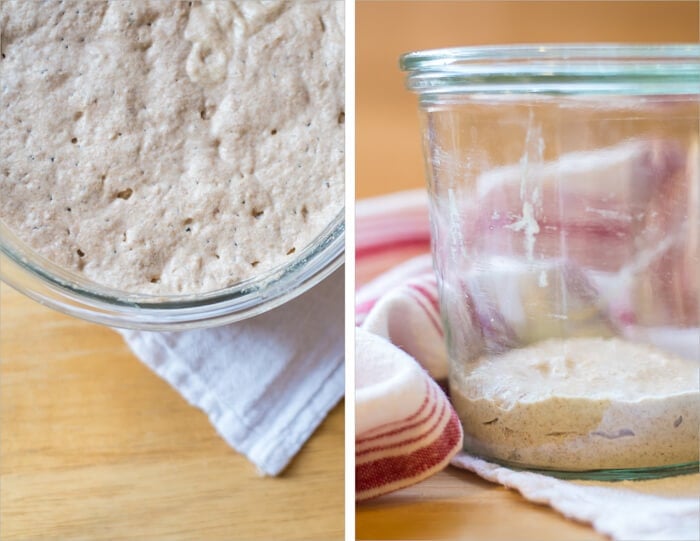
Although the leaven was prepared later than usual on Saturday night, it was ready to go (left-hand side image below). As you can see, the bubbles on top indicate there was significant fermentation activity overnight, and judging by the smell (like ripe fruit, almost a hint of vinegar), hopefully, it didn’t go too far.
Over my starter’s lifetime, I’ve experimented with using different flour and grains and have settled on a formula that my particular strain seems to thrive on. Instead of following Chad Robertson’s Tartine starter formula in his book where he feeds 50% whole wheat, and 50% all-purpose, I feed my starter 100% rye flour. I’ve found that my starter shows noticeable activity when fed rye exclusively. If you’re interested in reading about how to create and manage a sourdough starter like mine, head over there and read on.
Also, if you’re one who frequents Instagram, head over and check out my Instagram feed. I typically post many “daily bakes” and those behind-the-scenes shots that sometimes don’t make it into these posts!
Tartine Sourdough Country Bread Recipe
Prepare the leaven – 12:00 a.m.
The night before you plan to prepare your dough, mix the following, lightly cover, and set out on the counter overnight:
| Weight | Ingredient | Baker’s Percentage |
|---|---|---|
| 31g | Mature sourdough starter (100% hydration) | 28% |
| 110g | Whole Wheat Flour | 100% |
| 116g | Water | 105% |
Mix the flour + water, autolyse – 9:00 a.m.
For this loaf, I decided to try and tweak the whole wheat to white bread flour percentages. I still wanted some of the WW taste and texture, but a bit more “white” in this loaf. Due to the WW reduction (from the last Tartine recipe), I’ve also reduced the amount of water to 79%.
Note that this is not a traditional “autolyse,” which only has water and flour mixed, but this is how Chad performs this step in Tartine—let’s follow suit for this bake. In my more recent baking adventures, I no longer mix flour, water, and levain for this step.
Gather the following:
- 250g of your new leaven
- 300g whole wheat flour (I’m currently using Great River Organic whole wheat flour)
- 700g unbleached all-purpose white flour (King Arthur)
- 20g salt
- 740g water and 50g water (reserved for step 5, below)
Method:
- Add 250g leaven to your large mixing bowl
- Pour in 740g water and mix with your hands until the leaven is completely dispersed
- Add 700g white flour and 300g whole wheat flour and mix with your hand until all the dry bits of flour are gone
- Cover your bowl with a towel, or if in a dry climate, plastic wrap and let autolyse for 30 minutes
- After 30 minutes, add 20g salt on top of the dough and slowly pour the remaining 50g of your reserved water on top. Squeeze the dough with your hand to incorporate the salt throughout
- Now reach your hand under the dough and pull the side up and over onto itself. Continue to do this as you spin the bowl; grab, pull, and push. Do this just until the dough comes together and becomes super sticky. Generally, this will only be between 5-10 turns
- Transfer your dough to your plastic or glass container, set a timer for 30 minutes
Next, we tackle the bulk fermentation step.
Bulk Fermentation
At this stage, we want to do four sets of turns, plus 1 – 2 hours of rest on the counter. A “turn” consists of reaching under your dough, grab the bottom and pull up the dough on top of itself. Do this four times, one of each side of your container (if it’s square, that is). Additionally, you want to do this rather vigorously. The stretch up and down on itself is what gives the dough strength.
- 10:10 a.m. – Turn 1
- 10:40 a.m. – Turn 2
- 11:10 a.m. – Turn 3
- 11:40 a.m. – Turn 4
- 11:40 a.m. to 1:40pm – Rest on Counter
Pre-shape – 1:40 p.m.
When the dough has risen about 20-30%, and you see a bunch of little air pockets throughout, it’s ready for pre-shaping. Take the dough out of the container onto your *unfloured* work surface.
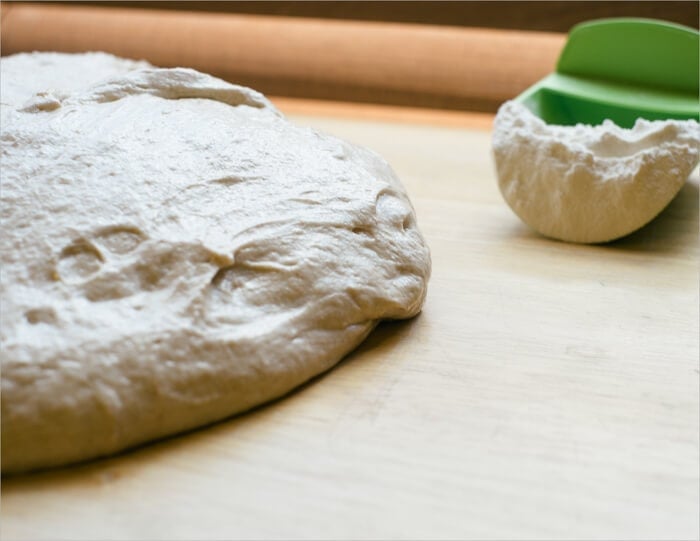
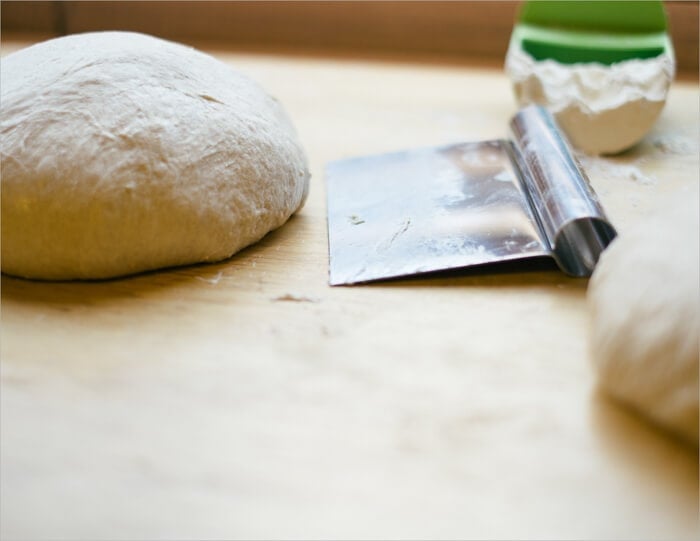
Sprinkle some flour on top of your dough and divide into two halves. Take a half, flip it over and pull each of 4 edges from under onto the top. Then, flip the folded dough over, so the seam is on your work surface. You want to form loose boules here by using your hand and your dough knife. Your work surface grabs the bottom of the dough slightly as you spin the dough around to make a little ball. Repeat with the other half and cover (I cover with two inverted mixing bowls) for 30 minutes.
Shape – 2:10 p.m.
The resting dough should have spread out, but not quite into a pancake shape. If it has formed a pancake, you can strengthen it by pre-shaping one more time and waiting another 40 minutes.
Flour the top of one of the boules and flip it over with your lightly floured hand and dough knife. Take the part of the dough that’s closest to you and fold it up and over in half. Take the part that’s to the right, stretch it out as far as it will stretch, and fold it up and to the left. Repeat with the left side and the side of the dough farthest from you. Then take the edge that’s closest to you, pull it up and over again towards the back. When performing this last motion, you will lift the entire dough up and over until the seam side is now down on your work surface.
Spin the dough using your two hands to shape into a boule. As you slightly pick up the dough and spin it, the bottom snags the unfloured work surface and creates tension. I do this several times to create a very taught surface on the top of the boule. Sometimes small air bubbles will be visible.
If you’d like to shape this dough as a batard instead of a boule, check out my batard shaping guide.
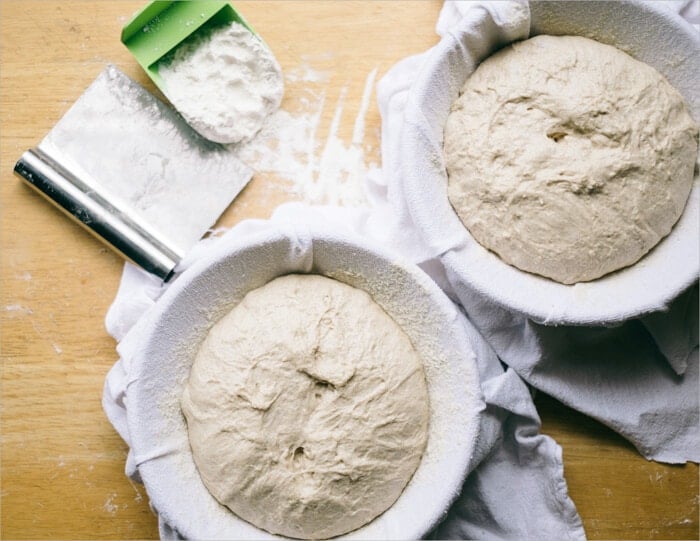
Proof – 2:20 p.m.
Place towels into small mixing bowls or proofing baskets and dust with white rice flour. These bowls will hold the dough as they proof in the fridge overnight. Take your taught boules and place them into the floured bowls with the seam *up* facing you. I place each of my bowls into plastic bags and then into the fridge.
Score + Bake – 9:00 a.m.
Gather your tools:
Speaking of tools, if you’d like to see all the tools, I use when baking head over to my tools page and take a look.
The first of these sourdough loaves was retarded for 18 hours. The Tartine formula lists an 8-hour cool fermentation in the fridge but 18-20 hours seems to be the sweet spot for me as my bread takes on a complex flavor with this extended fermentation time. It also seems to help open up the crumb more than what you would typically see; I strive for that light and soft interior.
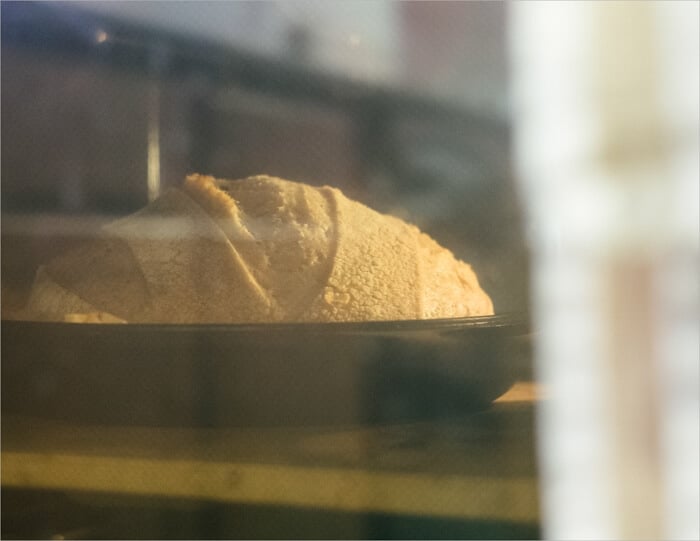
In the morning you first want to get your oven ready. I place the rack in the bottom third of the oven. Turn your oven on to 450°F (230°C) and let it preheat.
Once your oven is preheated, get your dough ready. I bake this dough straight from the refrigerator—no warmup time is necessary. Take one of your loaves out of the fridge, cut a circular piece of parchment paper, and place it on top of the bowl. I then place a pizza peel on top of the parchment paper (and bowl) and invert the whole thing quickly to get the dough out of the bowl and onto the paper + peel. Get your razor blade out and score the top of the loaf to allow the bread to expand while rising in the oven. For these sets of loaves, I scored one with my “Roman numeral three” pattern and the other with a single long slash.
Quickly take out the shallow half of your hot combo cooker and drag in the parchment paper and dough.
Cover with the other half of the combo cooker and bake for 20 minutes with the lid on. After this time, open the oven and lift off the combo cooker lid (you can leave it in the oven to the side), close the oven, and bake for an additional 35 minutes. These times and temps are a drastic change from the Tartine book, but I’ve found them necessary due to my elevation and climate. I want the crust to be nice and dark brown.
After pulling the loaves from the oven, I cool them on a wire rack for at least one hour before cutting into them. Cutting too soon can cause the crust to harden drastically and the inside to become quite dense. Easier said than done, however.
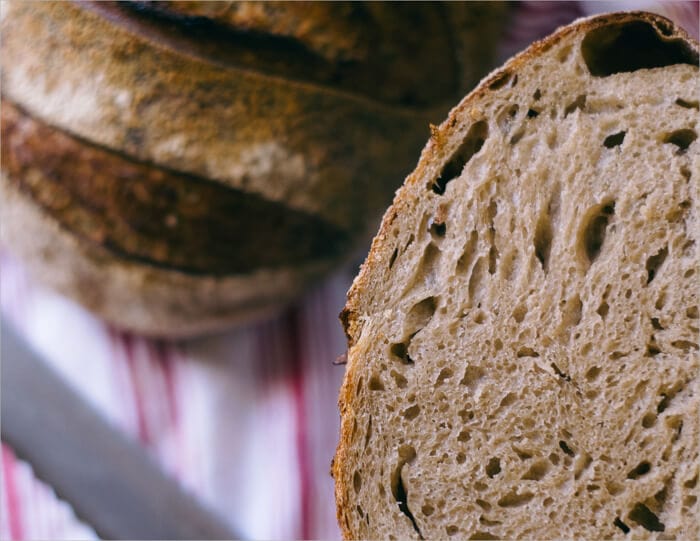

What a pair of beautiful loaves this morning. There’s no doubt the lazy Sunday morning/afternoon turned out to be a success in the kitchen, and this Tartine sourdough country bread recipe couldn’t be more delicious.
Buon appetito!
Now that you’ve attempted this recipe try your hand at the higher hydration version for a bit more challenge, and an even better tasting loaf!
If you use this recipe, tag @maurizio on Instagram so I can take a look!


374 Comments
Hello there,
quick question. when the dough is taken out of the fridge, do you allow it to come to room temp or slash and put in the oven straight ahead. And do you think it is necessary to give the dough another rise outside after its taken out of the fridge? thank you
I bake it straight from the fridge. I’ve tried this each way many times and really haven’t noticed any benefit to letting the dough rest on the counter before baking. The one thing I’ve noticed when you do leave it out, though, is that the dough will be harder to score if it’s very high hydration. That cold environment helps keep the dough together some, making it easier.
Hope that helps!
thank you so very much for your reply. my last question would be, what makes nice holes inside the loaf. I have been baking and getting some but not as big as the ones I see in your pictures. what determines them. what factors have to be taken into consideration to achieve that. thank you
You’re very welcome, glad it helped. There are many, many factors that come into play when “opening” up your crumb when baking. Proper starter activity (fermentation), sufficient dough strength, light but assertive pre-shape/shape, and sufficient proof time. It’s something I continue to work on and have had success over time with practice and experience. You’ll get there, it comes with experience and attention to all the little details when baking.
Have fun!
Hi Maurizio, I know this thread is older but I am stuck on one of the preliminary steps. My starter is strong and filled with activit, it passes the float test. When I attempted to make my leaven, I followed your #33, as I am at altitude as well (Denver), adding the bread flour and water and letting it sit in a warm spot for 12+ hours. The leaven turned very runny and does not pass the float test. I decided to let it sit another 12 hours…still does not pass. I guess I am unclear why the leaven needs to be prepared when the starter seems ready to right from the jar. I have 500+ grams really active. My starter has been hungry and alive for over a month, fed a combo of rye and gold medal bread flour every 24 hours. Is it critical that I feed on a shorter interval…every 12 hours? Your site is very informative, yet I feel I must be missing something???
Your help is much appreciated!
Britt-
How much of your existing starter did you add to make your leaven? For your leaven try this: 25g existing starter + 50 white flour + 50 whole wheat flour + 100g water. Mix that up the night before, say around 10pm in a glass container (so you can see the activity on the sides in the morning). In the morning, around 7-8am depending on the temperature in your kitchen, your leaven should be ready to go. It should be bubbly and smell slightly ripe (like fruit, in a good way). Use this for your dough mix, as any of my recipes do.
If yours was super runny there is a high likelihood you let your leaven go too far. 12+ hours at a high-ish temp (close to 80ºF?) could over ferment and you’d end up with a soupy mess in there.
If you feed more often, say every 12 hours, then you can definitely feed it less and keep less than 500g total. If you can only get to it once every 24 hours then more at feeding is necessary to give it food to eat during that longer period. I don’t think it’s absolutely necessary to feed it often like I do, but I’ve seen the best results that way.
I’m not sure if you’ve read my posts on managing a sourdough starter but I highly recommend them if you have any more questions: http://www.theperfectloaf.com/category/starter/.
Thanks for the feedback on the site, I am glad it’s helping! Good luck with your next attempt and please feel free to comment back or contact me with any more questions. Happy baking Britt!
Morning Maurizio,
Thank you for your quick reply! I know I didn’t give you a lot of background. I followed your #33 loaves…55g Starter + 200g bread flour (maybe I should use WW?) + 210g H2O. My starter is on the stiffer side and very gooey. After your explanation, I think I did let the leaven sit for to long. The bowl I used was very large too, I remember reading this can create problems.
One other thing I am a bit confused on is the timeline. If I wanted to bake bread, lets say Sunday morning, would I need to get the leaven ready Friday night? Looking through the time line for #33, it appears the process is 48hrs. +?
Leaven prepared Friday night.
Leaven ready Saturday morning for making dough…autolyse…late afternoon start bulk fementation…pre-shape…shape…proof. The proofing is where I am confused, and I suppose this step is measured on how you prefer the taste of your end product. I have read anywhere from 4hrs to 20. In #33 it appears you did 18hrs for your first loaf. Did your bread have a really sour taste? I am looking for a very subtle sourness, I think my family wouldn’t like a real sourdough ( I like it!)
Thank you!
Britt,
If you use WW flour as part of your leaven you’ll see stronger yeast activity due to the extra nutrients in WW flour. I like using a mix.
Yes, if you wanted to bake Sunday morning you would do the following:
1. Prepare leaven Friday night before bed (like 10pm)
2. On Saturday, mix dough, bulk ferment, pre shape, shape and then into the fridge for the overnight proof
3. Bake Sunday morning/afternoon (about 12-20 hours after you pop into fridge night before).
There are ways you can cut down this timeline if you have a time crunch, but you don’t want to sacrifice too much here as more time generally means more flavor! In some of my later posts I talk about making the leaven the morning you do your bulk, pre shape, shape and it works out very well.
Yes, the longer the proof the more sour your bread will become. Now, this doesn’t mean you can cut your proof super short as the dough still needs to ferment. Think about it this way, the longer your starter (leaven) has to ferment the more acidity in your bread (a byproduct) and the more sour the taste. Have you ever let your starter go too long before feeding again? Smells strange because it’s consumed all the food you’ve given it and it has produced a ton of acidity.
One sure way to reduce the sourness of your bread is to manage your starter so it is fed frequently enough to get rid of that excess acid byproduct. The posts I liked to above help with that.
I’m not a huge fan of super sour bread, it does have its place, but I like the sourness to almost disappear. To each his own, though.
Hope that helps, I’m here if you have any more questions!
Update: Did this bake last Sunday and the result was INCREDIBLE! Wife and others (including me) simply loved it. Tried sprinkling the spent grains on top, but I will likely try to incorporate them during the first mix next time (bonus, they are likely crawling with lactobacillus)…
One question I had: I wanted to do a bake this weekend (to serve around mid-day Sunday), but we are going to be busy during the time when I really should be working the dough (most of the day Saturday, until the evening). What is your experience from a shorter retard before the bake? Ie I would be doing all the steps you outline for mid-afternoon Saturday in the early/mid evening Saturday.
I have referred about 6 people to this page after my bake…awesome, awesome, awesome stuff. Oh and I used rye in place of the WW. To your point, going to tweak things one-by-one in furtherance of the craft in my homebakery!
That’s great! Glad the formula worked out and glad I could help. It’s such a great feeling to prepare excellent bread for guests, very satisfying.
I’ve done shorter final proofs by adjusting the time left out on the counter before popping into the fridge, or using slightly warmer water when doing your mix. The long and slow fermentation adds more subtle flavor to your end loaf, but that proof in the fridge can be cut short by leaving your dough out, say for 1 hour, after you do your final shaping. You’ll have to experiment with these times to suite your starter and environment, but that is one way you can shorten your final proof.
If you want to shorten your bulk fermentation step, you can use warmer water in your mix (which will speed up fermentation). This has a side effect of, again, reducing the more subtle flavors in your end loaf. Taking more time always increases the flavor in your result but sometimes one’s schedule will not be flexible!
Thanks so much for referring people to my site! Trying to get the word out as much as I can, but it’s not always easy. It pleases me when I can help others in any little way I can.
Have fun!
Sorry maybe I missed this: do u preheat the combo cooker (I am using a Dutch oven) in the oven when preheating the pizza stone?
Also, any benefit to greasing the combo cooker/Dutch oven?
Any adjustments you would make for sea-level climates? (Longer high temp/low temp or variations thereof)?
Finally I have some spent barely grain from brewing. Was going to dry it out and sprinkle over the top if the loaf before the bake…bad idea forgetting a crunchy crust? Was going to dry out the grain on a paper towel overnight.
GREAT page. Thanks for posting!
Yes, I pre-heat the combo cooker in the oven on top of my baking stone for a full hour before baking.
I don’t see any benefit to greasing the cooker, it’s so hot by the time you put your dough in the bottom will sear quite quickly and prevent sticking.
When I first started baking I experimented with different levain amounts, water amounts, etc. to compensate for my high altitude. After about a year or so of tinkering with this I’ve determined, at least for these recipes, there really is no need to alter the recipe based on your altitude (climate is a different story though, the drier it is the more hydration you’ll need as your flour is more dry).
I have no experience in using spent grain byproduct, but I know there are many bakers who have used these grains with excellent results. I would definitely try sprinkling it on top, why not! Sometimes I coat my loaves with oats, nuts, and other ingredients.
You’re welcome, thanks for the comments!
Hi, I tried making this bread today, and just put it in the fridge.
I’ve been really happy with the result of both my new sourdough starter, and the rising of the dough so far, but when I got to the step where I was suppose to shape the dough, it was all gooey. It stuck to my hands, the kitchen table, even my shirt got caught in it.. I ended up having to dust the whole table top, just to be able to do anything with the dough.
All I can hope now, is that the dough will hold the shape, when I pull them out off the bowls tomorrow. Right now I’m scared they won’t even let go off it.
Though I have a tendency to go off the recipe, I actually stuck to this one all the way (so far), sine it’s my first try making bread, but right now I have a feeling it won’t turn out well. Do you have any suggestion to where I did something wrong? The dough looked really good, and rises really well, it just never hold itself, even after having turned it ever 30 min for 2 hours.
But other than that, thanks for some really great instructions – I just hope I can bake a bread that looks just as delicious as yours does!
How did the bake go?
With high hydration dough like this it is definitely a challenge to shape as the dough sticks to absolutely everything. What I would suggest is to try this exact same approach but next time remove some water from your mix, start with say 50g removed. This will help tighten up the dough some and make shaping easier. If you’re still having trouble remove even more until it’s comfortable for you to work with. As you get experienced with this dough start increasing the water again in small increments.
I don’t think you did anything wrong at all, it’s just challenging at first! Thanks for the kind words and let me know how it goes on your next attempt. This is one of those things that gets easier with practice, and no matter what, the results are always tasty.
Ok, I’m about to put together the leaven to bake tomorrow but…did i read somewhere that if my starter was made with rye flour i should use rye flour on the bread as well? Will switching to whole wheat slow things down? Really want this loaf to turn out!
I use a rye starter with non-rye bread all the time, no worries there! My 50/50 all purpose/rye starter really is multipurpose, you can use it in any sourdough bread recipe you’d like. You might have read that some people don’t want to impart any rye flavor in their bread and thus keep a starter without rye flour. It’s all personal preference — and honestly the amount of rye flavor you get is very, very small.
Good luck and let me know how it turns out!
How fun and super delicious bread! Two beautiful artisan loaves on the first attempt. Wish I knew how to attach a photo! Ended up throwing away almost 200g of leaven the first time, baking again tomorrow and this time didn’t discard, just reduced the rest of the ingredients proportionately. Will have four awesome loaves this time! Thank you for your terrific instructions!
This is great news! Glad to hear your two loaves came out excellent. Really is a great feeling, right? Making bread has got to be one of the most satisfying tasks out there.
You’re welcome on the instructions, I’m really glad they helped. If you haven’t yet, check out my other loaves once you get this one under your belt — happy baking!
After turning down the oven to 450 and baking for 25 mins, you saybto “open the oven…” Do you mean to remove the top 1/2 of the lodge cookeror actually open my oven door?
Open the oven and remove the top 1/2 of the lodge cooker, close the oven and proceed with baking! Removing the top half releases any steam that has built up and will allow the bread to full crisp up and cook.
Hi, so i’m on day 8, feeding twice per day for the last two days and i have yet to get the rise in the starter that yours does ( or at least looks like it does in your photos). It smells as it should but feels kind of pastey when mixed, Some bubbles – mostly larger ones. Temp in my house is cool, usually 65 during the day a little cooler at night. Have the starter next to the stove where it’s a little warmer. Can’t figure out what i’m doing wrong. Too cold? Too dry? Suggestions?
Temperature definitely has an impact on your starter. The cooler the temperature the slower the fermentation (meaning it will take longer to rise). When my house is around 66-67º F at night and it takes a good 12 hours for my starter to burn through about 100g of flour. My mixture is typically 50g starter to 100g flour to 100g H2O.
As for the dryness of the starter, perhaps try adding a tad more water, say 5g, to get it just past that “pasty” state and a little more easily mixable.
Do you have an area of your kitchen that is low to mid 70’s? I think increasing the temperature will definitely help get things going!
One more suggestion: you might want to stick with one feeding per day for a little while until you see some good fermentation activity. It’s possible you are discarding too much of your culture before it has a chance to fully consume all the food (flour+water) you’ve given it.
Let me know how these tips work out for ya — good luck we’ll get you up and running!
Ok thanks! So excited for that first loaf it’s difficult to be patient!
Trust me, I know exactly what you mean. It’ll come very very soon!
I used Stone Buhr ww bread and king arthur ap, I don’t have many options for organic flour here, except by mail order. I’d like to try baking with organic emmer and einka flours. I’ve made the Tartine recipe before and although it always tastes good, my loaves are usually very spread out, so I’ve had the best luck with your recipe so far.
How many minutes do you reheat your dutch oven for the second loaf(I turned it back up to 530 and heated about 15mn), or do you use two dutch ovens at the same time? I don’t think I could fit two on my stone.
Just for experiment’s sake, try using King Arthur Bread Flour next time instead of the KA AP. I’ve had really good results moving to a higher protein flour like that one.
I usually just reheat for about 15 mins after the oven gets back up to 530º F. I don’t have enough room for 2 combo cookers either.
I’ll try a bread flour, but I haven’t seen KA bread around here. What different results have you gotten with a bread flour?
Have you tried any Ken Forkish recipes from Flour, Water, Salt, Yeast? I like the taste of the Country Blond/Brown, but it must be another recipe I need to adapt for my altitude.
I’ve noticed a bit more strength in the bread flour with a bit more rise. I think it’s possible to get this same rise with AP, but I am still working with straight AP to achieve this.
I have read through Forkish’s book several times now but have not baked from it as of yet. I have a few more “experiments” to try with my Tartine recipe and then I’m going to give the Country Blond a shot. It’s a great book.
So, no difference in taste between the KA ap and the KA bread?
I can’t wait to hear about your Forkish experiments and your next Tartine experiments!
Taste-wise, no I didn’t really notice much different besides the crumb just being lighter.
Can’t wait to get started on them, first I have to finish eating the loaf I’ve just baked 🙂
Picked up a combo cooker this morning and just took my first loaf, following your recipe, out of the oven. Looks pretty good, but I haven’t cut into it yet, so it could be dense, which usually seems to happen for me, baking straight from the fridge. I’ll let you know what the crust and crumb is like for me here in MT at 6000ft. Thanks!
Excellent, can’t wait to hear how it turned out. One quick question: what flour are you using to bake?
I’m at about 5280ft so we are almost in the same boat there. Higher elevation, I believe, really makes things a bit more challenging.
What kind of towels are working well for your proofing bowls?
I’m currently using a pack of flour sack towels from Amazon. I’ve taken these and cut them to fit the size of the basket with a little overhang and then use a thick rubber band to keep them lifted just a bit above the bottom of the baskets.
Thank you. I’ll have to try the rubber band trick, is that to keep any creases from forming on the surface of the dough?
Also, are you baking your loaves straight from the fridge, without warming them up at all?
The rubber bands can be a bit annoying, but they serve their purpose. I use them to lift the towels just a bit off the surface of the baskets to keep the dough in the center a bit more, preventing them from spreading out too much.
Correct, straight from the fridge.
Just wanted to let you know, under method #5, you have 50g of salt, instead of 20g.
Fixed. Thank you!
Just wanted to let you know, under method #5, you have 50g of salt, instead of 20g.
Fixed. Thank you!
I’m located in New Mexico, my elevation is around 5200 ft. It’s very dry here, although this summer has been a bit more humid than usual which has been nice. I am still tweaking my formula to compensate for the elevation, but I firmly believe adding a bit more leaven (I add about 5% more overall) helps things along.
If you aren’t achieving as much tang as you’d like, and you’re doing a slow cold proof in the fridge, go a bit longer and see how it turns out. Mine usually get close to an 18 hour proof in the fridge.
I’m glad my posts have been informative for you as a guide! Would love to hear how things turn out in your future bakes.
Thanks! The bread, while quite a bit of work, is very worth the effort. And yes, she’s a great dog… most of the time 🙂
Thanks! The bread, while quite a bit of work, is very worth the effort. And yes, she’s a great dog… most of the time 🙂