

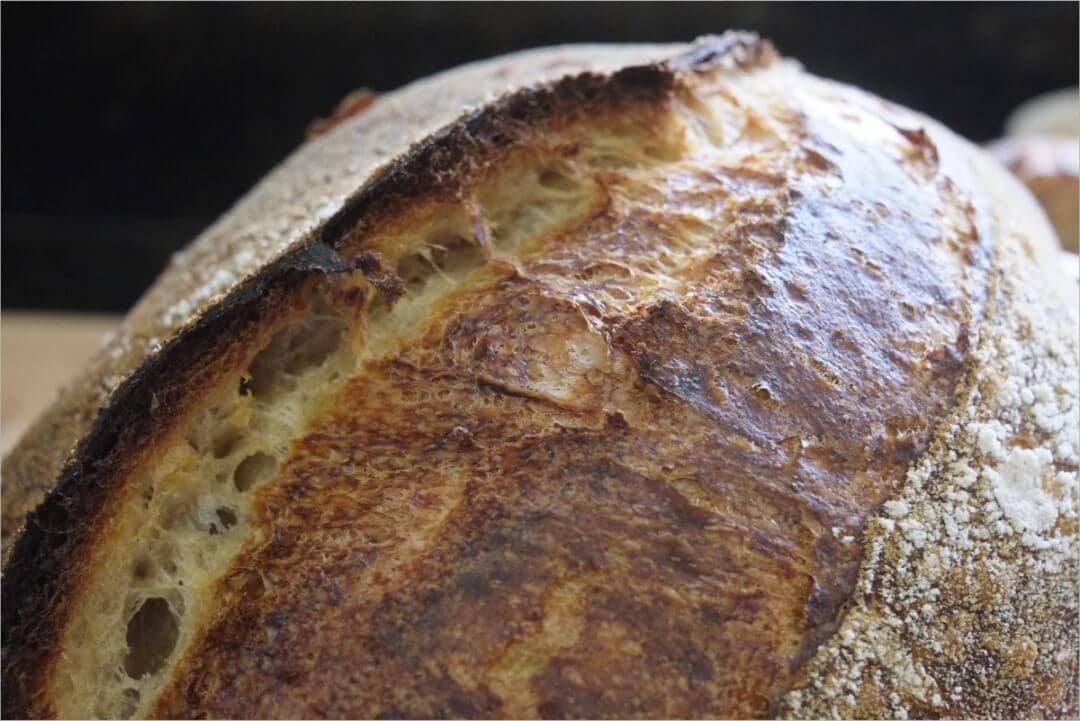
My wife keeps telling me: “every time you bake you keep saying ‘Wow this is the best bread I have ever made’ the saying is getting old now… Hmmm, this is delicious bread though, I think it is your best so far.” I’ve had some recent bakes that have just been a step or two above my usual. I find it hard to stop eating slice after slice with anything I can moderately justify placing on top (I even scraped up some onions and currants from a recent meal we had and used it in a sandwich—yikes that was good.). It’s dangerous when your bread just comes out great; you become a somewhat selfish person and hoard all the slices for yourself. And in this post, my sourdough bread with a young levain ranks pretty high up there.
This post has me continuing my streak of experiments with high hydration sourdough bread using a “young” levain (as I mentioned in the last entry). Chad, in Tartine Bread, makes it a point to say he usually uses a young levain and prefers this to a more ripe version. It’s an interesting approach, something I’ve enjoyed exploring.
As an aside, I keep the acid load in my starter to a minimum by either feeding it once a day with a hefty amount of flour (~100g) or multiple feedings per day. Doing either of these will discard most of the acidity produced by your starter, which in the end will push the resulting loaf away from a sour one. This subtle sourness is my preference. So, how can you tell if your starter is fermenting too fast by the time you feed it again? Just give it a smell right before you do your regular feeding. Does it smell sourish and vinegary? Is it very soupy and runny? It probably needs to be fed with more flour or an earlier feeding. See my previous post on starter management for more information on these topics.
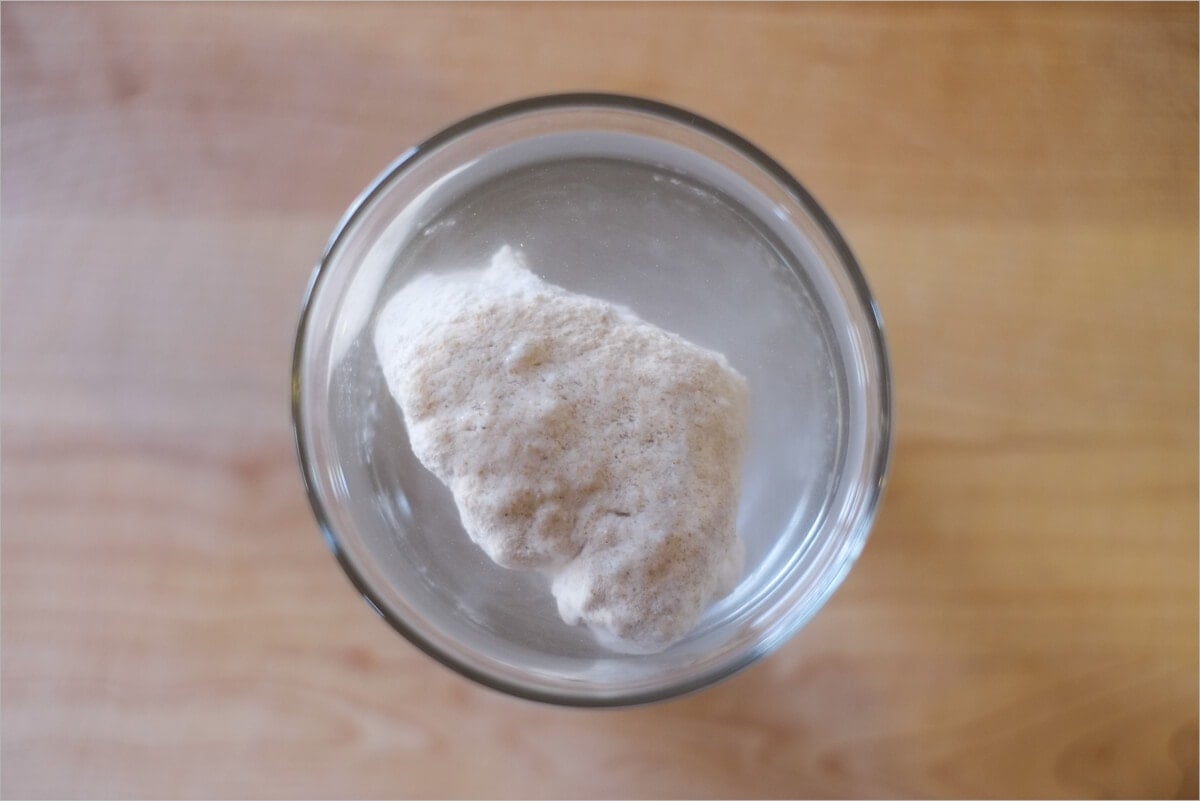
How young can this young levain be and still rise your bread properly? This entry has me using my levain at the earliest ever, just 3 hours after mixing in the early morning. I was very, very skeptical it was going to have enough strength to leaven my dough, but I did a quick float test (which isn’t a definitive test, but still a good general indicator) and sure enough, it floated happily at the top of my glass. I decided to go ahead and proceed knowing if it didn’t work out at least I’d have an excellent story to writeup here.
As you well know, I’ve been making only whole wheat bread for a little while now and have become accustomed to wrangling that dough into a loaf that has some loft to it. Well, the bulk step on this dough sure was a breeze. As it was progressing I could see the strength develop quite quickly, but in the beginning, the dough was very slack, I probably pushed the hydration a little too far. Next attempt with this flour will be done with slightly lower hydration, say 3-5%.
Sourdough Bread with a Young Levain
Prepare the levain – 6:45 a.m.
The following levain build was kept at around 77°F (24°C) ambient temperature and started in the morning on the day I mixed the dough, rather than the night before.
- 25g ripe starter
- 50g Bob’s Red Mill whole wheat flour
- 50g Sangre de Cristo white flour (King Arthur all-purpose flour would also work well)
- 100g water
After mixing the above in a thick-walled glass container, cover and set in a slightly warm area, around 77°F (24°C), for about 3 hours. The warm water helped move the fermentation along to get this levain ready in short order. I usually do a build that lasts around 10-12 hours overnight starting with room temperature water. As I mentioned above, it readily passed the float test, and so I proceeded.
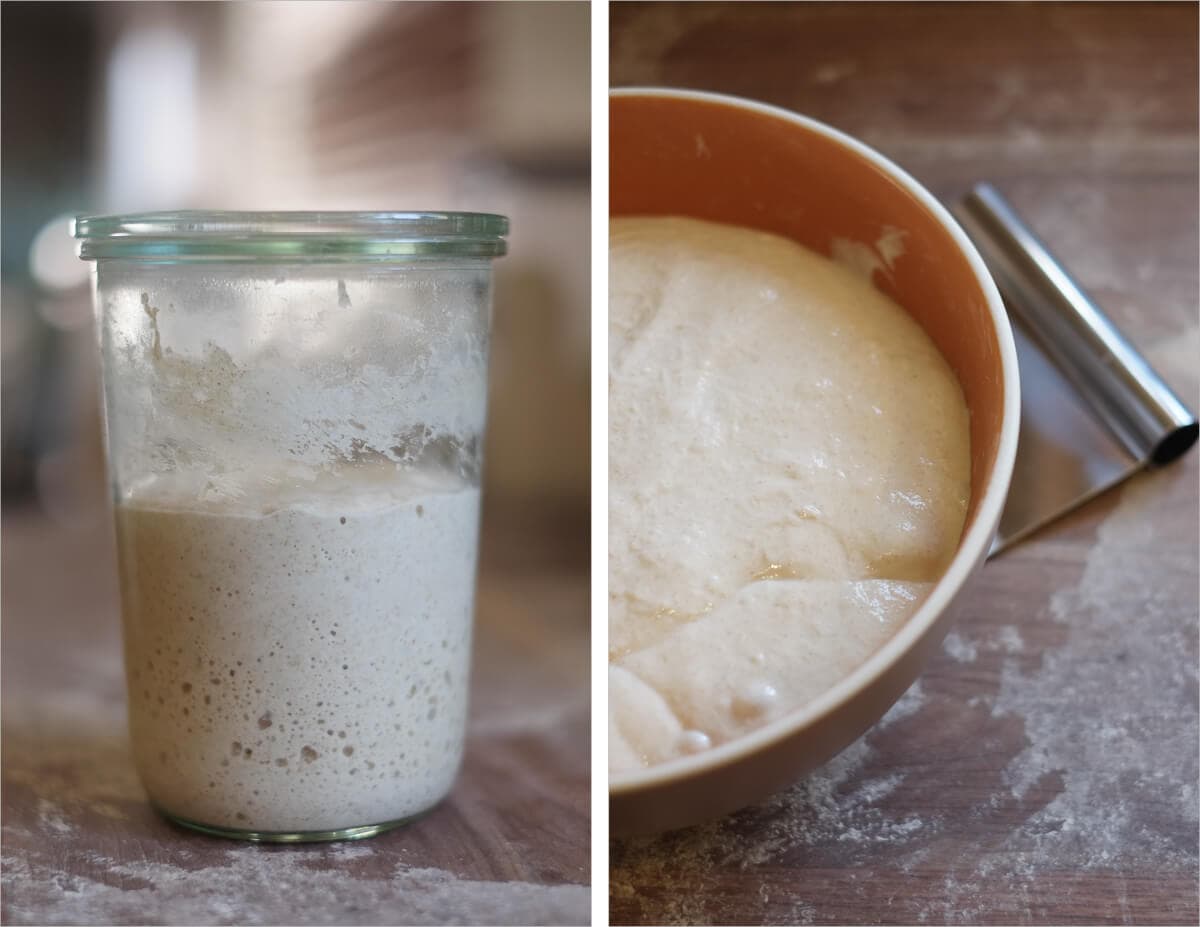
I should also mention that at this point my starter is a rather vigorous animal. I created my starter using my post on creating a sourdough starter from scratch a while ago, I refresh my starter twice per day, and it has gone without refrigeration for some time. When maintained properly a starter can get rather active, which is a great thing because this strong fermentation activity will transfer to the dough given the right conditions.
Keep an eye on your levain and employ the float test from time to time if you are unsure, each starter is different, and thus you must adjust your timetable to suit! Let’s start the autolyse.
Autolyse & Mix – 9:45 a.m.
Gather the following ingredients:
| Weight | Ingredient | Baker’s Percentage |
|---|---|---|
| 900g | All-purpose white flour (Sangre de Cristo) | 90% |
| 100g | Whole wheat flour (King Arthur whole wheat flour) | 10% |
| 20g | Salt | 2% |
| 900g | Water | 90% |
| 225g | Ripe levain | 22.5% |
Method:
One Hour Autolyse:
- In a thick bowl add in your 225g levain
- Add 850g water to your mixing bowl and mix with your hand until the levain is wholly dissolved
- Add in your white and whole wheat flours
- Mix by hand until all the dry flour is incorporated
- Cover with plastic wrap and keep covered in a warmish place in your kitchen at around 77°F (24°C) for 1 hour
While your dough is in autolyse thing, head outside for a bit while it’s still cool. I took my German shepherd, the “beast,” for a quick hike through the mesa near our house. I enjoy hiking around as she runs around me investigating every single bush, lizard, mysterious hole, and the occasional rabbit. Signs of Spring are emerging, and the foliage in my area is flush with flours and the trees are all turning green. This month is one of my favorite times of the year as it signals the time for me to emerge, get some more sun, and do some exercise outside.

Ok, back from your activities outside? Let’s get on with this, time to mix things up. After a full one hour autolyse:
Add to your autolysed dough:
- 20g sea salt
- Remaining 50g warm water
Cut the salt into the dough by mixing with your hands. Keep mixing relatively gently until the salt is mixed through and the dough turns a bit sticky.
| Final dough temperature: | 78°F (25°C) |
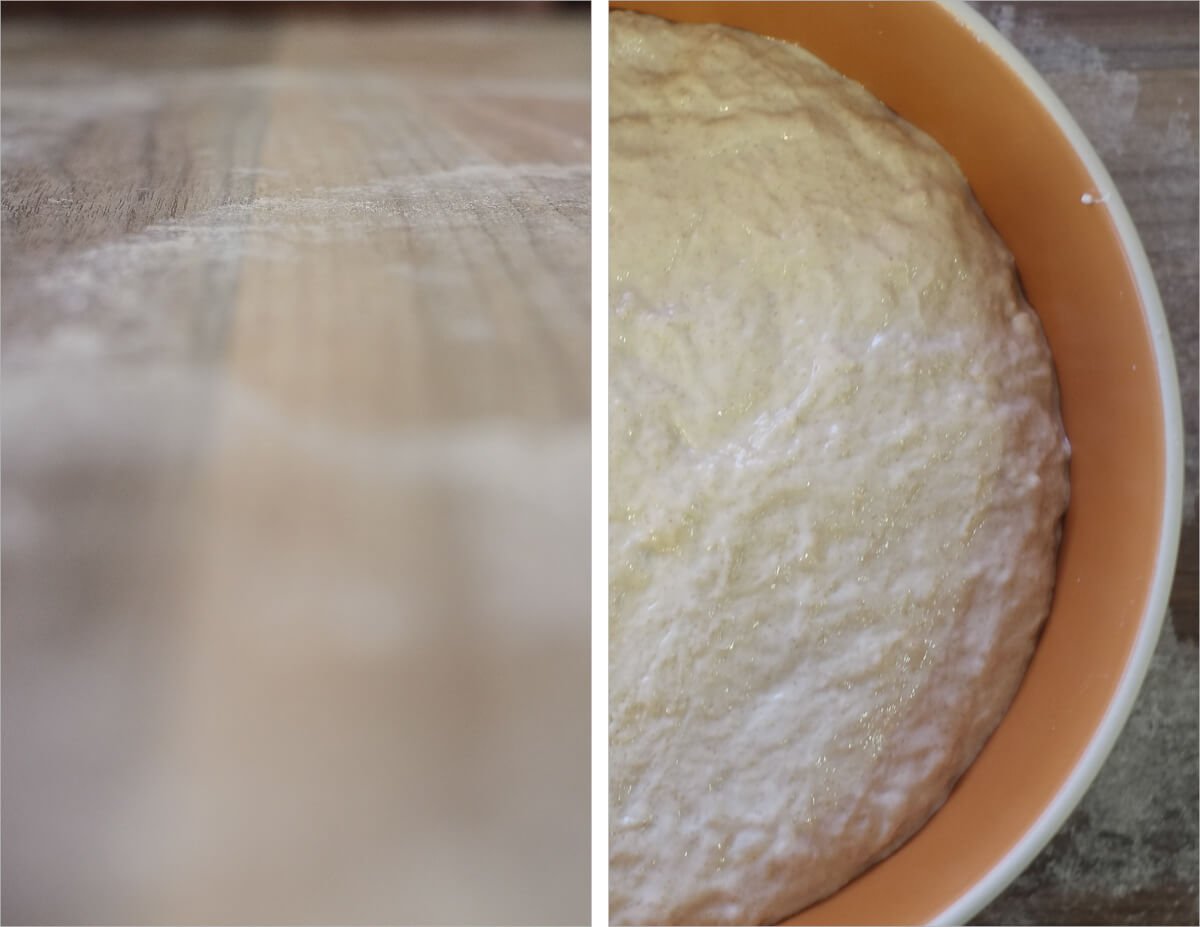
Bulk Fermentation – 10:45 a.m.
You’ll notice after the autolyse and mix the dough has some pretty good strength to it, yet it is extensible enough to stretch out without snapping back.
- 11:30 a.m. – Turn Set 1
- 12:00 a.m. – Turn Set 2
- 12:30 p.m. – Turn Set 3
- 1:00 p.m. – Turn Set 4
- 1:30 p.m. – Turn Set 5
- 2:00 p.m. – Turn Set 6
- 2:30 p.m. – Turn Set 7 (Easy set of turns)
- 3:00 p.m. – 4:00 p.m. – Rest on counter untouched
Note that a “Turn Set” here is 4 stretch and folds. I reach under my dough, pull up, and fold over the other side that’s done four times.
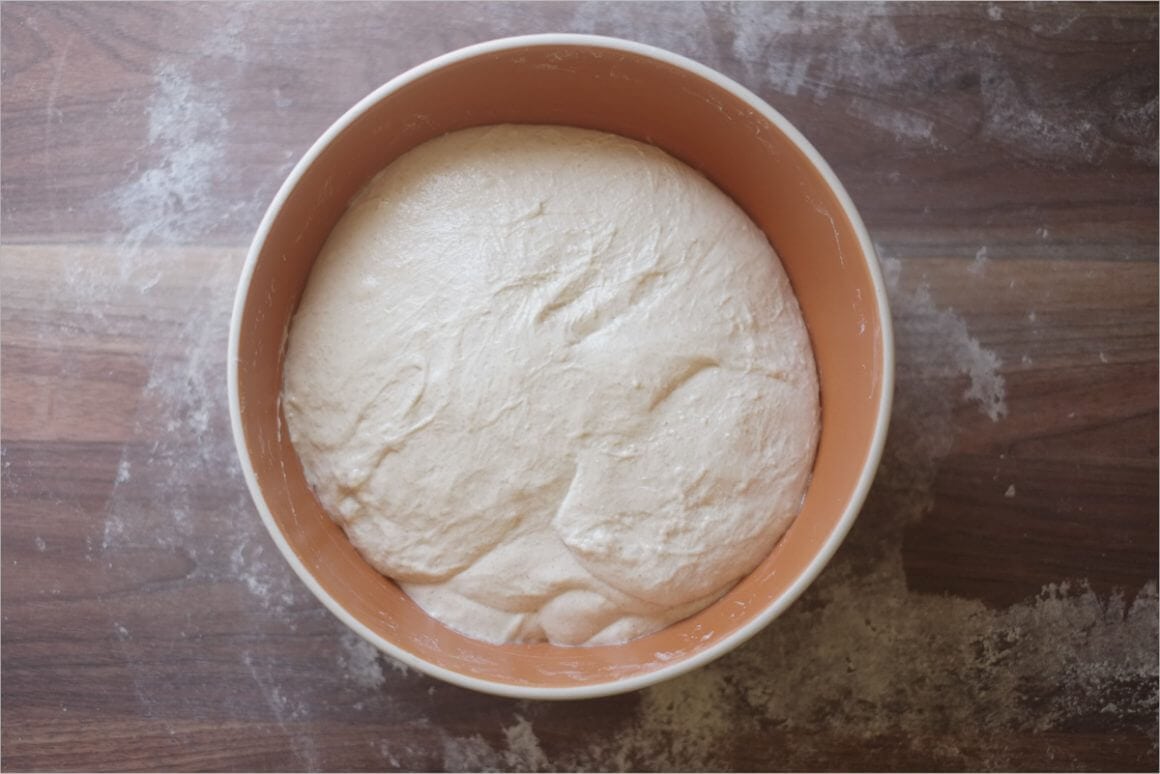
I had to up the number of turn sets during this bulk fermentation as the dough was pretty slack. The extended autolyse relaxes the gluten a little more than my usual 40 minutes, and the very high hydration also promotes a very extensible dough. After doing my folds at step #4, I could see I had to keep with the turns as the dough didn’t hold it’s shape well enough. An excellent visual indicator is by the time you’re done doing your four folds for that set, take notice of how the dough is resting in your bowl. If it isn’t holding its shape very well, meaning it kind of spreads out quickly after that last turn, you should probably do another set in 30 minutes.
Pre-shape – 4:00 p.m.
Take the dough out of the container onto your work surface and sprinkle some flour on top before dividing. Divide the mass into two halves and lightly spin each half with your dough knife in one hand and your other hand. Let this pre-shape rest, covered with a damp towel or inverted bowls, for 20 minutes.
Lightly dust your proofing baskets with white or brown rice flour in preparation for the next step.
Shape + Proof – 4:20 p.m.
I’m going to warn you here, this 90% hydration dough is very tricky to shape. Only keep your hands in contact with the dough when necessary and always keep them lightly floured. Even doing all this you might have trouble lifting the dough off your surface, and you’ll surely have dough sticking to your bench knife and hands. It’s ok though, that’s part of the fun, and things will improve with practice.
Given the fact that my dough was so extensible, I decided to shape both of them as a batard. I was able to get quite a tight skin on the outside of these loaves, but they needed some support in their proofing baskets.
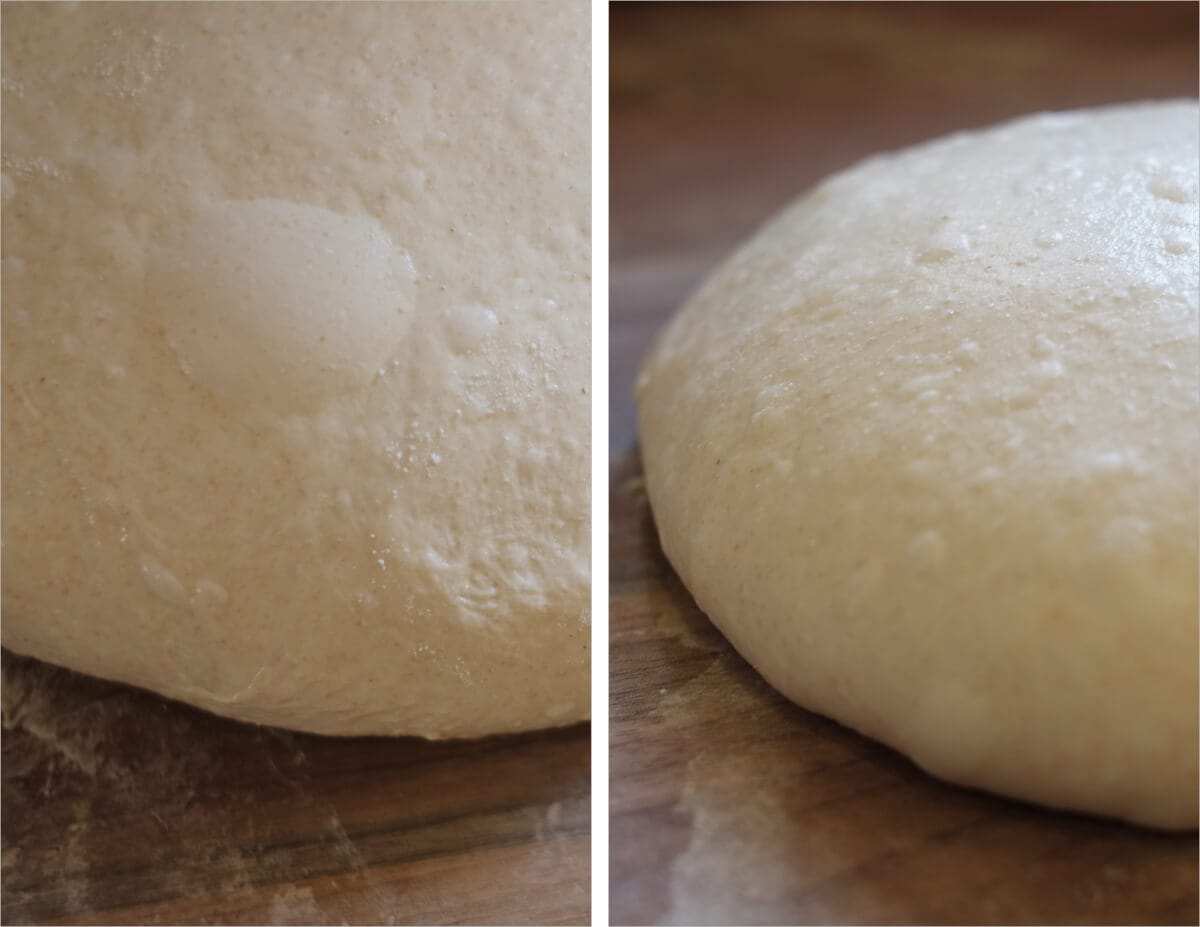
When hydration gets very high like this, I’ve started providing a little extra support to my proofing dough with linen in my bannetons. I place a flour sack towel on the bottom of the basket tied around at the rim with a rubber band. This holds the towel a bit off the bottom of the basket to keep the dough from expanding out too far filling the entire base.
After shaping both loaves, place them into their proofing baskets and cover each tightly. Please them immediately into the fridge for their overnight, cold proof.
Score + Bake – 7:15 a.m.
The morning I was to bake these two loaves was a very busy one. We are selling our home and moving to a new place across town and had a realtor showing in the early afternoon. Knowing I’d have to clean things up after the bake and that they would also see a loaf of freshly baked bread on the counter, I decided to go ahead and bake (I mean really, wouldn’t the house smell so amazing anyone viewing the house would just want to buy it immediately?). I guess my real fear was that these visitors would walk off with my hard work and enjoy my bread in the car on their ride to the next house… Remember my comments above about selfishness?
Preheat your oven to 450°F (230°C). I baked these loaves following my guide to baking in a Dutch oven (or combo cooker).
Because of the length fermentation time, I bake these loaves straight from the fridge. When your oven is preheated, take one of your loaves out of the fridge and cut a piece of parchment paper to fit the top of the basket containing the dough. Take your peel and then put it on top of those two and quickly invert it, so the dough is now resting on the parchment paper and the peel. Score the top of your batard with a crescent slash from top of the loaf to bottom at about 30° from loaf to blade.
Carefully take out the shallow side of your Dutch oven from the preheated oven and drag in your dough resting on parchment. Quickly place the pot back in the oven, cover with the deep end of the Dutch oven, and bake for 30 minutes.
After 30 minutes, open the oven and take off the lid of the combo cooker (set it next to the other half inside the oven), and bake for an additional 25-30 minutes until well colored.
Conclusion
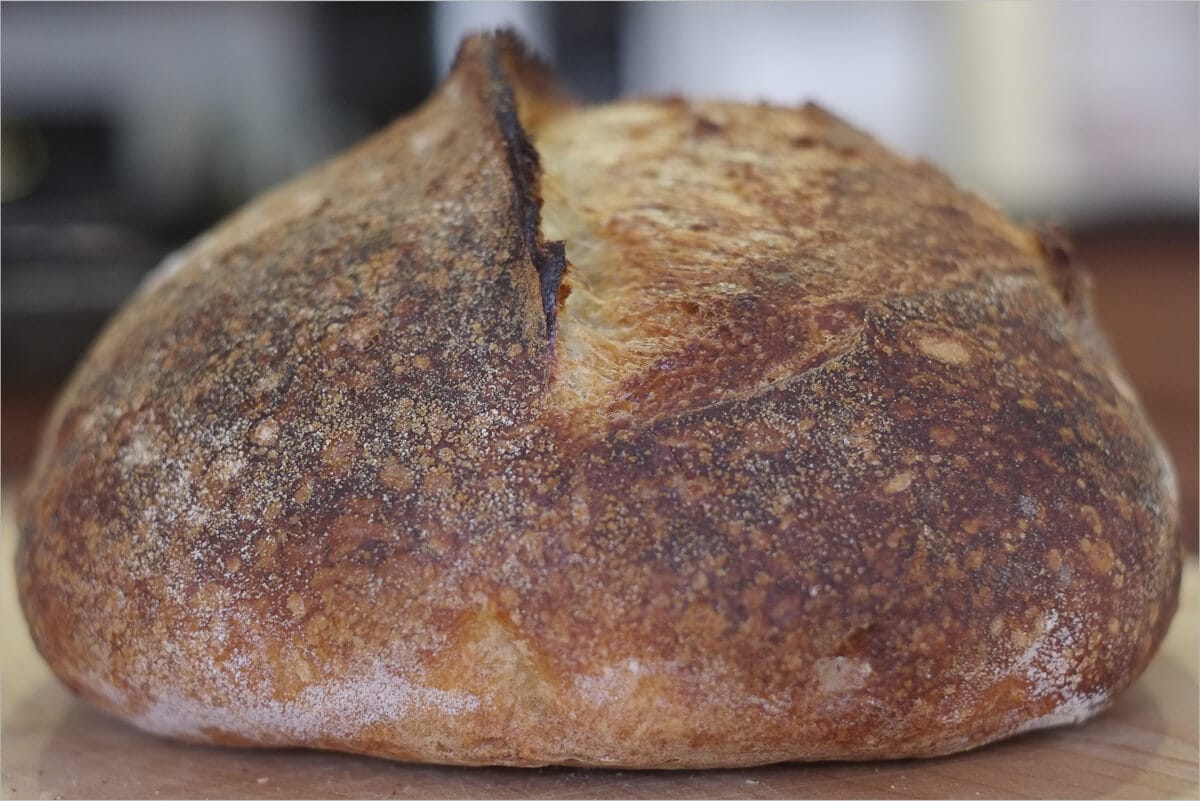
As my wife confirmed, this is the best set of white country sourdough loaves I’ve made. No doubt about it. I brought one loaf to our family Easter lunch, and it was gone in record time. Everyone commented on how soft and tender the crumb was, and how the sour flavor was so subtle, it only shows its head barely at the end. The young levain does impart a remarkable, complex taste without overpowering things.
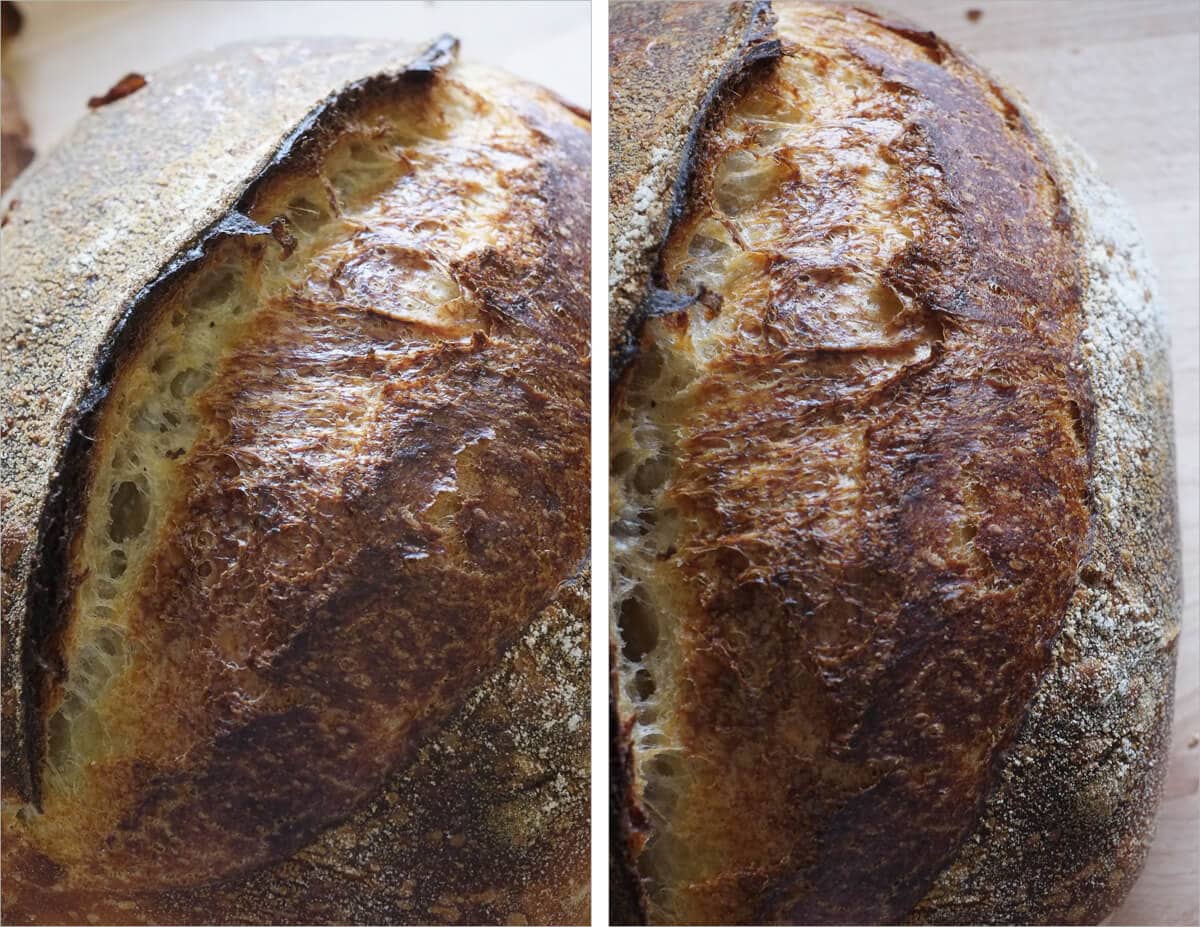
Crust
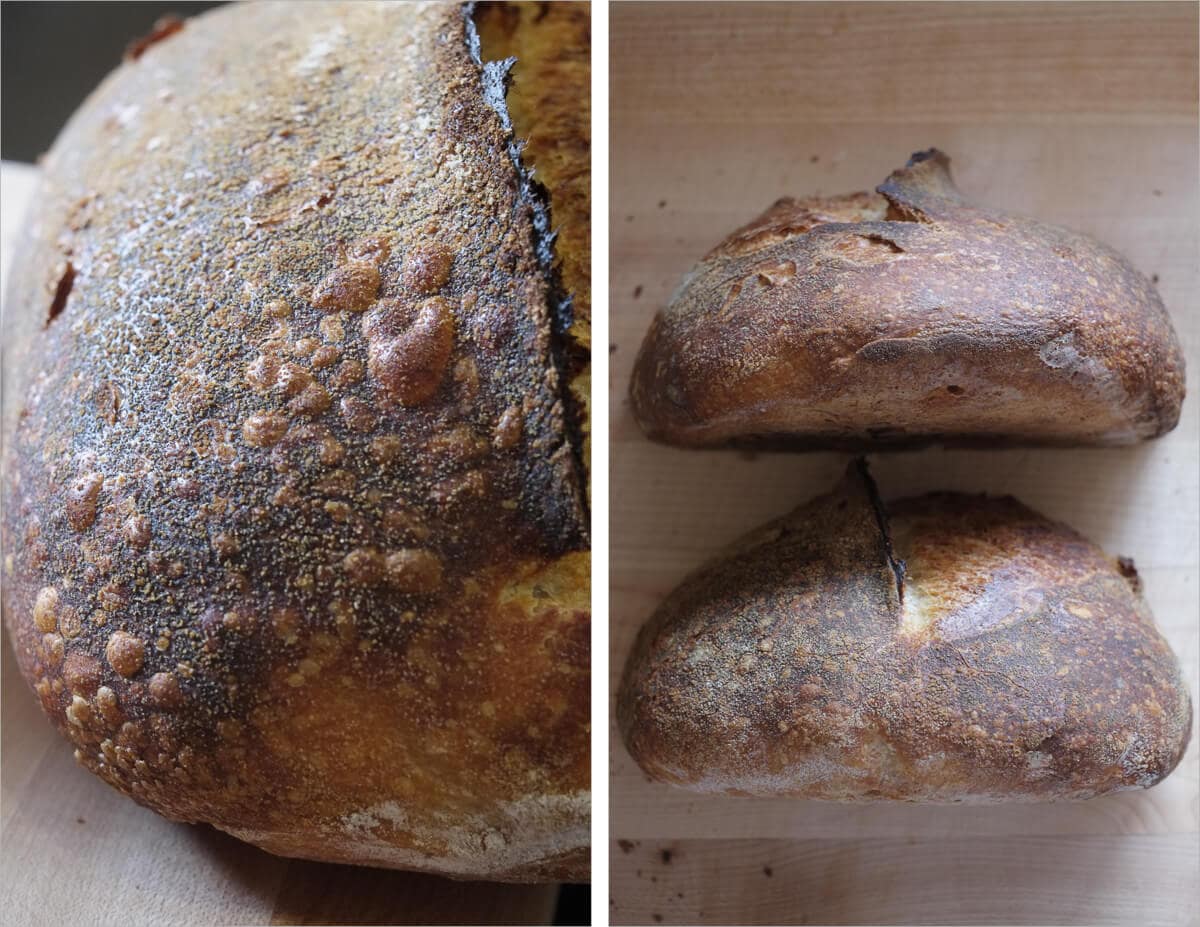
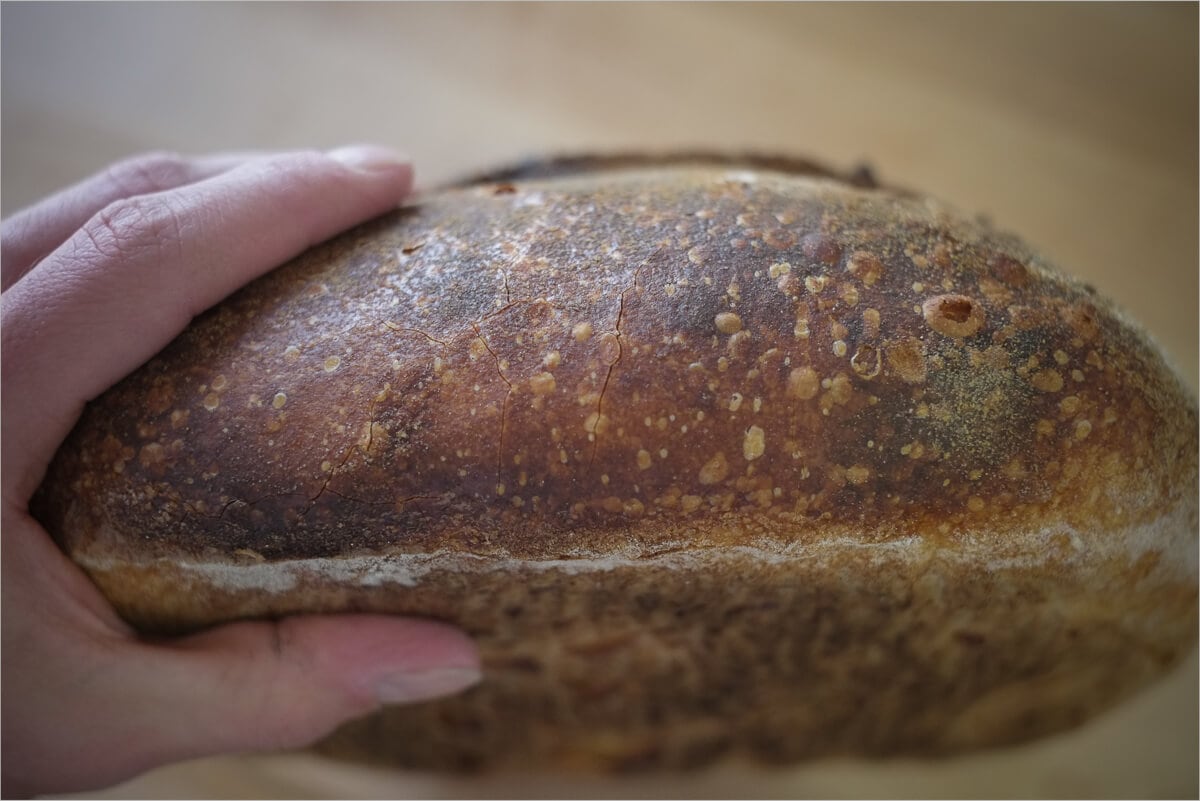
The crust was incredibly brittle, it was almost thin like a tortilla chip. Incredible. Even after the loaf sat out for a half of a week, it was soft, and easy to cut through and that’s saying a lot here in New Mexico where things dry out to cracker-like consistency in a matter of hours. Look at the range of colors in that crust!
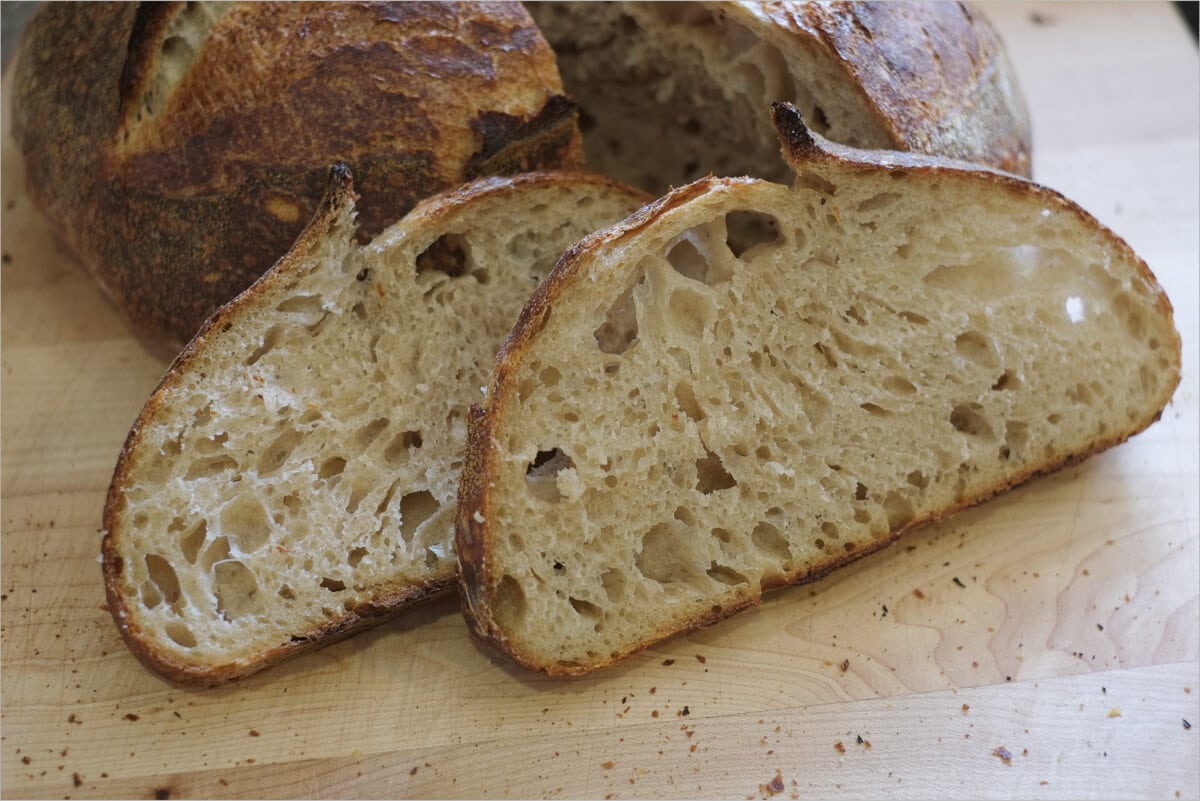
Crumb
The crumb on these loaves was superbly soft and tender. 90% hydration makes the inside of these loaves almost resemble a custard; it’s that moist in there. Pulling pieces apart with your hands has the crumb springing after it snaps irregularly, a most satisfying sight, one that reminds me of my Italian family breaking large pieces of bread at the dinner table.
Taste
Toast this bread and tell me you can only eat a single piece. Go ahead, write back and let me know if that’s possible. I usually eat a single big slice at a time, but with these loaves, I was cutting two. If I can bake bread like this consistently, I’m going to be a very, very happy man. As will my friends and family.
I mentioned earlier that I used a few slices of this bread to make an insanely good sandwich, this is a sandwich I would serve at a restaurant, and I know it’d be a hit. We cooked a recipe recently using caramelized onions, currants, and a paste made from harissa and water. I spread this concoction on one side of the bread, topped it with grilled chicken, tomato, lettuce, and some creamy cheese. Gone in an instant!
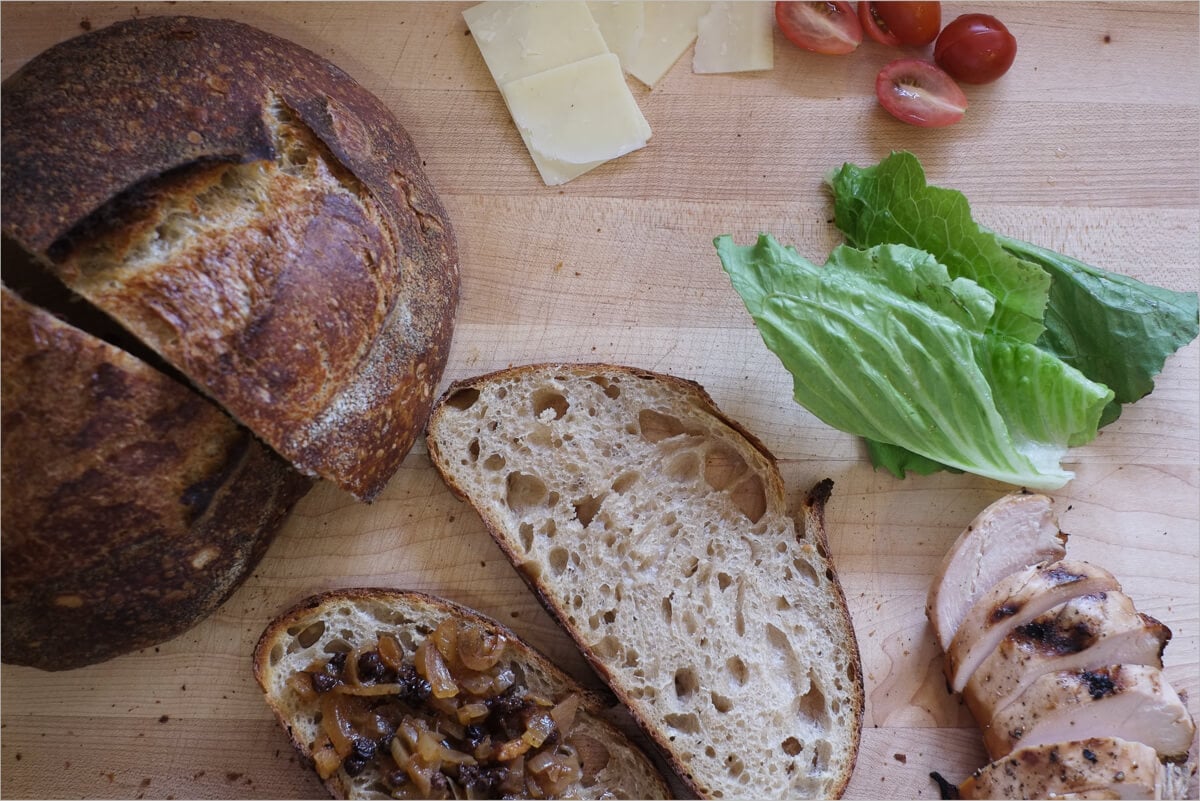
Buon appetito!
If you use this recipe, tag @maurizio on Instagram so I can take a look!


99 Comments
where is the ph /acidity of starter chart?
I dont have one, but it’s a great idea 🙂
Just made this – again. It did nothing during the cold proof, so I let it come to room temp before baking, still looked sluggish, but rose nicely, and not too much, in the oven. The crust has lots of small bubbles on the surface like yours pictured here. Impatiently waiting to be able to cut in for the moment of truth. But, I have a different question, a much more practical one: Any tips for getting sticky dough residue off, well, everything when cleaning up? Hot water and a plasti dough scraper for sure, but even then it’s tedious and hard to get all the dough off everywhere. Hard won tips from anyone appreciated!
Sounds like usual cleanup to me! Though, if your dough is strengthened a bit more it’ll come apart less. You could try folding it a bit more during bulk to make cleanup later easier.
It’s handy to have a large bowl filled with water and a washcloth kept in the water. You use less running water rinsing your hands each time and the washcloth is really helpful for getting bits of dough off your hands and utensils. I keep my dough scraper in there as well so it’s a bit wet I need to scrape down the sides of the bowl. And keeping tools wet means the bits of dough don’t dry, which makes cleaning up so much easier.
Help! this has happened twice now… after 3 hours when I check the leaven, there is a crust on top! I’ve got my glass bowl covered and in a warm spot in my kitchen…why does this crust appear? is it too dry? I’m a beginner with sour doughs…obviously….TIA. Luci
You definitely need to cover your levain!
I’m trying this recipe today and hoping for success tomorrow morning!
In preparation, I’ve gotten the BEST butter, and that’s mainly why I’m checking in here – to tell everyone who puts butter on their homemade sourdough (and who wouldn’t? but I’m not here to judge) to buy butter that your bread deserves.
My personal favorites are Plugra Extra Creamy, Lurpak, and President. I’m just mentioning ones that are generally available nationwide. Salted or unsalted, whatever floats your boat, but don’t insult your bread with the grocery store brand, or even Land o’ Lakes or Cabot.
Just my two cents. I could live on bread and butter, I swear.
Thank you for the recipe!
So glad to hear this, Laurie!!
You should try with booster? It is a awful. We usually do young levain at the bakery. We tried to booster version that Chad does. Man it sucked.
I haven’t tried his method yet, but in my experience, a levain left to ripen to full ripeness always works best. I see what they’re going for there, though! I’ll give it a try soon 🙂
Hey Evren, I’m in the process of making this bread using Chads young levain booster method. Was it a flavor or crumb issue with this method? I was planning on a long 36hr cold proof… maybe that could improve results? Curious what your thoughts are… thanks!
You’re very welcome! So glad to hear my site has helped.
Sounds like you might have either used your starter/levain a bit too early or there was a little too much water in the dough. I’d say definitely be sure to use your starter when ripe to make the levain and then the levain when ripe to mix into the dough—that’s always the way to go. You could then try holding back some of the water in the mix to see if that helps bring strength!
Hi. I am wondering if you have videos showing your crumb and how it tears and slices? I have used your bake schedule at high hydration with great results and the only comments are it is a little jelly like in the crumb for the high hydration breads. Is it a preference question or is it under proof or underscoring? Maybe the moisture can’t get out? And I can’t get that color on the loaves. I am leaving them longer and longer. Thank you
If the hydration is too high for your dough it can lead to an overly wet or gummy interior. If the dough feels “soupy” or very “slack” then try pulling back the water percentage by 5% and see if that helps.
Make sure to bake your loaves completely. The interior should register around 204-206°F (95-96°C) or higher.
If your loaf is under proofed then this will typically lead to a gummy or “wet” textured interior. Make sure your starter and levain are very vigorous and strong when you use them. This is very important! From there, make sure to bulk ferment your dough fully (use the images you see in my posts to guide you on what the dough should look/feel like). You want the dough to be alive and aerated before you divide and shape. From there, a full and complete proof is also very important.
Thank you. I will check the pictures and focus on these a bit more
I made this recipe about 6 weeks ago and had amazing results… my second bake is currently in the oven and it’s a TOTAL fail. Zero rise. It barely developed any strength during bulk and was a nightmare to shape. I knew it was going to fail, but baked it anyway. Any thoughts on why it refused to develop strength? I did the 7 sets, but didn’t really notice a change as the sets went on, which is how I knew it would fail. Super frustrating, but motivating to get it right the next time!
Sorry to hear that, Christina! Do you think the dough might have been over hydrated? If you’re using a new-ish flour it might have required some measure of adjustment there. Also, be sure to use your starter and levain when they’re very ripe and ready! If you use them too early, the dough will be very sluggish all the way through (which would show up as under strengthened and under-active dough).
It definitely could have been over hydrated and/or a problem with the starter/levain. I tried it after it came out of the oven and it was definitely much more on the sour side… and when I put the levain in it was very aerated… perhaps the levain was over ripe? Is that possible? Full disclosure, I got busy and it was fermenting for about an hour longer than the recipe called for, but I didn’t think an hour would make this big of a difference? Thank you so much for your help!!
This was my 4th bake in 25 years, and it came out great! It was definitely a challenge at the hydration level. I ended up adding some flour along the way so that the dough wouldn’t run all over the counter top when I went to do the stretch and fold; it was impossible actually. Not sure if I did something wrong, but adding flour definitely worked. I’m guessing it reduced the hydration to 85-90%?
Anyhow, these loaves came out great! The crust is thin and chewy, but not too chewy, the crumb is moist and fluffy. Nope, couldn’t eat just one fat slice…on to artichoke dip, with fresh basil and tomatoes from the garden 🙂
Right on, Matt! it sounds like your flour just took on less water than mine, not a problem, adjusting hydration in this way is expected and normal!
Hi, I’m a newbie. I have a healthy starter with a pretty consistent activity. I feed it morning and evening, and it doubles at around 3-4 hours.
I notice a lot of recipes have you make the levain first thing in the morning, but mine (after feeding around 9-10 p.m.) is fallen by morning, requiring to be fed before it rises again. So, my question is, does the started need to be active (at its highest point) for it to be used for levain? (If so, I suppose I would need to work with a different schedule) Or does it not matter? I am curious to know if the starter can be used at any stage to make the levain. Thanks so much.
Loved the challenge of this bread, though I did my usual substitution– fifty percent bread flour, fifty percent assorted multigrain flours (plus 2 tbs. gluten). Came out beautifully. Grazie ancora!
Glad to hear this, John!
Did you get a reply to this?
Hey! Just made this loaf and it feel wonderfully stretchy and stack during the folds but by the last one it was starting to hold its shape. I gave it a hefty series of folds and rolls to shape and then put it in a well floured banneton with the sack. Pinched it a few times to increase tension too. Covered and put in the fridge overnight. Not only was it overflowing my banneton this morning but it had stuck to the fabric like glue. Turned it out onto a piece of baking parchment and managed to get it off the fabric without too much damage by scraping with a knife. I had put the turned out dough into a shallow plate to try and contain it but it still rolled everywhere like Jabba the Hutt’s more liquid cousin. I gave it a good deep slash but it was so sticky that it glued itself together again nearly instantly and i basically had to pour it into the Le Creuset Pot! It stuck a little to the side on the way in and apart from no ear (sticky slash)it appears to have risen ok. Any tips for handling dough that is this wet?! It was more or less unworkable. I’ll reduce the hydration next time but I’m curious! Apart from that, great informative recipe – can’t comment on taste yet as it’s cooling downstairs!
Hi! I’ve started baking bread for the first time ever amidst the quarantine to share with family and friends and have been slowly learning about the complexity of simple delicious bread! I live in New Mexico, and was wondering if these recipes are adjusted for high altitude already, or if high altitude bakers should add additional amounts of flour and water, etc. Thanks for making bread-making accessible!
I’m very new to sourdough baking. I have a starter that I’ve been growing for about a month. I leave it in the fridge and take it out to feed every few days. I started my first bread by feeding my starter and when it was very bubbly, I took a bit out and made the leaven. Neither the starter or leaven have doubled for me, they both get very bubbly, but do not double. This is my first question, do they have to double to be ready or is the bubbling a sign that they are ready. I’m wondering if it is the temperature, my apt. stays at about 65 F and I can’t get the temp up any higher, I left my leaven out all night hoping it would just take longer to double, but it only bubbled. I moved on and made the dough, my dough hasn’t risen much but I”mgoingto back it just so I don’t waste all those ingredients.
Also, my other question is that my starter will bubble and look very active and then it gets that grey liquid on top very quickly, without doubling. Is this also a problem? if so, how do I fix this? I’m guessing all these small problems have led to the fact that my bread is not rising much. I guess my biggest question too is how do I get the sourdough to work if I Just don’t have a very warm area to make it in?
It’s still safe to bake and eat, right?
Thanks! So many questions!
Hey, Abigail! Your starter doesn’t have to double, no. What you’re looking for is consistency: you want it to rise and fall the same amount each day when fed the same and kept at the same temperature. 65F is a bit on the cold side, if you can warm your water (the microwave will work well) you use to feed your starter, try to hit 75-78F. That should give you quite a bit more activity from the get-go.
I would suggest you try to keep your starter out on the counter with regular feedings for a week and see if that helps increase activity (it will). Then, use that starter to make a levain and bake with it to see the results. If you get your starter to a point where it’s strong and fermenting well each day, then you can switch to using the fridge for storing it when you’re not baking (see my weekend baking schedule for tips on how to do this).
As long as you’re not seeing any mold (white/pink/green/fuzz) in your starter it’s fine to use, the resulting bread should be fine as well (trust that 500F oven!). I hope that helps and happy baking!
You make quite a leap from Shape + Proof (4:20pm) to Score & Bake (7:15am): There’s no mention of putting the proofing loaves into the refrigerator after 4:20pm. Right away or after some ambient proofing?, and then baking at 7:15am the next day (almost 15 hours in the fridge). And should one bake ASAP from removing a proofed loaf from the fridge, or should one remove from the proofed loaf from the fridge while preheating the oven?
Agreed — this was an early post here and definitely lacks some details in that section. I went through and added some clarification, but will repeat here: shape the dough and place them directly into their proofing baskets, cover them, and into the fridge they go immediately. In the morning, preheat your oven and bake the loaves straight from the fridge.
Thanks. Doing it this am. Any chance of meeting on Friday? The Grove?