

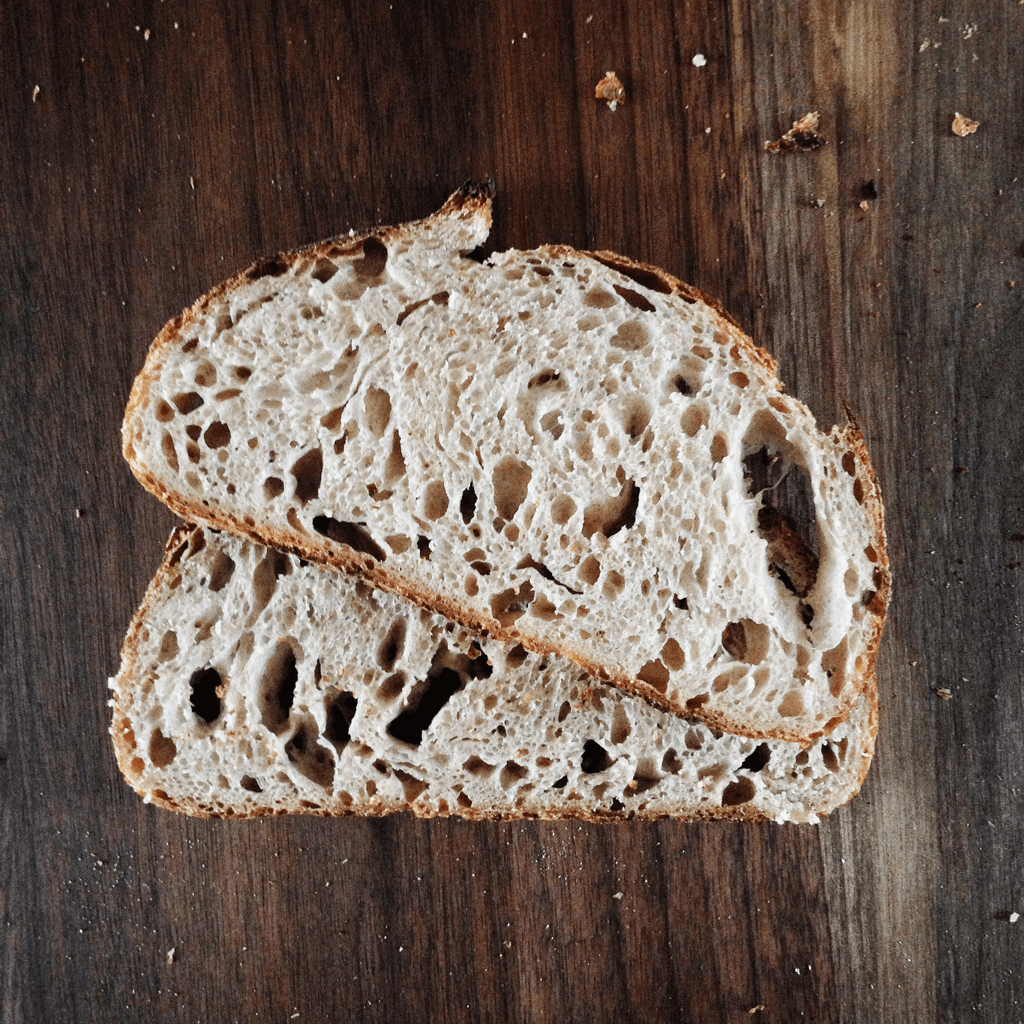
My wife and I were out at dinner with a few friends the other night, and we got to talking about local co-op produce, cooking with more natural ingredients, and, of course, baking bread with only the simplest ingredients. Just four little elements come together to make something more significant, something alive. One of our friends said: “I want to make bread for the sustainability aspect of it, not so much as to make it a work of art or something to look at in wonder.” Sure that’s true, at the heart of its bread is sustenance, something you eat to keep alive and keep you going. But isn’t there more to a craft than just simply producing something edible?
I thought about his words for a while and wondered to myself: why do I keep testing, experimenting, tinkering, and trying, with my bread? Isn’t it good enough to provide healthy nourishment? In a word, yes, it is good enough. But if it’s a real craft, then the crafter is always trying to do better, always trying to transform the simple inputs into something greater.
I’ve set this goal for a particular taste for my bread and a certain look when I serve it on the table, but I also want to use healthy, local ingredients. In the past few posts, I’ve been talking about a locally grown & milled white flour in north Albuquerque, New Mexico, and I decided to order a 50-pound bag from my local co-op. I think they were getting annoyed with me anyway… I kept emptying their small flour canister each week.
The flour is spectacular. I am not able to determine the actual protein percentage but it’s enough to hold up to this 81% hydration recipe, and I think I can still even push it a bit farther (though, not just for the sake of it, but because finding the right hydration results in the best bread). The taste though. The crumb comes out so tender and light, it’s the best I’ve had outside of Tartine Bakery in San Francisco.
Let’s get on with this week’s bake I have a few small changes here, and there and they have helped me improve my bread for the better. In continuation with the last entry, I wanted to try a high(er) hydration sourdough bread, bumping it up by 1%. Small increments, right?
Prepare the leaven – 10:00 p.m.
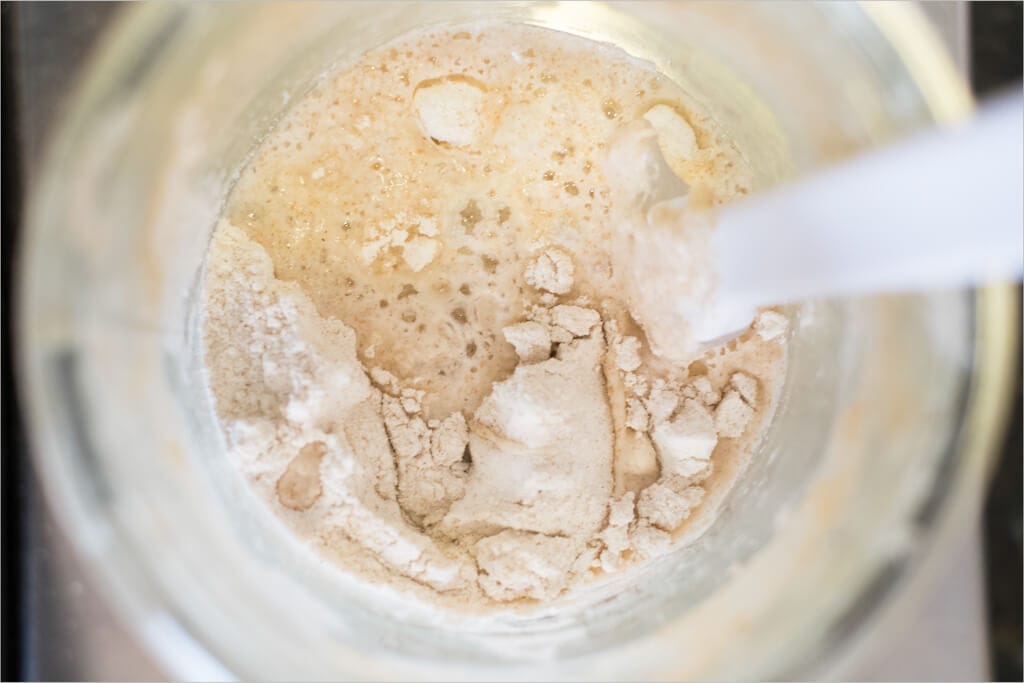
My typical 100% whole wheat leaven, prepared the night before:
- 34g ripe starter
- 120g whole wheat flour
- 132g
After mixing the above in a glass container, cover and set in a slightly warm area in your kitchen overnight.
Rest up tonight because tomorrow we start the baking!
Mix the flour and water, autolyse – 8:30 a.m.
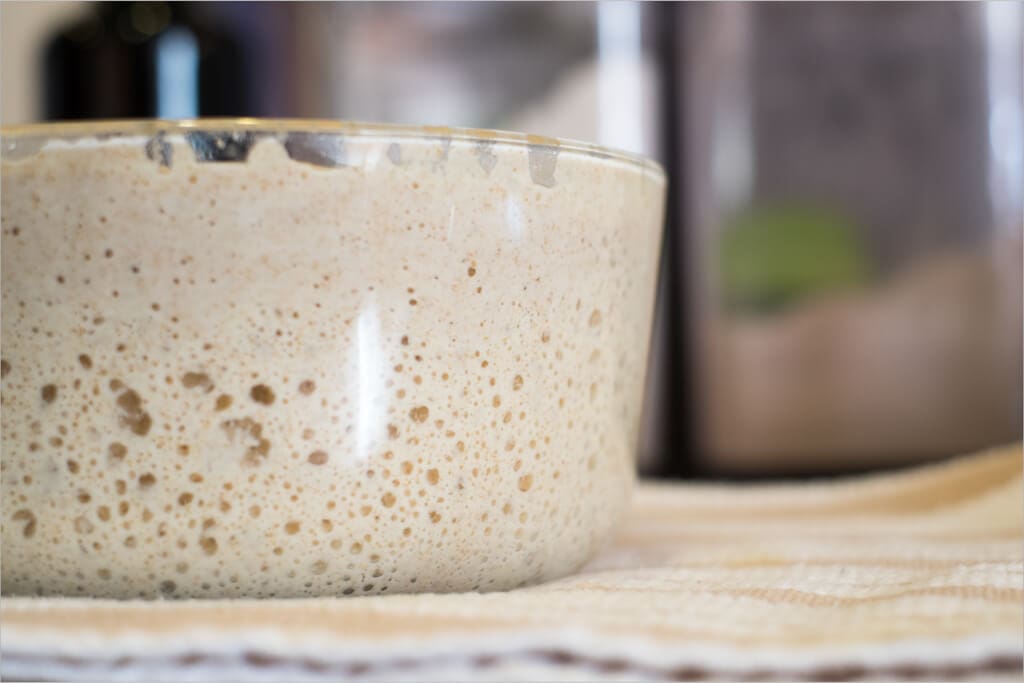
I think my levain has adapted to these cooler temperatures at night; it indeed was ready to go at 8:30 a.m. Lots of activity throughout and a slight smell of sour in the morning.
Gather up your ingredients and get ready to get your hands dirty.
Ingredients:
| Weight | Ingredient | Baker’s Percentage |
|---|---|---|
| 275g | Levain | 27.5% |
| 800g | All-purpose flour (Sangre de Cristo white flour) | 80% |
| 200g | Whole Wheat Flour (Bob’s Red Mill) | 20% |
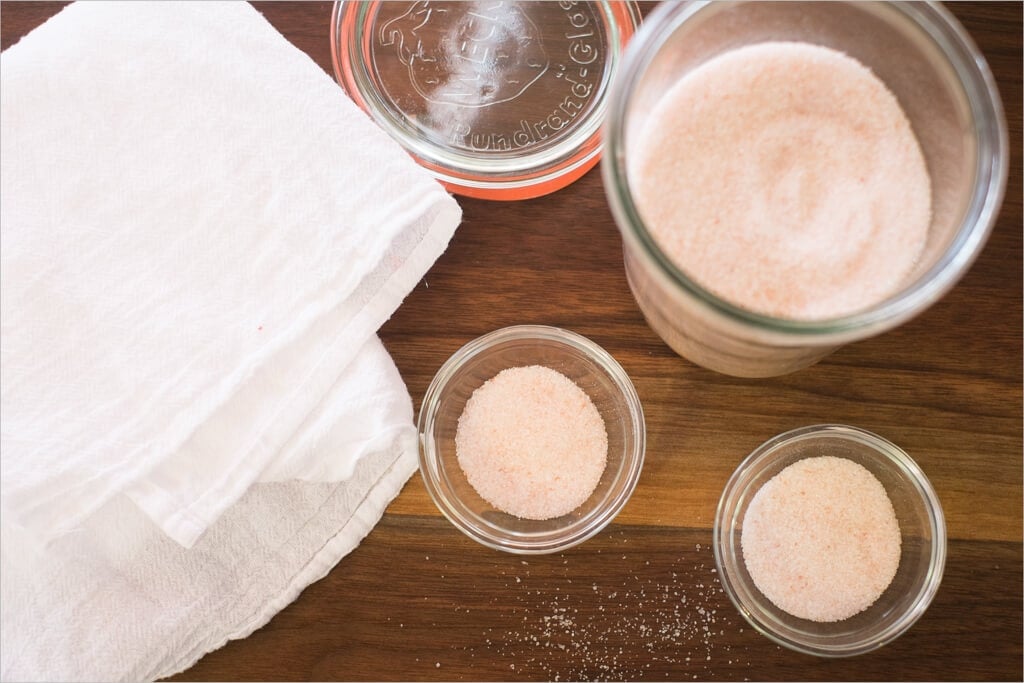
| 20g | Salt | 2% |
| 810g | Water | 81% |
Method:
- Add 275g of the prepared leaven (you might have a little leftover) to a large mixing bowl
- Pour in the 760g water and mix until you completely dissolve the levain
- Add 800g white flour and 200g whole wheat flour and mix with your hands until incorporated
- Cover your bowl and let autolyse for 40 minutes (see my guide to the autolyse technique for more information)
- After 40 minutes add 20g salt and slowly pour the remaining 50g water on top. Squeeze & mix until incorporated
- Mix a bit longer until the mass becomes a bit “sticky.”
- Transfer to your bulk fermentation container
| Final dough temperature: | 78°F (25°C) |
I’ve started to take note of not only the final dough temperature after mixing but also the ambient temperature. This will hopefully help you adjust your timing based on your ingredient and ambient temperatures in your kitchen.
Bulk Fermentation – 9:30 a.m.
I’ve been having issues recently with a crumb that has been a little on the dense side for my liking. I’ve done a few bakes in-between my last entry and this one to try to figure out what’s been happening and, after doing a little reading and chatting with fellow bakers, have discovered one of the causes. Thanks to some discussion with Francis over at the excellent Tartine Bread Experiment blog, I’ve concluded that I’ve merely been overworking my dough.
More stretch and folds during bulk fermentation does not equal a more open crumb.
You really can’t rely on the “6-turns-and-it’s-good-to-go” approach for bulk fermentation. You need to read the strength of the dough as it’s developing and stop the turns once it’s reached optimal strength more turns does not mean a more open crumb. Now, there are a lot of factors that go into this, but if you’ve been following along with me through these posts, try it out for yourself on the next bake and see if your crumb opens up a bit more:
When doing the turns for a set, if you get to the last turn and you’re not able to easily grab the dough to turn due to its strength, you can stop doing turns and let your dough rest for the remainder of the bulk fermentation.
- 10:00 a.m. – Turn Set 1
- 10:30 a.m. – Turn Set 2
- 11:00 a.m. – Turn Set 3
- 11:30 a.m. – Turn Set 4
- 11:30 a.m. – 2:00 p.m. – Rest on counter untouched
Note that a “set” here is four stretch and folds for me. I reach under my dough, pull up, and fold over the other side — I do this four times for one set.
For my dough and my temperatures I only had to do four sets of turns, with a few hours of rest afterward.
By 2:00 p.m. the dough had risen almost to the top of my bowl and was ready to be shaped (about 30% rise). It should be jiggly and fluffy but don’t push the bulk fermentation too far, or you mostly end up with one massive bowl of levain, and it won’t be usable. Trust me; I have done this a few more times than I’d like to admit.
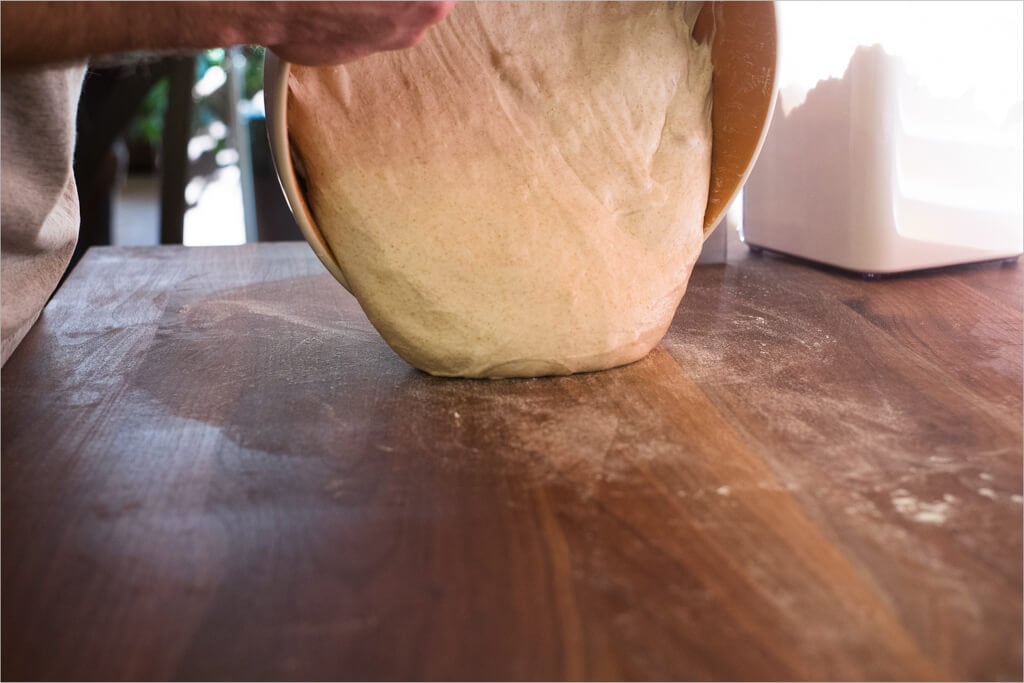
Pre-shape – 2:05 p.m.
Take the dough out of the container onto your work surface and sprinkle some flour on top before dividing. Divide the mass into two halves and lightly spin each half with your dough knife in one hand and your other hand. Let this pre-shape rest for 30 minutes.
Lightly dust your two linen-lined bowls with white rice flour.
Shape – 2:35 p.m.
For this session, I decided to shape one boule and one batard. For me, it’s much easier to shape the boule (but it’s not my preferred shape), and I wanted to ensure I had one shaped each way to test both.
Proof – 2:45 p.m.
After shaping, gently place the dough into their baskets and the fridge for an overnight proof.
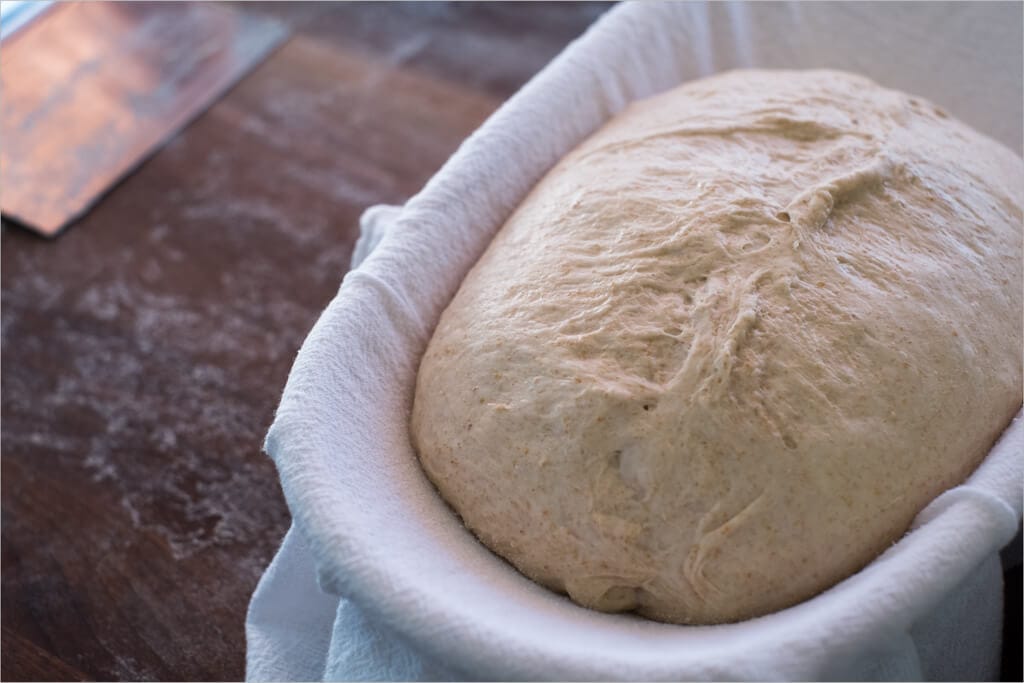
Score + Bake – 7:45 a.m. (the next day)
I baked these loaves in my oven following my guide to baking with a Dutch oven.
Place your combo cooker (I place the shallow side up on the left, and the deep side down on the right) in your oven at the bottom 1/3 position and turn it on to 450°F (232°C) to preheat.
I baked the dough straight from the fridge; this helps prevent spreading in the oven.
After one hour, take one of your loaves out of the fridge and cut a piece of parchment paper to place on top of the basket containing the dough. Take your peel and then put it on top of those two and quickly invert it, so the dough is now resting on the parchment paper and the peel.
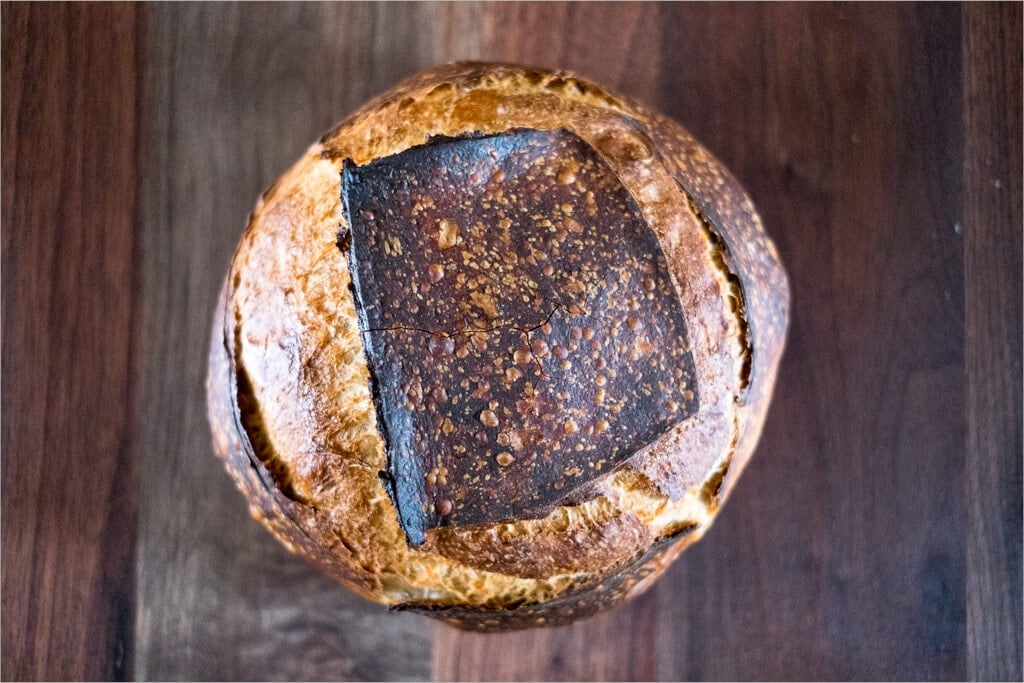
Get your razor blade out and score the top of the loaf to allow the bread to expand while rising in the oven. For the batard, I do a crescent shape along the center, and for the boule, I did a square-top as described in the Tartine books.
Place the dough into the combo cooker and bake covered for 20 minutes. After 20 minutes, take the lid off and continue to bake for an additional 35 minutes, until done.
Conclusion
I might venture to say these are the best set of loaves I’ve ever made, even better than the loaf in my fermentation post. The overall shape of the two is just how I had imagined, and the crumb is so very tender. The local Sangre de Cristo flour is something special; I am thrilled to have this resource near me.
Crust
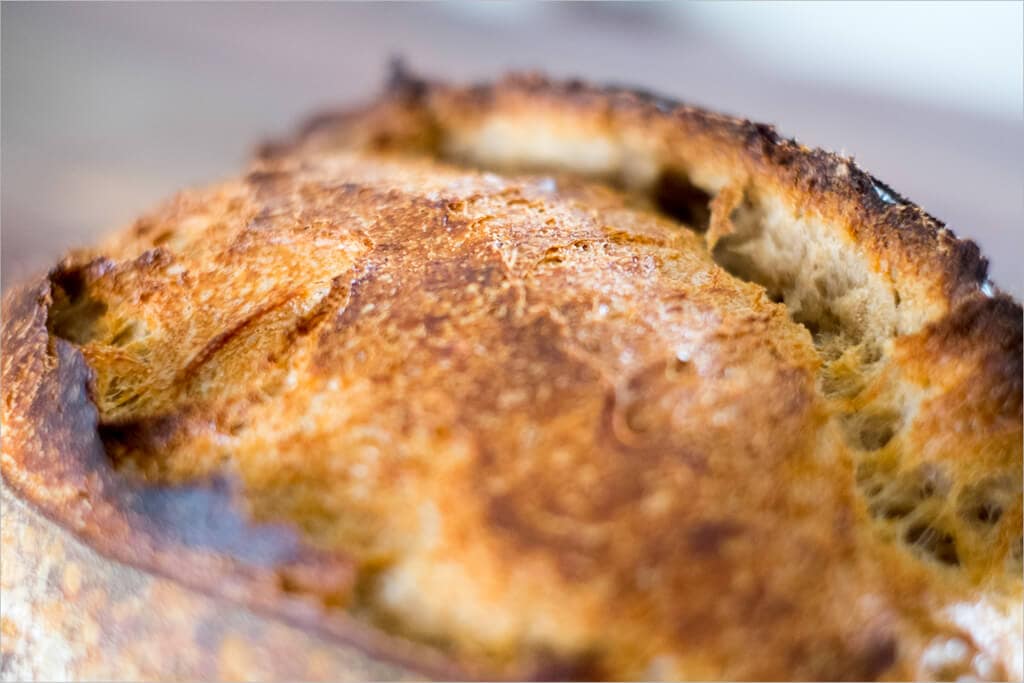
The crust was colored so nicely and was stunningly thin. Cutting this bread was very easy as the knife just slid right through.
Crumb
Finally, my open crumb has returned. This loaf was so light and airy that any more openness and it might start dropping sandwich ingredients. I’m happy here and will continue to work on evening things out, which is the ultimate goal.
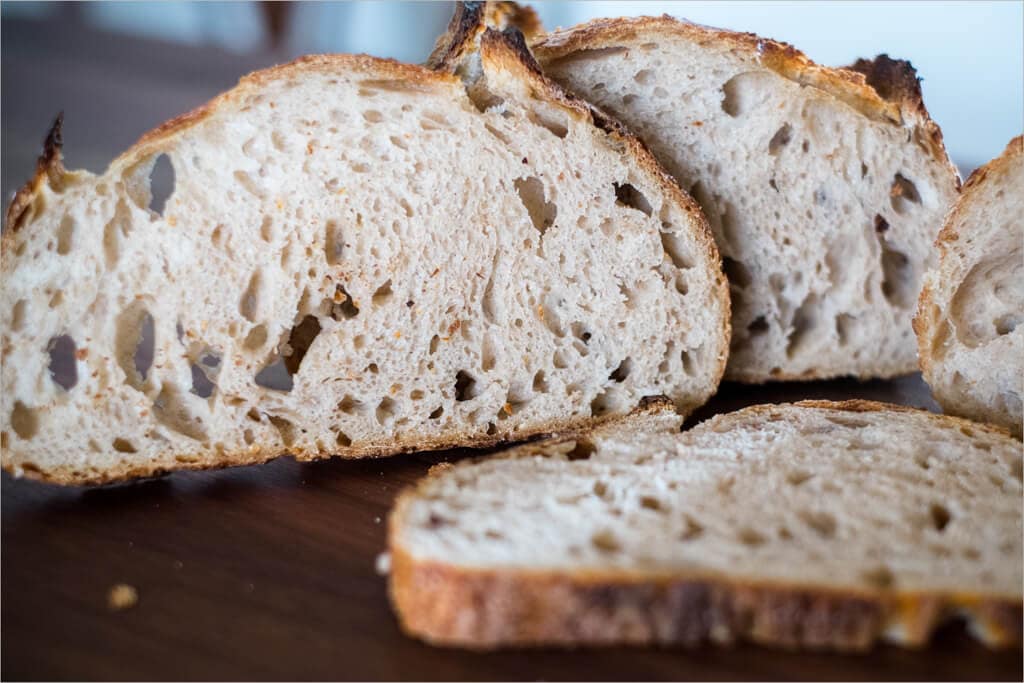
Taste
Tender, moist, custardy, slightly sour, very complex. As I mentioned, this is some of the best white flour I’ve tasted, and I’m going to be sticking with it as long as I can get a sufficient supply. These loaves are not going to last very long.
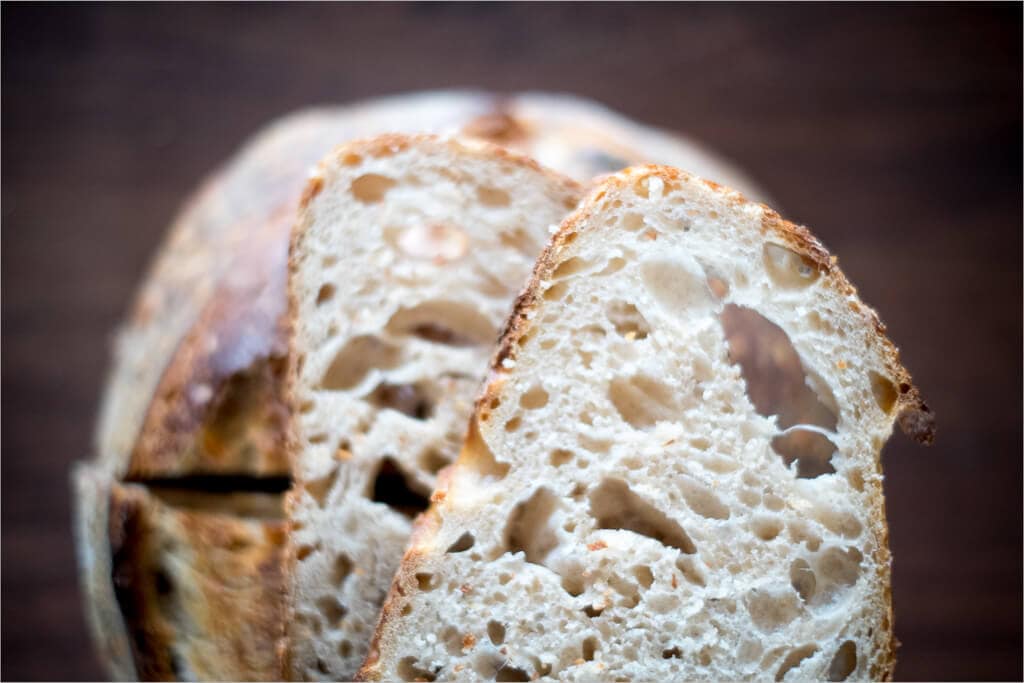
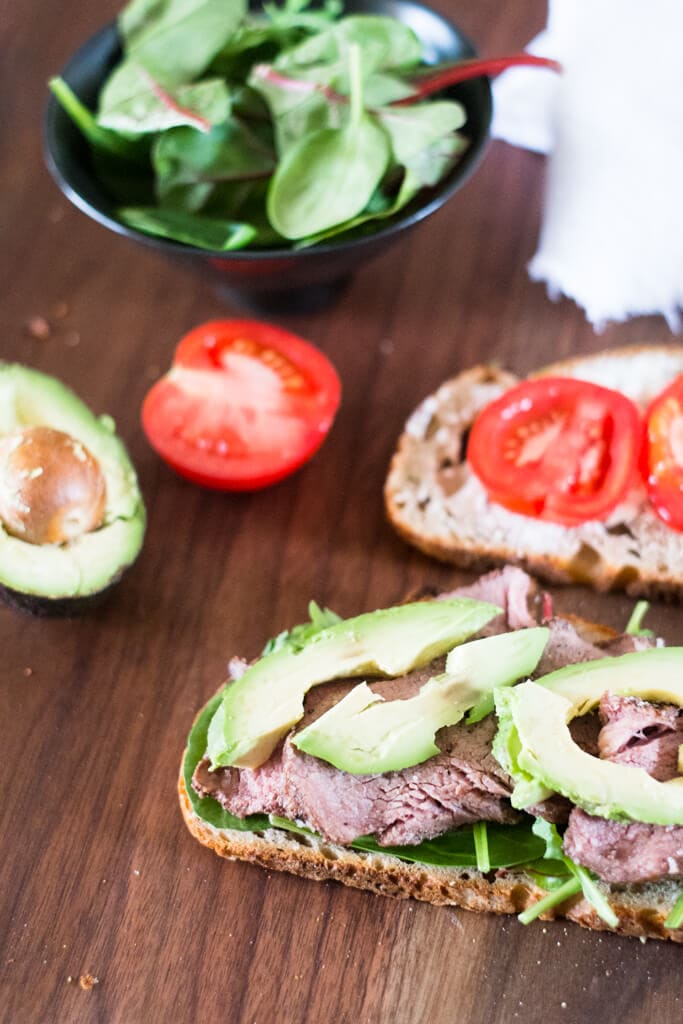
And with bread like this, I couldn’t help myself; I had to make a “whatever I have in the kitchen that sounds good” sandwich. I tossed on some local goat cheese, 1/2 a ripe tomato, chard & arugula, roast beef, and sliced avocado. The moist and light crumb of this bread, combined with the slight hint of sourness, really stood up well to the roast beef.
Buon appetito!
If you use this recipe, tag @maurizio on Instagram so I can take a look!


160 Comments
Great thread. Thank you, Maurizio. I’ve been baking for a couple of years now and about a year now selling. I’ve had some great loaves and some crap ones. It’s not really been consistent though. The flavour is always great but like everyone that gets into sourdough the way we all do, I’m always striving to make my crumb more open and airy. I recently started using a Italinox Prisma IBM30 Spiral Dough Mixer 32Ltr / 25kg Bowl. We had to make the jump because we went from about ten loaves a week to about 60. Normally I will mix ten loaves worth of dough and after I add the salt and additional water, I’ll leave it in the bowl until after the second turn then dump it out into a lexan tray and do my folds in it until I dump it again for a bench rest.
I was wondering if you use a mixer and if so, have you or have you heard of anyone that does all of the turns up until the bench rest and has been successful doing it or do you suppose it’s still better to do manual turns from a bowl or lexan tray?
I don’t seem to be getting the strength using a 75% hydrated mixture mixing it by hand which is why I ask. I’m getting great extensibility and elasticity but the strength seems to be suffering.
Any information would be great. Thank you All in advance. t
Hello! I’m just making this recipe and waiting for my overnight proofing but I do have a question about the amount of Levain used. Is there a way to make a little less so that I don’t waste any? With the recipe as is, more levain is made than called for – it only uses 278g of it and the rest is discarded (I presume). What would the proportion of starter, water and flour be to make just the right amount?
Hi! I’ve been making this recipe frequently with a lot of success. However, I would generally prefer a little more of a sour flavor than comes through when I follow the recipe exactly. The last time, I left the shaped dough in the fridge for about 20 hours and the sourness was good, but I didn’t get as much oven spring as I would have liked. I have a feeling that the dough overproofed just a little bit (the crumb wasn’t bad, I would have just preferred more openness) by being left so long before baking. Should I reduce the bulk fermentation time if I intend to leave my dough in the fridge longer? Or what are some other ways to let more sourness come through in the bread?
Hello, Katherine! Happy to hear that. Lengthening the cold proof will definitely add more sourness to your loaf, there are also a few other things you can do:
Try to use your starter, and levain, when they’re very ripe. If it rises up to a certain height, let it sit there for a bit before you use it. If it starts to fall that’s ok too, just try to catch it right before, or after, it falls. That mature, ripe starter/levain has much more acidity than if used when it’s more on the “younger” side. Just be weary that your dough fermentation rate might be a bit faster than previous, keep an eye on it during bulk fermentation and divide the dough when it looks ready.
Additionally, you could try using some rye flour in your final dough mix. Rye helps stimulate more acid production for a more sour flavor. I wouldn’t go overboard on the rye, though, as the more you include the more dense your loaf will be. It’s up to you on the percentage, but even 5% plays a big role.
For me, rye is the biggest contributor. If you don’t have rye, or don’t like it, adding in more whole wheat flour will also do the same thing (although in my experience it’s not quite as effective).
Let me know if that helps!
This was the fiest time i mafe sourdough bread. I read and followed your recipe. Made slight change to the started and made it just with whole wheat bread. While it was in the fridge it did not rose much and it concerned me, but when i put it in the oven it doubled in size. I acvidrmtly left a st 510 degree farenhite for 30 min, then 5 min at 450 with the lid on, at 30 min at 450 with lid off. I kept the boiling water in the oven as well. It came beautifully at the end and so moist. Hope I could attach a picture of my bread. I just have a suggestion, if you could make a bideo, specially how you fold the dough it would be great. I try to saw a couple of videos then match it with your direction of dough folding. Thank you so much taking your time and providing such a great recipe.
Glad to hear your bake turned out well, Roza! Yes, video is something I know should be showing up more and more here on my site. I’ll work on it! Happy baking.
Ugh… Maurizio! I read, and I read, and I read.
Ive practiced SO much.
Ive experimented with more folds, fewer folds, more water, less water, temperatures you name it.
I tried this recipie this week because I just wanted a change…. Right from the get go I thought “oh this one is going to be good”….
And then…. Blah.
Everything to the letter… Perfection…. The starter was amazing… The levain… Amazing… The bulk proof.. so pretty, so many bubbles, so much volume… 18 hours later out of the fridge, into the oven…. AAAAAAND a brick. A tasty brick, but a brick.
What is happening? Oven spring is so random in this house.
I get loads of beautiful bubbles, but It’s so doughy/chewy…. And I want to hang my head against a wall– I’m a *tiny* bit of a perfectionist —
What else can I do???
Ahh, bummer! Just from the get-go, have you tried using different flour? Sometimes it does boil down to this. Aside from that, is it possible you’re overproofing your dough? Have you tried cutting back your proof time fro 18 hours to, say, 14 hours and see the result? Usually when a brick comes out of the oven it’s either due to poor flour (or even flour that’s been sitting around for too long), over hydration of the dough (usually you’ll get a hint of this earlier as it’ll be very hard to shape), or over proofed dough.
I’d say try a new batch of flour and at the same time try cutting back the final proof time to 12-14 hours in the fridge. Even if the dough is under proofed next time you’ll know you’re in the right direction.
Let me know how it goes!
I dropped it down to 13 hours (after many pokes) and it’s PERFECT!
Its embarrassing how excited I am about this… Hahaha
It’s not embarrassing at all, trust me, I feel the same way. Glad to hear this!!
Hi Maurizio,
Happy new year! Thanks for answering my question a few weeks back on your fridge (and cold proofing) temperature. I recently got a batard-shaped banneton and have been trying to get my batard-shaping skills up to snuff. I made this recipe a couple days ago – and here’s the result: https://imgur.com/a/A8ldL
Great recipe!
Happy New Year, Adam! Thanks for posting those pictures of your bread — wow what a loaf! Seriously nice work, super glad to see that.
Happy baking!
I have come a long way over the past year, and have one stubborn problem. My high-hydration loaf stands pretty high after a night in the fridge in a wicker proofing bowl. I turn it out onto a heated oven baking stone (coated wit cornmeal), and score it. I get decent oven bounce in a 500 degree oven (with great steam from cupcake pan with boiling water), BUT before it has a chance to bounce, it SPREADS as the part scored separates. How can I minimize the spread? It is a pretty wet loaf, so should I just reduce the hydration level?
It sounds like the dough is either over hydrated, has not been strengthened enough, not shaped with enough tension, or over proofed. The first two are essentially related: you could reduce hydration and strengthen the dough this way or you could try to knead or add more sets of stretch and folds during bulk to increase strength in the dough. The second, shaping with enough tension, is simply a matter of shaping the dough tighter, trying hard to achieve a really taut surface on the dough to hold the dough in shape through baking.
I’d guess the dough just needs more strength. Try reducing the water by 5% and see if this helps reduce the problem. If so, you can work the hydration back up slowly while at the same time adding more strength so it doesn’t spread so much.
Hope that helps!
By far the best tasting bread I’ve made so far! Thank you for the great details in the recipe! So delicious!
So glad to hear that, Jocelyn! Enjoy and happy baking 🙂
“Trust me, I have done this a few more times than I’d like to admit.”
I believe you. I´ve some bad stories to tell either. And most of then includes Rye (dam you rye flour!).
Ha ha!
I did this recipe the other day… my first attempt at this high of a hydration, which was maybe ill-advised (because it sounds like even you were pushing your hydration boundaries here). I live in Wisconsin and it’s winter, so I assume I live in a much colder environment than you; I thought even if I followed your timings exactly, my dough would err on the side of UNDERproofing (my kitchen stays at a pretty even 60F).
By the time I took the dough out of the fridge, the thing was massive. Even after I divided it in half. I mean really, really massive. Here’s a picture of ONE of the final loaves, and I’m pretty sure it’s bigger than my torso: http://i.imgur.com/jWvWDQN.jpg
I also got 0 oven spring, and usually my loaves have really great spring. I’m thinking it got overproofed somehow. The next time I try, I think I’m going to put it right in the fridge at 11:30 (you say to let it rest at room temp until 2pm, and then put it in the fridge). I might also bake it earlier, or maybe divide it into 1/4’s instead of 1/2’s? What do you think?
(P.S. love your blog by the way, the high def pictures make the hugest difference and your recipes always come out tasting good, even if I can’t make them look good yet)
WOW, now that’s a nice big loaf of bread!! It looks, and sounds, like your dough did overproof. Usually a shape like that and sluggish spring are the cues the dough fermented for too long. I think placing it into the fridge earlier is the way to go, you have a very active dough there and it sounds like it doesn’t need any extra fermentation time at room temperature.
Thanks so much for the kind words! Taste is most important anyways, the other stuff will come in due time 🙂
What should the internal temp be when it is time to take it out of the oven?
I shoot for 210ºF or higher. Take it out around 210ºF and see if it’s done to your liking.
This has nothing really to do with this recipe…but I was wondering if you knew how to care/clean bannetons with liners? Mine are full of flour and I’m not sure if I should wash the liner or not!
You will eventually have to wash them, yes. I think it depends on the type of liner you have. The thick ones I have, and also the cotton ones with elastic, I just hand wash them every few months or so in the sink with a little soap and water. After each bake I try to brush out any excessive flour, especially if it’s wet and gummy. You could also dry the baskets with liners in the sun to ensure no residual moisture is hanging around — that’s the real enemy.
So in short: brush out excess flour, especially if wet and gummy, and wash every couple months or so. Hope that helps!
I’m surprised you guys are putting the dough into the cotton liner. Is there any benefit over placing dough straight onto the ‘wood’.
I personally find it easier to go without liner. There is nothing to wash and the layers upon layers of flour make a non-stick surface over time. But I’m always open to suggestions. Thanks.
You can certainly just season the wood and put the dough right in, that’s what many bakers do. I like to use the liners as I can just toss them into the wash and I can get away with use very, very little dusting flour in the basket.
To each their own!
Hi! I’ve loved reading your blog the last few weeks and it’s been a great resource for me as I’m learning more of the in’s and outs of sourdough. Question: My loaves are all (5 different attempts) sticky inside after being baked. Like, I check the temp when they are done and it’s about 205 degrees F. I also let them rest for a number of hours before cutting into them. I’ve tried lowering the temperature and baking a little longer because the crust is definitely done…but they are just still sticky when sliced….my knife comes away with some gumminess and the bread is tacky. They taste great, but this is not really what I’m wanting. Is it because of the higher hydration? I’m guessing this isn’t supposed to be happening. I’ve tried your whole wheat sourdough and the whole wheat sandwich bread. My first three attempts were actually on the grill as I had started prepping it and we lost power due to a hurricane, so most of the process was in the dark. I was actually pretty impressed with how it turned out except for this stickiness. And it’s something I haven’t been able to resolve even now using the oven. What am I missing?? Thanks for your help!
Hi there, Emily! Your approach to lowering temperature and extending bake was a good one. I’d push that a little farther and see if you can get closer to 210ºF on the finished loaf interior. With my bread when I have an overly gummy interior it’s usually because I didn’t bake it out fully and it could have used some more time in the oven. That said, the interior on some of these higher hydration breads will be more on the moist side instead of dry and clean, but it shouldn’t be crazy sticky or gummy. I’d first try extending the bake a little longer and if it just won’t go away do a test batch with a slightly lower hydration (say, 5%) to see if that is more to your liking. I rarely have a gummy interior even at high hydration, though!
I hope that helps, let me know what ends up working for you! Happy baking 🙂
I have a similar problem, with the added question as to why I have a large air pocket that runs across most of the top of a round loaf, instead of some parts having large, and some small holes. Overall the crumb is satisfactory. BTW, with the hard crust that forms, how can I check internal temp? Also, the oven pop seems to be irregular, with on side of the loaf rising less than the other. THANKS!
Usually single, large holes in the crumb signifies an underproofed dough. Make sure your dough has plenty of activity by the end of bulk to ensure your dough is strong enough and aerated. If you haven’t yet have a look at my Beginner’s Sourdough recipe where I have a bunch of pictures showing how the dough should look at the end of bulk.
To check the internal temp just stick the dough with a small instant read thermometer through the crust. I find the best place is right under the “ear” that forms as it’s usually a softer place and won’t be noticeable 🙂
Happy baking!
I have an electric oven and I heat it to 475, no higher. Is that okay when using your sour dough bread recipes? Do you recommend any timing adjustments?
Sure that will be fine! I’d recommend preheating your oven for a full 1 hour to 1.5 hours (so the baking stone or Dutch oven get fully heated) and you’ll likely have to extend your baking time to ensure these loaves are fully baked. It’s hard to say exactly how long, but I’m estimating at least 10 minutes. Watch the dough near the end and stop baking when they look well colored, and if you have an instant read thermometer you could always poke the loaves when you think they might be done to ensure they are around 205ºF internally.
Hope that helps, happy baking!
I ended up keeping the lid on for an extra 10 minutes, then ended with an extra 6 minutes! This is the first time I tried a higher hydration and my loaf is quite nice! Thank you, Amy
You’re very welcome glad it’s working out for you!
Hi Maurizio,
First things first – thanks for your beautiful blog and clear guidelines. I’ve used your posts to bake bread the past few times, and the loaves have turned out surprisingly well! Thank you!
I only have one question. The loaves I baked the last two times have risen beautifully, and the last two had amazing oven spring and bloom – better than ever before! However, my crumb never seems to open as much as yours. I use fresh bread flour milled at a stone mill, and I have to say that the flour is indeed great. I’ve read guidelines re: more open crumb and all advise that you need to have a higher hydration dough (81% is pretty high, isn’t it? :)) and handle the dough gently (which I do), but somehow the crumb always seems a bit tight. I’m posting photos for your reference, and was wondering if you have any advice? I bulk fermented it for about 4.5 hours total, followed by 12 hrs in the fridge. Perhaps the dough could have handled some more hours of retardation?
Here they are from the outside:
https://scontent-vie1-1.xx.fbcdn.net/hphotos-xfa1/v/t1.0-9/13076663_10154178538152704_8063964478321728780_n.jpg?oh=254836c49dafae77cf6f9ef71ad16182&oe=57A5292D
Here’s the crumb shot:
http://imgur.com/JbSwQw5
Any advice is appreciated. Thank you!
Kristina — you’re very welcome and thanks so much for the comments! Glad your bread is turning out well so far.
Your loaves look really great! You’re correct about the first two things, you dough needs to have a high-ish hydration (81% is plenty, depending on the flour) and you definitely have to handle it gently. I do notice when I get a super rise in my dough it usually means it could have proofed a little bit longer. Try extending your bulk a few more hours (while keeping everything else as consistent as possible) and see if that helps open things up more. If you notice your dough is really, really sluggish then the proof has gone a bit too far. Getting a nice and open crumb does take practice 🙂
All in all your loaves really look fantastic and very tasty — great work and keep practicing!
I also think boules are much easier to shape than batards, which are easier to shape than baguettes. I was wondering if this is a general impression, if everyone feels the same, or it’s just me?
For me, the reason boules are easier is that it’s much easier to create surface tension as the movements are simpler and symmetrical, and you can do as many tension pulls as you want. Whereas doing too many tension pulls in a batard, you risk creating an irregular seam, which compromises oven rise… and also in a baguette, it’s impossible to me to do tension pulls at all.
I’m starting to think that I shouldn’t be doing that many tension pulls in my boules to begin with, so there’s actually something wrong with my dough. Any thoughts?
I think boules are easy, but I much prefer shaping batards. I’m not sure why, but it feels more natural to me and I like the end result more (nice slices for what I make).
You want just enough tension on that boule to keep its shape, but not too tight that you press out all the gasses built up inside and definitely not so tight that the skin prevents optimal rise in the oven. It takes practice finding that balance between the two!
I’m a newbie with a couple of questions and I really want to try this recipe.
My first is about the leaven in the list of ingredients which is listed as 275grams, but in making the leaven there is 55g starter, 200g flour and 220g H2o. Wouldn’t it be 475g total?
Then, when you say “ripe” starter I’m thinking you mean the same as a “fed” starter. Is that right?
Michael, this recipe does build a larger levain than is needed in the final recipe. I don’t do this much any more, but when this post was written I did so to have some leftover to carry on my starter (or my “mother” as some call it) and I also have a little extra wiggle room built in. The extra flour/water will give you a little cushion if you’re not able to use your levain right away as there will be extra food and water for your starter to use. I hope that makes sense. Feel free to reduce the ingredients here if you keep you ongoing starter separately and don’t need that cushion (I don’t do this anymore).
When I say “ripe” I mean the starter is at its peak rise, it has almost consumed all the food (flour+water) given to it and it smells slightly vinegary, but still a tad sweet. If you do a 12 hour build or so it’ll be somewhere around 10-12 hours, essentially at the end of its feed cycle.
Let me know if you have any more questions! Check out some of my more recent post on my sourdough starter maintenance routine, I go into detail on what “ripe” or “mature” means. Happy baking!
I wholeheartedly agree, not everyone baking is doing so for the art(isan) aspect of it, but out of a necessity for life. While baking a loaf or two each week is not a necessity for me and my family, one of my motivating forces for working to push my skill in sourdough is so I can provide bread that is healthy, rather than the pre-bagged, toss-in-whatever-chemicals-needed bread you get at the store.
Just as your grandmother in Italy was making bread because there really was no choice, my grandfather in Southern Italy was doing just the same. He baked to feed not only his family, but large chunks of his community as well. There were no sick days and certainly no paid vacation holidays. If he failed to make his daily output then it may mean a small dinner for his 9 kids.
I think it’s easy for things to get so out of perspective that bread loses its moniker as the “staff of life” and can become something else entirely, but when you boil everything down bread is really just bread, something that has sustained humanity long before we had the luxury of making it as something that’s nice-to-have rather than life giving.
I’m glad you’re enjoying my site and I appreciate your comments, it’s dialogs like these that really make me sit back for a few minutes and look outside of my “bubble”. I look forward to hearing from you on other posts — regards!
what do you mean by a “ripe” starter?
Bob,
By “ripe” I mean your starter is mature and ready for use. For a liquid starter, as described in this post, signs of maturity are a slight “vinegar” smell, possibly a small “alcoholic” tone to it. You want to see bubbles on top, some expansion, and when the top pulled back a good amount of bubbles inside as well. For me, in my 76ºF kitchen, this will be anywhere from 8-12 hours after feeding.
If using a stiff starter it should have expanded significantly but there will still be a dome at top, bubbles visible at the sides, and a slight smell of vinegar.
Essentially you want your starter to have had enough time to undergo fermentation to the point where it has almost used all of the food given, but not passed this. Look for the signs I’ve described above! I hope that helps, let me know if you have more questions!
Just wanted to drop a line to let you know that you have inspired me to get back in the kitchen and start baking. Im attempting my first loaves this weekend and am enjoying the process of baking bread. Thanks for taking the time to document your baking via this blog.
This is excellent news! Baking is such a rewarding thing, I think everyone should bake their own bread right from their home.
Good luck this weekend, I’d love to hear how things turn out!
Thanks — glad I could help!
What is the weight of the batards that you put in the dutch ovens… I have been making boules forever and could not figure out how to do batards!! Silly me put them in the dutch ovens!!! Thanks
Liz,
I don’t know the exact weight of the batards, unfortunately. I basically just divide the mass in two and I try to keep them as even as possible. I have to admit, sometimes they barely fit in the dutch oven!
Hello!! its me again!!, i made this bread just today, the problem is that my bread didnt rise at all in the frigde overnight and i left it several hours outside and…nothing…nothing happened, when i baked it, my bread was flat, it didnt rise, i cooled it and sliced it, the crumb had good holes, but flat, what did i do wrong?
Laura — is your starter rising and falling predictably when feeding it the few days before baking? You’ll need your starter to be in good shape before baking so you have sufficient activity during fermentation.
You might want to try tweaking one thing at a time to try and narrow down the problem. If you’re using a lot of water (high hydration), try cutting the hydration down slightly so the dough is manageable. Make sure you have a sufficient bulk fermentation time (typically around 4 hours at 75º F or so), and your shaping is tight.
I hope these suggestions help, let me know if you have any more questions or any other clues you can give to help me diagnose!
Hi Laura, I know how you feel about your dough not rising in the fridge. I think Maurizio is right on about the starter. Yours is likely not yet strong enough, especially for a retarted proof. I had the same problem a while back. I could never get my dough to rise in the fridge. Residential fridges are actually a little too cold for this process, but if your starter is strong enough, it will work.
I don’t presume to know how much experience people have baking naturally risen breads. I don’t have all that much, and the more I read, the more I see how little experience I actually have, especially when it comes to getting that deep, golden caramelized crust. I haven’t achieved that yet.
Anyway, what is the composition of your starter? Read Maurizio’s fermentation entry, the link is in this entry, above. Rye is a great flour to use to ensure a robust starter. I just switched my white 100%er back to a 50/50 mix, dark rye and UBBF, as suggested by this entry and to my suprise, the starter was robust and cooking right out of the gate. I’m spending the next few days feeding “Beatrix” to ensure a strong starter then will bake another one of these beauties.
And, as you probably know, shaping is everything. Pretty hard with this hydration though. If you are baking a batard, try this shaping method, which I just stumbled across while trying to shape mine: Flour your bench knife and, holding it at a 45 degree angle to the dough, push it underneath the loaf. The dough will follow the knife under the loaf forming a nice tight pull and not stick to the knife.
Now it’s off to try Maurizio’s 90% hydration loaf!
Great tips, Dave!
10:00am – Turn Set 1
10:30pm – Turn Set 2
11:00pm – Turn Set 3
11:30pm – Turn Set 4
11:30pm – 2:00pm – Rest on counter untouched
Typo? s/b 10:30am?
“Note that a “set” here is 4 stretch and folds for me. I reach under my dough, pull up, and fold over the other side — I do this 4 times for one set.” After you pulled the dough up and over, did you rotate the bowl for the remaining three stretches? So each turn set consists of pulling the dough up and over four times?
Yes that’s a typo, will have to fix that! Correct, each time I lift under and stretch the dough over I rotate the container 90 degrees. I do this 4 times.
Great Maurizio. Thanks for the clarification.
Second loaf, better than the first loaf. Still did not get the oven spring I was hoping for, but then I read your fermentation entry and saw that you spent two weeks building your starter before a bake! That may have a little to do with your results. I used to feed my starter APF and whole rye, but with continual reading, went with an all BF starter. Well, I just switched back to your 50/50 formula. I think the results will be quite different.
Still cannot get that deep golden brown color. But, this bread is delicious. The crumb is loaded with holes, and is velvety soft and creamy. The overnight retarded proof gives it just the right amount of tang.
This loaf was in the shape of a batard and while shaping, I discovered a way to get a tension pull by using my pastry knife. I floured the blade and by pushing the blade at a 45 degree angle under the dough, I was able to get a nice tension pull all the way around. Maybe I “discovered” what others already knew, but for me, it was a true discovery.
I also had to bake this without the benefit of a cloche because it was over 10″ long. So I put a pan of water in the oven, sprayed the loaf, and baked for 20 minutes at 500 degrees and 30 minutes at 450.
I think you can build up the vigor of your starter in really just a few days before baking — this is what I do typically now. 3 or so days before I’ll ramp up to 3 smaller feedings per day, this helps get your starter into high activity mode.
Sounds like that tension building method is a good one! Whatever works, I think each baker probably has a slightly different method. I just love stumbling on discoveries like this, isn’t it great? It always makes me step back happy thinking “why didn’t I do this before!?”
Sometimes my batards really push the Dutch oven and I barely get them in there!
I’m glad to hear you’re getting really great results now. This is my go-to bread and I make it every chance I get, I just love it.
This has become my goto bread as well. Like you point out, it has that perfect balance of ultra soft crumb and slight tang. And I love cutting into it for the first time and inspecting the crumb. High hydration is the way to go if you like this type of texture and crumb. Does take skill though working with it and knowing what to expect when you turn it out onto the counter for shaping.
So I was roaming around your blog and came across you 90% hydration loaf…
Good luck on the 90% loaf — let me know how it works out!
Had a disheartening experience with the dough. I did eight s&fs and the dough seemed to be coming together. On about the sixth turn, the first of the four folds the dough was fairly slack, but the other three the dough felt more elastic and had more body. After the eighth turn, I decided to do a few slap and folds. Bad move as the dough almost instantly turned into an extremely slack, sticky mess. The only thing I can think of is that the sharpness of the whole wheat flour cut the gluten to shreds. It was as if I was just starting the dough from the beginning. I was very disappointed. It happened almost instantly. Would you have any thoughts on what may have happened?
But, I put the dough back in the bowl, did another turn and let it rise for two hours. Then I shaped it as best I could. Couldn’t really get a decent tension pull but forged ahead anyway. After baking the next day, the loaf was quite servicable. Nothing like your beauty though. Mine was much denser, not as high, but full of holes. Not much oven spring. But I could see the seeds of a high hydration dough, as in lots of holes, much more than with a lower hydration dough.
I used KA UAPF and Bob’s Red Mill Whole Wheat. I also used a 75% hydration starter. It seems to be much stronger than my 100% starter.
Another observation is that you can definitely see the whole wheat flour in my bread as the loaf has a light brown tint to it. Yours is almost pure white. Did you use stone ground whole wheat and would that be why there is no brownish tint to your bread?
You performed 8 sets of stretch and folds? Where each set has several stretches? How long did your bulk go for? I can think of two things:
1. You did overwork the dough and the gluten network was destroyed by overworking (and the WW didn’t help as you mentioned)
2. Perhaps your bulk went too far? If fermentation goes too far you will end up with a sticky mess that doesn’t hold shape at all
After your bench rest, did the dough spread out on the counter and fail to hold shape? This could be another indicator fermentation/gluten development went too far. I would guess this also contributed to lack of oven spring: no strength left in the dough to trap gasses and rise high.
I’ve definitely noticed that different flours contribute differently to the overall color of the resulting loaf. My loaves sometimes do take on a more white tint to them, but usually they are slightly brown, especially since I have a slightly higher percentage of WW than other sourdough recipes. So the difference between our flours could definitely be the cause here!
I did eight turns, each of which consisted of four folds, meaning I pulled the dough up and over, turned the bowl a quarter turn, pulled the dough up and over, turned the bowl a quarter turn, pulled the dough up and over, and finally turned the bowl a quarter turn, pulled the dough up and over. Is this what you mean by a turn set?
You say that if I get to the last turn and I’m really not able to easily grab the dough to turn it because it’s holding its strength so much it is basically in a ball, then my dough is probably strong enough and I can stop doing turns. Well, I never got to that point with the turns, or at least I think I didn’t. That’s what led me to the slap and folds. But in retrospect, I think I may have actually been where I wanted to be with the dough and not known it.
After I got done destroying my dough, I let it rest for two hours.
And yes, the dough flowed like a lava river after the rest. The thing about going too far with fermentation, I suppose knowing where that threshold is comes with experience. How else would you know when that’s about to occur?
Even though I had all these problems with the dough, the resulting loaf was still very good and the crumb was the airiest I have ever baked. Creamy and very tasty. Didn’t look quite like yours, but I can see that the next loaf will be better.
Yes that’s what I meant by a turn set: 4 stretch and folds basically, turning the dough between grabbing down and folding over.
Deciding when to divide the dough after bulk fermentation is a difficult thing. It doesn’t come with experience, and you can use subtle cues to help. Bubbles along the sides, increased volume, the dough will stay together more and lift easier from the sides of the container.
That’s great then – progress is always a good thing! Keep practicing and things can only get better.
In my enthusiasm I forgot to say that the only problem- if you can call it that- was in the shaping. The dough just wouldn’t stay where I put and it spread in every direction while I was preparing the banneton. I guess it’s to be expected from such a hydrated dough, and baking in the pot definitely makes this easier.
Awesome news! You’re welcome, I’m glad I could guide you along your way. The results are so worth the tiny bit of extra effort required — you’ll be eating sandwiches, eggs, and all things bread for a while.
It’s true, with higher hydration like this the dough does tend to spread around more. The increased hydration slackens the dough causing it to spread. When I proof these in my banneton I usually have a cloth in there to hold the dough in shape while proofing. Not necessary, but it might be depending on the size of your baskets.
Have fun!
Hello again. Just wanted to let you know about the second loaf I baked from the same batch I mixed 5 days ago. After baking the first one 24 hours after the bulk rise- as per your instructions, I had meant to bake the second one the day after. Because of a busy weekend, I only ended baking today- meaning that the remaining dough had sat in the fridge for almost five days. The resulting loaf was surprising in a very good way. Definitely more sour, but very flavourful, considerably more than the first. The crust was crunchier too, making me think that the long retardation had intensified the caramelisation. 5 days is probably too long, but next time I’ll try a 48-72 hour retardation to intensify the flavour. Thank you once again for the recipe & inspiration.
Wow 5 days, now that’s a long proof! I’ve left dough up to 3 days and had excellent results as well. Typically the more time you give your dough the more complex and flavorful the result (to a limit, of course). Naturally the longer fermentation time will increase the sourness, but sometimes that can lead to unexpected and favorable results.
I’m glad to hear my guide here has helped out, I hope to hear how future bakes go — happy baking!
Thank YOU! I just cut into the first loaf: not too sour, creamy crumb and a lovely crispy crust. The air holes may be a tad smaller than in your pictures, but the loaf is very airy and totally delicious! I couldn’t even wait for it to cool properly before I cut into it; you are absolutely right, it makes a heavenly sandwich! I am leaving the rest of the dough to bake tomorrow or Sunday- can’t wait!
Wonderful recipe, thanks again.
Maria
Hello. I am baking your recipe tomorrow! I have been experimenting with increasing hydration so I’m very keen to give this a try. Your photos are absolutely mouthwatering! One quick question, if you don’t mind: is the recipe for levain correct? Your instructions make up 475g of levain and you only use 275g in the final dough. Is that intentional?
Many thanks
Maria
Thank you! I do actually make a bit more levain than is required. Feel free to adjust the levain build to whatever works for the recipe so you have just enough to do your mix. Just make sure you save off a part of your starter so you can keep that going!
I’d love to hear how your loaf turns out, good luck and happy baking!
Correct, that’s a total of 30 minutes covered, and then an additional ~30 minutes uncovered until done. Keep an eye when you get close to the end of the last 30 minutes, you might need to go a little less or a little more, depending on how you like it. Thanks for the comments and happy baking!
Did you mean to write that you drop the temperature to 450 after the first 20 min and cooked for 10 min with the lid still on? If not why would you just not write that you cooked with the lid on for 30 min at 500 and then, took the lid off and cooked at 450?
I’ve been using your recipe and had excellent results. Baking a loaf to your spec with the Sangre re Cristo flour having recently moved to Abq from Australia. Looking forward to seeing how it turns out.
Yes you’re right, that’s a mistake in my writeup — fixed! Lower the heat to 450ºF and cook for 10 minutes after the initial 20 at 500ºF.
Wow you’re here in ABQ? That’s awesome, a local reader! Welcome to the Land of Enchantment. I’ve really taken to the Sangre de Cristo flour, it has some pretty incredible baking qualities and is local to boot. I’d love to hear what you think about it!
Fantastic blog and illustration of your experiments, thanks so much for sharing! I’m trying out the High(er) recipe right now, going to bake it off this evening. Quick questions, if I might:
1. Seems to be some debate with Tartine loaves on the need to pre-heat the dutch oven/combo cookers vs loading the dough into a room temp combo cooker — have you tried baking any of these loaves without the 1 hr pre-heat, perhaps extending the bake time a little bit?
2. What is the function of the baking stone in your method — regulate the oven temperature a bit better?
Thanks again, really love your site!
Drew,
Thanks I really appreciate that! No problem:
1. I have not tried baking without the preheat of the combo cooker. I’ve always had excellent results with it preheating but I should try that experiment one day. I do vaguely remember Chad mentioning a preheat in his books, but I’m not 100% sure.
2. Yes, the baking stone helps to regulate the baking temperature in the oven and creates an evenly hot surface along the bottom that is nice and warm. Mine is fairly thin and I actually hope to get thicker “oven bricks” in the future to retain even more heat. My understanding is this baking stone helps emulate professional baking ovens or even a wood fired hearth.
I’d love to hear how the recipe works out for you — good luck and happy baking!
Thanks for the quick reply. I have 4 loaves in the fridge, so I am thinking of trying out one of each method tonight — pre-heated combo cooker and room temp combo cooker — and see if I can discern a difference.
Do you bake your batard shaped loaves in the combo cooker as well? I am still working on my shaping here, but the batard proofing baskets I have seem too long (~13″) to produce a loaf that fits in a combo cooker cleanly. Instead, I’ve been using a baking steel for these longer loaves. High recommend a steel if you are looking to invest in another baking stone — huge difference/improvement, especially for pizzas.
Thanks again!
Did you notice any difference between the two baking methods?
I do bake my batards in the combo cooker. You’re right though, they are pushing the maximum size for that pan. My batard bannetons are pretty large as well and the dough probably takes up 1/2 of the basket (in fact I’ve been contemplating proofing two loaves in one banneton, side by side…). I’ve come very close to it not fitting in the pan in the morning (!) but I always seem to divide it just right.
Thanks for the “steel” recommendation. I’m going to look into that!
Are you still feeding your 40g starter with 40g(50/50 AP/Rye) and 40g water?
Elizabeth,
I keep my main starter on that feeding regiment, yes. I have also been experimenting with another starter that I’m feeding 50g WW, 50g APW, and 100g H2O. Honestly I haven’t seen that much of a difference between the two so I haven’t mentioned much yet. One thing I do notice, however, is that since I feed with more flour (100g total) I only have to feed twice a day instead of three when ramping up for a bake. I’m going to keep experimenting with this “test starter” and see what flavors develop when using instead of the rye. I hope to have a post comparing the two!
Thank you! I’ve seen mixed results so far with my WW starter. Like you said, sometimes it’s extremely vigorous, other times it’s on the weak side. I keep things pretty consistent between feedings so it’s unclear yet what this cause is. I’ve been thinking about going back to my rye starter full-time as I do also enjoy the slight rye flavor in my breads, plus it’s just a very reliable and strong starter.
I’ll hopefully have an entry up here at some point comparing the two starters but only after I have some significant findings. It’s fun to experiment with the two but I just haven’t seen that much to report on as of yet.
Baking has an unending number of variables and methods to experiment, this is why I love it 🙂
That’s funny, I’ve recently done the same thing. I think with pure rye flour things get out of control and fermentation happens too rapidly for me to keep up. This mix slows things down a little but and gets the culture used to the two types of flour. Glad to hear yours is doing so well! These experiments only help us get better 🙂
Ahh if only I had the time to bake that many loaves, maybe one day. I probably bake 2-3x as many loaves as make it to this site as many are “experiments” and don’t turn out so great. But yes, that’s the fun part about this: we will likely never achieve that perfect loaf as it’s always just out of our grasp… But the greatest thing about baking, I believe, is that constant search! … and the fact that they always at least taste good, and they always get eaten 🙂
Great post, amazing pics.
I got a hold on some local flour here in D.C. but I’m a bit reluctant to try it. I’m too afraid. 🙁
Thanks! I know, I know, it is scary diving into that unknown, especially since making good artisan bread takes the better part of two days. It’s worth it though if the results are better than previous!
I say dive in!
Chris,
Thanks so much! It’s great to get feedback from an accomplished baker for sure. Thanks for stopping by and happy baking!
Corey,
Thanks!
1. Yes, I do preheat the combo cooker with the baking stone. I place the cooker right on top of the stone at the bottom 1/3 of my oven and preheat both for a full 1 hour before baking.
2. Yes, I go straight from the fridge into the combo cooker. I’ve tried proofing for an hour or so like you say, but I have not noticed any improvement doing that.
3. My elevation is close to 5000 ft above sea level. With more experience I think I’ve come to the conclusion that the actual temperature doesn’t matter so much as the actual baking time. I’d recommend going with my latest baking temps & times in this post (High(er) Hydration Sourdough) and bake the last part, the 30 mins uncovered, until the bread looks done to you. That is a somewhat personal preference on your part — do you like it baked dark like the way I have it, or a little less dark? Up to you!
I’d love to hear how things turn out. Let me know if you have any more questions and happy baking!
This is really inspiring! I am following your baking journal for quite some time now and, I have already started experimenting with my first loafs! Thank you for all the ideas and the very detailed instructions, I have found them to be very helpful.
And if I may make a request… I would like to see a recipe with higher percentage of whole wheat flour 🙂
Keep up the impressive work!
Thanks, I’m really glad my posts have been helping. I do plan on doing a few posts coming up on other percentages of whole wheat and other grains!
Thanks again and happy baking!