

My wife and I were out at dinner with a few friends the other night, and we got to talking about local co-op produce, cooking with more natural ingredients, and, of course, baking bread with only the simplest ingredients. Just four little elements come together to make something more significant, something alive. One of our friends said: “I want to make bread for the sustainability aspect of it, not so much as to make it a work of art or something to look at in wonder.” Sure that’s true, at the heart of its bread is sustenance, something you eat to keep alive and keep you going. But isn’t there more to a craft than just simply producing something edible?
I thought about his words for a while and wondered to myself: why do I keep testing, experimenting, tinkering, and trying, with my bread? Isn’t it good enough to provide healthy nourishment? In a word, yes, it is good enough. But if it’s a real craft, then the crafter is always trying to do better, always trying to transform the simple inputs into something greater.
I’ve set this goal for a particular taste for my bread and a certain look when I serve it on the table, but I also want to use healthy, local ingredients. In the past few posts, I’ve been talking about a locally grown & milled white flour in north Albuquerque, New Mexico, and I decided to order a 50-pound bag from my local co-op. I think they were getting annoyed with me anyway… I kept emptying their small flour canister each week.
The flour is spectacular. I am not able to determine the actual protein percentage but it’s enough to hold up to this 81% hydration recipe, and I think I can still even push it a bit farther (though, not just for the sake of it, but because finding the right hydration results in the best bread). The taste though. The crumb comes out so tender and light, it’s the best I’ve had outside of Tartine Bakery in San Francisco.
Let’s get on with this week’s bake I have a few small changes here, and there and they have helped me improve my bread for the better. In continuation with the last entry, I wanted to try a high(er) hydration sourdough bread, bumping it up by 1%. Small increments, right?
Prepare the leaven – 10:00 p.m.
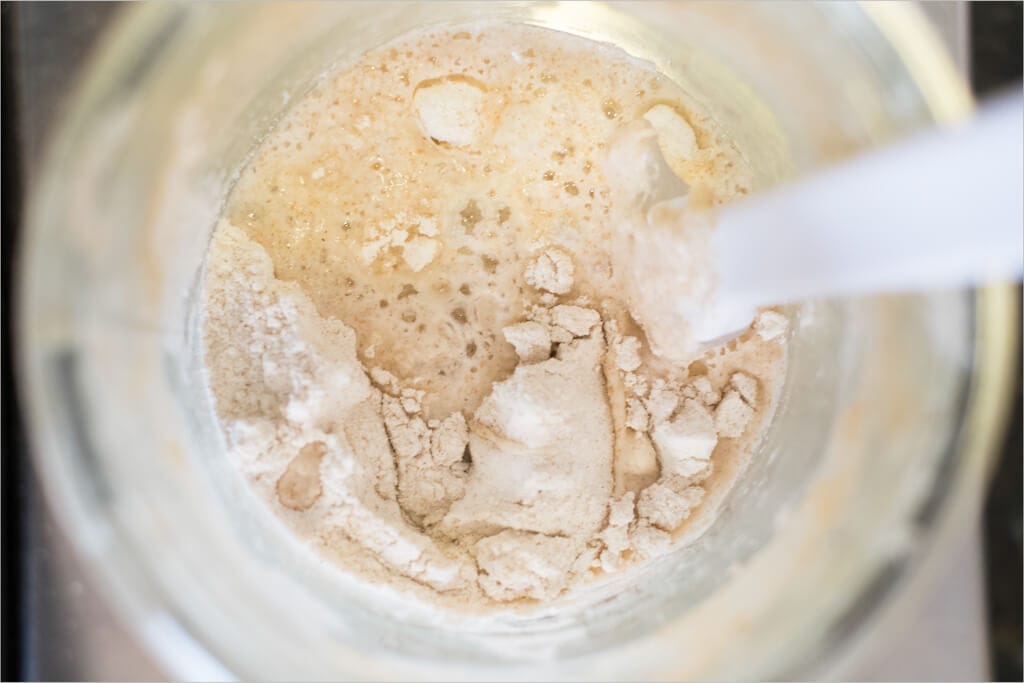
My typical 100% whole wheat leaven, prepared the night before:
- 34g ripe starter
- 120g whole wheat flour
- 132g
After mixing the above in a glass container, cover and set in a slightly warm area in your kitchen overnight.
Rest up tonight because tomorrow we start the baking!
Mix the flour and water, autolyse – 8:30 a.m.
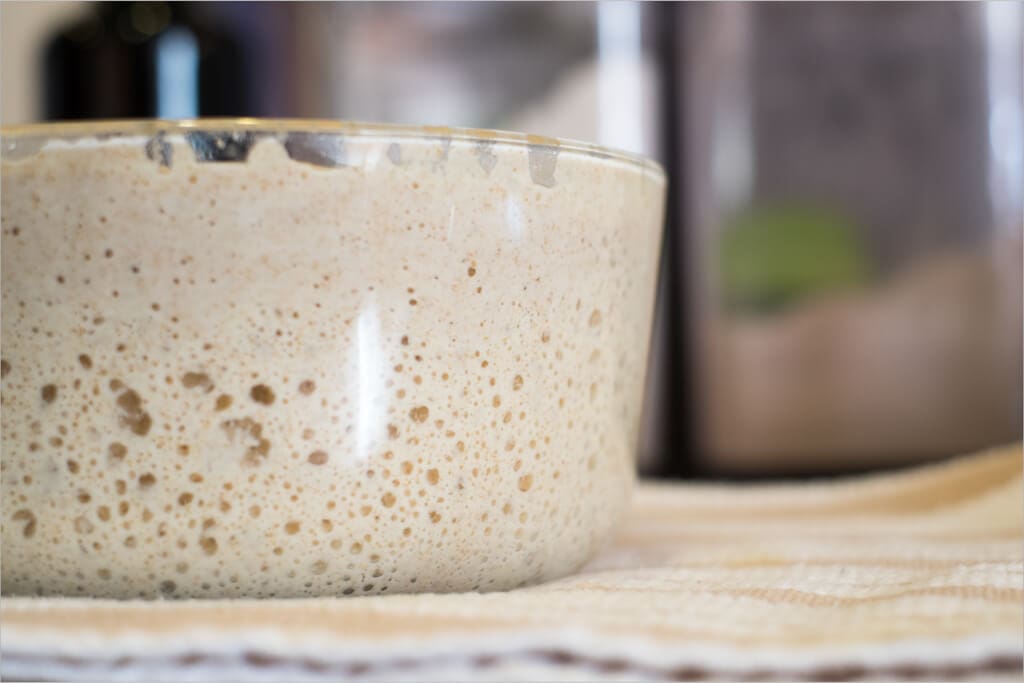
I think my levain has adapted to these cooler temperatures at night; it indeed was ready to go at 8:30 a.m. Lots of activity throughout and a slight smell of sour in the morning.
Gather up your ingredients and get ready to get your hands dirty.
Ingredients:
| Weight | Ingredient | Baker’s Percentage |
|---|---|---|
| 275g | Levain | 27.5% |
| 800g | All-purpose flour (Sangre de Cristo white flour) | 80% |
| 200g | Whole Wheat Flour (Bob’s Red Mill) | 20% |
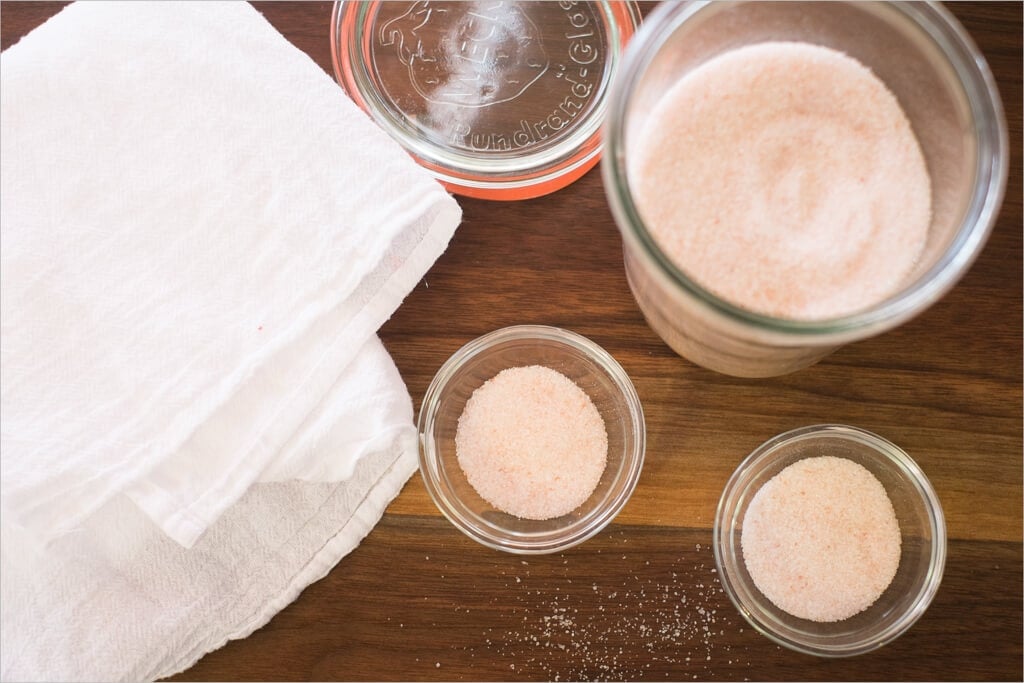
| 20g | Salt | 2% |
| 810g | Water | 81% |
Method:
- Add 275g of the prepared leaven (you might have a little leftover) to a large mixing bowl
- Pour in the 760g water and mix until you completely dissolve the levain
- Add 800g white flour and 200g whole wheat flour and mix with your hands until incorporated
- Cover your bowl and let autolyse for 40 minutes (see my guide to the autolyse technique for more information)
- After 40 minutes add 20g salt and slowly pour the remaining 50g water on top. Squeeze & mix until incorporated
- Mix a bit longer until the mass becomes a bit “sticky.”
- Transfer to your bulk fermentation container
| Final dough temperature: | 78°F (25°C) |
I’ve started to take note of not only the final dough temperature after mixing but also the ambient temperature. This will hopefully help you adjust your timing based on your ingredient and ambient temperatures in your kitchen.
Bulk Fermentation – 9:30 a.m.
I’ve been having issues recently with a crumb that has been a little on the dense side for my liking. I’ve done a few bakes in-between my last entry and this one to try to figure out what’s been happening and, after doing a little reading and chatting with fellow bakers, have discovered one of the causes. Thanks to some discussion with Francis over at the excellent Tartine Bread Experiment blog, I’ve concluded that I’ve merely been overworking my dough.
More stretch and folds during bulk fermentation does not equal a more open crumb.
You really can’t rely on the “6-turns-and-it’s-good-to-go” approach for bulk fermentation. You need to read the strength of the dough as it’s developing and stop the turns once it’s reached optimal strength more turns does not mean a more open crumb. Now, there are a lot of factors that go into this, but if you’ve been following along with me through these posts, try it out for yourself on the next bake and see if your crumb opens up a bit more:
When doing the turns for a set, if you get to the last turn and you’re not able to easily grab the dough to turn due to its strength, you can stop doing turns and let your dough rest for the remainder of the bulk fermentation.
- 10:00 a.m. – Turn Set 1
- 10:30 a.m. – Turn Set 2
- 11:00 a.m. – Turn Set 3
- 11:30 a.m. – Turn Set 4
- 11:30 a.m. – 2:00 p.m. – Rest on counter untouched
Note that a “set” here is four stretch and folds for me. I reach under my dough, pull up, and fold over the other side — I do this four times for one set.
For my dough and my temperatures I only had to do four sets of turns, with a few hours of rest afterward.
By 2:00 p.m. the dough had risen almost to the top of my bowl and was ready to be shaped (about 30% rise). It should be jiggly and fluffy but don’t push the bulk fermentation too far, or you mostly end up with one massive bowl of levain, and it won’t be usable. Trust me; I have done this a few more times than I’d like to admit.
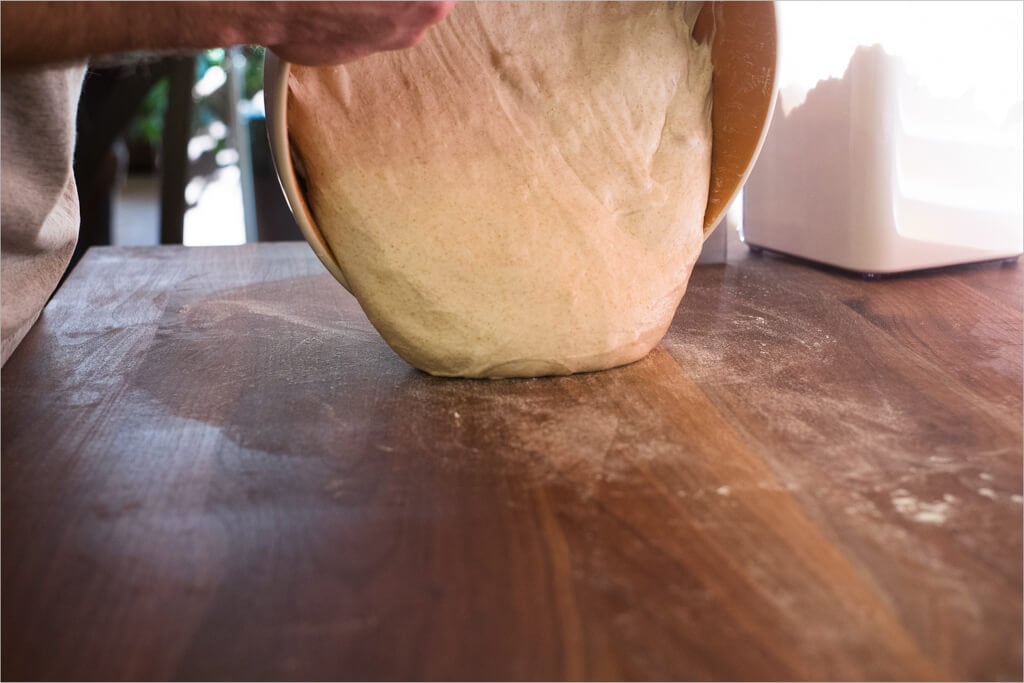
Pre-shape – 2:05 p.m.
Take the dough out of the container onto your work surface and sprinkle some flour on top before dividing. Divide the mass into two halves and lightly spin each half with your dough knife in one hand and your other hand. Let this pre-shape rest for 30 minutes.
Lightly dust your two linen-lined bowls with white rice flour.
Shape – 2:35 p.m.
For this session, I decided to shape one boule and one batard. For me, it’s much easier to shape the boule (but it’s not my preferred shape), and I wanted to ensure I had one shaped each way to test both.
Proof – 2:45 p.m.
After shaping, gently place the dough into their baskets and the fridge for an overnight proof.
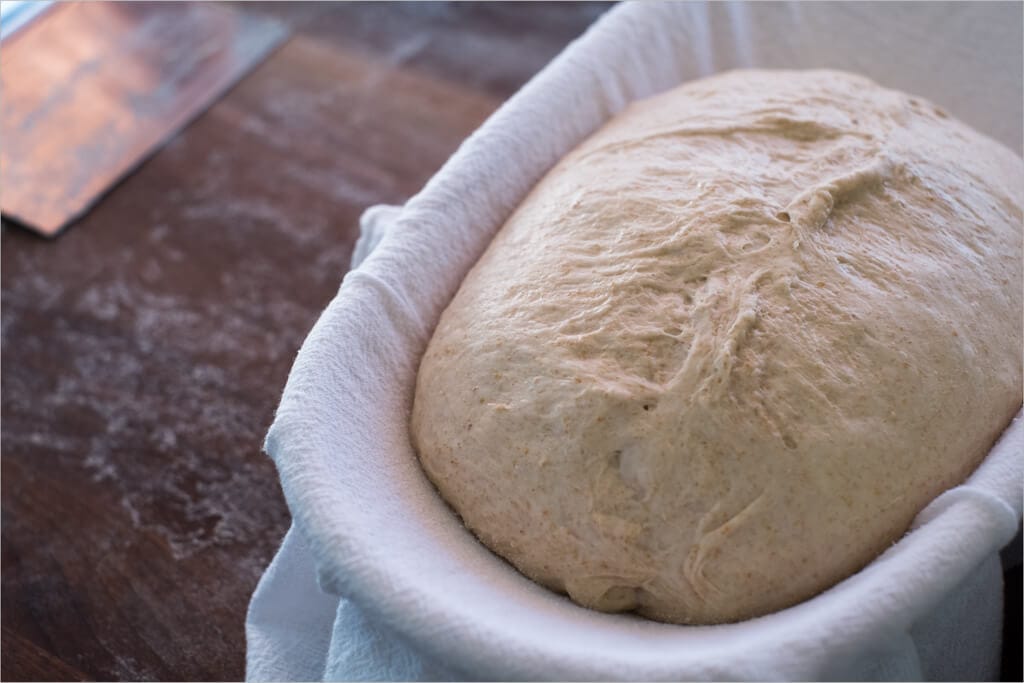
Score + Bake – 7:45 a.m. (the next day)
I baked these loaves in my oven following my guide to baking with a Dutch oven.
Place your combo cooker (I place the shallow side up on the left, and the deep side down on the right) in your oven at the bottom 1/3 position and turn it on to 450°F (232°C) to preheat.
I baked the dough straight from the fridge; this helps prevent spreading in the oven.
After one hour, take one of your loaves out of the fridge and cut a piece of parchment paper to place on top of the basket containing the dough. Take your peel and then put it on top of those two and quickly invert it, so the dough is now resting on the parchment paper and the peel.
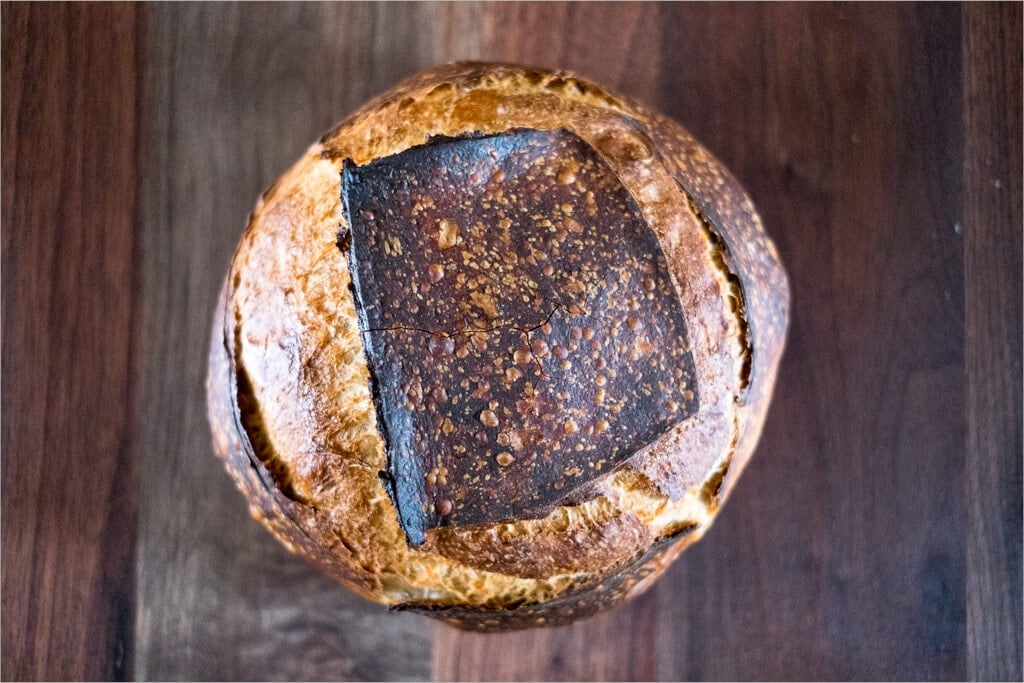
Get your razor blade out and score the top of the loaf to allow the bread to expand while rising in the oven. For the batard, I do a crescent shape along the center, and for the boule, I did a square-top as described in the Tartine books.
Place the dough into the combo cooker and bake covered for 20 minutes. After 20 minutes, take the lid off and continue to bake for an additional 35 minutes, until done.
Conclusion
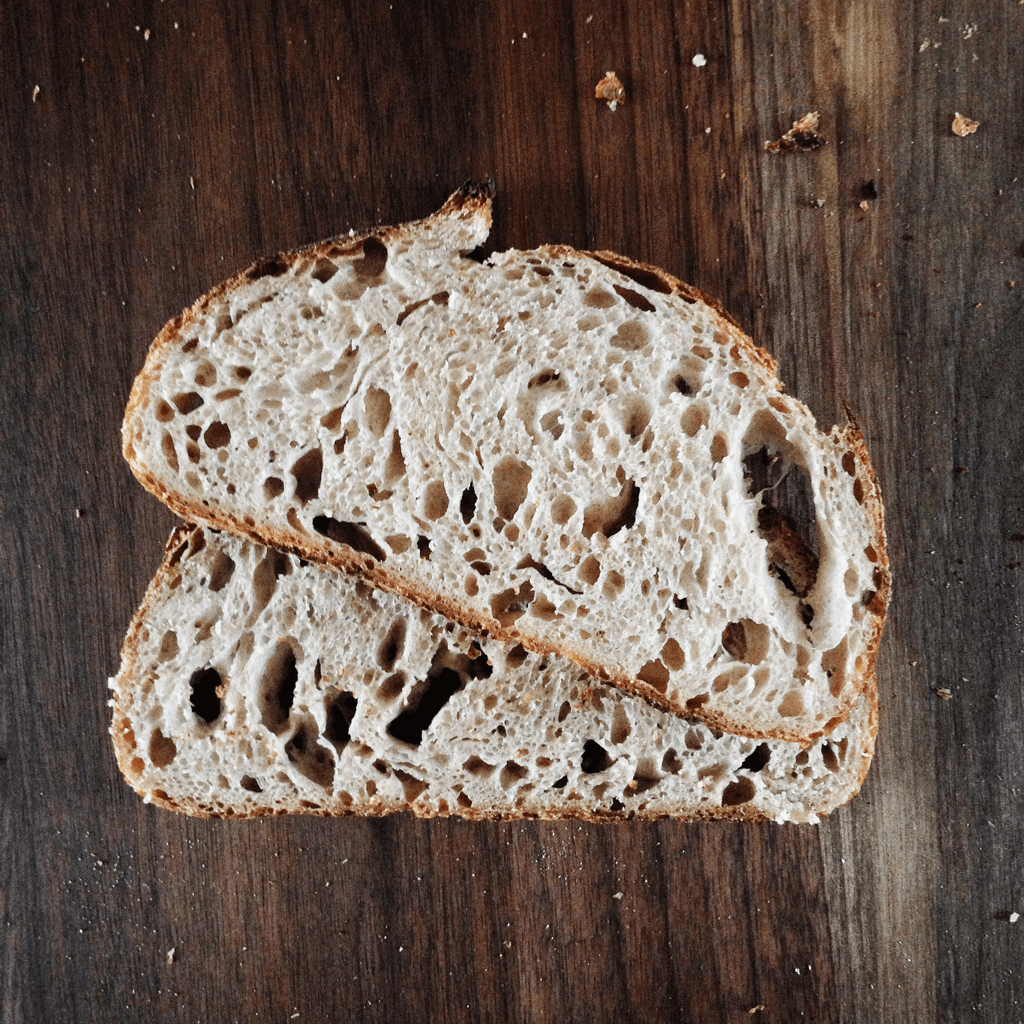
I might venture to say these are the best set of loaves I’ve ever made, even better than the loaf in my fermentation post. The overall shape of the two is just how I had imagined, and the crumb is so very tender. The local Sangre de Cristo flour is something special; I am thrilled to have this resource near me.
Crust
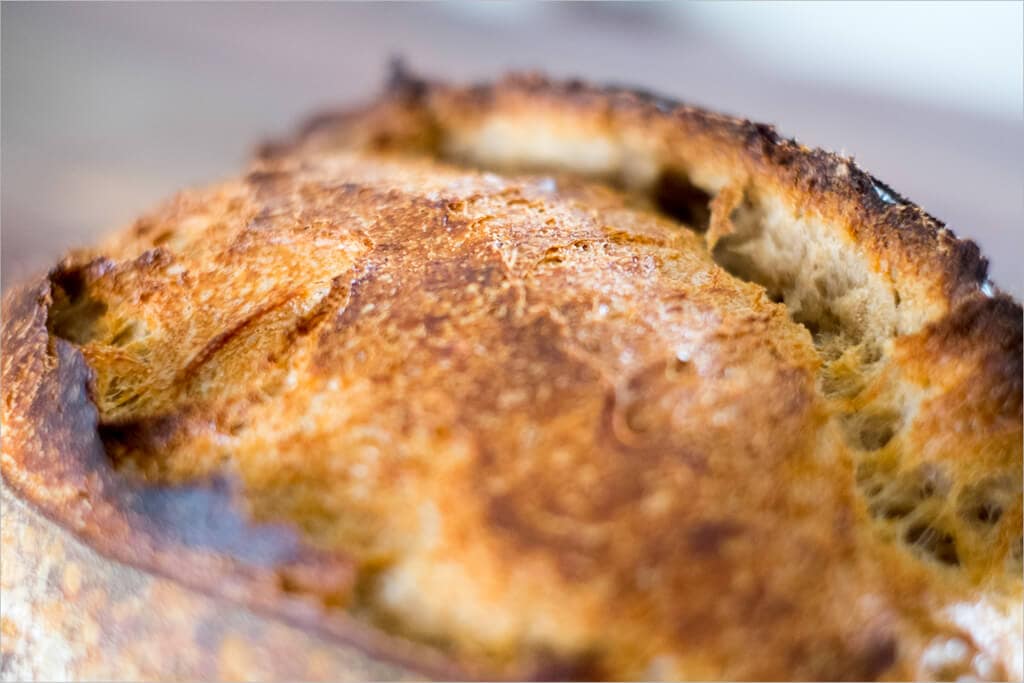
The crust was colored so nicely and was stunningly thin. Cutting this bread was very easy as the knife just slid right through.
Crumb
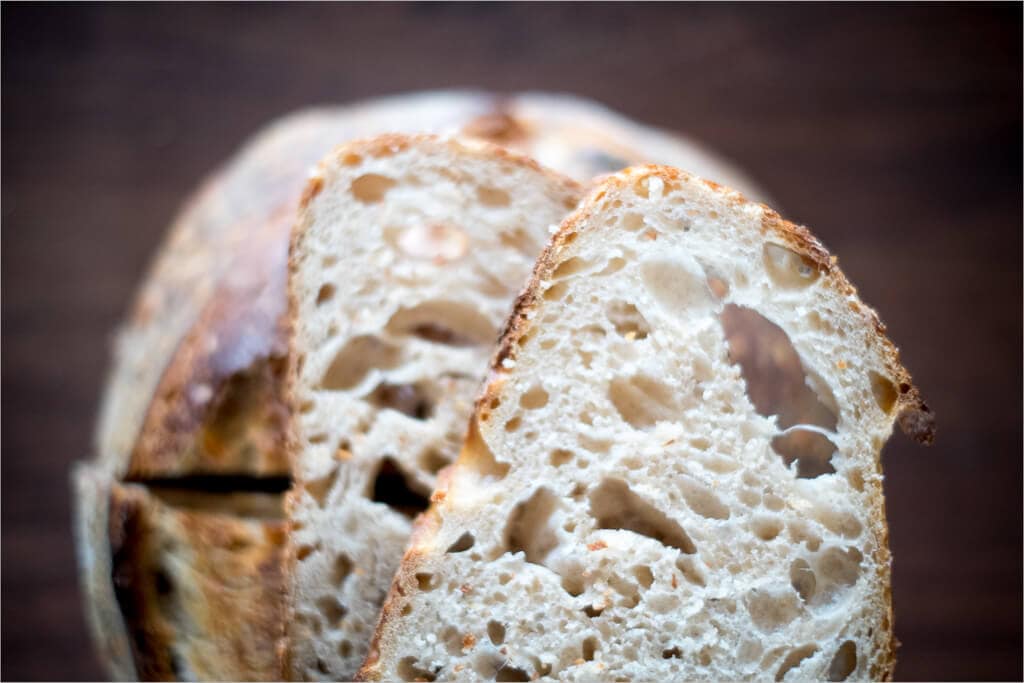
Finally, my open crumb has returned. This loaf was so light and airy that any more openness and it might start dropping sandwich ingredients. I’m happy here and will continue to work on evening things out, which is the ultimate goal.
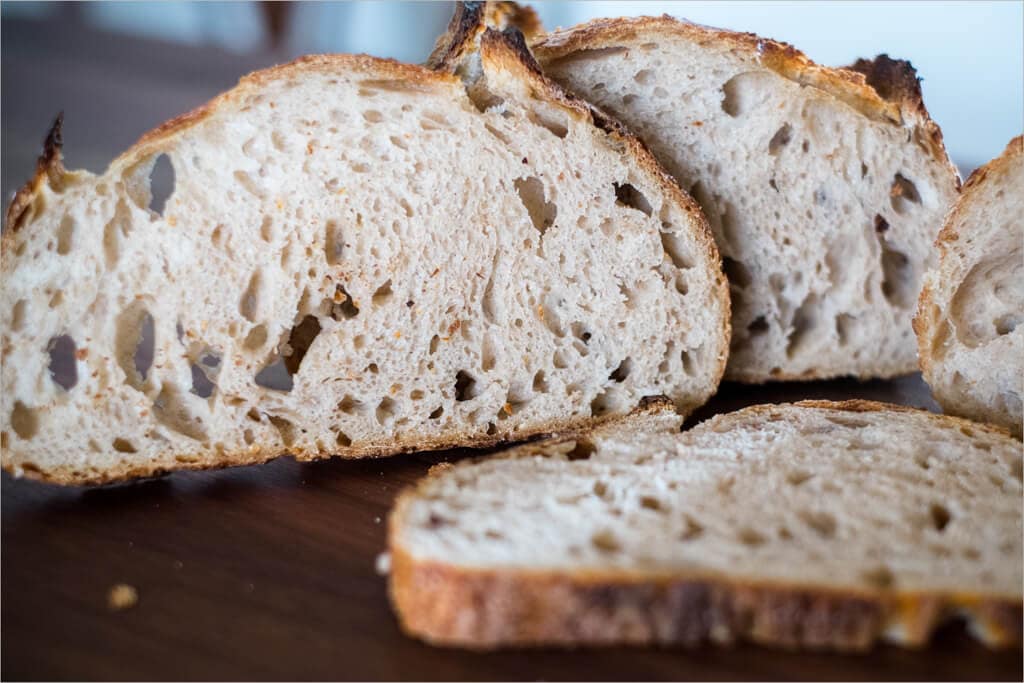
Taste
Tender, moist, custardy, slightly sour, very complex. As I mentioned, this is some of the best white flour I’ve tasted, and I’m going to be sticking with it as long as I can get a sufficient supply. These loaves are not going to last very long.
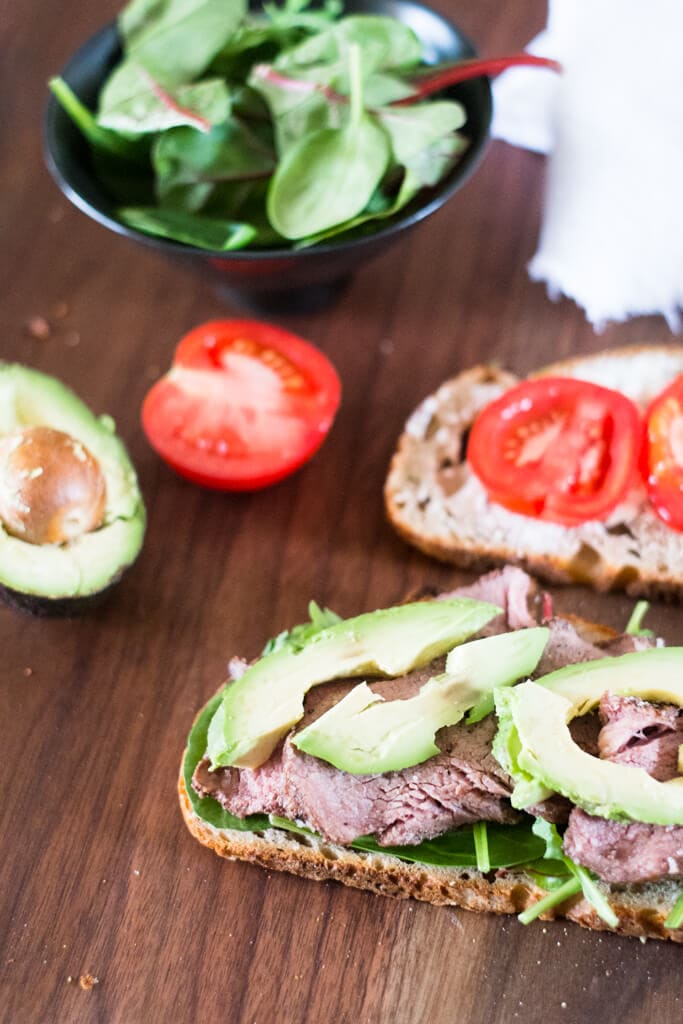
And with bread like this, I couldn’t help myself; I had to make a “whatever I have in the kitchen that sounds good” sandwich. I tossed on some local goat cheese, 1/2 a ripe tomato, chard & arugula, roast beef, and sliced avocado. The moist and light crumb of this bread, combined with the slight hint of sourness, really stood up well to the roast beef.
Buon appetito!
If you use this recipe, tag @maurizio on Instagram so I can take a look!


160 Comments
Would this recipe work with sprouted spelt?
hello! why do you determine hydration percentages different in this recipe compared to your best sour dough recipe, in this one you don't include levain while determining 81 % hydration, in your best sourdough recipe, you include the flour and water in the levain to claim 85 % hydration, could you explain? Thank you so much from mexico
Hey Maria! This is a very, very old recipe (10 yrs or so) and I need to update it. More recent recipes are more correct in this regard!
So glad it works well for ya!!
Hello, I read through the comments trying to see if others had this problem, but I’m running out of time, so my apologies is this is redundant. I am in the middle of making this and I actually cut the bulk fermentation phase short by about 45 mins because the dough was busting out of my container. Because of this, there were many large surface bubbles that made the shaping a bit tougher (while trying not to de-gas the dough much). My questions is, if you have a very active dough, A) how do you know when to cut the bulk fermentation short and B) should I have de-gassed it a bit to get a more uniformed shape? I now worry that it’s going to over-proof in my fridge tonight.. time will tell..
Yes, I would have degassed it a bit if it's a bit out of control like that. Excessive gas production in the dough can lead to a weaker dough.
The best way is to ensure you hit the proper final dough temp so the dough doesn't ferment too quickly and "run away" on you!
https://www.theperfectloaf.com/the-importance-of-dough-temperature-in-baking/
Hi, where do you source the Sange de Cristo flour from? I live in ABQ and couldn’t find anything on the internet. Thanks!
It's been so long since I've used this flour and can no longer find it 🙁
Can I use this recipe with your Hayden mills flour blend? I need a high hydration loaf. I’m at 4800 feet altitude in Montana.
Yes!
If i wanted to throw this in a loaf pan. How would i go about it?? Apart from doing an envelope fold shaping, would i still need to cold ferment in the fridge?? Or should I let it rise in the loaf pan for an hour or so? Maybe less?
You can do either, Jose!
Hello, I’m wondering if I can make it in a day. I’m vacationing in a chalet up north and I would like to eat it for supper. So I started my levain last night, started the mix this morning and I’ve read (on someaone else’s blog) that after the bulk fermentation and shaping, the loaf can go in the freezer for 1 hour while the oven heats then cook it as the recipe. I know, you might fall off your chair in reading this but just wondering.
Let the dough proof on the counter for 2 to 4 hours until it’s ready (it passes the dough poke test).
Hi! Wondering if it’s possible to half the recipe and only make one loaf? I assume that’s fine but just verifying
Yup, just fine to do so.
Wondering if it would be OK to dissolve the salt in the 50g of water and then add it into the initial dough?
Yes, that will work Lizabeth!
I have been making this higher hydration recipe for a couple of months now and I absolutely love it! Thank-you for it!
So happy to hear that, Lizabeth!
What’s the highest hydration bread you’ve made? I just made an 83% hydration batch using a mix of King Arthur’s hi gluten and bread flours and I’m trying to figure out how much higher I can take it before it turns to mush. 😁
It’s all relative to the flour you’re using! 100% whole wheat might be near 100% and feel like 70% with white flour. So it’s all about the flour!
I am in search of a way to get a more tender crumb so I want to try this. I just want to let you know that your beginner sourdough recipe has helped me so much and I have referred so many friends to that post when they are interested in making sourdough. Thanks for sharing your skills! Lately I have been experimenting with higher hydration.
I am wondering, would you suggest I use King Arthur all-purpose or bread flour since I can’t get the Sangre de Cristo?
Thanks!
So glad to hear that, Patrycia! I’d go with KA Bread Flour for that flour, especially at high hydration. Happy baking!
Hello Maurizio!
I was wondering why you included the levain during the autolyse? Typically with higher hydration doughs you suggest not to. Was it that specific type of flour you used for the recipe?
Thanks!
Bill
Hey, Bill! Great question. The reason: I based this post on Tartine-style bread and they call for adding the levain to the autolyse. These days, I don’t do that unless I need to (as I discuss on my guide to the autolyse technique).
I love the taste of this bread, but I am struggling getting a nice open crumb (and better looking) due to difficulty in the turn/folds and the shaping. I’ve made this twice now and both times I have the center of the dough tear open during turn/folds which exposes a sticky and wet dough. Any built strength falls “open”. I extended the amount of turn folds to 6 the second time I made it and had a slightly stronger dough for shaping but not by much. When I dump the dough it spreads like crazy. Preshaping/shaping I am using a lot of flour (King Arthur Unbleaches AP) to keep the skin from tearing and making the inside exposed again which causes difficulties making it tight enough to shape well.
What am I doing wrong? Second time I decreased the hydration by ~10g. I do live in a higher humidity area. I have never had this issue with other higher hydration doughs so I’m at a loss. Thanks for the help.
I tried this a third time and it was the charm. I only added an extra 30g of water. And folded 5 times instead of 4. I felt after 4 I just could use a little extra strength. Paid off. I baked three beautiful loaves. Very large, rose beautifully and taste amazing!
Thanks so much for reporting back, Jaq! It sounds like you made the right modifications. I would have said the dough was a little under strengthened and/or weak and needed either a reduction in hydration or increased kneading (or stretch and folds during bulk fermentation).
I will say I have tried again at the regular extra water but after letting it set for the autolyze I go ahead and split it, then laminate it, autolyze and hour, then the folds. It has built amazing strength to the dough but keeps amazing open crumb. Maybe a suggestion for those having difficulty building the strength with just the folds. Take care! Love your blog/recipes. Looking forward to trying the bagels
Awesome to hear that, Jaq, and thanks for those tips! Glad you’re enjoying my website—you’re going to love the bagels 🙂 Have fun!
Glad to hear that, Keith! I usually indicate between 206-208F, but it really depends on the bread being baked. You want the crust to be deeply colored, crunchy, and if you squeeze it just a bit from the oven, it’ll crackle and crunchy. It shouldn’t feel dense or heavy, and a knock to the bottom should give you a mostly hollow sound. It sounds like you might want to try baking a few minutes longer than you have, see how it goes and adjust from there!
Thank you so much, Keith!
Hi just wanted to say thanks for a great website and videos etc. have started using your Higher Hydration recipe and incorporating some of the slap and fold techniques (will have to work on the arm strength to get up to your video level) but the results have been exceptional. Beautiful crumb, higher rise, great crust. Thankyou for sharing your passion for creating the perfect sourdough
Thanks so much for the feedback, Lynda! Glad I could help 🙂
I have made 6 batches so far and there is no question they are outstanding in crust, airy crumb and flavor!! My problem is pre-shaping and shaping. After the bulk fermentation, it is so wet it will not hold any form. I end up just plopping it into the proofing baskets. Same issue when transferring the loves into the dutch ovens. It’s like a sweet mutt, fantastic and sweet, but damn ugly! I’m using King Arthur unbleached bread flour and whole wheat flour. Suggestions are very much appricated.
HI I am no expert, but I would say maybe your starter is not active or its over fermented, you have enough gluten in your flour I think. take a look at that part of the process 🙂 good luck!!
Glad to hear things are mostly going well, Toby! I’d say your dough most likely needs more strengthening (or a reduction in hydration). Try giving the dough one more set of vigorous stretch and folds during bulk fermentation. Then when preshaping, preshape it rather tight so the dough is smooth and holding its shape on the counter. From there, shape tightly!
A levain is not always more acidic than a starter, it depends on the timetable for the levain and starter, the flour composition, the seed amount (the amount of ripe starter carried over), and even the temperature — lots of variables! Chad is known to employ a “young” levain in Tartine, and what you listed there speaks to that: a lot of fresh flour to a little starter, used before it becomes overly ripe. And that works just fine! It’s a different way to go about the process. Using it younger will mean the timeline for a bake will likely need to be stretched out, and you might also end up with a more mild flavor profile (assuming many things along the way).
I say all this not to make things overly complicated, but there are a lot of variables when refreshing a starter and when creating a levain. As I replied to your other comment, you don’t even have to create a levain if you don’t want, but I find it useful for many reasons. Creating a levain gives you the chance to change the characteristics of that levain for a single bake, for example, I might choose to create a levain with a heavy sour profile by using 100% whole wheat, warm temperature, and low seed to ripen overnight. That will likely result in a very sour levain mixed into a dough the next morning, carrying that over to the dough itself, starting things along the path to a more sour loaf of bread. There are many levers to pull when creating a levain to get the desired flavor profile and texture in the end, and part of the fun in baking is testing what to change and how it affects the end result 🙂
I made this last week and it was a great triumph – the best crust, crumb, oven spring and flavor that I have achieved in my 6 months of experimenting. I only did 4 sets of turns as I was really trying to follow your advice on not over-doing it. I do feel I could have had greater height – yours maybe 25% better than mine. Every time I do a fridge proof I feel like I hardly get any rise in the dough overnight at all. Is that bad? Should I be getting some rise in the fridge? Would that give me more height int he finished product? Thanks!
Thanks for your recipe. I’m a beginning sour dough baker (I know, why am I starting out with high hydration bread? Because I want THAT kind of bread) and obviously because of that I realise I’m not going to succeed for a while (I also don’t have certain essential-seeming items like a dutch oven). I was really happy with my bread when I put it in the fridge. The shaping was much easier than the previous loaves I’ve tried (although still a little loose — I lack technique). I checked on it once in the fridge and it looked promising — like it had structure but was also nicely airy. But when I pulled it out to put it on the baking sheet it turned out to be a soggy mess and just spread everywhere.
So why is it not keeping a structure? Over-proofing? Bad shaping? Weakly proteined flour?
The questions are endless!
I have a smaller bowl with thicker sides for bulk fermentation, but you’re right, you don’t have to switch if you don’t want to!
Glad to hear that, Robert! Yes, definitely a valid way to bake and it’s how many, many bakers go about it. In fact, there are many recipes here at my site that don’t use a cold proof and bake the same day. So by all means, go for it! Enjoy 🙂
I dont understand “Place your baking stone and your combo cooker (I place the shallow side
up on the left, and the deep side down on the right) in your oven…..”
Maurizio,
Thank you for such an interesting site. I appreciate your ‘marriage’ of art with science in your baking techniques and recipes. I have long used Tartine Bread as my main resource but I know go to your site on a more frequent basis. I have made your High(er) Hydration loaf and it came out as you described. My standard technique, going back to Tartine days, is to bake one, large loaf (1500-1600 g). I scaled your recipe down to 75% on all listed ingredients. Following the steps leading up to proofing, everything is the same. My baking vessel is a Lodge 5 qt double dutch oven; pre-heated as you recommend. I proof my single, large loaf in a flat bottomed bowl of the same dimensions as the Lodge. The bowl is lined with two pieces off parchment paper, criss-crossed at 90 degrees. When the loaf is ready to bake, I use the lame to score the top and lift the proofed loaf up by grasping the parchment paper. The dough is then lowered into the deeper portion of the Lodge; cover with the shallower portion and proceed with your baking times and arrangements in the oven. I really like the parchment paper ‘basket’ method and the deep double dutch oven. My next attempt is to try a batard shape following your full amount recipe (baking one boule and one batard). I’ll be using the same proofing technique (parchment paper) in an oval banneton. Baking will be in a down-sized version of the original Romertopf. Thanks again for such an informative site!
Tom
Glad my site has helped, Tom! I baked with that exact method for many years, it works super well. The convenience of baking in a Dutch oven or combo cooker is pretty hard to beat. Have fun with it and happy baking!
You don’t mention kneading in the recipe. Did I get this right?
Thank you
That’s right, but you certainly could. You could do a combination of kneading up front and stretch and folds (fewer sets) during bulk, or a bunch more sets of stretch and folds only.
Thanks for your reply. I usually knead until I can do a nice satisfying test window and then I send it to the proofer at 28c for 2h, do a quick fold, send to the proofer for another 2h and then send to the fridge until the next day. The bread is good but it doesn’t open as much as we would like. Your recipe uses 81% water while mine uses 70%. I’ll play with increasing the water and see if less kneading and more stretch and fold help.
That sounds like a good approach, too. An open interior isn’t only achieved by increasing water, many factors come into play 🙂
Maurizio,
Your recipes are really great and I’ve had awesome results. The one thing I am struggling with is getting a nice ear on the loaves. Any tips?
Recipe: ~80% hydration with ~40% whole wheat but tweak this from time to time
Scoring: trying just one quick slash at about 30 degrees on a batard loaf
Baking: I bake on stone with inverted dutch oven for 20 minutes at 500 (pre-steamed the oven) then 10 minutes at 450 before removing the dutch oven to finish at 450 until done
Thanks, Rama! Is the ear sort of fusing back together? This might be a sign of over hydration or a dough that’s over proofed. It could also be due to insufficient dough strength (and a shape that’s note quite tight enough). It sounds like you’re scoring at a good angle, also be sure to cut in deep enough to promote the formation of a ridge as the loaf expands in the oven. I hope that helps, it’s hard to diagnose without more info/pictures!
Thanks for the response! I loaf ends up just spreading out and never forms a ridge. I used to get good get ears when I first started and definitely did lower hydration back then (out of fear). Can’t figure out how to attach a picture.
I’ve wondered if over-proofing might be the issue. Just to be clear on what we mean, this would be post bulk fermentation. So too much time resting on table after preform and/or in proofing basket overnight?
Yes, could be too much time sitting out before in the fridge, or too much time in the fridge as well.
Hiya! Starter is happy and active and have 4 loaves accomplished. As my starter matures, i’m wondering what hydration does to the final dough. Why higher? Why lower. Why?? Thanks!!
Glad to hear that! Hydration effects so, so many things in a dough: fermentation, the “feel” and strength of a dough (elasticity vs extensibility), and ending mouthfeel and texture. The best way to internalize all of this, as there are many variables, is to try things for yourself. Try increasing the water a bit, see how the dough feels; conversely, try reducing the water a bit and see how the dough feels. Then compare these differences in the end product to each other, find out what you like best. There’s no right way to do hydration and it’s very relative to the flour you’re using (in other words, the actual percentage number matters little, it’s relative to the flour you’re using). A long topic I could write on for quite a while, I hope this helps in some way!
Thanks so much, yeah, i’ll experiment around with it. Have a great weekend and thanks for the reply!
Hello – this is quite an old thread so I hope you see it. I’m curious about the pizza stone. You say to put it in the oven along with the combo cooker for a 1 hour pre-heat but then there’s no mention of it after that as you then say to place the dough into the combo cooker after scoring. So what happens to the stone that’s been pre-heating for an hour? I can only imagine that the combo cooker sits on the stone????
I’ve only seen round combo cookers here in Australia so if you’ve shaped batards, will they hold their shape in a round combo cooker?
Is there a risk of the second loaf over-proofing in the fridge while the first one bakes?
Once I have a rye starter, I guess there are no restrictions on the type of loaf I could make? That is, if I make a rye starter, could I then make say a white flour sourdough?
Great blog – thank you, but I want to understand EVERYTHING before attempting. Hope to hear from you.
Hey there! Yes, when I wrote this post that was my typical practice, to use the baking stone under the Dutch oven. However, nowadays I actually recommend not using the baking stone at all, unless you wanted to put it on another rack in the oven. I find the stone and the dutch oven to be a little too hot, sometimes causing scorching on the bottom (see my guide to baking with a Dutch oven for more).
Dutch ovens really are best for baking boules (rounds), a batard will come out somewhere between the two.
It’s not likely the second loaf will over proof in the short time the first loaf is baking if it’s kept in the fridge the entire time.
That’s right, once you have a starter rising and falling predictably, you can make any bread from it regardless of the flour used. Some bakers like to have a starter with a particular flour for certain breads (e.g. a 100% rye starter for rye bread), but it’s not mandatory, it’s up to you.
Hope that helps and happy baking!
So, I have recently acquired the sourdough baking illness and it is proceeding rapidly! My bread is “coming along” but it’s not there yet so I’m always tinkering, which is why I love reading your blog. My one question here is when you proof your loaves in the fridge do you cover them to keep them from drying out?
Always put them is something airtight (like a sealed bag) so they do not lose their moisture.
Hey, Doug! Yes, I do keep them covered. Check out My Baking Tools page where I have a link to the large reusable plastic bags I use to keep my dough covered during proofing. Happy baking!
Hey.. I have been baking sourdough for about a year and was very fortunate to have found your blog… After much experimentation, I have found this recipe to be my family’s favourite. Pretty happy with today’s bake, best one yet (I always say that)!
I have a question regarding natural leavening.. does geography play a factor in the natural yeasts and resulting flavours of local sourdoughs? Or is the difference in taste (i.e. New York sourdough, Montreal sourdough, etc.) all method and local techniques and formulations?
That’s really great to hear, Craig! Well, if you keep saying your latest bake is your best, that means you’re always improving, which is the goal for all of us 🙂 In my experience, it’s not specifically the geography that affects the flavor/culture, it’s more the flour used (especially with regard to starter maintenance), the temperature, and the refreshment/feeding schedule. Sorry for my delay in getting back to you and I hope that helps. Happy baking!
Hi Maurizio, I am really interested in trying this recipe. I am just starting to experiment with some fresh local flours, and earlier this week bought some new whole wheat flour and a some fresh bread flour. The issue is that the bread flour has a 14.5% protein content, should I adjust the hydration % at all for the recipe? Or in your opinion would I be better off sticking with my King Arthur bread flour and using the new stuff for some pizza dough (which I am completely fine with)?
That’s a very high protein percentage! I’d likely use less of that flour to compensate for that. Alternatively, yes, you could likely increase the hydration of the formula to soften and slacken the dough a bit more. In fact, I’d probably try that last option first, just to see how the dough responds! I hope that helps and sorry for the delay in getting back to you.
“It should be jiggly and fluffy but don’t push the bulk fermentation too far, or you mostly end up with one massive bowl of levain, and it won’t be usable. Trust me; I have done this a few more times than I’d like to admit.”
My question is – How do you know if it’s become all levain? What are the characteristics, and why is that not usable? What happens?
Thanks!
Make sure to keep going with bulk fermentation until your dough looks like it’s ready to divide. Determining this point can be difficult, but it’s a critical part of the process and requires some experience. Usually I say to wait to divide unit the dough looks nice and smooth (it’ll smooth out as bulk progresses), the edge where the dough meets the container should be domed downward, and if you tug on the dough a bit with a wet hand it should show some resistance. The dough should jiggle in the bowl when you shake it a bit, it should look alive. If you divide the dough too early it’ll mean there isn’t enough fermentation in the dough and because of this you could end up with a more dense interior and dough that’s much harder to handle and shape.
It’s hard to give an exact time to divide for bulk because it really depends on many variables and it takes experience. My best advice there is to stick with the same formula for a while (this can be hard, we’re always wanting to experiment!) and really observe the dough each time you do a bake. How does it feel after 3 hours? 4? Is it smoother, stronger, more elastic? Those are good signs it’s ready. Generally at 76-80F for a recipe like this one, it’ll take between 3.5 and 4 hours in bulk.
I hope this helps. In my experience, determining when to end bulk fermentation is one of the steps in baking that take significant experience and is quite difficult!
Hi Maurizio,
I’ve been experimenting with this recipe. During my last attempt, the dough during shaping turned out very nice, but it didn’t get a nice oven spring and sagged/lost its shape when baking. I took a look at some comments, and I think it was over proofed in the fridge, so this attempt I’m trying to cut down cold proof to around 14 hours. I am trying to shape the new dough right now, but it is so much wetter and doesn’t hold its shape as nicely as it did the last attempt. The only difference I noted down was the ambient temperature last time during bulk was around 22 Celsius, and temperature during bulk today was around 26 Celsius. Is it possible I overproofed the dough during bulk…? Thanks!
It’s definitely possible to overproof the dough during bulk, and that might have happened. There are a few indicators your dough could be going over: sluggish rise in the oven, the score on top of the dough might not open with a nice “ear” and instead just kind of fuse together, the interior will have lots of small holes and perhaps one or two large ones near the top (but no dense areas of unfermented flour), and finally the loaf could be a little on the sour side. If you notice these again next time, try to keep your dough a bit cooler during bulk and/or shorten that timeframe down a bit (divide it when it’s ready, not what the clock says!). I hope that helps, Benjamin!
Hey, nice bread and site, this has been an invaluable learning resource! Just wondering why you didn’t include the levain in the percentage calculation? Isn’t this bread closer to 83% hydration?
Thank you! That’s correct. The levain should be included, but this this older post I didn’t — all my more recent posts this is correctly accounted for. I’ll go back and update this post soon, sorry about that!
I have this dough in my fridge undergoing its overnight proof right now. It somewhat accidentally fermented for two more hours than the 4.5 noted here, and when I got back to it, it had risen a looottttt. So we’ll see how it turns out tomorrow! But the dough did feel so airy and soft in my hands when shaping, and it had a lot of bubbles in it. It barely fit in my oval brotforms, which I’m trying for the first time, too. I think I might decrease the proof because of the longer BF, and see what happens. I’ll report back once they’re baked!