
Steam burns hurt. Like, really hurt. The small mark on my left forearm begs the question daily: Maurizio, was it worth it? But before we talk about my new baking badge of honor, let’s concentrate on overcoming the challenges of baking good bread at home. While many of these challenges present themselves early in the two-day process (fermentation, flour selection, mixing, shaping, and so on), there is that crucial component at the end of this ordered procession: baking bread with steam in your home oven.
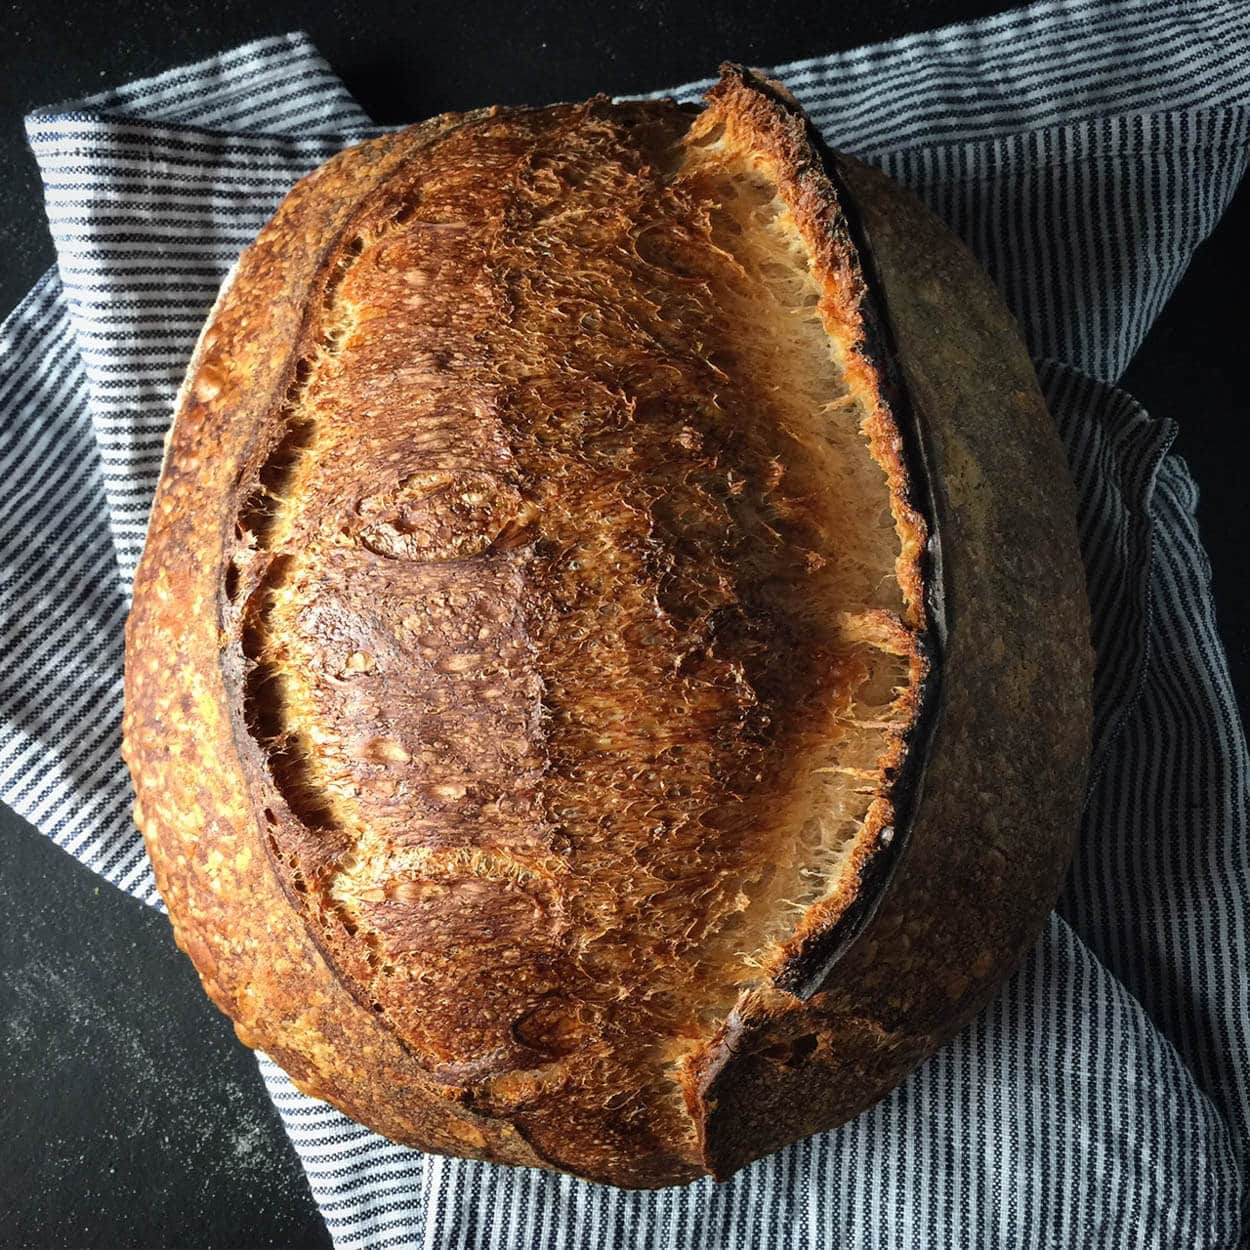
For your bread to rise to its potential, that outer, taut skin on your loaf needs to be able to expand and stretch before hardening off. Steam in the oven and subsequently on the surface of your loaves helps keep that skin pliable and stretchy during baking. If your dough dries and bakes too quickly on the exterior, it can harden off before it rises to its full potential (and you may not see a satisfying gringe, either).
So how can we get enough steam in the oven to keep those loaves rising? There are indeed methods abound, and each person has a different approach, but arguably the most popular choice at the moment, and the one I started with, is baking bread in a Dutch oven (see my guide on how to bake bread in a Dutch oven if you’re not familiar). However, there comes a time when you might want to bake two (or more) loaves at a time, or perhaps your loaves are scaled more substantial than your Dutch oven can comfortably hold. An alternative is to bake directly on stones and generate sufficient steam in your home oven by some other clever means.
Professional baking ovens have steam on tap. Press a button, and a wave of steam sprays over the decks of newly loaded dough (however, there are always challenges, no matter what oven you use). Now there are home ovens that are “steam ovens,” but the ones I’ve looked at are incredibly small. You might be able to fit two loaves, but I could also fit two Dutch ovens in my current home oven; no advantage there. Some other alternatives can’t inject steam at a button press, but they are sealed to trap steam and have a method for generating steam. These look very promising but are on the expensive side.
Since most of us bakers out there do not have one of these fancy ovens, we have to make do—read on to learn how baking bread with steam in your home oven can be a straightforward process.
Video on baking bread with steam
In the video below, you’ll see my baking bread with steam from start to finish.
Baking Steam Method
The following does take a bit of practice. First, ensure you get all your tools ready and within reach; this is a rather hectic process, and you want to do it almost without thought — muscle memory. The longer your oven door is open, the more heat will escape. Your thick baking stones or a baking steel (which is also awesome for sourdough pizza!) will help offset some of the loss, but you still want to act quickly.
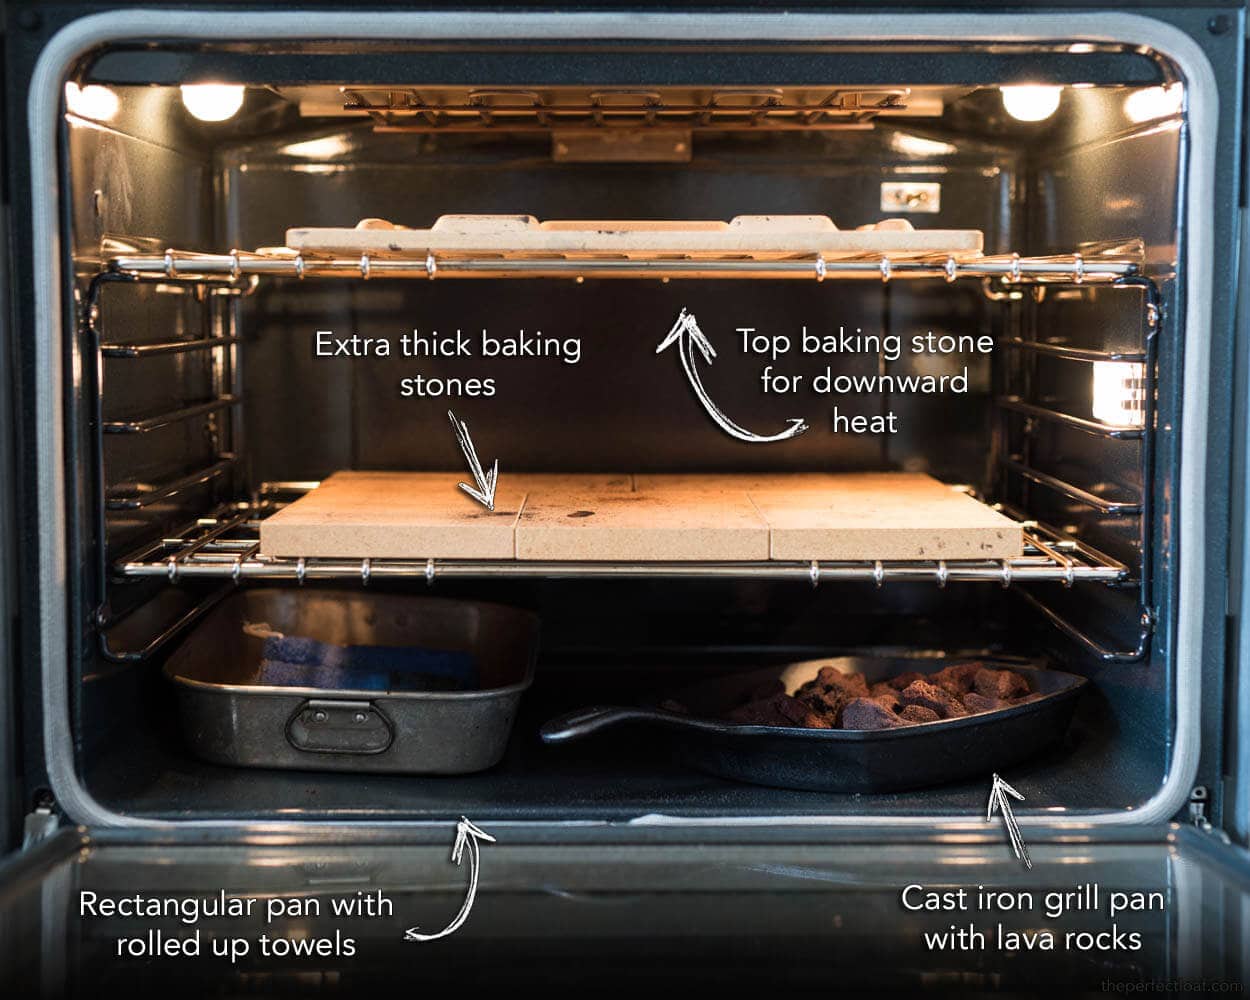
Below is a quick visual showing where I have my pans, where the loaded dough goes, and where my baking stones are.
Now that we have a list of what things we need, where items will be placed, and why, let’s get to the actual method (with the animated version below!).
Home oven steaming method
- An hour before baking, turn on your oven (preheat)
- 10-20 minutes before loading your bread, boil water, pour over the towels in your rectangular baking pan, fully saturate them, and place them in the back corner of your oven
- 10-20 minutes after loading the pan, put each mass of dough on a separate piece of parchment paper
- Place the dough and parchment underneath on a pizza peel
- Score dough
- Open the oven and slide the dough (with parchment) onto baking stones
- Quickly lay a towel on the oven door glass (optional; you can see me doing this below). I’ve read that cold water dropped onto a hot oven glass door will shatter the glass, thus the towel. I have dropped some water on the oven door without any ill effect, but I do this to be safe.
- Carefully toss 1 cup of ice into your cast iron pan with lava rocks
- Quickly spray loaves a bit with a hand spritzer (optional)
- Close the oven door and watch your dough rise
- 20 minutes later, remove both steaming pans (careful these are extremely hot) to stop steaming
- Bake as usual until done
Whew, that’s it! Here is the whole process (minus the preheating and drenching of towels) in one trendy baking-with-steam GIF:
Why do we use two sheets of parchment paper for our dough? When you use two sheets, you can adjust the space between the loaves as they bake, if necessary. One of the worst things to happen is when the dough expands and joins with another loaf; this reduces the overall rise of both loaves. If you notice the loaves start to get a bit close as they rise, quickly slide them apart.
After 20 minutes of baking, we remove the cast iron and rectangular baking pan, so no more steam is generated, allowing your loaves to crisp up and harden off.
Caution: Please be careful with this method: if you drop too much cold water on your oven door, you might crack the glass. I have never had this happen to me, but I know of at least one baker who had this issue. Be sure to keep the water off the glass.
Another approach to baking bread with steam
Baking bread in a sealed post is possibly the easiest method of baking bread with steam at home. You place your dough in a preheated pot, close the lid, and put that in your oven.
That method works incredibly well, but the drawback is you can only bake round loaves this way. You’re limited to the realm of round pots.
If you’d like to keep using a Dutch oven, see my post on how to avoid burning your loaves →
Tools for Steaming Home Oven
We first need to have the right set of tools for the job. Let’s go over a few more additions to our home-baking arsenal:
Lava rocks
The first is a cast-iron pan filled with lava rocks. Other materials will work just as well here: (clean) nuts and bolts, a metal chain, or any other heat-retentive material that will increase surface area. Keep in mind whatever the material needs to be able to withstand around 525ºF and water splashed onto it.
Lava rocks are a primo choice because they get extremely hot, don’t break down easily, and have tons of jagged sides and crevices for an incredible increase in surface area. What’s the big deal about surface area? As cooler water comes into contact with a blisteringly hot surface, it instantly turns to steam. The more hot surface area you have, the more steam you generate. I found these lava rocks, specifically made for home BBQ grills, and they have turned out to be a perfect choice. They come in a fairly large bag, and I am still on my first handful — I probably have lava rocks for life.
Roasting pan
The second component is the heavy-duty stainless steel pan I use to hold the lava rocks. This stainless steel pan is great for a few reasons: it’s super thick-walled, retains heat well, and holds up to abuse.
Rectangular baking pan
The last component is an old rectangular baking pan with small dish towels rolled tightly. I use an old pan around the kitchen and roll up three small towels in the center. The more towels you add, the more steam you’ll generate. I use cheap, clean towels as these will eventually get scorched and need replacing.

Ten to twenty minutes before you start baking, you will boil some water and pour it over the towels in the rectangular pan, so they are fully drenched and steaming. You will then place this pan with towels back inside your oven. This pan will saturate the interior with steam before you even splash water on the lava rocks and will continue to do so well into the bake.
Optional Hand Spritzer
The final item is optional. A stainless steel hand spray bottle I use to spray in a bit more steam just before closing the oven door. I like to have the option to spray in a bit more steam if I feel it is warranted. Additionally, you could use this after 5-10 minutes into baking to quickly saturate the oven inside one more time. Some bakers, like Jeffrey Hamelman in Bread, recommend this second round of steaming in a home oven.
Not many new tools are needed, and if you think about it over the long run, you will probably save money as now we can bake 2-4 loaves at a time — no more wasting all that space in the hot oven. How do we do this now that we have the tool requirements squared away?
Conclusion
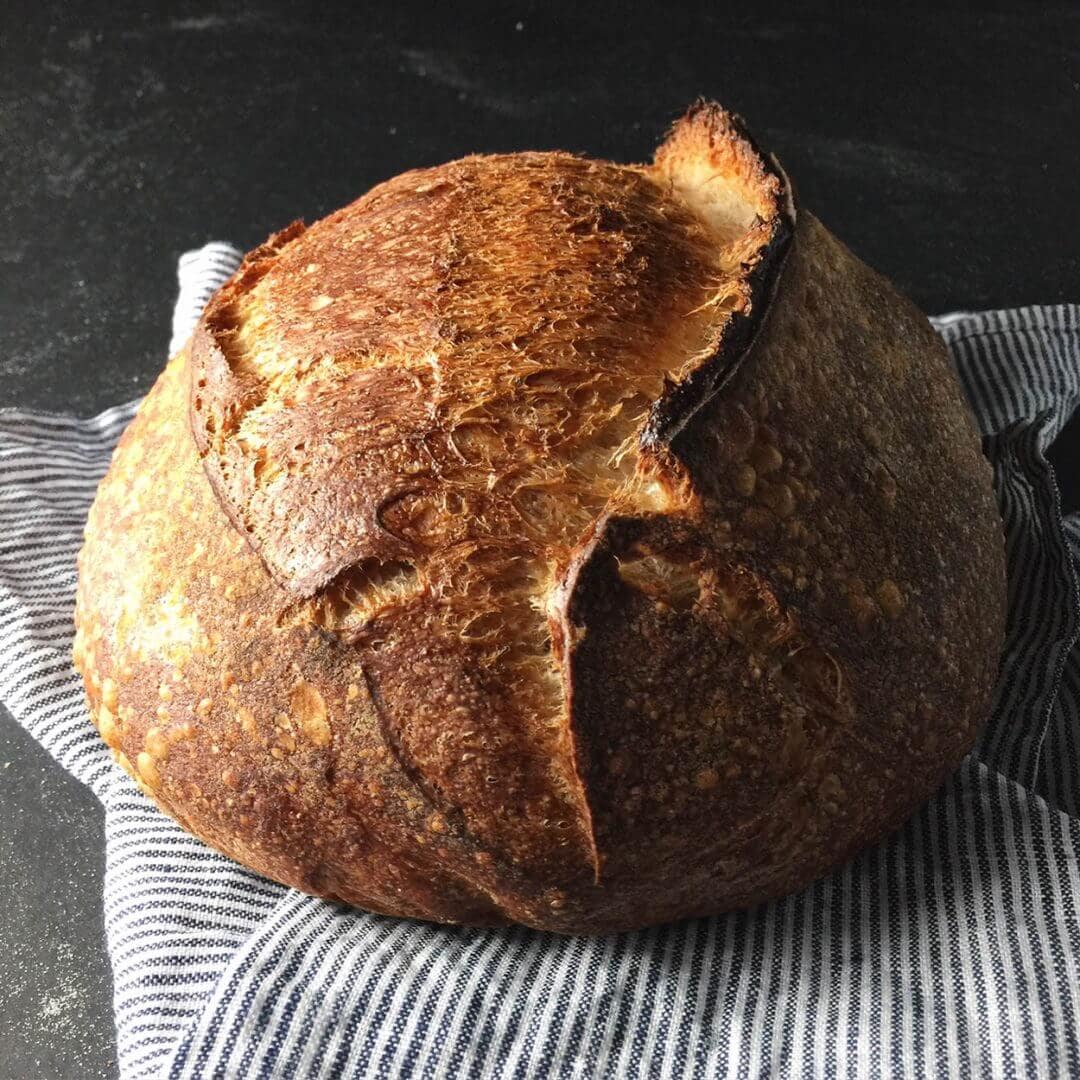
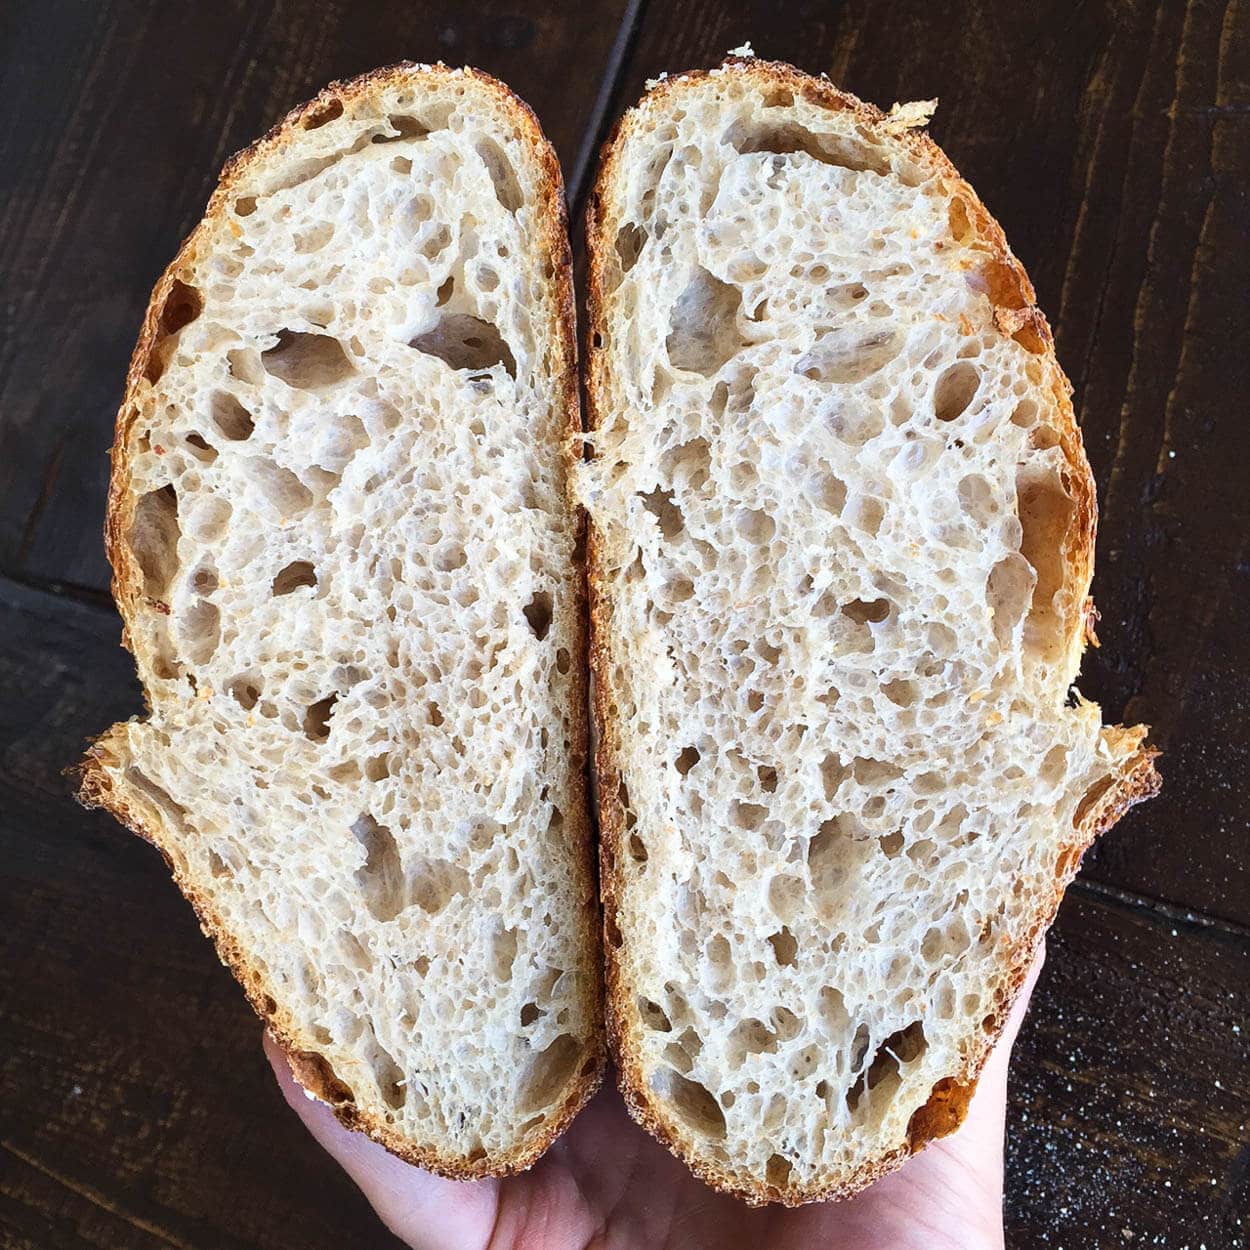
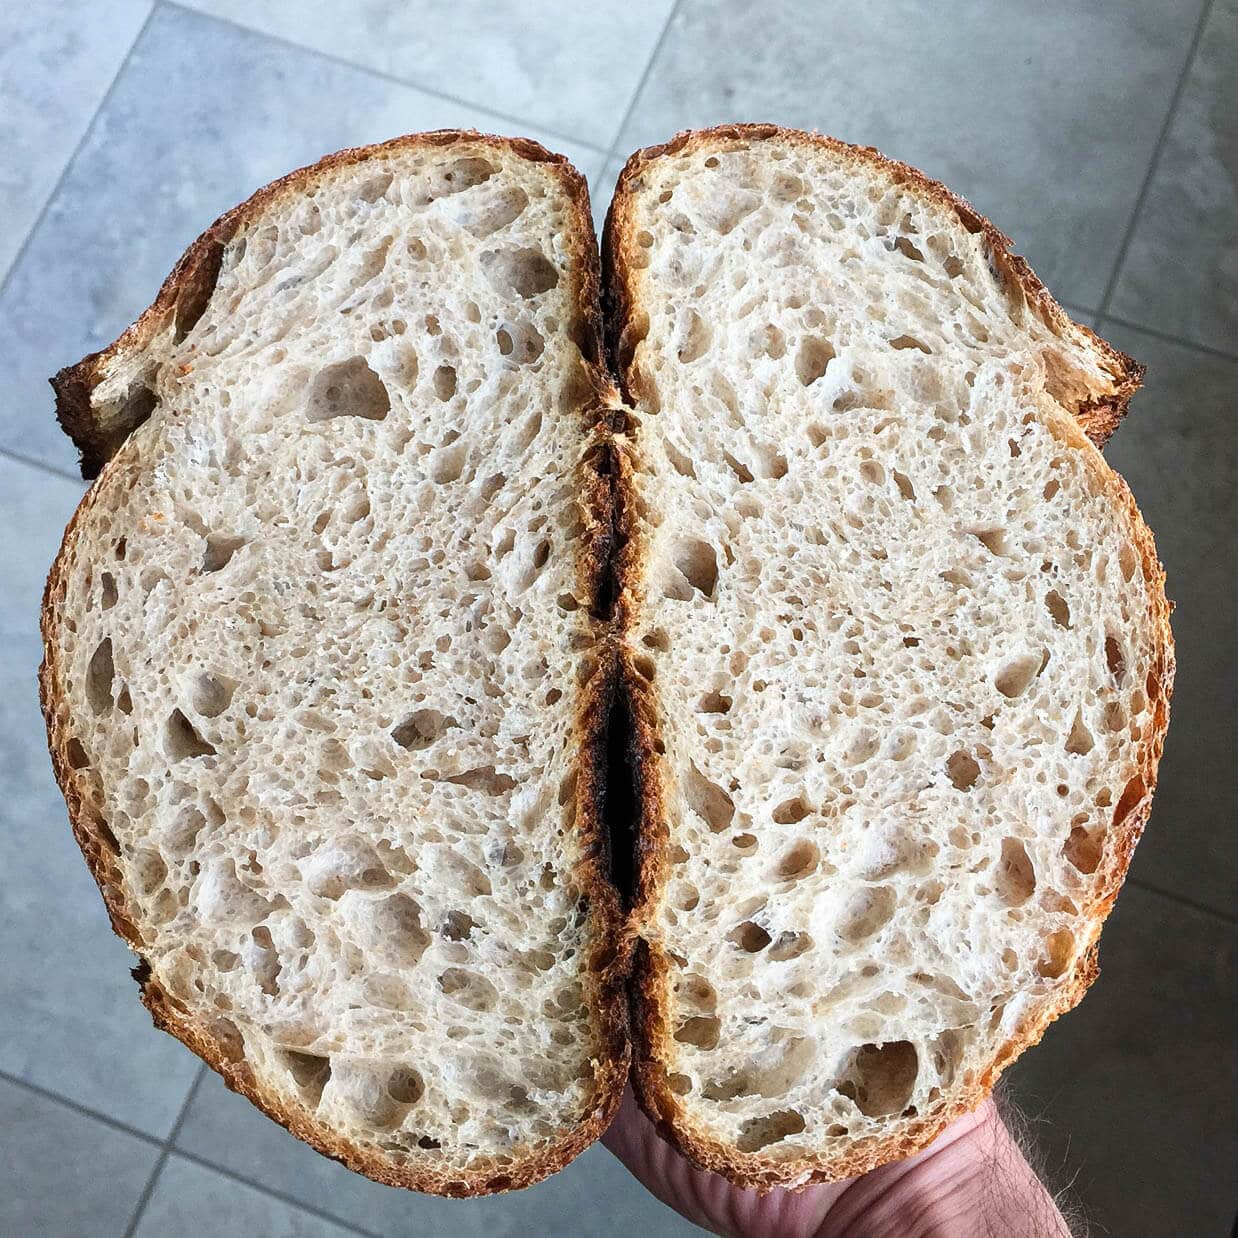
I like this method for baking bread with steam in my home oven because it allows me to cook two large loaves of bread at a time. I plan to bake four loaves at a time, and this will let me do that with no problem. Baking with a Dutch oven (or combo cooker) works exceptionally well, and I might still use that method if doing only a single loaf or a highly hydrated one (the pan will help keep the dough together). Still, I find myself using this new method more and more. The results have come out smashingly.
Small steam burns: worth it (as you can see below).
What’s Next?
Be sure to check out my full guide to baking bread at home for more details on this important step!


423 Comments
I don’t use the convection or true convection fan in my oven when baking bread. I’ve always thought that it might pull the moisture off the dough as it’s circulating around, which would cause it to harden too fast. I’ve never tested this, though!
I have also seen some people have used stainless steel chain link in their pans to generate more hot surface area for steam creation.
Yes, that’s another great approach! Anything that has significant thermal mass should work well.
Yes, that’ll still work!
I couldn’t get my hands on lava rocks, will towel + spray suffice?
Google “Schwadomat” for some further inspiration. 🙂
Whoa, that’s such a great idea. I’m wondering how I could get my hands on something like that…
Sounds good. That is definitely interesting. Keep me posted!
Recently I bought a FibraMent stone. (Before this I used a Dutch oven or a cloche.) My plan was to bake with a big stainless bowl over the dough to create steam. I’ve baked twice this way. The first was the biggest flop I’ve ever had – no oven spring; the crust was smooth and shiny and the inside was a cavern! Thinking the stone had not gotten hot enough, I tried again. It still had a cavern inside although not as big. Clearly oven spring did not happen but I don’t know why. Today I used the same recipe and went back to the Dutch oven and it came out beautifully. I have no idea what’s going on with the stone/bowl method but would appreciate any feedback.
That’s very interesting. Are you preheating the stone sufficiently? Depending on the thickness and the material it may just take much longer to preheat — perhaps up to 2 hours. If you have a cheap IR thermometer you could check the temp of the stone to ensure it’s fully saturated with heat each time. Other than that, the bowl method should work really well — I’ve done this myself several times and many readers have reported success as well!
I did use an IR thermometer. The stone got up to 450 but would not go higher. My gas oven takes a long time to preheat and even longer with the stone. This in itself is a problem not only because it’s wasteful but it’s hard to time the proofing when I need such a long time to preheat, plus I like to proof in the oven with the light on which I obviously can’t do during the preheat. But if I was getting decent bread it would be worth it! Until I get up the courage to try again, I’ll stick with the Dutch oven!
Wondering…why not just leave some water in a tray below? At that temperature it will convert to steam in the oven. Will this work?
It will, but I think the bowl works better.
I think I get a higher density of steam with the bowl in closer contact with the dough. And its a pretty large oven, so it takes a lot of water.
The bowl is an excellent method as well! @vijayapushkarna:disqus
I’m not entirely sure it makes a difference. Its been a long time since I baked in a dutch oven, and I’ve gotten a bit better at the whole process.
If you have to buy one, the bowl is cheaper!
You can probably control the bake temp better in the bowl, as the dutch oven retains a lot more heat. I usually reduce the temp after I remove the bowl, so the bread doesn’t get too brown and I can cook more of the water out of it.
Others might see heat retention of the dutch oven as a positive. If your oven temp swings wildly, the dutch oven can mitigate that.
Remember that I am cooking on a pizza stone too. I wonder how a cookie sheet would work…
I already have not just one but two dutch ovens ~, but I am thinking of getting a pizza stone because with my dutch ovens right now, they tend to burn the bottom crust of my bread a bit — I like to bake my bread to a pretty deep brown color, but by the time the top crust becomes deep brown, the bottom gets burned.
But I do love the oven spring that my bread gets in the dutch ovens. Some people complain about not getting as much oven spring when baking on a baking stone. I obviously could create a water bath setup as described in this post, but it seems like too much of a hassle. If a bowl works, I’d just use a bowl since I already have a big stainless steel mixing bowl that I can use as a lid.
Do you use parchment paper under your bread in the dutch oven? You could put something under the bread to slow down heat transfer. A couple of layers of parchment paper, or a sandwich with parchment paper and aluminum foil might just work.
I usually bake in a 7 inch springform pan without the bottom to get a good shape – the springform and the bread both rest on the parchment. Sometimes, I slip the bottom under both the parchment paper and the bread during late baking to keep the bottom from getting too brown.
Thinking about it, a springform pan bottom in the bottom of your dutch oven right from the start might work to slow down heat transfer a little.
I do use parchment paper under my bread — I sometimes put put multiple layers of parchment paper, which didn’t seem all that helpful. But yesterday, I experimented with lowering the initial baking temperature (I typically do 500F for 20 minutes during the lid on phase, based on some of the recipes I use), but instead, I did 475 for 20 minutes with the lid on, and 450 for 25 with the lid removed. The bottom definitely wasn’t burned this time!
Have you baked bread in a dutch oven? If you have, how does the bowl on a pizza stone method compare to a dutch oven?
That’s a really good method that is very effective at trapping steam! Experimentation is half the fun with baking, isn’t it? Have fun!
Now I just need to find something long enough trap steam to bake baguettes!
I’ve taken to using a stainless steel bowl on top of my pizza stone. I do the final rise on parchment paper, spritz the bread and the inside of the bowl, plop the dough on the parchment down on the stone, and cover it with the wet bowl.
I usually leave the bowl on for 20 minutes, but today I’m experimenting…
I think its some kind of black magic.
I can’t set anything on the floor of my oven as some of my heat comes from under that base. I actually melted the enamel and burned out the oven in the past. Will putting the towels and stones on a bottom rack be sufficient?
Yes, that will work just fine!
I’m not very experienced with those types of ovens. Typically in a professional bread oven you’d just hit the steam injection button a few times right after you load your dough. Since the oven chamber is completely sealed the steam will stay inside until you vent. If you have control like this over the oven I’d do the same thing! Just a few sprays in the beginning and then vent it out (carefully) after 20 minutes.
I’m sure it’s going to take some experimentation but what a joy to have that oven at home!
I am very new to sourdough bread, and recently upgraded my oven to a model that has a water reservoir for steam baking. Previously, I’ve only used my Dutch oven but I’d like to try the steam option. Would I just use a baking stone and steam for the first 20-30 mins when switching to my oven’s steam setting?
HI! I’ve been following you and using your methods for the past 8 months and I have loved getting into baking and refining my process with each bake! I recently switched to your home steaming method to increase the possibilities of shape and size of my bakes, and it’s been going ok. One thing I’ve run into is that I am not getting a good crust on the bottom of my loaves by the time they are crispy and golden on top. Do you have any tips for this? I bake in a gas oven on a thick stone using the lava stones and tray for steam in the first 20 minutes @ 475 and then come down to 450 for the rest of the bake. Typically i go for 25 minutes in the second part if using the dutch oven, but find I have to pull loaves out closer to 15-20 mins with this new method and have even resorted to flipping the loaves for another 5 minutes of oven time to crisp up the bottom some more.
It might be that you’re not preheating your oven sufficiently. I preheat for at least an hour, sometimes 1.5 hours, to ensure my Baking Steel (or even my baking stones) are 100% saturated with heat. If you have a cheap IR thermometer you could quickly test the surface temperature of your bricks to ensure they’re hot enough!
Loved the lava stone option. One wuestion: Do I place the cast iron pan with the stones into the oven as its heating up ?
Yes, I preheat those as well. You want them super hot so they help instantly generate steam as the ice hits them!
Hi there mauri! Why you use a top baking stone when you have an oven with already heat from above?? great site bro!
Hey, thanks! The top stone is not 100% mandatory. I kept it up there to help insulate and regulate downward temperature but if your oven has consistent heat from the top it’s not something you need. Happy baking!
Hi Maurizio,
I’m a big follower of yours but I gotta ask: why pour the water over the towels 10-20 minutes before putting the dough in the oven, and not at the same time? I learned from one of Peter Reinhart’s books that’s how you do it, but it seems to work for you so I’m really looking forward to what your comments are on this.
Thanks and regards.
Hey, Daniel! I usually pour the water over the towels and get them very saturated, then put them in the oven 15-20 minutes before loading the dough. Why? Because that helps pre-steam the environment before loading your dough, then once you do you add even more to fully saturate. It might be a superfluous step but I find the towels hold on to so much water they don’t completely dry out even by the end of my steaming period. So it might be optional but it doesn’t hurt! Hope that helps, happy baking.
I see what you’re saying. You’re right… it doesn’t hurt (in fact, seeing your point, I see how it would create a more humid environment). Thanks for your reply.
@maurizioleo:disqus , do you bake only pizza on Baking Steel or bread as well? How do you avoid bottom of the loaf to be burnt? Mine came out black. Baking stone at the same oven with the same temperature gives better results.
I do use the Baking Steel for bread also. It can be hard to avoid a slightly more baked bottom than top, and it requires quickly turning down the oven to avoid this. A few sheets of parchment paper below the loaf help as does other insulating material like cornmeal and/or wheat bran. A baking stone works extremely well, use whatever works best for you and your oven!
@maurizioleo:disqus , may you recommend any particular oven for home bakers? May be the one worked best for you. I am not going to use your answer as an advise what to buy, but as one of the most valuable opinions 🙂 I would really appreciate your answer. Thank you.
I’m not very up to date on the oven offerings out there but my home oven is a double oven made by Thermador — it works well. There are steam ovens out there but I haven’t looked into them much. That might be another option to look at!
@maurizioleo:disqus thank you so much, I looked at Thermador as well, but hesitated to make a choice toward that brand due to the small oven capacity compared to fancy Samsung and other ovens 🙂 Thank you
Hmm if I turn the heating element on the top on my electric oven, the bread gets a thick crust after I remove the top of my Duch oven and the bread does stops growing… so I was thinking I better not use the top element at all. Am I wrong?
Sounds right to me, you shouldn’t need that top heating element as long as you have a bottom one continuing to provide heat to the oven.
Just received my lava rocks. Do I need to clean them before first use? Do you have a preferred way to prep these?
I didn’t clean them in any way, since they were prepared for culinary use. If you see lots of dust you could rinse them off the night before you use them!
I bake in my Bosch steam oven. Your ideas are great and gives everyone a chance to make their bread great! I have plenty of room to make two side by side loaves like yours in one of those perforated bread baking pans. My bread has been turning out reliably well.
Thanks! I’d sure love to have a steam oven like that. I looked for one a while back when I redesigned my kitchen but I couldn’t find anything just like I had wanted. Sounds like you’re set!
Hey, I’m thinking about buying an oven with a steam function, which can be used with either the fan forced setting, or bake using the top and bottom elements and fan assist. Steam can’t be used without a fan setting. Which fan setting do you use when baking with steam and how have the results been, or are they different if using different settings? Thanks! Also, do you know what percentage steam/fan you use?
I don’t use a fan in my oven because I’m afraid it’ll reduce the effectiveness of my steaming. If your oven is made to use a fan with steam I would assume it would work well (as it’s being sold to do so)!
Good points Maurizio! The steam function isn’t specifically for baking though, so it’s hard to know whether it’ll be effective for that purpose. I read about someone who bought one to bake and said it was terrible using the steam function with fan forced setting as it made her bread pale and soft! Hence my concern. But it does seem like a good oven regardless of the steam function. I’m curious to read about how commercial ovens work as it seems that in order to have the oven at 250 degrees on the ones I’m looking at you can only use 25% steam, 75% fan heat, which I imagine is roughly what you want.
Yes that’s what originally steered me away from purchasing one of those ovens when I remodeled my kitchen. It seems rather limited and was mostly geared for steaming vegetables and other food, not for baking. The other issue was, at least back then, the oven cavity for those were rather small!
Steam injected ovens in a bakery simply have a button you press, and when you do, the oven chamber is flooded with steam (usually for a few seconds or however long you hold the button).
Good luck on the search!
Yeah, the full steam ovens are mostly tiny. There do seem to be a lot more on the market now and some are normal size and there are more combination ovens, though no one seems to know much about them!
I think I’m going to take the risk, fingers crossed!
Maurizio, nothing could be farther from the truth. My pies are gorgeous and baking is plain awesome in my steam oven.
That’s awesome! I probably should have revisited those ovens after I had looked at the small one I had access to back in the day. I know if they worked like you’re saying I’d be in heaven!
my loaves are golden dark brown and shiny fyi
I bake my bread at 375 on the steam convection setting and it’s perfect. I do an overnight rise in the refrigerator (my recipe for my home weekly loaf is 2 cups spelt and kamut that I soak for 2 hours, I throw in the sourdough starter and top is off with bread flour-overnight in fridge on second rise and it does most of the fluffy rise in the steam oven! I always use steam convection because the results are so nice, the fan is perfect.
Amazing, thanks for letting me know. I’m happy to hear that it works well using steam and the convection fan as it seems that’s how most of the combination ovens work. It’s so tricky to get information about how the steam function works, even the company that makes them can’t tell me!
I have the Bosch steam oven, I’ve never used the straight steam setting for bread and I have made bread in the dutch oven however we like a normal sandwich loaf with lots of tooth and flavor. The round loaves are great for a special meal but nothing beats a great loaf of bread with a dusting of cardamon. It’s a reliable recipe and everyone raves about the flavor of spelt and kamut incorporated into the recipe. I would love to try a sprouted grain bread, that’s next on my list.
Sounds delicious!
Hey! What baking stone do you use for downward heat? What do you consider a thick stone? I’m hoping to transition from DO baking to baking on a baking stone (need to buy one first). Scared to make the wrong investment, would love some advice! I bought some lava rocks from Home Depot recently, need to get some bath towels (the ones in your picture don’t look like kitchen towels).
I see that your pans are on the very bottom of your oven, can I do that in a gas oven? My pilot light is right underneath along with the broiler, I see some splash back in your short video, that might possibly turn off my pilot light…which has happened when I accidently missed the pan completely~
Hey! I use this baking stone for the top, it works really well. My oven is an electric oven and there’s no heating element on the bottom, it’s just a flat base. You can put the the pans on anything, really, even a rack at the bottom most set of rungs. You could buy a very large metal baking sheet and place everything on top of that, this way it would catch any water dripping as well. Just an idea!
No heating element on the bottom? So the upper element alone can heat both stones enough to bake?
I meant there’s no exposed heating element on the bottom. I do get radiating heat from the top and bottom when my oven is on.
Maurizio,
Thanks for providing such a helpful blog. I’m new to bread baking. I’ve tried a few different methods, and yours is by far my favorite, however every recipe I have tried my crumb comes out very gummy. My crust is good, and i get plenty of good air bubbles, but the crumb is shinny, gummy, and chewy. I have followed your method as best as I can from starter to steam bake. Any thoughts on what I might be doing wrong?
I find that this happens when I underproof my loaf. Maybe try giving the final proofing another hour. Also, a few extra minutes in the oven is good insurance against underbaking, just as long as the crust isn’t getting too dark.
Hey, Joshua! Glad to hear things have been going well for the most part. As @erikmidtskogen:disqus suggested below, it’s possible the loaf is underproofed. Make sure the dough gets sufficient time at room temp and proofs fully — you could leave your dough out (covered) 30 minutes or so after you shape it before placing it in the fridge.
Also, ensure your loaves are fully baked out. If you find the crust coloring too fast and the interior is under cooked (the interior temp of the loaf should be around 210°F or so) reduce the temperature of your oven for that second half of the bake so you can bake it longer but at a lower temperature.
Hope that helps!
Thanks Erik & Maurizio I’ll definitely try that on the next bake. I live just south of Atlanta Georgia so I’m still trying to figure out the proofing times. Most recipes I have found are from drastically different reigons.