Teaching the art of sourdough bread, pizza, and more.
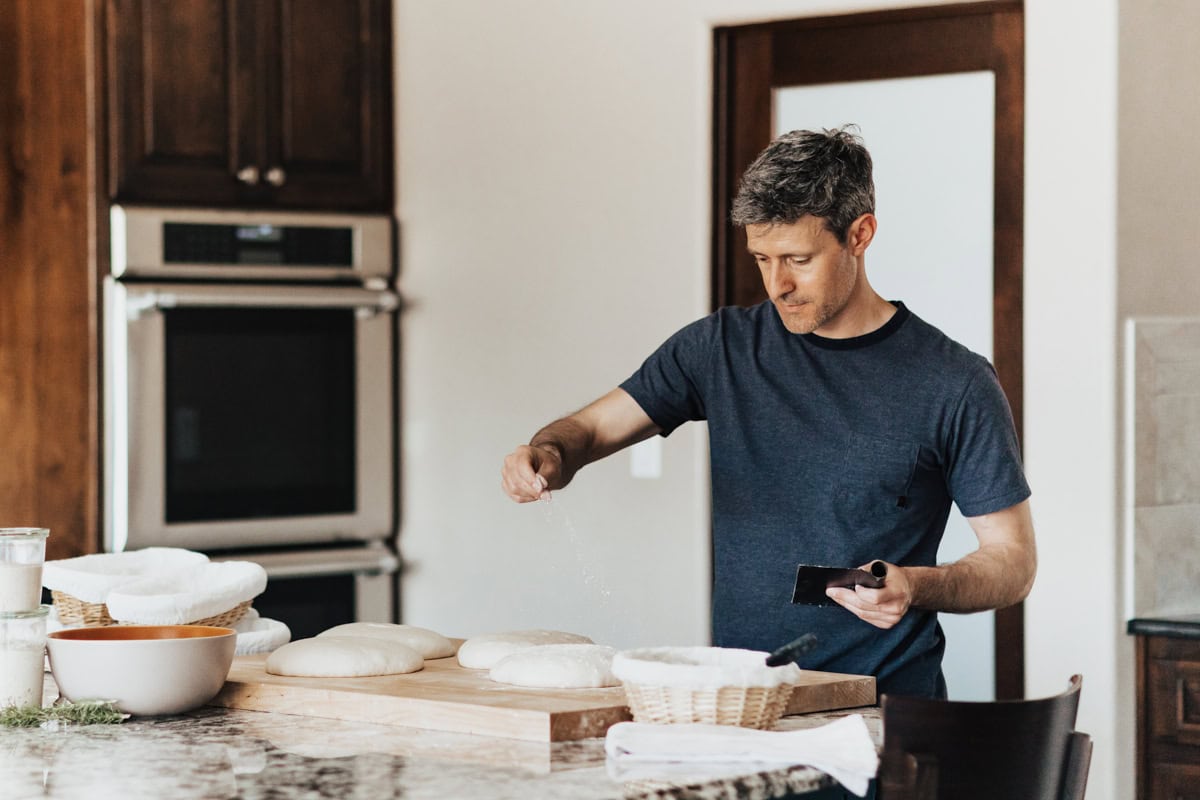
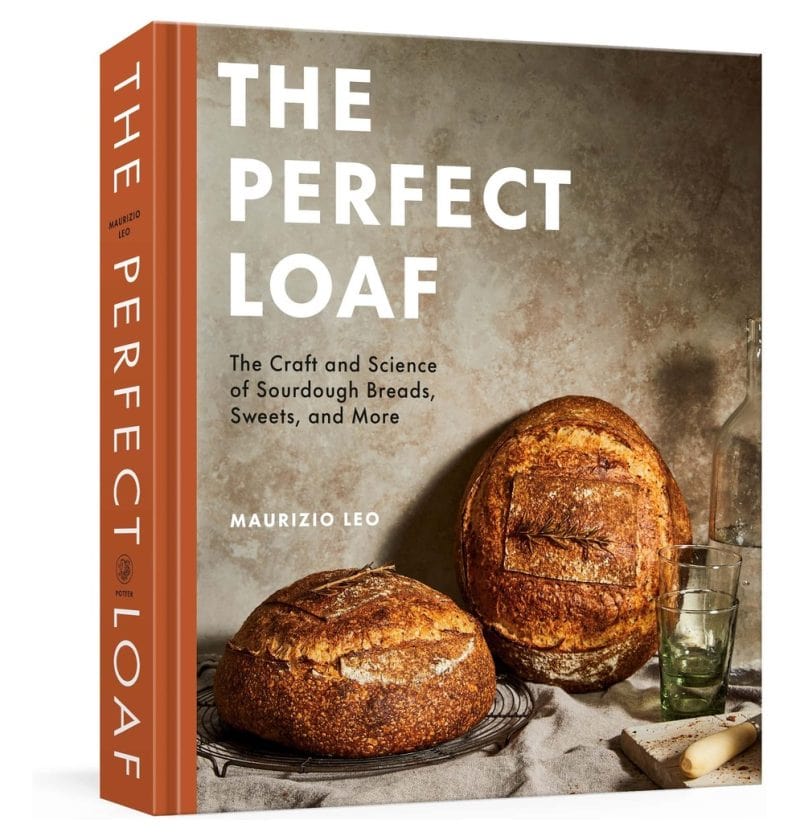
Hello there, I’m Maurizio Leo, the James Beard Award-winning, New York Times bestselling author of The Perfect Loaf and The Perfect Pizza, and the creator of this site. Since 2012, The Perfect Loaf has been the leading independent resource for baking sourdough bread and pizza at home.
But long before any of that, I was a kid in my dad’s pizzeria in Albuquerque, watching him work dough.
The Restaurant (as we called it), along with my mom’s gnocchi at home, taught me early on that good food made by hand takes time. Summers in Italy, with their long family meals and fresh bread hunts, only cemented it.
I took the long way back to dough: a master’s degree in computer science and years spent writing software before I founded The Perfect Loaf in 2012 (and along the way, the site picked up a couple of Saveur Blog Awards and a Webby nomination). The engineering never really left me, though. It’s why every recipe here leans on temperatures, iteration, and written-down results rather than feel alone. But at some point the measuring ends and baker’s intuition takes over. Great bread isn’t complicated technique—it’s simple technique done with attention and flavor given time to develop.
I’m still learning and still experimenting, and if I’m not baking sourdough, I’m probably thinking about it.
He strives for perfection, for the perfect loaf, secretly hoping never to attain it — for where would he go from there?
Jeffrey Hamelman
Every Sourdough Recipe Is Tested. Repeatedly.
Before I publish any recipe, it’s baked repeatedly in my home kitchen using the same ovens, same tools, and same ambient temperature chaos you’re working with. I log dough temperatures, fermentation times, and results for every test bake (the same baking notes worksheet I share here).
One thing that surprises readers is that recipes here continue to evolve after I publish them: I’m constantly learning and improving as a baker, and reader comments and questions regularly send me back to the kitchen to retest, clarify, or fix. If a recipe here says 20 minutes, it’s because that’s what worked across many bakes, not once.
My Cookbooks
The Perfect Pizza
Sourdough pizza, focaccia, and more than forty regional styles from New York to tavern to al taglio to Sicilian, with every dough built to use a sourdough starter and tested in home ovens, pizza ovens, and everything in between.
Baking is better with other bakers. Members get exclusive recipes and guides, and a place in our community where questions get answered daily (often by me, always by someone who’s had the same dough problem).
A few times a year I host small group bread trips to visit cities, farms, mills, and bakeries in search of incredible bread and the food that goes along with it. Or, join me in my next baking workshop!
If you have a burning baking question, I usually hang out with many like-minded—and very helpful!—bakers on The Perfect Loaf’s Discord, where you can post questions, comments, and photos. Come join the community and ask a question.
Thanks to your Web site, I now consider myself a baker and no longer buy bread, except as research. Just made your potato rolls and they were perfect. I bought a Mockmill and hope you write more about working with it. I am not certain that I am getting the finest grind and wonder if this is the reason my 50/50 loaf doesn’t have the oven spring that yours has. I tried the pan bread, hoping that the structure of the pan would help support the rise, but still didn’t get the rise I’d like.
On another subject, last year, during a cross-country drive, I discovered the Corona BakeryGolden Crown Panderia in Albaquerque. What a find!
So glad to hear that! It’s hard to say why you’re not getting the same rise. Flour could be the issue, or it could be a proofing issue or dough strength issue… With my Mockmill, I usually mill as fine as it can possibly go. If you’re going to that level, well, that’s all we can do 🙂 Keep at it with that recipe, it’s a little challenging but you’ll notice improvements the more you bake it!
Ah yes! I’d say one of the few great bakeries here. So good!
I am new to sourdough, taken up to try to keep sane, during Covid. I ran across your blog and had success recently backing your Perfect loaf. Thank you for such great instructions. I have a question about freezing the sourdough. My husband and I do not go through enough bread to warrant cooking 2 loaves at a time. I ran across a post that credited you for instructions on freezing dough which said to wrap and freeze the dough prior to the final rise. I took that to mean before the final 2 hour rise. I let the dough defrost in the fridge overnight, when I took it out for the final rise it was very cold. I believe one thing that I did wrong was not letting the dough come back to room temperature before the 2 hour final rise. The bread didn’t rise as much as my first loaf and it was not cooked, doughy, inside even though the temperature was correct. Can you give me some tips on freezing the dough?
Thank you for your attention and love for sourdough!
Hey, Alice! Happy to help. I’ve actually never done what you’re describing, but I know readers here who’ve had success doing this. What I prefer doing instead is baking all the dough and then freezing the final loaf, which reheats wonderfully. Some readers have said with dough they’ll freeze it in a container that’s wrapped very well. Then thaw the dough in the fridge until very pliable. Finally, bring it out to the counter to finish proofing.
If you’re interesting in freezing a baked loaf (my preference), check out my post on storing bread.
2 salt questions. Some of your recipes call for “fine sea salt.” I just use regular table salt, nothing fancy. Is that OK? Since I’m measuring by weight, i figure they are comparable. Also, I’m trying to cut down on salt in our diet. “My Best Sourdough Recipe” calls for 19 g salt, or 2%. I add about 15g, not 19g. Is there a particular percentage of salt below which you shouldn’t go?
Thanks so much. I love this “Best” recipe. Am adding walnuts and it tastes great.
Hey, Lisa! I don’t like to use table salt because of the iodine added, to me it tastes a little off. I don’t think there’s a problem there, though. And yes, measuring by weight is the way to go! Typically, bread recipes do not dip below 1.8% salt—in fact, that’s where I’d say 95% of my recipes end up. But, if your dough baked up well then that’s great! Walnuts in bread is perhaps one of life’s greatest joys 🙂 Happy baking!
I have been having tremendous success with the simple weekday sourdough recipe. It seems to rise well and often I get an ear, but, one of the comments that people make is that it doesn’t toast well. Too heavy, they say. Is it not rising enough? I don’t have the bubbles like you do, but I am improving.
Hey, Kate! It sounds like perhaps your dough was slightly underproofed. There are a few indicators your dough could be under: explosive rise in the oven, dense spots in the interior with potentially scattered large holes, and a gummy texture to the interior. Finally, it’s possible the bottom of the loaf might be slightly bowed upward (like the letter “U” — the top will kind of dome).
Make sure to build your levain from a starter that’s strong and mature (meaning it’s risen to it’s peak height before you take some to use). From there, bulk fermentation is very important! Make sure your bulk fermentation goes sufficiently far, you want the dough to look smooth, it should have risen considerably, and have bubbles here and there — it should look alive. If you tug on the dough a bit it should offer resistance to your tugging, it’ll feel stronger. Give the dough the time it needs in bulk fermentation! If you have to give it another 30m or hour to see these signs, do so. It’s important for this step to go sufficiently far for the dough to have enough fermentation activity before its proof.
Thank you, Maurizio! I will work on the bulk fermentation first. My starter is very active and bubbly. I noticed when I did the final proof in the banneton, the dough had a few bubbles under the skin of the dough. This is an improvement for sure. So how do you know when the dough in the final rise has risen enough? And, for my starter, sometimes it triples and sometimes it doubles. I can only guess for full ripeness. Should I feed the starter again if it only raises to double?
If you’re proofing the dough overnight in the fridge, you have a larger window when you can bake the dough. In the morning, the dough should feel risen, soft, and airy. If it feels dense and lifeless, give it a little time at room temp before baking. If you’re baking with the dough proofing at room temp, give it a few gentle pokes around the surface. The dough should feel very soft and airy, but not so much it’s broken down. It takes some experience in determining these times. I always say, before you bake try to assess the dough by feeling it a little, poking, seeing how it looks. Then bake. If the dough rises dramatically (too much) then you’ve under proofed. Draw a connection between how the dough looked and felt with how that bake ended up—next time you know those signs lead to an under proofed dough.
I don’t like to go by rise height for a starter to determine when it’s ready because the flour you’re using can change how it looks. Instead, I go by a combination of signs: sour aroma, loosening consistency, bubbles at sides and top, and then I take the time and temperature into account.
Thank you!! This “see how it feels” approach totally worked. I gave my dough a bit more time out of the fridge before baking and it was incredible!!!!! Lots of holes, lovely texture and great oven spring (but not too much). I also now understand that my dough was under hydrated. Too dry, in other words. I was concerned as a newbie that the dough was too wet. But the overnight proofing in the fridge allowed the dough to absorb more moisture and still have great strength. Now all my friends can’t wait until I bake them a boule.
Right on, Kate! So glad that is now working for you. I find that overnight proof really does help firm up the dough and bake up nice the next day. Enjoy and have fun baking for your friends!
Hi Maurizio, one of my favorite recipe of yours is the Stout Country Sourdough…..beer and bread what can be any better? One question I have is level of sourdough sour taste. I would like to increase the sour level some (not san francisco level). How would I achieve a bit more tang to your recipes? Thanks
Happy to hear that, Steve! I’m actually working on a comprehensive recipe and guide page on exactly this topic with many suggestions to help get you there (not to SF sour, but to increase sourness in general). Hopefully I can have this posted here soon! Keep an eye out 🙂
Hi Maurizio, thank you so much for all your posts! I’ve found your posts really helpful as an inexperienced bread baker! I did have a question for you regarding the starter – if I wanted to share my starter with friends, should I wait until it is active (5-8 days) to put the discarded starter in a jar for them, or should i take some of the discarded starter from Day 1 on Day 2, and just feed it like I am with my starter? Thank you!
You’re welcome, Emily! Glad I could help. You should definitely wait until your starter is rising and showing signs of consistent fermentation each day—that consistency will indicate a stable culture, which is what you’ll want to share 🙂 Happy baking!
Dear Maurizio! I am not very experienced sourdough baker yet but I wonder what is your impression or experience of Rubaud and French slap and fold (R. Bertinet) method. I am under impression that higher-hydration and well aired dough gives a softer and nicer bread – which my family loves. My statements might be wrong. Some sources say that Rubaud gives much softer crumb than slap and fold, yet I do not have strength enough to carry out Rubaud mixing/technique. I need to make breaks and cannot do it 3-5 mins in a row as some sources/recipies suggest. You have probably used the both techniques. Can you comment on this topic a bit. With my kindest regards to you.
Hey, Terje! I’ve mixed with both methods many times over the years, and while the Rubaud method works really well, I prefer the slap/fold technique (see my guide to slap/fold here). I can’t say I’ve noticed either method leading to one loaf being softer or more tender over the other, I feel they’d both result in the same bread in the end. In my experience, the s/f technique develops the dough much faster and more efficiently, so perhaps those using both are mixing for the same time but the s/f dough is strengthened further during that time period. Regardless, I feel it’d result in the same bread in the end (assuming all else equal)!
I wish you could consider giving virtual classes. Reading books and different sources is good and helpful but working in parallel with a master (also, when he can see student’s doing and point at mistakes) is an extra.
Again, I adore your homepage. What you are doing, your dedication, experimenting, etc. is so inspirational and fantastic! Many thanks and the very best!
You’re very welcome, Terje. Yes, virtual classes would be helpful, I know! I’m juggling several things with regard to the site and my baking right now, when some more time clears up hopefully I can look more into supporting this!
I really appreciate the kind words, it means a lot when I hear my site has helped and is inspirational—so thank you!
Maurizio, I see that you use a granite surface for your slap and fold video. Since you dough looks a bit wet (I know it’s supposed to be that way, is the stone better for this? Currently, I use a large wooden board. I notice that the wood absorbs moisture, causing the dough to stick more than I would like.
Thank you for all the wonderful information you share – especially the explanation of the bakers’ math. While waiting for my starter to get going (several failed attempts) I have been reading as much as I can find and I think I’m over thinking all of this. Back to the starter – I am now using 50-50 rye and unbleached all purpose flour. Like you describe, after the first two days it was all bubbly and large and wonderful. The “recipe” I am following is to discard half (amounts to about 190g) and then add 100g flour and 100g water which I have been doing and now on day 6, there are bubbles but no volume. I think temperature may be my problem. The fall has settled in here and we do not keep the house anywhere near 85 degrees and I haven’t been able to find a spot that is consistently warm. I tried leaving the starter longer and it ran out of food and started developing hooch. I am now trying my yogurt maker but carefully monitoring the temperature this maker has a steady state of 44 degrees C. I keep the lid off and have a thermometer in there to monitor the temperature. Any suggestions? Thanks again.
You’re welcome, Valerie! I’d say 44°C might be cutting it close for too warm of a temperature, but if you’re keeping an eye on it so it doesn’t get too warm, that’s good. If you’re having trouble keeping it warm, warm the mixing water in the microwave to 85-88F at each feeding. Then, keep the mixture in a thick jar and keep it insulated and warm. You can wrap it with a kitchen towel and then place that container inside another container for more insulation. That should work just fine. Just stick to the schedule, even though you’re not seeing a ton of activity, it will come around 🙂
Well, the temperature in the yogurt maker was beginning to scare me so I went all-in with your suggestions. I warmed the water (have been doing that all along), I warmed the jar (still using a new, clean jar each time), I warmed a towel, and I warmed the second jar and it’s all tucking into the cupboard above my fridge (which surprisingly does not get as warm as I expected). Let’s see what it looks like tomorrow. Thanks again for taking the time to reply so quickly. Wishing you a great day.
Ha, I was just thinking the same! So glad to see that this post is 6 days ago and a book really is coming! Also, I’m hoping you’ll do what you do here – get into the hows and whys of it all. I really want to understand the process, and I suspect a lot of your readers do also. I want to know the chemistry of it all, so that I can learn to look at my levain or my autolyse or my resting loaves and know when it’s time to do the next thing. : )
Yes, it’s been in the work for some time now, I’m buried under many words and a long manuscript. I have a lot of info in the book already, I think you’ll be happy when it’s released! And thanks for all the comments and kind words 🙂
Mauricio, if you need someone to translate your recipe book into french, I am your man! I have been spending some much time translating your recipes for my non-english speaking friends because google translate is not precise enough for baking. Feel free to contact! I can send you bread pictures as a resume! Thanks again for the great work!
Thank you for the offer, Adoul! And I really appreciate you spreading the word about my site 🙂
I haven’t announced anything yet, but yes I do 🙂 If you haven’t signed up to my newsletter (there’s a Subscribe box in upper-right), please do so—I’ll announce there when it’s ready!
You’re very welcome, Julie! Yes, that should work well. You will likely need to adjust the baking times (and perhaps the temperature), but that’s almost always the case, anyway. Still go with the usual 20min beginning part with the lid on, remove the lid, and then go for what the recipe indicates. Keep an eye on it, though, near the last 10-15min of the bake to ensure it’s not getting too dark. Happy baking!
Hi Maurizio, I love your recipes and instruction and really appreciate the science you include, it’s so helpful to understanding the process. I’d like to try to create taller, narrower loaves – more traditional sandwich shaped slices. I’ve been using an oval banneton and cooking in an oval shaped dutch oven. Would a loaf baker like this yield good results with your recipes? https://www.emilehenryusa.com/collections/bread-bakers/products/artisan-bread-loaf-baker?variant=31717152849967
I am on the 4th day of my first starter – which I discard/feed every 24 hours. Although there is slight bubbling at the surface, my starter does not rise. Isn’t this a problem? Any advice as to what I do from here?
The fifty-fifty whole wheat recipe came out great. The only variation I made was to use white whole wheat flour. Otherwise, I was careful to follow your directions precisely. I love the detail that you put into the explanation, and the fact that we are baking in the same city. (no need to adjust for humidity or altitude.)
Jill —
It sounds like maybe your dough is not strengthened enough, over hydrated, or over proofed. Dusting your baskets with flour is definitely important and certainly helps dough cleanly remove, but it can only go so far.
If your dough is on the weak side it won’t be as smooth and as strong as needed to cleanly remove from the liner. Try adding in another set or two of stretch and folds to impart a little more strength, and be sure when you shape the resulting dough is smooth, strong, and taut. A good test here is to just shape one loaf very, very tight and see if it cleanly removes next time (still dust your basket, though).
Over hydration is related to dough strength also: if your dough is over hydrated and not commensurately strengthened, it’ll lose shape during proof and stick to the liner. Reducing hydration is a quick way to give your dough strength to ensure it removes cleanly.
Finally, the longer your dough proofs the more it begins to lose strength: fermentation has the effect of strengthening gluten up to a point, but as acidity builds up in the dough it begins to degrade. This is actually a good (and necessary) thing up to a point, but too far and your dough will lose shape, get overly sticky, and eventually collapse. If you’ve tried shaping tighter and this isn’t working, try pulling back your proof time a bit to see if that helps.
I have a good amount of leftover discarded starter that’s been in my fridge for 4 days, awaiting use for sourdough pancakes this weekend(!) The question is, do I use the leftover straight from the fridge (stirred down, as Maurizio says,) or do I need to revive it first?
I’ve been following your site for a few months and following all your tips and tricks on building and maintaining a strong starter and it’s been fantastic! I’ve baked up the Simple Weekday recipe 3 or 4 times and have really learned a lot about paying attention the my dough and looking for the right signs that everything is progressing as it should. I’m happy to say I think I’ve mastered that recipe! So I tackled your My Best Sourdough knowing it would be a challenge with the high hydration levels. To my surprise I was really feeling like the dough was turning out wonderful and super excited about how it would turn out!
Then came the OH NO moment. My dough stuck to the inside of my proofing baskets terribly!!!! I used a liner in one basket and no liner in the other. The liner in the basket with the liner was quite wet when I pulled the loaf from the fridge in the morning and it stuck pretty bad. I hoped it was the liner causing the issue but the loaf without a liner also stuck something fierce. I floured them both really well so my question to you is how to you keep your dough from sticking??? Especially in the more challenging high hydration recipes? I went ahead and baked them up and they were tasty and I LOVED the crumb (so nice and delicate) but they didn’t rise as well because of my sticking issue. Any tips you can give would be welcomed! Thanks!
Hey Maurizio, I love your blog and how precisely you build-up your recipes. Must be your engineer soul in there;) I have a question – are you planning on issuing a book?
Hi Maurizio, I made my first honest to goodness successful sourdough bread
yesterday thanks to you (and a great starter from Breadtopia). I’m primarily a cookie baker- Italian/Sicilian treats are my favorite, so bread baking was a quarantine induced activity that I’ve loved. You really simplified the process and I appreciate that! I’m looking forward to trying your discard recipes
I did cultivate a rye starter as an offshoot of my sourdough starter. It is very active and I’m researching rye recipes. Now I just need to find rye flour! Thanks again for your inspiring baking.
So happy to hear that, Cynthia! Ooh, I love Italian treats (of course), some of my favorite are from Southern Italy where some of my family is from (Ceglie). Happy to help and happy baking 🙂
Nancy — thanks so much for the contribution, I really appreciate that and you spreading the word! Yes, there have been times when the dough was pushed too far in bulk and I really had no choice but to bake them that day. I don’t let them come up to room temp after the fridge, they can be baked cold straight from the fridge with no problem. Yes, there are many ways to bake great bread! Thanks again and I hope that all helps — happy baking!
Hey Maurizio, I just made a (small, for now) contribution to support your site! I recommend it a lot and am happy to pitch in. I do have a question tho…i have loaves in the fridge, felt and looked great, no problem there. I’m wondering about final rise…my last loaves were enormous in the fridge and I hadn’t ever experienced that before. They just ballooned more than usual. So today, I cut back on bulk time, and shaped, and popped them in the fridge. Question is, have you ever decided to bake before a long overnight rise simply because of volume? Or poke test (which i still don’t understand)? And do you let your loaves come up to room temp after overnight fridge or just go straight into the oven? I always go straight into the oven from the cold. With so many expert bakers on Insta these days, everyone does it just a little bit differently. Thanks!
Hi! I made a starter before finding your site. It’s 14 days old now. Now that I’ve found you, I’m only using your recommendations and I’m loving this process! I do have a couple of questions though.
First, due to covid, I’m out of bread flour. Can I fed my starter that’s been 50% bread flour and 50% white whole wheat flour only white whole wheat now? I can’t find bread flour anywhere anymore. I’m thinking of trying out your drying process to store it in my pantry until I can find supplies more regularly again. Or if I can switch to only whole white wheat flour, I’m going to put it in the fridge and feed once a week with just the whole white wheat flour. I’m hoping it doesn’t die.
Second, can you help me figure out why my first loaf and had a huge pocket on the bottom? Sorry, this is the long question! I know I ran into a few problems during the process, but I’m hoping you can help me figure out which mistake or mistakes it was that got me there. Again due to covid, I didn’t have much bread flour and I didn’t have any rye flour or rice flour. So I used as much bread flour as I could, but used whole white wheat for the rest of the weight. Here’s the steps that I think caused the huge bottom cavity. I made the levain in the morning and think I should have made it at night to give it more time. I was planning on doing bulk fermentation for 4 hours, but I noticed I didn’t have as many bubbles on top as your pictures. I was going to let it rest another 20 min, but my wild toddler caused me to leave it on the counter for about an extra hour instead. I’m obviously new with the process, but think I did ok with the preshape and shaping process. Could I have trapped some air in it causing that pocket though? My proofing basket hadn’t arrived in the mail yet, so I used a large ceramic bowl with a tea towel dusted with unbleached all purpose flour since I also don’t have rice flour. I had to score with a knife since my tool hasn’t arrived yet either. I baked in a cast iron Dutch oven with cut out parchment paper on the bottom. I know all that seems like a mess, but I felt pretty good during the steps. The bread did rise, had a beautiful crust, and tasted great. It just had an enormous cavity on the bottom and small bubbles throughout. Thank you for reading my lengthy post!
Hey there! I don’t feed my starter Bread Flour, I usually use a mix of AP and rye or AP and whole wheat. Really, any flour will work just fine. Check out my weekend baking schedule for a sample itinerary where you can keep your starter in the fridge most of the week, only to take it out near the weekend to bake.
Your steps don’t seem like a mess at all — you made due with what you had, nothing wrong with that at all! Based on the description of your loaves it could be that they are slightly under proofed. There are a few indicators your dough could be under: explosive rise in the oven, dense interior with potentially scattered large holes, and gummy texture to the interior. Finally, it’s possible the bottom of the loaf might be slightly bowed upward (like the letter “U” — the top will kind of dome).
Make sure to build your levain from a starter that’s strong and mature (meaning it’s risen to it’s peak height before you take some to use). From there, bulk fermentation is very important! Make sure your bulk fermentation goes sufficiently far, you want the dough to look smooth, it should have risen considerably, and have bubbles here and there — it should look alive. If you tug on the dough a bit it should offer resistance to your tugging, it’ll feel stronger. Give the dough the time it needs in bulk fermentation! If you have to give it another 30m or hour to see these signs, do so. It’s important for this step to go sufficiently far for the dough to have enough fermentation activity before its proof.
Finally, yes it could have been shaping. If you don’t evenly shape the dough large pockets can form, but if fermentation was still sufficient (and not under proofed like I mentioned above) the rest of the loaf will still be fermented well (bubbles all over). If you see those dense spots, though, it’s usually a giveaway the dough was underproofed.
Hope this helps and have fun with it, things can seem overwhelming at first but you’ll do just fine!
Hey, Leilah! Answers below:
– I like to keep the malt usage to the minimum, especially so as of late. I usually actually starter at something like 0.5% and then work up to 1% as needed, but it really depends on the flour you’re pairing it with. I’d suggest starting at 0.5% to avoid an overly red crust and gummy interior. If you find the crust color still isn’t great and/or you’re seeing a lack of strong fermentation, increasing that percentage slowly as necessary is the way to go. Check your AP flour to ensure it doesn’t already have malt (malted barley flour) added.
– You can add those two if you’d like, it really depends on what you’re after and the reason for adding them. I’ve actually never used vital wheat gluten in any baking. You could try adding a small bit of malt if you think it’ll help.
– That’s good, I don’t like to place the Dutch oven directly on a baking stone/steel these days, it gets too hot!
– Some of those changes in temperature were simply my experimentation over the years, but some do benefit from a slightly higher temp. I find higher hydration doughs do well with a really high blast of heat (500F) as well as whole wheat doughs (even things like miche). Otherwise, I tend to go with 450F to avoid burning in a home oven.
Hope that helps (and I think it was you who contributed to my site, thank you!)!
Yes, it was me and you’re VERY welcome. It’s been incredibly helpful to have a sounding board as I go through the learning process. Thank you for these answers, all make sense.
Hi Maurizio, now that I’ve been baking using your recipes for about a month now, I’ve consolidated a few questions I was hoping you could answer….
– I finally received my dry Malt Diastatic powder from Amazon….if I’m adding it to my all purpose flour, along with vital gluten to create a malted bread flour, do you think 1% of total is about right? I’ve read between .5 and 5% but not sure what would be appropriate for recipes like COUNTRY SOURDOUGH OR SIMPLE WEEKDAY RECIPE…or how you decide to use more vs. less.
– I’ve enjoyed the quicker 1 day process in your most recent ALL PURPOSE SOURDOUGH RECIPE and using my starter immediately vs creating Levain . Even though I obviously don’t get as much of a rise or open crumb, it is still delicious. Would it be appropriate to add gluten and malt (mentioned above) to this recipe as well, or would something get thrown off by doing that?
– Oven questions…
– I have a pizza stone and a le Creuset Dutch Oven. I’ve been putting the dutch oven to preheat on a middle rack and the pizza stone on the rack directly below that. Is this correct, or is the pizza stone supposed to be directly under the dutch oven on the same rack?
– I’ve noticed that the baking temp and times vary in many of your recipes. For instance…Weekday is 450, Country sourdough is 500 for 20 mins, then 450, A return to Basics is 510, then 440, then 435. Can you explain why the different approaches, and if these can be inter-changed between recipes or if they are that specific b/c of the type of bread.
Thank you!!!!!
Hi Maurizio, what is the significance of San Francisco style sourdough? What makes it special? Do you have any posted recipes that are comparable?
Thanks!
I think the biggest association there is the extreme sourness. They push things to the limit in terms of that tangy, sour flavor and it’s their calling card. I don’t have any recipes here for a super sour sourdough bread but it’s something I’m working on!
I would go for the square one, and really either thickness works very well. I’d probably go with the 3/8″ option (it’s a little lighter and easier to move)!
Hi, which baking steel do you recommend? I am clicking on the link you have under “Baking Tools”. There is a round or square option, and a 1/2″ or 3/8″ option. Which one do you recommend?












501 Comments
Hi Maurizio;
Thanks to your Web site, I now consider myself a baker and no longer buy bread, except as research. Just made your potato rolls and they were perfect. I bought a Mockmill and hope you write more about working with it. I am not certain that I am getting the finest grind and wonder if this is the reason my 50/50 loaf doesn’t have the oven spring that yours has. I tried the pan bread, hoping that the structure of the pan would help support the rise, but still didn’t get the rise I’d like.
On another subject, last year, during a cross-country drive, I discovered the Corona BakeryGolden Crown Panderia in Albaquerque. What a find!
So glad to hear that! It’s hard to say why you’re not getting the same rise. Flour could be the issue, or it could be a proofing issue or dough strength issue… With my Mockmill, I usually mill as fine as it can possibly go. If you’re going to that level, well, that’s all we can do 🙂 Keep at it with that recipe, it’s a little challenging but you’ll notice improvements the more you bake it!
Ah yes! I’d say one of the few great bakeries here. So good!
Hi Maurizio.
I am new to sourdough, taken up to try to keep sane, during Covid. I ran across your blog and had success recently backing your Perfect loaf. Thank you for such great instructions. I have a question about freezing the sourdough. My husband and I do not go through enough bread to warrant cooking 2 loaves at a time. I ran across a post that credited you for instructions on freezing dough which said to wrap and freeze the dough prior to the final rise. I took that to mean before the final 2 hour rise. I let the dough defrost in the fridge overnight, when I took it out for the final rise it was very cold. I believe one thing that I did wrong was not letting the dough come back to room temperature before the 2 hour final rise. The bread didn’t rise as much as my first loaf and it was not cooked, doughy, inside even though the temperature was correct. Can you give me some tips on freezing the dough?
Thank you for your attention and love for sourdough!
Hey, Alice! Happy to help. I’ve actually never done what you’re describing, but I know readers here who’ve had success doing this. What I prefer doing instead is baking all the dough and then freezing the final loaf, which reheats wonderfully. Some readers have said with dough they’ll freeze it in a container that’s wrapped very well. Then thaw the dough in the fridge until very pliable. Finally, bring it out to the counter to finish proofing.
If you’re interesting in freezing a baked loaf (my preference), check out my post on storing bread.
Hope that helps, Alice!
2 salt questions. Some of your recipes call for “fine sea salt.” I just use regular table salt, nothing fancy. Is that OK? Since I’m measuring by weight, i figure they are comparable. Also, I’m trying to cut down on salt in our diet. “My Best Sourdough Recipe” calls for 19 g salt, or 2%. I add about 15g, not 19g. Is there a particular percentage of salt below which you shouldn’t go?
Thanks so much. I love this “Best” recipe. Am adding walnuts and it tastes great.
Hey, Lisa! I don’t like to use table salt because of the iodine added, to me it tastes a little off. I don’t think there’s a problem there, though. And yes, measuring by weight is the way to go! Typically, bread recipes do not dip below 1.8% salt—in fact, that’s where I’d say 95% of my recipes end up. But, if your dough baked up well then that’s great! Walnuts in bread is perhaps one of life’s greatest joys 🙂 Happy baking!
HI Maurizio
I have been having tremendous success with the simple weekday sourdough recipe. It seems to rise well and often I get an ear, but, one of the comments that people make is that it doesn’t toast well. Too heavy, they say. Is it not rising enough? I don’t have the bubbles like you do, but I am improving.
Hey, Kate! It sounds like perhaps your dough was slightly underproofed. There are a few indicators your dough could be under: explosive rise in the oven, dense spots in the interior with potentially scattered large holes, and a gummy texture to the interior. Finally, it’s possible the bottom of the loaf might be slightly bowed upward (like the letter “U” — the top will kind of dome).
Make sure to build your levain from a starter that’s strong and mature (meaning it’s risen to it’s peak height before you take some to use). From there, bulk fermentation is very important! Make sure your bulk fermentation goes sufficiently far, you want the dough to look smooth, it should have risen considerably, and have bubbles here and there — it should look alive. If you tug on the dough a bit it should offer resistance to your tugging, it’ll feel stronger. Give the dough the time it needs in bulk fermentation! If you have to give it another 30m or hour to see these signs, do so. It’s important for this step to go sufficiently far for the dough to have enough fermentation activity before its proof.
Thank you, Maurizio! I will work on the bulk fermentation first. My starter is very active and bubbly. I noticed when I did the final proof in the banneton, the dough had a few bubbles under the skin of the dough. This is an improvement for sure. So how do you know when the dough in the final rise has risen enough? And, for my starter, sometimes it triples and sometimes it doubles. I can only guess for full ripeness. Should I feed the starter again if it only raises to double?
If you’re proofing the dough overnight in the fridge, you have a larger window when you can bake the dough. In the morning, the dough should feel risen, soft, and airy. If it feels dense and lifeless, give it a little time at room temp before baking. If you’re baking with the dough proofing at room temp, give it a few gentle pokes around the surface. The dough should feel very soft and airy, but not so much it’s broken down. It takes some experience in determining these times. I always say, before you bake try to assess the dough by feeling it a little, poking, seeing how it looks. Then bake. If the dough rises dramatically (too much) then you’ve under proofed. Draw a connection between how the dough looked and felt with how that bake ended up—next time you know those signs lead to an under proofed dough.
I don’t like to go by rise height for a starter to determine when it’s ready because the flour you’re using can change how it looks. Instead, I go by a combination of signs: sour aroma, loosening consistency, bubbles at sides and top, and then I take the time and temperature into account.
Thank you!! This “see how it feels” approach totally worked. I gave my dough a bit more time out of the fridge before baking and it was incredible!!!!! Lots of holes, lovely texture and great oven spring (but not too much). I also now understand that my dough was under hydrated. Too dry, in other words. I was concerned as a newbie that the dough was too wet. But the overnight proofing in the fridge allowed the dough to absorb more moisture and still have great strength. Now all my friends can’t wait until I bake them a boule.
Right on, Kate! So glad that is now working for you. I find that overnight proof really does help firm up the dough and bake up nice the next day. Enjoy and have fun baking for your friends!
Hi Maurizio, one of my favorite recipe of yours is the Stout Country Sourdough…..beer and bread what can be any better? One question I have is level of sourdough sour taste. I would like to increase the sour level some (not san francisco level). How would I achieve a bit more tang to your recipes? Thanks
Happy to hear that, Steve! I’m actually working on a comprehensive recipe and guide page on exactly this topic with many suggestions to help get you there (not to SF sour, but to increase sourness in general). Hopefully I can have this posted here soon! Keep an eye out 🙂
Hi Maurizio, thank you so much for all your posts! I’ve found your posts really helpful as an inexperienced bread baker! I did have a question for you regarding the starter – if I wanted to share my starter with friends, should I wait until it is active (5-8 days) to put the discarded starter in a jar for them, or should i take some of the discarded starter from Day 1 on Day 2, and just feed it like I am with my starter? Thank you!
You’re welcome, Emily! Glad I could help. You should definitely wait until your starter is rising and showing signs of consistent fermentation each day—that consistency will indicate a stable culture, which is what you’ll want to share 🙂 Happy baking!
Dear Maurizio! I am not very experienced sourdough baker yet but I wonder what is your impression or experience of Rubaud and French slap and fold (R. Bertinet) method. I am under impression that higher-hydration and well aired dough gives a softer and nicer bread – which my family loves. My statements might be wrong. Some sources say that Rubaud gives much softer crumb than slap and fold, yet I do not have strength enough to carry out Rubaud mixing/technique. I need to make breaks and cannot do it 3-5 mins in a row as some sources/recipies suggest. You have probably used the both techniques. Can you comment on this topic a bit. With my kindest regards to you.
Hey, Terje! I’ve mixed with both methods many times over the years, and while the Rubaud method works really well, I prefer the slap/fold technique (see my guide to slap/fold here). I can’t say I’ve noticed either method leading to one loaf being softer or more tender over the other, I feel they’d both result in the same bread in the end. In my experience, the s/f technique develops the dough much faster and more efficiently, so perhaps those using both are mixing for the same time but the s/f dough is strengthened further during that time period. Regardless, I feel it’d result in the same bread in the end (assuming all else equal)!
Dear Maurizio!
Thanks! Relieved, as I love S/F.
I wish you could consider giving virtual classes. Reading books and different sources is good and helpful but working in parallel with a master (also, when he can see student’s doing and point at mistakes) is an extra.
Again, I adore your homepage. What you are doing, your dedication, experimenting, etc. is so inspirational and fantastic! Many thanks and the very best!
Terje
You’re very welcome, Terje. Yes, virtual classes would be helpful, I know! I’m juggling several things with regard to the site and my baking right now, when some more time clears up hopefully I can look more into supporting this!
I really appreciate the kind words, it means a lot when I hear my site has helped and is inspirational—so thank you!
Maurizio, I see that you use a granite surface for your slap and fold video. Since you dough looks a bit wet (I know it’s supposed to be that way, is the stone better for this? Currently, I use a large wooden board. I notice that the wood absorbs moisture, causing the dough to stick more than I would like.
Thank you for all the wonderful information you share – especially the explanation of the bakers’ math. While waiting for my starter to get going (several failed attempts) I have been reading as much as I can find and I think I’m over thinking all of this. Back to the starter – I am now using 50-50 rye and unbleached all purpose flour. Like you describe, after the first two days it was all bubbly and large and wonderful. The “recipe” I am following is to discard half (amounts to about 190g) and then add 100g flour and 100g water which I have been doing and now on day 6, there are bubbles but no volume. I think temperature may be my problem. The fall has settled in here and we do not keep the house anywhere near 85 degrees and I haven’t been able to find a spot that is consistently warm. I tried leaving the starter longer and it ran out of food and started developing hooch. I am now trying my yogurt maker but carefully monitoring the temperature this maker has a steady state of 44 degrees C. I keep the lid off and have a thermometer in there to monitor the temperature. Any suggestions? Thanks again.
You’re welcome, Valerie! I’d say 44°C might be cutting it close for too warm of a temperature, but if you’re keeping an eye on it so it doesn’t get too warm, that’s good. If you’re having trouble keeping it warm, warm the mixing water in the microwave to 85-88F at each feeding. Then, keep the mixture in a thick jar and keep it insulated and warm. You can wrap it with a kitchen towel and then place that container inside another container for more insulation. That should work just fine. Just stick to the schedule, even though you’re not seeing a ton of activity, it will come around 🙂
Well, the temperature in the yogurt maker was beginning to scare me so I went all-in with your suggestions. I warmed the water (have been doing that all along), I warmed the jar (still using a new, clean jar each time), I warmed a towel, and I warmed the second jar and it’s all tucking into the cupboard above my fridge (which surprisingly does not get as warm as I expected). Let’s see what it looks like tomorrow. Thanks again for taking the time to reply so quickly. Wishing you a great day.
You’re very welcome, Valerie! Let me know how it goes. Have a great Sunday!
You need a cookbook. I printed out your recipes and they are a mess from referring to them sooooo many times. Let’s go!!!!
He he, this is a great sign! I am working on my cookbook right now (and have been for the past year)—it’s getting there 🙂
Ha, I was just thinking the same! So glad to see that this post is 6 days ago and a book really is coming! Also, I’m hoping you’ll do what you do here – get into the hows and whys of it all. I really want to understand the process, and I suspect a lot of your readers do also. I want to know the chemistry of it all, so that I can learn to look at my levain or my autolyse or my resting loaves and know when it’s time to do the next thing. : )
Yes, it’s been in the work for some time now, I’m buried under many words and a long manuscript. I have a lot of info in the book already, I think you’ll be happy when it’s released! And thanks for all the comments and kind words 🙂
Mauricio, if you need someone to translate your recipe book into french, I am your man! I have been spending some much time translating your recipes for my non-english speaking friends because google translate is not precise enough for baking. Feel free to contact! I can send you bread pictures as a resume! Thanks again for the great work!
Thank you for the offer, Adoul! And I really appreciate you spreading the word about my site 🙂
I haven’t announced anything yet, but yes I do 🙂 If you haven’t signed up to my newsletter (there’s a Subscribe box in upper-right), please do so—I’ll announce there when it’s ready!
Do you have a cookbook in the works? I always end up coming back to your recipes, and I’m old school… I like to use a book!
Help! You Contact form will not send
Don—I just tested it, works fine over here! Be sure you have your name and email address input in the required fields.
I think it was busy, or CentryLink was asleep but it worked fine @30 minutes later. Thanks for the response.
You’re very welcome, Julie! Yes, that should work well. You will likely need to adjust the baking times (and perhaps the temperature), but that’s almost always the case, anyway. Still go with the usual 20min beginning part with the lid on, remove the lid, and then go for what the recipe indicates. Keep an eye on it, though, near the last 10-15min of the bake to ensure it’s not getting too dark. Happy baking!
Hi Maurizio, I love your recipes and instruction and really appreciate the science you include, it’s so helpful to understanding the process. I’d like to try to create taller, narrower loaves – more traditional sandwich shaped slices. I’ve been using an oval banneton and cooking in an oval shaped dutch oven. Would a loaf baker like this yield good results with your recipes? https://www.emilehenryusa.com/collections/bread-bakers/products/artisan-bread-loaf-baker?variant=31717152849967
It’s ok if you’re not seeing rise at that point. Give it more time to mature!
I am on the 4th day of my first starter – which I discard/feed every 24 hours. Although there is slight bubbling at the surface, my starter does not rise. Isn’t this a problem? Any advice as to what I do from here?
The fifty-fifty whole wheat recipe came out great. The only variation I made was to use white whole wheat flour. Otherwise, I was careful to follow your directions precisely. I love the detail that you put into the explanation, and the fact that we are baking in the same city. (no need to adjust for humidity or altitude.)
Glad to hear it turned out well for you! I love white whole wheat, it’s a wonderful variety. And nice to meet a fellow New Mexican!
Jill —
It sounds like maybe your dough is not strengthened enough, over hydrated, or over proofed. Dusting your baskets with flour is definitely important and certainly helps dough cleanly remove, but it can only go so far.
If your dough is on the weak side it won’t be as smooth and as strong as needed to cleanly remove from the liner. Try adding in another set or two of stretch and folds to impart a little more strength, and be sure when you shape the resulting dough is smooth, strong, and taut. A good test here is to just shape one loaf very, very tight and see if it cleanly removes next time (still dust your basket, though).
Over hydration is related to dough strength also: if your dough is over hydrated and not commensurately strengthened, it’ll lose shape during proof and stick to the liner. Reducing hydration is a quick way to give your dough strength to ensure it removes cleanly.
Finally, the longer your dough proofs the more it begins to lose strength: fermentation has the effect of strengthening gluten up to a point, but as acidity builds up in the dough it begins to degrade. This is actually a good (and necessary) thing up to a point, but too far and your dough will lose shape, get overly sticky, and eventually collapse. If you’ve tried shaping tighter and this isn’t working, try pulling back your proof time a bit to see if that helps.
Perhaps in the future! 🙂
Rex — use straight from the fridge!
Hi, Maurizio and fellow fans,
I have a good amount of leftover discarded starter that’s been in my fridge for 4 days, awaiting use for sourdough pancakes this weekend(!) The question is, do I use the leftover straight from the fridge (stirred down, as Maurizio says,) or do I need to revive it first?
Thanks,
Rex
Hi Maurizio!
I’ve been following your site for a few months and following all your tips and tricks on building and maintaining a strong starter and it’s been fantastic! I’ve baked up the Simple Weekday recipe 3 or 4 times and have really learned a lot about paying attention the my dough and looking for the right signs that everything is progressing as it should. I’m happy to say I think I’ve mastered that recipe! So I tackled your My Best Sourdough knowing it would be a challenge with the high hydration levels. To my surprise I was really feeling like the dough was turning out wonderful and super excited about how it would turn out!
Then came the OH NO moment. My dough stuck to the inside of my proofing baskets terribly!!!! I used a liner in one basket and no liner in the other. The liner in the basket with the liner was quite wet when I pulled the loaf from the fridge in the morning and it stuck pretty bad. I hoped it was the liner causing the issue but the loaf without a liner also stuck something fierce. I floured them both really well so my question to you is how to you keep your dough from sticking??? Especially in the more challenging high hydration recipes? I went ahead and baked them up and they were tasty and I LOVED the crumb (so nice and delicate) but they didn’t rise as well because of my sticking issue. Any tips you can give would be welcomed! Thanks!
Hey Maurizio, I love your blog and how precisely you build-up your recipes. Must be your engineer soul in there;) I have a question – are you planning on issuing a book?
Hi Maurizio, I made my first honest to goodness successful sourdough bread
yesterday thanks to you (and a great starter from Breadtopia). I’m primarily a cookie baker- Italian/Sicilian treats are my favorite, so bread baking was a quarantine induced activity that I’ve loved. You really simplified the process and I appreciate that! I’m looking forward to trying your discard recipes
I did cultivate a rye starter as an offshoot of my sourdough starter. It is very active and I’m researching rye recipes. Now I just need to find rye flour! Thanks again for your inspiring baking.
So happy to hear that, Cynthia! Ooh, I love Italian treats (of course), some of my favorite are from Southern Italy where some of my family is from (Ceglie). Happy to help and happy baking 🙂
Nancy — thanks so much for the contribution, I really appreciate that and you spreading the word! Yes, there have been times when the dough was pushed too far in bulk and I really had no choice but to bake them that day. I don’t let them come up to room temp after the fridge, they can be baked cold straight from the fridge with no problem. Yes, there are many ways to bake great bread! Thanks again and I hope that all helps — happy baking!
Hey Maurizio, I just made a (small, for now) contribution to support your site! I recommend it a lot and am happy to pitch in. I do have a question tho…i have loaves in the fridge, felt and looked great, no problem there. I’m wondering about final rise…my last loaves were enormous in the fridge and I hadn’t ever experienced that before. They just ballooned more than usual. So today, I cut back on bulk time, and shaped, and popped them in the fridge. Question is, have you ever decided to bake before a long overnight rise simply because of volume? Or poke test (which i still don’t understand)? And do you let your loaves come up to room temp after overnight fridge or just go straight into the oven? I always go straight into the oven from the cold. With so many expert bakers on Insta these days, everyone does it just a little bit differently. Thanks!
Hi! I made a starter before finding your site. It’s 14 days old now. Now that I’ve found you, I’m only using your recommendations and I’m loving this process! I do have a couple of questions though.
First, due to covid, I’m out of bread flour. Can I fed my starter that’s been 50% bread flour and 50% white whole wheat flour only white whole wheat now? I can’t find bread flour anywhere anymore. I’m thinking of trying out your drying process to store it in my pantry until I can find supplies more regularly again. Or if I can switch to only whole white wheat flour, I’m going to put it in the fridge and feed once a week with just the whole white wheat flour. I’m hoping it doesn’t die.
Second, can you help me figure out why my first loaf and had a huge pocket on the bottom? Sorry, this is the long question! I know I ran into a few problems during the process, but I’m hoping you can help me figure out which mistake or mistakes it was that got me there. Again due to covid, I didn’t have much bread flour and I didn’t have any rye flour or rice flour. So I used as much bread flour as I could, but used whole white wheat for the rest of the weight. Here’s the steps that I think caused the huge bottom cavity. I made the levain in the morning and think I should have made it at night to give it more time. I was planning on doing bulk fermentation for 4 hours, but I noticed I didn’t have as many bubbles on top as your pictures. I was going to let it rest another 20 min, but my wild toddler caused me to leave it on the counter for about an extra hour instead. I’m obviously new with the process, but think I did ok with the preshape and shaping process. Could I have trapped some air in it causing that pocket though? My proofing basket hadn’t arrived in the mail yet, so I used a large ceramic bowl with a tea towel dusted with unbleached all purpose flour since I also don’t have rice flour. I had to score with a knife since my tool hasn’t arrived yet either. I baked in a cast iron Dutch oven with cut out parchment paper on the bottom. I know all that seems like a mess, but I felt pretty good during the steps. The bread did rise, had a beautiful crust, and tasted great. It just had an enormous cavity on the bottom and small bubbles throughout. Thank you for reading my lengthy post!
Hey there! I don’t feed my starter Bread Flour, I usually use a mix of AP and rye or AP and whole wheat. Really, any flour will work just fine. Check out my weekend baking schedule for a sample itinerary where you can keep your starter in the fridge most of the week, only to take it out near the weekend to bake.
Your steps don’t seem like a mess at all — you made due with what you had, nothing wrong with that at all! Based on the description of your loaves it could be that they are slightly under proofed. There are a few indicators your dough could be under: explosive rise in the oven, dense interior with potentially scattered large holes, and gummy texture to the interior. Finally, it’s possible the bottom of the loaf might be slightly bowed upward (like the letter “U” — the top will kind of dome).
Make sure to build your levain from a starter that’s strong and mature (meaning it’s risen to it’s peak height before you take some to use). From there, bulk fermentation is very important! Make sure your bulk fermentation goes sufficiently far, you want the dough to look smooth, it should have risen considerably, and have bubbles here and there — it should look alive. If you tug on the dough a bit it should offer resistance to your tugging, it’ll feel stronger. Give the dough the time it needs in bulk fermentation! If you have to give it another 30m or hour to see these signs, do so. It’s important for this step to go sufficiently far for the dough to have enough fermentation activity before its proof.
Finally, yes it could have been shaping. If you don’t evenly shape the dough large pockets can form, but if fermentation was still sufficient (and not under proofed like I mentioned above) the rest of the loaf will still be fermented well (bubbles all over). If you see those dense spots, though, it’s usually a giveaway the dough was underproofed.
Hope this helps and have fun with it, things can seem overwhelming at first but you’ll do just fine!
Hey, Leilah! Answers below:
– I like to keep the malt usage to the minimum, especially so as of late. I usually actually starter at something like 0.5% and then work up to 1% as needed, but it really depends on the flour you’re pairing it with. I’d suggest starting at 0.5% to avoid an overly red crust and gummy interior. If you find the crust color still isn’t great and/or you’re seeing a lack of strong fermentation, increasing that percentage slowly as necessary is the way to go. Check your AP flour to ensure it doesn’t already have malt (malted barley flour) added.
– You can add those two if you’d like, it really depends on what you’re after and the reason for adding them. I’ve actually never used vital wheat gluten in any baking. You could try adding a small bit of malt if you think it’ll help.
– That’s good, I don’t like to place the Dutch oven directly on a baking stone/steel these days, it gets too hot!
– Some of those changes in temperature were simply my experimentation over the years, but some do benefit from a slightly higher temp. I find higher hydration doughs do well with a really high blast of heat (500F) as well as whole wheat doughs (even things like miche). Otherwise, I tend to go with 450F to avoid burning in a home oven.
Hope that helps (and I think it was you who contributed to my site, thank you!)!
Yes, it was me and you’re VERY welcome. It’s been incredibly helpful to have a sounding board as I go through the learning process. Thank you for these answers, all make sense.
Hi Maurizio, now that I’ve been baking using your recipes for about a month now, I’ve consolidated a few questions I was hoping you could answer….
– I finally received my dry Malt Diastatic powder from Amazon….if I’m adding it to my all purpose flour, along with vital gluten to create a malted bread flour, do you think 1% of total is about right? I’ve read between .5 and 5% but not sure what would be appropriate for recipes like COUNTRY SOURDOUGH OR SIMPLE WEEKDAY RECIPE…or how you decide to use more vs. less.
– I’ve enjoyed the quicker 1 day process in your most recent ALL PURPOSE SOURDOUGH RECIPE and using my starter immediately vs creating Levain . Even though I obviously don’t get as much of a rise or open crumb, it is still delicious. Would it be appropriate to add gluten and malt (mentioned above) to this recipe as well, or would something get thrown off by doing that?
– Oven questions…
– I have a pizza stone and a le Creuset Dutch Oven. I’ve been putting the dutch oven to preheat on a middle rack and the pizza stone on the rack directly below that. Is this correct, or is the pizza stone supposed to be directly under the dutch oven on the same rack?
– I’ve noticed that the baking temp and times vary in many of your recipes. For instance…Weekday is 450, Country sourdough is 500 for 20 mins, then 450, A return to Basics is 510, then 440, then 435. Can you explain why the different approaches, and if these can be inter-changed between recipes or if they are that specific b/c of the type of bread.
Thank you!!!!!
That’s great! I’m amazed you have any time to code with all the baking! But life is all about balance 😊
Hi Maurizio, what is the significance of San Francisco style sourdough? What makes it special? Do you have any posted recipes that are comparable?
Thanks!
– Mike in Michigan
I think the biggest association there is the extreme sourness. They push things to the limit in terms of that tangy, sour flavor and it’s their calling card. I don’t have any recipes here for a super sour sourdough bread but it’s something I’m working on!
Can you freeze sourdough dough to bake later?
I don’t usually do this, but some readers have said it works well if you freeze pizza dough in shape, bomboloni in bulk, etc.
I do! I still work on our app, SkyView 🙂 Great to hear from a fellow dev!
I would go for the square one, and really either thickness works very well. I’d probably go with the 3/8″ option (it’s a little lighter and easier to move)!
Hi, which baking steel do you recommend? I am clicking on the link you have under “Baking Tools”. There is a round or square option, and a 1/2″ or 3/8″ option. Which one do you recommend?