
Wrinkled fingers and toes, sand in every nook and cranny, lunch sacks with empty oil-stained white baker’s paper, and serpentine hair that could pass as a sun-bleached mop head—all signs of a successful outing to the beach. Our daily trips to the Adriatic’s cool, blue waters were welcome escapes from the city heat during family visits to Southern Italy. Our little beach— perhaps with a bit of fantasy I like to think it was just ours—was a short drive away in a small stick-shift car packed to the brim with people. Family car after family car, we’d speedily caravan through the small towns toward our respite. The few, yet crucial, stops along the way had a single purpose: to fill our sacks with baked goods meant to sustain our time away. My favorite among these, by a long measure, was a simple sourdough focaccia.
With hardly a second thought, we’d buy several full sheet trays of the golden bread. The baker would cut the thick slabs into manageable pieces and wrap the entire thing in the white paper, sealed shut with a shiny sticker— conceivably an attempt to elevate the humble, yet utterly otherworldly, snack.
You see, focaccia is a rustic and simple affair: it’s a slab of naturally leavened dough topped with simple ingredients, any vegetable in season, olive oil, and salt. Some focaccia are soft, and some are crispy (my preference), sometimes thick and sometimes thin. There are as many variations across Italy as there are dialects. The beauty of this bread is that you can make it with little effort. First, mix the dough in the morning, then let it rise during the day, and finally bake it just before dinner. If you have a ripe sourdough starter, salt, and olive oil, you’re hours away from golden focaccia—and all the wonderful olfactory impressiveness therein—baking in your home oven.
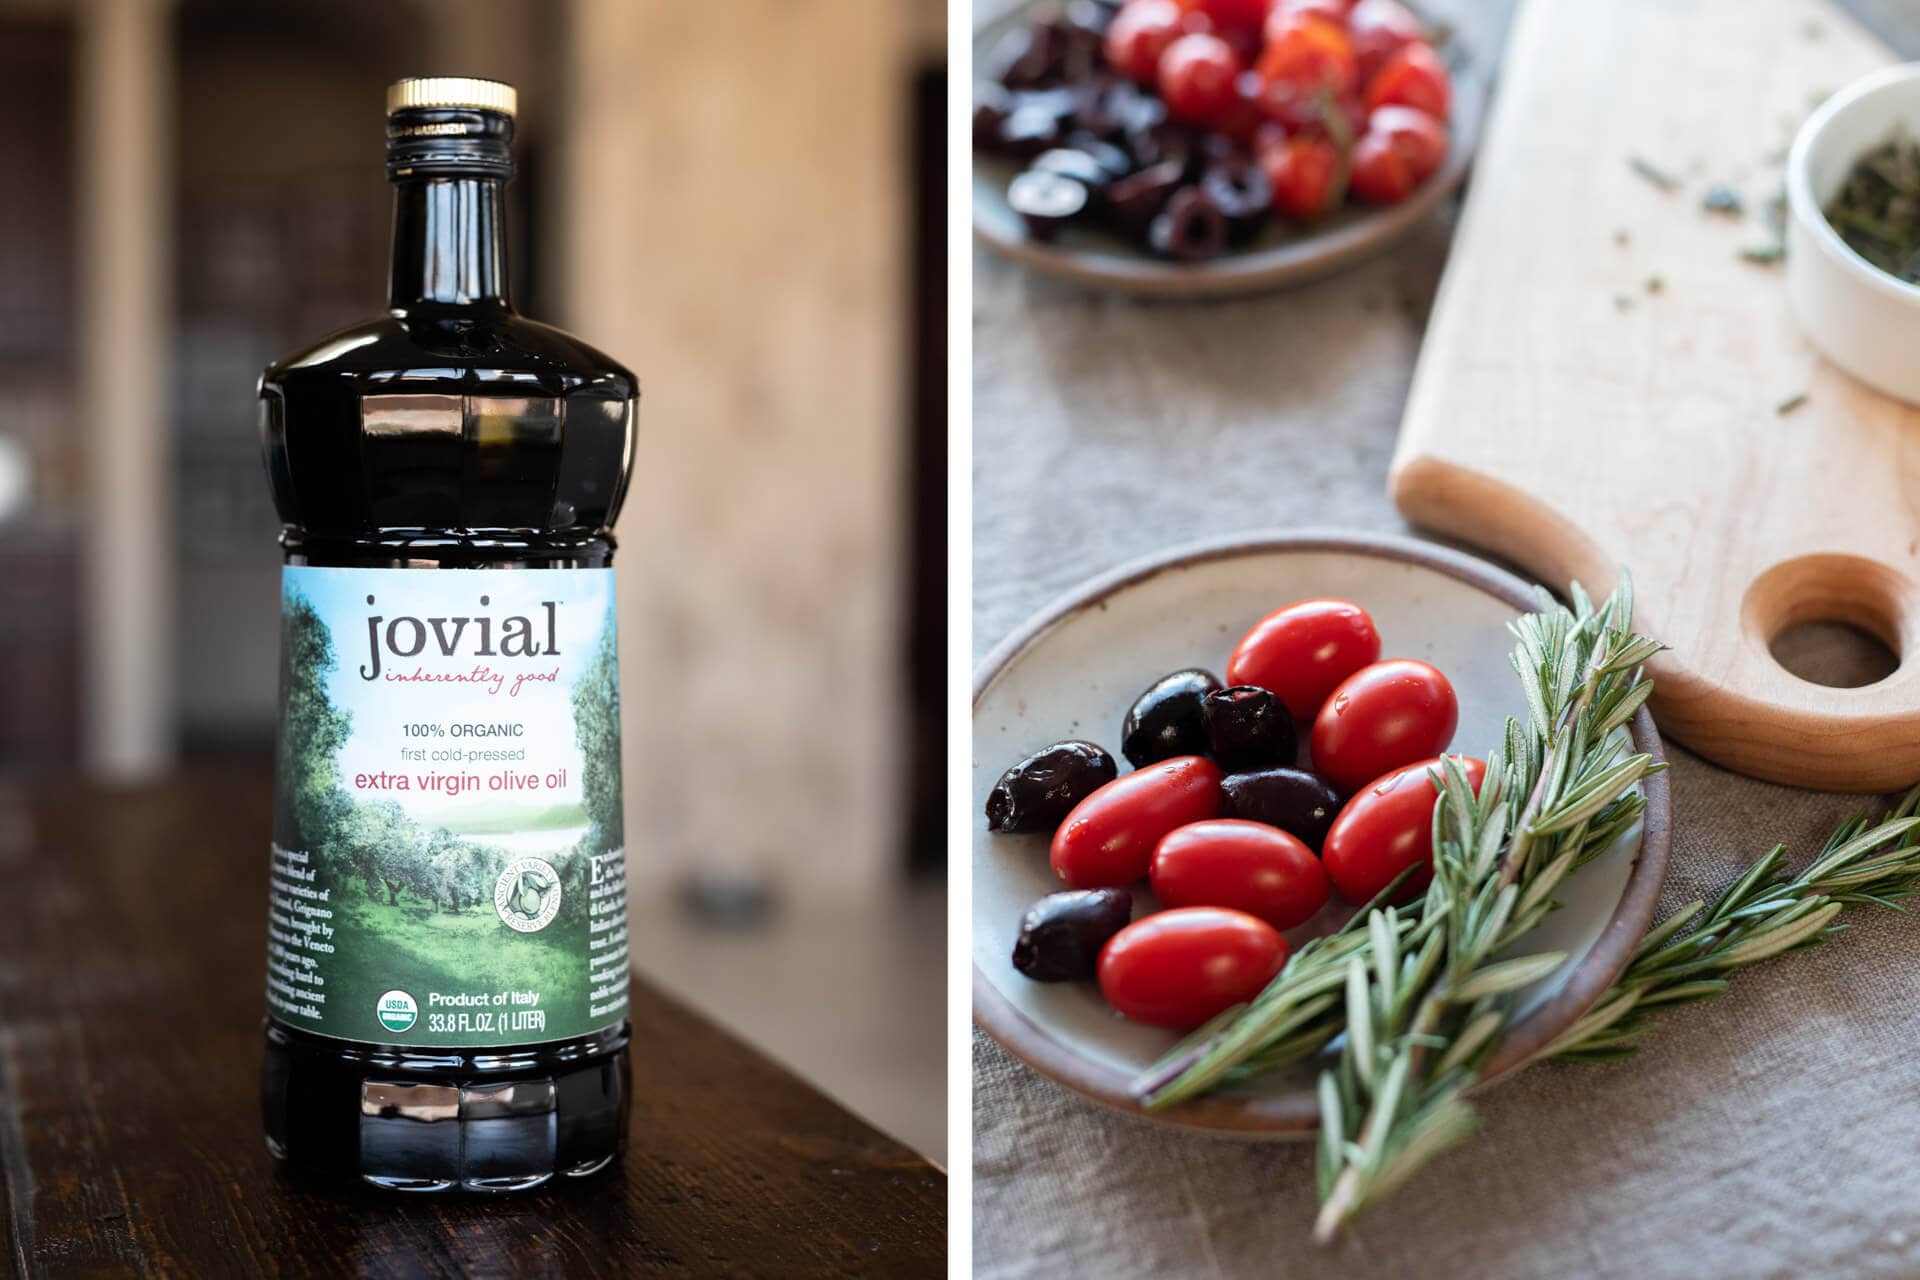
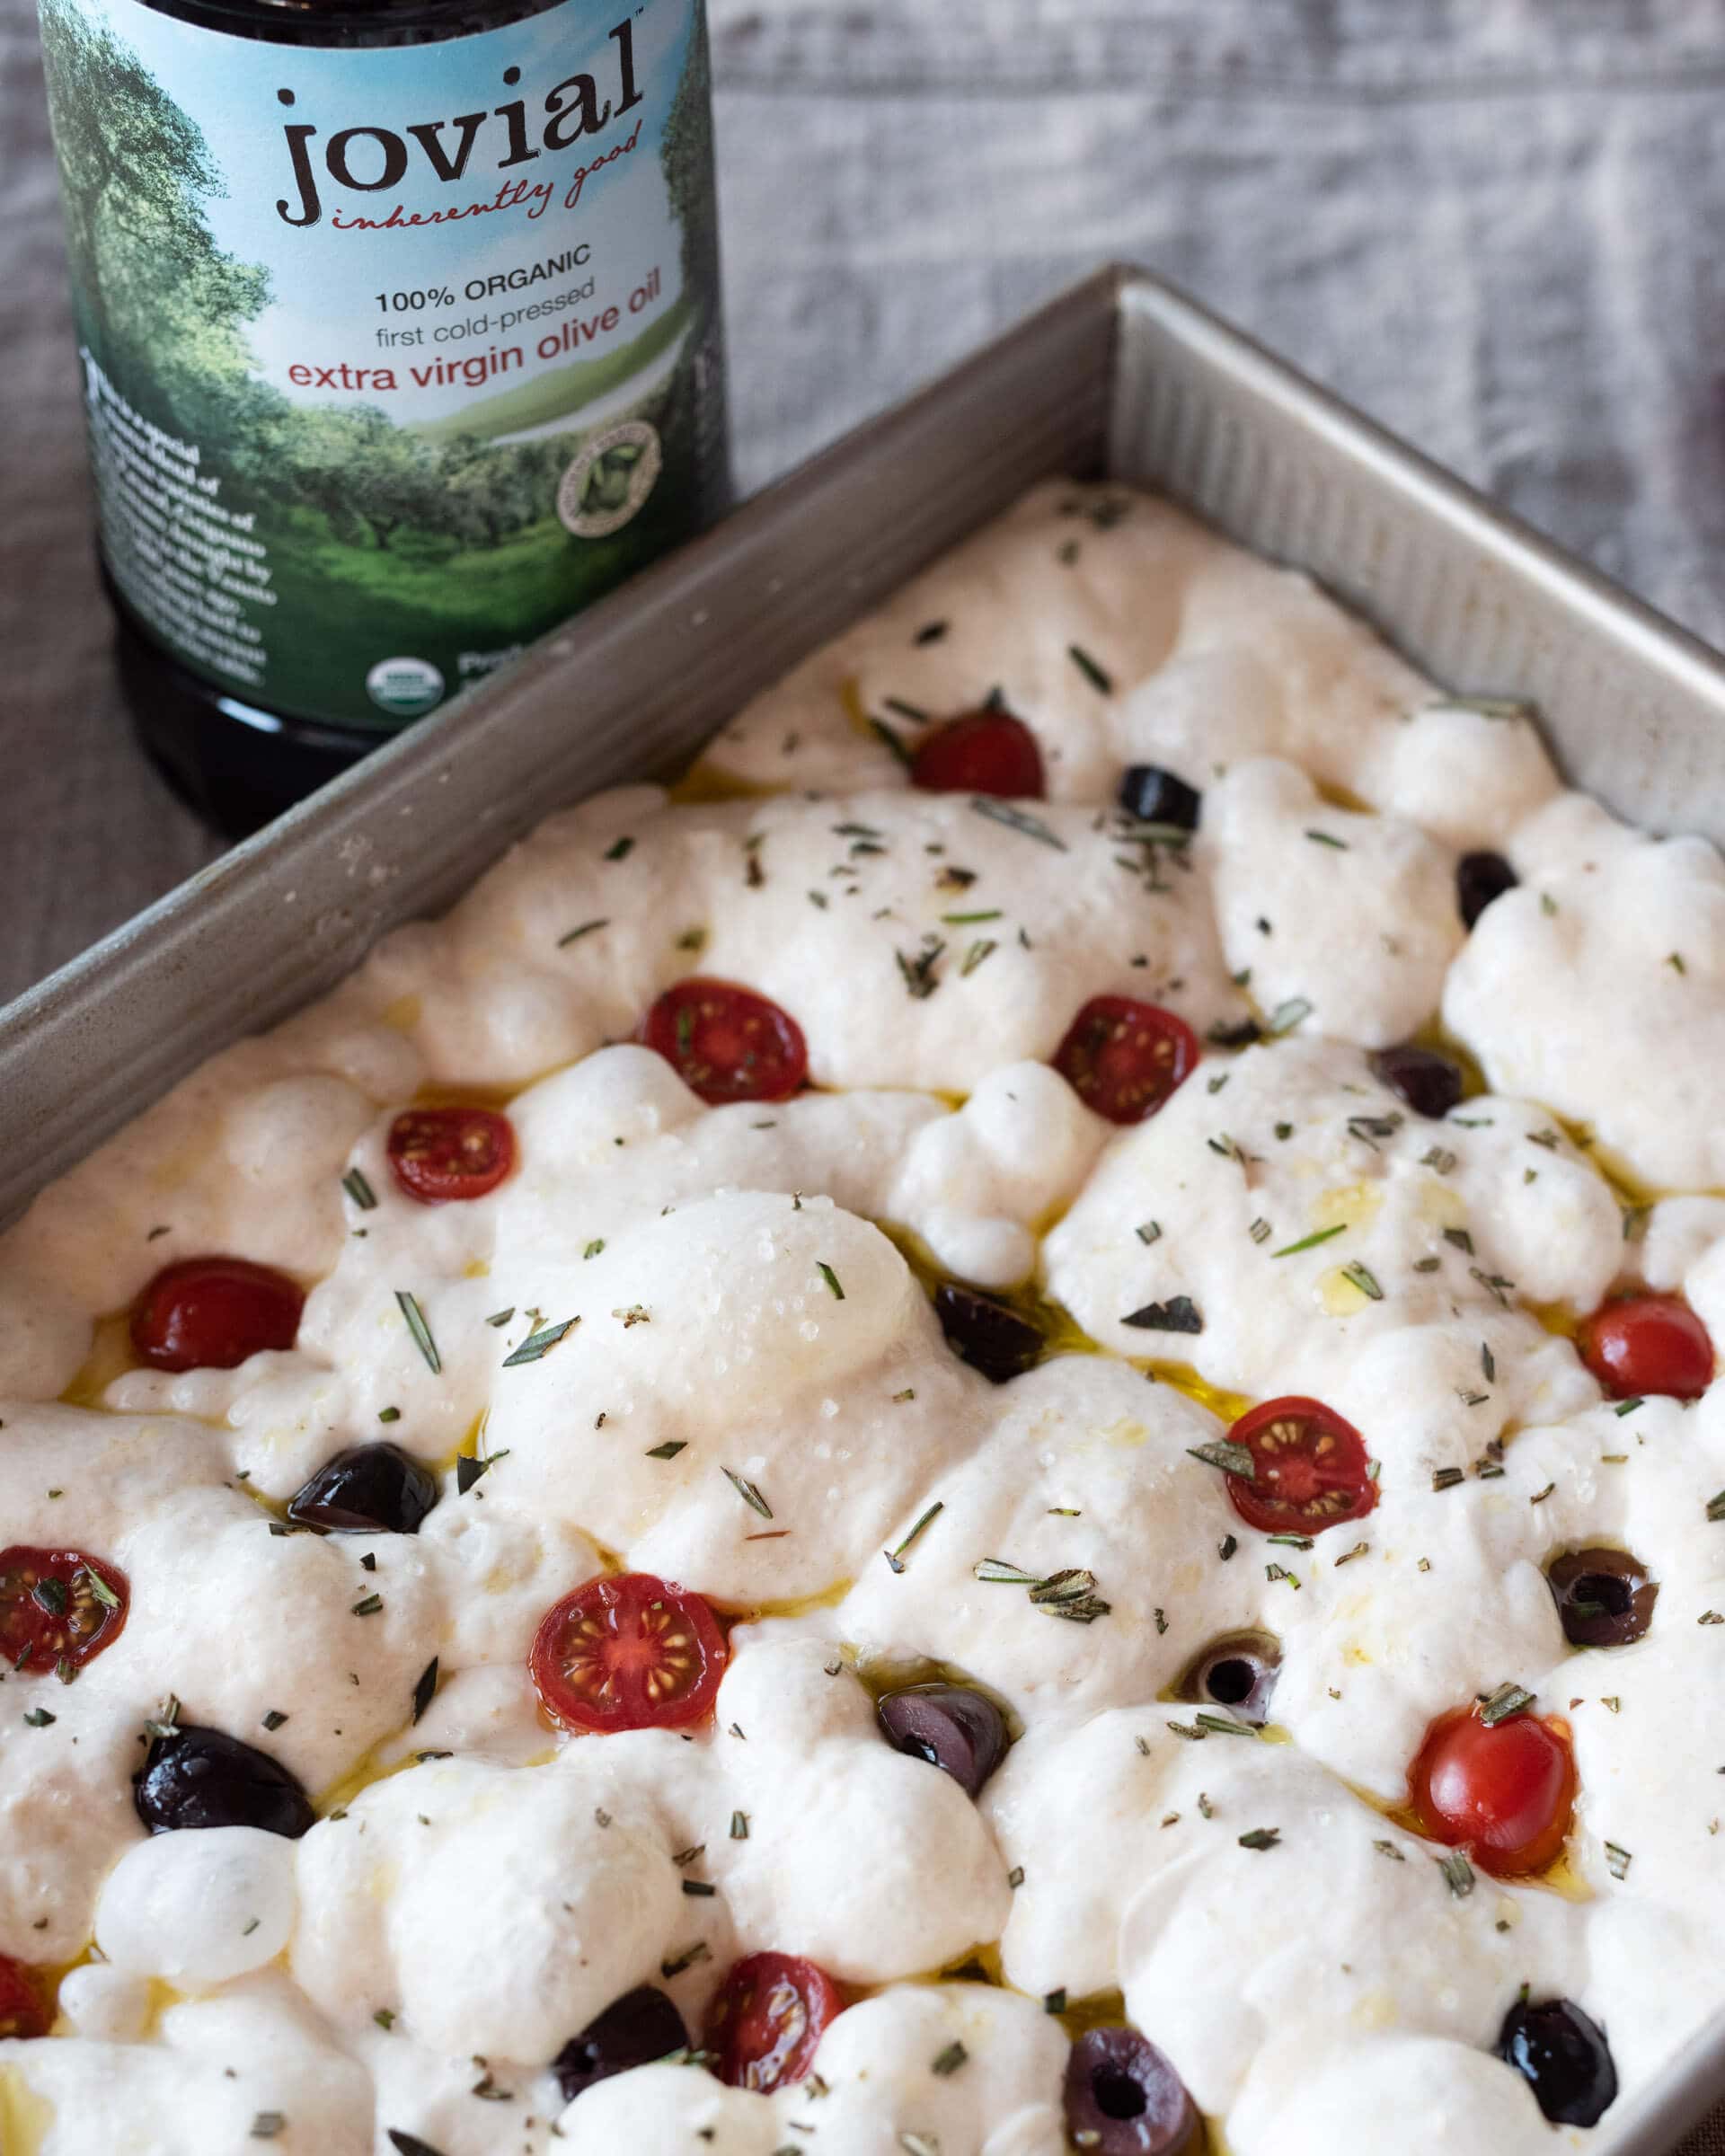
Because sourdough focaccia has so few ingredients, the ones you use should be of the utmost quality. Use vegetables in season and the highest quality olive oil you can find. In this post, I worked with Jovial’s Olio Nuovo, a fresh-pressed olive oil from the Valpantena area of Northern Italy. It isn’t easy to source exclusively fresh-pressed olive oil. Usually, this oil is blended with aged oil, balancing the flavor profile to make it consistent with other offerings throughout the year. This fresh oil has a delicate flavor but a balanced, upfront fruitiness as well. If you’ve never had the chance to try an oil like this, you’ll be pleasantly surprised.
Flour Selection
With this naturally leavened focaccia, I wanted little sourness in the result. While I typically include whole grains in most of my recipes, I wanted the flavor of this classic bread to be mild so the taste of the olive oil and fresh toppings pop. Removing all the whole grain flour from initial trials hit the spot.
For this formula, I blended 30% high protein flour (about 13% protein) with 70% all-purpose flour (11-12% protein). The high protein flour helps give this highly-hydrated dough strength and structure—and 30% is just enough.
Focaccia Toppings
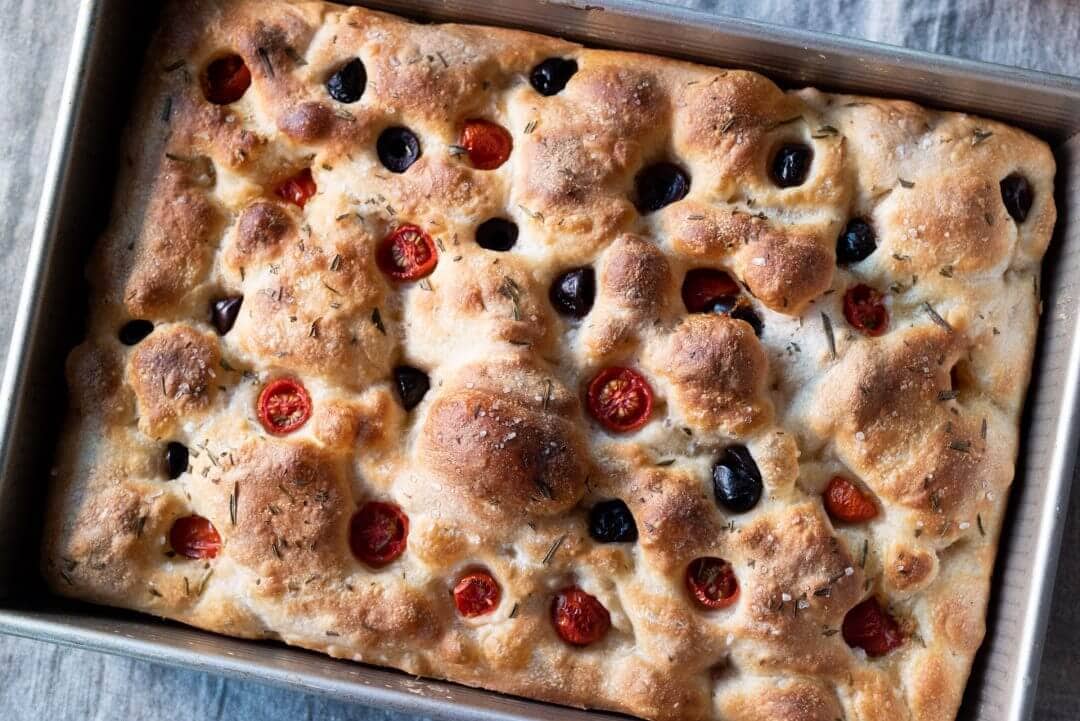
This simple sourdough focaccia can be topped with just about anything you can imagine. My favorite is rosemary, chopped cherry tomatoes, pitted kalamata olives, coarse sea salt, and good quality olive oil. Traditionally, Ligurian focaccia (and as shown in the recent Salt Fat Acid Heat episode on Netflix) is topped with a salty brine. Instead, I love dusting the top with coarse sea salt: the chunky crystals bring unexpected pops of flavor.
Here are a few more ideas:
- Tomatoes, capers, oregano, garlic, olive oil
- Thinly sliced Yukon gold potatoes tossed with coarse salt. Let the potatoes drain over a colander for 15 minutes to help remove some water. Then top in addition to coarse sea salt, fresh thyme, and olive oil
- Sliced and olive oil-marinated red onions, brined olives, and fresh chopped tomatoes
- Grated hard cheeses of all kinds (parmesan, pecorino, etc.), rosemary, olive oil
A Simple Sourdough Focaccia Recipe
Special Equipment
For this sourdough focaccia, you will need a round or rectangular pan for baking. I like to use a deep pan (as opposed to a baking sheet) so the focaccia doesn’t dry out too fast in the oven. My preferred pans:
- 9″ x 13″ USA Pan Rectangular Cake Pan
- Two 10 x 2.25″ LloydPans Round Pans (use the same dough weight as in this recipe, just divide in half and place each half into one pan)
Both pans have a nonstick interior, and they conduct heat exceptionally well, imparting a beautiful crust on the naturally leavened focaccia.
Vitals
| Total Dough Weight | 1,200 grams |
| Sourdough Starter | 19.00% |
| Hydration | 76.00% (78.00% with olive oil) |
| Yield | One 1200g focaccia |
Total Formula
This table shows the entire quantity and baker’s percentages for each ingredient. If you’d like to make two large focaccia (or four smaller ones), double everything in the table below.
There’s no specific levain build for this focaccia, just use some of your sourdough starter when it’s ripe (when you’d normally give it a refreshment). See my post on the differences between a levain and sourdough starter for more information on the two preferments.
Target final dough temperature (FDT) is 76°F (24°C).
| Weight | Ingredient | Baker’s Percentage |
|---|---|---|
| 423g | All-purpose flour (King Arthur All-Purpose Flour) | 70.00% |
| 181g | High protein bread flour, malted (King Arthur Bread Flour) | 30.00% |
| 12g | Extra virgin olive oil (Jovial Olio Nuovo Organic Olive Oil) | 2.00% |
| 459g | Water | 76.00% |
| 11g | Salt | 1.80% |
| 115g | Sourdough starter (100% hydration) | 19.00% |
Method
Mix – 9:00 a.m.
This dough can be mixed by hand (I would use the slap and fold technique) or with a stand mixer like a KitchenAid or Famag spiral mixer.
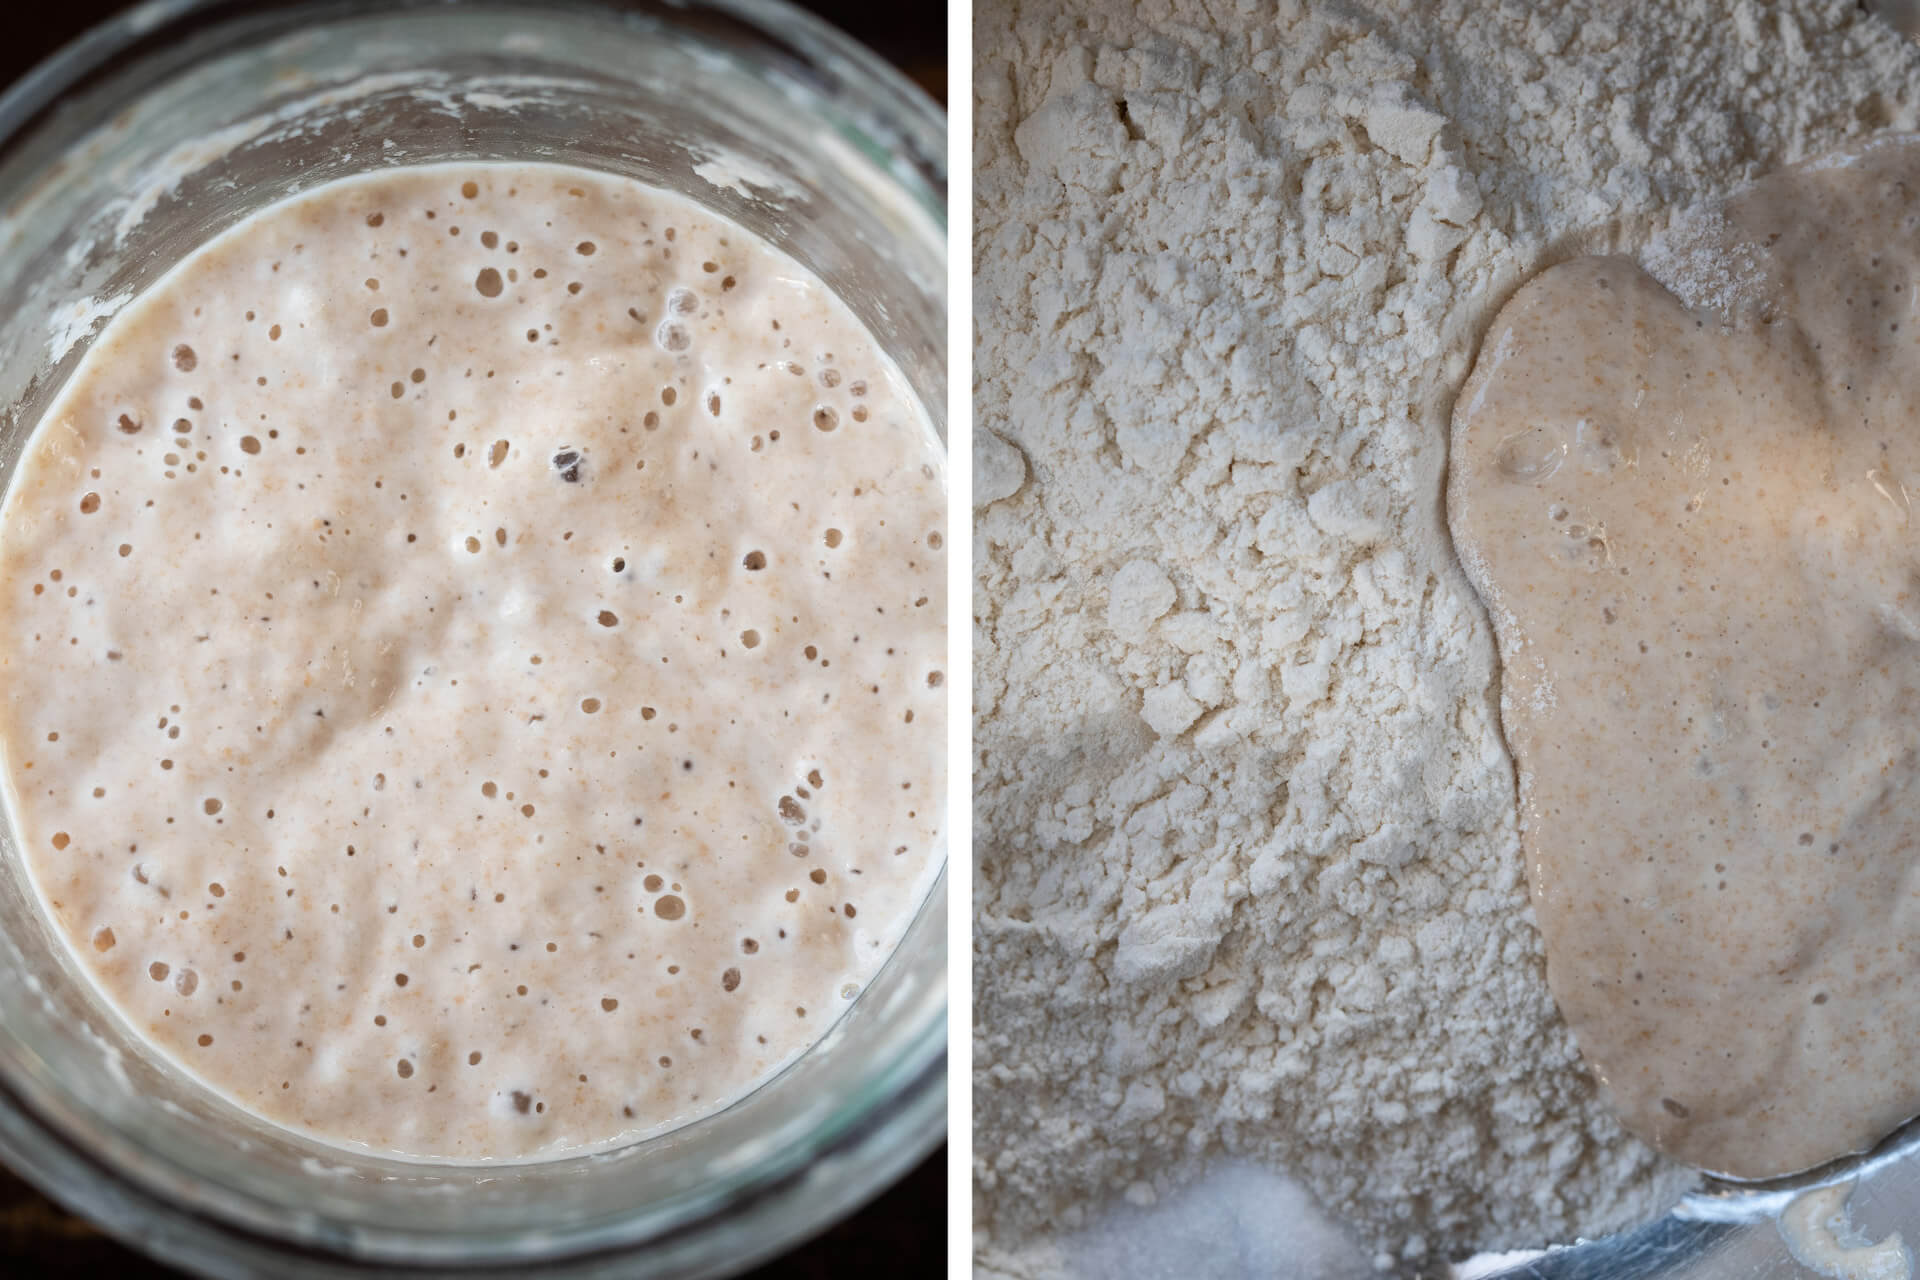
To the bowl of a stand mixer fitted with the dough hook attachment, add both the flours, water, salt, and ripe sourdough starter (hold back the olive oil until later in mixing).
Mix on speed 1 for 1 to 2 minutes until incorporated. Then, mix on speed 2 for 5 minutes until dough strengthens and clumps around the dough hook. Let the dough rest in the mixing bowl for 10 minutes.
Next, turn the mixer on to speed 1 and slowly drizzle the olive oil into the bowl while mixing. Once all of the olive oil is absorbed, turn the mixer up to speed 2 for 1 to 2 minutes until the dough comes back together.
Transfer your dough to a bulk fermentation container and cover.
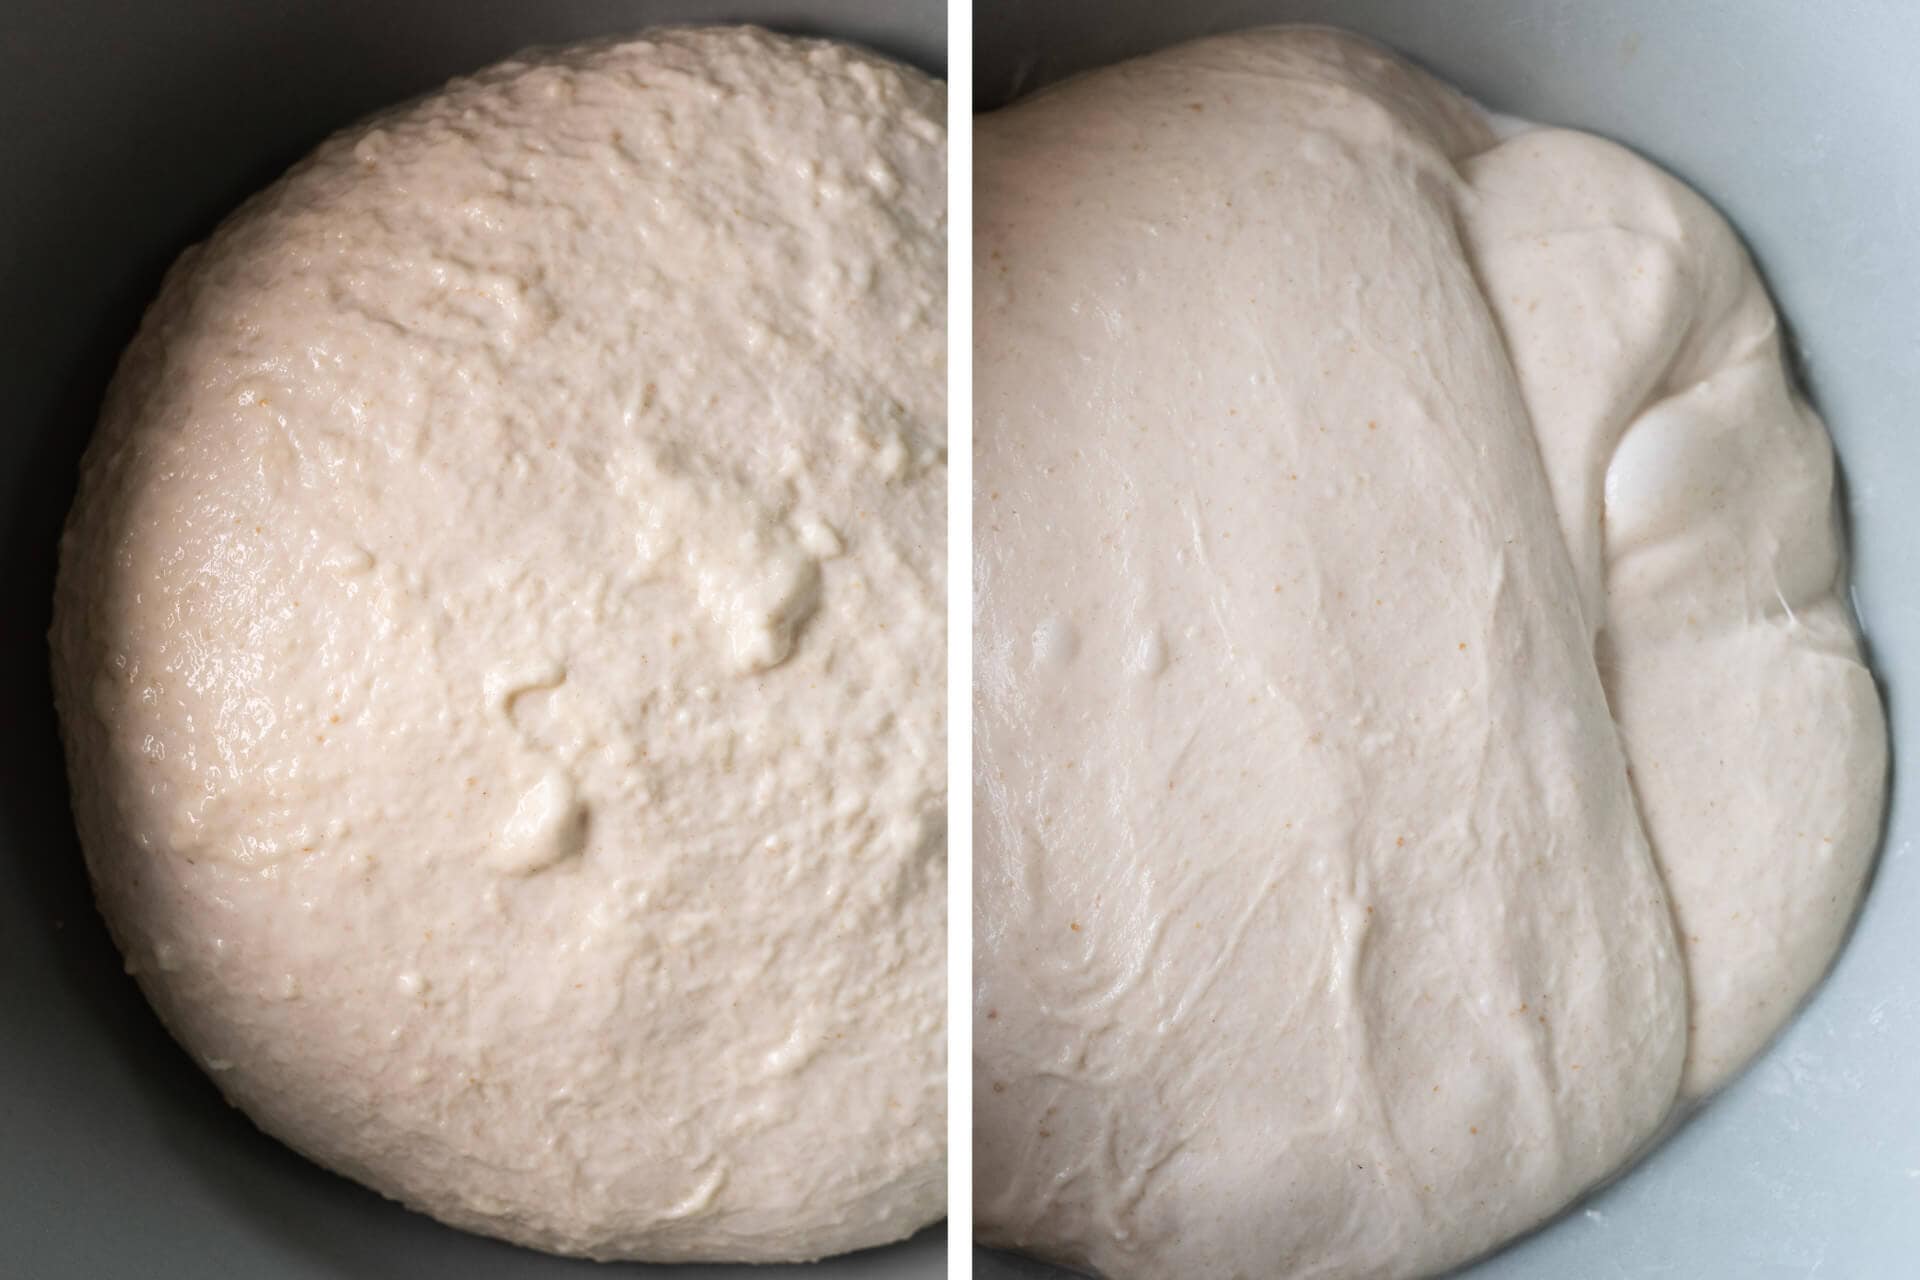
This highly hydrated and enriched dough is wet and loose, it won’t strengthen to the same degree as a typical bread dough.
As you can see below on the left, the dough is still very wet and chunky immediately after mixing. However, it’s not falling apart or soupy. Please resist the temptation to add more flour at this point. As you can see below in the image at the right, by the middle of bulk fermentation, it’ll strengthen after several sets of stretch and folds (see my guide on how to stretch and fold sourdough for more information).
Transfer the dough to a covered container for bulk fermentation.
Bulk Fermentation – 9:15 a.m. to 11:15 a.m.
Give the dough 4 sets of stretches and folds (fold a side of the dough up and over to the other side, and then rotate the container to perform 4 folds per set), starting 30 minutes after mixing, and a set every 30 minutes after that.
Proof – 11:15 a.m. to 3:15 p.m.
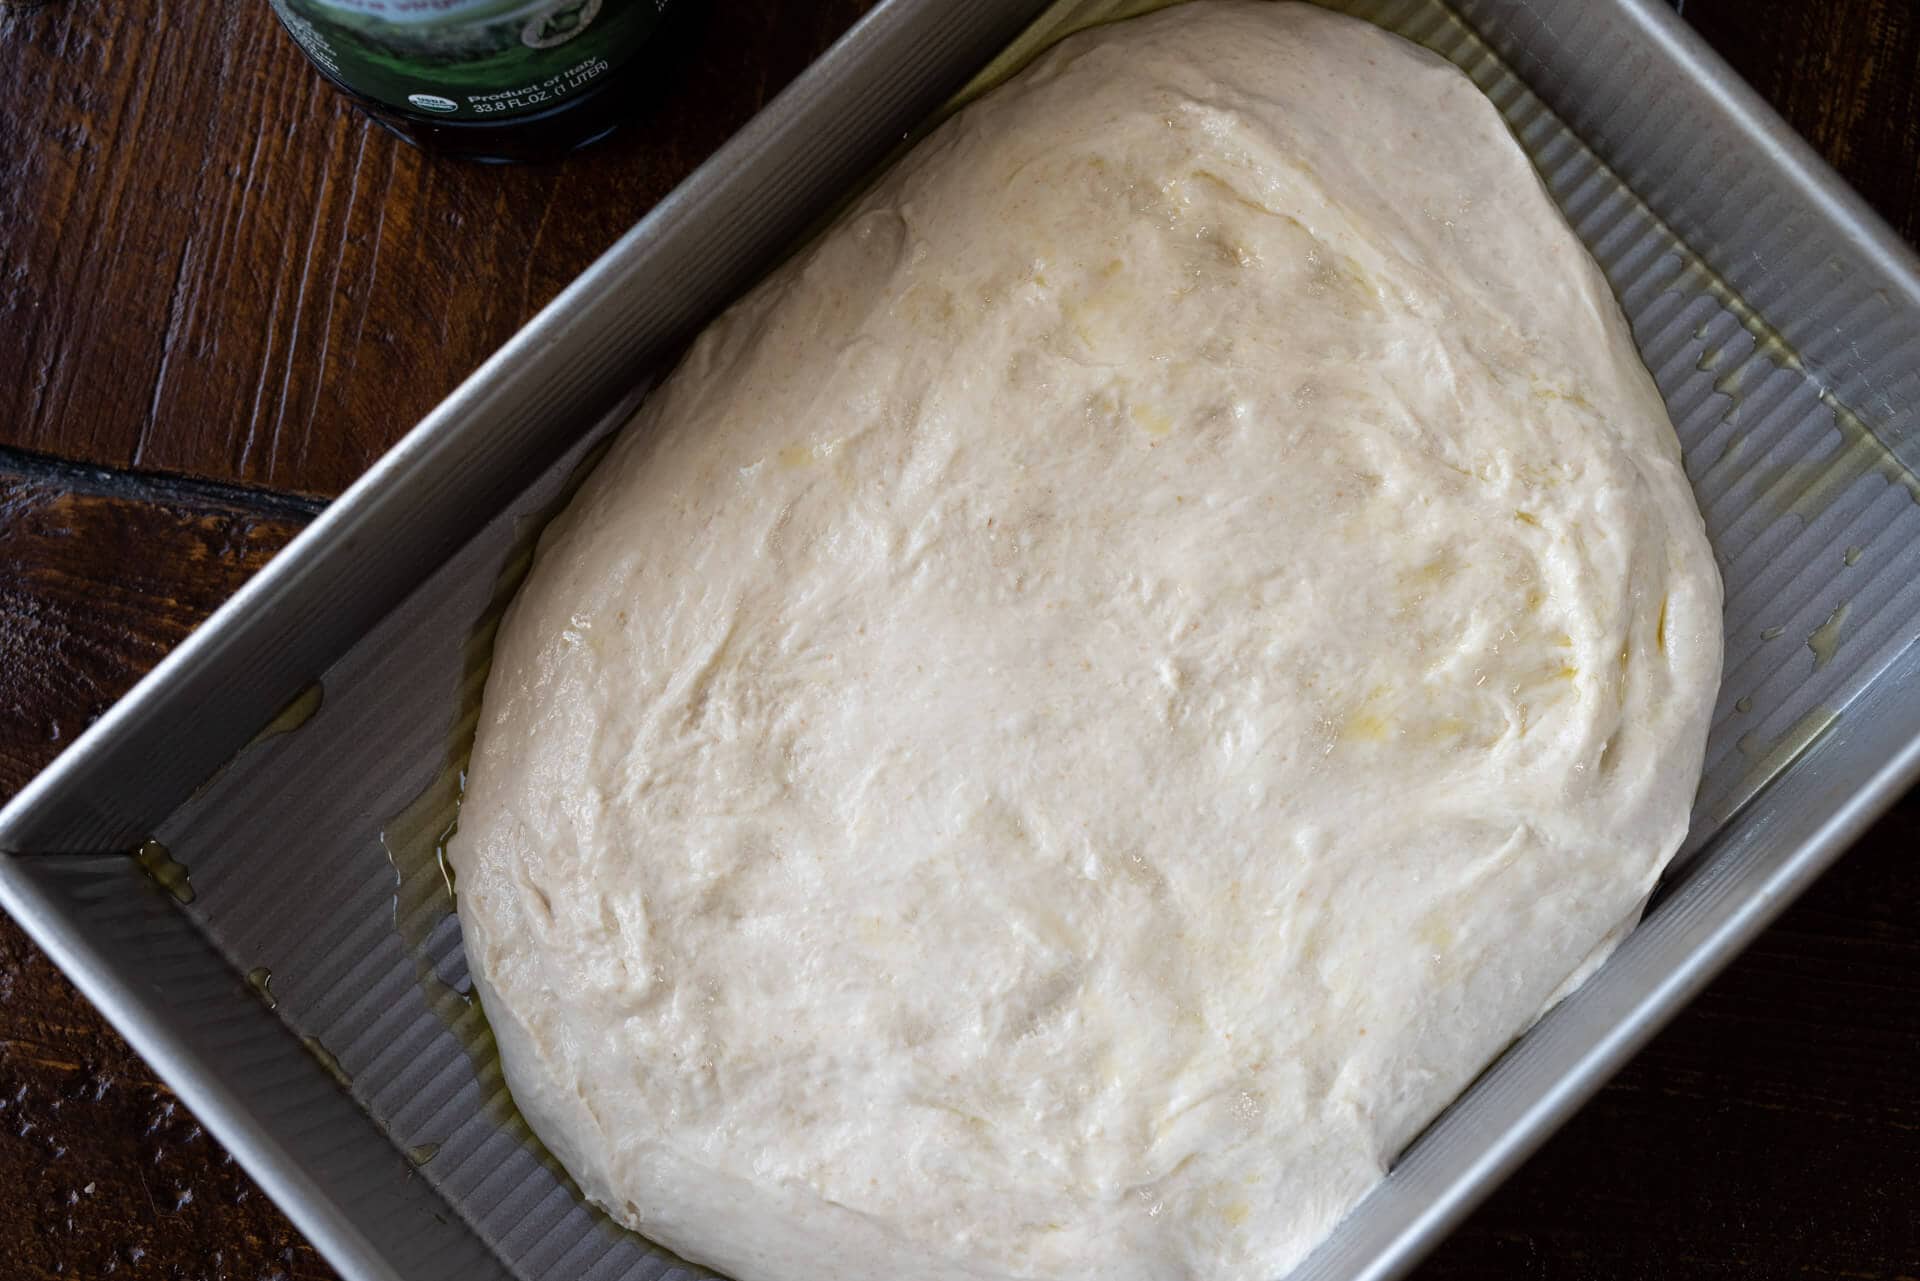
Transfer the dough to a deep rectangular pan that’s been greased with olive oil. If you don’t have a pan with a silicone liner, make sure to heavily oil the pan’s interior so the focaccia doesn’t stick during baking.
At 76-78°F (24-25°C), the dough will proof for 4 hours. This time period is flexible and dependent on the temperature: if it’s cooler, let it proof longer, and conversely, if it’s warm, you might be able to bake sooner.
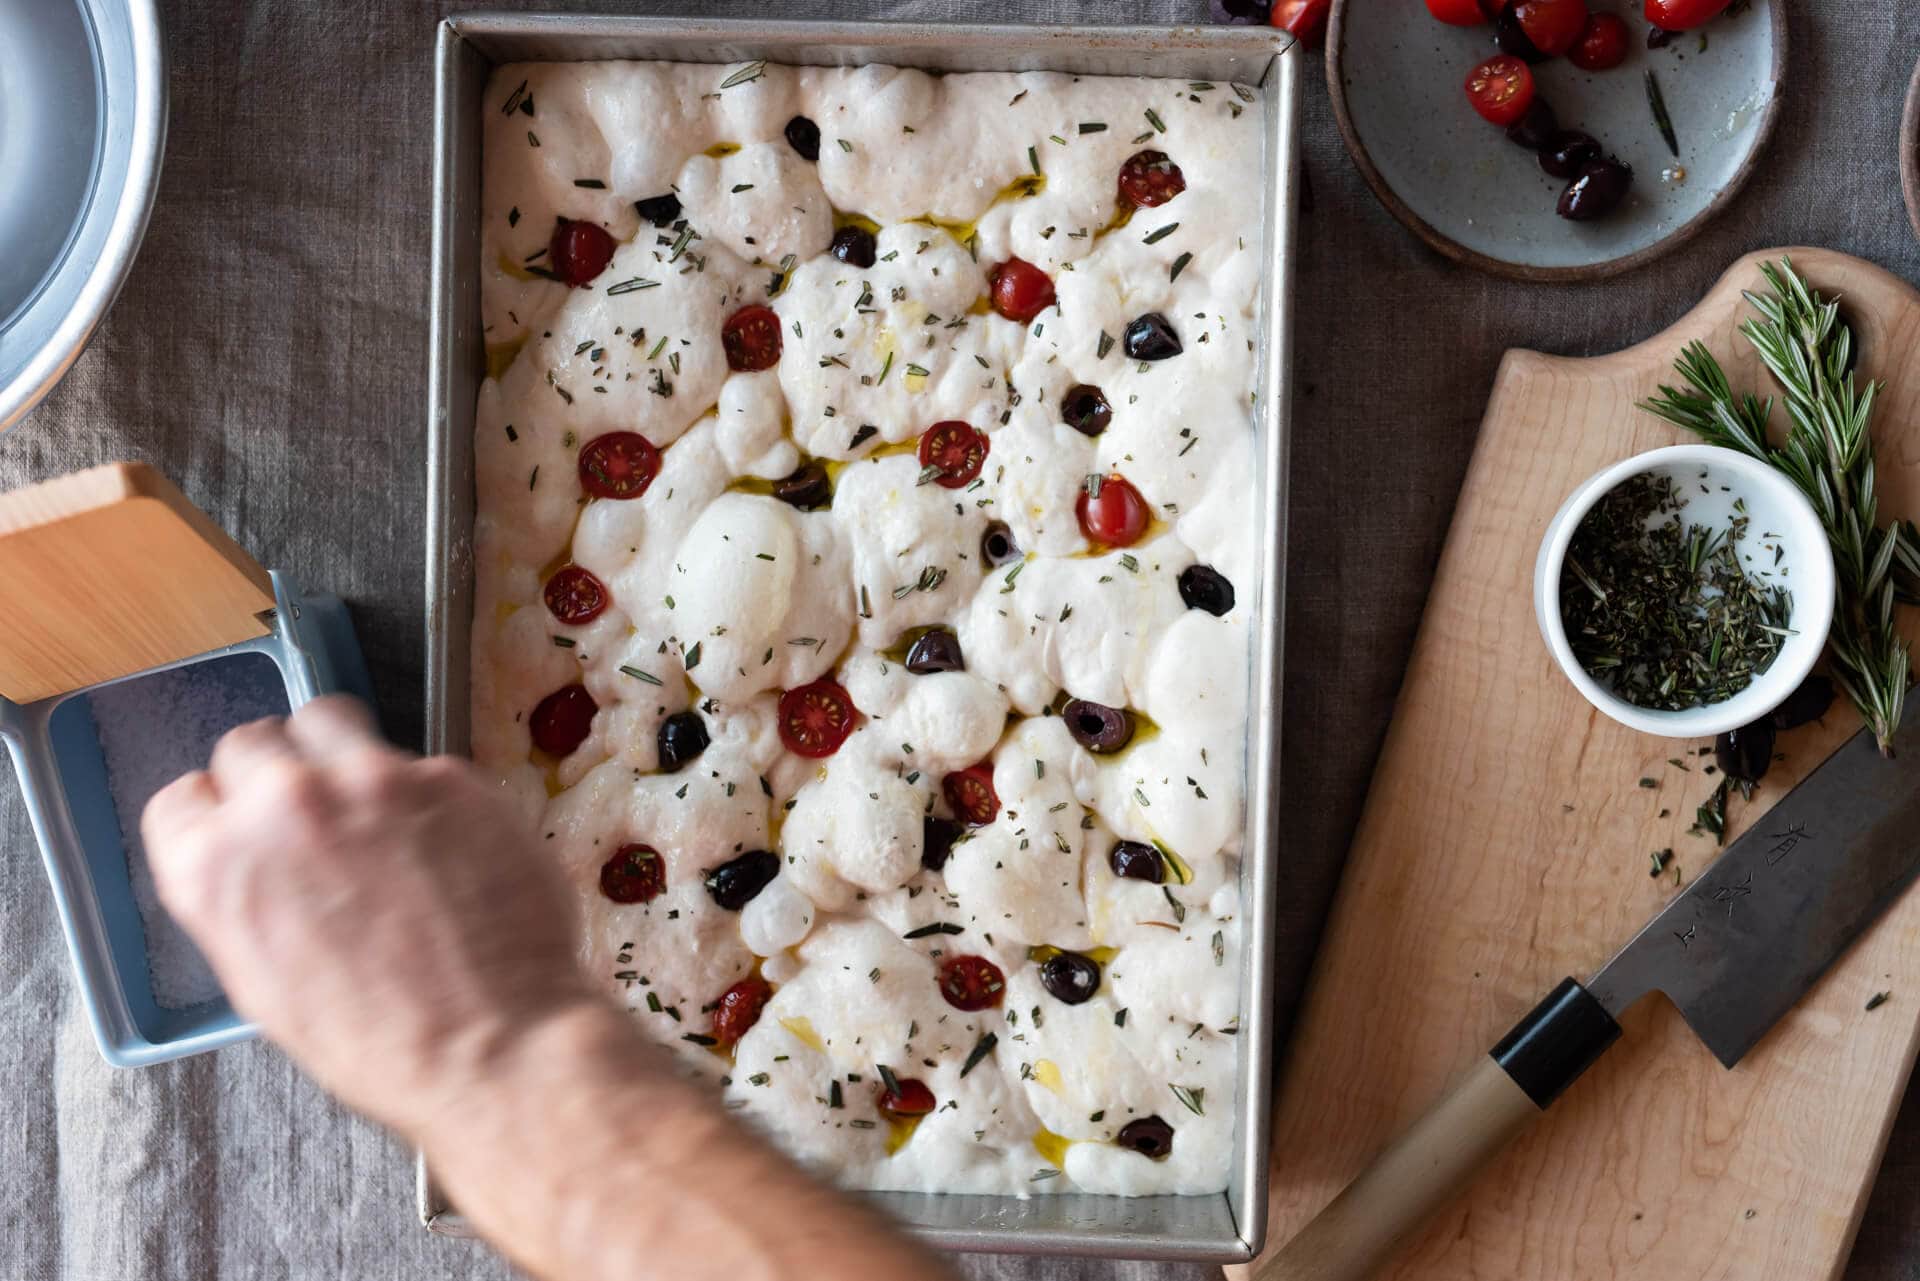
Every 30 minutes for the first hour, uncover the pan and gently stretch the dough with wet hands to the pan’s edges to encourage it to fill the pan. The dough will naturally spread out during this proofing period, so it’s unnecessary to spread the dough aggressively. Once the dough is mostly spread to the edges, cover the pan and proof for 4 hours.
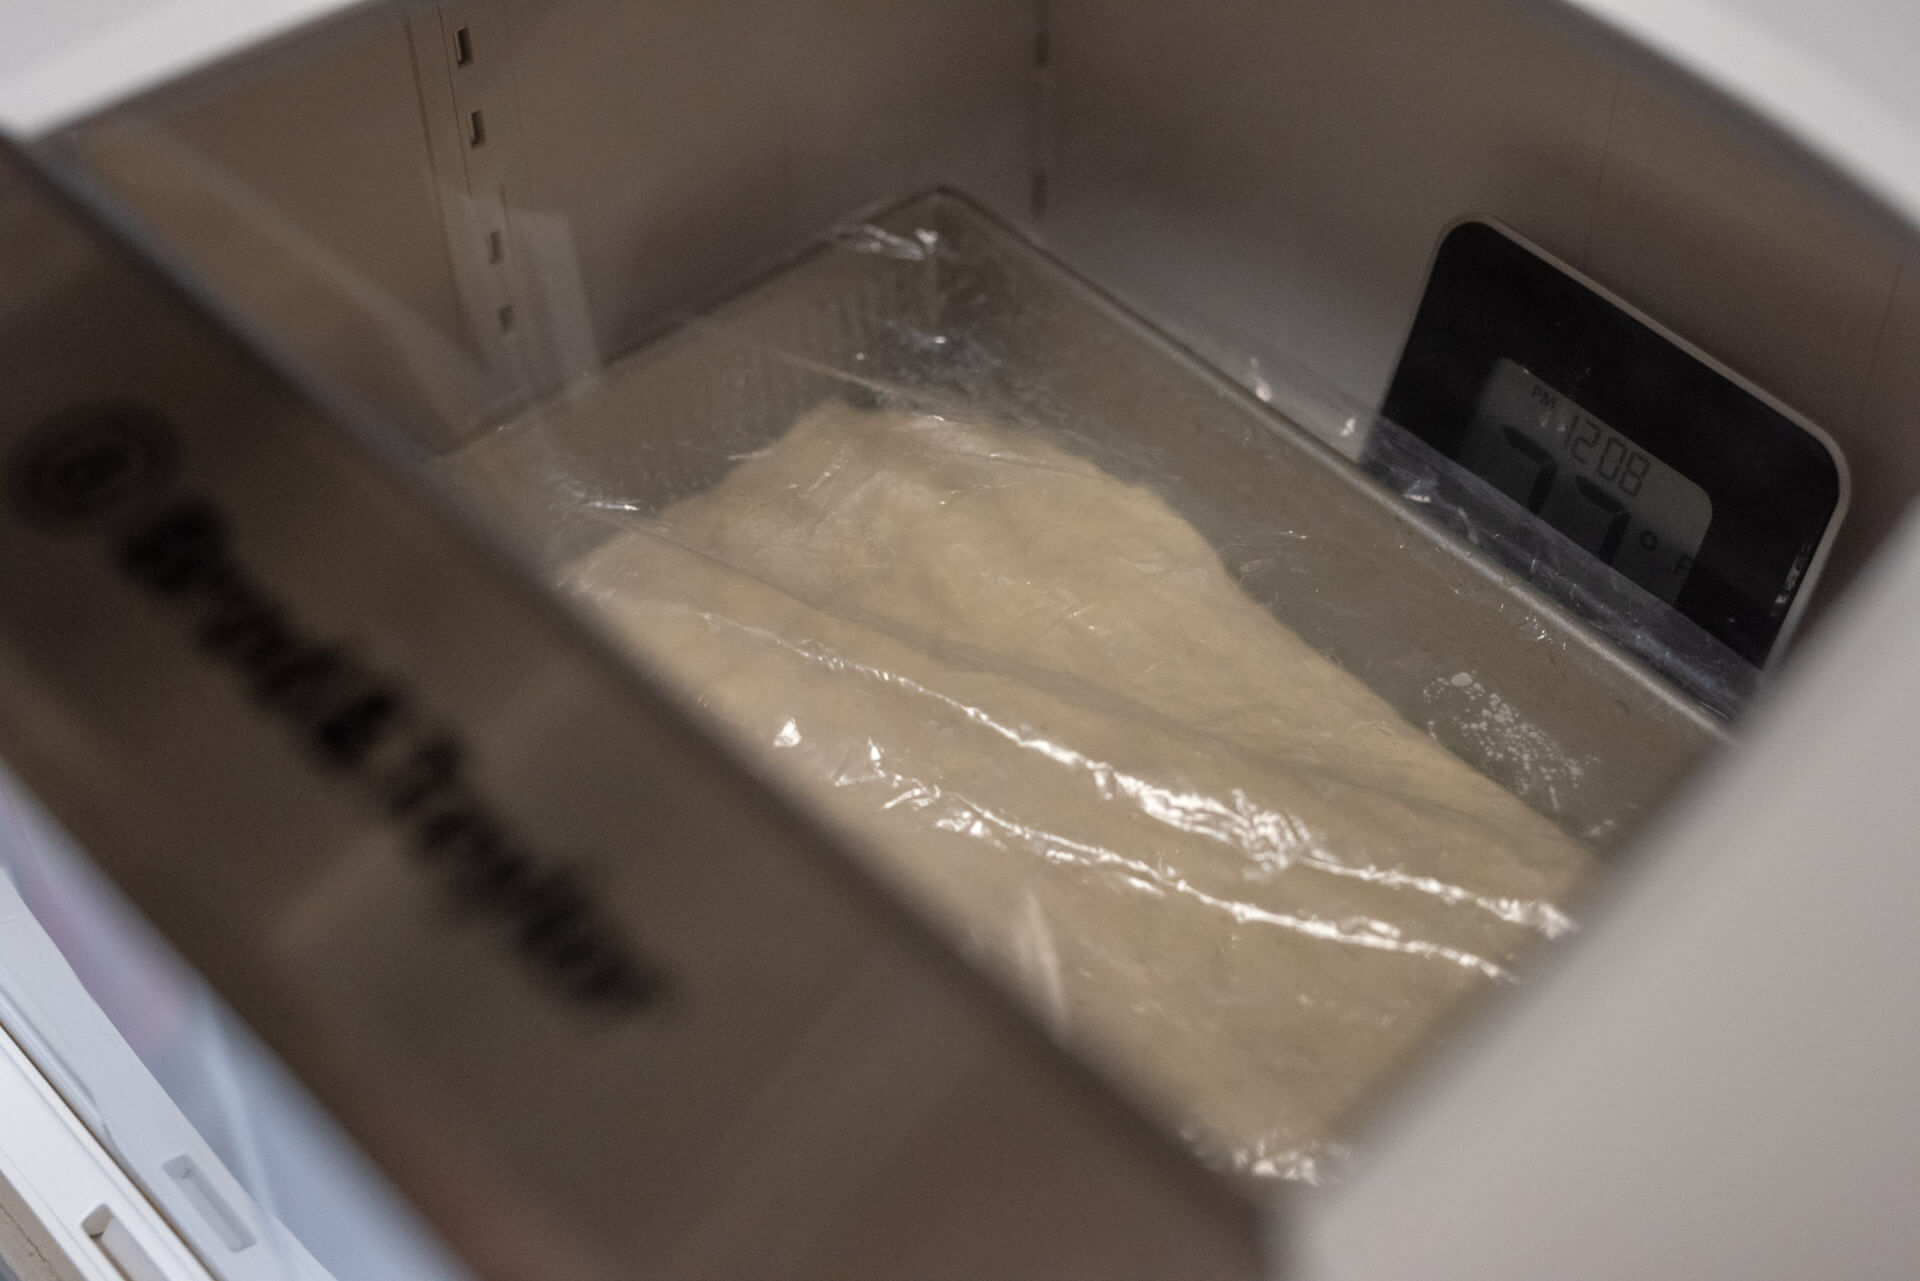
OVERNIGHT OPTION: After two hours in proof, cover the rectangular pan with an airtight cover and transfer to the fridge. The next day, take out the dough and let it come to room temperature, and continue with the Top & Bake step below.
The rectangular pan I use fits perfectly inside my B&T Dough Proofer. I keep it inside the proofer, covered with reusable plastic, and set to 78°F (25°C) until ready to bake.
About 30 minutes before you anticipate the sourdough focaccia dough being ready, preheat the oven to 450°F (232°C) with a rack placed in the bottom third (a baking stone is not necessary).
Top & Bake – 3:15 p.m.
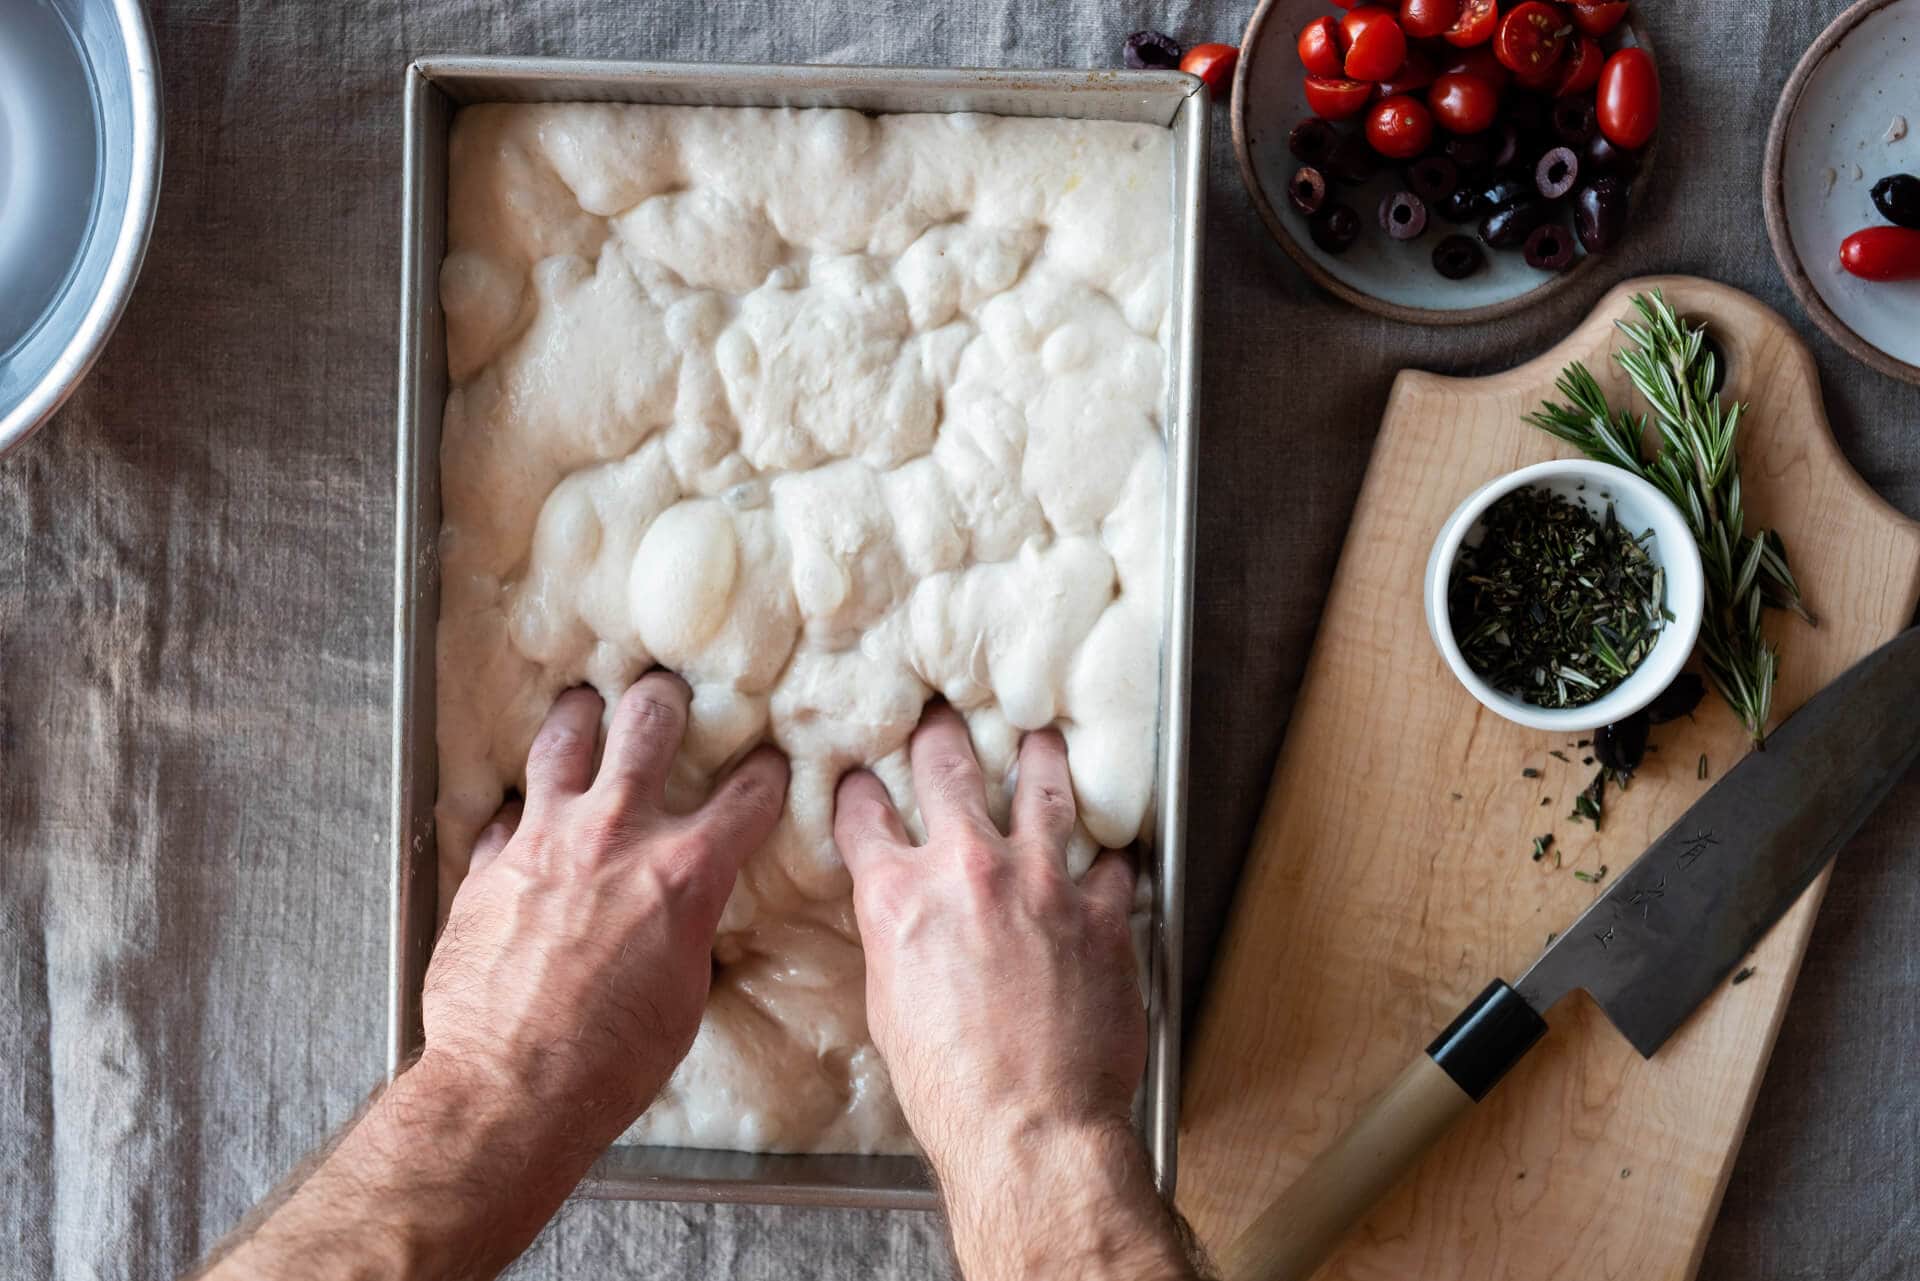
First, dimple the unadorned dough with wet fingers. Make sure the dimples are evenly spaced and go all the way down to the bottom of the pan. Then, drizzle on 1-2 tablespoons of your extra virgin olive oil and sprinkle with herbs and coarse sea salt. If using other toppings, add them now as well—I like to press them into the dough gently.
Bake the focaccia in the oven at 450°F (232°C) until deeply colored on top, about 30 minutes. Rotate the pan front-to-back halfway through this time. Keep an eye on it during the last 5 minutes and pull it out if it’s coloring too quickly, or leave it in longer if you’d like it a little darker.
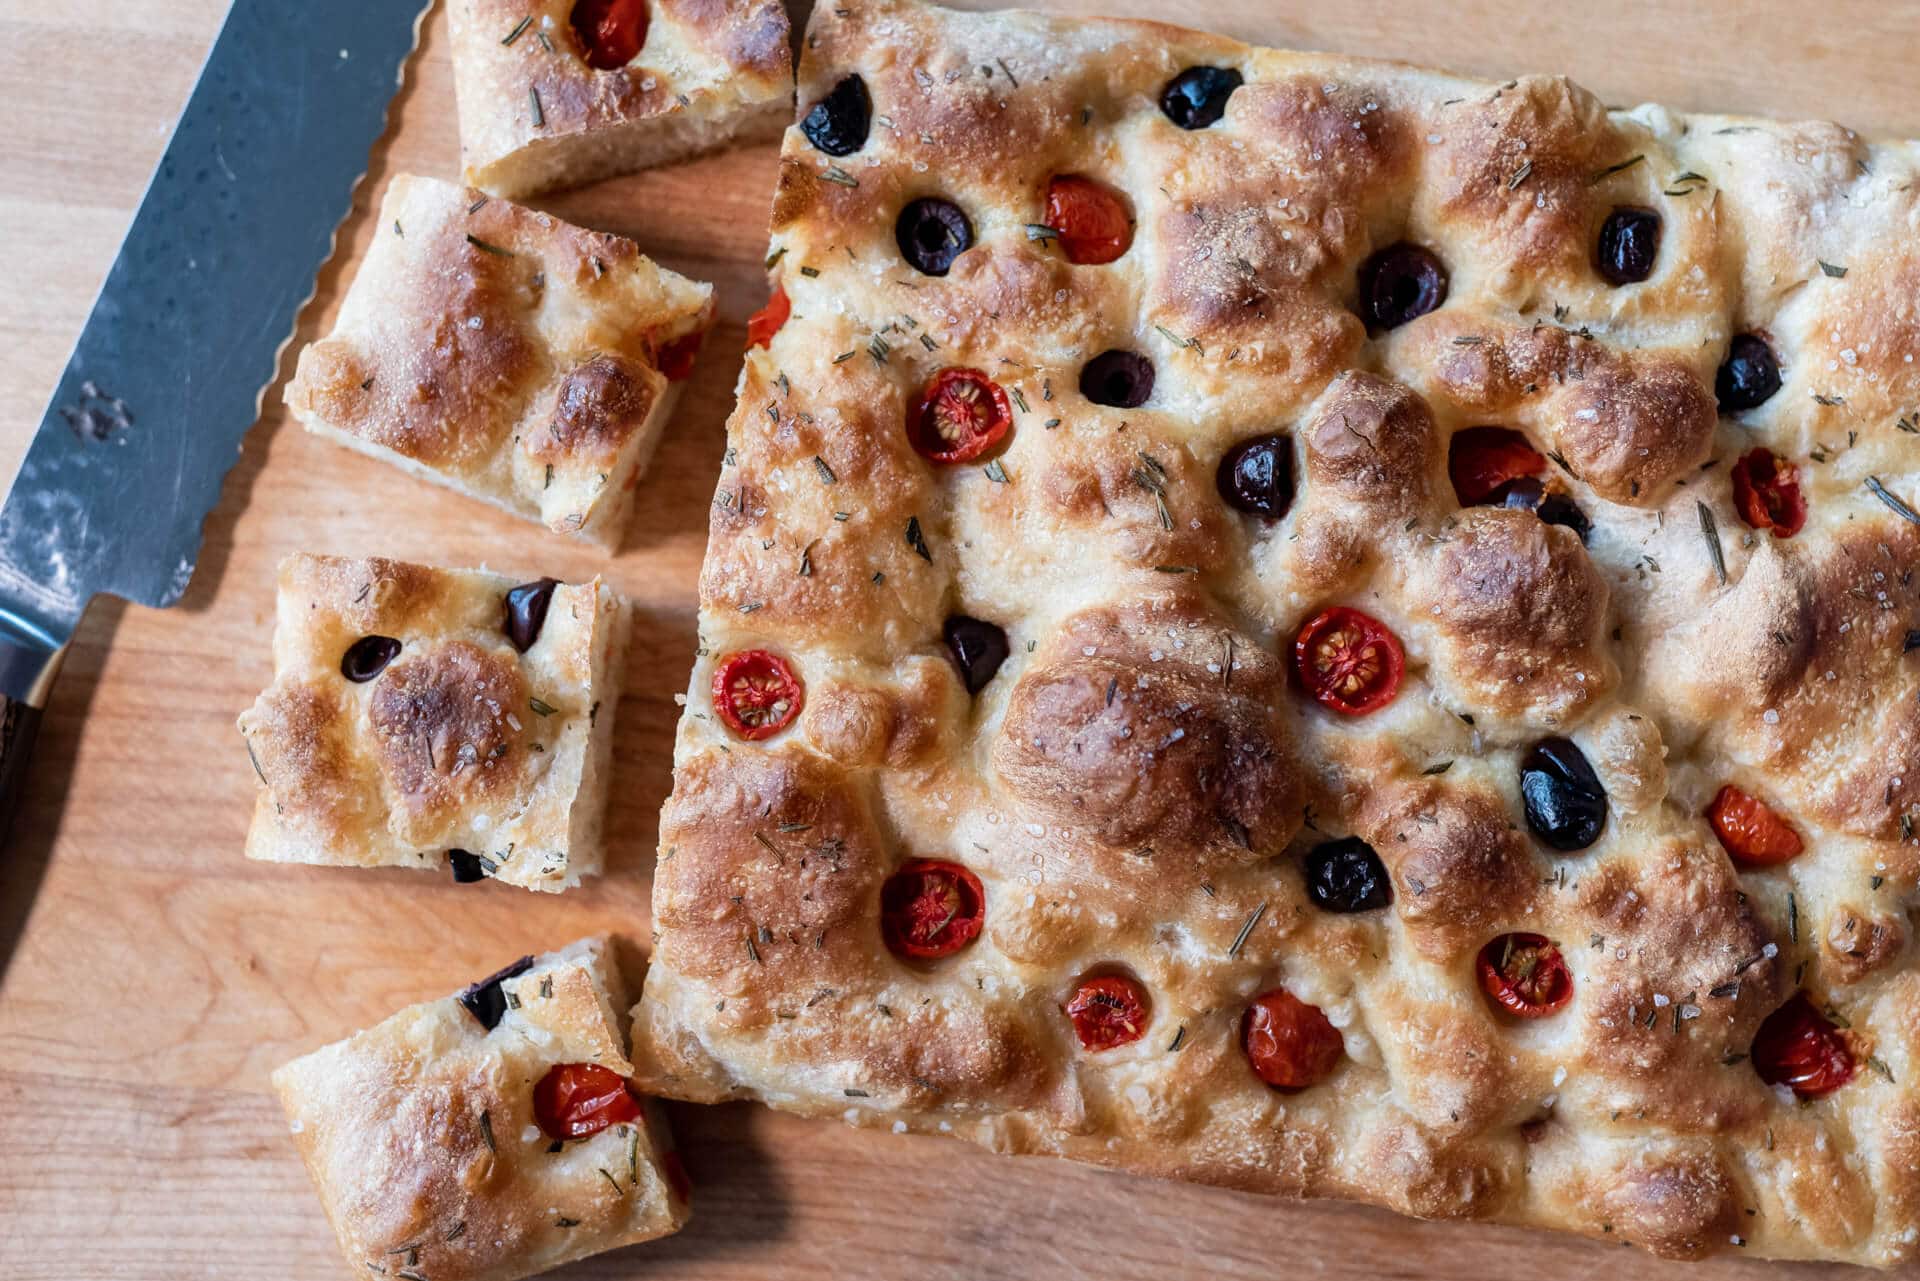
Let the focaccia cool a few minutes in the pan, then transfer to a cooling rack. It’s fantastic warm from the oven, and best on the day of baking, but it’ll keep well for a couple of days loosely wrapped in foil (reheat under the broiler before serving).
Conclusion
When I topped the pillowy focaccia dough, the aroma of fruity olive oil and chopped rosemary was captivating. Once the pan was slid into the oven, my house gradually filled with the most intoxicating perfume as the dough rose high and the edges began to crisp. The melange of baking dough, toasted herbs, olive oil, and briny olives had me checking the oven frequently—as if checking on it would expedite things. Sit tight, wait for it to finish, I told myself as I gently slapped my hand from opening the door yet again.
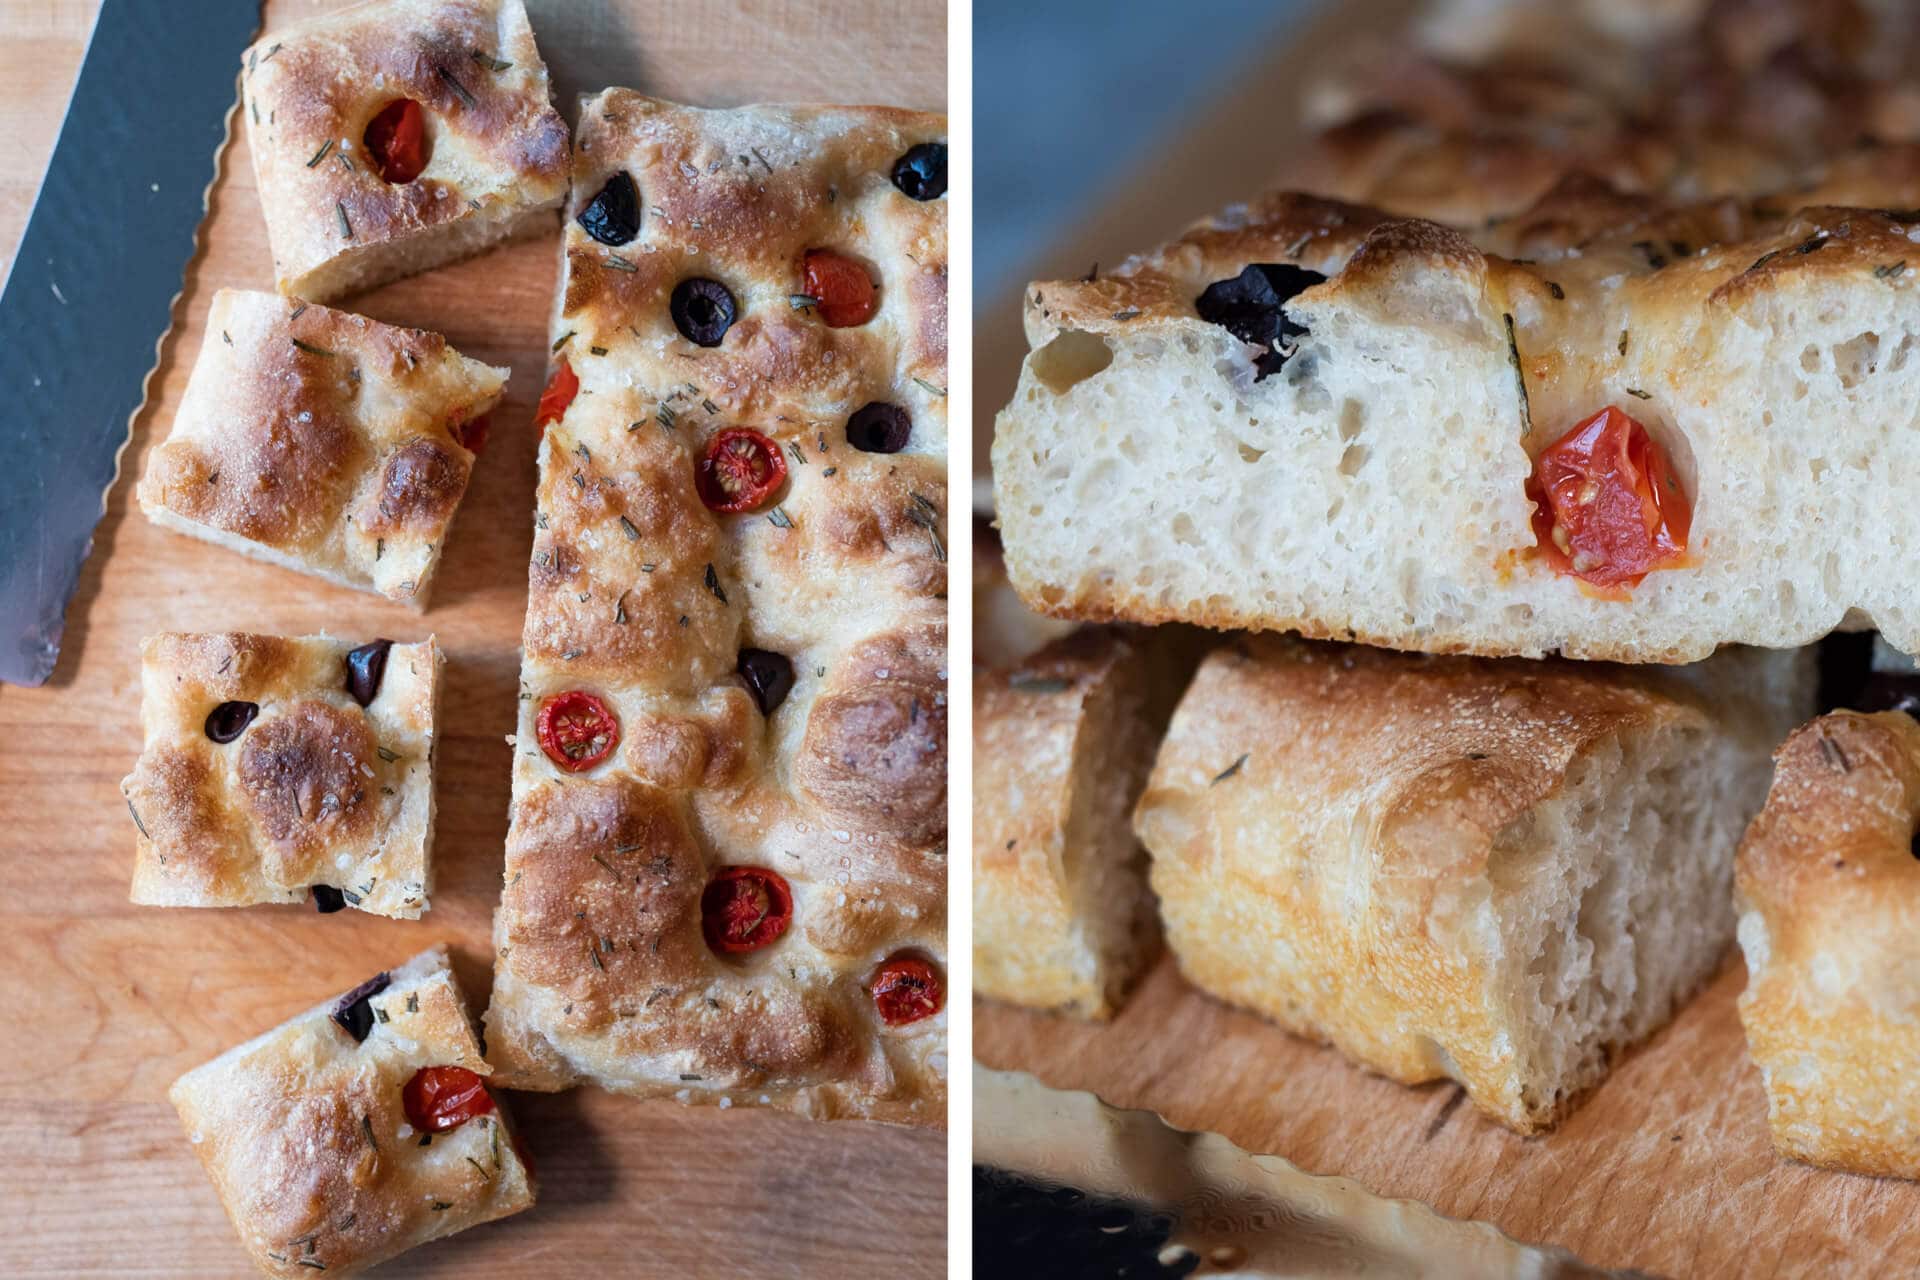
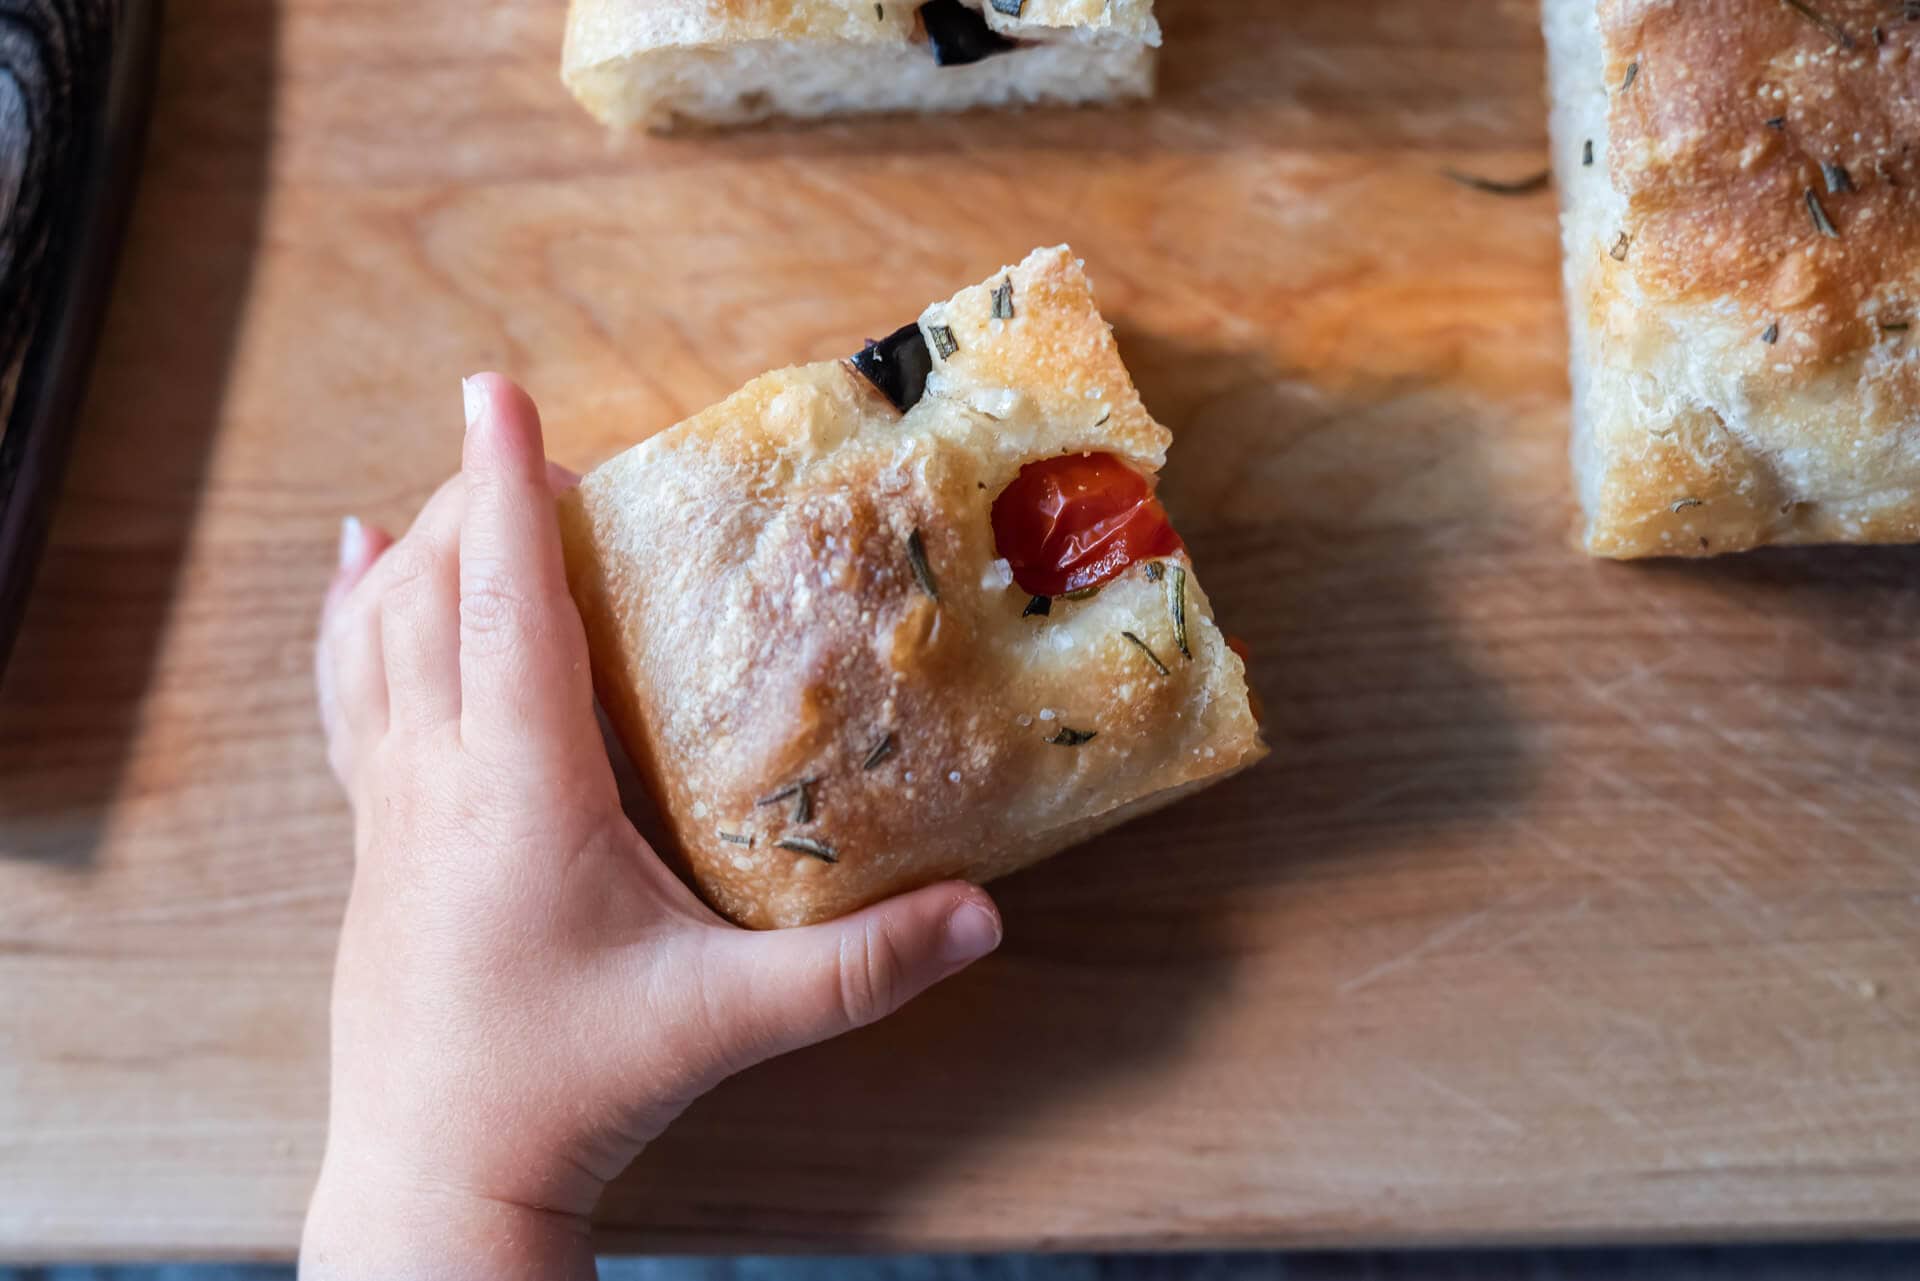
Thanks to the copious addition of high-quality olive oil, both in the mix and on top of the dough, causes the dough to turn crispy and take on a beautiful golden hue. Biting through a slice first provides a faint resistance, then gives way to a soft and ultra-tender interior. A perfect mix of flavors and textures—an experience best savored, as if you’re at the beach without an agenda.
This simple and rustic sourdough focaccia, made with a naturally leavened dough and topped with just the right balance of ingredients, brings me right back to the blue waters of the Adriatic; the sun in my eyes and thick, crunchy slices of bread eaten with haste. The only things absent are the beautiful white wrapping paper and all those little bits of sand that seem to work their way into just about everything—yea, I can do without that.
If you’re looking for more focaccia-goodness, check out my sourdough focaccia Pugliese which has potato added into the dough, for even more chew, softness, and deliciousness.
Thanks so much to Jovial for supplying me with their wonderful olive oil and sponsoring this simple sourdough focaccia recipe! As usual, the content and opinions here are my own.
Print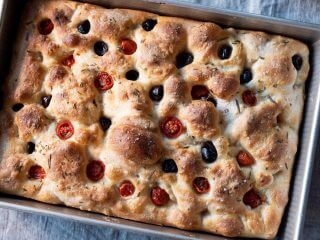
A Simple Sourdough Focaccia
- Prep Time: 6 hours
- Cook Time: 30 minutes
- Total Time: 6 hours 30 minutes
- Yield: 1 focaccia
- Cuisine: Italian
Description
This easy to make and delicious focaccia comes together all in one day using your already ripe sourdough starter. Top with tomatoes, olives, rosemary, and coarse sea salt—or, really, anything you have in the kitchen that’s fresh and sounds delicious!
Ingredients
- 423g all-purpose flour
- 181g high-protein bread flour
- 12g extra virgin olive oil
- 459g water
- 11g salt
- 115g ripe sourdough starter
Instructions
- Mix (9:00 a.m.)
This dough can be mixed by hand or with a stand mixer (like a KitchenAid). To the bowl of a stand mixer fitted with the dough hook attachment, add both the flours, water, salt, and ripe sourdough starter (hold back the olive oil until later in mixing). Mix on speed 1 for 1 to 2 minutes until incorporated. Then, mix on speed 2 for 5 minutes until dough strengthens and clumps around the dough hook. Let the dough rest in the mixing bowl for 10 minutes.Next, turn the mixer on to speed 1 and slowly drizzle the olive oil into the bowl while mixing. Once all of the olive oil is absorbed, turn the mixer up to speed 2 for 1 to 2 minutes until the dough comes back together. Transfer your dough to a bulk fermentation container and cover. - Bulk fermentation (9:15 a.m. to 11:15 a.m.)
Give the dough 4 sets of stretch and folds at 30-minute intervals, where the first set starts 30 minutes after the start of bulk fermentation. - Proof (11:15 a.m. to 3:15 p.m.)
Liberally oil the inside of a 9×13″ rectangular pan or two 10″ diameter circular baking pans. Gently scrape the dough out of the bulk fermentation directly into the rectangular pan (or onto a work surface, divide in two, and place each in a circular pan).The dough will proof in the pan for 4 hours. Every 30 minutes for the first hour, uncover the pan and gently stretch the dough with wet hands to the pan’s edges to encourage it to fill the pan. The dough will naturally spread out during this proofing period, so it’s unnecessary to spread the dough aggressively. Once the dough is mostly spread to the edges, cover the pan and let it proof for the remainder of the 4 hours. About 30 minutes before the end of the 4-hour proof period, preheat your oven to 450°F (230°C) with an empty rack in the bottom third. - Top & Bake (3:15 p.m.)
When your oven is preheated, dimple the top of the dough all over with wet fingers. Then, liberally drizzle on olive oil to cover the surface of the dough. Spread on chopped herbs and coarse sea salt. Bake until golden on the top and bottom, about 30 minutes. Let the focaccia cool in the pan, then transfer to a cooling rack. It’s wonderful straight from the oven, and best the day it’s baked.
Notes
Overnight proof option: mid-way through the 4-hour proof, place the covered pan with dough in the refrigerator to proof overnight. The next day, take the dough out, bring it up to room temp, finish proofing until well-risen and bubbly, and continue with the Top & Bake step.
If you use this recipe, tag @maurizio on Instagram so I can take a look!


729 Comments
Hello Maurizio, your website is my baking bible, thank you for everything you post!
I’m planning to make this focaccia but I’m a bit reluctant to use olive oil as it starts turning into harmful and toxic compounds when heated. Would it be alright if I used either coconut oil or butter instead? As for the drizzled oil, could I add it after I take the focaccia out of the oven? Thanks.
As far as I know that toxicity point isn’t until OO hits its smoke point, but no worries, I’d say another oil would work well also. I believe coconut oil has a lower smoke point than OO, so be sure to get the variety that has a higher smoke point (I think it’s unrefined). And yes, you can drizzle after you bake, but the focaccia won’t get quite as crispy as it would in the oven with the oil.
That is actually a myth. There are many newer studies that prove olive oil does not become toxic at higher temps.
Can you please provide evidence for that? I’m intrigued
Hi Maurizio. If my dough comes out pale, is that the result of an under fermented or over fermented dough? Also, I omitted the olive oil in the dough. Would this contribute to a pale colour? Thanks for all your help!!
Not the author but how long did you bake it for? Generally you can continue to brown the dough the longer you leave it in the oven. Leaving olive oil out of the dough shouldn’t affect it too much. Also hard to tell whether you under or over fermented it just based on the color. Did it feel light and airy or dense? Were there lots of bubbles when you cut it open? If not you may want to adjust your rise time
I wouldn’t say the pale color is a result of over/under fermentation, it’s likely a baking issue. Be sure to bake it until very well colored!
Hi Maurizio, I live in India and a newbie to sourdough baking . I want to try your focaccia recipe . I keep my starter in the fridge Sunday evening to be used next week . Just wanted to ask when should I take out my starter from the fridge to use it for making focaccia. As you wrote we have to use a mature starter for this . Please advice . Thanking you in advance .
I am not the master but I’ve read take it out a day or two ahead and give it at least two good feedings, leave at room temp, and it should be fully mature and active.
Thank you
Hey! I just made this and it doesnt look anything like yours.. I left it in the fridge overnight after the bulk which was looking good. Next day I left it a room temp for an hour and then baked. When I tried to dimple it, the indentations kinda didnt stay in.. and when I baked also. Is this overproofing , can you please share what you think? I will try to link a photo :
Sounds like under proofed dough to me! Give it more time in bulk fermentation or proof, that should help.
I tried this focaccia today as I wanted something that didn’t require an overnight rise for a change. The dough was looking good until shaping when it kind of stopped rising. There were definitely bubbles and a bit of a rise but not enough to fill the pan all the way. I had already waited about 3 hours after the stretching period so decided to go ahead with the bake. After half an hour the color was looking good so I took it out and of course… it stuck to the pan like glue. While the corners (with the least dough) did dry out too much, the middle was fluffy and soft so I don’t think it was a starter problem. I’ll try again with a smaller pan next time and parchment paper lining!
Definitely go with that parchment!
Hi Maurizio, I have found that in my proofing stage the dough has not come out very risen or gassy – it’s actually quite sticky!
I did the 4 sets of slap and folds and put it in the fridge overnight. I’ve bought it out this morning, let it proof further at room temperature for about two hours but it is looking very dense.
I’m hoping to make one for a friend tomorrow night but I’d love to know where I went wrong! I had wondered if my pan was too big, but regardless, the dough doesn’t seem quite right! I’m based in Aus so I used Lion Plain Flour and the Lighthouse, high protein bread flour. Does this combo sound right?
I’d say try dropping the water in the recipe a bit, maybe 50g – 100g, and see if that helps bring strength to the dough!
Hi Maurizio,
I am reading through this recipe in preparation for making it during our next rainy day here and I’m very much looking forward to it. My one concern is that I may run into the same issues I did with your Fifty-Fifty Whole Wheat Sourdough recipe. Both if these recipes have you doing slap and folds before mixing in the final amount of water (and in this recipe olive oil). The issue I had when making your 50/50 recipe is that after preforming the slap and folds I had made such a lovely cohesive mass that it was virtually impossible to add in the remaining water without tearing all the wonderful gluten strands I had just worked so hard to create. My question to you is would it make more sense to do the slap and folds after all the ingredients are combined? Or, is they’re a method of mixing, post slap and fold, that I can use that will mix in the remaining water without tearing the gluten?
Thanks so much for the time you’ve put into this amazing resource.
Cameron
What I typically do with a very wet dough like this is to do two rounds of slap and folds, this way in the end you get a smooth and cohesive dough. It’s normal (and expected) the dough to break apart if you add water or salt + water in later. The problem with adding all the water in the beginning is that slap/fold can get challenging (not impossible) to get a strong dough — however, you can certainly take this route. If the hydration isn’t too high for the flour you’re using, I’d go this way.
Alternatively, I’d recommend two rounds of slap and fold, and this is typically what I do here. That second round will be with all the water and salt (if the salt was held back till later) and will take a little more work, but it’ll eventually come back together and smooth up.
Hope this helps, let me know how it goes!
Hi. Just following up on this question. Once you do a slap and fold and have a strong elastic dough do you really need to do stretch and folds during bulk fermentation. For all my dough rather than do stretch and folds I prefer to do the slap and fold and build strength right at the start. I am wondering then during bulk fermentation if its better to just leave the dough alone or actually still do the stretch and fold. many thanks.
Basic beginner’s question… when you say “high protein bread flour, malted”, do you add malt to your flour?
Typical “bread flour” here in the USA already has malt added (you can check: look at the ingredients list on the bag of flour). If your flour isn’t malted and you don’t have any diastatic malt, don’t worry about it, it’s optional.
Hi! I just made this recipe for the first time using my new-ish rye sourdough starter. My starter has been doubling in volume with lots of bubbles predictably so I hoped it was ready. I didn’t have all purpose flour so used Flourist sifted red fife in it’s place along with Janie’s Mill high protein in the amount indicated. The bread turned out very dense and while it produced lots of bubbles during proofing it didn’t rise much. Was this due to the flour I used or perhaps the fact that I am at 1200ft elevation? I attempted a country loaf last week and had the same issue (dense and not a lot of height). Wondering if I need to get a more all-purpose flour.
It’s hard to say what happened there. It could be under proofed dough or even over hydrated dough. If the dough felt super wet, slack, and weak, try reducing the water in the recipe to see if this helps bring some strength to the dough.
With those flours I’d assume you’d see some strong signs of fermentation assuming your starter was used when mature and ready. Be sure to use it when it rises up to its peak height in the jar, looks bubbly, and smells slightly sour! I’m about to post a guide on determining when a starter/levain is “mature,” keep an eye out for it!
In the meantime, I hope this helps.
Hi Maurizio!
Thank you so much for this beautiful blog. I am looking forward to making this tomorrow. I am a new sourdough bread maker given the times… I recently was able to purchase a 50lb bag of King Arthur “Special Patent” flour. The only other flour I have is some whole wheat as well as rye. Which should I use in this recipe? Thank you so much!
Trica
Go with the KA flour, it’ll be perfect! Have fun and happy baking 🙂
Hi Maurizio, this looks and sounds wonderful, and I’ve put it on my to-bake list. One question: I have an almost-full bag of Caputo tipo 00 flour (marked “chef’s flour” for long-fermentation baking) that I’d like to find a use for. Can I use that for this focaccia, either alone or in combination with King Arthur all-purpose or bread flour? Thanks in advance, and thanks for the great discussion and recipes.
Yes, that will work very well for my focaccia recipe. I might suggest a reduction in the water added, though. Perhaps hold back 100g and see how the dough feels. My experience with Caputo is that it typically needs far less water to hydrate. You could mix that Caputo with bread flour or AP if you’d like, anything will work well there!
Thanks very much for the advice! I made this yesterday using the Caputo flour and it was lovely — not quite as thick when baked as I’d expected, but nice and airy with great soft texture and crispy/chewy crusts.
I decided to make this on a whim, with the leftover ripe starter that I had prepared to make the levain for the 100% Whole Wheat loaf (with flour of all types being so scarce I’ve used some sprouted whole wheat KA, and white whole wheat KA for both the main part and the levain of the Whole Wheat). I’ve oiled the glass pan that I’ve got that is close to the same size (only pan in that size) and hope it won’t stick!
It is very hot here today for us, running 82º in the house, and I’m wondering if I bake this on convection mode if I could speed things up. Which made me curious, do you ever use fan/convection mode when baking? I’m newer to having a convection oven, and I sorta love it, but I’m sure it’s not meant for everything.
You can definitely use the convection function. I do sometimes use it when baking things other than bread (like this recipe) to help bake faster and impart a nice crust.
Awesome, glad to hear all this! Sticking is a problem in some pans, use parchment as a “sling” on the bottom next time to help keep it nonstick. Have fun and enjoy!
Oh my gosh, you just took me back to my Italian Grandma’s baking! She called it pizza but it is a perfect replication of your focaccia recipe. It is pillowy on the inside and crusty on the bottom, oh just Heaven Maurizio! I didn’t have your called for pan so I got some sticking on the bottom but it still tastes amazing! I used your link and just purchased the USA pan, so excited!!! Thank you sincerely for sharing this fabulous recipe…take care Dora
So glad to read this — made me smile! Happy to help and enjoy! You’ll love the USA Pan, it’s so good for this dough. Happy baking 🙂
Hi Maurizio! Thanks so much for all of your posts and for being so engaged with the readers/bakers! I’m making this focaccia right now and I put it into my 9×13 pan about 30 minute ago – and it’s already filling the 4 corners, with no stretch assistance from me! Should I shorten the bulk ferment time, since I won’t need to continue stretching?
I guess my bigger picture question is – what’s the different between “bulk fermentation” and proofing when talking about sourdough in general? It’s resting at the same temp for both stages on this recipe correct?
Happy to help, Briana. Well, it’s not only about fitting the pan, it also needs to properly ferment as usual. I’d keep going, it should be nice and puffy, billowy, jiggly.
Generally, bulk fermentation is also called the first rise, it’s when the dough is “in bulk” or in a larger mass. This time is critical for fermentation and is more efficient since the dough is one cohesive unit (in terms of temperature and fermentation efficiency). The proof, or second rise, is done once dough has been divided into final shapes. It’s a blurry line with this recipe, though, since there’s no dividing. So could see it as just one long first rise, but I like to kind of split it up into the second phase — the proof — once it’s in the pan.
Yes, same temp for both phases!
Hi Maurizio! Found your website a few days ago and I love the detailed descriptions and photos as well as the scientific explanations in your recipes and guides . Whereas I will eventually give the starter a go, I currently have some fresh organic yeast to hand … can this be used instead? Also I have white flour 9.1% protein and bread flour 12% protein.. are these strong enough? Do I reduce the hydration for weaker flour and/or fresh yeast?
I’d go with the 12% protein flour. You can absolutely use the fresh commercial yeast but unfortunately I’m not sure how much this dough would call for!
I made this today and it was beautiful and very tasty! My question is about the rise — mine seemed to actually rise too much in the oven, with a lot of large (~1/2″ to 1″) bubbles near the surface. (Ironically, I wish my actual sourdough loaves would have this open of a crumb!) The finished focaccia nearly doubled in height from before it went into the oven. There were a few large bubbles visible underneath the surface when I was at the dimpling phase and I intentionally did not burst them, but perhaps I should have? Any ideas of what happened?
Background: like everyone else, I also used slightly different flours because I’m located in Switzerland. I followed the recipe timings and put it in the fridge at 2 pm yesterday after the bulk fermentation step of repeatedly pushing the dough into the pan corners. I took it out of the fridge at 8:15 am this morning and it went into the oven around 11 am.
P.S. Like many here, I began a sourdough starter around week 2 of quarantine using your guide and I’ve been making your Beginner’s Sourdough loaf once a week with great results for a first-time bread baker, if I say so myself 😀 Thanks so much for this blog and keep the recipes coming!
Awesome, Emily! Sounds like a very yeasty dough, which is great. Honestly, I love that! It creates more places for oil to settle around and when you dimple the dough they get squished anyway. For me, this isn’t a big deal at all.
So happy to hear my site has helped so much. There’s nothing wrong with being proud about your bakes in your kitchen — embrace it! Have fun and happy baking.
hi maurizio! I was hoping to make this with only bread flour (all the stores near me have been out of AP flour for weeks..) how would you suggest adjusting the hydration/proof to accommodate this? thanks so much!
I’d actually go exactly as it is with bread flour — it’s highly hydrated and bread flour would work equally well here!
Tried this out today. Came out perfect !!!! Thanks for the recipe. Only glitch I had was that the bread got stuck a bit to the bottom as I used a glass pan instead of metal tray. Is there any way to post pictures here?
So glad to hear that! Yes, it might stick a bit with glass. Try oiling more or you could even line with parchment. Unfortunately I don’t have a way to post pictures, sorry about that! Enjoy 🙂
I am looking forward to trying this recipe out today. I am going to substitute bread flour with whole wheat flour (I saw your response to a comment below). Can you post picture of the bread flour bag that you use? I want to try and get it when it is available, but want to be sure I’m getting the right kind.
You can use the blue King Arthur Flour bag, that’s Bread Flour. Or you could also use Bob’s Red Mill as well. But I’d say bread or all purpose will work well, you just might have to reduce the hydration 25-50g if using all purpose!
Thank you!
These look so so beautiful!
Thank you 🙂
Followed recipe to a T, but my dough never got billowy. It remained a bit sticky, and when I tried to do dimples, they just smoothed back out into the dough. If this a symptom of overproofing or underproofing? Or perhaps overhydrating? 😳
Same thing seems to be happening with me! I am just about to start the 2hr rise so we’ll see what happens but I am skeptical. I am leaning towards overhydrating (should not have added the extra 50g of water) bc my dough looked great before but wasn’t “wet” so I added the water and it would not hold shape after that.
See my reply above, Brie!
Thanks! I am a novice baker so troubleshooting is really what I’m working on learning now. I’m happy that one of your suspicions is what I suspected. I’m going to cook mine anyways and see what happens 🤷♀️
Just want to report back that dialing down the hydration a bit worked beautifully for me! Second focaccia was a smashing success! 😍
My guess is over hydration and/or lack of dough strength. I’d say drop the water in the recipe 5% and you should notice a much stronger dough (with more rise, likely)!
Oh man, I’m at the same point with the same results. I wish I had read these comments first. I only have access to AP flour currently so it seems I likely over-hydrated. This is my first time making focaccia, so all of the pictures of the dough really helped, but I did think I still had the right mix by the time I started the stretch and folds. I also did add the olive oil at the beginning so perhaps that also affected the rise.
Same here. I’m pretty sure it was over-hydrated. I was doing 2 at once and wonder if I just botched the measurements. I’m waiting to see if it is edible at all and then I’ll try again another day!
I forgot to transfer the dough into the deep pan and stretch it again. I left it in the bowl for a few hours. I just moved it to the pan and stretched it once and set the timer for 30 minutes. will it be okay
Yes!
Hey Maurizio! Your bread baking has helped keep me sane during the quarantine, thank you! We are having trouble finding high protein bread flour at the store so we are relying heavily on whole wheat flour because it is more available. How would you adapt this recipe to use both AP and Whole Wheat flour?
Hey, Caroline! No worries, we’re all running into tight times right now. You could sub out the bread flour for whole wheat, or halve that whole wheat section for ww and all purpose flour.
Hi Maurizio- I have made this recipe a bunch of times and it is DELICIOUS! However, only 1x have I had it be really light and fluffy. Of course, I’m trying to figure out what I did right the time it worked so beautifully. I’m thinking it is one of 2 things- My starter is just different than yours and isn’t translating well, OR I am using the Kitchen Aid wrong- maybe over mixing the dough? I see below that someone thinks it would be helpful to have more detailed instructions on the setting and time you mix the dough on the KA. I’ve also only done dough by hand and so not really good w/ the KA yet. Any details you could offer would be great! Also, my starter is about 2.5 years old, so I think it is probably strong enough. This time I waited to mix the dough until the starter floated in water to ensure that it was at peak. Any thoughts?
Hey, Greg. I replied back to the person asking about mixing, scroll down to see the (lengthy) reply if you’re interested. I highly dough you’re over mixing the dough unless it becomes very stiff and taut. This is a pretty highly hydrated dough, it’d be hard to over mix in my experience. If your starter is rising and falling predictably each day with signs of strong fermentation, it’s just fine. Definitely use it at it’s peak for this dough and try to keep the dough itself warm. The key to a light interior is strong fermentation and minimal handling near the end when it’s in the final pan rising. Just let it be after it mostly fills the pan, this will give it the space/time it needs to fill the pan and rise up nice and tall. You won’t see much rise until the end of the proof, really.
Read through that mixing comment below and see if that helps as well!
Hi Maurizio. Have you ever experimented topping your focaccia with a brine near the end of your final proof (/while oven is preheating) to keep the focaccia tender and the crust thin? I’ve come across the technique in a few recipes and I’m curious to try – I have your dough resting in my fridge for its final proof as I type!
I haven’t Jennifer, but it’s something I need to try! That said, my crust is always so thin with this, every time I make it I am so apprehensive to change anything 🙂
Hi Maurizio! Do you still recommend the “Bakers Math” silver kitchen scale, or is the Hario scale shown in the photos above better? Love your website! Thank you so much for sharing your knowledge with the world.
Thanks, Annie! I still recommend the MyWeigh linked on my baking tools page. The Hario is a nice scale but it’s more of a coffee scale (fine precision) 🙂 Happy to help and happy baking!
Hi Maurizio, we just ate this focaccia for dinner. I had made it for the first time today and loved the fact that I now have a fourth recipe to use up excess starter.
Unfortunately I wasn’t as impressed with the outcome as I had hoped for. Like several others said before me, my dough didn’t really rise or become puffy. There were some bubbles and it rose a little, but even after 6 hours it didn’t look quite ready. Granted the temperature in the house was 75 at most. Since it was dinner time I went ahead and baked it. The focaccia turned out to have quite a sturdy, rustic crust and the inside texture was more sourdough bread than focaccia. I baked it exactly as instructed. The crumb was open and fairly light, but again, more like a sourdough loaf than expected. May be I over proofed it? But what about the crustiness? Is there anyway to get a more delicate crust? Thanks as always!
Hey, Birgit! This should turn out light and airy, so I’m sorry to hear it didn’t work out for you. I’d say next go try to use a bit of your starter right when it is mature, if you didn’t this last time. When I bake this I get a light and thin crust, with an open interior. If your dough is over hydrated and/or under strengthened, you might not see sufficient rise or bubbles. Try dropping the hydration a bit and give it a bit more strength (through kneading, mixing, and/or stretch and folds during bulk) to see if you can get more rise. Also, be sure the pan isn’t overly large or it’ll spread wide and thin instead of staying thick.
Let me know how that next attempt goes!
Thanks Maurizio! The starter was very mature, may be even a little too much so (12-13 hours old). I used the Kitchen Aid to knead the dough for probably 10 minutes and it looked and felt beautiful and not too wet. I might keep a closer eye on the proofing temperature next time. The pan is the same one you use. I will try again and attach a picture next time. Thank you!
Hi – quick note… I looked on the KitchenAid site because I’m using one for this also, and it said never knead anything in the mixer for more than 5-6 minutes total mixing time. Maybe that’s the issue?
Ha! I love that you looked that up Jackie! I really wasn’t sure how long to leave the machine on and assumed the longer the better. 5-6 minutes is it for next time. Thank you!
It’s definitely possible to over mix this dough if mixed too fast for too long in a KA!
Hi Maurizio — can I ask you to speak for a moment about overworking dough? I’m sure it’s a topic deserving of its own article (and I’d very much appreciate that!) but for now, for this particular focaccia dough, since you said you often use a KA stand mixer, what sort of rule of thumb do you follow? I’m thinking about guidelines for speed setting, amount of time, whether you use the regular paddle, flex-edge paddle, dough hook, etc. I’m generally very interested in this topic as I suspect I’m often going overboard with my KA mixer, but want to have an idea of a starting place. Thanks so much for everything!
Yes, definitely a deep topic. I almost always use the dough hook for bread-related items unless the hook is having trouble mixing. Some super wet doughs or enriched doughs benefit from the paddle, at least in the beginning until the dough comes together — a good example are my Bomboloni.
I usually mix a dough like this until it starts to smooth out some and begins pulling from the sides o the mixing bowl, it’ll start to bunch up around the dough hook as it gains strength. If it’s very wet, though, it might never reach this point in the mixer. The general rule I like to follow is to think about what I’m going to do during bulk: if I plan to give it a few stretch and fold sets then I don’t need to fully mix the dough (by fully I mean full development, passing the windowpane test — which I rarely do with a brea dough). I mix the dough just enough to get to the point where a few sets of s&f will finish it off and get it strong enough. I realize these are very vague and general terms, it’s hard to convey such a tactile thing with words.
The good thing here is we can always use s&f during bulk to correct for mixing: if we under mixed a bit, just give it another set or two of folds during bulk until it’s strong enough. Conversely, if we mixed too long and the dough is hard to s&f, stop there, even if you had more sets planned.
For this dough I highly doubt you’re over mixing unless you’re really pushing it. The dough is very wet and slack, and if you did mix for a long time and it started bunching around the hook, that’s fine, just stop there.
Hope this helps!
Much appreciated!
Can I use discarded starter for this recipe??
I make this focaccia with my starter directly, so yes you can certainly do that. I’d recommend, though, you try to time it so you’re using your starter right when it matures and not too long after.
I tried my first focaccia yesterday. Everything seemed to be going perfectly, and then I never got a bubbly rise even after extra hours – this was all in my proofer. There was a rise, a few small bubbles and that’s it – the dough was very sticky. After all that time I decided to attempt to bake it. When I pushed my fingers in to make holes the whole thing deflated, and I still baked it. I want to try again with the pan you suggest. My experience of focaccia in Italy is from Liguria and visiting the focacciarias daily – it was amazing, so light and fluffy. Any ideas?
Ah bummer, sorry to hear that Cheryl. It sounds like it was over proofed and/or over hydrated. I would try reducing the hydration of the dough by 5% and then cut back just a bit on that final proof time, perhaps 30 minutes, and see how that bakes up next!
This recipe looks delicious! However, my dough behaves kind of strangely when I try to make it. My house is a bit cooler, ~72F, so the bulk ferment takes a bit longer. I do the bulk ferment completely in a small cambro instead of half in a container and then half in the pan. It takes a bit longer, maybe 6 hours to get to a decently poofy state. At that point I dump it out and stretch it in the 9×13, but it seems to stop rising at that point. Gas bubbles form on the surface, but the dough itself doesn’t seem to lighten or rise, even if I let it for 6+ hours. Is there something I’m doing wrong?
It’s hard to say but it might be that the dough has gone a bit too far in bulk stage and there’s little left by the time you stretch it out to fit the pan (which will degas the dough). I would say try doing half in container and half in pan if possible!
Hello Maurizio. I’m planning to make this in the morning. I’m going to try using the mix master instead of by hand. My hope is that it will strengthen the dough and help it rise. Also, my sourdough should be at peak so I’m hoping that will help, too. Any tips on using the mix master for this recipe? Is my assumption abt strengthening and helping rise based in reality? 😋
I’m not sure what a mix master is, but a stand mixer will work very well with this recipe — I use my KitchenAid to mix this dough very often!
Great. Thanks so much for the quick reply!
Can I leave the dough in the refrigerator for 2 days instead of overnight? It is Saturday night and I really want to bake it on Monday
You’ll likely get less rise and a more-sour result, but it might be doable (really depends on how fermented your dough is)! If it were me and I didn’t feel like baking it, I’d try 🙂
Thank you! I’ll give it a try.
Thanks so much for this Maurizio! I just made Samin’s recipe last week after watching It’s Alive! and immediately got to wondering if you had a sourdough spin on focaccia.
What are some good principles to hold in mind as I look to modify this recipe (or any) and add more whole grain flour – say, 15%? My first guesses would be to swap the AP flour with whole wheat, lengthen proof by an hour or so (or add in an autolyse), and up the water content if needed. But how do you think about this? Thank you so much!
I do indeed! I make this recipe very, very often and it couldn’t be easier. I’d say if you’re increasing the wg flour (which I’ve done) you’d actually want to expect to shorten the proof: you’ll likely see more fermentation activity as whole grain flour has more nutrients present because the bran and germ as intact in the flour. Just wing it, though, and bake it when you think it’s bubbly and risen enough. Even if you go a little over, it’ll still be great.
All in all, I think it’s a great idea to add in some wg flour! Have fun and enjoy.
Can we use 100% all purpose flour?
Yes, that would work well. I would suggest if you do this to hold back a little of the water in this recipe, perhaps 25-50g, and see how the dough feels when you’re mixing. There are always hydration adjustments to be done, but using all AP flour might mean it’s a little less able to take on the same water content (and this is just fine!).
Thanks a ton! Will make this ASAP! Love your best sourdough RECIPE too. In fact have two loaves for a cold bulk in my fridge right now!
Right on, so glad to hear all that. Thanks and happy baking, Anuja!