
I like experiments. You know, the whole scientific method and all that: forming a hypothesis, testing, observation, recording results, and finally, a conclusion with perhaps an updated hypothesis at the end. I used to have fun at the school science fair every year, not because my projects were incredibly complex or groundbreaking (although my mom did help me create some pretty impressive human-like lungs, once), but because it was enjoyable working on something completely outside the curriculum. A chance to dig deep into something itching my brain. And while this post’s experiment—and that’s exactly what it is—might not break out of the spectrum of baking sourdough bread, it does involve something I’ve not done for a long while and also something I’ve never done before: malting grain.
I’ve sprouted grain in the past, but never milled the sprouts into flour. My hypothesis for this post is that sprouting wheat, drying it, and then milling it into flour and mixing it into the dough will lead to increased flavor (sweetness and nuttiness) and a darker crust color. And as bakers, we already know malt can benefit the dough, but will my homemade malt yield the outcome I’m seeking?
This post requires a bit more effort than a standard mix-and-bake, but these deep dives are a fun way not only to learn something new but also to explore a facet of baking that we might otherwise overlook. To examine a part of the process, we might take it for granted (your miller no doubt augments your flour with malted barley flour or another form of amylase to balance enzymatic activity). And finally, it’s just plain fun.
However, first, let’s discuss malt.
What is Malt?
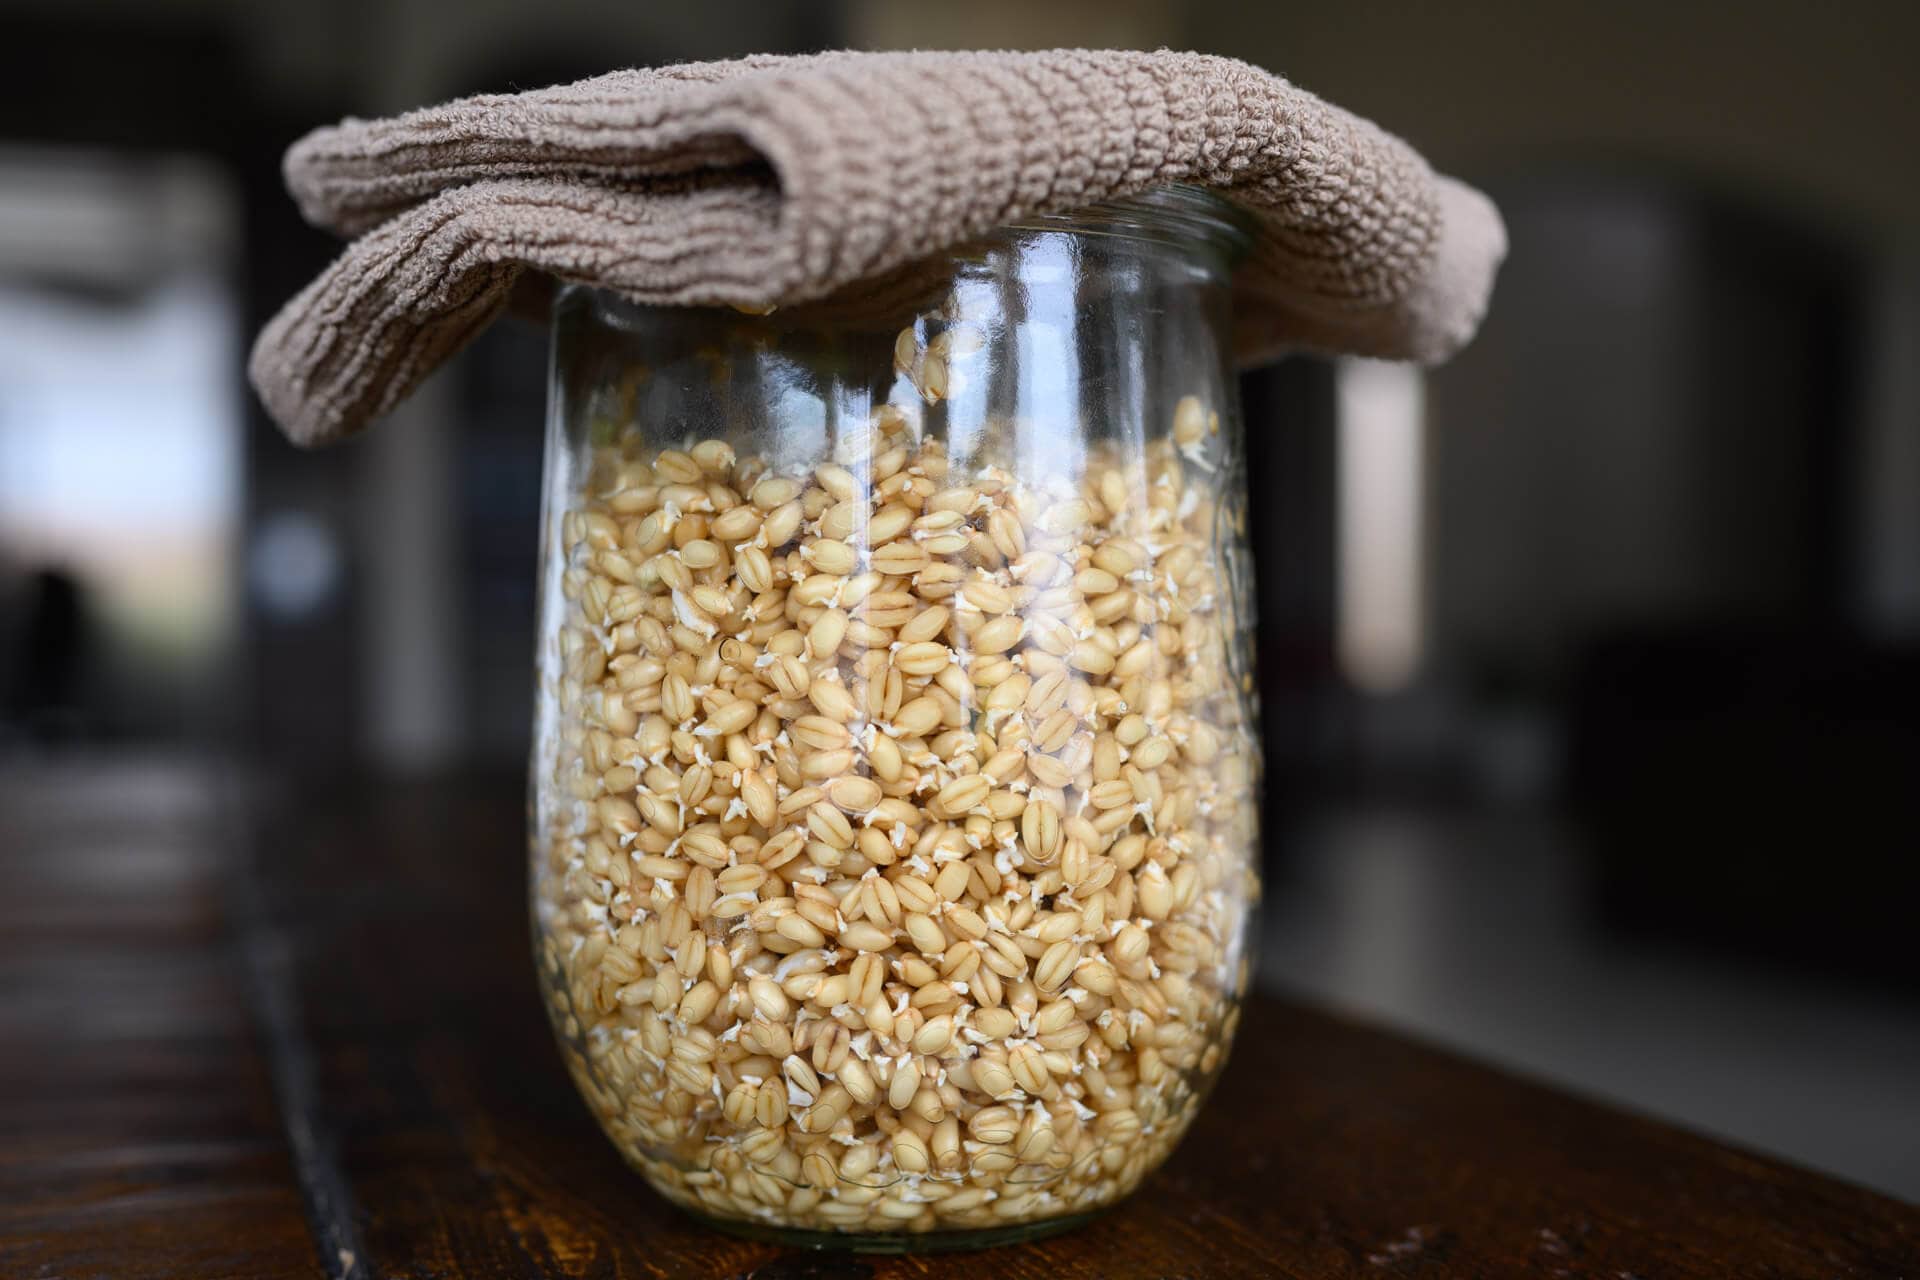
When a grain such as wheat or barley is sprouted, enzymes (amylase) inside the grain activate and begin breaking down the starch locked up in the endosperm, producing maltose (sugar). Maltose is what provides the fuel during this germination, allowing the grain to grow the little sprout you see emerging in the photo above.
The exact point this process is stopped varies and likely requires precise timing/instrumentation for a particular result. In my kitchen, it’s not so tightly controlled and that’s just fine, I’m looking for flavor, not enzymatic activity preservation. At this point, the sprouting grain is dried and kilned to stop the germination process. Kilning at an adequately high or low temperature determines whether the resulting malt will be diastatic or non-diastatic.
But what’s the difference between diastatic and non-diastatic and why should I, a baker, care?
The baker’s perspective: Diastatic Malt Powder vs. Non-diastatic Malt Powder
If the grain is kilned at a sufficiently high temperature, the result is a non-diastatic malt with enzymatic activity eliminated. Non-diastatic malt is what I’m making here in this post and is typically used as a flavor and nutrition additive only (because no amylase activity will exist). Non-diastatic malt powder (or malt syrup) is high in maltose and can impart a nutty/malty flavor to a dough.
Conversely, if kilned at a lower temperature (I’ve read around 105°F/40°C or below) the result is diastatic malt that has enzymes still active. These enzymes can aid in fermentation by helping to convert more starch to sugar and is especially helpful in long-fermented doughs (like many you’ll find here). These additional sugars help fuel fermentation, contribute to the flavor, and also impart a deeper color to the crust through caramelization as your dough bakes.
The distinction between the two is very important. If I were to add 15% diastatic malt to this dough instead of the non-diastatic malt, I’d certainly end up with a significantly gummy interior and a reddish crust that just looks off. This is why you’ll typically see recipes call for diastatic malt at less than 1%—too much is a bad thing in this case.
For more on the differences, see our guide to what is diastatic malt powder.
How to Make Your Own Non-diastatic Malt Powder
As discussed above, there are three steps to malting: 1) sprouting the grain, 2) dehydrating or roasting the sprouted grain (also called kilning), and finally, 3) milling. Overall this is a straightforward process and only took a few days of minimal work on my part. Let’s look at sprouting, first.
1. Sprout Wheat
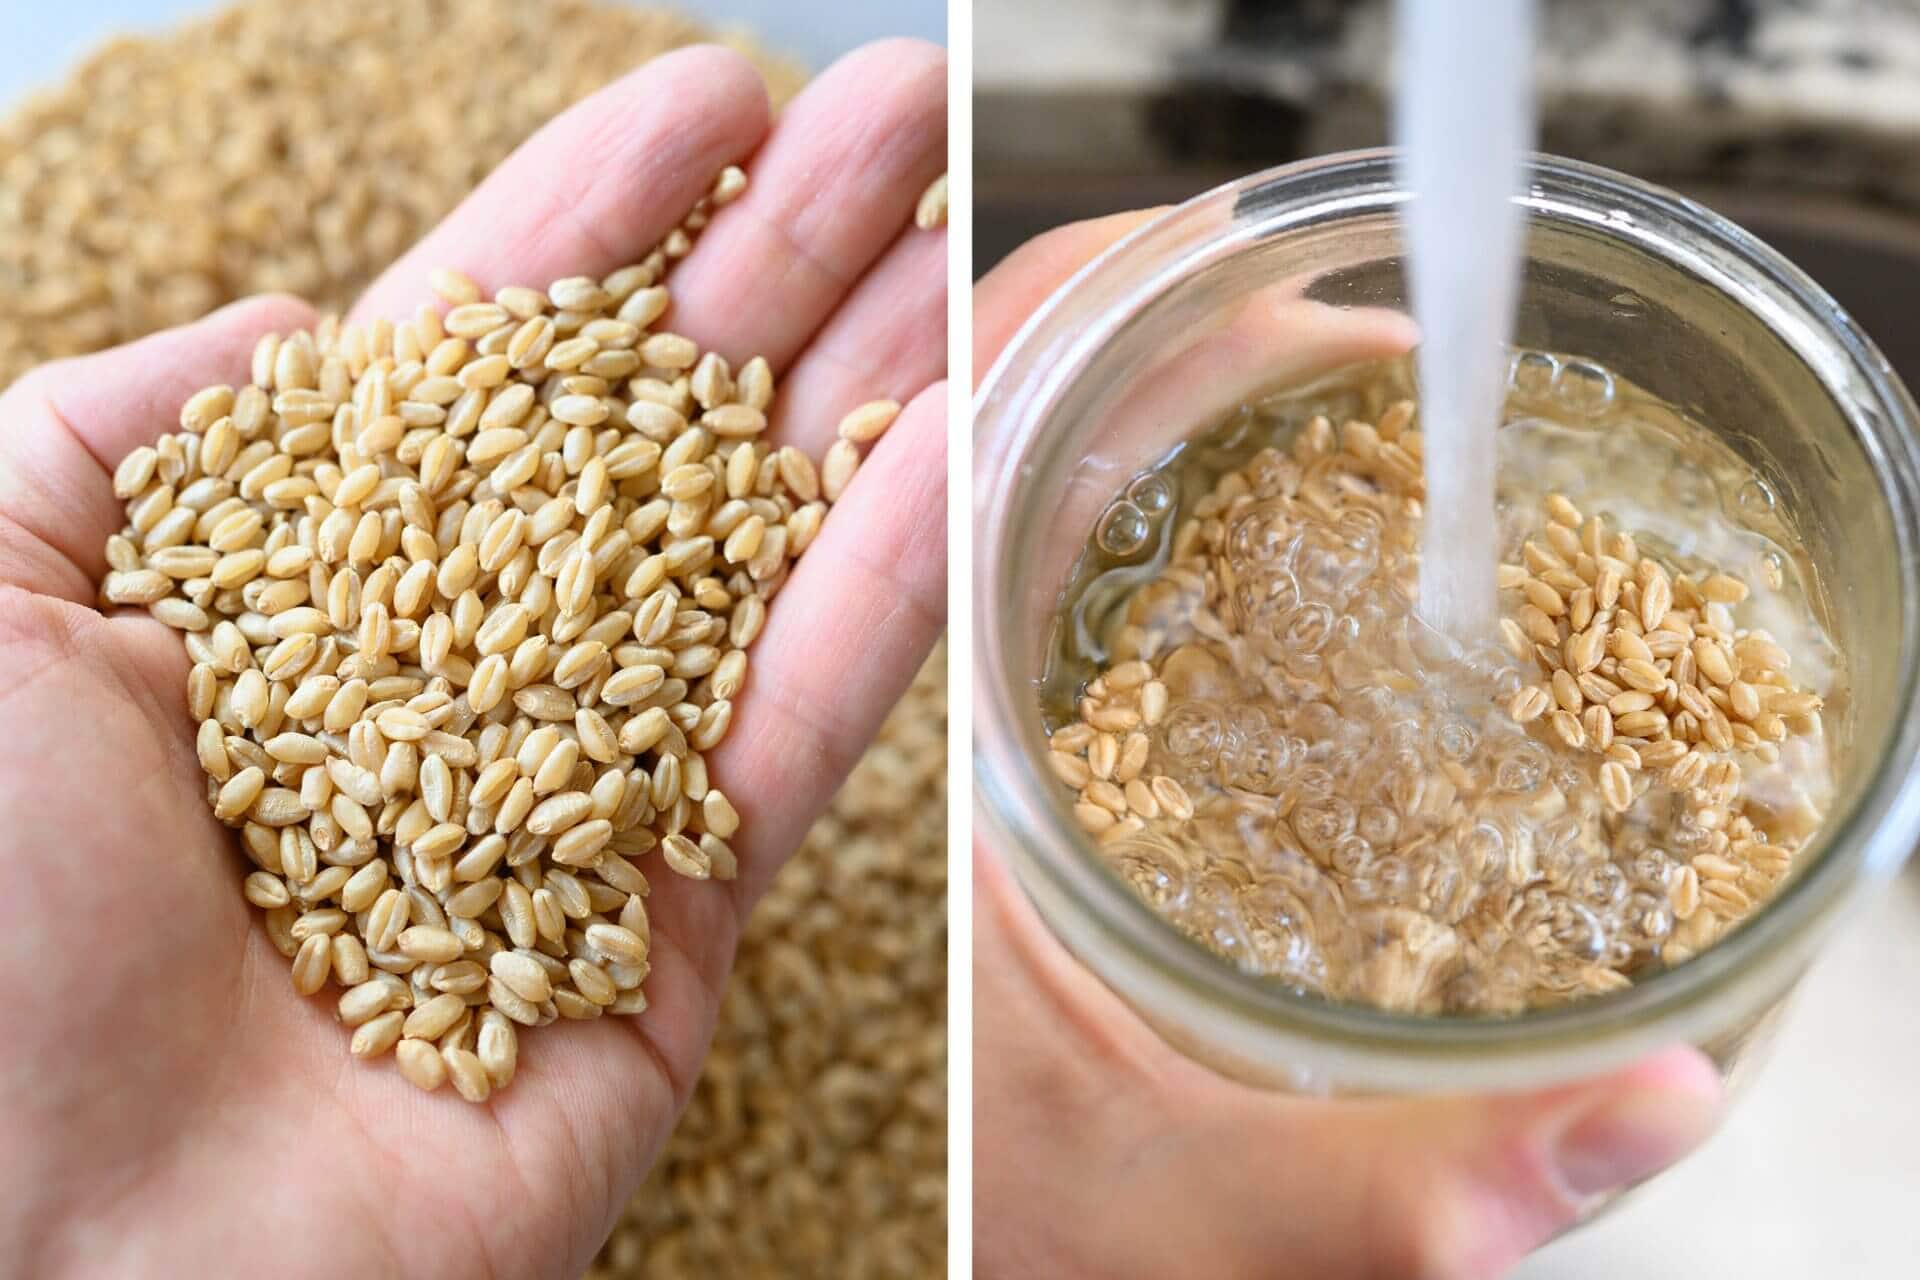
- Rinse the raw wheat berries several times with water.
- Place the berries in a jar (make sure the jar has plenty of headspace; once these guys start sprouting, they’ll need more room) and submerge in water, covered, for 2 hours.
- Drain the jar of the water (keeping the berries inside), and cover with a thick kitchen towel and let sit for 2-4 hours or overnight.
- Rinse the berries again and drain them, then place them back into the jar, covered with a towel.
- Continue with this process until you start to see sprouts emerge from the berries. If they become excessively dry at any time, rinse and drain them to keep them semi-moist.
It took my hard white wheat about two days to fully sprout. Once they sprout, you can cover the jar and place it into the fridge if you don’t plan to mill soon after.
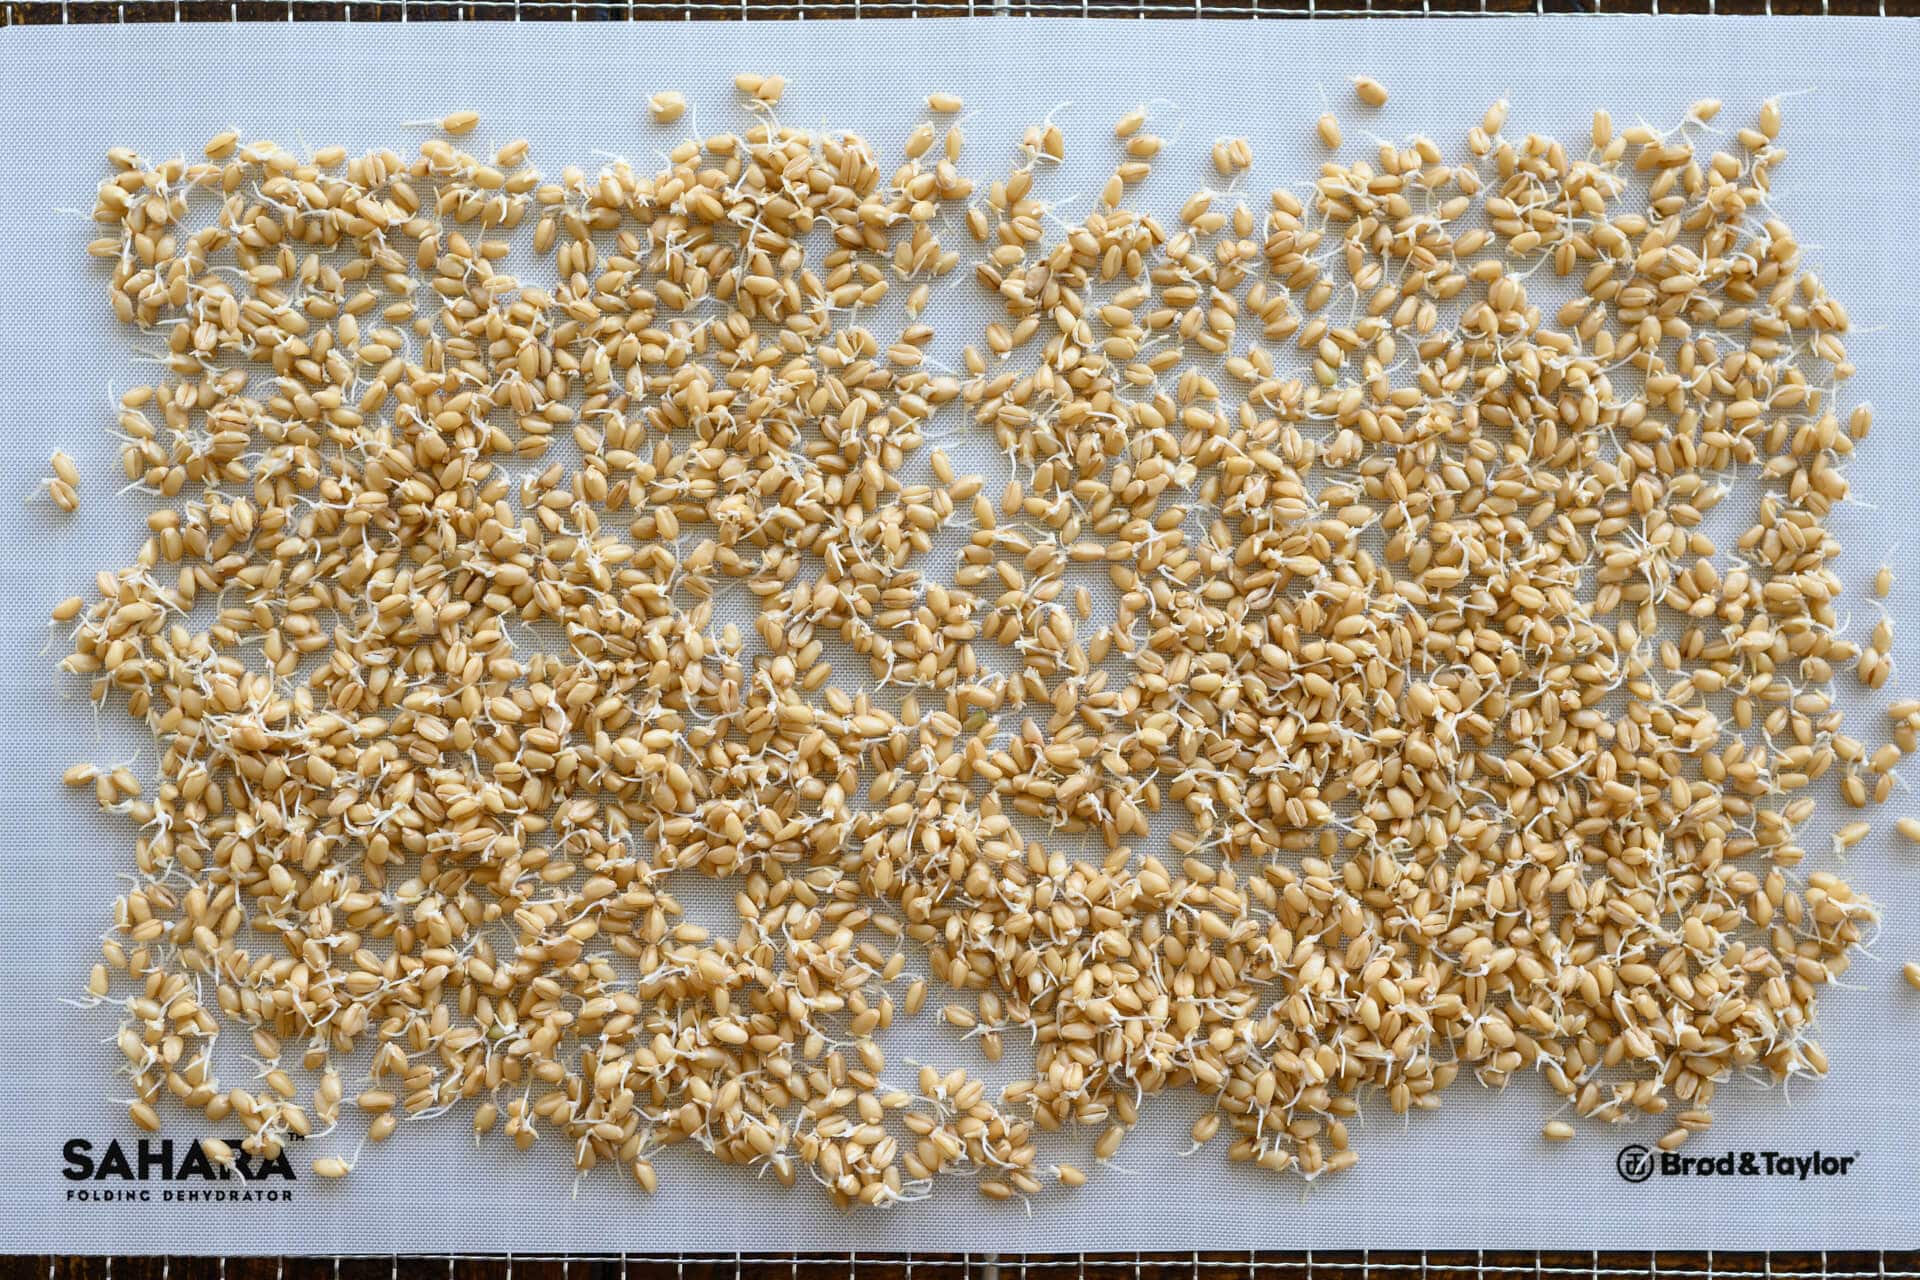
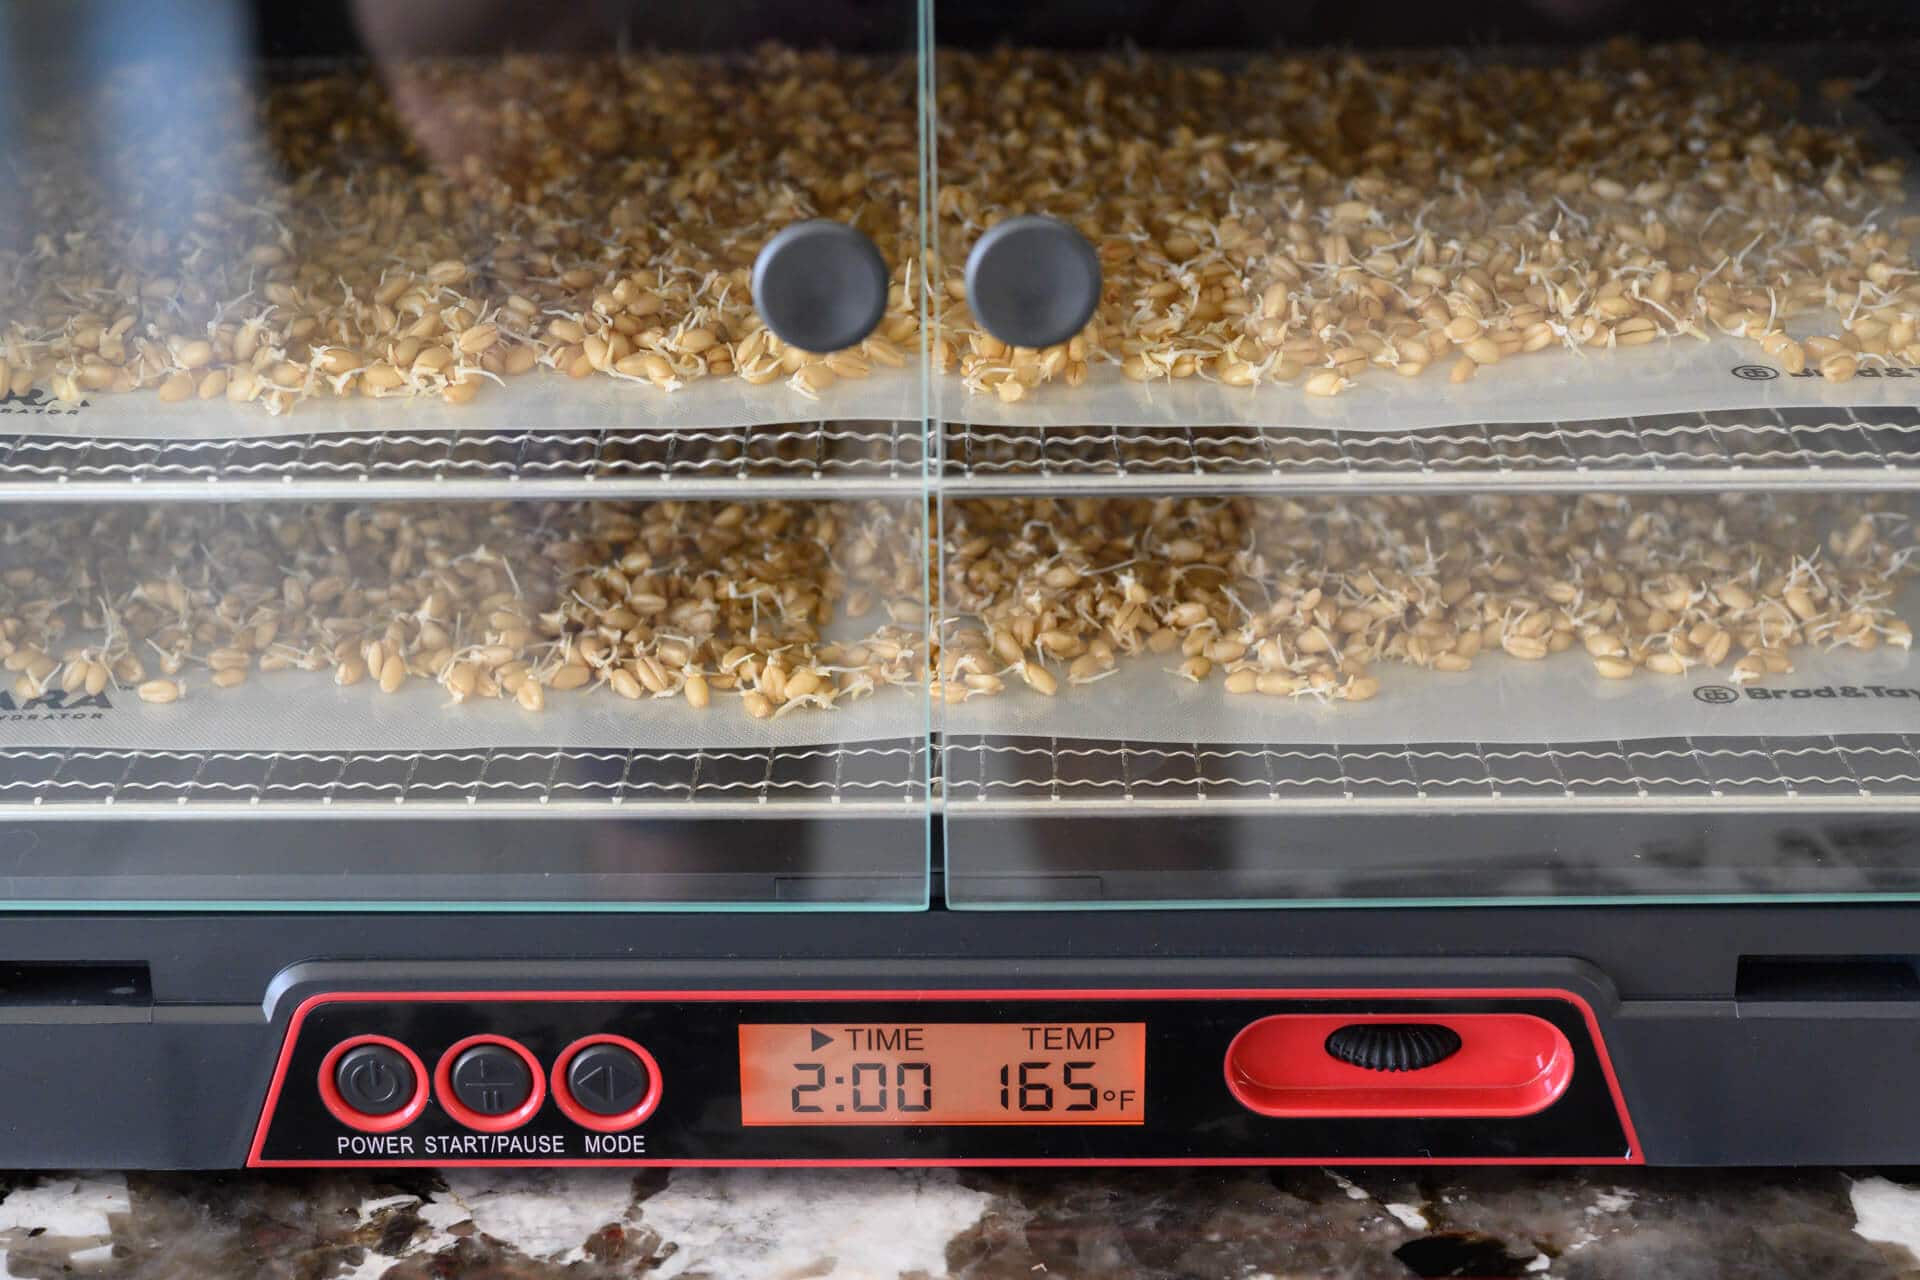
2. Dehydrate or Roast Sprouted Wheat
I used my Brød & Taylor Sahara food dehydrator (which they sent me for my previous Cinnamon Raisin Sourdough sponsored post) to dehydrate the sprouted grain. I set the dehydrator to 165°F (73°C) and let it run for 2 hours. At this temperature, the enzymes present will be completely denatured, ensuring the milled flour will be non-diastatic.
Ensure the sprouted wheat is completely dry before milling; if not, continue dehydrating until it’s thoroughly dry.
If you don’t have a food dehydrator, you could also roast the grains in your oven, just be sure to keep an eye on them because they can scorch rather quickly (the dehydrator does an excellent job at evenly dehydrating).
3. Mill
I milled the sprouted wheat as I would any raw wheat berry using my Mockmill 100 set to very fine. Be sure to do it early enough so the grain can cool before mixing into a dough.
Malted Wheat Sourdough Bread Recipe
Vitals
| Total Dough Weight | 2,000 grams |
| Pre-fermented Flour | 4.50% |
| Hydration | 80.00% |
| Yield | 2 x 1000g loaves |
Total Formula
| Weight | Ingredient | Baker’s Percentage |
|---|---|---|
| 751g | White bread flour, malted (Central Milling Organic Artisan Bakers Craft, ~11.5% protein) | 70.00% |
| 161g | Hard red wheat (Central Milling Organic Whole Wheat Hi-Pro Fine or King Arthur Whole Wheat Flour) | 15.00% |
| 161g | Malted hard white wheat (Central Milling Hard White Wheat; see above for malting process) | 15.00% |
| 858g | Water | 80.00% |
| 21g | Salt | 2.00% |
| 48g | Sourdough starter (100% hydration) | 4.50% |
Levain Build
This is a short, and fast levain build. The high inoculation (the starting amount of ripe sourdough starter used to create the levain) will ensure this levain is ready in 3-4 hours. Be sure to keep it warm, 78-80°F (25-26°C), during this time and use warm-ish water to mix, an FDT of 80°F (26°C) is ideal.
| Weight | Ingredient | Baker’s Percentage |
|---|---|---|
| 48g | Ripe sourdough starter (100% hydration) | 100% |
| 24g | White bread flour, malted (Central Milling Organic Artisan Bakers Craft, ~11.5% protein) | 50% |
| 24g | Hard red wheat (Central Milling Organic Whole Wheat Hi-Pro Fine or King Arthur Whole Wheat Flour) | 50% |
| 48g | Water (warm) | 100% |
Dough Formula
Target final dough temperature (FDT) is 78°F (25°C).
Note that the baker’s percentages listed below are with respect to the final dough ingredients and do not take into account the levain.
| Weight | Ingredient |
|---|---|
| 727g | White bread flour, malted (Central Milling Organic Artisan Bakers Craft, ~11.5% protein) |
| 137g | Hard red wheat (Central Milling Organic Whole Wheat Hi-Pro Fine or King Arthur Whole Wheat Flour) |
| 161g | Malted hard white wheat (Central Milling Hard White Wheat; see above for malting process) |
| 810g | Water |
| 21g | Salt |
| 145g | Ripe, 100% hydration levain (see Levain Build, above) |
1. Make Malt – Two days (or more) before mixing
Refer to the process listed earlier in this post for instructions on making malted wheat.
I begin sprouting the wheat 2 days before my planned mix day. Once your wheat begins to sprout (this typically takes 2 days for me) and you see relatively long shoots emerging from the berry, place your jar of sprouted wheat into the fridge, covered, to halt the process. Or, if the timing works out, start dehydrating right away. Alternatively, you can dehydrate and mill the flour the day before you plan to mix.
When your sprouted wheat is fully dehydrated, mill as you would any whole grain berry using your grain mill. Be sure to give your flour a few hours to cool down after milling before using it to mix into your dough.
2. Liquid Levain – Morning of mixing, 10:00 a.m.
Add the called for ripe sourdough starter, water, and flour listed in the Levain Build section above to a clean jar. Mix well and cover for 3-4 hours until ripe and ready to use in mixing.
3. Autolyse – 12:30 p.m.
To perform the autolyse technique, add the called for flour (including homemade malt) and all but 50g of the water to a mixing bowl. Using your hands, mix to incorporate the ingredients until there are no dry bits of flour remaining. Cover, and keep somewhere at warm room temperature until it’s time to mix.
4. Mix – 1:00 p.m.
Add the liquid levain, salt, and remaining water to the mixing bowl holding the autolysed dough. Using your hands, mix everything until it comes together into a shaggy mass. Then, dump the bowl out to the counter and slap and fold the dough for about 8 minutes to develop strength. Alternatively, you can keep the dough in the bowl and do a series of stretch and folds with one hand as you rotate the bowl — 50 or so will suffice.
Transfer the dough to a container for bulk fermentation and cover.
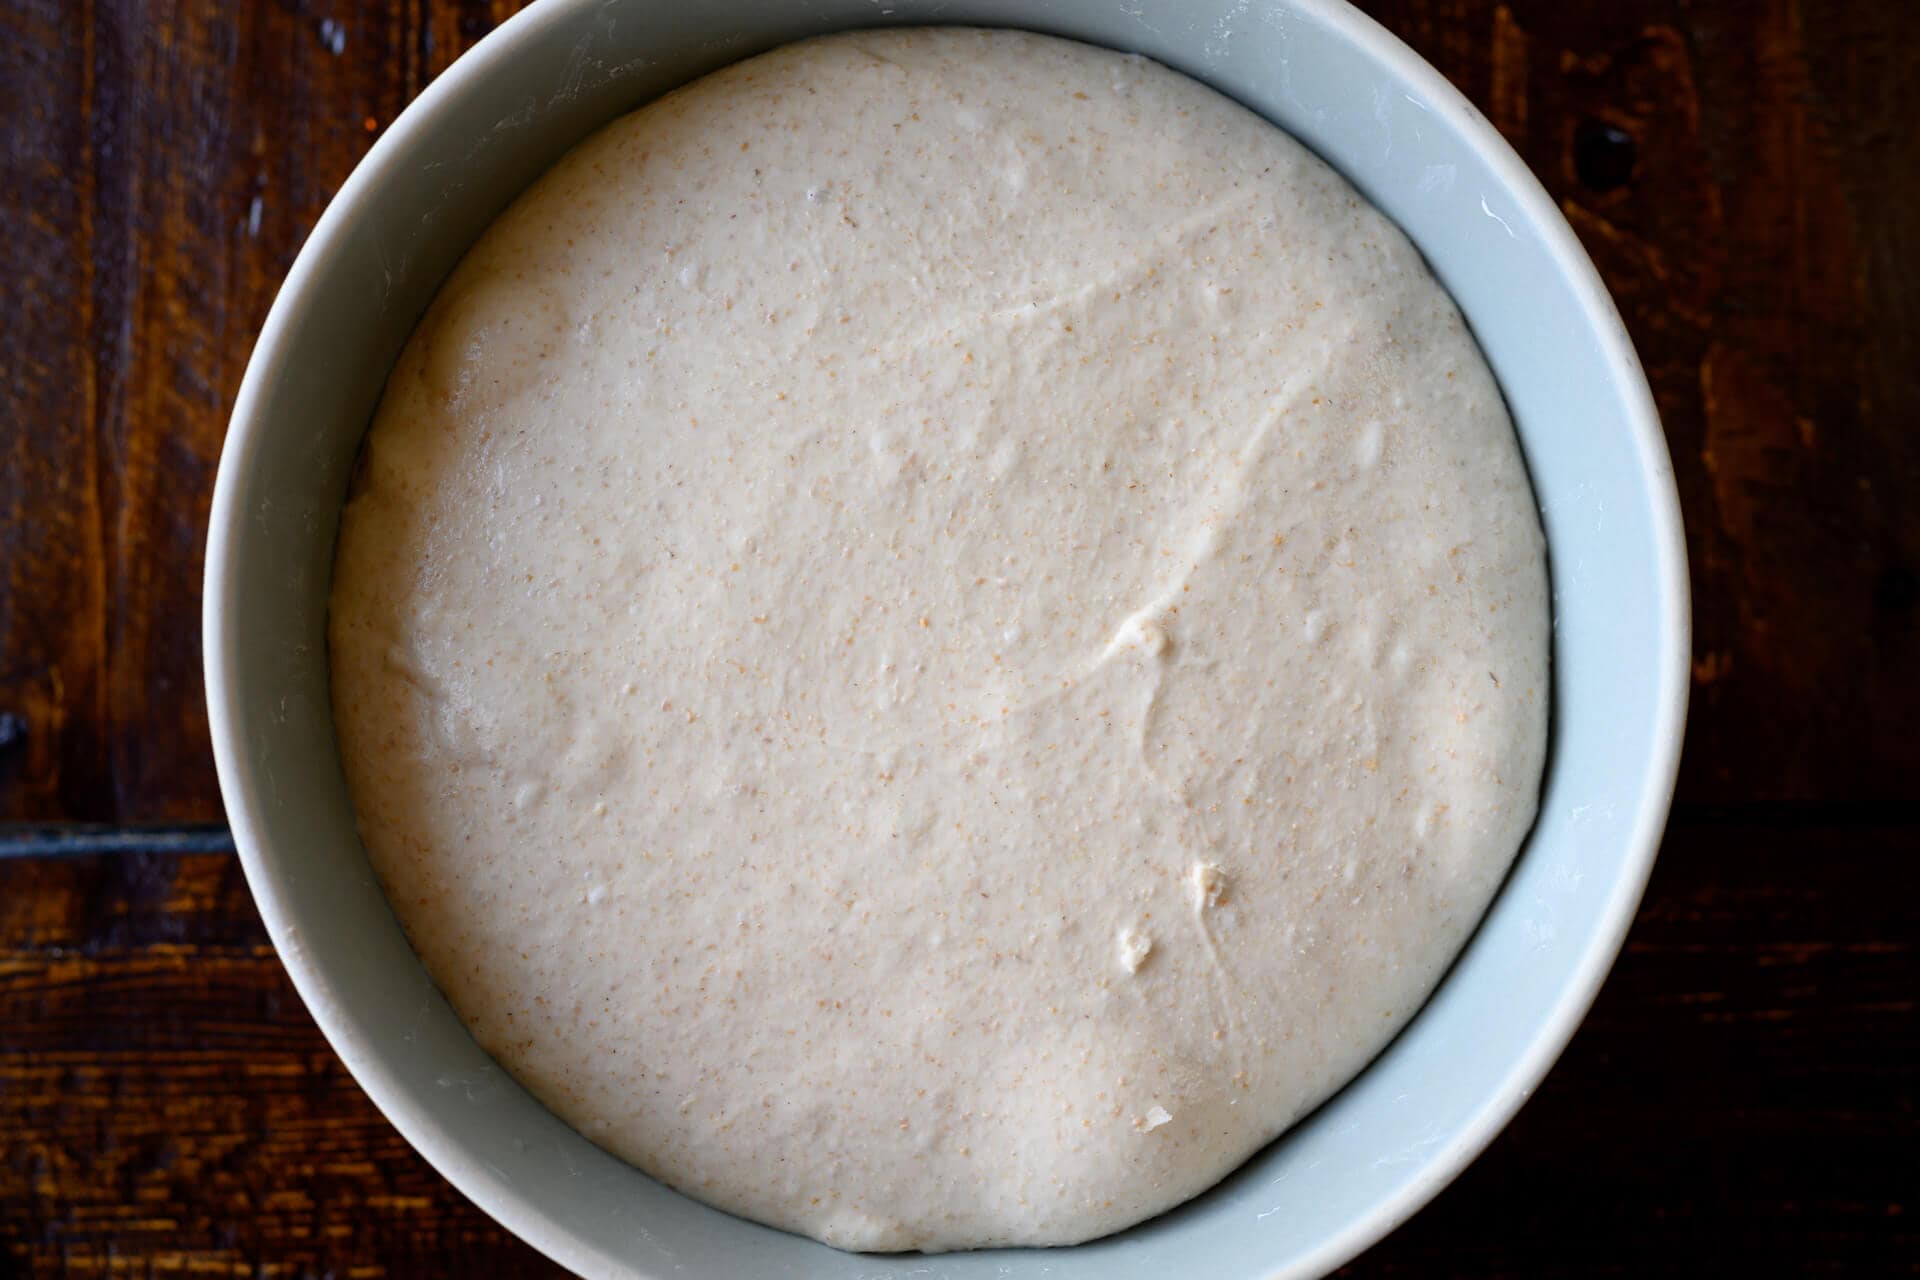
5. Bulk Fermentation – 1:15 p.m. to 5:15 p.m.
During the four-hour bulk fermentation, give the dough three sets of stretch and folds, 30 minutes apart. The first set starts after the first 30 minutes of bulk fermentation.
Let the dough rest after the last set of stretch and folds for the duration of bulk fermentation.
6. Divide & Preshape – 5:15 p.m.
Dump the contents of your bulk fermentation container to an unfloured work surface. Lightly dust the top of the dough with flour and, using a bench knife, divide the mass in half.
Gently preshape each piece of bread dough into a round on the counter using your bench knife and a flour-dusted hand. Let rest for 35 minutes, uncovered.
7. Shape – 5:50 p.m.
Congruent with my last pan loaf post, I’ve been using quick-cooking oats to top many of my loaves. I did the same here for one of my boules, and I’m still loving their texture and added nutrition, but this is optional.
Shape each pre-shaped round into a boule. I shaped mine in the same way shown in my boule shaping guide.
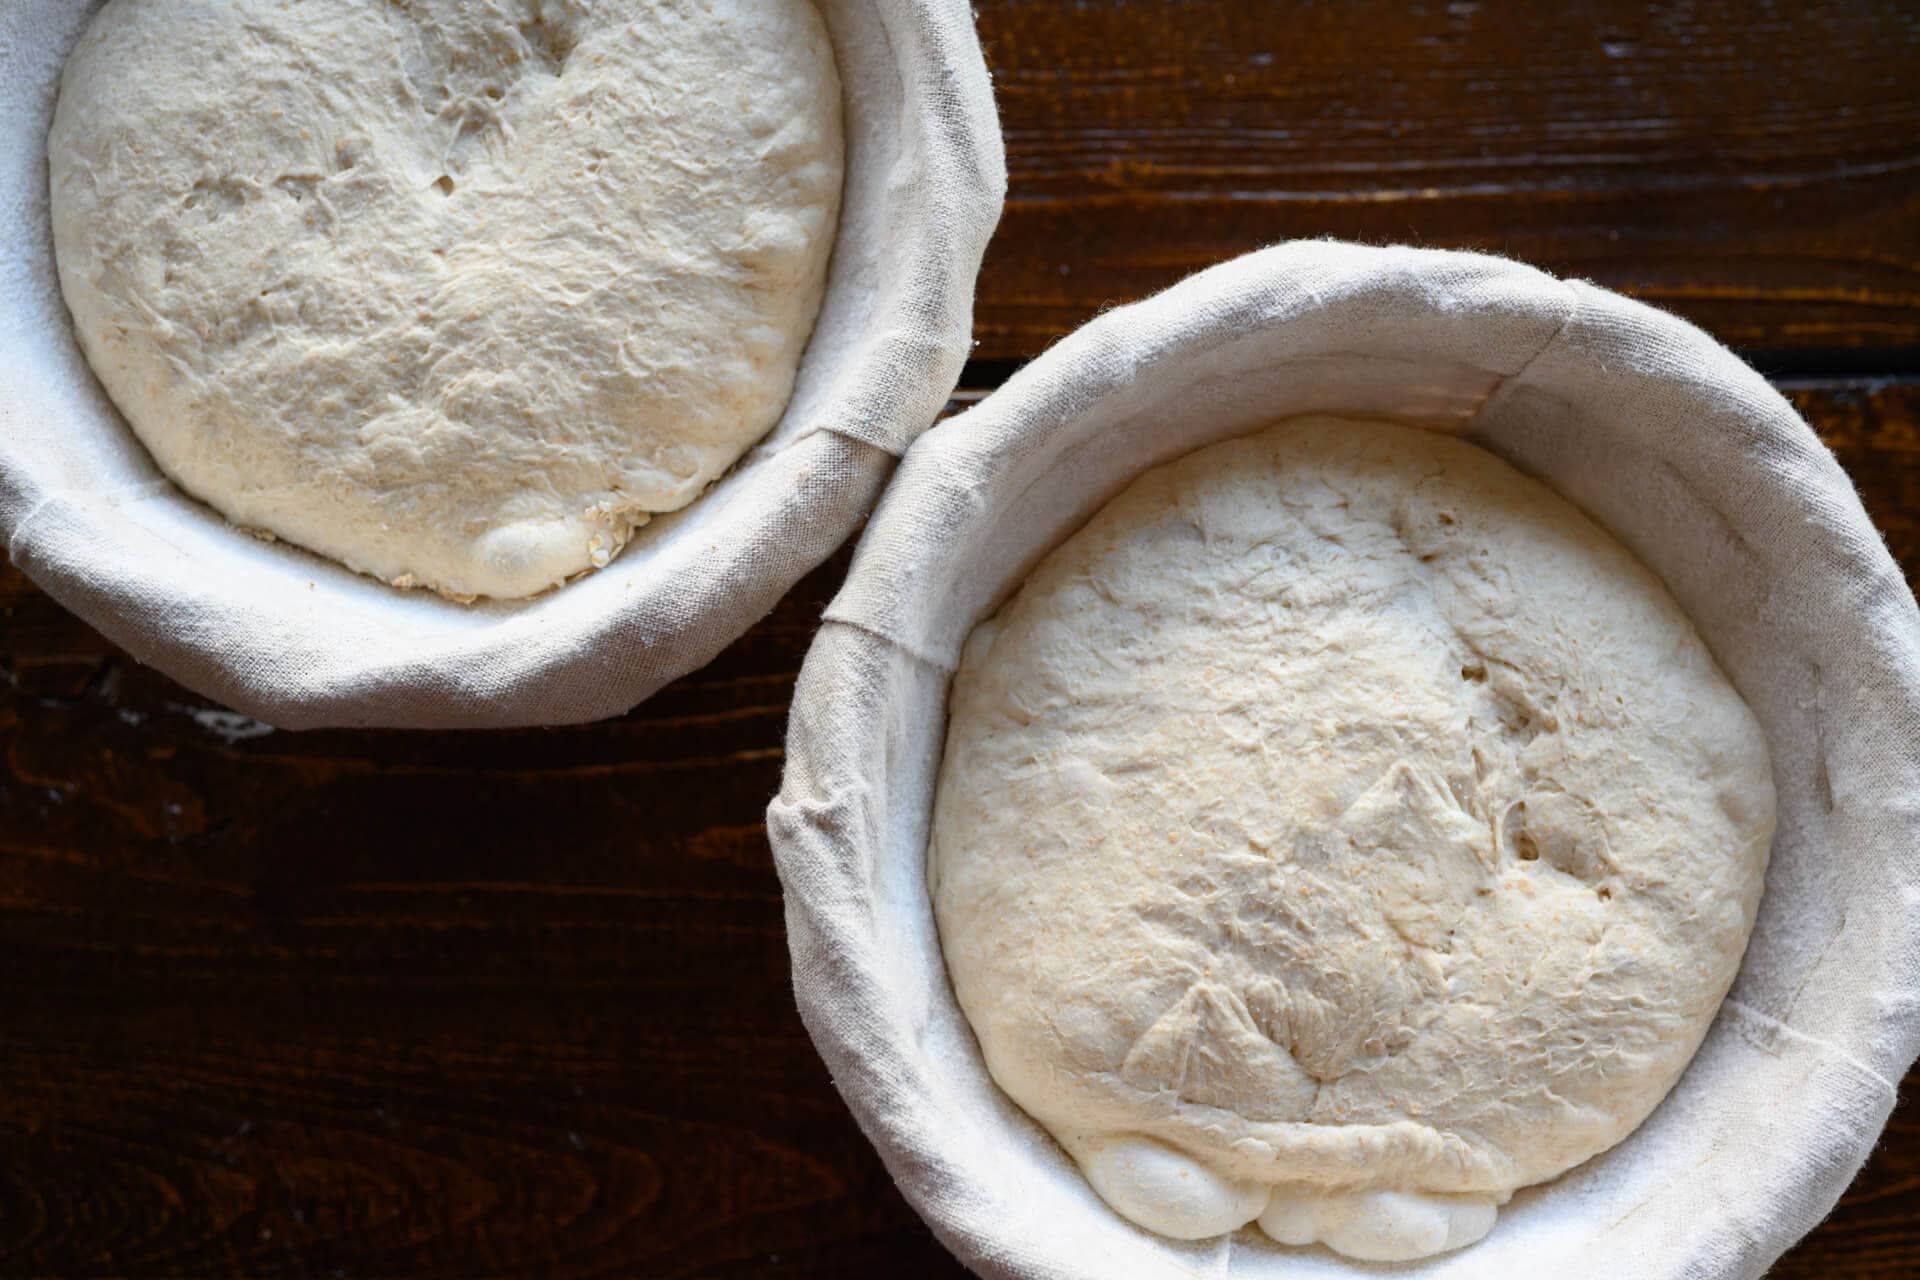
8. Proof – 6:00 p.m. to 8:00 a.m. (next day)
Cover both baskets and place in the fridge to proof overnight (also called retarding).
9. Bake – Preheat oven at 7:00 a.m., bake at 8:00 a.m.
I baked these boules on my Baking Steel in my oven: see my post on how to steam your home oven for baking. However, you could also use a Dutch oven: see my post on how to bake with a Dutch oven (in which case don’t use a baking stone or Baking Steel).
The next morning, preheat your oven with baking stone/steel for one hour at 450°F (232°C).
Load your dough using one of the two methods listed above and bake your loaves for 20 minutes with steam. Then, remove the steaming pans from inside the oven (or remove the lid to your combo cooker) and bake for an additional 30-35 minutes, or until done.
Once fully baked, cool your loaves on a cooling rack for 1-2 hours.
Conclusion
All-in-all I’d say this experiment met my hypothesis: malting my own wheat added flavor and ample crust color. The flavor of the malt didn’t spring forward in an intense way, but a slight nuttiness was there at the end of each bite. Further tests (this is the observation → iteration part of experiments!) will include higher percentages of malted wheat and also an attempt at roasting the sprouted wheat at a higher temperature. My hope is that higher temperatures will encourage more caramelization in the sprouted grain and bring forward more flavor.
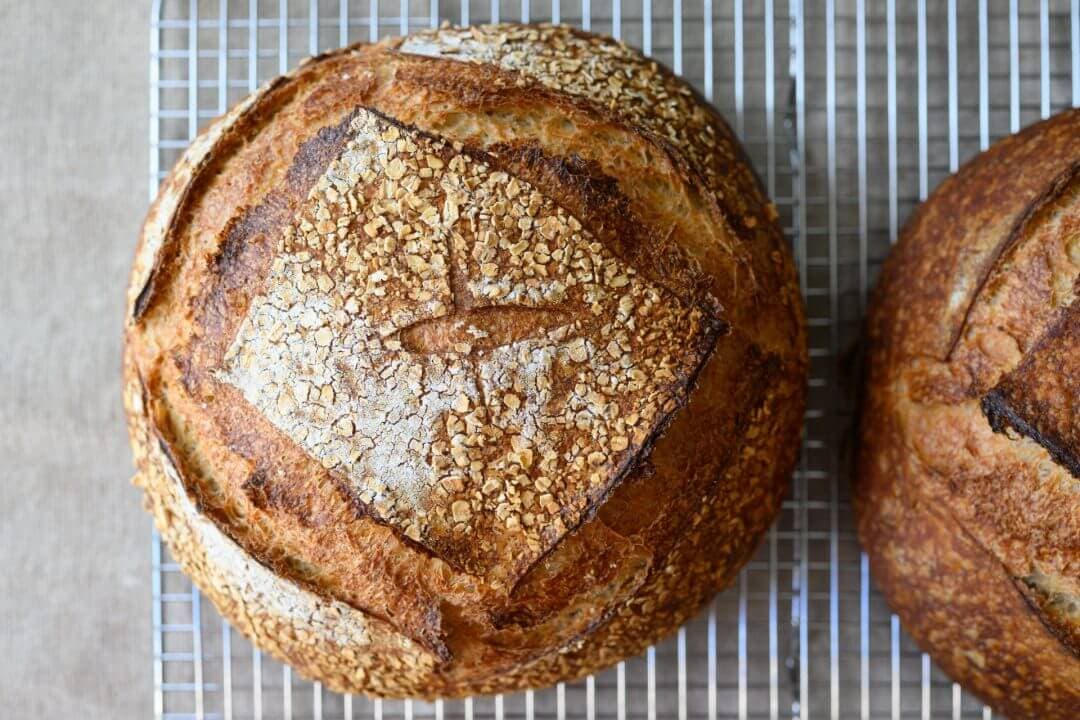
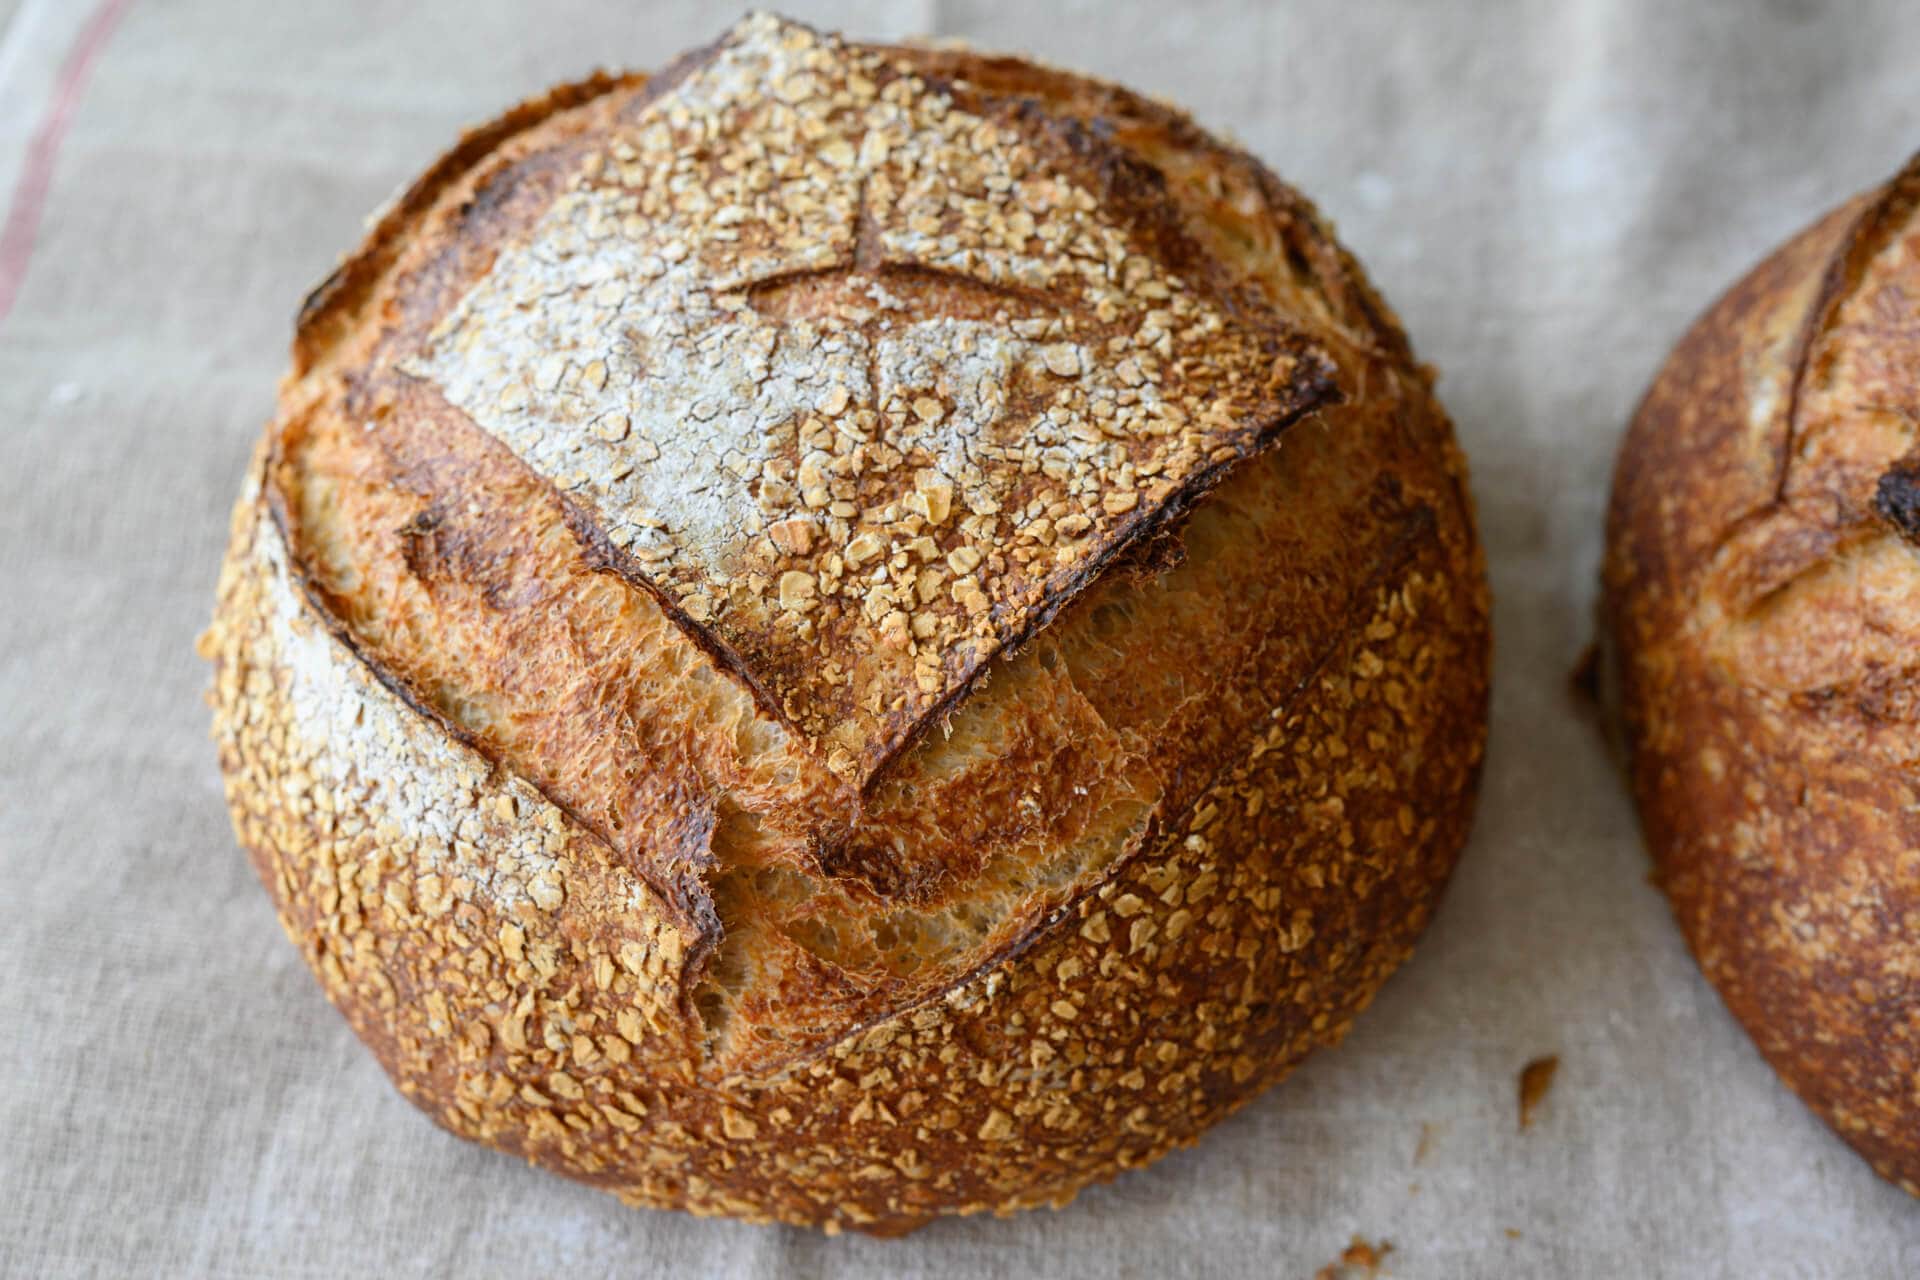
Crust
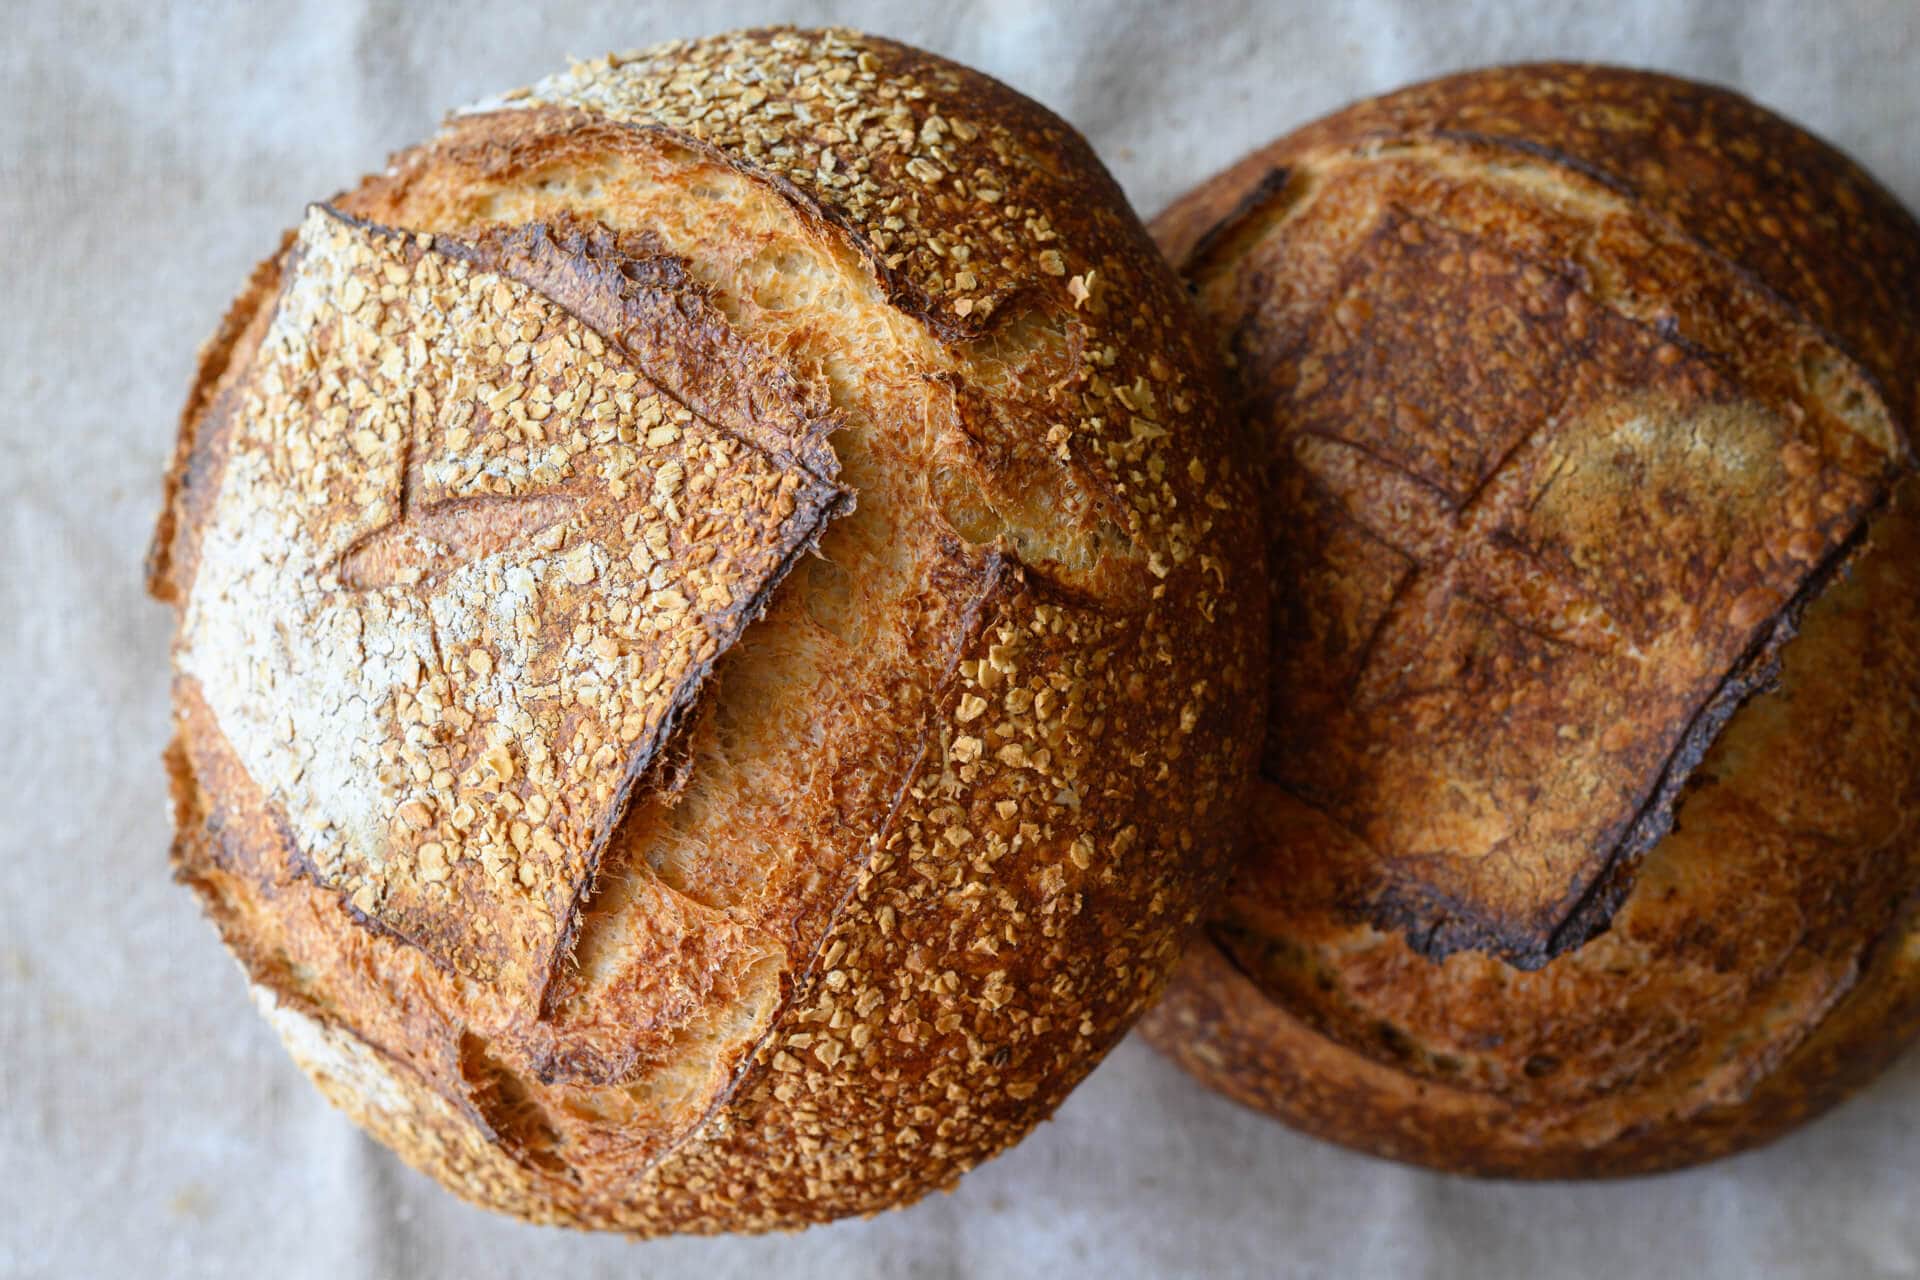
The crust on these loaves turned out wonderful. The high heat from the oven caused them to pop up dramatically and open up just right at the score. That area between crust ridges grew deep and wide, seemingly containing all the colors one wishes to see in a bake.
There’s no doubt these had ample color in the crust, likely helped by the addition of the malt. Even though it was non-diastatic, the added sugars remained until they finally caramelized on the exterior during baking.
As I said earlier, I’m still fascinated with the texture (and aesthetic!) of the instant rolled oats spread on top. They add a little extra crunch, a little surprise, much like puffed rice does to granola or candy.
Crumb
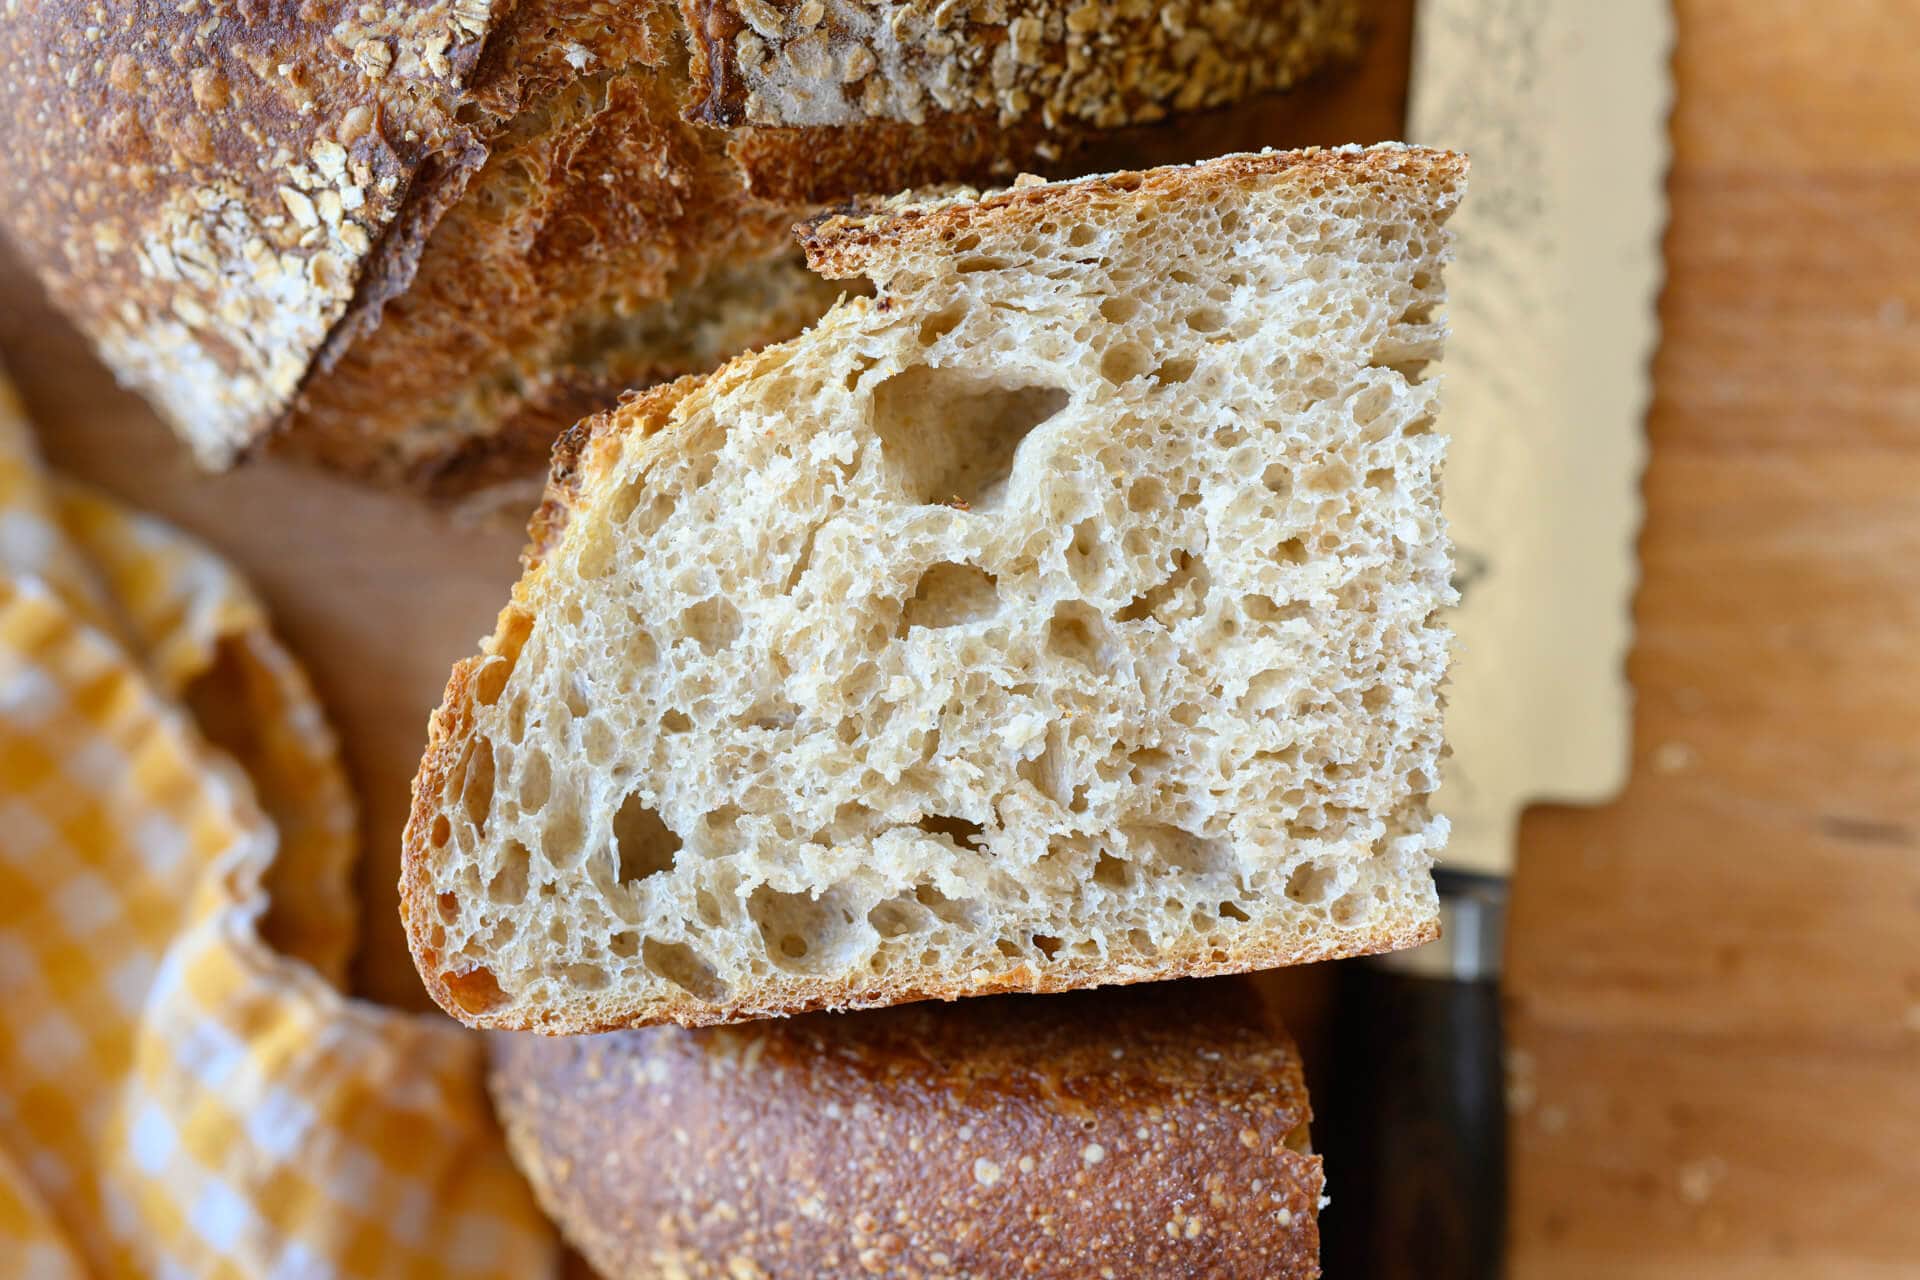
The interior of this bread was supremely soft and tender, light in hand, and had just the right mouthfeel. Using low-protein flour, whole wheat, and freshly milled sprouted wheat made for a loaf of soft bread.
This kind of loaf begs for harsh toasting, top-tier sandwich materials, or, in my case, a spread of high-quality jam—and it just so happens to be jam season. Serendipity.
Taste
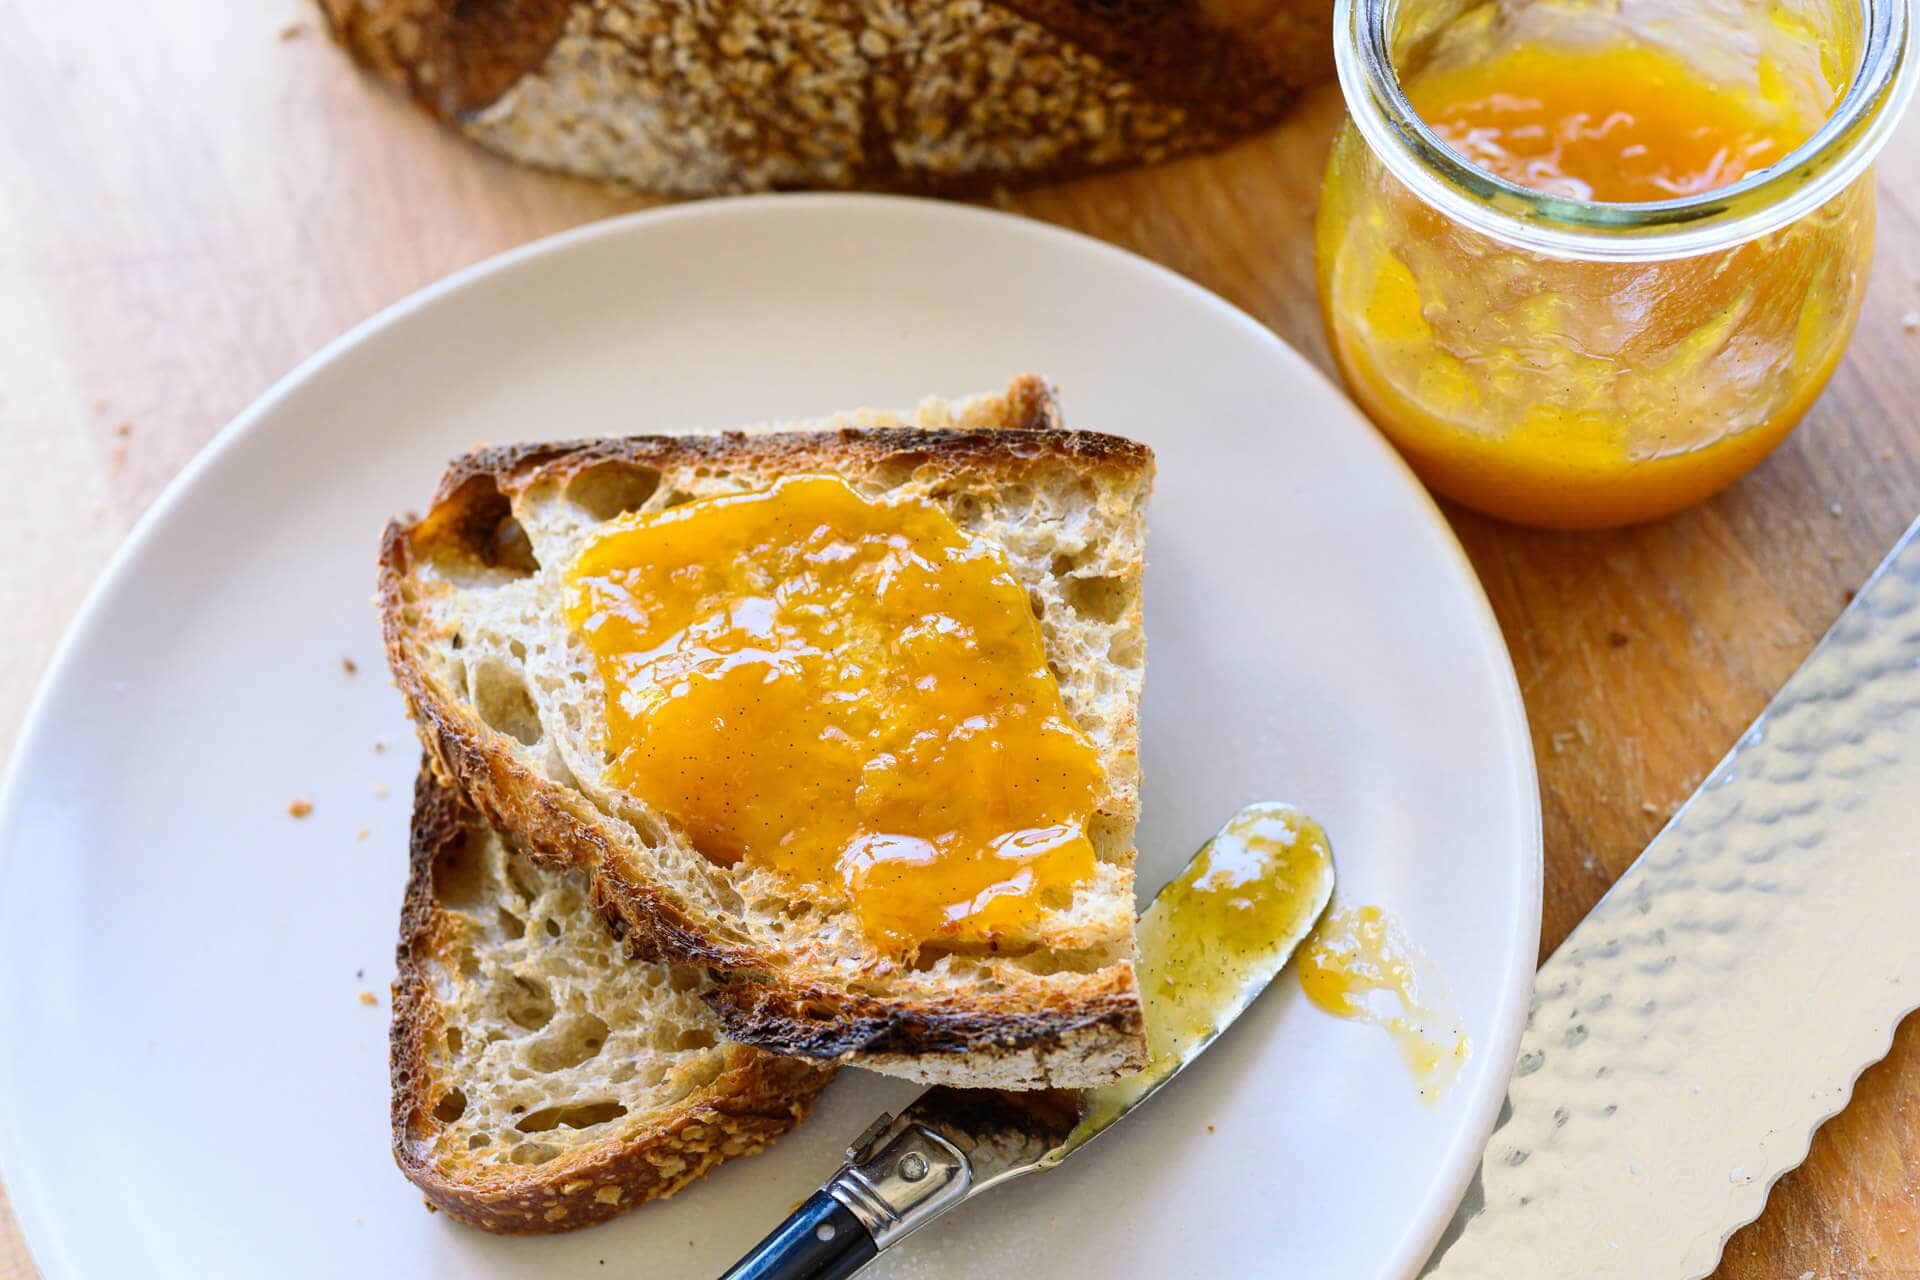
Heavily toasted and topped with fresh-made apricot (from my parent’s tree), maple syrup, vanilla, and brandy jam (the recipe is from Saving the Season, one of my all-time favorite books) made for an incredible morning. I didn’t even need butter.
This bread has a very mild, nuanced flavor. As mentioned, I wouldn’t say the malted wheat shows through so powerfully as to be immediately noticeable, but a nutty flavor comes through at the very end of each bite—a welcome addition, to be sure.
Buon appetito!
If you use this recipe, tag @maurizio on Instagram so I can take a look!
Thank you so much to Brød & Taylor for sponsoring this post! As always, the recipe, thoughts, and opinions here are my own.


35 Comments
So, what is the difference between the homemade malted stuff and the kind you can buy at the Homebrewing beer store? I have been purchasing the Vienna Lager grain there for years and use it as my dusting flour instead of normal flour. If I add it to my dough, the bread gets gummy, though. The Vienna is slightly roasted. I can add about 1/2 tsp to my starter after it’s been sitting on the counter overnight, and this small snack & stir gives Sir Bobby Farts-Alot more “umpf” while my dough is autolyzing. I did sprout & dehydrate rye a few weeks ago, but that must have turned into diastatic malt, because adding 25% of that to my dough made the bread really gummy. How can I avoid that? I dehydrated it at 165F in my cosori dehydrator. I used the rest for cookies – and that worked great!
I recently sprouted and malted rye berries and barley. The flavors and colors of these are amazing. I can’t wait to use them in my breads.
For the malted rye berries I fermented them in an instant pot for 20 hours after sprouting on the yogurt setting. You could smell the sweet fermentation when I opened it.
Whoa, that sounds incredible, Doug! It’s those types of mix-ins I really love. (Sorry for the super delayed reply!)
Does anyone have a suggestion for how much (weight or volume) wheat berries to sprout? I’d prefer not to have an extreme over- or under-abundance 🙂 Based on the picture of sprouts it looks like about one full pint jar of raw berries?
I measured out 161g wheat berries!
Oh great. I’m sprouting 450g. The recipe was confusing, so I’m soaking extra, as I only have organic whole wheat, not malted whole wheat. Can I keep the sprouted and dehydrated wheat berries in the fridge or can I freeze them? I’m new to allllll of this. My friend has been milling and sourdoughing for seven years. She landed on YOU and your whole wheat with honey and Yudane bread. I messed it up with too much water, but it still rose, cooked, and was deeee lish us!
You can freeze them!
Hello everyone,
I reached the point in my baking career (passion/hobby/hunger?) that I feel confident enough to try a malted wheat loaf.
This article describes the malting process in detail, but when I gotr to the recipe I got confused.
Do I have to use malted (self-malted) wheat flour that I make from the berries ONLY, or it is just a part of the overall mix?
Hey! In this recipe I malt the wheat berries, but the resulting malt is non-diastatic, so it’s not the same as the malt you’ll find already added to flour you buy (which is diastatic malt, enzymes are still active). In other words, the malted wheat added to this recipe is for flavor only. You don’t have to use flour that already has malt added.
Hey Maurizio!
Is it possible though to go through the process where the result is diastatic malt so my loaf could benefit from the extra loftiness that might provide? If so, could you describe the process and the amount to add to dough? Thank you!
I’ve never used one but you certainly should give it a try. I’d try 5 seconds of steam at the beginning of the bake (assuming the oven is completely sealed and will retain head).
I see that you use malted bread flour in many of your recipe’s. Could i the same amount of bread flour plus 1%(bakers percentage) diastatic malt powder.
Yes, you certainly could. I typically start at 0.5% and work my way up as necessary.
Hi Maurizio, I recently got a gummy/gelantinized crumb texture in a 100% whole wheat (Central Milling High-Pro Fine) sourdough, baked in a sandwich loaf pan. Since everything went well, including reaching proper internal temp, I’m wondering if you think adding the diastatic malt may be the problem here. The formula was a total of 455g of the WW flour at 85% hydration, 2% salt, about 1 tsp. diastatic malt powder, and 70g 100% hydration active starter (discounted from the total water and flour). Three stretch and folds over about 1.5 hours, then fermented at about 68F room temp. for about 9 hours. Lifted and let the dough fold under itself about three times in the bowl (coil folds?), moved to counter dusted lightly with WW flour, stretched the dough lightly into a ~8 in. by 12-15 in. rectangle and rolled up into a log, put into the 8.5 X 4.5 loaf pan. Let proof for about 1 hour and 15 at about 70-72F. It increased about 50% or so, not quite reaching the rim of the pan. Dusted with sifted wheat bran, scored three times at an angle (sort of bagetter style). Baked at 450F for about 45 min to internal temp. of about 202F. Let cool completely. It had GREAT oven spring, about 2 inches above the rim at the top-center, but still split lengthwise along one side near the pan rim, despite my scoring. It tasted great, and has the somewhat more close-crumb I wanted for sandwich, but instead of soft/fluffy, it’s more gummy/gelantinized/firm (though I wouldn’t call it “dense” like a badly risen or a fallen loaf is). What do you think causes the gummy/gelantinized texture? Could it be the diastatic malt? Should I omit or use less? Thanks for any help!
Yes, I’d definitely drop the diastatic malt with a 100% whole wheat loaf — that could certainly be a cause for a gummy interior.
Maurizio: I have “sprouted wheat flour”. This this the same as “Malted wheat flour”? Thank you
While malted grain does imply sprouting to some degree, sprouted wheat flour is not malted flour. Malted wheat flour likely means the wheat flour has diastatic malt powder added (which is sprouted, dried, and milled barley that’s still enzymatically active). Sprouted wheat flour is usually wheat that’s sprouted, dried, and then milled. Enzymatic activity is likely still active to some degree, but it’s hard to say how far they take the sprouting process.
Thank you Maurizio!
Great Post Maurizio, I haven’t yet tried sprouting my own wheat but i did by malt powder a while back and have been adding a little in with every bake. Is there a general rule for the amount I should be adding and which flour I should be substituting? Is it beneficial to always be adding Malt powder or only with certain flours? appreciate the posts and look forward to giving this a shot in the near future!
Thank you! Diastatic malt powder is not typically used in place of flour, but rather it’s an additive to a formula. Typically percentages are very low, anywhere from 0% to 2% at maximum. I’ve found if you add too much you can run the risk of having a very gummy interior and overly reddish crust color. I also don’t add it to every formula, no, it really depends on whether additional enzymatic activity is needed or if I expect to have long fermentation times and feel the flour mixture could use some help. It’s helpful especially for doughs that will undergo long fermentation as it can help “unlock” additional sugars from the flour so they’re available for fermentation. Additionally, I’ve found it to add extra color to the crust (due to the extra sugars in the dough).
One thing to know is that many flours already contain some diastatic malt added by the miller. You can find this out by looking on the bag of flour, it’ll say “malted barley flour” or “diastatic malt powder” as an ingredient. If it’s already added, you shouldn’t have to add any extra.
Hope that helps and happy baking!
Hi Maurizio,
I’m wondering if you’ve ever had a problem with denseness at the bottom of your loaves. I can make really lovely sourdough but every now and then when I cut the loaf open, just above the bottom crust, it’s almost like the dough has melded together – just slightly. It’s literally a couple of mm of denseness. Any ideas on why this could be happening? I always pre-heat my oven well… Thank you.
I’ve seen this before when a layer of raw flour was somehow incorporated in the dough during preshape/shape time — raw flour almost always shows up as a dense, gummy blob or layer in the final bake. Additionally, this can also help when the dough is underproofed (although this typically presents as gummy sections throughout).
EXCELLENT post! I appreciate your details and content. I learned a lot from this post.
Thanks so much, Fawn!
I once tried to mill sprouted grains and they were so light, my husband tried to shove them into my mill and ended up breaking it! I’ve been a bit leery of them since! And had no idea that sprouted flour was synonymous with malted, diastatic or otherwise. I have used sprouted wheat flour in recipes before and have found the dough to be very sticky and slack…I just added it thinking it added to the nutrition and digestibility. Learn something new from you every time!
Whoa, that’s scary to be sure. I didn’t have too much trouble milling these, but on once occasion they got clogged in the chute up top but I just had to stir a bit to get them to fall down into the mill. Yes, the dough can quickly get slack and sort of sticky, I usually have to keep a very close eye on fermentation rates — divide that dough on the early sick! Thanks for the comments Gina and happy baking 🙂
Apologies for being a bit off topic here, but hope you might answer two questions. I’m a long time baker but new to your blog and site and also to sourdough, my son got some started and shared about six months ago and it certainly is changing up my bread. Your experimentation and documentation and writing are great – you’re much more detail-oriented than I’ve ever been! With sourdough now, I’m getting great taste and crust but forever wanting more open crumb. Today I’m trying your High(er) Hydration Sourdough Bread recipe, reading all the comments about over-working, leads me to wonder (without doing a totally thorough search of your site) if you’ve ever tested No-Knead and if so, your thoughts? Timing wise it looks to me like a wash, and certainly removes the over-working issue. And, I like your beautiful dark crusts but do you ever have problems with the bottoms of the loaves being really burnt-tasting? I use an old cast iron dutch oven and also a new Le Creuset, I’ve had to put a couple of layers of foil in the bottoms of both and lower the overall temperatures by 25degreesF as well to prevent the burn, but then I don’t get that same lovely color on top. Any help greatly appreciated!
Hey, Kew! Thanks for the kind words and I’m really happy to hear you’re enjoying my website. I find in practice it’s actually very hard to over knead or over mix your dough at home if you’re not using a mechanical mixer. To achieve a more open crumb it’s definitely necessary to be more and more gentle with the dough as bulk is progressing, but in the beginning it actually helps to get a little strength in the dough at mix time or right at the beginning of bulk. My Beginner’s Sourdough Bread is somewhat a no-knead recipe in that there’s nothing but stretch and folds during bulk fermentation — it’s pretty hands off!
Yes, that bottom burning is an issue with using Dutch ovens, it’s very common. Check out my post on baking bread in a Dutch oven for lots of tips on all that and few solutions for that bottom burning.
Also, have a look at my Guides page, tons of good posts in there on everything from maintaining your starter to different shaping techniques.
I hope that helps and happy baking, Kew!
The converging of two hobbies – home brew and baking! Thanks for the ideas, I can access a wide range of malted grains from my local home brew supplier. I may try malting my own too, as your instructions are very clear.
Have you tried smoked malt? It makes delicious beer…
The best of foods, right!? Great idea, I should look at my local brew store to see what they carry, it’s a big scene here in Albuquerque. I haven’t tried smoked malt, do you smoke it yourself or buy it already smoked? I really like this idea!
I buy smoked grains and mash them. Smoked Barley is used in Rauchbier, which is absolutely amazing. There is a huge range of malts, which have been dried and kilned various ways to achieve different flavours for everything from Lagers to Stouts. I’ve often considered using something different.
Ok, I’m taking a trip next week 🙂
on this topic, would you have to dehydrate malted grains (from a brew store, for example)? I’m thinking, the brew store sells malted grains, they’ll even mill them for you. Could I take those, dehydrate them and try this recipe?
You can, just ask them whether they are diastatic or not and use them where appropriate.