
Baking sourdough bread at home certainly comes with challenges (or, as my enigmatic calculus professor used to tell me, opportunities for continuous growth). Baking bread at home with a consistent outcome has even more, ahem, opportunities. But one of the most critical facets of successful sourdough bread baking is learning to consistently monitor and adjust the dough’s temperature to keep it within an optimal range for vigorous fermentation. This will help produce consistent loaves of bread with a tall rise and the most flavor.
I’d argue that temperature is the most important aspect of the bread-making process because it greatly impacts fermentation, which is the backbone of sourdough bread. And, of course, maintaining a consistent and sufficiently high dough temperature becomes even more difficult when ambient temperatures begin to drop (hey, winter!) or when they’re in flux (as they often are in a typical home kitchen). Like a frog in a pot, sometimes we don’t even realize temperature change is happening.
Often, we blame our sourdough starter if the dough is slow to rise or if the final loaf has a lackluster flavor: it just wasn’t as lively as usual, we say, or maybe we forgot to feed it last night, we confess. While sticking to a dependable starter maintenance routine is essential, sometimes the dough’s temperature (too low or too high) is at fault. We must make simple adjustments to ensure the dough is at the right temperature for optimal fermentation activity.
Let’s first look at why temperature is so important when baking sourdough bread in the first place.
Real Quick: What’s My Favorite Dough Thermometer?
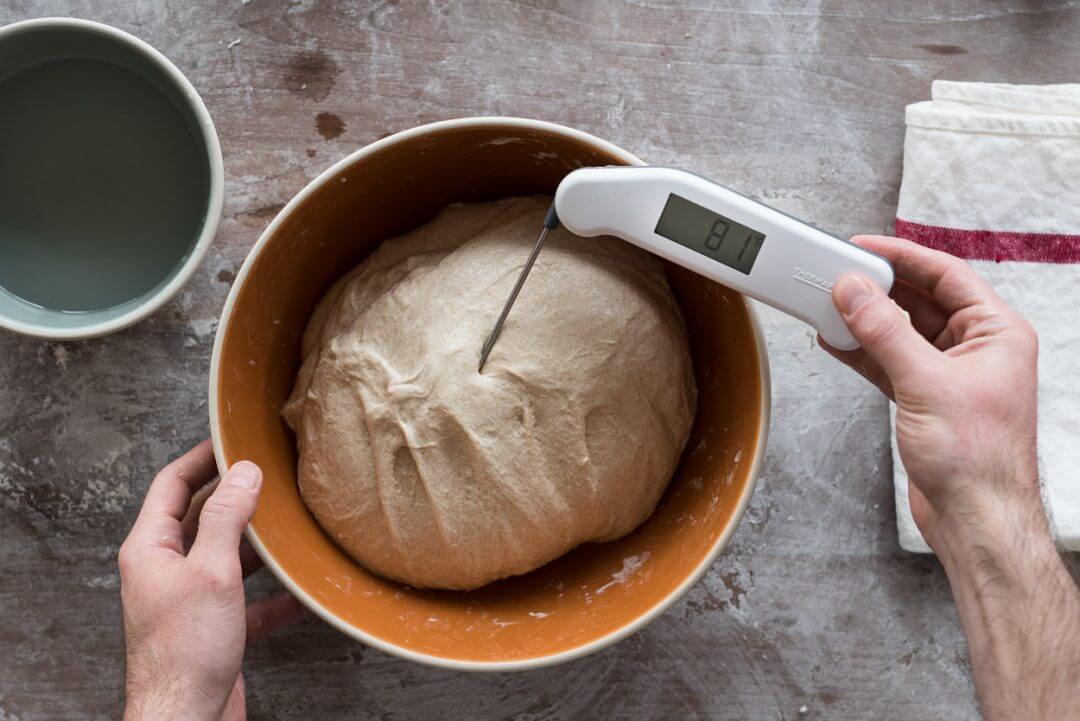
Without question, my Thermoworks Thermapen. It can read the temperature within a second or two and is extremely accurate. If you’ve ever taken a workshop or baking tour with me, you’ll recognize it: I always (always!) have it in my shirt pocket ready to test a dough’s temperature.
Why is Dough Temperature Important?
Temperature is the driving force in fermentation, and fermentation impacts sourdough bread volume, flavor, and texture. Warmer bread dough will ferment faster than colder dough, and strong fermentation will result in better bread. The longer the dough can ferment, the greater the opportunity yeast and bacteria (primarily) have to flavor it. But there’s a limit. If a dough ferments too long or is too warm, it can quickly overproof and degrade its structure, resulting in poor rise.
It’s also important to keep the dough temperature consistent throughout the bread-making process. If we can ensure temperature consistency, we know the dough will be in the same fermentation condition throughout the lengthy process. And further, if we maintain the same temperatures each time we bake, we make delicious bread.
In other words, we cannot expect consistent results every time we bake if our dough temperature varies widely.
I measure and log two dough temperatures every time I bake: the desired dough temperature (DDT) and the final dough temperature (FDT). And yes, I keep an extensive written record of my dough temperatures to refer to them for future bakes–all to produce consistently delicious loaves!
(Psst! If you don’t want to do any math, scroll for a temperature cheat sheet and calculator.)
What is the Desired Dough Temperature?
The desired dough temperature (DDT) is the ideal dough temperature at the end of mixing, just before bulk fermentation begins. Each of my recipes includes a DDT as a guide.
What is the Final Dough Temperature?
The final dough temperature (FDT) is similar to the desired dough temperature, except it’s the actual measured temperature of the dough right after mixing all the ingredients.
How Temperature Affects Flavor (Not Just Timing)
Temperature doesn’t just control how fast your dough ferments; it influences how it ferments, and that shows up directly in flavor.
At warmer temperatures (around 78-82°F / 25-28°C), both yeast and bacteria are highly active. Fermentation is efficient and relatively fast, which tends to produce a milder, more lactic sourness that’s smooth and yogurt-like.
At cooler temperatures, yeasts remain relatively active while lactic acid bacteria slow down more significantly. This shifts the balance of acid production toward acetic acid (the sharper, vinegar-like tang that defines more assertive sourdough). Cooler, slower fermentation—whether during a long bulk at 70°F or an extended cold proof (retard) in the refrigerator—generally produces more complex, developed flavor.
This is why bread baked in a cool kitchen, or left for a longer overnight cold proof, often has more depth of flavor than bread rushed through a warm fermentation. The tradeoff is time, but for many bakers it’s worth it.
How Warm Should Dough Be to Rise?
The warmer the sourdough bread dough, the faster it will ferment and rise. Dough should be warm enough to encourage lively fermentation and flavor development, but not so warm that it overproofs quickly. For most recipes here, I target a final dough temperature between 75°F and 78°F (24-25°C).
Bacteria and yeasts function optimally at different temperatures: 89°F (32°C) and 80°F (27°C), respectively. However, these temperatures are relatively high, so finding a happy medium at around 78°F (25°C) results in a dough that’s warm enough to have ample bacteria and yeast fermentation activity but not so warm that you end up with a dough that ferments too quickly and becomes sticky, hard to handle, and overproofs.
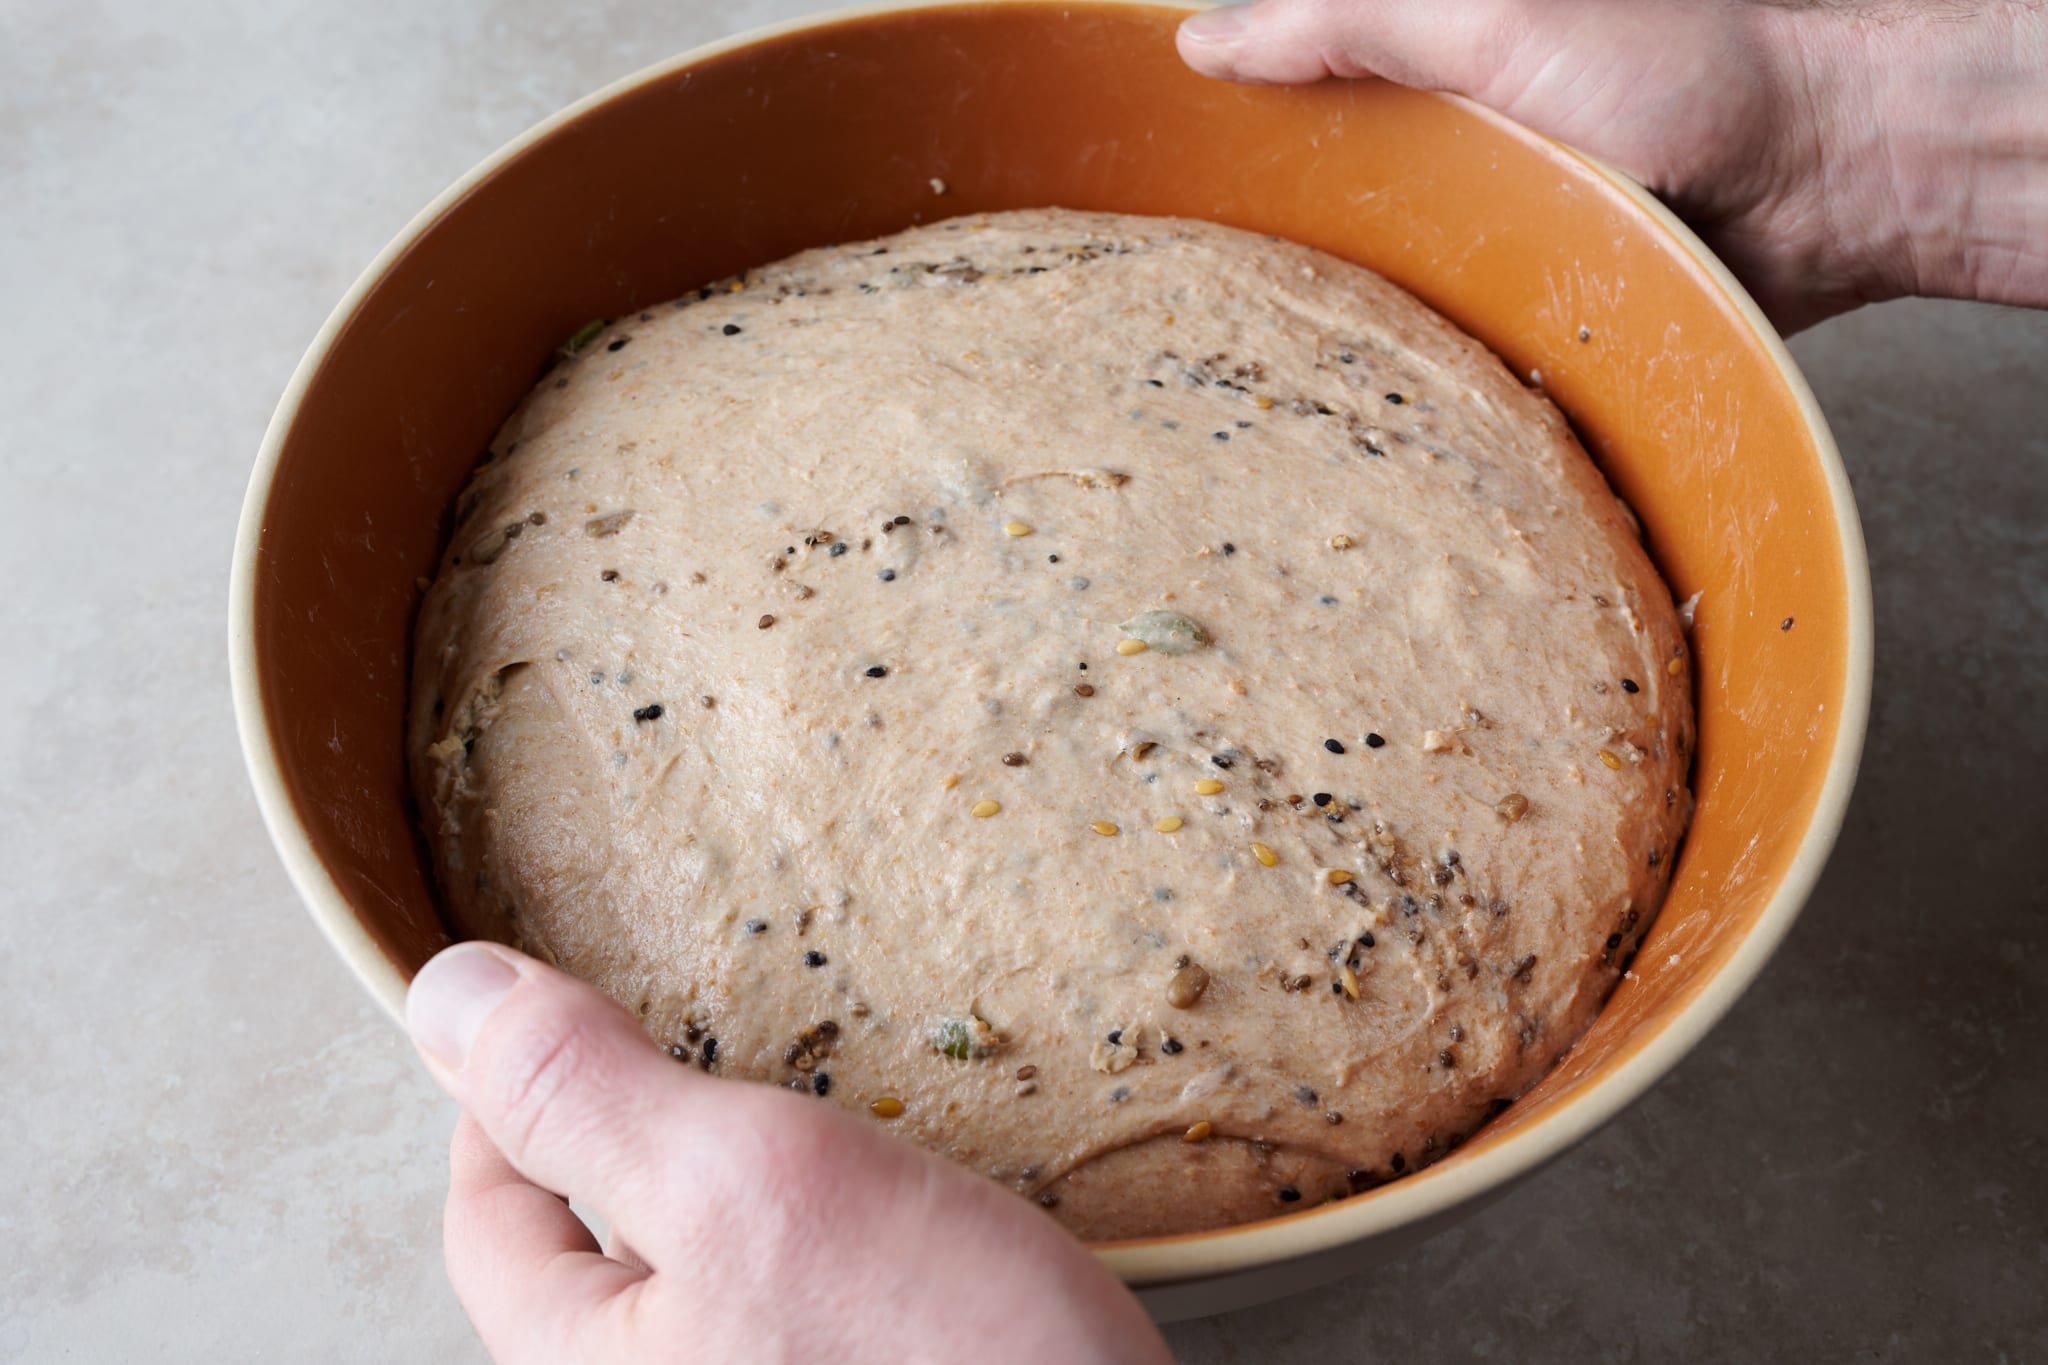
For doughs with a high whole-grain content, I typically reduce the desired dough temperature (DDT) to around 75°F (23°C) to avoid overproofing. Whole-grain doughs contain more bran and germ particles in the flour, which enhance fermentation activity.
| Type of dough | Approximate DDT |
|---|---|
| Mostly white flour | 75°F to 78°F (24 to 25°C) |
| Mostly whole-grain flour (including freshly milled whole grains) | 75°F (23°C) |
What Happens if My Bread Dough is Too Warm?
Most bakers know that cold dough means a longer bulk fermentation, but the reverse is equally important to understand. If your dough comes out warmer than the DDT, fermentation will move faster than the recipe anticipates.
Watch for rapid bubble formation early in bulk, a dough that feels very alive and active during folds, and a faster-than-expected volume increase. You may need to divide and shape 30-60 minutes earlier than the recipe suggests.
The risk with warm dough is overproofing. Dough that gets away from you becomes slack, loses structure, and bakes up flat with poor oven spring. When I’m in this situation, I usually err on the side of dividing earlier—it’s much better to slightly underproof going into the fridge than to let the dough go too far.
To remedy a dough that’s too warm: place the bulk fermentation container, covered, in the refrigerator for 15 to 30 minutes at the start of bulk fermentation to help bring the temperature down.
What Happens if My Bread Dough is Too Cold?
If the bread dough is cold, even by just a few degrees below the desired dough temperature, it might result in a much longer bulk fermentation and/or proof time. In this case, be flexible and wait to divide or bake the dough until it displays the signs it’s ready to move on to the next step in the bread-making process.
To remedy a dough that’s too cold, put the container with the dough, covered, in a warmer spot in the kitchen (or a home dough proofer; more on this below) until the dough reaches the desired temperature.
Next, let’s look at measuring and monitoring dough temperature because, well, without the ability to measure, it’s hard to ensure the temperature is where we want it to be.
Seasonal Sourdough Bread Baking
Temperature management looks quite different depending on the time of year. I’ve written two dedicated guides that go deep on the specific adjustments for each season:
- How to Bake Sourdough Bread in Summer — Keeping fermentation under control when your kitchen is hot, including reducing pre-fermented flour, using ice water, and watching your dough more closely.
- How to Bake Sourdough Bread in Winter — Combating slow fermentation in a cold kitchen and avoiding the most common winter mistake: underproofed dough.
How to Monitor Dough Temperature
Monitoring a dough’s temperature is simple: stick an instant-read thermometer into the center of the dough and record the temperature.
I like to take the dough’s temperature at the end of mixing to record the final dough temperature in my baking notebook. I also record the dough’s temperature a few more times during bulk fermentation, when I stretch and fold it—this is a great time to check in and see how fermentation is progressing.
Some bakers will say you don’t need a thermometer and don’t need to monitor dough temperature—strictly speaking, this is true! People have been baking bread for centuries—way before the thermometer was even invented. However, I find investing in a few simple tools, with corresponding processes, helps me remove the guesswork and take steps to improve my bread-making consistency. A good quality thermometer (like my Thermapen) is one such tool.
Over time, as your baking intuition builds, reliance on these tools does subside, but to this day, I always take a minute (if that) to measure the dough temperature right at the onset of bulk fermentation. Why? It provides me with an intuitive sense of how bulk fermentation will progress. Is my dough temperature a few degrees lower than I expected after mixing? If so, I’ll either warm up my dough a little at the beginning of bulk, or I’ll plan for bulk fermentation to go a little longer than planned. Conversely, if I overshot my DDT, I know bulk fermentation will likely take less time, and I’ll keep an eye on the dough to divide it earlier.
Now, let’s look at how to use temperatures to ensure our dough is on target.
How to Calculate the Mixing Water Temperature for Bread Dough
Water is often the largest ingredient in a dough, so it has the largest impact on the final dough temperature (FDT). This is an opportunity for us bakers because the water’s temperature is easily adjustable, allowing us to dial in the final dough temperature.
If we measure the temperature of other factors—flour, the levain or preferment, the room temperature, and take into account heat generated when mixing—we can do a simple calculation to figure out to what temperature we should heat (or cool) the water to reach a recipe’s desired dough temperature (DDT).
Example: Calculating the Mixing Water Temperature for my Beginner’s Sourdough Bread
In the following example, which is from my Beginner’s Sourdough Bread. The recipe has a DDT of 78°F (25°C). First, look at the temperatures needed for the calculation:
- Levain or preferment temperature (this might be your sourdough starter, if you’re using that directly)
- Flour temperature (usually the same as your room temperature)
- Room temperature (use your Thermapen to measure this!)
- Friction factor (see below)
What is Friction Factor?
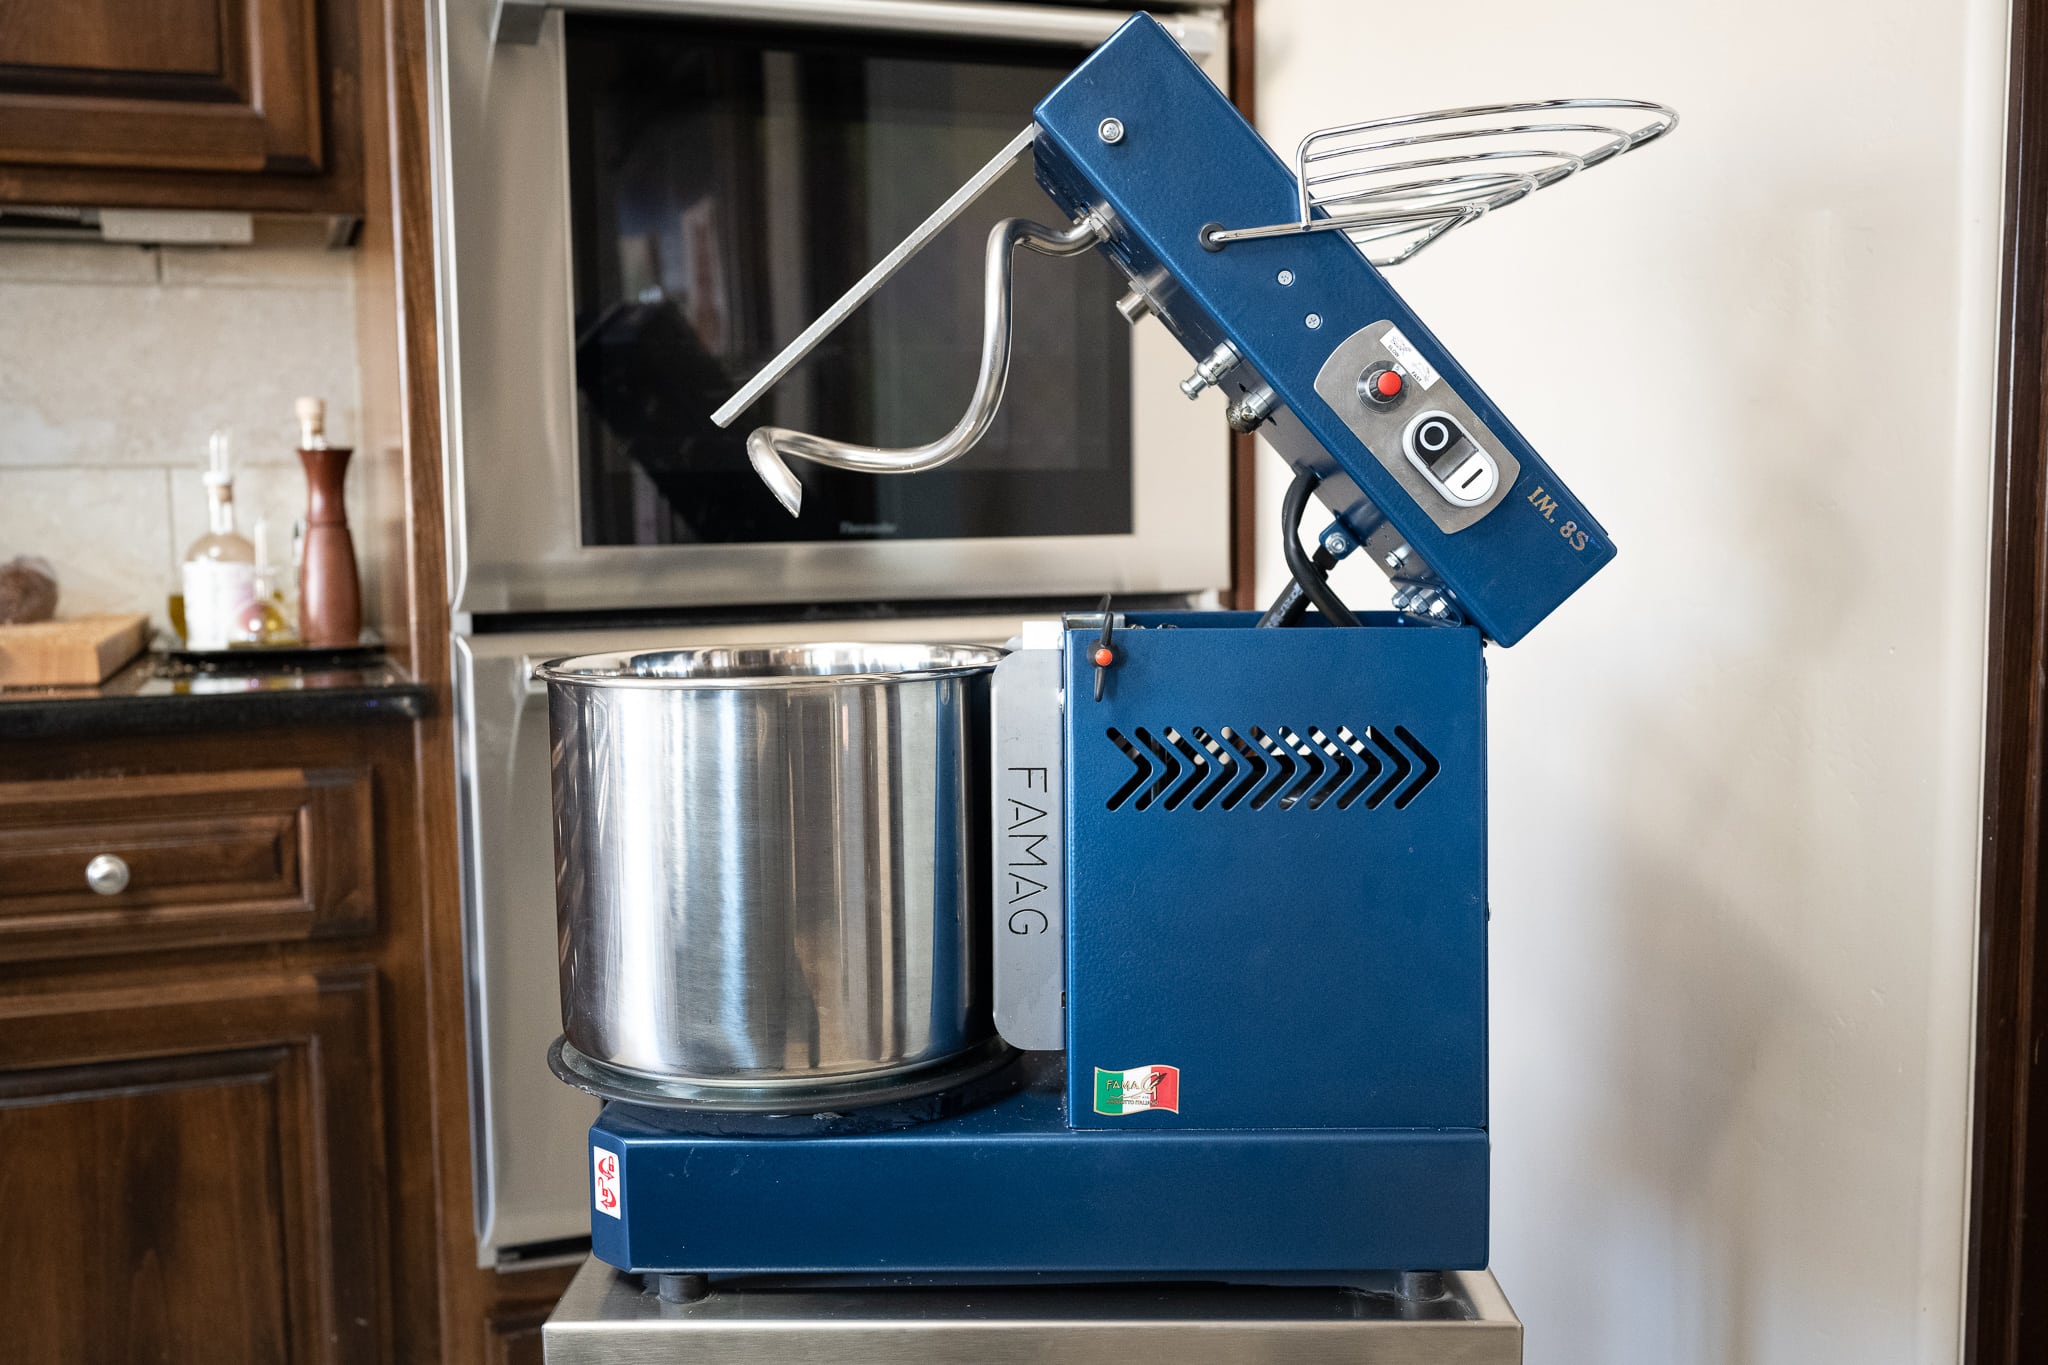
One variable in the water temperature formula that often causes confusion is the friction factor—the heat generated by mechanical mixing. When a stand mixer is running, the motor and mixing action warm the dough, sometimes significantly, depending on the mixer, speed, and mixing time.
When mixing by hand, I set the friction factor to 0. Hand mixing simply isn’t vigorous enough to heat the dough in any meaningful way (and in a cold winter kitchen, it might actually cool it slightly).
If you use a stand mixer, you’ll need to determine your friction factor by experimenting: mix a dough, note the dough temperature before and after mixing, and calculate the difference. Once you know your mixer’s friction factor, it stays fairly consistent as long as your speed and mix times don’t change.
So, back to our example, here are the temperatures I measured:
| Temperature Variable | Measured Temperature |
| Levain | 78°F (25°C) |
| Flour | 74°F (23°C) |
| Room Temperature | 74°F (23°C) |
| Friction Factor | 0 (since I’m mixing by hand) |
Mixing Water Temp = (DDT x 4) - (Levain Temp + Flour Temp + Ambient Temp + Friction Factor)
Mixing Water Temp = (78 x 4) - (78 + 74 + 74 + 0)
Required Mixing Water Temp = 86°F
We need to warm our water to 86°F (30°C) so that, at the end of our mix, our FDT will be 78°F (25°C).
Water Temperature Calculator
Use the interactive dough water temperature calculator to quickly determine how much to warm or cool your water so that, at the end of mixing, your dough reaches the desired dough temperature. Head to the water temperature calculator page to bookmark it and use it each time you mix.

Water Temperature Calculator
Don’t Like Math? Use This Water Temperature Cheat Sheet
I have a cheat sheet for temperatures like this in my cookbook, but here’s a quick reference chart. On the left, it shows what your kitchen temperature might be, and on the right, what you should warm your mixing water to so you get close to a final dough temperature of 78°F (25°C), the common goal for recipes at The Perfect Loaf.
| If your kitchen temperature is | Warm or cool the mixing water to |
| 68°F (20°C) | 98°F (37°C) |
| 70°F (21°C) | 94°F (34°C) |
| 72°F (22°C) | 90°F (32°C) |
| 74°F (23°C) | 86°F (30°C) |
| 76°F (24°C) | 82°F (28°C) |
| 78°F (25°C) | 78°F (26°C) |
| 80°F (26°C) | 74°F (23°C) |
How to Heat or Cool the Mixing Water
The easiest way to warm the mixing water is to heat it in the microwave (my choice for convenience), on the stove, or to draw warm water from the tap. To cool the water, use cold water from the fridge (I keep a container inside just for this) or drop a few ice cubes inside your water pitcher.
Where is The Best Place For My Dough to Rise?
Now that we know how to monitor our dough temperature and hit that all-important DDT each time, how do we ensure our dough maintains a sufficient temperature throughout bulk fermentation and proofing? As home bakers, this can be challenging because our doughs are usually smaller batches, which are more easily affected by temperature changes. Additionally, the home kitchen can also have drastic temperature changes due to heating and cooling. So, the trick is finding the optimal place to proof dough.
These are my favorite places to let my sourdough bread dough rise:
- Inside a small home dough proofer
- Inside the home oven, closed and with the light on
- Inside the microwave
- In a warm spot in the kitchen, for me, this is on top of my refrigerator
Let’s look at each option in more detail.
Using a Home Dough Proofer to Maintain Dough Temperature
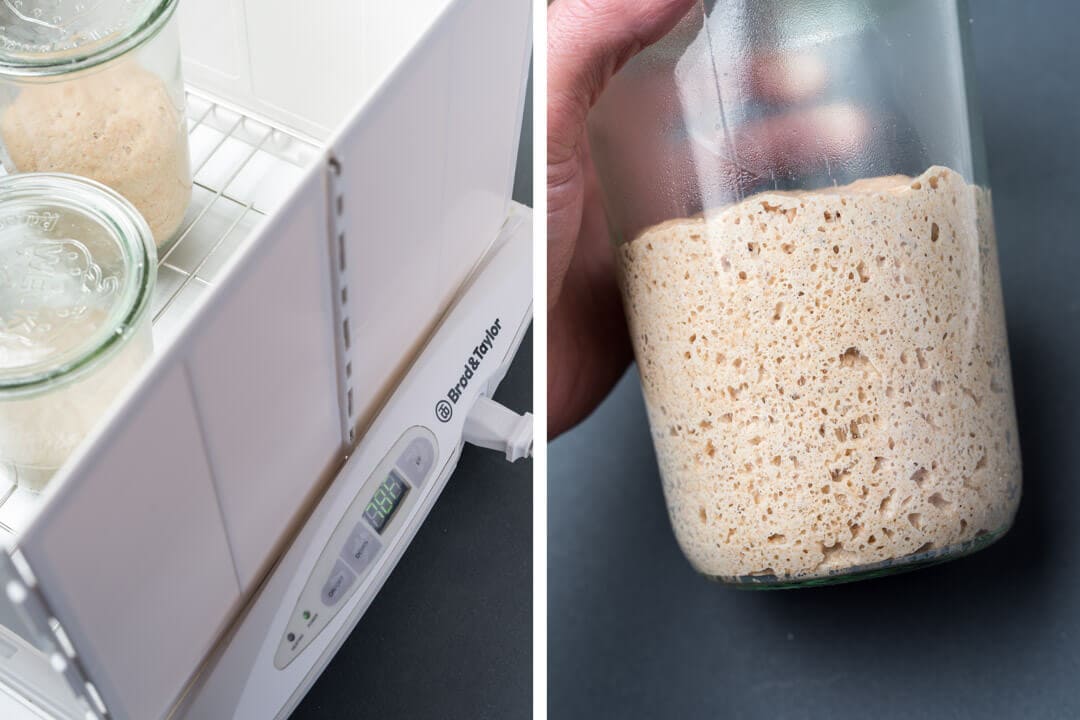
I’ve been using a Brød & Taylor dough proofer for years. The electric proofing box sits in my pantry and runs 24/7, keeping my sourdough starter (and a levain before a bake) at a comfortable 76°F (24°C) for optimal fermentation. Since purchasing this proofer, I have noticed a significant increase in the consistency of my bread, thanks to its steady temperature.
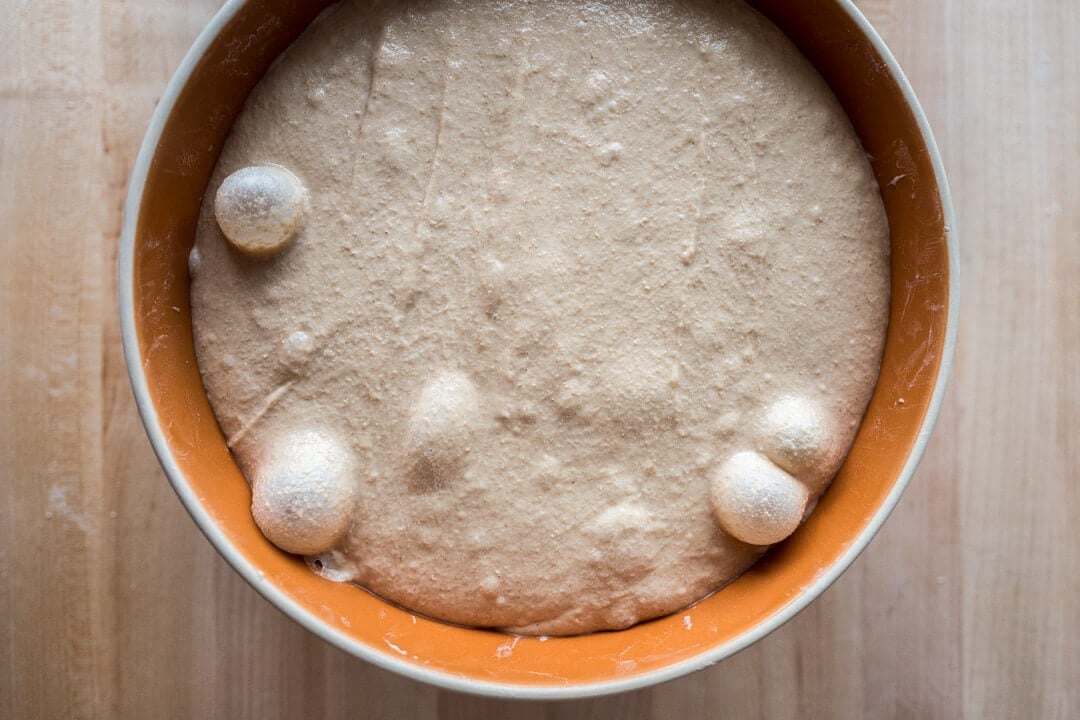
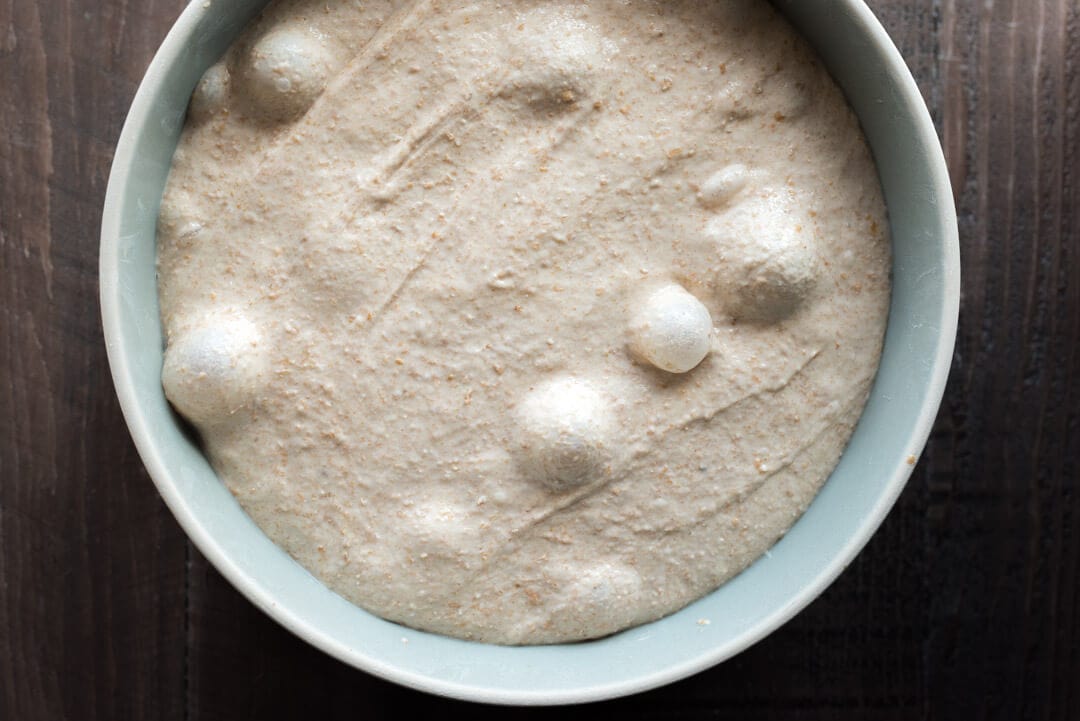
There’s enough room in the proofer to fit my starter (and even another levain) in a corner and my proofing bowl with 2kg of dough (see the picture below). This means I can have multiple bakes that are nice and warm at the same time.
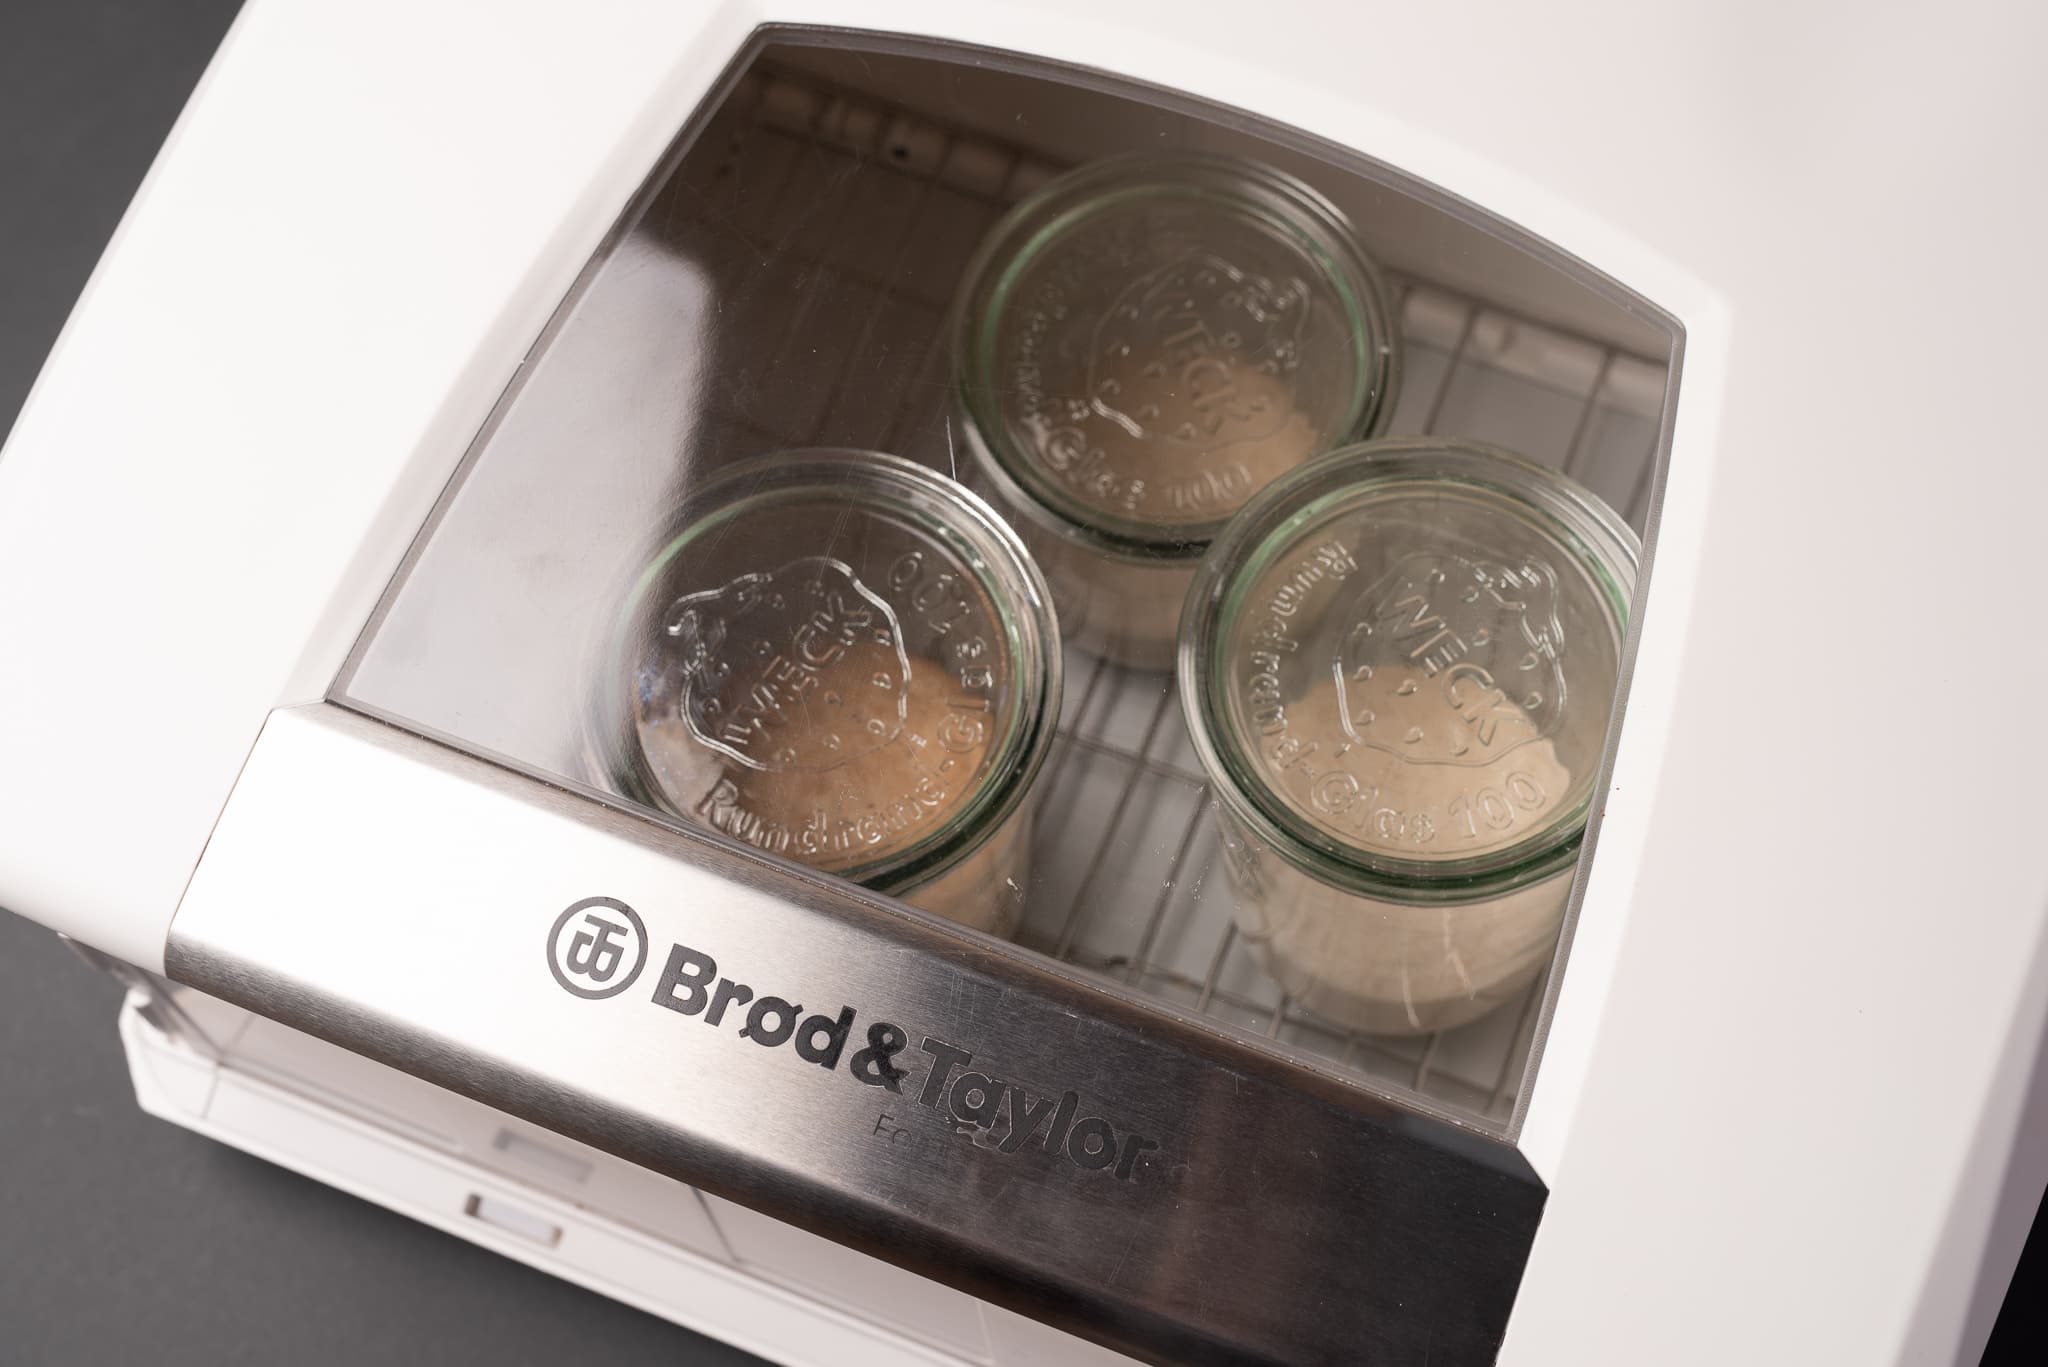
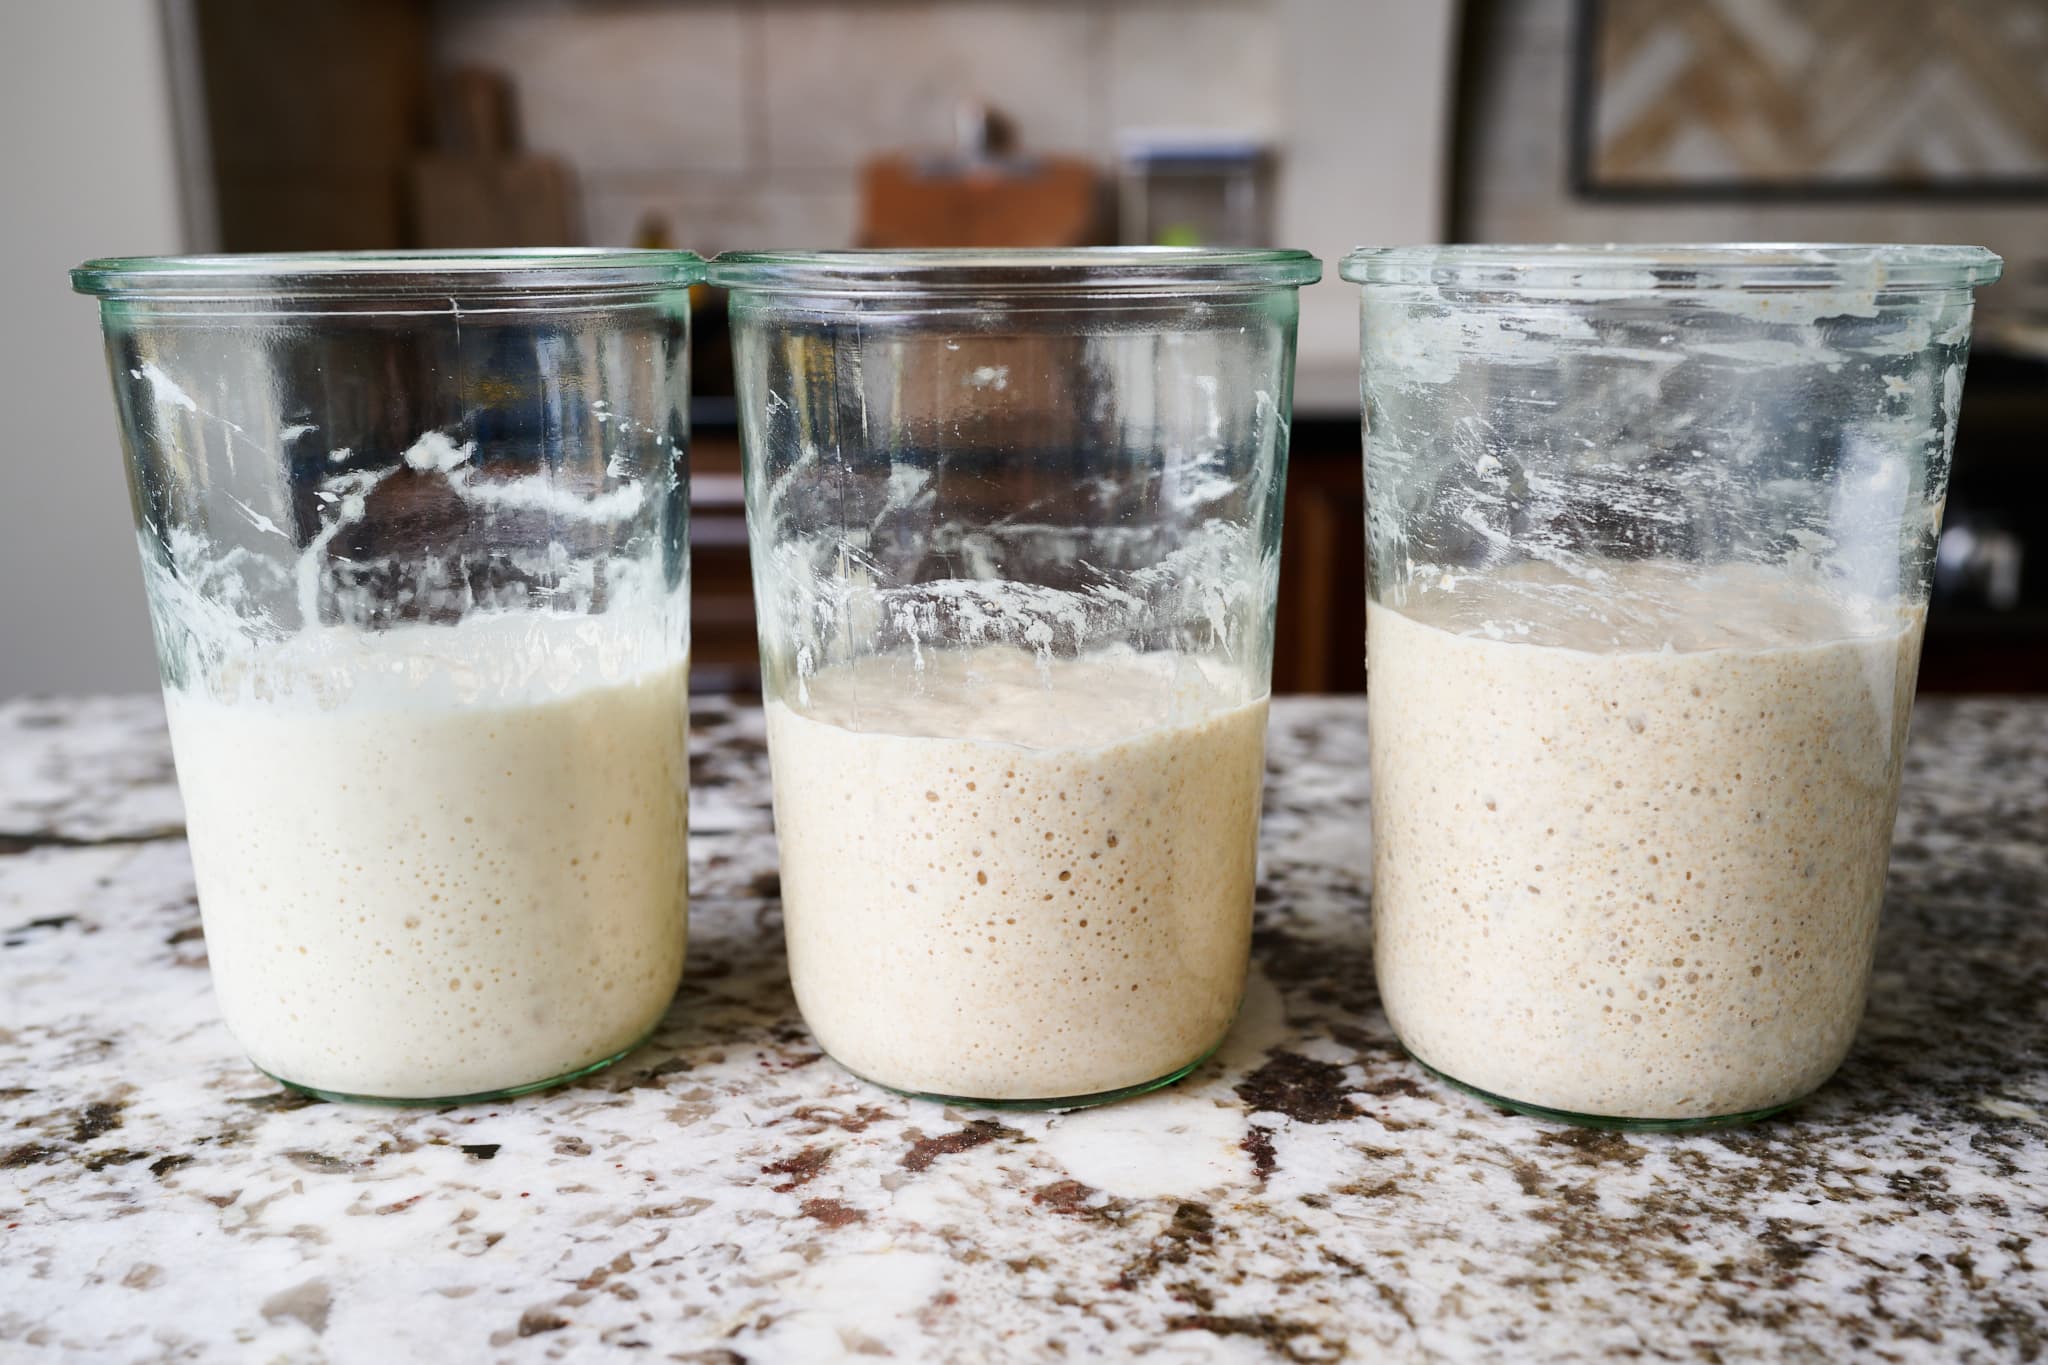
What you see above is typical of a morning in my kitchen: two levain and my starter (on the left) in my favorite Weck jars. The proofer is plenty spacious, and I can even fit my bulk fermentation container with these three jars.
The proofer is dead simple to use. Use the up and down buttons to enter the desired temperature until it is displayed. The entire bottom of the unit is a gentle heating element that runs continuously to maintain the set temperature. They even make a shelf you can insert halfway down the length to hold shallow bowls or trays.
In the beginning, I mentioned that adjustments could be made in bulk if we miss our DDT by a small margin (1 to 2 degrees). If my measured FDT is a little low, I’ll turn up the proofer by 5 degrees so the dough mass heats up at the start of bulk. Then, at each set of stretches and folds (30 minutes apart), I remove my dough from the proofer and measure its internal temperature. If the temperature is close enough to my initial target, I’ll set the proofer back to my DDT for the remainder of bulk.
When I have dough in bulk fermentation inside the proofer, I set it exactly to the formula’s DDT (typically 78°F/25°C).
Because the proofing can be adjusted quickly, we can speed up or slow down fermentation (within reason). There are so many handy features of a home proofer, and I recommend reading my guide to using the Brod and Taylor Proofer for an in-depth discussion.
Using a Home Oven to Maintain Dough Temperature
A home oven is another great, convenient option for maintaining dough temperature. Place your starter or bulk fermentation container in the oven (turned off), insert an ambient-temperature thermometer inside, and turn on the interior light. Usually, this light will generate enough heat to raise the internal temperature quite a bit—just keep an eye on that thermometer to ensure it doesn’t go too high. (Additionally, put a sticky note on the outside of the oven that says “Do Not Turn On!” so someone doesn’t accidentally bake your starter.)
Using a Microwave to Maintain Dough Temperature
A microwave is a small, sealed chamber that is rather convenient for holding a starter, levain, or a bowl of rising bread dough. I typically cover my bulk fermentation container or proofing dough, then place it in the microwave to help insulate the dough and keep it warm. If you want to warm up the dough, boil a small cup or bowl of water and place it inside the microwave alongside the dough.
Using a Warm Spot in Your Kitchen to Maintain Dough Temperature
Every kitchen has warm and cool spots. As bakers, we seek these out over time and learn to place our dough (and our sourdough starter) in various locations depending on its temperature needs. The top of my refrigerator is always a few degrees warmer than the rest of the kitchen. In your kitchen, the warmest spot might also be next to a coffee machine, a home oven, or another secret spot. Find yours!
Note: For my sourdough starter, I like to keep it in my Sourdough Home, a specially designed little unit that maintains the perfect temperature.
How does Dough Temperature Affect Bulk Fermentation Time?
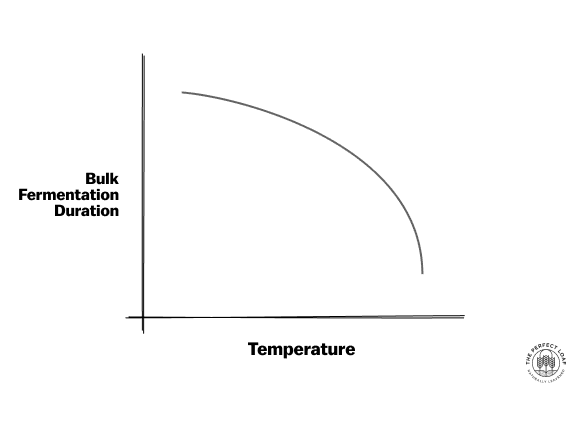
While it’s challenging (if not impossible) to assign a hard number for how long bulk fermentation should last for a particular dough, the following table shows how a range of final dough temperatures could impact this duration.
Note that this table is for illustrative purposes only and provides a snapshot of how the bulk fermentation duration may vary with temperature. The table assumes all other factors are equal, bake-to-bake (which is hard to ensure!), and is most accurate for the recipes and processes here at The Perfect Loaf.
| Final Dough Temperature (FDT) | Typical Bulk Fermentation Duration |
| 75°F (24°C) | 4 to 4.5 hours |
| 78°F (25°C) | 3.5 to 4 hours |
| 80°F (26°C) | 3 to 3.5 hours |
In the chart below, you can see this idea depicted roughly in a diagram: as dough temperature increases the bulk fermentation duration decreases.
Dough Temperature FAQs
When is the dough temperature for bakers calculated?
The final dough temperature (FDT) is calculated right at the end of mixing, before the start of bulk fermentation.
Where is the best place to put the dough to rise?
A warm spot in your kitchen is the best place for bread dough to rise. Try to find a place that’s between 75°F and 78°F (24°C and 25°C) to encourage strong sourdough fermentation.
What happens if the dough is too warm?
If the dough is too warm, it can become sticky, hard to handle, and eventually overproof.
Will dough rise at room temperature?
Yes, absolutely. Room temperature can vary widely and differs from room to room, but as long as it’s around 68 to 76°F (20 to 24°C), you’ll see your sourdough dough rise. The cooler the temperature, the longer it will take for your dough to rise.
How long can you let the dough rise at room temperature?
The time you let the dough rise at warm room temperature depends on the dough formula and the exact temperature. For most sourdough bread doughs, a final rise (proof) time of 1 to 4 hours at room temperature is appropriate.
My kitchen runs very hot—between 82-90°F (28-32°C). How do I adjust my timing?
At these temperatures, fermentation can move twice as fast as a recipe anticipates. For instance, a 4-5-hour bulk might be done in 2 to 2.5 hours. Use ice water for mixing, watch the dough rather than the clock, and consider reducing your levain percentage to 10-12% pre-fermented flour to buy yourself more working time.
What’s the ideal refrigerator temperature for cold proofing? My dough always comes out underproofed from the fridge.
Aim for 38-40°F (3-4°C) and verify with a thermometer, as home fridges often run colder than the dial suggests; below 35°F (2°C), fermentation can nearly stall. Also, check that the bulk has gone far enough before shaping: a 50% rise alone isn’t always sufficient. Look for a dough that feels aerated and jiggly, and give shaped loaves a 20-30 minute rest at room temperature before refrigerating.
During bulk fermentation, the rise doesn’t seem significant. Is this because of low kitchen temperatures?
Most likely yes. In a cool kitchen (around 68°F / 20°C), bulk can easily take 6-8 hours, and the dough often feels sluggish for the first half before picking up. Don’t rely on volume alone. Look for bubbles on the sides, a lighter feel, and a jiggle when you shake the container. Use warmer mixing water to hit your DDT and find a warm spot to maintain it throughout bulk.
Is there a maximum water temperature I should use to avoid killing the yeast in my levain (or starter)?
Yeast starts to weaken around 120°F (49°C) and dies above 130°F (54°C). As a practical limit, stay below 110°F (43°C) for mixing water, especially since you’re often adding water near the levain before it’s diluted by flour. In practice the formula rarely calls for water that hot anyway, but it’s a good ceiling to keep in mind.
What’s Next?
As bakers, I’ve talked about how we need to be acutely aware of our environment and treat temperature as importantly as our ingredients—and it is that critical: temperature is the driving force behind fermentation. To see how temperature plays a role in the final rise of sourdough bread dough, read through my guide to proofing bread dough.
Happy baking!


208 Comments
Thanks for all the info on Sourdough. The only thing that I’m confused on is the temp calculations. They include all the ingredients. However the autolyse step is some time before the levain is added. Do the calcs still apply? I could be overthinking it.
You’re not overthinking things, and yes, this is a concern if you have a long autolyse. What I’ll typically do if my autolyse is longer than 30 minutes is to mix the water a few degrees warmer to offset the time the dough will be sitting. There’s a bit of experimentation here but it’ll get you in the ballpark. The other thing you can do, and I usually do a combination of warmer water and this, is to keep the dough warm during this time just as if you’d keep it warm during bulk fermentation. Stick it in a dough proofer or keep it in your oven with the light on — this way we can keep it close to our desired dough temp. Hope that helps!
Hey Maurizio, Great stuff. I’ve learned a ton from your website and insta.
2 quick things: Do you have any tricks for how to keep the dough temperature up after an autolyse and mix with a cold winter counter/room? When I slap and fold on a 60F counter, the dough temperature seems to drop a good 5F or more. I suppose I could keep the autolyse temperature higher, but that would require a second proofer or some other method.
And secondly, I see you mention that your starters/levains may read higher than the temperature of the proofing box. I think this is to be expected since fermentation is exothermic, correct? Thanks!
Yes, I run into the same issue when I slap/fold on the counter (it’s cold!). To alleviate this, or at least reduce the temp swing, I’ll mix with warmer water and keep the dough nice and warm in a proof box or my oven with light on. If we raise the temp of the dough (when in autolyse) we can sort of counter the drop when it’s being mixed/kneaded. You’ll have to play with how much to warm up the dough but you’ll have to go over the FDT of the recipe you’re working with, of course. That’s what I usually do!
Yes, you’d definitely detect a higher temp inside the jar because of the actual fermentation taking place, but it’s also a function of the jar and how much insulation is provides — it simply hangs onto the heat for longer than the proof box. Additionally, I find the B&T box has a slightly warmer temperature in the middle than the sides (which is by design, for a variety of reasons).
I hope that all helps!
Thanks, yes that helps. I’ll try having the autolyse start 10F warmer, assuming it’ll loose some heat in the proofer and then the slap/fold. Thanks again!
Im brand new to sourdough and have been trying to get a starter up and running from scratch with just Einkorn all-purpose flour and water. My initial temps weren’t high enough I think (room was ~60’sF and water was maybe 70F and my water to flour ratio (113g each) were not working. After 8 days only surface bubbling, no rising and falling, no bubbles at depth and no hooch. So I tried using warmed potato cooking water at the next feed, bumped my flour volume up to more like almost 2:1 and moved everything off of the counter and into my warming drawer set on low. When I used the potato water at the outset, I got a massive amount of activity all the way down to the bottom of the jar. Now that I’m using plain warmed filtered water, it’s back to the same original status of just some surface bubbles and pocking. I do get a faint sourdough smell, but no other activity. I’ve been religiously feeding using this new approach 2x per day as before, and I’ve done this for about 5 days. So my starter is now 13 days old, but still no rising and falling other than the day when I added the potato water. I feel like I should give up. Do you have any advice?
It’s hard to say why it hasn’t yet taken off, but you should be able to do this with good quality einkorn. It might speed things up if you were able to find whole grain einkorn or would be willing to use a bit of whole grain rye flour, just to get things started. From there I would try to make sure and keep the mixture warm, around 75-80°F, throughout the process. Even at 70°F things are a little on the cool side and it might just take longer.
If you haven’t had a chance to look at my post on creating a sourdough starter it might give you some tips on what to look for and how often to feed it!
Just keep in mind temperature is super, super important!
For those that use the oven method, my oven door has a lock for the self cleaning function. By setting that lock, I am unable to preheat the oven, preventing me from baking my levain.
That’s a brilliant idea — kind of a safeguard helping to prevent late night tears in the kitchen. Thanks for that suggestion!
I have a thermostatically controlled light bulb I put in the oven to maintain temperature during starter build and bulk. I also put a piece of blue painter tape over the oven on button to prevent accidental oven turn on.
Also, thank you for your great website. I have learned so much from you.
Really great tips there, Bill! Thanks for sharing those. I’ve received a few emails over the years from people who accidentally bake off their starter… Bummer, indeed. Thanks again and happy baking!
Hello! Two quick questions:
1. Regarding the FDT formula. If we are using a proofing box, that means we’ll use the profing box temperature?
2. For the autolyse stage are we using the water with the temperature computed by the FDT formula?
Thanks
Hey, Bogdan. Answers:
1. The “ambient temperature” is whatever the temperature is in the room you’re doing the mixing in as this will be what as an effect on the dough when it’s mixed. The temperature in the proof box can then be adjusted up or down if you need to slightly adjust the temp of the dough over time through bulk.
2. Depending on what your ambient room temperature is, and how long your bulk is, you might have to either cool down or heat up the water used for your autolyse. The end goal of all of this is to get your FDT where you want it, this might mean adjustments to your autolyse temperature and it might mean some trial and error. For example, let’s say your autolyse is 1 hour long. If your kitchen is overly cold you can expect that dough to cool off a bit while it’s sitting there that one hour (unless you keep it warm during this time, which I recommend), so you might then have to warm up the water a little higher than what the formula tells you.
I hope that makes sense. Happy baking!
Hi Maurizio,
Thank you for this great post!
One question that I‘ve been thinking about quite a lot: is there in your opinion any difference between steering the levain ripening time over temperature and over the amount of starter?
Theoretically, if I want to set up the levain the night before baking (and so give it about 10 hours to get ready), I could use a smaller amount of my starter or let the levain ferment in a colder environment than I would normally (and use the same amount of starter). What do you think?
Another question, that‘s connected to the first: Is there any reason why the most recipes use 50% (in bakers %) starter in the levain? Theoretically I could use 100% starter and get my levain ready in a shorter time, or is there anything speaking against this? Sometimes I use 100% for freshing up my starter and it would be ready for use as a levain after 2-3 hours.
Thank you!
Stefan
Hey, Stefan! Most bakers have their preferred way to build their levain, whether it’s an overnight, 12 hour build or a shorter 4-6 hour build (and everywhere else along the spectrum). I haven’t seen a significant difference in the various ways to build a levain, personally, and for me the most important thing is to just use the levain at the right level of ripeness. I like to wait till it’s very mature/ripe before using it in a dough, whether it’s a build that takes 12 hours at cooler temps or smaller inoculation, or a warmer build that takes 5 hours.
I personally don’t see an issue with building a “faster” levain with higher inoculation, in fact, this is typically what I do! Just keep an eye on that levain and use it when it looks ready to you and your process.
Hope that helps!
Hey Maurizio, thank you! Nice to hear that as I mostly made the same experiences.
Another little problem that I can‘t solve – my loafs will mostly float away after the final proof. I have to reshape what means pressing out gas and I can‘t score them sufficiently – bad oven spring 🙁
The dough is not overproofed (happens also already after 2-3 hours of final proofing) or overhydrated (75%) and shaped really tight after bulk – so it seems the gluten structure is too weak, or could there be other reasons? I give about 5 sets of S&F while bulk.. would you recommend even more or any other things? Flour is 100g organic full grain and 900g of typo 00.. last thing I could imagine would be more sets or a longer autolyse – what do you think?
Thank you!
It’s very hard to say, it could be many things. If there’s too much fermentation activity in your dough you could reduce your levain percentage, reduce your final dough temperature, or even use your levain a little earlier before it gets overly ripe. From there, a tighter shape and/or more dough strength could also help keep it in check. Also, keep an eye on the dough during bulk and divide a little earlier before it gets too gassy!
Hello Maurizio! I’ve just bought a Brod and Taylor Proofer!
I have two questions.
1. For dough proofing should we use the dry or humid proofing? By humid I mean the mode with the little tray with water, under the grill. I’m assuming for the sourdough we will use the dry one, considering the jars are covered.
2. Are condensation signs on the walls of the jar normal? Should I further increase the cap “opening”?
Thank you!
Right on, Bogdan! You’re going to love it. Answers:
1. I always keep my bowls covered and thus never use the humidity tray. It’s best to keep the dough somewhat humid to avoid forming a crust on it while bulking or proofing. If you keep your bowl covered it should be just fine as is, but if you want to leave things uncovered then some water in the tray will definitely help.
2. Signs of condensation are fine. It might mean it’s quite warm in there but perhaps not. I don’t see any issue with that.
Happy baking!
Wow! In my house is pretty warm, but the temperature seemed to vary during the night when nobody was in the kitchen. After one month of failed attempts to feed a sourdough (no bubles, no growth) wtih two different flower types, after I bought this little box, my culture after 4 days grows predictable and has bubbles! 😀 Amazing!
That’s fantastic to hear! Yes, this thing really elevated my baking to the next level — such a simple but effective (and well designed) device! Have fun 🙂
How high should the humidity in my room be when I’m proofing on the counter top not the proofer?
When I proof my dough at room temp en couche (on baker’s linen) I believe it’s typically around 30-50% humidity (it’s really dry here). However, in my fridge when I proof overnight it’s usually 70-80% since it traps all moisture inside my retarder freezer. I think it depends on how long you’ll be proofing. If it’s a few hours, whatever your kitchen is at should be fine.
Hi Maurizio,
How important is humidity in the air? Its an extremely dry cold winter here and I purchased the ambient temp thermostat you suggest. The humidity is showing only 20%. Will this affect my breads in any way? I purchased a humidifier to increase it. Im using the Brod and Taylor proofer for when Im baking just for myself but how humid should the house be when I make larger batches and cant use the proofer?
Humidity is important. The B&T proofer comes with little humidifier trays you can place in the proofer but I find it easier just to keep the bowls/bins/tubs I place in there covered with reusable plastic wrap. Covering everything ensures they stay moist and a dry crust won’t form on the top. Either way, you do want to keep the dough relatively moist through the process, a dry crust can cause issues. Hope that helps!
Hello Maurizio!
I have used this recipe close to 40 times and each time i get a different loaf. Sometimes it looks gorgeous and has a lovely ear however lately i’ve really struggled to get an ear, and instead have a lot of blow outs. i have a couple of questions
– Sometimes but not often, i get the beautiful gassy bubbles at the end of bulk fermentation and other times i only get a few small ones sitting on top. Is this a dough temp issue?
– are the blowouts in my loaf and lack of an ear caused by poor scoring?
Thank you!
Bonnie — I’m not sure what recipe you’re referring to but the actual recipe shouldn’t matter too much, this shouldnt happen regardless. If you see blowouts it could be a combination of shaping, insufficient scoring, and/or under proofed dough.
Make sure to keep an eye on the dough temperature starting when you finish mixing all the way through bulk to the end. You want it to stay pretty warm! This way you’ll get sufficient fermentation activity in the dough. Alternatively, if it’s cooler than expected lengthen bulk fermentation until it shows signs when it’s time to divide (bubbles, domed edges, smooth texture, strength).
Make sure you score deep enough and at enough spots to allow the loaf to rise in the oven and expand in a controlled direction. If you see blowouts in other areas it could signify insufficient scoring.
I hope this helps!
Thank you!! i’m going to start paying a lot more attention to the details. Looks like i’ve posted this question twice – on this thread by accident 🙂
Hi Maurizio and Happy New Year to you!
I just purchased a Brod and Taylor Proofer as I’m having difficulty maintaining consistent temperature in my home. I live in central Ontario Canada and today its a record breaking day for December at -13F. I keep my home between 68-70. Chad Robertson recommends keeping the levain at 65 degrees. Why is that? I only bake twice a week so do you recommend keeping my starter in the fridge the entire week then transfer to the Proofer once I begin adding to my starter as I’m getting ready for a bake?
Happy New Year, Sharon! Keeping a levain at 65F would really slow down activity in the levain, it would lengthen the ripening process quite a bit. Maybe Chad is going for something specific there but I prefer to keep my levain pretty warm so it’s well expanded and ripe by the time I use it in my dough.
If you don’t wait to do daily (or 2x daily) feedings for your starter you could definitely keep it in the fridge most of the week. Have a look at my weekend baking schedule for exactly how to do this. Hope this helps and happy baking!
Sorry, hit enter button too soon. I make my levain at 9pm with water at 78 degrees. I put it in the proofer set for 72 degrees. I’m excited to make bread at 9 am but levain does not float which means I’m past the active stage. What is your experience?
It might not float for a variety of reasons: it’s under fermented, it’s over fermented, it has a large percentage of rye (all-rye levain won’t really float). If it looks like you’re going over, you could turn the temperature down to 70°F or use a smaller percentage of mature sourdough starter to build the levain — these things will slow the process down. Additionally, you could make the levain later at night so there’s less time before it’s needed for a mix.
I hope that helps!
Hi Maurizio,
I have the Brot & Taylor proofer which is a great tool. I’m having some fine adjustment challenges.
Hi – first thanks for the detailed posts. Really helps in taking my baking hobbie to the next level!!
I am now convinced I need a tool to measure DDT consistently as well as my oven real temperature. I saw there are infrared Thermometer options that will measure the over temperature easily but only measure the surface dough temperature. Is that sufficient and can I assume surface tempurture is the same as inside the dough? Or would you recommend a probe based Thermometer?
Thanks!
You’re very welcome! I know some bakers that use an IR thermometer to take dough temperature but I prefer to use a probe thermometer. Theoretically the temperature of the dough inside the mass could be slightly different than the exterior surface, depending on how the dough is place in the bulk container and whether it’s covered, etc. Hope that helps!
Hi Maurizio,
I’ve got a question about cold proofing. I never seem to get much of a rise (if any) from overnight cold proofs –
and I wonder if my fridge is too cold. It’s set to 37F.
What temperature is your fridge set for cold proofing? Also, if you believed your dough was underproofed in the fridge, would you proof more before refrigeration, or after?
Thanks much – and wonderful blog.
-Adam
Thanks, Adam! My fridge is usually around 38-39°F, so pretty close to yours. I don’t see a lot of rise from my dough when it’s in the fridge, at those temps most of the activity will slow or stop. I’d recommend trying to leave your dough out a little longer before placing it into the fridge — that extra room temperature proof time will help push things farther before slowing in the fridge.
In the morning, take a look at the dough and give it a few pokes. It should feel slightly more puffy than when you put it in. If you think it could use even more time, let it sit out some time (perhaps 20-30 minutes during oven preheat) to proof a little farther.
These times are very dependent on your dough and how fermentation is progressing. The best advice I can give there is to try and stick with the same formula for a while so you can spot the nuances as the dough develops. Try to keep as many things as consistent as possible (including dough temperature!) between each bake.
I hope that helps!
That’s a very interesting read, thanks for linking that article. I don’t have Modernist Bread, can you define what some of the variables in that equation are (th? flour_t? what’s 38?)?
I agree that perhaps this standard formula needs a slight “upgrade” to take into account the amount of water used relative to the other ingredients, as @Ryan has said in the comment above.
Thank you!
Yes, salt is another element we can use to temper fermentation!
I used this formula a week ago and I still overshot my DDT by 8 points (86 instead of 78). Wouldn’t the volume of water compared to how much dough/levain you use make a difference?
Absolutely, the amount of water in relation to the other ingredients does play a role. The larger the volume of water used in the dough mix the more of an impact the temperature of that water will make. I should state in this post that the above advice, and calculations, are really a starting point for calculating FDT and DDT — they’ll kind of get you in the ballpark of what DDT you’re trying to get to and from there you have to adjust from bake-to-bake.
I find when I’m baking every day the temperature adjustments are usually minor because I have the days prior as a starting gauge for where I need to adjust to hit my DDT. I still take the temperatures of each component and I know how to adjust the temperature of the water, especially since I know approximately how much water will be used, to get right to my DDT.
All that said, 8 points is quite a deviation! It sounds like something else might have been wrong unless your ratio of water to flour was skewed really far to one side. Any chance there was an error somewhere?
I was making my temperature notes in my phone as I measured them… I measured with a Thermapen MK3:
Levain @ 72F
Flour @ 69F
Room Temp @ 69F
FF @ 0F.
DDT was 78.. so it told me to use 102 degree water (as did your calculator page).. ended up with 86 degree dough after hand mixing. *shrug*
(This was your typical Tartine Country Loaf recipe, FYI).. so we’re talking 750 grams water, 1000 grams flour and 200 grams levain and 2% salt.
I’m about to start up another batch tonight so I’ll post back again to see if I have more success.
Yes, those numbers check out. The water definitely needs to be heated up but I’m wondering if there should be another factor in the formula to account for the small percentage of water. This formula is pretty standard and is what you’d find in almost all textbooks (and the one we used in a course I recently took at King Arthur Flour) but perhaps as the total amount of ingredients drops, and the water ratio then becomes more and more significant, the formula should be adjusted somehow to suit.
I almost always use this formula but usually when I’m doing larger batches (like 4kg) — I’ll have to test this again with a small 1-2kg batch and see how it affects the results.
Please post your findings and I’ll keep thinking about this and test it soon as well! Thank you!
Okay, so last night:
Flour @ 71F
RT @ 71F
Levain @ 73F
Calculation says use 97F water. End up with a FDT of 86 (again)… Same Tartine Country recipe (2 loaves). I’m unsure how this would change if we say, doubled or tripled the batch since the ratios are the same.
Awesome, thanks for reporting back those numbers. I’m wondering if when I do these calculations I have outside factors playing a role. For example, when I mix by hand I typically mix on my counter top (it’s granite) and it might be cool enough to chill the dough and offset the delta you’re seeing.
I’m going to verify this again myself here in the next day or two. Maybe I need a factor in there to account for the deviation you’re seeing if I end up with the same result. Right off hand I’m thinking I might need to adjust the friction factor variable when mixing by hand.
Question: how are you mixing? Are you doing it in the bowl or out on the counter? Thanks for helping me debug this, Ryan! Sorry for the frustrating outcomes.
I’m mixing in a 6 quart cambro sitting on a formica counter.
Don’t feel bad. I just wanted to share my experience with the calculations. As you said above they are published in numerous books.. so I just found it odd I didn’t get within a degree or two of my DDT… but 8 over!
I definitely want a solid formula here that works for most home bakers. There are, of course, a lot of conditions to take into account with each person’s individual kitchen, but I feel like there might need to be adjustments to this classical formula if it’s not working out for most of us. I’ve used it for quite a while and it works ok here (I don’t measure every time, usually only when shifting to a new formula I’m developing), but it might be that the conditions of my kitchen make it so.
Anyways, it’s fun to get to the bottom of these differences! For me at least 🙂
Perhaps the metal bowl you are using is taking some of the heat away from the dough. Metal is far more conductive than plastic.
NEXT time I’ll do my mixing in a metal bowl.. and post back again. (or you can test in a cambro tub if you have one)
(for the record I tried to register with Disqus and it hasn’t send me a verification email)
Yes, I do mix in a metal bowl — that could be one factor. However, when I mix I always do slap and fold, which keeps the dough in contact with my home granite counter for quite a while. It’s usually pretty cold and the dough cools off several degrees during this time. I’m pretty confident that has to be the reason the formula works reliably for me.
That’s strange about Disqus — any chance it’s in your spam folder?
So far nothing in spam or any other folders.
Ok.. finally the verification email came through. That was slow!
I was just checking through the settings — ok, at least it came through!
Are the optimal temps an attempt to attain consistent results within a timeframe to produce the desired results or are the same results attained by longer proofs and lower temps? Hammelman says that flavor and keeping quality are enhanced by slowing the process down by retarding doughs or proofs. Is a more open crumb only possible by adhering to a 78 degree dough temperature? What is gained and lost by trying to replicate recipe timeframes?
These are great questions, Don. No, an open crumb doesn’t necessitate a strict 78°F — there are many temperatures across the spectrum that could lead to a nice, light loaf. There are lots of factors that go into that and at each step of the process including having a healthy starter/levain, good quality flour, gentle handling, a full bulk, full proof, etc.
Controlling (and observing and adjusting to) temperature is a good way to help increase the consistency of our bakes but the actual temperature isn’t the key point of this writeup. I presented what temps work for me and the results I’m after but maybe your dough does better at 75°F (perhaps because you’re working with fresh milled flour or 100% whole grain). The key is we can’t expect consistent outcomes if one day we have a FDT of 70°F and the next 85°F (I think Hamelman even says this in his book).
I agree totally with Hamelman that longer fermentation times for the dough yield more flavorful and bioavailable bread. I always get the best crust when I cold proof my dough overnight, in addition to a slight acidity that tastes incredible. When shortening the timeline by removing the cold proof, for example, we’ll usually get bread that’s much less sour tasting and it usually won’t have the same crust coloring. In my experience these same-day loaves are great when trying to emphasize the wheat flavor in the bread or to produce a more “clean” result for something like a baguette or delicate table loaf. That’s my opinion, at least!
Hope that helps!
Tremendous information here, Maurizio yet very concisly written. Temperature is the most important aspect when it comes to sourdough baking. I was caught off guard many seasons before realizing that :), in fact it’s true for fermentation in general. Glad you addressed it in the way that’s easy for home bakers to understand. Awesome product recommendations also.
Thank you, Jinal!
Hey Maurizio! very informative post as always! after reading about your proofer previously, my dad kindly put together a contraption that will give me between 20C&26C consistently…it’s made winter baking so much more hassle-free!
I am looking for some advice on levain temperature though; I was wondering whether it’s possible to build an 11hr levain while I’m at work so it’s ready for mix when I come home from work. I’ve experimented at a few low temps and 5% starter (as a %age of flour weight+water) but nothing would float after 11hrs,..any advice?
Thanks! That’s great to hear about the proofer — they really increase consistency when we can keep that dough nice and warm, especially in the winter.
Yes, building a 10-12 hour levain is totally possible, I do it sometimes when I want to get baking first thing in the morning. What I do there is mix 20% mature starter with 100% flour and 100% water, then I leave it overnight at around 75°F. In the morning it’s usually ripe and ready to go. Sometimes it needs another hour or two, but if I need to speed that last bit up I pop it into my proofer and turn the temp up a few degrees to speed it along.
The key is to play with the percentage of mature starter you use to create the levain. It might take a few trials but you’ll figure out what percentage (and at what temp) gets your levain to the same stage as when you make a shorter, warmer, build.
I hope that helps!
I find if I am doing the bulk fermentation of dough in a cold kitchen, easiest for me is to put a heating pad on the lowest rack of the oven, then put another rack on the next slot up and put the dough bucket
on it. The heating pad is sometimes on high, sometimes on medium depending on the amount of dough in the bucket.
Kate, thanks for that suggestion, that will work very well! Anything to keep that dough warm 🙂
This is a great post, Maurizio! After many months of great loaves inspired by your recipes, I’ve had a string of overproofed (I think) loaves. Consistent temperature is likely the culprit. This is very helpful.
One question. I’ve been using high whole grain recipes quite a bit lately. For these, you said you’d target the FDT at 75 degrees to compensate for the faster fermentation. But your chart shows the 75 degree going for 4 to 4.5 hours. If fermentation increases with more whole grains, should the temperature and time decrease? After a string of overproofed loaves, I’m worried that if I drop the temperature but then extend the time, I’ll end up with overproofed loaf. Recently, I’ve cut bulk to 2.5 hours for some high whole grains (at about 78-81 temp with a VERY active starter), and still get loaves with uneven big air pockets under the skin). Dropping the temperature seems warranted here, but would I still extend the time?
Thanks, Thomas! Yes, temperature is incredibly important and it can be hard to monitor/control sometimes. A few good tools definitely helps with each.
You’ll likely not need to extend the time with more whole grains, but it does depend on many factors (fresh flour, percentage of whole grains, levain percentage, maturity of levain, etc.). With the information you’ve provided I’d say don’t extend bulk any more than you do currently and with that FDT. If you think you’re going over then yes, cut it back!
The other thing you could do to adjust is to reduce the levain percentage in your mix. This way, even with a very ripe levain (which is how I always bake these days), the timeline won’t shorten too much — I don’t like to go < 3 hr bulk if possible. That said, watch the dough and not the clock, adjust as needed.
Hope that helps!
Just spent a ton of time trying to find good guides on this from under proofed bakes this last week…perfect timing, huge help!!
Ahh, yes, the dreaded winter under proof — it happens all the time! I get caught off guard by that first cold spell and have to adjust. Glad this post has helped, happy baking!
Another great post Maurizio! Thanks. Now, we just need to get you guys to adopt celsius rather than Fahrenheit, my app gets too many work outs converting! 🙂
Thanks, Maree! Ahh yes. I’ll go through and add celsius, I keep meaning to do that!
Ha ha, makes me concentrate more. 🙂