
This may seem like a mundane post to some, but it’s one of the most common questions I receive: what is the best way to store bread after baking it? And really, it makes sense: we spend considerable time fussing about with our sourdough starter, preparing a levain, mixing dough, and tending to it for hours—and finally, all our work culminates in the oven. But after baking (and eating), there’s still the task of storing the bread, to try and keep it as fresh as possible for as long as possible.
One of the beautiful things about sourdough bread is it will last longer before staling and molding than commercially yeasted bread.
The acidification of the dough by lactic acid bacteria in our sourdough starter and other physical-chemical changes during the breadmaking process help protect against premature bread firming and drying. These acids also help prevent molding, and in my experience (and also that of the WSU Bread Lab), they usually keep a loaf perfectly edible for a week or more—all without any chemical preservatives.

The science: from baking to staling
Before we get into solutions for the best way to store bread, we should first briefly talk about stale bread: no one’s favorite, unless we’re making French toast, ribollita, bruschetta, or bread crumbs and croutons, of course. But what happens behind the scenes when the dough is baked, left to cool, and on its way to staleness?
As bread dough is baking, the starch granules (which wheat flour primarily consists of) gelatinize. When they gelatinize, they swell from the moisture in the dough, and their rigid, crystalline structure transforms into a non-crystalline (amorphous) form (very similar to when you make a tangzhong or yudane). When the baked loaf is removed from the oven, it cools. From this point on, the crust and crumb begin to harden over time as starch—and most significantly, amylopectin(J.A. Gray and J.N. Bemiller 2003, Bread Staling: Molecular Basis and Control, p. 3) undergo retrogradation, a re-ordering into a crystalline form.
This retrogradation means a hardening of the crumb as moisture moves out from the starches, eventually taking a loaf of bread from soft and pliable to excessively hard and what we identify as stale. Other processes begin to take effect with the crust as well, as it begins drawing moisture out from the crumb into itself, making the crust rugged and leathery.
In general, staling can be reversed somewhat by reheating the bread to a sufficient temperature (140°F / 60°C), but it can’t completely reverse the effects of staling, and the results from heating will only last a short time. You can see this directly in your kitchen: reheat a slice of stale bread in the oven or toaster, and you’ll think you almost have a slice of fresh-baked bread on your plate—for a few minutes at least.
It’s also worth knowing that doughs containing some percentage of fats (lipids) will typically last longer before staling. The fat present in the dough slows the re-crystallization of the starch granules and reduces the movement of moisture between starches and proteins (de-gelatinization), which causes the crumb to harden.
Staling vs. drying
Note that staling and drying are distinctly different processes at work. Staling can result in a firm, hard loaf of bread but is not necessarily due to the evaporation or loss of water from the crumb and crust; it’s more about the retrogradation process described above. However, drying can also occur and can especially be a problem in arid climates (like where I live in New Mexico).
To avoid excessive drying, it’s important to ensure bread is stored properly (cut-side-down, using a breadbox, etc.—more on this soon, I promise) so it doesn’t prematurely dry to a bone.
Ok, enough science. So how do we put this into practice?
The practice: keep bread fresh longer
The following steps are loosely how I take a loaf of my baked bread from the oven to cooling, cutting, and long-term storage.
But first, are you using the best bread knife for sourdough bread? If you don’t have a good knife, you’ll squash your loaf instead of cutting it cleanly. If you have a sharp, hefty knife, read on!
After baking sourdough bread, wait to slice until it’s cooled
Slicing a warm loaf of bread too early will result in a gummy and sticky interior.
First and foremost, it’s always best to let fresh bread rest until it’s cool and fully set before slicing. I know, fresh-from-the-oven is hard to resist, but your bread will not only taste better it will keep longer if you wait to cut it for at least an hour—I prefer two or more.
The reason goes back to the science behind all this: starch retrogradation is happening right as the loaf is pulled from the oven, but it hasn’t progressed far enough to firm up and set the interior appropriately. Slicing a warm loaf of bread too early will result in a gummy and sticky interior.
Further, recipes containing a high percentage of whole grains, especially a 100% whole grain loaf (typically highly hydrated), or loaves that are larger (like my 1.5 kg miche), benefit from an even longer rest. In fact, I find their flavor improves 2-3 days after baking with these types of bread.
With rye bread, especially when rye is in a high percentage, it’s common to let the bread rest, wrapped in baker’s linen or a towel, for one or two days before cutting.
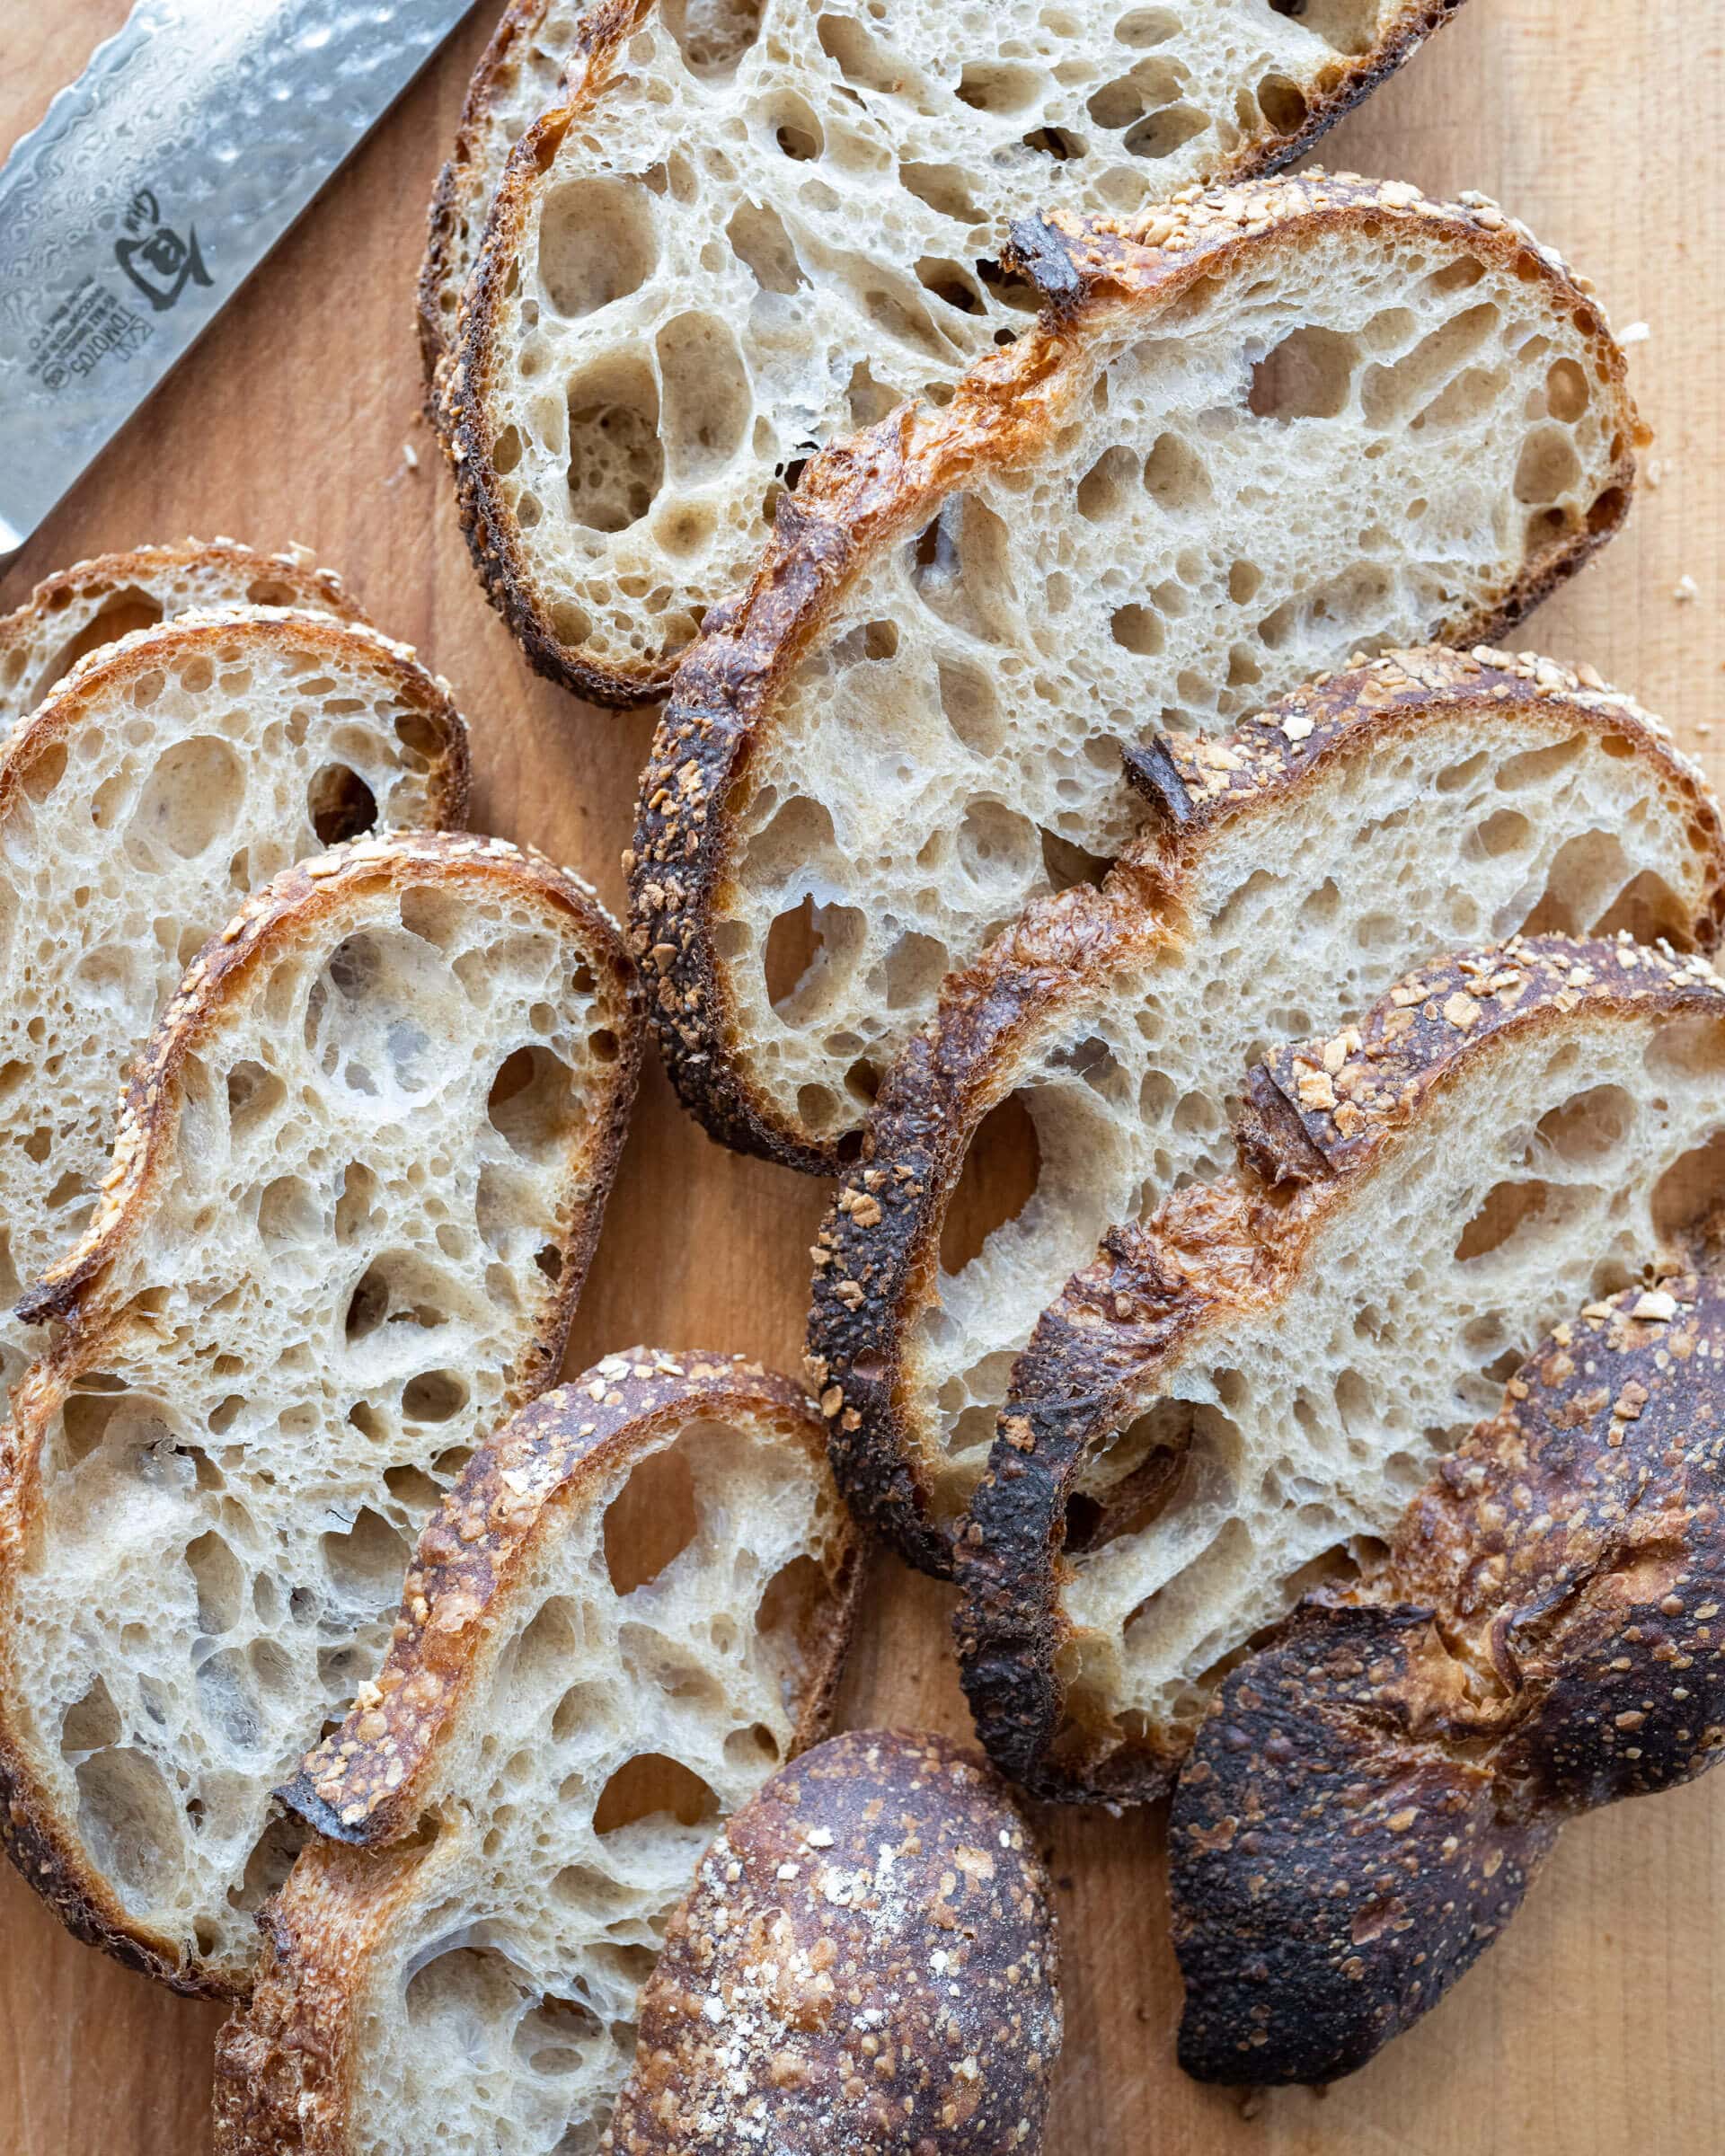
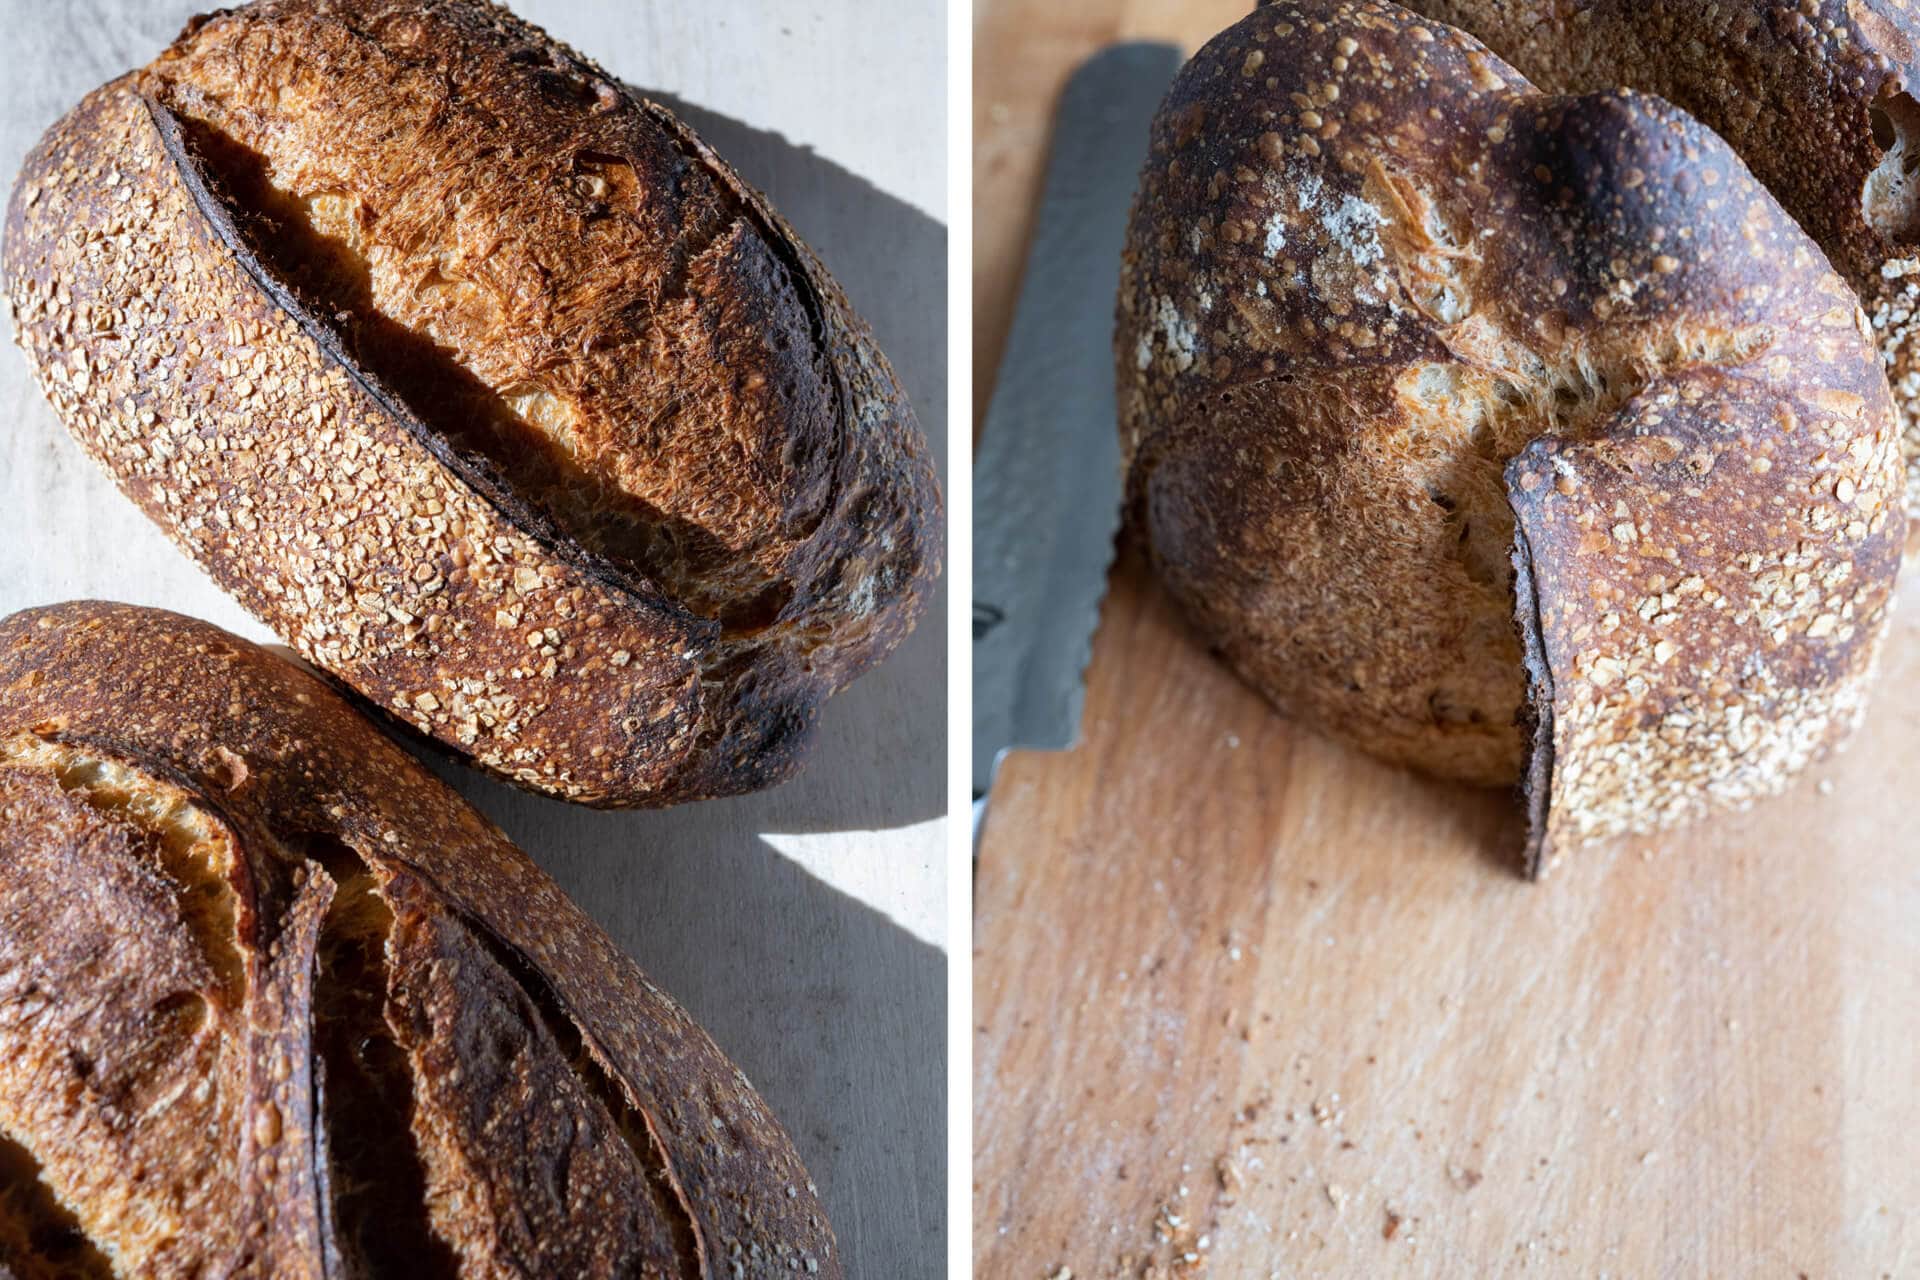
After the baked loaf is cooled and fully set, it’s time to cut.
Store bread cut-side down
Once cool, I cut the loaf directly down the middle creating two halves (as seen above, right). This way, after slicing from the middle, I can turn the halves so the crumb faces the cutting board. This completely surrounds the interior with the (relatively) thick crust, keeping it from drying out excessively. The crust is a natural bag of sorts, keeping moisture in and dryness out.
I can typically keep my bread like this for a day or two (remember, it’s very dry here) on my cutting board, which I move to a breadbox.
Note that if you live in a very high-humidity environment, you may not be able to keep your sliced bread on the counter for as long; you might have to move it to the refrigerator to prevent molding.
Use a breadbox
This is as simple as it gets: keep your cooled loaves, cut or uncut, in a bread box, and let the box do its job. I like this svelte stainless steel breadbox (seen below) which is well-made and has lasted for years in my kitchen.
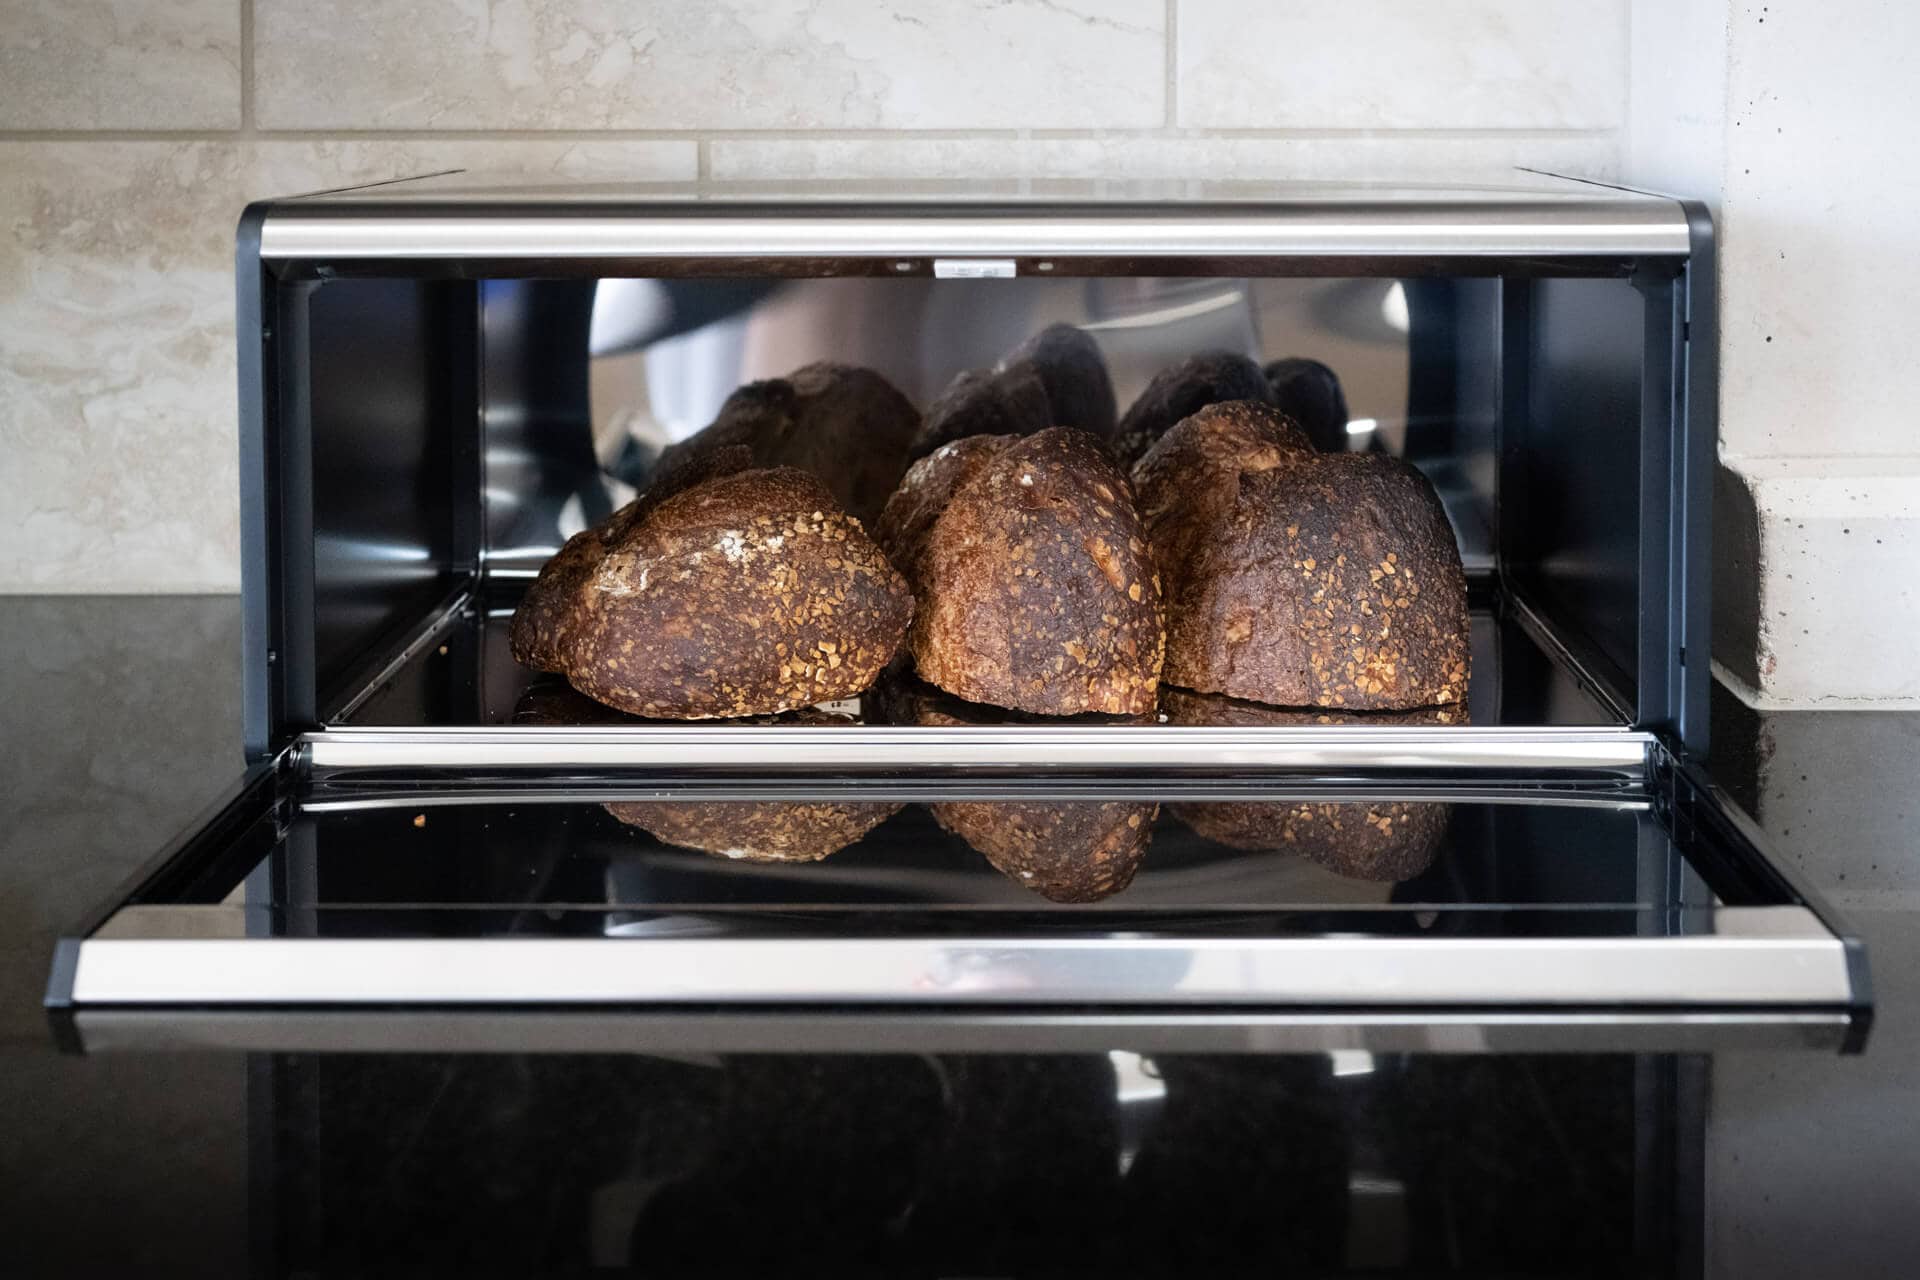
I like that it’s rather large (H: 7.3″ x W: 18.2″ x D: 9.8″), and I can easily store 2-3 whole loaves of bread in there at a time. And because I bake so often at home, I almost always have at least one loaf of bread in the box, ready to be sliced and used straight away.
Use reusable wrap like Bee’s Wrap
Another option is to use a reusable wrap like this bread-sized Bee’s Wrap. This is one of my favorite ways to wrap up longer loaves (like demi-baguettes), and the wrap works extremely well at keeping loaves soft but not too soft.
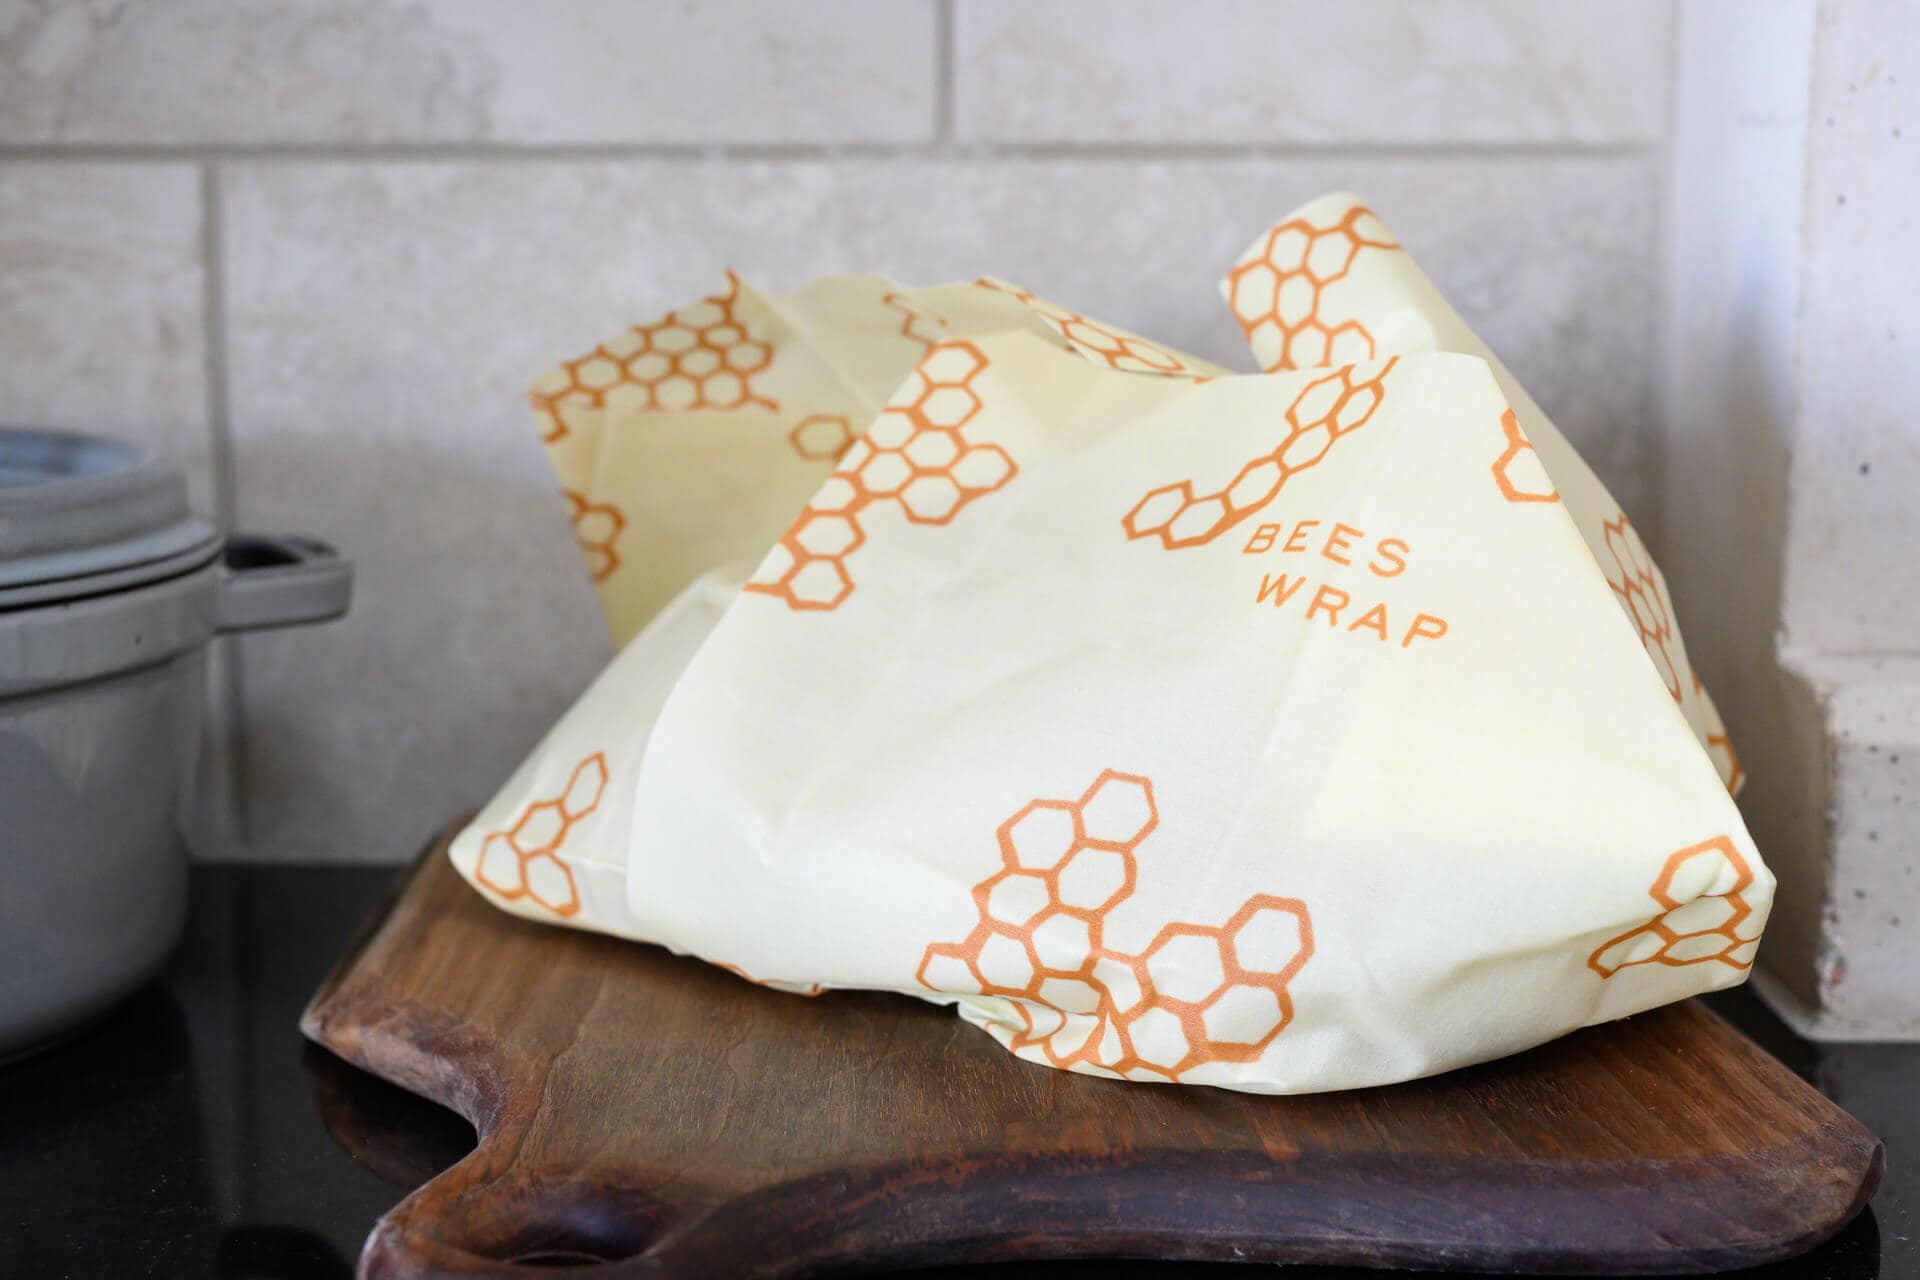
Simply place your bread in the wrap and cover it tightly. The beeswax-lined wrap will deform and wrap around all the nooks and crannies of your loaf as the warmth of your hands molds it to fit.
Paper bags, kitchen towels, and plastic bags
Plain paper bags and kitchen towels also work very well to keep the bread from drying excessively. And while many sources say never to use a plastic bag, sometimes it might be necessary, especially if your climate demands it. In the dead of winter here in New Mexico, humidity levels drop so low my lower-hydration sourdough bread almost has to be placed in a sealed plastic bag to retain some semblance of a soft texture. In this rare case, a sealed plastic bag is necessary and works well.
Don’t place bread in the refrigerator
Finally, and this is very important, don’t store bread in the refrigerator. It might seem counterintuitive since the refrigerator is seen as a food-preserver, but placing your homebaked loaf of bread in the refrigerator will cause it to be stale faster than if it’s kept at room temperature.
The practice: freeze bread for long-term storage
For long-term storage, a freezer is a handy option. The retrogradation process can be mostly halted by subjecting bread to very low temperatures, preventing moisture migration out of starches and their subsequent recrystallization. This means a cooled loaf can be frozen whole or sliced completely, and then the slices are frozen independently (my preference).
First, let’s look at freezing slices.
Freezing Slices
In practice, freezing individual slices of bread is a great way to get the best of both worlds: conveniently sliced bread that can be reheated at a moment’s notice that also keeps for a very long time in the freezer (I’ve done a month or so, but this could probably go longer). When reheated, the bread comes out like freshly baked bread that’s perfectly toasted.

Years ago, when I first started baking bread, I searched for the perfect toaster. After going through a few, I found the Breville Smart Toaster, which is the best toaster I’ve found: not only does it take extra long slices (like the ones from sourdough boules or batards), but it has a frozen function that works perfectly to reheat a frozen slice of bread to just the right amount. It’s expensive for a toaster, but the amount of bread I go through in my kitchen justifies the expense.
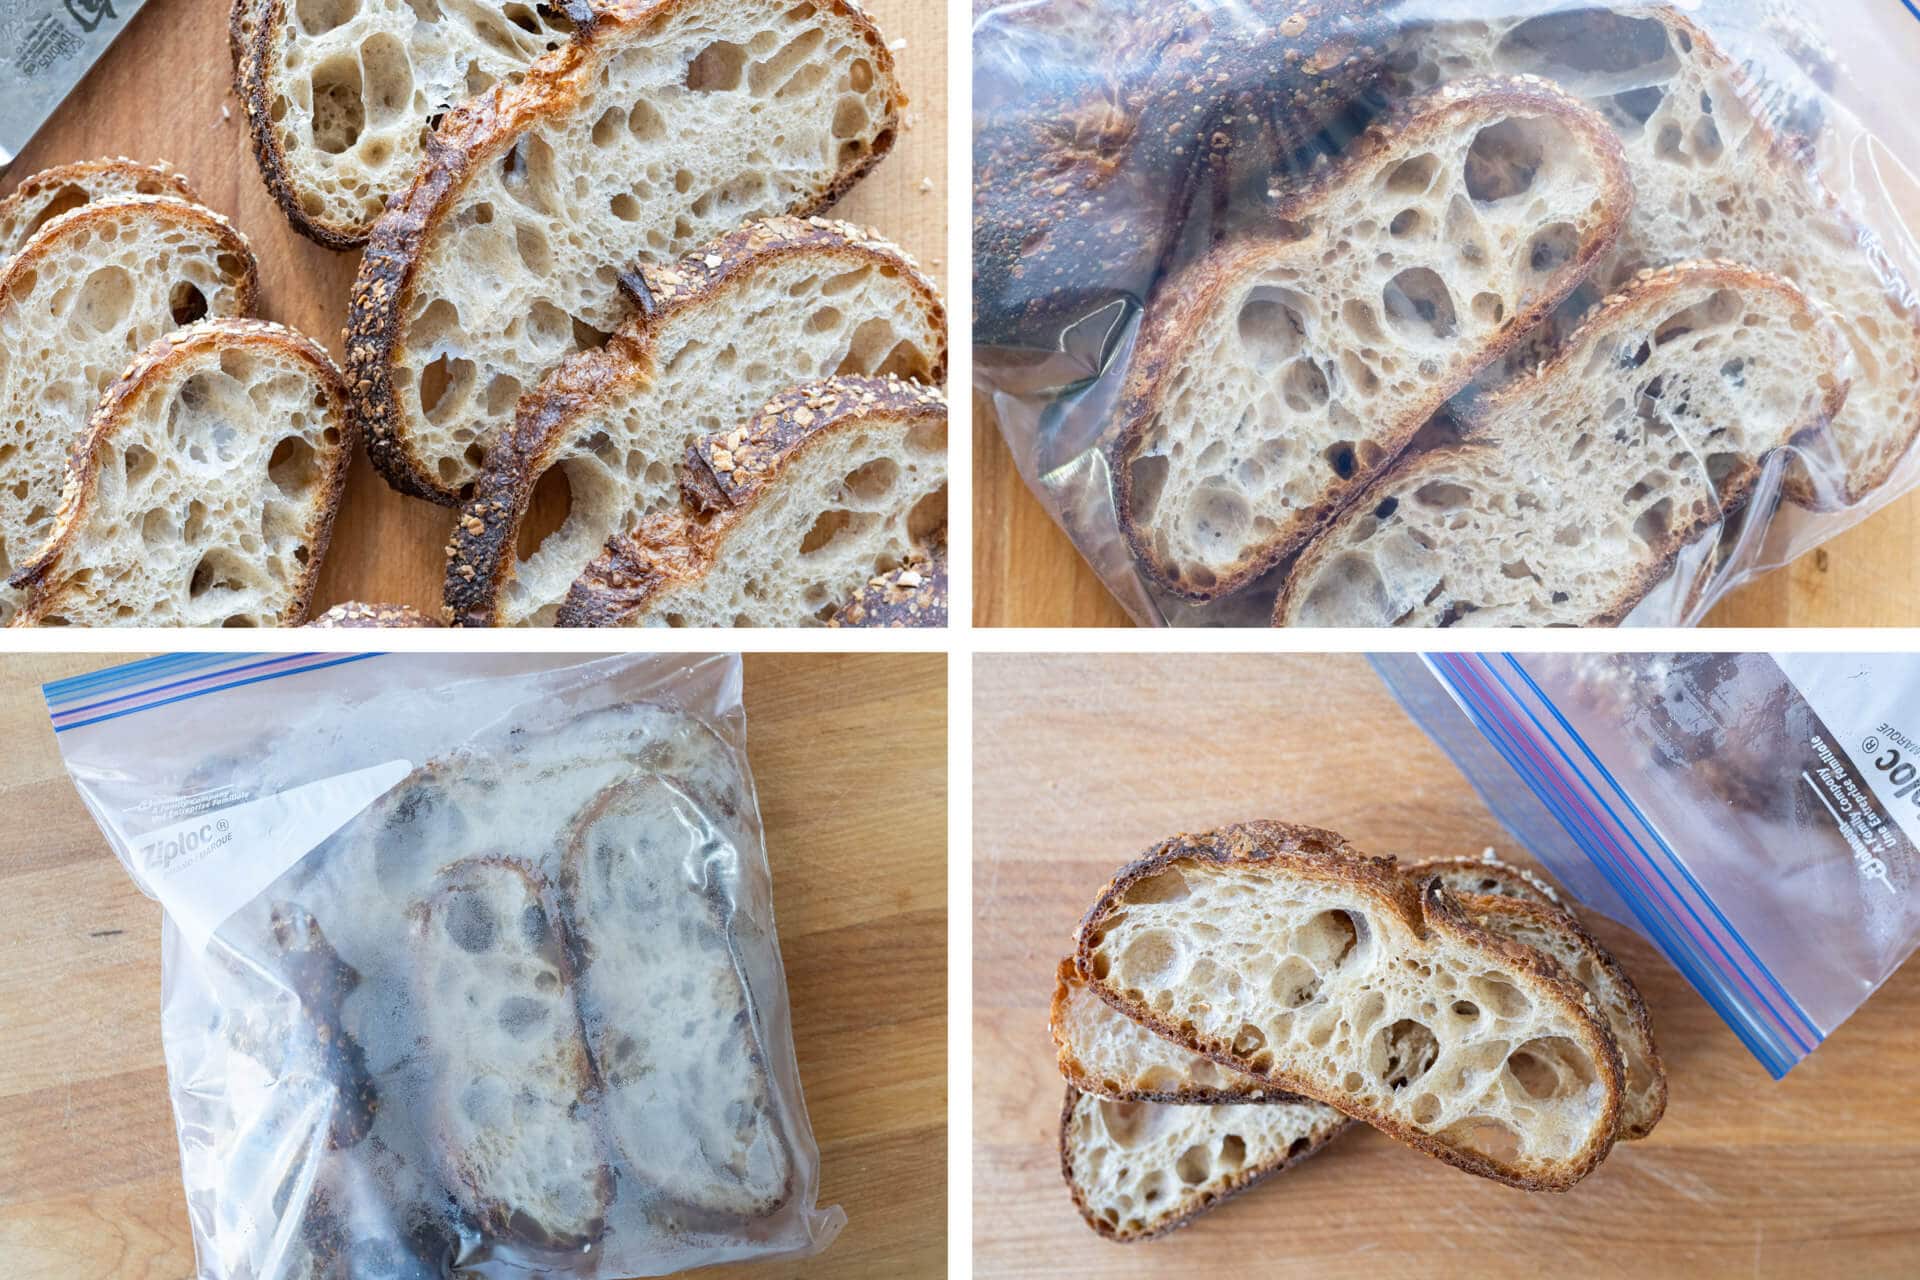
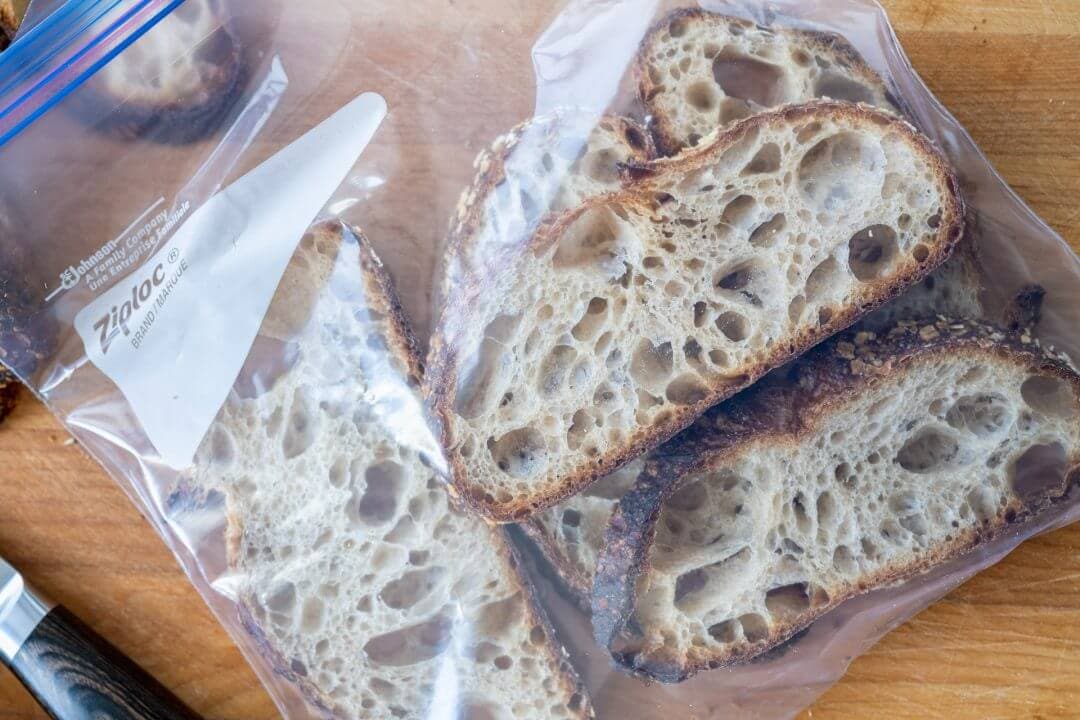
The process is simple: once your loaf of bread is cooled thoroughly, slice it completely from end to end. Then place the pieces in a freezer Ziploc bag, one on top of the other, in an alternating pattern (place a layer on the bottom from side to side, then place slices on top of the bottom layer turned 90°) and press out as much air as possible. Then, place the bag in the freezer until the slices are frozen. At this point, take one or two slices out and reheat them in the toaster to your liking. The plastic freezer bag can be used many times without discarding.
Freezing whole loaves
This method uses a little more material to work, but it’s a great option if you want an entire loaf of bread for some use in the future. A good example might be if you bake two loaves at one time, plan to eat one this coming week, but want the second loaf for the week or two after.
Once the baked bread is fully cool, wrap it in plastic. Then, take the wrapped loaf and put it into a freezer Ziplock bag. Press out as much air as possible, then stick the bag in the freezer. When you want to eat the bread, take it out to defrost in the fridge for a few days or on the counter overnight. Once it thaws completely, store it on the counter via one of the methods described above.
What next?
I’d love to hear your best way to store bread and keep your sourdough fresh. I know here in my kitchen, with the various options for storing and using bread, there’s hardly ever a loaf wasted—and I bake a lot of bread!
For other practical baking guides, see how to store a sourdough starter (for short and long term) and my guide to how to store flour to keep it fresh.
If you’re looking for a recipe to start baking sourdough (and freezing!), check out my simple weekday bread—a delicious bread that couldn’t be easier.
Happy baking!


188 Comments
There has been some interest in vacuum packing expressed here. This is a tip I picked up from sous vide cooking which utilises vacuum sealed low temperature controlled slow cooking. Get a very large zip lock type bag. Don’t use the “slider” model. They do not seal as well. Put whatever you want “pseudo vacuum packed” in the bag. Seal from one edge but keep the last 5 cm. (2″) un-sealed. Have a large pot of water that will hold your entire bag, and tilt the bag, holding between thumb and finger from the unsealed corner, with the sealed end at a lower angle into the water. You can see the air being pressed upward by the pressure of the water. with your other hand, you can “encourage” any bubbles to rise. Continue lowering until you almost reach the unsealed edge. Now use your bubble chasing fingers to slowly seal the rest of the baggie until you can seal and dip the last bit in, and “all” air is removed. Part of any staling process , of any food item, is oxidation. As the word implies, oxygen is pretty good at doing that, and heat then speeds that process. As a rule of thumb, about every 10C (18F) doubles the rate of reaction. Removing the air (1/5th oxygen) from the bread storage, and then popping the loaf in the freezer should improve storage times.
I have not done a side-by-side comparison to actually prove to myself that this is so, but since learning the baggie trick from sous vide cooking, it is so incredibly easy to do, that I simply follow the “logic” of why it should be so.
BTW: Brilliant post Maurizio!
Whoa, that's a stellar method for sealing up the bag, far better than I could do by trying to press out the air. I'm going to try this next time, I don't have a vac sealer! Thank you 🙂
I often freeze whole or half loaves, wrapped first in foil then freezer bags. I reheat FROM FROZEN directly on the oven rack at 350F for 30-40 minutes depending on size and thickness of loaf. The crust turns out crisp and the loaf is as good or better than fresh baked! For slightly less crispy crust, leave the foil loosely wrapped around the loaf. Or for halved loaves, set the cut side down on the foil while reheating. I hope you try it!
Fantastic idea here, Rosemary. Definitely going to give this a try soon 🙂
question that is related, but not necessarily about storing … what is the best way to ‘revive’ bread once it gets hard (after more than 2 or 3 days)? I have put water on the bread and put it back in the over to warm, but this is using a larger chunk of bread that I may not want to use all of; However, at this point the bread is impossible (or dangerous) to cut and only do a slice. Thanks!
That's the best method I've found, too. You can pre-slice the bread and then spritz the bread with some water before toasting (works best in a toaster oven or home oven).
Thanks for this post! Two questions: (1) What does the bread box
actually *do* functionally to preserve the bread? As in, does it simply
have a good seal? Does that control temp or moisture? Does it somehow
wick air/moisture away? Is there any real difference from a big piece of
tupperware (if one existed)? You explain the science of bread staling
well so I’d love to understand the bread box solution part better too.
(2) Does storage approach change for other types of breads such as
sourdough sandwich loaf?
The breadbox simply keeps some (but not all) of the moisture inside! Yes, the storage choice can changed based on the type of bread. For example, a high hydration loaf may not need to be kept as humid (and it can make it sag some, too).
Oh sorry. Nevermind. I see the toaster in this post. duh! Thank you
How do you reheat your soft dinner rolls?
I put them on a baking sheet and bake very low heat for a few mins!
Hi Maurizo…
I like baking breads & cookies to send to my niece who is in an assister liveing facility due to a stroke.
Problem is baked goods i send her mold rather quickly, something about the quality of the air in her appartment.
I’m wondering if vacuum packing breads & cookies in single or double size portions for her to freeze and take out as needed would work.
Do you have any experiance with vacuum packing breads?
Thanks, Hall
Hi Hall, I work as a rehab therapist in a skilled nursing facility and honestly, although it’s very nice of you to bake goods for your family, I always see my patients have their baked goods just sitting in their rooms for days untouched. I would suggest only bringing your family member like 1-2 cookies at one time. Bringing anything more is going to be an absolute waste. Most often that specific population tend to not have much of an appetite due to medications they take and the priority is going to be eating the nutritious meals the facility supplies over treats. They even have a hard time just eating a basic nutritious meal. Your family will appreciate your kind gesture but even with a small quantity.
Unfortunately, I don’t have any experience vacuum packing! I’d imagine it would help, though.
If you freeze the bread slices or other items first (loosely in plastic), you can then vac-pack them without squashing them. Thawing during transport and subsequent re-freezing shouldn’t affect the quality significantly (if transport is fairly quick).
Hi Maurizio…
I use a Güde Bread knife (Barrel Oak – E430/21 with a blade length of 8.25 inches). It is knife made in Solingen, Germany. It is hand-forged from one piece of chrome-vanadium-molybdenum knife steel with a hardness of approx. 57-58 HRc (Rockwell). The edge is rather straight and I have been using it for more than ten (10) years to cut normal whole wheat bread. Can I use this bread knife to cut Sourdough bread. Please let me know.
Cheerio !
S. Radhakrishnan (Ranjit) / Divya Raheja
Chennai, India
That sounds like a fantastic knife!
A former roommate shared this tip with me, and I’ll pass it along. The best, and for me now the only, way to store sourdough bread to keep it fresh and soft is to double wrap it. First, wrap the bread in a paper bag. Second, place the paper bag into a plastic bag. Et voile. I reuse both, but the plastic bags last me much longer–a paper bag can only be used a couple times before it begins to come apart.
That’s a fantastic method. The paper helps absorb moisture and is porous, while the plastic keeps just enough locked in.
Hi Maurizio, just reread this article on bread storage first read a year ago and again realised how helpful it is particularly the science. My method first used bymy wife is to make a small cap of aluminium foil to cover the cut end of the bread and to store on a covered bread board. Works well for bread consumed in 3-4 days which is about as long as a cut loaf lasts. If the second loaf looks like being too long in waiting it goes off to a neighbour, friend or most likely my daughter. I like to have an excuse to bake again so giving away one loaf hastens that opportunity. Cheers
Hi Maurizio! Just for fun, I sewed a doubled lined bag, linen in the inside, cotton on the outside. A small cutting board fits inside where I place the cut side of my bread on. Seems to keep the bread fresh for about 4 days before it starts to harden. By then there’s only a very small piece left.
Does it hurt the bread, when freezing slices, to be in a frost free freezer, where the temperature fluctuates as it defrosts itself, or is it better to keep it in a freezer (that needs manual defrosting) where the temp is always steady at 0 degrees?
Thanx for your great wisdom.
Hi Maurizio! I’m a beginner but have already learned so much from you. I was wondering about freezing dough. What I’d like to do is freeze a loaf after it is formed and instead of placing in the refrigerator for it’s cold-proof. What would be the process to thaw and bake it when we’re ready?
Hey, Susan! Sorry for the incredibly late reply. I let the loaf fully cool, then double wrap in plastic and freeze. Let thaw overnight in the fridge (maybe 2 days), then warm in the oven.
She was actually enquiring about freezing dough, not baked bread.
All really good points, Amanda. You live in basically the opposite climate from mere where humidity is around 30%. I hve the opposite problem: if I leave my bread anywhere uncovered, it’ll be a rock in no time.
I’ve been using micro.perforated plastic bread bags for about 6 months now with very good results and longevity of bread life. Ordinarily I eschew plastic wherever possible but I reuse them enough times that I believe they are acceptable
That’s a really good suggestion, Phil. And I’m sure you can use them over and over.
I feel like my loaves dry out so quickly here in Arizona, no matter what I do. Cut side down, definitely never refrigerated. I can usually get 3-4 days, but never a week. One exception recently was the seeded pan loaf, that seemed to stay soft longer. Probably due to the tangzhong. I need to start slicing and freezing by day 3 or 4.
Yup, that is a problem here. In your case, a plastic bag is probably best.
Great information! I usually bake 2 boules each week and always slice and freeze one loaf. Works beautifully for my teen grandson’s packed lunch. I just make the sandwiches with the frozen bread slices; place in a sandwich bag and by lunch time all is ready for eats!
Fantastic, Joyce!
Hi thanks for all your brilliant information, not only this article.
When you defrost whole loaves do you unwrap them or leave them wrapped?
Karen in Johannesburg South Africa
Also high altitude so that information is especially valuable to me
You’re very welcome, Karen! Sorry for the delay. When I defrost them, I leave them wrapped to thaw 🙂
I found that your tip to not cut the bread fir 12-24 hours not only improves flavor but reduces gumminess and prolongs the life of the loaf for counter storage. My mixed dough weighs approximately 800g, I use a 1.5 quart Pyrex and linen towel for the final cold rest and store the bake bread in the linen on the parchment it was baked on, on the counter, after the bread completely cools. First cut is 12-24 hours later and then the cut side is placed face down on the same parchment and wrap it in the linen and into a zip bag big enough to hold the loaf. I don’t zip the bag but fold it under. This works for up to a week and both the linen and parchment seems to play a roll in removing excess moisture in the bread but also prevents mold during humid days. The bread always feels fresh and the flavor improves. After 7 days I move any bread left to the fridge but still wrapped in the linen and parchment (this is rare but it happens). Only once when I didn’t use the linen wrap did the bread get moldy during the first week.
Yes, letting the bread rest completely before cutting really brings out the full flavor and texture of bread! Love that storage method, too, Faw!
For thinner loaves, i.e. baguettes, I wrap them in foil then in plastic wrap before freezing. When I’m ready to use one I leave it in the foil and put it in a 450 F oven for 10 minutes. Open the foil, turn off the oven and let rest until the internal temp is between 120 – 150. At this point it is ready to serve hot and fresh.
That’s brilliant, Steve!
I have a Pyrex glass baking sheet as a base and a 3 litre large Pyrex bowl over the top – only suitable for boules of course, but it works for me.
That’s a great method! Glass is a wonderful insulator.
This is great. Thank you. When defrosting a whole loaf from the freezer overnight, do you leave it wrapped in the plastic & ziploc, or take it out of the bag/plastic wrap?
I usually leave it in the bag!
Hi, Maurizio, I just moved from New Mexico, where I’ve been baking all my life, to a very humid part of Wisconsin. I have always used a bread box but here I find that the bread often molds by day 4 or 5. I’ve been putting the bread in the fridge on day 3. This has worked so far, and I really don’t notice a huge difference in the bread. But then we mostly toast it. I have to say it’s like living in opposite land, where everything that worked for me in Santa Fe
is doomed for failure here.
Hah, yes that sounds like a very different environment! As you’ve found, do what you gotta do to make it last, in a humid env. a fridge would help pull some of that excess moisture out and keep things fresh once it gets a bit on the older side!
Once the bread is completely cool, I wrap it in a cotton tea towel and then place the towel-wrapped bread in a plastic bag that is slightly open to the air. I think the towel and small bit of air circulation helps keep excess moisture from building in the plastic bag. My mom taught me this (she eats toasted bread every morning) and it works beautifully to keep the bread soft and delicious for at least a week.
P.s. I live in Northern California (Los Gatos)
Yes, that’s a great approach! Sometimes I do something similar, and with some breads here (mostly those with lower hydration), I have to use a plastic bag!
I always freeze my loaves by using wax paper in between each slice. That way they don’t stick to each other and I can toast just the amount I need. I always recycle the pieces of wax paper by keeping them in the freezer when not being used. That way they don’t get moldy.
Fantastic, yes that’s a great way to keep them from sticking!
And here’s a tip for slicing a boule (whether for freezing or not): https://www.youtube.com/watch?v=xu8KixgDRVI
I also recommend waiting till the slices are frozen in the ziplock bag *before* squeezing the air out. The slices are less likely to stick together and don’t get compressed. (I also use a straw to suck the air out from one corner, pinching the bag as I withdraw the straw and finishing the zip as soon as the straw is out.)
Great points there!!