
This may seem like a mundane post to some, but it’s one of the most common questions I receive: what is the best way to store bread after baking it? And really, it makes sense: we spend considerable time fussing about with our sourdough starter, preparing a levain, mixing dough, and tending to it for hours—and finally, all our work culminates in the oven. But after baking (and eating), there’s still the task of storing the bread, to try and keep it as fresh as possible for as long as possible.
One of the beautiful things about sourdough bread is it will last longer before staling and molding than commercially yeasted bread.
The acidification of the dough by lactic acid bacteria in our sourdough starter and other physical-chemical changes during the breadmaking process help protect against premature bread firming and drying. These acids also help prevent molding, and in my experience (and also that of the WSU Bread Lab), they usually keep a loaf perfectly edible for a week or more—all without any chemical preservatives.

The science: from baking to staling
Before we get into solutions for the best way to store bread, we should first briefly talk about stale bread: no one’s favorite, unless we’re making French toast, ribollita, bruschetta, or bread crumbs and croutons, of course. But what happens behind the scenes when the dough is baked, left to cool, and on its way to staleness?
As bread dough is baking, the starch granules (which wheat flour primarily consists of) gelatinize. When they gelatinize, they swell from the moisture in the dough, and their rigid, crystalline structure transforms into a non-crystalline (amorphous) form (very similar to when you make a tangzhong or yudane). When the baked loaf is removed from the oven, it cools. From this point on, the crust and crumb begin to harden over time as starch—and most significantly, amylopectin(J.A. Gray and J.N. Bemiller 2003, Bread Staling: Molecular Basis and Control, p. 3) undergo retrogradation, a re-ordering into a crystalline form.
This retrogradation means a hardening of the crumb as moisture moves out from the starches, eventually taking a loaf of bread from soft and pliable to excessively hard and what we identify as stale. Other processes begin to take effect with the crust as well, as it begins drawing moisture out from the crumb into itself, making the crust rugged and leathery.
In general, staling can be reversed somewhat by reheating the bread to a sufficient temperature (140°F / 60°C), but it can’t completely reverse the effects of staling, and the results from heating will only last a short time. You can see this directly in your kitchen: reheat a slice of stale bread in the oven or toaster, and you’ll think you almost have a slice of fresh-baked bread on your plate—for a few minutes at least.
It’s also worth knowing that doughs containing some percentage of fats (lipids) will typically last longer before staling. The fat present in the dough slows the re-crystallization of the starch granules and reduces the movement of moisture between starches and proteins (de-gelatinization), which causes the crumb to harden.
Staling vs. drying
Note that staling and drying are distinctly different processes at work. Staling can result in a firm, hard loaf of bread but is not necessarily due to the evaporation or loss of water from the crumb and crust; it’s more about the retrogradation process described above. However, drying can also occur and can especially be a problem in arid climates (like where I live in New Mexico).
To avoid excessive drying, it’s important to ensure bread is stored properly (cut-side-down, using a breadbox, etc.—more on this soon, I promise) so it doesn’t prematurely dry to a bone.
Ok, enough science. So how do we put this into practice?
The practice: keep bread fresh longer
The following steps are loosely how I take a loaf of my baked bread from the oven to cooling, cutting, and long-term storage.
But first, are you using the best bread knife for sourdough bread? If you don’t have a good knife, you’ll squash your loaf instead of cutting it cleanly. If you have a sharp, hefty knife, read on!
After baking sourdough bread, wait to slice until it’s cooled
Slicing a warm loaf of bread too early will result in a gummy and sticky interior.
First and foremost, it’s always best to let fresh bread rest until it’s cool and fully set before slicing. I know, fresh-from-the-oven is hard to resist, but your bread will not only taste better it will keep longer if you wait to cut it for at least an hour—I prefer two or more.
The reason goes back to the science behind all this: starch retrogradation is happening right as the loaf is pulled from the oven, but it hasn’t progressed far enough to firm up and set the interior appropriately. Slicing a warm loaf of bread too early will result in a gummy and sticky interior.
Further, recipes containing a high percentage of whole grains, especially a 100% whole grain loaf (typically highly hydrated), or loaves that are larger (like my 1.5 kg miche), benefit from an even longer rest. In fact, I find their flavor improves 2-3 days after baking with these types of bread.
With rye bread, especially when rye is in a high percentage, it’s common to let the bread rest, wrapped in baker’s linen or a towel, for one or two days before cutting.
After the baked loaf is cooled and fully set, it’s time to cut.
Store bread cut-side down
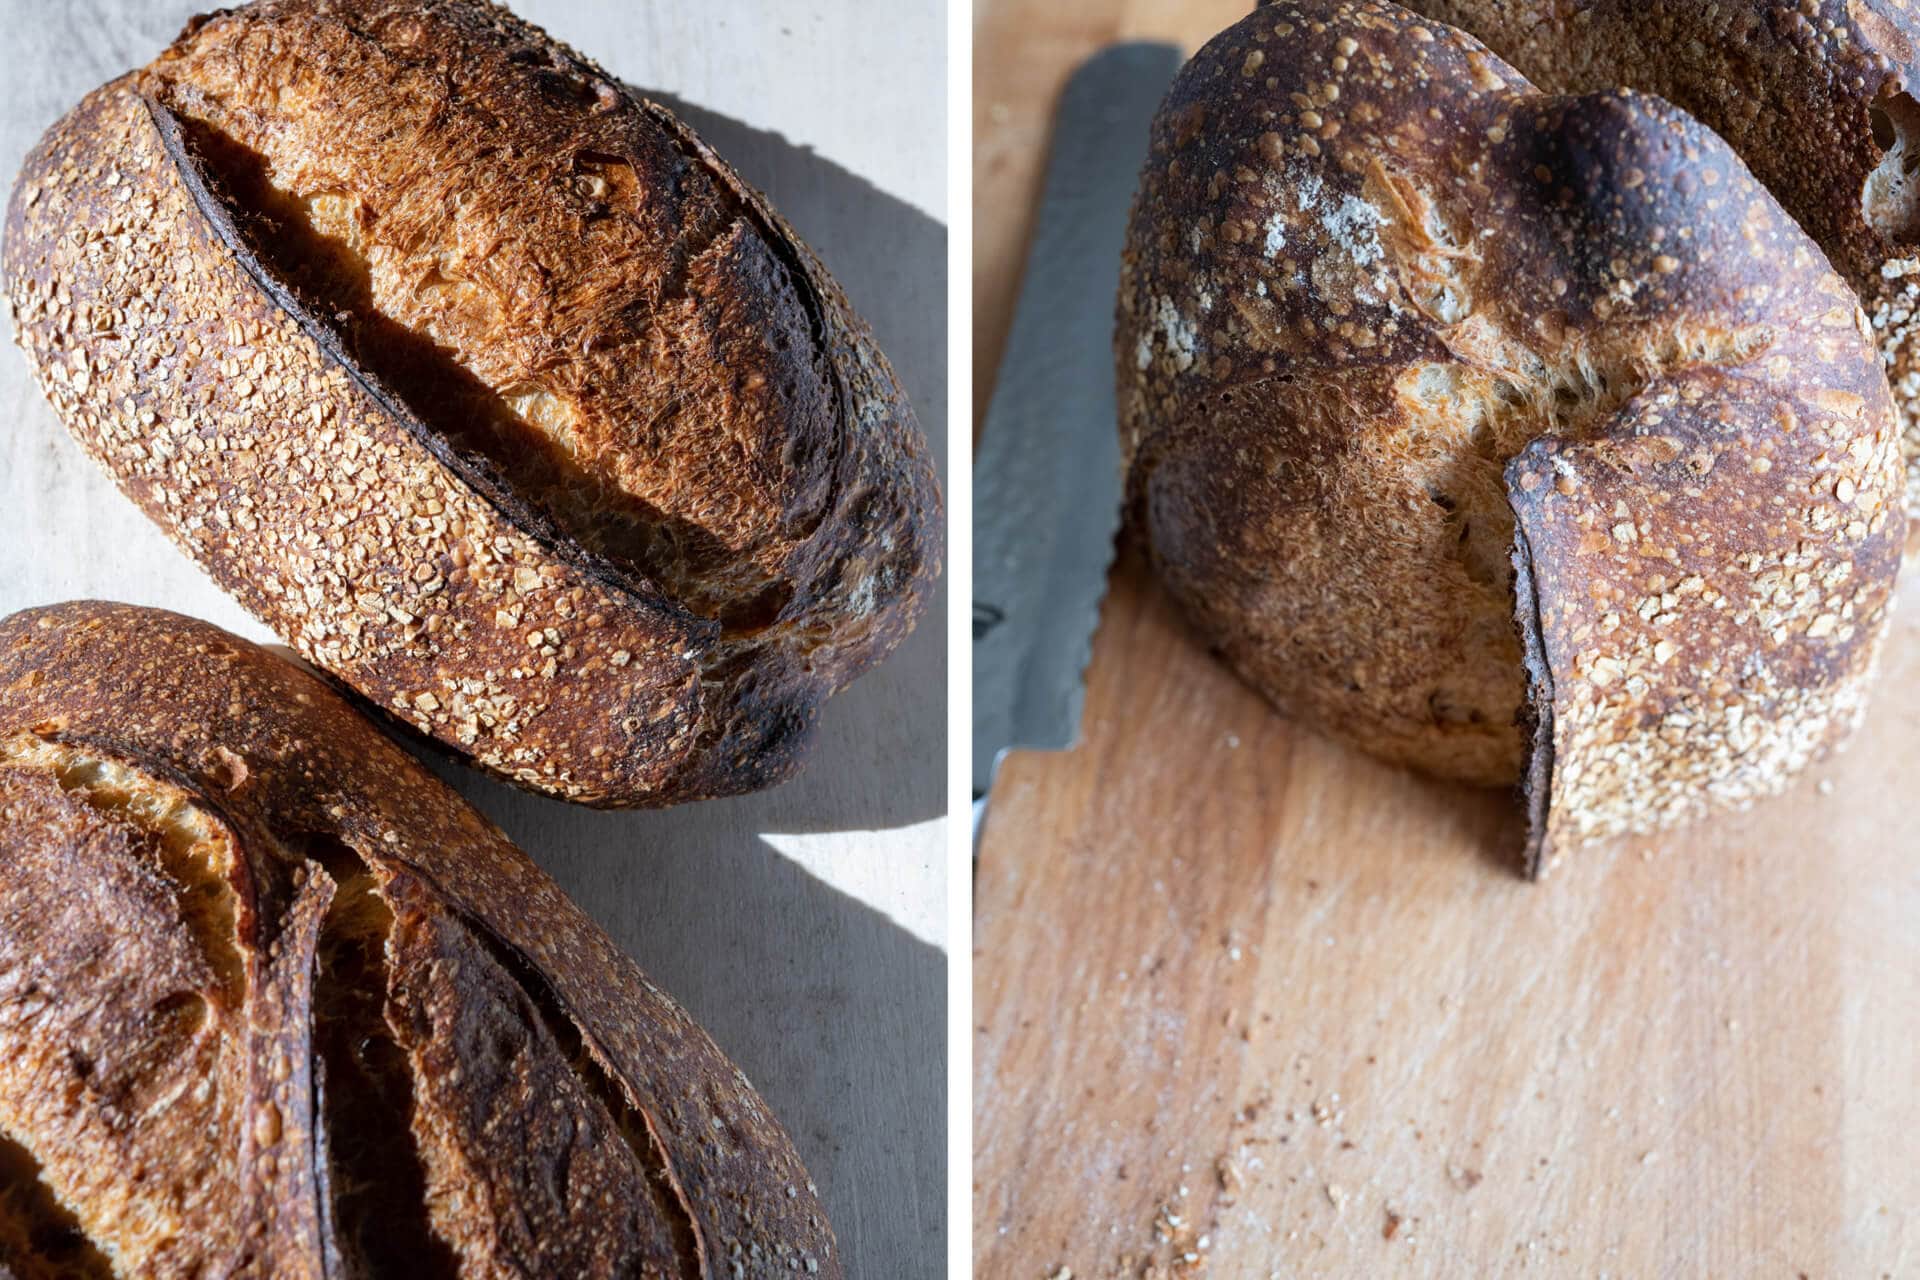
Once cool, I cut the loaf directly down the middle creating two halves (as seen above, right). This way, after slicing from the middle, I can turn the halves so the crumb faces the cutting board. This completely surrounds the interior with the (relatively) thick crust, keeping it from drying out excessively. The crust is a natural bag of sorts, keeping moisture in and dryness out.
I can typically keep my bread like this for a day or two (remember, it’s very dry here) on my cutting board, which I move to a breadbox.
Note that if you live in a very high-humidity environment, you may not be able to keep your sliced bread on the counter for as long; you might have to move it to the refrigerator to prevent molding.
Use a breadbox
This is as simple as it gets: keep your cooled loaves, cut or uncut, in a bread box, and let the box do its job. I like this svelte stainless steel breadbox (seen below) which is well-made and has lasted for years in my kitchen.
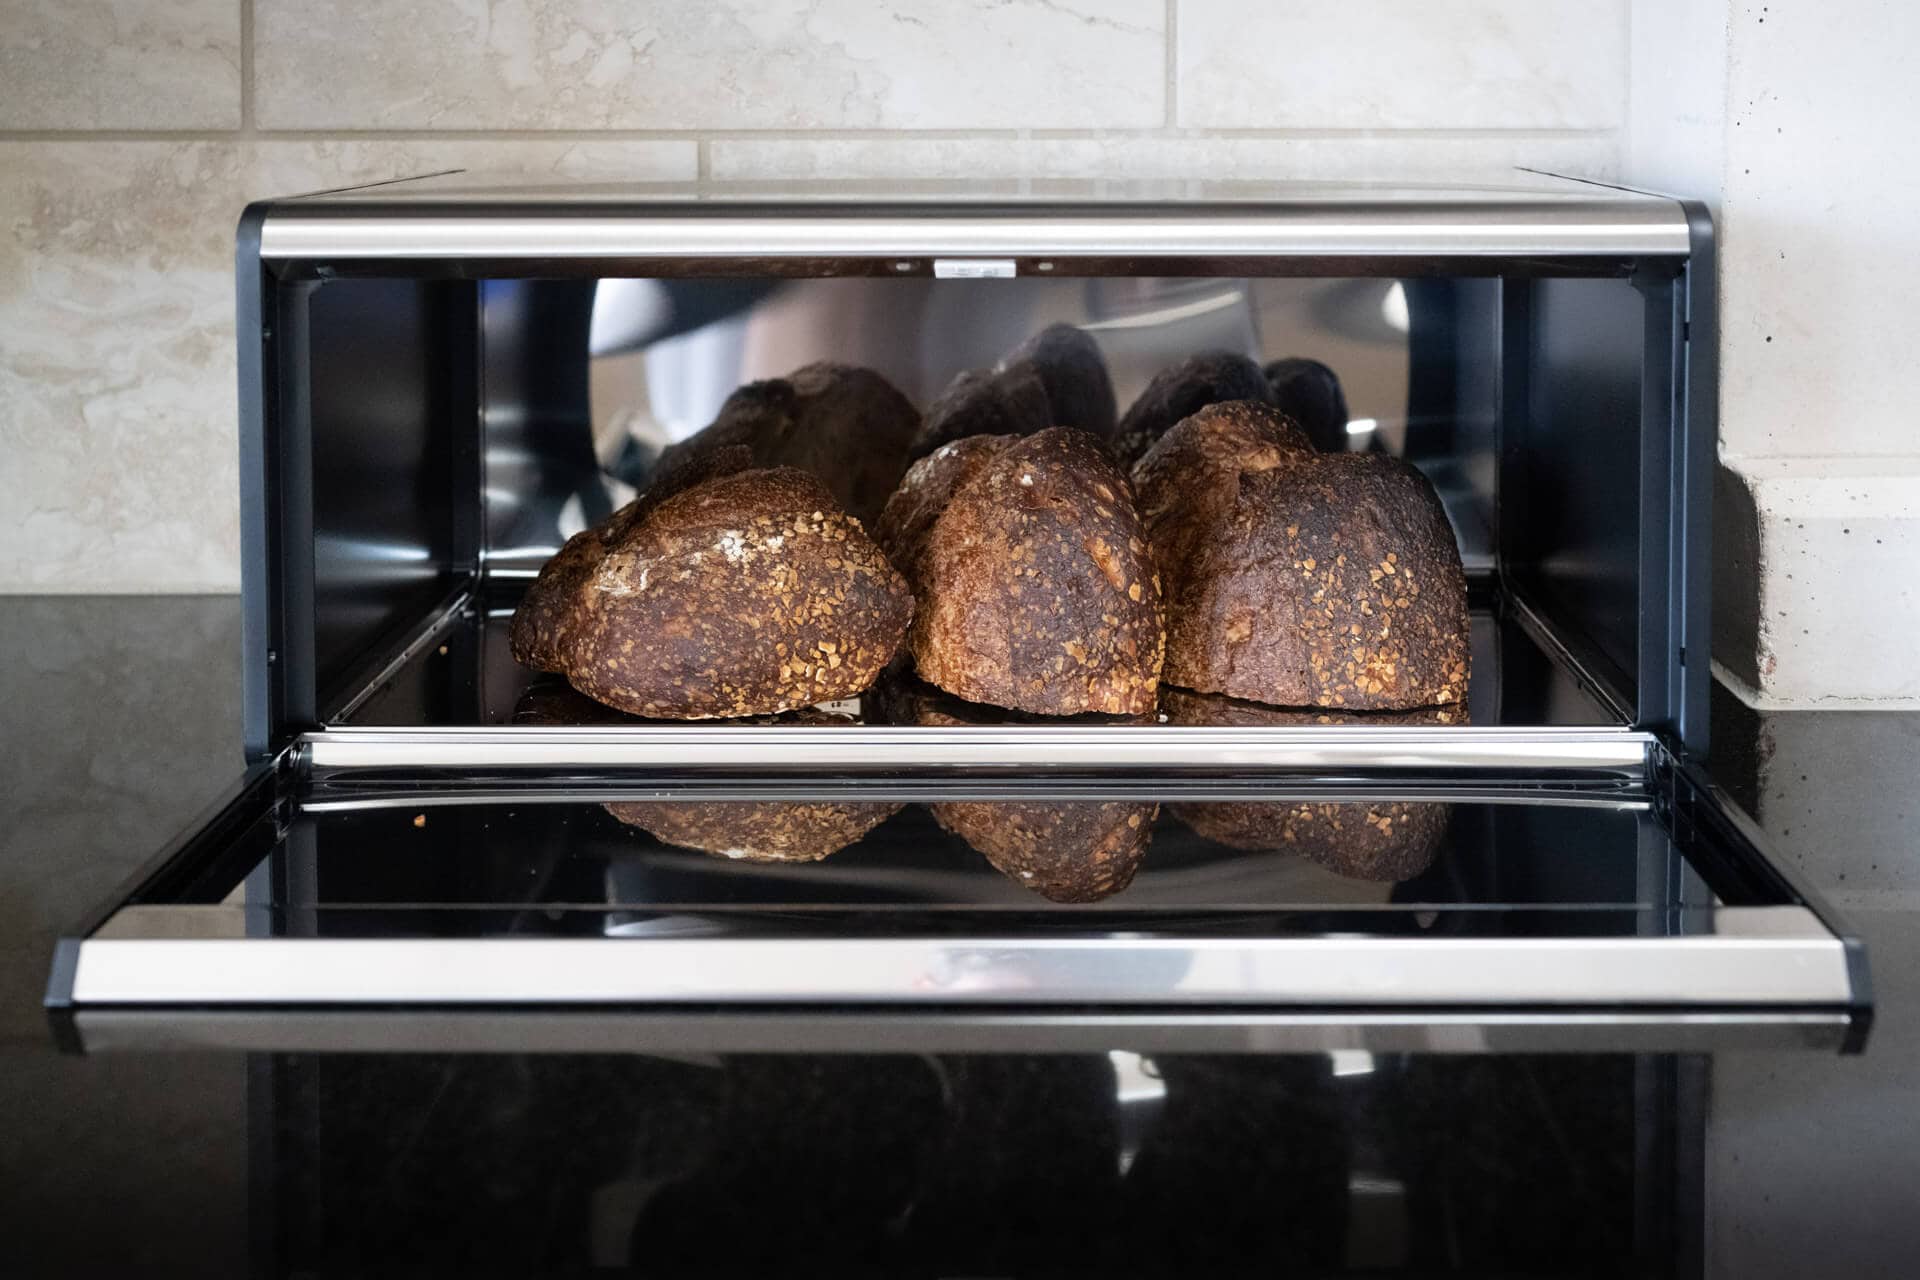
I like that it’s rather large (H: 7.3″ x W: 18.2″ x D: 9.8″), and I can easily store 2-3 whole loaves of bread in there at a time. And because I bake so often at home, I almost always have at least one loaf of bread in the box, ready to be sliced and used straight away.
Use reusable wrap like Bee’s Wrap
Another option is to use a reusable wrap like this bread-sized Bee’s Wrap. This is one of my favorite ways to wrap up longer loaves (like demi-baguettes), and the wrap works extremely well at keeping loaves soft but not too soft.
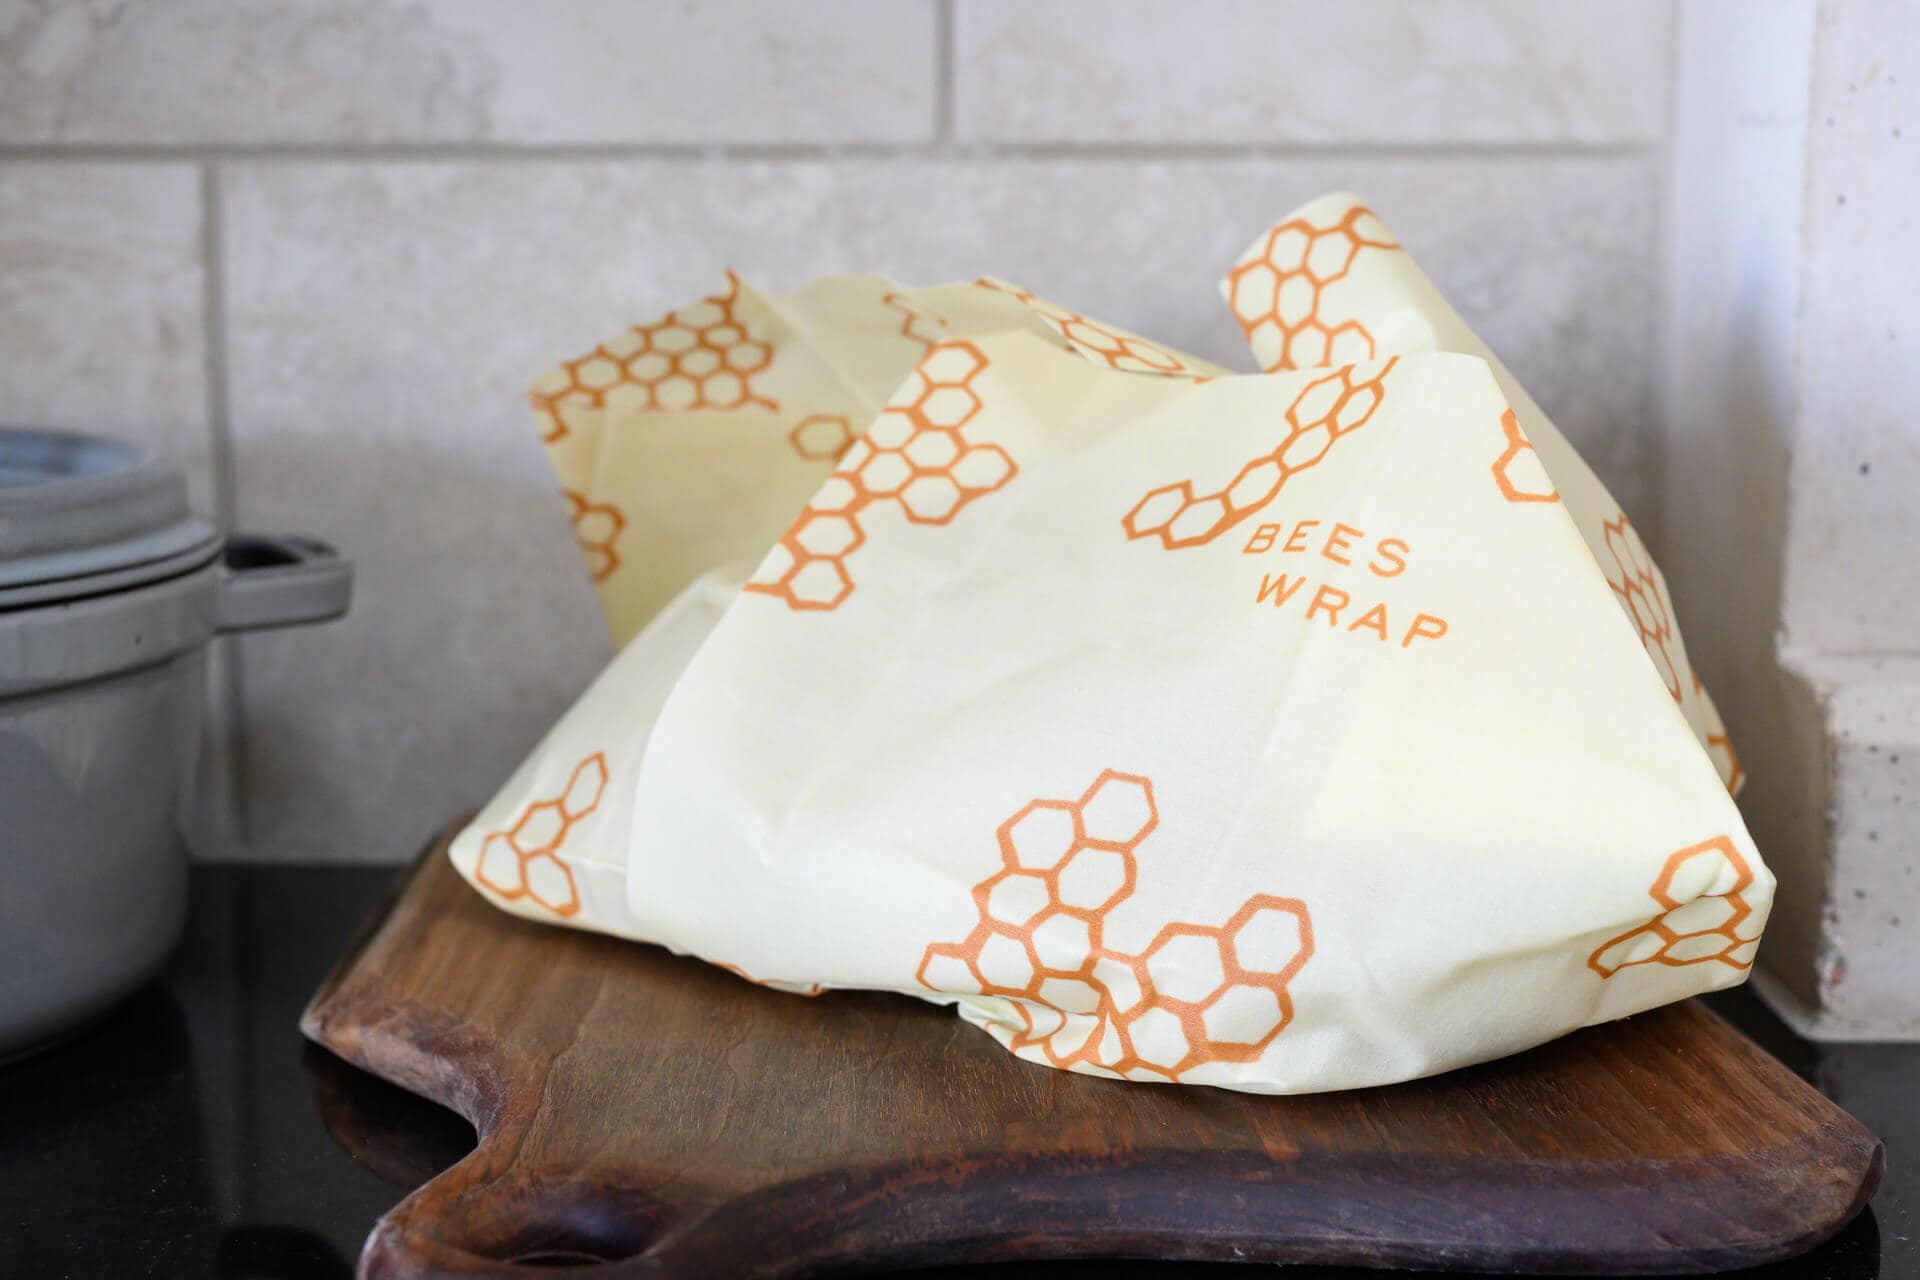
Simply place your bread in the wrap and cover it tightly. The beeswax-lined wrap will deform and wrap around all the nooks and crannies of your loaf as the warmth of your hands molds it to fit.
Paper bags, kitchen towels, and plastic bags
Plain paper bags and kitchen towels also work very well to keep the bread from drying excessively. And while many sources say never to use a plastic bag, sometimes it might be necessary, especially if your climate demands it. In the dead of winter here in New Mexico, humidity levels drop so low my lower-hydration sourdough bread almost has to be placed in a sealed plastic bag to retain some semblance of a soft texture. In this rare case, a sealed plastic bag is necessary and works well.
Don’t place bread in the refrigerator
Finally, and this is very important, don’t store bread in the refrigerator. It might seem counterintuitive since the refrigerator is seen as a food-preserver, but placing your homebaked loaf of bread in the refrigerator will cause it to be stale faster than if it’s kept at room temperature.
The practice: freeze bread for long-term storage
For long-term storage, a freezer is a handy option. The retrogradation process can be mostly halted by subjecting bread to very low temperatures, preventing moisture migration out of starches and their subsequent recrystallization. This means a cooled loaf can be frozen whole or sliced completely, and then the slices are frozen independently (my preference).
First, let’s look at freezing slices.
Freezing Slices
In practice, freezing individual slices of bread is a great way to get the best of both worlds: conveniently sliced bread that can be reheated at a moment’s notice that also keeps for a very long time in the freezer (I’ve done a month or so, but this could probably go longer). When reheated, the bread comes out like freshly baked bread that’s perfectly toasted.

Years ago, when I first started baking bread, I searched for the perfect toaster. After going through a few, I found the Breville Smart Toaster, which is the best toaster I’ve found: not only does it take extra long slices (like the ones from sourdough boules or batards), but it has a frozen function that works perfectly to reheat a frozen slice of bread to just the right amount. It’s expensive for a toaster, but the amount of bread I go through in my kitchen justifies the expense.
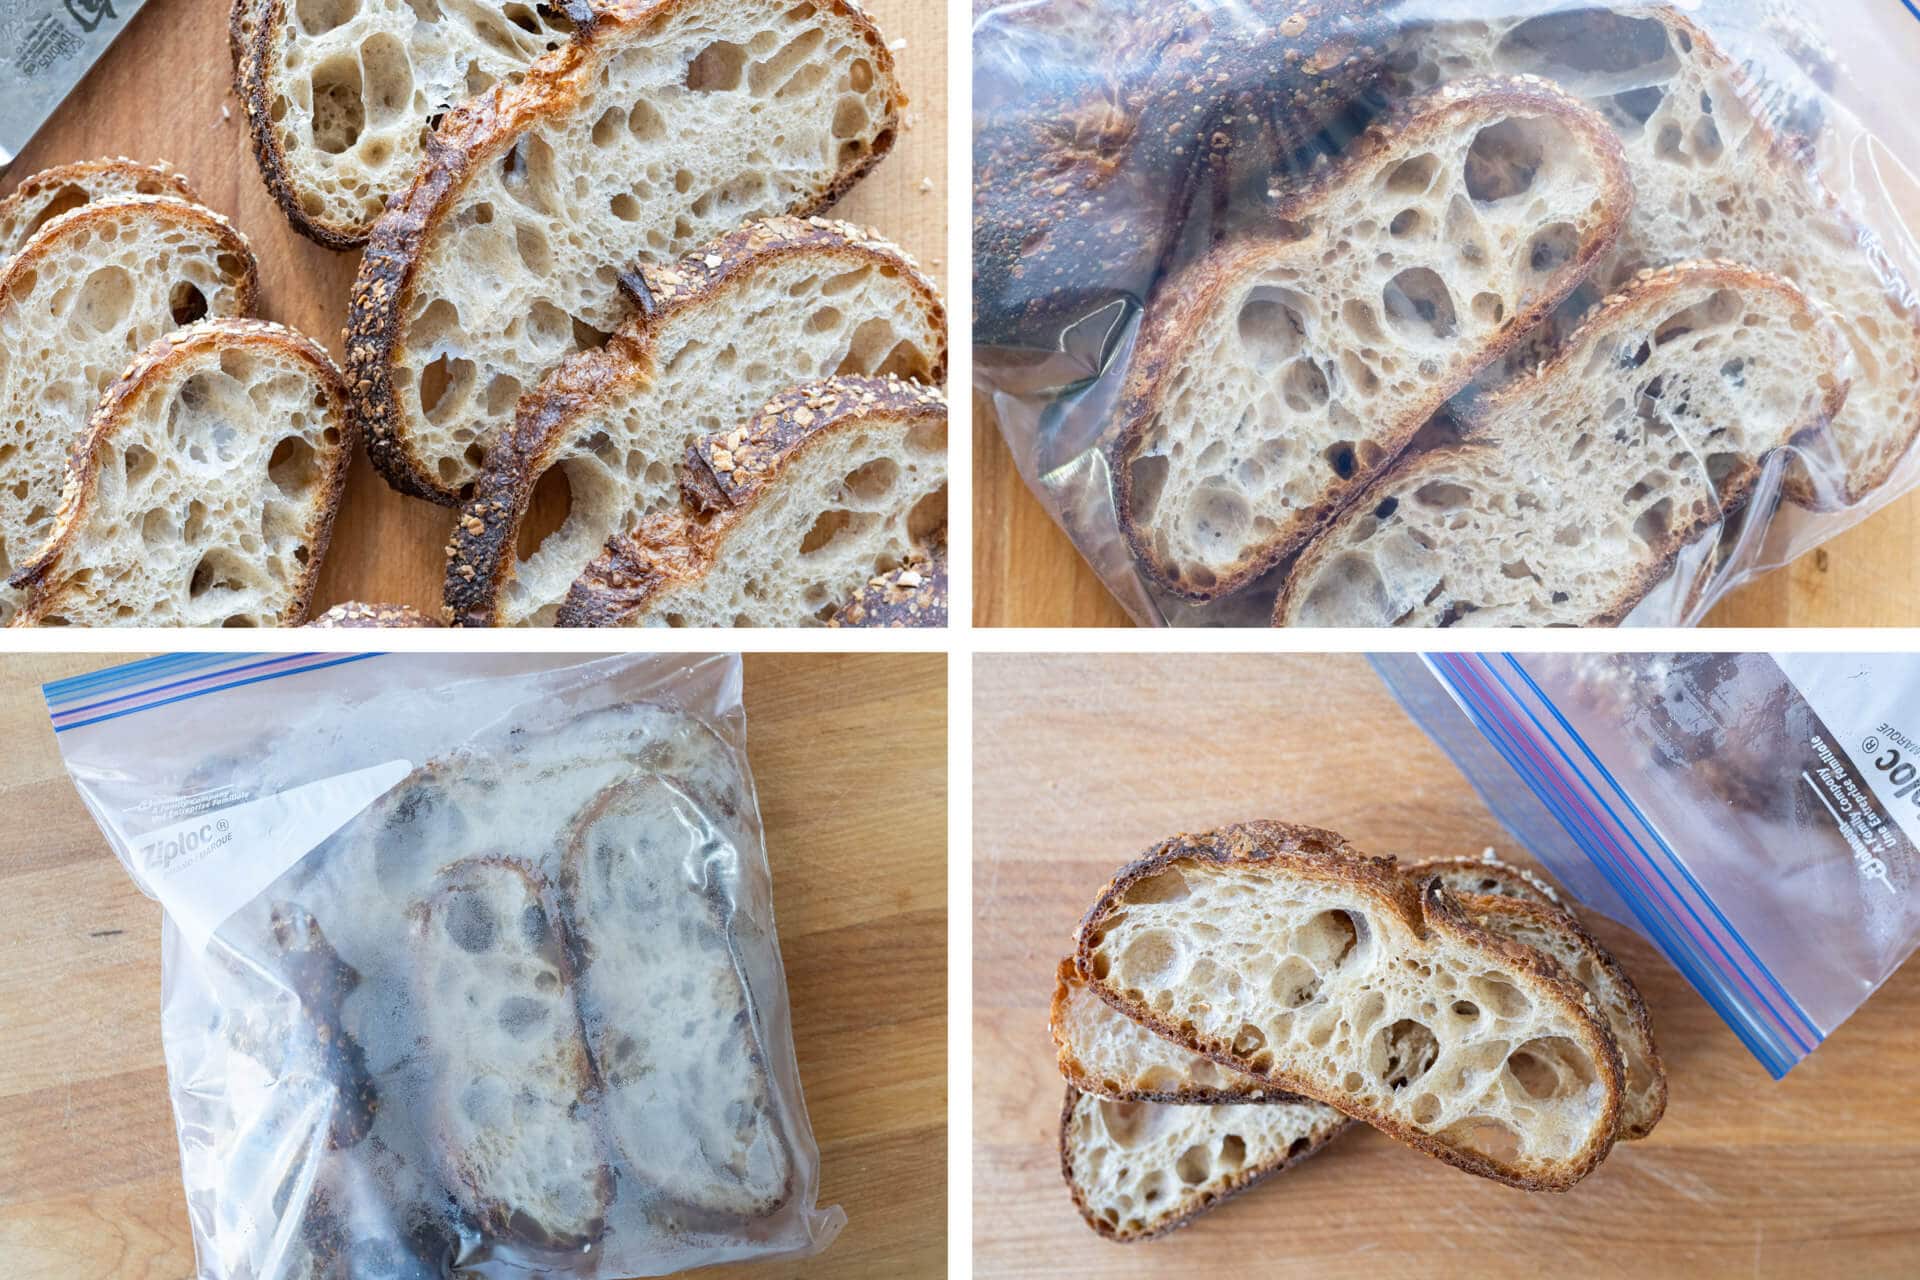
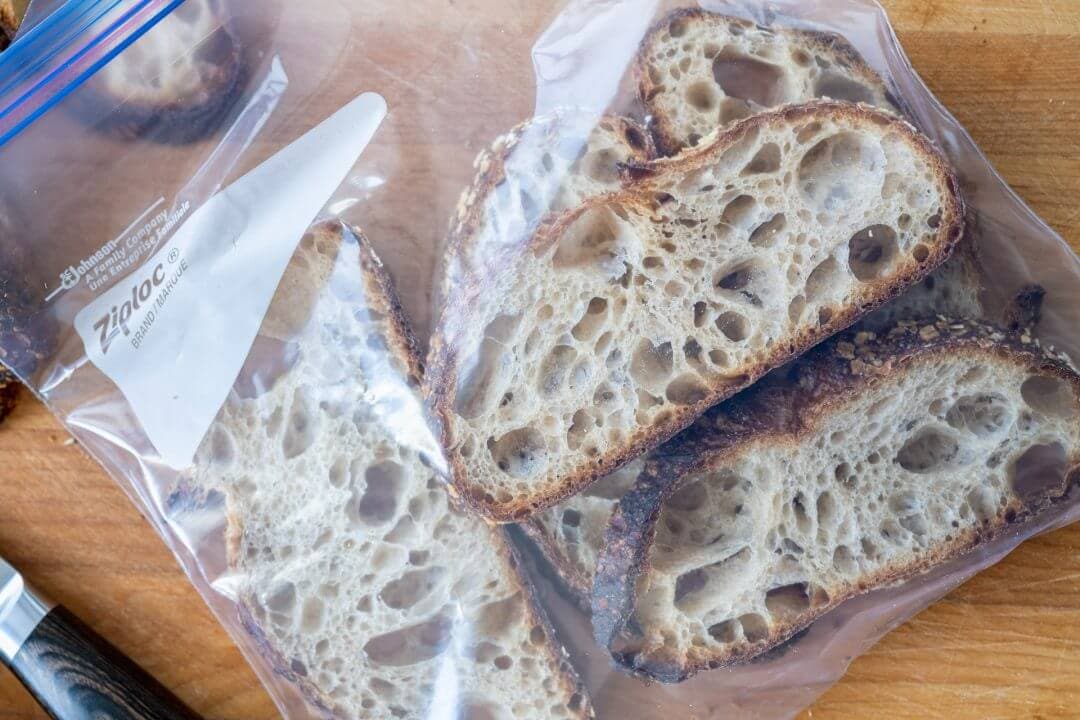
The process is simple: once your loaf of bread is cooled thoroughly, slice it completely from end to end. Then place the pieces in a freezer Ziploc bag, one on top of the other, in an alternating pattern (place a layer on the bottom from side to side, then place slices on top of the bottom layer turned 90°) and press out as much air as possible. Then, place the bag in the freezer until the slices are frozen. At this point, take one or two slices out and reheat them in the toaster to your liking. The plastic freezer bag can be used many times without discarding.
Freezing whole loaves
This method uses a little more material to work, but it’s a great option if you want an entire loaf of bread for some use in the future. A good example might be if you bake two loaves at one time, plan to eat one this coming week, but want the second loaf for the week or two after.
Once the baked bread is fully cool, wrap it in plastic. Then, take the wrapped loaf and put it into a freezer Ziplock bag. Press out as much air as possible, then stick the bag in the freezer. When you want to eat the bread, take it out to defrost in the fridge for a few days or on the counter overnight. Once it thaws completely, store it on the counter via one of the methods described above.
What next?
I’d love to hear your best way to store bread and keep your sourdough fresh. I know here in my kitchen, with the various options for storing and using bread, there’s hardly ever a loaf wasted—and I bake a lot of bread!
For other practical baking guides, see how to store a sourdough starter (for short and long term) and my guide to how to store flour to keep it fresh.
If you’re looking for a recipe to start baking sourdough (and freezing!), check out my simple weekday bread—a delicious bread that couldn’t be easier.
Happy baking!


188 Comments
Hi, the bread in the pictures on this page look delightful, and such an open crumb! Which recipe did you use to achieve them?
Thank you! It’s a recipe I’ve been working on but not posted here yet. Almost there with it!
Sadly, the brod & taylor proofer is NLA. And since it has died, no one else has stepped up to fill the gap. I generally keep my starter on my fridge toward the back in the winter time. When the heat rises and my fridge top gets warm, the back is slightly cooler. This seems to keep my starter happy.
The brod & Taylor is still available: I’ve just purchased one and it arrived today ☺️
They should be available now!
What if you live in a place with high humidity? The humidity in my country is typically 80% or higher. Things like bread get mouldy very fast.
You live in the opposite climate as me, where I want to keep things moist, you do not. Do the best you can to keep it dry, leaving out on the counter is probably fine where you live! There are also food-based desiccants that might help there.
Thanks for the post! I’ll share what might have been a freak accident, but it’s worth mentioning anyway. I’d always used the cut-side down method on a wooden cutting board for storage and never thought too much of it because it worked great.
Until the morning I woke up to a cracked cutting board.
I usually used my big edge grain board, but that night I brought the loaf to the table on a smaller end-grain board and just left it overnight. Turns out end-grain cutting boards can absorb quite a bit of moisture from high hydration loaves. So, now I always make sure I put a thin plastic cutting board between the bread and end-grain cutting boards.
Wow, Zach! I’ve never heard of this happening nor would I have thought about it. Thanks for the heads up on this one (and sorry to hear about your board)!
Storing bread…lol.
I bake 2 loaves from these recipes and I always post a pic on Viber to my nephews and nieces and great nephews and nieces and it’s like: Great Uncle Lee and Uncle Lee can I have some? Gone in a hour or so, knock at the door…slice..butter, jam, avocado tomato soft cheese, toasted…end result is it’s gone before you can say How do you store it. Haha. Thanks for the great resource you’ve got here. I’m in the sub tropics in Australia and humidity and warm temps can make it a bit hard sometimes to get a loaf right. Also, thank you for the metrics in your site, why the US doesn’t join the rest of the world in this is beyond me. I grew up in inches and pounds and miles and metrics has just been the greatest thing. Thx again for your site and I hope you stay safe in the current crisis.
Hah! Yes, that’s typically the case here as well, my kids will go through an entire loaf before I even know what happened. Thanks for the comments, Lee, and wishing you all good health!
Maybe a fun thing to mention. We start using a breadbox witch is about 60 years old at least. It was bought by my wives parents when the where just married. I hope it stil does his thing 😀
That’s awesome! It’s nice to have something with a little sentimental value as well — I’m sure it’ll work just fine 🙂
When is a bread cooled enough? Can I measure it with thermometer?
Just feel it with your hands: once it’s cool enough to hold and is at room temperature it should be fine. Usually for me that’s about 2 hours after baking, depending on the recipe.
Thank you for all that you do. A few years ago started baking from your tutorials and now I’m baking some amazing loaves of two or three days a week.
I wanted to know what recipe you used for the bread in the pictures? The crumb on those slices look amazing!
Glad to hear that, Waliana! The bread pictured here was my best sourdough recipe — a challenging recipe with the high hydration, but delicious nonetheless. Happy baking!
I’m using t
Thanks so much, Waliana 🙂
this is a bit not relevant question but here it goes : I am assuming you buy flour in bulk, how do you store it safely to avoid going it rancid? I live in Houston, TX and as you know it gets pretty hot around here which speeds up the process of food spoilage.
Hey there! I keep my whole grain flour in a cool place i my pantry, as dry as possible (here in NM it’s very dry so I don’t have an issue with moisture). Additionally, if it’s whole grain flour I’m not going to get to for a while I’ll keep in my freezer or refrigerator to avoid spoilage.
Thanks, Maurizio! 🙂 I have kept some of the whole grain flours in refrigerator and some whole berries in freezer.
Thanks for another great article. I totally agree that whole grain bread tastes best 1-2 days after baking, the taste kind of develops, and for 100% full grain rye – I don’t even dare cut it before 2 full days of rest, otherwise it’s gummy. For storage I mostly use a Brabantia steel bread box, and if I’m going to be away and need longer storage – the box + paper bag for the loafs, works pretty good. Cheers.
Right on Ivo, sounds like we’re two peas in a pod with all of that. Agreed regarding the wg bread — and a miche, same thing! Hope all is well and thanks for the kind words 🙂
Great article.
Did you find any difference in quality between freezing whole loaves vs slices? I always freeze my loaves as whole halves, never thought of slicing it. But I’d be afraid that the bread would dry out quicker and get freezer burn when freezing sliced. Any thoughts on that?
Thanks, Benjamin! Honestly, the convenience of having frozen slices pretty much beats out any perceptible loss in quality. However, my gut says freezing a whole loaf intact would definitely be the better practice for longer term storage and if you were going for the best possible quality.
When I freeze a sliced loaf I “reassemble” the loaf after slicing, then freeze as a whole loaf. The slices stick together but when I want a slice a knife tip easily prys apart. If I want to toast, I microwave first.
Great idea and it likely saves space this way. I find I never get sticking if the loaf is aired out just a bit after slicing and then stacking, but nothing a knife can’t fix as you said. Thanks for the info, Wouter!
Thanks for this useful article! I have always wondered what is special about a ‘bread box’? Can I use any form of box? You have a metal one so I can see that it is not wood-specific. And there’s no mention of tupperware boxes, are these a no no?
You’re welcome, Alison! I think the key for breadboxes is they let some, but not all, air in but they’re not completely sealed either. So yes, you could theoretically use anything with just a bit of porosity but not too much.
Another good article. I freeze whole loaves in vacuum FoodSaver bags. After thawing(before opening bag) it’s close to fresh baked. I really like this bread box, not as large as the one you recommend but it’s the last one i’ll need. https://www.crateandbarrel.com/carter-wood-bread-box/s666667
Thank you! It seems FoodSaver bags are a good option, as others have mentioned, I’ll have to look into that. And that is a nice breadbox, simple and gets the job done. We use our so much I’m not sure how I could go on without one. Thanks for those suggestions and happy baking!
I love you man. Not a mundane post at all. In fact, you’ve solved many of the questions I’ve been wrestling with for years now, especially the “never store bread in the fridge” principle. I’ve always been tempted to put extra bread in the fridge but you’re absolutely right in that it seems to accelerate how quickly staleness sets in.
I always bake in 2s so I have a loaf to eat and a loaf for later, which stores nicely in the deep freezer in a freezer bag. In I pinch, I’ve revived frozen loaves by microwaving for 6-9 minutes (depending on size) then tossing in the oven set to warm for a few more minutes to deal with any surface sogginess. Cutting into loaves revived thus isn’t too far off from fresh baked!
Ah thanks Ryan, much appreciated — and glad I can help! Yes, the freezer is a miracle worker for bread, it’s pretty surprising how well a loaf can be preserved in there. I like the combination of microwave and then oven, a super fast option. Thanks for those suggestions and happy baking, Ryan!
Great post! I often freeze whole loaves as soon as they are cooled after baking. A great trick for reheating them from frozen (and in a manner that almost replicates a freshly baked loaf) is to use a medium sized turkey roasting bag. I have a couple that I use exclusively for this – just refold after use and tuck them away until next time. Simply exchange the plastic bag the bread was frozen in for the roasting bag and pop in the oven at 325 for 20 minutes or so. Nice crisp crust and soft warm crumb if you like your bread warm from the oven 🙂
What a great idea, Cheri! I would have never thought of this. I’ll pick one of those up next time at the store and give it a try on one of the loaves in my freezer 🙂
Thanks for great tips. I tend to sometimes leave the bread inside a linen towel in my cupboard. But this sometimes causes the crumb to soften very quickly, even when fully cooled, though sometimes not, so Im not sure why but I’ve stopped putting them in the cupboard now. It may succesfully rest in a linen towel on the bench for a while. But mostly I just let it cool and slice it and put in the freezer in a plastic bag as you say, to take out small amounts and toast for a quick and perfect slice of bread yum. I usually lay the slices upon eachother as they were when they was a bread. This works quite well, as long as I make sure its fully cooled and aired out just little after slicing, if not theyll stick to one another and it will be very hard to retrieve just a few slices from the freezer. So I will try to use your method now, of re-arranging the slices in such a way that they will not stick. I just have a bit limited freezer space.
As for toasting I remember someone I used to know, who made wonderful sourdough bread, who had a kind of toaster that made for absolutely the msot delicious sourdough toast. It resembles a kind of toast master, big, wide, flat iron where you lift one side up, and let it down to rest upon the bread. Dont remember what it’s called but Im sure it cost a bit – I will invest in one in the distant future..
I just have one question for you, if you have time to answer, or for anyone else in here:
– I can’t seem to get that nice thick caramelized crust now that I no longer have my Le creuset iron pot for baking… So now I just bake straight in the oven on a steel tray, and though its crisp and tastes wonderful, the crust is just not wht it used to be and what I love so much…. The perfect crust should be no less crunchy than to have most people turn around in the library to see whats going on. My ideal crust is in no way library friendly and thats the way it should be. Though I suppose it’s easier to bring my lunch to the library now with these new loaves. Oh well, if you have any tips I’d love to try them out. I think, perhaps, it helps a lot to have a lot of whole grain or at least rye flour, and to leaven in the refridgerator. Also perhaps I could turn down the heat a bit (lately Ive done “straight in the oven” (with extra moisture/damp) on around 240 C. Next try, I will make sure to use mostly rye, rise the last period the fridge, and lower the temperature so it can stay a bit longer before burning and hopefully have a deeper crust. I usually also wet the top of the loaf before it goes in the oven, to have a more crispy crust and to help it rise max before crust hardens and closes the loaf, but I’m not sure whether this helps or hinders the depth of a crust. Oh and I should say, lately Ive used very high hydration, perhaps it is so that a firmer dough will aid in deepening the crust
Thank you for a wonderful blog!
Thanks for sharing your methods, Ingi! I wonder if that large “toast master” is like a panini grill? I’ve see some that can be used on a stove top but there also some that are electric. They make awesome sandwiches.
If you want a thicker, more substantial crust you might try lowering the baking temperature but then bake it for longer. This way, more heat permeates into the dough to thicken more than just the external layer. I do find that baking in a Dutch oven you’ll get a thicker crust! You could also try leaving the loaf in the oven for 5 more minutes at the end of the bake and crack the oven door a bit so heat can escape. This should also add a little more heft to the crust as your oven will turn on for that last bit and keep firing heat. Let me know if that works and happy baking!
The ability to freeze sourdough bread is a gift from God! It is just as good as fresh baked when handled properly and thawed correctly. I use the “Defrost” setting on my microwave and set “01” per slice, 02 for 2 slices…
Here is a post that may be of interest to those that freeze their bread. It stops the slices from sticking together. No more butter knife needed to pry the slices apart.
http://www.thefreshloaf.com/node/62257/tip-frozen-bread-individual-slices
Dan Ayo
So true, Dan! Wow, I had totally missed your post over at TFL, looks like you do the same as me (I have several loaves in the freezer right now 😀). Great suggestion using the freezer rack but I’ve actually never had a problem with the bread slices sticking in all my years of freezing. I’d imagine some do, though, so that’s a great approach!
It may be the way you stack them. I have limited freezer space so the slices were bagged in the same fashion they would be if they were on the store shelf.
Maurizio, I can’t express how much you bless the bakers that visit your site! You are highly respected on The Fresh Loaf. Your write ups are always thorough and super informative. You are on the cutting edge and we are inspired by your post. The bakes you post on The Perfect Loaf are commonly discussed on our forum.
Lead us on…
Danny
I really appreciate the kind words, Dan, truly. Thank you! But really, as a community of online bakers it’s great to exchange ideas and just keep pushing the craft further and further. Stay well and happy baking!
It’s a great article Maurizio. Lots of good information there. My only thought is regarding storing bread in the fridge. I’ve had great results keeping it there and even better for long term than on the counter top. Once it’s about 2 days old and beyond freshness for a non-toasted sandwich, I use it more for toast so storing it in the fridge extends the life by quite a few day vs. holding it on the counter in a plastic bag. (No room for a bread box here).
Vic Yepello, Palm Springs, CA
Thank you, Vic! That’s an interesting take on using the fridge — I guess I could see putting it in there once it’s past fresh, then using the toaster to reheat it as you would anyway. It would “reverse” some of the staling that would occur on the counter anyway. I’d have to do a side-by-side test to judge the differences (something for the future!). Thanks for sharing that idea and happy baking!
I don’t have a bread box (yet!) but I do use some of the methods you’ve described. When freezing slices, I’ve found that cutting waxed paper and placing the pieces between the slices better protects from freezer burn. It also keeps them from sticking together and makes it easy to remove as many slices as needed at a time. Thanks for all the great postings that have greatly helped me bake beautiful and tasty breads! Homemade bread is a wonderful way to share love and comfort in stressful times. Everyone stay well.
Great idea using wax paper, and you could reuse the paper and bag over and over as well. I’ll try this next time I bake. You’re very welcome and I’m happy to help. Baking is a good way to not only nourish, but also get our minds off the world at large — even if just for a little while. Be well and happy baking!
Thank you for this informative article. I too live in New Mexico near Taos. I freeze half of my loaf after cooling…and will start slicing as you suggest before freezing. I store my remaining half in my micaceous clay cloche that I baked it in. The cloche becomes my bread box as well as my baker.
Happy baking! PattyMara
You’re welcome, Patty. Great to hear from a fellow New Mexican! I love the double use of the cloche, great idea. I’d imaging it might also provide for the perfect environment for the bread, it’s probably semi-porous naturally! Stay well and happy baking 🙂
This is a great post subject Maurizio, especially at this point in time when everyone is hoarding and stashing food due to the pandemic. Extension of food life is one of the things that I’m focusing on at home with my valuable food purchases and creations — freezing, dehydrating, fermenting, etc. Right about now I’m wishing that I’d gotten around to adding a second refrigerator/freezer to my garage! Your scientifically-backed explanations of the how and why of proper bread storage are extremely helpful. Thanks very much for taking the time to write this in a worldwide time of need for this kind of useful information!
You’re welcome, Susan! Yes, I figured this would be a perfect time for this post (I started writing it long ago!). I’ve been baking the past few days and freezing loaves to have backup — we eat a lot of bread! I’m now thanking myself for making so many preserves this past summer with the fruit from my parent’s trees and my own. Usually it’s just a taste of summer in the winter, but this time it means a little more 🙂 Well, thank you so much for the note and stay well!
Do you have a preference between the counter and the fridge for defrosting your frozen bread? In the article you mentioned to never store your bread in the fridge because it will cause it to go stale faster, but in your defrosting methods you list putting it in the fridge as an option. Just curious which method you had better luck with? (Fridge vs Countertop)
Love your articles and always have great information! Keep up the excellent work!
Thanks, Tony! When defrosting I sometimes go from freezer to fridge but then take it out once it’s soft and mostly thawed, then to finish on the counter. But you can certainly go straight from freezer to counter, I do this often as well. In practice, I almost always slice my bread fully and freeze it that way instead of freezing a whole loaf.
Happy baking!
Thanks for this post! It’s very interesting to read.
I always store my sourdough loaves in one particular way for long term storage. Firstly, I always bake two loaves at once, and my husband and I generally only eat a quarter of a loaf at a time. So rarely do I find myself with a cut loaf crumb side down, though when I have, it seems to last well for at least 2-3 days, similar to what you said (I do live in a much more humid environment, in San Francisco).
For the long term storage, I wait for my loaves to cool (generally waiting anywhere from 6-24 hours), cut them into quarters, slicethe quarters, wrap them in foil, and then store in freezer ziploc bags in my freezer. When I’m ready for some bread, I will bake straight from the freezer (in the foil) for about 40 min on 450 degrees in my toaster oven. It works like a charm!
I have kept bread frozen in this way for on the order of 2-3 months and have never seen any serious degradation in the quality of the bread once taken out and reheated to warm, crusty sourdough.
I’m interested to hear what others have to say, also!
Oh and, I should say… Lately I’ve used very high hydration, mostly for buns but also bread. It might be that a lower hydration/ firmer dough will aid in thickening the crust?
You’re welcome, Laura! Glad you found it informative. Thanks for sharing your methods, great ideas as well — especially the foil! Straight from freezer to oven, can’t beat that. Slicing into quarters might also be a great method for super large loaves like a miche or anything greater than 1.2 kg or so (sometimes I bake a huge 1.5 kg batard as well).
Thanks again for sharing, Laura, and happy baking 🙂
HOLEY SOURDOUGH, BATMAN!
As usual, a very informative article!
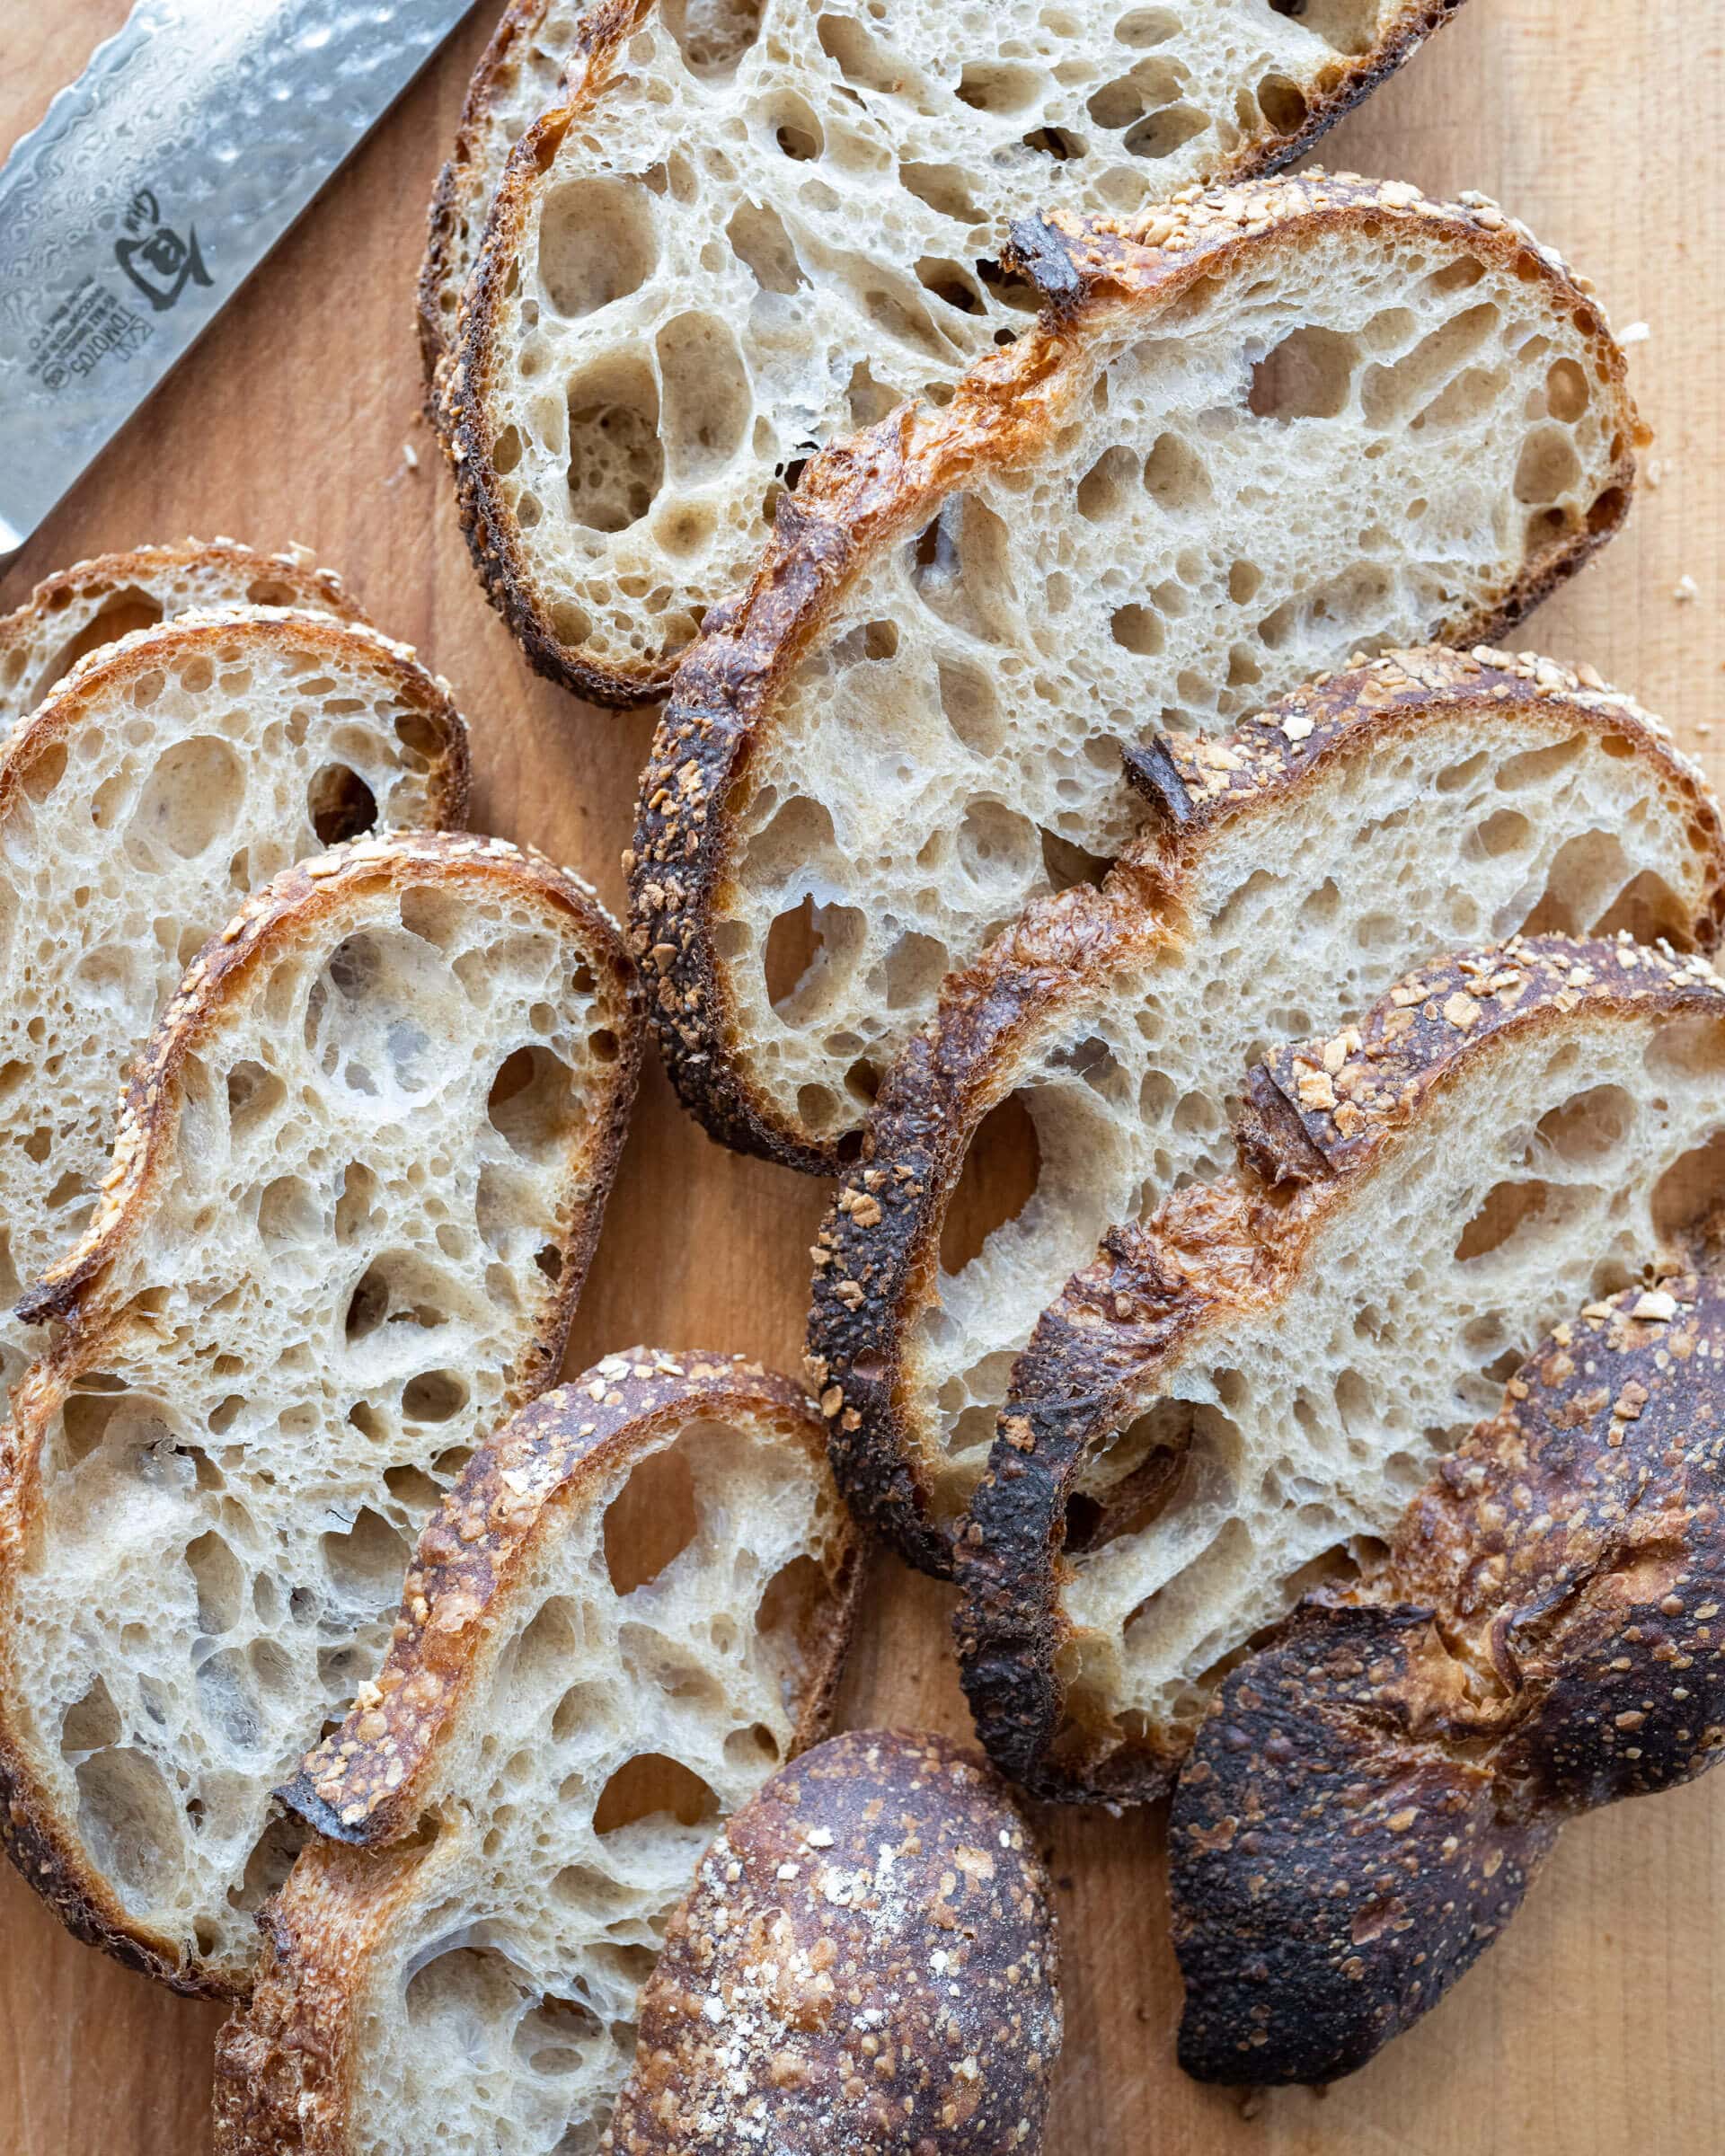
Apologize for tangenting off topic here, but my question revolves around the “bread models” you hired for this photo shoot: which of your recipes will result in boules with that kind of airy / hole-filled texture? I’m generally happy with my bread, but have never been able to achieve that kind of result, even using high hydration recipes. Is there one of your recipes that will esp result in holy / holey sourdough?
Hey, Ariel! The bread baked here was loosely following my best sourdough recipe, which is a rather high hydration (this isn’t a pre-requisite for an open crumb, though!).
Unfortunately there isn’t a single thing that leads to a more open interior in a baked loaf of bread. First, the flour used is very important, it needs to be strong enough (protein) and have the proper gluten properties to trap the gasses produced during fermentation. For example, no matter how hard you try with rye flour, the gluten properties in the grain just won’t lead to an open interior.
From there, a very strong and well-fed starter is important — it all begins there. Fermentation in general is so critical, it’s worth spending some time really stepping back to look at how your starter is performing and how well-fermented your dough is during bulk fermentation and the final proof. Without strong fermentation your loaf will never rise to its full potential.
Sufficient dough strength through mixing, and also organically through fermentation, is also important. Think of your dough as a balloon: you want it strong enough to trap gasses and expand in the oven, but not so strong that it won’t relax and expand out. Finding this sweet spot takes some practice.
A full and complete bulk is also very important. Cutting bulk fermentation short before the dough is sufficiently fermented will hinder the development in final proof.
I also find that, and this depends on the dough you’re working with, a very gentle preshape and shape are key to maintaining an open interior. If you’re rough with the dough during these times the delicate interior will quickly break down and become more dense. That said, the dough does still need enough strength through shaping to hold its shape during baking.
Sorry for the long winded answer but really all of these things are important! Each part plays into the next and overall what we’re searching for as bakers is balance. Balance between the extremes in each phase of the process.
I hope that helps 🙂