
As I walked through the two enormous wooden doors of the German beer hall, each host to a gold-emblazoned crown, my senses were first assaulted by the aromas of beer, mustard, and sauerkraut. It was the beginning of an awakening. An unknown, or perhaps forgotten, craving began to bubble to the surface as I scanned for an empty bench. People were packed tight with broad grins, large mugs of beer, and that happy demeanor that only comes when the world outside is forgotten. My natural desire to raise my voice and tell a few stories was only matched by the desire for a seriously soft (sourdough) pretzel.
In recalling my travels through Germany a few years back, my memories of these beer halls are still fresh. We’d duck the incessant rain by dropping in on a beer hall where we’d have sausage with sauerkraut, a laugenbrezel (pretzel), and a maß (1 liter) of beer. It seemed our entire time in Germany consisted of a series of strung-together visits to these fine establishments. I can confidently say I ate more pretzels during that week-long trip than in all the previous years of my life combined.
And there are so many ways to enjoy pretzels. There are countless variations not only in the final shape, but also in the toppings and accompanying condiments. I’ve also come to find out that there are pretty heated discussions on these topics among pretzel aficionados! It’s safe to say one could spend a fair amount of time traveling around and still fail to encounter all the variants. Laugenbrezel, brezel, brezen, butterbrezel… So many names, varieties, and options–so little time.
Admittedly, my attempts at a soft sourdough pretzel should have started long ago. To make up for my lack of appropriate focus on this wonderful food, I’ve been working on this recipe relentlessly over the past few months. I’ve made them almost every day (as you might have seen on my Instagram feed), and I’ve really come to expect a fresh pretzel for lunch. Now, days without a fresh pretzel have become a day of deprivation.
The beauty of this pretzel recipe is that it can be made in a single day using your already-ripe starter or an overnight levain. However, the work for this flexible dough can also be split over the course of two days, forcing you to make the difficult choice of fresh, warm pretzels in the morning or the later afternoon. Further, the dough is rather easy to get together, mix, and bulk—the only slightly involved part of the process is the lye bath.
Watch a Video of Me Making These Sourdough Pretzels
The Lye (Sodium Hydroxide) Bath
What Does Lye Do to Pretzel Dough?
Traditional pretzels are made by dipping (not boiling) the proofed and chilled pretzel dough in a 3 to 4% lye solution before baking. Lye is a corrosive alkali that amplifies the Maillard reacation on the outside of pretzel dough when briefly dipped in a lye bath. This lye bath will give the German style pretzel a deep brown color, shine, a chewy crust that, and a typical “pretzel” flavor.
When baked in the oven, the lye dissipates and becomes harmless while imparting that signature pretzel flavor and a beautiful brown crust (thanks again to the Maillard reaction).
What Lye Should I Use to Make Pretzels?
I use 100% food-grade lye and have used the same brand for all of my tests. It comes in a coarse powder form and you mix the powder in a stainless steel bowl that is already filled with water, stirring until completely dissolved.
I use a 4% lye solution for these sourdough pretzels:
| Cool water (the cold water helps keep the chilled pretzel dough firm) | 940g (1 quart) |
| 100% food-grade lye (sodium hydroxide) | 38g |
Lye is caustic (corrosive) and can be dangerous if used incorrectly. Always wear long rubber gloves (and eye protection, if desired) and be mindful when handling it. It’s best if children and pets aren’t present in the kitchen as well. If by chance some of the lye solution does get on your skin, don’t panic; just wash it off in the sink as quickly as possible. As with all household chemicals, be sure to keep them up and out of curious reach.
After testing this recipe countless times, I’ve found that lye isn’t quite the big deal many make it out to be. If you are careful and use proper precautions when handling the solution, the whole process is safe and over in a matter of minutes.
What Can I Substitute For Lye?
If you don’t want to use lye, another option is a baking soda solution. Baking soda isn’t as caustic as lye but it should have a similar, less potent, effect. I haven’t yet tested the substitution myself, but I’ve read it won’t garner you quite the same result. However, it might be preferential to those who choose not to bring lye into their kitchen.
Finally, another substitute for lye was made famous by Harold McGee, and it was to use baked baking soda. Baked soda (also called jian in Chinese kitchens) becomes a more powerful alkali than traditional baking soda which will help add more flavor and color to a baked pretzel.
Can I Freeze and Store Pretzels?
After baking, these pretzels will keep well for a few days stored in a bread box on the counter. Alternatively, once they are completely cool, you can place them in a freezer bag and keep them frozen for months. To thaw, place them in the refrigerator overnight, and then warm them thoroughly in a low 350°F (175°C) oven.
How Do I Reheat Sourdough Pretzels?
If kept at room temperature, these sourdough pretzels will reheat nicely in a 350°C (175°C) oven for a few minutes until soft.
Seriously Soft Sourdough Pretzel Recipe
Through testing, reading, researching, and discussing with other bakers, I’ve found there are a few key points to making these pretzels.
While some of these are seemingly insignificant, they are small steps that add up to achieving that spectacular result:
- Degas heavily when dividing
- Don’t cover your baking trays when chilling the shaped pretzel in the fridge (this helps to develop a skin on the pretzel)
- Bake in a very hot oven, 450°F (230°C)
- Using lye for the pre-bake bath imparts that classic pretzel color, flavor, and texture
Vitals
| Total Dough Weight | 1,420 grams |
| Pre-fermented Flour | 12.0% |
| Hydration | 55.0% |
| Levain in the final dough | 28.6% |
| Yield | Twelve pretzels |
Total Formula
Desired dough temperature: 76°F (24°C) (see my post on the importance of dough temperature). I typically make these in the cooler months of the year, and if you find yourself doing the same, be sure to review my guide to baking in the winter.
This table shows the entire quantity and baker’s percentages for each ingredient. If you’d like to make fewer or more pretzels, scale up the quantities using baker’s math.
| Weight | Ingredient | Baker’s Percentage |
|---|---|---|
| 635g | High protein bread flour (12-13% protein; King Arthur Bread Flour) | 74.0% |
| 171g | All-purpose flour (11.5% protein; King Arthur All-purpose Flour) | 20.0% |
| 51g | Whole wheat flour (King Arthur Whole Wheat Flour) | 6.0% |
| 60g | Unsalted butter at room temperature | 7.0% |
| 471g | Water | 55.0% |
| 3g | Diastatic malt powder | 0.4% |
| 17g | Fine sea salt | 2.0% |
| 10g | Ripe sourdough starter, 100% hydration | 1.2% |
Sourdough Pretzel Method
1. Prepare the levain – 9:00 p.m., the night before mixing
To make the levain, mix the following ingredients in a jar and leave them covered at a warm temperature, 74-76°F (23-24°C), to ripen overnight.
| Weight | Ingredient | Baker’s Percentage |
|---|---|---|
| 10g | Ripe sourdough starter, 100% hydration | 10.0% |
| 51g | All-purpose flour | 50.0% |
| 51g | Whole wheat flour | 50.0% |
| 102g | Water | 100.0% |
2. Mix – 9:00 a.m.
Note: this sourdough pretzel dough is extremely stiff. If you’re using a KitchenAid mixer, it could cause your machine harm in the long run. You could mix for a few minutes in the mixer to incorporate, then turn the dough to the counter and finish kneading by hand (similar to a firm pasta dough). I used my Haussler Alpha dough mixer with a dough hook for this recipe because it excels at working with stiff doughs.
| Weight | Ingredient |
|---|---|
| 635g | High-protein bread flour |
| 120g | All-purpose flour |
| 60g | Unsalted butter at room temperature |
| 369g | Water |
| 3g | Diastatic malt powder |
| 17g | Fine sea salt |
| 214g | Ripe levain (from step 1) |
Cut the butter into 1/2-inch pats. Set them on a plate to warm to room temperature.
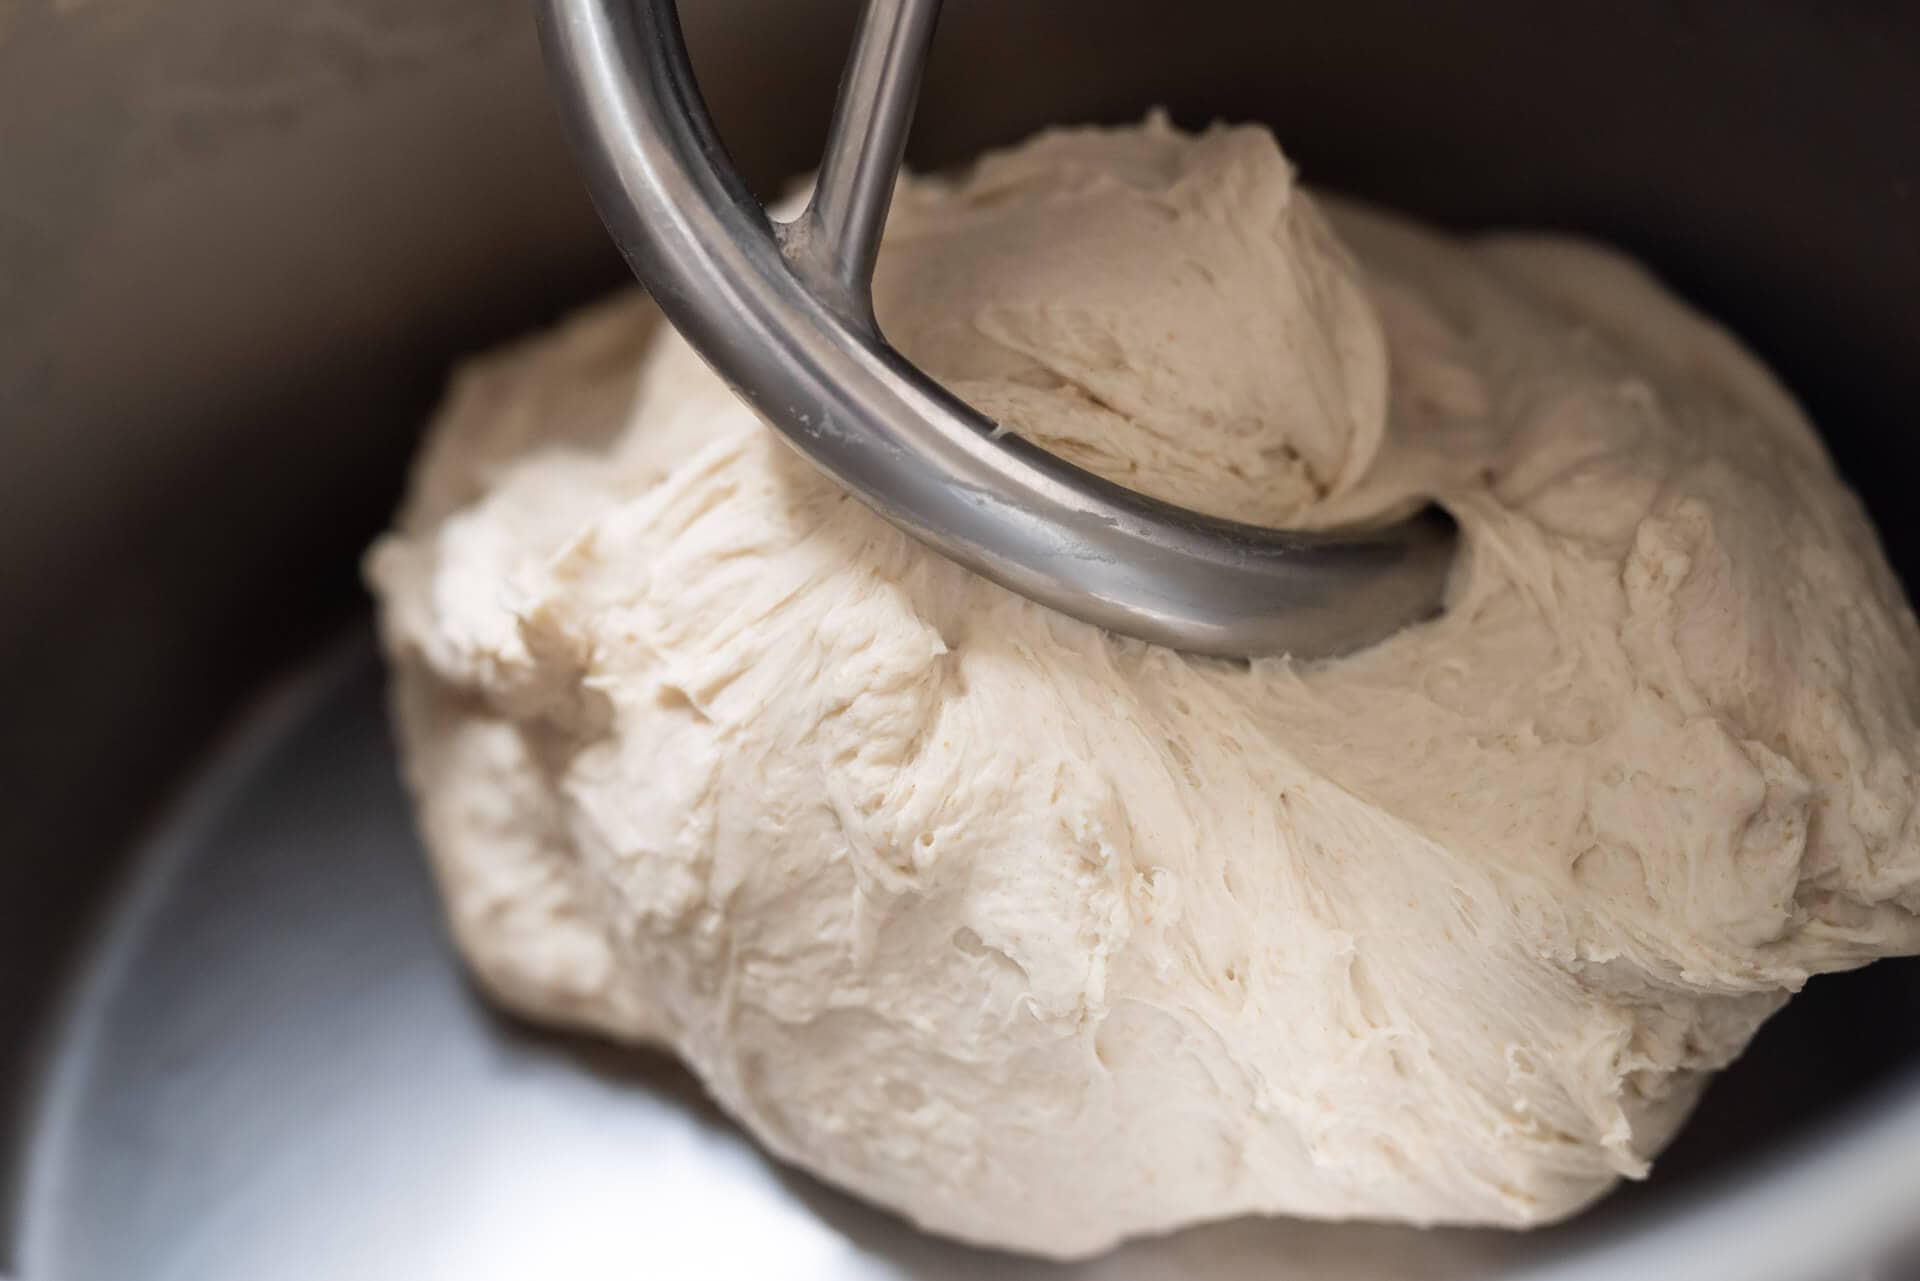
To the bowl of a stand mixer fitted with the dough hook attachment, add the flour, water, salt, butter, diastatic malt powder, and levain. Mix on speed 1 for 2 to 3 minutes until all of the ingredients are incorporated. Let the dough rest for 5 minutes.
Continue to mix on speed 2 for 4 to 6 minutes until the dough becomes smooth and cohesive. I’ve found the stronger the mix, the better the result.
Transfer the dough to a container for bulk fermentation and cover it with reusable plastic.
3. Bulk fermentation – 9:15 a.m. to 12:45 p.m.
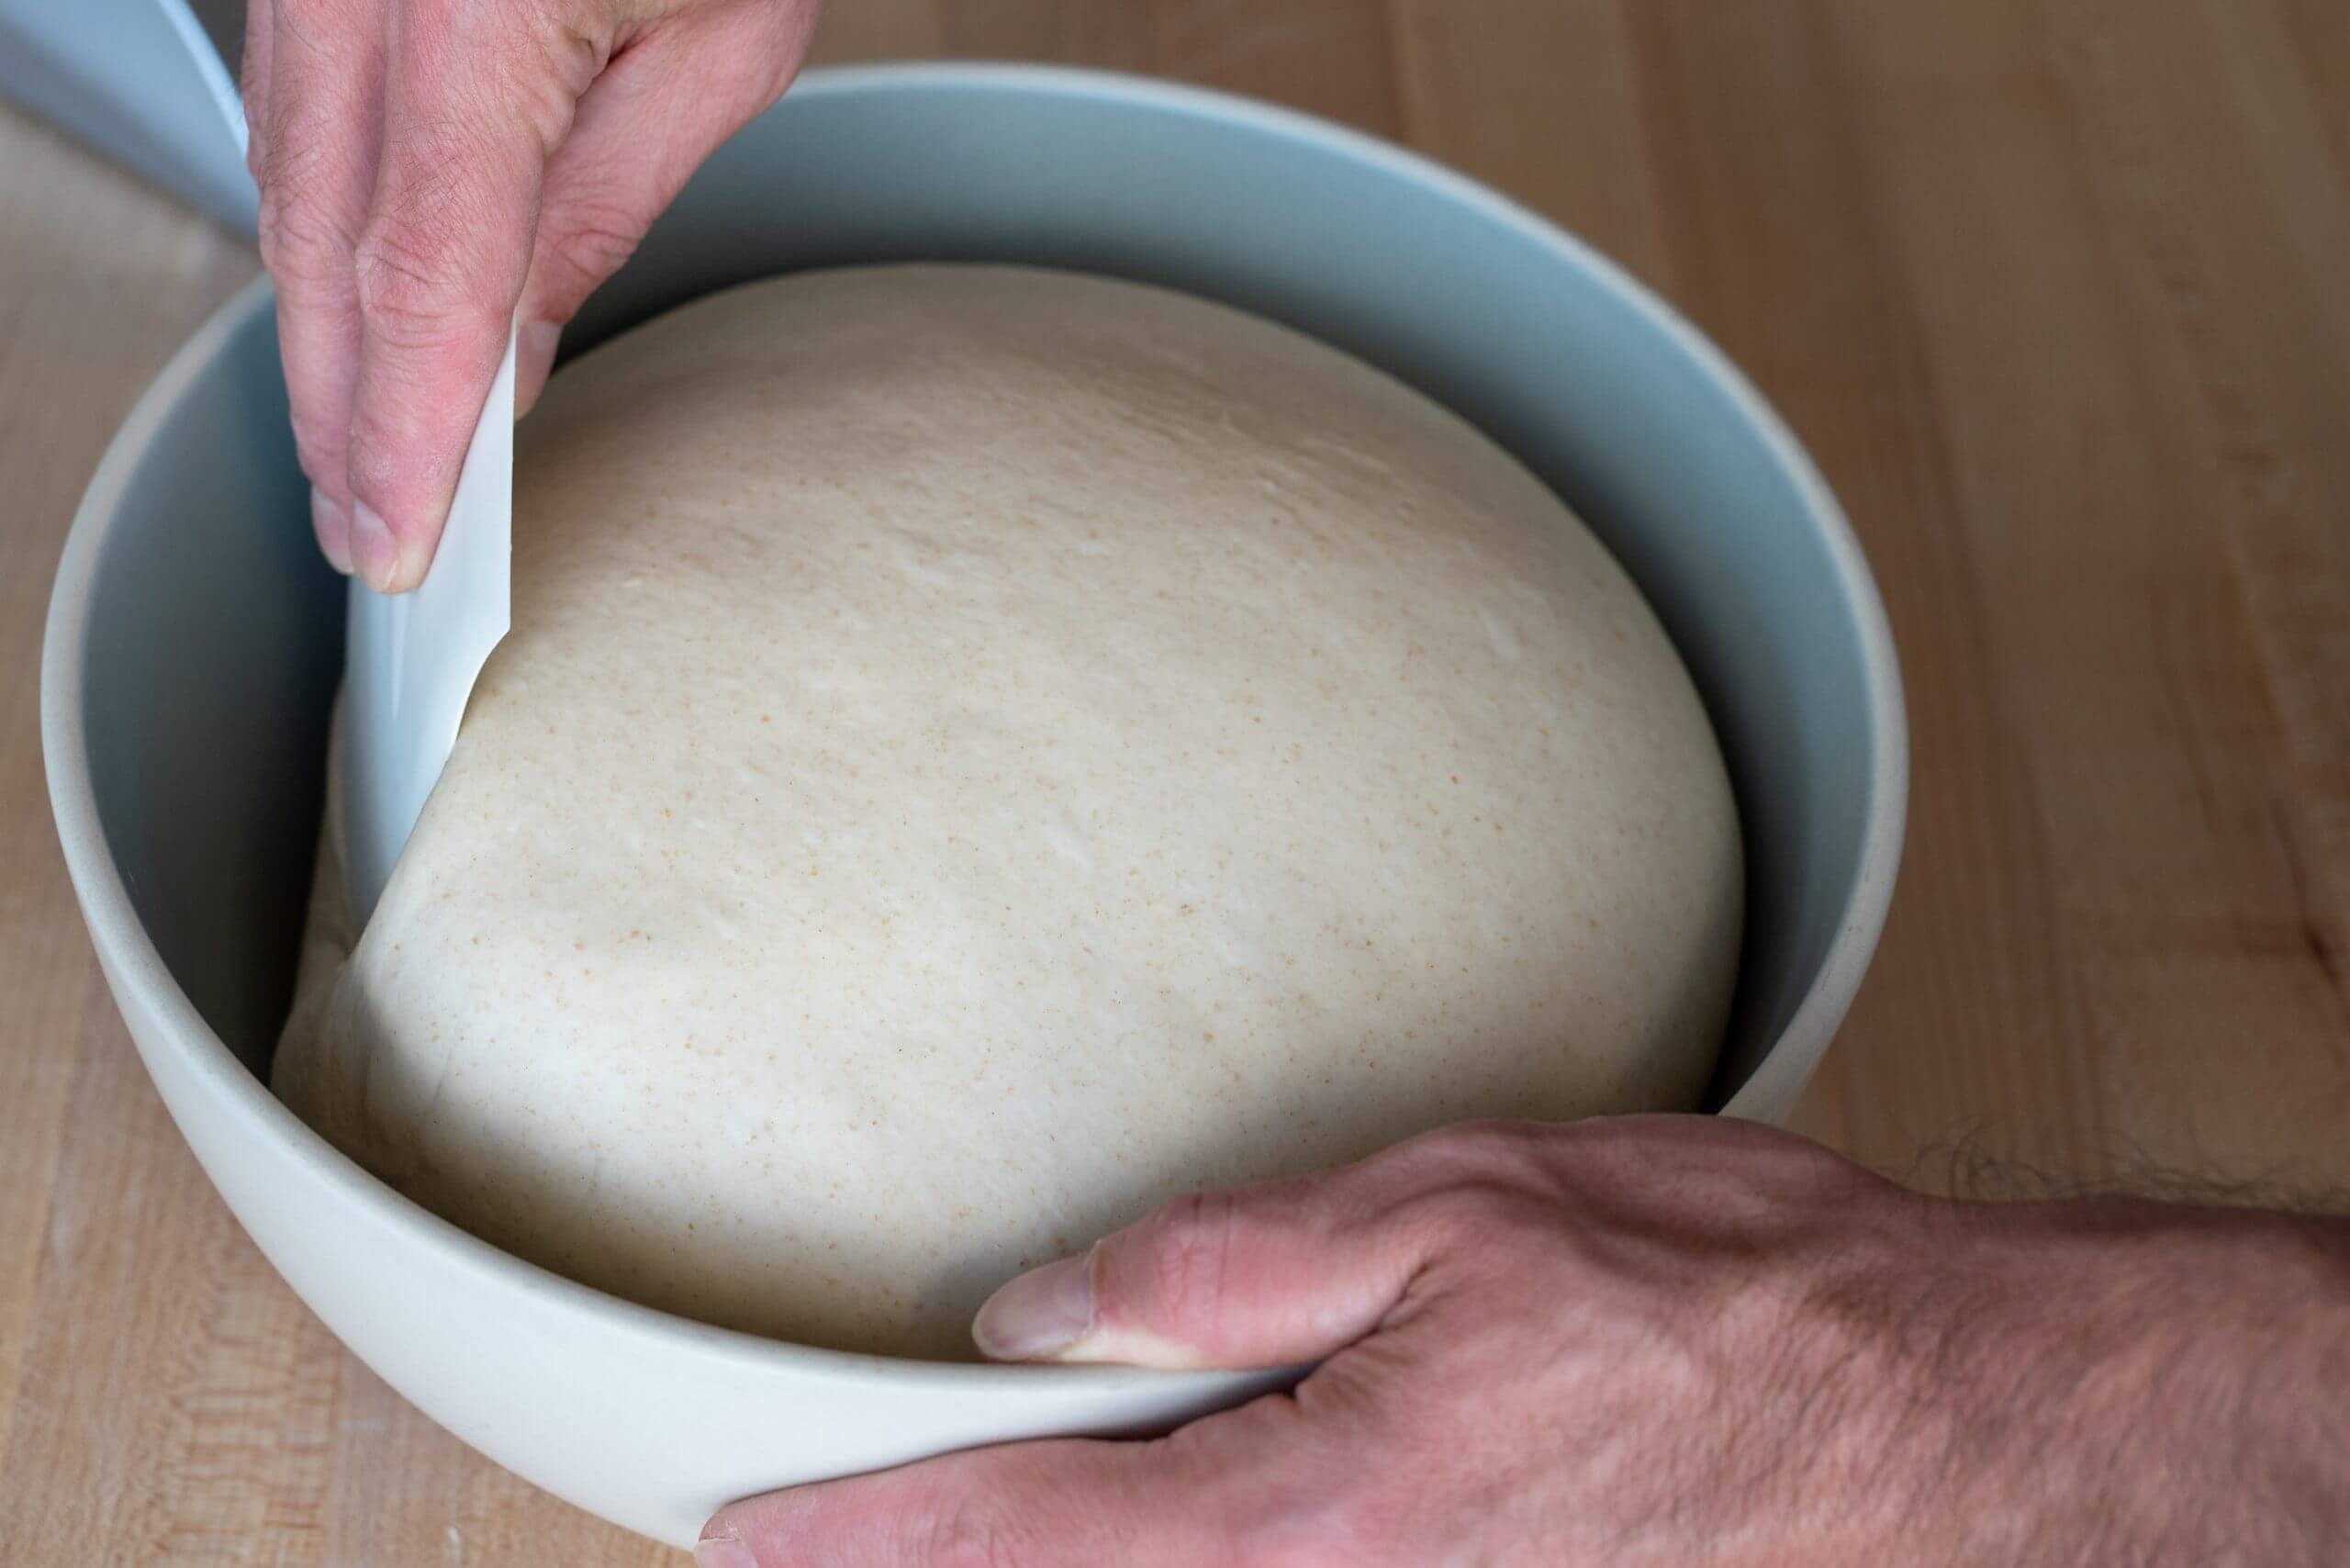
At a warm room temperature, 74-76°F (23-24°C), bulk fermentation should take about 3 1/2 hours. The dough is ready when it is risen and is slightly puffy.
This dough requires one set of stretch and folds during bulk fermentation. After the first hour of bulk fermentation, turn the dough out onto a clean counter surface, and using two hands, stretch each side of the dough out and over to the middle.
Return the dough to the bulk container and let rest for the remainder of bulk fermentation.
4. Divide and preshape – 12:45 p.m.
When I’m not handling this dough, I like to keep it covered with plastic at all times. Because the dough is low hydration, it can quickly dry out and form a skin on the outside. To cover, I’ll drape one large proofing bag over the mass of dough yet to be divided and one bag over the “cigars” as I finish preshaping each one.
Scrape the dough onto a clean counter surface. Divide the dough into twelve 115g rectangular pieces. For each piece, degas heavily with a flat hand (really be assertive with the dough) and gently stretch it into a small rectangle. The fewer the seams, pits, and uneven sides, the cleaner and more uniform the resulting pretzel will be.
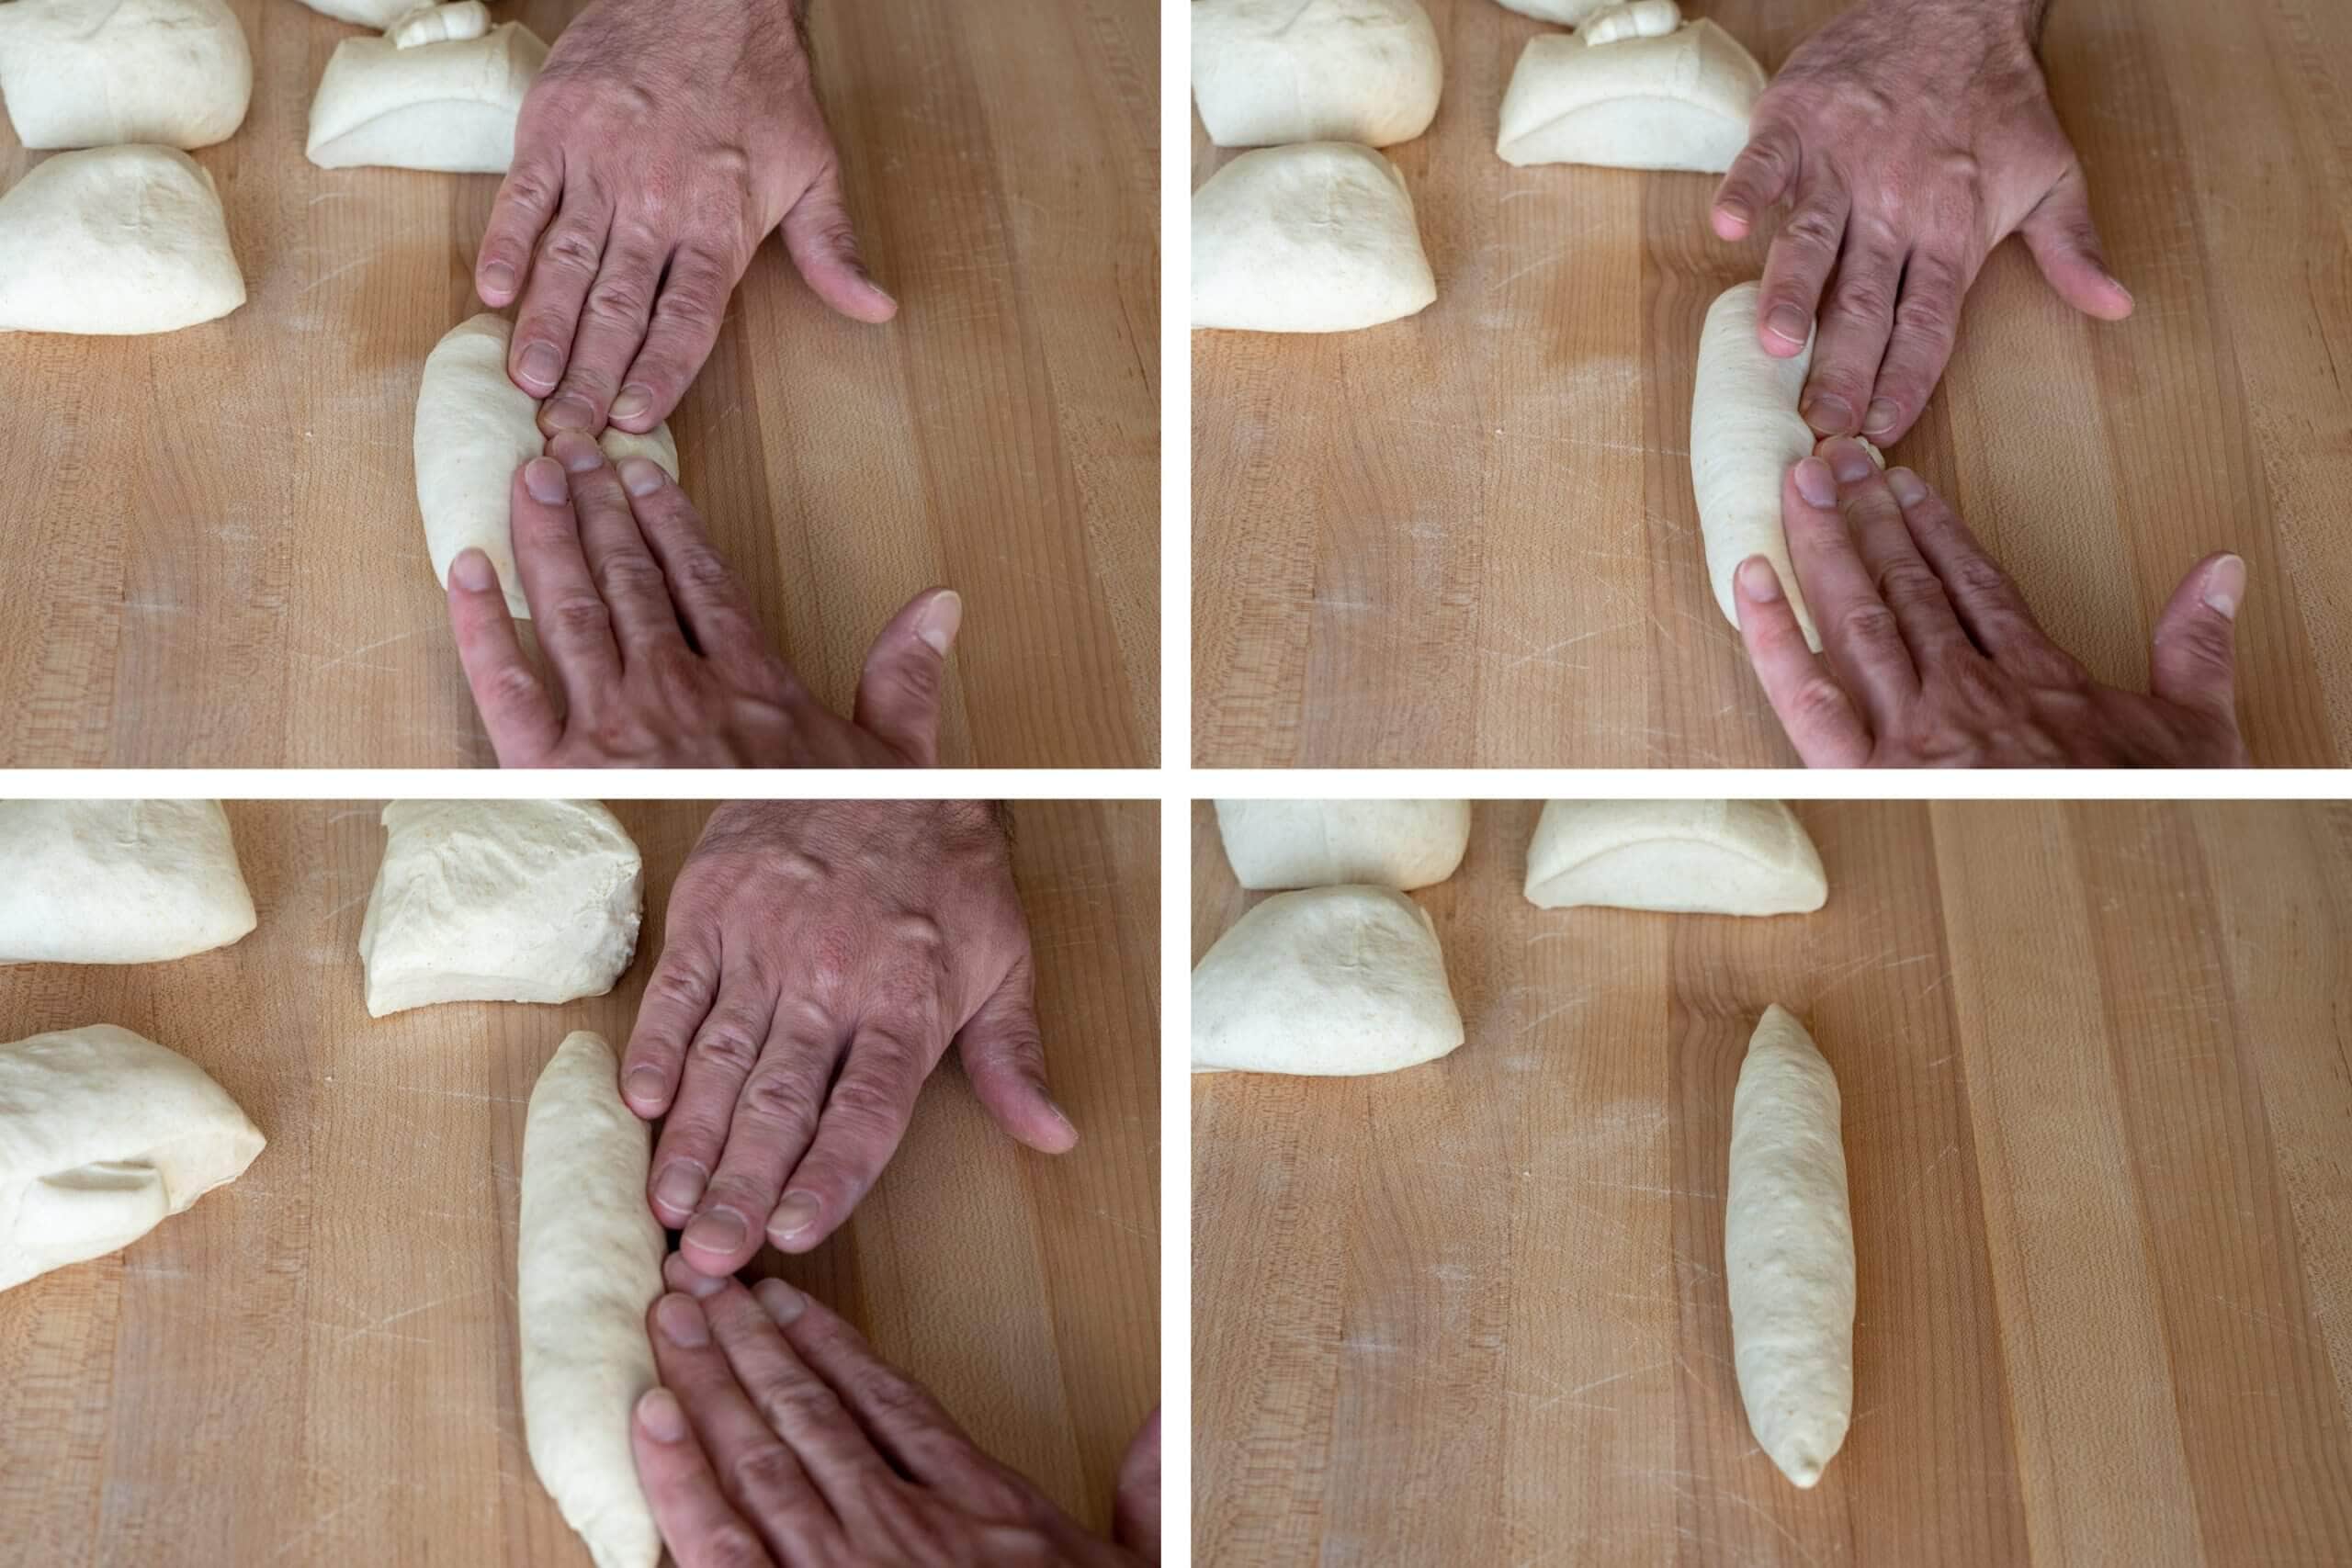
Working with one rectangular piece at a time, using your fingertips, fold down the long, top side of the rectangle and gently press down into the dough with your fingers to begin rolling a cylinder (upper-left image, above). Continue to roll the dough down, gently sealing each revolution, until the dough is rolled up. Seal the seam with your fingers or the palm of your hand.
Transfer the cylinder to the side of your work surface and cover with plastic.
Let the cylinders rest for 15 minutes.
5. Shape – 1:00 p.m.
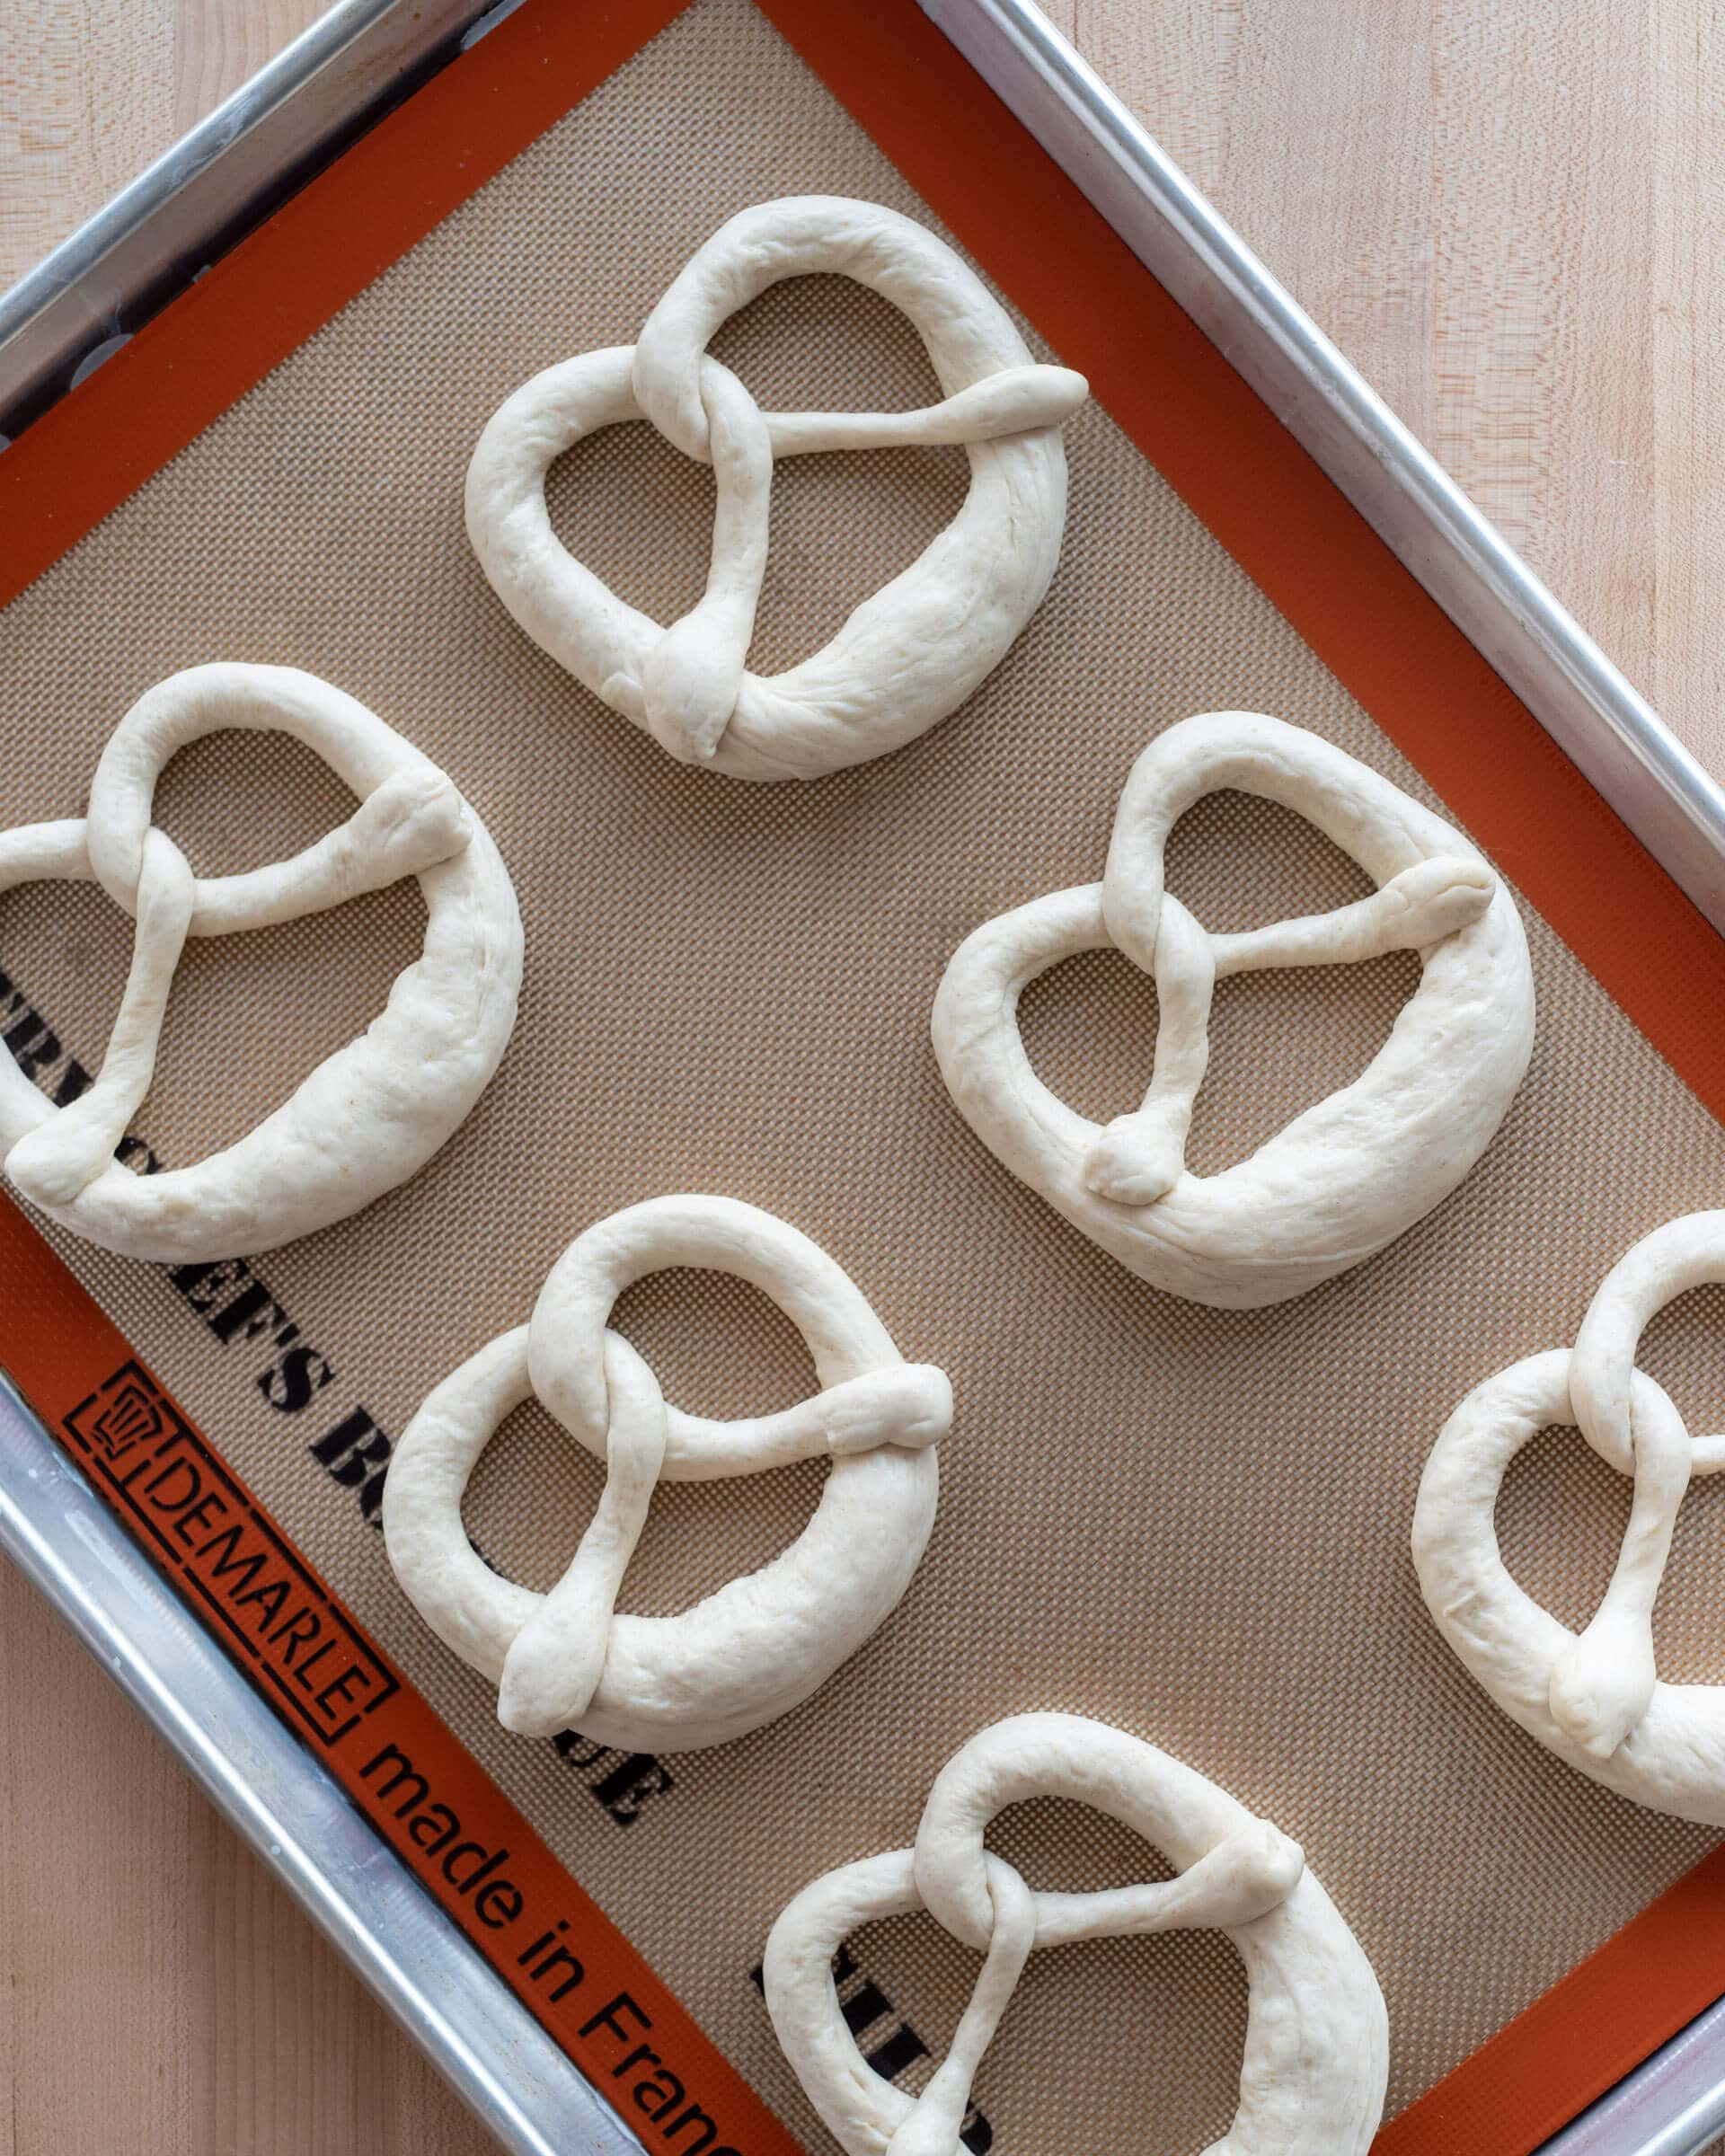
Prepare two large sheet pans by lining them with parchment paper or a silicone baking mat. Depending on how large you roll out and shape your pretzels, you should be able to fit six per 13 x 18-inch sheet pan.
First, a few tips when shaping:
- If at any point the dough starts to become extraordinarily elastic and resist rolling outward, let it rest for a few minutes before continuing.
- The dough should be moist enough to stick to the work surface when rolling. If the dough dries out excessively, use a handheld spray bottle to lightly mist the dough, your hands, and the work surface to encourage a little friction.
Starting with the piece that you preshaped first, place the cylinder in front of you such that the tips are at your sides. Begin with your hands slightly overlapping in the middle, press down and roll the dough back and forth, away and then toward your body. As you are rolling, begin moving your hands outward to encourage the cylinder to elongate and taper as you move from the center out to the ends. You want to keep an exaggerated bulge in the very center of this rope–this will be the large part of the pretzel you score to encourage rise in the oven.
Finally, classic technique suggests leaving small little bulbs at the extremes of the rope, but that is up to your preference.

Grab the ends of the dough and arrange the dough so it loops away from you (upper-left image, above). Take one end and fold it over the other side (upper-right image above). Switch your hands so your right hand is holding the new right end and your left is holding the new left end. Fold the same side over the other as previously done (you’ll now have performed two twists). Grab the two ends, fold them up over the knot in the middle, and place each end on its corresponding side inside the loop. It looks nice to have a little overlap with each tip. Then, gently press it down into the side to seal (lower-right image, above).
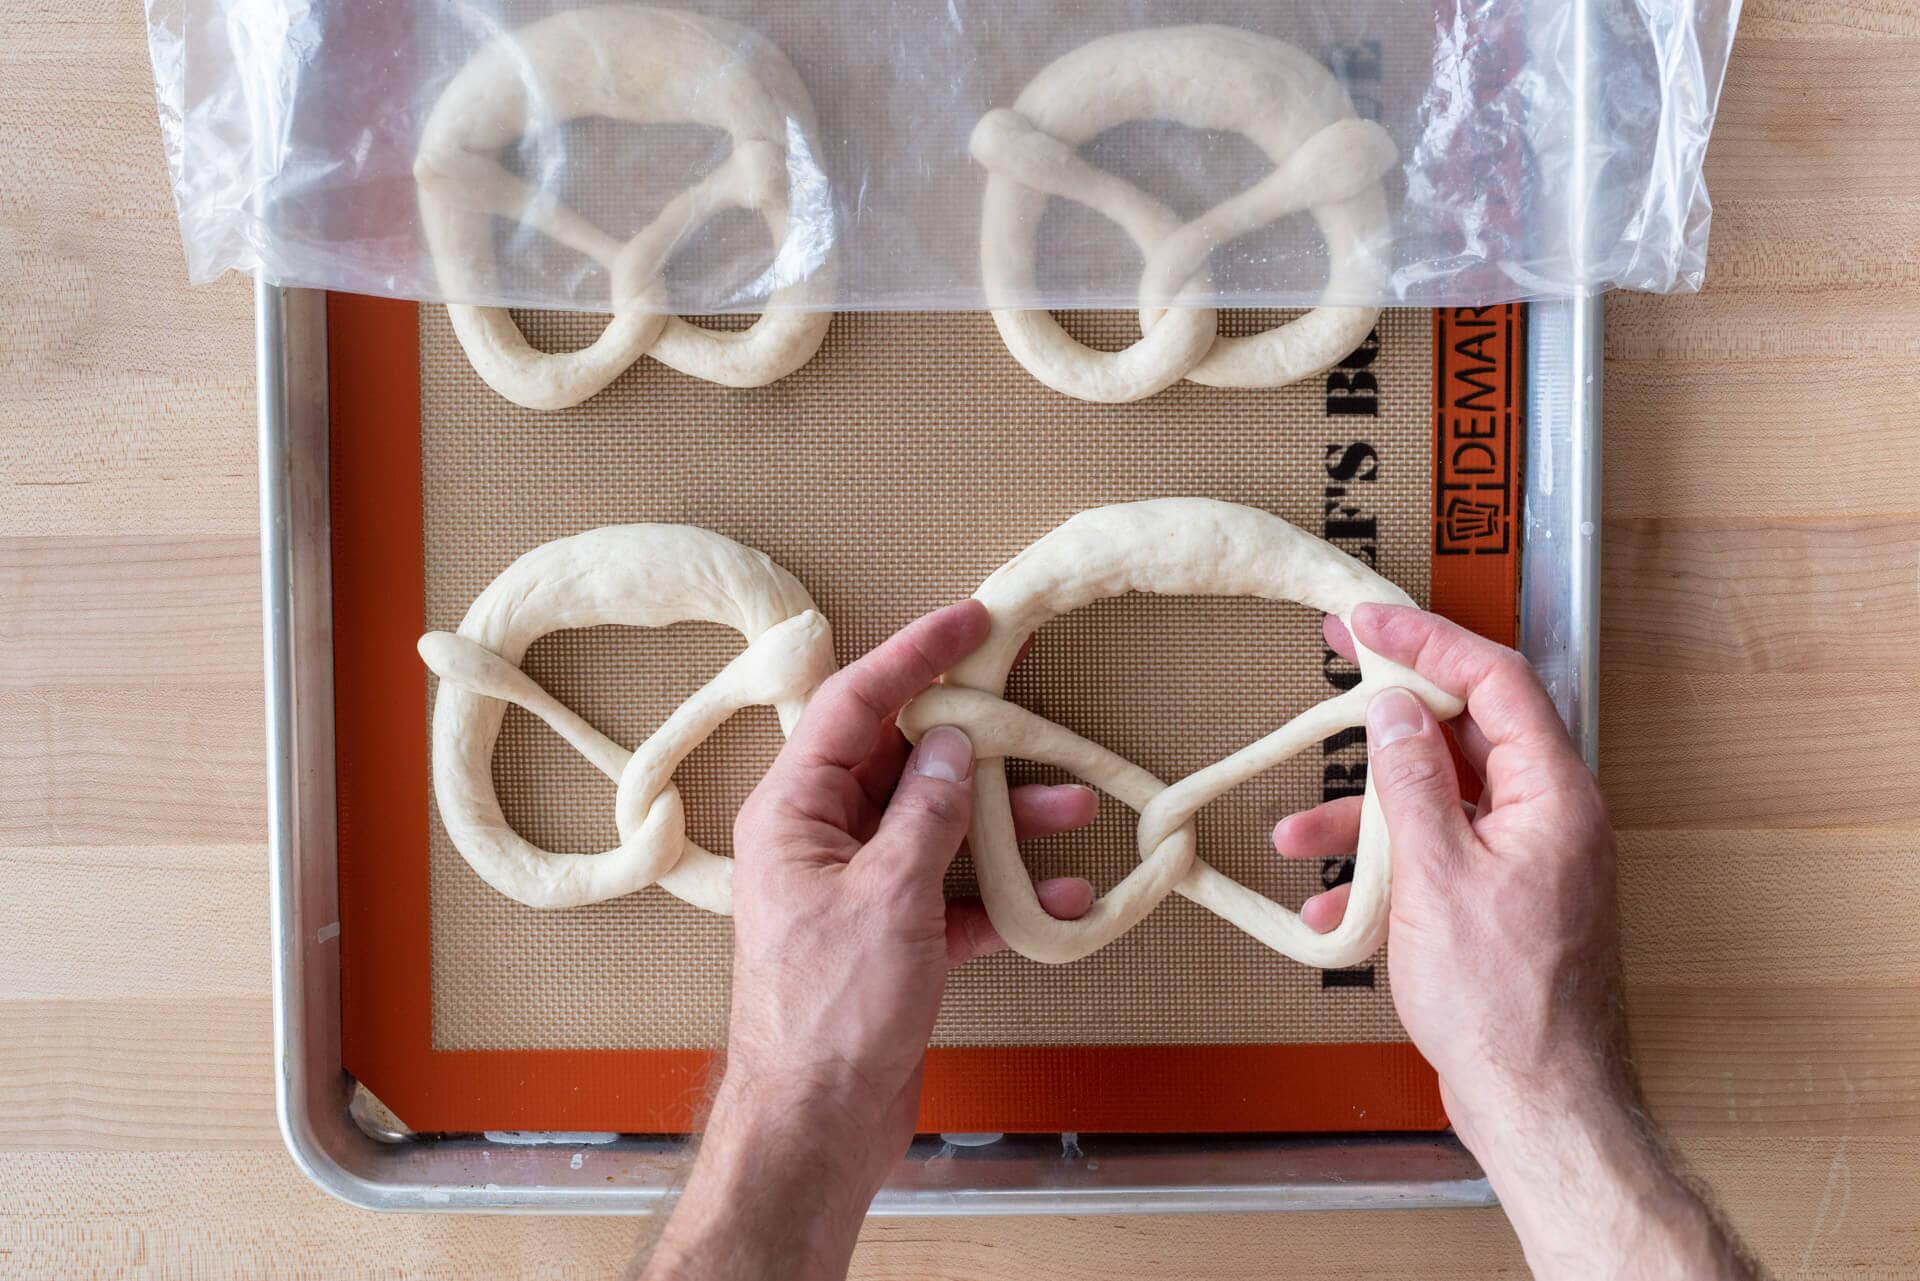
Transfer the shaped dough to the prepared baking sheet. I like to keep the sheet loosely covered while I’m shaping the remaining pretzels.
6. Proof – 1:15 p.m. to 1:45 p.m.
Let the sourdough pretzel dough proof on the counter at room temperature for 30 minutes, covered.
OVERNIGHT OPTION: At this point, you could also retard the shaped pretzels in the fridge overnight to make them the next day. Instead of leaving them out for 30 minutes to proof, leave them for only 15 minutes, cover the sheet pans with plastic, and place them in the fridge. The next day, uncover the sheet pans, return them to the fridge, and chill for 20 minutes (to develop a skin, as mentioned previously). Then continue with the rest of the process.
Transfer the uncovered sheet pans holding your pretzels to the fridge for 45 minutes to 1 hour. Be sure to let the dough chill thoroughly and develop a dry skin on the outside. Not only will this make handling the dough easier, it helps the pretzels keep their shape when dipping them in the lye bath.
7. Lye bath – 2:45 p.m.
After the one-hour rest in the fridge, place an oven rack in the bottom third of the oven and another in the top third. Preheat the oven to 450°F (230°C).
Set up your station. Take out the sheet pans with fully proofed pretzel dough and gather the following:
- pretzel salt
- razor blade
- half sheet pan lined with parchment paper or a silicone sheet and a stainless steel wire rack inside,
- stainless steel bowl and rubber gloves for the lye bath. Be sure the bowl is not aluminum, which will react with the lye.
The goal is to set up an assembly line where you can work quickly.While wearing long latex or rubber gloves, add 940g cool water to the stainless steel bowl. Add 38g food-grade lye while gently stirring with a stainless steel whisk or large spoon. The mixture will initially be cloudy; keep stirring until all the powder or pellets are dissolved.
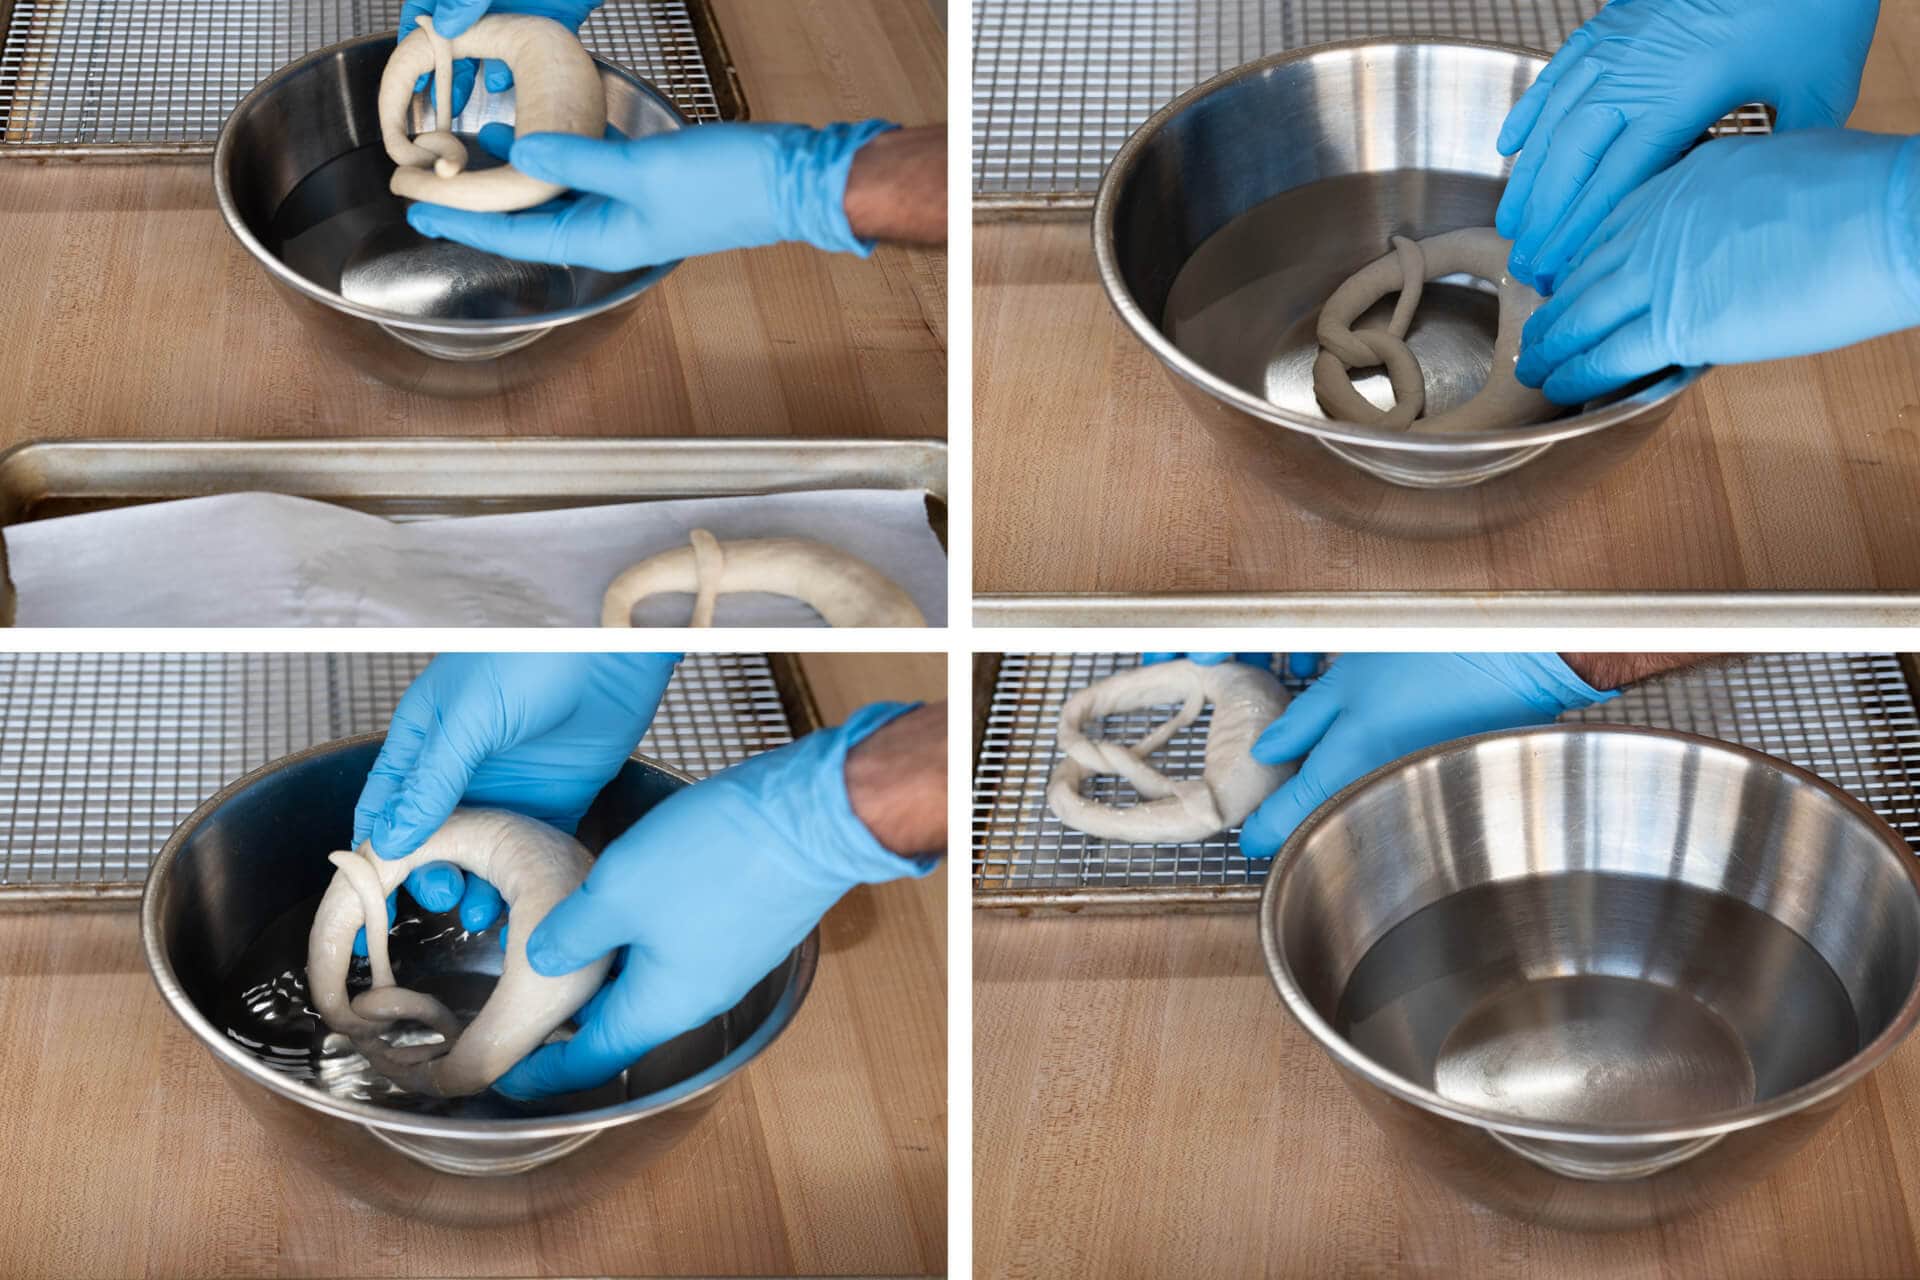
While still wearing gloves, pick up one shaped pretzel and transfer it to the lye bath (upper-left image, above). Let it sit in the bath for 15 to 20 seconds (upper-right image, above) and then transfer it to the wire rack (bottom-left and right image, above). Repeat with 5 more pretzels. Then, transfer the pretzels back to the original sheet pan (it should still have parchment paper or a silicone sheet on top) and setaside. Repeat with the remaining dough.
Carefully flush the remaining lye solution down the toilet or the sink and flush with water.
8. Bake – 3:00 p.m.
Carefully score each pretzel using a razor blade to make a single straight cut across the top of the bulge. Sprinkle the bottom area with pretzel salt. Transfer the sheet pans to the oven.
Bake at 450°F convection for 10 minutes. Rotate the sheet pans (bottom to top, back to front) and reduce the oven temperature to 425°F (220°C) convection. Bake for 8 to 12 minutes more until done to your liking.
Keep an eye on the pretzels in the oven; they will color quickly. If the temperature is too high, open the oven door to let it cool slightly and turn it down by 25°. Each oven is different, and my altitude of 5,280 feet might mean I require a hotter oven and longer duration—adjust as necessary.
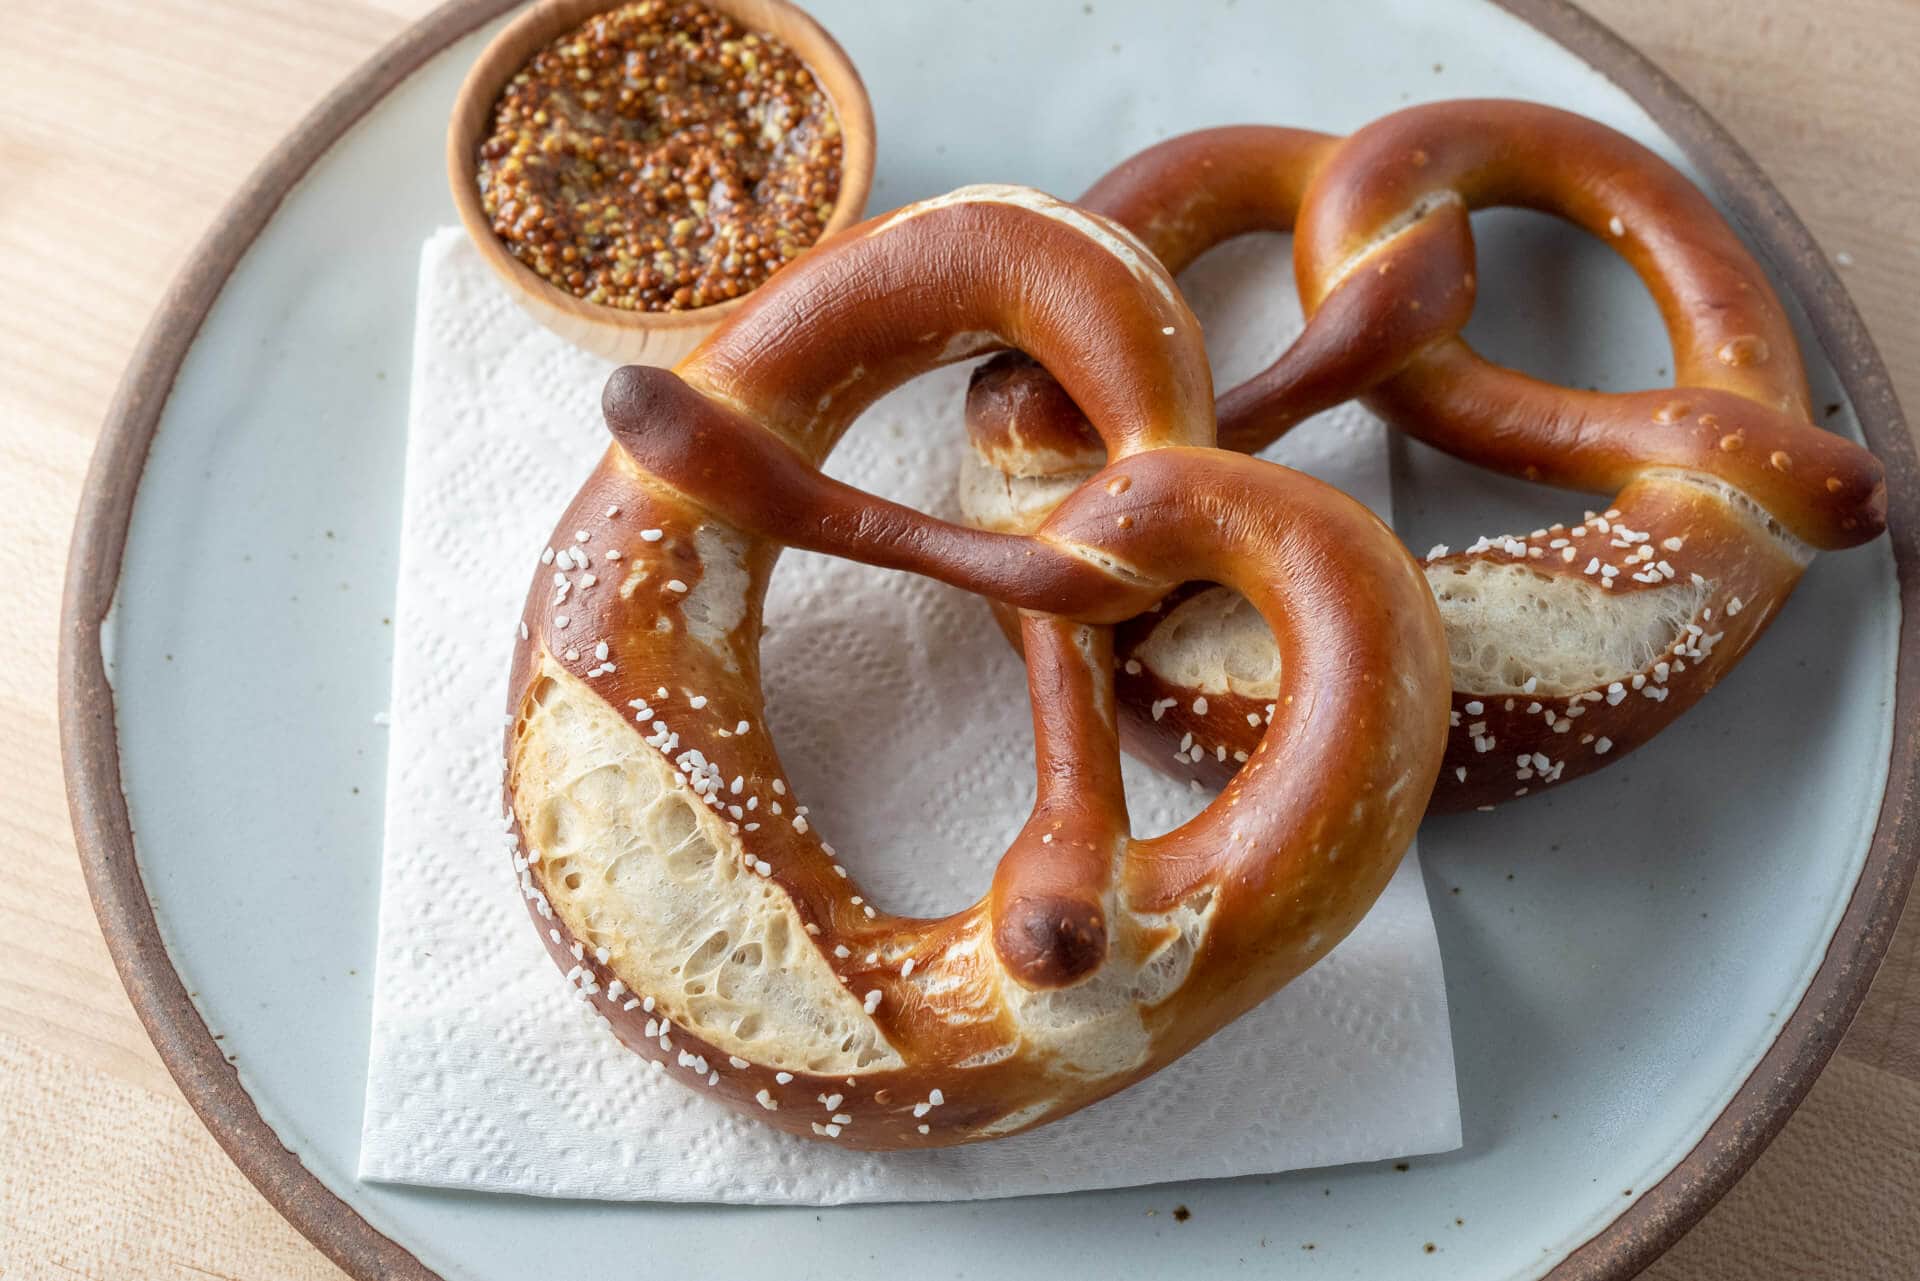
Remove the sheet pans from the oven and let cool. The pretzels are best the day they are baked—and sublime still warm from the oven—but will keep quite well for up to 2 days. Enjoy warm with butter, mustard, and beer, of course.

Conclusion
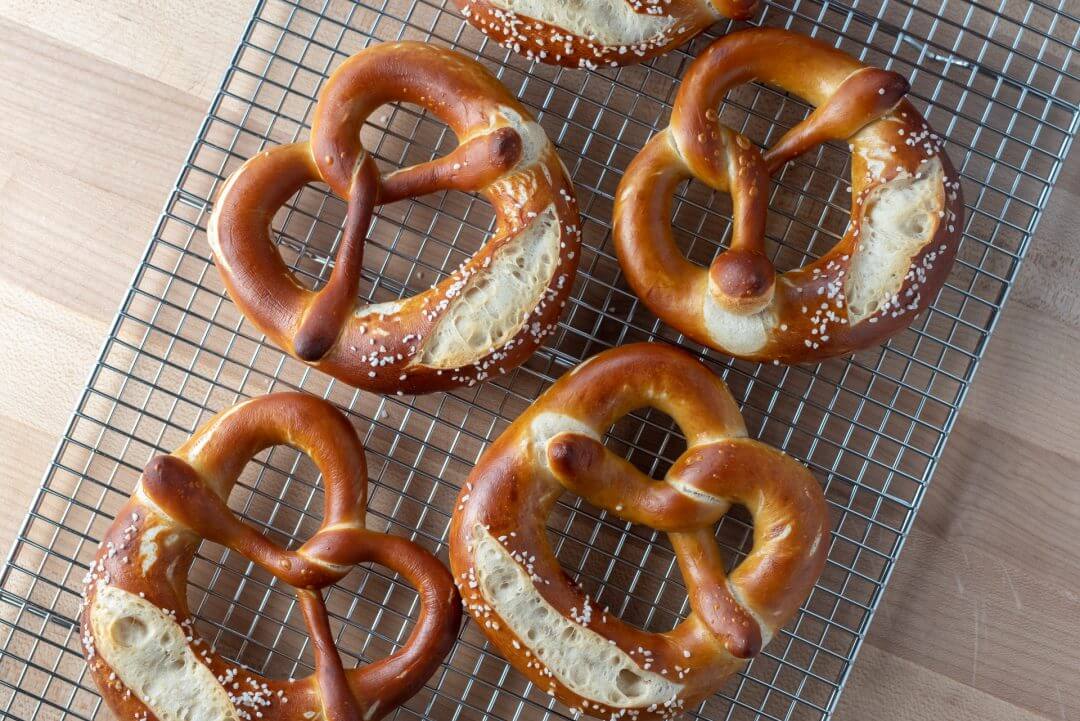
These pretzels check all the right boxes: a beautiful dark color, the thinnest of crusts, that traditional pretzel flavor, and a chewy, soft interior that’s dense but well-fermented.
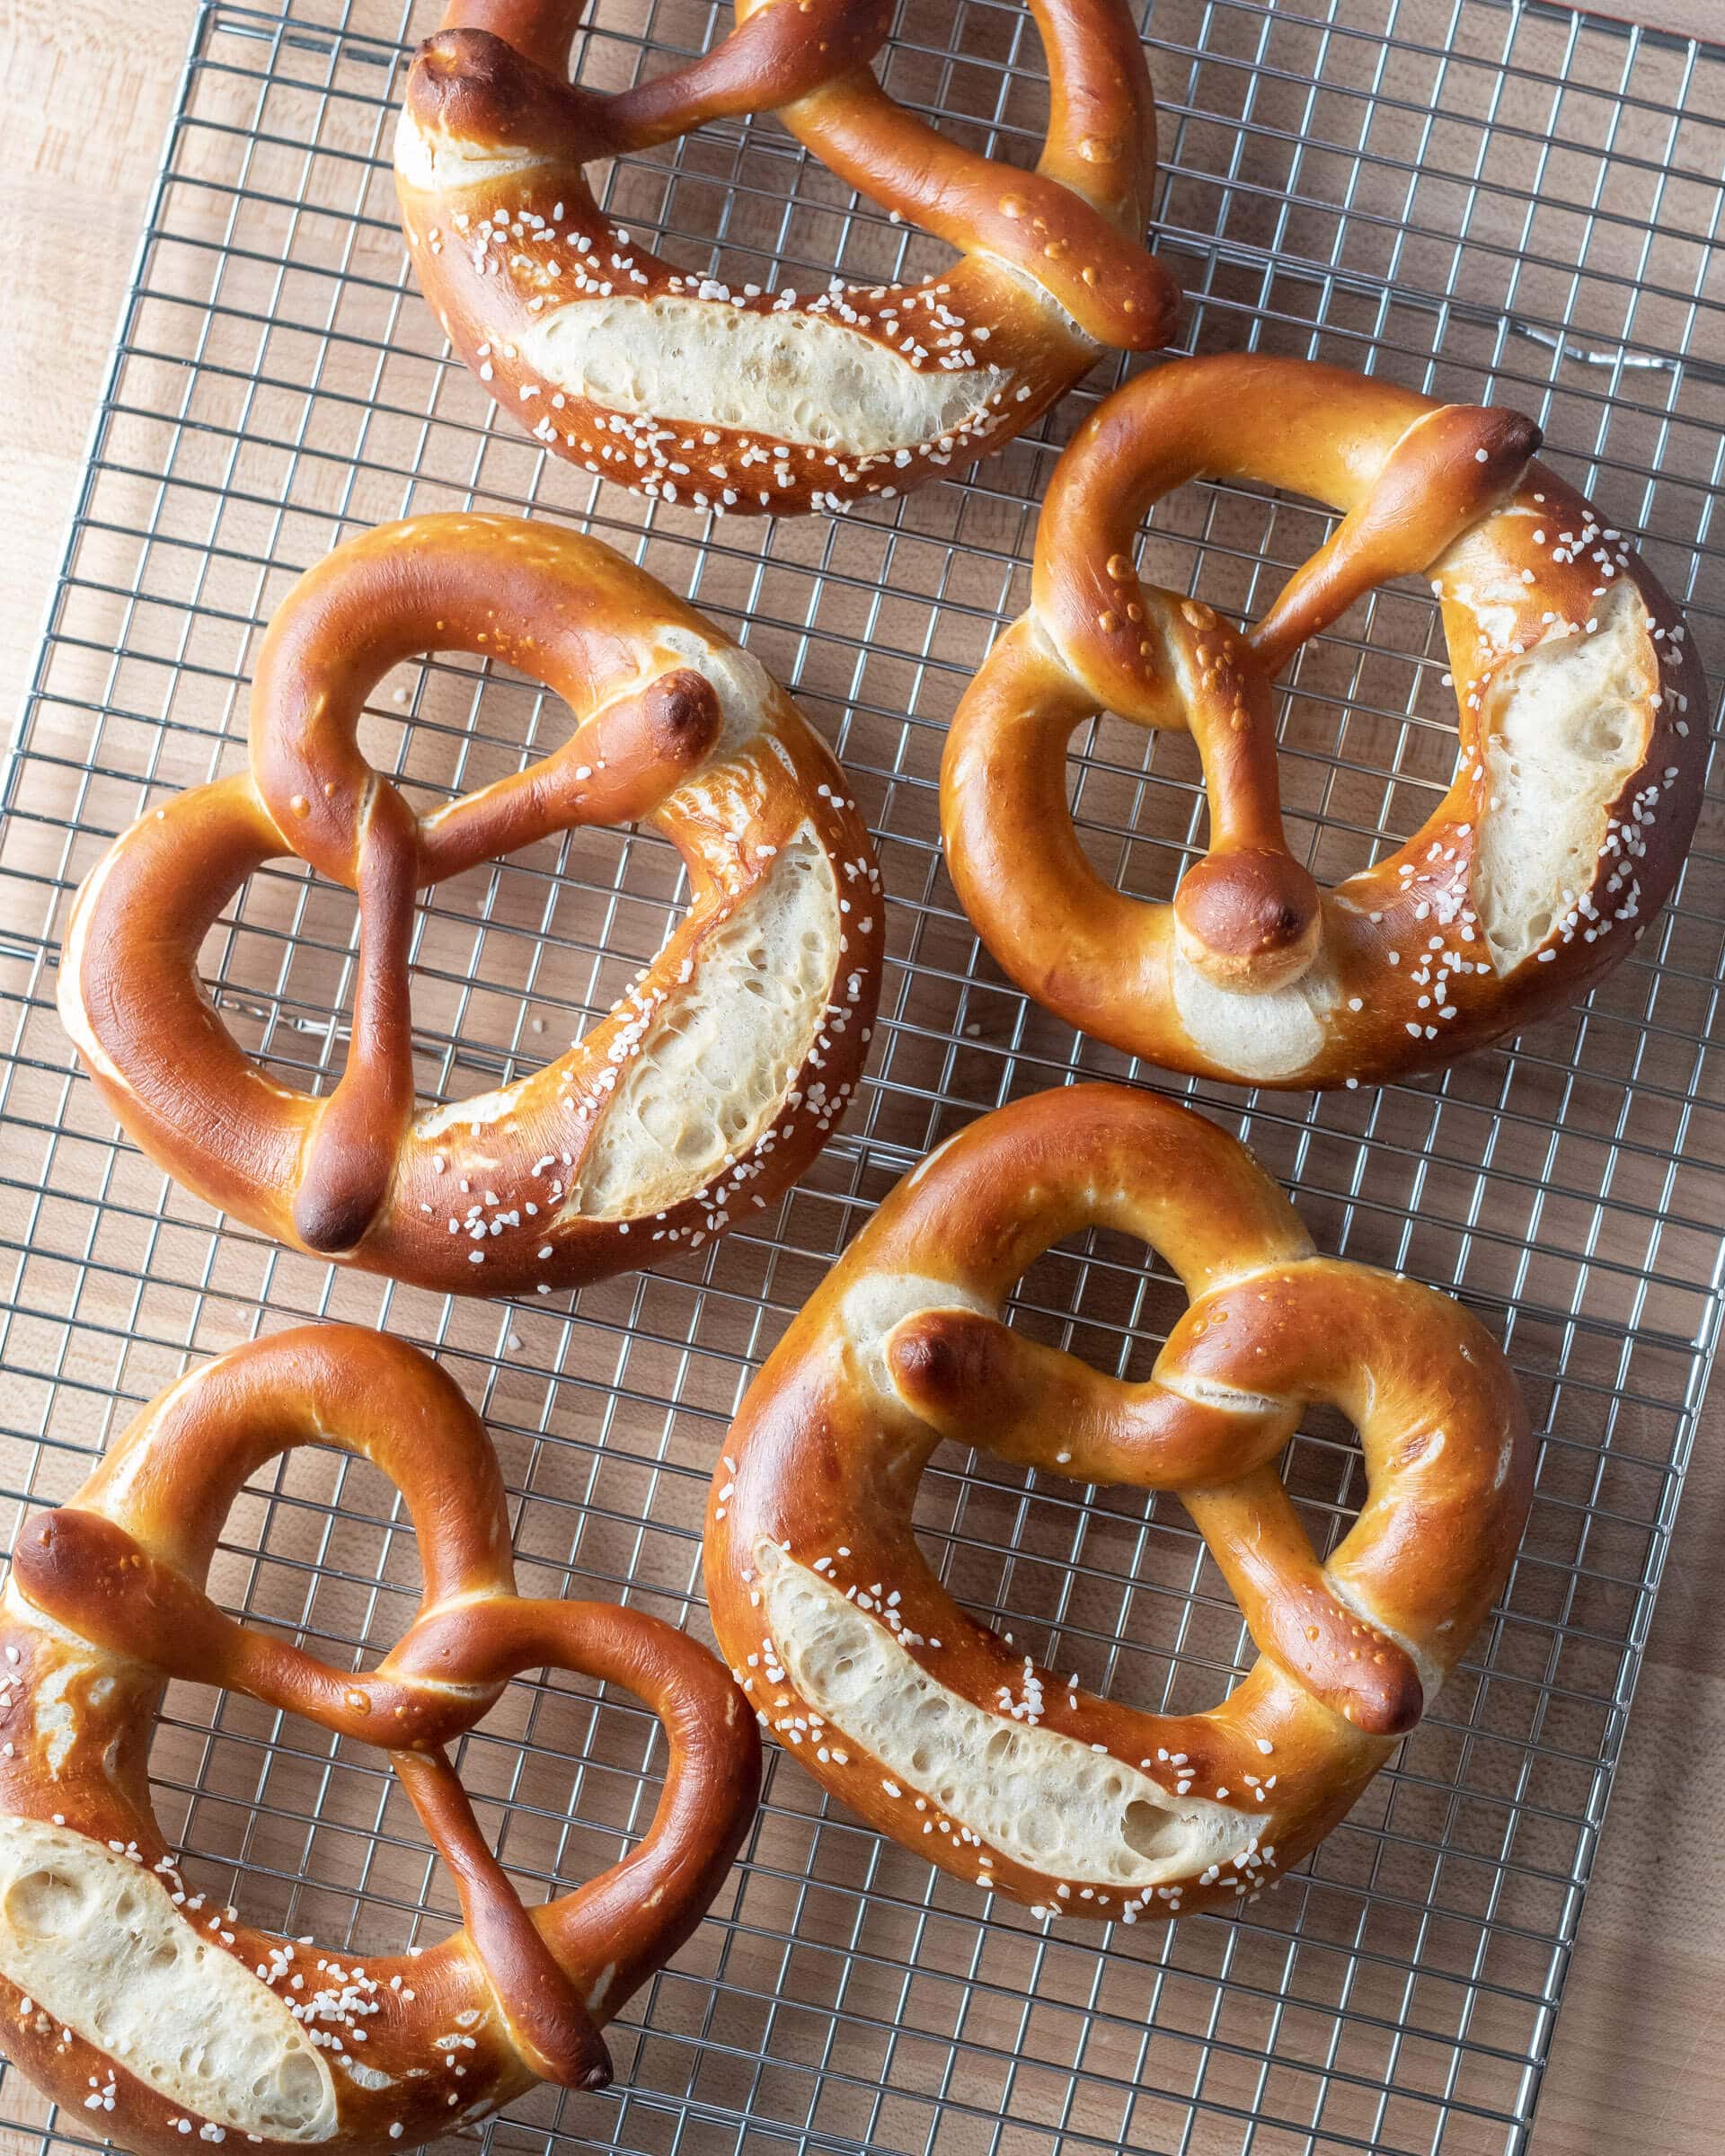
If you want, you can exaggerate the textural contrast between the “arms” up top and the bulge at the bottom by rolling the arms very thin. This way, they’ll bake completely through and become crunchy, which is a nice counter to the soft bottom.
Print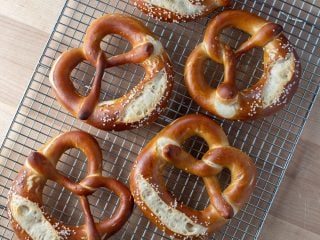
Seriously Soft Sourdough Pretzel
- Prep Time: 18 hours
- Cook Time: 25 minutes
- Total Time: 18 hours 25 minutes
- Yield: 12 pretzels
- Category: Sourdough, Pretzel
- Cuisine: German
Description
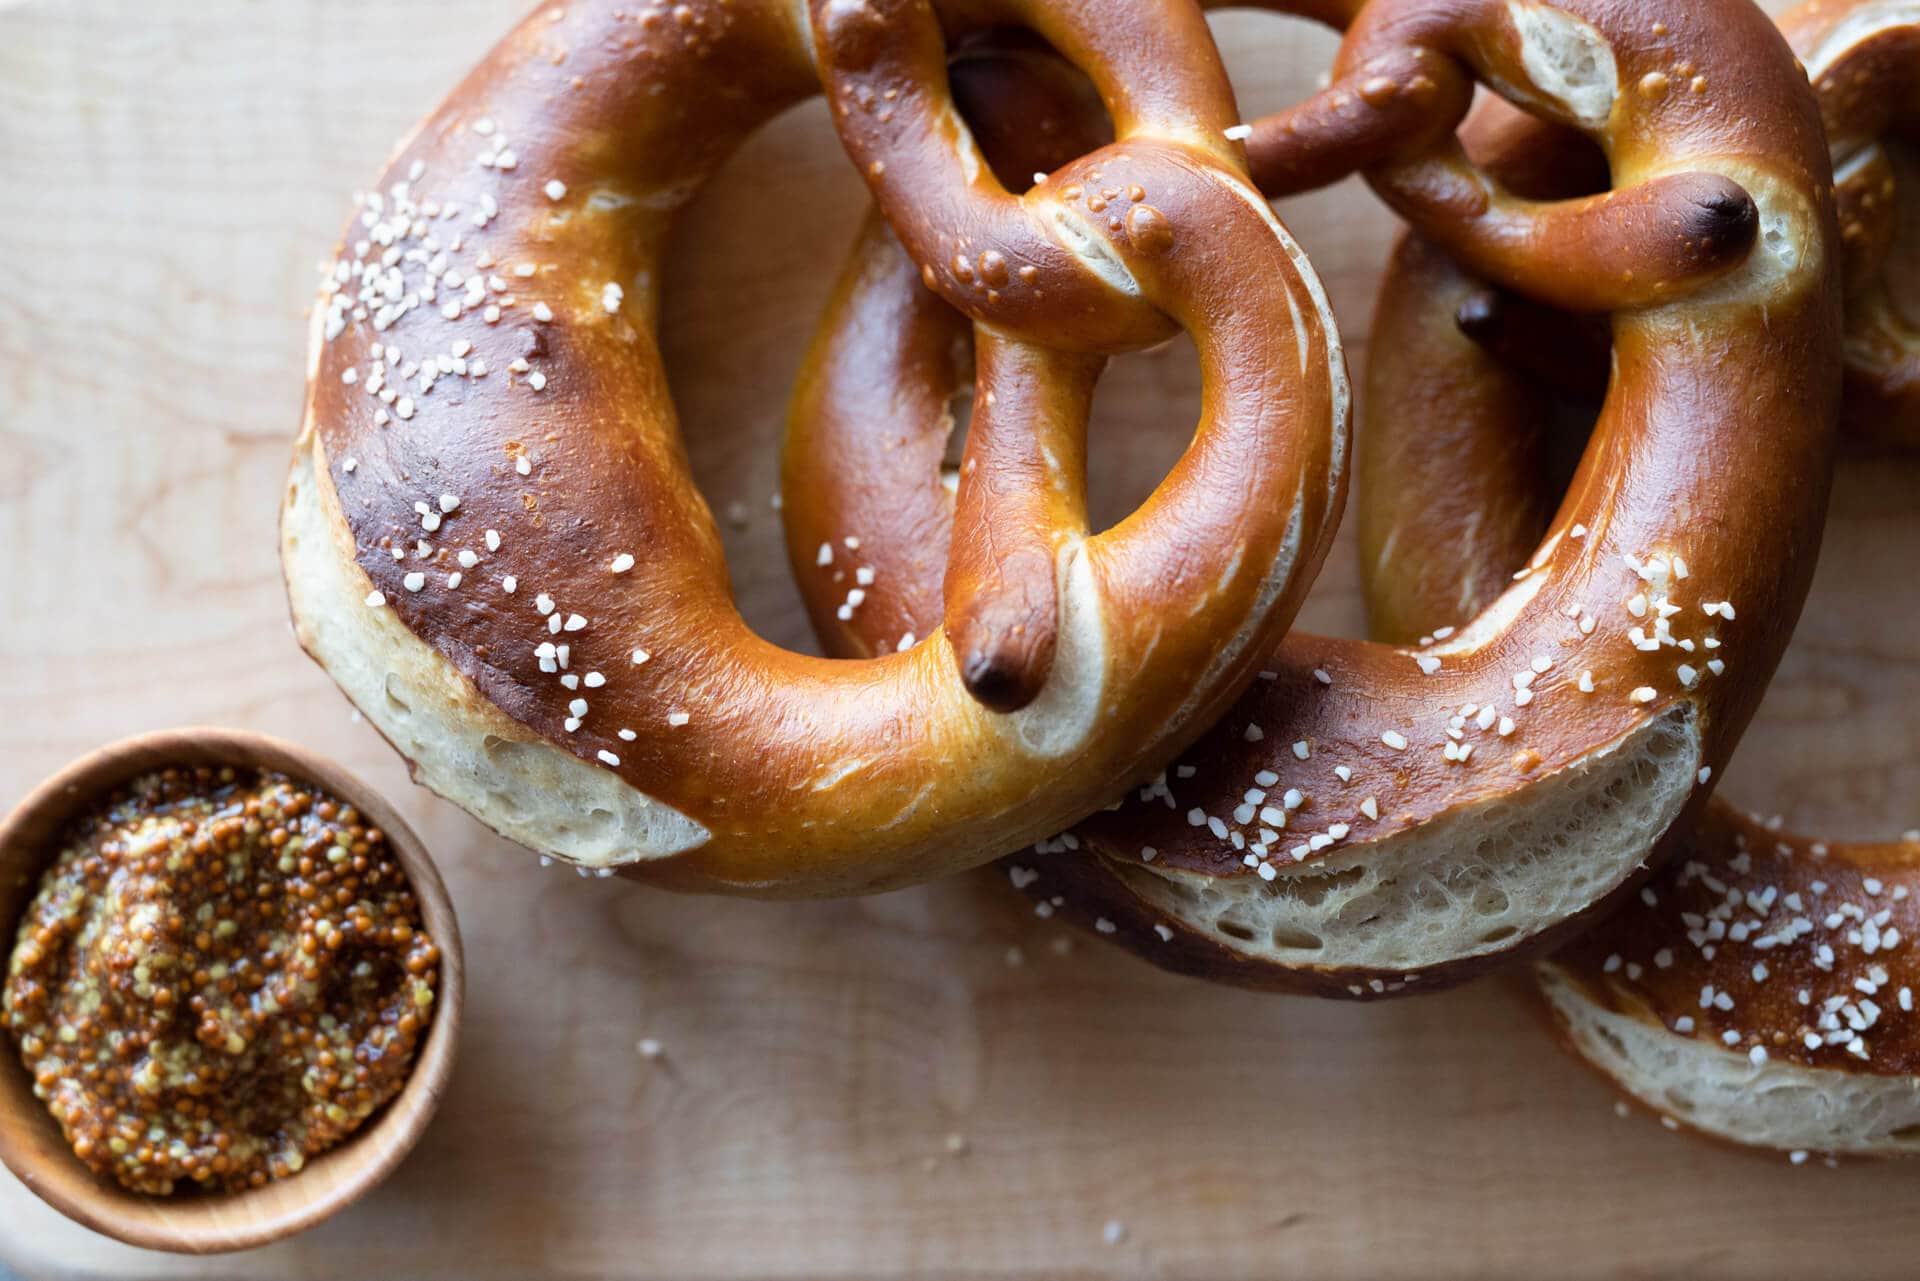
Chewy and soft, these sourdough pretzels are the real deal. Equally delicious with mustard, cheese, and beer, they have that unmistakable pretzel flavor and deep color.
Ingredients
Levain
- 10g ripe sourdough starter, 100% hydration
- 51g all-purpose flour
- 51g whole wheat flour
- 102g water
Main dough
- 635g high-protein flour (“bread” flour)
- 120g all-purpose flour
- 369g water
- 17g fine sea salt
- 60g unsalted butter, softened to room temperature
- 3g diastatic malt powder
Lye bath
- 940g cool water
- 38g food-grade lye
Topping
- coarse pretzel salt
Instructions
- Levain (9:00 p.m.)
In a small bowl or jar, mix the Levain ingredients. Cover the jar and keep it at a warm temperature for 12 hours. - Mix (9:00 a.m., next day)
Add the flour, water, salt, softened butter, diastatic malt powder, and levain to the bowl of a mixer fitted with a dough hook. Mix on speed 1 for 2 to 3 minutes until all of the ingredients are incorporated. Let the dough rest for 5 minutes. Continue to mix on speed 2 for 4-6 additional minutes until the dough becomes smooth and cohesive—an improved mix. - Bulk fermentation (9:15 a.m. to 12:45 p.m.)
Give the dough one set of stretch and folds after the first hour of bulk fermentation. Return the dough to the bulk container and let rest until time to divide. - Divide and preshape (12:45 p.m.)
Because the dough is low hydration, keep it covered at all times. Divide the dough into twelve 115 gram rectangular pieces. Preshape each rectangle into a tapered cigar shape. Let the pieces rest 15 minutes covered with plastic. - Shape (1:00 p.m.)
Line two half-sheet pans with parchment paper. Starting with the piece preshaped first, place the cigar in front of you so the tips are at your sides. Begin with your hands slightly overlapping in the middle, press down and roll the dough back and forth away from and then toward your body. As you are rolling, start to move your hands outward to encourage the tube to spread out and become increasingly thin as you move from the center out to the tips. You want to keep an exaggerated bulge in the very center of this rope, this will be the part you later score to open in the oven. Grab the two tips and arrange the dough so it loops away from you. Take one tip and fold it over the other side . Switch your hands so your right hand is holding the new right tip and your left is holding the new left tip. Fold the same side over the other as previously. Grab the two tips and fold them up over the knot in the middle and place each tip on its corresponding side inside the loop. It looks nice to have a little overlap with each tip — gently press it down into the side to seal. - Proof (1:15 p.m. to 1:45 p.m.)
Let the dough proof on the counter at room temperature for 30 minutes, covered. Then, uncover the pans and transfer to the fridge for 45 minutes to 1 hour. - Lye bath (2:45 p.m.)
Place two racks in your oven, one at the bottom and one in the top third. Preheat your oven to 450°F (230°C) convection (475°F (245°C) without convection). While wearing long latex or rubber gloves, add 940g cool water to a stainless steel bowl. To the water, add 38g food-grade lye while mixing with a stainless steel whisk or large spoon. The mixture will initially be cloudy, keep stirring until all the powder/pellets are dissolved. With gloves, pick up one shaped pretzel and transfer it to the lye bath and let sit for 15-20 seconds. Transfer to the cooling rack on top of the parchment paper inside a baking sheet. Repeat with remaining dough pieces. Once all the pretzel have been dipped, carefully flush the remaining lye solution down the toilet. - Bake (3:00 p.m.)
Score each pretzel with the razor blade and sprinkle on pretzel salt. Bake at 450°F (230°C) for 10 minutes. Rotate the pans back to front and top to bottom, turn the oven down to 425°F (220°C) and bake for 8-12 minutes longer until a deep brown color. Remove from the oven and let cool. Enjoy warm from the oven.
Notes
- For the lye bath, you will need a stainless steel bowl, stainless steel cooling rack, and pair of rubber gloves.
Sourdough Pretzel FAQs
Is pretzel dough the same as bagel dough?
No, they are quite different. Bagel dough typically has barley malt syrup added (and sometimes sugar, too, as I do in my sourdough bagels) to the dough, whereas pretzel dough does not. Additionally, pretzel dough typically has lard or butter added to the dough whereas bagels do not.
What is different about pretzel dough?
Pretzel dough typically has butter added for enrichment, whereas most typical bread recipes do not. Additionally, pretzels are dipped in either lye or a baking soda solution before baking for increased browning and that signature flavor (especially true with lye).
Does pretzel dough need diastatic malt?
I like to add diastatic malt powder to increase the coloring in the pretzels, add a little more chew, and ultimately, more flavor. However, you can omit the malt powder if you don’t have any on hand.
What’s Next?
There’s no question I’ll be making these soft sourdough pretzels often. When I’m in the mood for something sweet, my sourdough bomboloni will do, but these are their savory opposite. They’re slightly salty and the perfect snack for any sporting event, when friends come over for a beer or two, or even just for a tasty weekend treat.
Given the multitude of Oktoberfest festivities in my area, I’m certain I’ll have these on repeat for the next few weeks. The only real question is whether I’ll accompany them with mustard, cheese, or butter… Don’t judge.
If you’re in the mood for another recipe that’s in the same vein as these sourdough pretzels, check out my sourdough bagels: a similarly stiff dough but a completely different end product.
Guten appetite!
If you use this recipe, tag @maurizio on Instagram so I can take a look!


200 Comments
What is missing from many of your recipes that would be super helpful is an estimate of the degree of rise at the end of bulk.
I love your formulas and recipes. What would be really helpful is an estimate of degree of rise at the end of bulk which is missing from this recipe.
Hi, I made these once before and they were perfect! Thank you for the recipe! I’m interested in making these into pretzel bites, do you just recommend reducing the baking time but keeping everything else the same? Thank you!
i had a good laugh as soon as these came out of my oven. I followed exact ingredients and steps in your recipe, only one thing is different. Could this https://uploads.disquscdn.com/images/f3ef7832fb543a7b42552a182decef3ba413831b1c3f6858a4fd24465f1b6c97.jpg be the reason? As I can only get hold of lye liquid, I used 38g of lye liquid to mix with 940g water. And besides, the pretzels tasted nothing like pretzel. I was disappointed 🙁 Any suggestions?
love the recipe … my pretzels look great but are quite stuck to the parchment paper do i need different parchment or silicon mat? thanks for all your excellent work!!
A silicone mat works really well here, yes. But also, I've found Kirkland brand and Reynolds parchment to work better than others!
You mention this can be made in a “single day using your already-ripe starter” rather than an overnight levain. In that case, do I disregard the “formula” for the levain? My ripe starter has rye and AP flour while the levain includes wheat and AP…..
The recipe states 214g of the overnight levain. Do I substitute for an equal amount of active fed starter?
What is the advantage to doing the overnight levain vs a ripe starter?
Thanks so much for your help!
Yes, just use your starter in place of the levain—it's okay if the flour blend is different since it's such a small percentage! I call for the o/n levain because it helps get most people's starters on the right foot for making this recipe. It's not mandatory if you feed your starter regularly. I talk about levains more here, check it out .
I was expecting these to have more of a sourdough flavor but found it undetectable. They were delicious, but I am curious about a soft pretzel that has more of a sourdough flavor. Any recommendations or suggestions?
I learned a while back that while sourdough has come to be known as a flavor profile, it's actually just a natural/wild yeast baking method. That helped me when I was frustrated with the lack of SD flavor I'd been expecting. If you look at the ingredients in commercially made sourdough, it typically has acetic acid/white vinegar and/or ascorbic acid/vitamin c added to get that signature tangy flavor that we have become used to being there. Adding rye and/or whole wheat and longer fermentation times can add more of the natural tang, but it won't ever be the same as commercial because of those additives.
You could try using your starter when it's more ripe, let it ferment longer. Also, adding a bit of rye flour will help, even just 2-5%.
I want to bake these for Super Bowl on Sunday, but I'm going to be out of town from Wednesday to Sunday early afternoon. What would you recommend for the approach? Would it best to proof, do the lye bath, then freeze the dough and bake from frozen? Bake first then freeze? Or could I go for a mix, short bulk fermentation, then a cold proof in the fridge from Tuesday night to Sunday?
I would not freeze the dough, but freezing the pretzel works well (just be sure not to top them with salt, do that the day you want to eat them). Thaw in the fridge overnight, then reheat in a warm oven. Sorry for the late reply!
Ciao Maurizio! Grazie!
Please can you share the amount of volume( also in percentage% ) that the dough Will reach? Do you think the 30% – 50% of original volume Is enough? Thank you
Yes, that should be enough, Luca!
oh and how about instructions for us schmoes who do things by hand and who have no machines
who the heck has Food Grade Lye lying around (no pun intended)
is there no workable substitute for a normally equipped kitchen?
Ha ha. Oh I don't, I had to order it. But now I have it lye-ing around and use it with these pretzels! If you don't want to use lye (but I highly recommend you do), you can "double bake" baking soda.
The instructions don’t match from covered 30 minute proof in counter in details steps to uncovered 30 minute proof in counter in actual recipe. Which is right?
Sorry about the confusion, Ben! I proof them on the counter covered for 30 min, then uncover and transfer to the fridge.
I just want to say that these are the best pretzels I’ve made so far! I am german living in the US and have been experimenting with recipes here and there. In the past, my pretzels have gotten a weird too crispy texture on them and bubbles. These are perfectly crisp on the outside without being too hard. Thank you!!!
Makes me happy to hear that, thank you Jenny!
Is there a way to use starter discard in this recipe? Or are there modifications you, Maurizio, or a community member could suggest?
I would not use discard for this recipe, you want a very active starter for these pretzel!
You mention using either starter or levain. If using starter should we feed it with the wheat vs all purpose ratio we would’ve used in the levain? Or would any fed starter work? Is that important? Thanks
Any ripe starter will work just fine!
I made these last night and everyone agreed, they were amazing!!! I followed the recipe almost exactly (ran out of bread flour and substituted fresh milled wheat, with no problem).
I want to know, is there a way to give these a long ferment in the refrigerator? So instead of 45 minutes in the fridge, keep them in the fridge overnight and bake them the next day? I want to bring some to a party but they need to be ready by 4:00 p.m.
Thanks so much, Maurizio. I’m loving your cookbook!
Have been making pretzel with lye bath for years. Baking soda bath is never as good as lye. They are called Laugenbretzel for a reason. One thing I want to add is, that Germans (I am German) often eat them sliced horizontally and spread with good butter. I never liked them with cheese sauces or mustard, even though I love mustard on sandwiches.
I agree with you Inge, lye is far superior!
I am a chemist and would hesitate to use lye in my kitchen (although I have used sulfuric acid to scarify seeds). Make sure you mix in a metal or plastic bowl not glass. Alkali will attack the glass and eventually make it cloudy and even weaken the structure. Have some diluted vinegar on hand to quickly rinse your hands should they get lye solution on them. You can also use washing soda, sodium carbonate, instead of lye. I never use gloves as I count on not getting anything on my hands. Who knows if your rubber gloves have a hole in them? Use proper mixing and pouring tools and you should be ok.
I’ve used lye for many years here—zero problems 🙂 A good pair of latex or rubber gloves should be completely sealed with no holes, that is in fact why we buy them! Just follow good precautions and it’s not a big deal at all!
New to making pretzels. My daughter made them once, but used a different recipe. Hers didn’t call for a lye bath. Is lye bath necessary? What does it do to the pretzel?
The lye bath really makes these pretzel special. It adds the deep color and “pretzel flavor” you come to expect with them. You can also use baked baking soda instead, but I honestly would go with lye 🙂 It’s not as scary as it sounds, and with the right precautions, it’s really easy to do!
I love this recipe. It has worked out terrific for me. I do the first part of the shaping, rolling it into a cigar shape. Then, after rising and a lye bath, I use sissors to cut them into little epi shapes like you would with a bagette. It sort of turns the pretzel into four bite size pieces. They are a big hit at the tailgate. I also make a mayo and stone ground mustard sauce for an easy dip.
So glad, Mark. I love the idea of making these epi-esque!
DO you bake the pretzels on the cooling rack is inside the baking sheet? I tried baking them on the cooling rack inside a baking sheet as well as baking them on parchment paper but both times the pretzels stuck to the cooling rack in a very bad way and the other time to the parchment paper also in a very bad way. this was after allowing them to drip drain on the cooling rack while dipping the others. suggestions?
No, they are not baked on the cooling rack!
My pretzels looked gorgeous and tasted great out of the oven. However, just overnight, they were hard as if they’ve dried out. I even stored them in a zip locked bag after cooling. Do you think providing steam during baking help? Maybe I need to reduce the baking time to 8 min instead of 10?
I would reduce the baking time!