
When attempting a new recipe I will usually keep working at it many times over until things are to my liking. I will go through pages and pages of notes with various tweaks to temperatures, folding intensities, flour combinations, and numerous other things. When I finally make a breakthrough I refer to my notes and pictures and will write up a new post in the hopes my discoveries will help any readers out there looking to bake these loaves in their kitchens. And this entry is no different. I believe I’ve finally found a great combination of inputs to produce a superb whole grain sourdough loaf. In my last whole wheat entry, the result was around 75% whole wheat. This entry describes how to get a nice and light, moist crumb with a higher percentage.
If you’re looking for a completely whole grain loaf, take a look at my other recipe for a 100% whole wheat sourdough where I sift out the bran and reincorporate it later!
I haven’t made a “white” sourdough loaf in a few weeks (the last one was my Walnut Cranberry Sourdough loaf), and I’ve become accustomed to the deep & rich taste these whole grains present when baked. They hold up to just about any food, and only sometimes overpower other ingredients.
One thing I’ve been experimenting with is a younger levain, per Chad’s description in his Tartine Bread books. In his latest book, Tartine Nº 3, he describes a levain prepared in about 4 to 6 hours at a warmer temperature between 80°F (26°C) and 85°F (29°C). My levain, however, is typically created overnight (about 12 hours) at a relatively low temperature between 66°F (18°C) and 70°F (21°C), depending on how brutal the winter days have been. I wanted to reduce my levain build time to match Chad’s more closely and see if using it at an earlier stage would help with fermentation activity during my bulk fermentation stage. I’ve only baked a few loaves this way, and all have been whole grain, but I’m eager to try this younger levain method in future bakes with my typical country loaf.
If you’re interested in maintaining a warmer temperature for your starter and/or levain, a small home dough proofer might be a good option. I’ve been using one lately quite heavily in my kitchen and it’s proven to be indispensable.
Here you can see the progression over a 6-hour levain build. Earliest is top left, oldest and ready for the mix is lower right (read like a book).
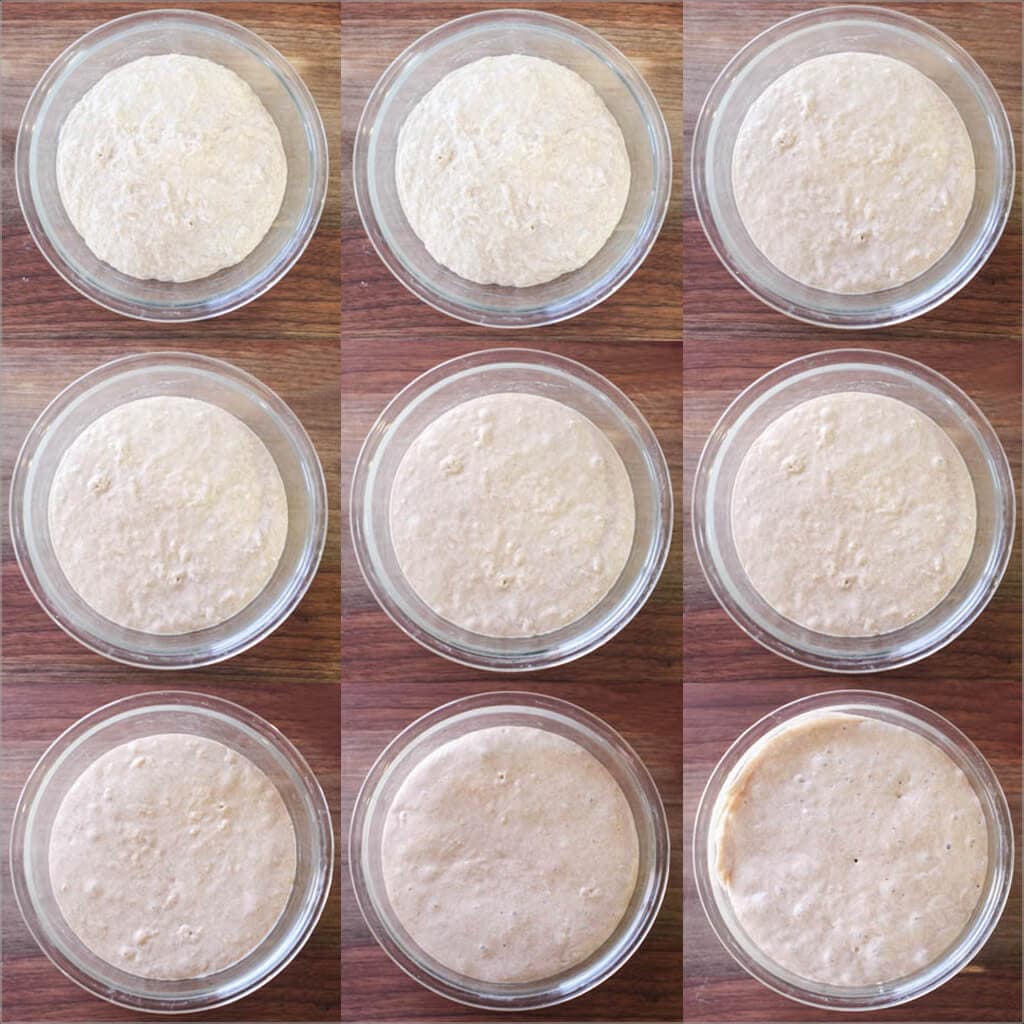
If you’ve only ever used a mature levain for your bread, you might get a little uneasy watching your young levain develop, never quite sure if it’s ready. Remember you can always do a quick “float test” before using the levain to ensure it’s ready.
Whole Grain Sourdough Formula and Method
Prepare the levain – 10:00 a.m.
The following levain build was kept at around 77°F (25°C) ambient temperature and started in the morning on the day I mixed the dough, rather than the night before.
| Weight | Ingredient | Baker’s Percentage |
|---|---|---|
| 19g | Mature sourdough starter (100% hydration) | 25% |
| 39g | Whole wheat flour (Bob’s Red Mill Stoneground Whole Wheat) | 50% |
| 39g | All-purpose or bread flour (Sangre de Cristo) | 50% |
| 78g | Water | 100% |
After mixing the above in a thick-walled glass container, cover and set in a slightly warm area, around 77°F (25°C), for about 6 hours.
Mix the flour and water & autolyse – 10:00 a.m.
Autolyse times for bread with this high of whole grain can typically range from 2 hours to overnight. I’ve done both and almost everywhere in-between. I elaborated on the differences between short and long autolyse times in my last whole wheat entry, but I’ll quickly say here a longer autolyse helps whole grains fully hydrate and starts the gluten development process to reduce total mixing time.
Additionally, during an autolyse, where the flour and water are mixed (remember, no levain or salt added during this step), enzymatic activity begins and sugars are “unlocked” for fermentation. Chad, in Tartine Nº 3 explains best:
As the autolyse is increased, amylase, which is activated by the water, starts to release sugars in the flour, making them more available for the wild yeasts and bacteria when the natural leaven is introduced to the dough. Some slightly bitter grains such as red wheat take on a noticeably sweeter tone…
Chad Robertson
But first, how does a long autolyse increase the rise height of your bread? Hamelman elaborates in his essential book, Bread:
When making breads containing lots of whole-wheat flour, during the autolyse the bran has an opportunity to absorb more dough water. This also has a favorable impact on loaf volume, because during the final mixing of the dough there is less of a cutting action of the bran on gluten strands.
Jeffrey Hamelman
I know, I know, I hear you saying “now I have to not only create a levain and watch it, but I also have to do a longer autolyse and manage that increased time as well?” Well, I found I can make this easy on myself, and you too. Just do your autolyse for the same amount of time as your levain, between 4 and 6 hours. Start them at the same time, and then they are done at the same time. Easy, right? From there you can experiment further with varying autolyse times and note their impact on reduced mixing time and dough strength and adjust accordingly.
Let’s get mixing.
Ingredients for Autolyse:
| Weight | Ingredient | Baker’s Percentage |
|---|---|---|
| 100g | Sangre de Cristo white flour (a locally milled flour, this is high protein, close to bread flour) | 10% |
| 150g | Bob’s Red Mill whole wheat flour | 15% |
| 500g | High Extraction (explained below) Bob’s Red Mill whole wheat flour | 50% |
| 250g | King Arthur Organic White Whole Wheat | 25% |
| 50g | Wheat Germ (optional) | 5% |
| 825g | Water | 82.5% |
Note that the total hydration for these loaves will be 95%, we will add more water later when we dissolve the levain after autolyse.
Method:
Six-Hour Autolyse:
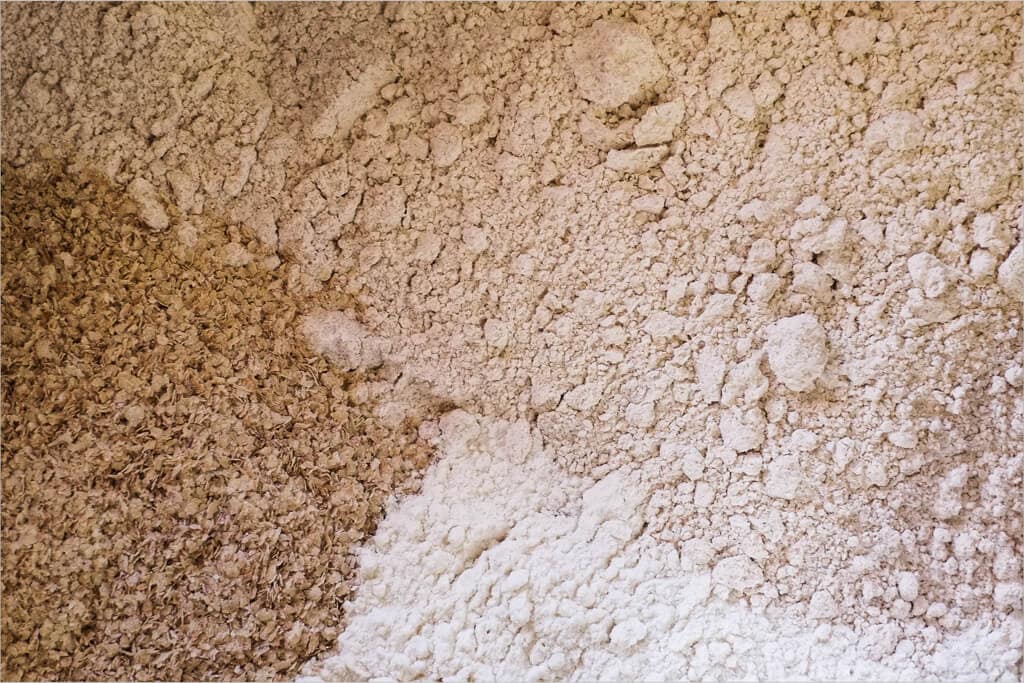
- Create your 500g high extraction flour by sifting your whole wheat flour. The flour that falls through the sifter is what you’ll use now, the bran that remains on the top can be reserved and used to coat your bannetons to prevent sticking but also increasing the whole grain percentage in this bread
- Add 825g water to your mixing bowl
- Add in 500g high extraction flour, 250g white whole wheat flour, 150g whole wheat flour, 100g white bread flour, and 50g wheat germ
- Mix until all the dry flour is incorporated
- Cover with plastic wrap and keep covered in a warmish place in your kitchen at around 77°F (25°C)
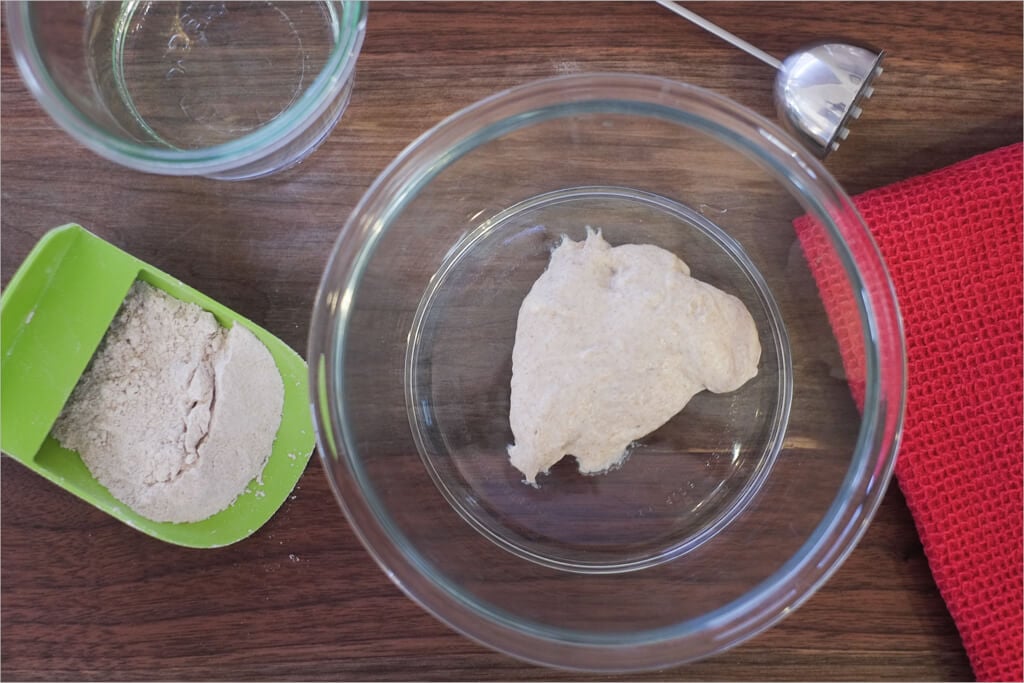
After six hours mix an additional 125g water and 175g levain in a separate bowl. Mix these until you’ve fully dissolved the levain in the water.

Add to your autolysed dough:
- 25g sea salt
- Your dissolved levain (your levain plus the withheld 125g water)
Mix with your hand until the mass becomes a bit “sticky,” and the liquid levain is fully incorporated. Transfer to your bulk fermentation container.
| Final dough temperature: | 78°F (25.5°C) |
Bulk Fermentation – 4:20pm
You’ll notice after the autolyse and mix the dough has some pretty good strength to it, yet it is extensible enough to stretch out without snapping back. Do the following turns gently during the bulk phase to avoid tearing the dough, with the last two sets of turns being very gentle.
- 4:50 p.m. – Turn Set 1
- 5:20 p.m. – Turn Set 2
- 5:50 p.m. – Turn Set 3
- 6:20 p.m. – Turn Set 4
- 6:50 p.m. – Turn Set 5 (very light set of 3 turns)
- 7:20 p.m. – Turn Set 6 (again, very light)
- 7:20 p.m. – 9:00pm – Rest on counter untouched
Note that a “set” here is four stretch and folds. I reach under my dough, pull up, and fold over the other side I do that four times. For this loaf in steps 5 and 6, I only did three very light turns, the dough was strong enough, and I did not want to risk tearing it.

With whole grain like this, you won’t see that crazy explosive rise you will with predominantly white bread, but the bulked dough should look jiggly in the bowl when you slightly shake it. The edges of the dough should have some shape to them in the bowl.
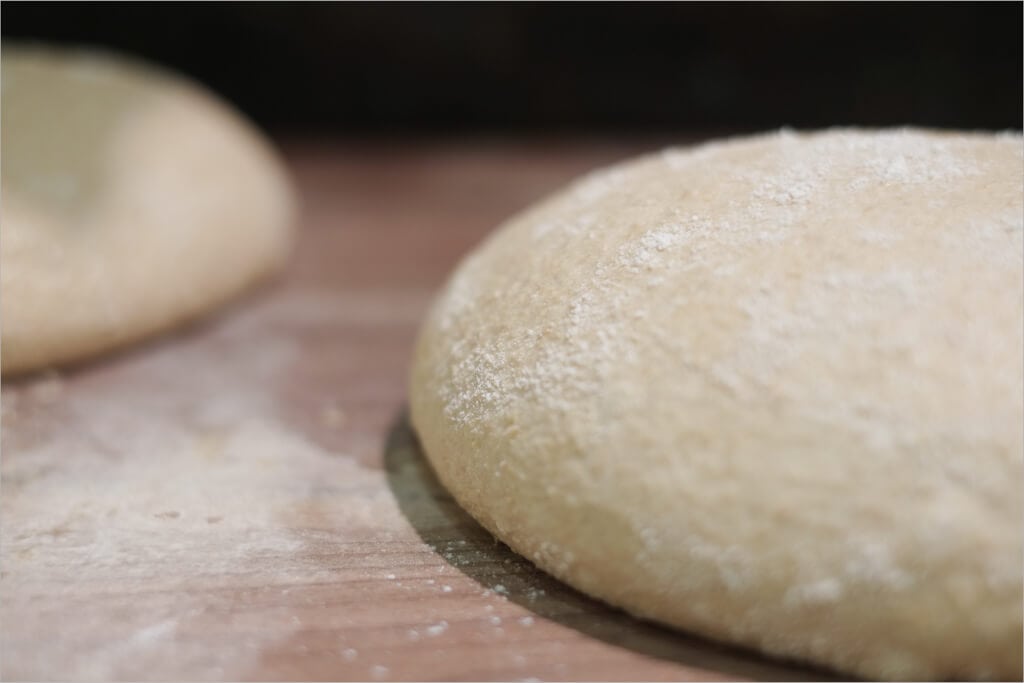
Pre-shape – 9:00 p.m.
Take the dough out of the container onto your work surface and sprinkle some flour on top before dividing. Divide the mass into two halves and lightly spin each half with your dough knife in one hand and your other hand. Let this pre-shape rest for 20 minutes.
Lightly dust your two linen-lined bowls with the bran you’ve reserved when creating your high extraction flour. Alternatively, you can use white or brown rice flour.
Shape + Proof – 9:20pm
After the pre-shape, my dough looked like it was holding its shape quite nicely, but it also still felt very extensible. I decided to do one loaf as a batard as I knew I’d be able to do the more complex shaping required. Plus, I love the batard shape. At 95% hydration shaping can be quite a challenge. Make sure you use enough flour to keep your dough from sticking to your work surface, but try to keep it to as much of a minimum as possible. I know, it’s not an easy balance to find.
See my post on shaping a batard for more tips and a video.
Create a nice taut surface on your loaves to ensure they have maximal oven spring. You don’t want to work them over and press out all the gasses, but you should have nice tight skin on the outside. This tight skin helps the dough rise when first put into the oven. After you’ve shaped them, gently place them into their bannetons and place in the fridge for an overnight proof.
Ahh that was a long day, but it was satisfying, wasn’t it? There’s nothing like taking the time to create these lumps of dough only to see them spring to life as large loaves in the morning not to mention the whole eating them part.
Score + Bake – 7:00am
In the morning, place your baking stone in your oven at the bottom 1/3 position and turn it on to 450°F (230°C) and preheat.
When preheated, take one of your loaves out of the fridge and grab a piece of parchment paper to place on top of the basket containing the dough. Take your peel and then put it on top of those two and quickly invert it, so the dough is now resting on the parchment paper and the peel.
When you score these whole-grain loaves, try not to dig in too deep at a 90° angle. If you go too deep, your loaf may not rise to its full potential. For the boule, I do a very light 90° “X” shape, and the batard is my usual 40° crescent from one side to the other.
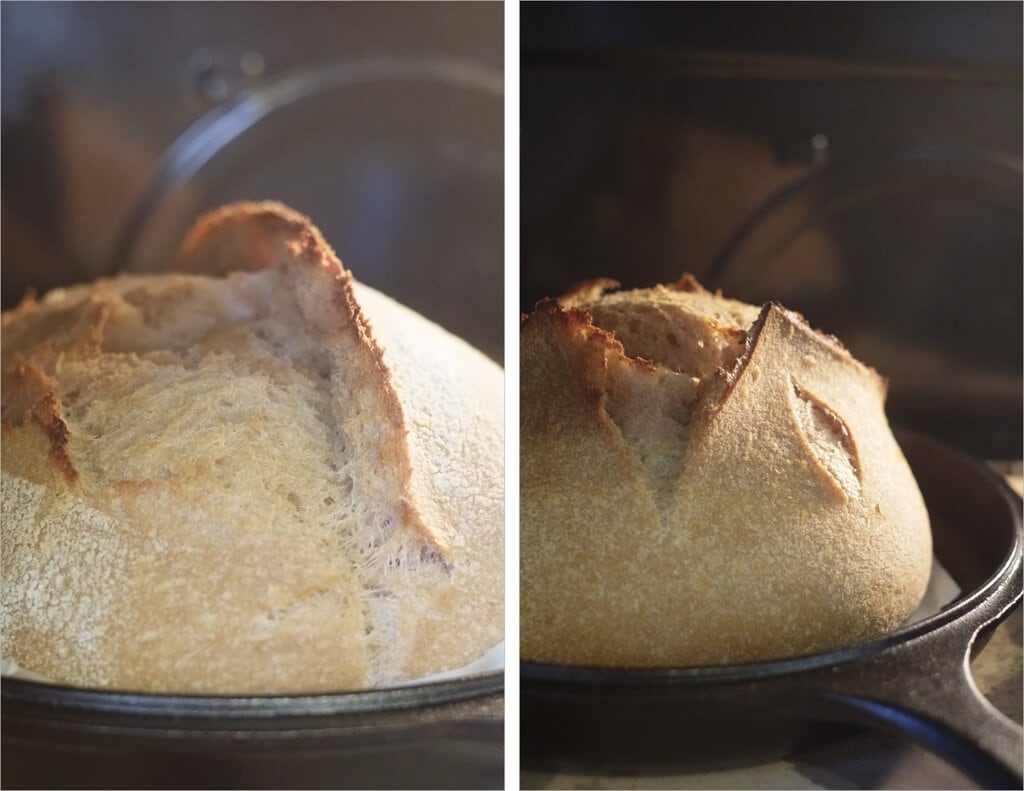
Place the dough into the combo cooker and bake, covered, for 20 minutes. After 20 minutes, take the lid off the combo cooker and bake at 450°F (230°C) for an additional 30 minutes, until done. For each of these, I had to go a bit longer than 30 minutes until the interior temp reached between 205-210°F (96-99°C).
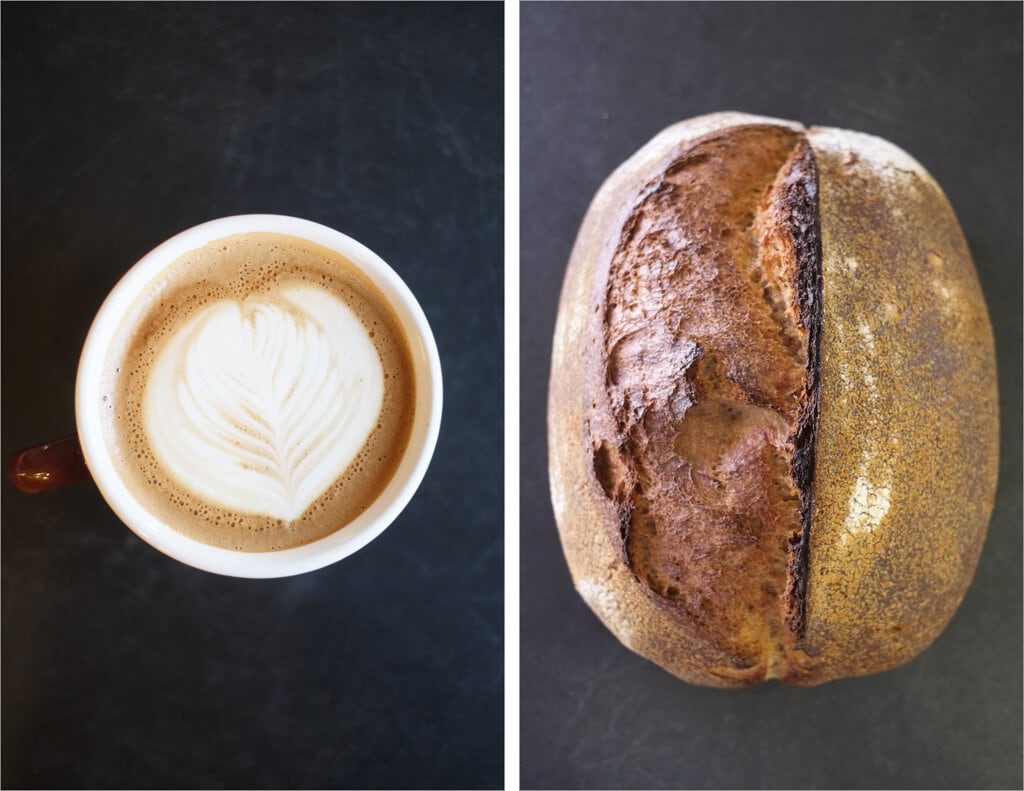
Conclusion
These two guys are, without a doubt, the best whole grain loaves I’ve made. The rise was far superior to any before them, and I just knew they were going to come out great when I loaded the oven. When I turned them out of their bannetons onto the peel, they held their shape: nice and bubbly with some height to them. I firmly believe I still have some room for improvement here and can get them even higher and an even more open crumb. These loaves have upped my bar and are a high starting point from which I’ll keep experimenting.
And as I mentioned up above, my future whole grain experiments have only improved and baking with so much whole grain brings so much flavor.
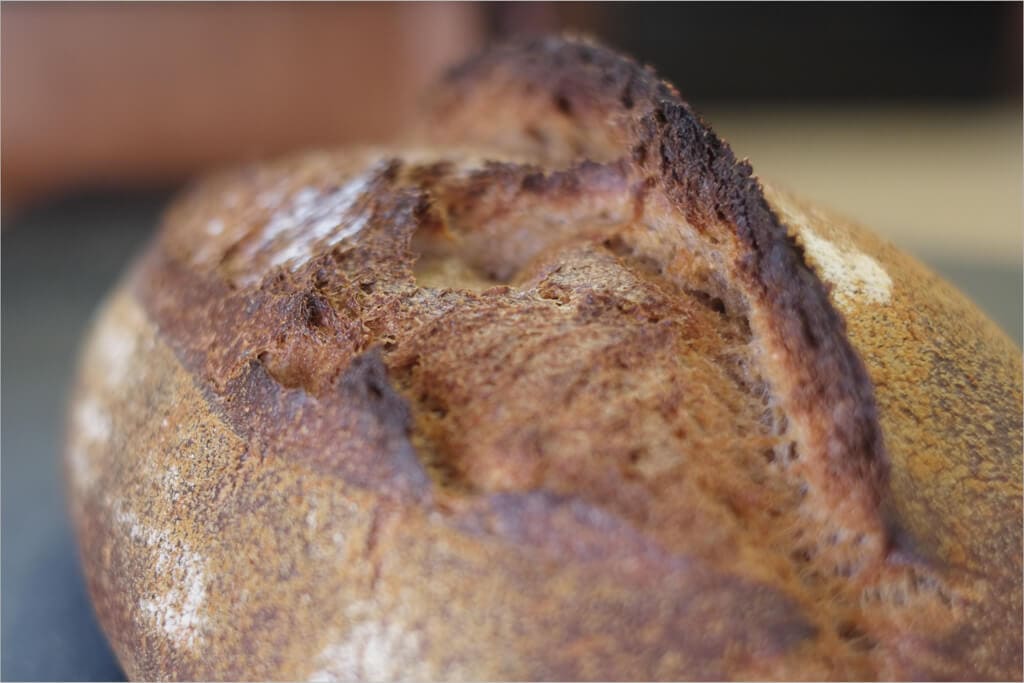
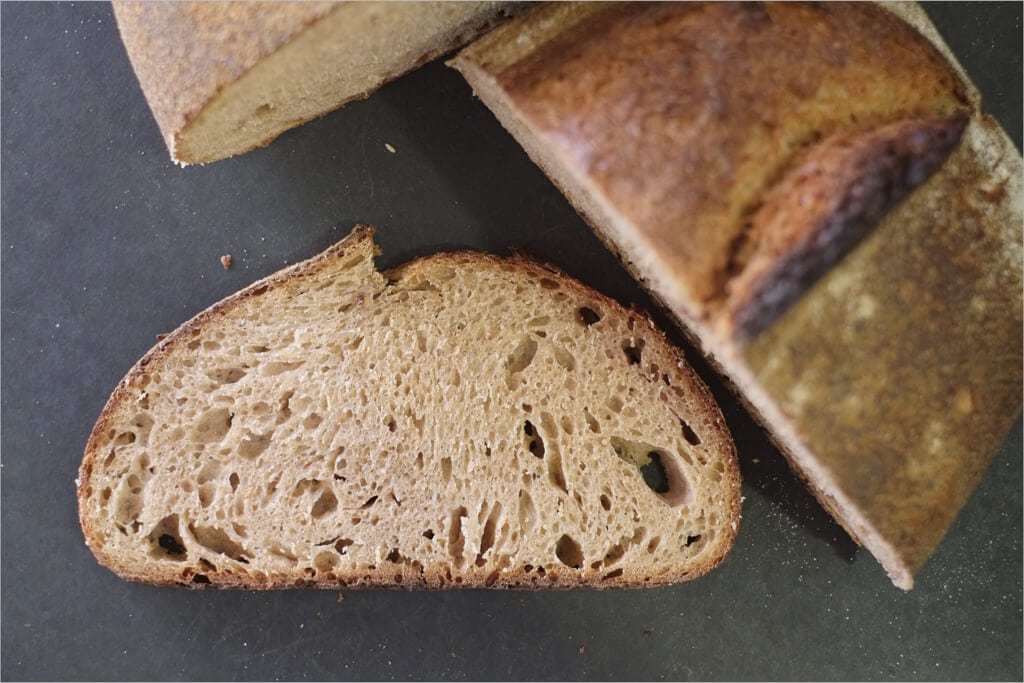
Crust
The crust was a tad on the thick side but not so much that it was hard to eat. I do not mind a thicker crust on my bread, but thin and brittle is what I strive for. Regardless, it was quite fragile, and there were some nice blisters and cracks throughout with some great movement, and look at le gringe! Now those are some ears if I’ve ever seen any.
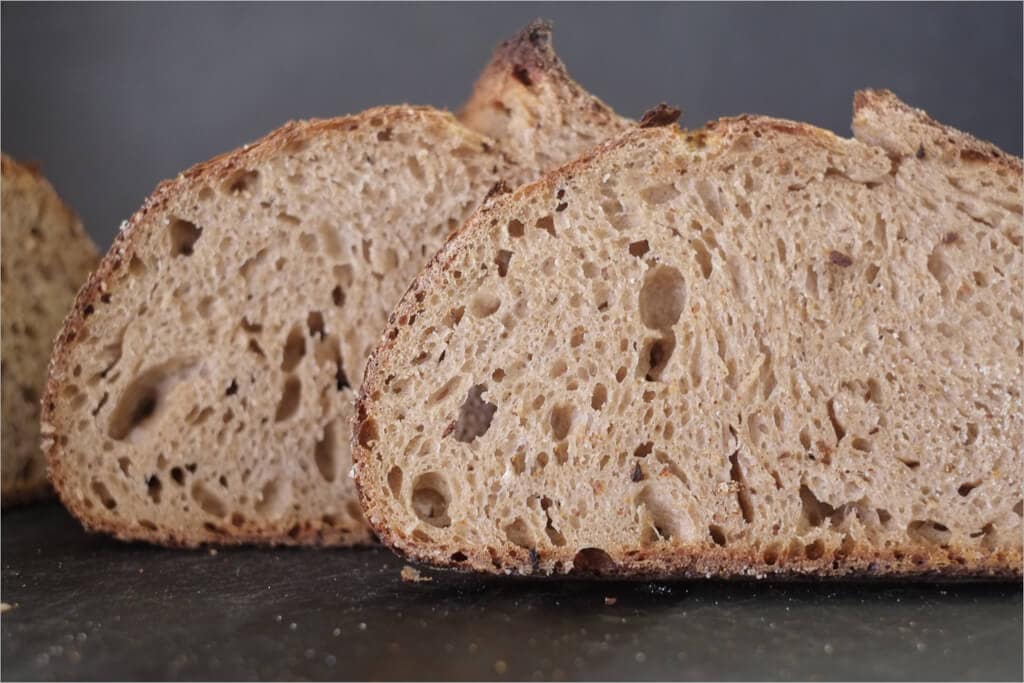
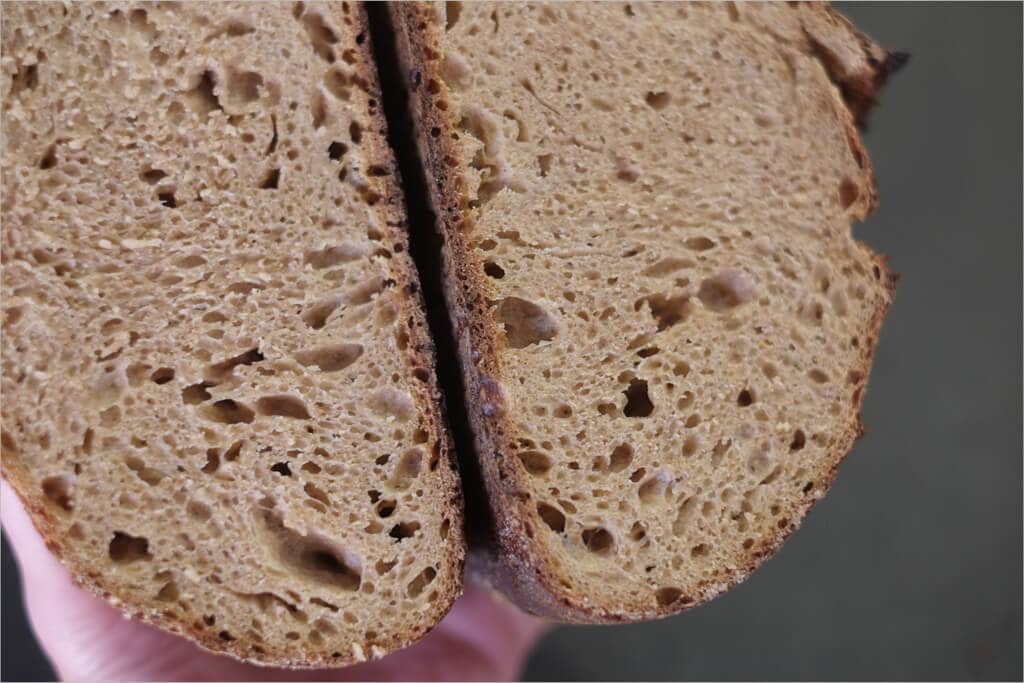
Crumb
High rise on these two! Each slice is open and airy with an excellent level of tenderness. At 95% hydration, a moist crumb is to be expected but I think this might be pushing the hydration levels, more water would not help this achieve anything further. Plus, pushing hydration more than 95% exits my shaping comfort zone as its very hard to handle (I’ve done a 115% hydration loaf, and I thought I was going to end up pitching the entire batch it was so difficult).
Taste
I like the taste of these whole grain loaves. The extended autolyse tones down the sometimes bitter taste found with this much hard red wheat, and the remarkable rise and airy interior help to lighten the loaf. I know I said this last time, but this is now my go-to recipe for whole grain bread!
Buon appetito!
If you use this recipe, tag @maurizio on Instagram so I can take a look!


130 Comments
Hello,
We love your wonderful recipes. The “Spelt, Rye and Whole Wheat” and “My Best Sourdough Recipe” (with added walnuts & golden raisins) are staples in our house.
This morning I’m trying this 95% Whole Wheat loaf for the first time and have a couple questions.
1) After sifting the WW flour to make Type 85 flour, about how many grams of bran should remain in the sifter?
2) I added 825g of water to the flours & wheat germ to make the autolyse and it seems pretty firm and less sticky to the other recipes I’ve made. Is it supposed to be a little firm?
Thank you!
Yo yo yo!!! Thank you for sharing a great nearly 100% whole wheat loaf at super high hydration! Would it be possible to make a video of the shaping process at similar hydration levels? This is where I find it hardest to manage!
Will definitely work on this!!
Hi Maurizio – I also tried to create my high extraction flour with my OXO kitchen sifter, but nothing remained in the mesh when I was done. Should I get a finer sifter? Thanks for another excellent loaf!
Yes, sounds like it’s too coarse!
Hi and thank you for sharing all of your knowledge and experience! I am wondering about the water in this recipe. It calls for 825 gm added at autolyse and then the “withheld” 125 gm added to levain. Does that mean 700 gm should be added at autolyse? Thank you!
Hey, Donna. No, all 825g added to the autolyse! I’m going to update this post soon to make it all more clear.
Thank you!
So, I am ready to give up. No rise. None. I don’t even know what I am doing wrong. Everything went soooo well yesterday. I was really encouraged. Now I have a baked discus
Hey Chris! Was your starter strong and active? Did you use it at the right time? Need more details!
Yes, the starter was strong and active. I am going to try again this morning. A friend said maybe I didn’t score it deeply enough. I scored it very lightly because that is what the recipe said. The second loaf spread out a lot in the oven. They both very totally edible. I didn’t think they would be. But the inside was soft and delicious. It was just very flat. There was some open pockets. I sent friend pictures and his response was “not as bad as you thought”. I don’t know how to put pictures in here.
I made this again. I used a finer strainer for the whole wheat and went deeper with the lame. Both loaves came out much better.
Fantastic, glad to hear that, Chris! Keep me posted on how it’s going. Sorry for the delay 🙂
I baked this today. I was expecting disaster, because once I added the Levain and the reserve water to the autolysed dough, I was certain I’d made a mistake. It was very slack, even after all the folds. But like and behold, all turned out well. I got a very good oven spring and a pretty airy crumb. Lesson learned – don’t be intimidated by high hydration.
Fantastic, Rick. Glad to hear it sprung up! I think every once in a while it’s useful to work with a higher hydration, it kind of expands your envelope of comfort. And almost always turns out great 🙂
Hi Maurizio! Trying to bake for a gluten-sensitive friend who can tolerate about half spelt flour and half white – can I sub spelt flour for the wheat with similar results? Thanks so much!
Yes, but I would reduce the hydration maybe 10%!
Hi Maurizio,
I am curious what water temperature do you use for the mixing? I heard it is recommended to use cooler water but I’m not sure that’s what you did. also, would you do any updates to this recipe if you were milling your own grain?
Hey there. With whole grain loaves I typically shoot for a lower final dough temperature (75-76F/23-24C), so the water is usually cooler. If I were using 100% freshly milled flour I’d certainly shoot for a lower FDT and I might also lower the levain percentage in the dough.
thanks for the prompt response! I’ll certainly try this out the next time around.
Pascal
Why are those adjustments necessary with freshly milled flour?
Not mandatory, but things I’ve found to help tame the dough a bit. A cooler dough temp will prevent over proofing, as will a reduction in the levain percentage.
That’ll work well!
Hi Maurizio, I made this recipe for the first time.
I struggled with the “high extraction” part. I borrowed a flour sifter and realized mid-recipe that my sifter was made in the last century; the holes were way too big. I sifted the whole 500g anyway and discarded a small amount, just to follow directions, but it didn’t remove any detectable pieces of bran. (I used KA whole wheat flour, and it seems pretty finely ground.) I was gentle with the dough, and was surprised that the bread turned out really well! (No self-mutilation of whole wheat flour detected.)
Did I just get lucky? Did my lame and lazy sifting actually do something? Or is the KA flour fine enough that it doesn’t need to be sifted? I’d like to replicate this recipe, and try my hand at your 100% WW sourdough, but only if I can get away without sifting in the future …..
Also, I assumed that I shouldn’t add salt in the autolyse mixture (but rather after), and wanted to note that you included salt in those ingredients. (
That’s great to hear, Sheela! KA whole wheat is milled very fine, but your sifting might have made a difference in removing the largest of the large bran/germ particles—which will help lighten the loaf in the end. I’d say try without sifting and see how it goes!
Thank you! I will!
Hi there — I made this bread again, without sifting (and using the KA ww flour) and it was very good! Next time, I may omit the extra wheat germ to see what happens.
Right on, so glad to hear that, Sheela!
The Tartine book specifies adding the levain to the autolyse from the start, vs. afterwards. Wondering what you think the advantage is of doing them separately? Thanks.
Follow-up question – I don’t quite see how you calculate the hydration at 95%. It seems like 900g. flour and 950g water….
Those aren’t the figures I get. I think we need to see your working out on that.
The flour mix adds up to 1000g,
100g Sangre de Cristo white flour (a locally milled flour, this is high protein, close to bread flour)
150g Bob’s Red Mill whole wheat flour
500g High Extraction (explained below) Bob’s Red Mill whole wheat flour
250g King Arthur Organic White Whole Wheat
In his first book, p114. CR discusses extened autolyse eg overnight WTHOUT levain.
Works well. Reading around the topic. Some of the “woodier” components
of wholemeal flour take a long time to absorb water.
That said, Mauriizio uses highly extracted (aka sieveed) wholemeal.
Awesome crumb on finished load.
I am going to try this formula.
Check out my guide to the autolyse technique for answers to your Q (and more!).
I have started making 80% whole wheat sourdough with an overnight autolyse and it has made all the difference. I have just adapted Chad Robertson’s process by mixing 100-150 grams whole rye and 650-700 grams of hard white wheat (both milled on my home grain mill) with 750-800 mLs of water and let it sit overnight in the fridge. Feed a small amount of my starter the night before with 100 grams of water and hard white wheat (just a small amount so it isn’t past ripe in the morning).
I add the levain to the autolyse and let it rest for 30 mins in the morning, then I add the salt, 200 grams of all purpose flour and sometimes 1/4 tsp of instant yeast AND I knead it in my mixer to build strength, until the dough is no longer stuck to the sides of the mixer.
Rest of the directions are just like in Tartine (with the stretches during bulk rise, the bench rest, the final rise and baking). This way the whole wheat rises essentially like a white flour loaf, but it tastes better and is healthier!
Thank you Carrie! Do you add additional water in when adding white flour?
If I want to substitute the wheat germ (unfortunately I don’t have) what would you recommend? Or do you think it is a must in the recipe otherwise will change the flavour/consistency?
Thank you!
I’d say just fine without! Still delicious and healthy bread 🙂
Hi Maurizio, I really like this bread and bake it quite often. Thank you for you amazing instructions. Could you please correct the wrong amount of levain? Some other people already asked you to do so as well. The instructions call to build a whopping amount of 450 g, from which you use only 175g. It was extremely confusing when I did this recipe for the first time! The correct amount would be
* 20g ripe starter
* 40g Bob’s Red Mill whole wheat flour
* 40g Sangre de Cristo white flour (King Arthur Bread Flour would work here)
* 80g water @ 85ºF
This results in 180g total mass, and you are likely to loose 5g during transfer to the mixing bowl.
I believe this would take you just a minute to update, but would save a lot of people from frustration and confusion. Thank you and happy baking!
Sorry about the late reply to your messages! Ok, the levain is now updated!
I love your recipes, but I seem to have an issue everytime I go to pre-shape. My dough is usually so wet and does not have the strength. It’s super sticky, and I just do my best. Do I need to be folding more during the bulk? This loaf got very poofy and bubbly, so I didn’t want to extend it any longer, but it was super slack and wet.
Hi Tiffany, this dough should indeed be quite sticky, but it is manageable. Make sure your hands are wet during the folding, it helps. Use some extra flour during the shaping and work quickly with the bench dough scraper (there are a couple of videos out there about the shaping technique).
I believe that a bit longer bulk fermentation and more folding sets should do the trick, as the dough becomes stronger with each folding set. Maurizio recommends four folds in each set, you can also try to make five or six. Make sure that you let it rest on the counter for some time after dividing.
I have another trick that simplified working with this dough at the beginning. When I added the levain and water to the autolyzed dough, instead of mixing this disgusting mess by hand, I just quickly stirred it with a spoon. Then I left this watery goo with pieces of dough in it to stay for a while. Just 20 minutes later it absorbed the water and magically converted into a dough that you already can touch. At this point I took it out and used slap+fold technique to mix it well.
As @disqus_AozSylNg0e:disqus says below, add in another set or two during bulk fermentation, this should help quite a bit!
Hi Maurizio, beautiful loaves! Can it also be done with stiff starter? Mine is @ 50-55% hydr. How can i proceed? Thanks!
Thanks! Yes, it certainly can. The recipe only calls for 50g of starter so I’d probably just use your 50g stiff starter and not adjust anything. If the levain turns out to be very stiff and hard to mix, just add a splash of water until it comes together. 50g starter is pretty small, so even if you had a stiff starter I don’t think it would be a huge deal 🙂