
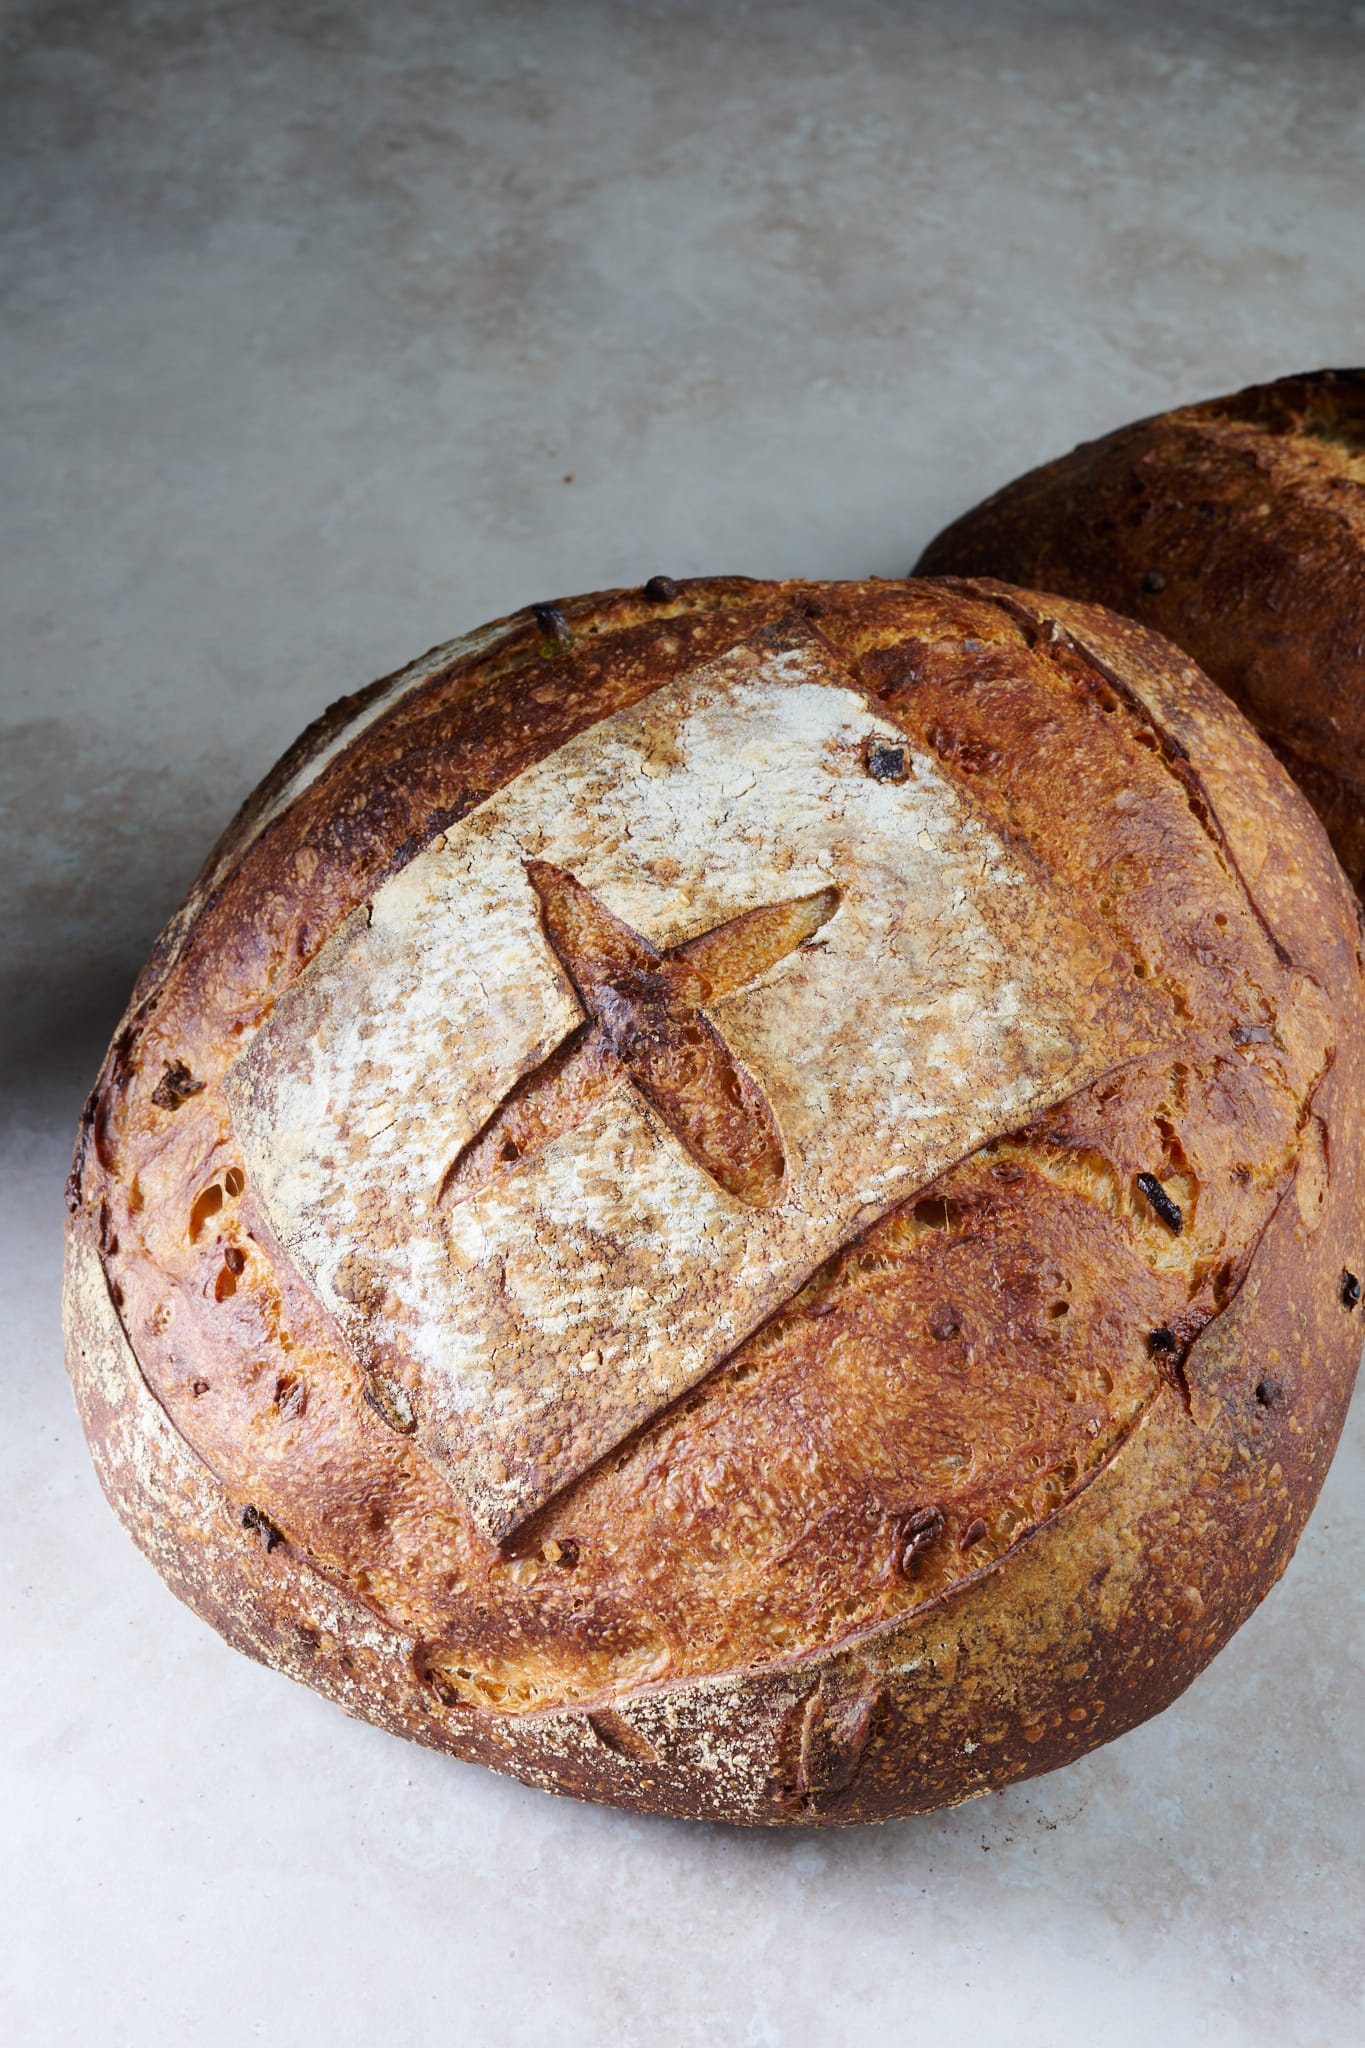
Growing up here in New Mexico means constant exposure to spicy foods. Red and green chile grow well here in the arid southwest of the USA, and you’ll find a spicy version of everything on the menu (even sushi). And for good reason, there’s an addictive quality to a well-roasted chile, and regardless of your spiciness tolerance, you might find if you eat it often, you’ll soon begin to crave its impact and flavor. With this jalapeño-cheddar sourdough bread, I’m channeling some of this, even if I call for jalapeño and not green chile, where the former is typically less spicy than the latter.
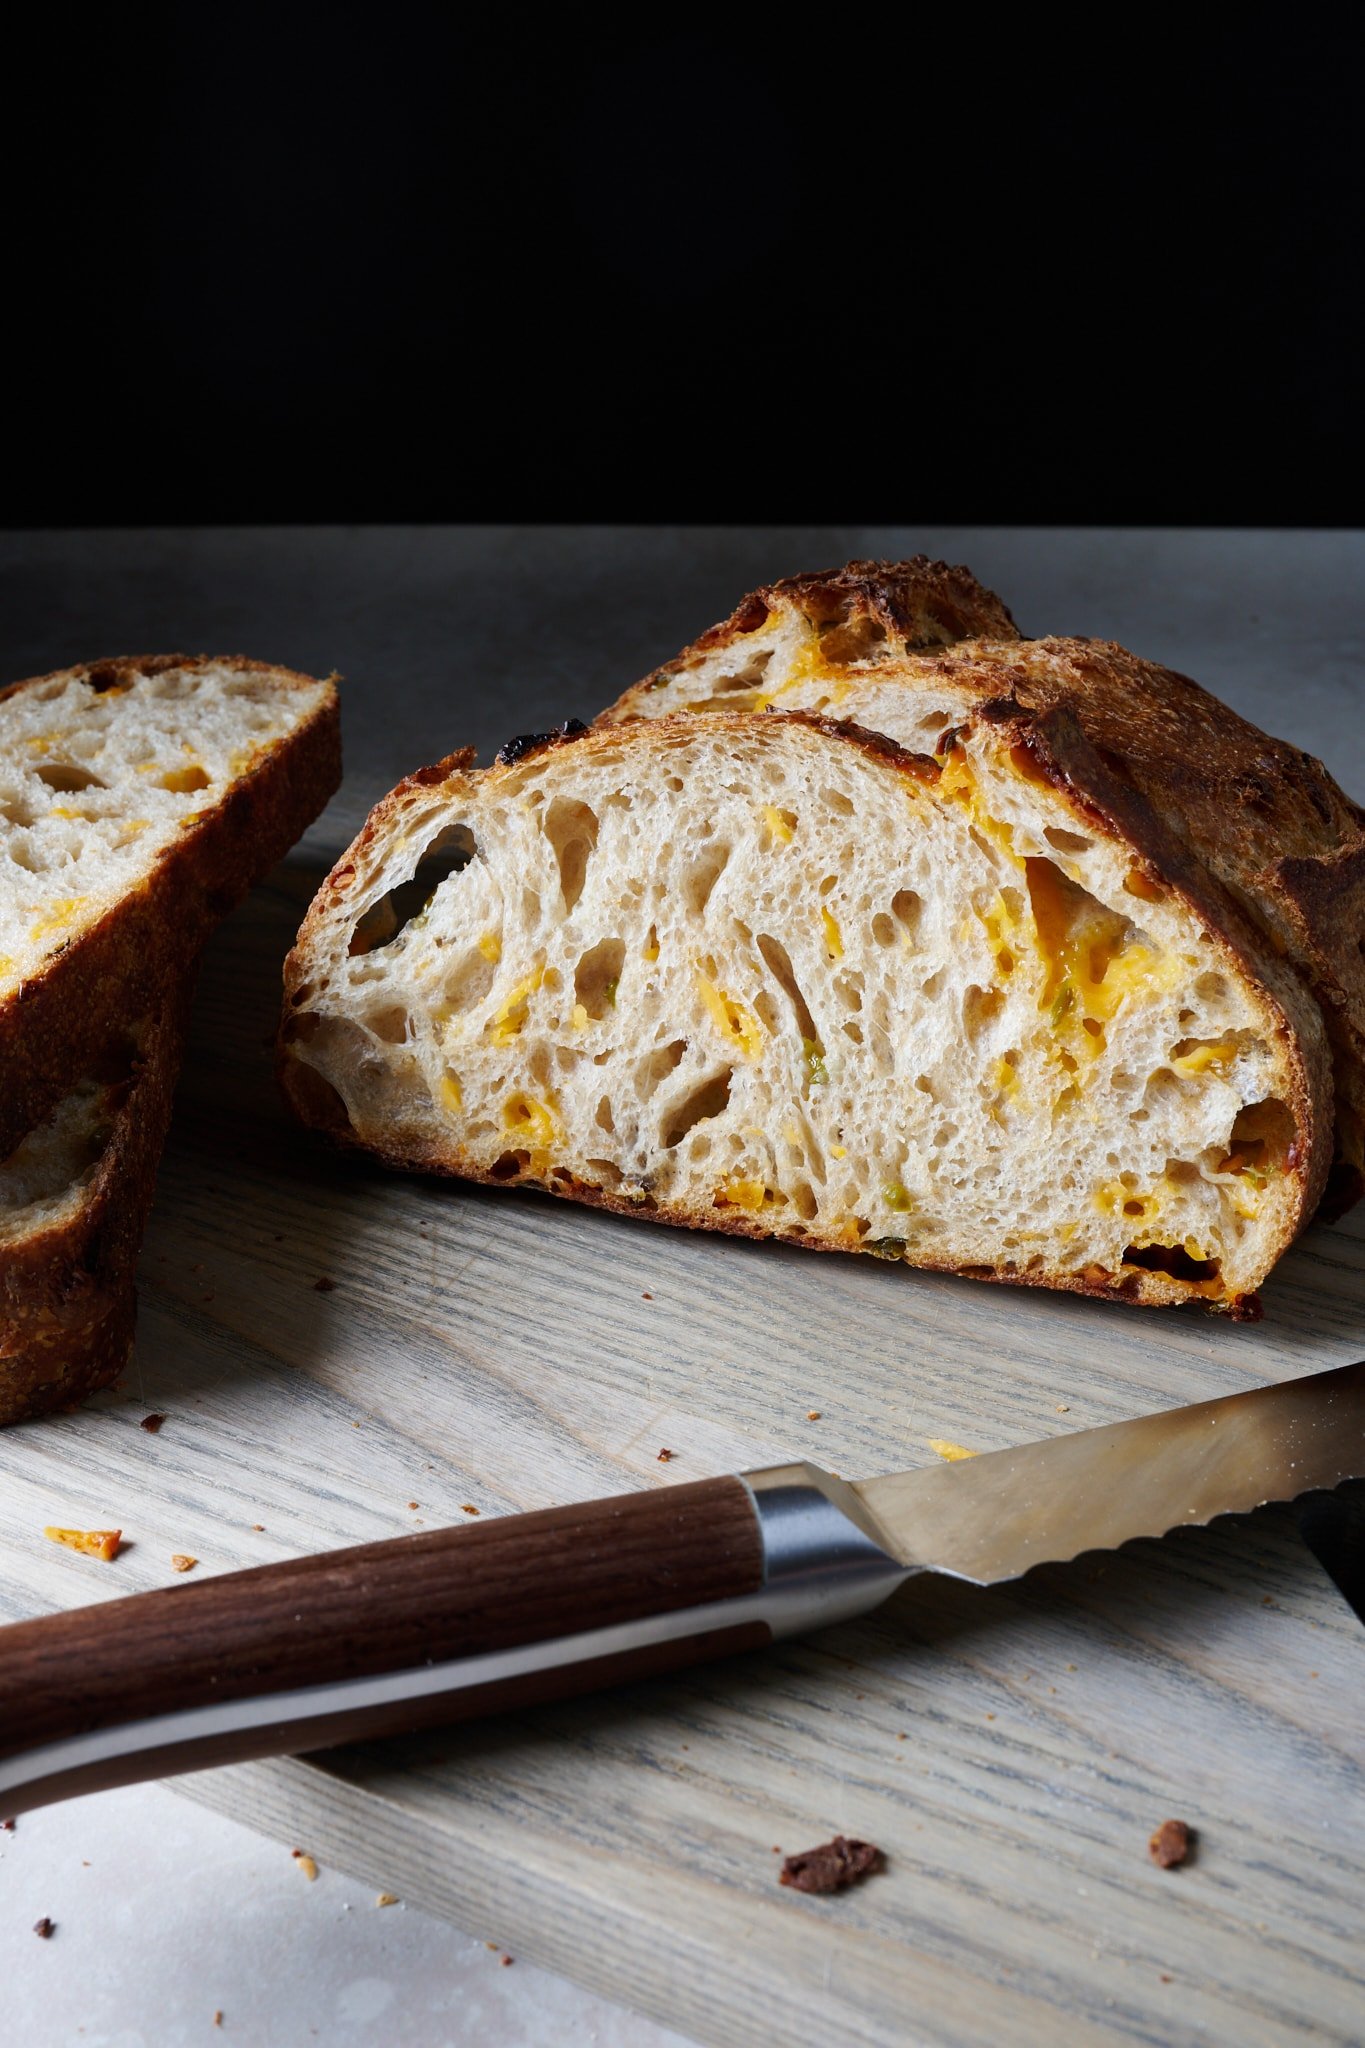
I’m certainly not the first baker to bake this combination, and I honestly can’t say where I first saw it (perhaps from my Southwest neighbor Barrio Bread), but after baking this in testing, I’m not sure I can avoid baking this often (and especially for visiting guests). I adore the aroma of the green, grassy jalapeños when chopped and mixed into the dough—so vibrant, so fresh, so pungent. The cheddar steals the spotlight when the bread is baking, and depending on how you shred, slice, or cube the cheese, you can either have a gentle or extremely evident melting situation—do as you prefer, and more on this later.
This is one of those loaves that’s less on the refined side and more on the do-whatever-it-wants side. But, melted cheese.
The flavor of this bread is spicy, but for me, not so much you can’t feel your tongue at the end of each bite. The savory and salty contribution from the cheese balances out the spice of the jalapeños, and the two work in unison to make those tastebuds dance. This is one of those loaves that’s less on the refined side and more on the do-whatever-it-wants side. But, melted cheese.
Flour and ingredient selection
Flour
Any high-quality whole wheat flour will work well for the whole-grain portion of this loaf. I used Carolina Ground whole wheat for the entire 30%, which brought a significant amount of flavor all on its own.
Or, if you frequently stock a high-quality type 85 flour, which is somewhere between whole wheat and white flour, this would be a great choice for some, or all, of the whole wheat in this recipe.
I also call for a 5% addition of whole rye flour, which I’ve come to realize is one of my favorite ways to bring color to the crust and add in some of that delicious and hearty rye flavor. It’s not a lot, but with rye, even a little goes a long way. If you don’t have rye flour, substitute it out for more whole wheat or even whole spelt.
Jalapeño
I used your standard green jalapeño from the market for the pepper component in this recipe. However, you could also go with a serrano for a more spicy result, or fire-roasted green chile to go full New Mexican (and it’s so, so good). While you may not always see little green bits of jalapeño in the interior of the loaf, you’ll taste and smell its impact.
Cheese
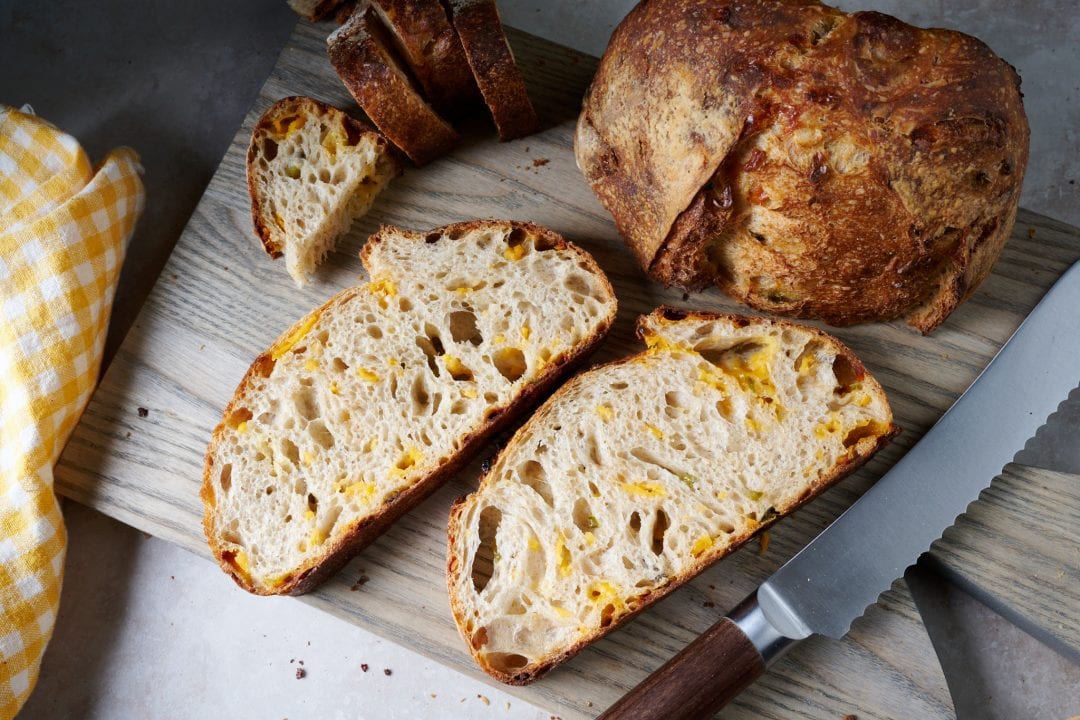
I’ve tested this with aged yellow and white cheddar, which are excellent. My preference, though, is for thickly shredded aged yellow sharp cheddar, which looks visually stunning and tastes great when paired with the spicy jalapeño.
If you thickly cut or cube the cheese instead of shred it, you’ll end up with pockets of slightly melted cheese throughout the loaf, which may or may not be your thing. I find a combination works well: some shredded (for maximum dispersion through the loaf) and some cut thick (for an unexpected and always welcome pool of golden flavor). Pre-shredded sharp cheddar is a great option for cheese.
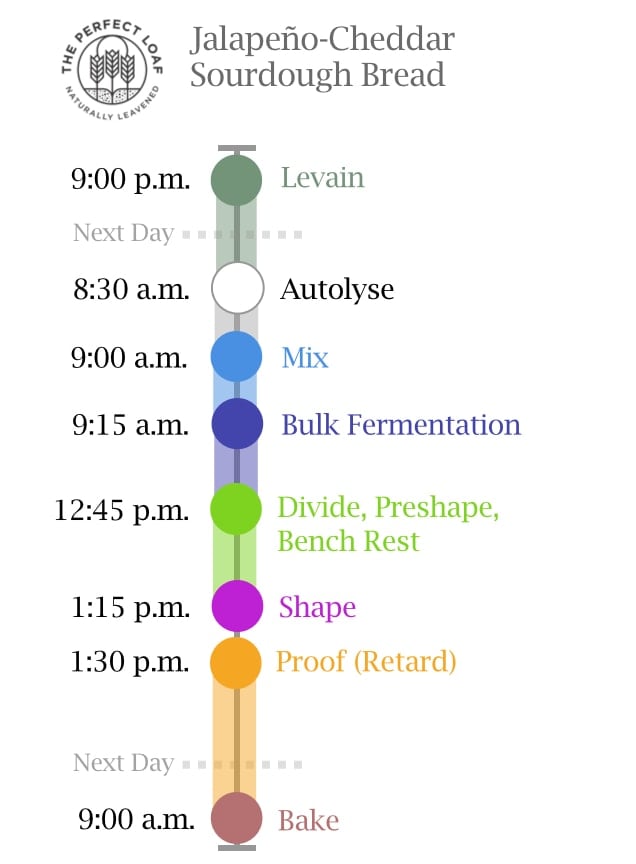
Baking schedule
This jalapeño-cheddar sourdough bread is made over two days. Cold proofing this dough brings additional flavor, but you can always do a same-day bake. Instead of placing the shaped dough into the refrigerator to proof overnight (shape retarded), leave it covered for 1-3 hours (depending on kitchen temperatures, colder means longer) until ready to bake.
Jalapeño-cheddar sourdough bread formula
Vitals
| Total Dough Weight | 1,800 grams |
| Hydration | 75% |
| Pre-fermented Flour | 8.50% |
| Levain in final dough | 19.51% |
| Yield | 2 x 900g loaves |
This recipe makes two loaves. If you’d like to make a single loaf of jalapeño-cheddar sourdough bread, divide all the ingredients in half. See my guide to using baker’s percentages for further help with scaling.
Total formula
Desired dough temperature: 78°F (25°C). See my post on the importance of dough temperature for more information on dough temperatures.
Jalapeño-cheddar sourdough bread method
1. Prepare the levain – 9:00 p.m. (the night before mixing)
Mix the following ingredients in a container and leave them covered to ripen at a warm temperature, about 74-76°F (23-24°C) for 12 hours.
| Weight | Ingredient | Baker’s Percentage |
|---|---|---|
| 36g | Medium-protein bread flour or all-purpose flour | 50.00% |
| 36g | Whole wheat flour | 50.00% |
| 72g | Water | 100.00% |
| 7g | Ripe sourdough starter | 10.00% |
2. Autolyse and prepare jalapeño and cheddar – 8:30 a.m. (the next morning)
This recipe uses the autolyse technique to increase the extensibility of the dough and make mixing by hand easier. Add the following to a mixing bowl and mix until incorporated. Let the mixture rest, covered, for 30-minutes.
| Weight | Ingredient |
|---|---|
| 593g | Medium-protein bread flour or all-purpose flour |
| 132g | Whole wheat flour |
| 42g | Whole rye flour |
| 516g | Water 1 |
At this time it’s also convenient to wash and finely dice the jalapeño peppers and shred or cube the cheddar cheese. Place the two in a small bowl and reserve until called for in bulk fermentation.
| Weight | Ingredient |
|---|---|
| 67g | Jalapeño, washed and finely diced |
| 210g | Sharp cheddar cheese, shredded or cubed |
3. Mix – 9:00 a.m.
| Weight | Ingredient |
|---|---|
| 34g | Honey |
| 42g | Water 2 |
| 15g | Fine sea salt |
| 149g | Ripe levain (from step 1) |
Add the honey, levain, and salt to the top of your dough already in the mixing bowl, and use a splash of water 2 to moisten. If the dough feels like it can handle it, add the remainder of the water. Next, knead the dough for a few minutes either with the slap and fold technique or do folds in the bowl. For this dough, I did this for about 5 minutes until the dough begins to smooth out and become elastic.
Transfer the dough to a container for bulk fermentation and cover.
4. Bulk fermentation – 9:15 a.m. to 12:45 p.m. (3 1/2 hours)
At a warm room temperature, around 74-76°F (23-24°C), bulk fermentation should take about 3 1/2 hours. If your kitchen is cooler, place your bulk container in a small home dough proofer, or extend the bulk fermentation time to give the dough more time to ferment. This dough needs around three sets of stretch and folds during this time.
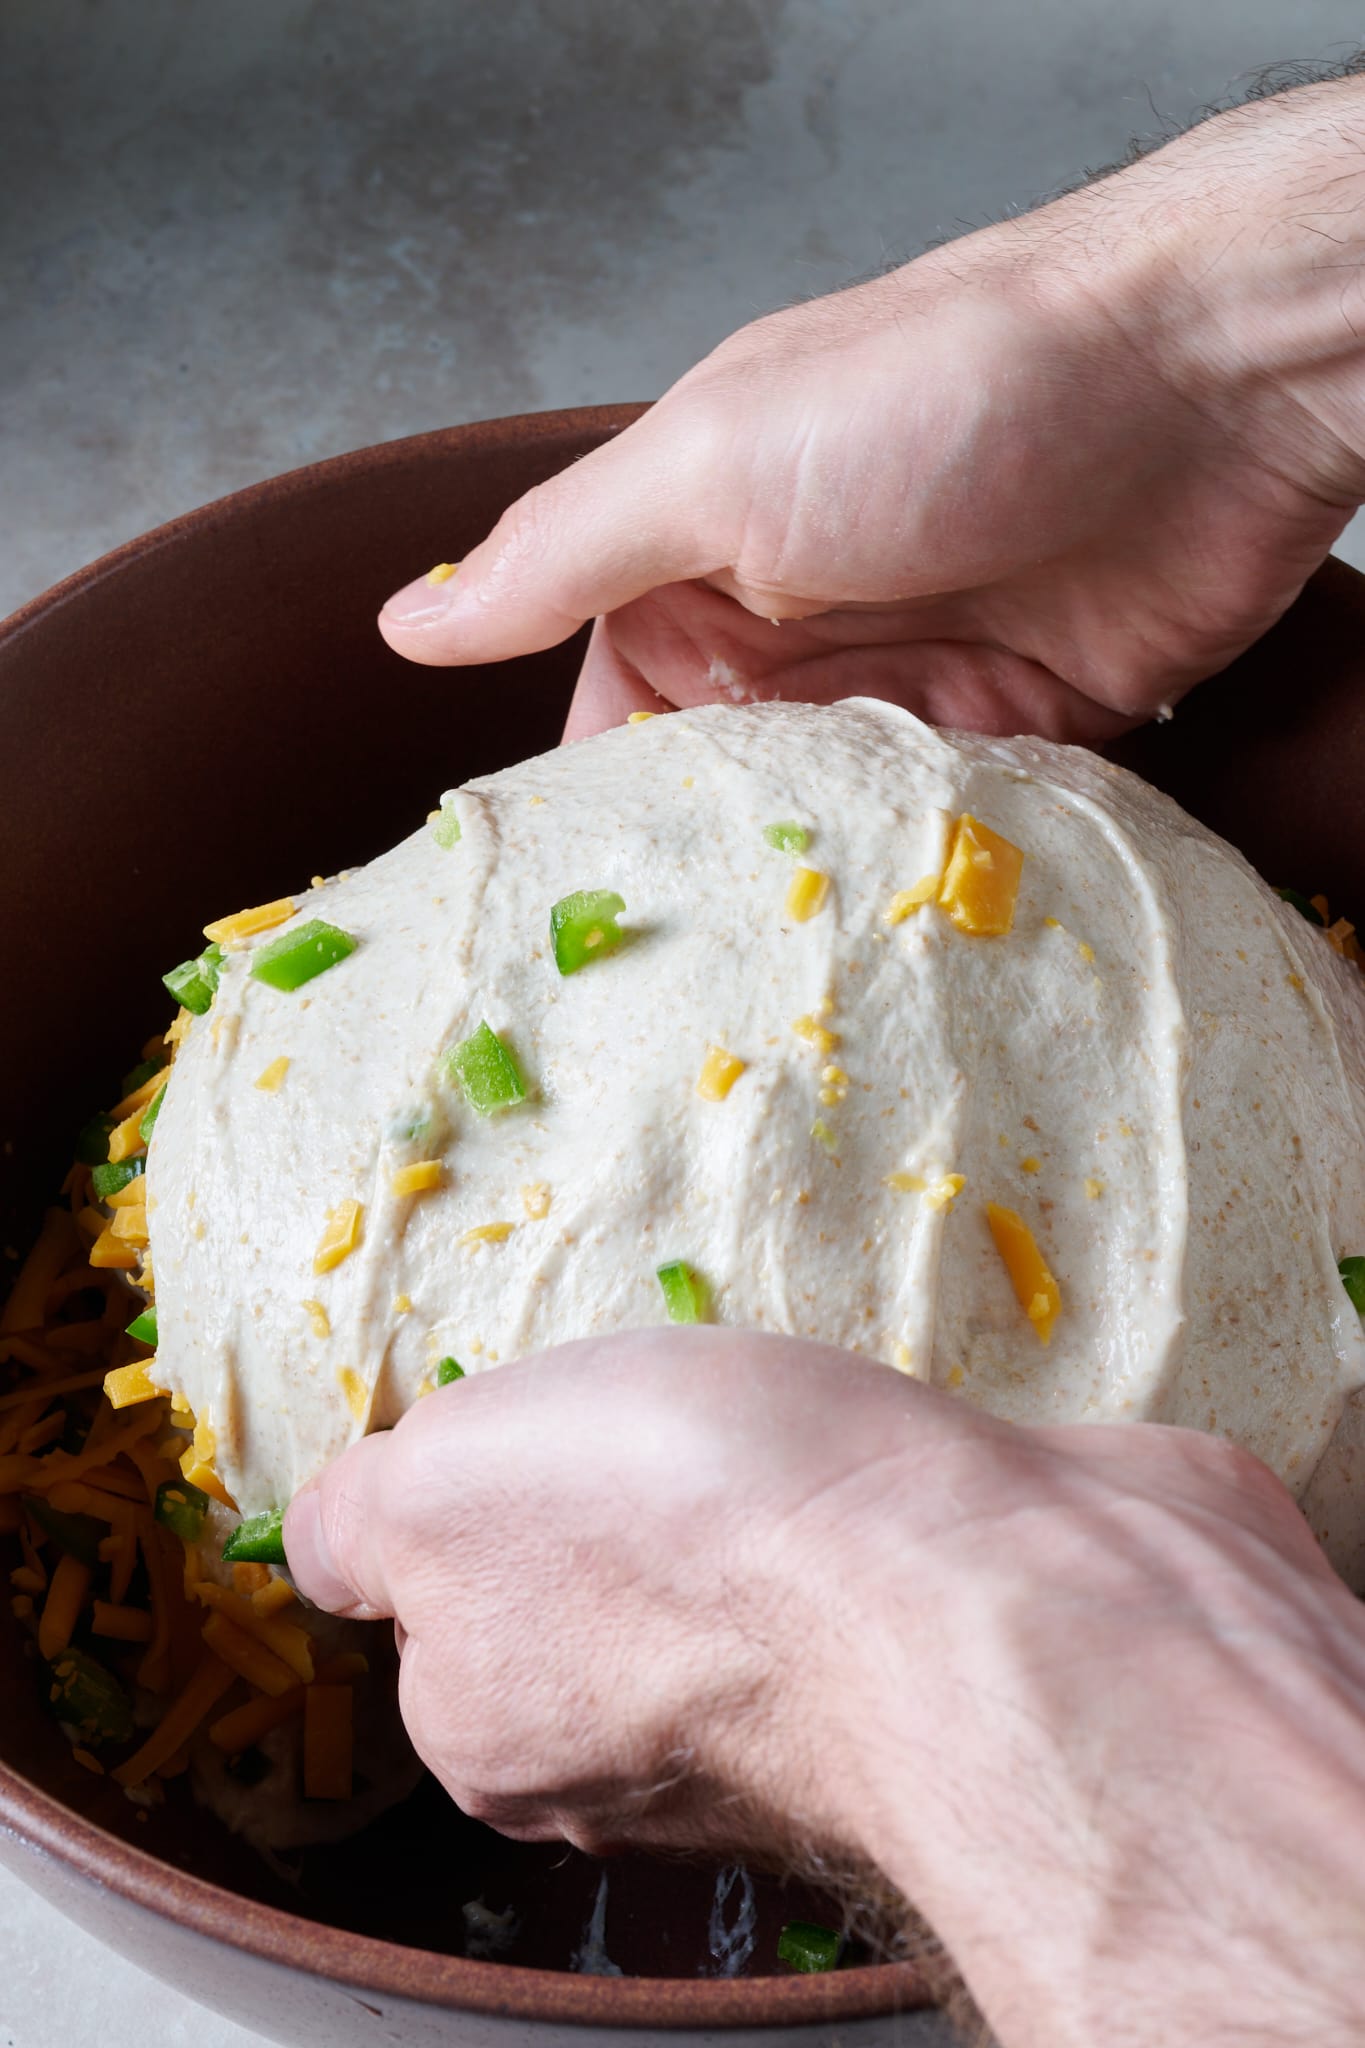
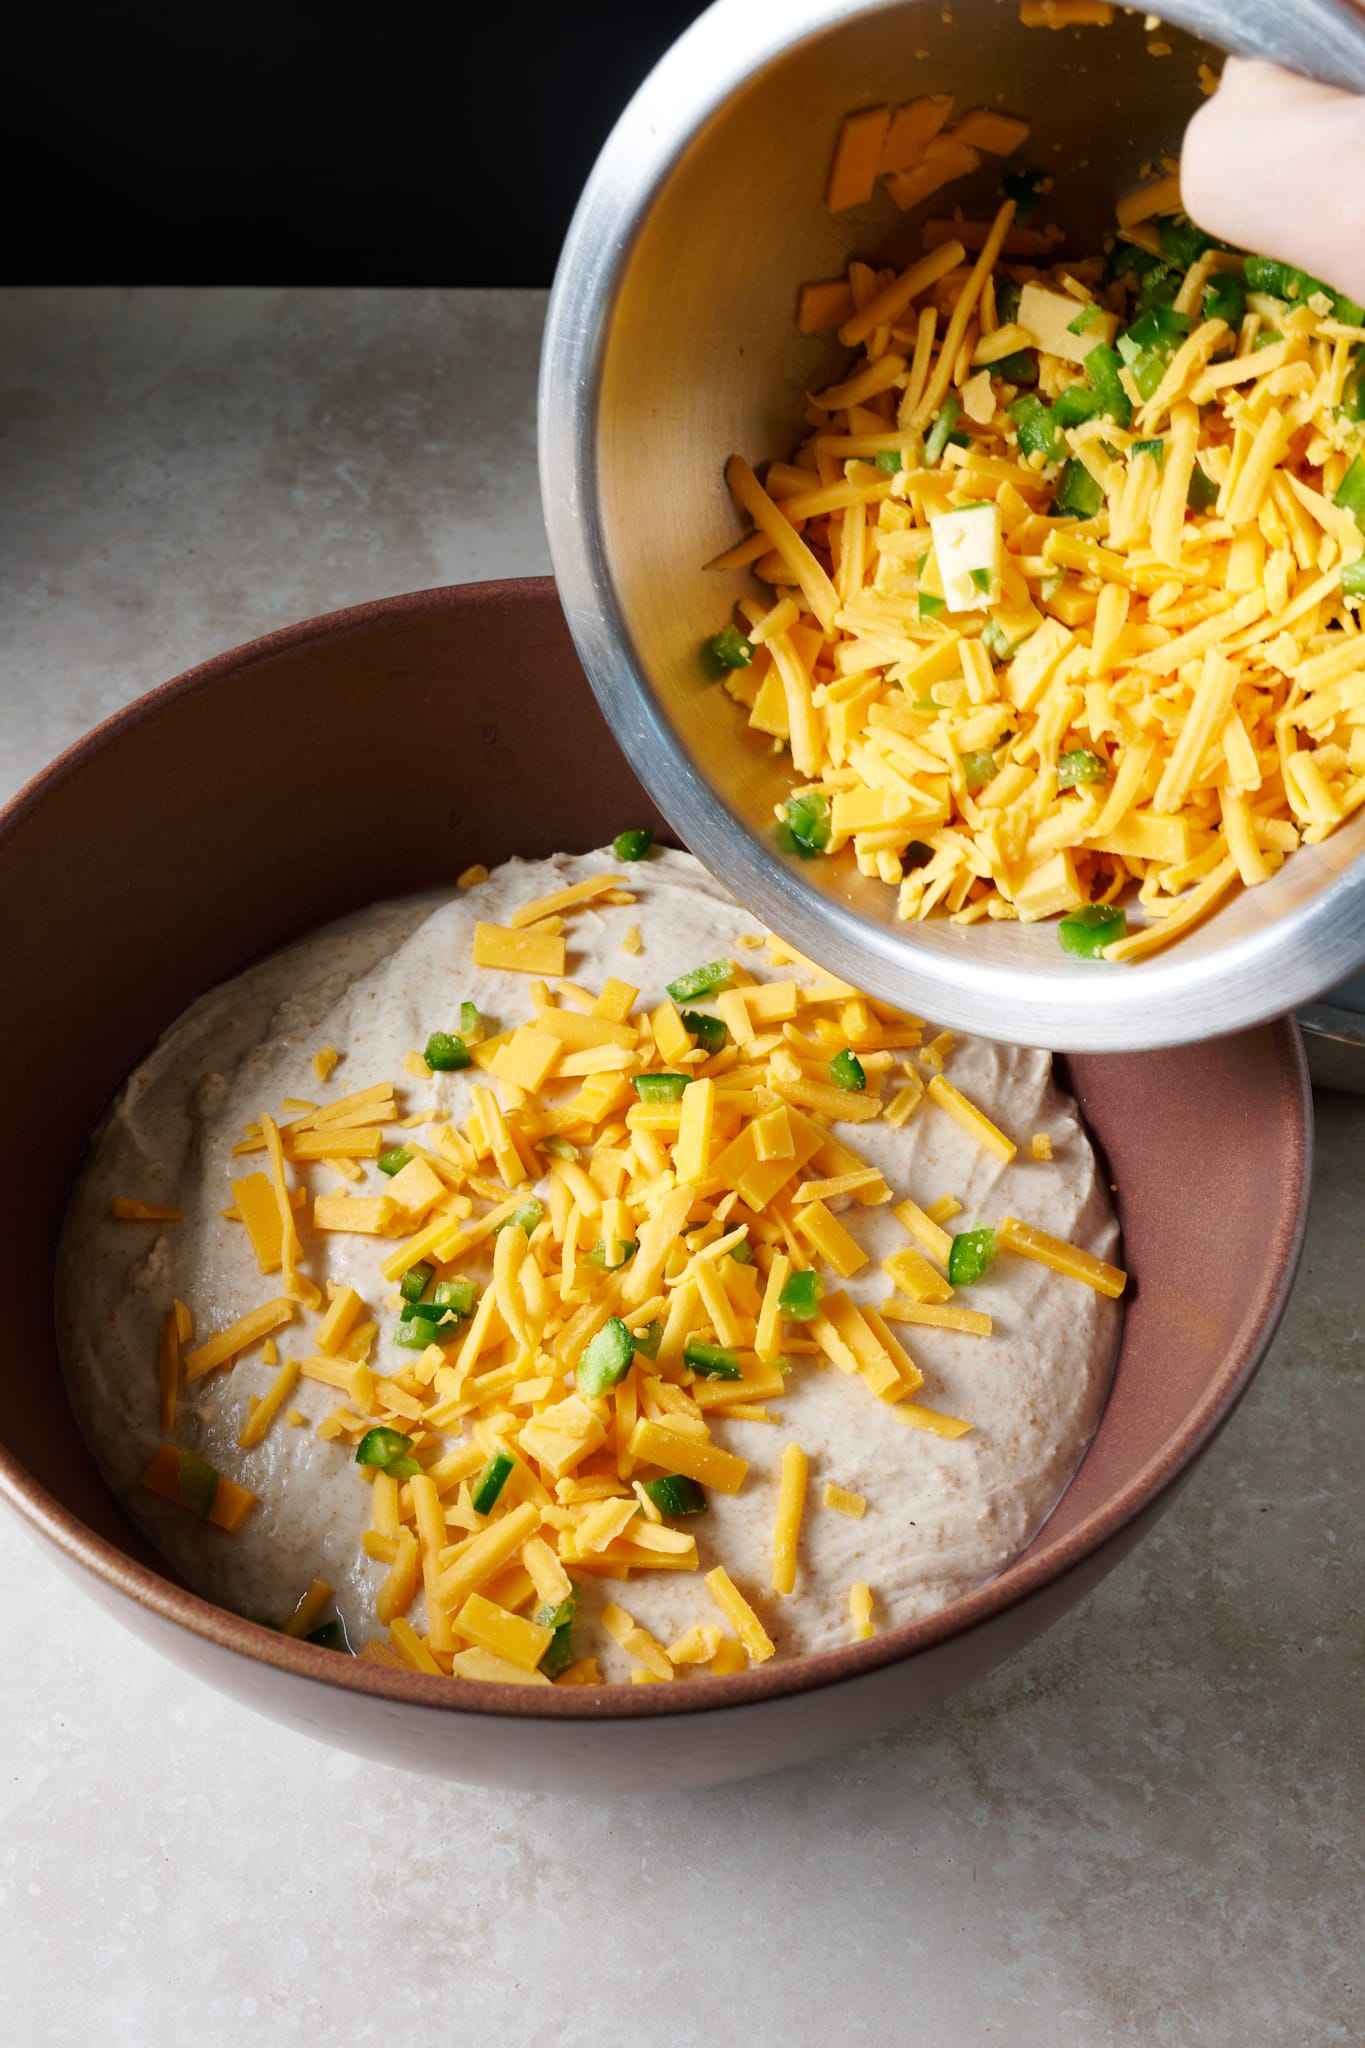
After the first thirty minutes into bulk fermentation, but before you give your dough its first set of stretches and folds, spread about 1/4 of the jalapeños and cheese over the top of the dough. Then, grab one side of the dough and stretch it up and over it to the other side. Next, spread on another 1/4 of the inclusions to the new top. Rotate the bowl 180° and perform another stretch and fold. Spread on another 1/4 of the inclusions, rotate the bowl 90° and do another stretch and fold. Finally, spread on the last of the peppers and cheese, turn the bowl 180°, and do one last stretch and fold.
And the end of each set, try to have the dough neatly folded up in the bowl.
The remaining two sets of stretch and folds should be more gentle. After the third set, let the dough rest, covered, for the remainder of bulk fermentation.
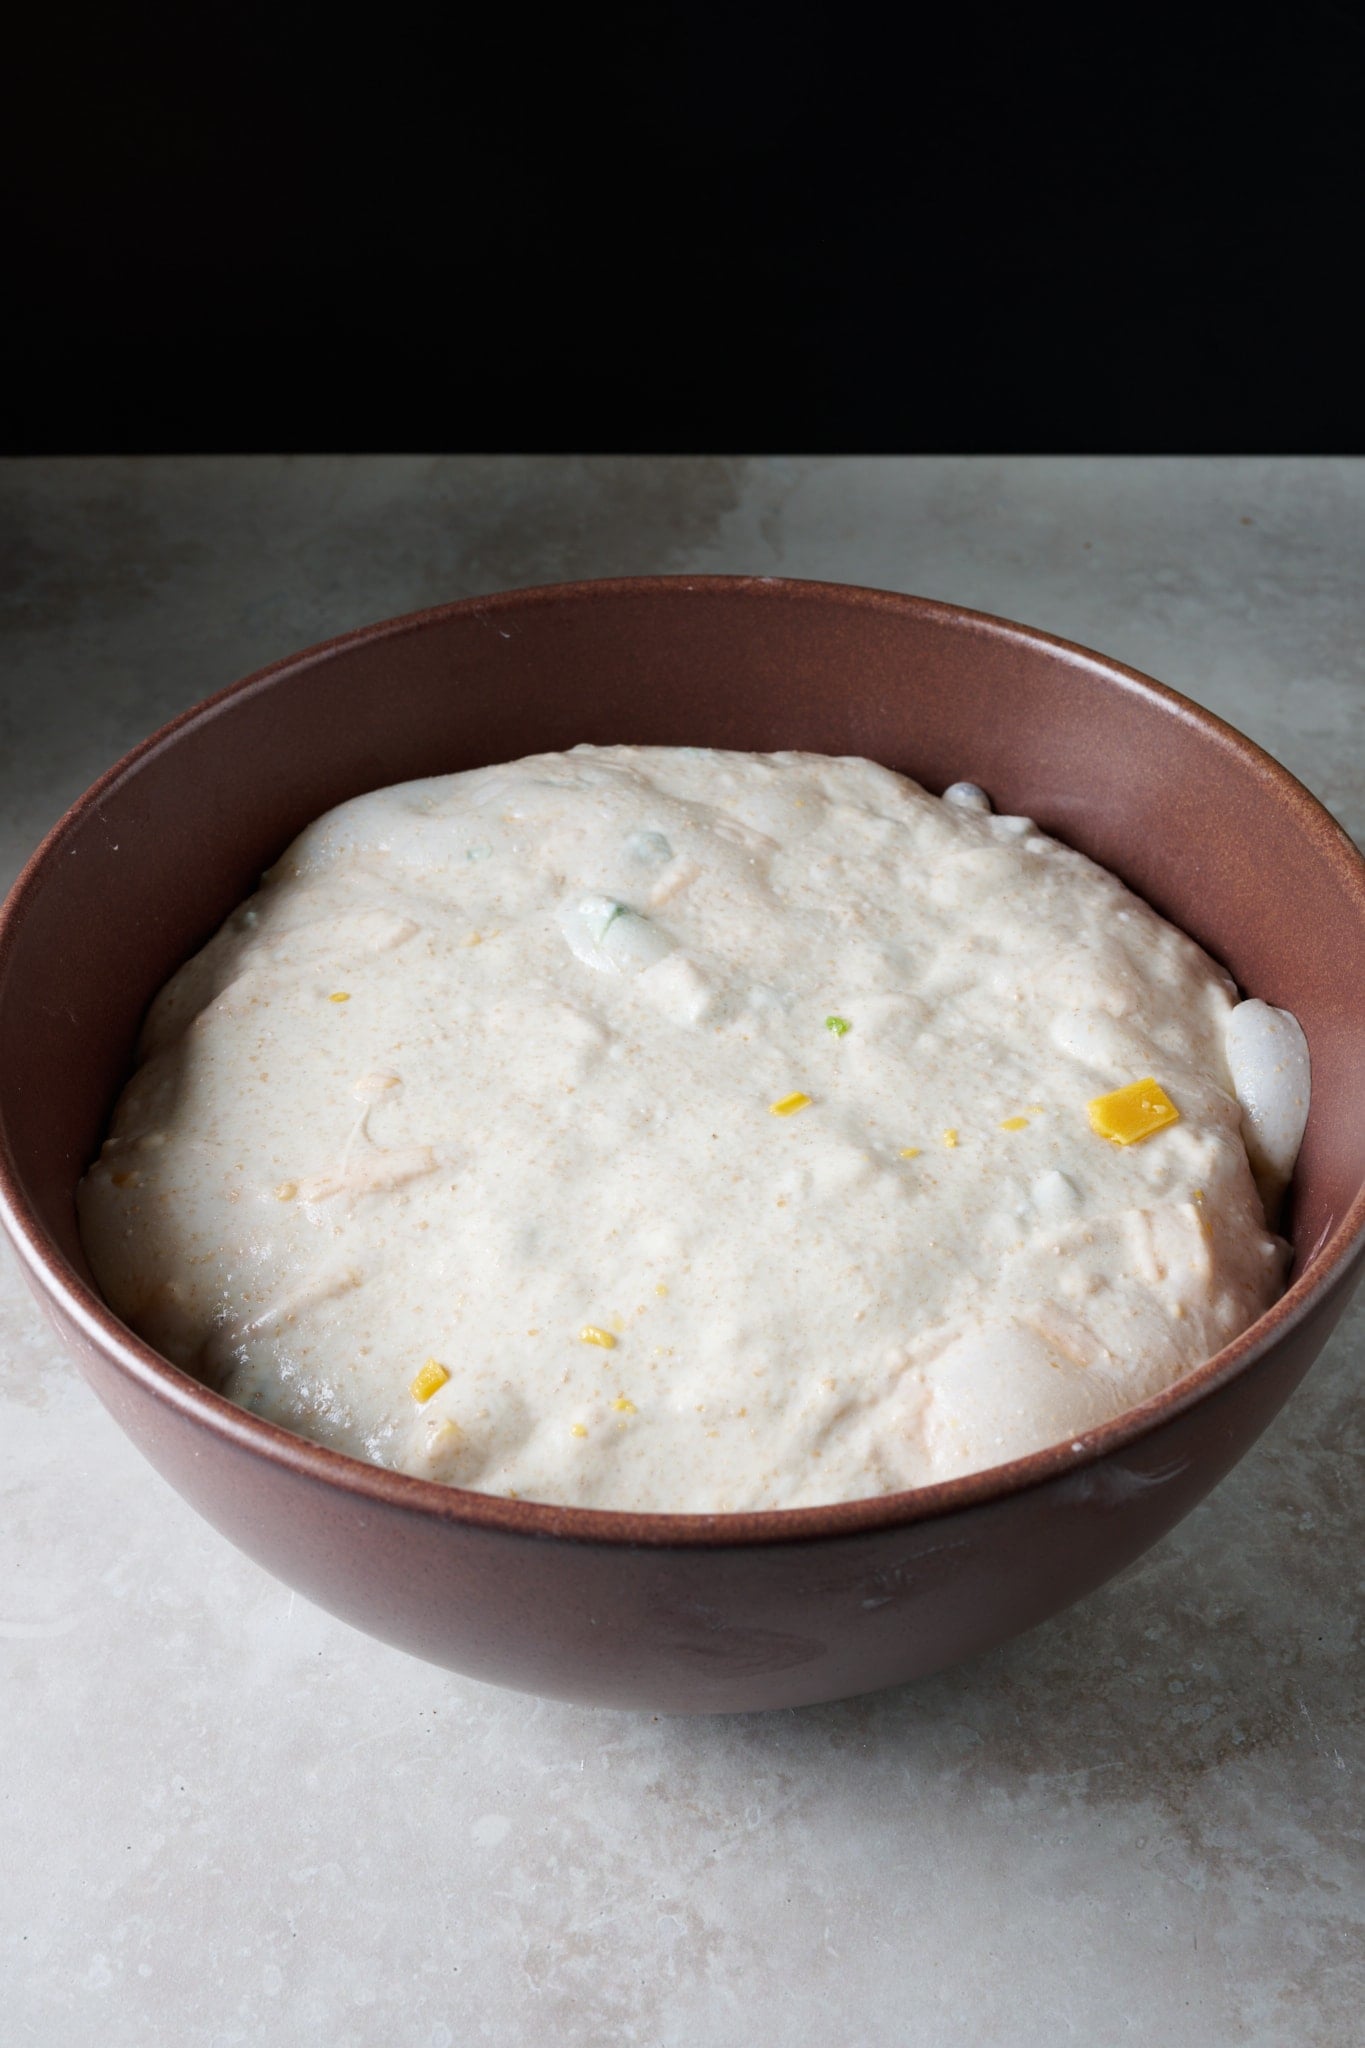
5. Divide and preshape – 12:45 p.m.
At the end of bulk fermentation, your dough should have risen in the container, but not a great deal. You should see signs of strong fermentation: some bubbles, a smooth texture, and an increase in elasticity (strength). As you can see below, my dough was ready to divide.
Fill a bowl with some water and place it on your work surface. Scrape out your dough from the bulk container onto your dry counter. Divide the mass in half using a bench knife. Using a wet hand and the knife in the other, gently preshape each half into a taut round.
This dough was still rather elastic and only required a very gentle preshape. Avoid being too aggressive with the dough, which may cause it to tear given the high percentage of peppers and cheese added.
Let the dough rest, uncovered, for 30 minutes.
6. Shape – 1:15 p.m.
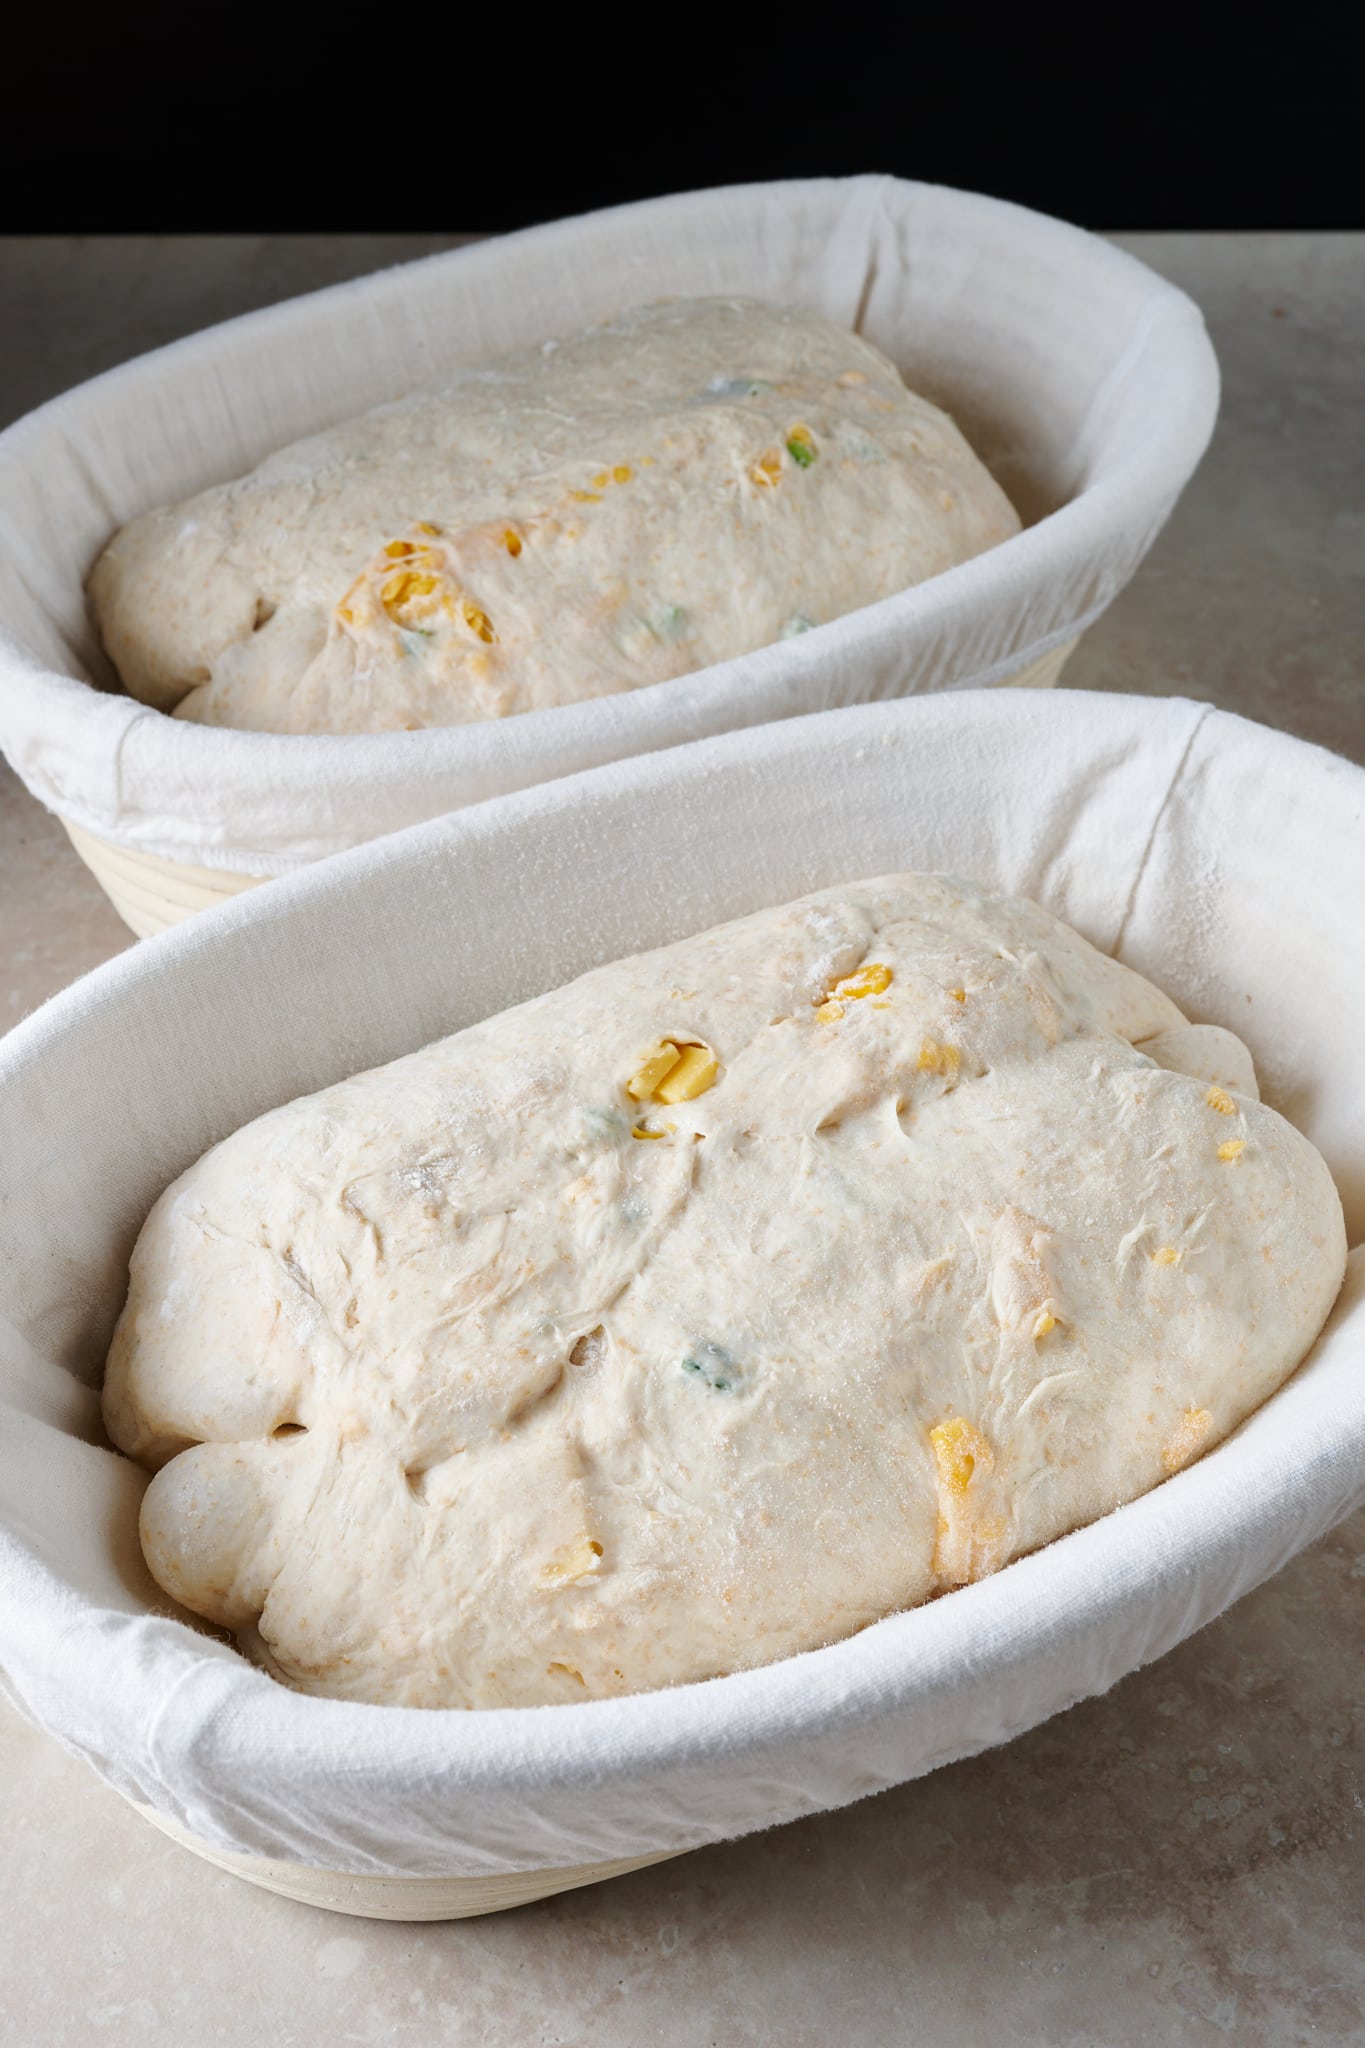
Flour the top of each preshaped round and your work surface, and using your bench knife flip one round over to the floured area. Using floured hands shape the round into a boule shape. I shaped this dough as both a boule (round) and a batard (oval) in testing—both work equally well. After shaping, place the dough seam side up in a 10-inch long proofing basket lined with canvas or a clean kitchen towel.
Repeat for the other preshaped round.
7. Proof – 1:30 p.m. to 9:00 a.m. (overnight)
Cover the baskets with a large, reusable plastic bag and seal it shut. Then, place the baskets into your refrigerator to proof overnight.
8. Bake – 9:00 a.m. (next day)
NOTE: I would recommend that whatever method you use to bake this jalapeńo-cheddar sourdough bread, you use a piece of parchment paper below the dough—the cheese tends to leak out of the dough just a bit!
Preheat your oven with a Dutch oven, combo cooker, Challenger bread pan, or baking stone or Baking Steel inside to 450°F (230°C) for 30 minutes.
I baked these loaves in my Challenger bread pan, but you could also follow my guide to steaming an oven for baking bread.
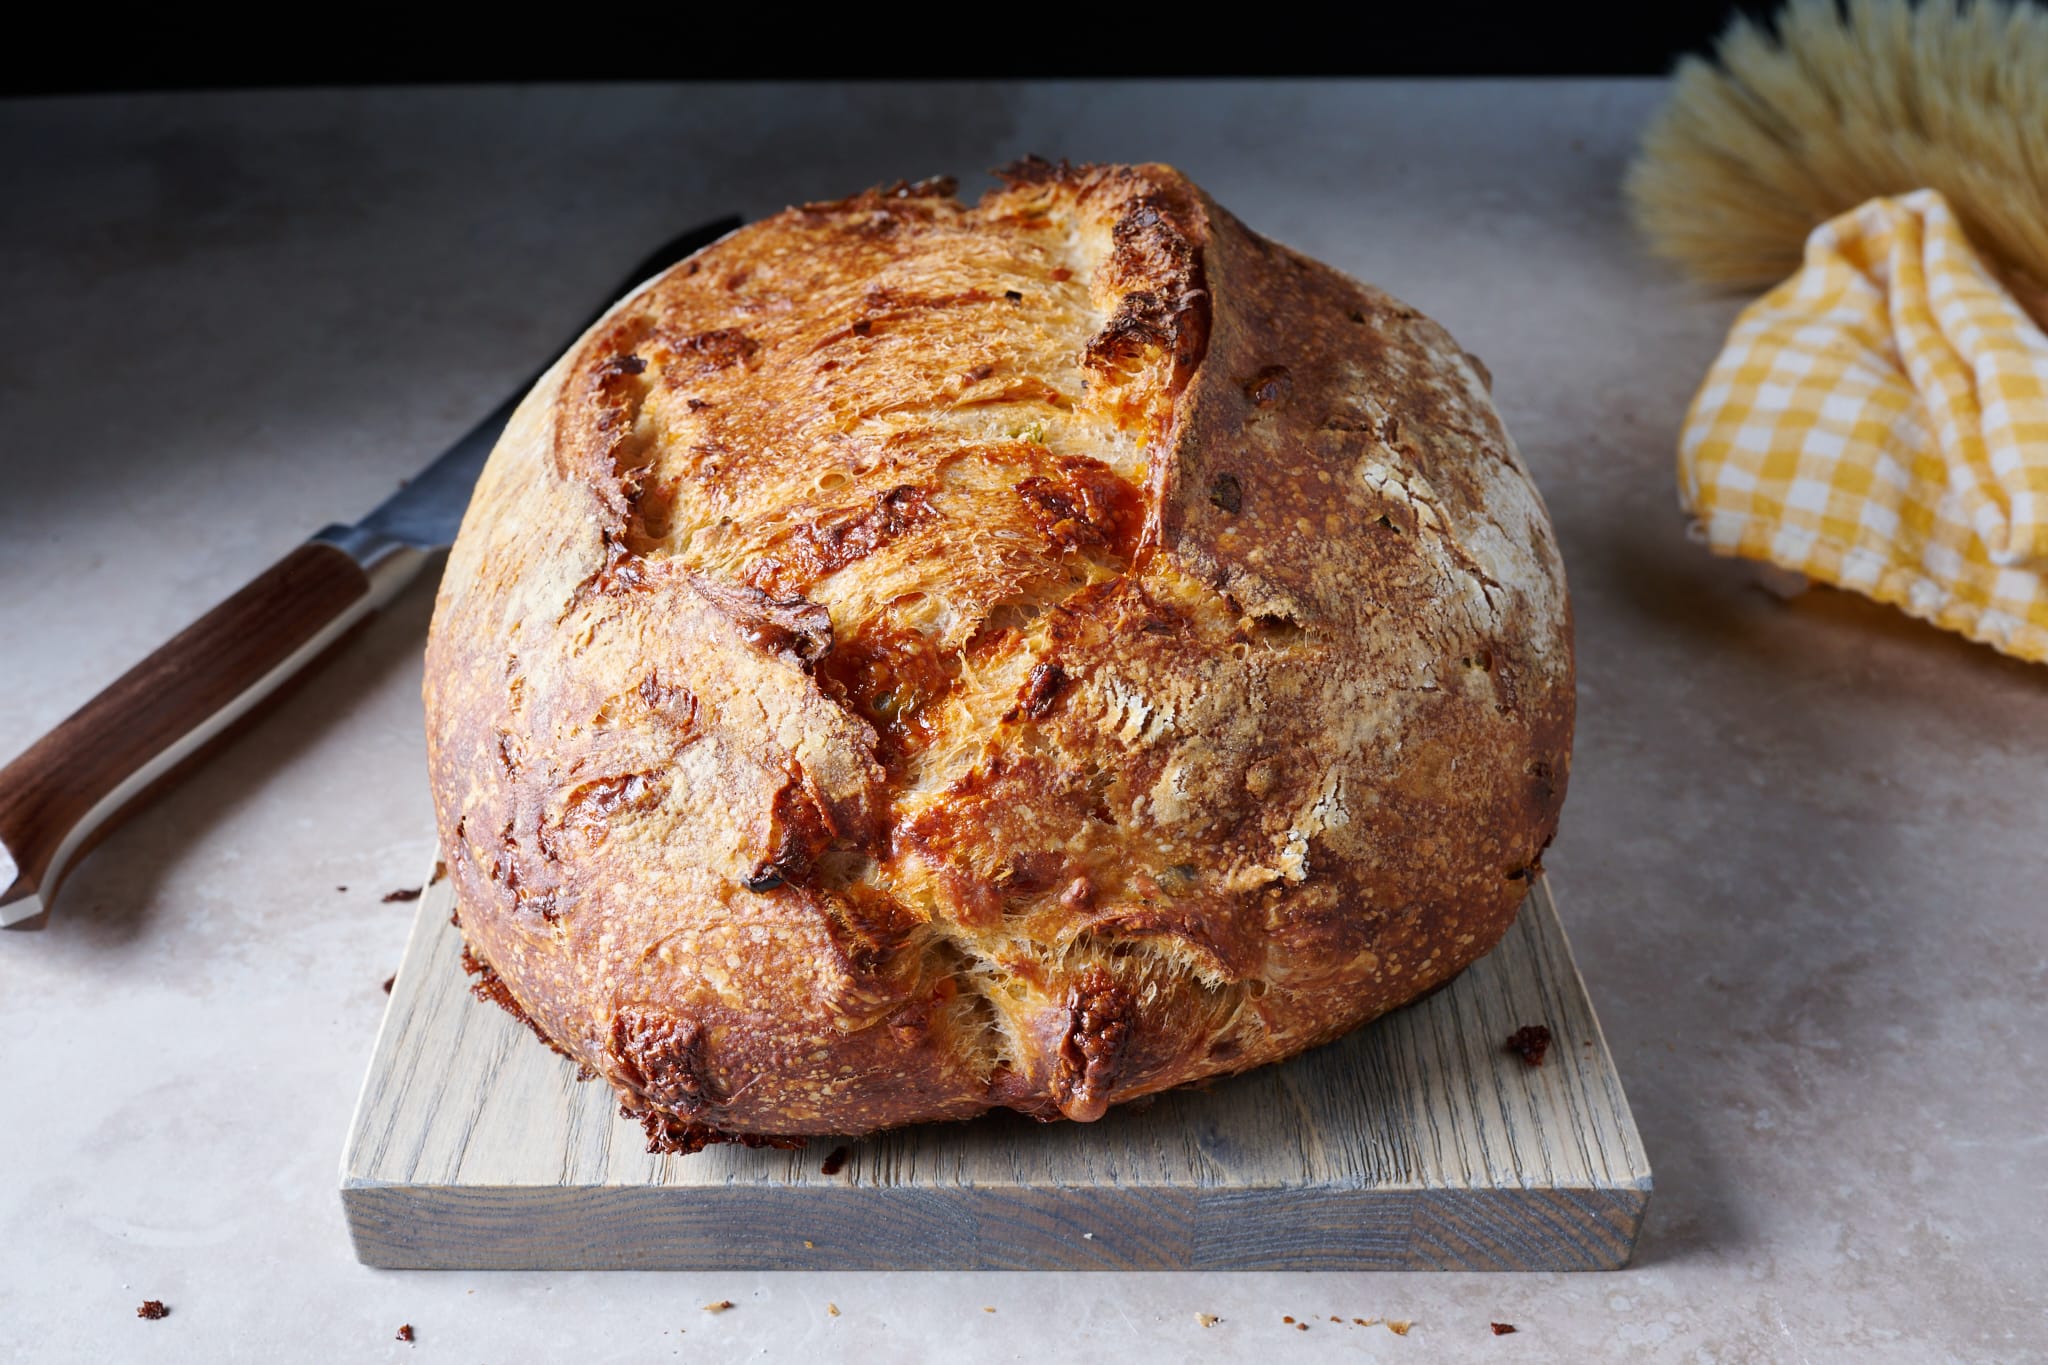
Score each piece of dough and slide it into the oven—bake for 20 minutes with steam. Then, remove the steaming pans from inside the oven (or remove the lid to your baking pan) and bake for an additional 30 minutes, or until the crust is deeply colored and the interior temperature registers around 204°F (95°C).
Once fully baked, cool your loaves on a cooling rack for 1-2 hours. See my post on the best way to store bread to keep it fresh for a week or longer.
When I was in college one of my favorite snacks was simply a plate of tortilla chips with shredded cheddar and a can of Hatch green chile on top, microwaved for 30 seconds to ensure a gooey situation was properly achieved—ahh the humanity! It was my form of quick “nachos,” and for some reason, this bread brought me back to the old days of cooking in the dorm with nothing but a microwave. While this bread is certainly a level up (maybe 10 levels?), the ethos of that snack somehow pervades. And the funny thing is, every time I bake this bread I now snack on it in just the same way, that is to say, slices toasted and eaten plain right off a plate.
This jalapeño-cheddar sourdough bread is an absolute treat and I hope you enjoy it just the same as I have been while sitting in my kitchen, thinking back to simpler times and just how special cheddar cheese can be on almost everything.
Buon appetito!
Print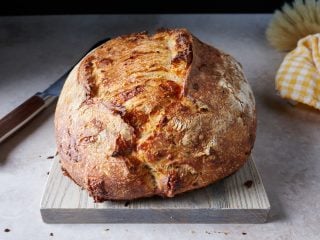
Jalapeño-Cheddar Sourdough Bread
- Prep Time: 24 hours
- Cook Time: 1 hour
- Total Time: 25 hours
- Yield: 2 loaves
- Category: Bread, Sourdough
Description
This savory sourdough bread with fresh jalapeño and cheddar cheese is a gooey, savory treat.
Ingredients
Levain
- 36g medium-protein bread flour or all-purpose flour
- 36g whole wheat flour
- 72g water
- 7g ripe sourdough starter
Main Dough
- 593g medium-protein bread flour or all-purpose flour
- 132g whole wheat flour
- 42g whole rye flour
- 210g Sharp cheddar cheese, shredded or cubed
- 67g Jalapeño, finely diced (1–2 large peppers)
- 34g Honey
- 558g water (water 1 + water 2)
- 15g salt
- 149g levain (from above, made in step 1 below)
Instructions
- Levain (9:00 p.m.)
In a small bowl or jar, mix the Levain ingredients. Cover the jar and keep it at a warm temperature for 12 hours. - Autolyse and prepare inclusion (8:30 a.m)
In a medium mixing bowl, add the 593g medium-protein bread flour, 132g whole wheat flour, 42g whole rye flour, and 516g water 1 and mix until no dry bits remain. Cover the bowl and let rest for 30 minutes. Wash and dice the jalapeño peppers and shred/cube the cheddar cheese. Reserve until bulk fermentation. - Mix (9:00 a.m.)
Add the honey, levain, and salt to the top of your dough already in the mixing bowl, and use a splash of water 2 (reserved water) to moisten. If the dough feels like it can handle it, add the remainder of the water. Next, knead the dough for a few minutes either with the slap and fold technique or do folds in the bowl. For this dough, I did this for about 5 minutes until the dough begins to smooth out and become elastic. Transfer the dough to a container for bulk fermentation and cover. - Bulk Fermentation (9:15 a.m. to 12:45 p.m.)
This dough will need 3 sets of stretches and folds during bulk fermentation where the first set starts after 30 minutes into bulk fermentation and the subsequent sets are at 30-minute intervals. During the first set of stretches and folds, add the jalapeño and cheese as you perform each stretch and fold. After the third set of stretches and folds, let the dough rest, covered, for the remainder of bulk fermentation. - Divide and Preshape (12:45 p.m.)
Lightly flour your work surface and scrape out your dough. Using your bench knife, divide the dough in half. Lightly shape each half into a round shape. Let the dough rest for 30 minutes, uncovered. - Shape (1:15 p.m.)
Shape the dough into a round (boule) or oval (batard). Then, place the dough in proofing baskets, seam side up. - Proof (1:30 p.m. to 9:00 a.m. the next day)
Cover proofing baskets with reusable plastic and seal shut. Then, place both baskets into the refrigerator and proof overnight. - Bake (The next day, bake at 9:00 a.m.)
Preheat your oven with a baking surface or combo cooker/Dutch oven inside to 450°F (230°C).I recommend baking this dough on a piece of parchment as the cheese might melt out slightly. When the oven is preheated, remove your dough from the fridge, score it, and transfer it to the preheated baking surface or combo cooker. Bake for 20 minutes with steam. After this time, vent the steam in the oven or remove the lid (you can keep it in the oven or remove it) and continue to bake for 30 minutes longer. When done, the internal temperature should be around 204°F (95°C).
Let the loaves cool for 2 hours on a wire rack before slicing.
Notes
- Yellow or white sharp cheddar cheese will work equally well for this recipe
- Instead of jalapeño peppers, use serrano or fire-roasted green/red chile for a more spicy bread


191 Comments
If i only cold proof for 12 hours vs. 18 as noted in the recipe, what is the imact?
That small of a difference (in the fridge) won’t be a problem at all.
Thanks. The loaves were absolutely delicious, but really flat, and I had a very active starter. Could the cheese possibly adversely affect the spring?
Is the autolyse step necessary? Can we combine the ingredients and let it rest for 30 minutes and then perform our stretch and folds?
Hi Maurizio,
As you know, it's Hatch chili season. Can Hatch be substituted 1:1 for the jalapeno? And raw is preferred, not roasted?
Thanks,
Mark
Is it normal to not have surface bubbles after shaping this loaf? I had a couple bubbles around the edges after bulk fermentation, but when I shaped the loaf felt more dense than others and didn't have bubbles on the surface. I could just be a bit crazy here since there's such a a high percentage of inclusions.
Same for me. Mine is in the fridge now for cold proofing. How did yours turn out once baked?
Hey Maurizio!
Fresh jalapeno's are not easy to come by in NZ, would just another green chilli be okay? Or is there a way I can use sliced jalapenos from a jar?
Much appreciated!
Aimee
I use pickled jalapenos in this recipe and MUCH prefer it to fresh. The vinegar in the jalapenos gives it an amazing tang. Highly recommend it!
Made this over the weekend – fantastic!!! And wow the smell during both the bulk fermentation and while baking was amazing.
Why is the starter quantity so small for this levain compared to other recipes?
Hi Maurizio,
Wondering if you have ever used Prairie Gold 86 flour in this or any of your recipes. I often purchase flour from a small bulk foods store and this is the only whole wheat flour I have seen. I understand it has a high (15% I think) protein content, and is made from hard white wheat vs red. Curious what your thoughts are on using this for some or all of the whole wheat addition.
Cheers
My question is about the water amount. The online recipe calls for 72 grams in the levain, and the main dough calls forn 516 grams, but there is no mention of the amount for the splash of water that goes into the honey and salt mixture. Can you please clarify? Thanks
Great recipe, very easy to understand as a newbie. I hope uou have time for another question. I weighed and measured everything precisely as outlined. My dough seemed very stiff and I was not able to do a slap and fold technique as the dough was tight. After kneeding for 7 minutes my dough was still very shaggy looking. It also did not get those small visible bubbles before the dough during the rise and it was on a proofing mat for an additional 2 hours. I did not want to leave it to rise any longer So I just proceeded with shaping and letting the dose it in the refrigerator overnight. The loaves baked beautiful but they did not have quite as much volume as yours, maybe 20% less. My levin did double and had small bubbles but it wasn't as airy as my standard levin. Any ideas?
This is a slightly stiffer dough at the start of mixing to help support all the cheese and peppers, but it shouldn't be super stiff. But it sounds like it was slightly underproofed to me in the end.
There are a few indicators your dough could be under the explosive rise in the oven, dense spots in the interior with potentially scattered large holes, and a gummy texture to the interior. Finally, the bottom of the loaf might be slightly bowed (like the letter “U” — the top will kind of dome) upward.
Make sure to build your levain from a strong and ripe starter (meaning it’s risen to its peak height before you take some to use). From there, bulk fermentation is essential! Make sure your bulk fermentation goes sufficiently far; you want the dough to look smooth; it should have risen considerably and have bubbles here and there — it should look alive. If you tug on the dough a bit, it should resist your tugging; it’ll feel stronger. Give the dough the time it needs in bulk fermentation! If you must give it another 30 minutes or an hour to see these signs, do so. This step must go sufficiently far for the dough to have enough fermentation activity before proof.
Check out my guide to proofing for a bit more help, too:
https://www.theperfectloaf.com/guides/proofing-bread-dough/
This was such a wonderful recipe. I used cubed cheddar pieces and as the dough was super delicate, it was hard not to tear it during stretch/fold and shaping. I was worried, but the end result was perfect. Next time, Iwill use shredded Cheddar. Hopefully, it will make the handling of the dough easier. Thank you for your detailed recipes.
I actually like a mix of shredded and cubed!
Hello my friend!
I see you've increased Diastatic Malt Powder use.
Would you suggest/consider he addition of Diastatic Malt Powder?
It has really enhanced my pizza and Turano Italian beef rolls!
I do often use DM in my baking, I find most flours need it (unless they already have it included!). Here's my guide to using diastatic malt , it'll help!
Hello my friend!
It seems you've increased Diastatic Malt Powder use. Would you suggest/consider he addition of ng Diastatic Malt Powder?
It really enhanced my pizza and Turano Italian beef rolls!
I finished this bake this morning and am a little taken aback at how good this is. First time I've incorporated anything into the dough and your page made it so easy. This bread is slap your grandma good and has taken over the spot of your best sourdough formula.
Next bake I'm going to try it with Habaneros.
Ha ha, thanks so much for the comments, Paul. Yea, this is a real winner. The spicy + savory combo is just crazy good. I've tried it with all sorts of green chile, and it's terrific. I bet Haba will be very good. Enjoy!
I unfortunately didn’t comprehend (?!) the clearly written directions and added the jalapeños and cheese ALONG with the levain, honey, etc….
What a MESS – but after hand kneading the heck out of it and really going at it during the first phase, it turned out quite well!
Going to give it another whirl as this bread toasted with a shmear of butter is fantastic 🙂
Love love your recipes!!
OH my! It'll be just fine. Thank you Cheryl, glad you liked this one, easily one of my favs. Enjoy!
I'm baking my bread at 500 degrees F in an enameled dutch oven lid on for 30 minutes on convection. Then, turning it down to 450 degrees F with lid off for 16-20 minutes depending on how it looks. I am noticing my loaves are hitting 211 degrees when I take the internal temp, but after cooling they are soft with a thinner crust, not crusty and crunchy on the outside like I'd like them to be. They are also more gummy on the inside. What do you think the reason behind this is? I'm fairly certain my bulk fermentation time is pretty accurate, shaping is good. I get an awesome oven spring, too.
If you're getting massive oven spring it can be that your dough is possibly slightly underproofed (which can present as gummy inside). If the dough is excessively wet, which I don't think is the case here since you're getting good spring, this can also show as gumminess.
I wonder if you've left it to cool (on a wire rack with airflow) long enough before cutting. If you cut too soon it can make the loaf gummy, I usually let mine rest at least 2 hrs.
Unbelievably wonderful bread! The process was easy and the results, phenomenal! I'm enjoying it toasted with butter and a good quality cherry jam!
Happy to read this, Pamela! Enjoy 🙂
Has anyone tried substituting Hot Honey instead of regular honey? I have not given this a try yet, but was curious thoughts on that…
I did something like that – I ferment garlic cloves in honey….used that – yum!
That sounds amazing. What a great idea.
This recipe is the bomb! Jalapeño Cheddar has always been my favorite loaf with inclusions, but the addition of a touch of honey, and I presume the rye, takes it to another level! It bakes up with a dark crust due to the additional sugars and whole grain flours. Last week I used pickled, spicy jalapeños and it was delicious. This week I'm trying fresh jalapeños, and I can't wait for the bake. However, a word of caution to fellow bakers. You might want to use gloves when handling the dough! My fingers, and everything I touch, are tingling or burning. Worth it tho, I'm sure.
So glad you like this one! And yes to the gloves 🙂
Sounds like another delicious recipe ! I can see where this method will take my sourdough jalapeño cheese bread to a whole new level. I have changed up many of my own methods since following your website, baking some of my best breads ever. Thank you ! (NOTE: Looks like there’s an error in the “Instructions” section. In step 2, Autolyse and prepare inclusion, the wait time is listed as 1 hour. But, according to your time table, and the breakdown written earlier in the recipe, it should be only 30 minutes. ).
Fixing the issue, Karen. Thank you!
I made your beginner sourdough recipe and it’s bulk fermenting now. Would it be ok to add the inclusions during shaping?
Thanks!
Eileen
I like to add them at the very beginning of bulk fermentation instead. That way, any sets of stretches and folds to be done will help incorporate them.
Followed the directions to a T and my bread came out under proofed and stodgy. I think the time stamps given are helpful but would appreciate what you’re looking for at each stage in terms of dough activity. My kitchen is on the cold side so I’m sure that impacted it’s ability to rise accurately.
Yes, definitely sounds like it needed longer in bulk and/or proof, especially if you’re kitchen is on the cooler side. I do try to describe the dough at each stage, but will work in even more descriptors next time!
I just took these loaves from the refrigerator and they don’t look like they rose at all?? Thinking I’ll let them sit on the counter and see if there’s any movement…..,,
It’s okay if they didn’t rise a ton in the fridge overnight! How did they turn out, Cindy?
I’m sorry, I just saw this! The bread was okay. It was delicious. But it was heavy. I think the cheese may have contributed to that. I’m making them again today. The loaves are already in the fridge. They were much more bouncy than the last. The warm weather always makes my dough happy! Thanks for the reply!
Hi Maurizio,
I’ve tried to find information about jalapenos in a can but couldn’t find any. So, if anyone has already asked, please forgive me. Can I use jalapenos from a can for this recipe?
Thank you!
Yes, you can!
Hi Maurizio, first i just wanted to say I recently bought your book and started reading it. I absolutely LOVE it! Everything is broken down so beautifully, it’s joy to read! I told my best friend how wonderful it is, and she ordered it, too. Thank you for sharing your gift with the world!
So, I have a question.. with this particular recipe, can i use KA Bread Flour, instead? I have KA wheat & rye, & all-purpose.. but am making it for someone who prefers white. Should I use a lower protein white? Please advise when u can. Thanks so much! All the best 💛
Thanks so much, glad you’re enjoying my cookbook! Yes, KABF will work great in this recipe.