
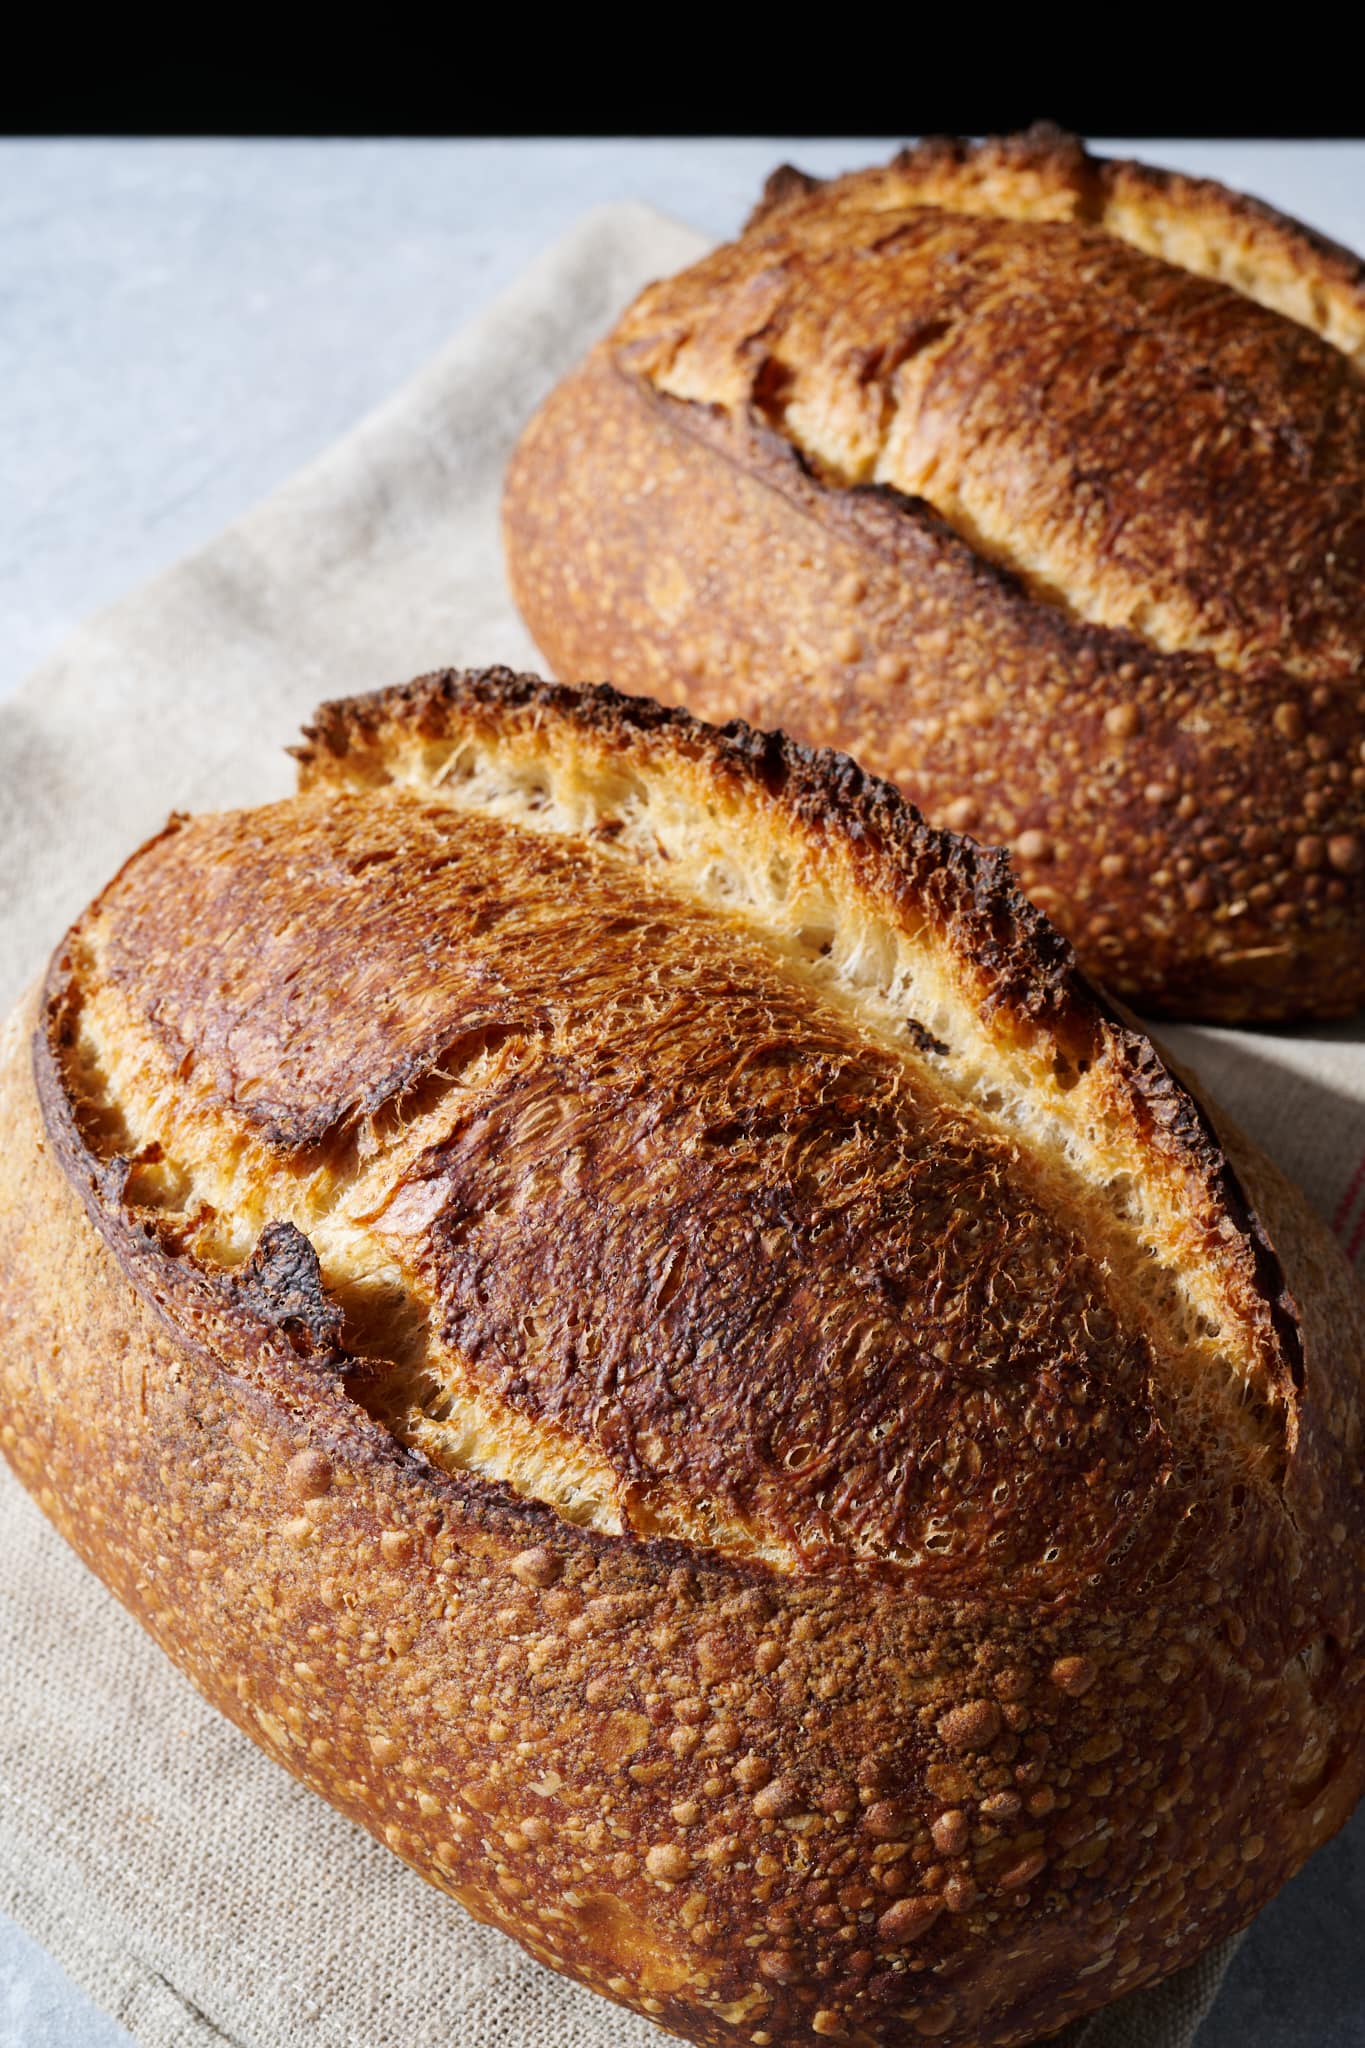
If you’re like me, winter tends to be a busy baking time. With Thanksgiving and Christmas holidays, plus the natural desire to warm the oven and pull out comforting food, it’s a time when your sourdough starter is likely working overtime. Ironically, the cold temperatures slow fermentation activity, making our starter sluggish or resulting in bread that tends to be underproofed. This article will examine techniques for dealing with the cold and how to bake sourdough bread in winter.
I often talk about how important temperature is in bread making, and there’s just no getting around it. For a great loaf of bread, it helps to keep the dough warm to encourage vigorous bacterial and yeast activity. Keeping the microbes in our starter, levain, and final dough working as optimal as possible ensures our final loaf of bread is proofed adequately with a pleasing texture and the best flavor.
The tips and information in this post are almost, but not entirely, the opposite advice I give in my post on baking sourdough bread in the summer when temperatures are warm. You’re likely faced with an opposite set of problems: an overly active and acidic sourdough starter, runaway doughs, and, eventually, overproofing. Each season requires a slight shift in mindset and different steps to ensure our baking is optimal.
The following are the first things I do when baking sourdough bread during the winter:
- Use warm water when mixing and kneading to help increase the final dough temperature.
- Use your sourdough starter and levain when they’re ripe.
- Use a dough proofer, oven, or microwave to keep the dough warm.
- Increase a recipe’s pre-fermented flour percentage to speed up fermentation.
First, let’s talk about why it’s hard to bake sourdough bread when cool temperatures.
Why is it hard to bake sourdough bread in the winter?
For home bakers who typically work with smaller batches of dough, usually around 2 kilograms (like in my Beginner’s Sourdough Bread), this smaller mass quickly cools, especially if it’s cold in your home kitchen. This cooling of the dough is less of a concern in a bakery with larger batches because a larger mass will take longer to cool (and in my experience, bakeries are usually much warmer thanks to their multi-deck steam-injected ovens).
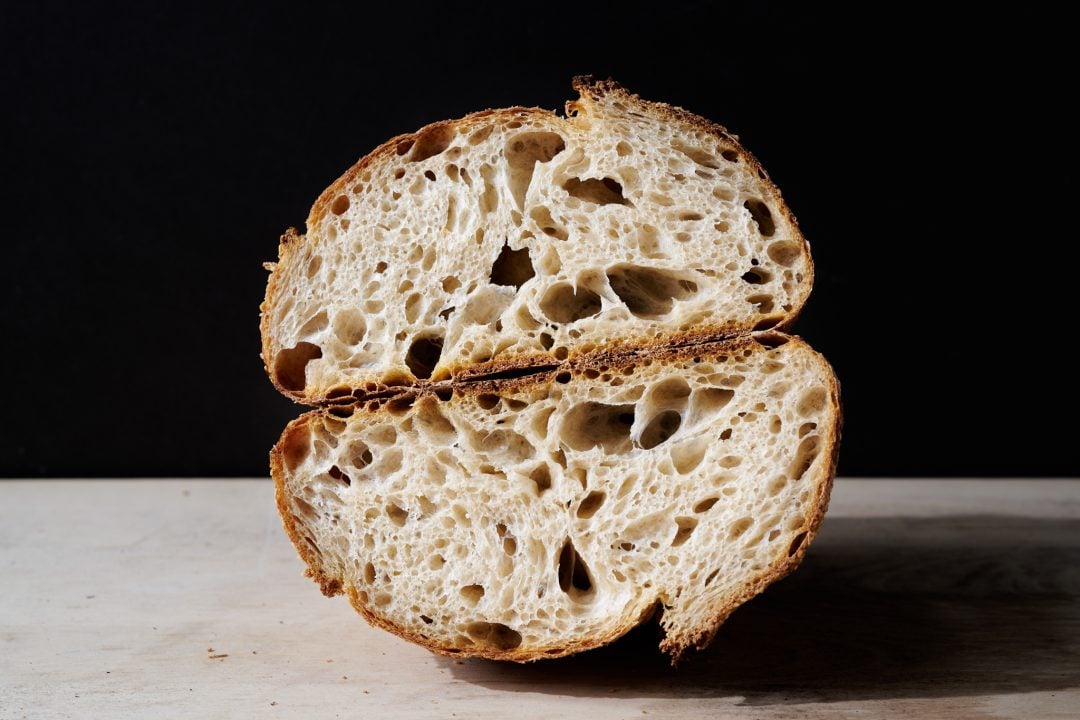
When it’s cold out, fermentation activity slows in our sourdough starter, levain, and final dough. With reduced fermentation activity, we tend to underproof our dough, resulting in bread with excessive rise, split crusts, and usually a dense and gummy interior.
Let’s look at a few more signs we might have underproofed dough.

What are the signs of underproofed dough in the winter?
For me, underproofed dough almost always shows itself in a single bake as temperatures begin to drop. The crust will rupture, and the loaf may rise excessively, especially in the middle for a bâtard.
Note that the following signs can also be due to other issues when baking, but here’s a list of things I look for:
- excessive rise in the oven.
- erratic ruptures in the crust, or an “ear” that is excessively tall and peeled back.
- dense interior with scattered large holes.
- one-note flavor with a “rough” texture.
How do I tell when my dough is sufficiently proofed in the winter?
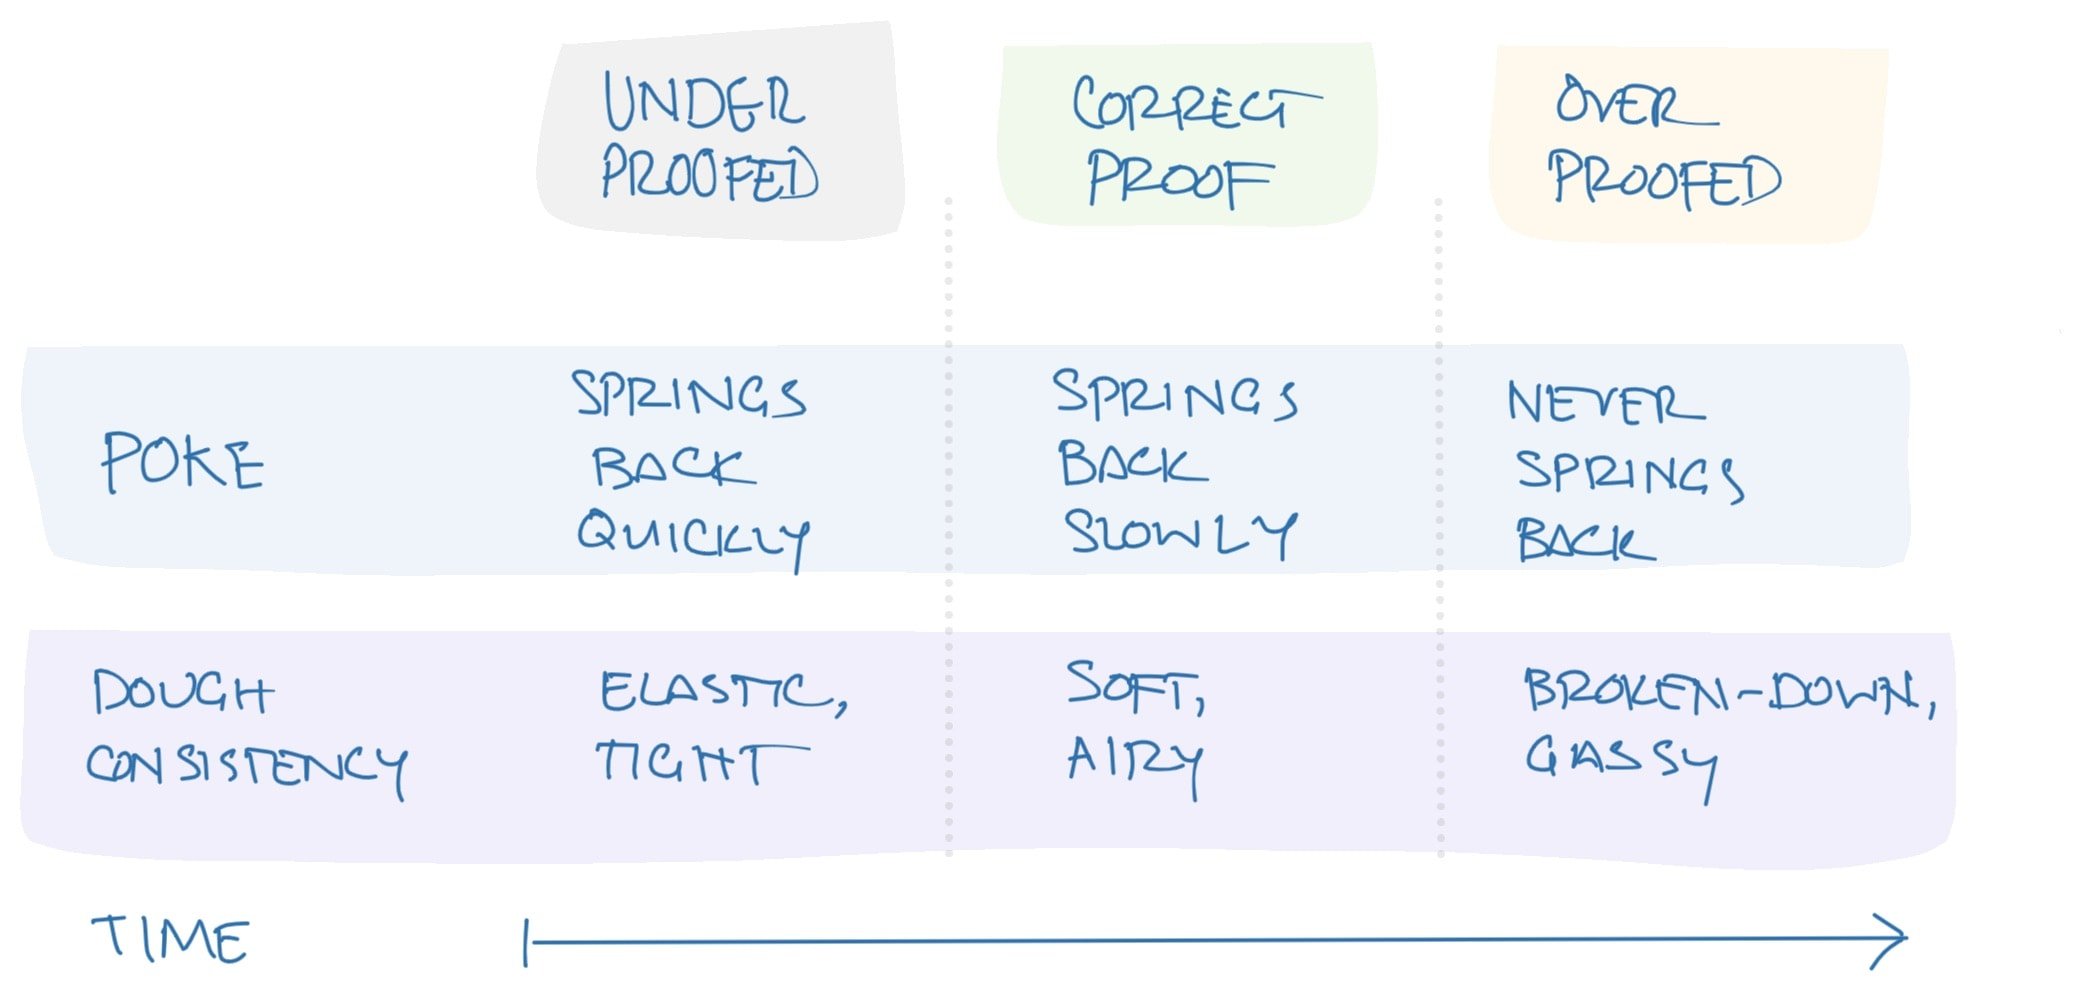
Using the dough poke test can be helpful here. I like to gently poke my dough in a few spots to try and determine its proof level at various steps in the process. And while the “poke test” is less accurate for cold-proofed doughs due to the tightening effect on the dough, it still gives you a good sense of its fermentation level. It becomes a much more reliable test for the ambient-proofed (direct) dough.
Poke the dough, and if you see:
- the indentation springs back very fast; it still needs time to proof (be on the lookout for this during the winter)
- the indentation slowly springs back; bake the dough soon
- the indentation stays depressed, bake immediately
My top 3 tips when baking sourdough bread in the winter
The following tips are what I turn to first when baking in the cold months of the year.
1. Use warm water when mixing
My first method for dealing with cold weather is to warm the water I use to refresh my starter, make my levain, or mix my dough.
First, I measure out all the water called for in my recipe and then take its temperature. Then, using a spreadsheet, quick calculation, or my water temperature calculator, I’ll determine what I need to heat the water to. Hence, my dough at the end of mixing meets my desired final dough temperature.
If your dough spends significant time in autolyse, take this period into account as the dough will slowly cool to ambient temperature. If it’s cold in your kitchen, keep your dough somewhere warm or heat the mixing water to a few degrees above the called for final dough temperature in the recipe.
Use warm water for your starter, levain, and final dough mix.
Warm your mixing water to ensure vigorous fermentation activity in your sourdough starter, levain, and final dough.
2. Use a sourdough starter and a levain when they’re ripe
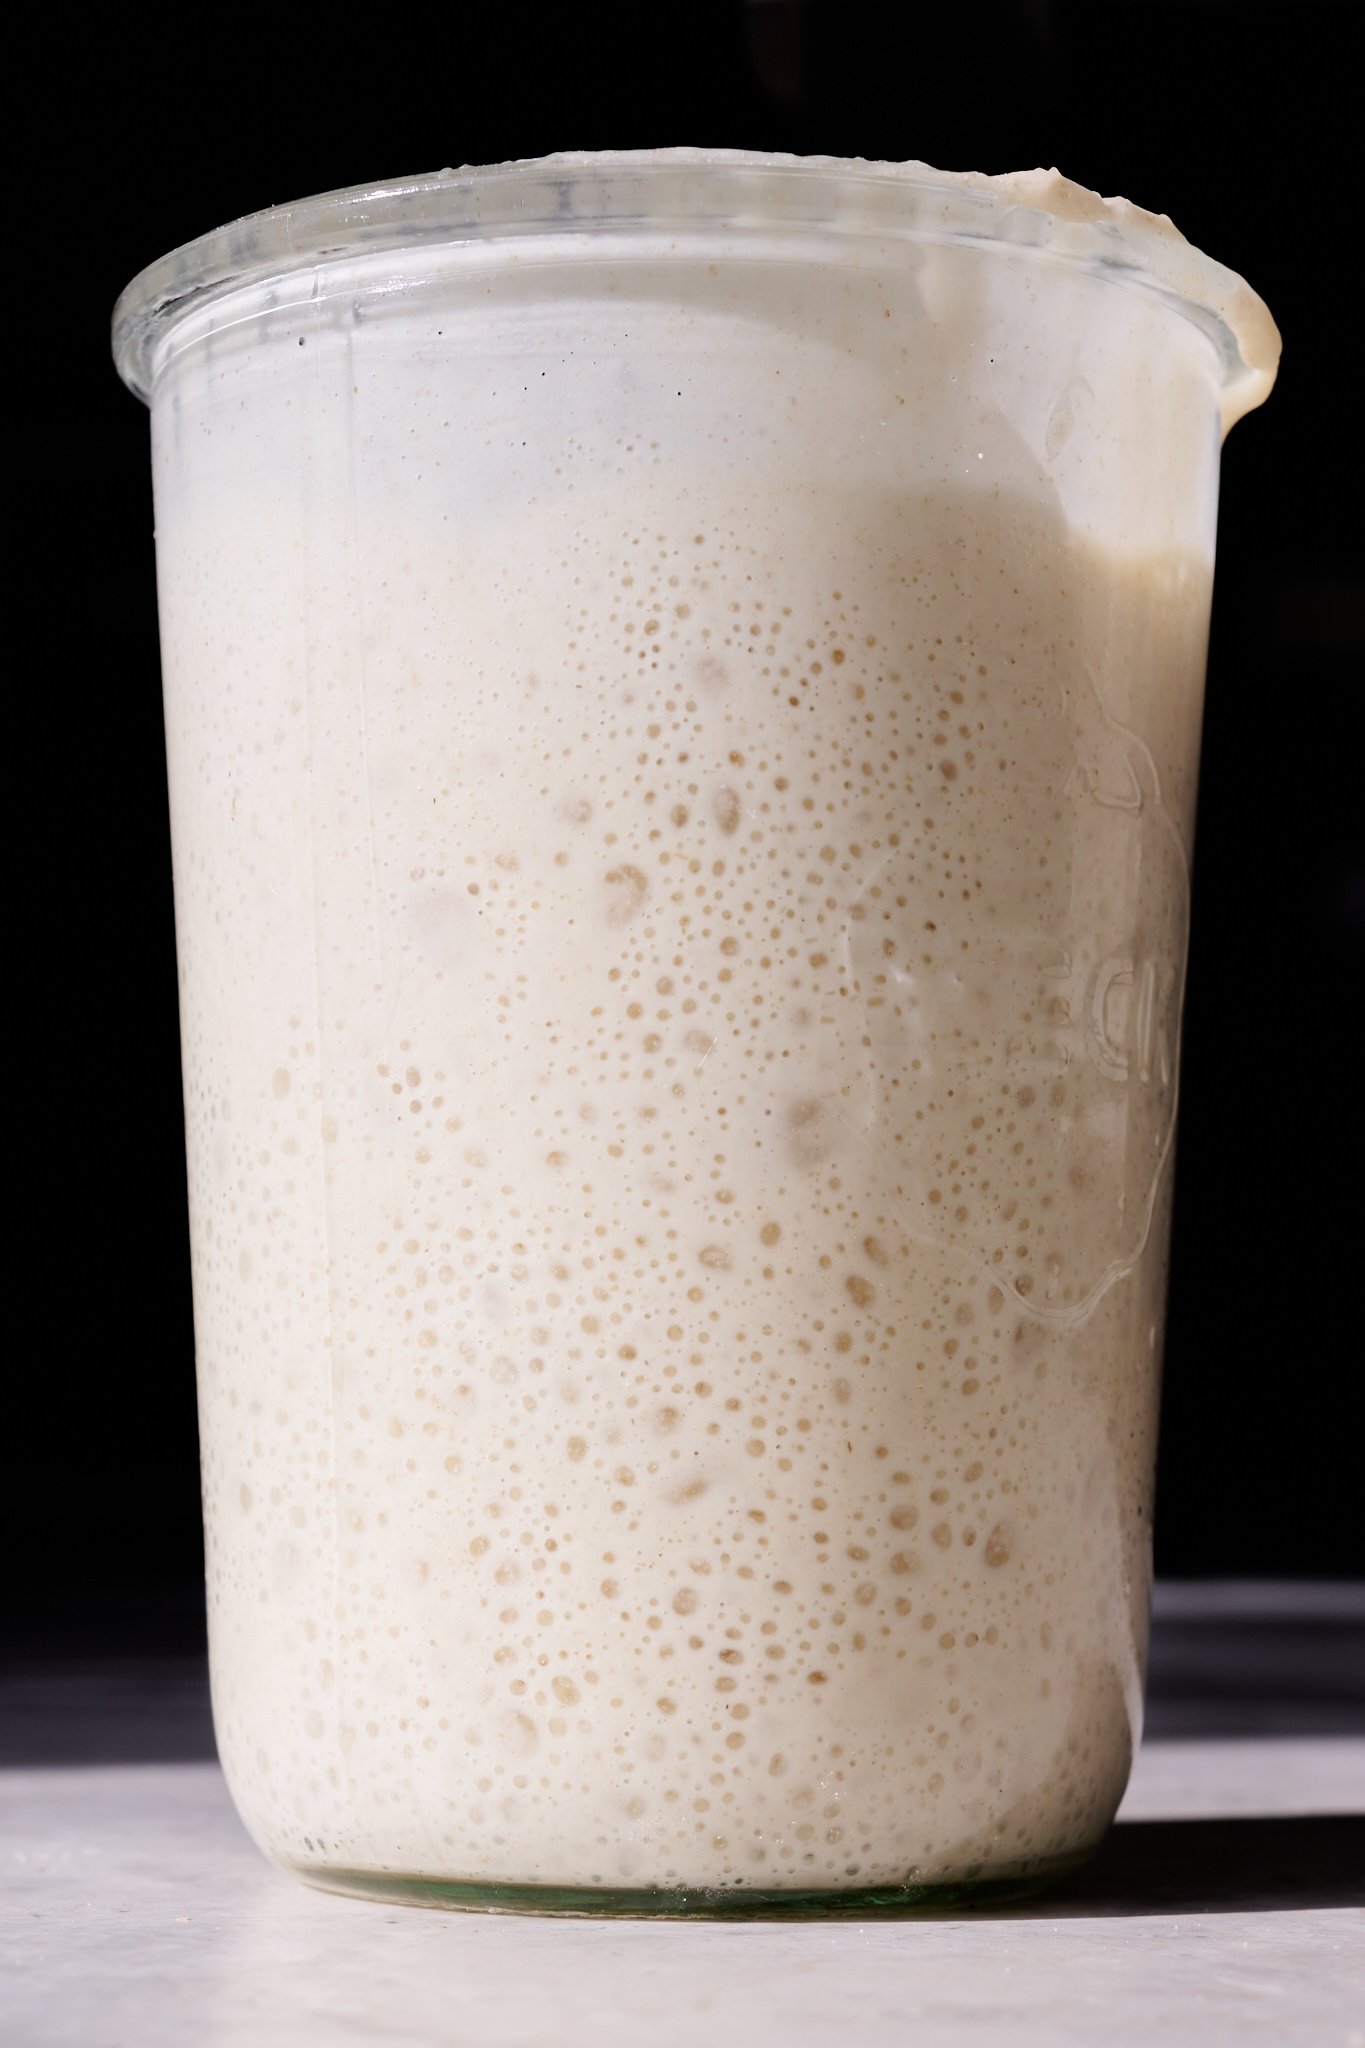
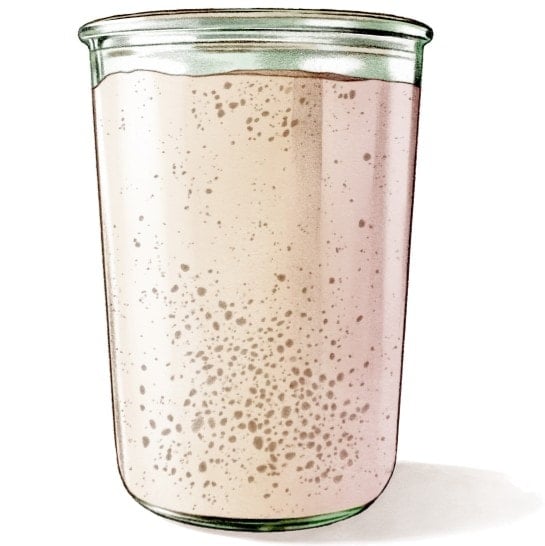
When temperatures are cool, we might find we’re using our starter before it’s fully ripe. Unfortunately, using a starter early ultimately leads to dough that’s underproofed. To ensure we’re starting on the right foot, keep your starter and levain warm and use it when you spot the signs of ripeness (a loose consistency, sour aroma, bubbles on top and at the sides, and it will have risen to some degree).
Tips to keep sourdough starter fermentation activity vigorous
The following are steps I take to ensure my starter and levain have vigorous fermentation activity (in order of preference):
- Keep starter in a warm spot. This sounds obvious, but sometimes we fail to realize just how cool some spots in our kitchen are! The top of the refrigerator, near the oven, or a spot below a heating vent are all places that might be warmer in your kitchen. The best spot, of course, would be a dedicated dough proofer.
- Increase starter carryover. My first approach to dealing with cool temperatures is increasing the starter I carry over at each refreshment. When maintaining my starter, I might drop carryover down to 5% in the summer, but in the winter, I might increase this up to 20%, depending on the temperature.
- Use warmer water. Warming your starter by warming the mixing water in the microwave or over the stove will help increase its final temperature to keep it warmer for longer.
- Let starter ripen for longer. Because fermentation activity is slowed in the cold, leaving your starter to ferment for longer can help ensure you’re still using it at a ripe state (this assumes temperatures aren’t too cold).
- Increase whole grain percentage. Increasing whole grains (especially rye flour) can help increase fermentation activity.
All of the above steps can help you keep your sourdough starter warmer and with increased activity. Sometimes, just one of the above will help, but it’s usually a combination of them to ensure my starter is strong and healthy in the coldest months of the year.
Recommended reading: How I Feed My Sourdough Starter
Use your sourdough starter and levain when ripe.
When it’s cold it’s easy to use your starter/levain before it’s fully ripe. However, doing so will mean your dough will need more time or a higher final dough temperature to keep the dough on schedule. Be sure to give your starter/levain more time to ripen if kept at a cold temperature, or warm its mixing water and keep it in a warm spot to keep it vigorous.
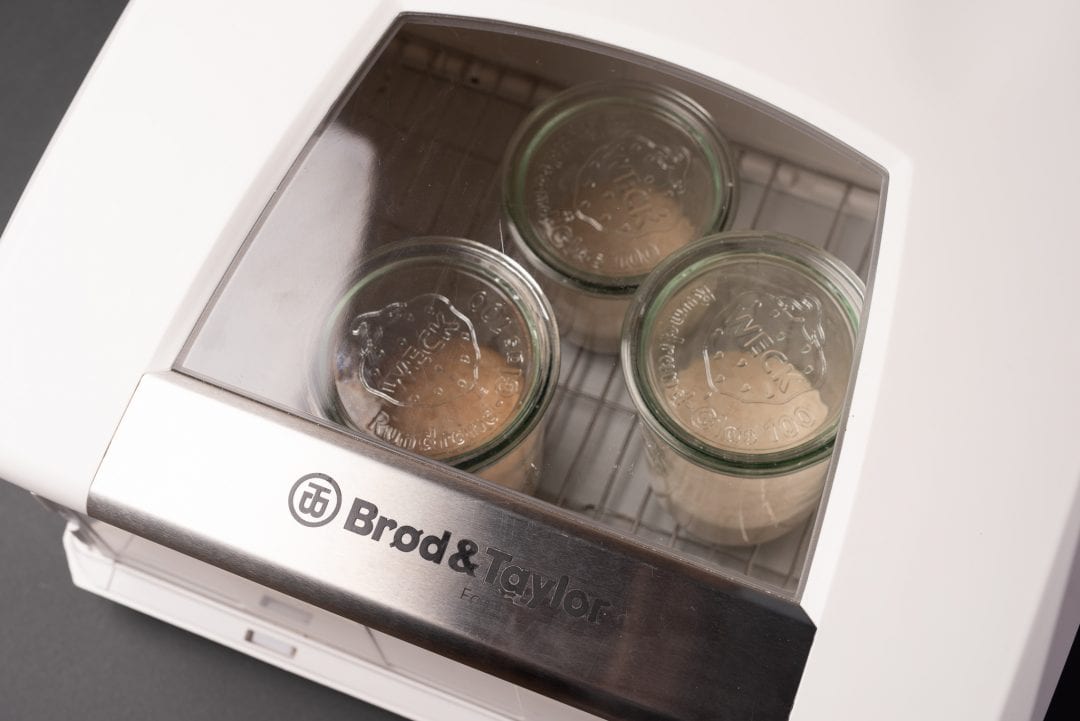
3. Keep your bread dough warm
I like to use a small home dough proofer to keep my starter, levain, and dough warm during the winter. I can keep my dough at a stable 78°F (25°C) in my proofer, which is my preferred temperature for most recipes. This warm temp ensures vigorous fermentation activity.
The larger the surface area, the faster the dough will cool
If you’re using a bulk fermentation container that allows your dough to spread out into a thin, flat layer, your dough will have increased surface area and thus will cool (or warm!) faster than if kept in a smaller container. See my baking tools page for my favorite bulk fermentation containers.
Use an insulated bulk fermentation container (or not)
Related to the point above, using a bulk container with thick walls (like a ceramic bowl) can help keep the dough warm if your ambient temperature is cool.
However, having a thermodynamically neutral container may also be beneficial; it has reduced insulation. In this case, a container that doesn’t buffer temperature can be helpful if you keep your dough in a dough proofer or spot in your kitchen that’s close to your desired dough temperature.
Recommended reading: How to use the Brød and Taylor Dough Proofer
Keep the bread dough warm for vigorous fermentation activity
Use a small dough proofer, your oven with the light turned on, or the microwave to keep your bread dough warm and insulated during bulk fermentation.
A few more suggestions on how to bake sourdough bread in winter
Increase pre-fermented flour percentage
A larger preferment means an increased bacteria and yeast population introduced into our dough. The more microbes, the higher the fermentation rate, which can help keep our cold dough on schedule with a recipe. In other words, we try to offset the reduced temperature (which would mean it would take longer for our bacteria and yeasts to multiply) by starting the dough off with a larger microbe population.
Adjusting this part of the recipe does affect the formula you’re following, though, and it should only be used after other measures have first been attempted (keep it warm!).
Watch the work surface temperature when kneading
Mixing and strengthening my dough using the slap and fold technique means my dough will be in contact with my cool granite kitchen counter. If I expect to knead by hand in this way for a long time, I’ll typically warm the mixing water even more to offset the cooling effect the counter will have on the dough.
If kneading the dough in a mechanical bread dough mixer, expect the mixer to heat the dough if mixed for a prolonged period—this may be a great thing in the winter!
A few frequently asked questions
Why does my sourdough starter look sluggish in the winter?
Cooler temperatures reduce fermentation activity. Keep your starter warm to help keep it strong and on the same refreshment timeline. Alternatively, keep it slightly warmer and give it more time to ferment before using.
Why does my bread dough underproof in the winter?
Cooler temperatures mean decreased bacteria and yeast fermentation activity. To offset this, you can increase the final dough temperature, pre-fermented flour percentage (levain percentage), or give the dough more time to ferment during bulk fermentation or proof.
What bulk fermentation container is best for my bread dough?
I like thick ceramic bowls because they’re primarily nonstick, and the thickness helps insulate the dough and keep it warm (or cool). However, a thin, plastic container can also work well if your ambient temperatures are similar to your desired dough temperature.
What’s next?
Due to the cold temperatures, most bakers have trouble proofing their bread dough in the winter. Be sure to review my ultimate guide to proofing bread dough for more tips on combating the cold and ensure your dough is always properly proofed before baking.
With the above advice on how to bake sourdough bread in winter, check out a few of my favorite recipes at this time of the year (bread, pastry, and sweets alike!):


37 Comments
I am exploring ways to warm starter (which I store in refrigerator) and doughs in the winter. I am considering getting a seed mat for my seedlings which would warm the bottom of my Weck jars 10 to 20 degrees above ambient temperature. Our house is in the mid sixties at night, upper 60’s in the day. Would that heating from bottom work? I’d have to cover the jars with a towel, and probably only use this set up when I can monitor.
I also wonder if it is harmful to have temperatures yo-yoing a bit as I take breaks from heat source. I now set Weck jar in warm water, so that is happening already as the water cools around the jar and I reheat every 30 minutes or so. Is that bad?
Hi Maurizio, I usually feed my starter with 30 C water at night (as my kitchen is quite cold). I follow your feeding ratio (1:5:5) with rye and all-purpose flour. The fermentation doesn't seem to happen throughout the night, and slowly picks up during daytime. The image below is my starter after 16 hours of refreshment. Do you have any recommendations to speed things up? Thank you so much! https://uploads.disquscdn.com/images/e5750904abbc8ddf04c304c2538c6eca525035fcd65cc2421f18a898a99803a4.jpg
Is it colder at night there like it is here? Even with the warm water it might be getting colder and slowing things down! I would suggest leaving more starter in the jar each feeding, which will help, along with using warm water.
I loved that you posted on a "failure"! Here in Minnesota, I deal with colder winter temps both outside and inside, but actually like baking better in the winter because it warms up the house with great smells.
Question for you – is the "flying roof" (a row of air pockets near the top crust) another sign of underproofing? I was making your spelt/whole wheat loaf.
Thanks much for all your posts (and a sense of humor),
Georgiana
Thanks for sharing! Yes, baking failures are such valuable learning experiences – we all have them, even after years of baking. About those air pockets near the top crust (sometimes called the "flying roof"): they typically appear due to overproofing, though they can also show up in doughs that are either too wet or haven't been developed enough strength during mixing and folding. For the spelt/whole wheat loaf, paying extra attention to dough strength during mixing can help prevent this. Keep baking and experimenting – those winter bakes do make the house smell amazing!
Our kitchen cabinets have counter lighting units mounted under them and the bottom shelf of the cabinet has a nice space for my starter. This cabinet holds a temp of 74-76, although today is unseasonably cold and it's only 72 degrees. This spot has been a perfect informal dough proofer!
ThermoWorks, makers of the ThermaPen insta-thermometer, also make a thermometer that sits on the cabinet-proofer shelf and reads its temperature. A helpful, little tool!
Really great tips there, Kim!
Is heating the water important for the starter and/or levain as well as the actual dough? I would think that the former would equalize with the ambient temperature in a short amount of time, so as long as the water isn’t far below room temperature it shouldn’t make much of a difference. Thoughts?
As for finding a spot with the right temperature, I’ve tried putting my starter in the oven’s warming cupboard but this still seems too chilly even with the oven on (given the slow/barely discernable rise); and recently when I tried putting it in the actual oven with the pilot on it was apparently too warm as I may have killed it. The top of the fridge is not an option in our kitchen, and I have a yogurt maker but even this may keep it too warm (105F or so), so the warming cupboard still seems the best place. Any tips for bumping up the “cozy” factor when the kitchen is chilly? Alternately, is there a way to know if temperature is in fact the problem?
I like to heat/cool the water, yes. It depends on the container and how large the lev/dough is, this can impact how long it takes to equalize. Better to get started on the right foot with temp (and to increase consistency!).
You can wrap your jar/container in a towel, put it in the oven with the light on (which may get too hot, watch it!), or place it inside another container to create some insulation.
Thank you Maurizio for this article. We live in the high Colorado mountains, so it never gets very warm in the house even in the summer. The T&B proofer was a game changer for us and putting a little water in the tray helps a lot since the ambient humidity is often in the single digits or teens. Before getting that it was just a lot of frustration with sourdough and proofing in general. The Weck jars are a huge upgrade over using canning jars too. We also added an Anova steam oven recently to our tool box and have been making pizza with a Roccbox for years. Your guidance and recipes are fantastic. Thanks a million for the effort to put into sharing your knowledge… Glenn
You’re very welcome, Glenn. So glad all my tips here have helped. I find with baking, finding the right tools is half the battle (and the other half, well, that’s me 🙂). Happy baking!
Hi. I use my instant pot (yogurt setting) for maintaining that 78-ish temp in the winter. I control the temp by adjusting the instant pot lid. The instant pot is just big enough to hold my thick ceramic bowl. I readily put 1000 g of dough in it but it would also accommodate the 1800 g used in most of your recipes.
This is a great idea, Cindy!
Unfortunately I can’t seem to get past the starter stage this winter. It’s 70 in the kitchen and results have been sporadic instead of consistent. I’ve tried the oven light method but that only gets to 72. I’ve wrapped the starter jar in towels with no luck. I’m contemplating a proofing box but that Brod and Taylor seems a bit pricey. I may be waiting for spring. Strangely though this is the first winter I’ve had issues. Flour source hasn’t changed and filtered water is the same. I’ve seen a few diy proofers so that’s a possibility. I just don’t get what variable has changed since the previous winters.
Very strange, Andy! Well, be sure you’re warming the water you use for mixing, that will definitely help. If you shoot for 80F water, it’ll keep things warm if your jar/bowl is insulated. The proofer is a tad pricey, but gosh, I love mine. I understand, though, it’s yet another tool in the kitchen! Another option would be a garden seedling mat with thermostat, then you could place that in a cooler or box to keep things warm.
Temperature is such an important factor in baking!
I warm the water to the mid-80s, but I don’t shoot for a specific temperature in that range. I use a glass jar so I don’t believe that would qualify as insulated, but I have in the past wrapped in a towel when I would sit it on the counter. I have seen the DIY videos with the seedling heat mat, but the only drawback is that the box doesn’t collapse like the broad and Taylor one does. Maybe that’s why it’s so pricey :-). Any idea if they ever have sales? Would you recommend another type of jar?
Hmm, not sure I’ve seen sales with B&T proofer. Though, (shameless plug) member’s here at TPL do get 10% off!
No, I think Weck really are the best. I’ve wrapped mine in a towel in the past or even put it in the microwave, which is somewhat insulated.
I ended up reaching out to B&T and they were quite nice about it but said they don’t put that item on sale. I’ll order a weck, wrap it in a towel, and see how that goes.
Amazon sells collapsible proofers for less than $30
Would increasing your starter and flour help?… and make a thicker starter.. with less warm water.
Lol, I guess my reply wasn't very timely 🙂
I’m learning to use my own diy proofer in this Wisconsin seemingly eternal winter. It’s just a collapsible cooler I found at a thrift store in which I place 2 quart Mason jars with boiling water, wrapped in fiber cloths. They keep a fairly even temp of 80°F for either my starter or my dough in its plastic gallon container.
I hope it works as well during the summer!
Thank you SO much for the guidance on how to grow and keep my sourdough healthy and thriving. This is my first year that I’ve been consistently getting a good crumb in my loaves!
That’s a fantastic find, Ted!
Thanks for maintaining these posts. This has been so helpful to getting me started on bread making path. You often talk about using a re-usable cover for your doughs. Can you recommend some specifics? I see bees-wax-paper as an alternative to saran. Also can you talk about when you use bottled water and when you use tap? Is bottled for maintaining the starter to avoid high chlorine content?
You’re very welcome! Sorry for the delayed reply. I have covers listed on my baking tools page, they’re plastic but have an elastic band and I use them over, and over, and over. I always use tap water in my baking—as long as it’s safe to drink, that’ll work! If you’re having trouble creating your starter, bottled water may help, but it’s not necessary to bake or once your starter is established and fermenting well.
We are regularly in the 90F zone….recommendations for that?
Check out my guide to baking bread in the summer 🙂
NICE! I turn on the aircon!
That works 🙂
I live at 5000 ft in northern Colorado, not high, but it gets cold! I regenerate my starter the day or night before, adding flour & warm water (110F) to the starter. I set the jar in another bowl of warm water. Depending on how much is in the jar and how much I need, I do this 2-3 times, usually the last time in the morning before baking. I don’t throw away any starter: I feed it with 1/4 c flour and 1/4 c water (scant) everytime. If I really want an acitve starter, I use a mix of half rye and half whole wheat. Does the trick.
I like your approach, Ann! Here in Albuquerque (around 5280ft) it gets cold, but probably not as cold as where you are. This is what I love about sourdough bread (and our starters): there are so many ways to bake amazing bread at home, and we each find our own way to work it into our lives. Thanks for the comments, I know they’ll help someone else in the high desert as well!
I also live at altitude in New Mexico – we are at 8000 ft. Do you have any high altitude suggestions for me?
Hey, Pat! Yes, I’ve compiled all of my high altitude tips here on my high altitude bread baking guide. Hope that helps!
From chilly Vermont (today’s high temp is 14F), I find I can control the temperature of my dough with the oven light on. I make small batches (~700 grams) and 30 minutes in the oven with the light on raises the internal temperature 2 degrees. I take the internal temp of my dough after kneading and calculate how long I need to leave it in the oven for my optimal temp. About halfway through the bulk proof I take the temp again to see if and for how long I need to put it into the oven again.
My next project is to build an insulate sleeve that I can put by proofing container into to help regulate the temperature when I take it out of the oven.
Ooh, that is chilly! It was a little below 20F here the other day, but the past week has been unusually warm, around 50F for the high!
Great method there with the oven, I too do the same thing when I have large amounts of dough. The oven with light on gets surprisingly hot, and because the chamber is insulated, helps keep things nice and cozy.
Stay warm and happy baking, Trip!
I’ve recently become very aware of just how critical temperature is in the entire process, i,e a few degrees can make a huge difference. I got the same Brod and Taylor proofer back in August and that’s been a game changer for consistently good crumb. I don’t really use it for maintaining the starter itself, just for proofing the loaf and sometimes the leavain too. Perfect for the cold winter (+ Spring +Autumn) in Ireland. 🙂
Yes, so, so critical! Fermentation is very temperature-driven. In a place like Ireland, I’d probably have two 😉 Happy baking and thanks for the comments, Shane!