

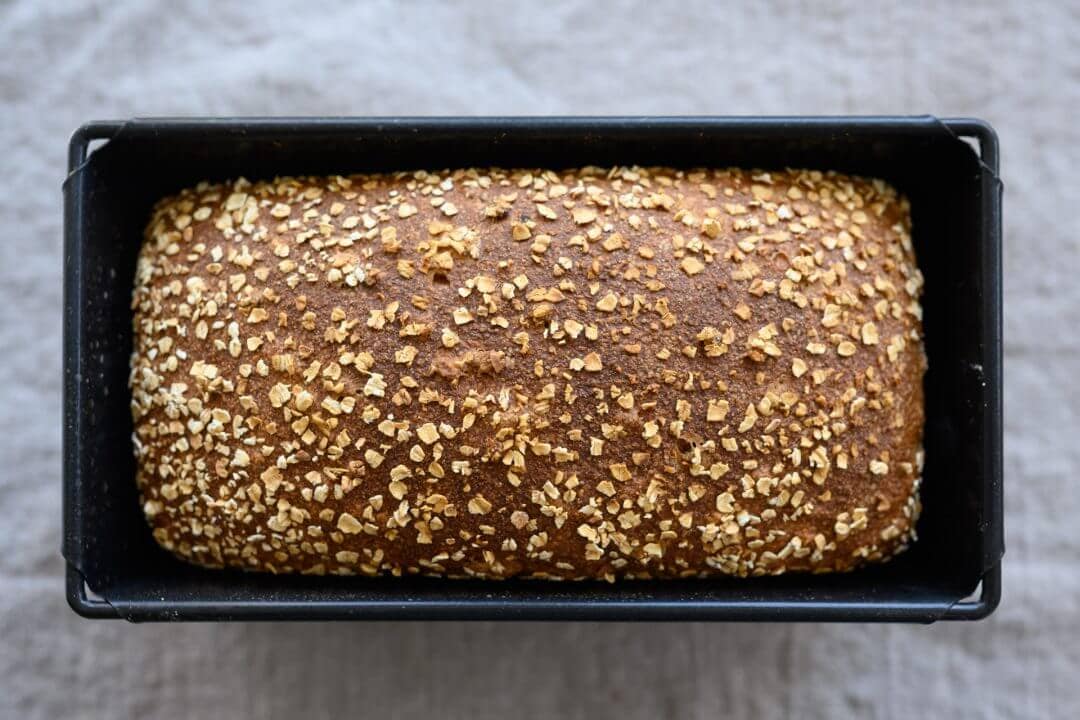
This charming and wholesome pan bread is as nutritious as it gets. And while I do have a particular fondness for pan loaves, especially when they use freshly milled flour, this honey whole wheat and barley pan loaf takes it to the next level with freshly milled flour, a little sweetening, a bit of (healthy) fat, and a porridge mix-in.
Yes, it’s chock-full of ingredients. Picking up the final, baked loaf is akin to picking up a concrete brick. I mean, with the barley porridge alone, we’re inching our way toward the title of construction worker rather than baker. But! Much like a piece of jewelry has some value associated with its heft, so does this nourishing bread. And believe me, while the overall loaf feels heavy in hand, each slice eats light and airy.
Barley was a staple in ancient Rome, and for a good reason. It contains many essential nutrients: it’s high in protein, fiber, B vitamins, and other nutrients necessary to a healthy diet. I’ve been eating barley for a long while and usually make a batch each weekend to last me through the week for salads and grain bowls. Not only is it healthy, but it’s mighty tasty. This beautiful grain sounds like the perfect addition to bread dough, and it turns out I was right.
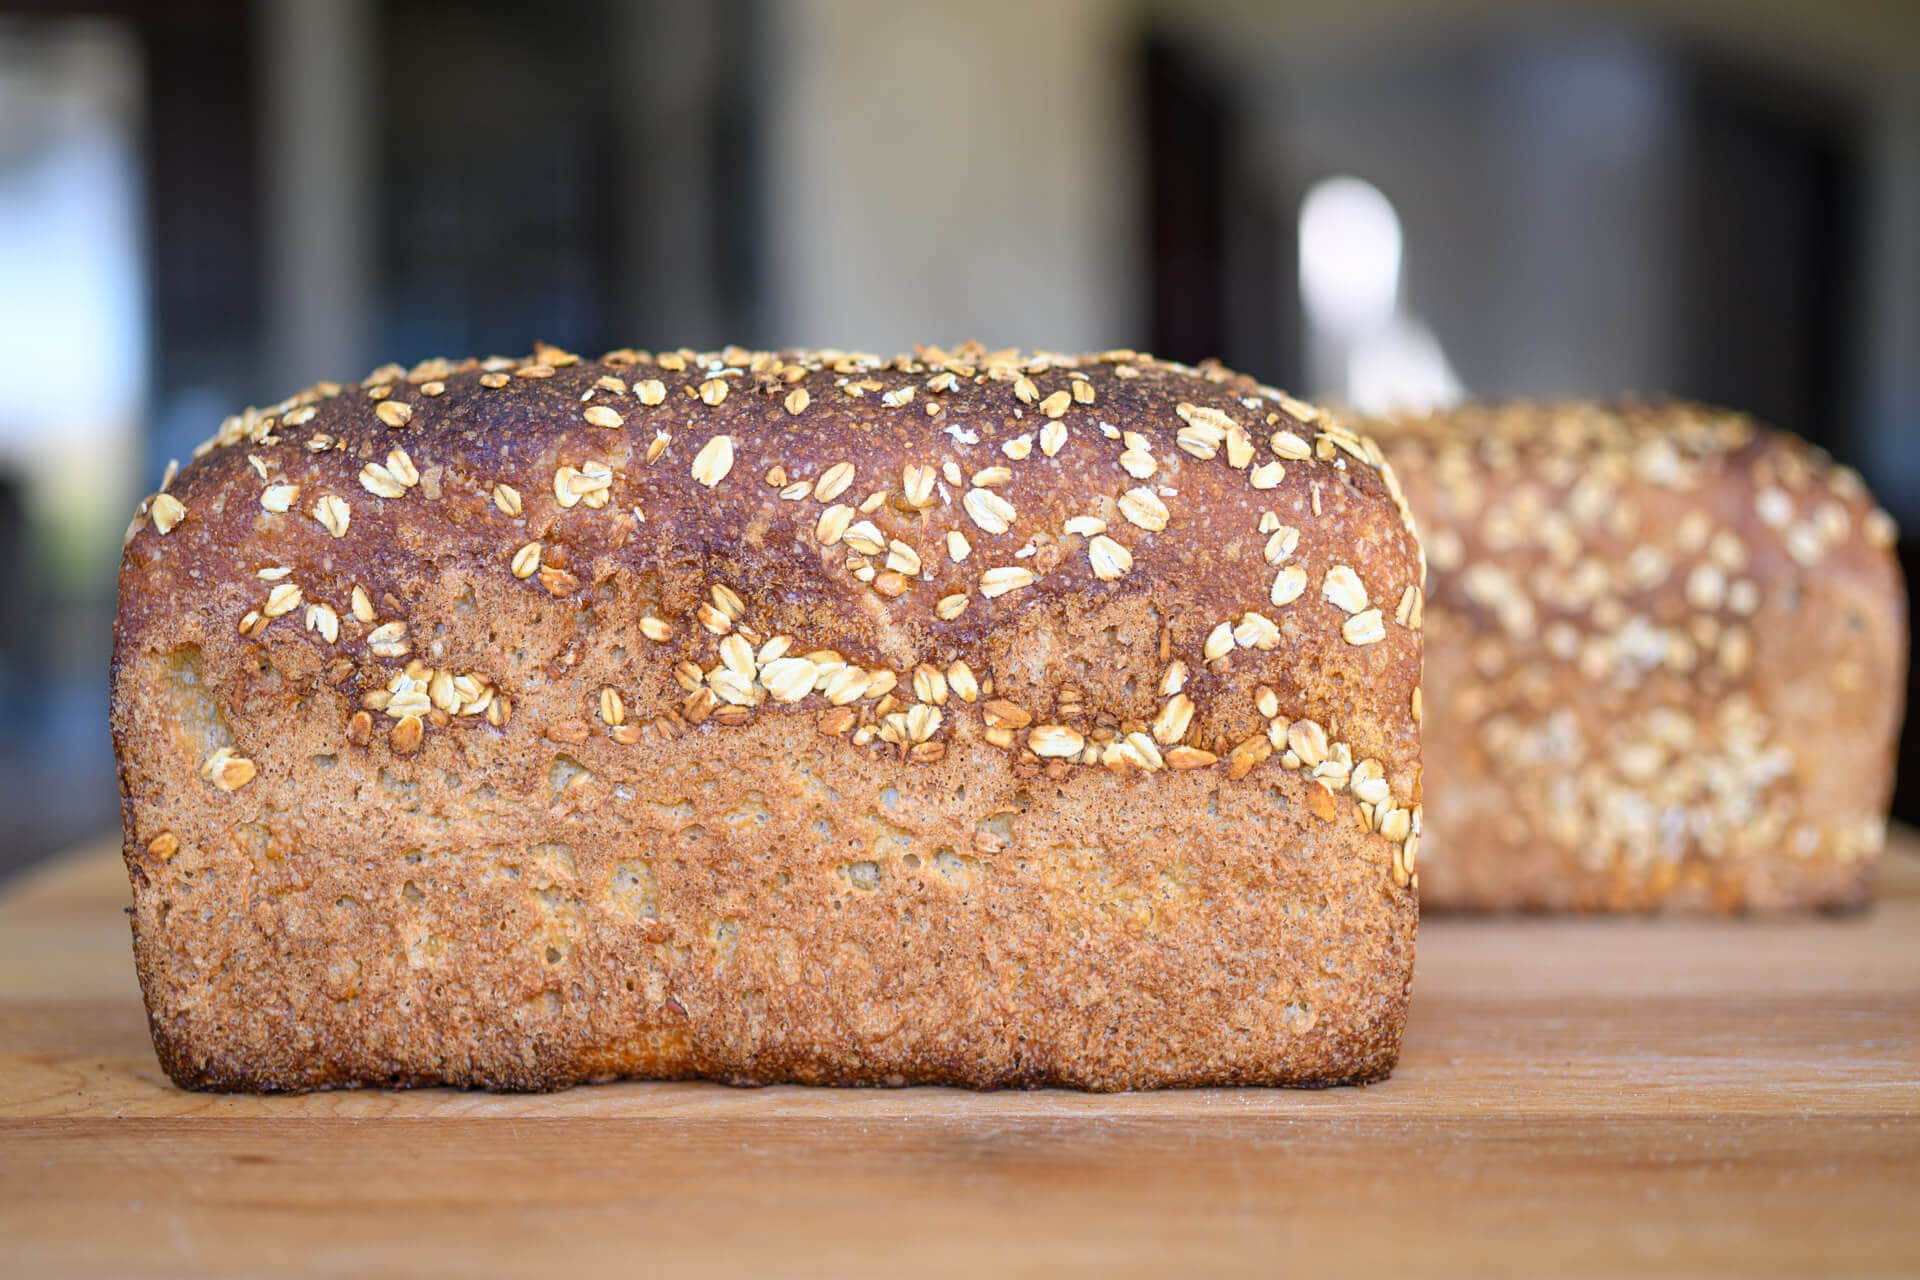
This is a same-day recipe (well, except for the overnight levain build). I do recommend sticking to that schedule: I found an overnight, cold proof adds in more sourness than I desired. Let’s talk about flour.
Flour Selection
I choose freshly milled hard white wheat as the majority grain in this recipe because I find it’s mild flavor (compared to red wheat) just works so well in pan bread. I milled the white wheat first thing in the morning with my Mockmill 100 grain mill and left it out to cool before using it in my mix.
If you don’t want to mill your fresh flour, King Arthur Flour White Whole Wheat would be a great stand-in.
Honey Whole Wheat and Barley Pan Loaf Recipe
Update: Originally, I had this recipe listed to have 700g in a 9″ x 5″ pan. After some feedback, I’ve increased that dough weight to 1000g per pan with a total dough weight of 2000g. This results in two much taller and better-proportioned loaves.
Whole Hulled Barley
For the barley porridge source, whole hulled barley, not pearled barley. Hulled barley has the non-edible fibrous hull (a shell of sorts) removed but still has the bran and germ, meaning it has all the nutrition and flavor intact. By contrast, Pearled barley has been steamed to remove most of the bran.
If you have flaked or rolled barley, you can also use this for the porridge, similar to how rolled oats are incorporated into an oat porridge sourdough bread. Adjust the cooking time of the porridge as needed; the flakes will likely cook much faster.
Vitals
The pans I’m using, which were custom-made, are 8.85″ x 4.7″ x 4.7″ deep (235mm x 120mm x 120mm deep) and can easily take 1400g of dough. If you’re using a traditional 9″ x 5″ pan, you can halve the total dough weight for this recipe and place 1000g in a pan and bake two loaves.
For several more examples of dough weights and pan sizes that accommodate them, check out my guide to shaping a pan loaf.
I like to double this recipe and make two loaves at once. This way, I can freeze an entire loaf by wrapping the baked and cooled loaf tightly in plastic wrap several times, then placing it into a freezer bag and then putting it in the freezer. To thaw, remove from the freezer into the fridge until defrosted.
| Total Dough Weight | 2,000 grams |
| Pre-fermented Flour | 3.75% |
| Hydration | 94.00% |
| Yield | 2 x 1000g pan loaves |
Total Formula
| Weight | Ingredient | Baker’s Percentage |
|---|---|---|
| 684g | Freshly milled hard white wheat (Central Milling hard white spring wheat berries, ~15% protein) | 75.00% |
| 228g | Hard red wheat (Central Milling Organic Whole Wheat Hi-Pro Fine or King Arthur Whole Wheat Flour) | 25.00% |
| 110g | Whole, hulled barley | 12.00% |
| 55g | Honey | 6.00% |
| 46g | Extra virgin olive oil | 5.00% |
| 858g | Water | 94.00% |
| 18g | Salt | 2.00% |
| 2g | Ripe sourdough starter (100% hydration). Yes, this small amount is correct. We’re building an overnight levain that requires very little sourdough starter to create. | 0.19% |

Levain
In testing this bread, I’ve made several levain builds and have found a mild, overnight levain to yield the best results. This levain, at room temp, will ripen in 10-12 hours—be sure to use your levain when it’s still on the mild side. It shouldn’t smell super sour or have fallen significantly in the jar. If it is on the acidic/mature side, your end loaves might have a more sour flavor (which is still ok, just not my preference for this bread).
| Weight | Ingredient | Baker’s Percentage |
|---|---|---|
| 2g | Ripe sourdough starter (100% hydration) | 5.00% |
| 34g | Hard red wheat (Central Milling Organic Whole Wheat Hi-Pro Fine or King Arthur Whole Wheat Flour) | 100% |
| 34g | Water | 100% |
Dough Mix
Target final dough temperature (FDT) is 78°F (25°C).
For an in-depth discussion on temperature when baking, have a look at my post on the importance of dough temperature.
| Weight | Ingredient |
|---|---|
| 684g | Freshly milled hard white wheat (Central Milling hard white spring wheat berries, ~15% protein) |
| 194g | Hard red wheat (Central Milling Organic Whole Wheat Hi-Pro Fine or King Arthur Whole Wheat Flour) |
| 312g | Barley porridge (cooked and cooled) |
| 55g | Honey |
| 46g | Extra virgin olive oil |
| 621g | Water |
| 18g | Salt |
| 70g | Mild liquid levain (see Levain Build section, above) |
Method
1. Liquid Levain – Night before at 9:00 p.m.
The night before you plan to mix your dough, prepare your levain. Using your mature sourdough starter, mix all the ingredients listed in the Levain Build section above into a new, clean jar. Cover and let ferment overnight for about 12 hours, or until ready.
2. Mill Grain and Cook Barley Porridge – Morning of the bake, 7:00 a.m.
The next morning, mill your hard white wheat. I used my Mockmill 100 grain mill to mill the hard white wheat berries and set it down to the finest grind level possible. Let the flour sit exposed to air to cool for a few hours before using it.
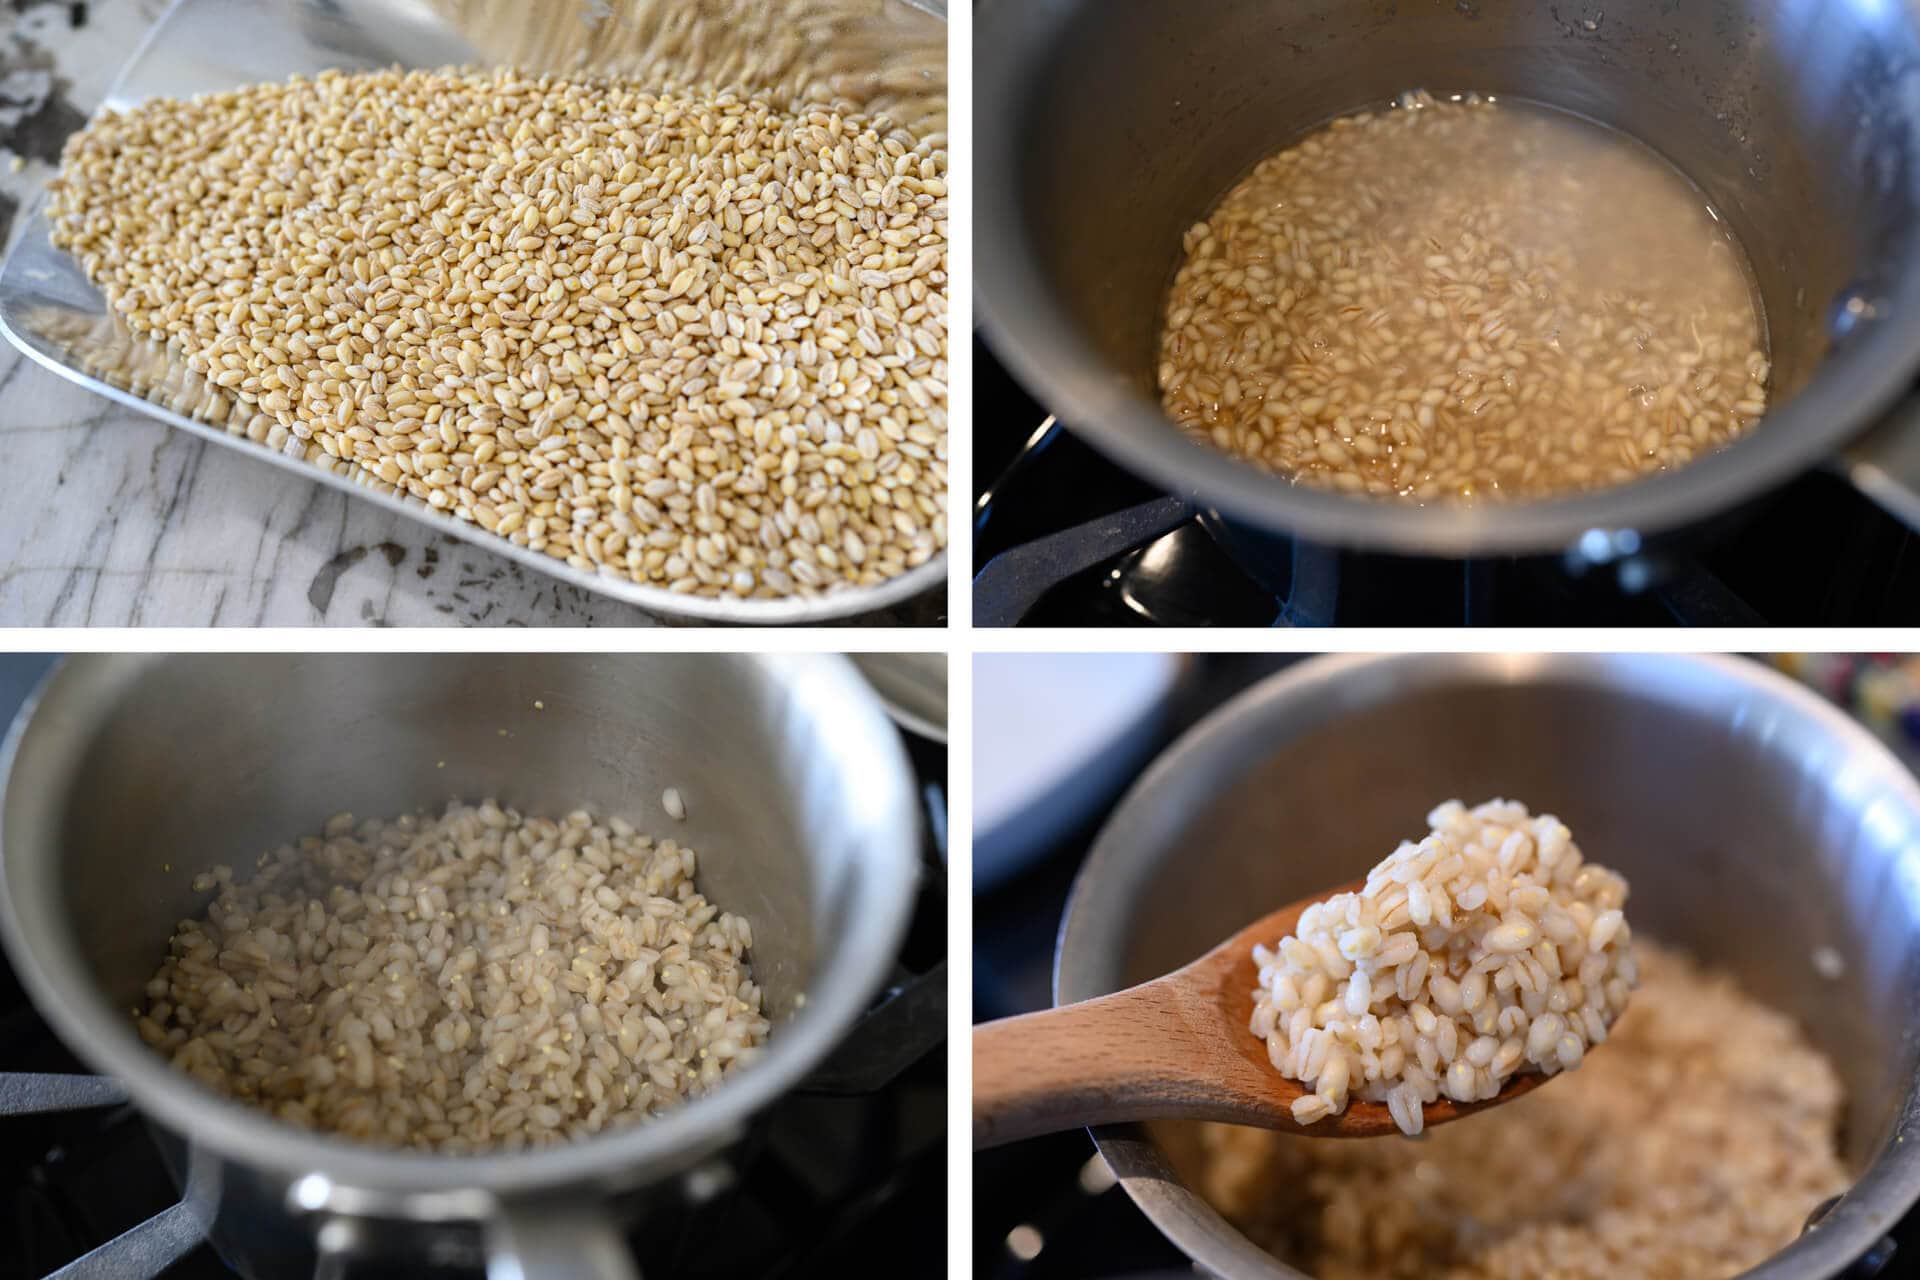
In a medium saucepan with lid, add the uncooked hulled barley and 203g of water. Cover the pot and bring to a boil. Once boiling, turn the heat down to low and continue to cook, stirring occasionally, for 20-30 minutes until very tender. Watch the barley in the last third of cooking as you might need to add a small dash of water to prevent burning. I ended up adding a small amount of water to the pot near the very end.
Once cooked, spread the barley out in a thin layer on a baking tray to cool.
2. Autolyse – 8:45 a.m.
Add the called for flour, all but 50g of the water, and your mild liquid levain to a mixing bowl. Using your hands, mix to incorporate the ingredients until there are no dry bits of flour remaining. Cover, and keep somewhere at warm room temperature until it’s time to mix.
While not typical, in this recipe we need to add our liquid levain to the autolyse step to facilitate mixing: the stiff dough needs the water for mixing.
Why are we adding our levain to an autolyse? The reason we do this is that this dough is rather stiff due to the high percentage of whole-grain flour. There’s a small, but significant, amount of water from the overall formula in the levain, we need this water to help mix sufficiently.
3. Mix – 9:00 a.m.
Add the salt and remaining water to the mixing bowl holding the autolysed dough. Using your hands, mix everything until it comes together into a shaggy mass. Then, dump the bowl out to the counter and slap and fold (see my guide to the slap and fold technique here) the dough for about 5 minutes to develop strength. Alternatively, you can keep the dough in the bowl and do a series of stretch and folds with one hand as you rotate the bowl — 50 or so will suffice.
At the end of this initial strengthening, the dough should have smoothed out and will loosely hold its shape on the counter (or in the bowl). Add the honey and olive oil and gently massage to incorporate. Perform a series of folds in the bowl to ensure the liquids are incorporated and the dough smooths out.
Finally, add the cooked and cooled barley porridge to the dough. Spread it on top of the dough and using wet hands massage it into the dough. It’s ok if it’s not completely dispersed, we’ll continue to do so during bulk fermentation.
4. Bulk Fermentation – 9:15 a.m. to 12:45 p.m.
Give the dough two sets of stretch and folds, 30 minutes apart, where the first set starts after the first 30 minutes of bulk fermentation. This dough was incredibly stiff for me, even with the large percentage of water, but if your dough feels excessively slack after the second set of stretch and folds, give it additional sets as needed.
Keep an eye on this dough during bulk fermentation, it can quickly overproof given the high percentage of whole grain flour and starchy porridge.
Let the dough rest after the last set of stretch and folds for the duration of bulk fermentation.
5. Divide & Preshape – 12:45 p.m.
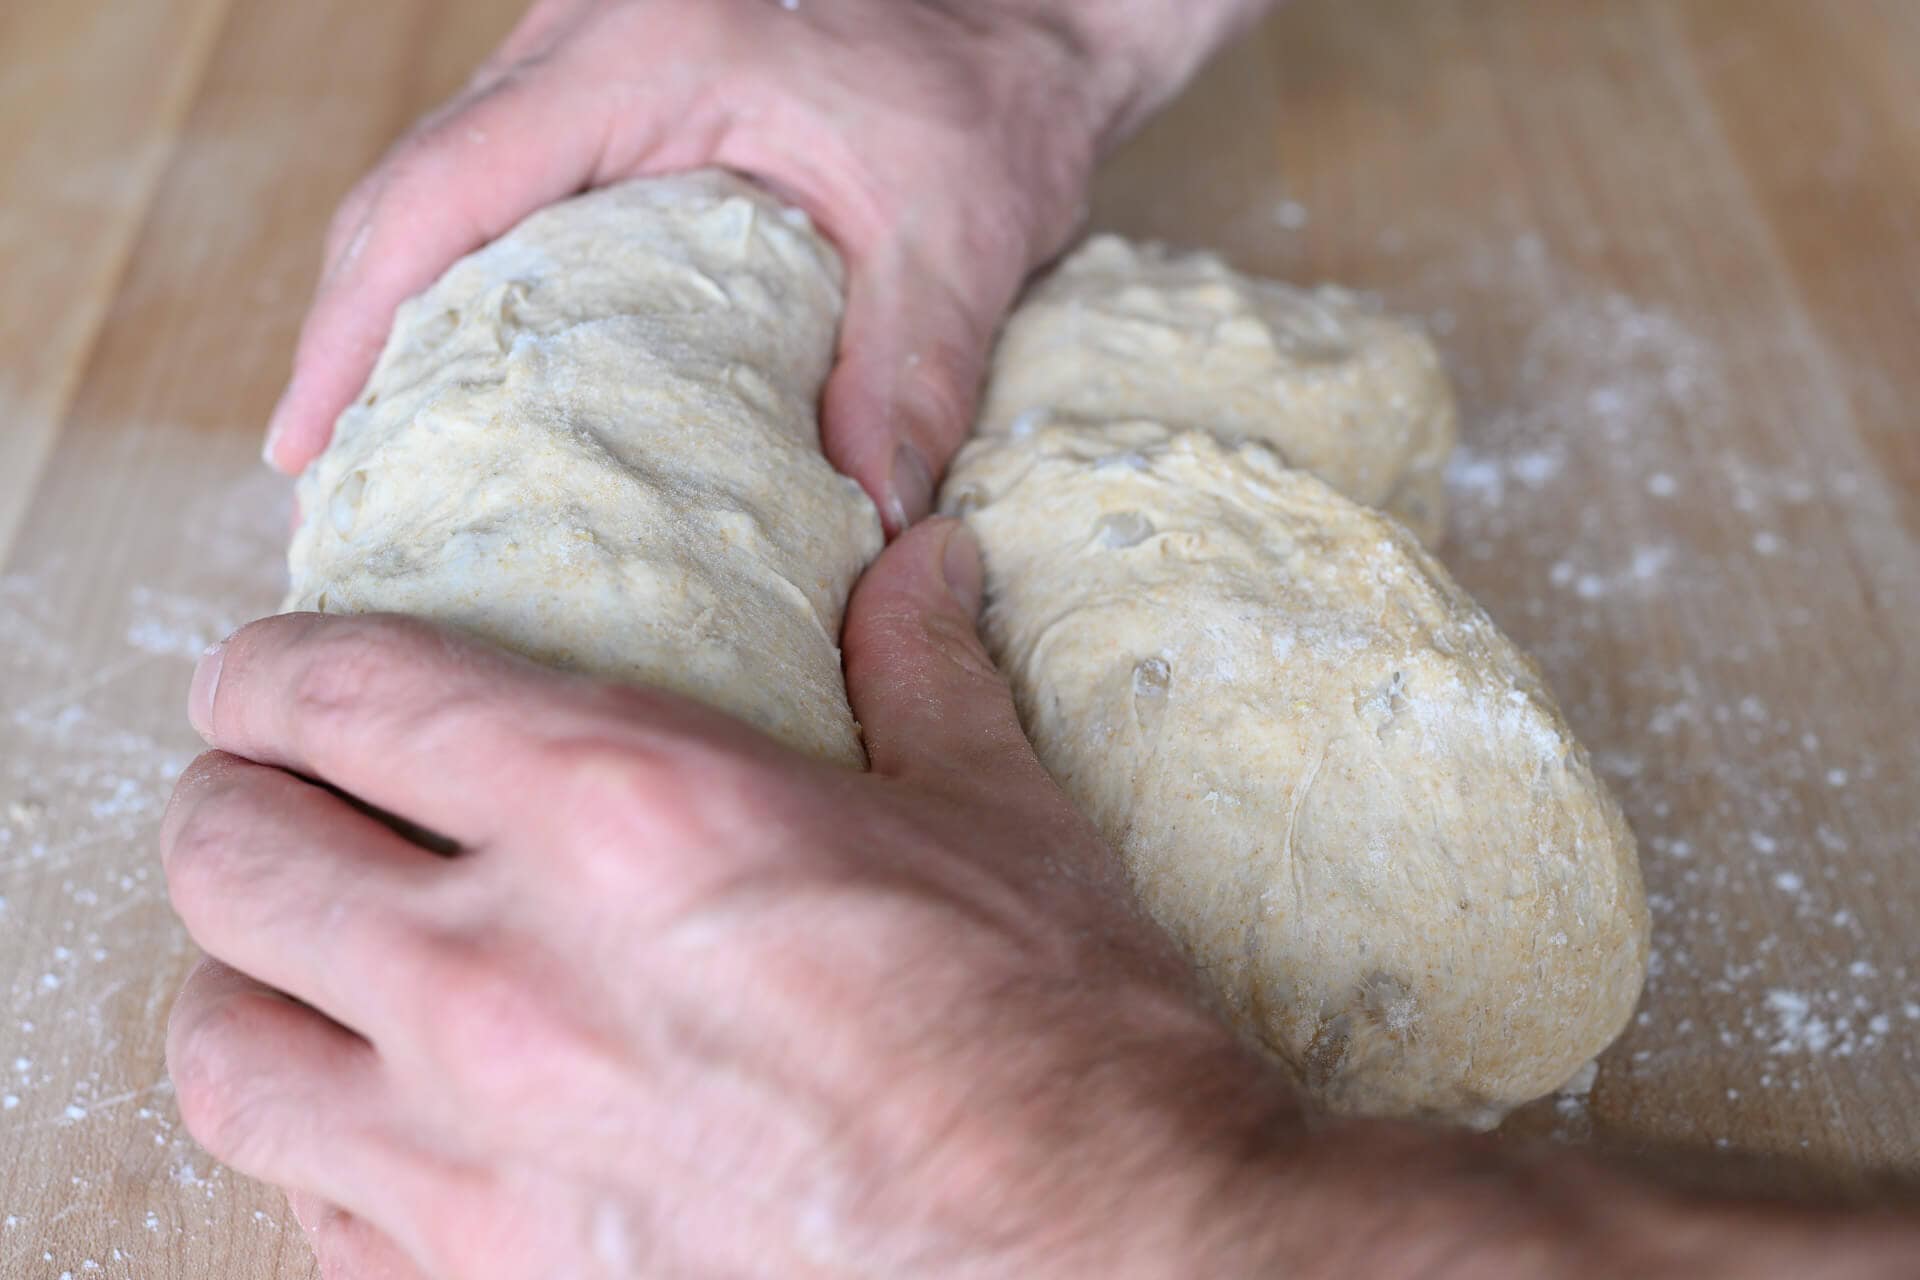
Dump the contents of your bulk fermentation container to an unfloured work surface. Lightly dust the top of the dough with flour and, using a bench knife, divide the mass in half. Gently form each piece into a round on the counter using your bench knife and a flour-dusted hand. See my guide to preshaping sourdough bread dough for a video and more tips on preshaping.
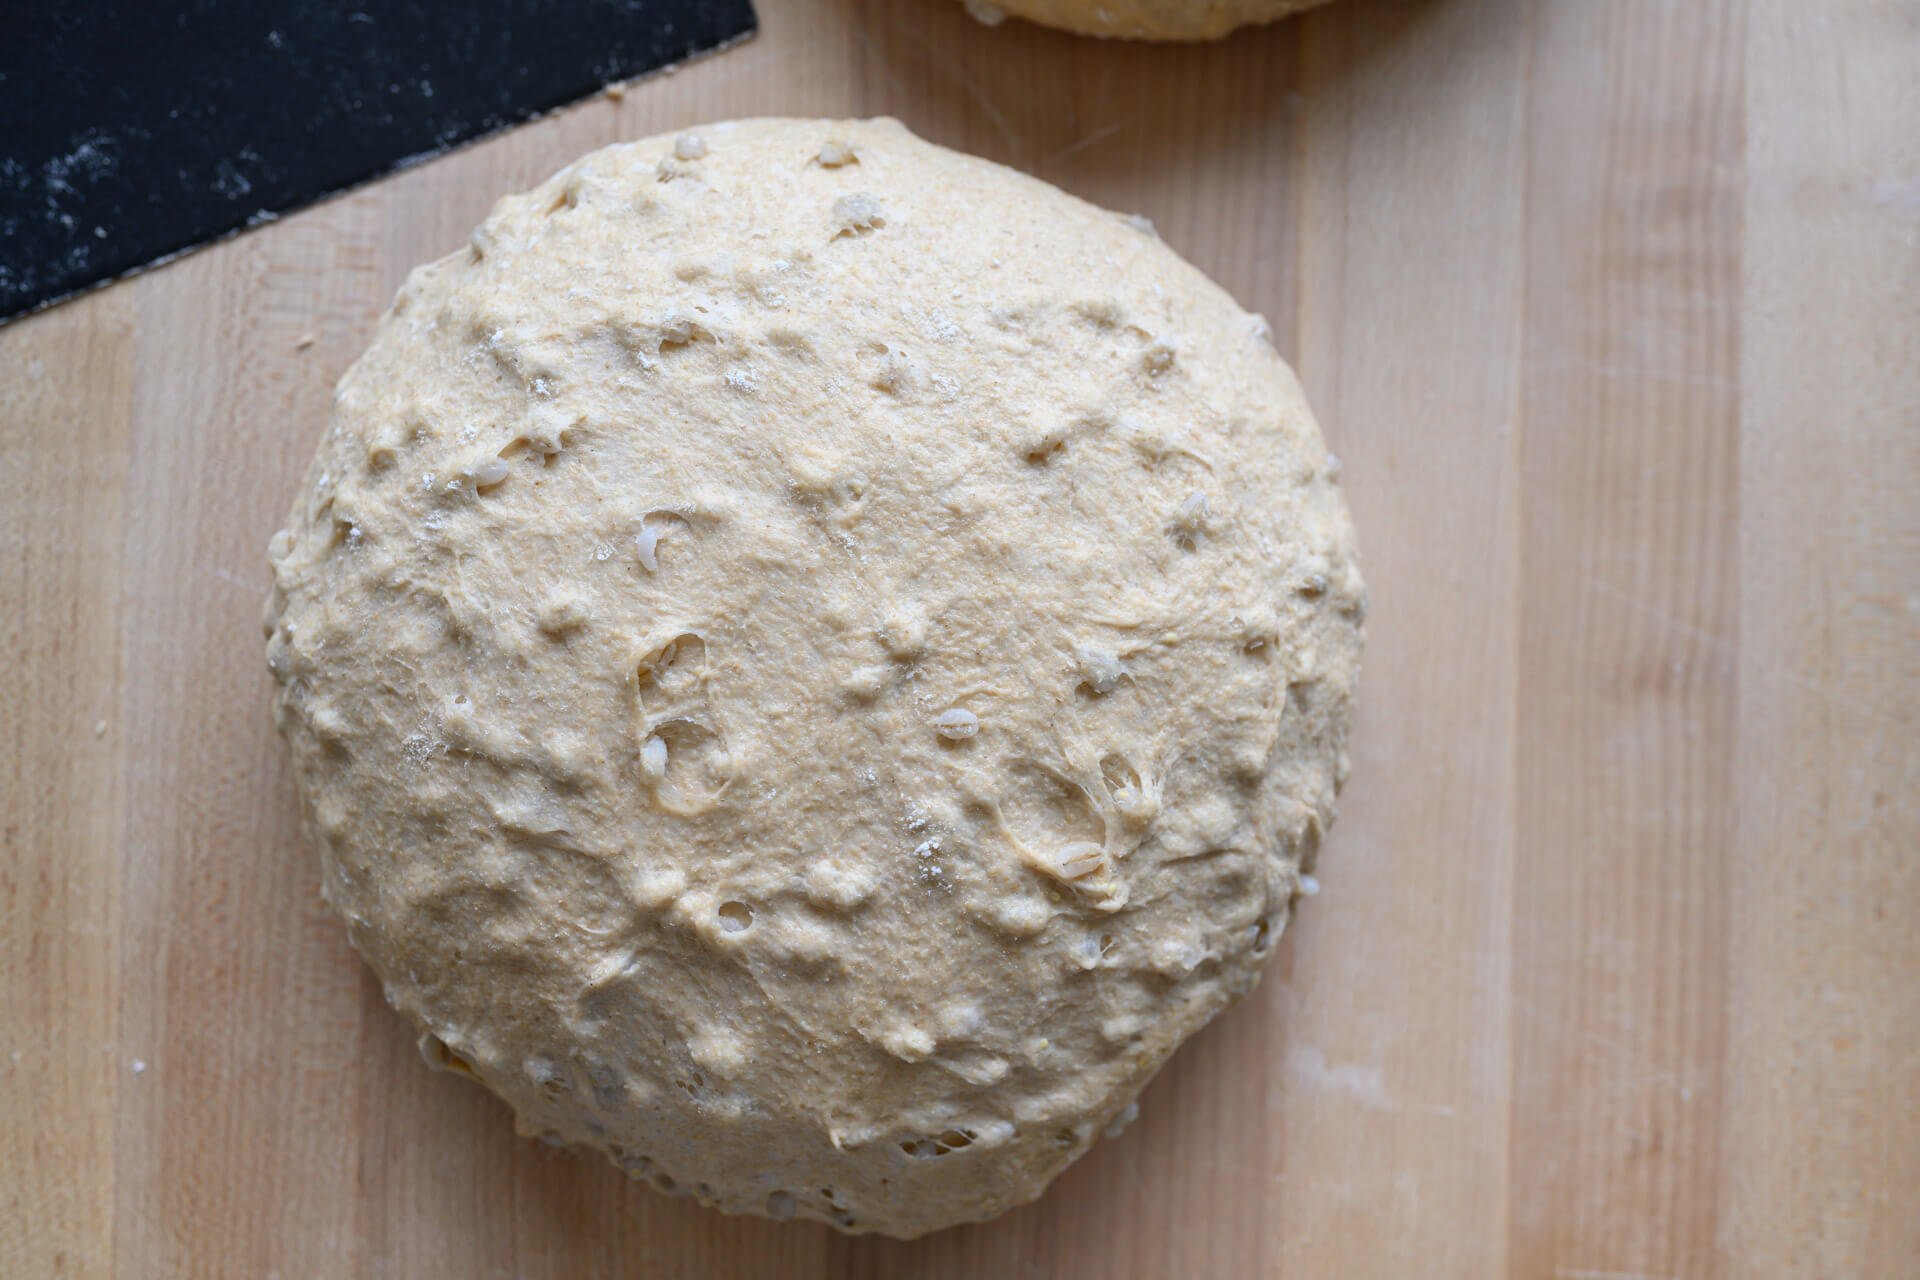
Let the dough rest uncovered for 30 minutes until it relaxes outward.
6. Shape – 1:15 p.m.
If you want to top these loaves with oats (or another seed/grain), spread a towel out on your work surface and spread a thin layer of oats on top. Lately, I’ve been using quick-cooking oats to top my pan loaves, and I’ve come to appreciate their texture. They’re thinner and almost chopped up, meaning they cook entirely through and soften in the oven.
Grease your baking pan thoroughly using oil or butter and set near your towel with oats.
I shaped this dough in my typical way for a pan loaf: I fold the sides in and roll down from top to bottom (see video below). Keep in mind, in the video I’m shaping this as one single 1400g mass to fit into my large dough pan.
For more tips and information on shaping pan loaves (including methods for topping dough and various pan sizes and dough weights), head over to my shaping a pan loaf guide page.
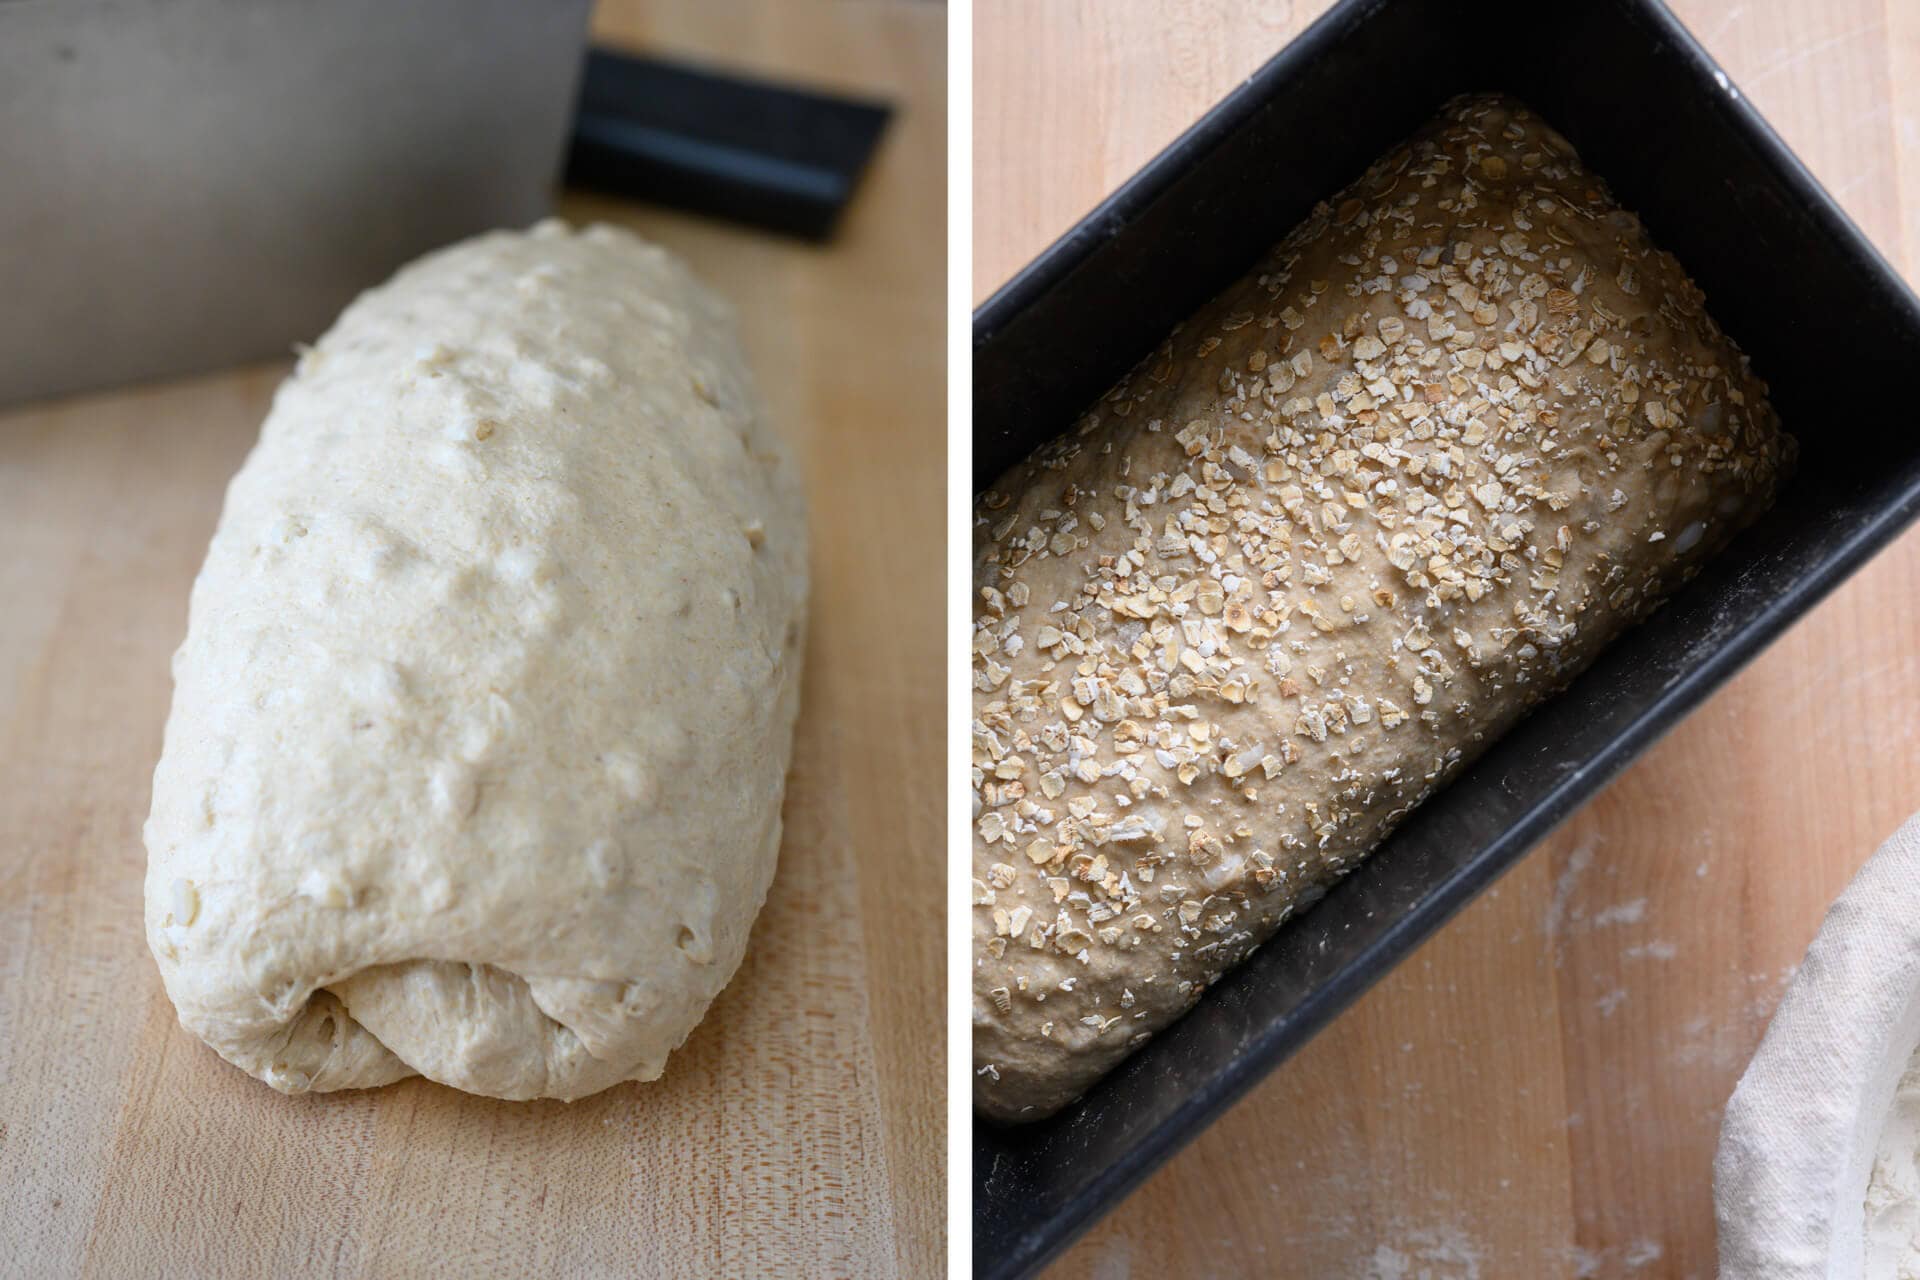
After you shape each piece, gently roll it on a towel with oats spread in a thin layer. I use two hands to rock the dough back and forth with the smooth side down (seam up) so the oats attach to the dough. Then, place the dough seam-side-down in your baking pan.
7. Proof – 1:30 p.m. to 3:30 p.m. (or until ready)
Cover both containers with reusable plastic bags and place somewhere warm for their final proof. For me, at my kitchen temperature of 76°F (24°C), it took 2 hours for this dough to fully proof.
Give the dough a poke periodically with a wet finger. This dough should pass the “poke test” when it’s ready to bake: a firm poke should show an impression in the dough that springs back very slowly, perhaps not quite filling the indentation.
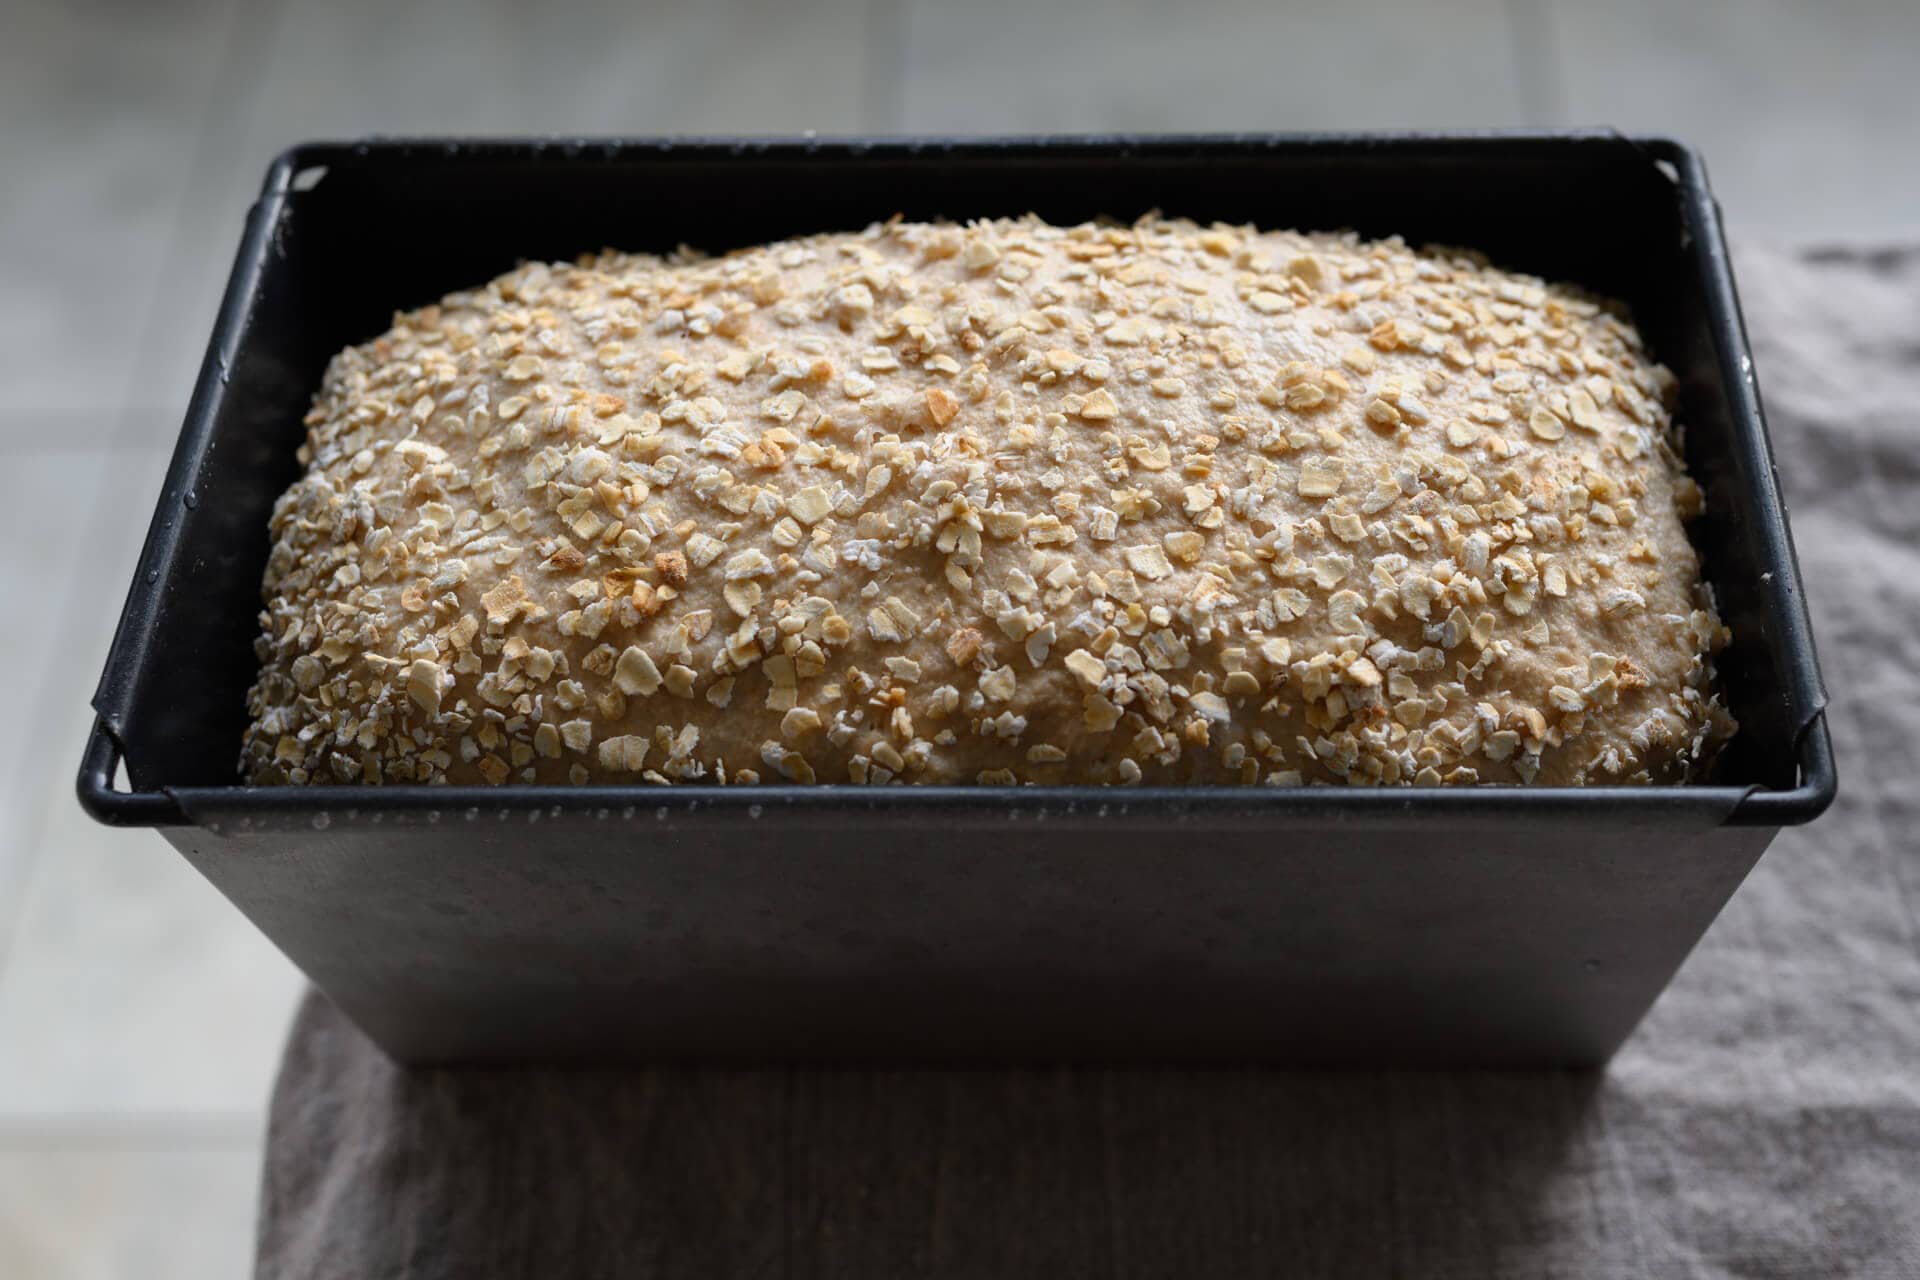
Be sure to preheat your oven before your dough is fully proofed.
8. Bake – 3:30 p.m. (pre-heat oven at 3:00 p.m.)
Preheat your empty oven (there’s no need for a baking stone for this bread) to 425°F (218°C) for 30 minutes.
Be sure to bake these loaves thoroughly. The downside to having lots of water and a wet porridge in the dough is that baking time will increase, this can lead to a slightly thicker crust. Regardless, ensure the interior temperature reaches at least 205°F (96°C).
Uncover each pan and place both into the oven. I used my typical oven steaming method for these loaves, but I did not use the pan with lava rocks. I boiled water and poured it over rolled up towels in a pan that was placed at the bottom of my oven. Additionally, I sprayed the top of the dough with a handheld mister a few times after loading into the oven.
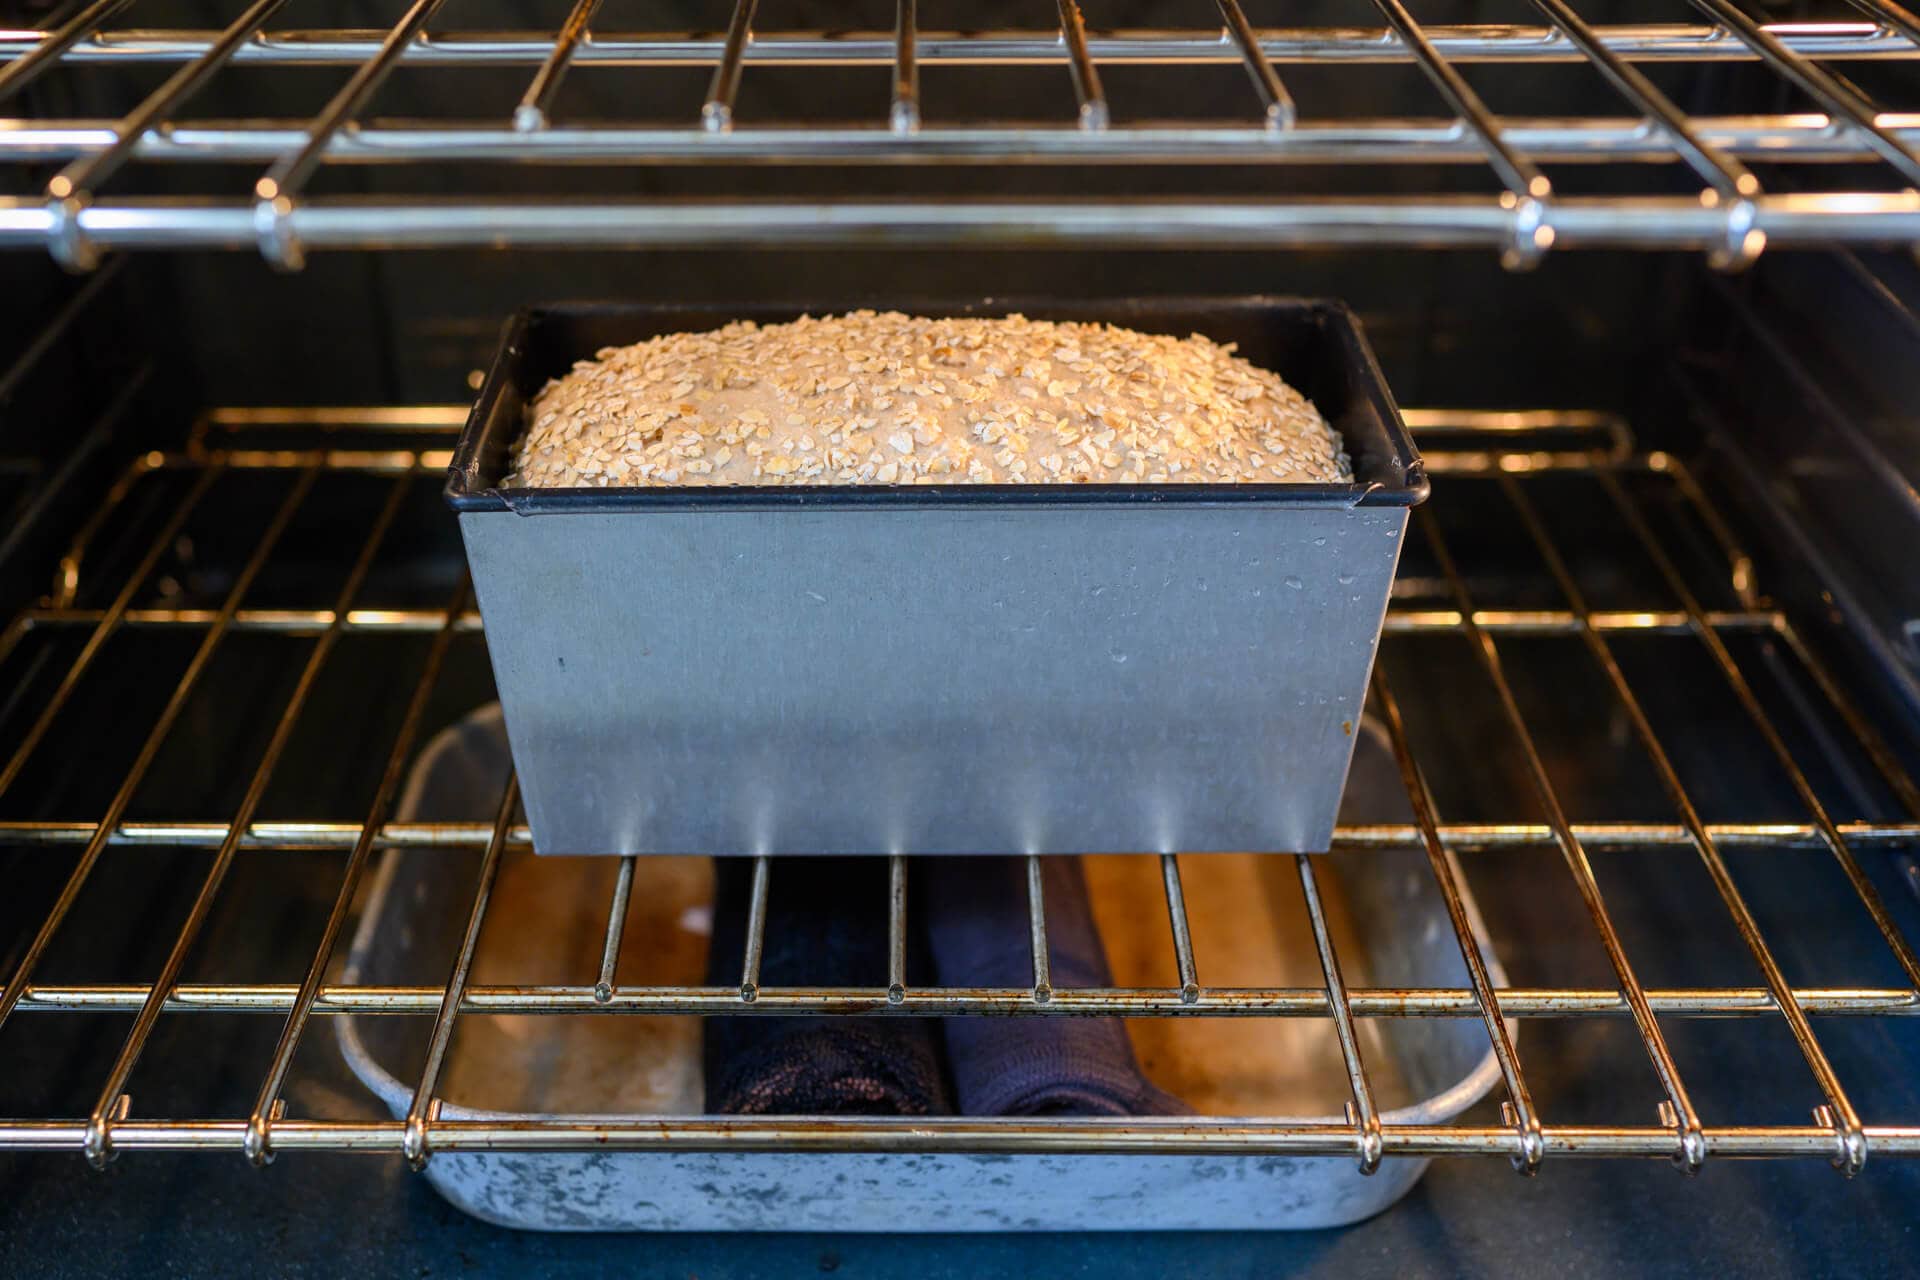
After adding the pans with dough and steaming pan, drop the oven temp to 400°F (204°C) and bake for 20 minutes with steam. After 20 minutes, remove the steaming pan and bake for an additional 15-20 minutes at 375°F (190°C). When the dough looks well colored on top and the interior temp registers around 205°F (96°C), remove the loaf from its pan and finish baking in the oven directly on the oven rack for 2-4 minutes for more color. Don’t bake too long outside of the pan, the crust will quickly thicken.
Remove the loaves from the oven and let cool on wire racks for at least 3-4 hours. These need ample time to fully set, if cut too soon the interior will turn quite gummy.
Conclusion
As I said in the beginning, I’m a huge fan of pan loaves and this is just another one to add to the list. The subtle sweetness from the honey brings a touch of levity to this 100% whole wheat bread in the best way possible. Additionally, the olive oil softens the texture, lasting days after baking. Finally, the barley porridge brings that custardy, moist interior for fantastic mouthfeel.
Crust
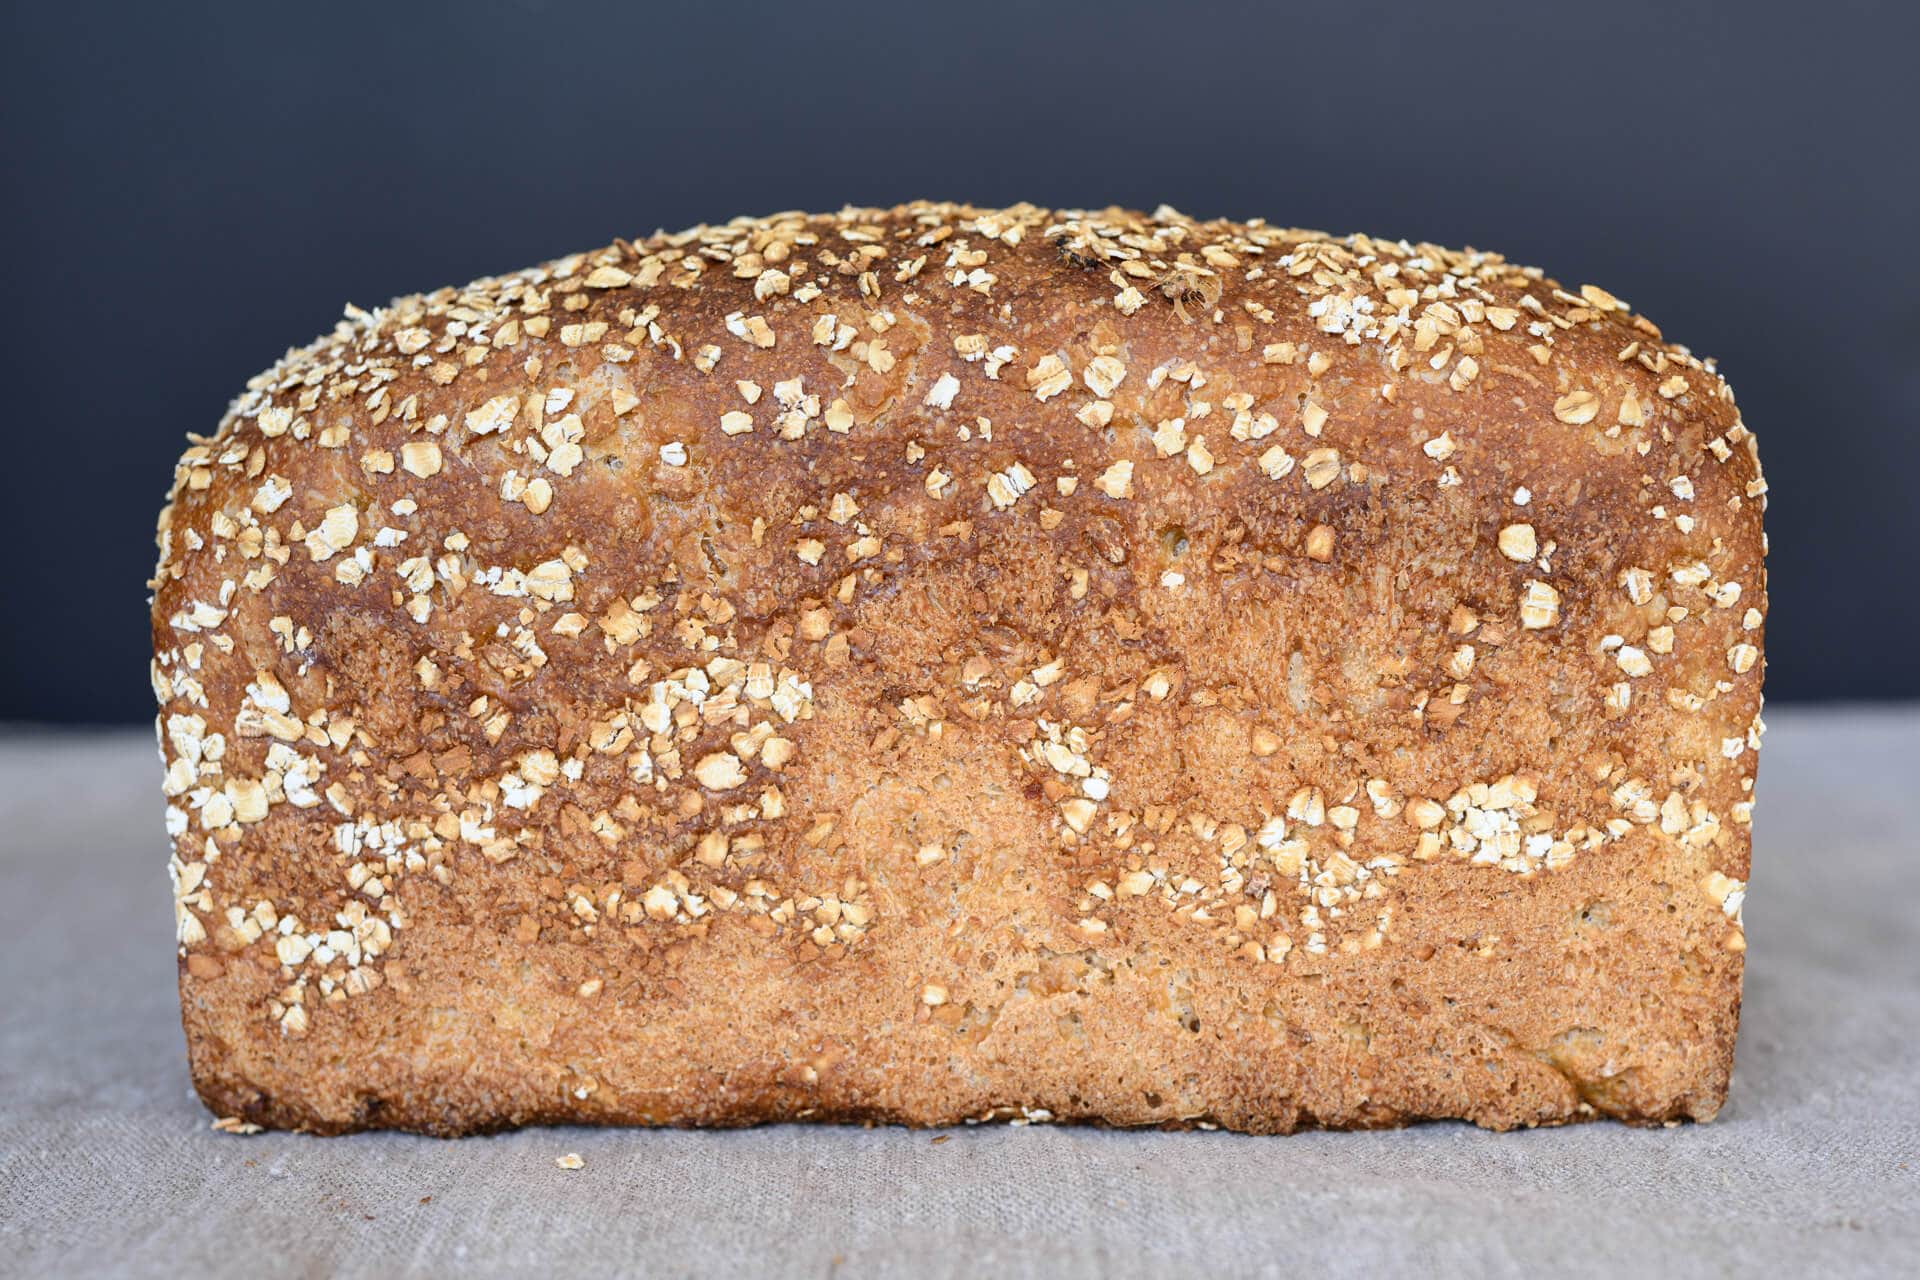
My goal is almost always to have a thin, crunchy crust — and this is especially true with a pan bread. While this bread doesn’t have an overly thick crust, it’s not staggeringly thin either. At 100% whole grain this is to be expected. Additionally, the bake time required to thoroughly bake out this loaf means, in the end, the crust will have a bit of a chew.
However, this bread has a wonderfully balanced texture between its super-tender interior and substantial crust. The crust gives the bread needed structure as each slice stands tall instead of flopping over. I like that and I think you will too.
Crumb
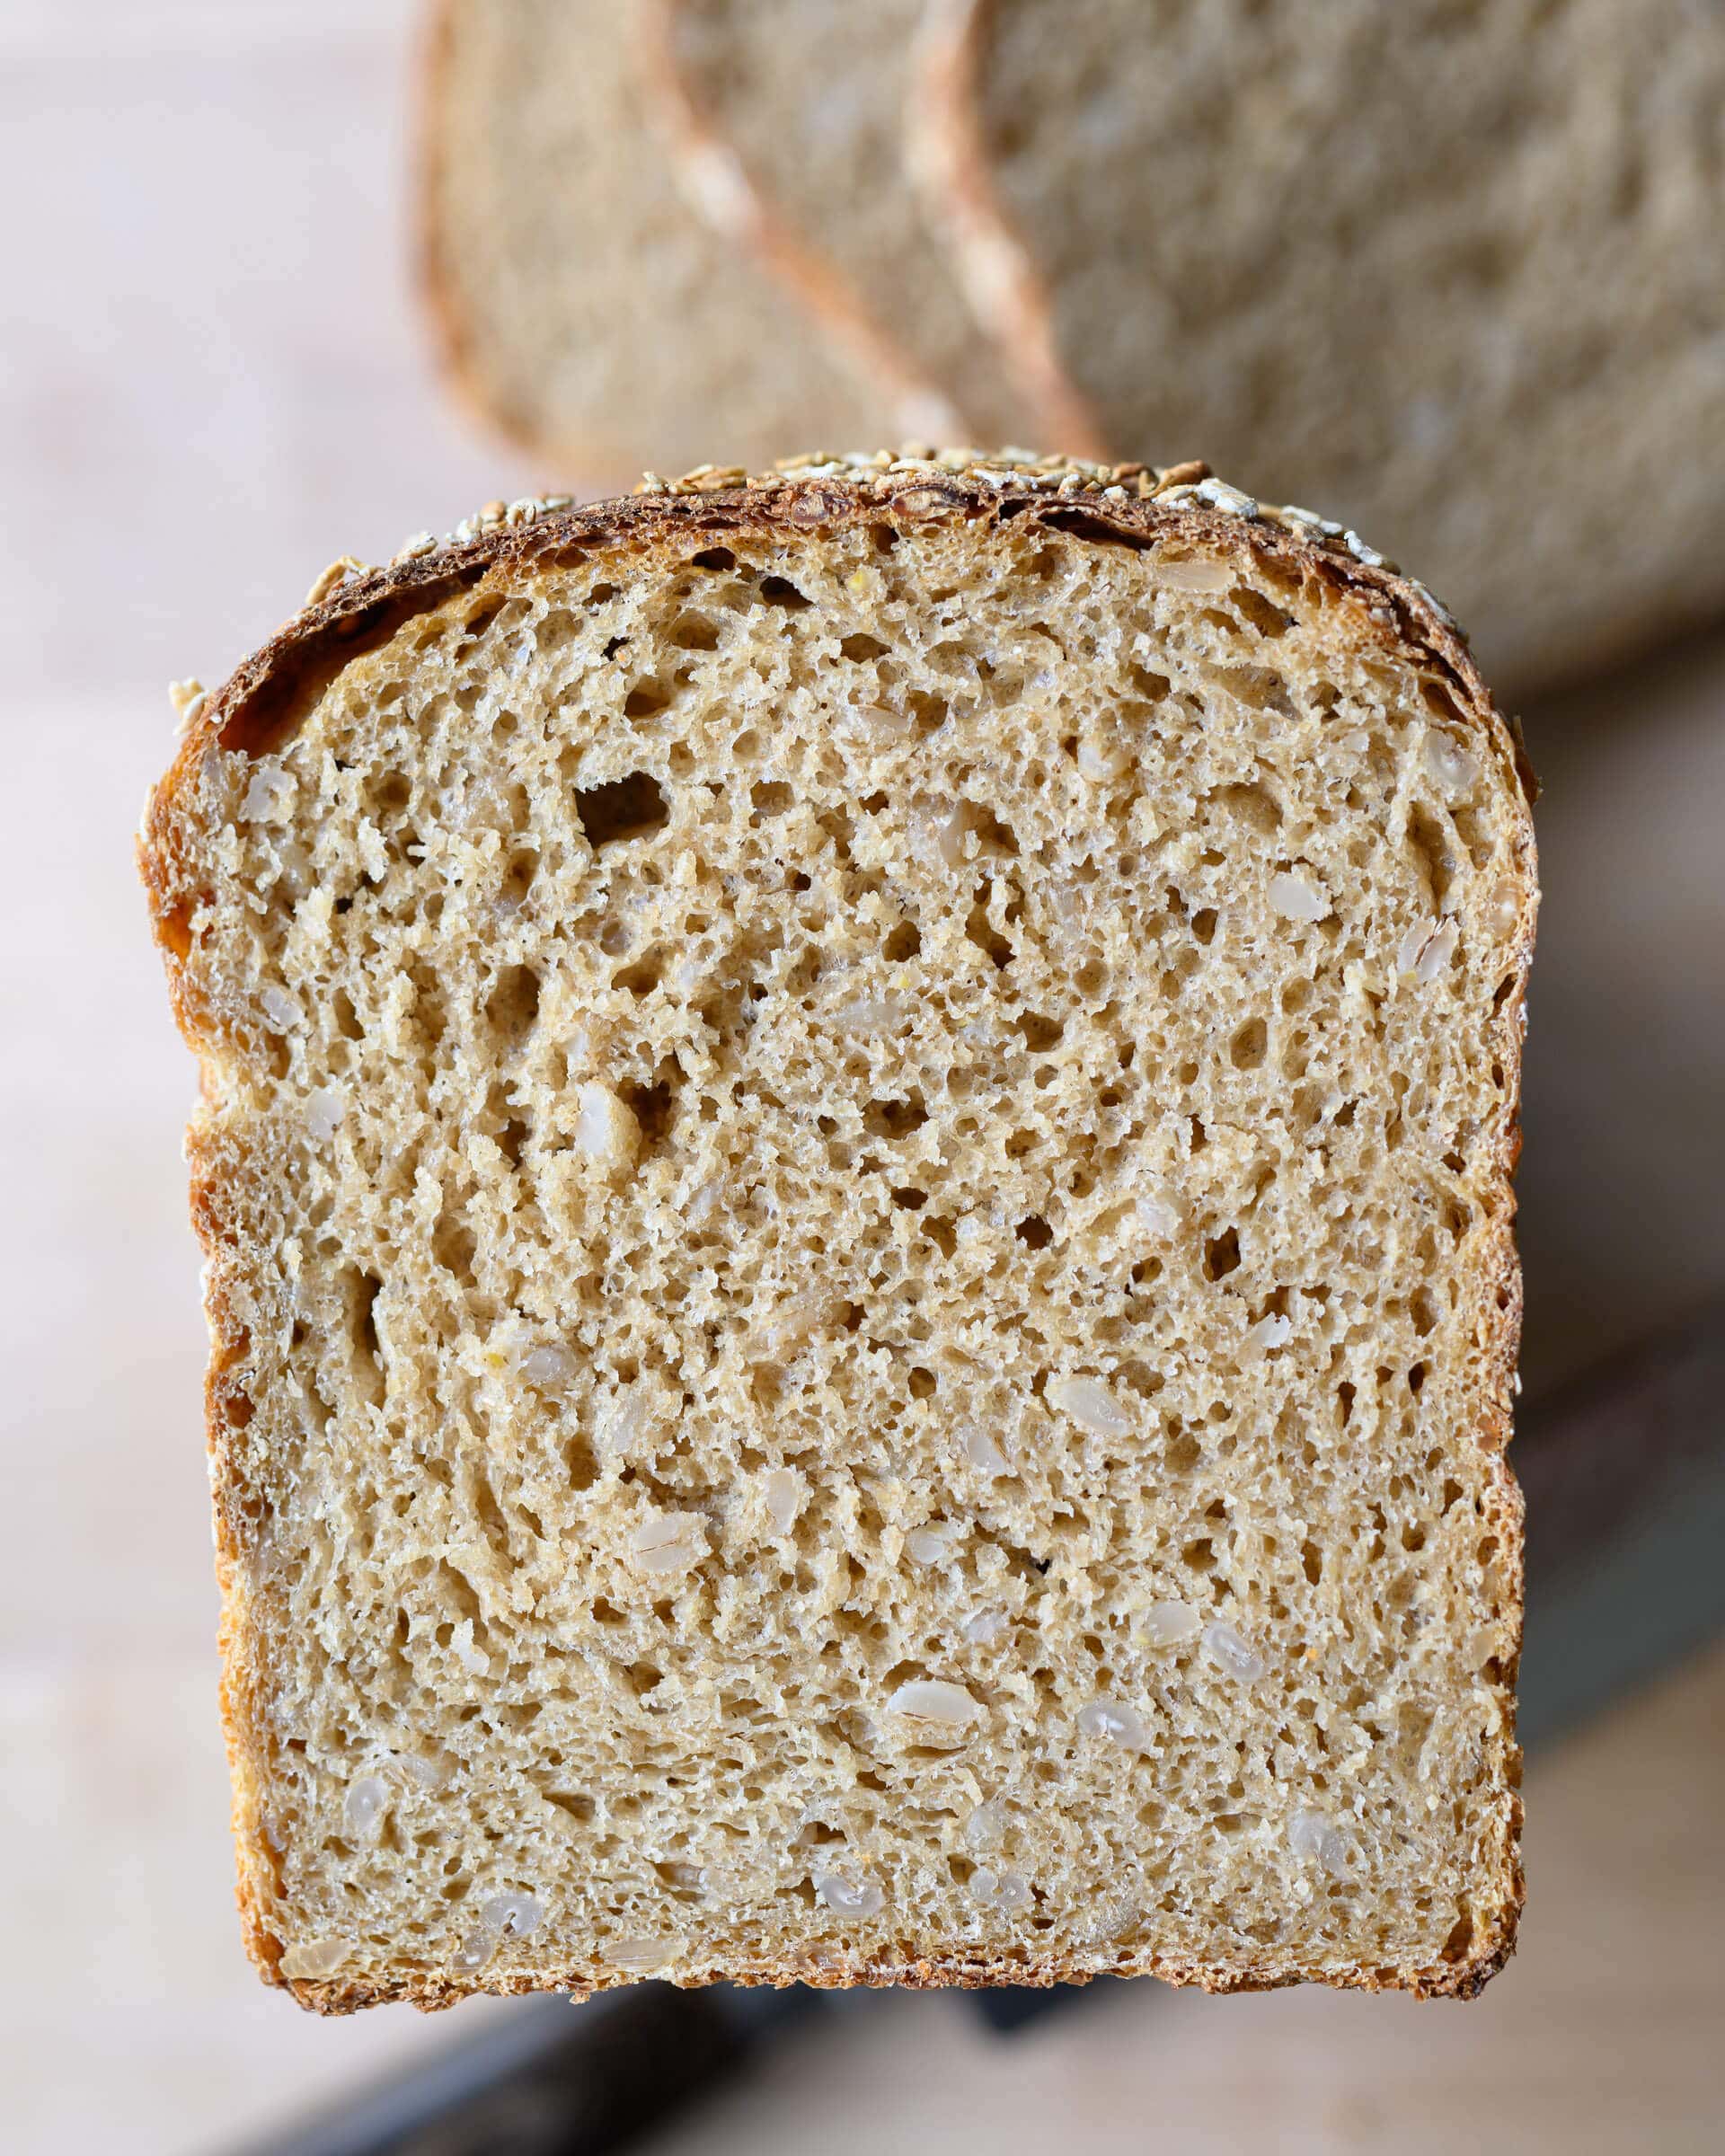
Moist and tender, the interior is a bread-eater’s dream. There’s a lightness to this loaf that sort of defies logic: so much water, so many ingredients, such a weighty porridge… And yet, the airy result is seen clearly in the picture above. A bread that is beautifully light and soft, just right.
Taste
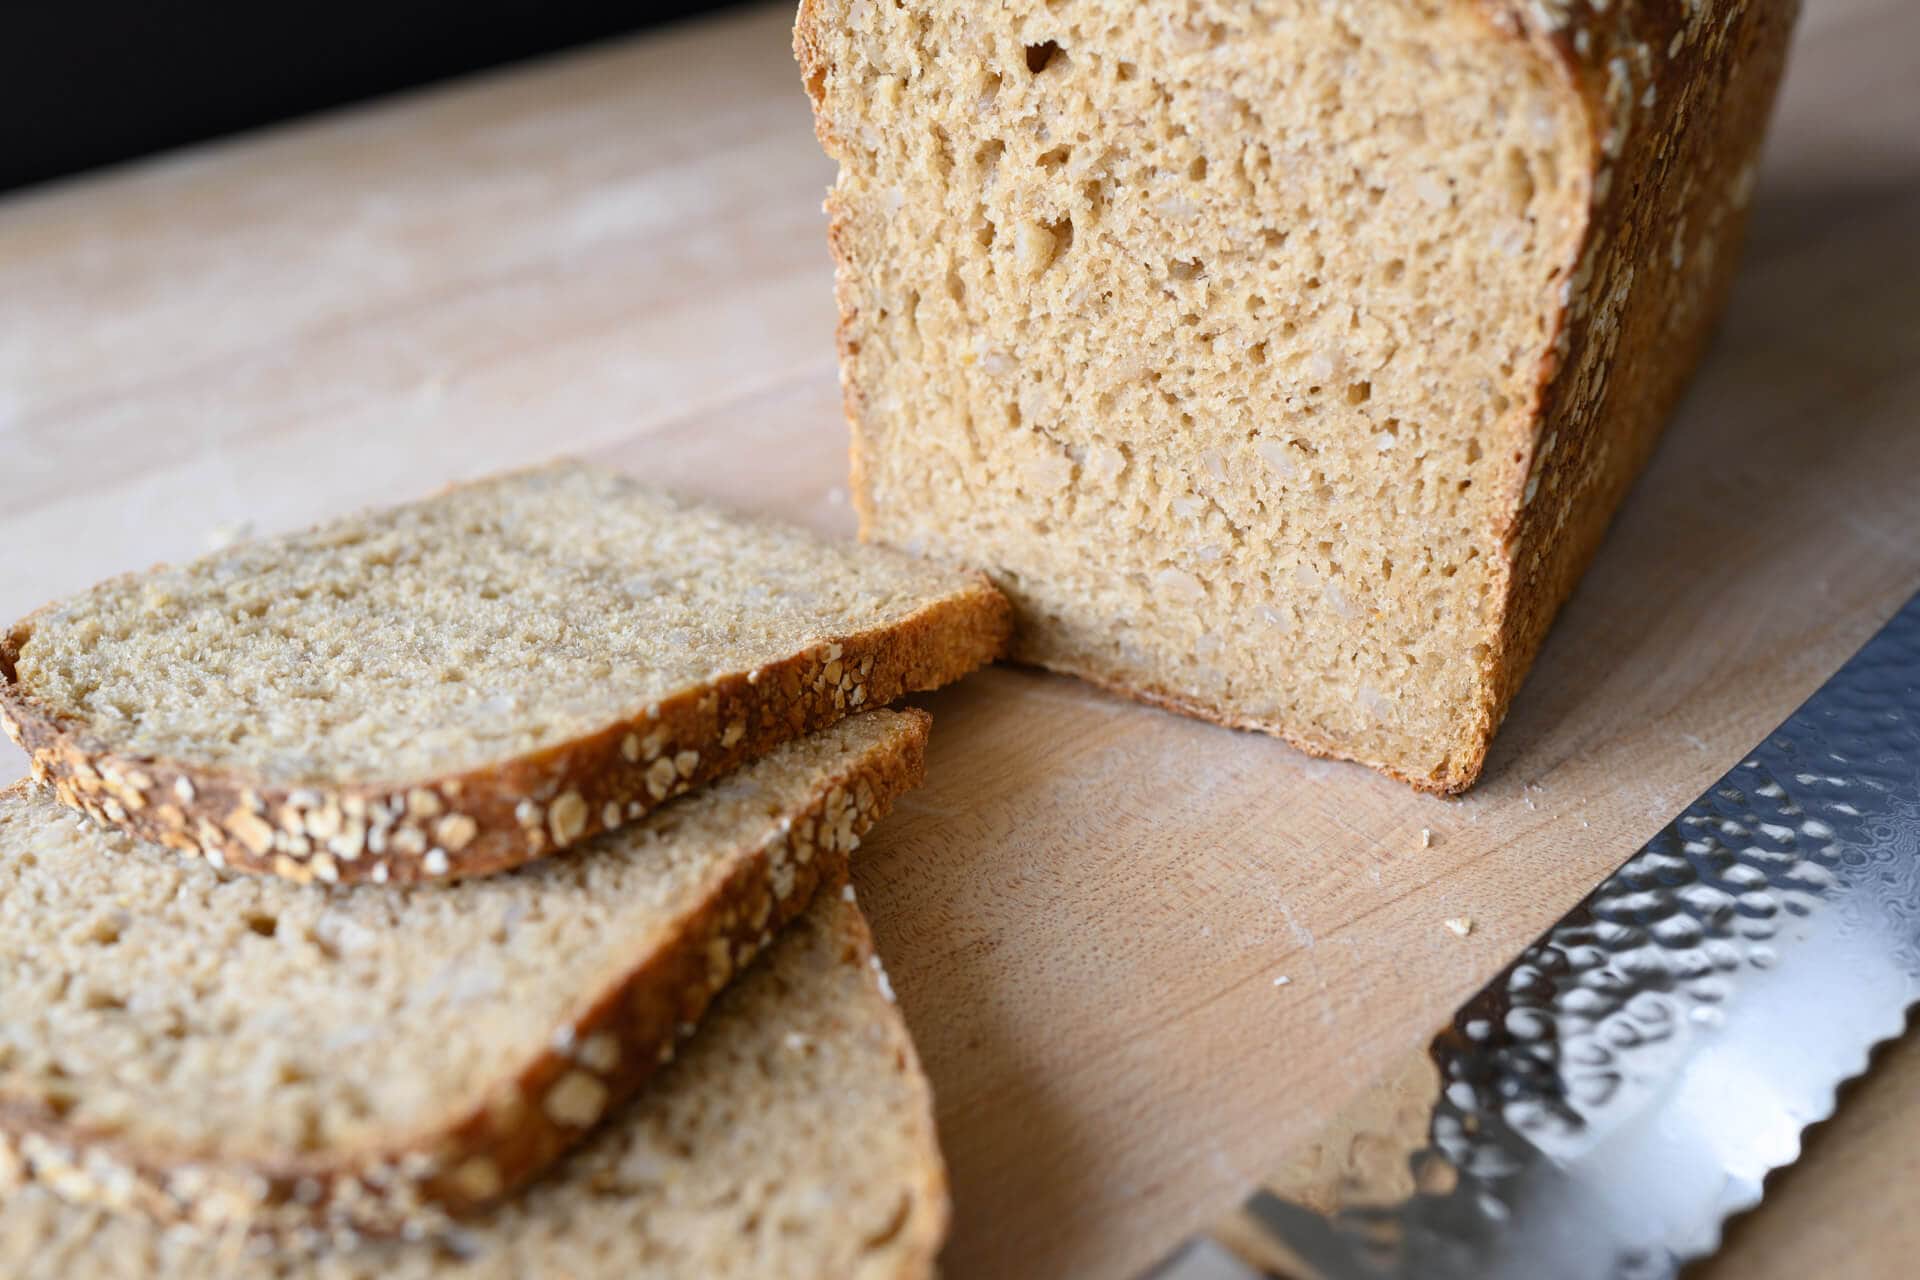
This honey whole wheat and barley pan loaf is straight-up delicious. I’ve been gushing about it this whole post, but after many trials and experiments, I’m supremely happy with the texture and flavor.
As I’ve said a few times, I highly recommend baking this bread in a single day without an overnight, cold retard to reduce any sourness that might build up through a lengthy fermentation. In some, if not most, recipes I find an overnight proof to add much-needed flavor, but for this bread, it’s not my preference.
Toast this bread heavily—lather on some butter. Eat with a smile. Repeat. Buon appetito!
If you’re looking for more nutritious and wholesome pan loaves, look at my honey whole wheat pan loaf that uses the yudane technique for a super soft interior, or my high-fiber seeded pan loaf!
If you use this recipe, tag @maurizio on Instagram so I can take a look!


66 Comments
I bought your book and for this recipe the levain called for 85g whole wheat flour, 42 grams water and 4 grams ripe sour dough starter. However even in the online version you have equal parts flour and water. I wasn't able to make the levain ripen with these ratios even in a proofing oven. Was this a typo?
Hi Maurizio, my barley isnt going to make it in time for me baking this week – could I swap out the barley for rolled oats, maybe just cook the oats down similarly to the barley?
Yes, definitely! Oats would be a good sub here.
Here’s what I did that turned out great. I used all the same measurement and items listed in this recipe but not the method. I mixed ALL the dry ingredients together, added all the water, mixed and let autoyze in the fridge overnight. Next morning added the levain and did a normal sourdough process. Bread turned out fantastic, the oatmeal wasn’t discernible in the crumb but the texture and aroma of the bread was great.
That’s a great method, Guy! I’ve never done such a long autolyse with this dough, will need to give it a try.
When you updated this recipe from 1400g to 2000g, did you adjust the bake time? I have baked this one a couple of times now and I find that 20 minutes with steam plus 20 without steam is not nearly long enough, with internal temp only around 160F. I’m doing 20 minutes with steam plus 30 – 40 minutes without steam to get up to 205F.
I have made this recipe a few more times, with some adjustments I thought I’d share. First, a thought on hydration. I too found this dough to be very stiff. Since 200+ grams of the water are actually “locked up” in the barley porridge, it seems like that water shouldn’t be counted toward the dough hydration. On my latest bake, I bumped up the water and used 625g at dough mix plus 50g additional when the salt is added (675g total). For me, this made the dough much easier to work with throughout the process. I may try higher hydration levels in the future.
I didn’t do the overnight levain on this bake. I just used 75g of starter right out of the fridge.
I used maple syrup instead of the honey, and vegan butter (Earth Balance) instead of the olive oil. I think the extra water in the dough mix made it easier to get these mixed in compared to the stiffer original recipe.
In addition to the barley porridge (using black barley), I also made a seed soaker add-in consisting of 20g flax, 20g amaranth, 20g quinoa, 40g sunflower seeds plus 60g water. I let this soak for a couple of hours before folding it in at the first stretch and fold. I like lots of seeds!
I adjusted my bake time to 30 minutes with steam at 400F, then 25 minutes more without steam at 375F. The internal temperature measured 208F, so I took the loaves out without any extra “naked” bake time. These turned out to be some of the best loaves I’ve ever baked. Flavor, texture and appearance were all excellent!
I live at sea level in Southern California, and I baked in to regular pullman pans in a gas oven. I mill all my flour fresh in my Mockmill 200. I’m looking forward to trying some other adjustments, such as using some rye flour instead of some of the red wheat flour.
Thank you, Maurizio, for sharing your love of bread with us all!
Yes, if increasing the dough weight, you’ll have to increase the bake time as well.
Thanks so much for all your modifications to this bread, I love the idea of using maple syrup especially! Your bread sounds super hearty, which I think is fantastic—I thought this bread was already healthy, but yours takes it to the next level 🙂
Thank you, Clay!
I’ve been using black barley in this bread. It takes a little longer to cook but has a nice chewy texture in the bread. But one problem is, the barley berries that end up on the outside/crust of the loaf, re-harden as they bake, turning hard and crunchy. A bit TOO hard and crunchy sometimes, like little stones. Any suggestion for how to avoid this? Or is that just a hazard when using black barley?
Hmm, that’s very interesting, Clay. It’d be hard to ensure those didnt migrate outward, too. I’ve never tried this with black barley so I can’t say, but usually with traditional barley, if you soak or cook them so they’re softer, that’ll help!
I do simmer the black barley nearly an hour with a bit extra water to make sure it is soft and tender before it goes into the dough mix. It gives a nice chewy texture inside the loaf, but the grains on the surface crust seem to re-harden when baked. I even got a steam oven to bake my loaves, but the barley still gets a bit too hard for comfort.
That’s a bummer. I’ll try to source some and see if I can run tests here, too, though I’ve never seen any. Will do some homework!
I got the black barley from Azure Standard.
Not sure if anyone will see this since the post is so old, but some black barley can be quite pointy at the tips. It's possible that the grains you are using are piercing the gluten structure more than hulled barley would. Just a note for anyone else that my use whole grains in their baking… the pointier the grain the more it might pop out of the loaf.
I baked this bread today. I did not have a big oven spring but the flavor and texture are outstanding. I think I could’ve pushed bulk time a bit but didn’t. Lesson learned for next time! Great recipe Maurizio! Thank you!
You’re welcome Sandra! This is a really, really tasty bread, but yes, adjust that proof as necessary!
Hi I have a question about cooking time for the barley. I bought some black barley which I’d like to use in this recipe. It takes over an hour to cook…. Wrong barley for this recipe? Thanks.
I’d say you can use any barley in this recipe!
I’m looking forward to trying this! I just received my Mockmill so perfect timing. My go-to bake is a loaf with 100% whole grain and a Tangzhong, and have my first loaf with Mockmilled flour retarding in the fridge now. Have you ever tried this with 100% fresh milled flour. The main question I have is regarding the oil. If I want to skip the oil, should I replace it with an equal weight of water?
Right on, Jeff! Yes, I’ve done a variant of this with freshly milled flour, it’s wonderful. Yes, you can swap the oil for water. The oil does bring softness to this loaf, though, and water won’t quite fit the bill there. It’s ok, though, it’ll still be awesome!
Hello,
I love your site so much, I am constantly recommending it to people and have made many of your recipes over the years. You have taught me basically everything I know about bread making, so thank you for your thoroughness and meticulous attention to detail! And for fueling a hobby which has given me so much joy!
I have been meaning to try this one for a while and I finally did this week. It has to be one of the best breads I’ve ever had, certainly the best I’ve ever made. I only have one 8x4x4 Pullman pan, so I halved the recipe. But the second time, I felt like my pan could handle more dough so I made 70% of the recipe and it turned out great! Just added an extra 20 min or so to the baking time and it was perfect! Just wanted to share this for someone who (maybe like me lives in a studio and has a tiny kitchen) only has 1 pan.
Thanks again for sharing all your bread expertise!
Thanks so much, Elise! Glad to hear my site has helped. Nice work on scaling the recipe and suiting it to use your equipment! Also happy to hear you like this recipe, it’s a seriously flavorful (and nutritious!) loaf. Enjoy and thanks for the feedback!
Hi! How much barley do you use for the porridge? I see you’ve added how much water but what is the ratio for the barley? and can you consider putting less narrative in the recipe and just give the entire recipe in one go, with narrative after or before? Thanks. 🙂 I am cutting and pasting the recipe in my own format lol 🙂
I’m going through and adding little recipe cards to all my posts at the end which are concise blocks with just the need to know info for the kitchen!
Nice!! ❤️
I love this bread! On my own I had increased the flours to make a bigger loaf, and most recently have also added about 100g of stoneground corn meal, which brings additional depth to the flavor. Having now made this dozens of times, I have found that with my oven and this weight of dough, increasing the 425 steam/bake to 30 minutes and then turning the oven to 365 for another 30 minutes is needed before taking the loaf out of the pan and putting it in for another 2-4 minutes. Sometimes I have used buckwheat groats in place of barley.
So glad to hear that, Margaret! This is one of my favorites as well, wholesome and totally delicious. I love the idea of adding cornmeal to this as well, a little sweetness would be great. These loaves with high percentage of whole grains do require additional bake time, and of course, every oven is different! Thanks for reporting back, Margaret, and happy baking!
Hi Maurizio! I’m a very new sourdough baker and have found your recipes super helpful for getting started! This has been my favorite recipe of yours so far–love whole grains and oats. I do have a question–I like to make half of this recipe into a pan loaf and attempt to shape the other into a boule. Sometimes the boule comes out ok, but I know that the dough is formulated to rely on the tin for structure. Do you have any suggestions for how to adapt this recipe to be made into a freeform loaf rather than a pan loaf?
So glad to hear that, Joshua, and sorry for the late reply! Yes, this recipe is definitely geared for the tin, it helps it keep shape. If you want to shape it as a loaf, you might want to reduce the water in the mix to help bring strength to the dough so it holds up all the way to bake time. Hope that helps!
Hi Maurizio,
I’ve just made this with the millet porridge you used in a different recipe and rolled the loaves in millet to top. I used an overnight ferment due to time constraints. It’s pretty and has a lovely pop and the family loves it for toast and sandwiches. I wonder if the millet is a bit lighter than the barley. Only downside is the mess with cutting, but I can live with that.
I have an unrelated question–I’m contemplating the purchase of a grain mill, but wonder if I am overcomplicating my life in response to world events. I try for about 2 bakes per week and tend towards different flours. Do you have any recommended reading that would give me (1) a sense of whether this is a good idea and (2) a glossary of the different types of grains and what they would be recommended for?
Thanks
k
I mill my flour very often here (and you’ll find many freshly milled flour recipes here as well). I absolutely love milling fresh flour, the flavor and nutrition are pretty incredible. I don’t think it’s a bad thing at all, and if you’re looking to expand your baking into a new area, it’s a great place to go (in my opinion)!
Check out my baking tools page for recommendations on mills.
Happy baking and sorry for the late reply, Kris!
Maurizio, I recently made this and used a 9x4x4 bread pan. (I am using the bread pan that is suggested for the rye bread) I was concerned it would be too small so I portioned the dough 1/3 and 2/3 and baked the smaller in a loaf pan. I think I could have baked it all in the 9x4x4 pan, but not sure. That would mean 2000g in the one pan, correct? My loaf took a very long time to get to 205. I baked it 20 minutes longer than prescribed. It turned out dense but very good. If I wanted to bring this recipe back to 1400 grams total dough weight would I reduce the ingredient percentages by 30%-except for the starter which would remain the same?
Sorry for the late reply, Kim! Yes, 2000g might be too much for the 9x4x4 pan, I’d likely drop that down to 1000-1200g or so.
If you reduce the ingredients by 30%, you would also need to reduce the levain by 30%—this will work just fine!
Hi Maurizio, I have tried this recipe! But since the store ran out of barley, I got farro instead. The porridge was cooked similarly and it tasted really good. (I also used plain white flour instead of fresh milled flour…) However, my house was really cold and I assume that was the reason why my levain was not at the right temperature, the bread ended up not having a good rise and turned out quite dense. Even with the lack of airiness, it still tasted decent! I would most certain give it a second attempt and make sure it is rising properly.
Farro would be a great substitute for the barley — I use them pretty interchangeably here in my kitchen, even if they have a different flavor and texture. Try warming up the water you use to feed your starter/levain and the water you use to mix the dough. If your levain doesn’t look very active give it more time before you use it and try to keep it warm. Additionally, try to hit that Final Dough Temperature I list in the recipe as well!
Good luck on the next go and have fun!
One more question Maruzrio, do I take 203 grams of water from the final dough mix ???
Hello Maruzrio. How is the best way to cook hulled barley because mine didn’t want to cook. so I have to make the bread all over again I think. And I have electric stove🙏🙏🙏🙏
I forgot to mention about the Levain, is the amounts of the starter and flour, water right amount because the dough didn’t raise enough for (honey barley sourdough pan loaf recipe🤔🙏🙏🙏
If your barley is taking a long time to cook, try soaking the barley overnight in water. Then the next morning, drain the barley and cook as usual. This soaking should help speed up the process.
If you’re having a hard time with fermentation, try increasing the sourdough starter in the levain from 2g to 6g and do 12 until fully mature. Be sure to watch the temperature and keep it warm!
Thank you so much Maurizio, I will soak them overnight and next morning drain the water and cook them like in the recipe 🙏🙏🙏🙏..
I have never cooked Barley before
Hello Maruzrio a question, I was about to make the honey whole wheat and barley bread pan loaf and your starter is 2 grams is this right🤔🙏
For this recipe, 2g is correct.
Hi Thanks for the detailed instructions on your blog. I made the bread yesterday in two tins, one USA pan Pullman size, and one 8x4x4. They came out a bit lighter in color but perfect crumb. Delicious.
Excellent to hear that, Shailja! I really do love my USA Pan, I use it mostly for rye but it’s perfect for this bread as well. Enjoy and thanks for the update!
I love pan loaves and this looks like a wonderful recipe! I’m slightly confused about the amount of dough and the pans for baking it. It appears that this recipe is written to make 2 – 9×5 loaves? Did you use the entire amount to bake the loaf in your custom pan from Campbell MacFarlane, or did you scale down the recipe to 1300 grams of dough to use with this beautiful pan? Thanks, Mark
Hey, Mark! I used one of the large pans from Campbell (which are awesome) but this recipe is adapted for what most people have in their kitchen, which is a 9×5″ pan. In Campbell’s pans I usually do around 1400-1500 dough weight per pan, depending on the recipe. The formula above is for 2kg of dough, so you could use one of his pans, or 1kg in each of two 9×5’s — whatever you have!
Hey Maurice! Thanks for the awesome recipes. I’ve never had a fail from one of them 🙂 I just wanted to pitch an idea – it’s very, very difficult to follow along with your recipes because of the format you’ve got going on. When the ingredients are listed paragraphs above the steps with lots of (very helpful!) exposition mixed in, it requires so much scrolling back and forth, I usually end up having to transcribe it into a Word document so I can follow along real-time. Would you consider adding a traditional recipe format at the bottom of your recipes (two columns with ingredients listed in the order in which they’re used on one side and numerical steps on the other side)? LOVE the blog, hopefully this is well-received. Appreciate all your hard work 🙂
You’re very welcome, Lindsey! Your input is definitely well received and appreciated, usability comments always help. I agree with you totally. I’ll add this to my list of things to work on in the future. I’ve been struggling with formatting for a while now and I’ve even gone back and forth whether to include images inline with the text (they’re nice for description but increase the length of the post).
In the meantime, have you seen my Print Sourdough Recipe function at the bottom of each post? If you click that you can print each recipe (with and w/o images) for use later 🙂 I hope that helps and thanks again!
Hey!
This is such a great recipe and the whole process turned out to be totally worth it! I was too busy with school and had to leave it proof overnight. It developed a deep, sourdough flavor, which is what you wrote in the blog. I will make more after I finish this loof. But it feels so good to eat your own loaf as breakfast!. Thanks again!
So glad to hear that! Yes, that sour flavor can actually be nice, all depends on your schedule and what you’re after. There have been many times where I did have to proof this overnight as well — delicious nonetheless. Enjoy!
This is similar to the staple sandwich loaf we make every couple days. Likewise, I do ~5% oil and honey each, but what’s different is water–for my 13x4x4″ pan I hydrate 1,000g of whole grain flour (500 white + 400 white + 100 legumes) with 900g of water–90% hydration before any porridge. When I choose to include a porridge, I’m approaching >=100% hydration. Excluding your cooked barley, I’m figuring the loaf is at ~72% hydration, right? If so, what main differences in process and product do you think there’d be with this variance in hydration?
That’s right, if don’t count the water in the porridge the hydration would be around 71-72%. I like to play it somewhat safe with these loaves in that I remove water from the dough mix and use it to cook the porridge, otherwise I’ve experienced doughs that are far too wet and sloppy to handle (usually discovering this midway or nearing the end of bulk).
Generally you’ll find the same results with this dough as you would with others at a reduced hydration: a stronger dough and slightly less fermentation activity. Additionally, you can usually reduce the overall bake time as there won’t be as much water to “bake out” of the loaf. The beauty of a pan loaf, in my eyes, is the added structure you get from the pan. Higher hydration percentages are possible with the pan and if it gets you to your desired end result then I say go for it! I often push 100% hydration with 100% freshly milled pan loaves without a problem, I just like to take it slow working up that water when folding in a porridge and I found at the formula above, the bread had the taste and texture I was after so I stopped there. That doesn’t mean I might not eek it up a bit next time, though 🙂
I hope that answers your question. Happy baking, Ryan!
Got it. Thanks. Higher hydration then means more vigorous yeast activity (less time required for rising), longer bake time, and a greater need for structure support of a loaf pan. My personal taste has enjoyed the moister bite of higher hydration loaves, its structure achievable only by the aid a loaf pan. Without it, my dough would sprawl all over in the oven 🙂
Delicious looking loaf!! 🙂 one question – not completely related to recipe – what was your reason for getting Mockmill 100 instead of 200? I am trying to figure out which one to choose, leaning more towards 100 since I am going to use it for home milling and am not going to be grinding a lot all at once.
Thank you! It sounds like the MM 100 would work well for you, then. I find it mills plenty fast for home use!
Beautiful! I can’t wait to try these! Just FYI, you can also use shower caps to cover your dough when proofing. And they’re pretty! LOL
Thanks, Gina! And yes, great tip on the shower caps! 🙂
Hi, Maurizio, I would like to try the bread, but I think there’s a mistake in the formula: how can 77 g of barley and 77 g of water add up to 218 g of porridge?
Sorry about that, I had a typo! I fixed the post: it should be 77g whole barley added to 142g of water to make approximately 218g cooked barley porridge.
Sure, those pans will work!
This looks like such a flavorful loaf! Bravo. Just wondering what kind of bread pan you are using here, looks different from the pullman you usually use. I am shopping around for some loaf pans. Great way to squeeze a lot of bread into a limited fridge space.
Thank you! I give the specs for the pan up in the post, and in my Guide page on shaping a pan loaf, but it’s a custom pan made from a fabricator in the UK (he also makes incredible bench knives!).
I sure like the look of those pans. . . . they were custom made you said. Did you have to purchase a bulk quantity?
I was lucky enough to get these pans as a test run from the fabricator. If you ask him, he might be able to do just one or two for you, he does small orders as well. If you tell him you heard about his pans at my website he might also be more inclined to help 🙂 They’re really top notch.
I emailed him and he promptly replied as follows:
Hi Marcy
We are in the process of getting bread tins added to our website. We currently have a few issues to resolve before we can add them to the site, apologies for the delay but they will be added as soon as we possibly can. Please bare with us.
Best regards
Campbell
Excellent, thanks for the update. They really are fantastic pans!