
Walnuts, being some of my favorite nuts, are used all over the place in my kitchen: banana bread, oatmeal for breakfast, a yogurt snack with strawberries and cinnamon, tomato and avocado salad with arugula, dried cherries & figs, and of course, my 100% whole wheat walnut loaf. And the list goes on. Perusing through Tartine Bread the other day, I stumbled on Chad’s Tartine Country Walnut Sourdough recipe. I thought walnuts in my sourdough bread sounded incredible (and walnuts with cranberries, even better), and thus the impetus for this journal entry.
While the recipe calls for unshelled walnuts, I couldn’t find them in my area for the life of me. After searching for a few days, and at a few different markets, I had to settle for shelled walnuts eventually. A little bit of a spoiler here, but the resulting loaves from this bake are genuinely exceptional; however, I think with roasted and unshelled walnuts, the flavor would be even more rich and complex. I ended up roasting the shelled walnuts in the oven, and because they don’t have a shell, it was easy to overdo it. Watch those walnuts like a hawk, and I’d venture to say even under roast them by a few minutes to stay safe.

Prepare the leaven – 10:00pm
In my typical fashion, I start the process with a 100% whole wheat leaven. My starter just loves whole wheat flour and shows some real activity by the morning it’s very easy to tell when it’s ripe and ready to mix. The night before, mix and set out covered:
- 55g ripe starter
- 200g whole wheat flour
- 200g water
Once your leaven is mixed, get some rest and we’ll start in the morning.
Mix the flour and water, autolyse – 7:30am
A little bit of a late start to my Sunday morning, but you can’t blame me for wanting to sleep in just a bit. I typically work at home a little on the weekends and try to plan things so I can tend to making bread when I take frequent breaks. This Sunday was no exception. Between typing on a keyboard and doing design work in Photoshop, I was giving my dough a turn here and there. The dog is always at my heels asking to play, but there’s bread to start, espresso to drink, and a little work to do. She’s just going to have to wait until later in the afternoon — trust me, she just sleeps comfortably without a worry until then.

Upon waking, check your leaven’s progress, you want it to be a little bubbly on top and, if you used a glass container, tiny little visible air pockets throughout. If you see these signs, and after pulling back a little bit with your finger, there is a slight smell of ripe fruit, you’re set to mix your dough.
Alternatively, many will use Chad’s “float test” to determine when the leaven is ready. Grab a small glass of room temperature water and toss in a small chunk of your leaven. If it floats there’s a good chance it’s ready to go. Essentially the yeast has created enough small air bubbles and pockets in the leaven to keep it afloat. I stopped doing this method a while ago after I was able to visually tell when things had progressed enough to have high fermentation activity in my dough.
Gather your ingredients and get ready to do some mixing.
Ingredients:
- 250g (25%) of your new leaven
- 900g (90%) white bread flour
- 100g (10%) whole wheat bread flour
- 20g (2%) salt
- 700g water for Step 2, and 50g water (75%) in reserve for step 5
- 2 cups walnuts (preferably unshelled but this recipe uses shelled)
Method:
Walnut Prep:
- Preheat your oven to 400°F (200°C)
- Break up the walnuts to your preference and spread on a baking sheet
- Bake for about 8-10 minutes until they just start to turn a darker brown
- Set out to cool
Dough:
- Add 250g of your leaven to a large mixing bowl
- Pour in 700g water and mix with your hands until the leaven is completely dissolved and bubbly
- Add 900g white flour and 100g whole wheat flour and mix with your hand until all the dry flour is wet
- Cover your bowl with a towel and let it autolyse for 40 minutes
- After 40 minutes, add the salt to the dough and slowly pour your reserved, 50g water on top. Squeeze the dough with your hand to incorporate the salt throughout
- Now reach your hand under the dough and pull the side up and over onto itself. I’ve started doing this step a bit more vigorously these days and do it until the dough really comes together and becomes sticky. I believe this adds a bit more strength to the dough early on
- Transfer your dough to a bowl or container large enough to hold the mass of dough, plus all those walnuts you’re going to incorporate. Set your timer for 30 minutes
Final dough temp was 76°F (24°C). See my post on the importance of dough temperature for why monitoring this temperature is important.
Bulk Fermentation – 8:45am
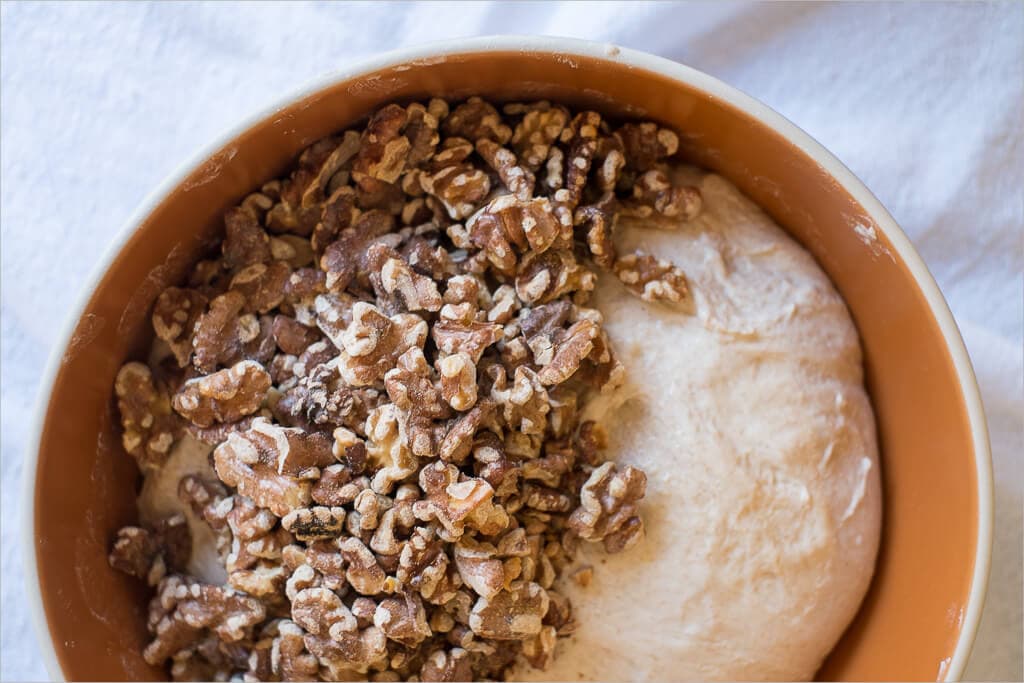
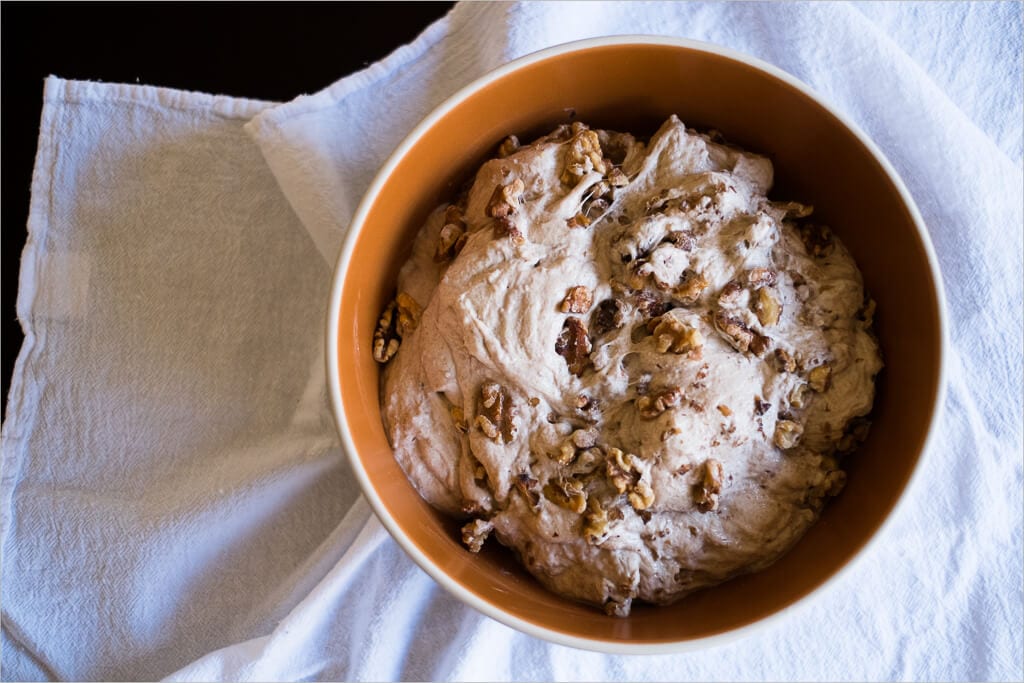
During the bulk fermentation step you want to do 6 turns spaced out 30 minutes apart. The first 4 turns should be vigorous, you really want to grab the dough from the bottom of the container, pull it up high, and then tuck it in on the other side. The last turn, number 6, will be a more gentle turn as we don’t want to knock out the air pockets that have formed thus far. We will add in our toasted walnuts after doing the second turn.
- 9:15am – Turn 1
- 9:45am – Turn 2 (After the second turn is complete, add all your walnuts and mix them into the dough by cutting them in the dough with your fingers. If things feel a bit dry, add just a tad of water. )
- 10:15am – Turn 3
- 10:45am – Turn 4
- 11:15am – Turn 5
- 11:45am – Turn 6 (this turn should be done gently)
- 11:45am – 3:00pm – Rest on counter untouched
This weekend was one of the first where I could feel winter starting to show its cold face. No more waking up at 6:00 am to go running in the warm sunrise, more like 10:00 am after the sun has been up a few hours to heat things up. Colder weather means for longer bulk times so watch your dough and adjust as necessary. For me, this means I might have a little more time after my usual few hours of untouched bulk time sitting on the counter.
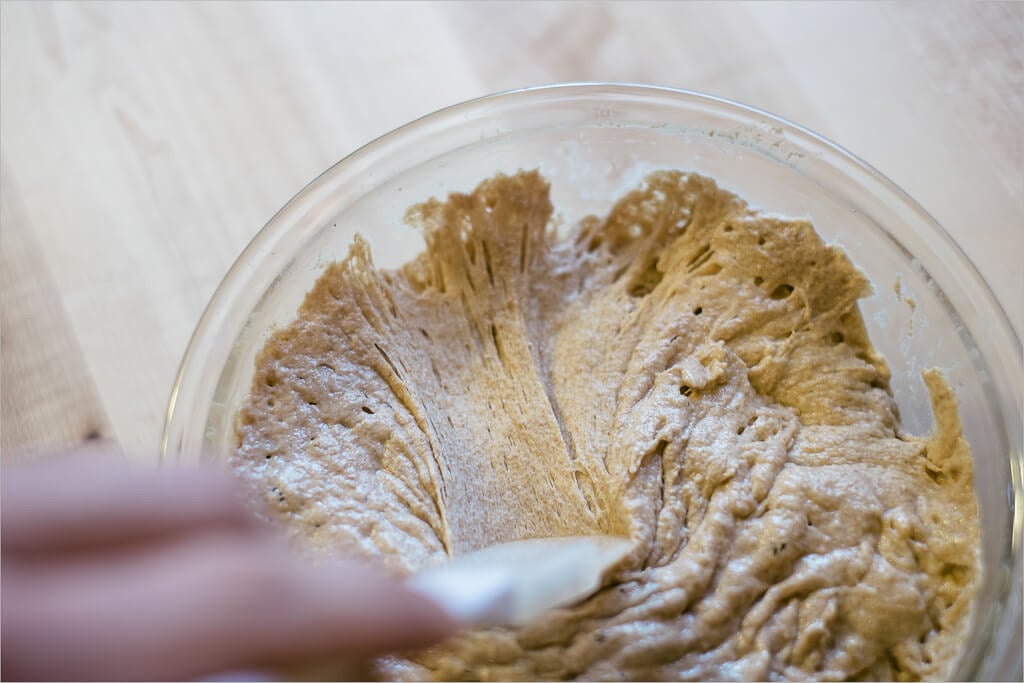
It’s hard to sometimes tell when your dough is strong enough and has had enough time to build sufficient gluten development. I usually determine this by the amount it has risen (around 30% is good), small bubbles throughout, and the amount it resists snapping back after you turn it. But, there is another popular way of determining gluten strength: the “windowpane” method. To do this you can tear off a small chunk of your dough and stretch it out between your two hands. If the dough stretches out so thin that you can see light passing through but no tears, then your dough is ready.
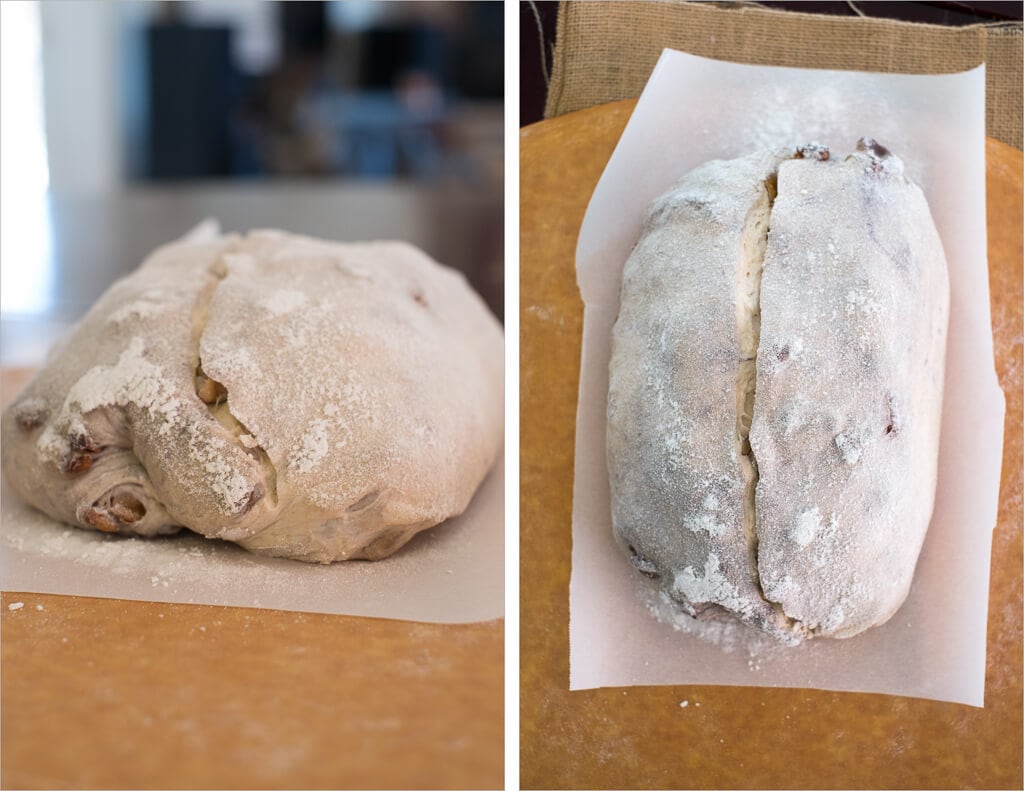
Pre-shape – 3:15pm
Take the dough out of the container onto your unfloured work surface and sprinkler some flour on top before dividing. Divide the mass into two halves and flour the top of each half. I made one half slightly larger than the other as I wanted a longer rectangular loaf. Flip one half over using your dough knife and your hand, then gently bend the 4 sides of the dough from under to the top. Using the knife flip the mass so the new seam is on the counter and spin it a few times to create a bit of tension. Set a timer for 40 minutes and let it bench rest.
Shape – 3:55pm
With the larger half of dough, I wanted to try a different Tartine shaping technique (it was worth it) in an attempt to get a longer loaf that is more of a batard than a boule. Check out my guide to shaping a batard for shaping photos and a video. It takes a bit of practice, but I believe the results are worth it.
Take the other smaller half of dough and follow my usual boule shaping method outlined here. This method is pretty tried and true and not super difficult, even with higher hydration doughs such as this.
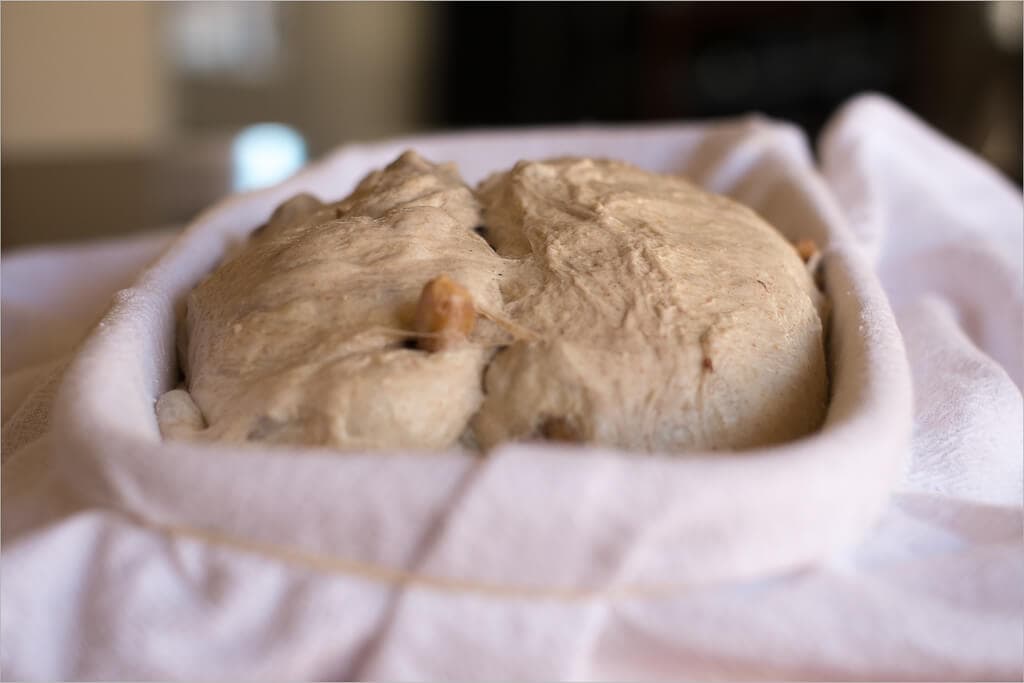
Proof – 4:00pm
Place towels into small mixing bowls, or bannetons, and dust with white rice flour. These baskets will hold the dough as they proof in the fridge overnight. Take your dough and place them into the baskets, then place both of the baskets into the fridge for an overnight proof.
If you follow the times I’ve listed here you can generally see my proof times are around 16-18 hours long. That’s a long time! I think normally when you go this long, even in a cold environment, you would get a more sour loaf than what I end up with. One reason my loaves end up having just a hint of sourness is because of the way I manage my starter. I feed it regularly 3 times a day, once when waking, once in the mid-day, and once before bed. These frequent feedings, combined with only transferring a small amount of starter to the new feeding, keeps the acid load very low. In my previous post I outlined exactly how I keep my starter “young” by following this method, if you’re interested head over and read about my feeding schedule and for a more “advanced” discussion, how I manage my starter.
Score + Bake – 9:00am
Gather your tools (for a complete list of the tools I used most, check out my baking tools page):
In the morning, preheat your oven to 450°F (230°C) with your empty combo cooker inside, deep half to one side and shallow lid to the other. See my post on baking with a Dutch oven (or combo cooker) for an in-depth discussion on this process.
Take one of your loaves out of the fridge, cut a piece of parchment paper and place on top of the basket. I then place a the pizza peel on top of the parchment paper (and basket) and invert the whole thing quickly to get the dough out of the bowl and onto the paper and peel.
Get your razor blade out and score the top of the loaf to allow the bread to expand while rising in the oven. For the rectangular loaf, I did a single slash down the middle starting from the very top to the very bottom. This long slash lets the dough rise upward only through the score, creating an excellent stretching look as the loaf expands in the oven.
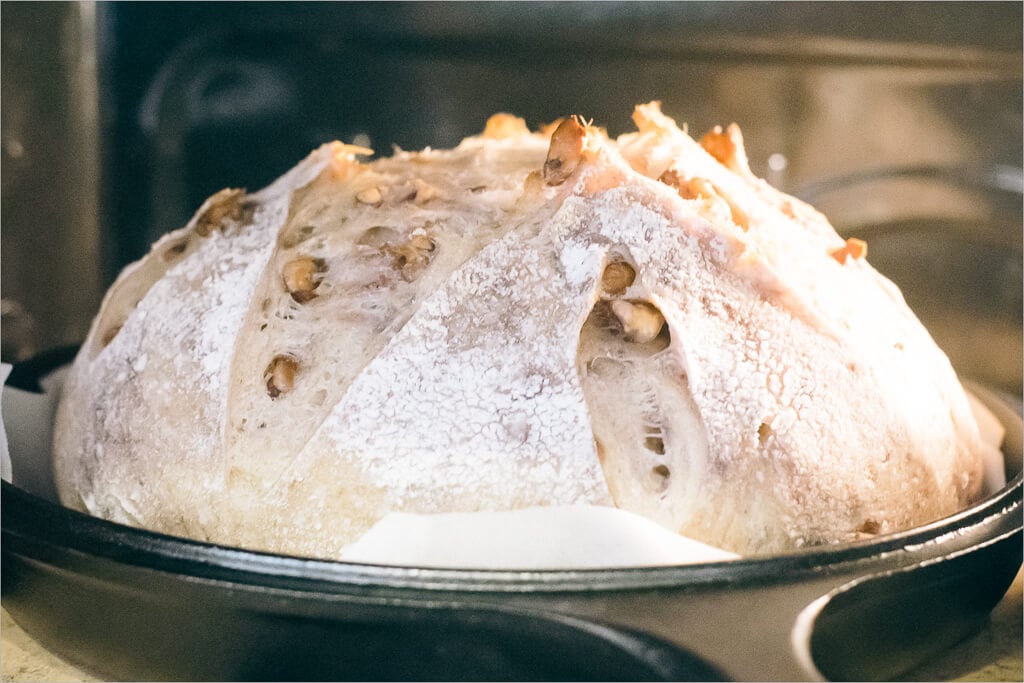
Place the dough into the combo cooker, cover with the lid, and bake for 25 minutes. After this time, remove the lid of the combo cooker (you can place it in the oven next to the bottom half or remove it) and bake for an additional 35 minutes. Below you can see the loaf I shaped into a boule in the cooker just after taking off the lid—excellent oven spring. I was tempted to pluck out a few of those walnuts, only the fear of searing my arm on the pan kept me at bay.
Conclusion
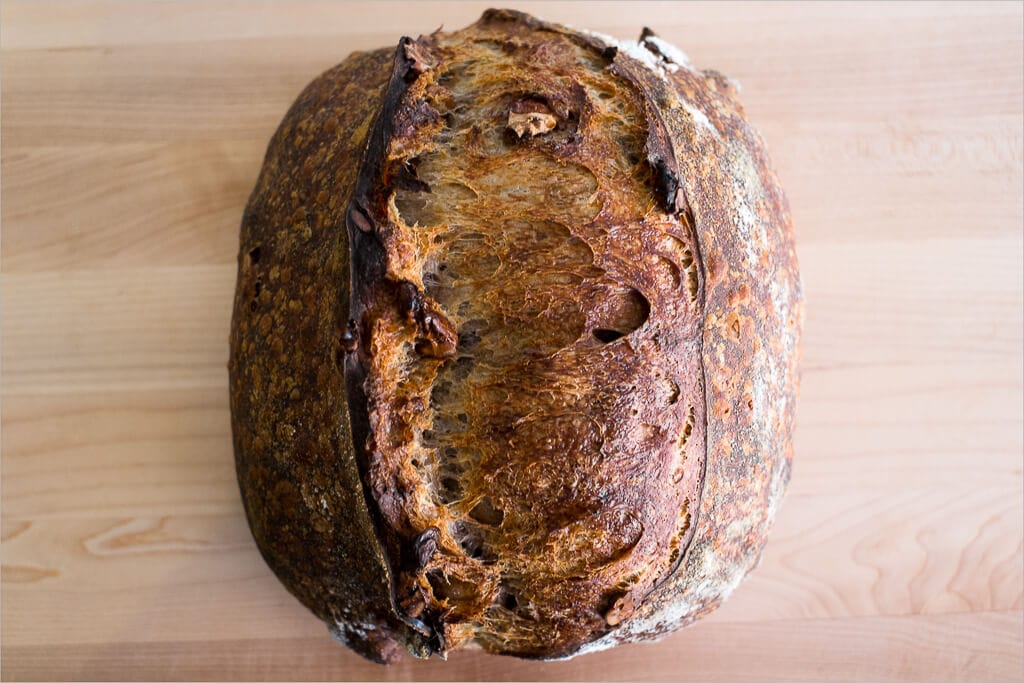
Crust
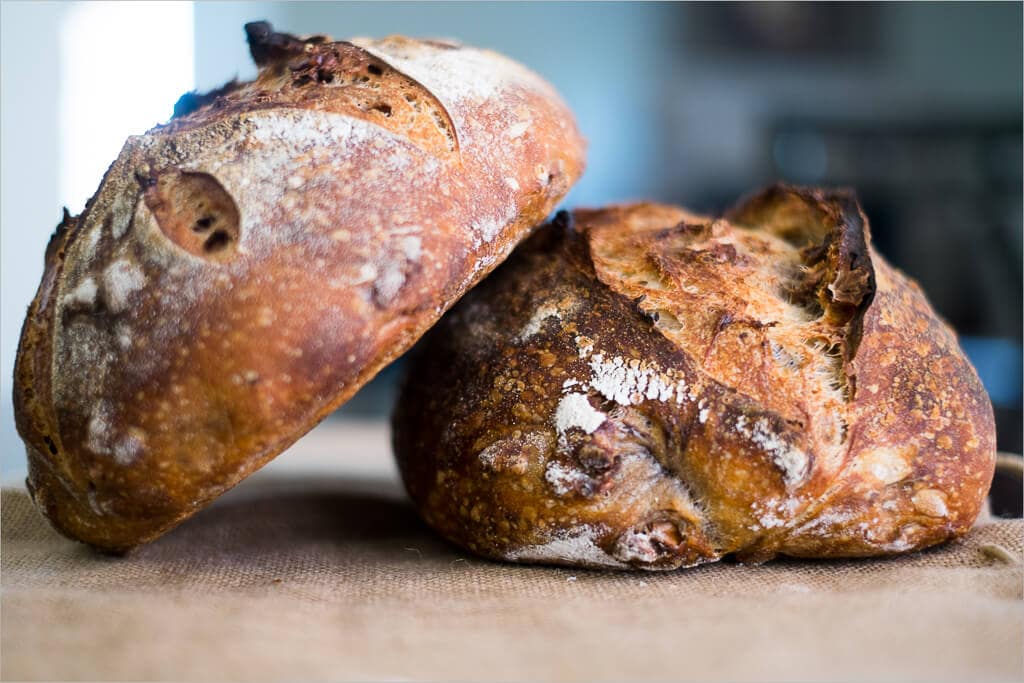
Both loaves had incredibly brittle crusts. The rectangular batard had beautiful coloring due to the long score, causing the inside of the score to remain a lighter color while the “ears” colored much darker. The small air bubbles on the skin also contributed to the brittle outside.
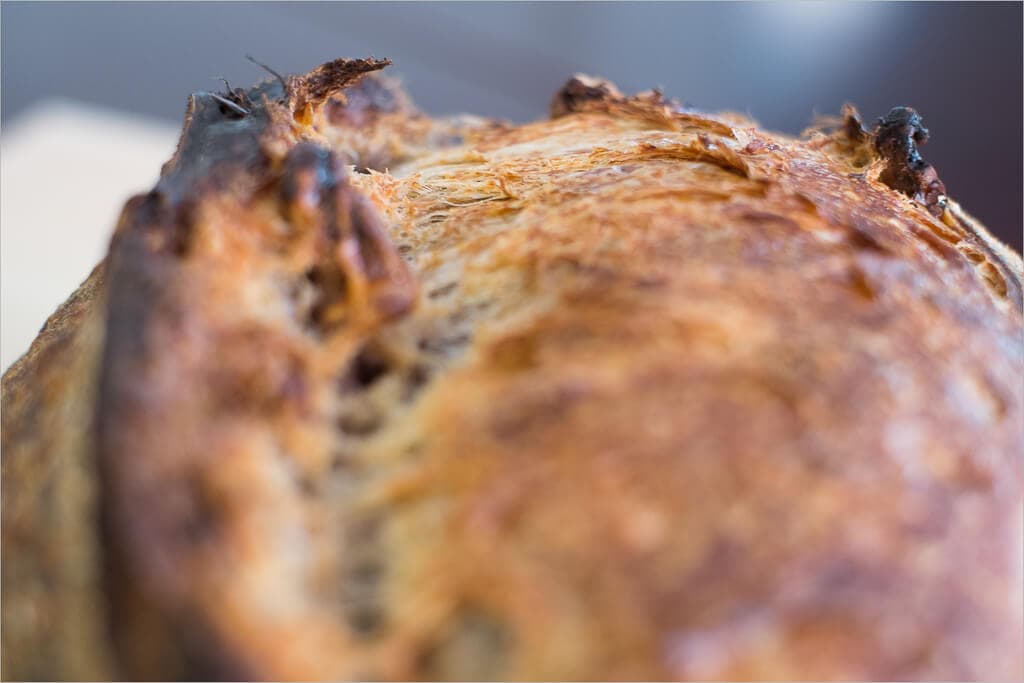
These two had the crust I was looking for: thin and brittle, but crunchy and substantial. Cutting into a crunchy crust like this is just so satisfying!
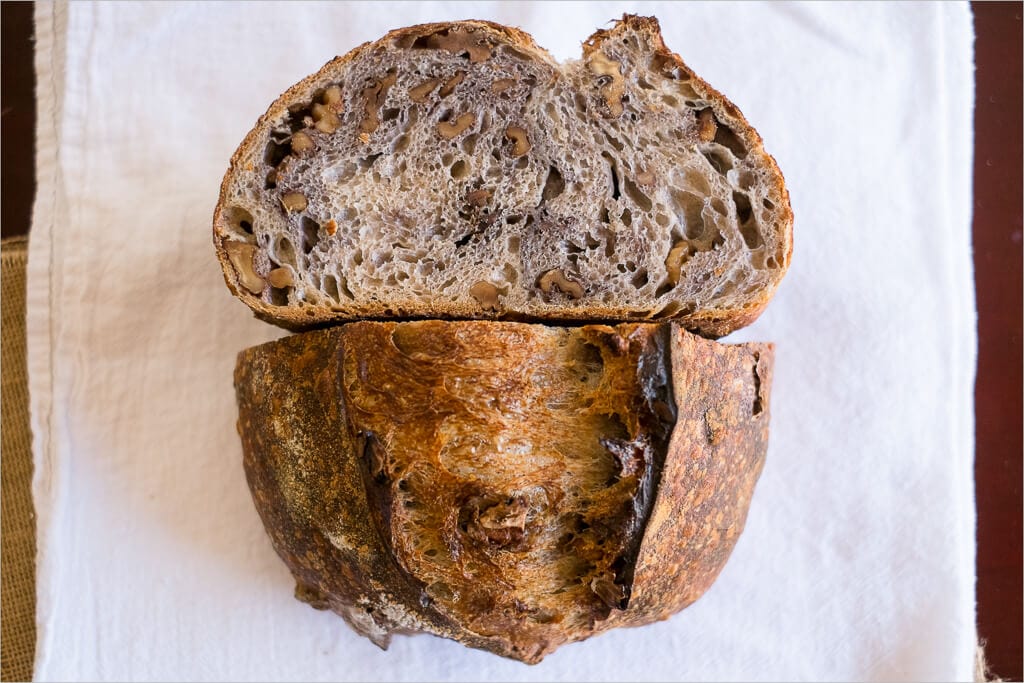
Crumb
Nice and open, but not overly so. The walnuts, I believe, prevent a super airy crumb but I don’t think one can complain about these results. I’m happy with this. Also, note the purple color throughout the dough, this is caused by the tannins in walnuts that seep out during the entire process.
Taste
Just fantastic. All I can say is that I absolutely love the taste of the walnuts with the slight hint of sourness present in this bread. I ate one loaf with just about everything my kitchen could throw at it and it left me wanting more each time. This recipe is a definite keeper. The other (smaller) loaf was a gift to my parents, they devoured it in no time with a request for another.

What’s Next?
Check out my 100% whole wheat with walnuts for your next nutty adventure!
Buon appetito!


110 Comments
why is there still 450 gm of levain when only 250 gm is used?
This is an older recipe and I'll be updating it soon. Back then, I'd make a larger levain though it's not needed. Stay tuned 🙂
Just realized the same thing… only 250g of levain 🙂
Waiting for that update as for now I’ll try to use more levain and see what happens.
I’ve tried several of your recipes and got my best results yet with this one! It continued to rise during the cold proof overnight and baked up really nicely. The walnut flavor isn’t super strong, but it is delicious.
I think next time I might cut the baking time by five minutes as the crust is just a little tough. But this recipe is definitely a keeper!
https://photos.app.goo.gl/kMgFt7TVaH5hF16s9
Glad you like this one!!
Hi Maurizio, if I wanted to add walnut oil per the starting recipe, when would I add that here, with the walnuts?
I would add the walnut oil at the very end of mixing, then add the walnuts in during stretches and folds in bulk fermentation.
Oh my! I think this turned out to be my most delicious bread to date. The flavor, the crust! Delicious! Granted Ive only been baking sourdough every weekend for about 6 weeks but still worth mentioning such success. I substituted einkorn for the whole wheat in both the levain and the dough and used a 50/50 mix of shelled pecans and dried bing cherries in place of the walnuts. Both straight from the bag – no roasting or soaking. The bing cherries were quite supple straight from the bag – (thank you Trader Joe’s). I used my Emile Henry Dutch oven.
Awesome, Cindy! 100% worth mentioning every success 🙂
Love your modifications, too!
I would like to use my bread proofer for the bulk fermentation, and was wondering what temperature? I usually set at 76F, but this recipe has some whole wheat, and your recipe calls for letting it sit on counter during bulk fermentation, leading me to think I should set the proofer at a lower temperature than 76? any suggestions?
Yes, that’s what I shoot for as well, 76F in the proofer. But the key is the actual temp of your dough, measure that and see where it comes in at. I like to keep my dough at 76-78F, so if the dough is warmer, turn down your proofer a bit to reach that level.
Check out my guide to using the B&T proofer for an in-depth discussion on all this!
thank you, I really appreciate your feedback. I kept it at 76, and the dough practically bubbled out of my giant bin by the end of bulk fermentation, so next time I’ll keep a closer eye on it and check the dough temperature (but the bread nonetheless turned out delicious!)
The levain weighed over 400 grams. Am I only supposed to use 250 grams of it?
That’s correct, only 250g. This is an older post and I no longer build in extra levain like I used to! I need to update soon.
2 years later … 😉
thanks for the recipe. wasn’t easy to work with such sticky dough (maybe because i added 50 gram rye flour and I changed it to 200 grams WW flour/800 bread flour… ). I had to add some flour during pre-shaping. I also added some walnut oil after I had added the roasted walnuts. It’s very hot in my kitchen and after 4 S&Fs the dough had already risen 30%. I let it go up to 50% and the window pane test didn’t really do it for me (i could stretch the dough and mostly it didn’t tear, but just a little bit in the corners).
Now they’re in the fridge. let’s see if I get pancakes or not….(i hope not and that i will get some oven spring). Anyway, i am sure they’ll taste great.
Hi Mauricio. I’m currently trying out this recipe and noticing a step that I’ve never done before. I’m referring to the step after bulk fermentation, where dough rests on the counter for a few hours. What is the reason for this? Could this result in a flat loaf because of over fermentation?
Hey, Nicole! These days I rarely leave the dough out to proof a little bit before placing it in the fridge. Judge this time based on your dough: if it’s well-fermented and went far enough in bulk fermentation, stick it in the fridge and skip this step. If the dough looks like it didn’t have enough time in bulk, a rest out before retarding can help!
Hi Maurizio,
I have been making several of your recipes. In some instances, I have used your slap and fold technique, which has yielded some great oven spring. I have made this Tartine walnut bread with good results. However, is there a reason not to use this technique with this walnut bread, or an advantage to incorporate it?
Thanks so much for your great website!
You can absolutely use slap/fold with this recipe (and just about any other here at my site). In fact, I recently made this and did just that! Happy baking, Mimi 🙂
Hi Maurizio,
I really liked this dough and been making it multiple times successfully, thank you so much for the recipe and guide! Now I have a question, what if I was to swap the walnut with cranberry and chocolate? Should I bulk ferment for less time because of the sugars might accelerate the fermentation?
Thank you again!
Glad to hear that, Cynthia! I’m not sure how the chocolate will react in the dough, but the cranberries won’t affect too much. My gut feeling is it’ll likely be similar bulk fermentation times. But as always, keep an eye on the dough and divide when necessary!
Hello Maurizio,
I’m making your bread today and was wondering if you happened to know the weight for the walnuts? I want to avoid putting too many, and risking weighing down the crumb, as mine are already chopped. Just toasted a bunch and it smells so good!!
Thank you for your help,
– Andréane, from Montréal, QC
Updating this post soon with more weights and a better layout!