Dough hydration is one of those topics that seems straightforward at first glance, but quickly reveals itself to be one of the most nuanced aspects of sourdough bread baking. I’ve spent countless mornings at my kitchen counter, hands deep in dough, learning that hydration isn’t just a number in a recipe. It’s a conversation between you and your dough, one that changes with the weather, the flour (most important!), and even the humidity in your kitchen.
In this guide, I’ll walk you through everything I’ve learned about hydration over years of baking, from the science behind the numbers to practical tips for adjusting on the fly. Whether you’re struggling with sticky dough that clings to everything or wondering why your loaf came out dense and tight, understanding hydration is often the key to unlocking your best bread. I talk about dough hydration quite a bit in my sourdough bread book, and this guide expands on this important topic.
What Is Dough Hydration?
Dough hydration represents the total amount of water in your recipe expressed as a percentage of the total flour weight. Hydration is calculated using a simple formula: divide the weight of the water by the total weight of the flour, then multiply by 100.
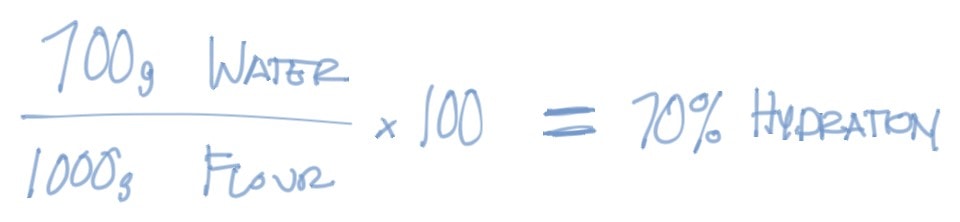
For example, if your recipe calls for 1,000 grams of flour and 700 grams of water, your hydration is 70% (700 ÷ 1,000 × 100 = 70%). This percentage gives us bakers an intuitive way to understand what to expect from their dough before mixing.
Here’s the thing I wish someone had told me when I started baking over a decade ago: a dough’s hydration percentage is a guideline, not a rule. Flour is not a static ingredient. It changes from type to type, mill to mill, and even bag to bag.
A dough’s hydration percentage is a guideline, not a rule.
The weather plays a role, too—though I’ve found it has less impact unless there’s a dramatic shift from day to day (think: dry as a bone to torrential downpour). A dough that is mixed up smooth and elastic on one day might need adjustment the next if it’s raining and extra humid.
But, Why Does Hydration Even Matter?
A dough’s hydration percentage significantly affects the characteristics of your final loaf. Think of it this way: water is what transforms a pile of dry flour into a living, breathing dough capable of trapping the gases produced during fermentation. Too little water, and the dough is tight and resistant. Too much, and it becomes a soupy mess that can’t hold its shape.
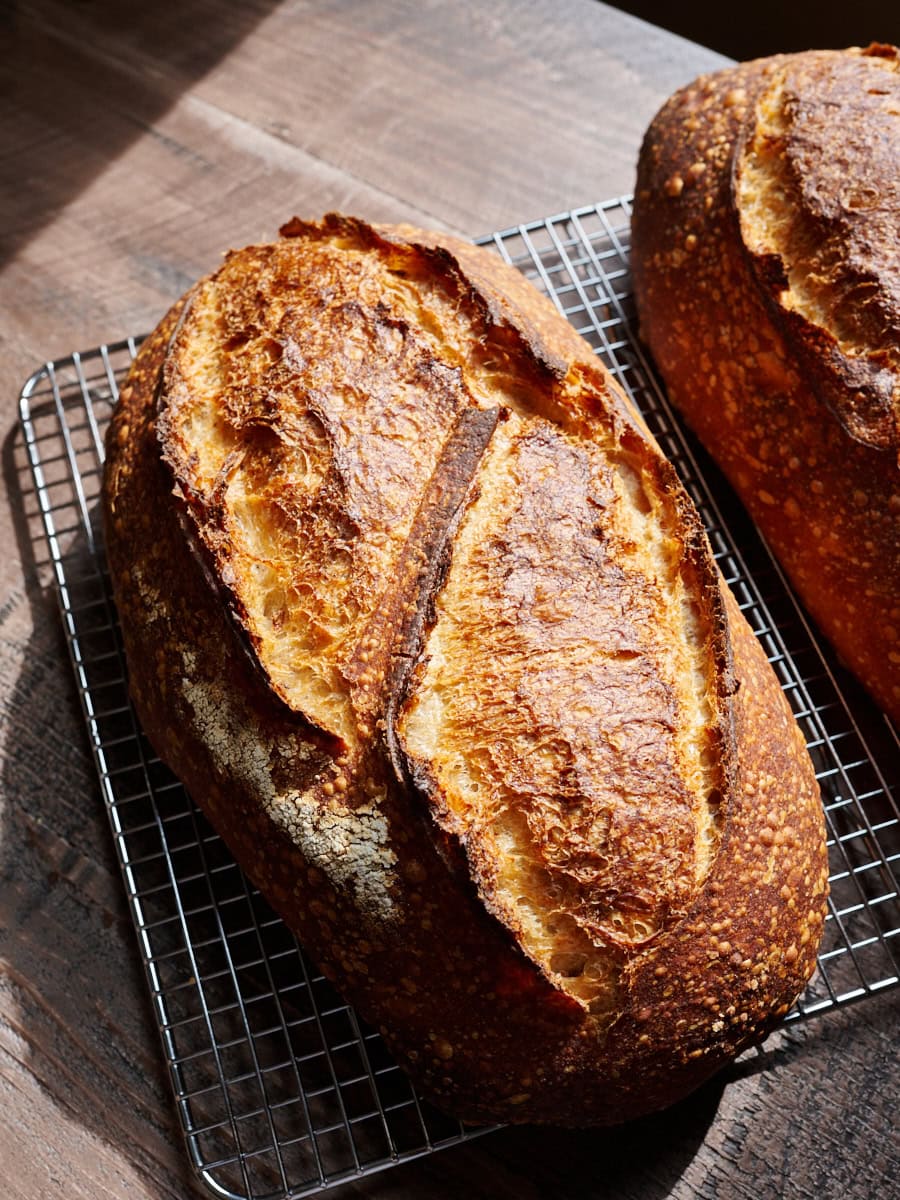
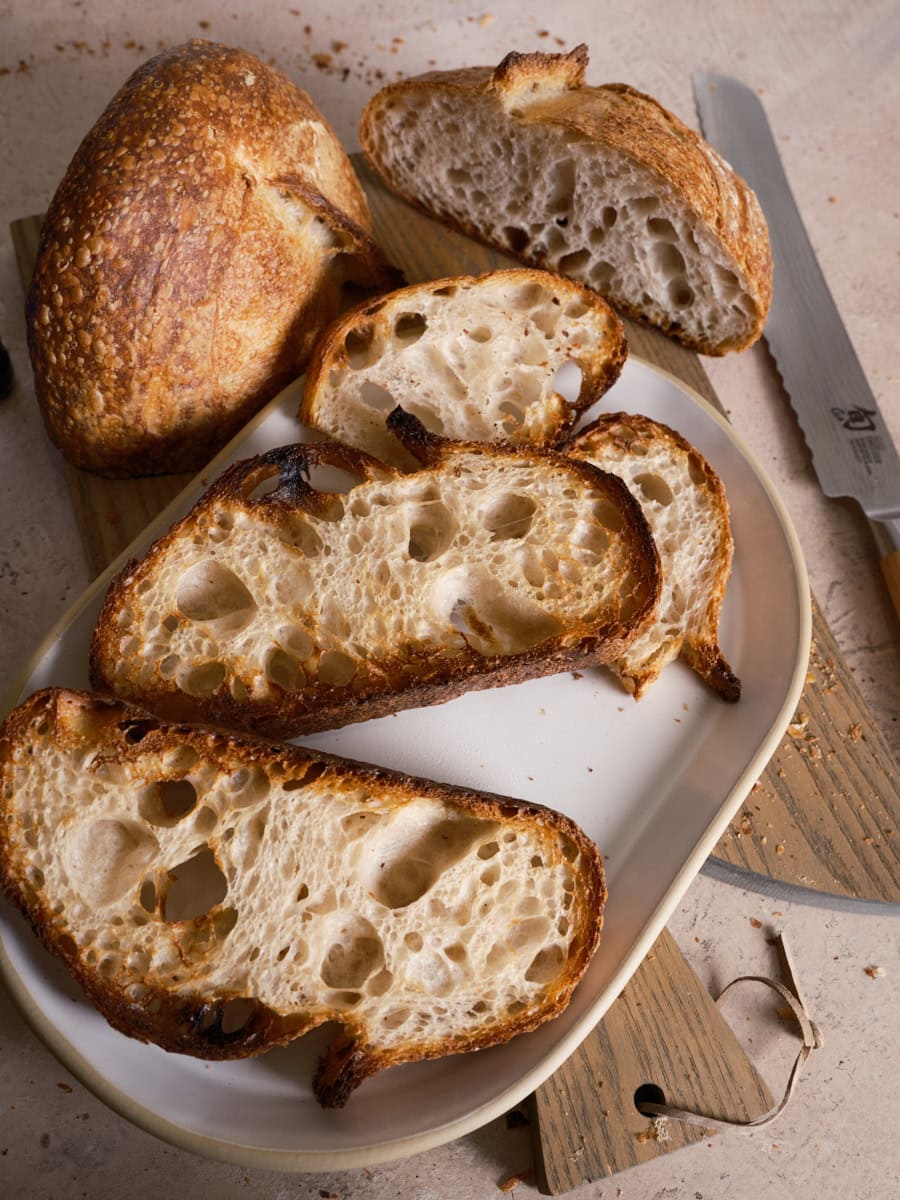
Between these two extremes exist many different bread styles, from a lower-hydration loaf with a substantial crust and chewy texture to a high-hydration loaf (like My Best Sourdough Bread recipe) with a brittle crust and a custardy interior.
Let’s look at some characteristics of breads near the ends of the extremes (though there are those that go beyond this, too, of course).
Lower-Hydration Bread (60-68%)
When I bake a lower-hydration loaf, I notice:
- A slightly thicker, more robust crust
- Usually a taller rise and more pronounced oven spring
- A crumb that’s more toothsome and structured
- Easier handling during shaping
Higher-Hydration Bread (75-85%+)
In contrast, when I push the hydration higher:
- The crust tends to be thinner and more brittle
- The loaf may have a slightly squatter profile (less vertical rise)
- The crumb becomes more tender, almost custard-like
- Those beautiful, irregular open holes become more achievable
In general, my sourdough baking tends to lean toward the higher-hydration end of the spectrum. I enjoy a loaf with a very thin crust, a tender crumb, and a melt-in-your-mouth quality that comes from a dough that is sufficiently hydrated and fully fermented. But this is just my preference, and it may not be yours!
When it comes to highly hydrated doughs, keep in mind there is a line that can be crossed: if the water is pushed too high, the resulting loaf will have an excessively soft texture, won’t retain its structure long after baking, and may stale faster (especially without proper storage).
When mixing, I’m always searching for a hydration that’s high enough to achieve the characteristics I’m after, given the flour I’m using, without compromising volume, texture, or eating quality.
So, then, which is better, high-hydration bread or low-hydration bread?
So, Is High Hydration Bread Better Than Low Hydration Bread?
Not necessarily. Pushing a dough hydration to stratospheric numbers just for the sake of it (which was—is?—a very common thing out there!) shouldn’t be your end goal. In other words, a higher number doesn’t mean you’re making better bread.
Consider the flour you’re using: is it high-extraction (like Type 85) or more whole-grain? Is it known to absorb and want more water for a better end texture? Then by all means, push the water in the dough higher and assess the final bake. If you find the mouthfeel of the crumb and crust improves, you’re moving in the right direction.
But please, don’t go to 100% hydration because it sounds cool—in the end, we need to eat the loaf, right? And if the bread at 100% hydration has a gummy crumb or collapses after a day of proper storage, you probably went too far.
A Visual Guide to Dough Hydration
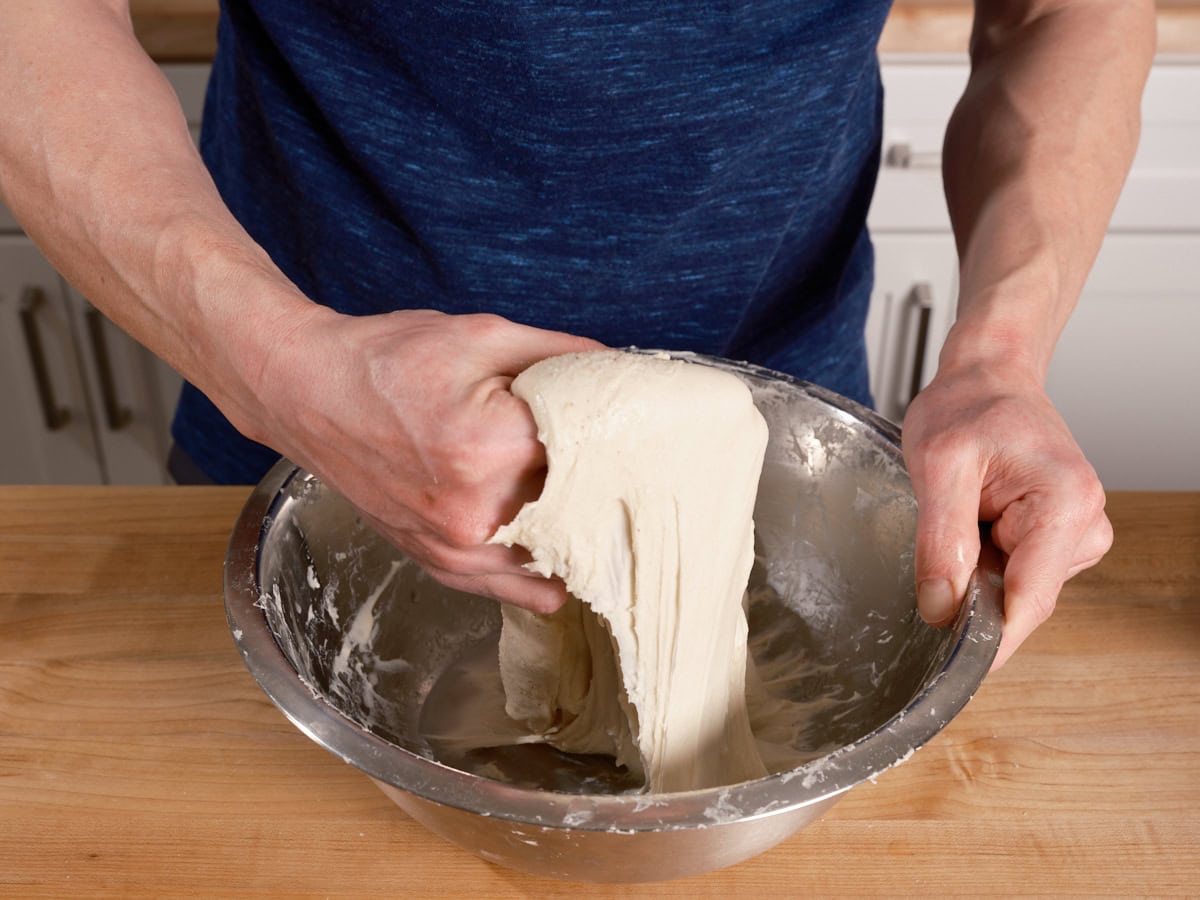
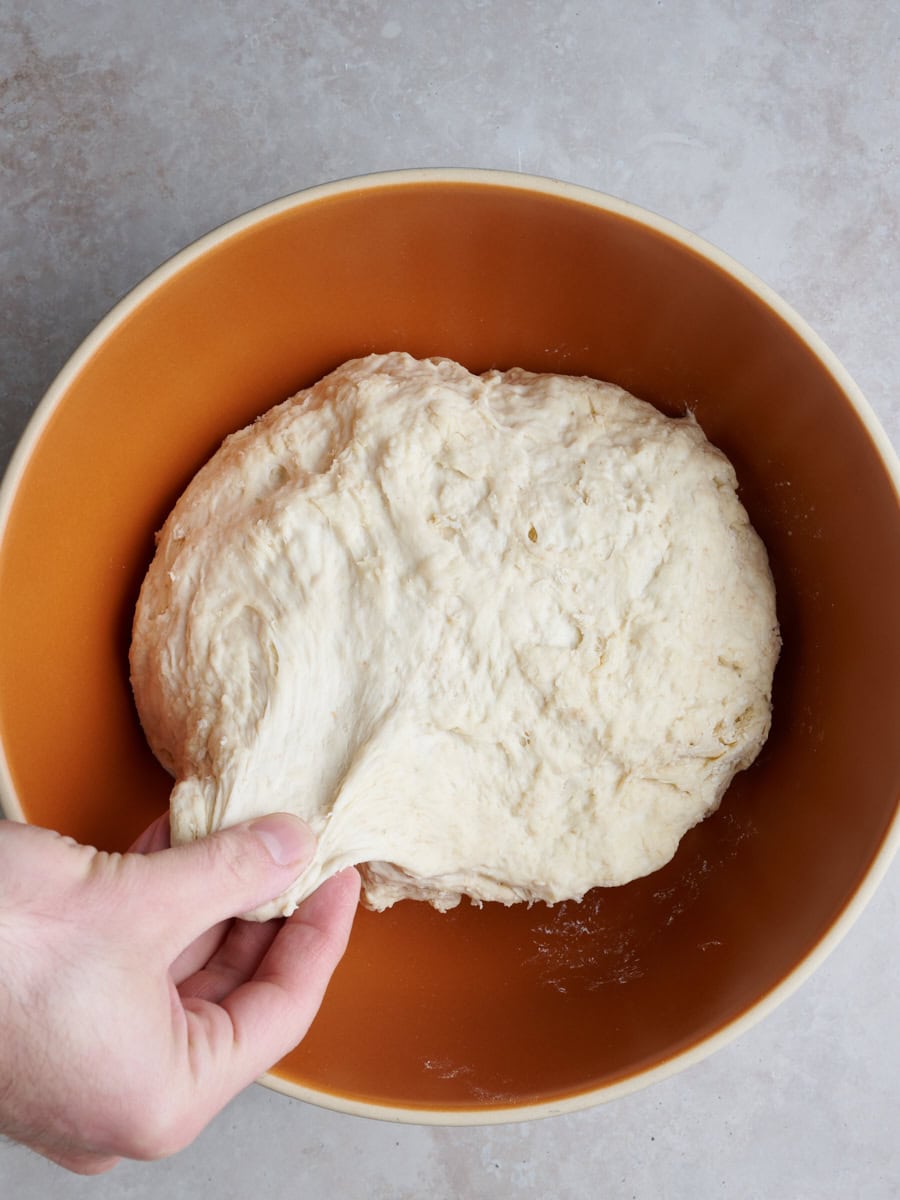
One of the most important skills I’ve developed is learning to read my dough rather than blindly following numbers. The hydration percentage isn’t as important as how the dough looks and feels in the mixing bowl. What feels like a wet, soupy dough at 70% hydration with one type of flour might feel stiff when using another flour.
Let’s look at three doughs and their hydration: under-hydrated, just right, and over-hydrated. This dough was a slight variation of my Beginner’s Sourdough Bread Recipe, which is mostly comprised of medium-protein white flour—useful for illustrating hydration levels.
Under-Hydrated
(~62% or less)
Signs your dough needs more water:
- The texture is incredibly strong, elastic, and hard to mix
- In extreme cases, there may still be flour not completely hydrated
- The dough resists stretching and feels “tight”
- Solution: Add more water, a splash at a time, until the dough loosens up and feels pliable and workable

Just Right
(~68-75%)
Signs your dough is properly hydrated:
- The dough is smooth and extensible, but still shows signs of potential strength and elasticity
- It will be glossy and may shred apart when stretched (remember, gluten isn’t fully developed at this stage)
- It should not feel “soupy” with puddles of water scattered about
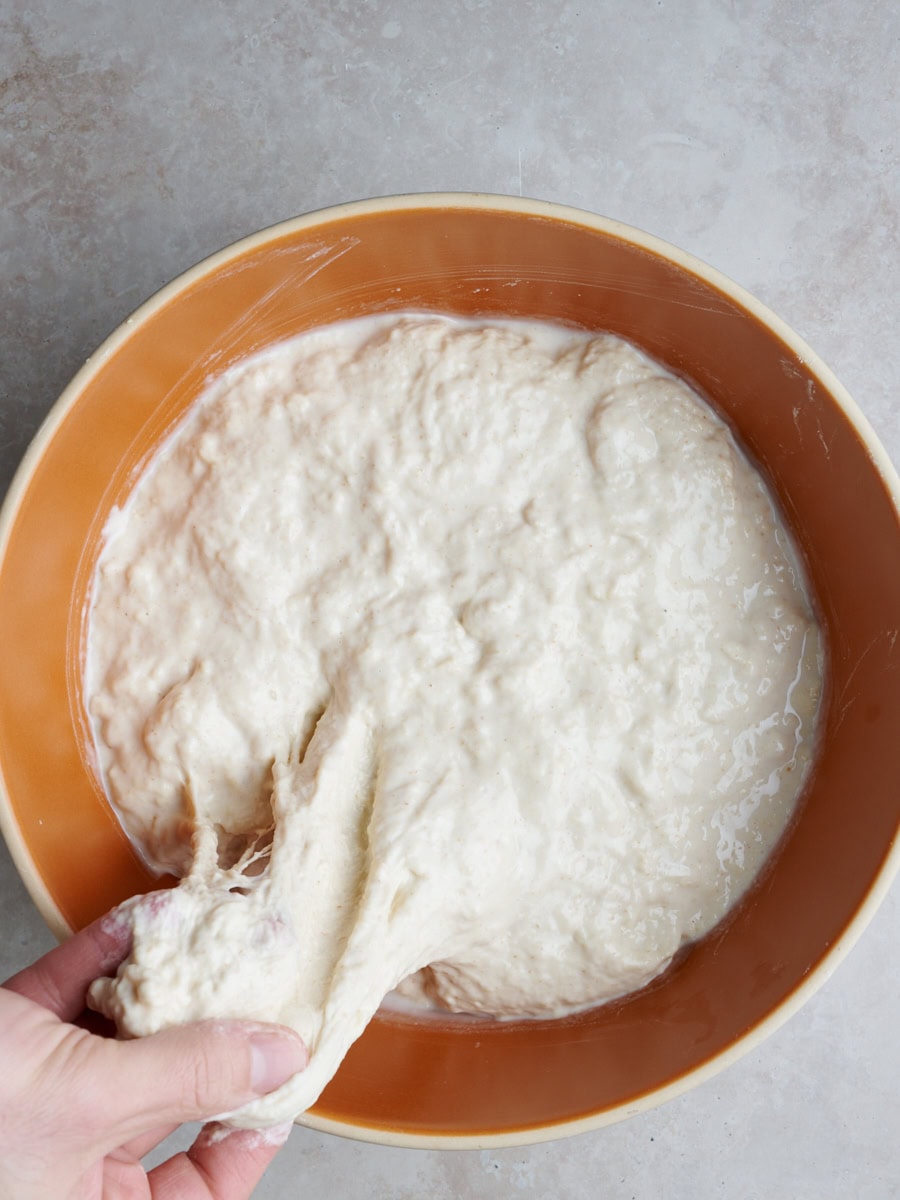
Over-Hydrated
(~75%+)
Signs you’ve added too much water:
- The dough is very soupy and falling apart
- You can see puddles of water that haven’t been absorbed
- Solution: Add more flour to the mixing bowl, a little at a time, until the dough comes back together
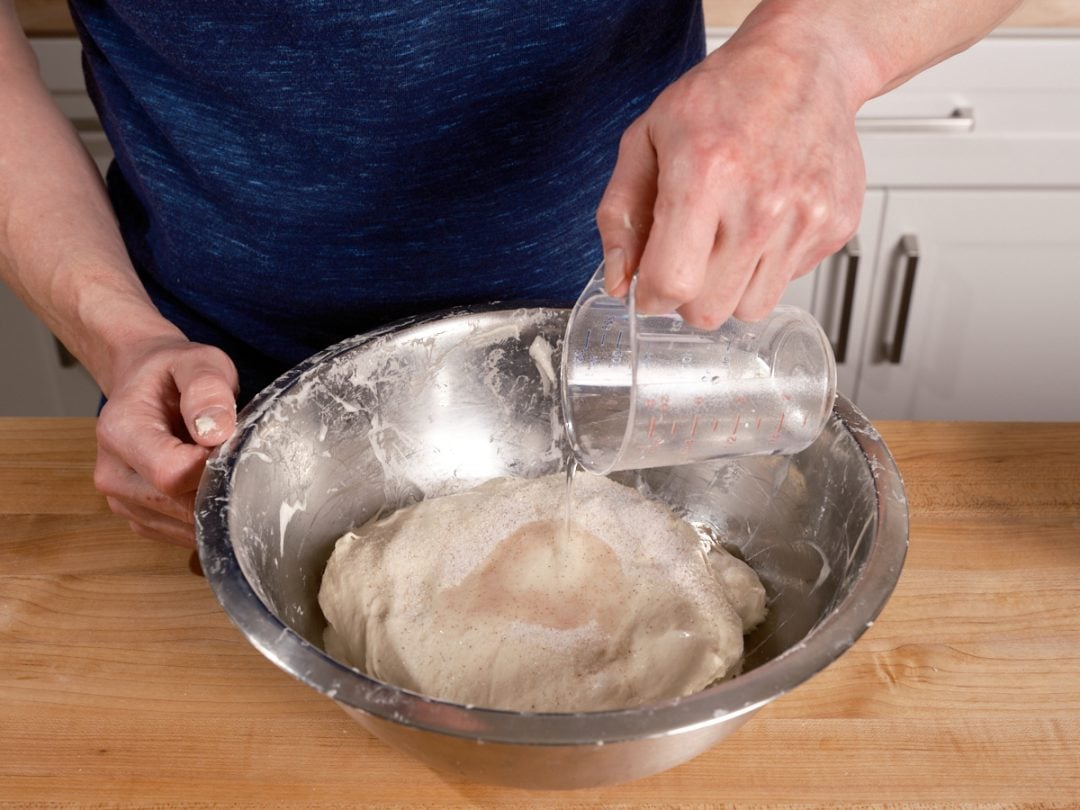
Adding Water in Phases (Bassinage)
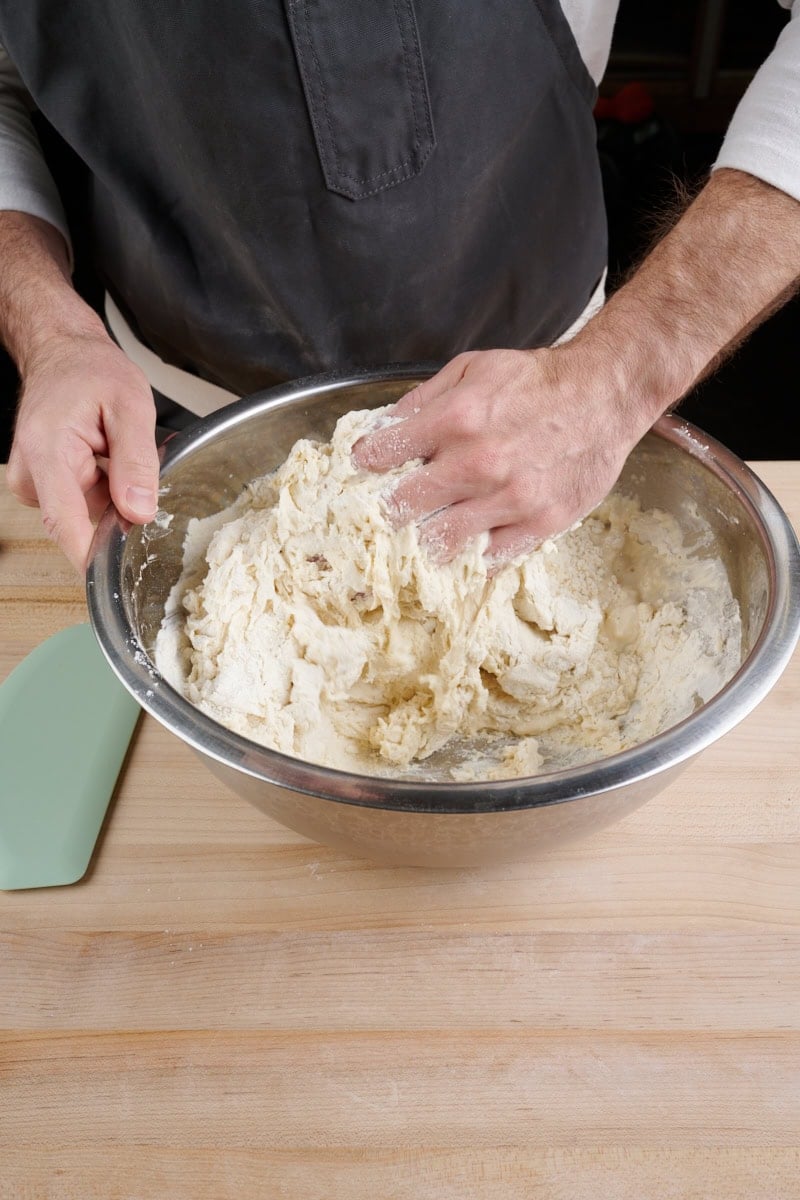
One technique that transformed my baking is bassinage—also called “double hydration.” Instead of adding all the mixing water up front, I hold some in reserve and add it slowly during the later parts of mixing, after the starches in the flour have started to absorb water and the gluten matrix has begun to develop.
If you’re a reader of this site, you’ll be familiar with this technique, as it’s often illustrated in one of my formulas with two waters: Water 1 and Water 2 (the bassinage water).
This approach has several benefits:
1. It Makes Gluten Development Easier
If all the water is added at the beginning, especially with higher-hydration recipes, it can be incredibly difficult to efficiently strengthen the dough. When water content becomes too high before any gluten is developed, it’s hard to get enough friction to further develop the gluten network.
By adding most of the water first (usually 80-90% of the total), mixing until the dough shows signs of development, and then slowly adding the remainder, you can push hydration higher without excessively long mix times or running the risk of under-developing the dough.
2. It Gives You a Chance to Judge Dough Strength
Holding back water during mixing gives you a chance to assess the dough’s strength near the end and decide if that reserved water should be added or omitted. This is why many of my recipes include “Water 1” (for the levain and autolyse) and “Water 2” (a smaller amount reserved for the final mix used to adjust dough consistency).
A practical tip: If your dough feels incredibly wet, slack, and sloppy after adding Water 1, don’t add the reserved water at all. If the dough feels strong and like it can handle more, add Water 2 slowly while mixing.
Factors That Affect How Much Water Your Dough Needs
Flour Type and Protein Content
Higher-protein flours (12-14% protein, like “bread flour”) can generally absorb more water than lower-protein flours, and often need that extra water to avoid an overly gummy texture. The protein forms gluten, which creates a stronger network capable of holding more water. This is why American bread flour, which tends to be higher in protein than flour found elsewhere in the world, often requires increased hydration for the best final texture.
If you live in the UK, South America, Europe, or elsewhere in the world, there’s a high chance your flour has a lower protein percentage and is “softer.” This isn’t a bad thing as these flours can result in a spectacular final bread texture. It means a reduced hydration may be necessary to avoid an overly sticky, unmanageable dough.
Whole Grain Flours
Recipes with higher percentages of whole wheat, rye, or other whole grains require more water because the bran and germ particles absorb significant moisture. When I bake my Fifty-Fifty Sourdough Bread with 50% whole wheat, I push the hydration pretty high to 82%—a level that would be tough to work with if it were 100% white flour.
If you’re working with a recipe that has significant amounts of whole-grain flour, don’t be afraid to really push the dough’s hydration, but be sure to mix in stages using the bassinage technique to safely work the water into the dough.
Freshly Milled Flour
When making sourdough bread with freshly milled flour, I find it typically requires more hydration than with aged flour. Even if the fresh flour has been sifted to remove some or all of the bran and germ, increasing the hydration is necessary to achieve proper dough consistency.
Climate and Environment
I live in arid, high-altitude (which dramatically impacts baking) New Mexico, which means I typically need higher hydration percentages compared to someone living in a lower-altitude, more humid environment. On rainy days, I often find I need to hold back more water because the flour has already absorbed moisture from the air, though while this is typically minimal, it is something to be aware of.
Why Is My Bread Dough Always So Sticky?
Sticky dough is one of the most common frustrations I hear about, and it’s often related to hydration, strength, or both.
Here are the most likely causes:
- The dough is overhydrated for your flour. Try reducing the water in the recipe, starting with Water 2 if there is any. In some cases, you might need to omit Water 2 entirely. Again, listen to the dough and adjust as necessary.
- The dough isn’t strengthened enough. More mixing time (especially if you’re mixing by hand) or additional stretches and folds during bulk fermentation can help.
- You’re not working quickly and confidently. The more you handle sticky dough, the stickier it gets. This is more important when working with a high-hydration dough recipe. Move with purpose.
- The dough is overfermented. An overproofed dough becomes slack and sticky. Watch your timing and temperatures.
Tips for Working with High-Hydration Doughs
As you increase the dough’s hydration, its stability decreases. Increasing water is like pushing the gluten matrix—the dough’s scaffolding—to its limit. Here’s what I’ve learned about managing high-hydration doughs:
- Tighter shaping is essential. Because high-hydration doughs naturally spread during proofing, they require tighter preshaping and shaping to maintain structure.
- Use wet hands, not flour. When dividing, preshaping, and sometimes even shaping sticky dough, keep a bowl of water nearby to wet your hands. This prevents sticking without incorporating raw flour into your dough.
- Cold proofing helps. An overnight retard in the refrigerator firms up high-hydration dough, making it much easier to score and handle before baking.
- Build strength during bulk fermentation. Additional sets of stretches and folds help high-hydration doughs develop the strength they need to hold their shape.
Hydration Quick Reference Chart
| Hydration Level | Characteristics | Best For |
|---|---|---|
| 60-65% | Stiff, easy to handle, potentially thicker crust | Bagels, pretzels, pizza, some pan loaves |
| 65-70% | Balanced, manageable, good structure | Classic breads, beginner-friendly sourdough |
| 70-75% | Moderately open crumb, thin crust | Classic country loaves, baguettes |
| 75-80% | Requires longer mixing, tender crumb, requires skill when handling | Ciabatta, focaccia, open-crumb loaves, sandwich loaves |
| 80%+ | Requires longer mixing, typically more open crumb, custard-like crumb, challenging to shape | High-hydration loaves |
Common Questions About Dough Hydration
Why can’t I just add more flour if my dough is too wet?
I’m often asked this, and the answer comes down to balance. All the ingredients in a bread recipe relate to the total flour weight: salt, levain, and everything is calculated as a percentage of flour using baker’s percentages. If you change the total flour weight, you’ll need to adjust all the other percentages and weights. Adjusting water, on the other hand, only affects hydration in isolation and doesn’t affect the ratios of the rest. Though if I’ve added all the water and the dough is completely falling apart, I will add a little flour as a last resort until it comes together. Record this for next time!
Does higher hydration mean a more open crumb?
Not necessarily! Hydration is just one factor in crumb structure. Proper fermentation, good shaping technique, and appropriate baking all play crucial roles. I’ve seen beautifully open crumbs at 68% hydration and a tight crumb at 80%. Instead, focus on mastering all the fundamentals rather than just pushing water higher.
What hydration should I start with as a beginner?
I recommend starting around 68-70% hydration with a quality bread flour. This gives you a dough that’s forgiving and manageable while still producing a beautiful loaf. As you gain confidence handling dough and understanding what it should look and feel like at each stage, you can gradually increase hydration.
What is the ideal hydration for bread dough?
There really is no ideal hydration; it all depends on the flour you’re using and the final bread characteristics you’re after. Generally, bread doughs are in the 60%-80% hydration range, but they can be outside that range, too.
Final Thoughts
Understanding hydration is really about developing sensitivity—or, as I call it in my cookbook, baker’s intuition. Essentially, you’re learning to see and feel what your dough is telling you, rather than rigidly following numbers. Every bag of flour is slightly different. Every day in your kitchen is slightly different. The bakers I admire most are those who treat recipes as starting points for a conversation with their ingredients.
My advice? Start keeping notes. Record the hydration you used, how the dough felt, what the weather was like, and how the final loaf turned out. Over time, you’ll develop an intuitive understanding of hydration that no guide can fully teach.
Happy baking!

