

I knew the time would eventually come—the time when I moved from wishing I had a bigger oven to actively searching for the thing. I was dreaming of easily baking six loaves at a time, certainly meager by a proper bakery’s standards but formidable in a home kitchen. Once you move to handling larger dough quantities, you naturally yearn for the right tools to boost efficiency.
I’m not saying it’s impossible to bake large quantities of bread in a home kitchen (I know many bakers who do!), but having the right tools means I can focus on other areas of baking: flavor, fermentation, handling, and shaping. Baking larger quantities of bread in a Rofco oven in ever-increasing quantities seemed like the natural progression of my baking evolution.
Those bakers who go down the path of expanding their home baking might suddenly arrive at this point through the subtle, slow takeover of an ever-increasing obsession, as in my case. Some might take it further and expand into a nano or micro-bakery; some might venture into selling at their local farmer’s market. Whatever the reason behind scaling up, I’ve written this guide as a single spot to outline the tools, times, temperatures, and other tips I’ve found over time when using my Rofco bread oven.
Also, to help others decide if a Rofco is right for them, or if they’ve just purchased one, a place to learn how to start using it and, eventually, develop their process for baking bread in a Rofco oven.
What is a Rofco Bread Oven?
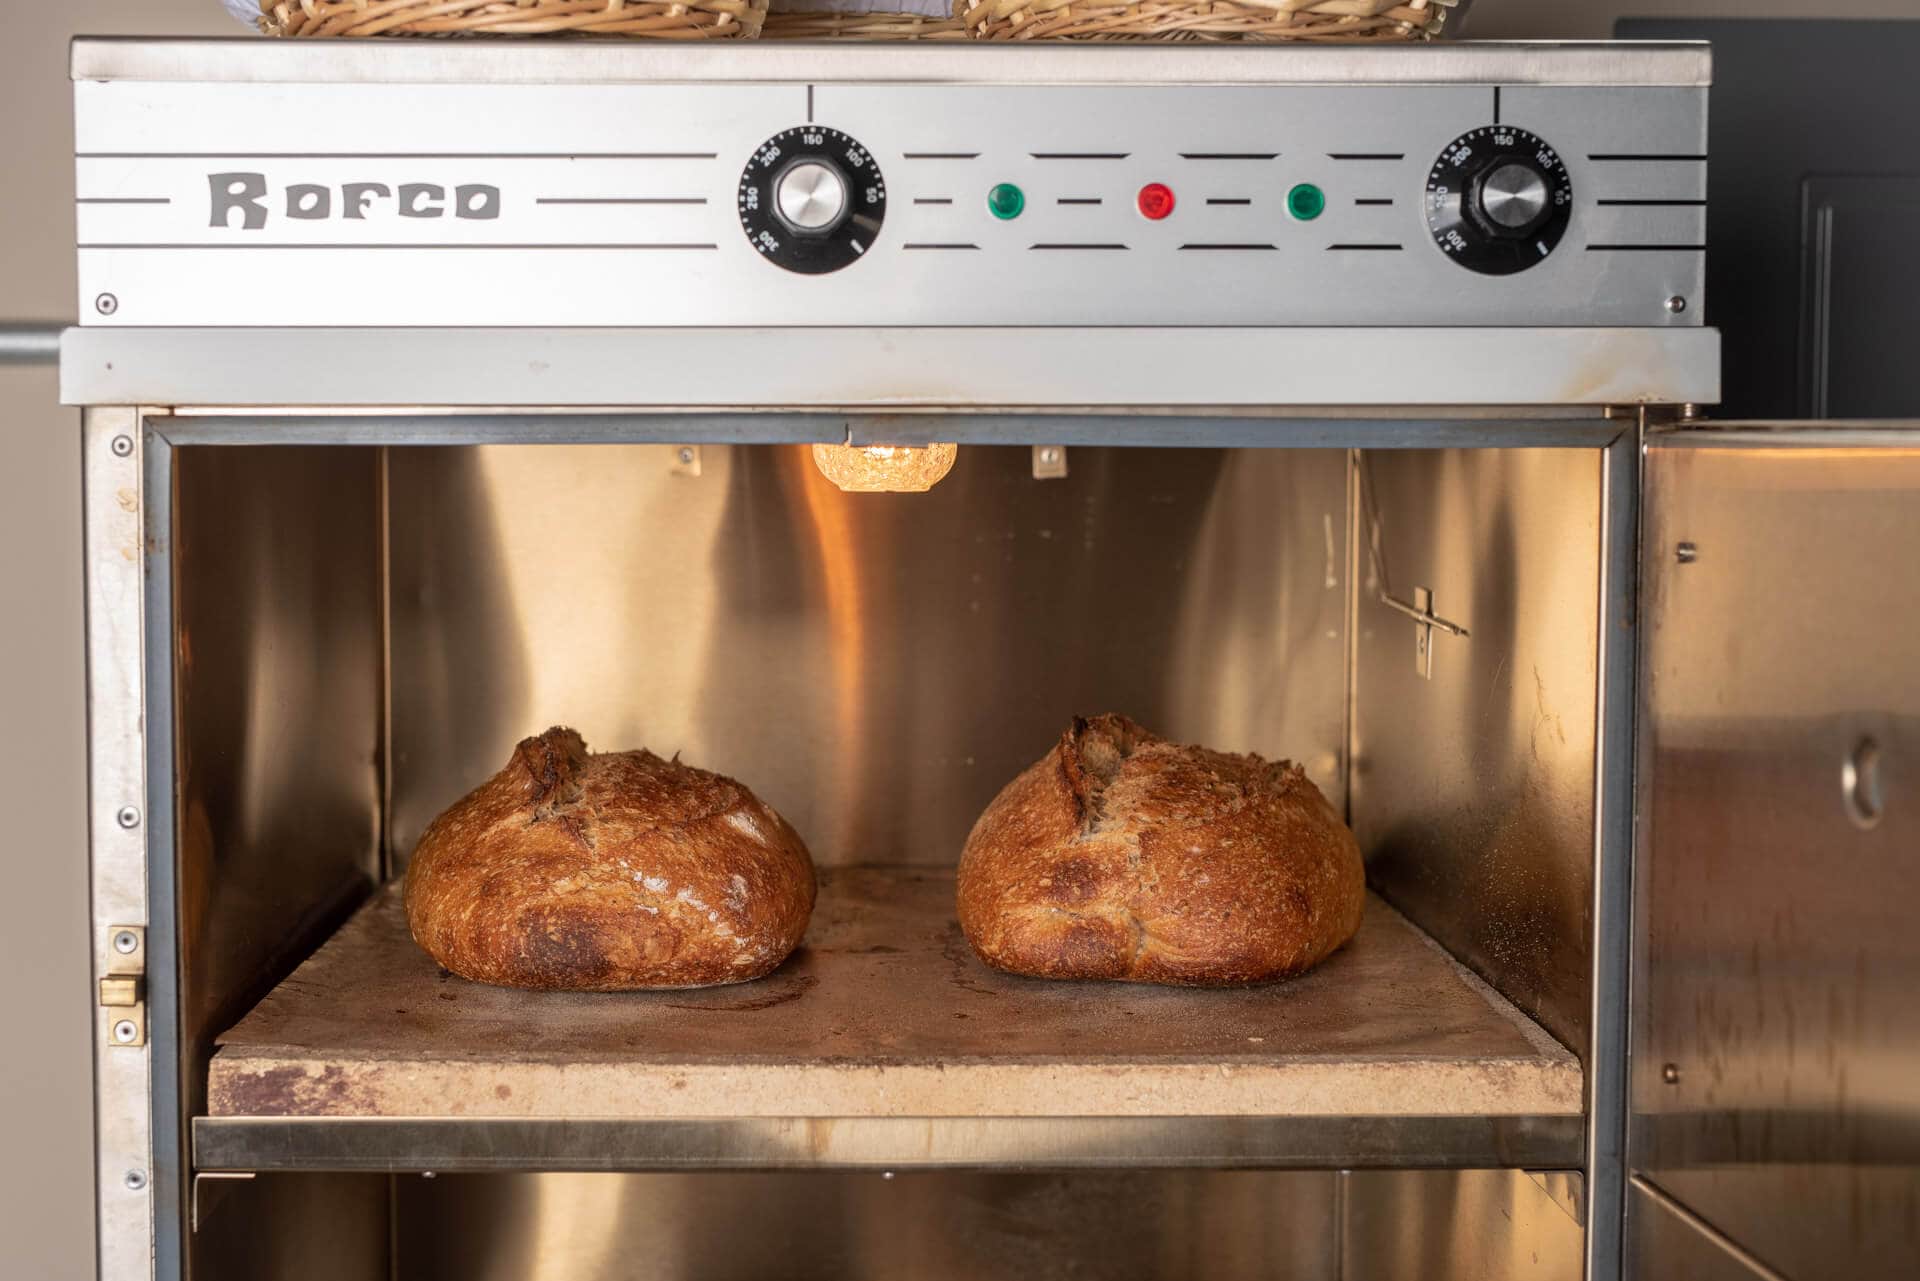
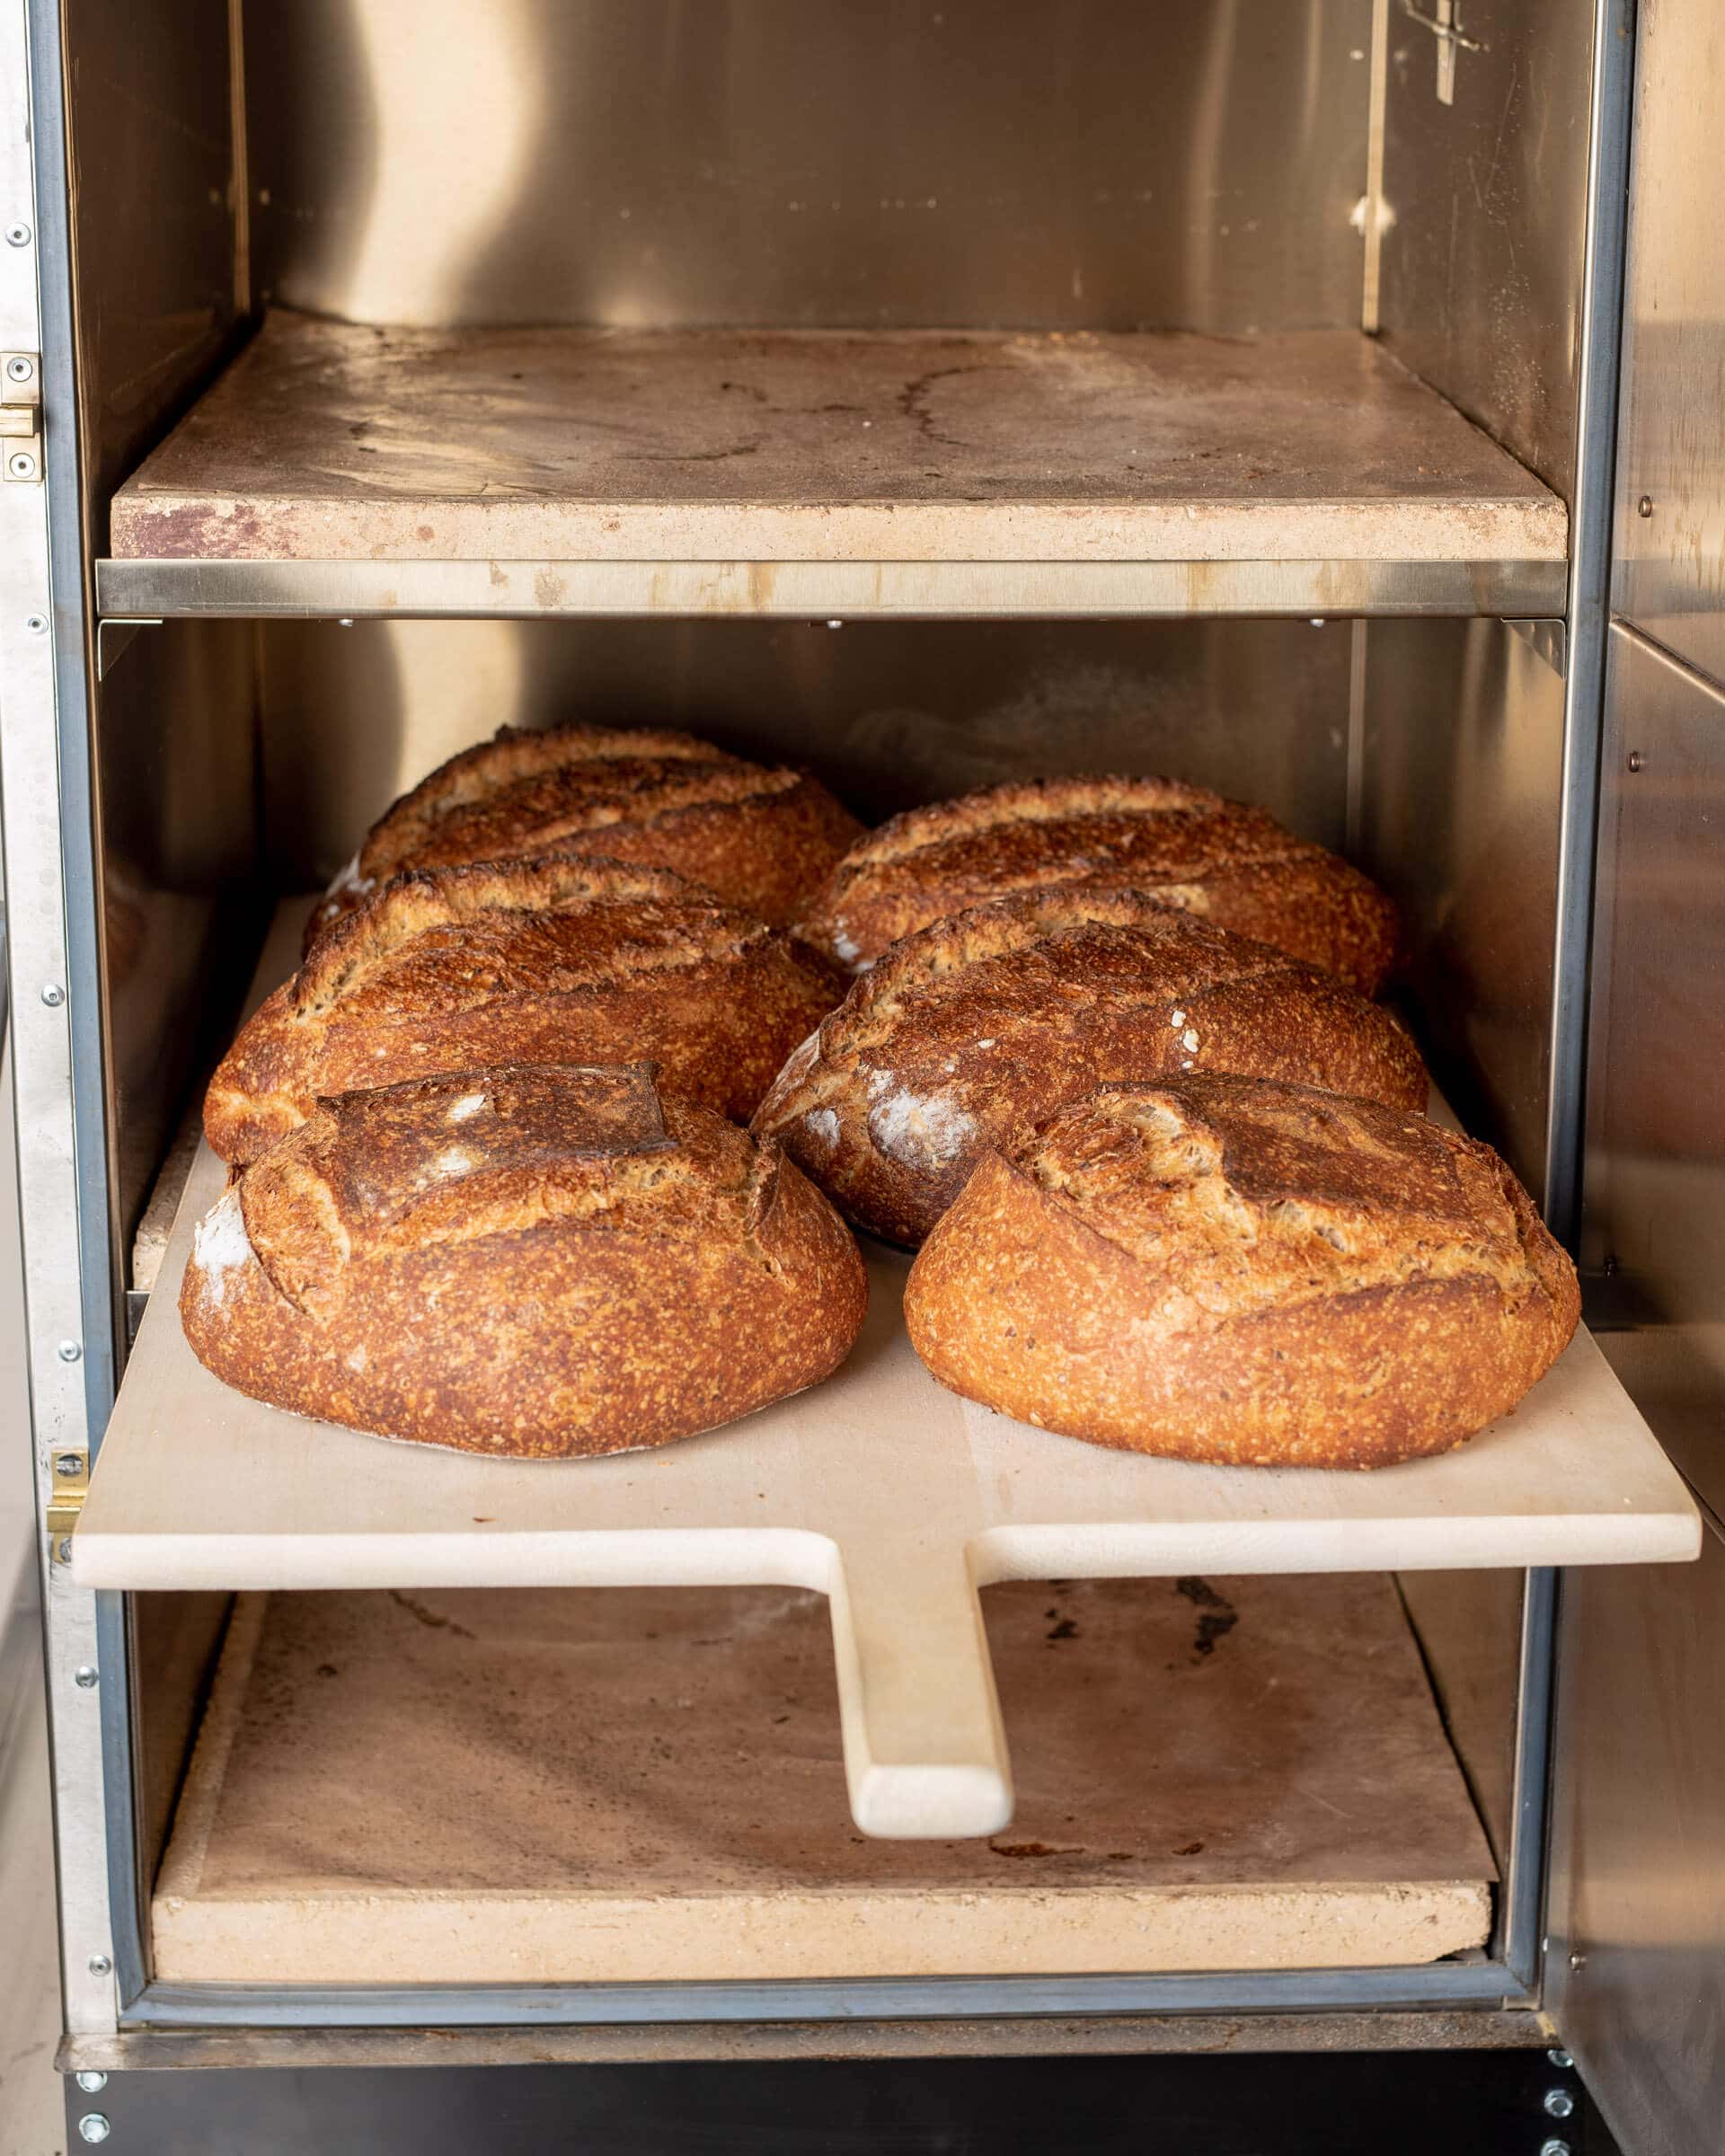
A Rofco is a Belgian-made brick oven designed for baking bread. It comes in various sizes, with mine being the largest option, the B40, with three square baking decks. It’s a compact oven with no-nonsense construction and a sealed oven chamber. It produces minimal external radiant heat (the oven gets hot to the touch, but not so much that you can’t place it close to a wall or another appliance). The three 1-3/8″ thick chamotte deck stones (refractory bricks) can retain significant heat after preheating the oven, even after opening the door and loading dough. Because the oven retains heat for hours, it’s excellent at multiple back-to-back bakes with a short rest period in between to get back up to full temperature.

The Rofco runs off typical 220V AC single-phase power (6-20P cord plug, 6-20R receptacle), similar to what other appliances run on in most US homes. I had an electrician come out to my house to install a new receptacle and breaker in my home breaker box, specifically for the oven.
When baking bread in a Rofco oven, I’ve baked large-scale batches for festivals, parties, and other large gatherings, but I also use it most often to bake 4-6 loaves. The oven is efficient and convenient. It’s a bare-bones workhorse that does exactly what you need when you need it.
I purchased my oven from Pleasant Hill Grain in the US, which always has exceptional service. They’ve been incredibly responsive when I’ve emailed for questions about the oven and even when I’ve had a minor issue with one of the door clasps. (Full disclosure: I received a discount from PHG on this oven, but this guide is written without their involvement or any expectation—all the information here is my own.)
Real Quick: Do I Recommend The Rofco Bread Oven?
To state this right away: yes, I love the Rofco bread oven! It’s a fantastic little (though not all that little) oven for anyone looking to bake bread beyond just two loaves in the home oven. Its simple design, easy-to-repair components, and even baking make it a wonderful oven for any home—or professional—bread baker.
How to Best Position Dough on Decks
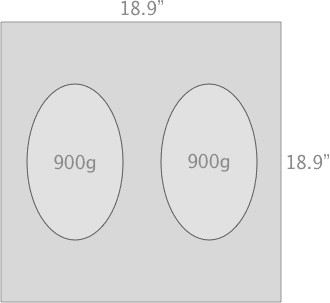
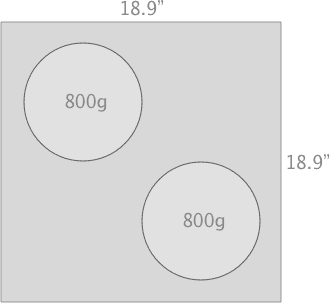
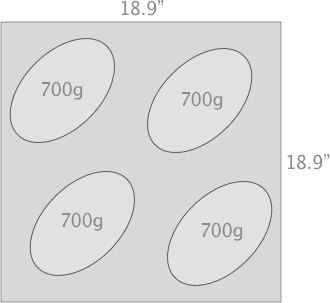
This is a bit like a game of real-life Tetris: how do we bake the most amount of dough without it touching while still achieving an even bake? Because I don’t bake at a large scale very often, I’ve not pushed the boundaries of this, but I know some bakers who have this down to a science. Below are the three most common dough arrangements for the baking I do here at home, with the far left (2 x 900g batard per deck) being my most common baking scenario.
Note that ovals represent my typical batard shape, circles represent boules, and each deck is sized 18.9″ x 18.9″ in the Rofco B40. The top edge of each square in the diagram is the back of the oven, and the bottom edge is the front of the oven with the door.
 |  |  |
Using the included square steel trays, you can fit several smaller buns, rolls, and even a large square pizza. I prefer to use these trays when making other goods besides bread; they make transferring many small items to the oven easier and contain spills.

Steaming the Rofco
As I’ve mentioned in my other steaming guides, steaming the oven at the beginning of baking is incredibly important for ensuring your bread dough rises to its full potential. One of the benefits of the Rofco is that the oven chamber is completely sealed, with no exhaust fan or place for steam to escape (until you open the two front vents). However, here is where the oven falls short of other professional bread ovens: there’s no steam injection at the press of a button. However, there are many ways to manually inject sufficient steam into the oven to ensure your bread rises properly.
Recommended reading: How to Steam a Home Oven for Bread Baking.
High-Pressure Sprayer
My preferred method for steaming the oven is using a commercial-grade pressure sprayer (see the Tools section in this post). First, I set the sprayer to the finest mist possible at the nozzle tip and ensure it’s filled with water. Then, I pump the sprayer to pressurize and load my dough. Starting with the bottom deck, I spray in and around for about 10-12 seconds. Then, I move up and do the same for the bottom and top decks.
When doing the top deck, avoid the glass-enclosed light fixture, as the glass will crack if hit with water (mine cracked long ago). After spraying the top deck, grab the door with the other hand, and just before closing completely, spray a second coat on each deck, then shut the door.
When I want to vent the steam in the oven, I’ll carefully open the door (steam will rush out at you, so give it a second to escape before looking in), close it, and then tilt the circular vents in the door to their open position (as seen in the image above).
Steam Pods
The optional rectangular steam pods are long, steel rectangular boxes placed on the left and right sides of each deck and designed to be preheated in the oven. When you want to steam, pour water (or ice cubes) into the boxes, shut the oven door, and watch as steam fills the oven. These pods work very well, but they take up valuable space on each deck’s side.
It’s possible to create quite a bit of steam with these pods, and I use them periodically to test, but I’ve found I need every inch on each deck, so I stick to using the pressure sprayer.
When I want to vent the steam from the oven, all the water in the pods has evaporated, and I’ll open the two circular vents in the door.

Baking Bread in a Rofco Oven: Start to Finish
I’m constantly modifying the baking process in the Rofco oven, continually tweaking times, and temperatures, and changing small parts of the process here and there. I do find that different doughs require different baking parameters, but the following is my go-to process for most formulas.
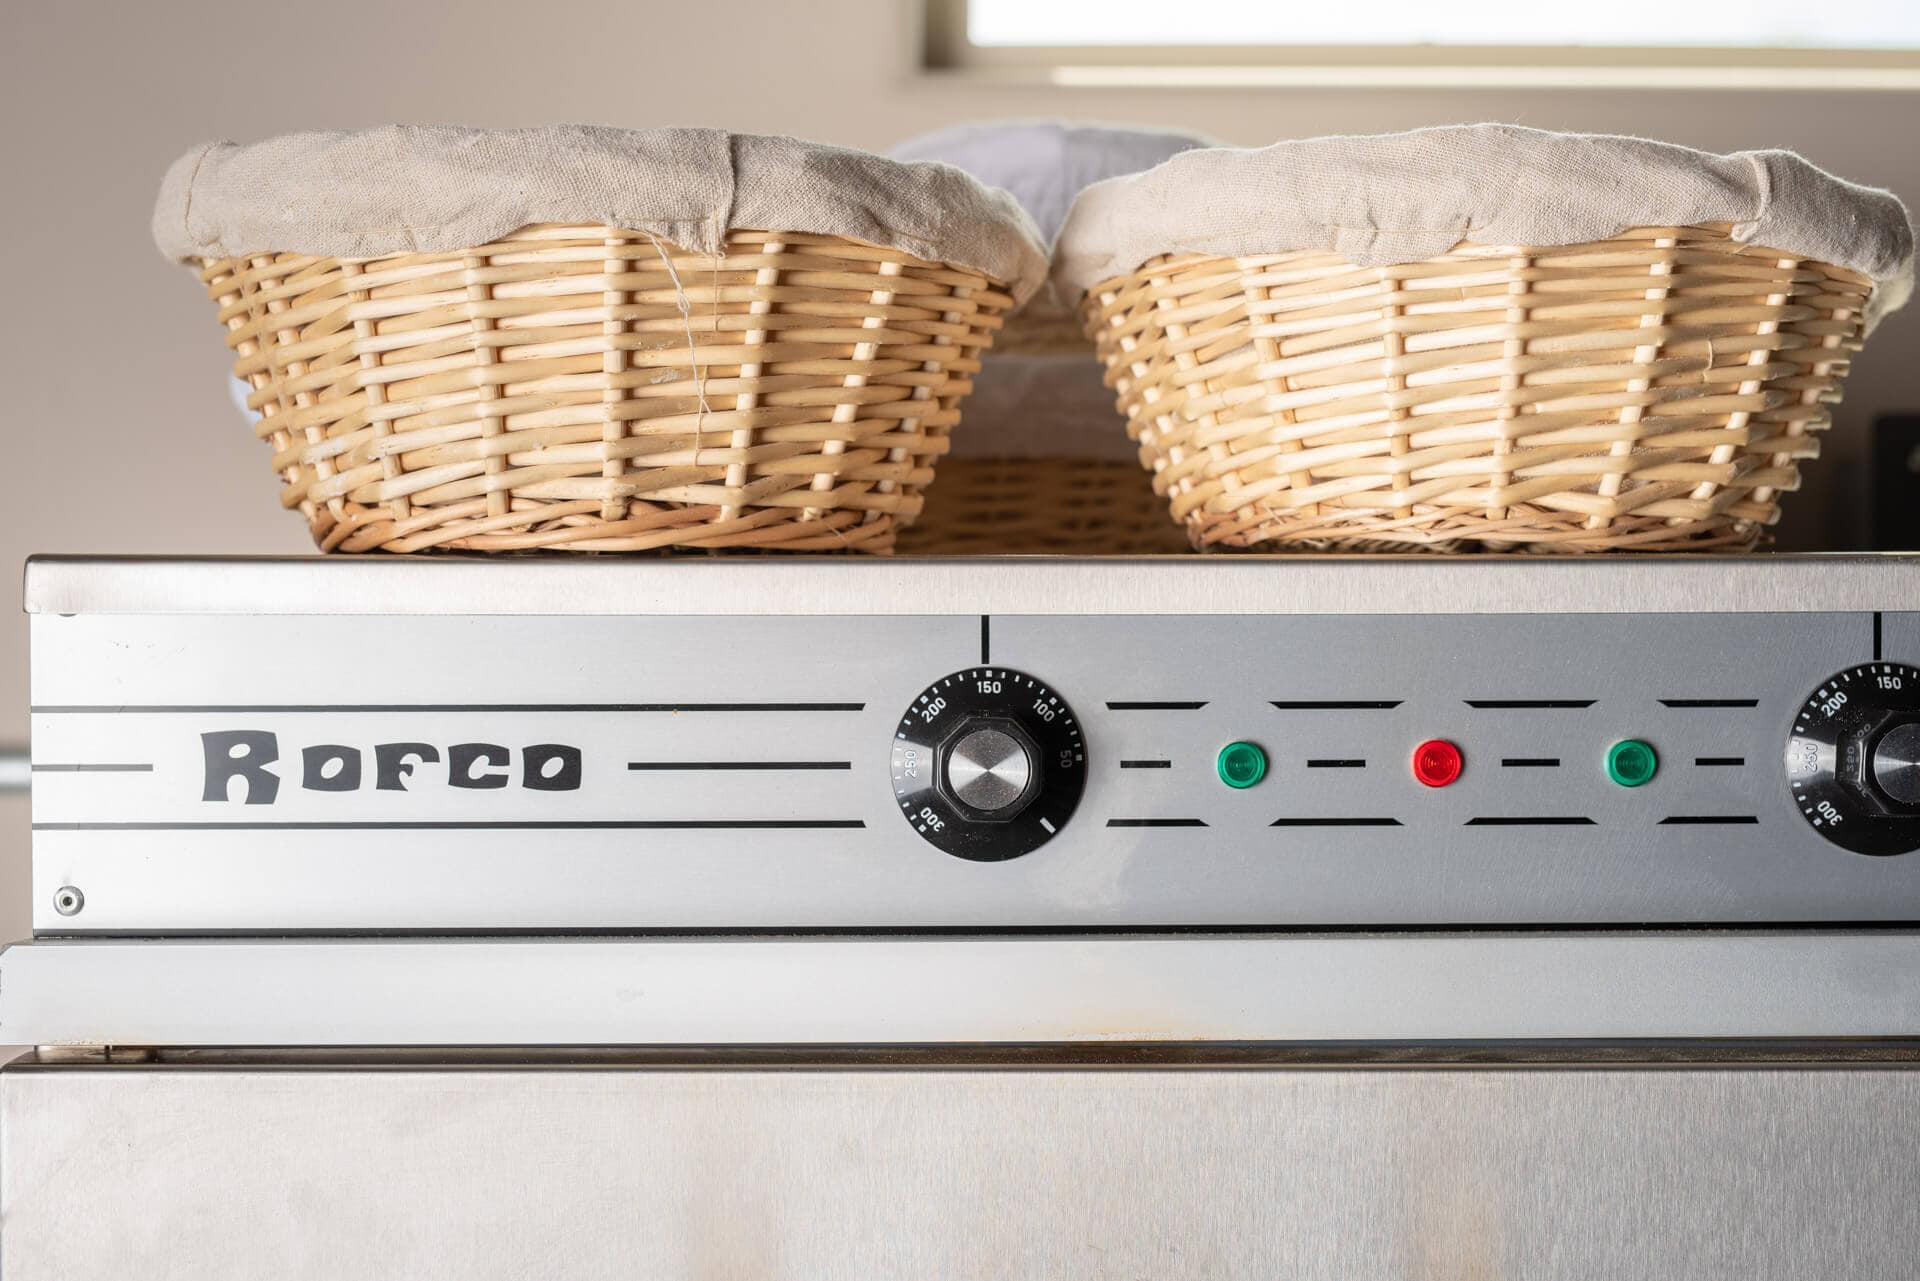
Turn the left knob to control the top heating element and turn the right knob to control the bottom heating element. The left and right light turn on when the left and/or the right heating element is active, respectively.
To turn the oven on first, be sure it’s empty inside (don’t make the mistake of leaving the silicone sheets inside!) and turn both left and right dials to 240°C. I preheat for 1.5 hours to ensure the bricks are thoroughly saturated with heat.
Once preheated, I lay my pizza peel (see Tools below) on a table next to the oven, with one silicone sheet on top, and place the other two sheets in an assembly line next to the peel. Then, gently turn out your dough to each sheet, score each loaf, and start with the sheet on the peel; slide it off the peel into the oven. Then take the peel, slide it under the next sheet, and continue down the line, loading the oven.
From there, I perform the following steps to bake:
| Step | Temperature | Duration |
|---|---|---|
| 1. Preheat oven (door closed, vents closed) | 240°C | 1 hour 30 minutes |
| 2. Bake, with steam | 150°C | 20 minutes |
| 3. Bake, vent steam (carefully open door briefly, swivel open vents) | 220°C | 10 minutes |
| 4. Bake (reshuffle loaves, if necessary) | 150°C | 20-30 minutes |
When the loaves are fully baked, I’ll remove them and the silicone sheets using the peel, then place them on wire racks to cool. Then, I turn off the oven (or heat it up to 240°C if baking more loaves) and close the door.
Useful Tools
Commercial Strength Sprayer for Steam
If you choose not to use the Rofco steam pods, this is the best sprayer I’ve found for the oven: the Electric Spray Bottle. Previously, I had recommended the Gloria hand-pump sprayer, but this little (less than half the size) sprayer can inject an incredible amount of fine mist into the oven at the touch of a button.
Oven Equipment Stand
I raised the oven about 20″ with a custom-cut stainless steel equipment stand from WebstaurantStore. The Regency 30″ x 30″ 16-Gauge Stand is extremely sturdy (it will slightly wobble if the oven door is slammed shut forcefully, but likely only because I installed casters). When ordering, I submitted a custom cut of the steel legs to 18″, which worked perfectly to raise the oven comfortably off the ground for loading and unloading.
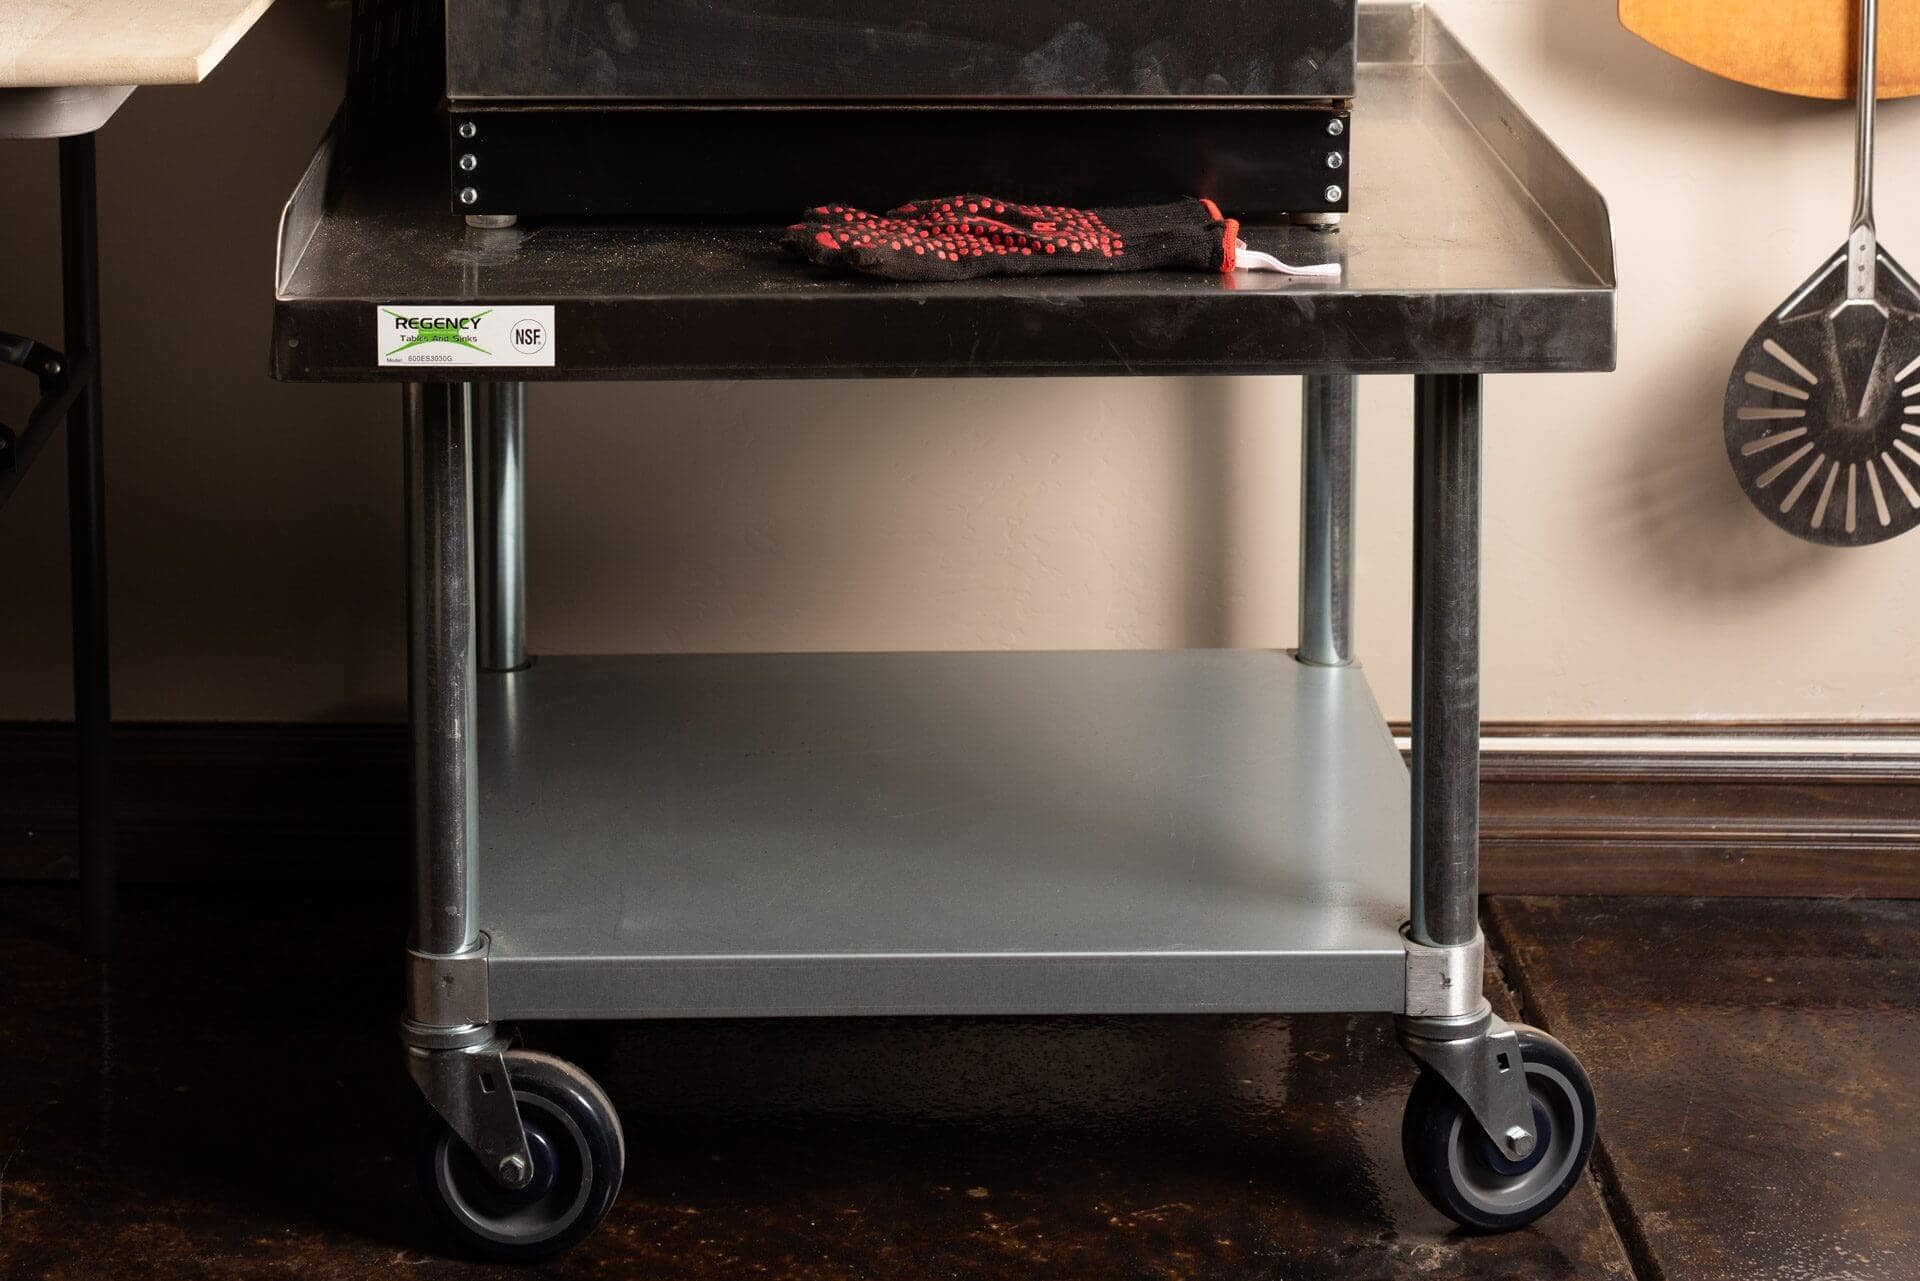
When baking bread in a Rofco oven, it’s convenient to have the locking casters on the bottom. Should I relocate the oven? Still, if I were to do this repeatedly, I wouldn’t get them to increase structural rigidity (if you don’t get the casters, be sure to measure the legs’ heights to suit).
Large Wooden Peel
When I first received the Rofco, I used the included square steel baking trays, inverted, so the flat side was up to hold the silicone sheets. Then, I would drop the dough onto the sheet on the steel tray and slide the sheets into the oven, off the trays. This worked well, but the steel trays were rather cumbersome.
I purchased a wooden pizza peel that I initially thought was too long, but I have since grown to appreciate the size. It’s an American Metalcraft 1836 18″ x 29 1/2″ peel with a 6 1/2″ long handle. The wonderful thing about this peel is that it’s the exact width of the Rofco B40’s decks (the decks are 18.9″ wide, the peel is 18″ wide), it’s light and very durable. When baking bread in a Rofco oven, I lay the peel on a table next to the oven. Then, I place a silicone sheet near the top, unload my dough, score, and slide the sheet with dough on top into the oven with the peel.
Baking Bread in a Rofco Oven Tips & Tricks
After Baking: Drying Proofing Baskets/Bannetons
After unloading my dough onto the silicone sheets, I place my proofing baskets in the oven to help expedite drying. This quickly dries the damp liner/canvas, so I can store my baskets quickly and help prevent mold from forming.
What’s Next?
When baking bread in a Rofco oven, expect your baking quality to take a slight dip as you get accustomed to the new oven (as is the case with most baking equipment!). Pick a straightforward sourdough recipe and practice that for a while until you get the hang of the new process. If you’re in the market for a new Rofco, head over to Pleasant Hill Grain, where I couldn’t recommend their service highly enough.
If you’re looking for more professional-level baking equipment, head to my write-up on the Famag spiral dough mixer, which can mix up to 8 kilograms of dough in a single batch.
Or, for a smaller home spiral (which is also convenient for small test batches in a microbakery), the Ooni Halo Pro Spiral Mixer is fantastic.
And if you’re interested in a larger bread oven, be sure to check out my guide to the RackMaster 2020 Bread Oven, which features larger decks for greater baking capacity.
Happy baking!

