
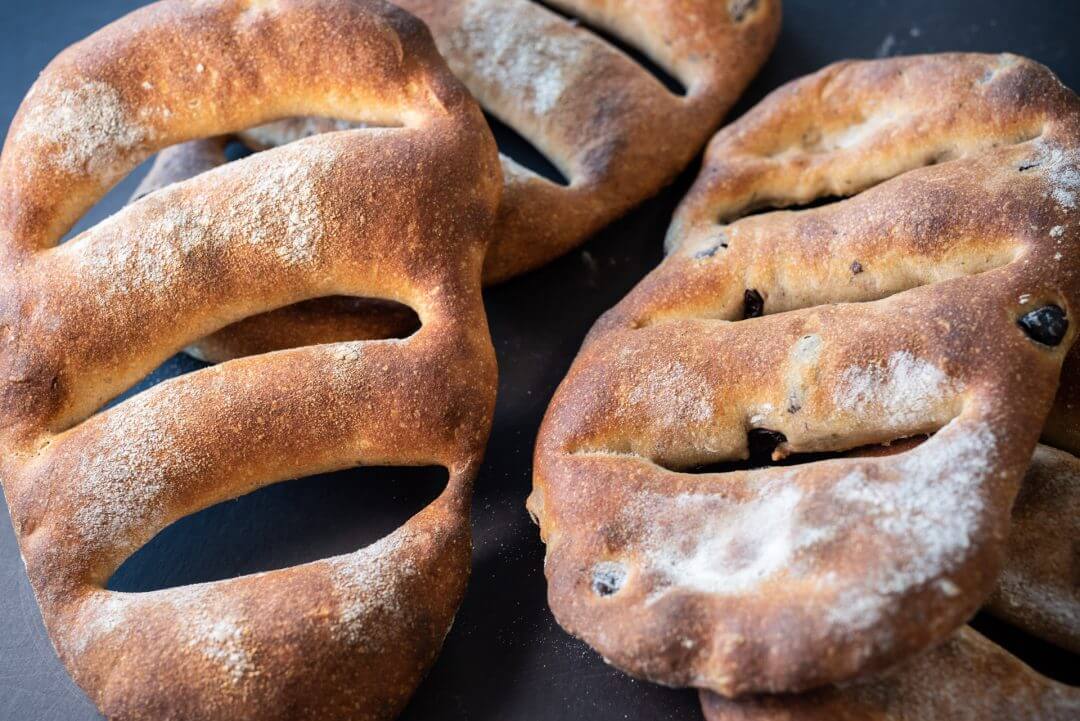
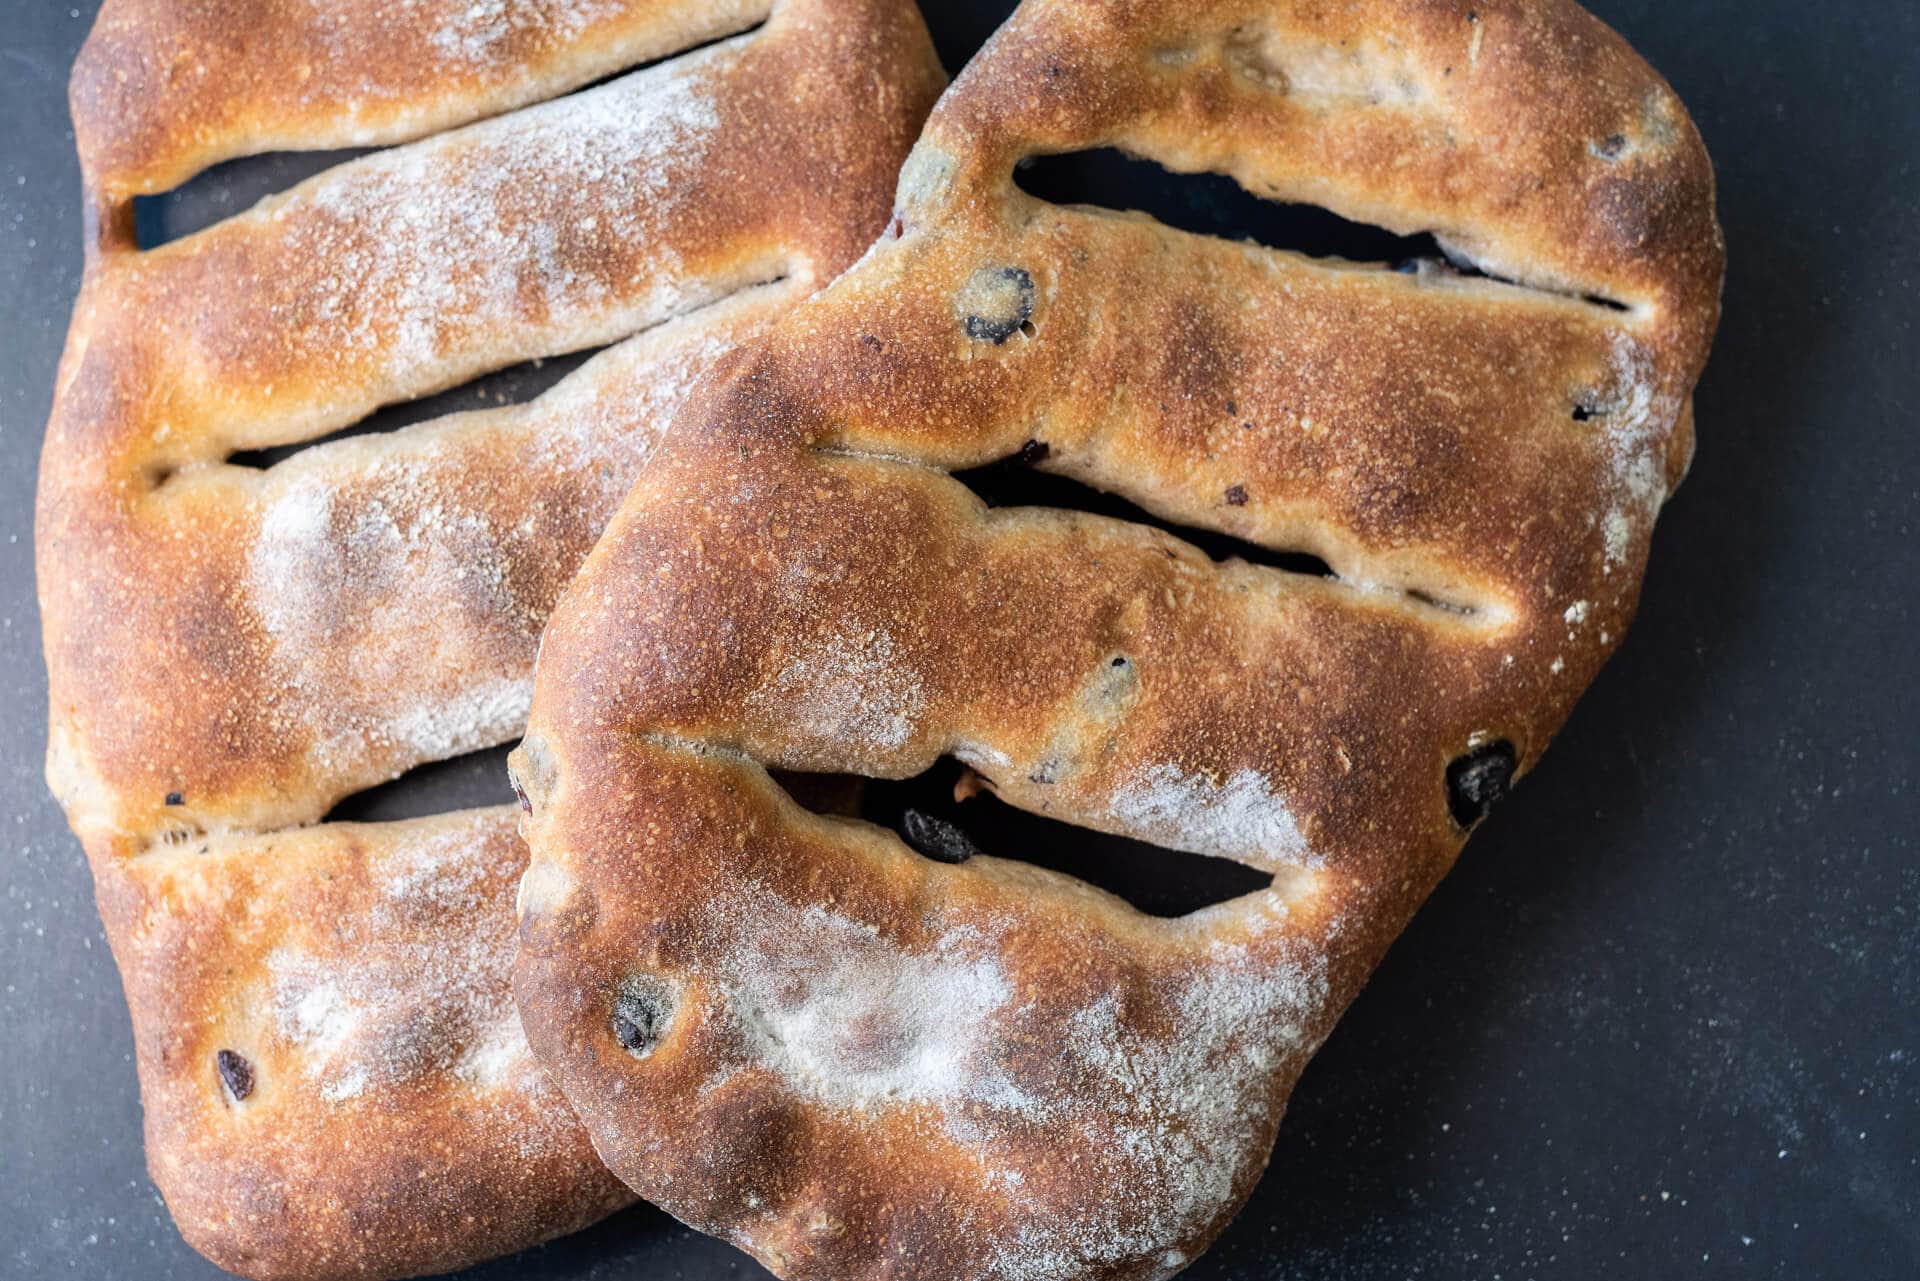
When placed in the oven, these sourdough fougasse look no more than cut, mangled pieces of scrap dough. After a few minutes, they begin to rise, to transform with the look of a chunky poolside inflatable ladder. And I mean that in the best possible way. They puff up and harden quickly, creating a crust-to-crumb ratio that definitely leans in favor of the crust. They’re soft, chewy, and delicate inside, but the exterior, with occasional olive poking through, hardens off to just-crunchy-enough.
The French fougasse shares many of the same traits as the Italian focaccia. My approach with this recipe followed much of the same path as my focaccia recipe: a same-day dough that’s meant to be quickly put together in the morning and ready for dinner.
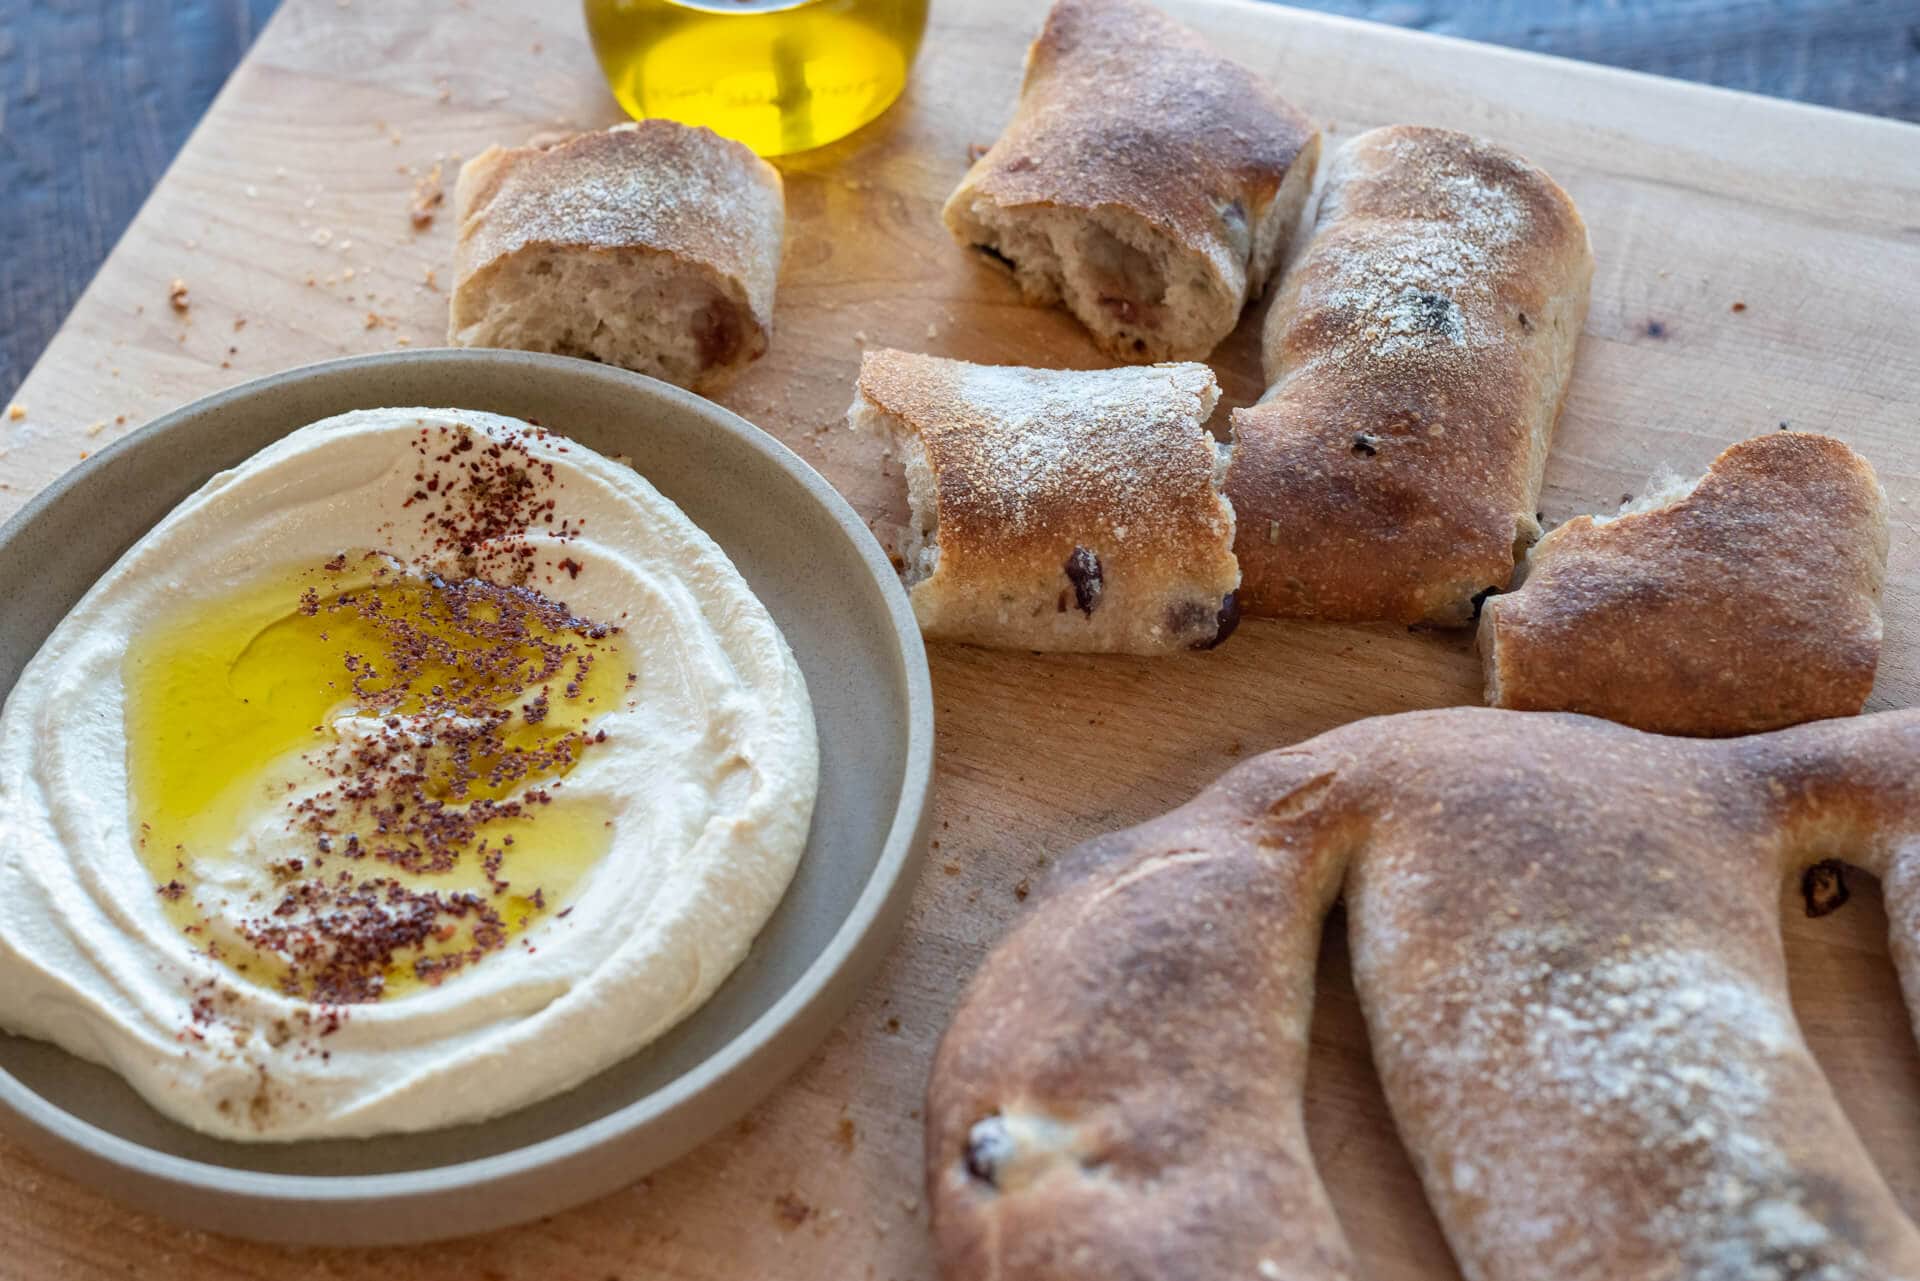
The focus of fougasse is to maximize the crust. When you cut the dough just before baking, you’re increasing the surface area of the dough exposed to the oven heat—imagine the cornicione (the ring of crust around a pizza) of a pizza baked just a bit longer than usual. It begs to be torn, ripped, and then dunked. And, rightly so, these make incredible contributions to a group dining table.
Flour Selection
The whole wheat flour called for in this recipe can be flour from the market (or a local mill) or freshly milled—I’ve made them both ways with excellent results. I’ve worked in freshly milled hard red wheat, durum wheat, and even spelt, all iterations have turned out fantastic.
Sourdough Fougasse Recipe
There’s no levain created for this recipe, it’s a same-day dough using a portion of your sourdough starter as the preferment.
For timing flexibility, you can also retard the dough in bulk overnight for a two-day dough. I’ve done this (as seen here on Instagram) and it works very well: place the dough in bulk into the fridge, covered, after the first two hours of bulk fermentation. The next day, take the dough out, preshape, shape, and let proof on the counter until ready to bake.
In the recipe below I used pitted kalamata olives but other types of olives, such as Castelvetrano or niçoise, would also work very well. Whatever the choice, be sure they’re pitted and I like them drained and coarsely chopped.
Vitals
| Total Dough Weight | 2,000 grams |
| Pre-fermented Flour (Sourdough Starter) | 18.00% |
| Hydration | 73.00% |
| Yield | 4 x 500g fougasse |
Total Formula / Dough Mix
| Weight | Ingredient | Baker’s Percentage |
|---|---|---|
| 865g | All-purpose flour (King Arthur All-Purpose Flour) | 90.00% |
| 96g | Whole wheat flour (King Arthur Whole Wheat Flour) | 10.00% |
| 115g | Pitted, drained, and coarsely chopped kalamata olives | 12.00% |
| 7g | Herbes de Provence | 0.75% |
| 24g | Extra virgin olive oil | 2.50% |
| 702g | Water | 73.00% |
| 18g | Salt | 1.90% |
| 173g | Mature sourdough starter (100% hydration) | 18.00% |
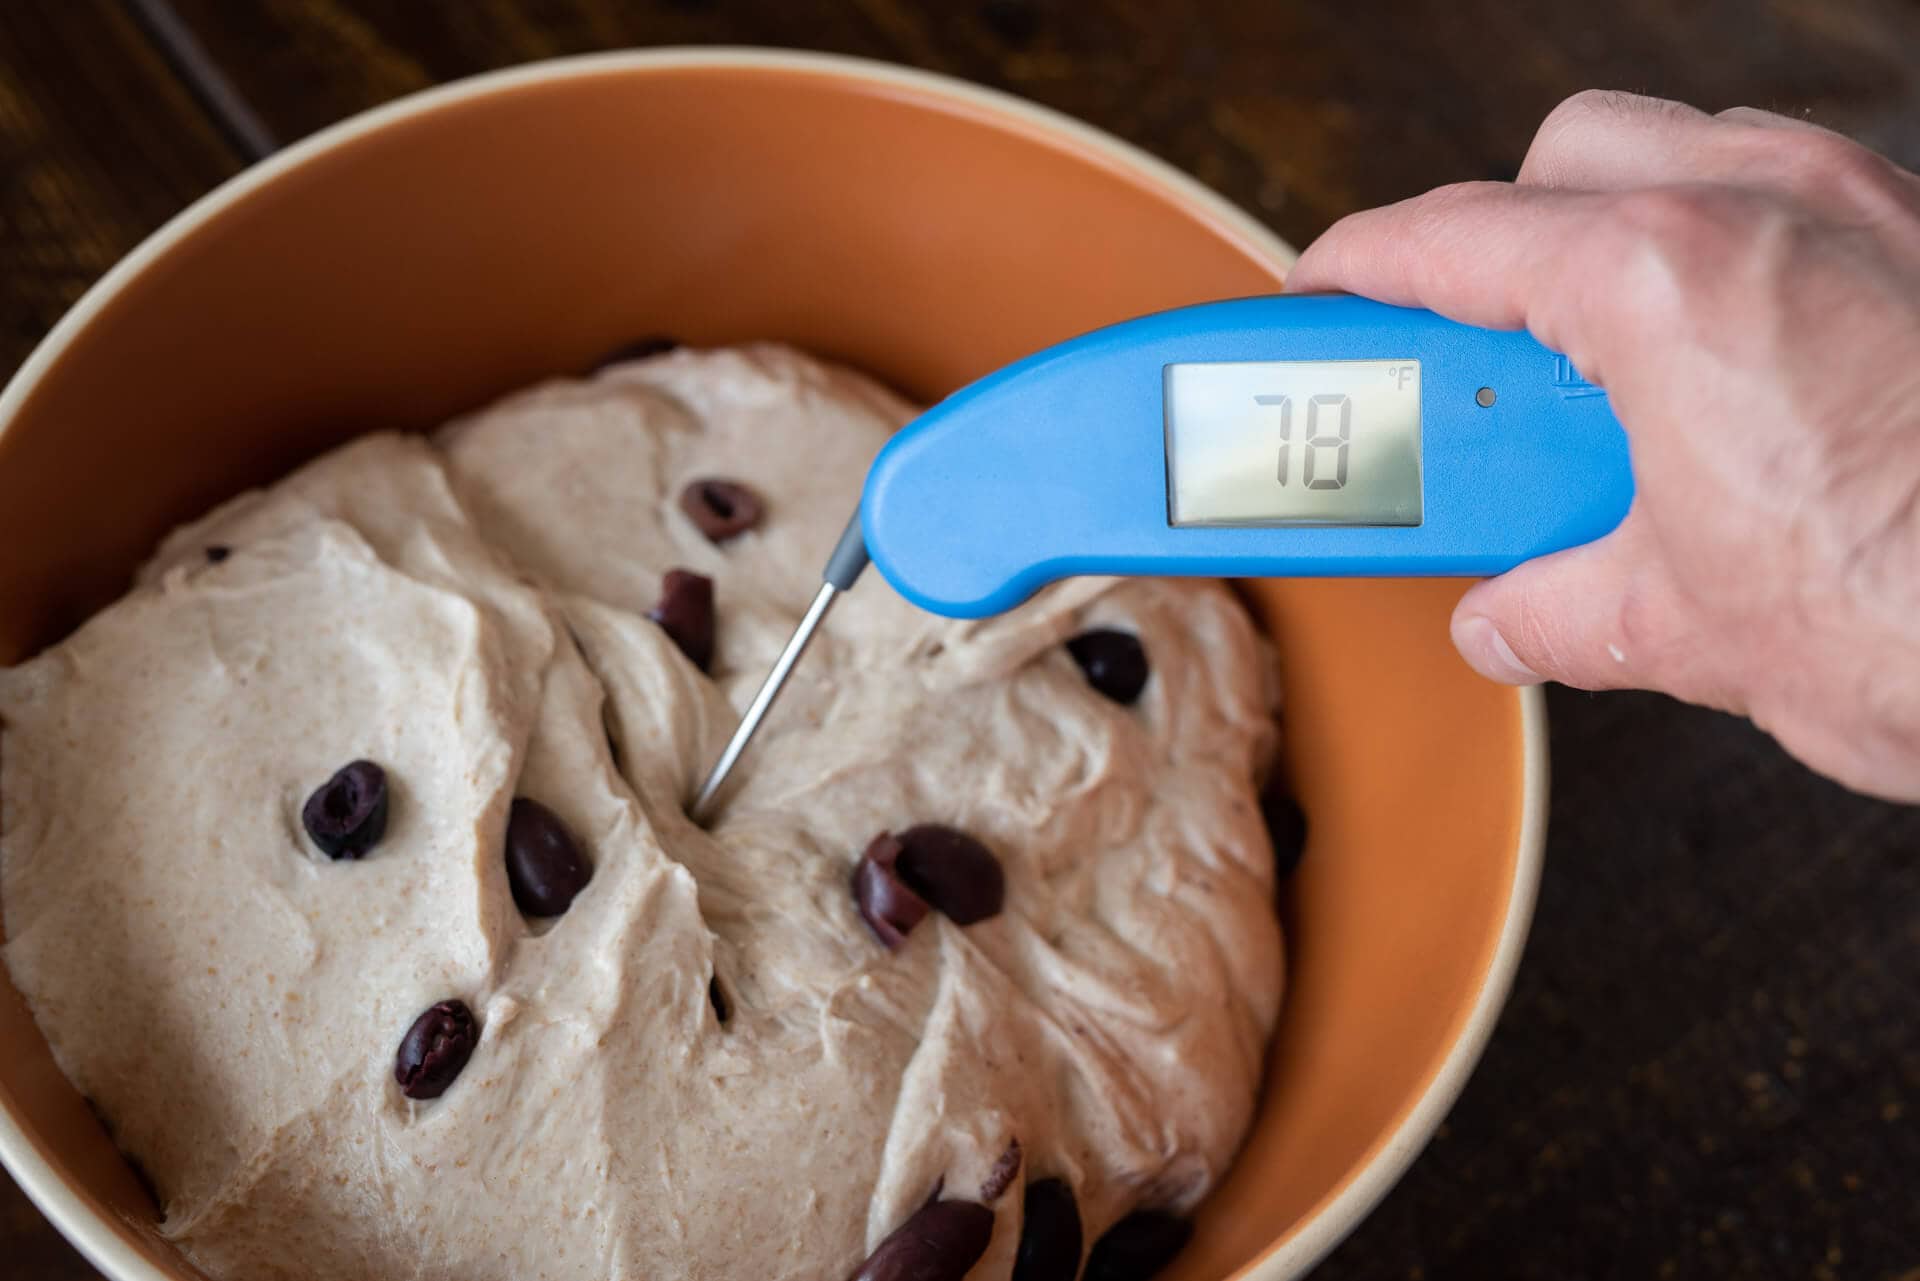
Target final dough temperature (FDT) is 78°F (25°C).
For an in-depth discussion on temperature when baking, have a look at my post on the importance of dough temperature.
Method
1. Autolyse – 8:45 a.m.
Add the called for flour and all but 50g of the water to a mixing bowl and mix by hand until incorporated. Cover and let rest for 30 minutes.
2. Mix – 9:15 a.m.
To the resting dough add the mature sourdough starter, salt, and reserved water. Mix by hand until incorporated and then turn the dough out to the counter and slap and fold (French fold) for 5-8 minutes until the dough starts to smooth and hold its shape. Alternatively, a dough mixer could be used: mix for about 2-3 minutes until the dough smooths and starts to cling to the dough hook.
Measure out the called for extra virgin olive oil, herbes de provence, and kalamata olives. Drain the olives and coarsely chop them to your preference.

Add the extra virgin olive oil to the mixing bowl and mix by hand (or with mixer) until fully incorporated. The dough should come back together and regain its smooth appearance. Add the herbes de Provence and olives and gently mix to combine (you don’t have to completely disperse the ingredients, your folds during bulk fermentation will help later).
Transfer the dough to a bulk fermentation container.
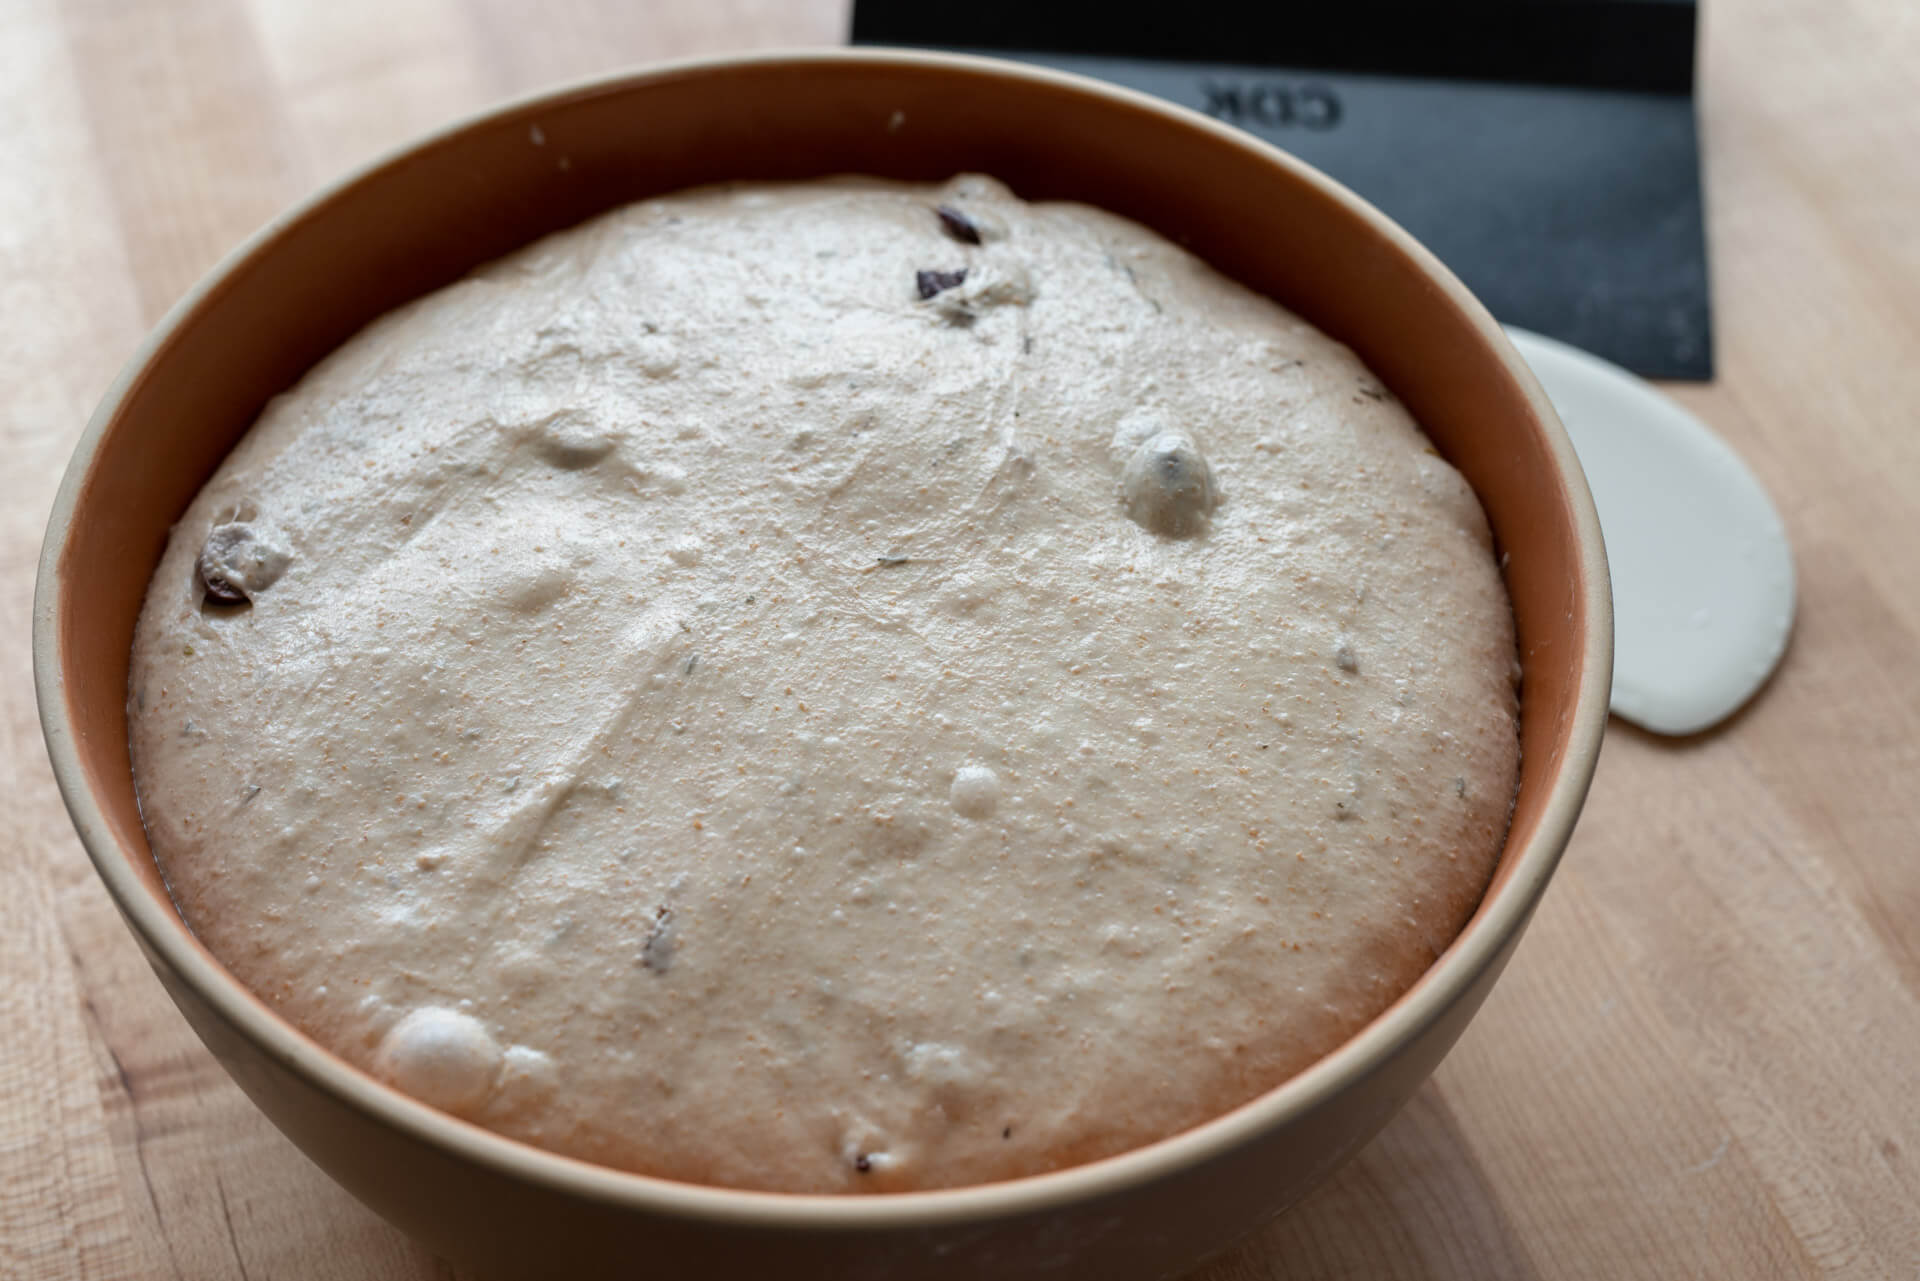
3. Bulk Fermentation 9:30 a.m. – 1:00 p.m.
Perform two sets of stretch and folds during bulk fermentation, the first set starting 30 minutes after bulk fermentation begins (10:00 a.m.). After the second set, let the dough rest, covered, for the remainder of this time period.
4. Divide & Preshape – 1:00 p.m.
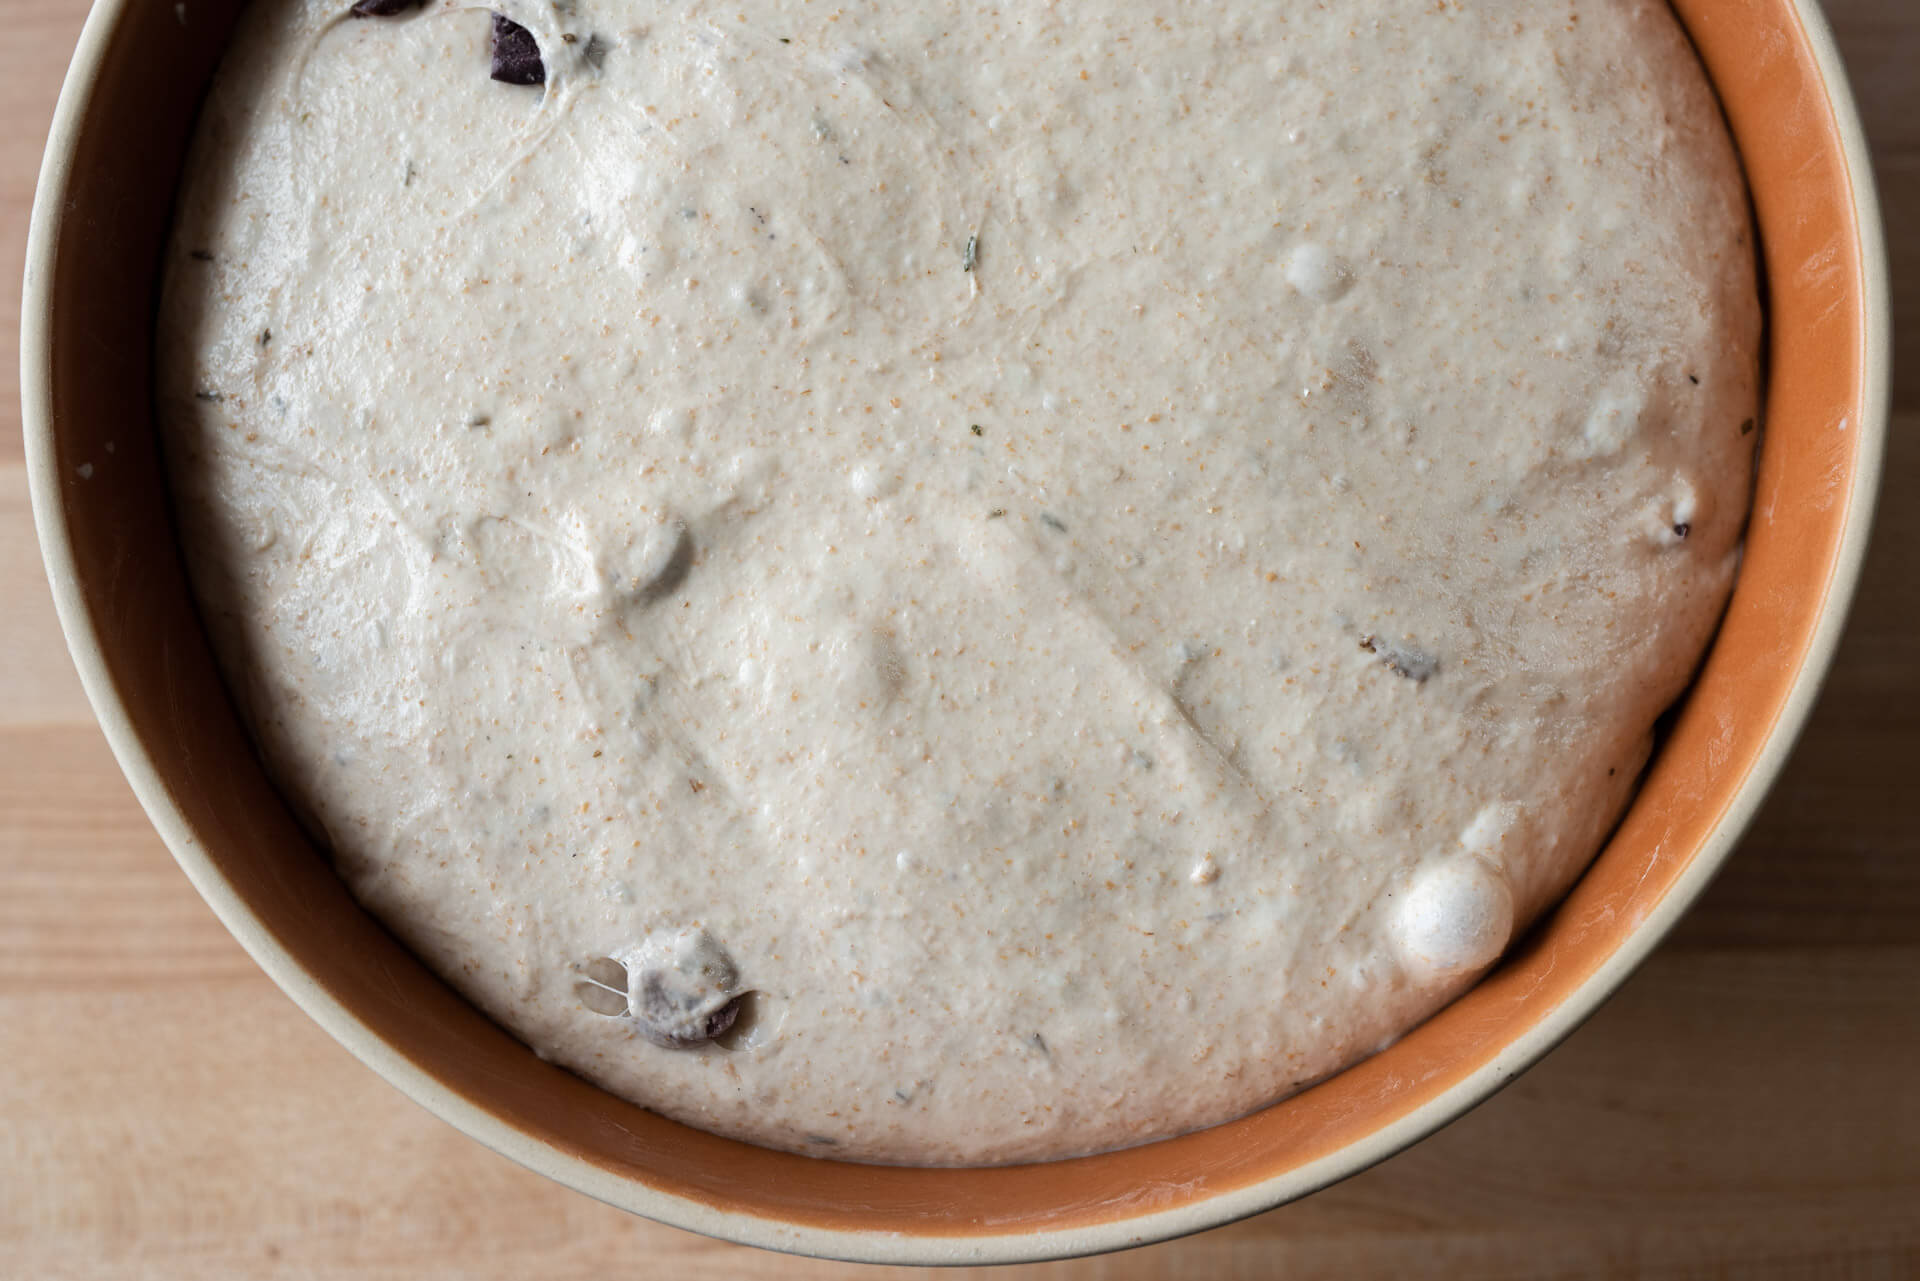
Divide the dough when it’s risen significantly in the bulk container, the edges where the dough meets the container are domed down, the top surface is smooth, and if you shake the bowl a bit, the dough will jiggle. If the dough still looks dense and not active enough, give it another 15-30 minutes to rise further.

Lightly flour the work surface and dump the dough. Then, lightly flour the top of the dough and, using a bench knife, divide the dough into four equal parts. Gently form each piece into a round shape.
Let the dough rest uncovered for 30 minutes.
5. Shape – 1:30 p.m.
I baked this sourdough fougasse on two racks in my oven, each rack holding two pieces side-by-side. Alternatively, you could bake two at a time if you only have a single baking stone/baking steel.
Cut two large pieces of parchment paper, wide enough to fit in your oven and baking stone or baking steel.
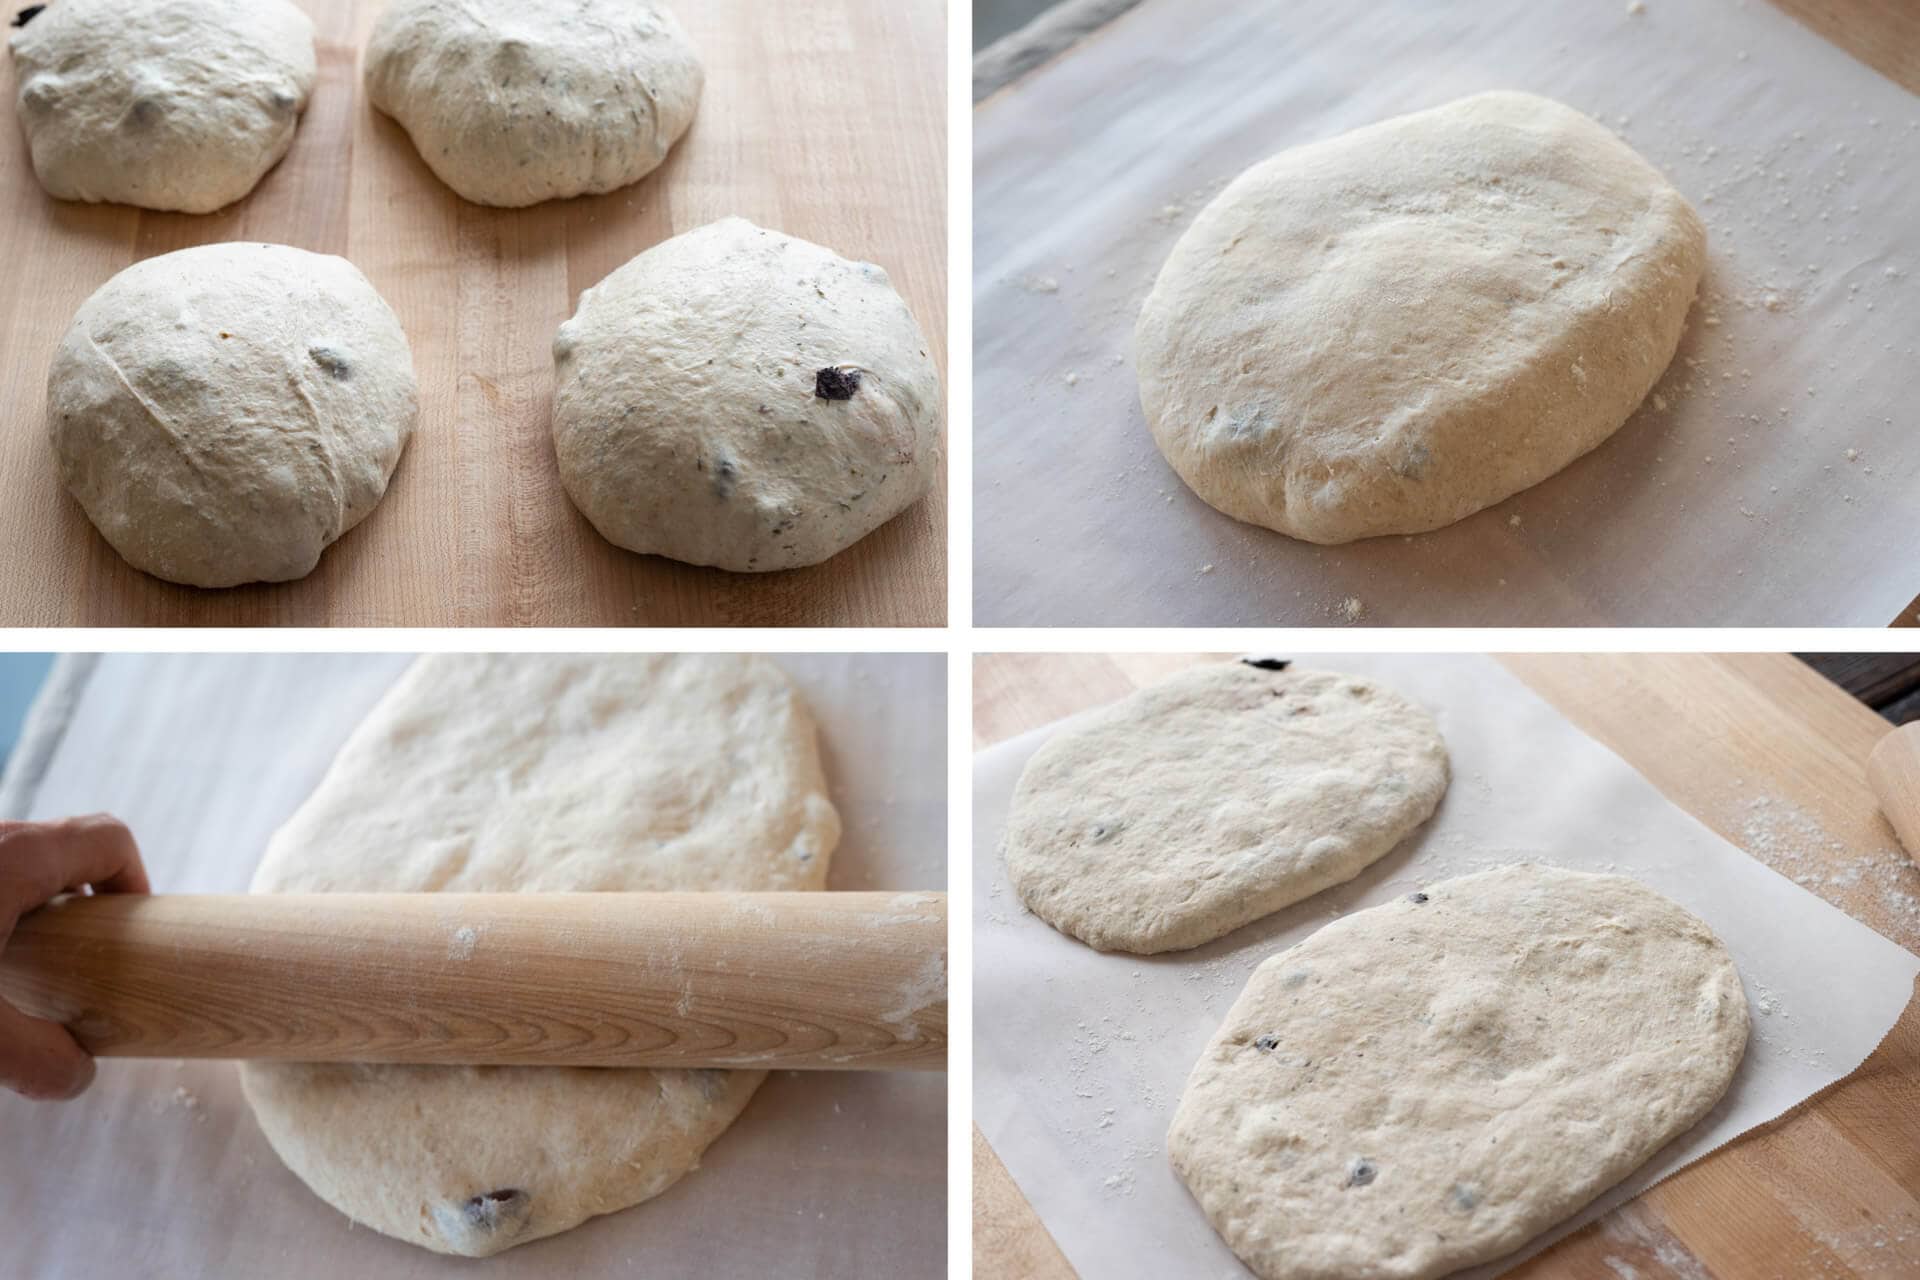
First, dust the parchment paper with flour in the areas where you’ll place each round. Then, flour the top of each round and flip it over onto the parchment paper using a bench knife (seen above, upper-right). Finally, flour the top of the inverted round. Using a straight-edged rolling dowel, gently roll out the dough into an oval shape (seen above, lower-left). Roll the rounds out almost as long as you’d like the final shape to be, with the knowledge that we’ll later stretch them out further.
6. Proof
Using large plastic bags (or inverted mixing bowls), drape them over the long ovals to prevent excessive drying during their proof. These bags tend to stick so you can grease them or prop them up a bit to keep them off the dough.
Let the dough proof for 1.5 hours on the counter at about 76-78°F (24-25°C). At the end of proof the dough will have risen some and be gassy when poked.
7. Cut & Bake
Preheat your oven to 450°F (232°C) with one or two racks, depending on how many fougasse you want to bake at a time (as explained above, 2 racks for 4, or 1 rack for 2).
I like to lightly dust the top of the ovals with white rice flour to ensure our bench knife/pizza wheel doesn’t stick to the dough. Alternatively, you could dust them with white wheat flour.
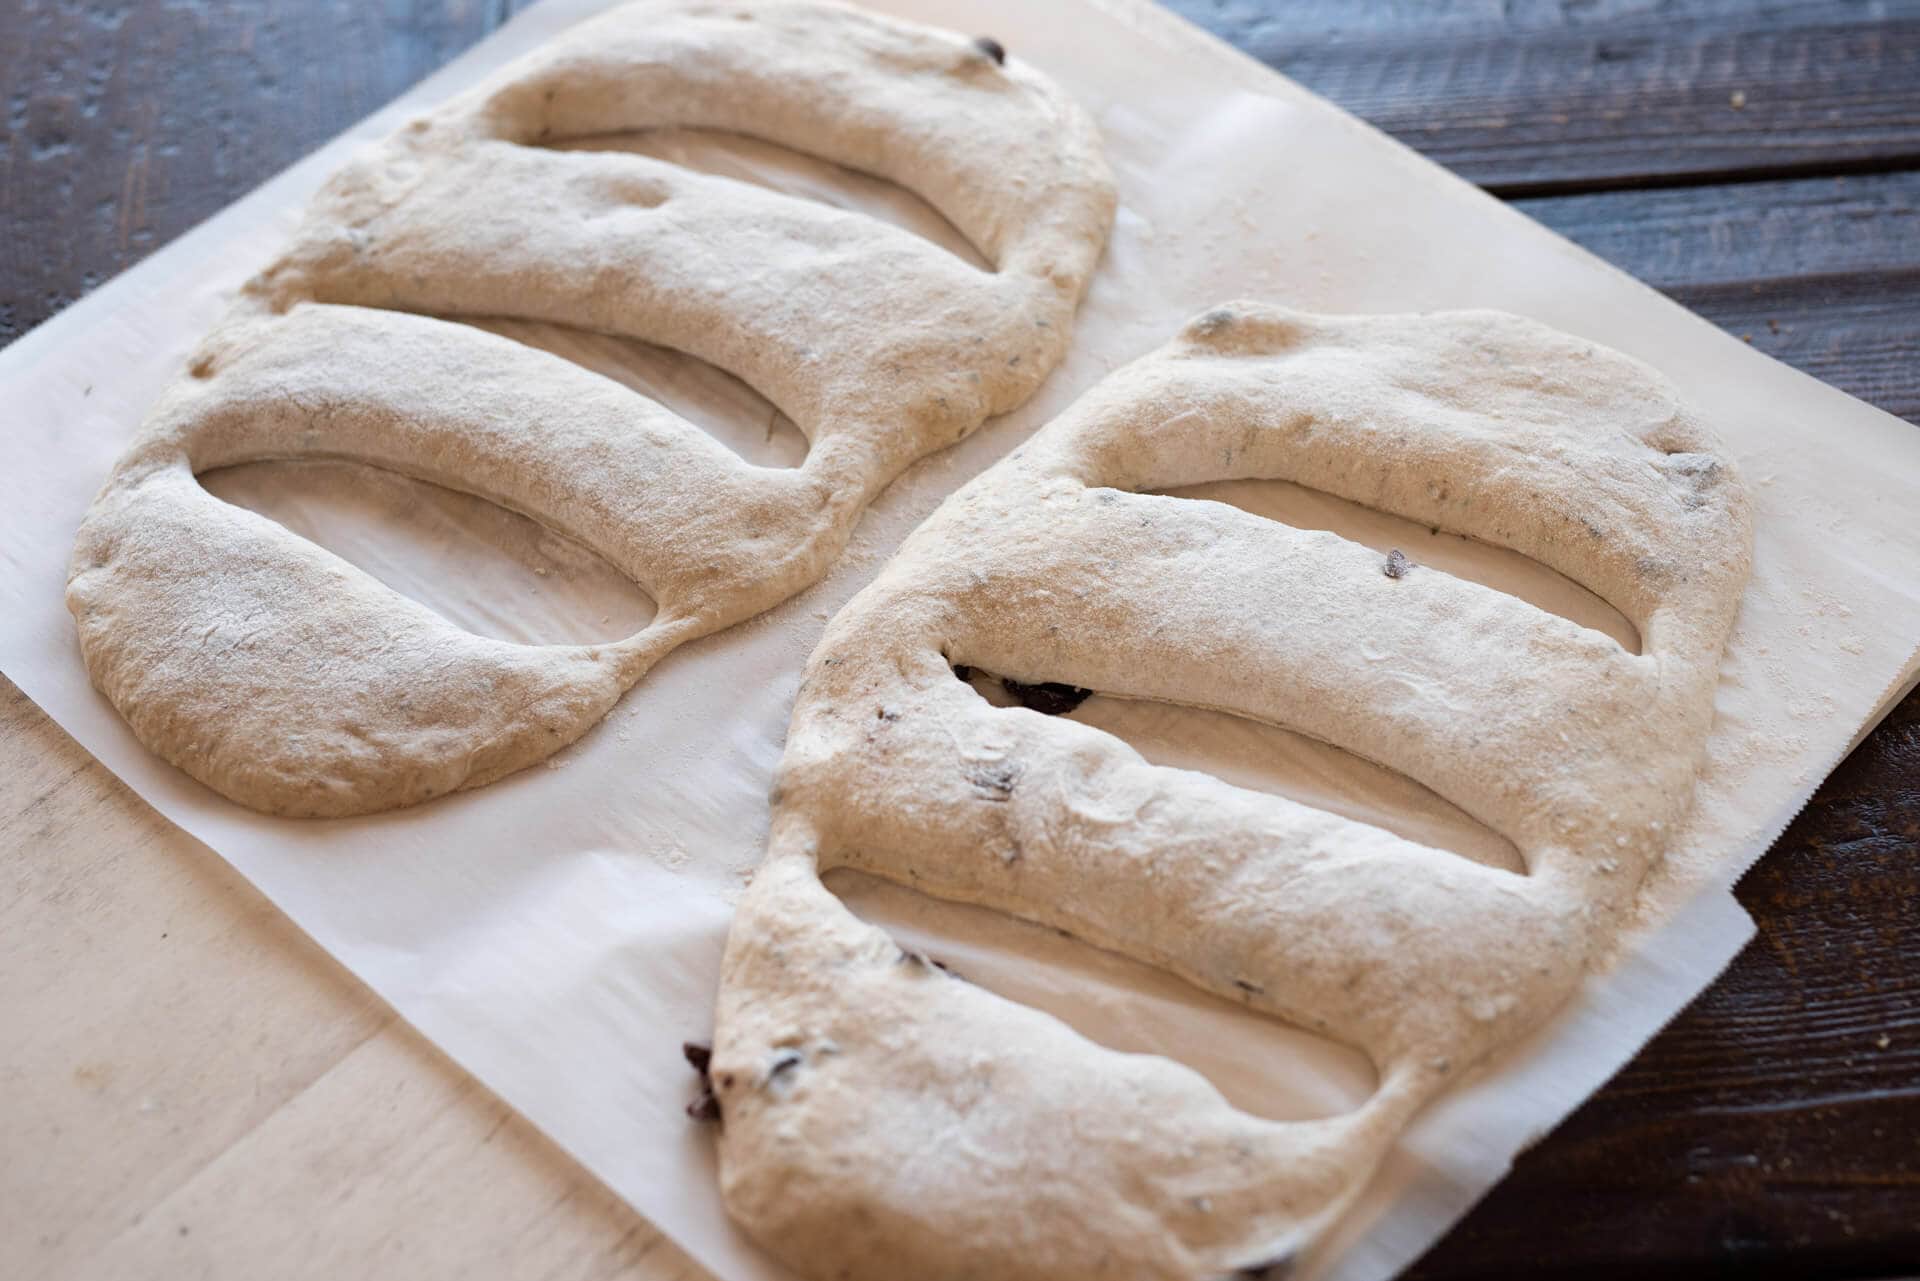
Using a small bench knife or pizza wheel, make two to four diagonal cuts into the dough starting from the top working your way down. Be sure not to make too many cuts and keep the blade from reaching too close to the edges. After cutting, gently grab the dough and stretch the cuts open to ensure they don’t seal back together during baking.
If you didn’t dust the parchment paper sufficiently the dough could stick when you go to stretch them, do your best to separate the cuts — if they are too close they might seal back up during baking, which isn’t a big deal.
Slide the parchment paper with dough into the oven and steam your oven. I steamed my oven per my usual home oven steaming method except I didn’t use the pan with rolled up towels, just the pan with lava rocks. If you don’t want to go to that extreme, you could simply spray heavily into your oven after loading the dough.
Here’s my YouTube video of how I steam the oven:
Bake at 450°F (232°C) for 20 minutes with steam, then open the oven door, remove steaming pans, and bake for an additional 5-10 minutes at 400°F (204°C) until done to your liking: they should be deeply colored but still light in the inbetween areas. The longer you bake them, the crunchier they’ll become.
Remove from the oven and let cool on wire racks. These are best the day they’re baked but hold up well into the next day (reheat them for a minute or two under the broiler).
Conclusion
The touch of lavender in my herbes de Provence filled the house with an incredible aroma when baking this sourdough fougasse. That, coupled with the earthiness of the kalamata olives, waiting thirty minutes for these to get out of the oven and onto your cutting board is a task. I’m a stickler for letting the bread cool before cutting into it, but mustering the required patience after pulling these from the oven test even the most steadfast.
Crust
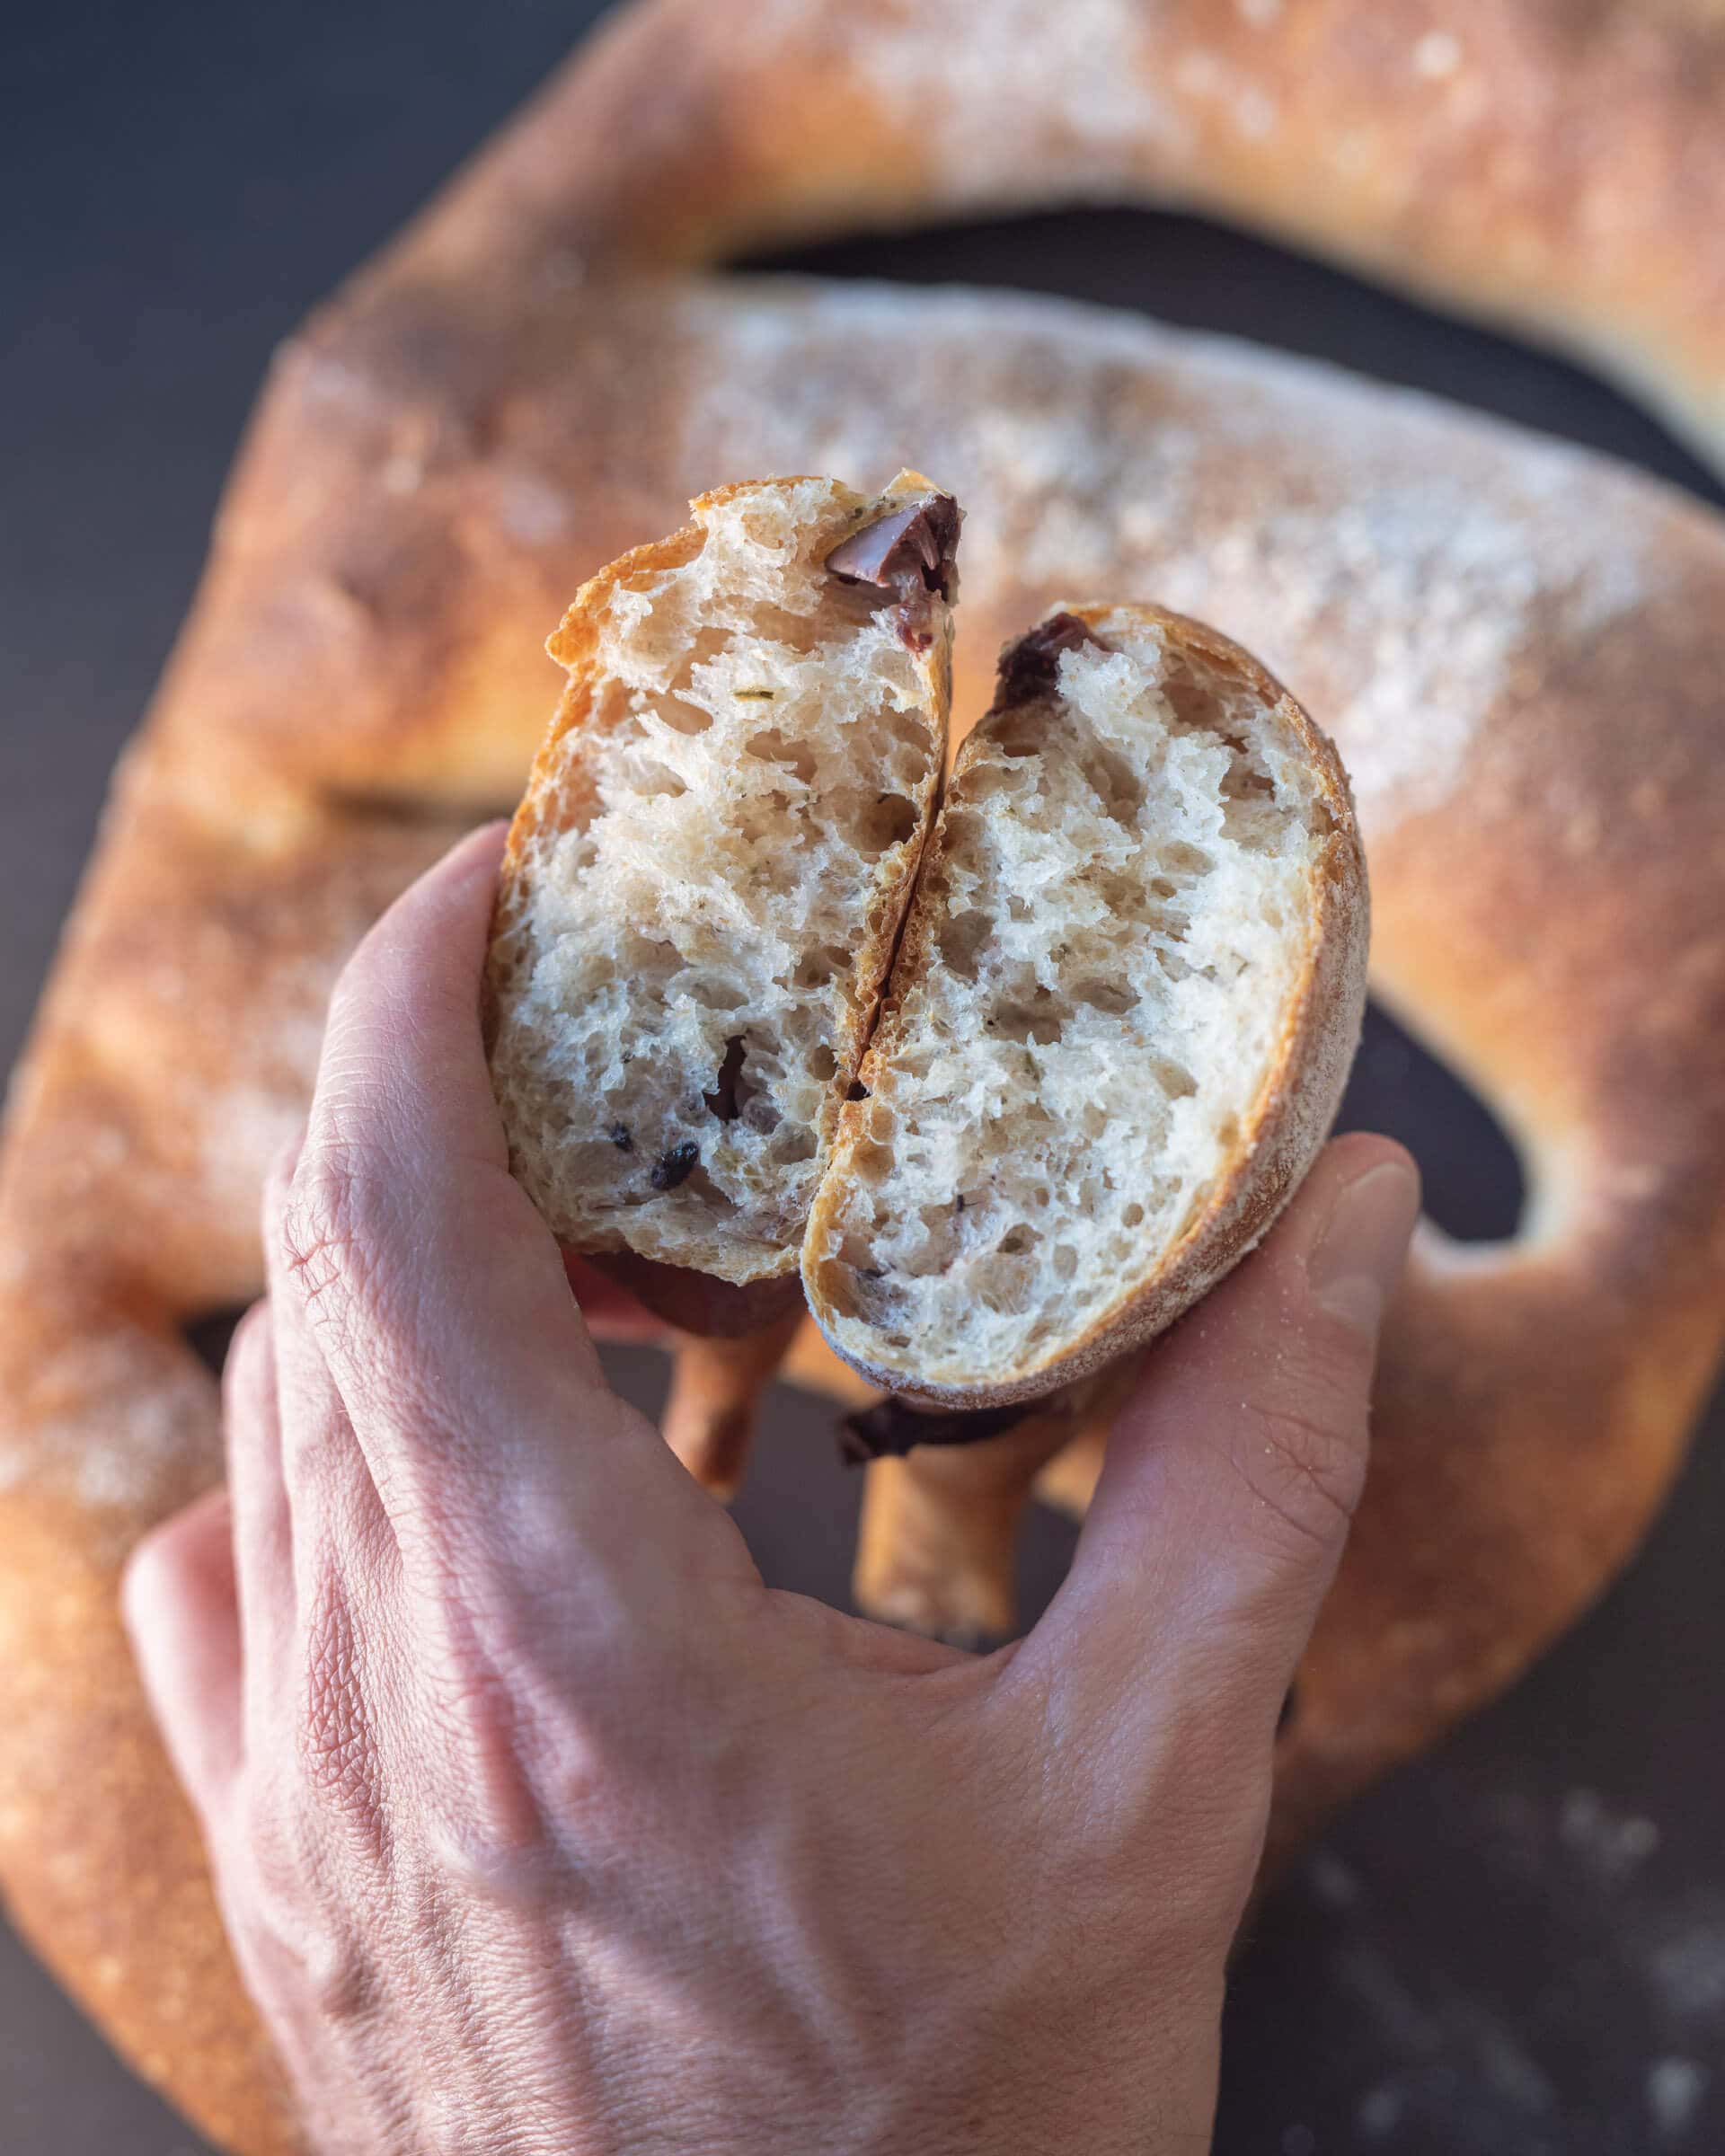
Ample crust is the name of the game with a fougasse, and these deliver. Thin and crunchy, the crust provides the right chew and contrast to the soft interior.
Taste
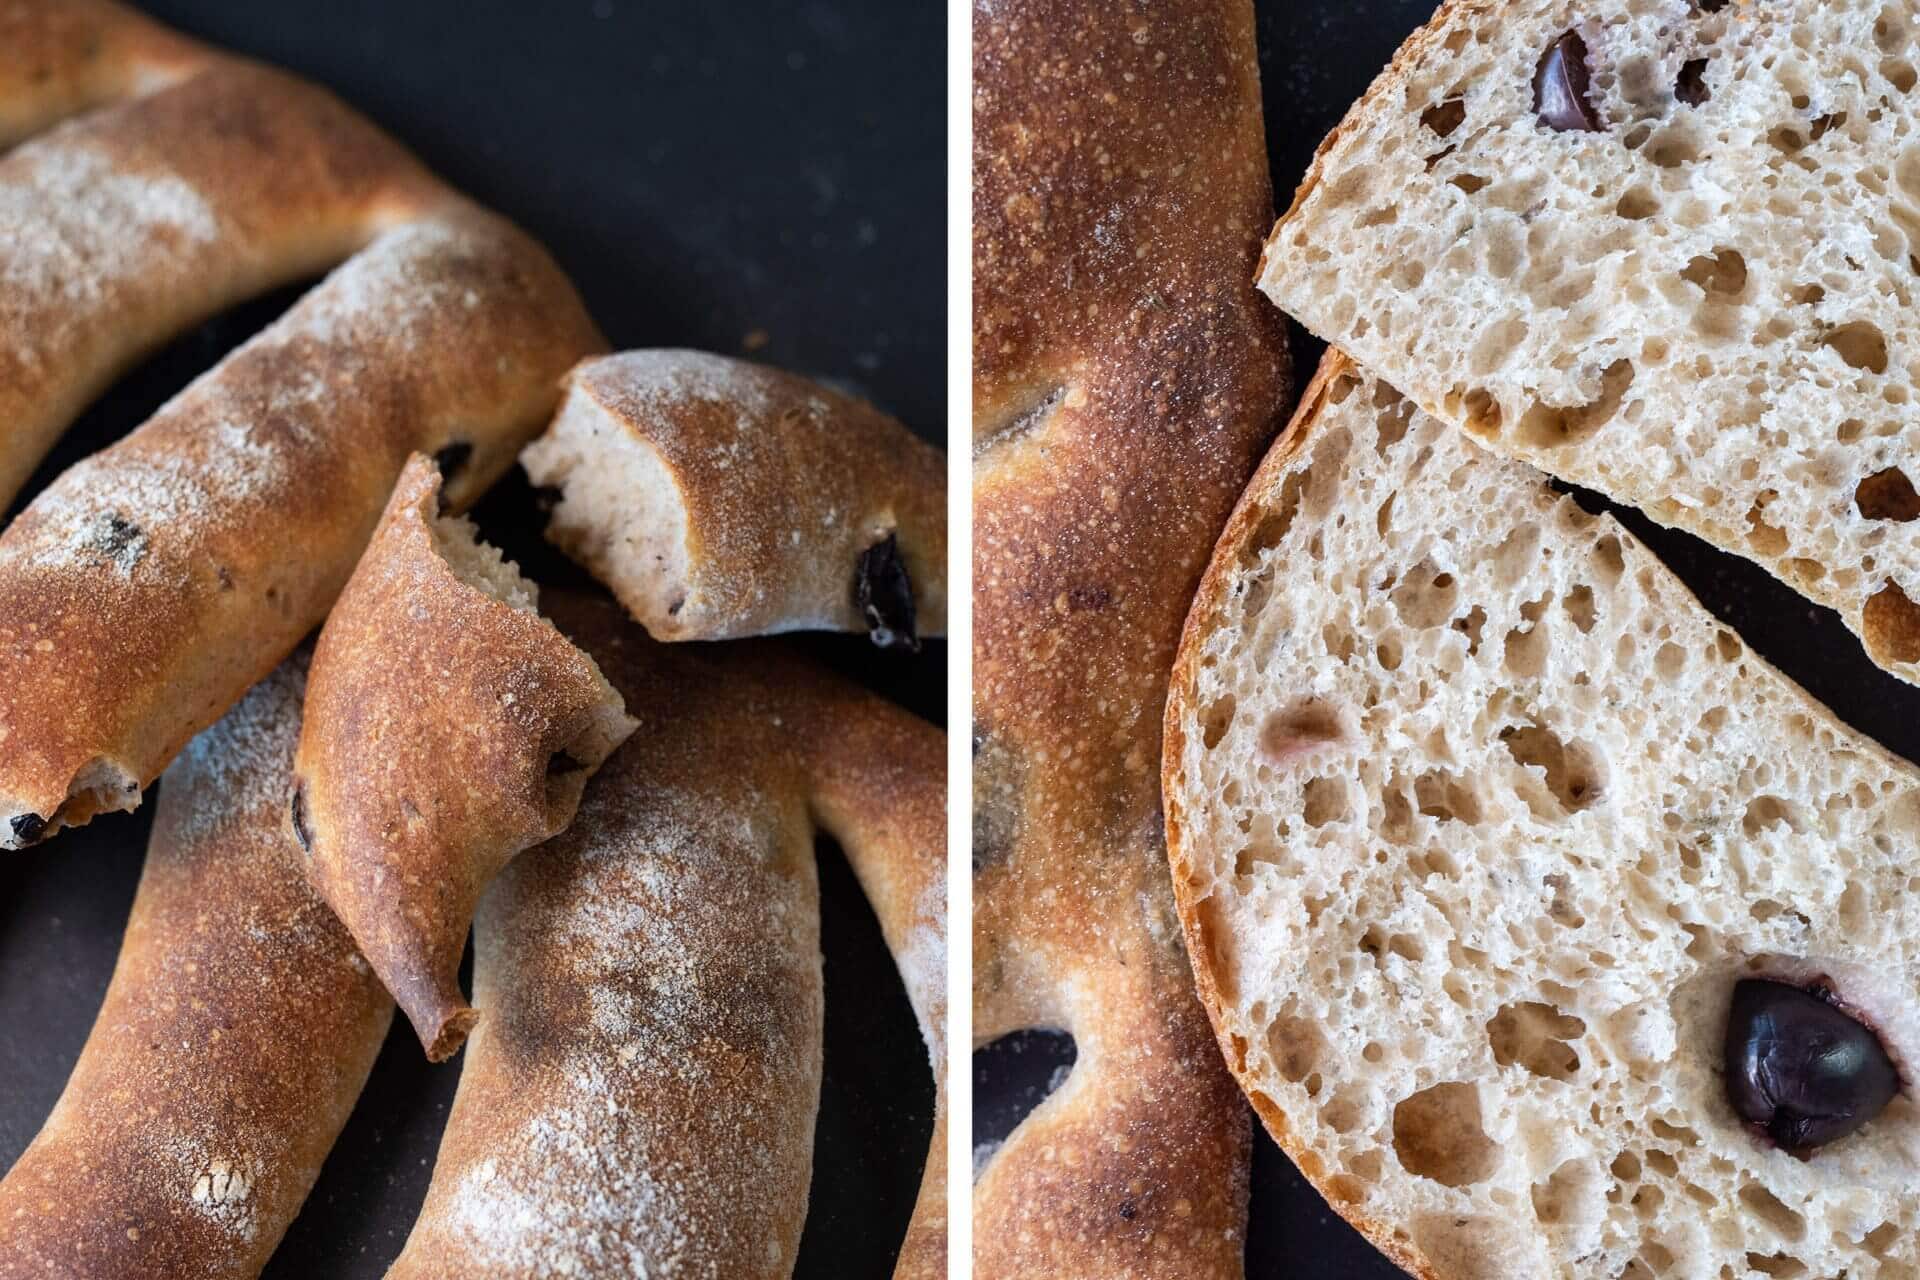
I like to coarsely chop and drain the kalamata olives because their flavor can be somewhat strong, this way, they give a pop only occasionally. I kept the percentage of herbes de Provence on the low side because these herbs — especially lavender — can also be overwhelming. Everything in this mix is just the right balance for me, but if you find one is under-represented, increase it to your liking.
Buon appetito!
If you use this recipe, tag @maurizio on Instagram so I can take a look!


79 Comments
Your article helped me a lot, is there any more related content? Thanks!
Thank you for your sharing. I am worried that I lack creative ideas. It is your article that makes me full of hope. Thank you. But, I have a question, can you help me?
Hello there I am not able to find the recipe and the schedule. Can you help please. Thanks.
I don't have that updated for this recipe just yet, Romena! working on it.
Just made this Fougasse and it’s outstanding! I bought some lava rocks and used that approach, which worked like a charm!
Fougasse turned out amazing! I bought some lava rocks and used that approach. Worked like a charm!
Right on, great to hear this Michael!
The bread turned out great! I wasn’t sure how flat to roll out the dough. In your photos it looks thicker than what mine looked like once it was baked. My rise was so fast that I didn’t need the 11/2-hour proof at the end.
So glad it turned out well for ya, Pamela!
There is no lavender in the actual herbes de provence mix though! I’m french and I’ve never seen any in the mix.
I hear you, Chloe, I think it's am American thing. But I do love the addition!!
What if your family doesn’t like olives? Can I just leave them out?
I’m not Maurizio, but yes, you can leave the olives out. You could add additional chopped fresh herbs instead, like thyme or rosemary, in addition to the herbes de Provence.
Yes absolutely, Dan!
I just made the fougasse from your book and I swear my bulk fermentations go so slowly compared to yours even though I use the ripe, overnight levain, for almost every recipe now that I’ve noticed. Ambient temperature in Florida is never under 75F… I don’t understand what the issue is, I even use fresh flour in almost every recipe so there should be even more activity!
The timing in the recipe is merely a guide. Everyone’s sourdough works differently. I have had several different sourdough cultures and they all required different timing. Early on I purchased cultures from Sourdough International. They published the time that each culture took to get to maturity after feeding. Their Alaska culture took 2-3 hours, their French took 4-6 hours and their San Francisco took 12 hours. There are a lot of videos out showing how to measure your culture to see how much time it needs.
I talk about this in the book, right at the beginning of the recipes section. It's normal for some fluctuation there, as Mark said below, it's more of a guide… Many factors at play, most importantly the temperature! If your dough is consistently fermenting much, much slower, increase the amount of levain you make for the recipe over my instructions. For example, if it calls for 150g, try 175g and see if that helps give it a boost!
These turned out amazing and I was so glad to learn the towel steam method. Worked great! I added some extra olives and fresh sage as I only had 5g of herbs. Looking forward to trying some other flavor variations with this recipe.
Fantastic, Arlo! That’s a super useful technique for steaming, if you haven’t yet, check out my YouTube video on the steaming process, too! Enjoy 🙂
Will this work without steam? I’m in an Airbnb so I have limited equipment
Yes, definitely. You could brush on a light layer of olive oil to help, too.
THANK YOU!!!!
Thanks a lot for the recipe! It might be the best thing I ever baked. And I do bake a lot. 🙂
So glad to hear that, Nicole!
Hey Maurizio! My first post….I have been making your recipes for almost a year now since we were on lockdown. You are my go to for recipes!! Thank you sooo much. I just found your Sundried tomato and Kalamata olive bread on your Food52 site.
My question is can I add sundried tomatoes to this recipe which sounded like a great idea. Also have you used homemade oven dried tomatoes? They are not as leathery as the ones in the store but very flavorful. I was hoping to use them, if that works…. would you then suggest changing up the herbs to more of an Italian mix?
Happy to hear my site has been a great resource, Cynthia! Yes, you certainly can add tomatoes, it would be great. I’ve not used homemade ones, but they’d work well to I’d imagine. If you did, I might consider dropping the hydration just a tad, depending on how plump the tomatoes are. An Italian mix would be great!
Hey Maurizio, found your site thru the F52 Fougasse recipe and video you just did. I’m curious if you adjusted the steps in that recipe for lower altitude while this is better for your location in ABQ? Or was it simpler? I made it, came out pretty great, but I’m also at 9700′ above sea level in CO. So I’m always tweaking and adjusting… my dough was really sticky during bulk but came together during the bench.
Hey, Dave! My newer recipe at F52 is a better approach overall, and I do plan to update this post with new techniques and an updated recipe. But yes, if you’re up at that altitude you might need to bake longer and hotter, adjust as necessary. But if your dough is excessively sticky, I’d say try reducing the hydration of the recipe a little to compensate. Hydration adjustments are almost always necessary!
Would I be able to use a cast iron with lid to bake, instead of a pizza stone/rack with steam?
That’ll work!
This is a terrific recipe. The first time I made it there was a bit of a learning curve but your photos really help and even though the dough was stickier than I expected a little faith in the Perfect Loaf carried the day. They turned out beautifully, and as you mentioned in your post, the aroma of olive and lavender was insane! I did add a teaspoon of diastatic malt and even though a schedule mishap forced me to let the dough proof for 18 hours (12 in the fridge) the dough was a dream to work with and the results were spectacular. Thanks for all you do for us carb lovers, Maurizio!
Thank you so much for all the feedback, Lyn! I’m happy to hear you liked these fougasse. I was just going to make these this weekend myself! This time I’m going to try brushing on a light coating of olive oil and a sprinkle of rosemary and other herbs on top (maybe one with za’atar as well!). Enjoy!
Za’atar – I’m all over that!
We made these yesterday and loved the taste, crust, and crumb. But my loaves turned out so pale, not golden brown like yours. I baked 2 on a steel, 2 on stone, 20 minutes with steam, and 15 (!) minutes without. I really think they would have been hard and dry if I continued. Any pointers? Less steam?
Usually more steam will add more shine and color. You could try adding a touch of diastatic malt to the dough to see if that helps — I’d start with 0.5% to total flour weight.
Hello, if i dont have a baking steel or stone, can I use a baking sheet?
It won’t be quite as effective, but it’ll work in a pinch!
I have a question about the baking: do you bake them on a stone or directly on your rack? I’ve been doing it on my stone and it works perfectly but I was wondering what you were doing since you’re not mentioning a stone in your recipe. Thank you for this recipe, it’s delicious, even better than what you can find in a French boulangerie in the South of France. I’m always looking for a perfect fougasse each time I go back to France during the summer, I think I found it here! This is the occasion to thank you for your blog as well, I made so much progress baking with my starter and following your approach.
Sorry about the confusion, Caroline! These are baked right on a baking surface (baking stone/steel). Thanks so much for the feedback, glad you enjoy this and the rest of my blog! Here’s to many more bakes 🙂
I made this a few times for family gatherings and they are a big hit and seem to come out perfect each time. I want to make more for the holidays, but try some different variations. Have you tried any other fillings/additions? How would you adjust things?
Excellent, Tracey! I’ve topped them with zaatar, rosemary+olive, flakey sea salt+rosemary, brushed with olive oil+rosemary+sea salt, light sesame seeds… Really anything you can dream up will work very well with these!
If you add any ingredients to the dough that would typically pull water from it (e.g. walnuts) or any additions that would add water (e.g. moist olives, raisins, etc.) be sure to account for that when preparing the dough. You might not need to adjust anything at all, but keep in mind what you’re adding and add a splash of water or remove some water, as needed.
Happy holidays!
I messed up when reading the recipe and compiling my shopping list and bought bread flour instead of AP. Do you think I’ll be alright? I have whole-wheat so I’m good on that front
Hey, Mark! It’ll be just fine. You might be able to increase the water in the recipe as “bread” flour usually can take a bit more, but if it’s your first time doing this recipe, stick with the quantities and use your BF, it’ll turn out great. Enjoy!
Quick followup: I followed your advise to do the one day bake with the idea that I’d “refresh” it by toasting the next day. I didn’t have access to an oven at the wedding so I just gave away a couple of the loaves. Comments on this recipe: It’s very tasty and worth repeating for sure. It is just as you said, with great crust, nice open crumb and great flavor. It is much better same day as the bake, though it refreshes nicely by slicing lengthwise and putting it the toaster; In this fashion it can be enjoyed for a few days. Also, I found this fun to make. I honed my dough slicing technique so that by the fourth loaf I could keep the gaps nice and wide for a more dramatic look.
Right on, thanks for the update Rick! This kind of bread loves to be eaten the same day, but it sounds like you adapted quite well. I’m glad those you fed loved them — and they’re incredibly fun to make from the baker’s perspective! You can get pretty creative with the cuts as well, many different shapes and the limit is your imagination. Thanks again and happy baking!
I’m making these for a wedding this weekend. I’d like to bake same day as the event which means doing the overnight retard. I’m wondering why you advise putting it in the fridge after the bulk instead of after shaping like is typical. Is it because of the feasibility of finding room in the fridge after shaping and keeping air off it? Also I wonder if bulk fermentation continues slowly in the fridge and completes so I can shape pretty quickly after taking them out. Note: The timing pretty much requires that I begin the second day action at 4:00 am or earlier and needs to proceed apace so I’m not late to the event (which is in the mountains 4 hours away). PS: Thanks so much for being a major impetus in this hobby: I’ve made 140 batches (recorded) since I discovered your site!
You might be able to get away with doing an overnight retard in shape with these, but I’m hesitant to do so. Like baguettes, I’d imagine proofing these in shape might lead to a thicker crust and it might also be challenging keeping them from spreading too much (you could use a couche, perhaps, to keep them nice and tight). If you do place them in the fridge during bulk, you’ll certainly have some final proof time in the morning before they’re ready to bake, this might be challenging since you have to leave so early.
Given your timetable, I’d probably take your approach and proof them in shape. Alternatively, you could bake them really late the night before, toast them early in the morning to get them a little crispy again, and then pack them up for the drive. Since you’re leaving so early that might not be a bad option!
I hope that helps, let me know how you go and how they turn out! I’m glad my site has helped so much, thanks for the kind words! Happy baking, Rick, and safe travels.
These fougasse look wonderful. I am thinking of making them for a luncheon. How would you approach the recipe incorporating an overnight cold bulk ferment to make the timing a bit more compatible?
Oops, I just found my answer, you addressed it pretty clearly in the text (that I obviously didn’t read carefully). Thanks.
Thank you and glad you found the answer (I like to include those options now to help others who want these types of recipes split over two days). Enjoy!
These were wonderful! Even though my starter was really bubbly before mixing, it turned out very lethargic, so these took all day, but wow were they worth it. One of the loveliest doughs I’ve worked with!
Right, on great to hear they turned out well! Strange that the dough had low activity — be sure to hit that final dough temp I have listed above and keep it warm. If you still think the dough is taking too long, you could try increasing the starter percentage in the dough by 5% — that’ll give it a boost.
Enjoy!
Thanks! Normally my sourdoughs are a bit slow because my kitchen is cold, but it was a warm day. I did a pretty thorough slap-fold stage, so maybe that’s why. No matter, though – I love longer bulk ferments anyway! Thanks for the tip about increasing the starter, if I’m in a rush next time I’ll definitely give it a try.
Wonderful Bread; thank you
You bet, Russ!
Thank you so much Maurizio for posting this amazing recipe for Easter 👍🙂😎 and have a wonderful Easter 🙂.
P.S. just in time for my starter to be ready🐰🐰🐰
You’re welcome, enjoy!
I use a stiff culture (Jeffrey Halmeman recipe) and I usually use 71% by weight of the required liquid culture and make up the rest with water. It usually works fine. I used the starter that I was going to pitch from my starter’s twice daily feeding when I have it out on the counter getting ready to bake. There was way too much liquid. There is no way it is ever going to come together so before I add the olives and the herbs de Provence, I think I might stop and rethink this.
Should I take out the usual half of the starter and feed it like I feed the half that I’m keeping except that I will make the volume more like the liquid culture? If I let it sit for at least 8 hours it should be mature enough. I’ll have to wait for another weekend though as I used up my “bread prep” time before the start of the onslaught of Easter baking and visiting.
Happy Easter.
This dough at 73% hydration is a very dry dough for me. I’d definitely suggest you hold back more water next go, perhaps 100g, and only add it in if it feels like the dough can take it. Remember you’ll also be adding in olive oil which will slacken the dough, so plan for that.
I’m a little confused about your starter/levain situation but I’d say as long as it’s nice and mature when you go to use it in the dough you’ll be fine. If it’s a stiff variety, a la Hamelman, it should make the dough even more dry, which might help your siuation.
Let me know how it goes next attempt!
Thank you for your help. I’ll try it again tonight. I was going to do the overnight retard as part of the fermentation since it works out well timing-wise.
The starter when it is nice and domed is considered “mature”, right? I’ll try using it as it is and add water if I need to. And do I remember correctly that the starter is at its best (perfect maturity) before feeding time if it is being fed every 12 hours?
My starter lives in the fridge for 3-4 weeks at a time. I take it out and feed it for a couple of days and then it’s ready to rock and roll again. I tend to make a couple of loaves at a time to maximize my bread output per time baking as my time is limited and then I slice and freeze for ease of use.
Sarah
If it’s a stiff starter then I look for a slight receding in the middle of the dome that forms up top, this is a good indicator it’s ready to be used.
Sounds like you’ve got a good schedule! Half the battle is figuring out your starter, how to keep it healthy, and when to use it 🙂
I have been baking the Pain De Mie since the day was first posted, yet substituted the white flour with 50% Organic wholewheat and 50% organic whole spelt added little more water and used yeast water instead of sourdough..success every time…:D
Oooh, sounds great. I’m on deck for another pain de mie this weekend as well, I’d like to work in some more whole grain flour so I’ll take your lead and do so this time around. Enjoy!
This is kismet! I will have olives in the fridge and enough sourdough leftover from my baking this afternoon to make half a recipe!! Looking forward to this!
The stars have aligned — time to get baking! Have fun 🙂