This slap and fold technique is my go-to kneading technique for wet dough. It takes a little practice to get the hang of it, and it gets messy, but it’s so effective at quickly strengthening a dough that I almost always use this approach when mixing by hand.
I find this method most effective with a wetter dough, which for me, is typically anywhere above 78% hydration. This hydration number is subjective, so you’ll have to experiment to see when this technique is most useful. If the dough is overly stiff or too dry, it’s hard to stretch it sufficiently at each turn. In this case, I knead the dough in the bowl with a series of folds right in the bowl to bring it together after initial incorporation.
A tip to keep your hands and counter clean: wet your hands often with water, pausing periodically through the kneading process. Keeping them mostly nonstick will help avoid excessive dough tearing. Additionally, use a plastic scraper to occasionally stop and scrape the counter clean, reincorporating any stuck bits back into the mass (you can see me do this in the video below).
What is the slap and fold kneading technique?
The slap and fold kneading technique, also called French fold, is a method for strengthening bread dough (and, more specifically, the gluten in bread dough) during mixing before the start of bulk fermentation.
When should I slap and fold?
First, I don’t usually slap and fold until after the autolyse step, if there is one. When mixing, I typically like to break it up into stages (and you’ll often see this in my recipes) where I hold back salt[footnote]I find adding salt too early makes mixing more difficult as it has a tightening effect on the dough. While adding salt early can help prevent some oxidization of the dough during mixing, I find with hand mixing—and its gentle nature—this isn’t a cause for concern.[/footnote] and some mixing water until later in the mixing process. You can slap and fold for a few minutes after incorporating just the flour, water, and sourdough, then add the salt and withheld water and do another slap and fold until strengthened to the desired amount. Or, you can slap and fold only once before the salt or after everything is incorporated. This is up to you and your preference.
How dough hydration affects slap and fold kneading
Excessive dough hydration can make the slap and fold process a little messier and sometimes even very difficult. If your dough is highly hydrated, it can help to split mixing up into stages or even do a bassinage type mix, slowly adding water through the mix to avoid a very sloppy dough in the beginning. For instance, hold back some of the mixing water and begin slap and fold without the reserved water. Once the dough builds some strength, add a little more to the dough in the mixing bowl and continue strengthening in a second slap and fold session on the counter.
Recommended reading: How to mix with a Famag mechanical dough mixer.
The slap and fold technique: step by step
- Dump the incorporated dough onto a clean work surface
- Using wet hands, grab one side of the dough to your left or right with both hands in a pincher-type formation
- Pick up the dough (it’ll hang long in front of you) and slap the long-hanging dough down onto the counter
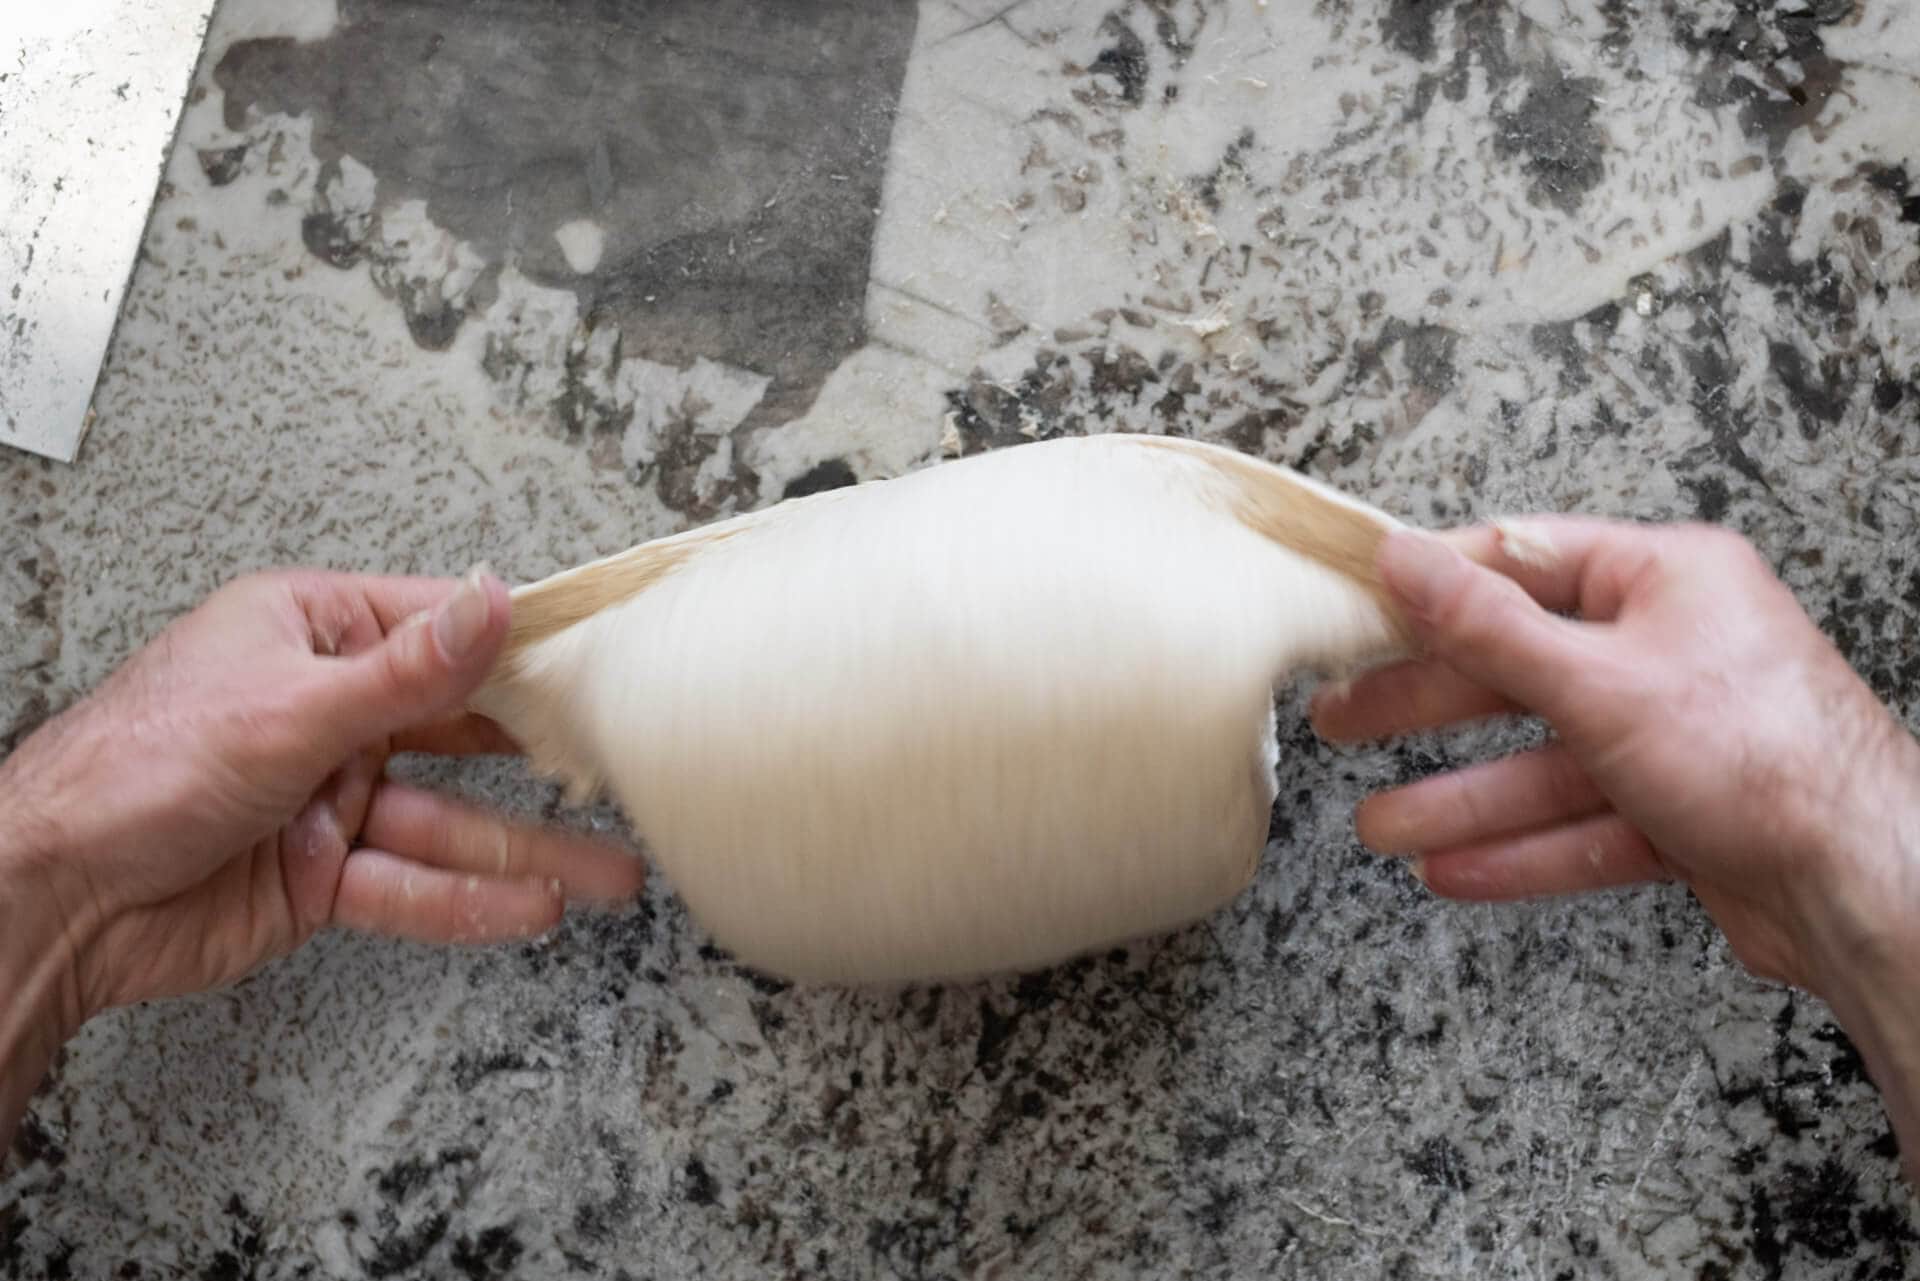
- While still holding the dough, stretch it towards your body (the dough slapped to the counter should stick and anchor so the whole mass elongates)
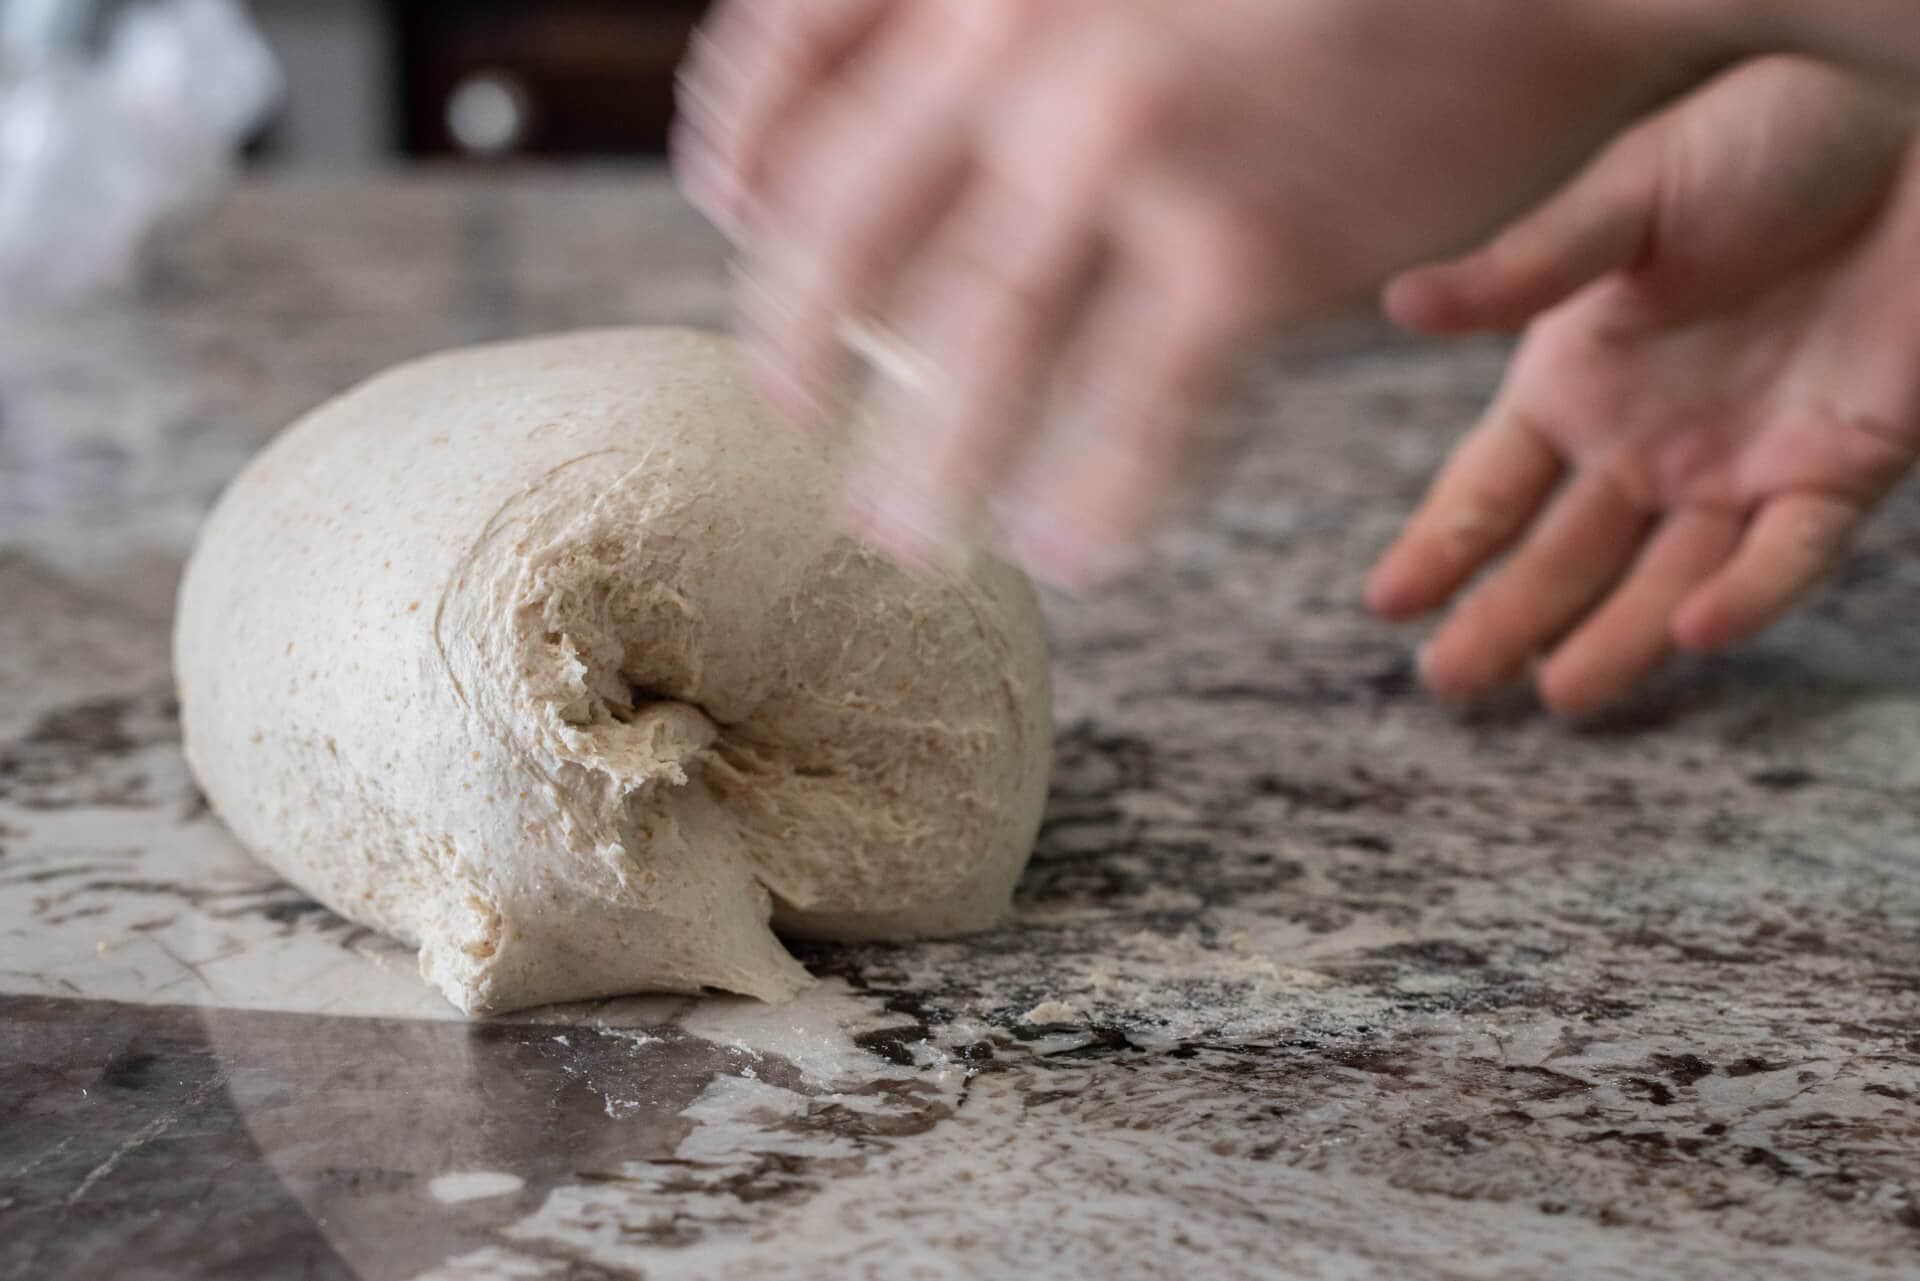
- Quickly fold the dough nearest your body in the air over the anchored section on the counter (it will fold up into a tight package)
- Repeat (note that the dough rotates 90° each time you perform these actions to ensure the entire mass is strengthened eventually)
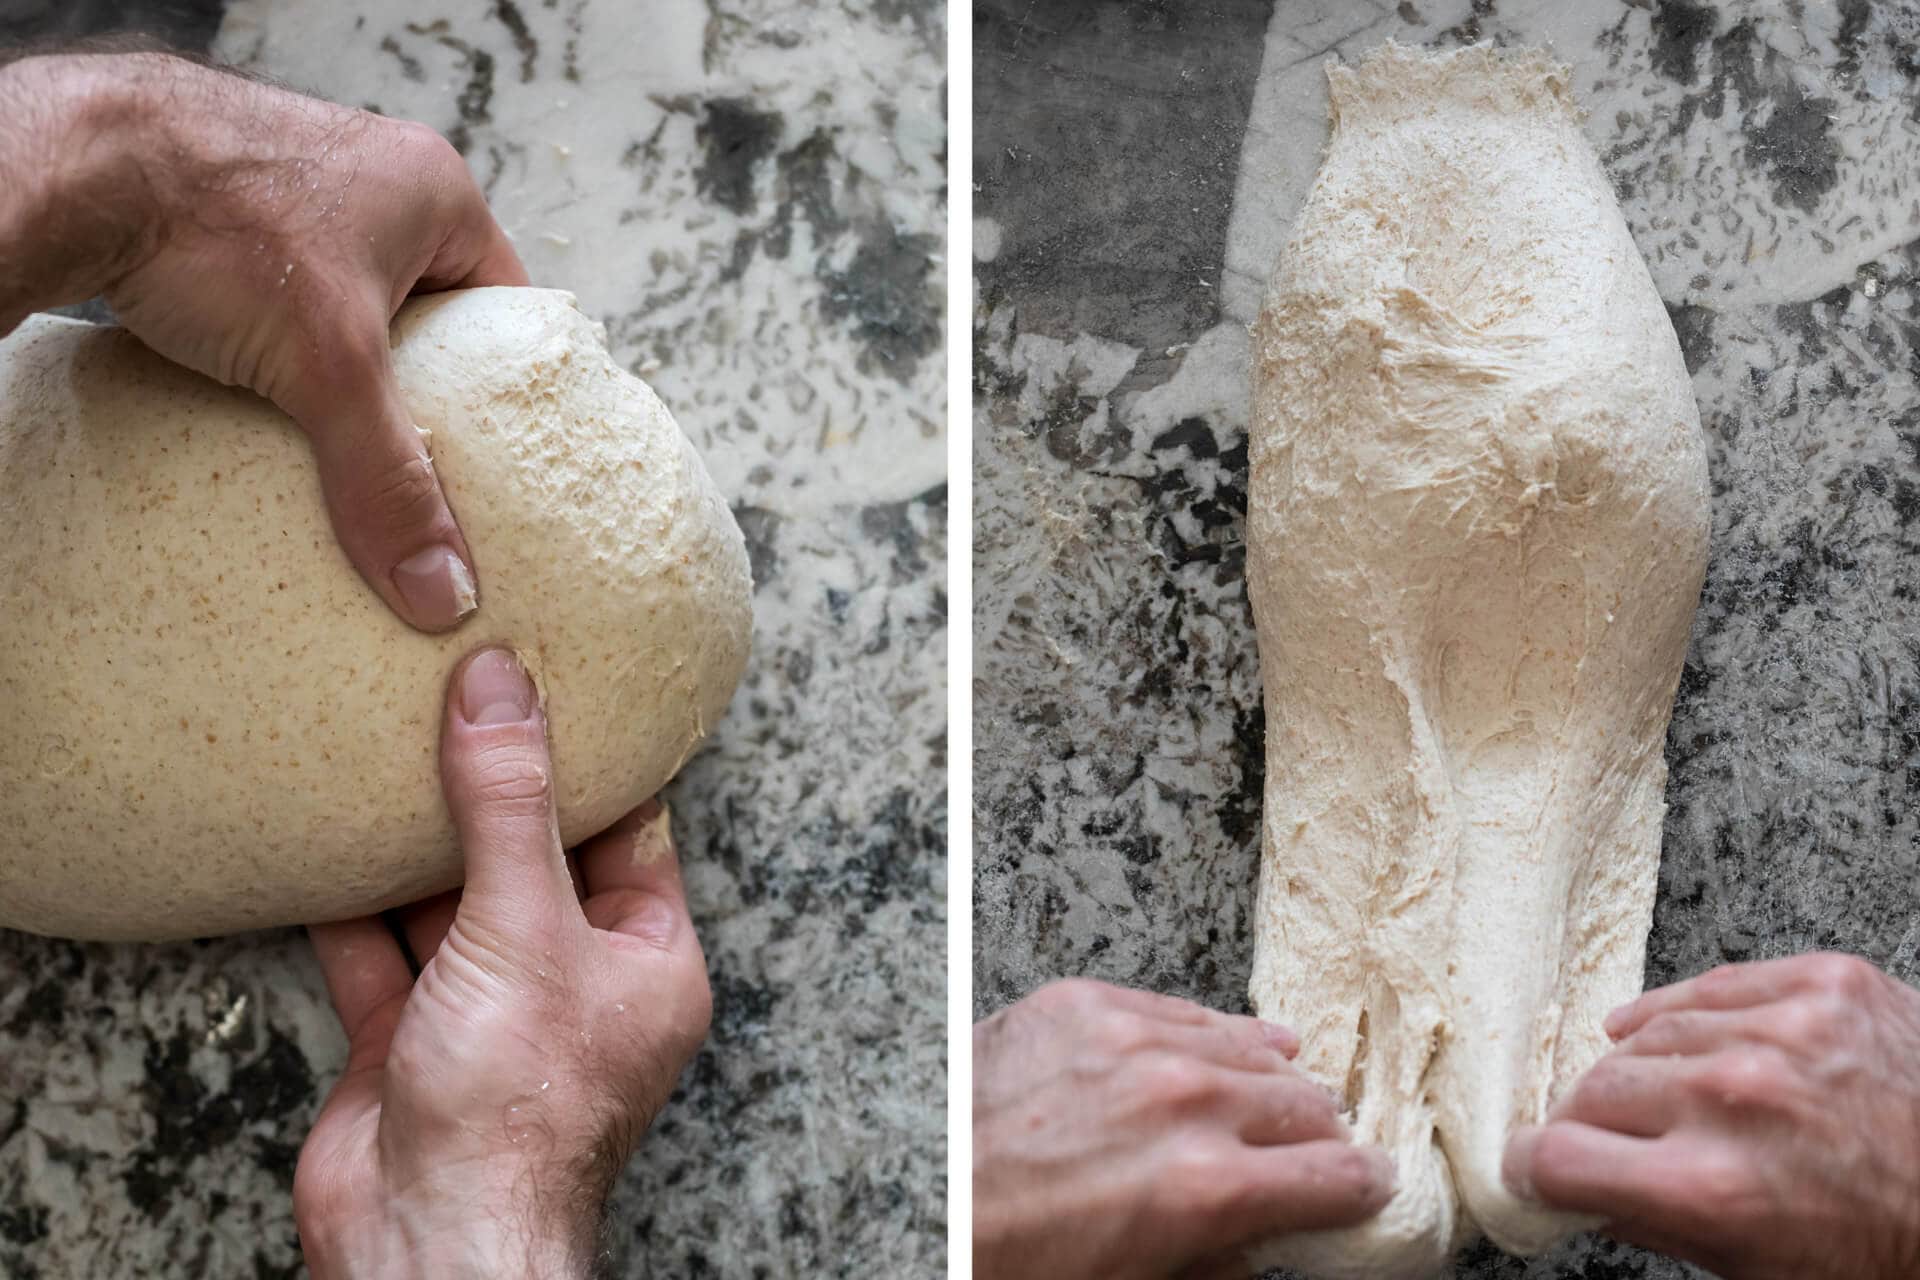
In the image above, you can see the pincher-type hand grip and the slap and stretch mentioned in steps 2, 3, and 4 above.
In the image above, you can see the quick fold over after the slap and stretch. This motion folds the dough into a tight little package, picked up again at the right side with the pincher grip, repeating the process.
Continue each step in this process, over and over, until the dough is sufficiently strengthened for the target number of stretch and folds you intend to do during bulk fermentation. For example, I typically slap and fold until the dough smooths out, stops sticking to the counter as much as the beginning of the process, and generally starts to hold its shape on the counter without any excessively shaggy sections. This would mean I’d still need 1-3 sets of stretch and folds during bulk to finish strengthening the dough for my typical doughs.
Recommended reading: How to Stretch and Fold Dough in Bulk Fermentation.
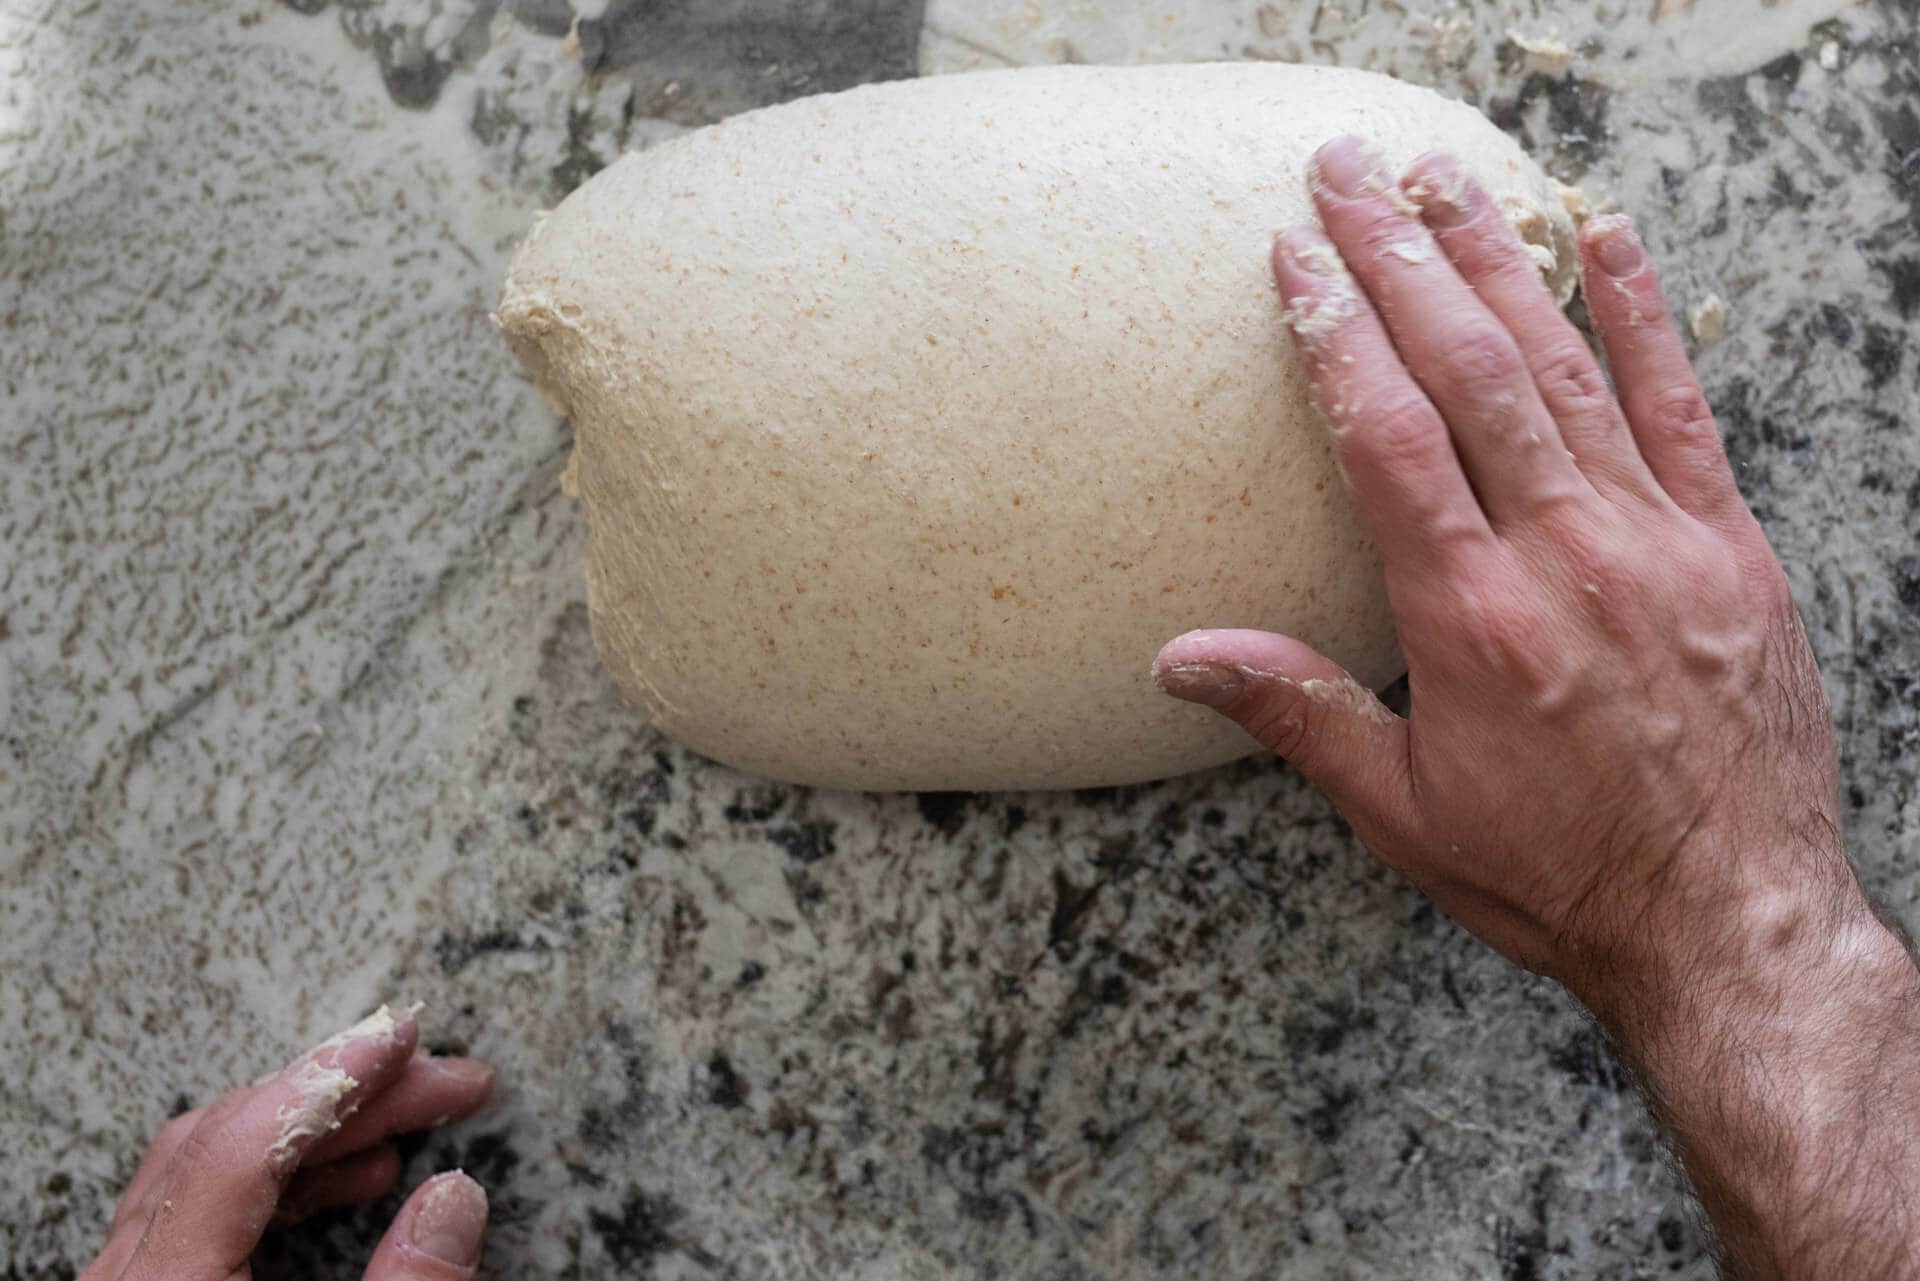
You can see the dough is smooth in the image above, not nearly as shaggy as the images above, and holds itself well on the counter. At this point, I’ll proceed with bulk fermentation.
How long should I slap and fold (knead) bread dough?
This is highly dependent on the dough (the flour itself and the hydration) you’re working with, and your effectiveness in the technique, but a good rule for me is somewhere around 3-6 minutes to yield a dough that usually requires 1-3 sets of stretch and folds during bulk to finish strengthening. Note that I’m quite vigorous during this process and give the dough a strong stretch at each step; if you’re more gentle, you might require a longer total kneading time.
Watch me slap and fold bread dough
This video illustrates how a wet dough can go from super shaggy and loose to nicely strengthened by the end. It’s worth a minute to scroll back and forth through the video to see how this transformation takes place in just a few minutes of kneading.
To see more of my technique videos, head over to my YouTube channel.
What’s next?
This kneading technique can be used with almost any of the bread recipes here at my site. Specifically, I like to use it with higher hydration doughs like My Best Sourdough Recipe, and it also works well with loaves with higher whole grain percentages.
The amount of kneading you perform on a bread dough is also very related to the strengthening required during bulk fermentation. In other words, the more kneading you do, the less you’ll have to stretch and fold the dough during bulk fermentation.
Happy baking!