
The goal of this weekend bread baking schedule is to help you get into a routine for baking fresh, healthy bread more often without having to worry about refreshing your sourdough starter during the week. Ok, I know it’s hard to bake a sourdough recipe every weekend, but I believe this post outlines a manageable schedule for fresh bread most weekends. It can be challenging to carve out time from our busy work schedule day after day to devote to sourdough starter maintenance—with two kids at home, believe me; I get it.
Help! I don’t have time for anything bread during the week, how can I ignore my starter most of the time and just bake on the weekends?
I get the above question a handful of times during the week, thus motivating me to put together this entire post. The key to reducing the maintenance required for a sourdough starter, of course, relies on using the home refrigerator. I’ve mentioned many times in the past that a starter can be placed into the fridge and taken out when needed, but given the number of questions, I think this sample schedule might give some concrete ideas and instructions for how it can be done and still make great bread—and even sourdough pancakes.
A high-level timeline goes something like this (click the link on each day to jump down to that day’s schedule):
| Day of Week | Action |
|---|---|
| Monday | The starter is in the fridge, resting. |
| Tuesday | The starter is in the fridge, resting. |
| Wednesday | The starter is in the fridge resting. |
| Thursday | Take the starter out of the fridge after work, let ferment for a few hours, and refresh at night. |
| Friday | Refresh starter in the morning before work. Feed again at night before bed. |
| Saturday | Build the levain early in the morning. Refresh the starter and let ferment all day until night. Mix the dough in the afternoon and bulk ferment in the afternoon/ evening. Shape the dough and place proofing baskets in the fridge overnight. At night make my sourdough starter discard pancake or waffle batter. Then, refresh the starter before placing it into the fridge. |
| Sunday | The starter is in the fridge resting. |

Most people are turned off by sourdough baking at home, primarily because of the overhead in dealing with a sourdough starter. It does indeed take a few minutes each day to care for but believe me, this is a weekend baking schedule that’s manageable and one that you can work right into life’s hustle.
First, let’s talk about what I refresh my starter with when I keep it in the fridge.
Starter Maintenance Refreshment Before Refrigeration
I like to slightly reduce the hydration at the refreshment right before placing my starter in the fridge. The lower hydration helps to reduce the fermentation activity slightly, and I prefer it a little on the stiff side, so it’s not quite so gooey when I take it out the following week.
Refreshment Process
Before placing my starter in the fridge1:
- Using a ripe starter, discard down to 20g
- Refresh the starter with the ingredients listed in the table below
- Let sit on the counter for 30 minutes to 1 hour
- Place in fridge for up to 3 weeks2
Refreshment Ingredients
| Weight | Ingredient | Baker’s Percentage |
|---|---|---|
| 20g | Ripe liquid starter (100% hydration) | 20% |
| 100g | 30g whole rye or whole wheat flour, 70g white flour | 100% |
| 100g | Water, warm room temperature | 100% |
For more, see my in-depth look at how I feed my sourdough starter daily.
Dough Proofer
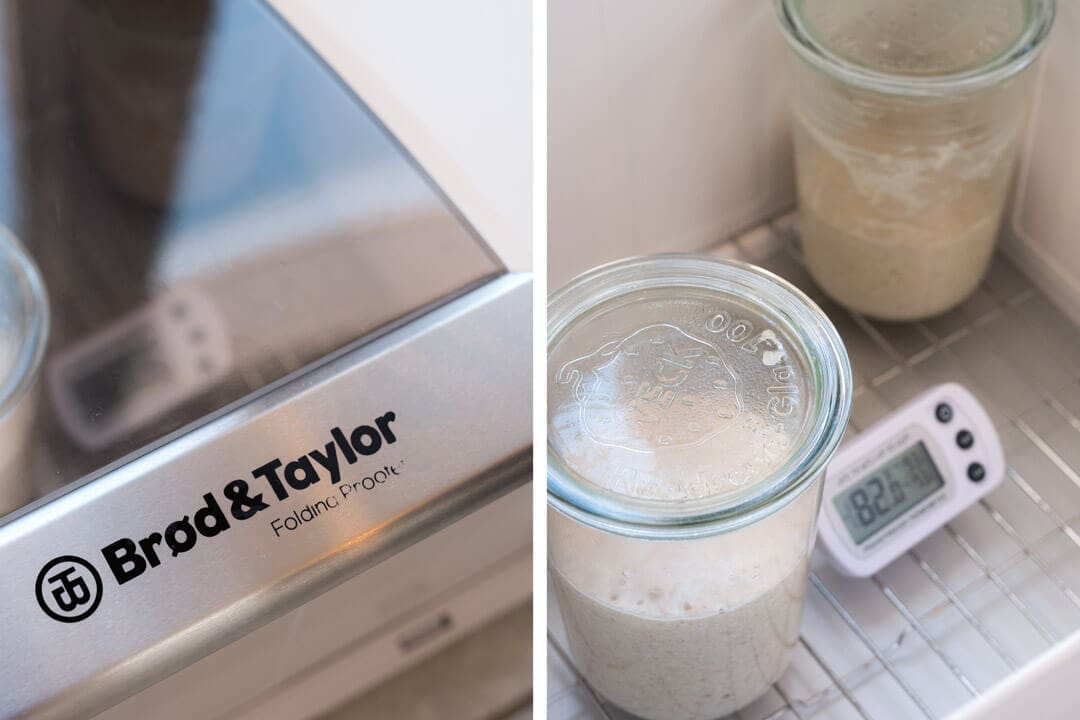
One tool I mention occasionally (and have been frequently asked about) is my proof box. In the past, I’ve considered building one of these on my own with a digital controller and ice chest, but in the end, I bought this Brød and Taylor dough proofer. It’s been plugged in and turned on ever since. I keep my starter in the box all day, every day, at just the right temperature—for me, that’s around 74-76°F (23-24°C).
Additionally, when making a levain for a single bake, I’ll place that in the center alongside my starter (also seen above). After I mix my dough, I can also easily fit my standard 2kg dough in the box, which is then also maintained at the right temperature during the entirety of bulk fermentation (the dough’s first rise).
The nice thing about this temperature-controlled box is that I can quickly get my starter back up to a warm temperature after taking it out of the fridge. Once I take it out, I place it into the proofer set to 76°F (24°C), and it will return to full activity in short order.
This proofer is one of those tools that help me achieve more consistency with each bake. If someone asks, I also keep a small thermometer next to my starter that tells me the current temperature at that spot and the highest and lowest temps recorded (handy to know if there were any spikes up or down).
See my post on using the Brød and Taylor proofer for more information. If it’s cold in your kitchen, refer to my guide on baking bread in the winter. Conversely, if it’s warm, my guide on how to bake bread in the summer will have tips for keeping your dough cool and under control.
Weekend Bread Baking Schedule: How do you schedule sourdough?
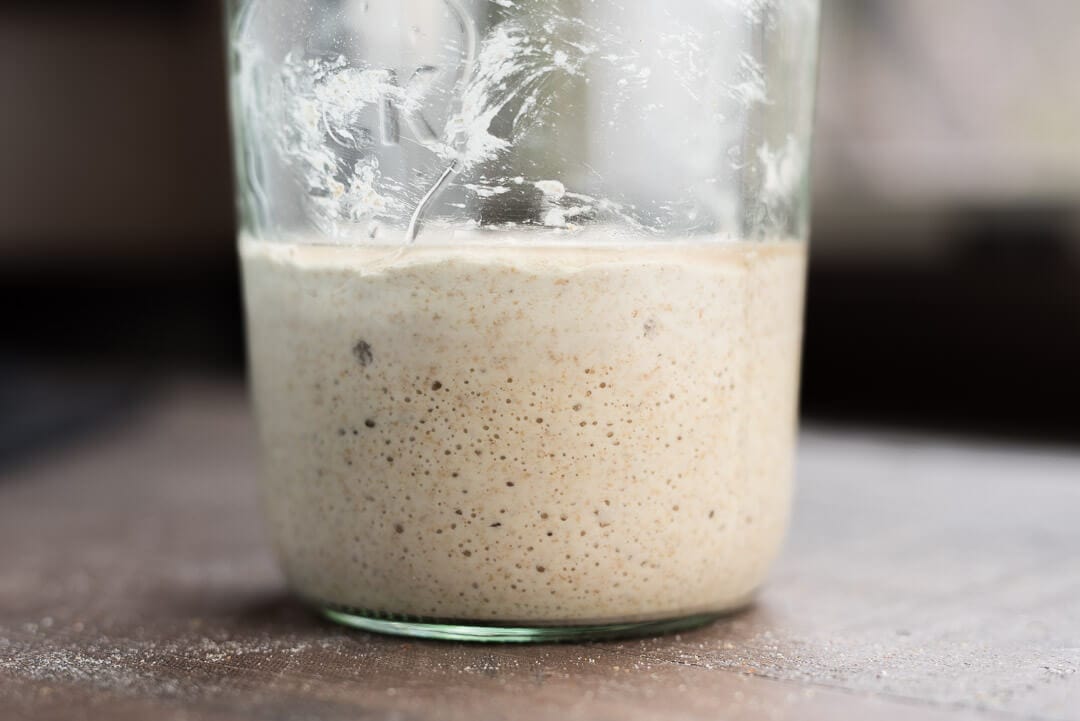
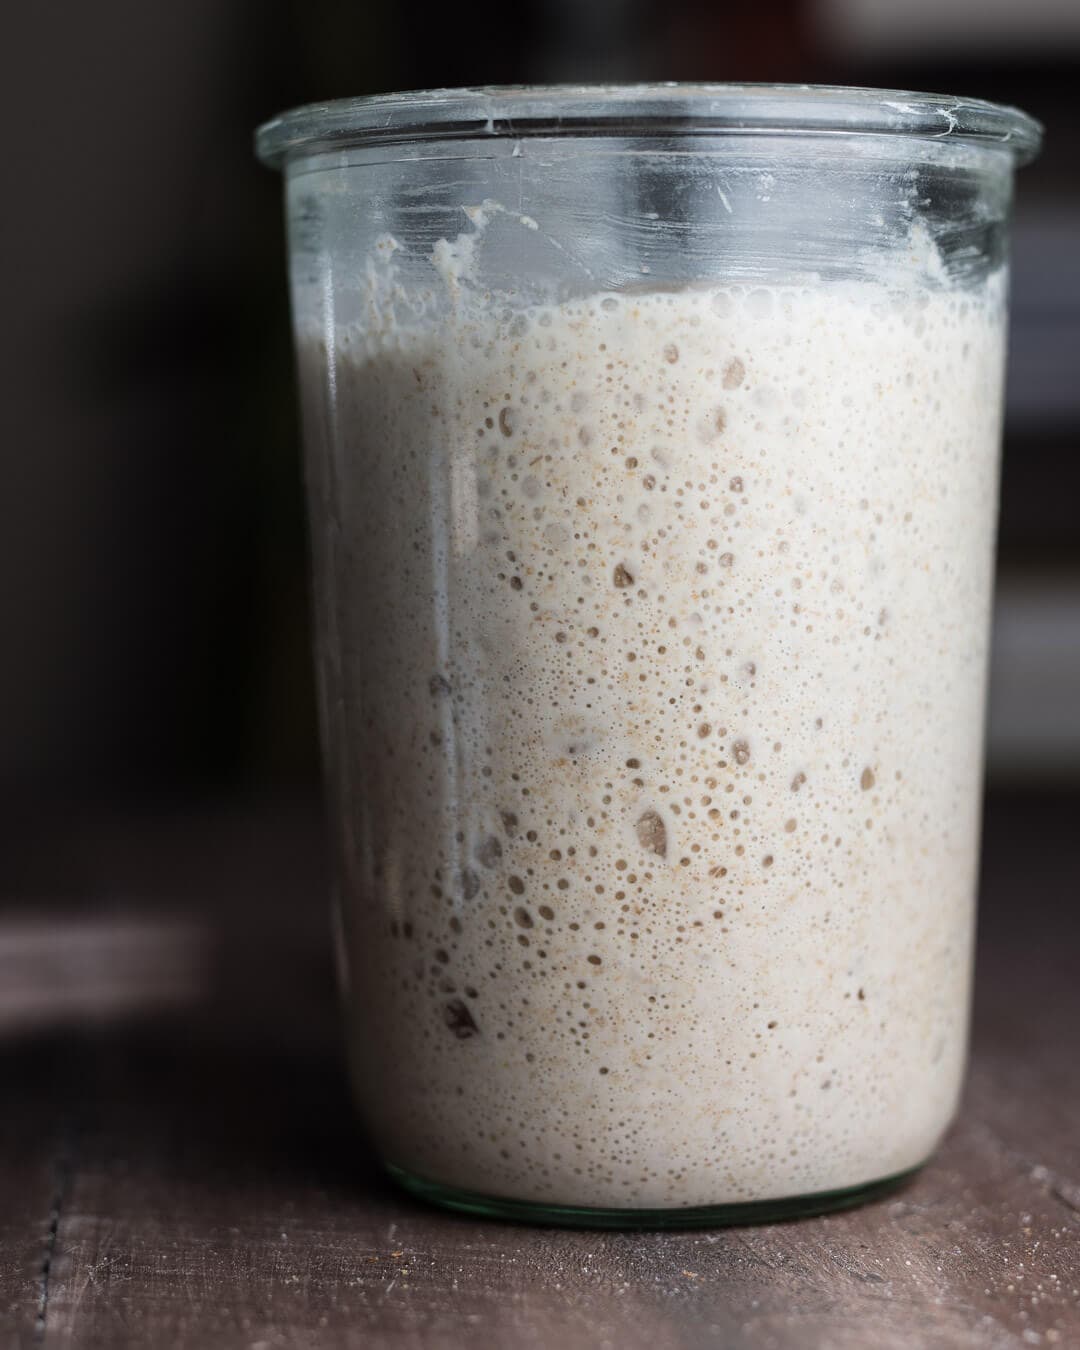
Before we begin, I want to show a picture of what my starter typically looks like when it’s at full strength, regularly receives refreshments, and I keep it at a warm temperature in my proofer:

Above, you can see the signs for vigorous fermentation: bubbles at the top and the sides, some rise height (it’s “peak,” as some bakers call it), and a loose and frothy consistency. My starter usually takes about 11-12 hours to get there using my typical refreshment (20g ripe starter, 100g flour, 100g water at room temperature) when it’s kept in my proofer at around 76ºF (24°C).
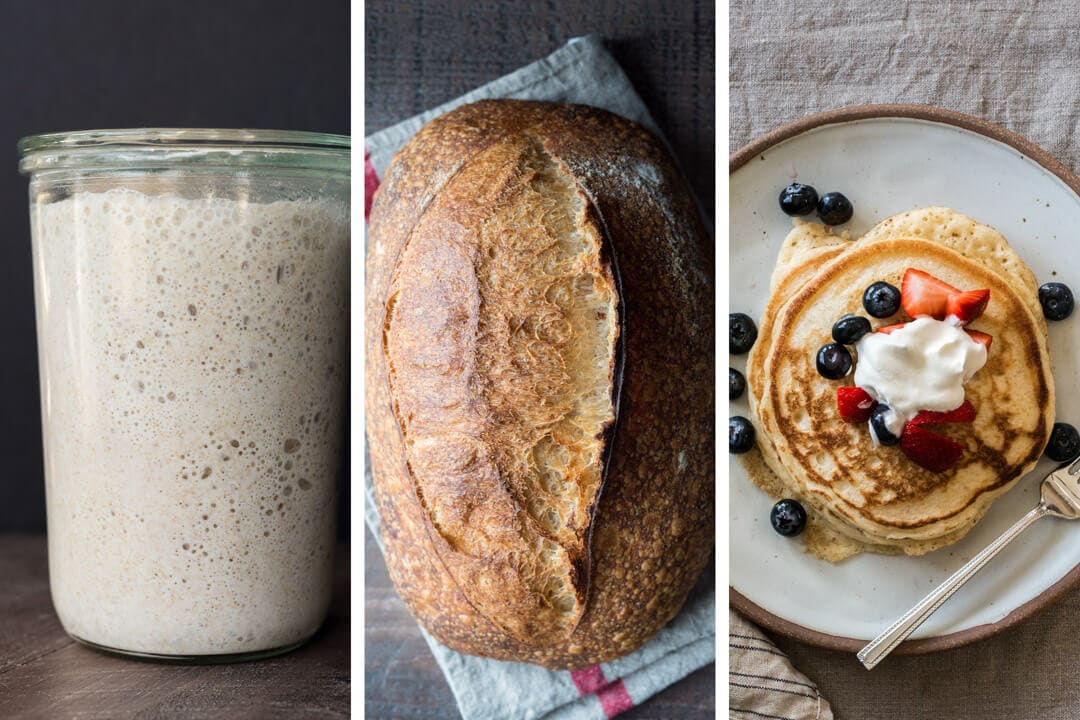
I followed the exact process I’m about to outline with my starter for a week, and I took photos of each step to illustrate the method better. In addition, I baked two loaves of Beginner’s Sourdough Bread and made sourdough pancakes to illustrate the effectiveness of my resuscitated starter. As a result, you’ll see my starter transition from states of high activity, reduced activity, “rest,” and the reverse when taken back out of the fridge. This progression will help me explain the cues and what to expect as your starter changes.
My stater performs best when given at least 2-3 refreshments after it’s taken out of the fridge but before being used to create a levain for baking.
Thursday
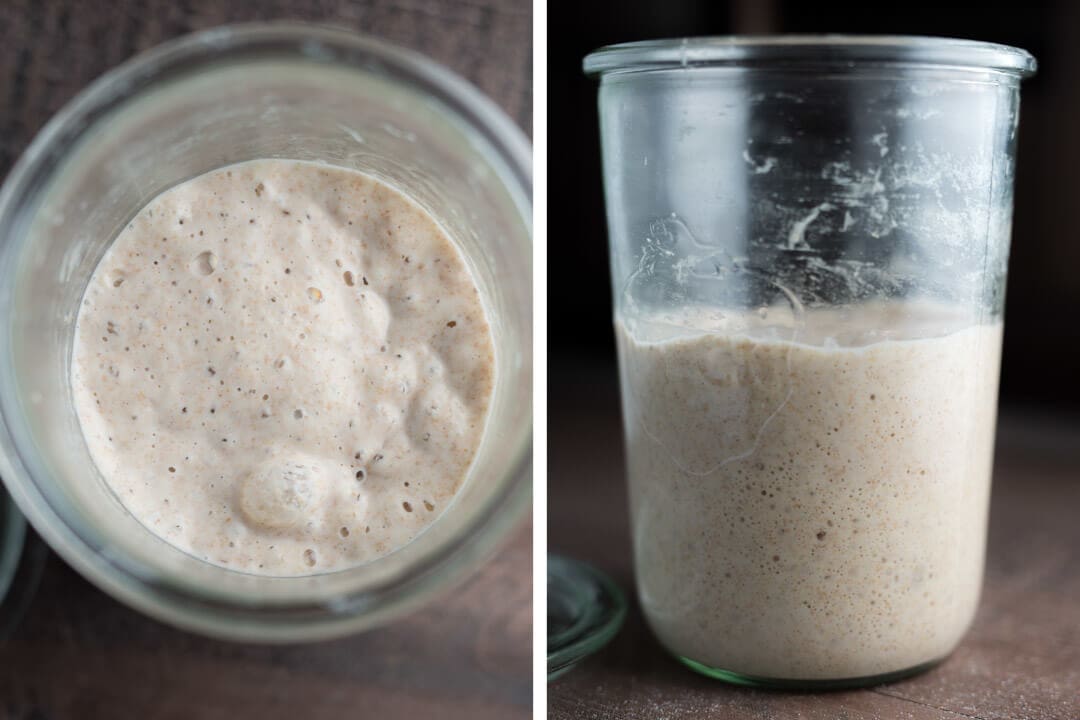
Our starter has been in the fridge for several days at this point (since last Saturday). Fermentation has continued, but it’s slowed due to the cold temperatures. Nonetheless, there will still be signs of fermentation (as seen above): some scattered bubbles and potentially a layer of thin liquid on the top that’s gathered. This liquid, sometimes called “hooch,” is a byproduct of fermentation and consists of alcohol. It’s not harmful, and I usually stir this down into the mixture during the first refreshment3.
Evening: Remove Starter from Fridge
When you get home from work, take your chilled starter out of the fridge and let it come to room temperature (or place it in a proofer set to warm temperature) for a couple of hours. I give mine enough time to warm up, become easier to stir, and potentially finish fermenting a bit longer.
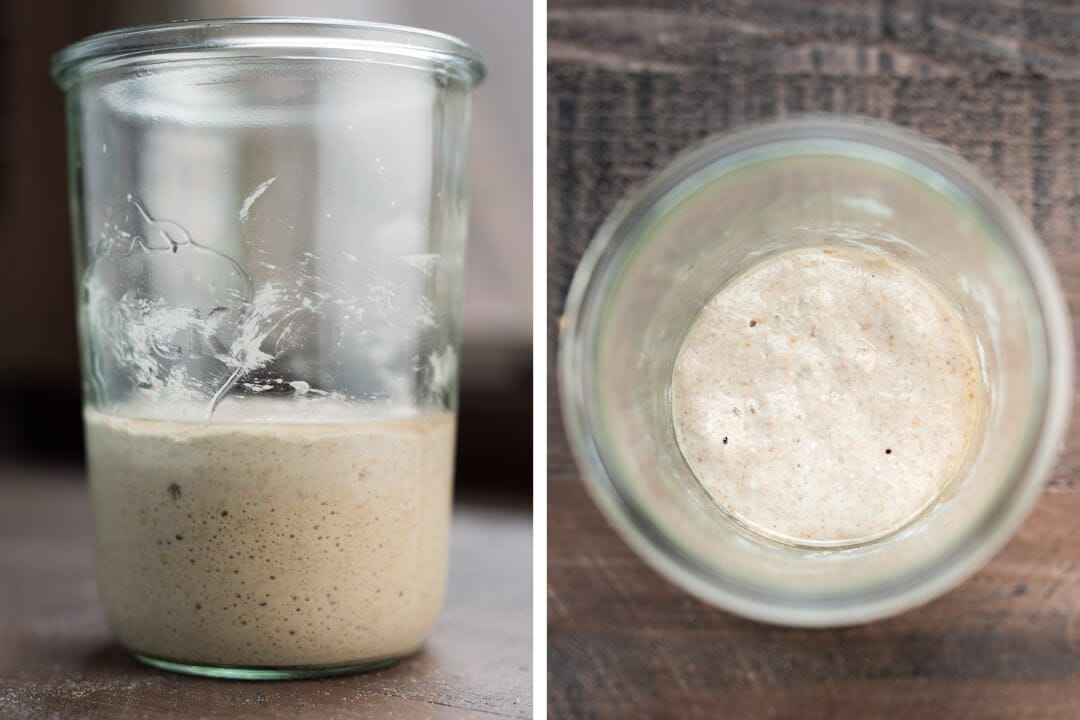
You can see the transparent layer of liquid on top, some bubbles in the interior and on top, but overall nowhere near the vigor you’ll see in my starter when kept in my proofer.
Before going to bed, discard the contents of your jar down to 30g ripe starter and add 100g room temperature water and 100g flour (or your standard refreshment flour mixture). Place your starter in a warm location or a proofer, and let ferment until the morning.
Friday
In the morning, you can see above that my starter is still a bit sluggish to rise and overall still not up to total activity (compare the above picture to the one at the beginning of the schedule). However, it has only had a single refreshment since you pulled it from the fridge, and with 24 more hours to ferment after this refreshment, we’ll see the activity pick up quite a bit by Saturday morning.
Morning: Refresh Starter
Before heading off to work, refresh your starter with whatever ratios you typically use to have your starter last for 12 hours before needing another refreshment. For me, I discard the contents of my starter container to 20g ripe starter and refresh with 100g flour and 100g water at room temperature. Then, stir, place the loose-fitting lid back on, and put the jar into your proofer or on the counter. Let ferment until later in the evening.

Evening: Refresh Starter
You’ll see that by the evening, your starter will display signs of even more vigorous fermentation—things are starting to pick back up to normal. So, in the evening, before bed (or when your starter needs refreshment), do a regular refreshment. I made the same refreshment as the morning.
In the morning, we’ll finally build a levain to mix the dough on Saturday.
Saturday
As seen above, my starter is back at full strength by Saturday morning. Super strong signs of fermentation occurred overnight with lots of bubbles, nearly the same height as usual, and a smell that’s ever so slightly sour and yet relatively mild—pleasantly reminiscent of creamy yogurt.
Morning: Build Levain
First thing in the morning, make a levain that will be used in a dough mix later that day. The recipe I decided to use here is based on my Beginner’s Sourdough Bread formula, but you could make a levain from any of the recipes here at my site.
After mixing a levain, place it in the proof box or somewhere warm in your kitchen, and let it ferment until it’s ready to be used later in the day. From there, autolyse (or not), mix, and continue to follow whatever bread recipe you’re baking.
Morning: Refresh Starter
After making a levain, refresh your starter and place it in the proofer or the counter until the evening. Why do we bother refreshing the starter? I do this to give my starter enough food to get through the day to nighttime, where I will prepare sourdough pancake batter for Sunday morning. If you want to skip making pancakes4, you can refresh your starter (as outlined Sunday morning, below) to prepare it for cold storage until next week.
Afternoon: Mix, Bulk, Pre-shape, Shape and Retard Dough
Proceed to follow whatever sourdough bread recipe you started this morning, then place the dough in the refrigerator for an overnight retard for increased flavor (you will bake the bread Sunday morning).
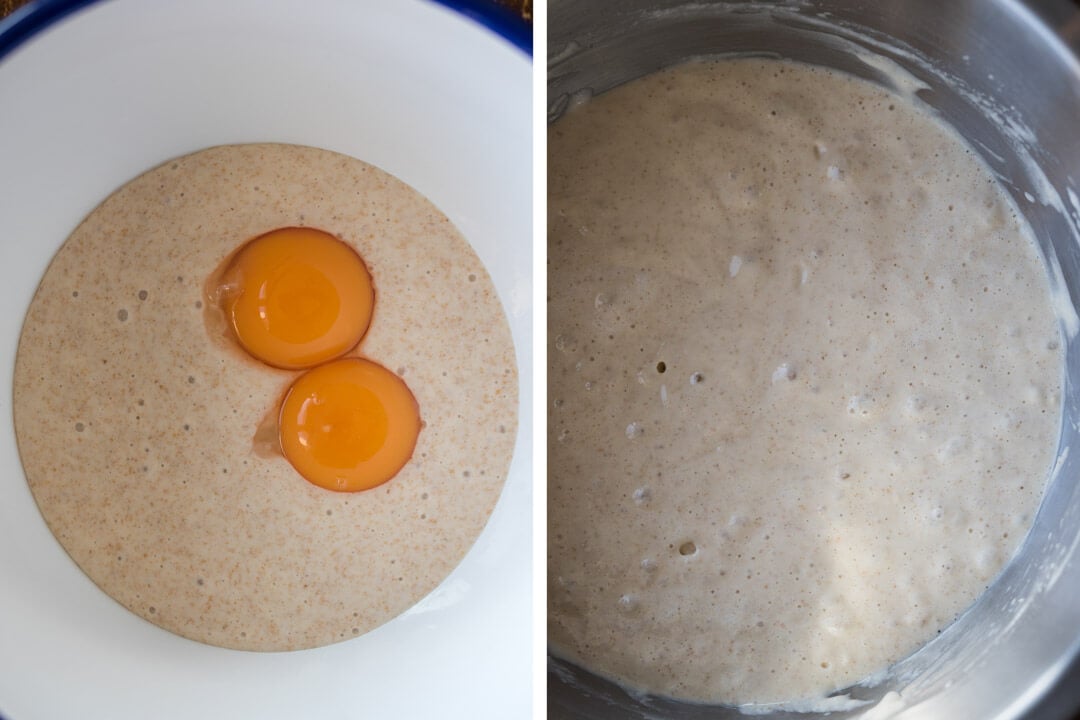
Evening: Make Pancake or Waffle Batter
If you feel like light and fluffy pancakes, use my overnight sourdough starter discard pancake recipe to make the pancake batter at night and let ferment until the morning. Alternatively, if you feel like something crunchier, make my overnight sourdough waffles.
Evening: Refresh Starter with Maintenance Ratios and Refrigerate
After making the pancake batter, refresh your starter using the maintenance ratios I described at the beginning of this post. Let sit out 30 minutes to 1 hour and then finally place back into the refrigerator until next week (or whenever you want to bake again).
Sunday

The past few days have built up to this final day, the day we get to enjoy not only fresh sourdough pancakes but also fresh sourdough bread later in the afternoon. Remember, at this point, your starter is in the fridge and resting until next week. So there’s no need for refreshment this morning.
Morning: Make Pancakes, Preheat Oven
In the morning, preheat the oven to prepare bread after breakfast. Additionally, get that smoking hot griddle (or 12″ steel skillet like I use) going and get ready to make some pancakes. Finish making the pancake batter, cut up some fresh fruit, and whip some heavy cream. Finally, make the sourdough pancakes and enjoy while the oven preheats.
Afternoon: Bake Bread
Continue to follow whatever bread recipe you started and bake the sourdough bread once the oven is preheated. Let cool and enjoy just in time for lunch. Again, your starter is still resting in the fridge, waiting until you want to bake again.
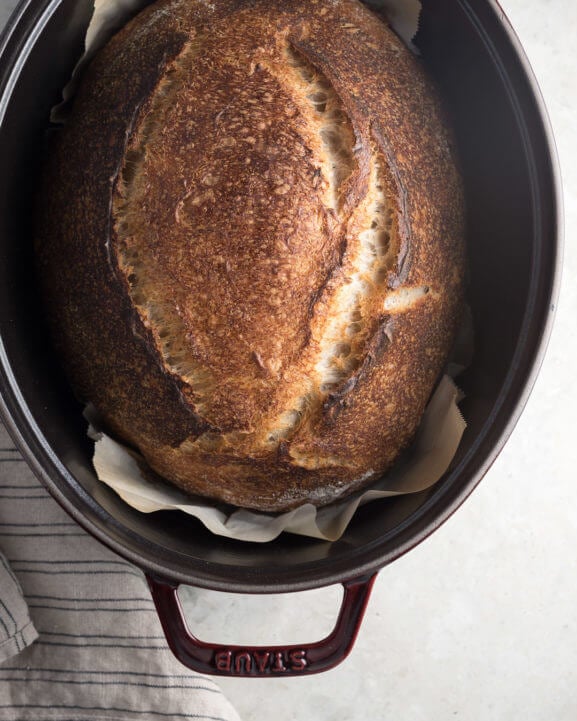
Lately, I’ve also been experimenting with baking my usual 900-950g batard shape (instead of being forced to make a boule in a combo cooker) in a 5.75 qt Staub Cocotte and, as seen above, the resulting bakes have been fantastic. The steam trapped inside is sufficient to blister the crust, and the radiating heat from the cast iron colors the crust beautifully. I’m going to continue using this, especially for single loaf bakes5 when steaming the entire oven isn’t necessary.
Alternatively, you could use your typical Dutch oven or even the Challenger Bread Pan for long, oval loaves.
The various bread shots used my refrigerated starter throughout this post—all fantastic bakes! I’ve found using a schedule like this to help offset workload during busy weeks while still ensuring I enjoy fresh bread on the weekend and into the following week.
At first glance, this weekend baking schedule post might come across as packed with many steps, but the fridge does most of the work. This way, our starter only needs attention a few days at the end of the week, removing many maintenance refreshments while still allowing us to make great bread. The key is using the cold temperature of the fridge to slow fermentation Saturday through Thursday and then only three refreshments before baking. And while our starter is out for bread, we might as well make some sourdough pancakes that make the weekend go from great to excellent. Buon appetite!
Weekend bread baking schedule FAQ
How do you schedule sourdough?
In most cases, your starter can be kept in the fridge, taken out a day or two before you need to use it, given two to three feedings, then used to make a levain or mixed directly in the dough.
How can I increase my sourdough activity?
To increase sourdough starter activity, keep it at a warm temperature and give it timely feedings. I like to feed it every 12 hours and kept around 74-76°F (23-24°C).
How do I make my sourdough schedule fit?
In the end, this is a personal thing! Your starter can go 12 to 24 hours between feedings when kept at warm room temperature, and at each point when you feed it, it can be used to mix into bread dough. This gives you multiple opportunities throughout the day to make fresh sourdough bread.
What’s next?
Now that you have a go-to method for a weekend bread baking schedule check out my weekday sourdough bread for when you want to try and squeeze a loaf of fresh sourdough in during the busy workweek.
If you use the tips in this post, tag @maurizio on Instagram and use the hashtag #theperfectloaf so I can take a look!
. You might also want to label your Weck jar “Sourdough Starter” to avoid someone inadvertently throwing it out!↩
I’ve done up to 3 weeks using this method, but it might be possible to keep it in there even longer. In this case, I’d reduce the hydration even further.↩
You could also pour it off if you’d like.↩
Why?↩
It’s also pretty amazing in the kitchen for roast chicken!↩
