
A few months back I was called again out to San Francisco for work, and before my trip I found myself following my typical routine: I planned on cafes for lunch, restaurants for dinner, bakeries for bread & pastry, and coffee shops to grab a cappuccino… You know, standard stuff. The problem with San Francisco is that there are too many good places to visit and it becomes an arduous task to eliminate items from your to-do list. I wish Albuquerque had this “problem.” But in all this planning, who knew I’d come home with a desire to start baking with stoneground red wheat.
A stop I almost make is Tartine Bakery, but I’ve already talked at length about the magical bread & pastry establishment. Another such place is The Mill, a place that checks two boxes: it’s a bakery and a coffee shop. And a damn good one of each.
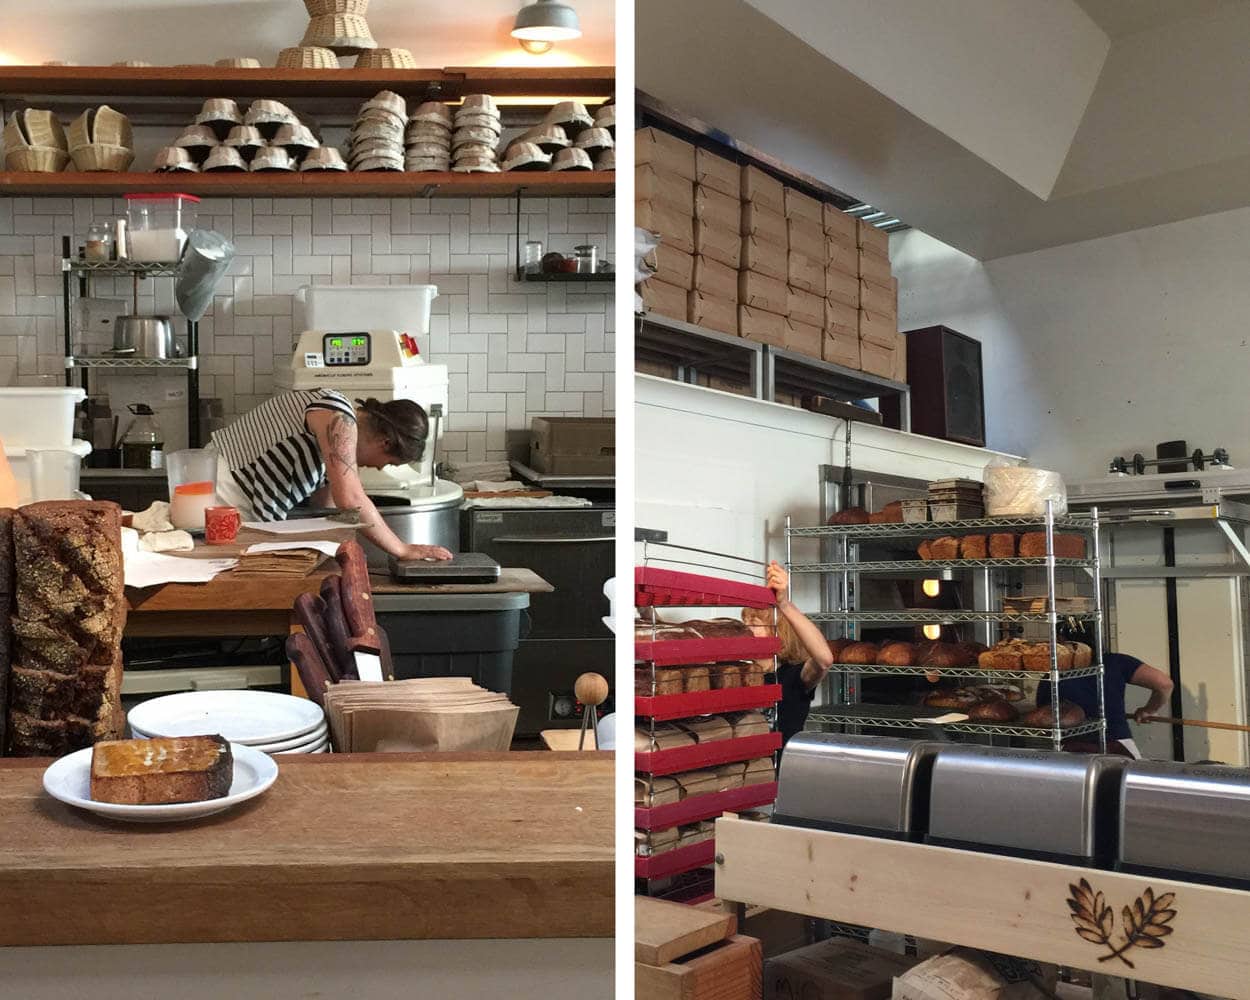
The line runs long. It snakes between the tables packed with patrons toward the door, but thankfully for me as I was inching closer to the counter for a cappuccino and slice of toast I noticed Josey had a few sacks of stoneground flour intermixed with his bread. Being the pathological baker that I am, and without thinking about my impending flight home, I promptly snatched a sack of red whole wheat and a loaf of bread. You can imagine the looks I got on the airplane as I boarded with a loaf of bread under my arm and my work bag in the other1.
I posted some shots of Josey’s bread on Instagram a while back, but I’ve finally reached the end of my supply, and this entry goes into detail about the flour and my findings when baking with it. Instead of talking at length about attaining an open and lofty loaf, I decided I would talk more about Josey’s red whole wheat and that incredible dark, rich crust it can impart.

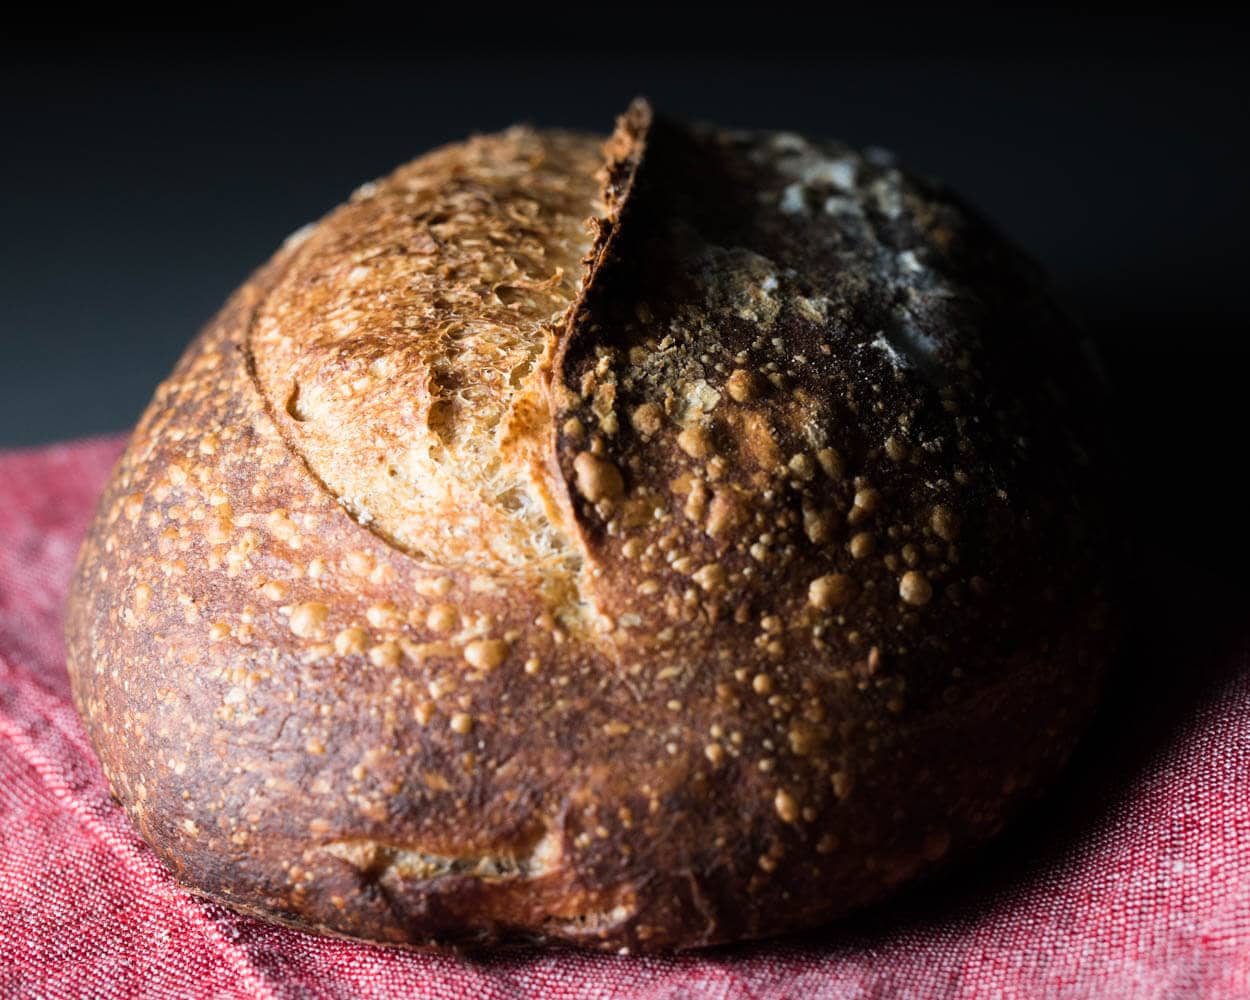
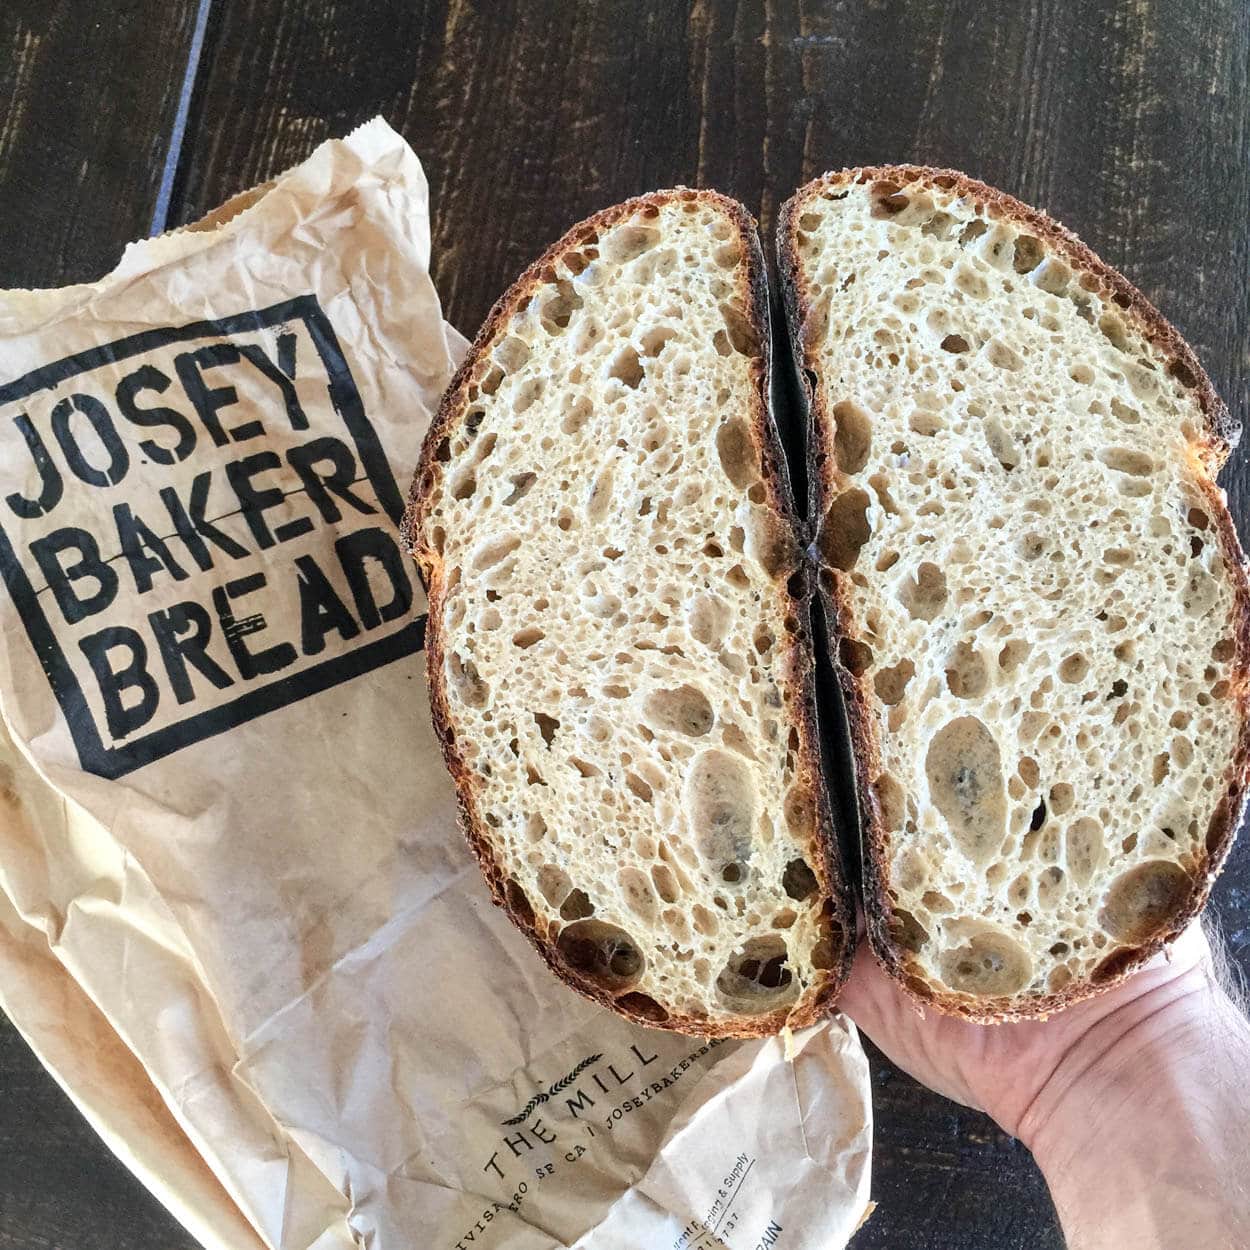
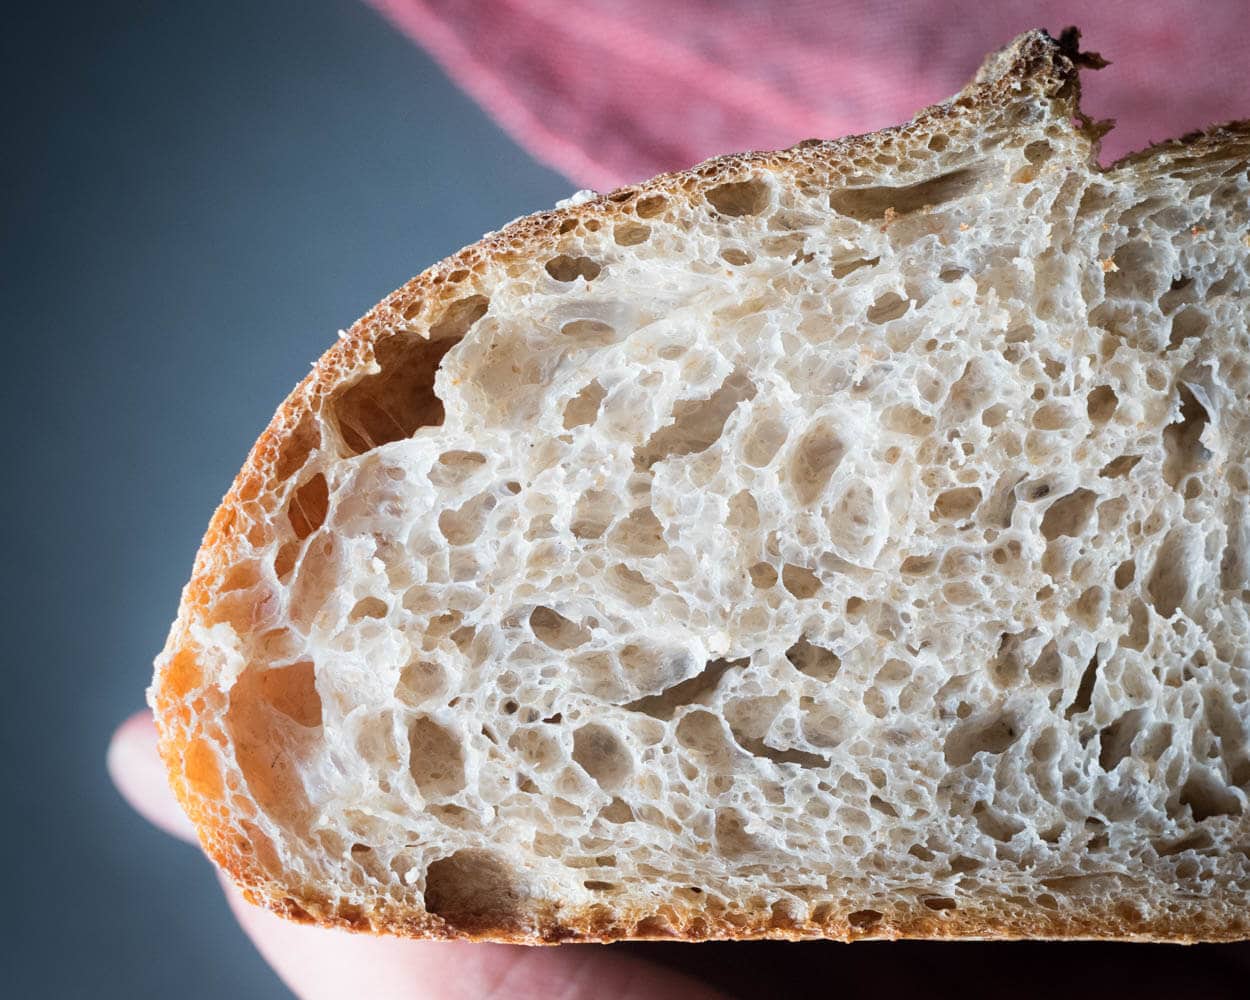
But first, a few shots of the loaf I procured at his joint. The bread was incredibly light in hand, the crust was thin but crackly, and it had this deep russet color with a sheen to it, almost a metallic shine. I want this color in my crust. Upon slicing, I noticed the crumb was a deep yellow color with uniform alveoli throughout, save for a few larger ones here and there. Signs of proper fermentation.
His loaf had an incredibly complex flavor with mild sourness and a deep, rich taste — quite a mouthful. With so much flavor it begged to be used with something simple, like a good slathering of cultured butter or light spreadable cheese. File yet another loaf of bread in my Seriously Good Bread list.
After my wife and I ate almost the entire loaf that evening, with everything in my fridge I could reasonably pair it with, I resolved to try and pull out some of those flavors in my bread using his flour. Now, I’m not even sure if the bread I ate was composed of the flour I had purchased, but I was determined to do my best. Let’s talk flour.
Flour Selection
I don’t recall if I’ve baked with stoneground flour before this sack of red wheat. Or perhaps I didn’t pay attention back then. Nevertheless, I’ve read that many bakers prefer flour milled by this ancient method, but why?
Stoneground flour is essentially just that: you take two massive grindstones, rotate them on top of each other, and feed in wheat berries. The resulting flour contains 100% of the wheat berry in its original proportions: the germ, bran, and endosperm. By rotating these two stones at a slow rate, milling is accomplished at a much lower temperature than when done with a high RPM mill. That lower temperature helps to preserve protein levels and prevents oxidization of the germ’s fats which causes significant vitamin loss2.
I’m not sure if this flour was hard winter or hard spring, but I do know it’s red wheat and not white wheat. Red wheat is high in protein but also has red pigmentation in the bran layer of the wheat berry, which is where it gets its name. This excess pigmentation causes the milled flour to be a tad darker in color but also has a slightly more rich flavor to it (some say “bitter”). Let’s take a look at how this stoneground flour visually compares to my regular whole wheat flour.
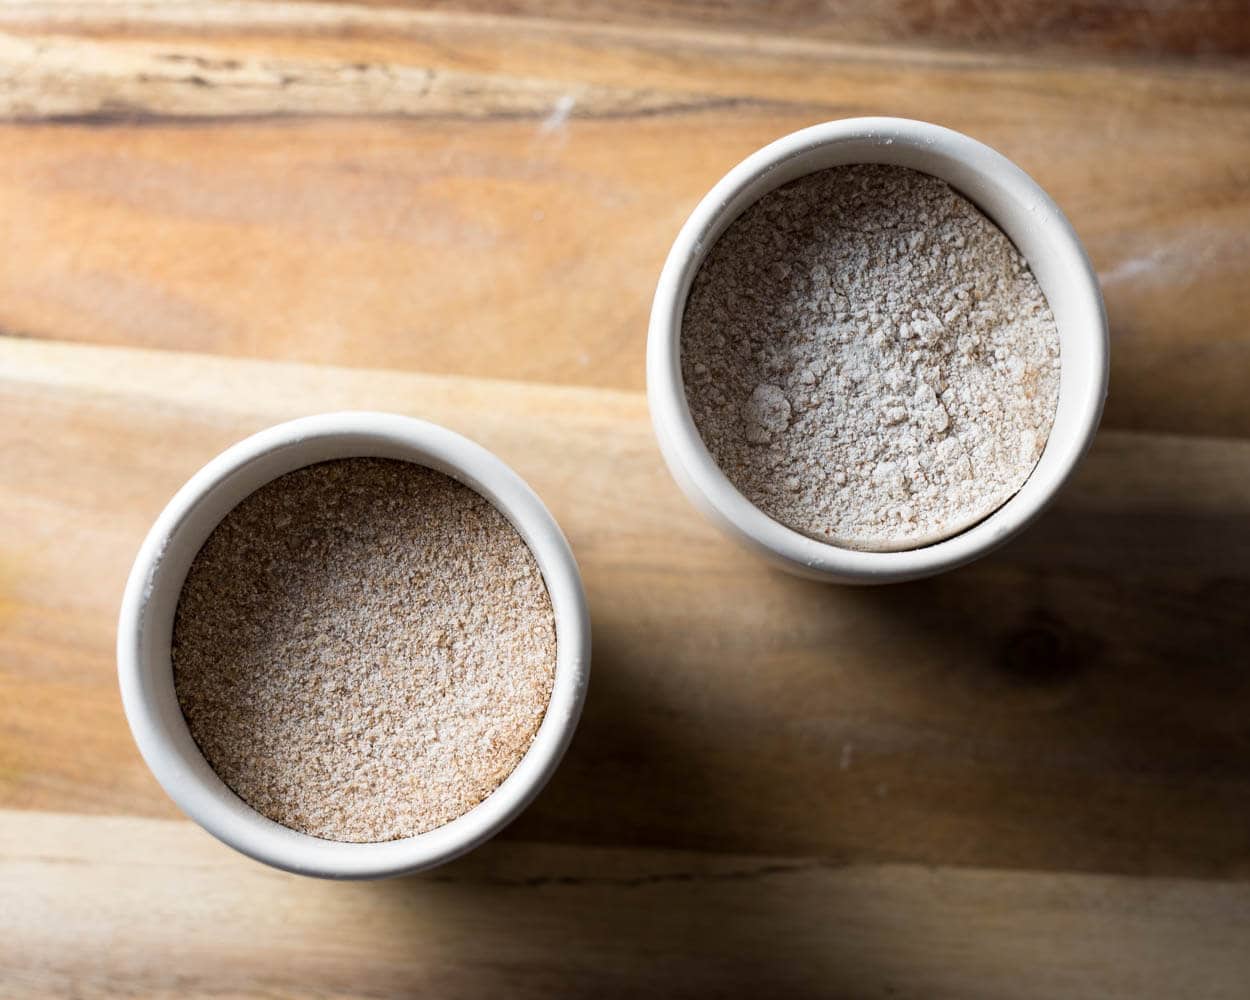
Above you can see a side-by-side comparison of Central Milling Hi-Pro Whole Wheat (right) and Josey Baker’s Stoneground Red Whole Wheat (left). Look at the large bran and germ flecks in Josey’s flour! Even further, below is a picture of Josey’s flour (left) on top of Central Milling’s Type 70 White Flour (right). As they say, stoneground flour without sifting preserves 100% of the wheat berry.
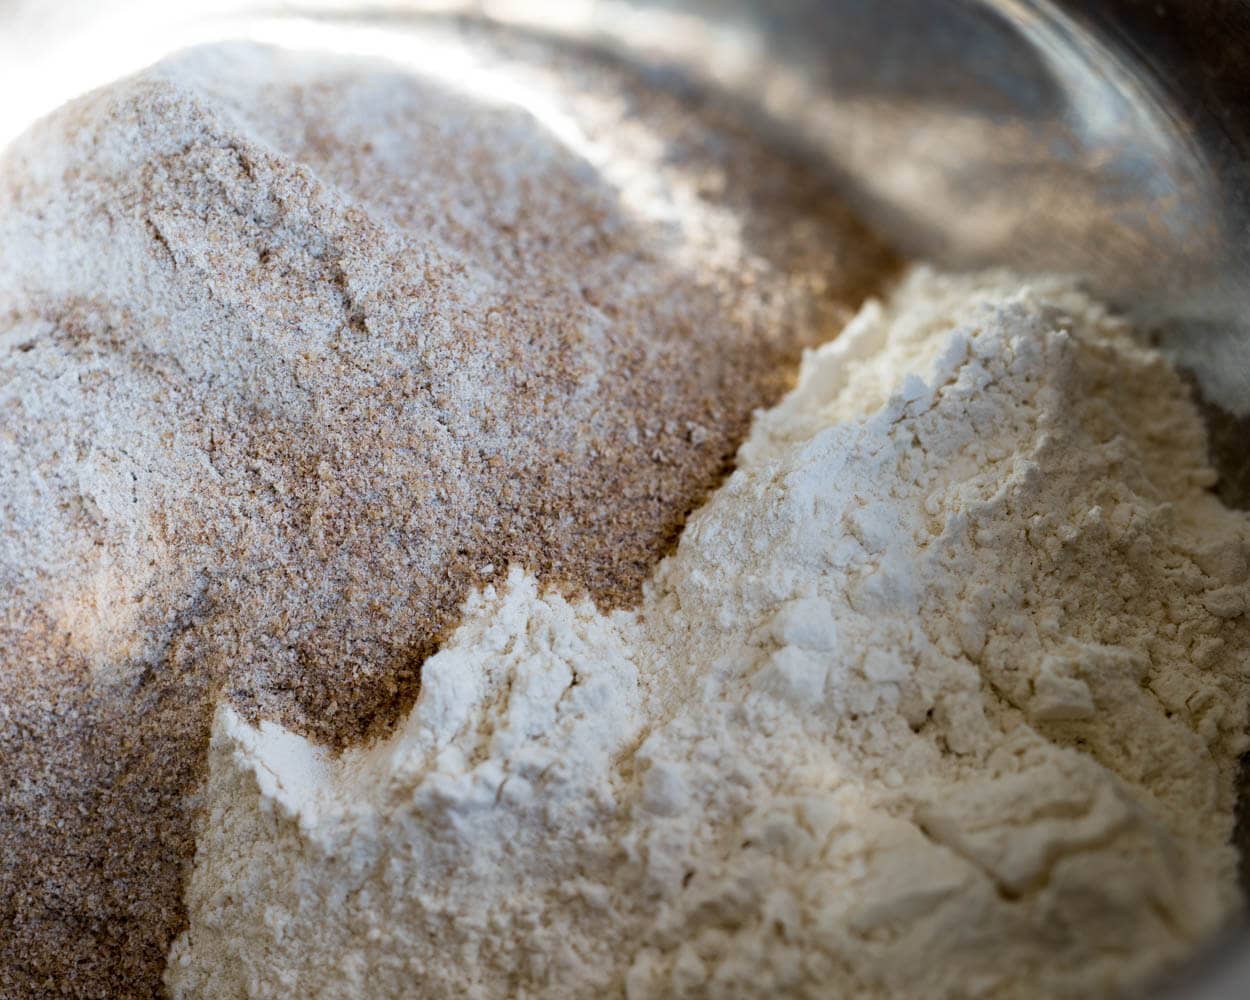
After baking several loaves using Josey’s flour, everywhere from 10% to 60% of the flour weight, I never achieved an incredibly open and lofty loaf. After those two pictures above it’s easy to see why: those large flecks of bran and germ act just the same as they do when baking predominantly whole wheat loaves, they cut gluten at each turn. But this is fine; an open, lofty crumb really should be a byproduct of an experienced baker, not the primary goal. Bread is to be eaten, right? The flavor is paramount.
Now that I’m out of Josey’s flour I regret not having the insight to try sifting out some of the larger particles, and then later reincorporating them as I did with my previous 100% whole wheat loaf, or just baking with “high extraction” flour. Ah well, next time.
Ok, now that we have all that under our belts, let’s bake a loaf.
Baking With Stoneground Red Wheat Recipe
Levain – 7:00 a.m.
I prepared a stiff levain (65% hydration) with a mix of Josey’s flour and Central Milling’s whole-wheat: 50/50. Gather the following and mix. This levain is a stiff variety at only 65% hydration. If you’re used to a liquid levain, it may feel strange to knead the mixture. Alternatively, you could up the hydration percentage to reach your normal liquid levain viscosity.
| Weight | Ingredient |
|---|---|
| 50g | Mature stiff starter |
| 50g | Josey Baker Stoneground Red Whole Wheat (or any stoneground whole wheat flour) |
| 50g | Central Milling Hi-Pro Medium Whole Wheat flour |
| 65g | Water |
Keep your levain in a warm area and wait about 4-5 or so hours until it’s matured enough to leaven your dough. If using a stiff levain you want to use after the significant expansion has taken place, but there is still a domed top (i.e., your “stiff ball” has not yet collapsed in the top-middle). If using a liquid levain you want bubbles on top and throughout and still a sweet smell to it, but almost tangy.
Autolyse – 11:00 a.m.
Prepare your flour and water (only) for a 2 hour autolyse.
| Weight | Ingredient | Baker’s Percentage |
|---|---|---|
| 200g | Josey Baker Stoneground Red Whole Wheat | 20% |
| 800g | Central Milling Type 70 White Flour (all-purpose flour would also work well) | 80% |
| 825g | Water | 82.5% |
| 20g | Fine sea salt | 2% |
| 175g | Ripe levain | 17.5% |
Perform the following for your autolyse:
- In a thick bowl add all the flour
- Add 775g of your water (the rest is reserved until later when we add in the levain & salt after the autolyse)
- Mix these ingredients by hand until all the dry bits are incorporated
- Cover with wrap and keep near your levain
Mix – 1:00 p.m.
After our autolyse has finished break up the stiff levain on top of the dough, pour about half of the remaining warm water on top to help dissolve things. Squeeze in the levain with your hands until well distributed.
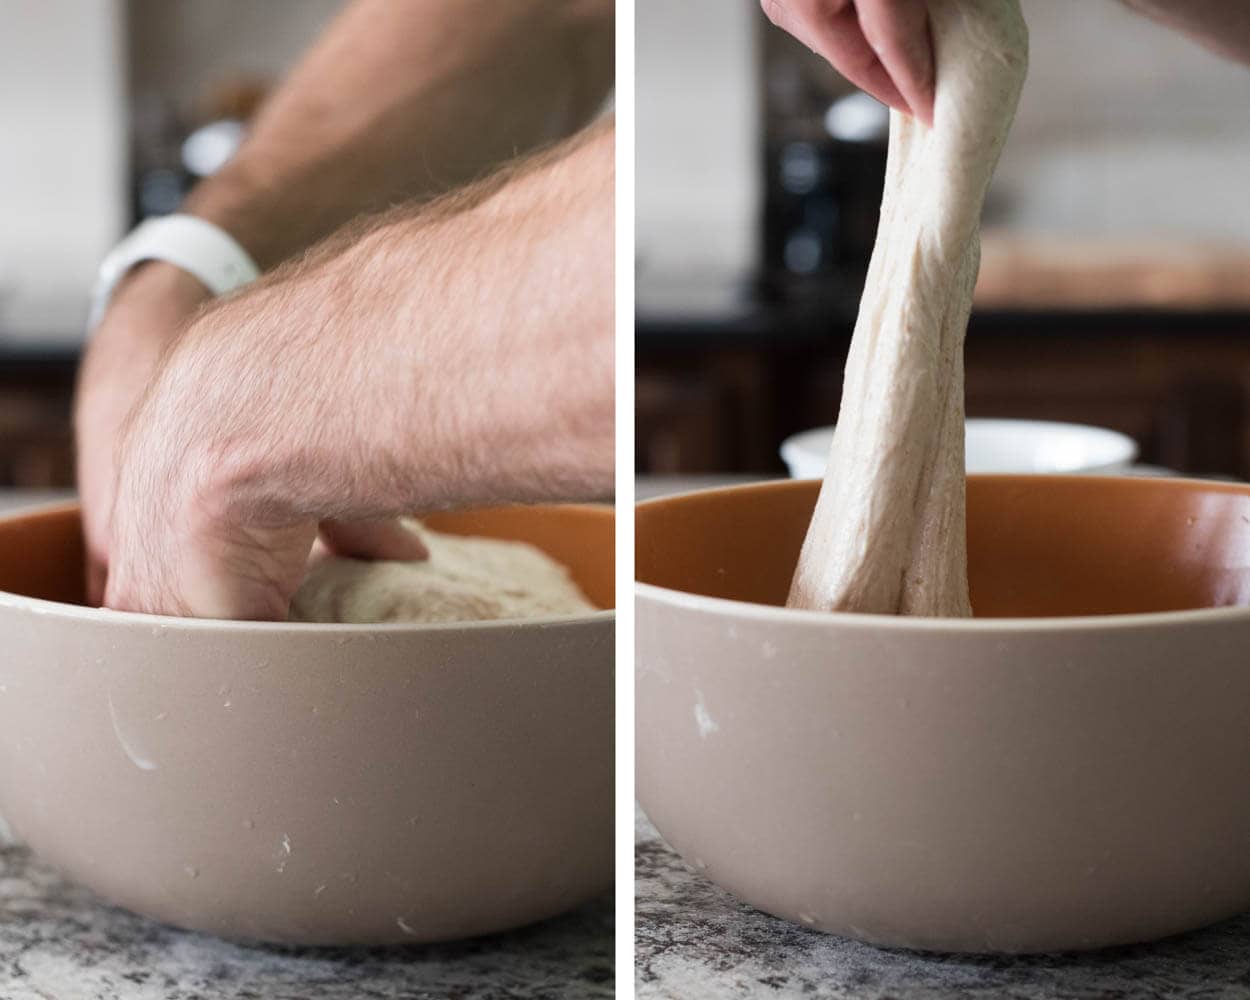
For mixing, I performed two 5-minute sessions of slap and fold (see my guide to the slap and fold technique), with a rest between.
- 5 mins slap/fold after adding levain & a bit of water (around 25g)
- 5 mins let the dough rest in the covered mixing bowl
- Add salt and remaining water (around 25g) and continue with 5 more mins of slap/fold until dough holds shape and is tighter
If you prefer to mix in the bowl instead of using the slap/fold technique, you can use a combination of the “pincer” method and stretch and folds. A “pincer” motion is bringing your index finger and thumb together as you work from one side of the dough to the other, when you reach the end we do a stretch up and fold over. Do this over and over until you feel like the ingredients have been incorporated thoroughly, after, you can merely do stretch and folds until the dough starts to feel a little more extensible, a little stronger. After about 8 minutes of mixing, pour on your 20g salt and pincer through the dough to mix well. I mixed for an additional 2 minutes with salt added.
| Final dough temperature: | 78°F (25°C) |
Bulk Fermentation – 1:30 p.m.
Transfer your dough to a container for bulk fermentation and let rest for the first 30 minutes. After the first 30 minutes have passed, perform your first set of stretch and folds. Repeat for two more sets at 30 minute intervals and then let the dough rest until the end of bulk fermentation.
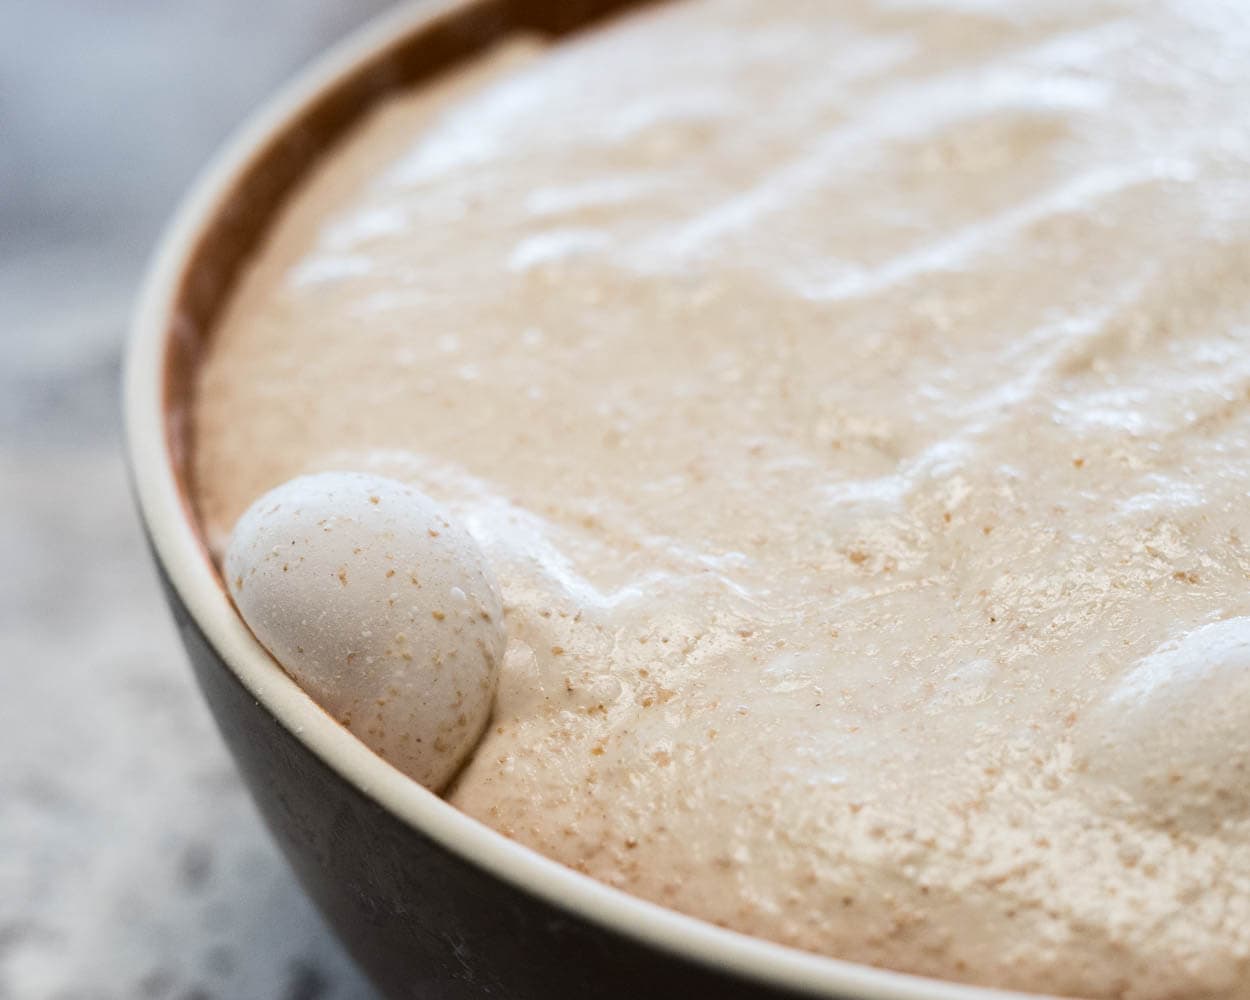
At the end of bulk fermentation, you’ll notice some bubbles on top of your dough, a rise by some percentage (perhaps around 30%), slightly domed at the edges where the dough meets the container, and it will be lofty and jiggly — alive.
Pre-shape – 5:00 p.m.
Take the dough out of your bulk container and divide the mass into two halves. Pre-shape into two loosely shaped boules to rest for 30 minutes. As you can see below, we do a gentle preshape. It’s not essential to have tightly rounded boules at this point, but if your dough feels exceptionally slack (mine did not), then a little extra tension here will help strengthen your dough.

Cover with inverted bowls or damp towels to keep the resting dough moist.
Shape and Proof – 5:30 p.m., Then in the Fridge at 5:45 p.m.
After the 30 minute rest, shape each dough mass into either a tight boule or a batard. Gently place them into rice flour-dusted bannetons or whatever proofing basket you happen to have around the kitchen (small mixing bowls work pretty well in a pinch). Cover with plastic wrap and pop into the fridge for their nighttime slumber.
It was a long day inside, get outside to walk the dog, play with kids or like me, all of the above plus pictures of garden plants as the sunset.

Bake – around 10:00 a.m.
Preheat your oven to 450°F (230°F). I baked these directly on my baking stones with the method outlined in my previous post, Baking With Steam in Your Home Oven. If you prefer to use a Dutch oven, have at it, you will get excellent results that way as well. If using a Dutch oven preheat with it inside and open so one side is on the left and one side is on the right. For more, see my guide to baking in a Dutch oven.
After 1 hour, pull out your loaves, we are going to bake straight from the fridge, per usual. Unwrap and place each on a piece of parchment paper. Score the top with your desired pattern to promote oven spring and get them into the oven.
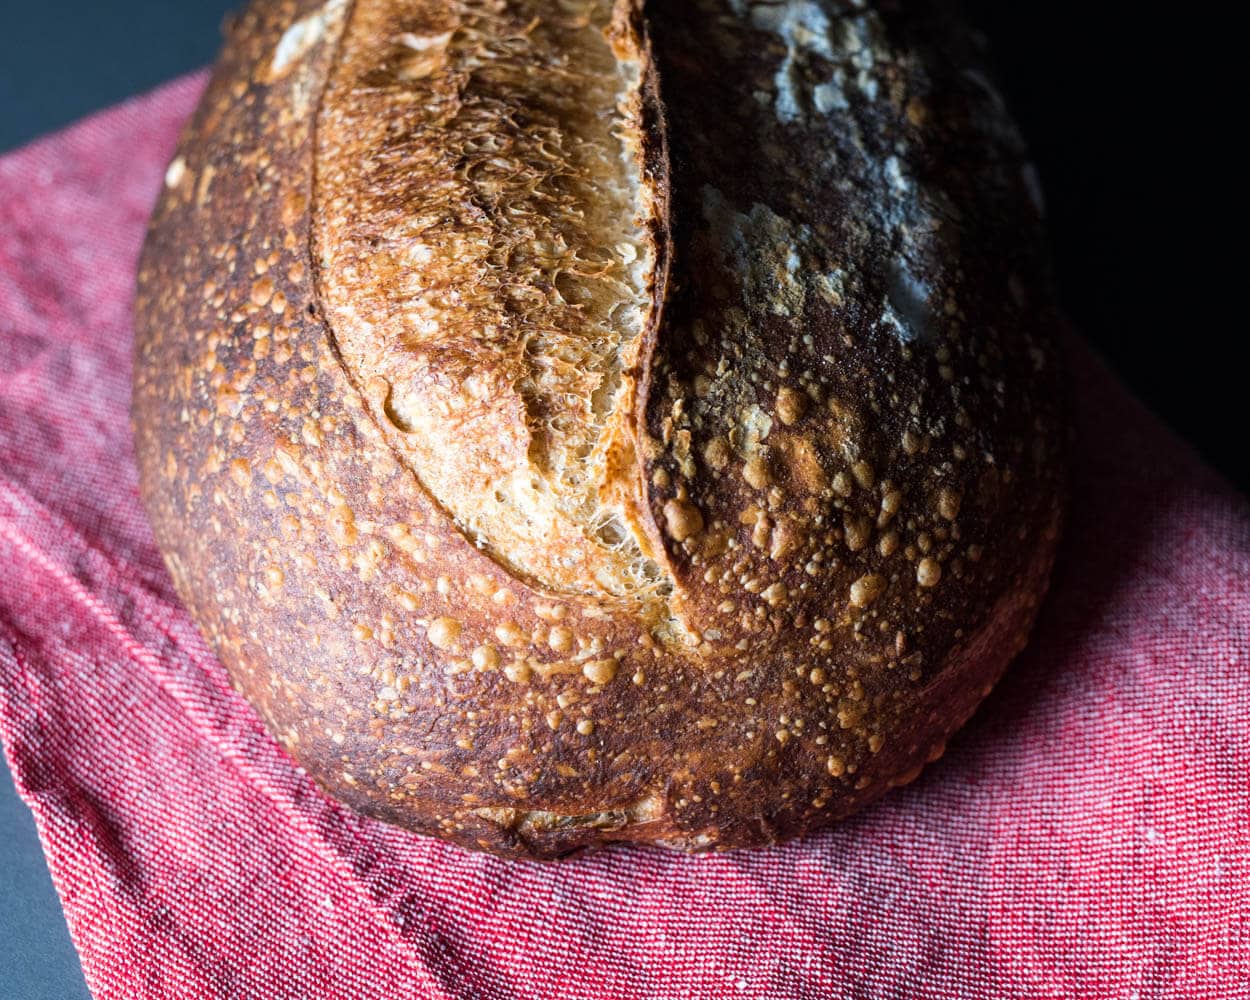
Bake with steam for 20 minutes at 450°F (230°C). After 20 minutes remove your steaming pans (if using Dutch oven remove the top, but leave in the oven) and bake for an additional 30 minutes, until your desired level of doneness. If you’re new at this and not sure how long to bake, go for a beautiful brown color (you can see below), or if you’d like to be more precise, the internal temperature of your loaves should be around 208°F (97°C).
Conclusion
In baking with stoneground red wheat, I wanted to focus on the crust, that wonderfully crackly crust with blisters and different gradients stretching across, but also a step towards my goal of further research and experimentation with varying flour types. Baking with Josey’s stoneground red wheat was an excellent addition to this bake, and the flavors were out of this world. If you’re in the San Francisco area, stop in at The Mill and snag a bag for yourself.
Along those lines, soon I’ll be milling my flour right from home and experimenting with these different wheat varieties, check out my recipe for baking with freshly milled flour.
Crust
Lovely blisters, super-thin crust, and a crunchy exterior. I couldn’t be any happier. These loaves had this sheen to them, like I mentioned at the beginning of this entry when looking at Josey’s bread, almost a metallic shine in the light. Not quite as pronounces as his loaf, but still there. Additionally, that red wheat imparts a rusty and bold look to the outside — I love that.
Crumb
Wonderfully fermented and deliciously tender. The loaf was light in hand and the interior supremely lacey. Pushing the fermentation in this loaf resulted in a bread that was so soft it tore apart easily—a sign of proper fermentation management.
Taste
A deep and complex flavor to this bread. The red wheat and its subtle astringency shines through just a bit at the beginning but fades away to the sweeter notes found in the white flour. An excellent balance of both tastes. If I could obtain a steady source of this stoneground red whole wheat, I’d surely do so.
I know it’s not possible for many out there to use Josey Baker’s flour, but I thought this entry would shed some light on the differences between stoneground and roller-milled flour and show some results I’ve had using his red whole wheat. Buon appetito!
If you use this recipe, tag @maurizio on Instagram so I can take a look!
