
I have made whole wheat sourdough in the past but never an entirely whole grain version, I typically mix in some white flour or sift out the bran, never to return. However, this entry is a real 100% whole wheat sourdough, through and through, and I have to say its taste surprised me. Not too wheaty, not bitter, and a beautiful rise with a just-dark-enough colored crust. Some of this is due to the exceptional whole wheat flour I’m using (see below), but of course, bread doesn’t just bake itself, the process is just as important.
The increased nutrition in whole wheat bread is a welcome thing, but also, the taste is so utterly different from my white flour sourdough loaf, and it’s great to change things up when you bake weekly (or more than that, in my case). But, not only a change in taste of the resulting bread but also a change in process and an adaptation of skills. I feel like baking whole wheat requires a baker to elevate their observational skills to a new degree, to observe the dough and respond to its ever-changing attitude as the bake progresses. It keeps you on your toes!
To achieve a completely whole grain sourdough I employed my 100% whole wheat stiff starter. If you don’t maintain a starter that is completely whole grain you can either convert yours over, make a new one from your existing one1, or use what you have with the expectation that your loaf will have just a little bit of white flour in it — not that big of a deal as the percentage of your eventual starter in the final dough is relatively small.
Flour Selection
After an exchange of emails with an astute reader (hey, Margie!) I’ve decided to add a new section to my posts that delve into the flour selected for the current bake. Sometimes the flour will be the same as the previous post, especially since I order it in 50-pound bags, but when there is something new to discuss I’ll add it in this section before the recipe.
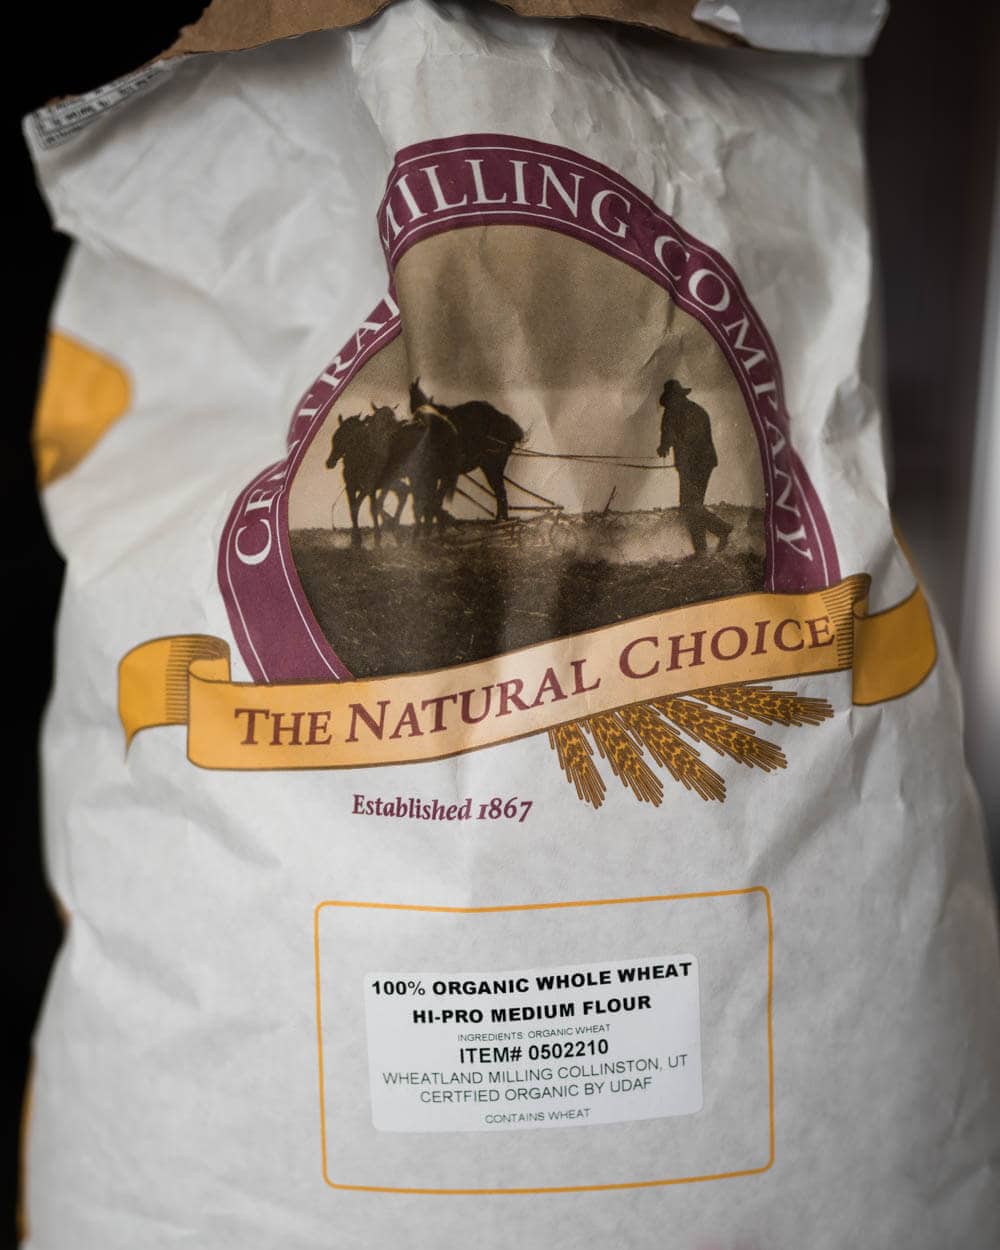
As we know, flour is an incredibly important ingredient in bread, you know, since it is one of the only three ingredients required. With Central Milling’s new website where they’ve made ordering 50-pound bags easier than ever2, I have access to some incredible flour options, including a variety of whole wheat flour. A month or so ago I decided to pick up a bag of their Organic Whole Wheat Hi-Pro Medium Flour and have truly enjoyed its flavor when used in my white country loaf. The medium here indicates the flour is ground to a “medium” granularity, which according to them is great for mixing in with white flour, but not superb when baking 100% whole wheat loaves. They have a Fine flour option which they indicate is more appropriate for 100% whole wheat. Pretty safe to say next order I will add a bag of this to my cart.
I’ve found that the finer the flour, especially for whole wheat flour, the better the result as there will be fewer large germ/bran particles to shred your gluten structure during mixing and folding. Until I’m able to procure my own mill (which I now have!), so I can mill at my own desired granularity, I’m reliant on what I can purchase. However, there are things we can do to help prevent the bran from wreaking havoc on our dough: sifting. I’ll dig more into this later in this entry.
The ash content of flour is calculated by burning a given quantity of flour under prescribed conditions and measuring the residue.
The flour I’m using for this bake has a protein level of about 14%, ash of 1.5%, and is a blend of hard red spring wheat. The ash content represents the amount of mineral content in the flour, in this case, a 1.5% value indicates an extremely high mineral content with no bran sifted out. In other words, the flour contains the entire wheat kernel (which is correct given this is whole wheat flour). Naturally, the higher the ash percentage, the higher the nutritional content of the flour.
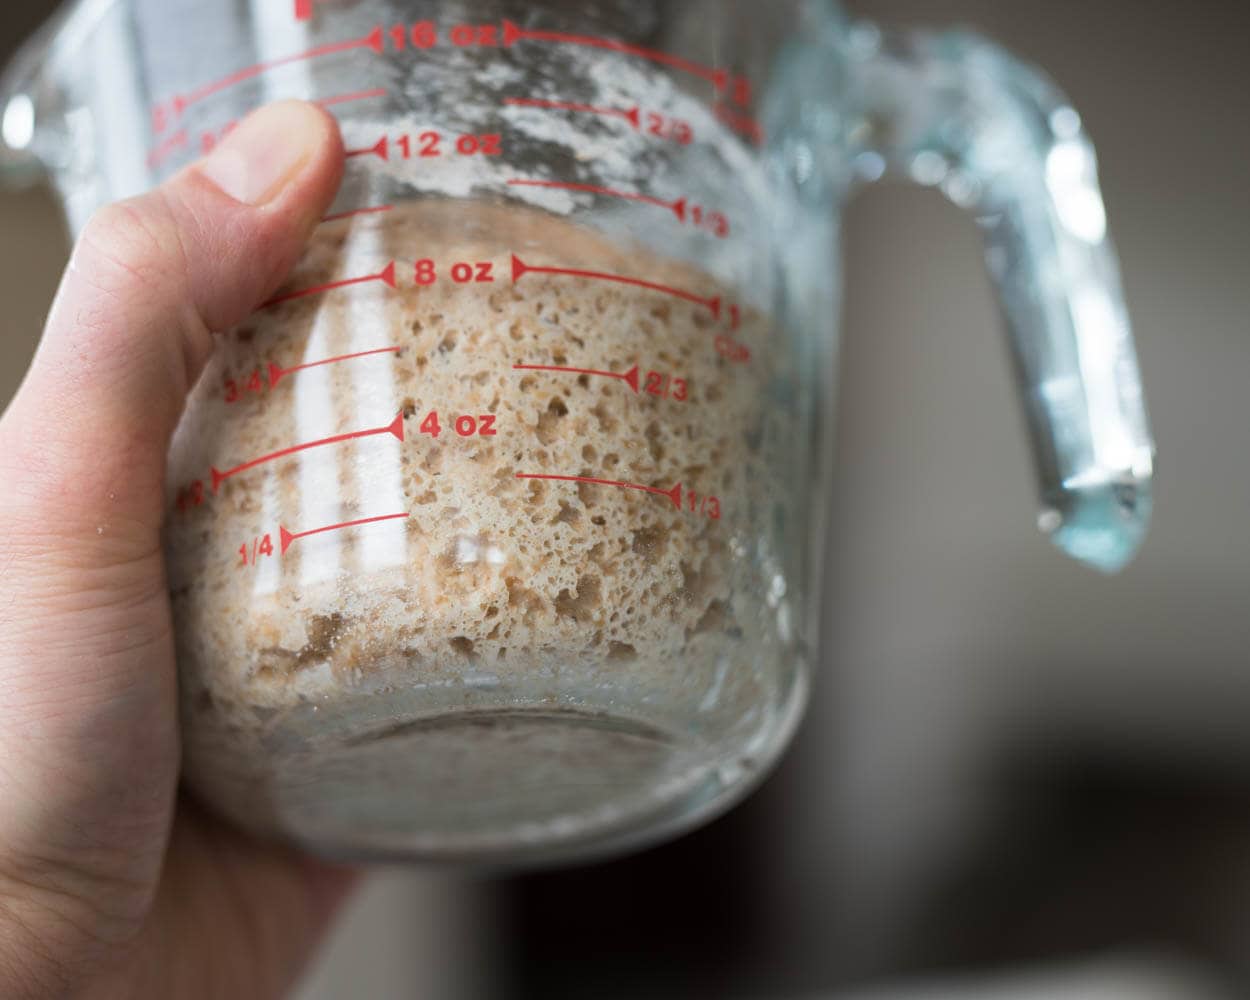
Due to the nature of whole wheat flour and the high level of nutrients available for your starter expect that your fermentation will move along at a pretty steady clip. Keep an eye on your dough and the signs that it’s progressing according to your expectations, it’s easy for this dough to get away from you! I avoided leaving the dough out on the counter before its cold retard; there was no need for additional counter time for me.
Prepare the 100% whole wheat stiff levain – 8:30 a.m.
I’ve kept a 100% whole wheat stiff starter for a while now and have used it to great success. I’ve written about it in the past, and my next upcoming entry will be my maintenance schedule and how to create one of your own. If you don’t have a stiff starter, no worries, your liquid version (and the one I’ve outlined previously) will do just fine here.
Gather the following and mix. This levain is a stiff variety at only 65% hydration. If you’re used to a liquid levain, it may feel strange to you to almost knead the mixture but don’t worry it will come together. Alternatively, you could up the hydration percentage to reach your normal liquid levain viscosity.
| Weight | Ingredient | Baker’s Percentage |
|---|---|---|
| 41g | Ripe, stiff starter | 50% |
| 81g | Whole wheat flour (Central Milling Hi-Pro Medium Whole Wheat flour) | 100% |
| 53g | Water | 65% |
Keep your levain in a warm (80°F/26°C) area and wait about 4-5 or so hours until it’s matured enough to leaven your dough. You can see my whole wheat stiff levain all mixed up and in a tight-shaped ball below.
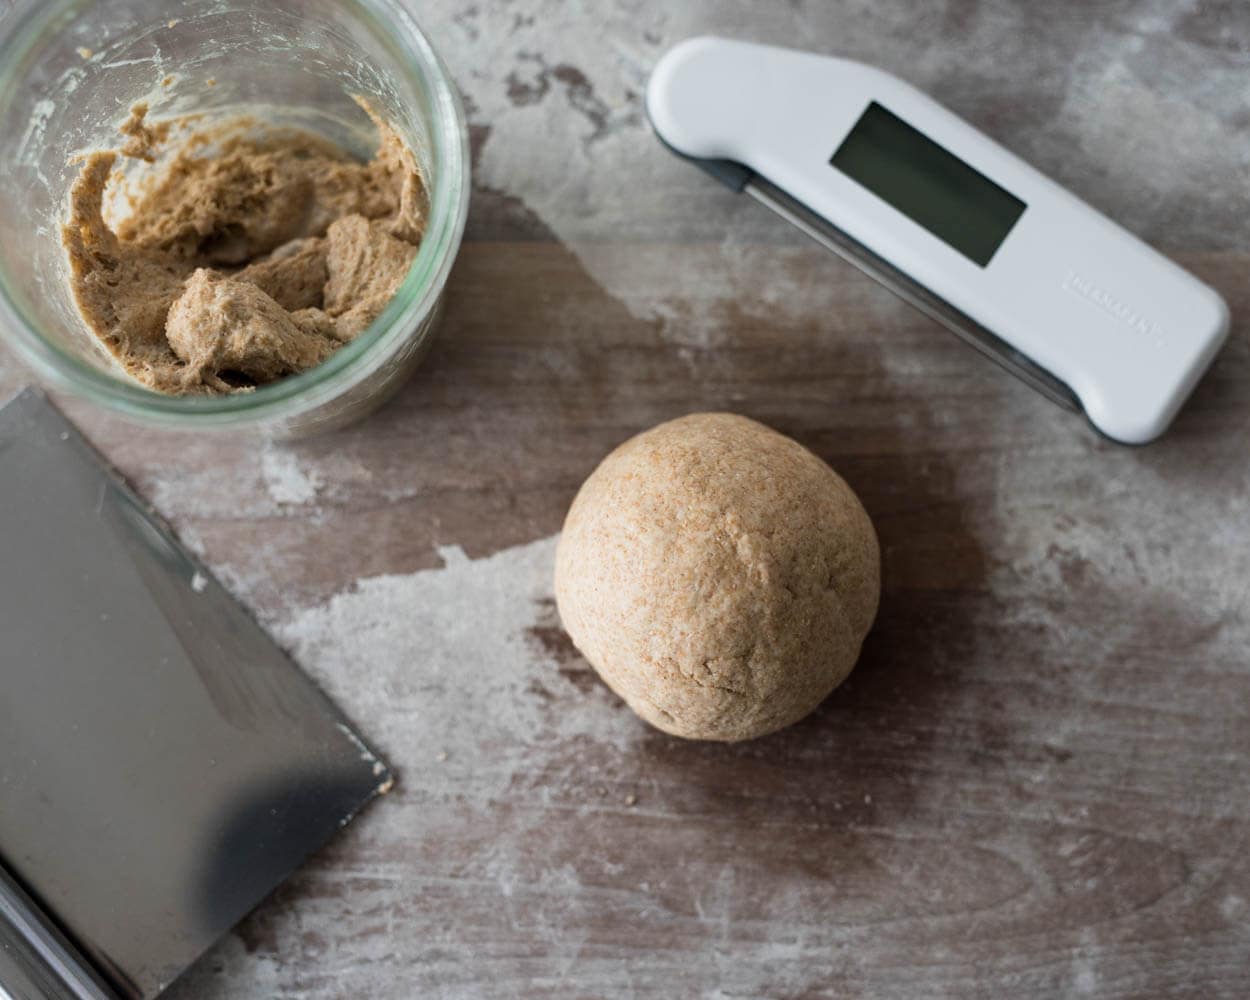
If using a stiff levain you want to use after the significant expansion has taken place, but there is still a domed top (i.e., your “stiff ball” has not yet collapsed in the top-middle). If using a liquid levain you want bubbles on top and throughout and still a sweet smell to it, but almost tangy.
Sift Your Flour – 8:40 a.m.
Right after preparing the levain, we will sift our whole wheat flour to remove as many of the large, chunky bran particles as possible. It is these large particles that act like little swords cutting through your dough destroying that nice gluten matrix we spend time building to trap gas and create a nice voluminous loaf. By sifting them out, submerging them in boiling water, and incorporating them later, we can treat the bran just like we would seeds or nuts and combine them back in gently after we’ve strengthened our dough.
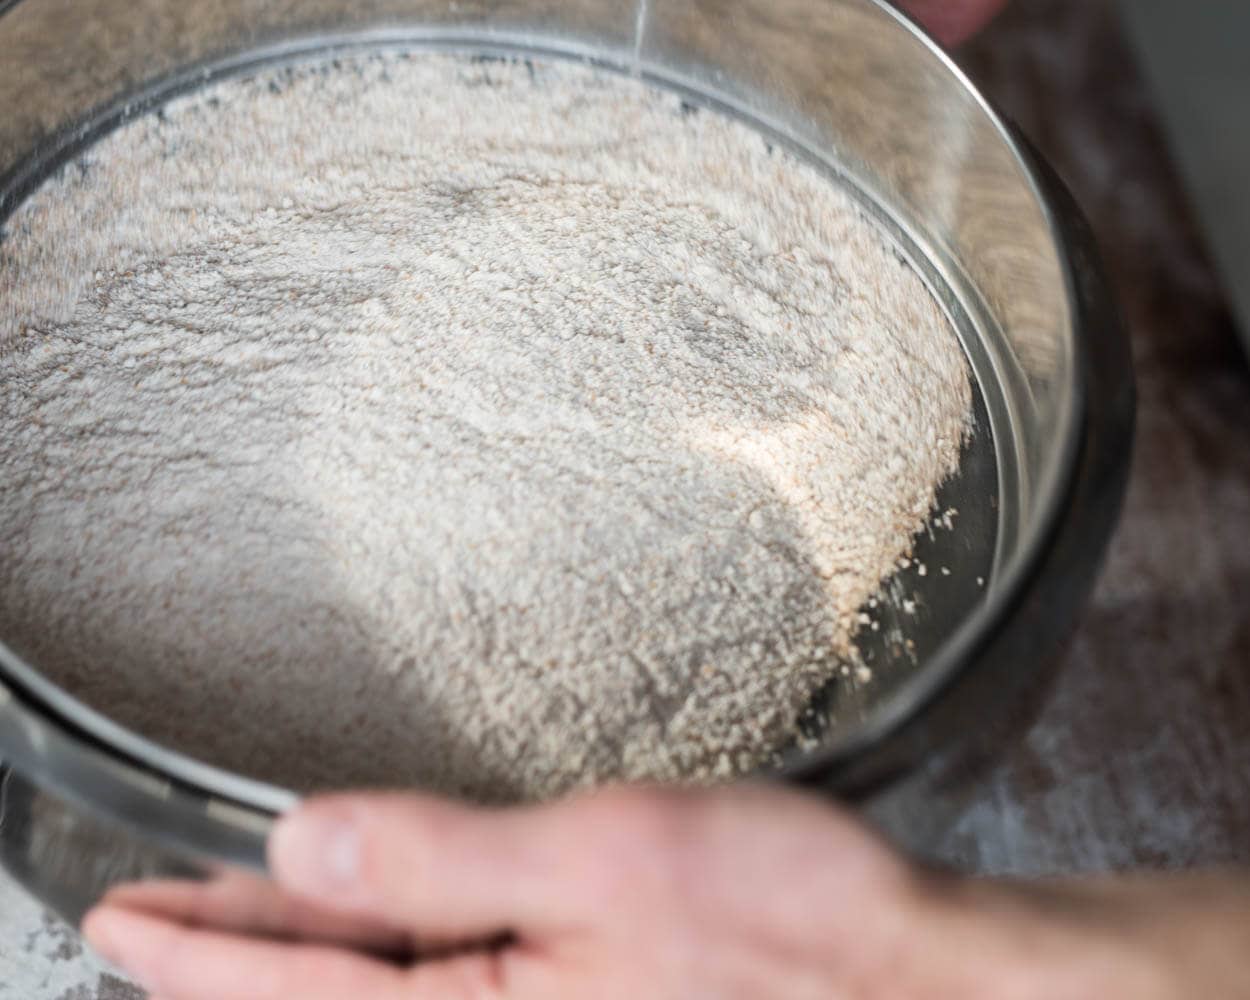
I use this flour sifter to do my sifting, but there are others you can find online with specific mesh spacing designations, so you know what extraction you’ll achieve. For me, I know after using this particular sifter, and this flour, I get from 13 to 15% extraction—and that works for me.
The easiest (read: cleanest) way I’ve found to sift is to find a bowl that will completely fit your sifter inside, but stop partway down from the top. Place the sifter inside till snug and pour in some flour, shake side-to-side to let the finer particles fall through, and collect the more coarse particles up top. I sifted out about 13% of the total flour used for this recipe, which means out of the 1000 grams of whole wheat flour for this recipe I removed 13% bran (or more accurately, 129 grams) using my sifter.
Pour the sifted, coarse bran into a small bowl and pour 200 grams of boiled water on top. Let this soaking mixture rest near your levain until we are ready to mix the dough.

Autolyse – 10:00 a.m.
We will do a two-hour autolyse with this dough. To make things easier, you could mix your autolyse ingredients at the same time you prepare your levain, but I wouldn’t do any less than 2 hours. Whole wheat flour, with its high protein levels, can be quite tough and resist stretching (low extensibility), a longer autolyse helps combat this.
Note: the mixed ingredients for this autolyse does not contain the stiff levain (only flour and water).
Ingredients:
Gather the following:
| Weight | Ingredient | Baker’s Percentage |
|---|---|---|
| 1000g | Whole wheat flour (Central Milling Hi-Pro Medium Whole Wheat flour) | 100% |
| 750g | Water | 75% (see note below) |
| 20g | Fine sea salt | 2% |
Note: the final hydration for this loaf is going to be around 95% (750g water above and 200g water poured over bran after sifting). The hydration might even be a bit higher than this as a little water was used on my hands when folding in the bran after the second set of stretch and folds.
Perform the following for your autolyse:
- In a thick bowl add all the flour
- Add 700g of your water (the rest is reserved until later when we add in the levain & salt after the autolyse)
- Mix these ingredients by hand until all the dry bits are incorporated
- Cover with wrap and keep near your in-progress levain and sifted bran until mix time (in my case in the oven to keep warm)
Mix – 12:00 p.m.
After the autolyse, break up the stiff, ripe levain on top of the dough. Pour about half of the remaining warm water on top to help it dissolve while mixing.
I mixed for about 8 minutes, in the bowl, using a combination of the “pincer” method and stretch and folds. A “pincer” motion is performed by bringing your index finger and thumb together as you work from one side of the dough to the other, when you reach the end we do a stretch up and fold over. Do this over and over until you feel like the ingredients have been incorporated thoroughly. After this, you can do stretch and folds until the dough starts to feel a little more extensible, a little stronger.
After about 8 minutes of mixing, pour on your 20g salt and pincer through the dough to mix well. I mixed for an additional 2 minutes with salt added.
| Final dough temperature: | 79°F (26°C) |
Bulk Fermentation – 12:10 p.m.
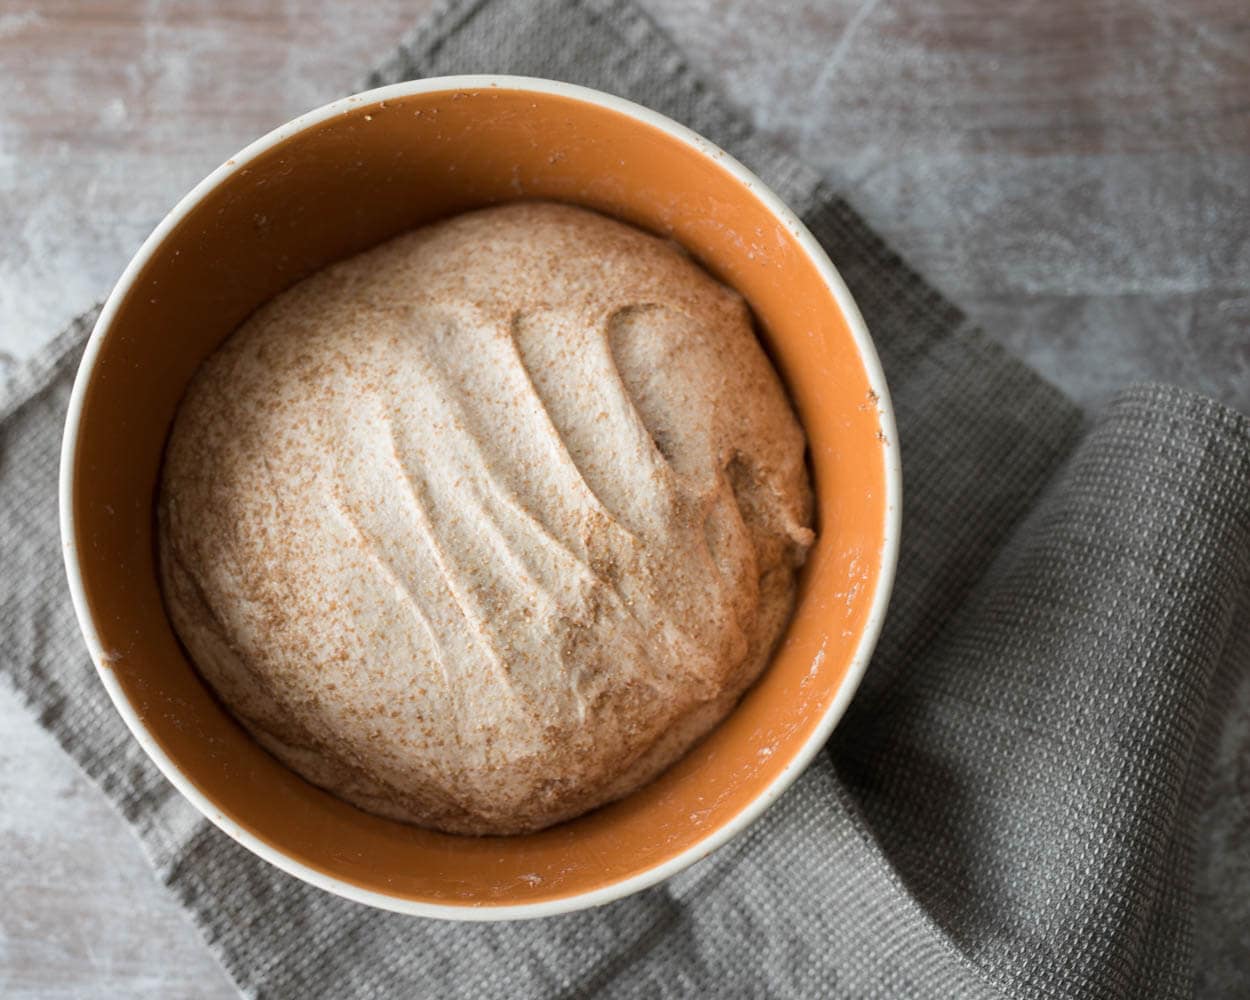
Transfer your dough to a container to be used during bulk fermentation and let rest for the first 30 minutes. I’ve taken to using my Heath Ceramics super thick ceramic bowl. It helps regulate temperature by keeping the dough insulated, the dough doesn’t stick at all to the sides, and it’s wide enough to do stretch and folds with no problem. Any container works well here, though, it’s a personal preference thing.
You can see in the image below just how much bran was sifted out and reincorporated back in after the second set of stretch and folds. Follow the schedule (loosely, you’ll have to adjust for your flour, environment, and many other factors) below:

After the first 30 minutes have passed, perform your first set of stretches and folds.
- 12:40 p.m. – Turn Set 1
- 1:10 p.m. – Turn Set 2 – After this set gently fold (using a little water on your hands) in your sifted bran, resting in boiled water (it will have absorbed all 200g and will be moist but not wet)
- 1:40 p.m. – Turn Set 3 – Dough felt strong here so this was my last set, we want to avoid overworking this dough
Because of the higher protein amount in this whole wheat flour the dough looked plenty strong to me after three sets of stretch and folds. I let the dough rest from 1:40 p.m. to 4:10 p.m. to complete bulk fermentation. You can see below the strength of my dough: it’s holding its shape in the container with rounded edges, streaks across the top, and the dark brown colors show the bran reincorporated at this point.
Preshape – 4:10 p.m.
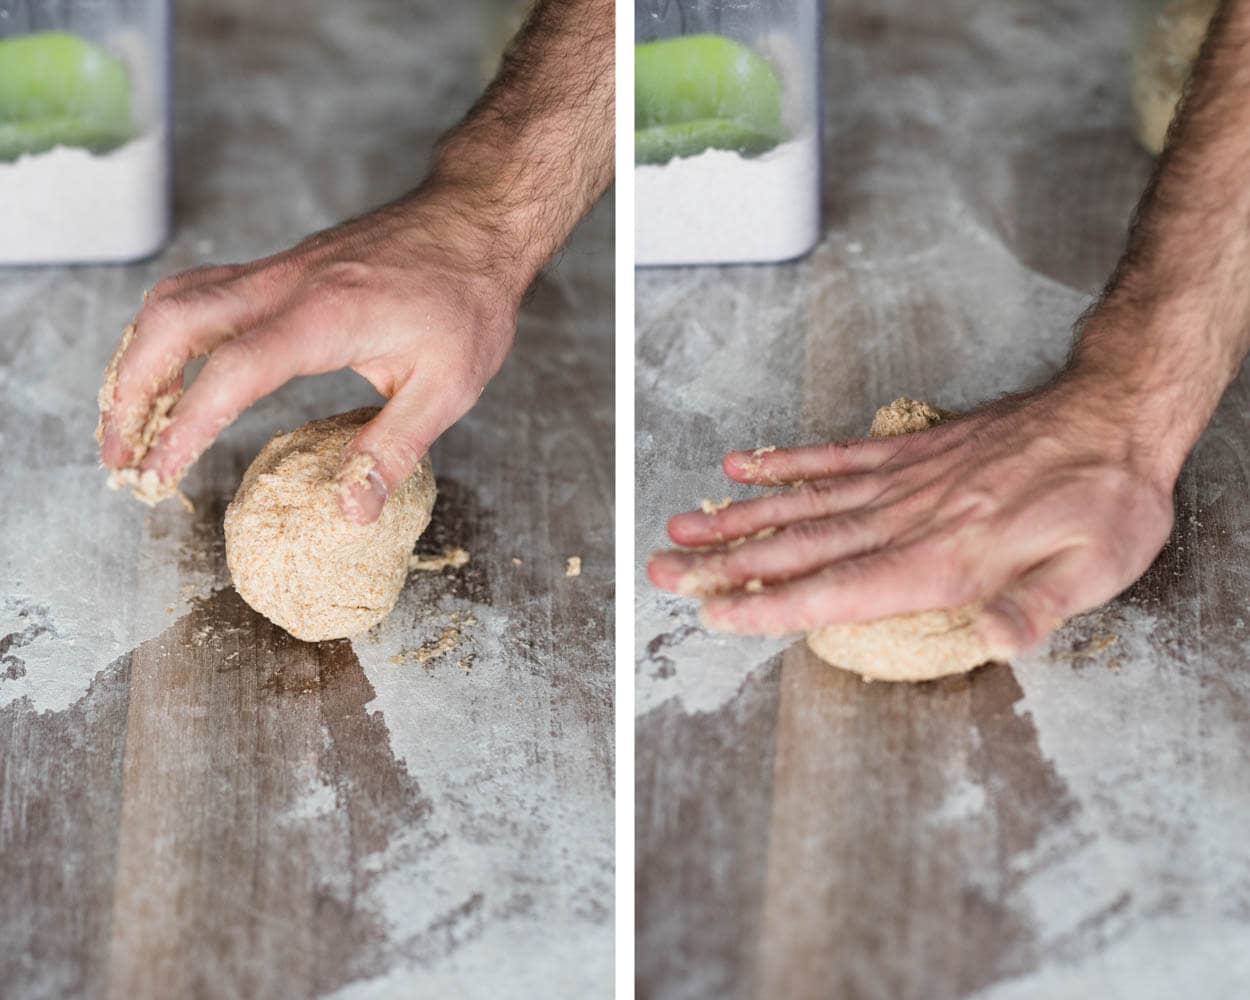
Take the dough out of your bulk container and divide the mass into two halves. Pre-shape into two loosely shaped boules to rest for 20 minutes.
As you can see below, we do a gentle preshape. It’s not important to have tightly rounded boules at this point, but if your dough feels exceptionally slack (mine did not), then a little extra tension here will help strengthen your dough. I try to avoid overworking whole wheat dough at this point, especially now since the bran has been incorporated.
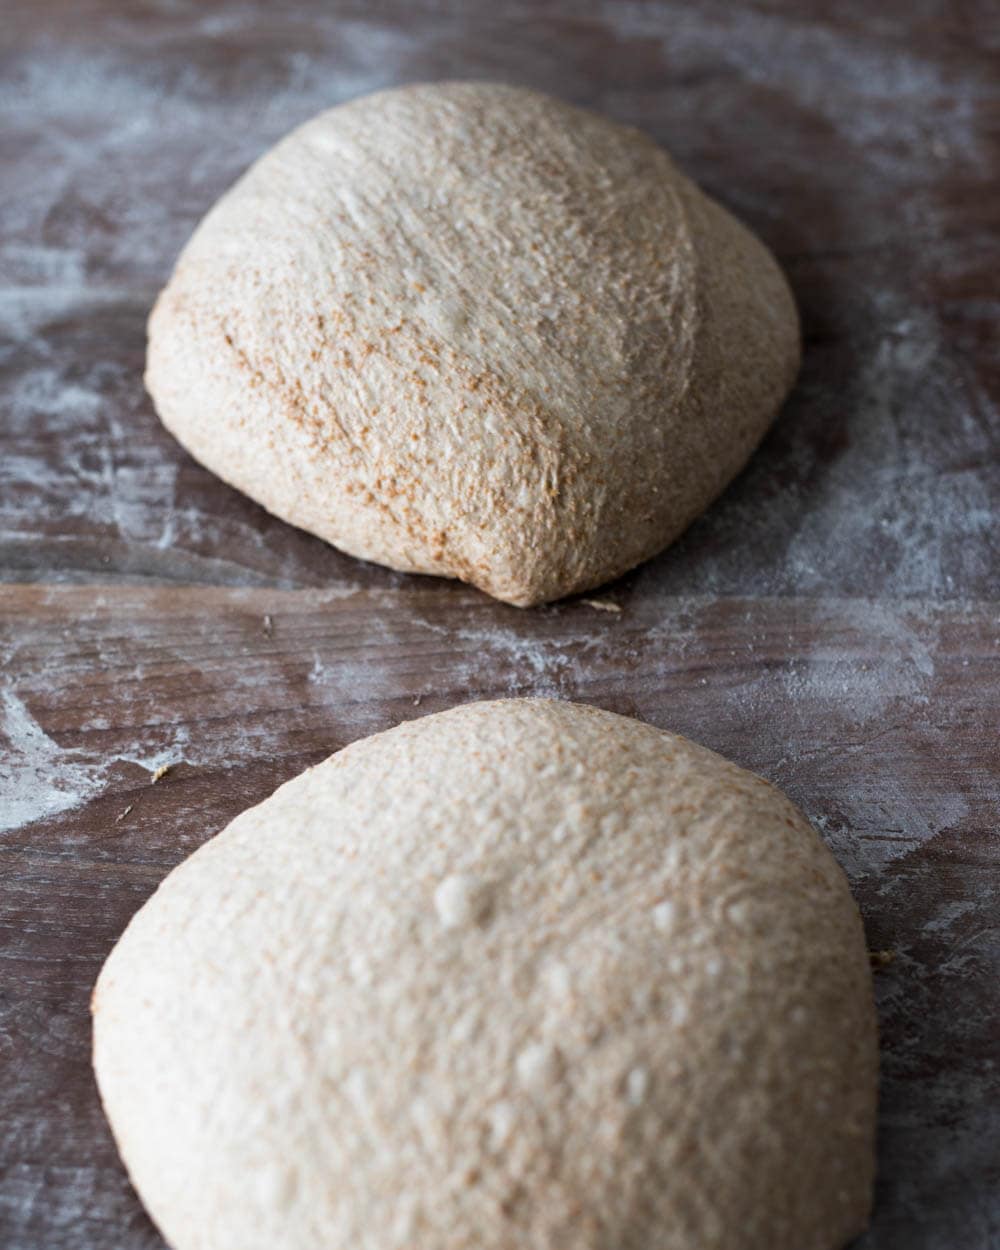
Cover with inverted bowls or damp towels to keep the resting dough moist.
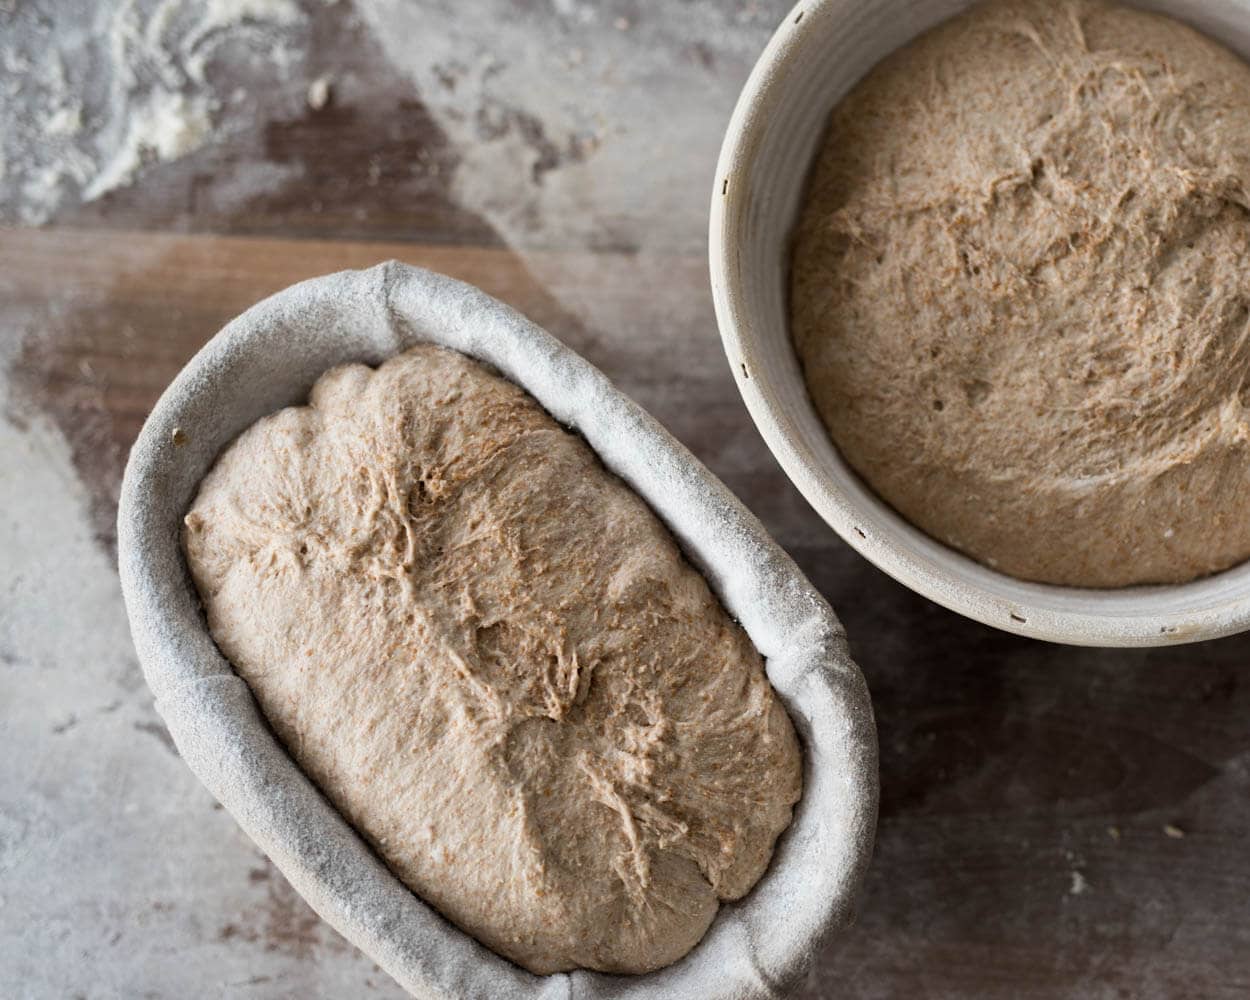
Shape and Proof – 4:30 p.m., then into the Fridge at 4:45 p.m.
After the 20 minute rest, shape each dough mass into a taut boule. I tested one as a batard and one as a boule, but for some reason with whole wheat bread, I prefer the boule shape.
As I mentioned earlier, I didn’t let the shaped dough rest on the counter before retarding. Your dough may need additional time, but likely not. Whole wheat ferments so fast (especially if your starter is in tip-top shape) it’s safer to retard in your fridge straightaway.
Score + Bake – around 10:50 a.m.
Baking in a Dutch Oven
See my post on baking in a Dutch oven or combo cooker for an in-depth discussion on the process to follow.
Preheat your oven with a combo cooker or Dutch oven inside to 450°F (230°C). When preheated, take one of your bannetons out of the fridge and cut a piece of parchment paper to place on top. Take your peel and then put it on top of those two and quickly invert it, so the dough is now resting on the parchment paper which is resting on the peel.
Take out the shallow side of your Dutch oven and drag in your dough. Quickly place the pan back in the oven, cover with the deep side, and bake for 20 minutes. After 20 minutes, open the oven and take off the lid of the combo cooker or Dutch oven to vent the steam (set it next to the other half inside the oven), then bake for an additional 35 minutes or so, until the bread is to your desired doneness.
Baking on Stones
Lately, I’ve been baking experimentally without my Dutch oven, placing the dough right on a thick baking stone and using various methods to steam the oven. I’m working on a comprehensive write-up on the different techniques I’ve tried but below is a shot of my current approach. I’m using a hot cast iron pan with lava rocks (preheated) where I toss on 1 cup of cold water right as I’m loading my dough.
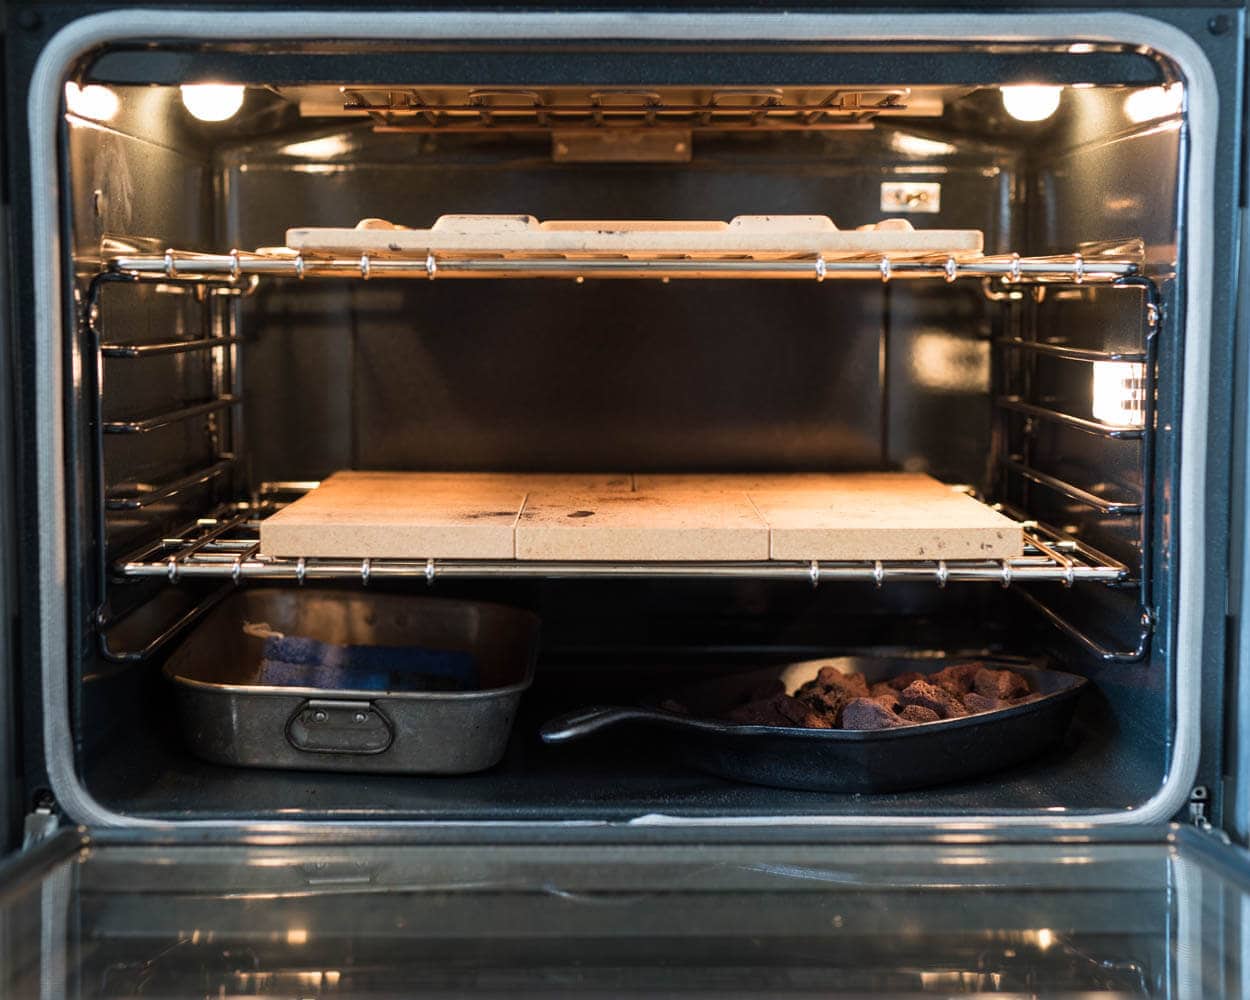
I have more information on generating steam in your home oven in this future post, but one thing I’ll say here if you’re studying my picture above: you’ll notice I have a baking stone on top to radiate heat downward on my loaves. After extensive testing, I’ve found this top stone to not be of much benefit.
Whether you bake in a Dutch oven or on baking stones, wait as long as you can (preferably around 12-24 hours) before cutting. The interior stays quite tender for an extended period, and the flavor develops the next day.
Conclusion
All-in-all this is my go-to approach for baking 100% whole wheat bread. For my next flour order I’ll pick up some of Central Milling’s “fine” whole wheat to see the result (and update this post with my findings) — I expect more volume and little, if any, need to sift. However, for any whole wheat flour, you purchase you always have the option to sift to remove those big particles as we did above. It lets you strengthen your dough with a lowered concern for damaging your dough.
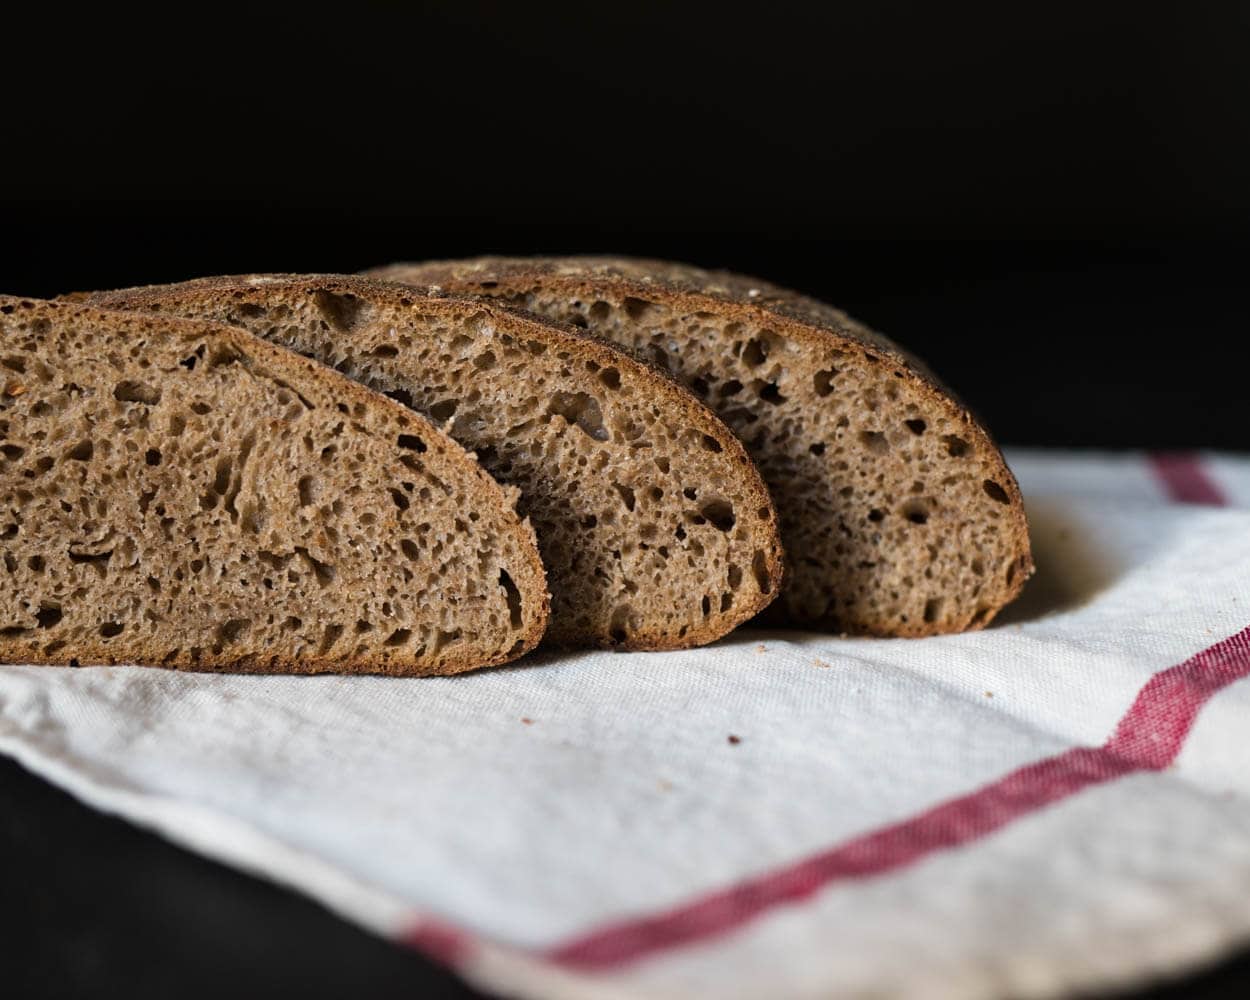
All that aside, this bread was very surprising to me. I’ve made whole wheat in the past, and the flavor of this bread was incredibly mild, a little sweet, and very soft. There wasn’t an overly “wheaty” taste, and the crust wasn’t leathery tough, just the right level of resistance.
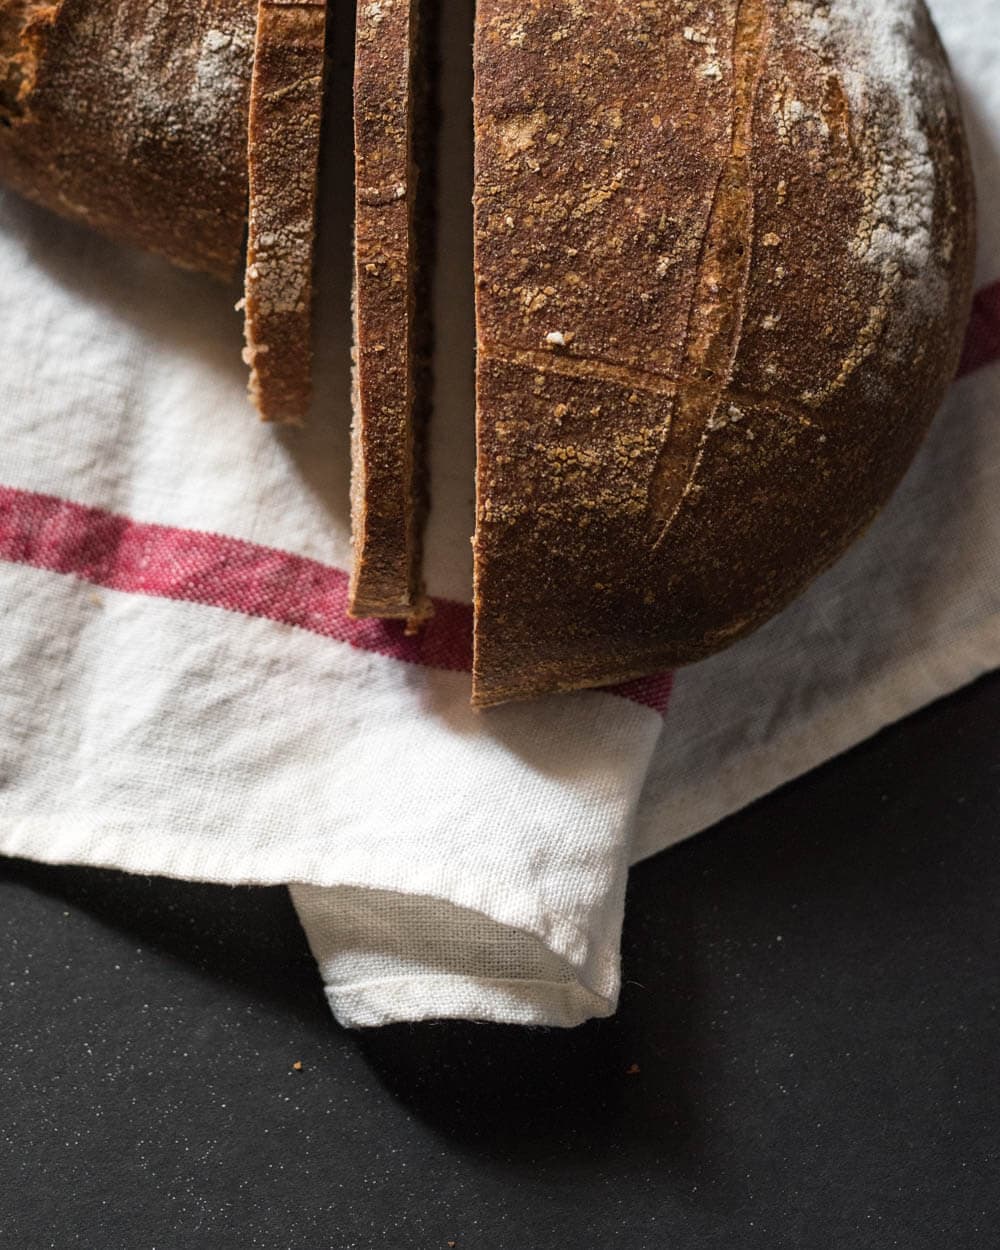
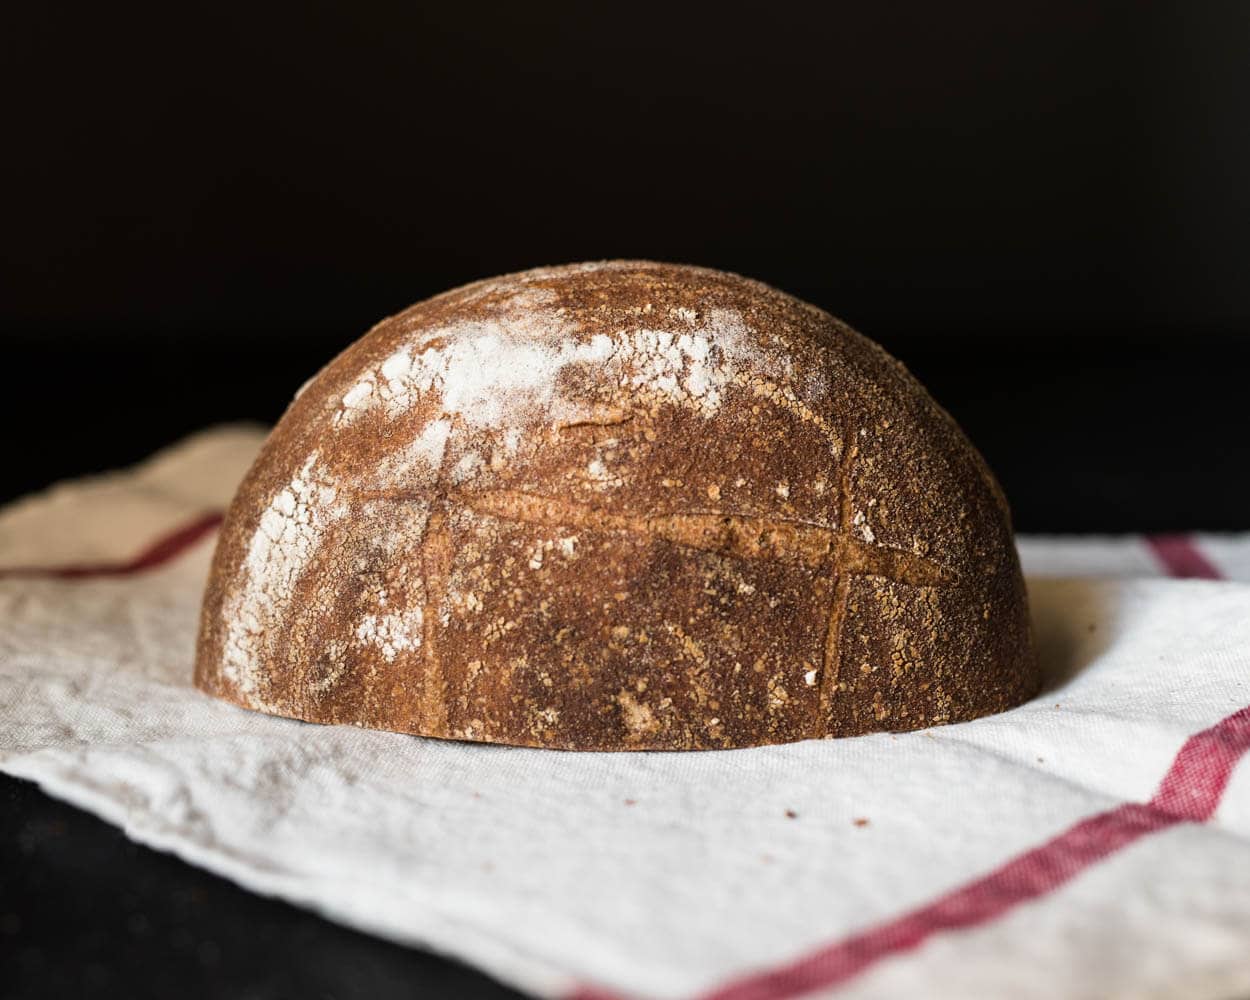
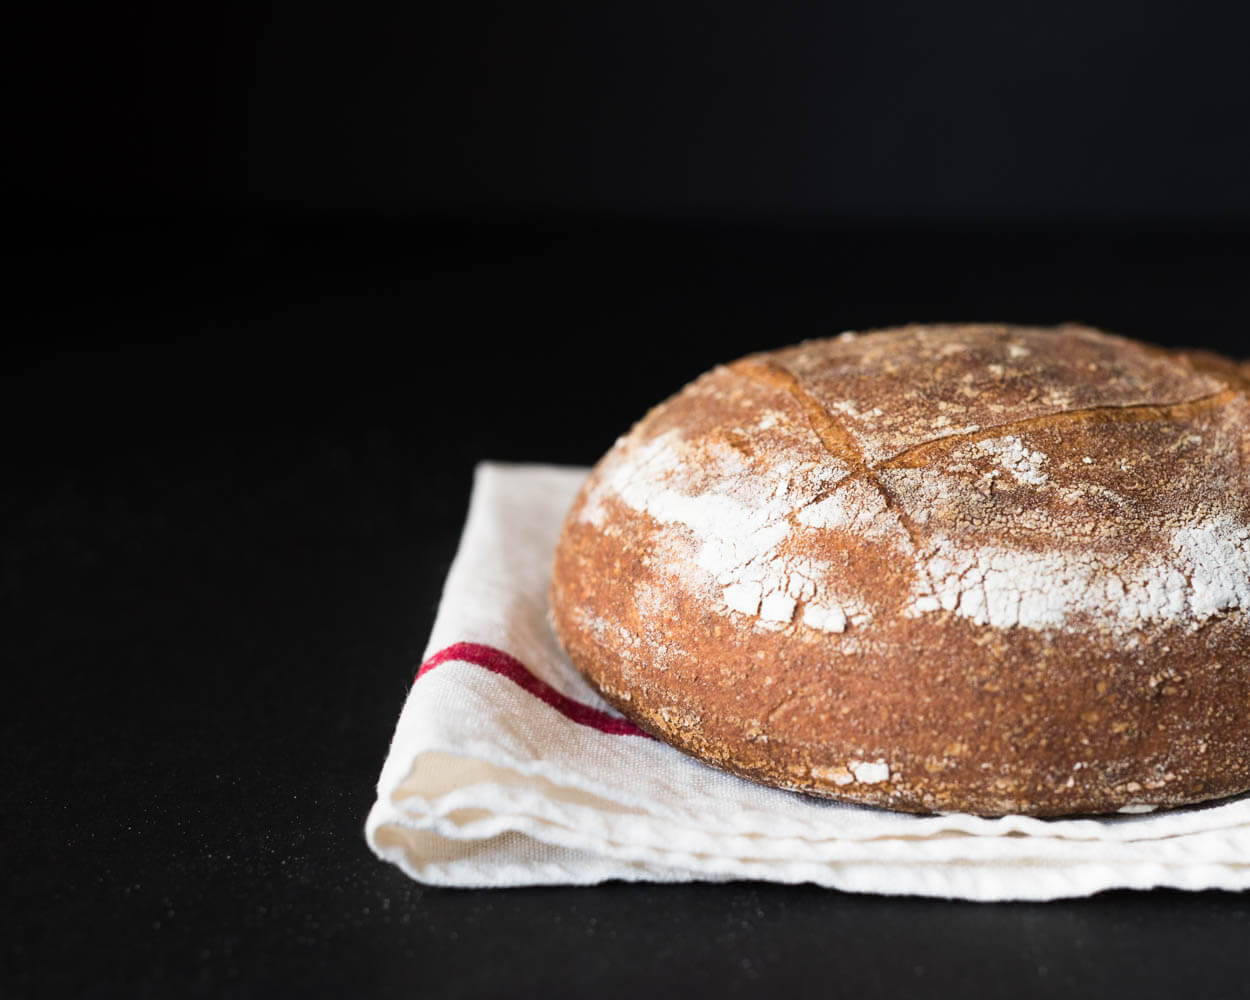
Crust
A soft and supple crust, beautiful coloring, and fantastic rise. The precision with your scoring is slightly more critical here with this bread as there is little explosive expansion, but rather, a slow increase in the oven that gravitates toward your slashes.
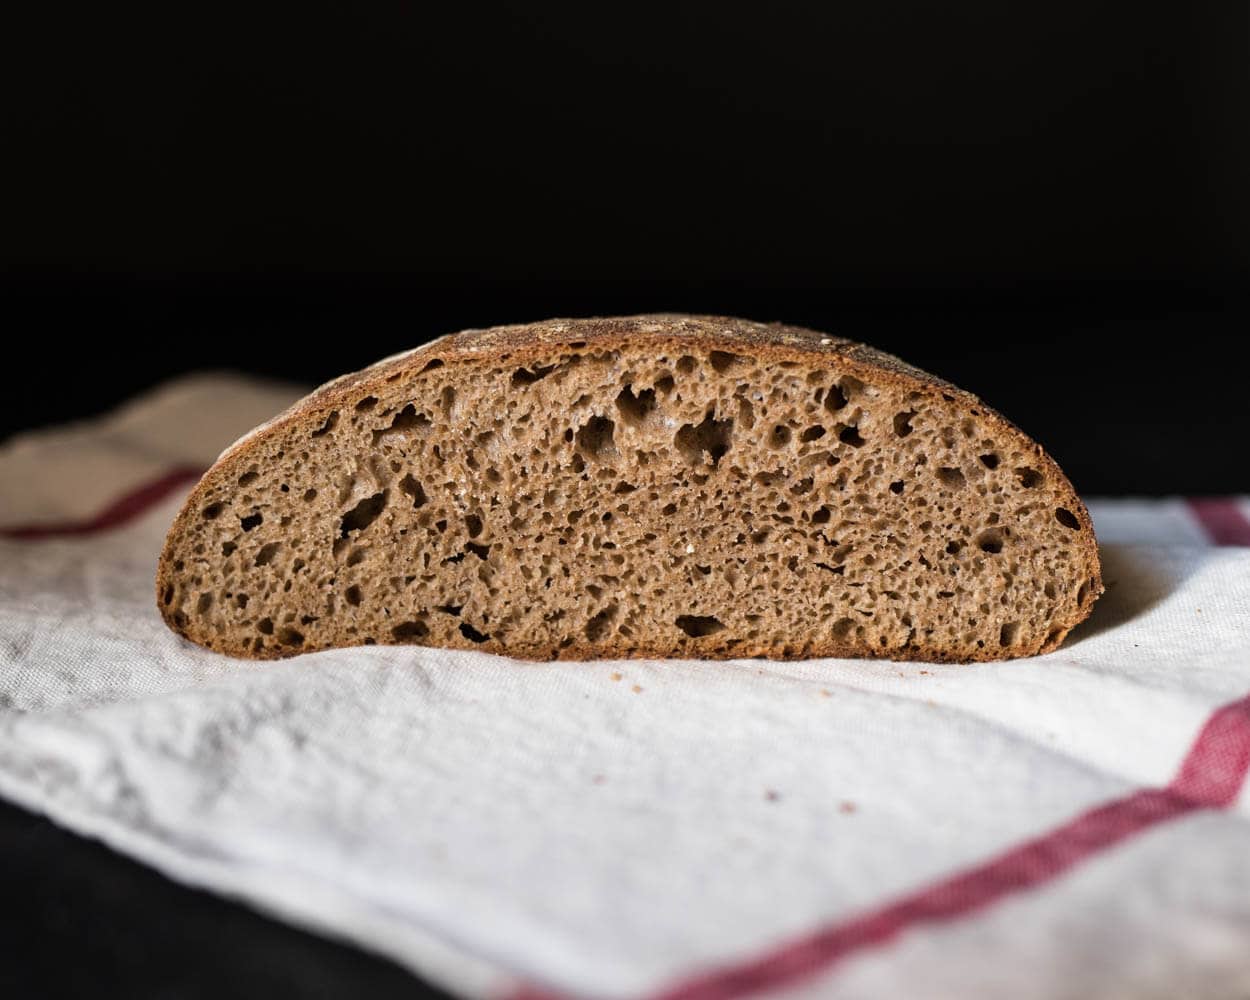
Crumb
The glossiness of this crumb was just spectacular. This is what I’ve come to look for in my bread, and these loaves had plenty of it. It’s difficult to get the same open crumb with whole wheat as you would with predominantly white bread, as we’ve discussed above, but I am more than happy with the spacious and light interior.
Taste
Very little whole wheat bitterness was found in this bread, in fact, it was almost a little sweet and very subtle “wheaty” flavors. A slightly increased sour tang at the end of each bite, most likely due to the nature of increased fermentation with whole wheat flour but not too tart, which is good as that is not my preference. Just beautiful and nutritious bread!
As I was enjoying a slice of this 100% whole wheat sourdough with some chopped avocados, extra virgin olive oil, and salt & pepper, I was happy that I was able to adjust my process in response to its potentially moody attitude and bake a genuinely healthy and wonderful bread.
Buon appetito!
If you use this recipe, tag @maurizio on Instagram so I can take a look!
